
Test Suites
Organise your test cases into test suites based on common functionalities or scenarios to manage and execute them effectively. Test suites will help you in executing and reporting the test plan status. You can add a test case to multiple test suites. This document will provide an overview and guidelines to create, edit, delete, and list test suites in Testsigma.
Prerequisites
Before you begin, ensure that you have referred to:
Listing Test Suites
On the Test Suites List page, you will have the below options:
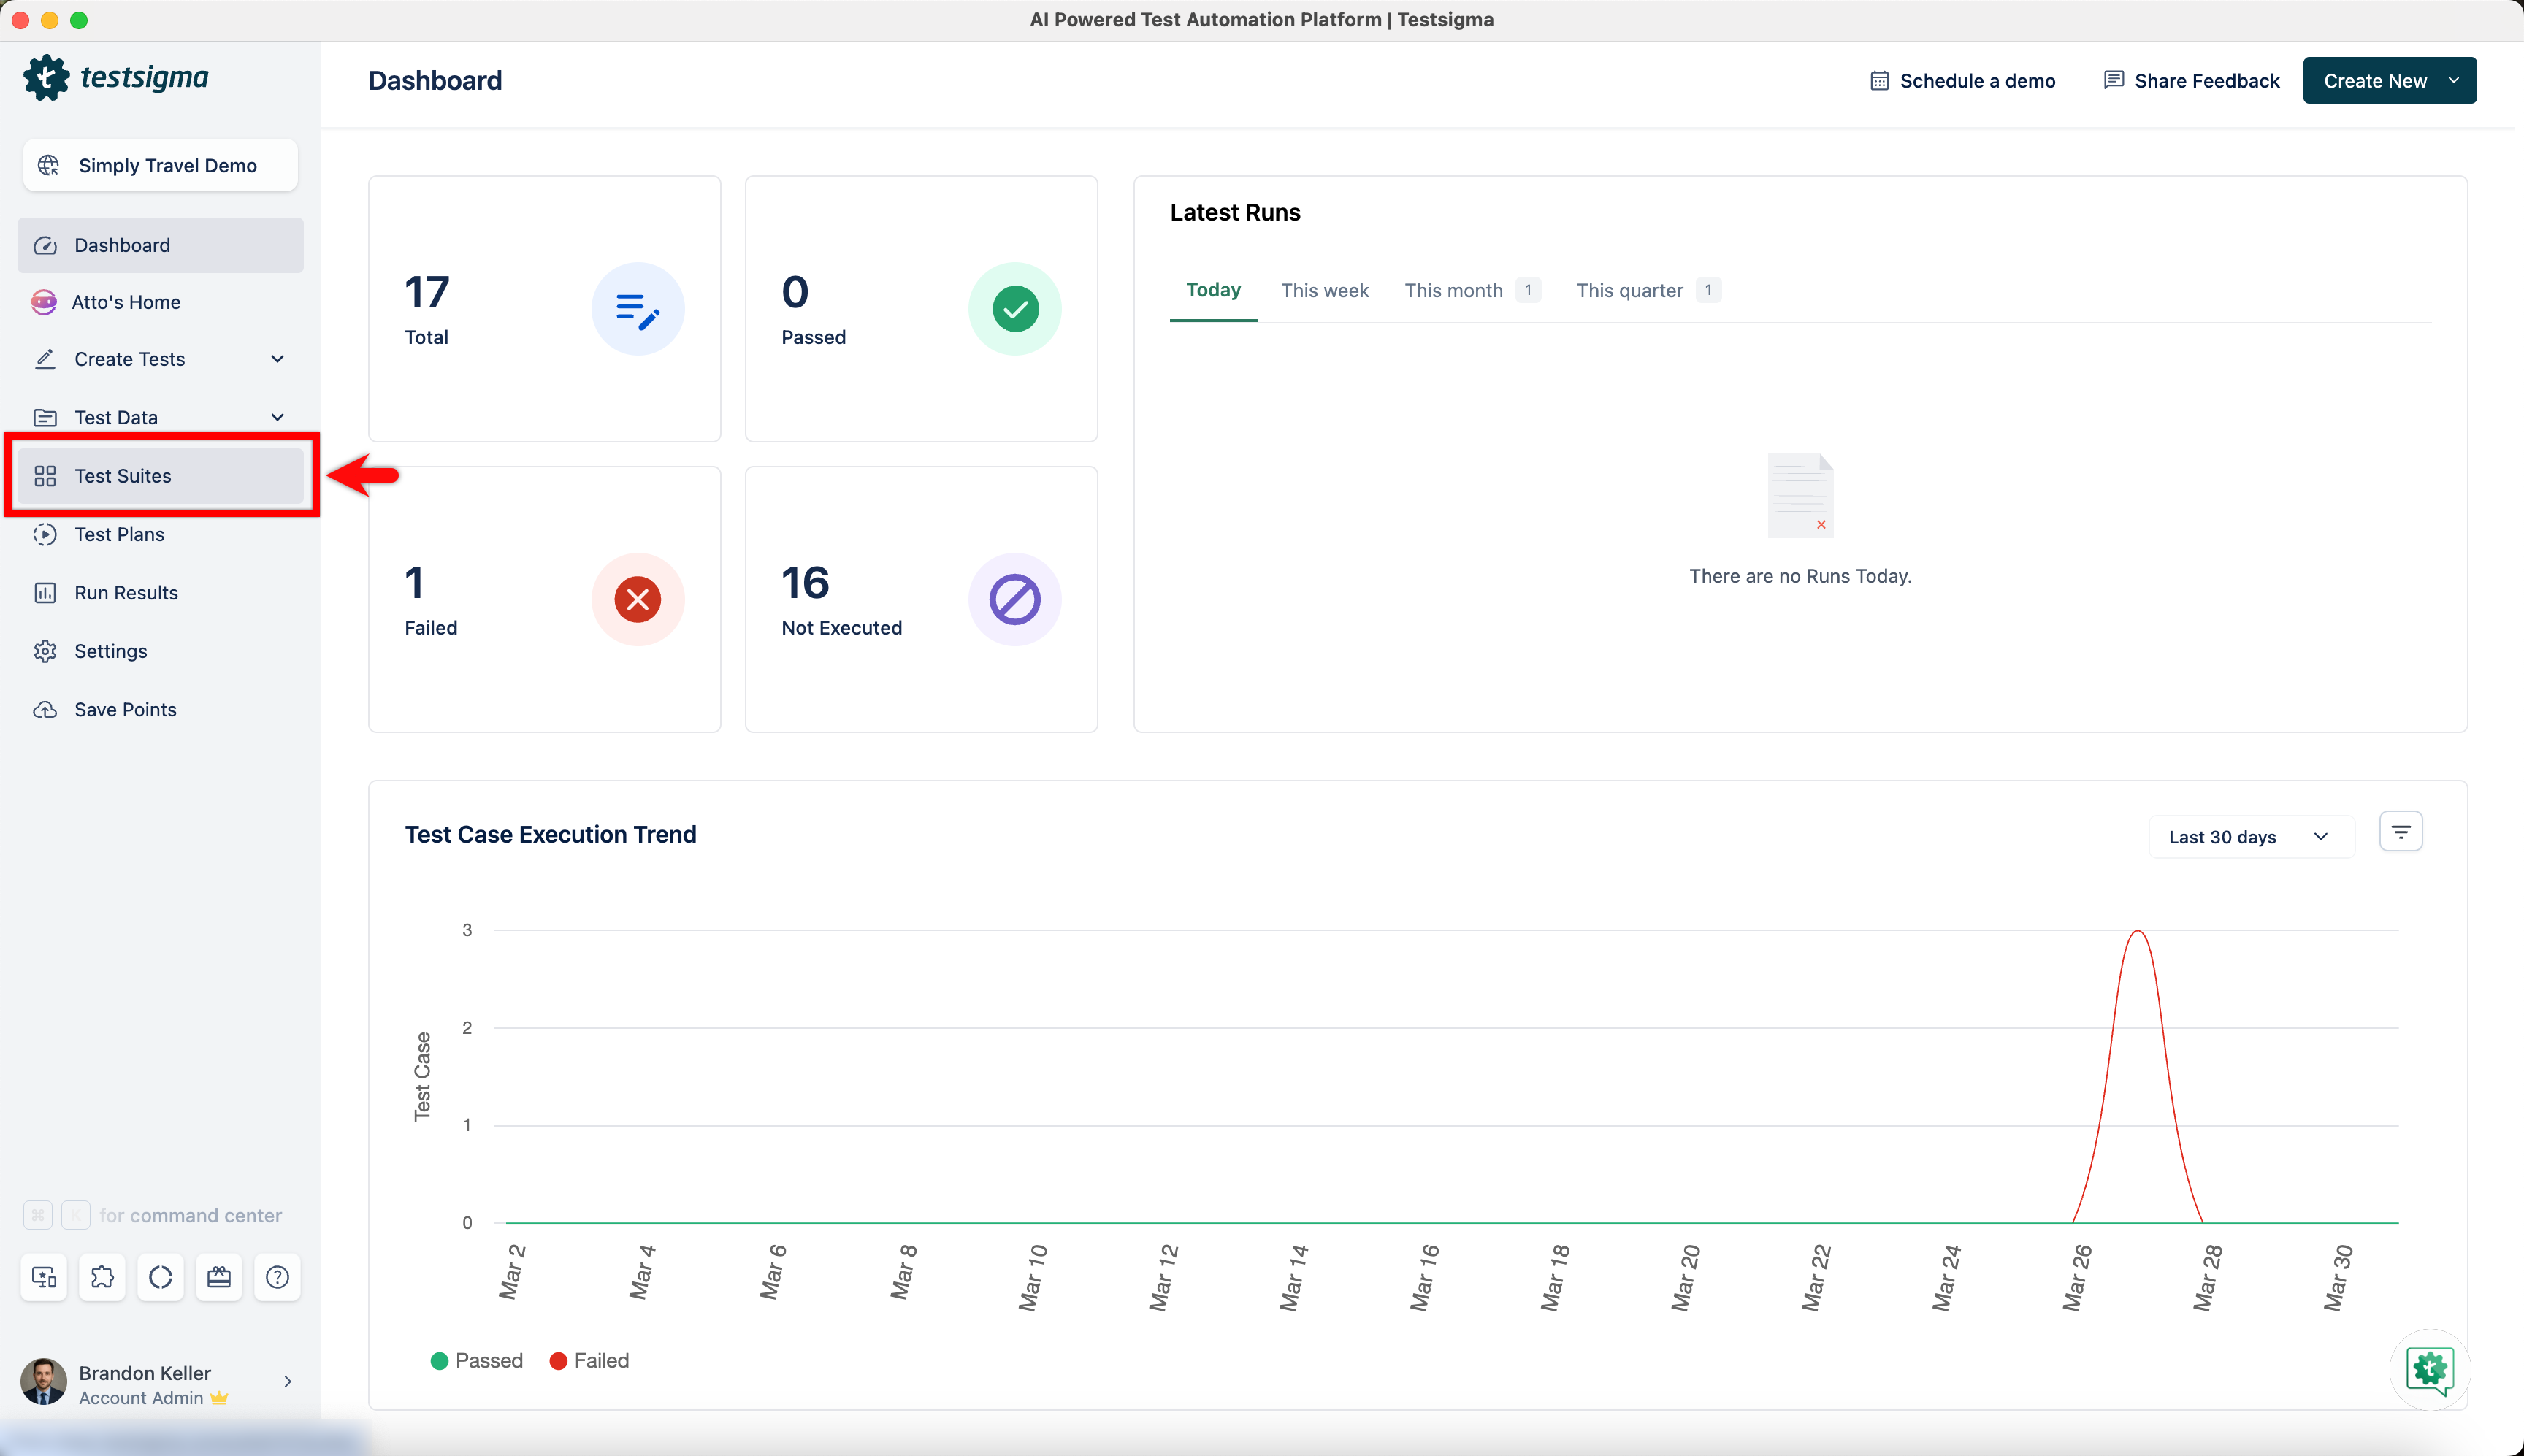
- From the left navigation bar, navigate to Test Suites.
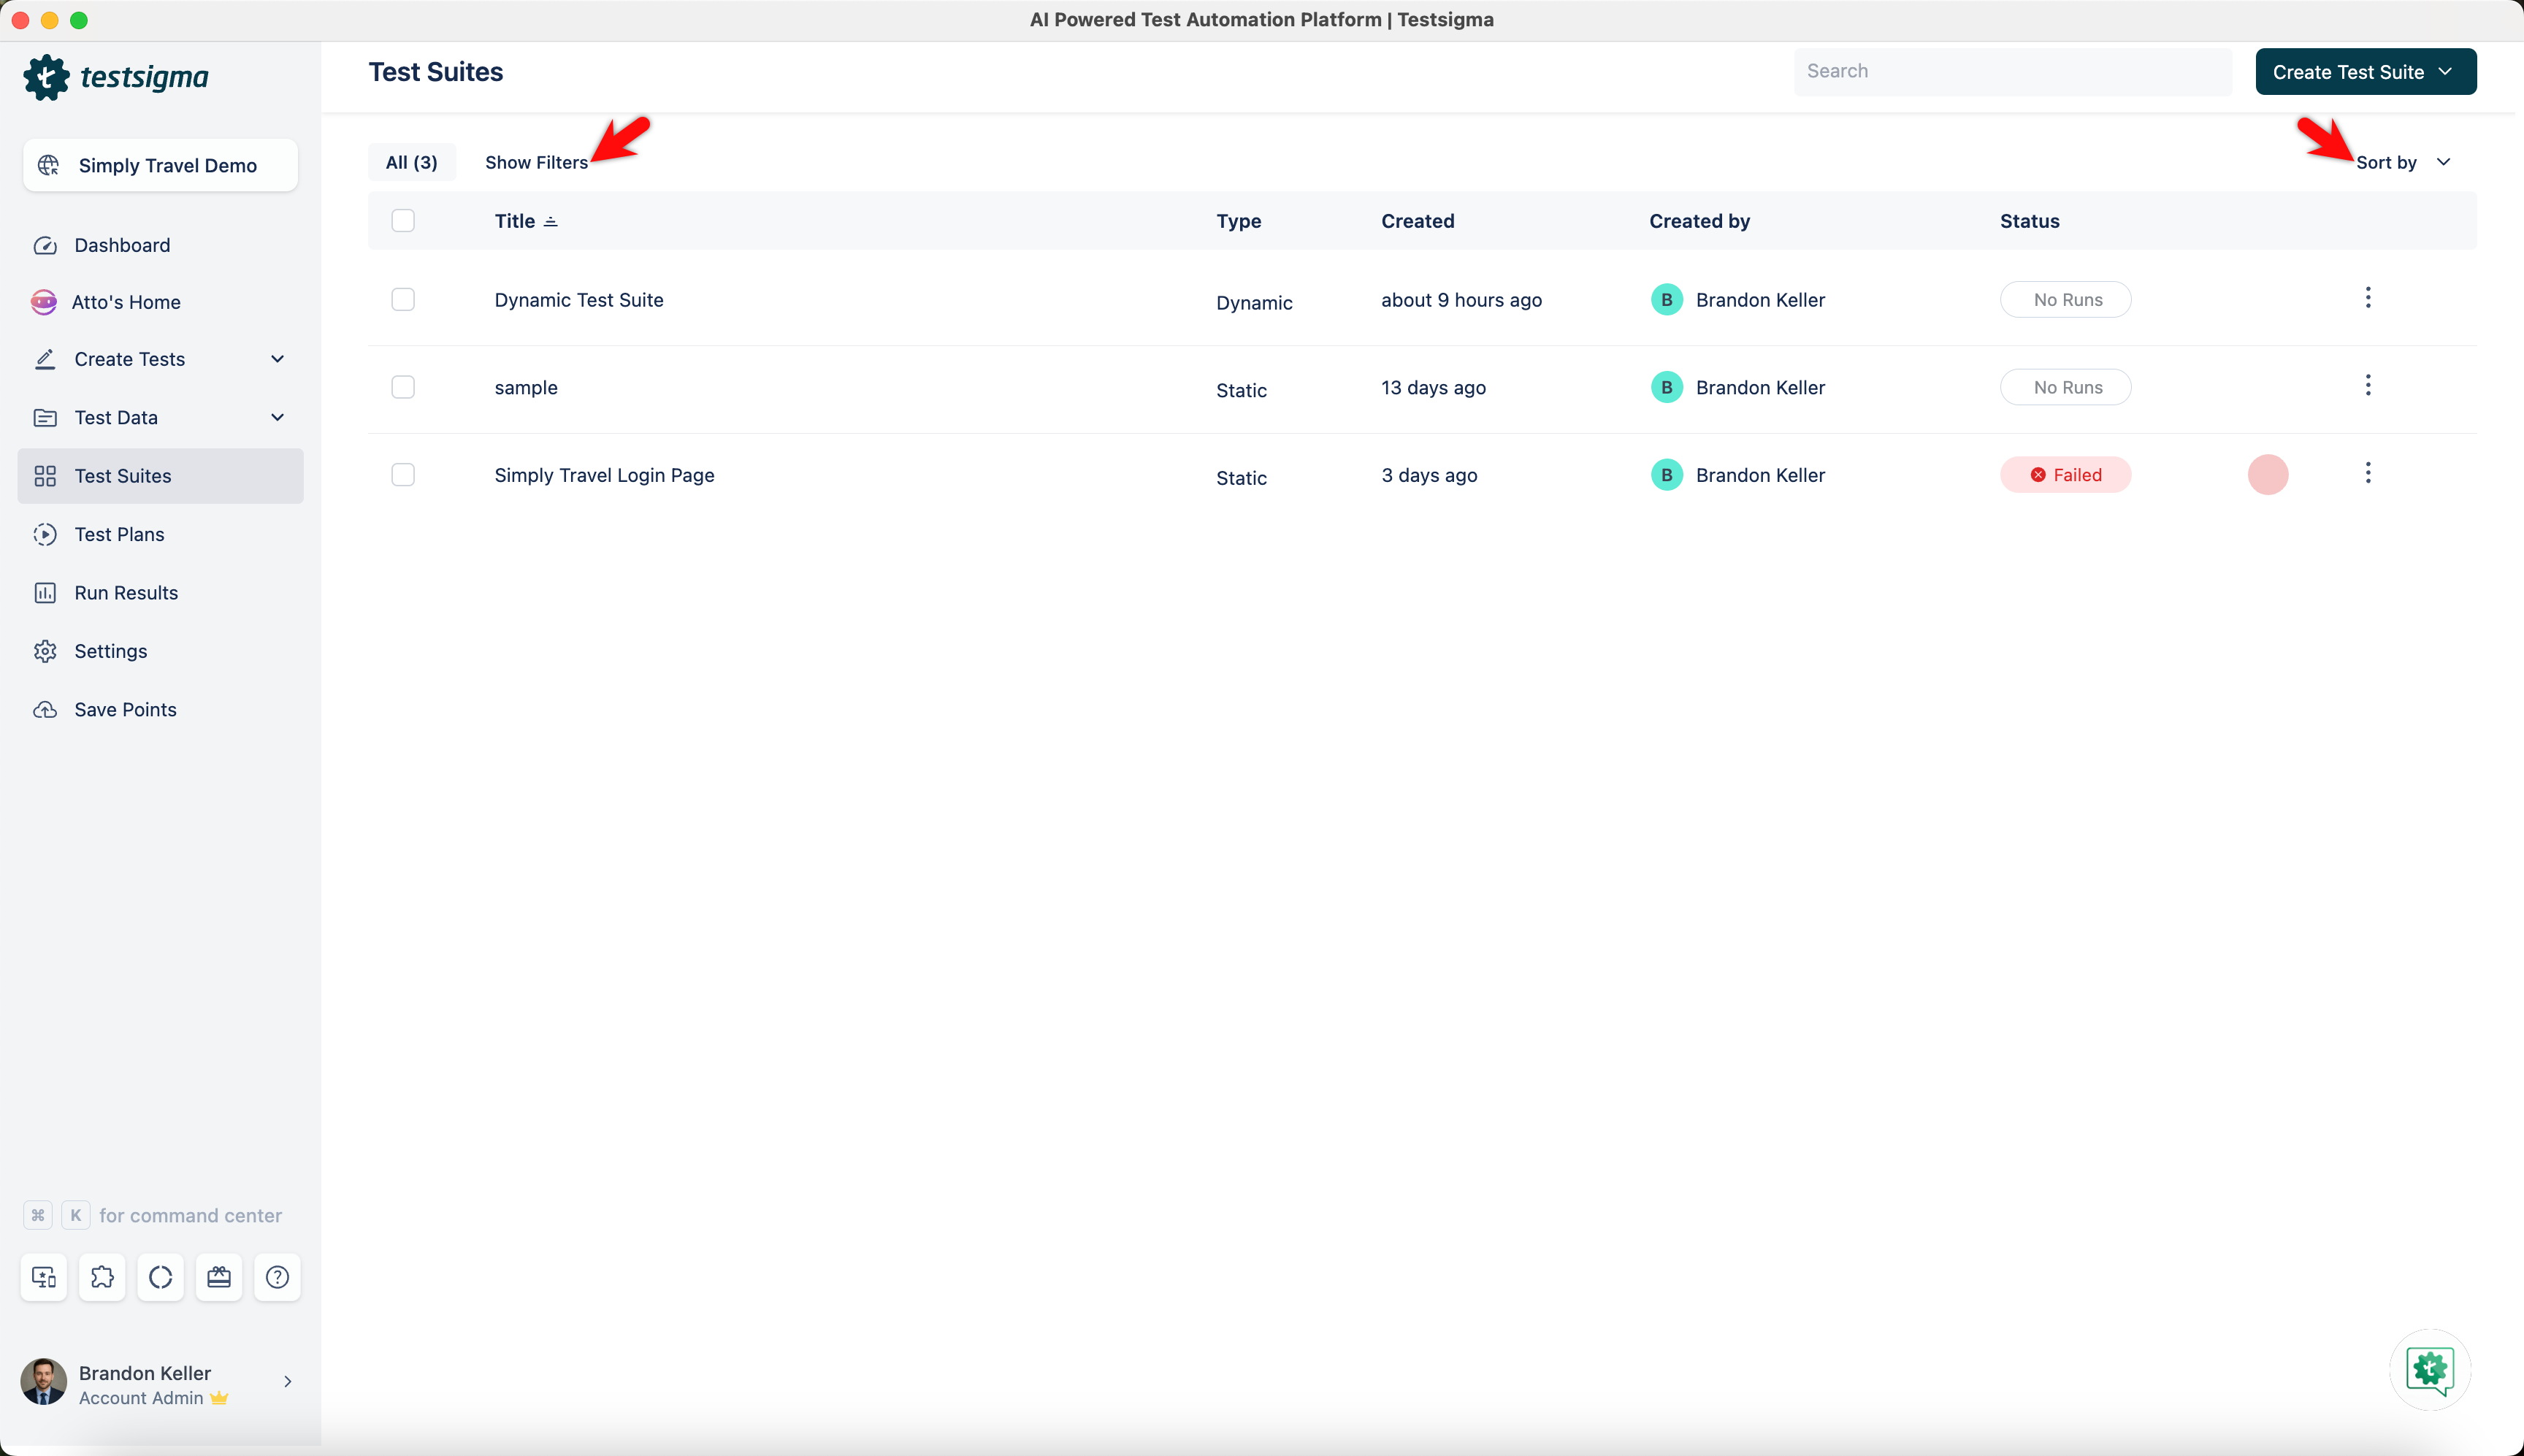
- You can easily manage test suites on the Test Suites list page by sorting, filtering, or searching. The page displays test suites with titles, types, creation dates, creators, and statuses.
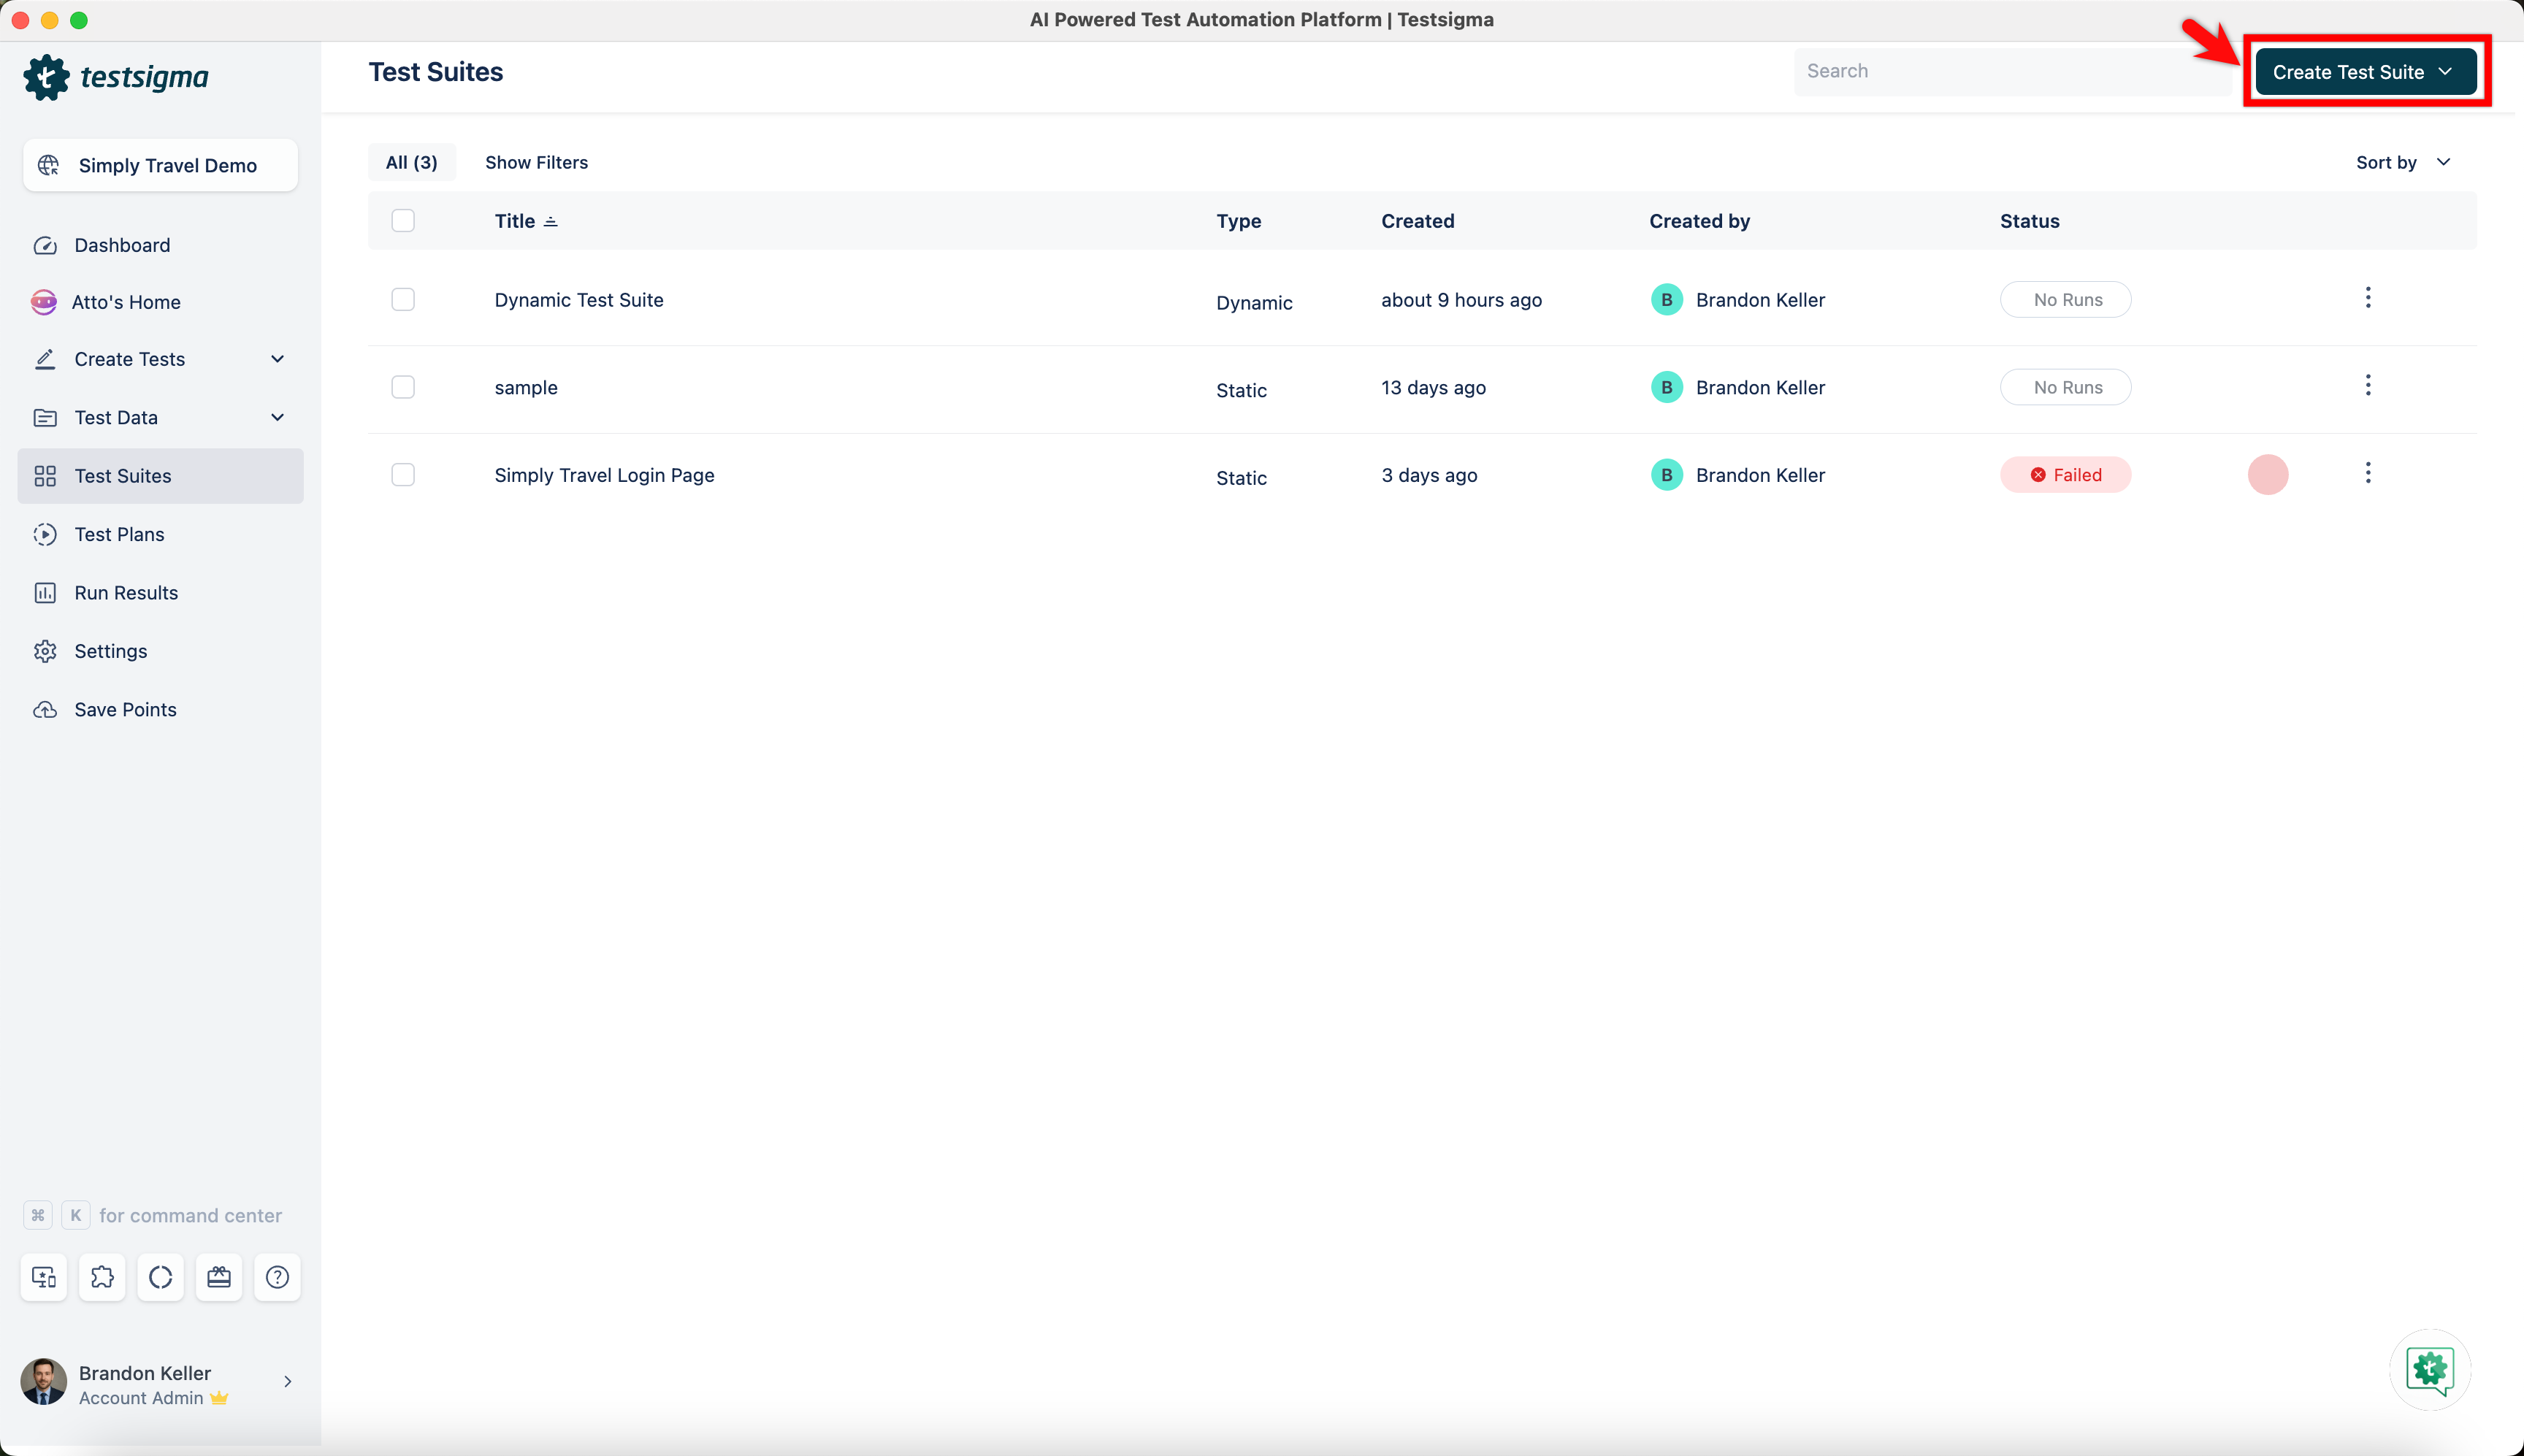
- Click Create Test Suite in the top right corner of the screen.
Creating a Test Suite
- Navigate to Test Suites in the left-side navbar. Click the Create Test Suite button in the top right corner of the Test Suites List page. Provide below details to Create Test Suite:
- Name(Required): Enter the title of the Test Suite in the Name field on the Create Test Suite page.
- Description: You can enable the toggle switch for the Description and provide a brief description explaining the test suite's purpose and scope. This will help your team members understand the objectives of the test suite.
- Pre-Requisite: Specify any Pre-Requisite for executing the test suite, such as specific test data, system configurations, or test environment setup.
- Label: You can assign a Label to the test suite. This will allow easier management of multiple test suites, as labels can be used for categorisation and filtering.
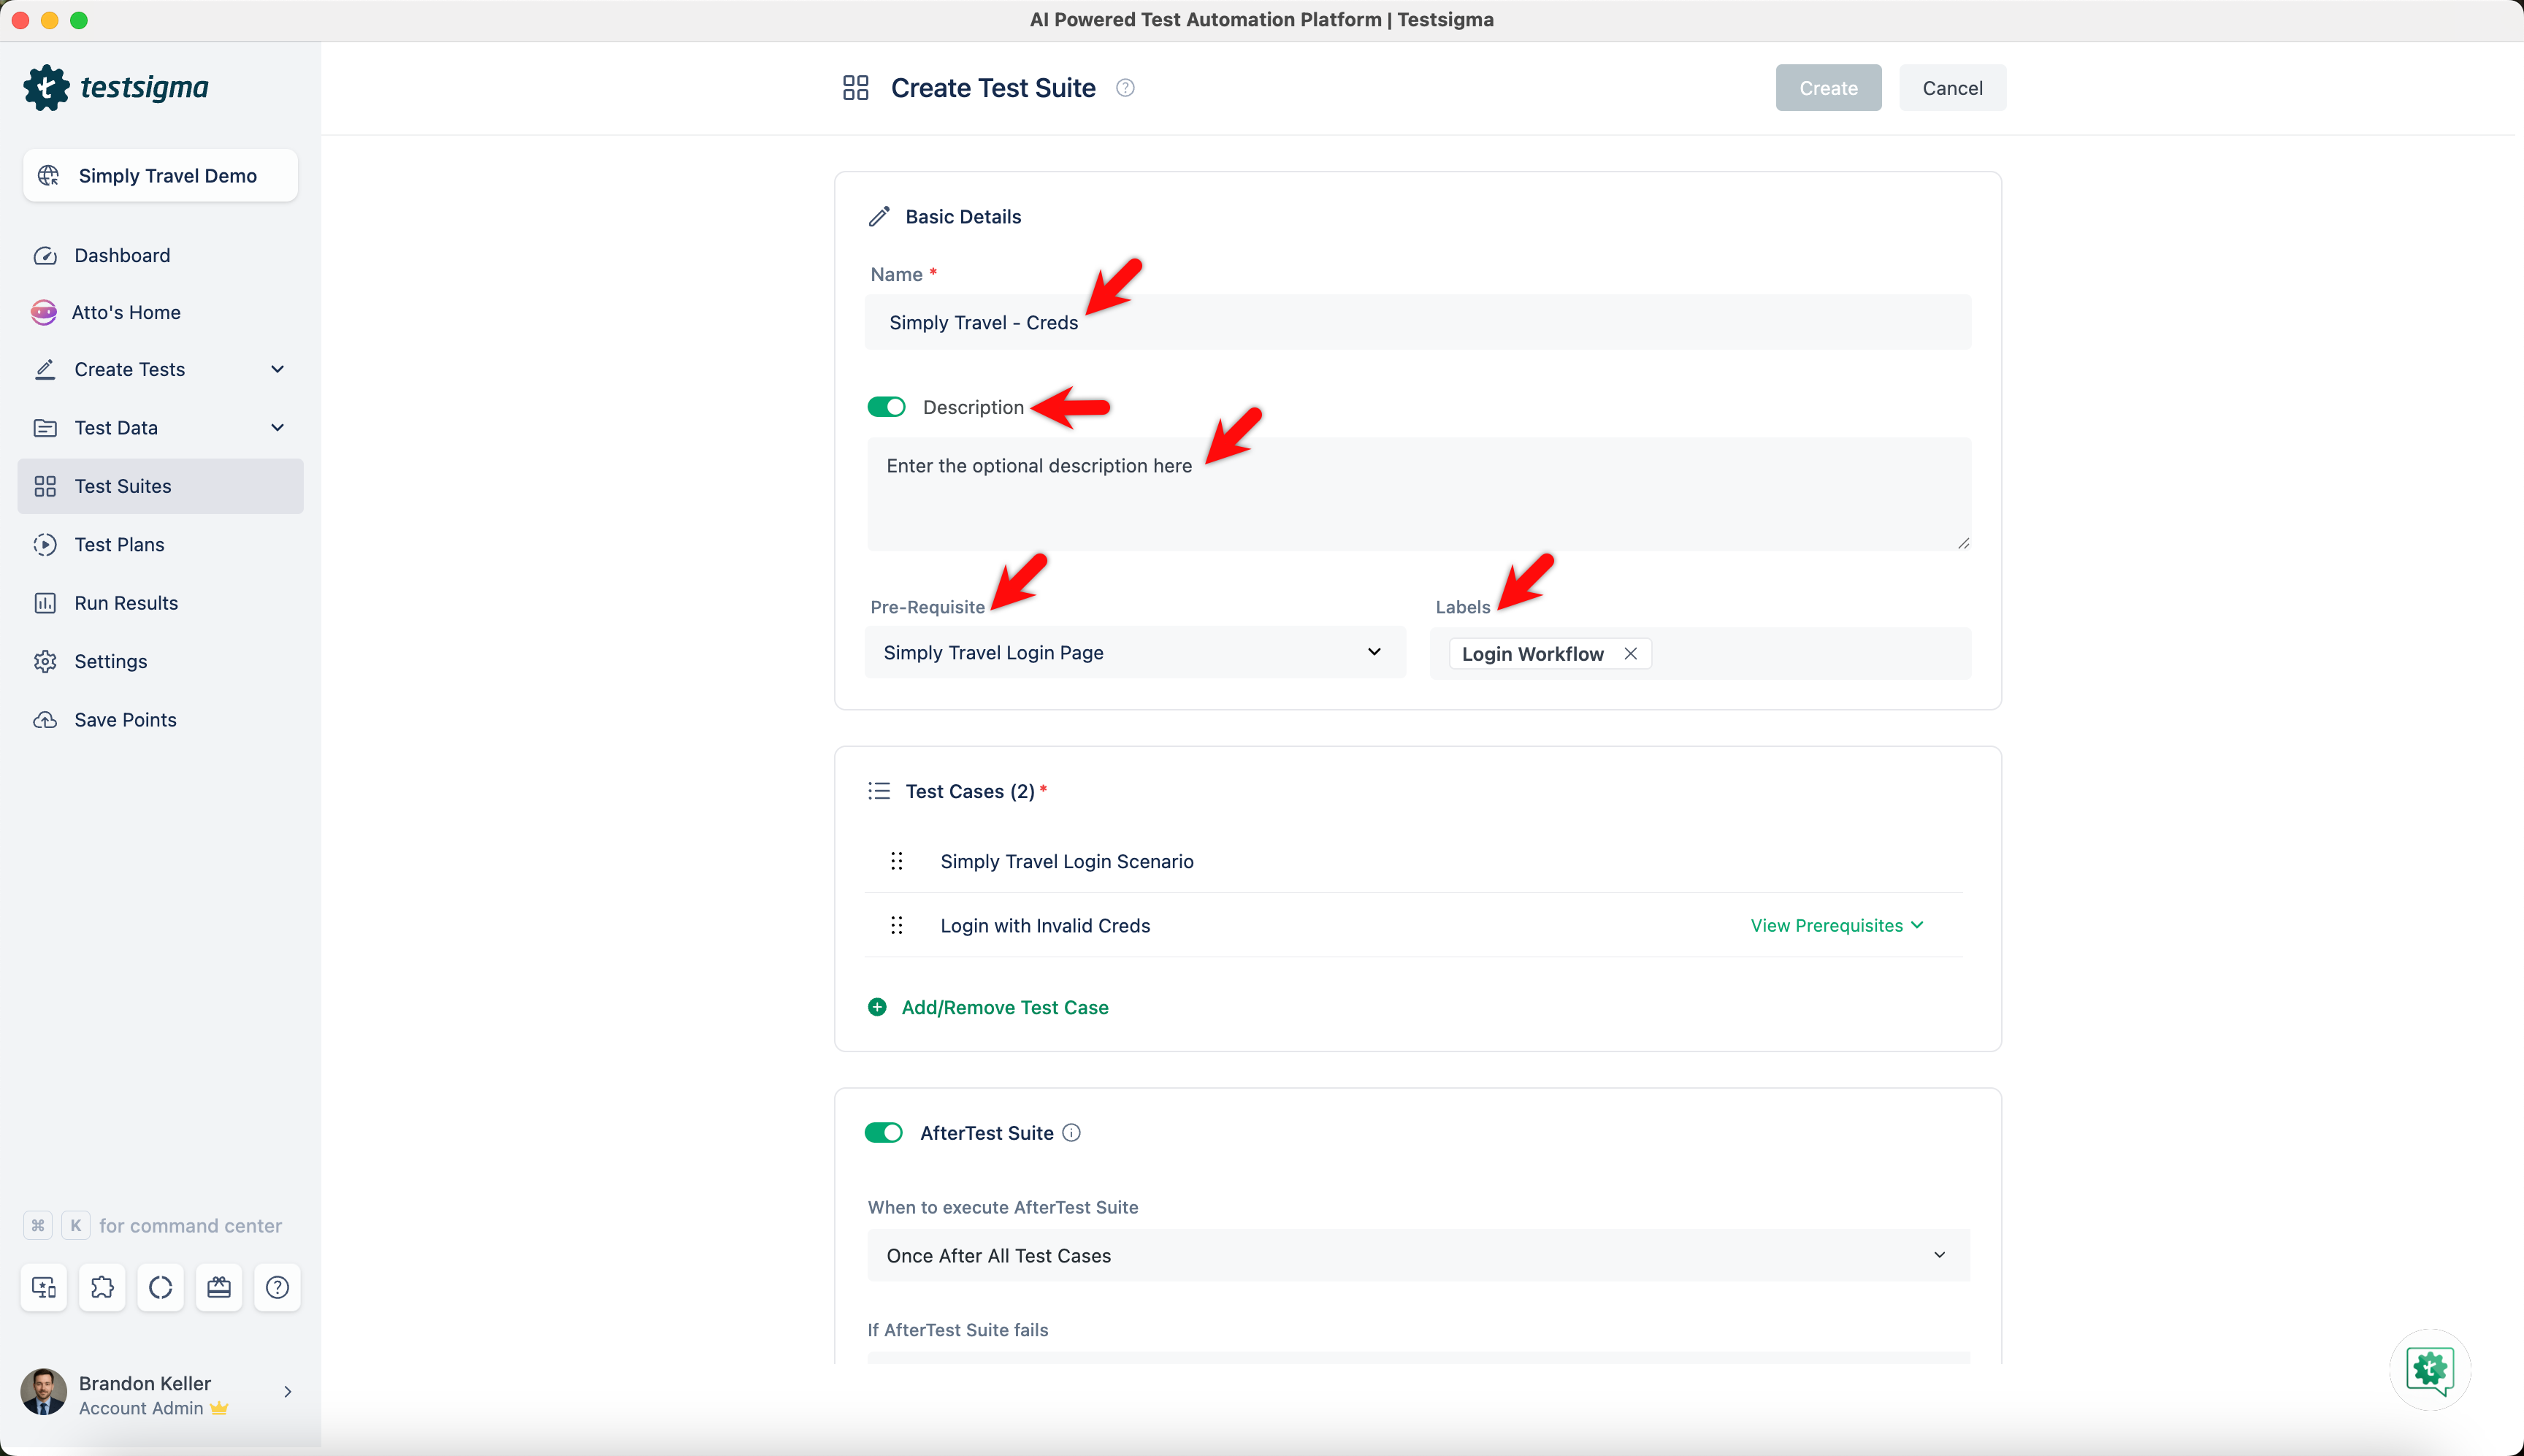
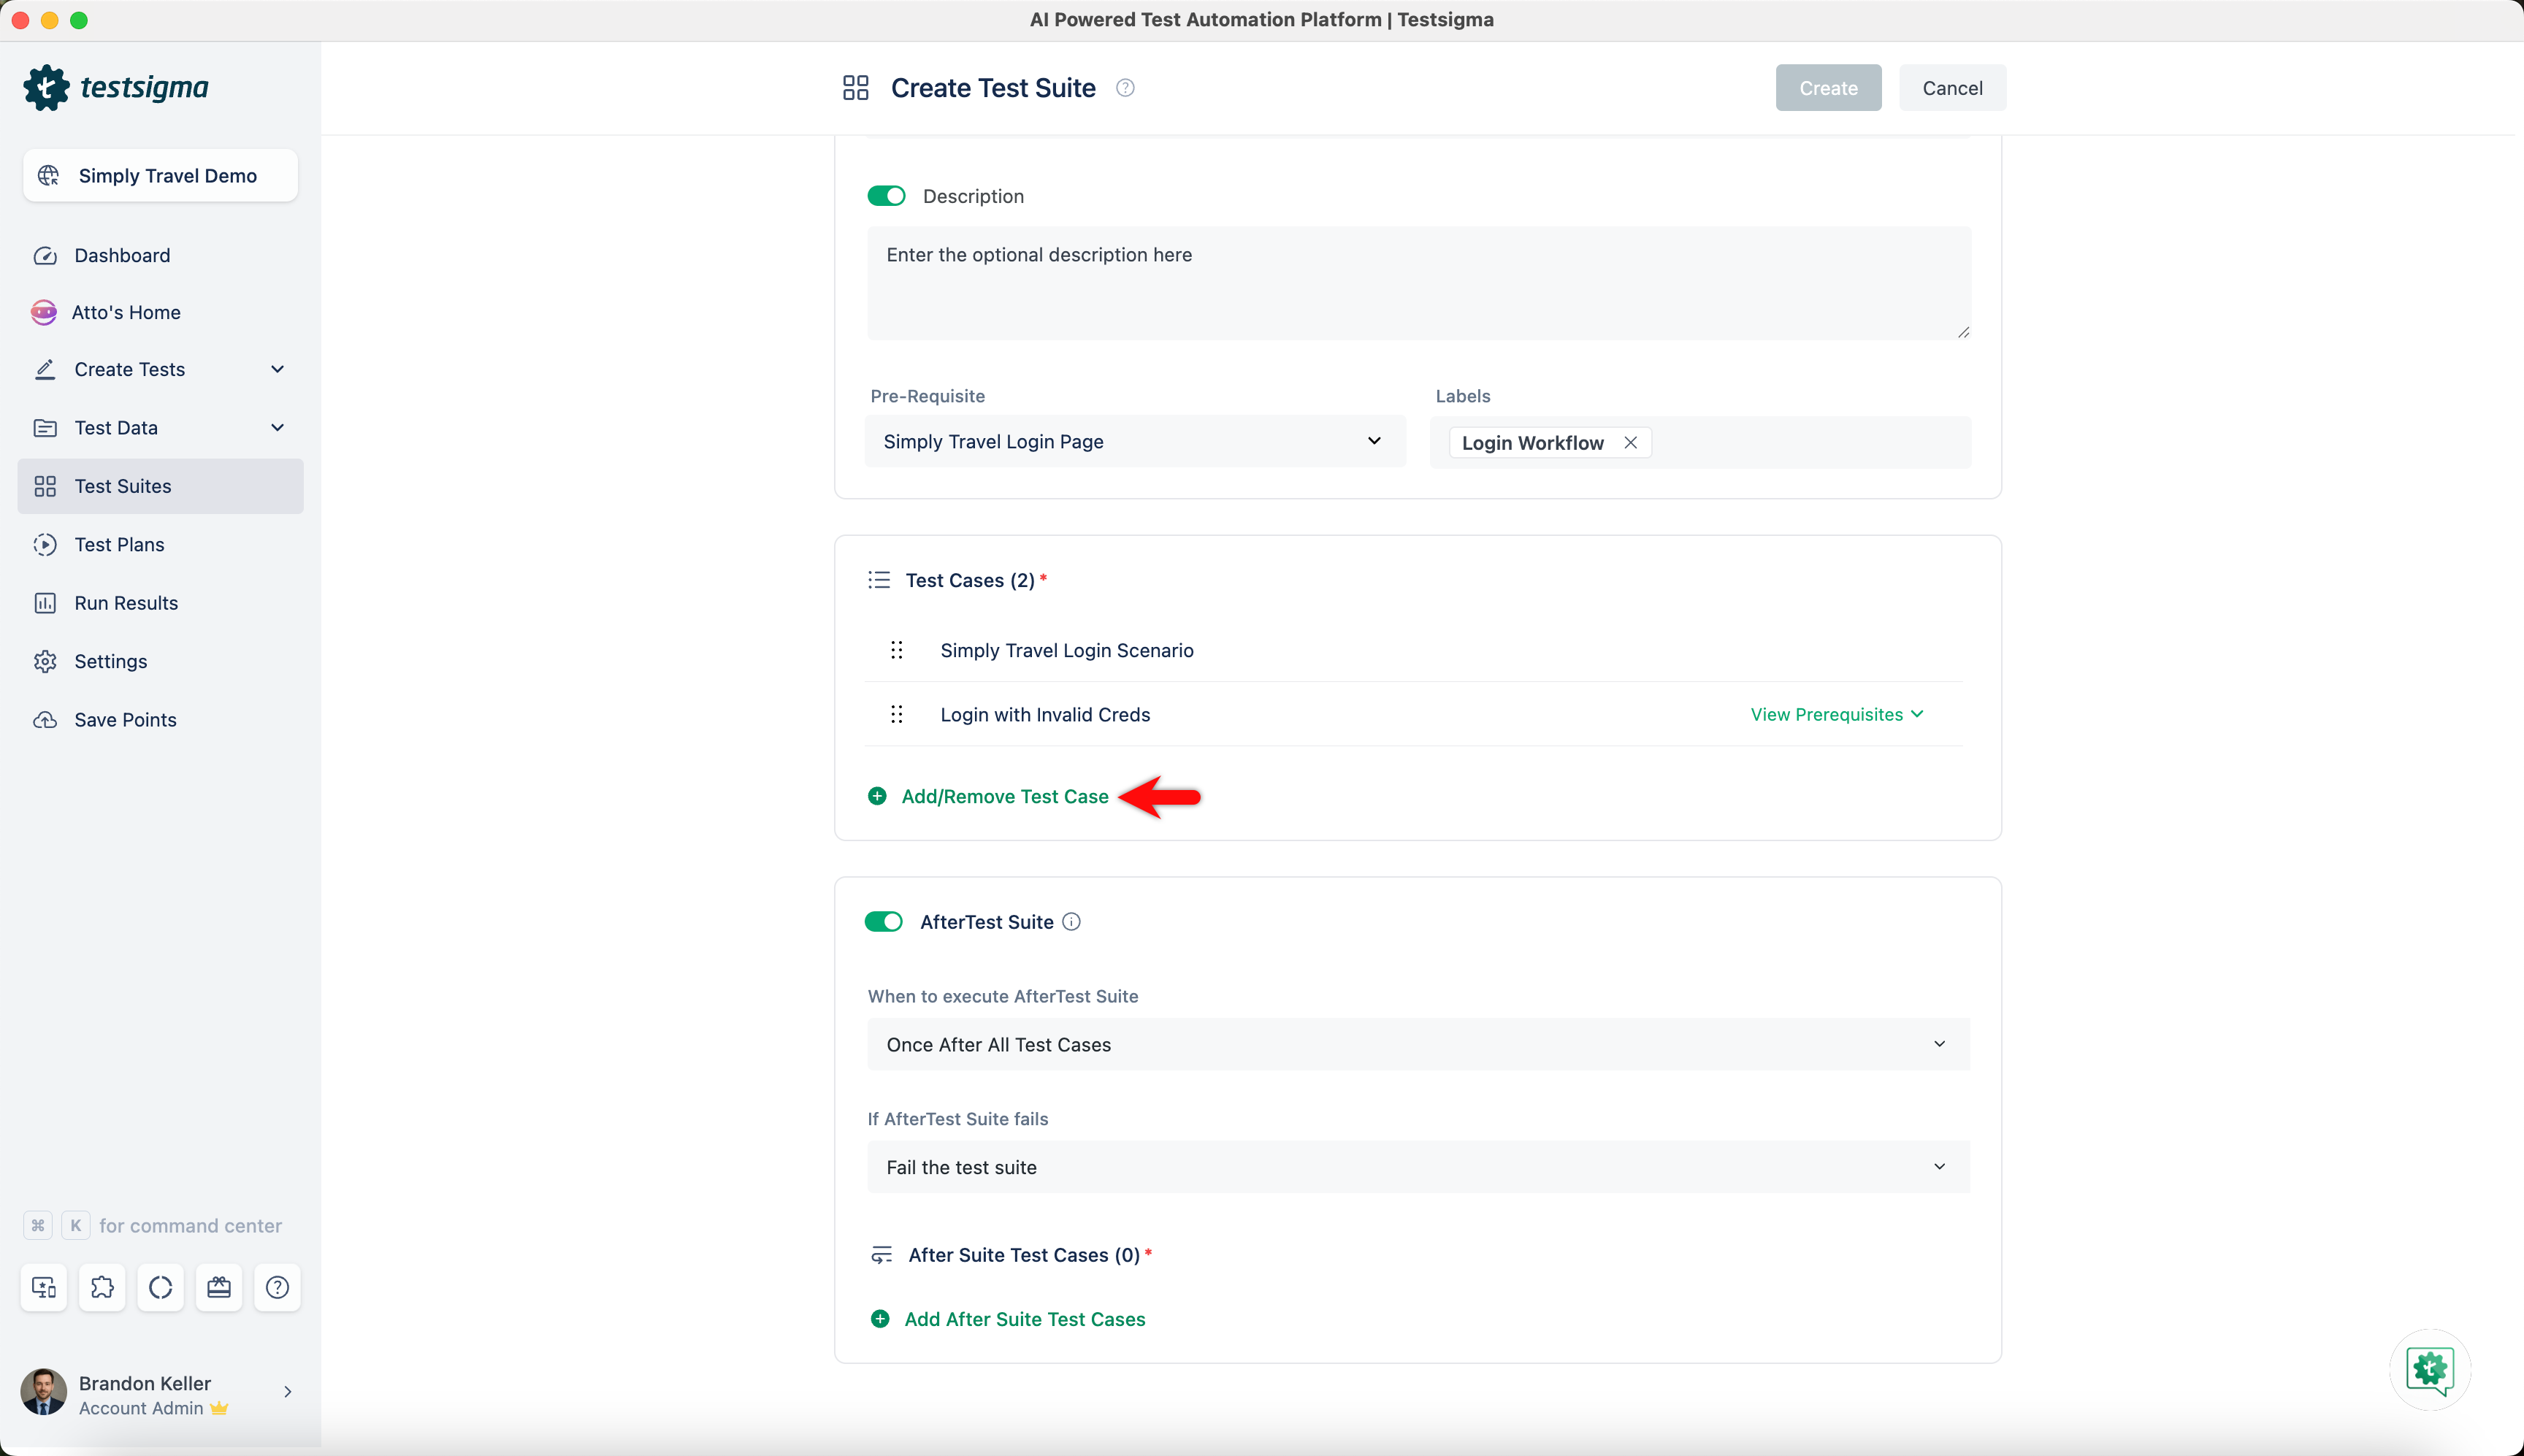
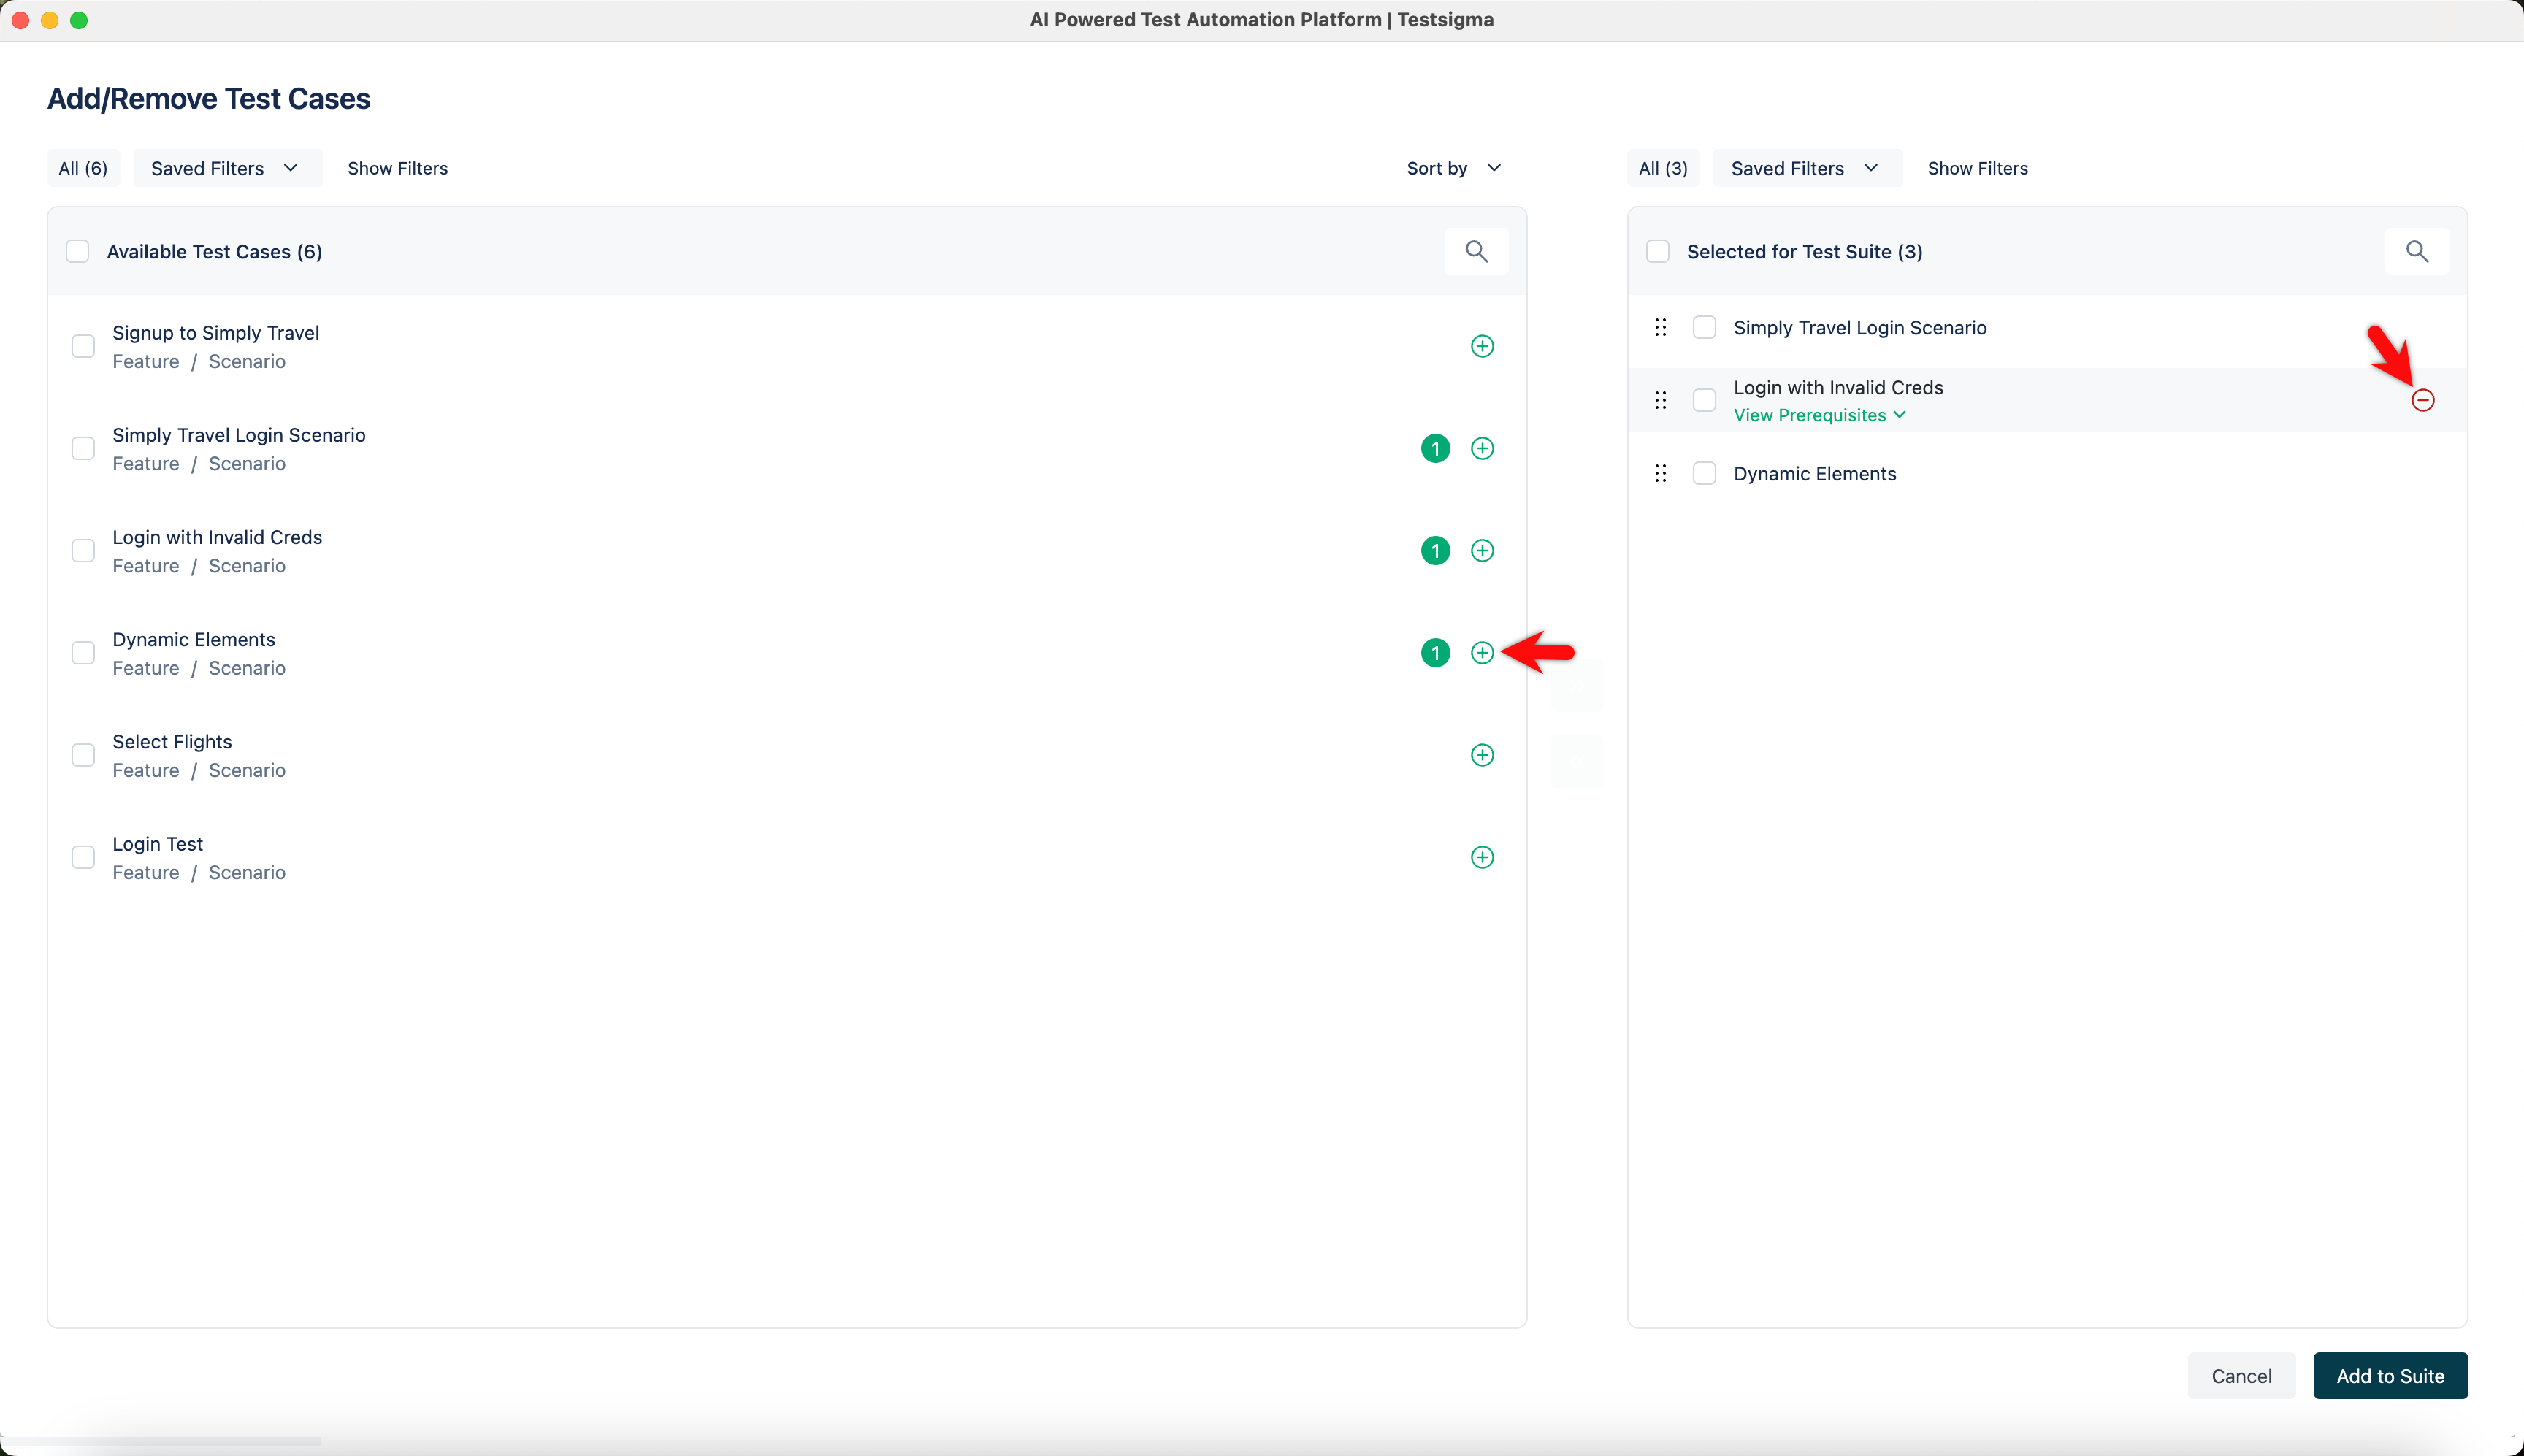
- Add/Remove Test Cases: Click the Add/Remove Test Cases button to add or remove test cases from the Test Suite. An Add/Remove Test Case overlay will appear, allowing you to select test cases from the Available Test Case list by checking the box next to them or clicking the + icon to select individual test cases.
- Add to Suite: Click the + icon to move the desired test cases from Available Test Case to Selected for Test Suite. You can drag and drop the test cases to change their order in the Test Suite. Finally, add the selected test cases to the Test Suite by clicking the Add to Suite button. To remove test cases from the Test Suite, select them from Selected Test Cases and click the - icon.
-
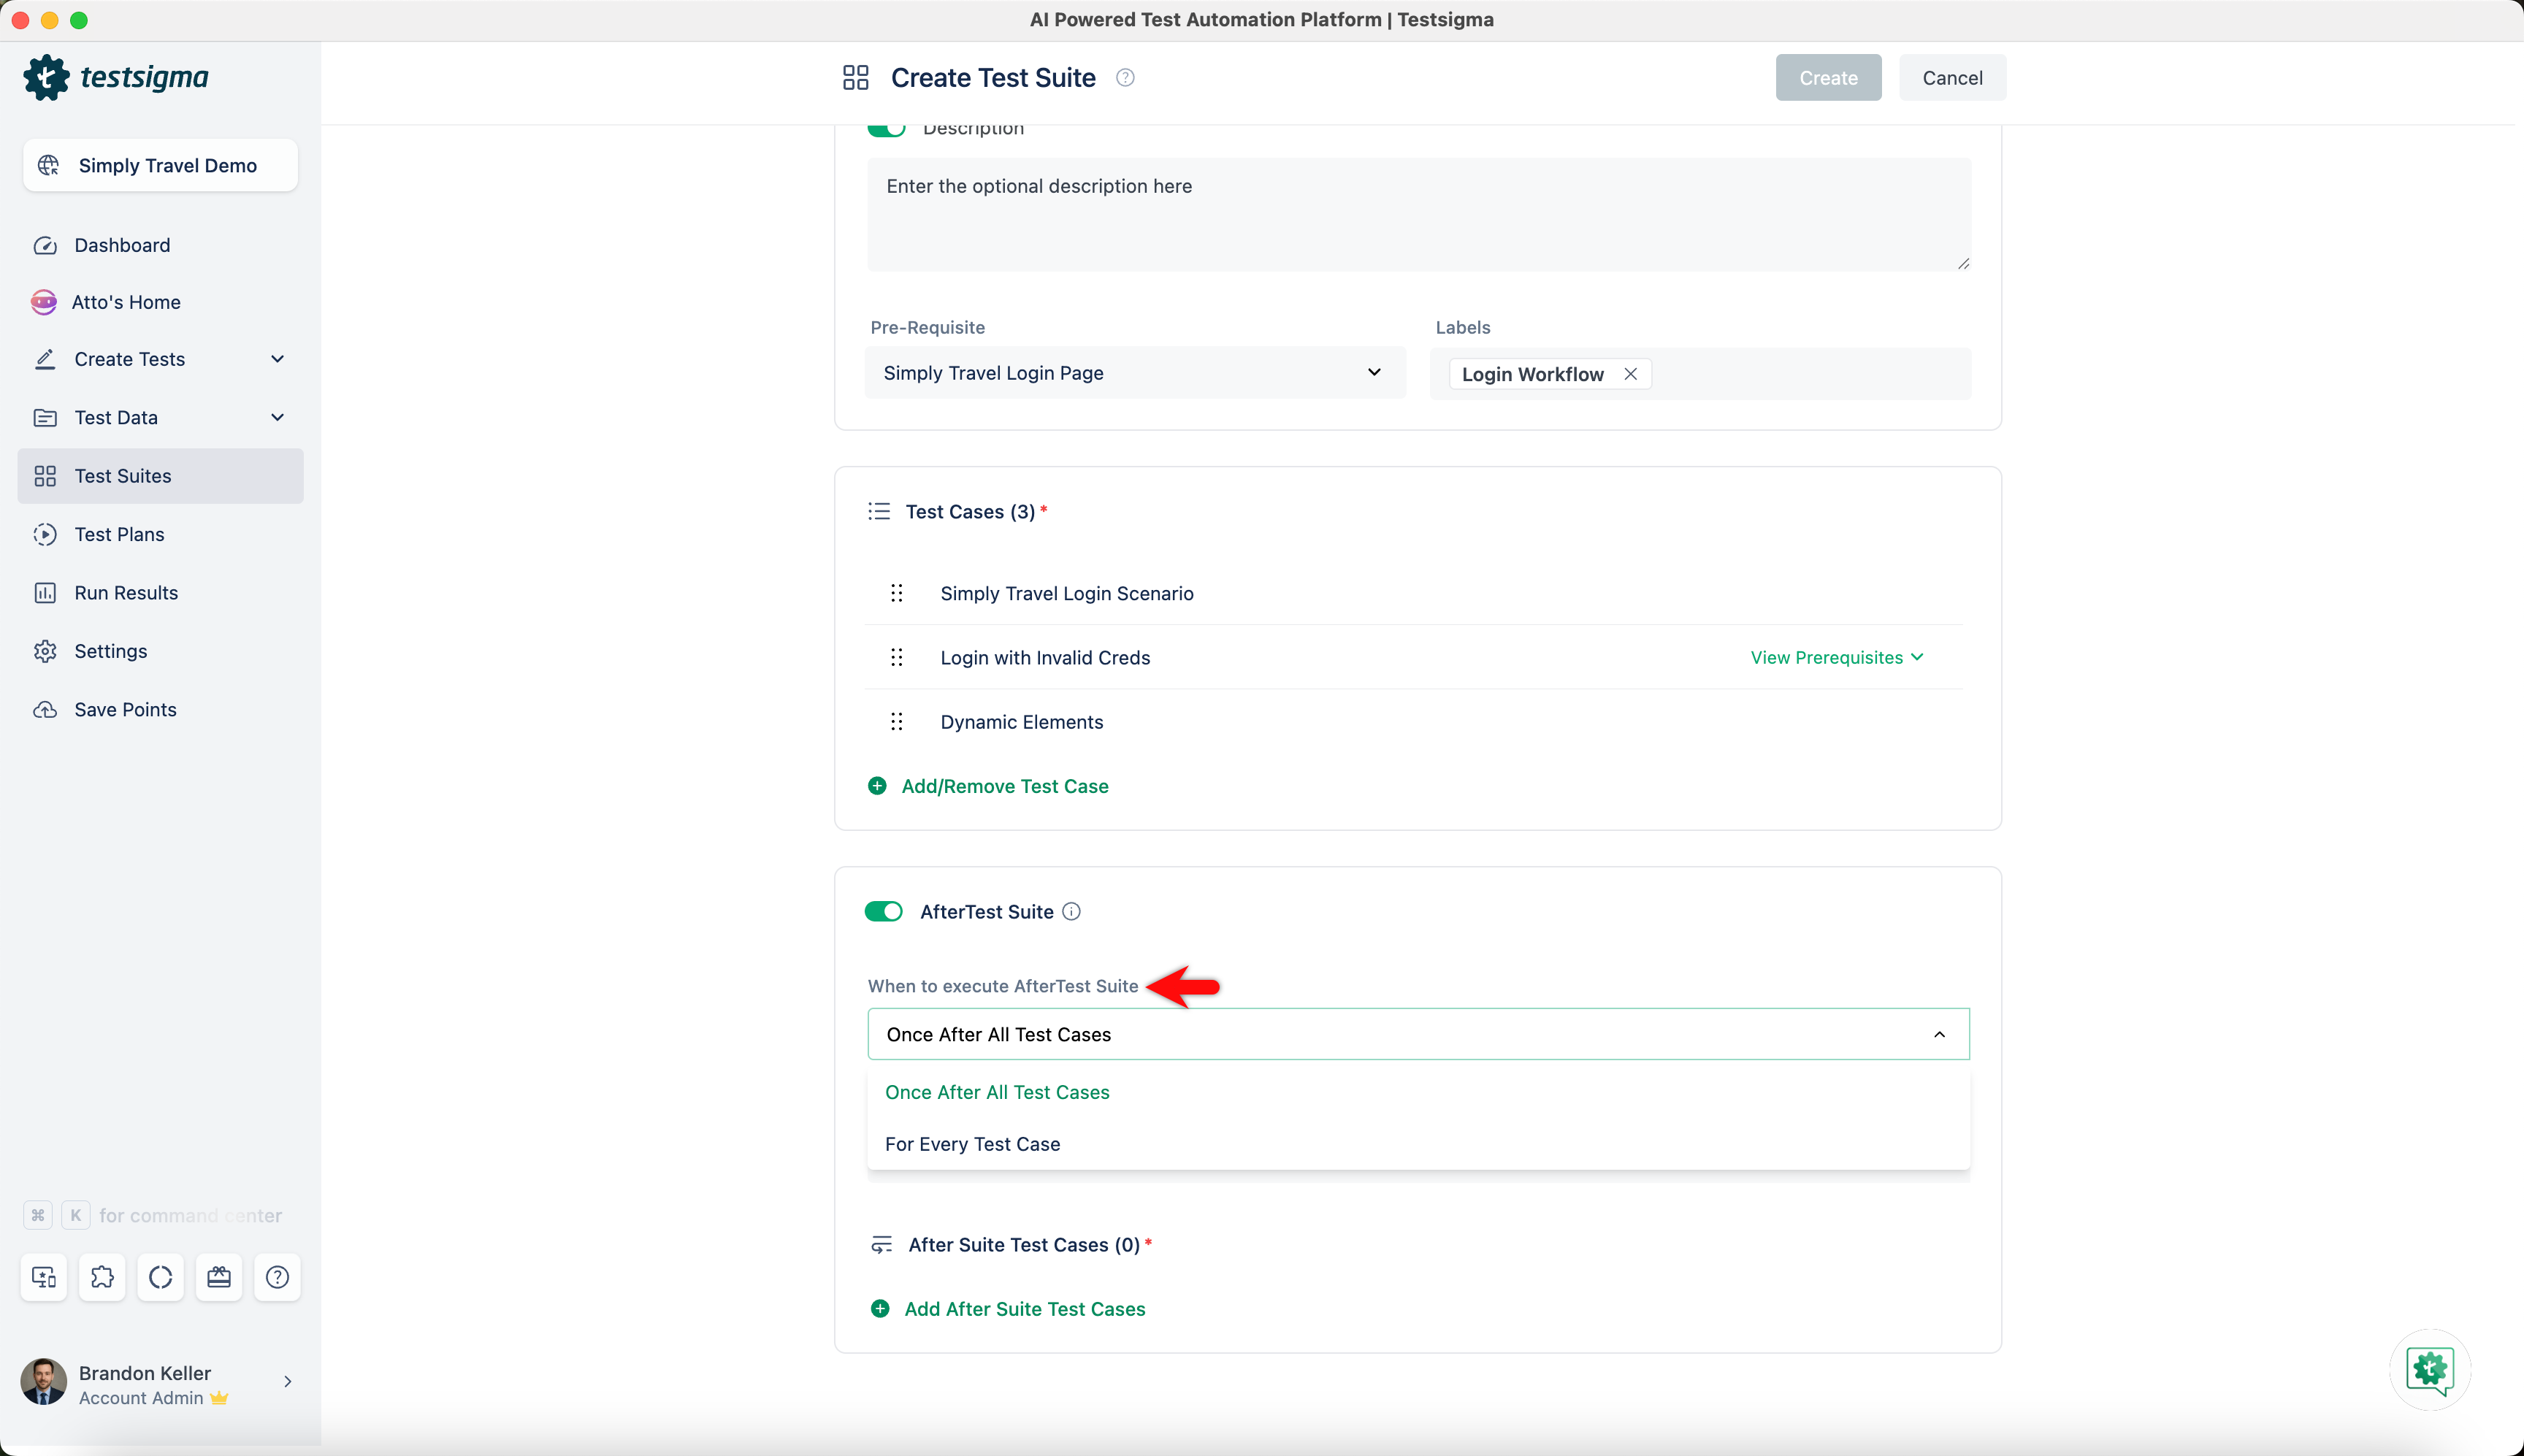
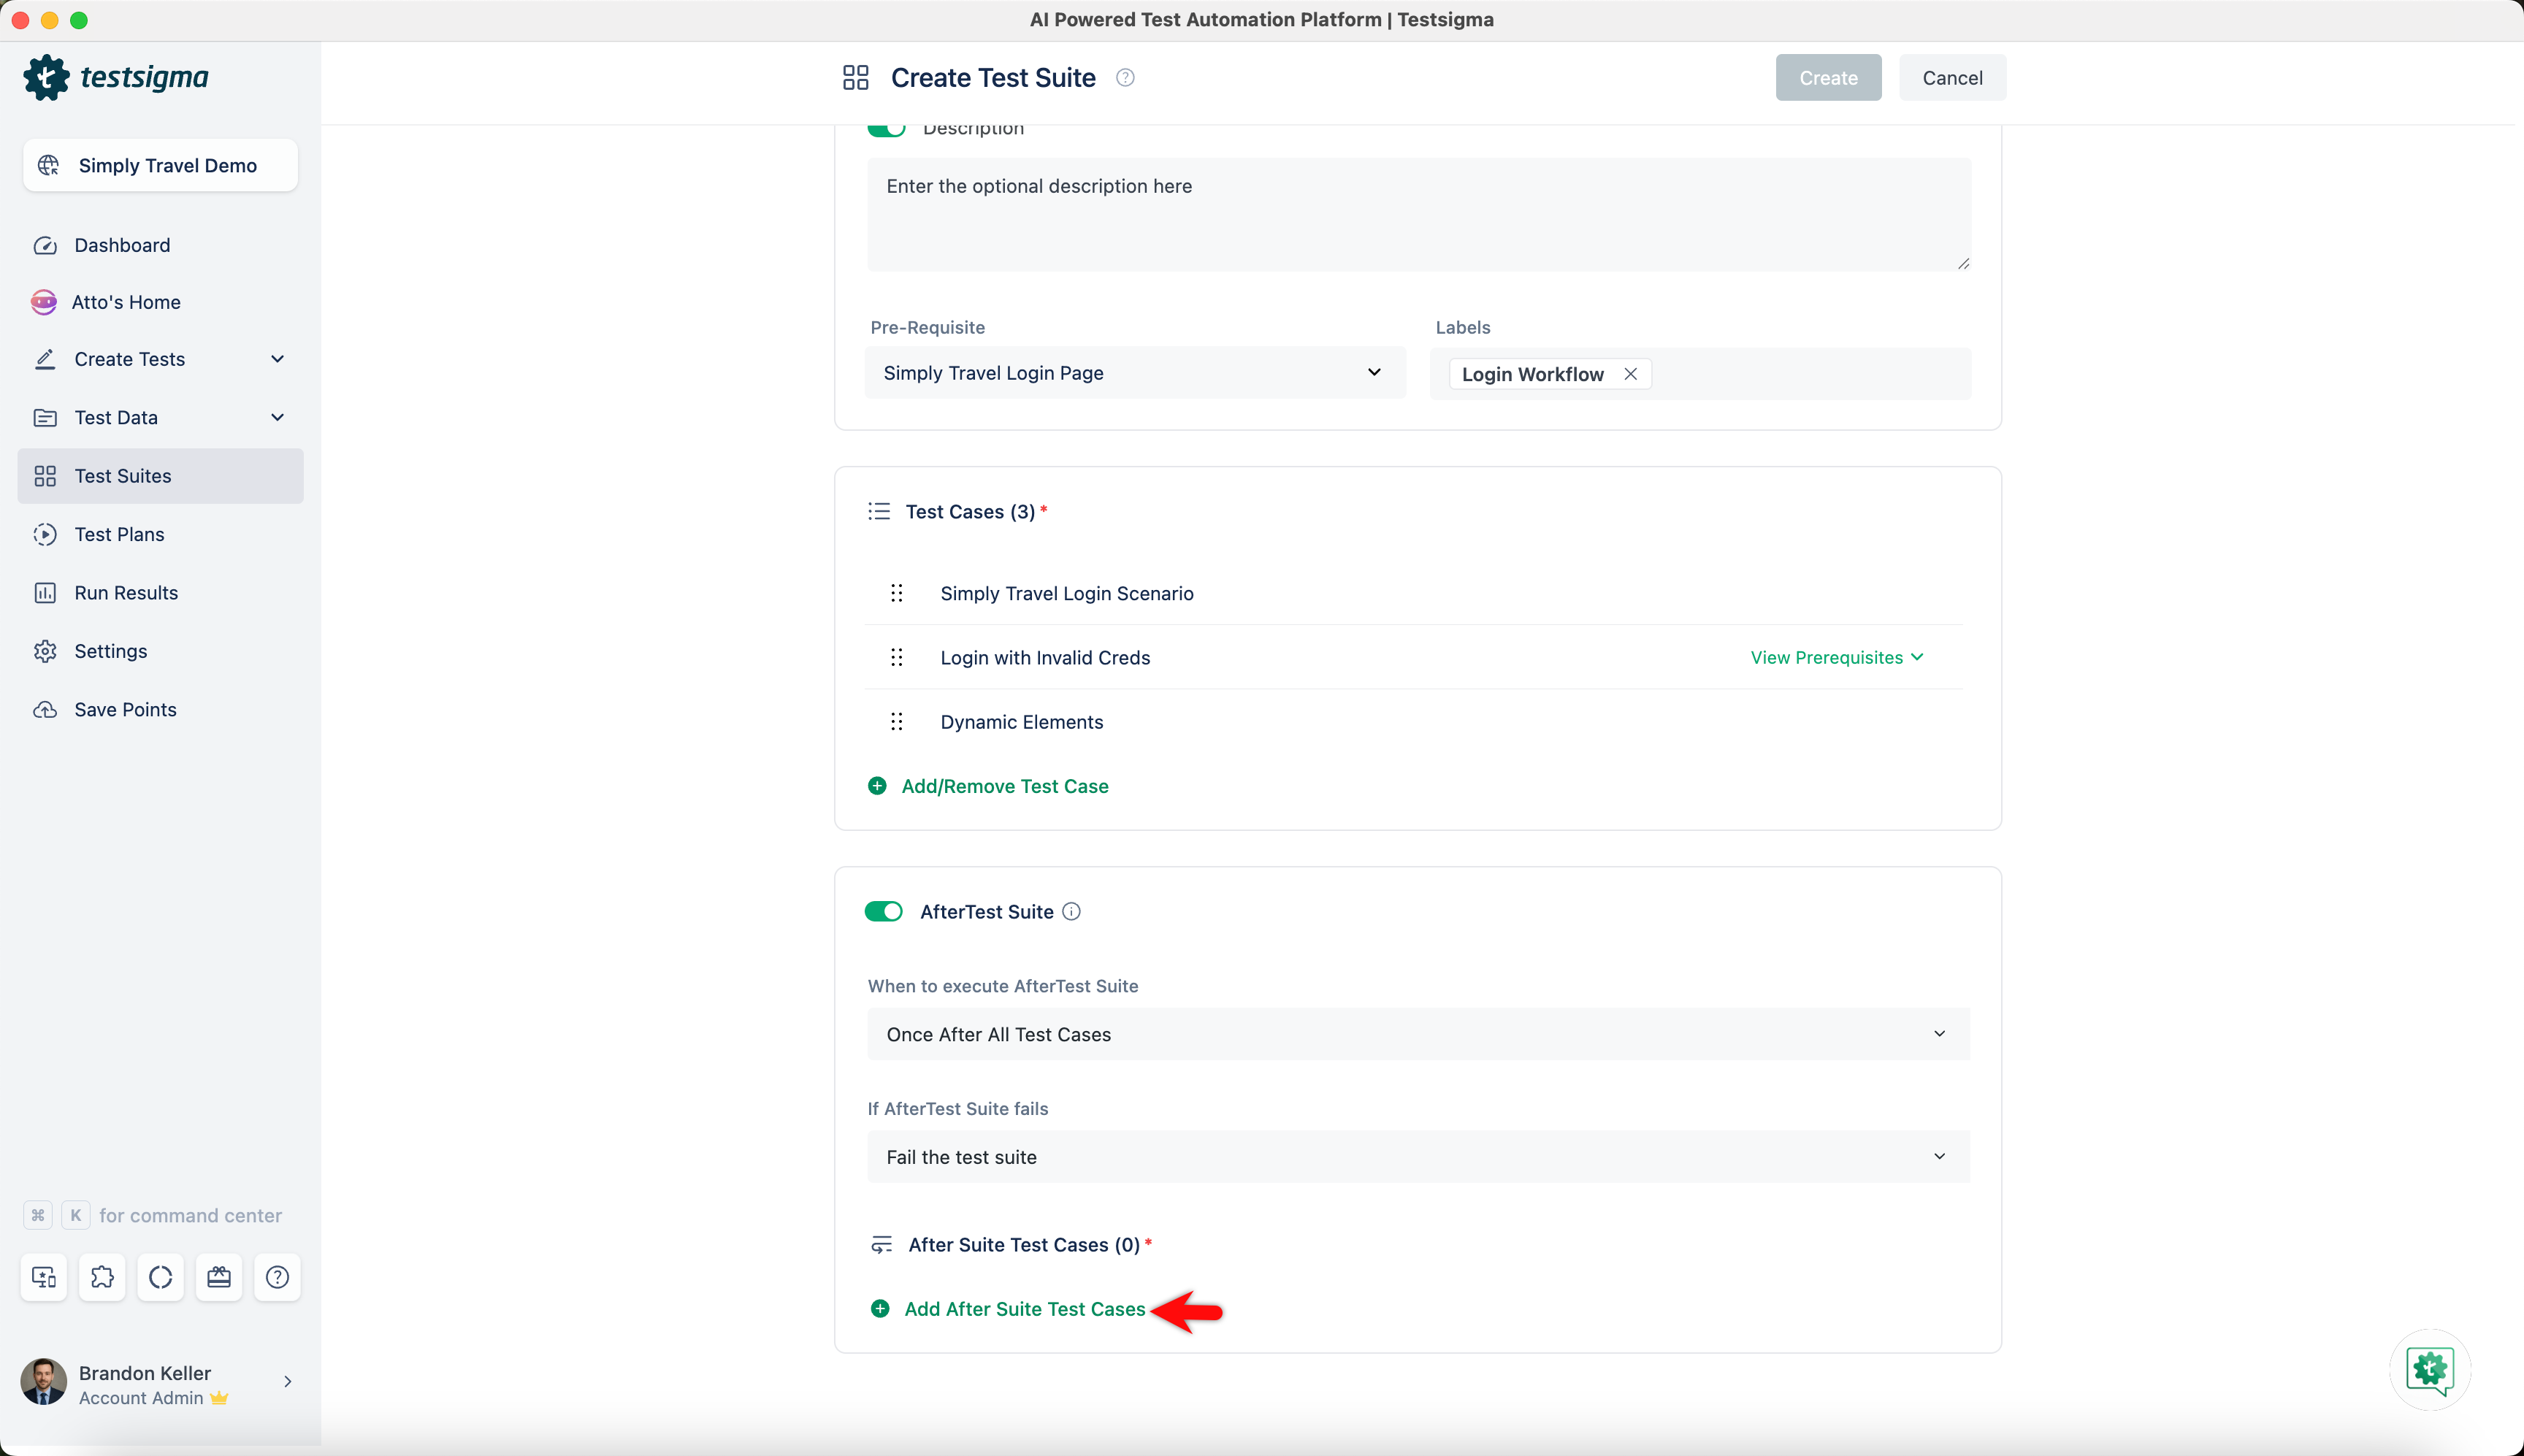
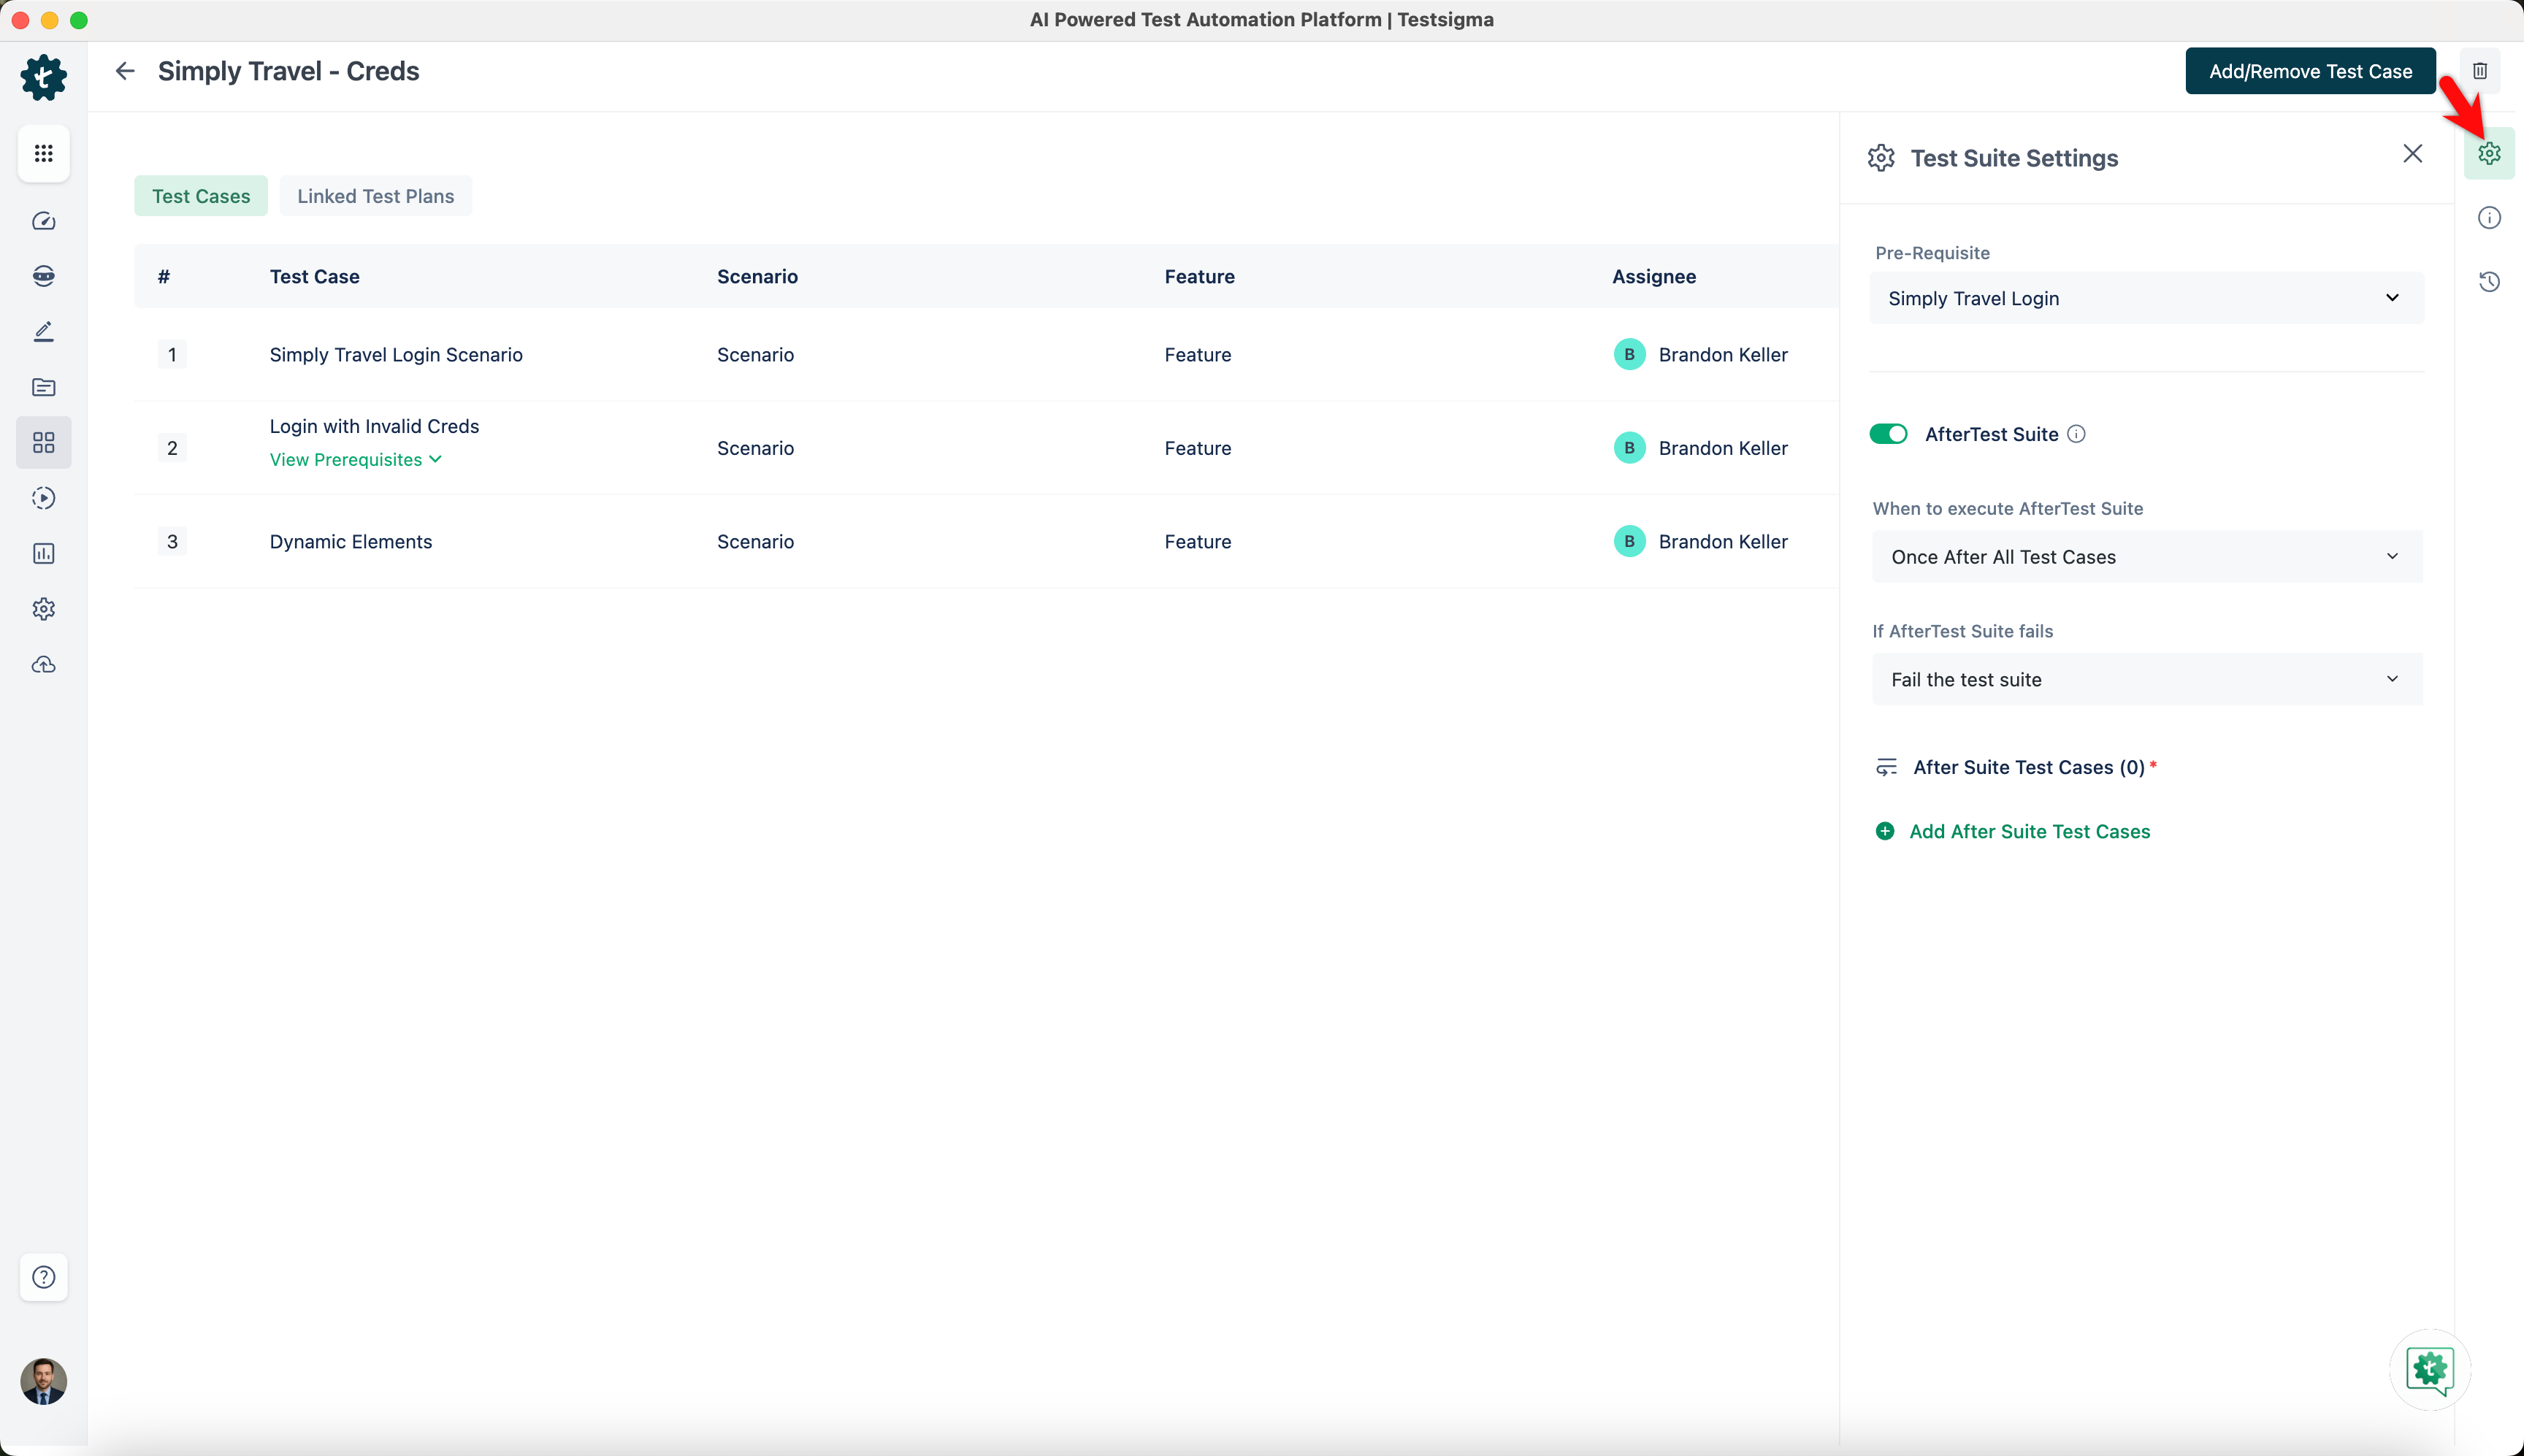
After Test Suite: Enable the AfterTest Suite feature toggle switch, which enables you to define actions or test cases to execute after completing all test cases within the suite. You can use this feature to perform clean-up or post-test activities.
- When to execute After Test Suite - Once After All Test Cases: Select this option to execute the actions or test cases within the After Test Suite section only once after all the test cases have completed execution.
- When to execute After Test Suite - For Every Test Case: Select this option to execute the actions or test cases within the After Test Suite section for every individual test case within the suite after each test case is executed.
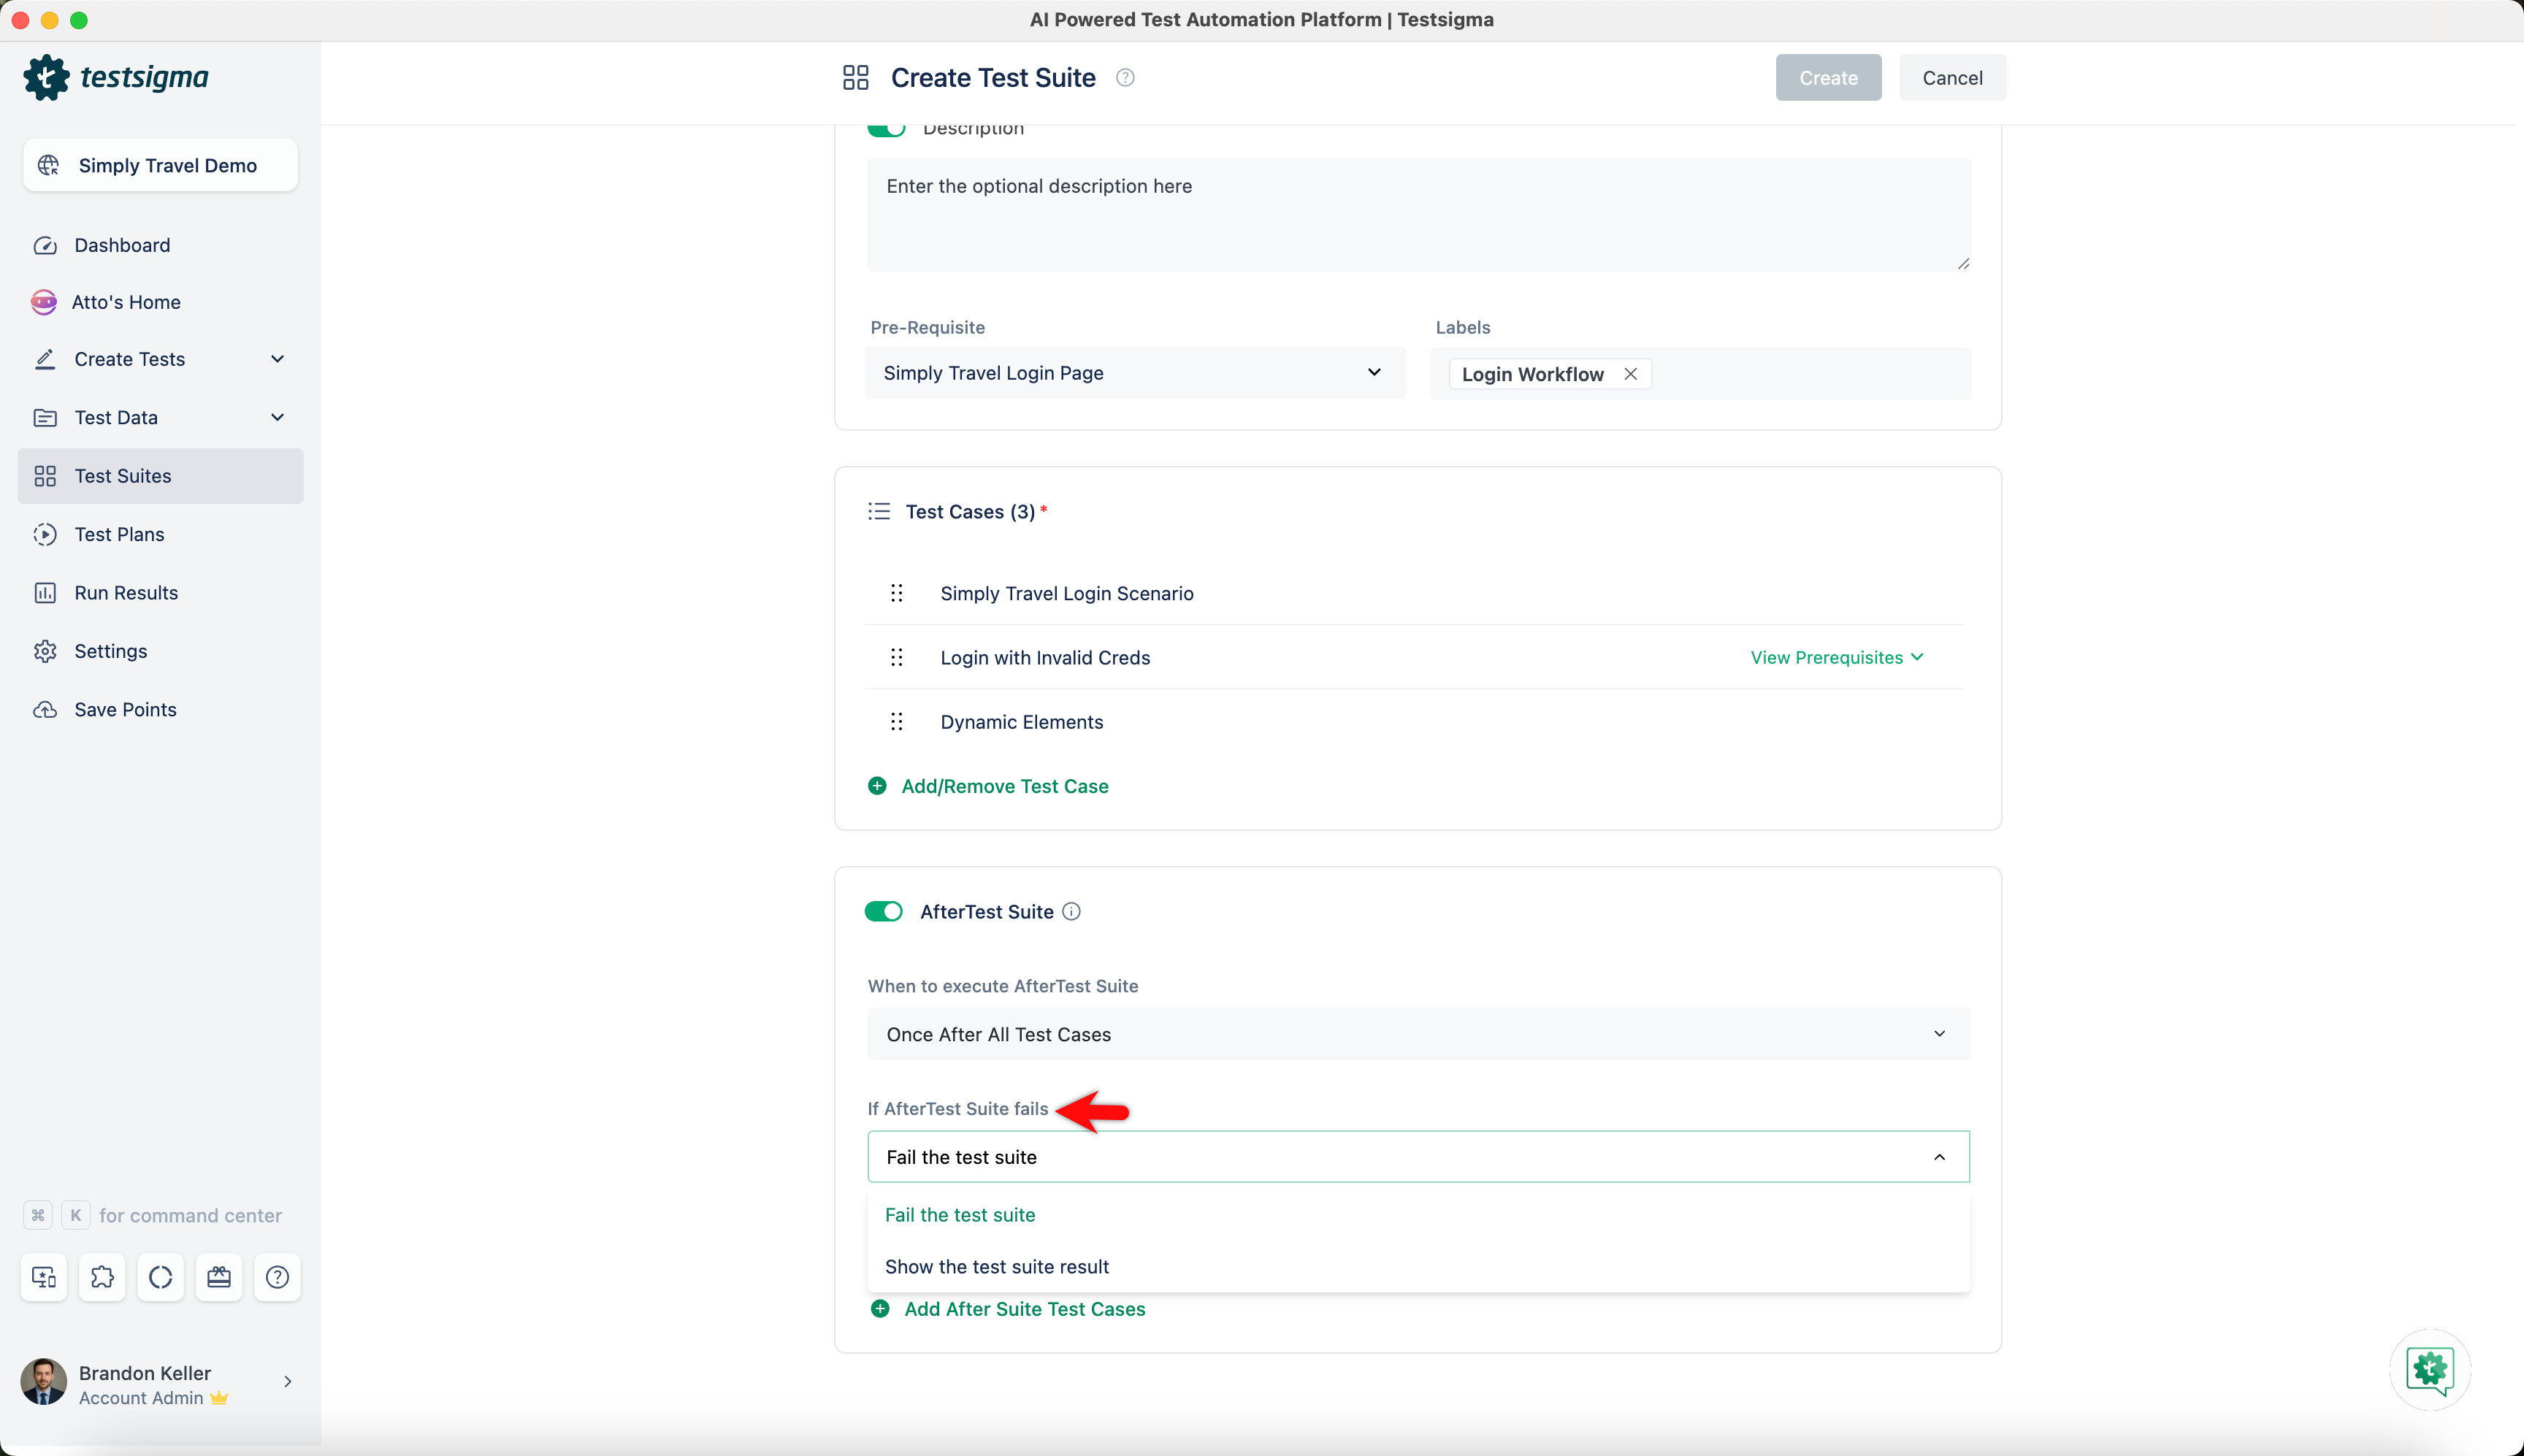
- If After Test Suite fails - Fail the test suite: Choose this option to mark the test suite as failed during execution if any of the actions or test cases within the After Test Suite section fails.
- If After Test Suite fails - Show the test suite result: Select this option to display the test suite result even if any of the actions or test cases within the After Test Suite section fail during execution.
- Add After Suite Test Cases: You can add specific test cases within the After Test Suite section that will execute after completing all the other test cases in the suite.
Carefully consider the order and dependencies between test cases when defining the After Test Suite section to ensure effectiveness and that it does not impact the subsequent test cases or cause environmental conflicts.
Editing a Test Suite
- From the left navigation bar, navigate to Test Suites.
-
You can edit the test case using any of the following methods:
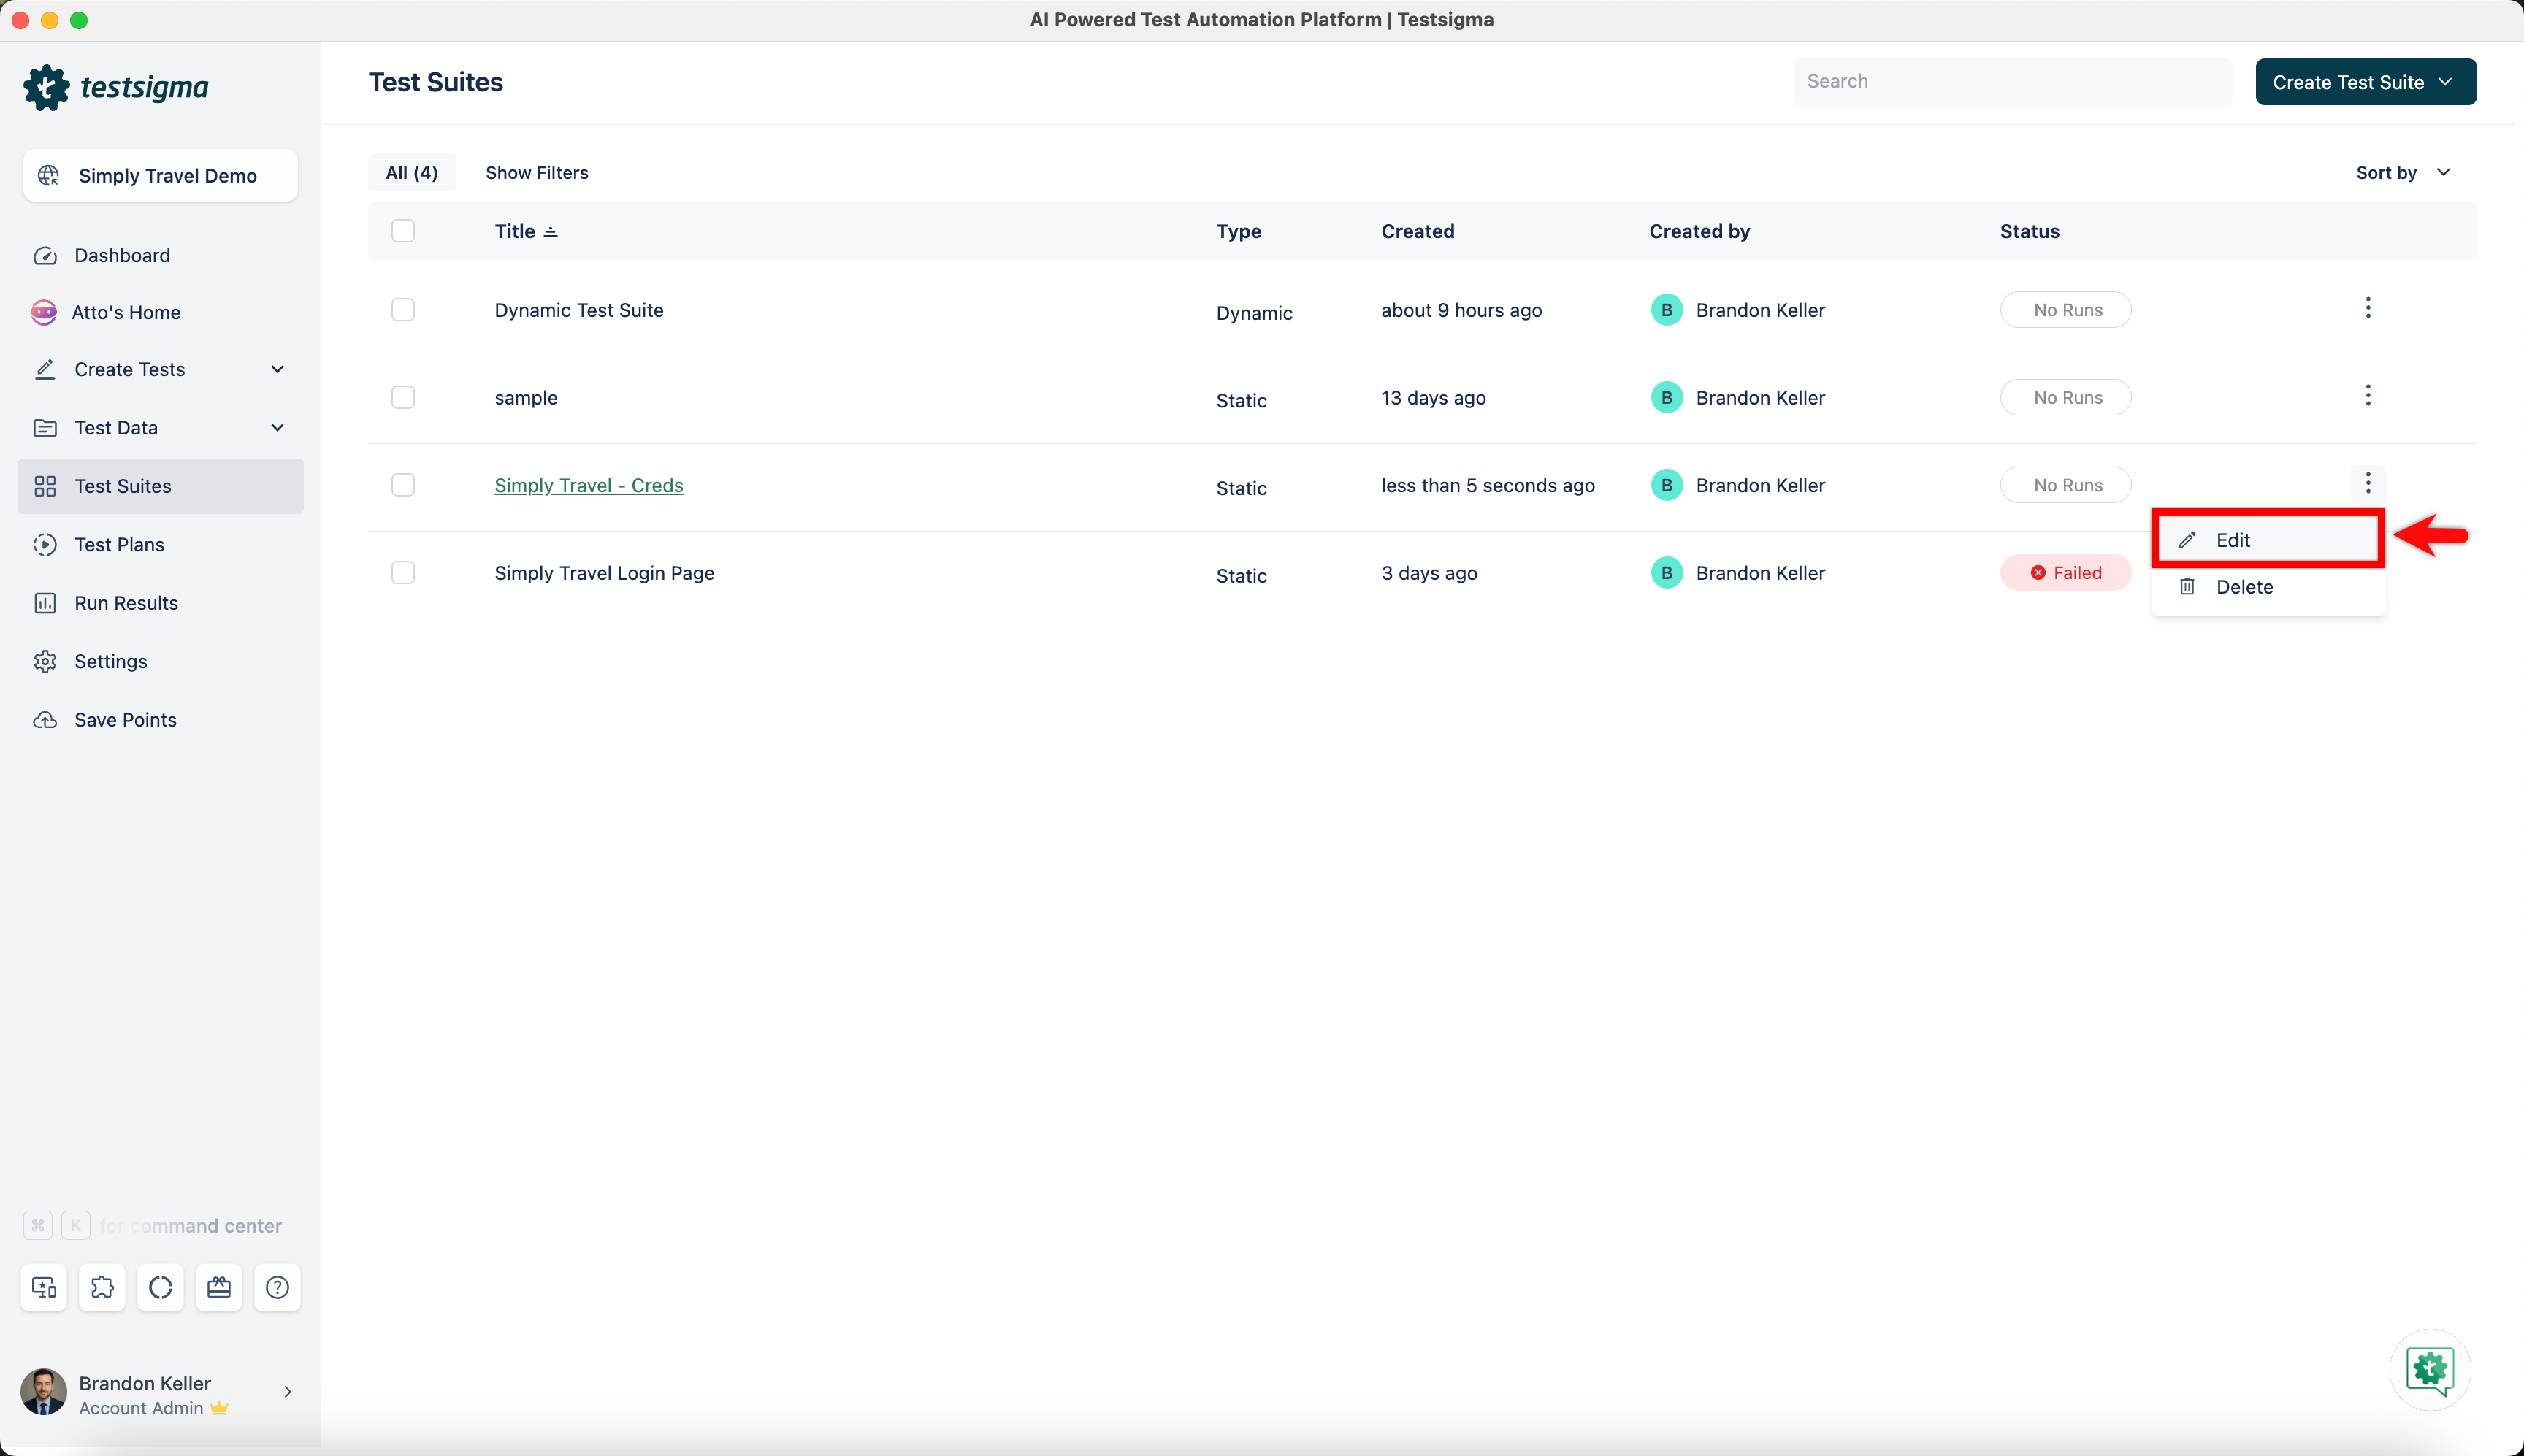
- Click on the ellipsis icon for the Test Suite you want to edit from the Test Suite List page, and select Edit from the drop-down menu.
- Click the Test Suite you want to edit and open the Test Suite Details Page.
- Click on the ellipsis icon for the Test Suite you want to edit from the Test Suite List page, and select Edit from the drop-down menu.
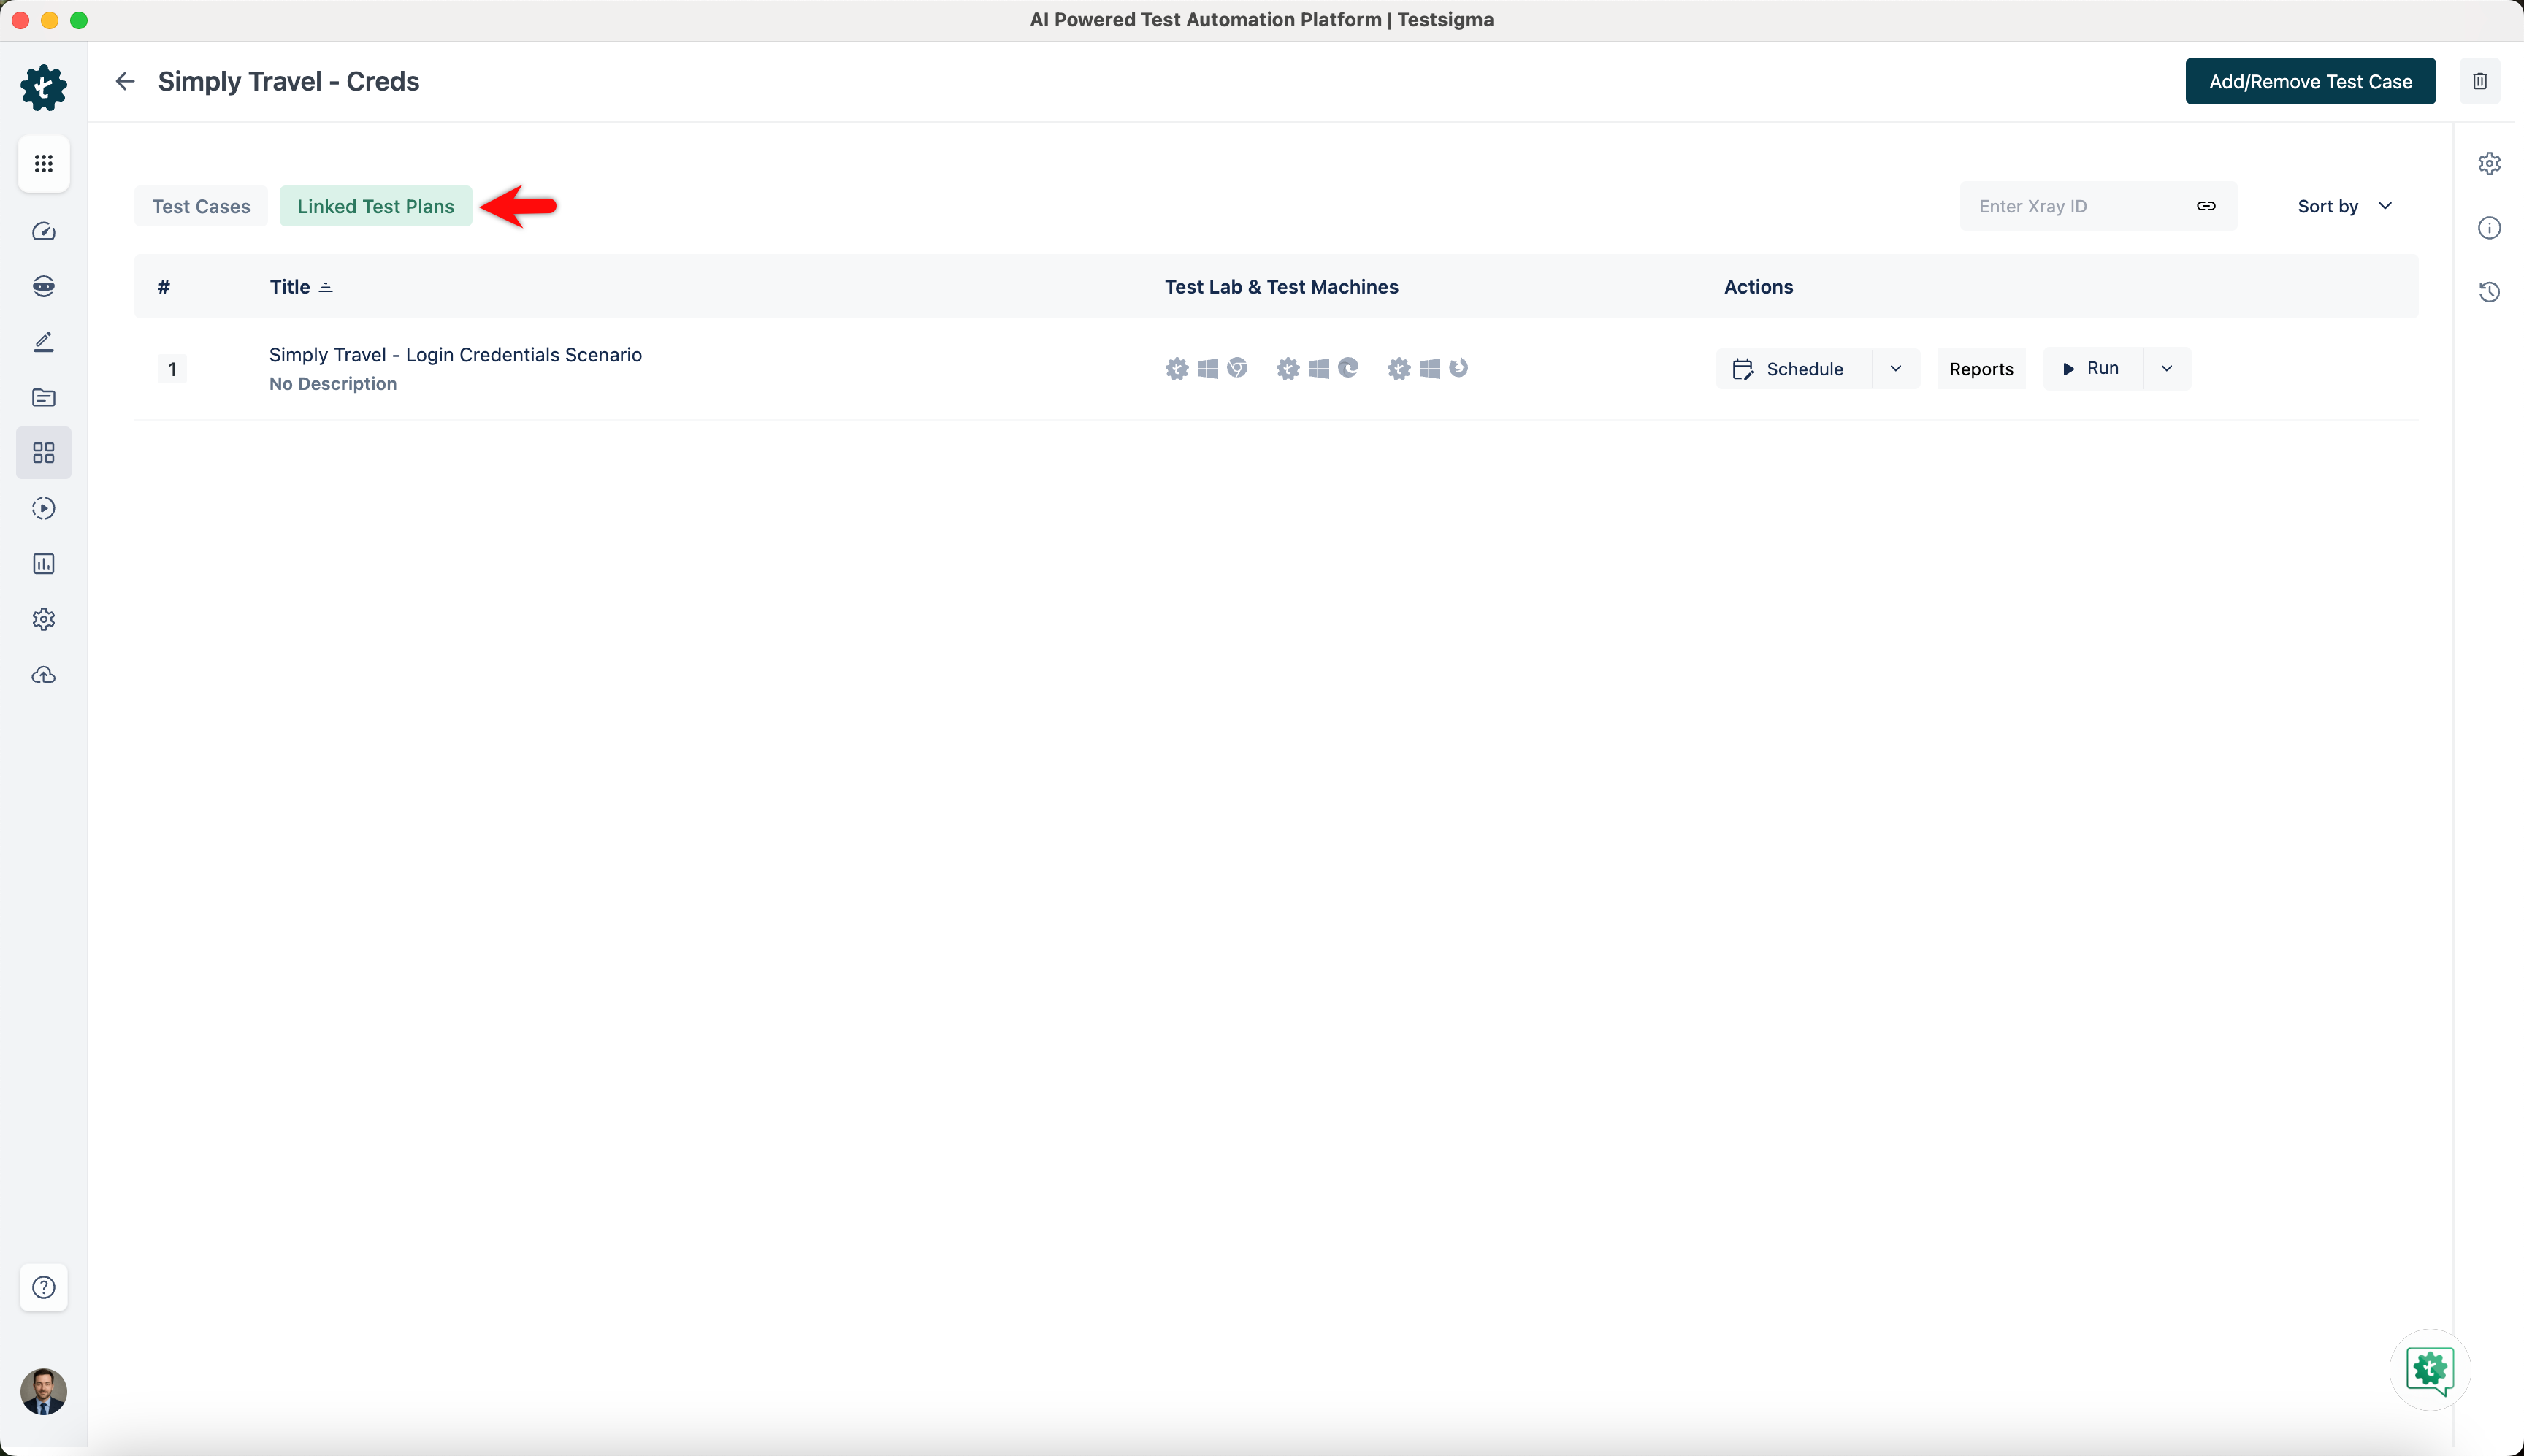
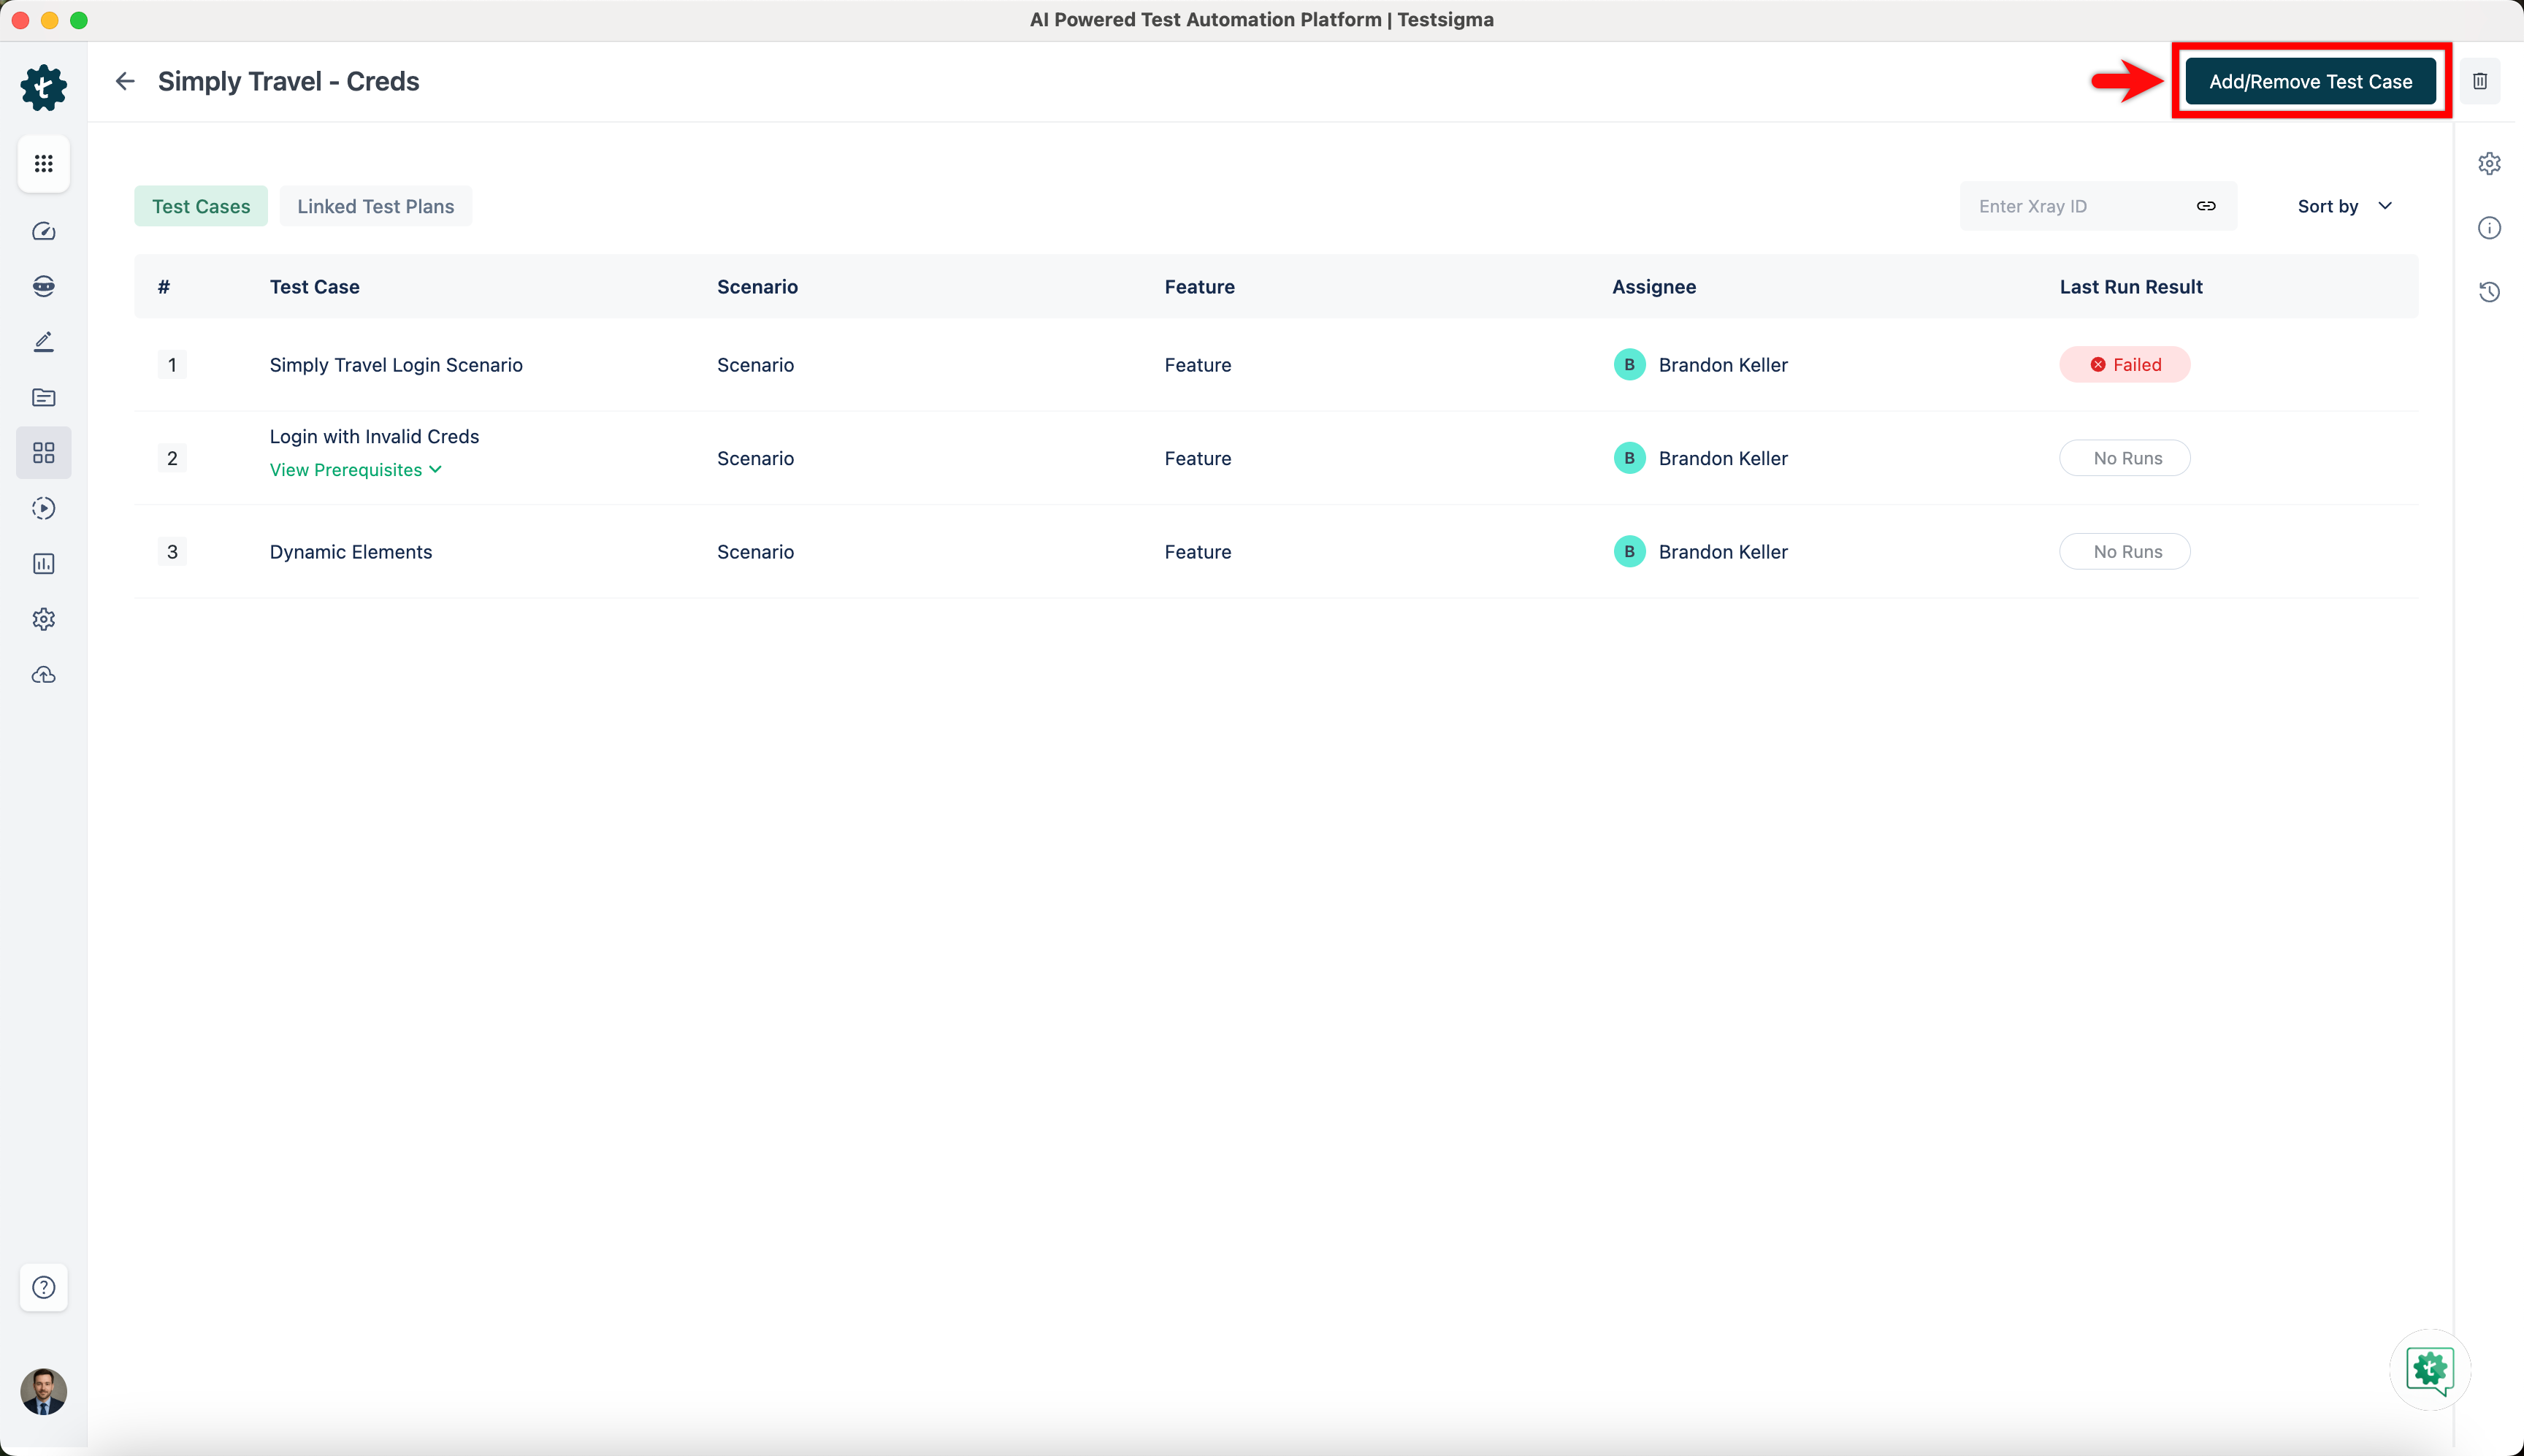
- You can view Test Cases and Test Plans linked to your Test Suite on the Test Suites Details page.
- Click the Add/Remove Test Cases button in the top right corner of the Test Suite details page. An Add/Remove Test Case overlay will appear, allowing you to select test cases from the Available Test Case list by checking the box next to them or clicking the + icon to select individual test cases.
- Click Test Suite Settings in the right-side navbar, and follow steps 4 & 8 in the Creating a Test Suite section to add Pre-Requisite, After Test Suite for the Test Suite.
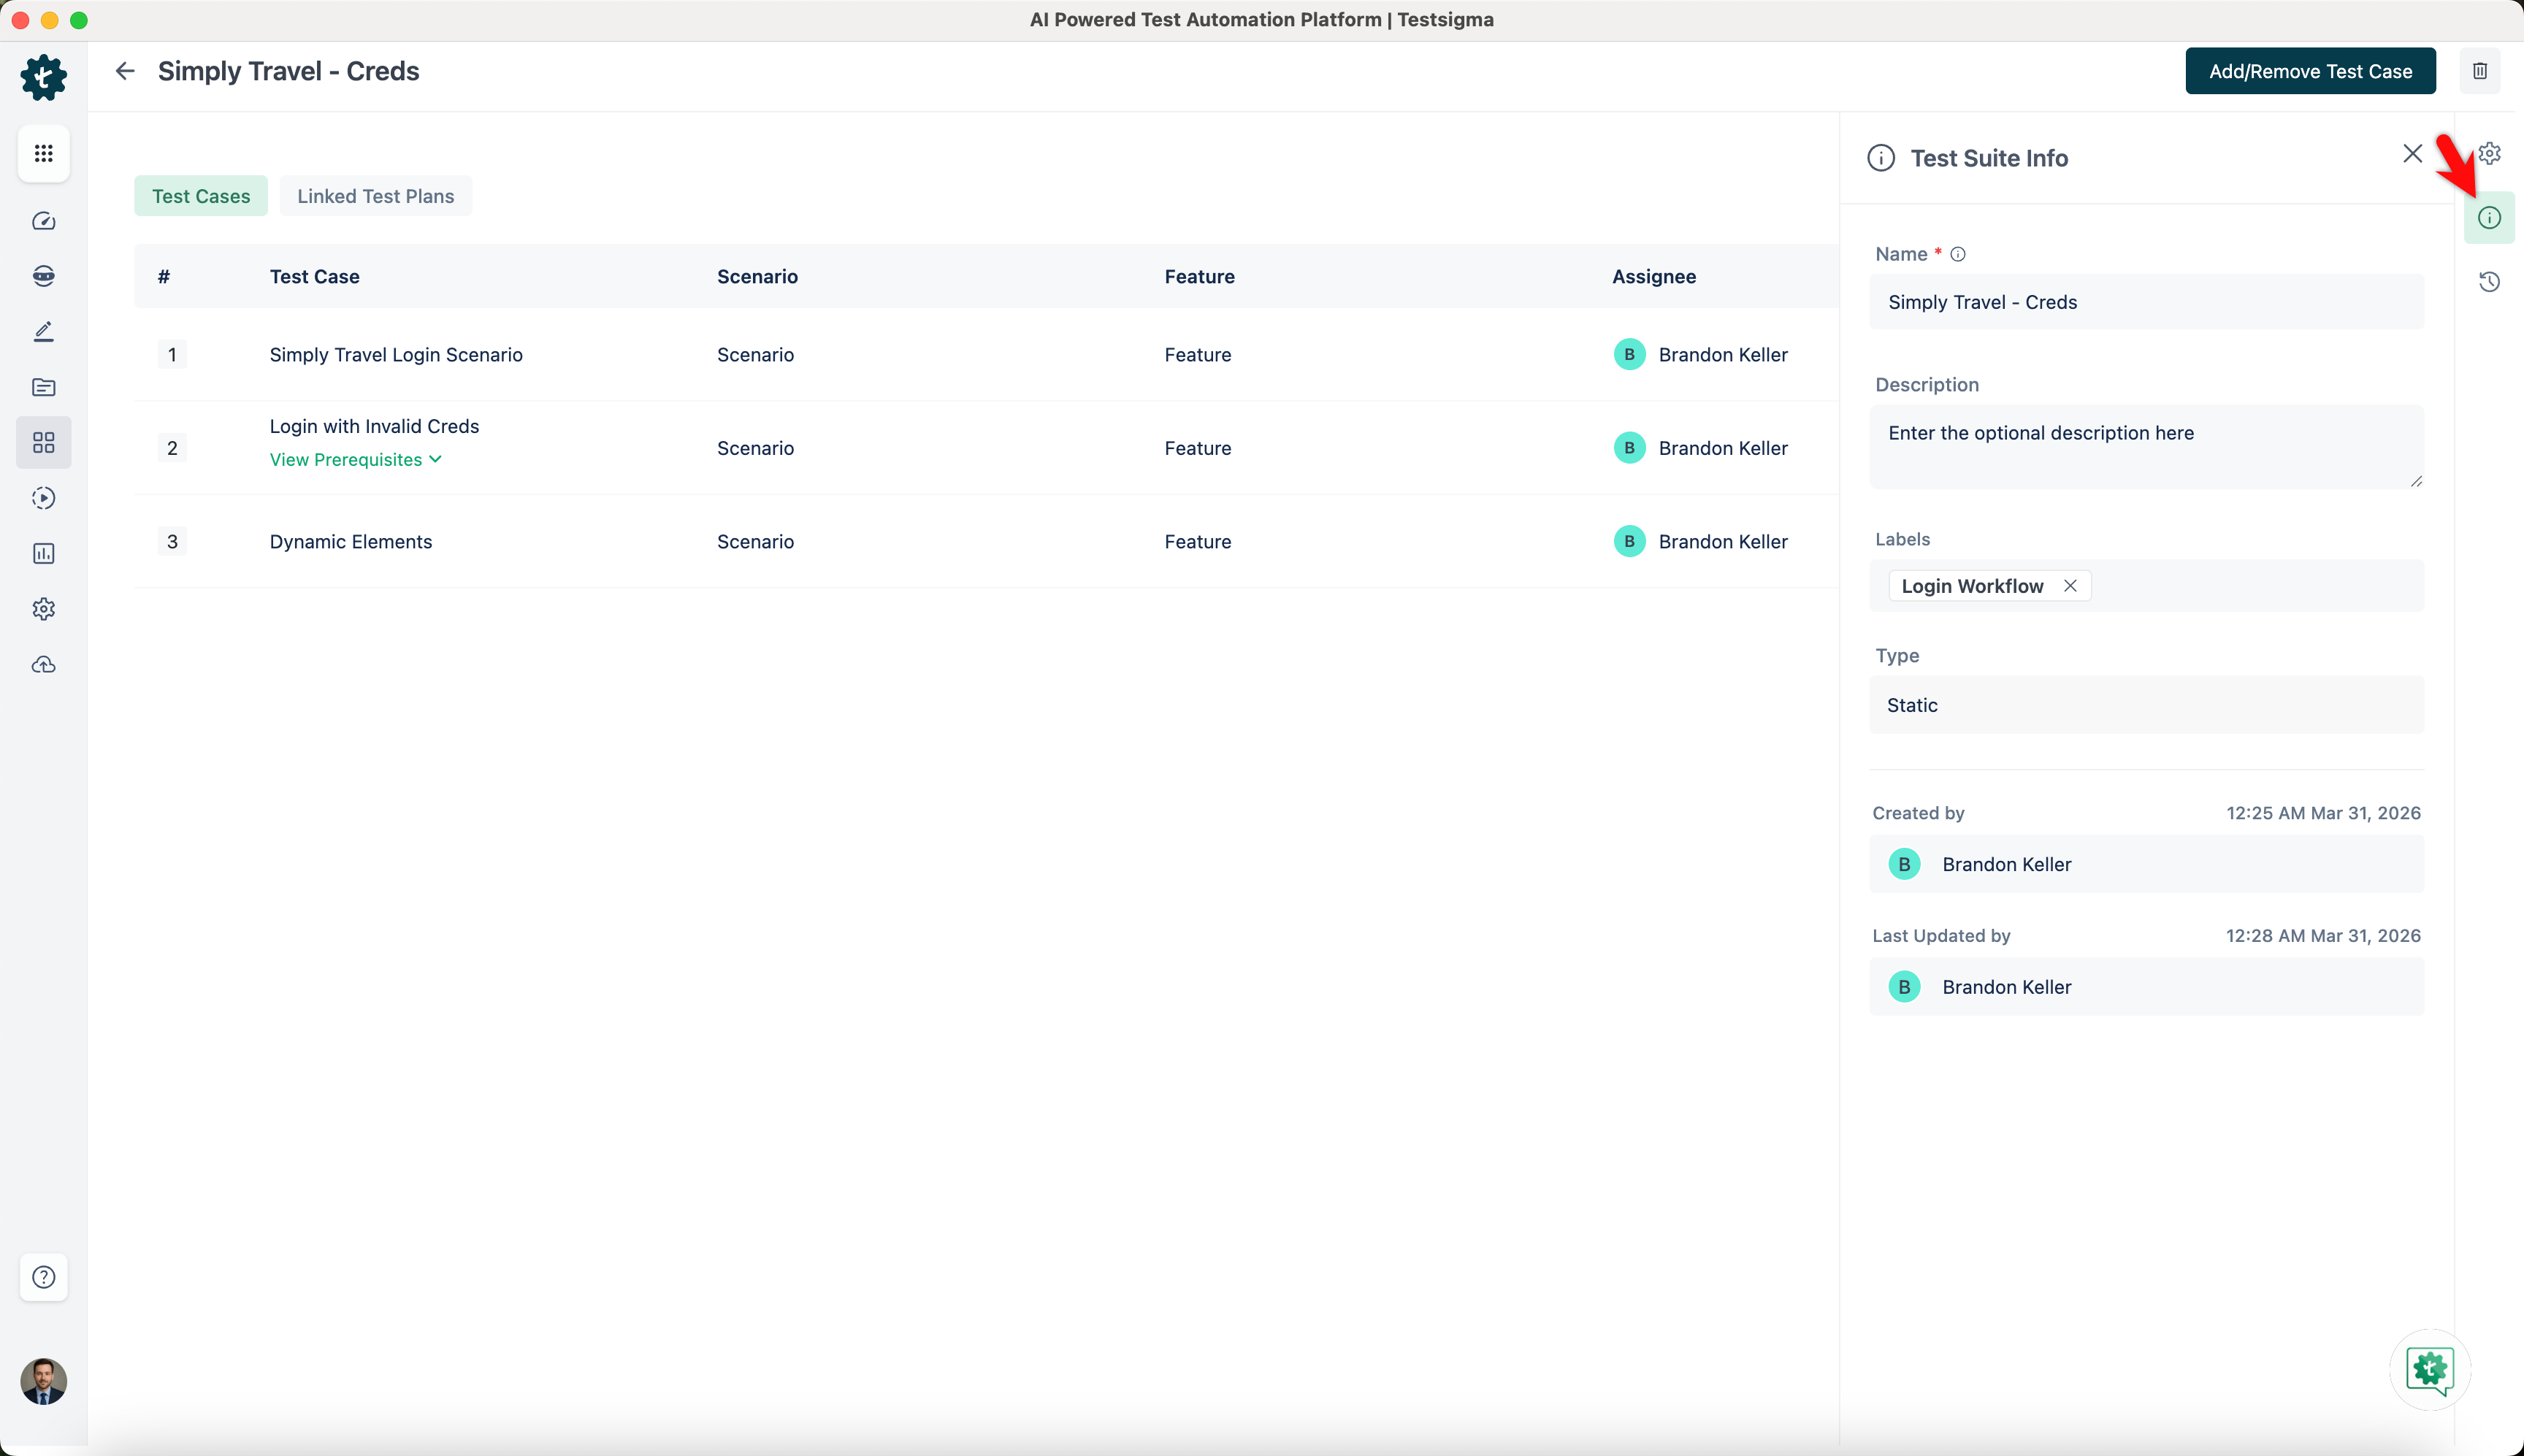
- Click Test Suite Info in the right-side navbar. You can update the Test Suite Name, Type and Description from there and view information about the Test Suite's creation and last update.
-
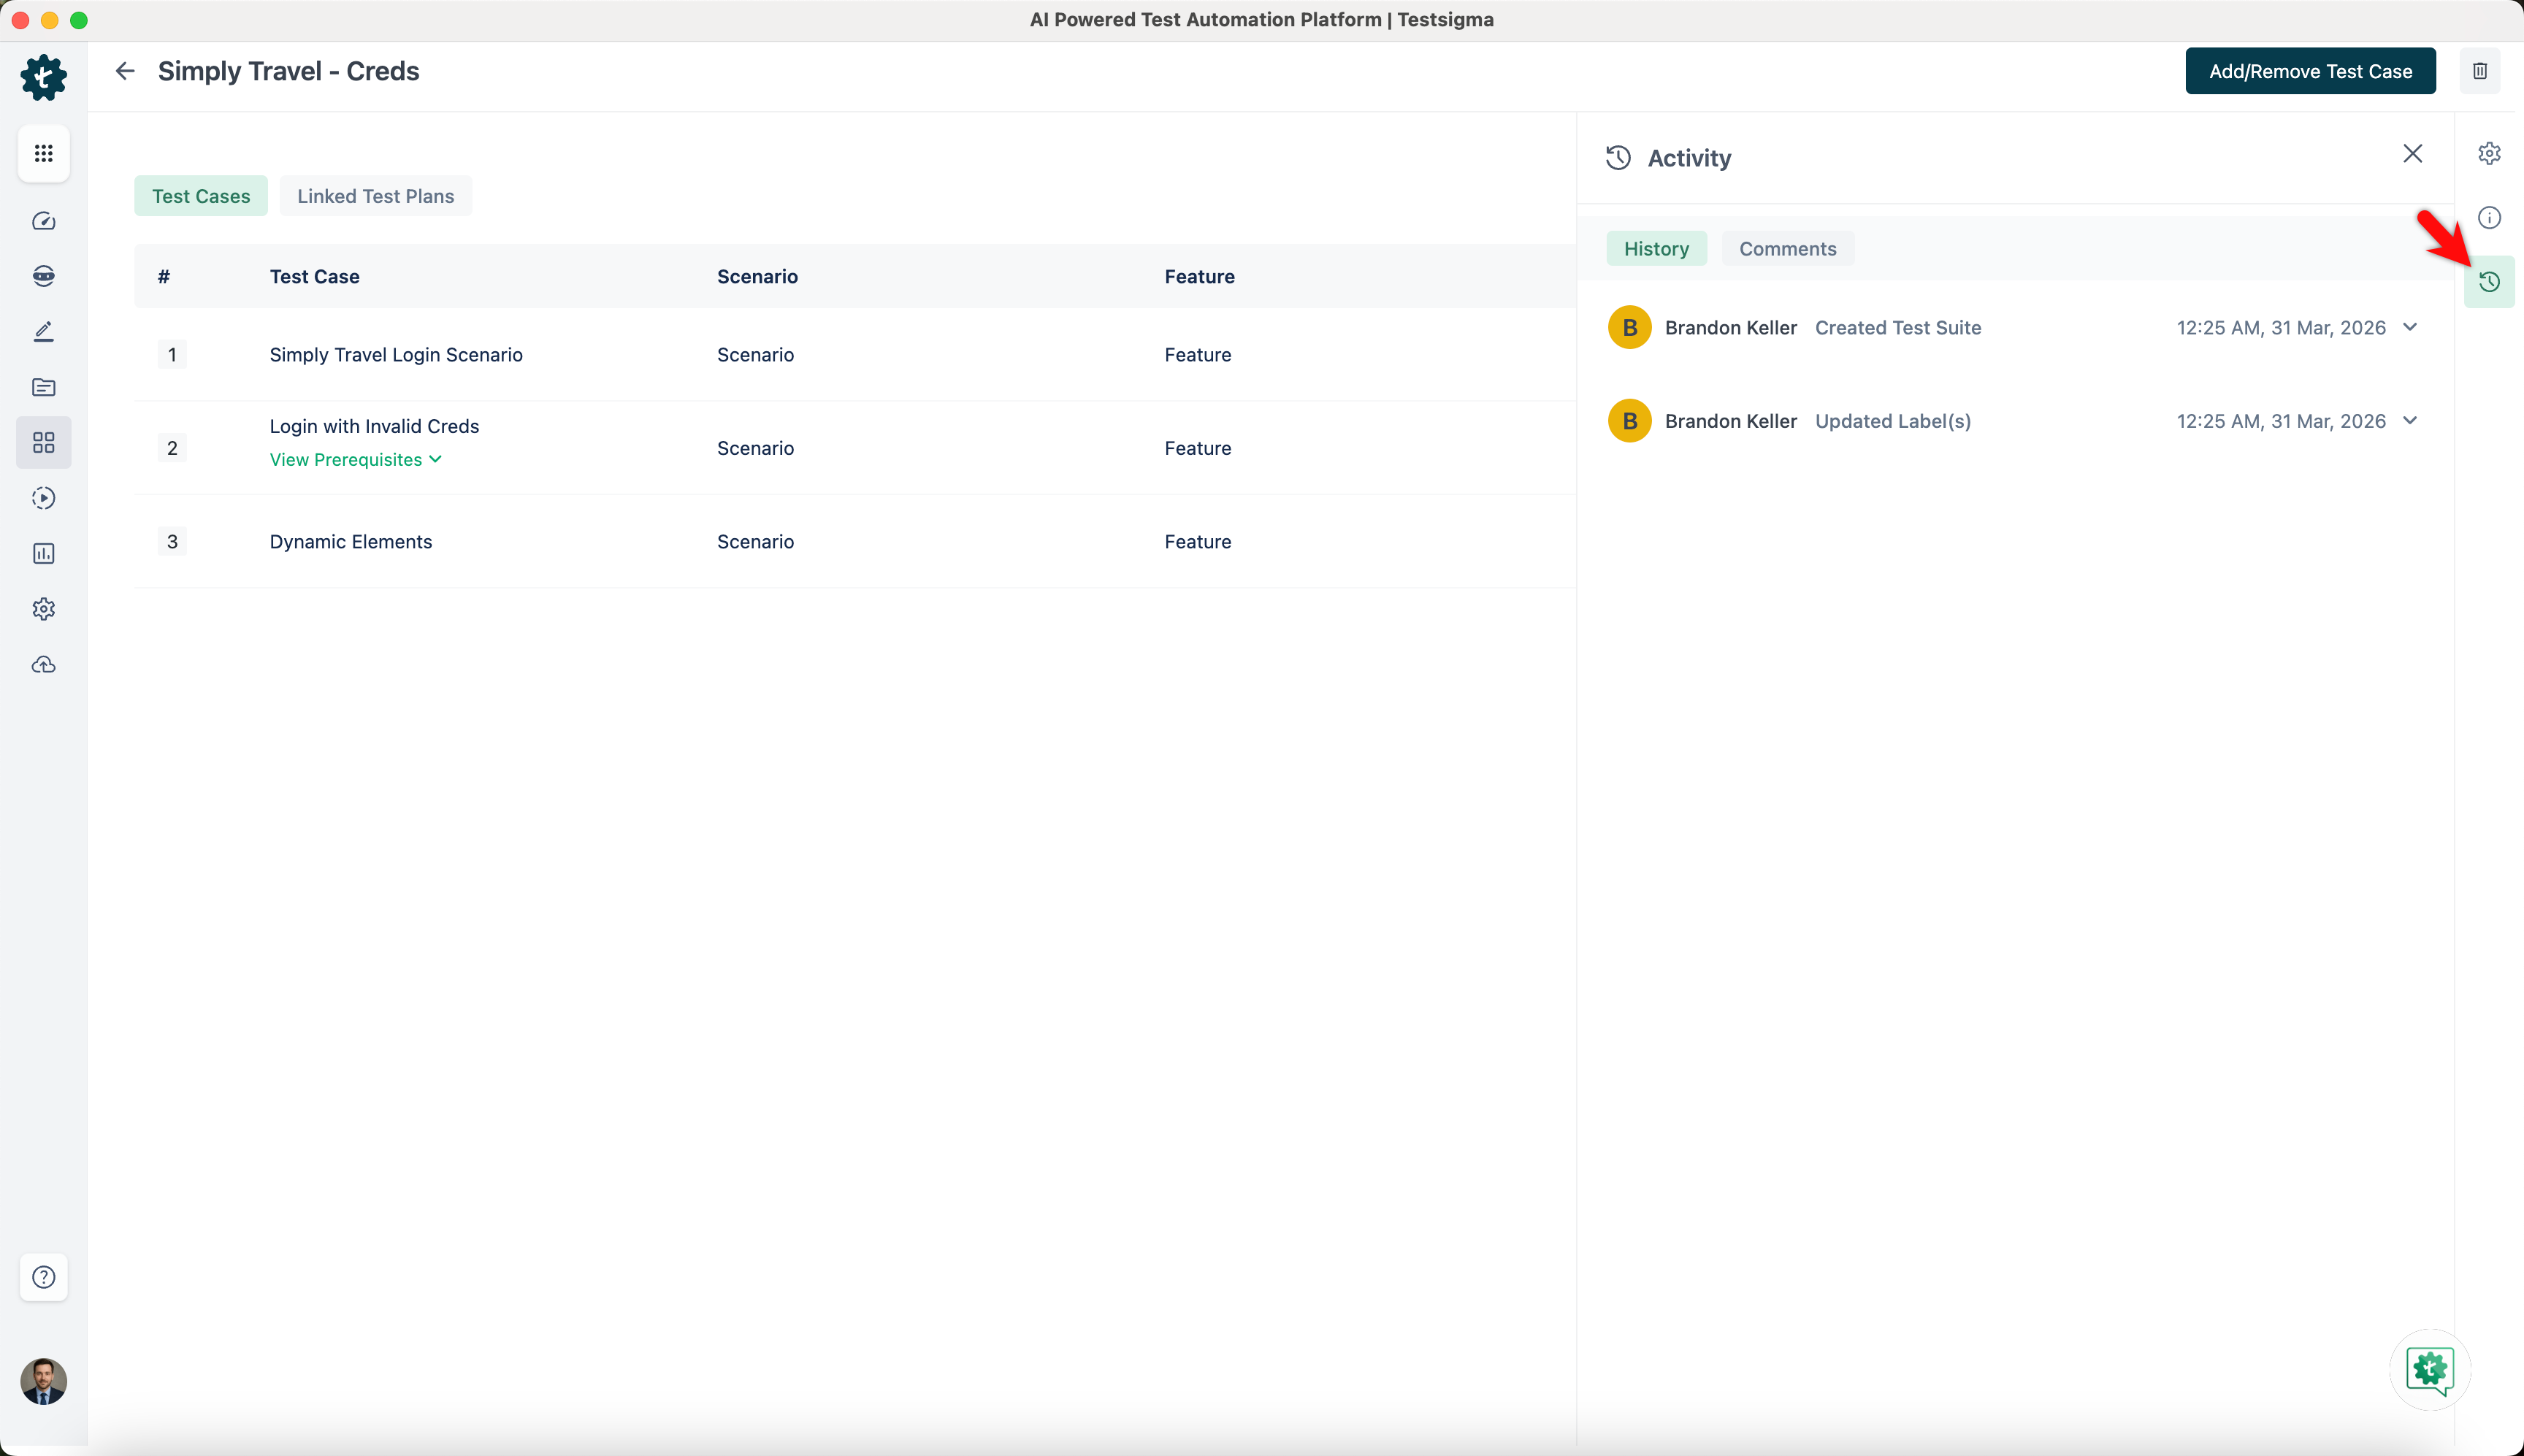
Click Activity in the right-side navbar and view the History and Comments of test suite.
Deleting a Test Suite
- Navigate to Test Suites in the left-side navbar.
-
You can delete the test suite using any of the following methods:
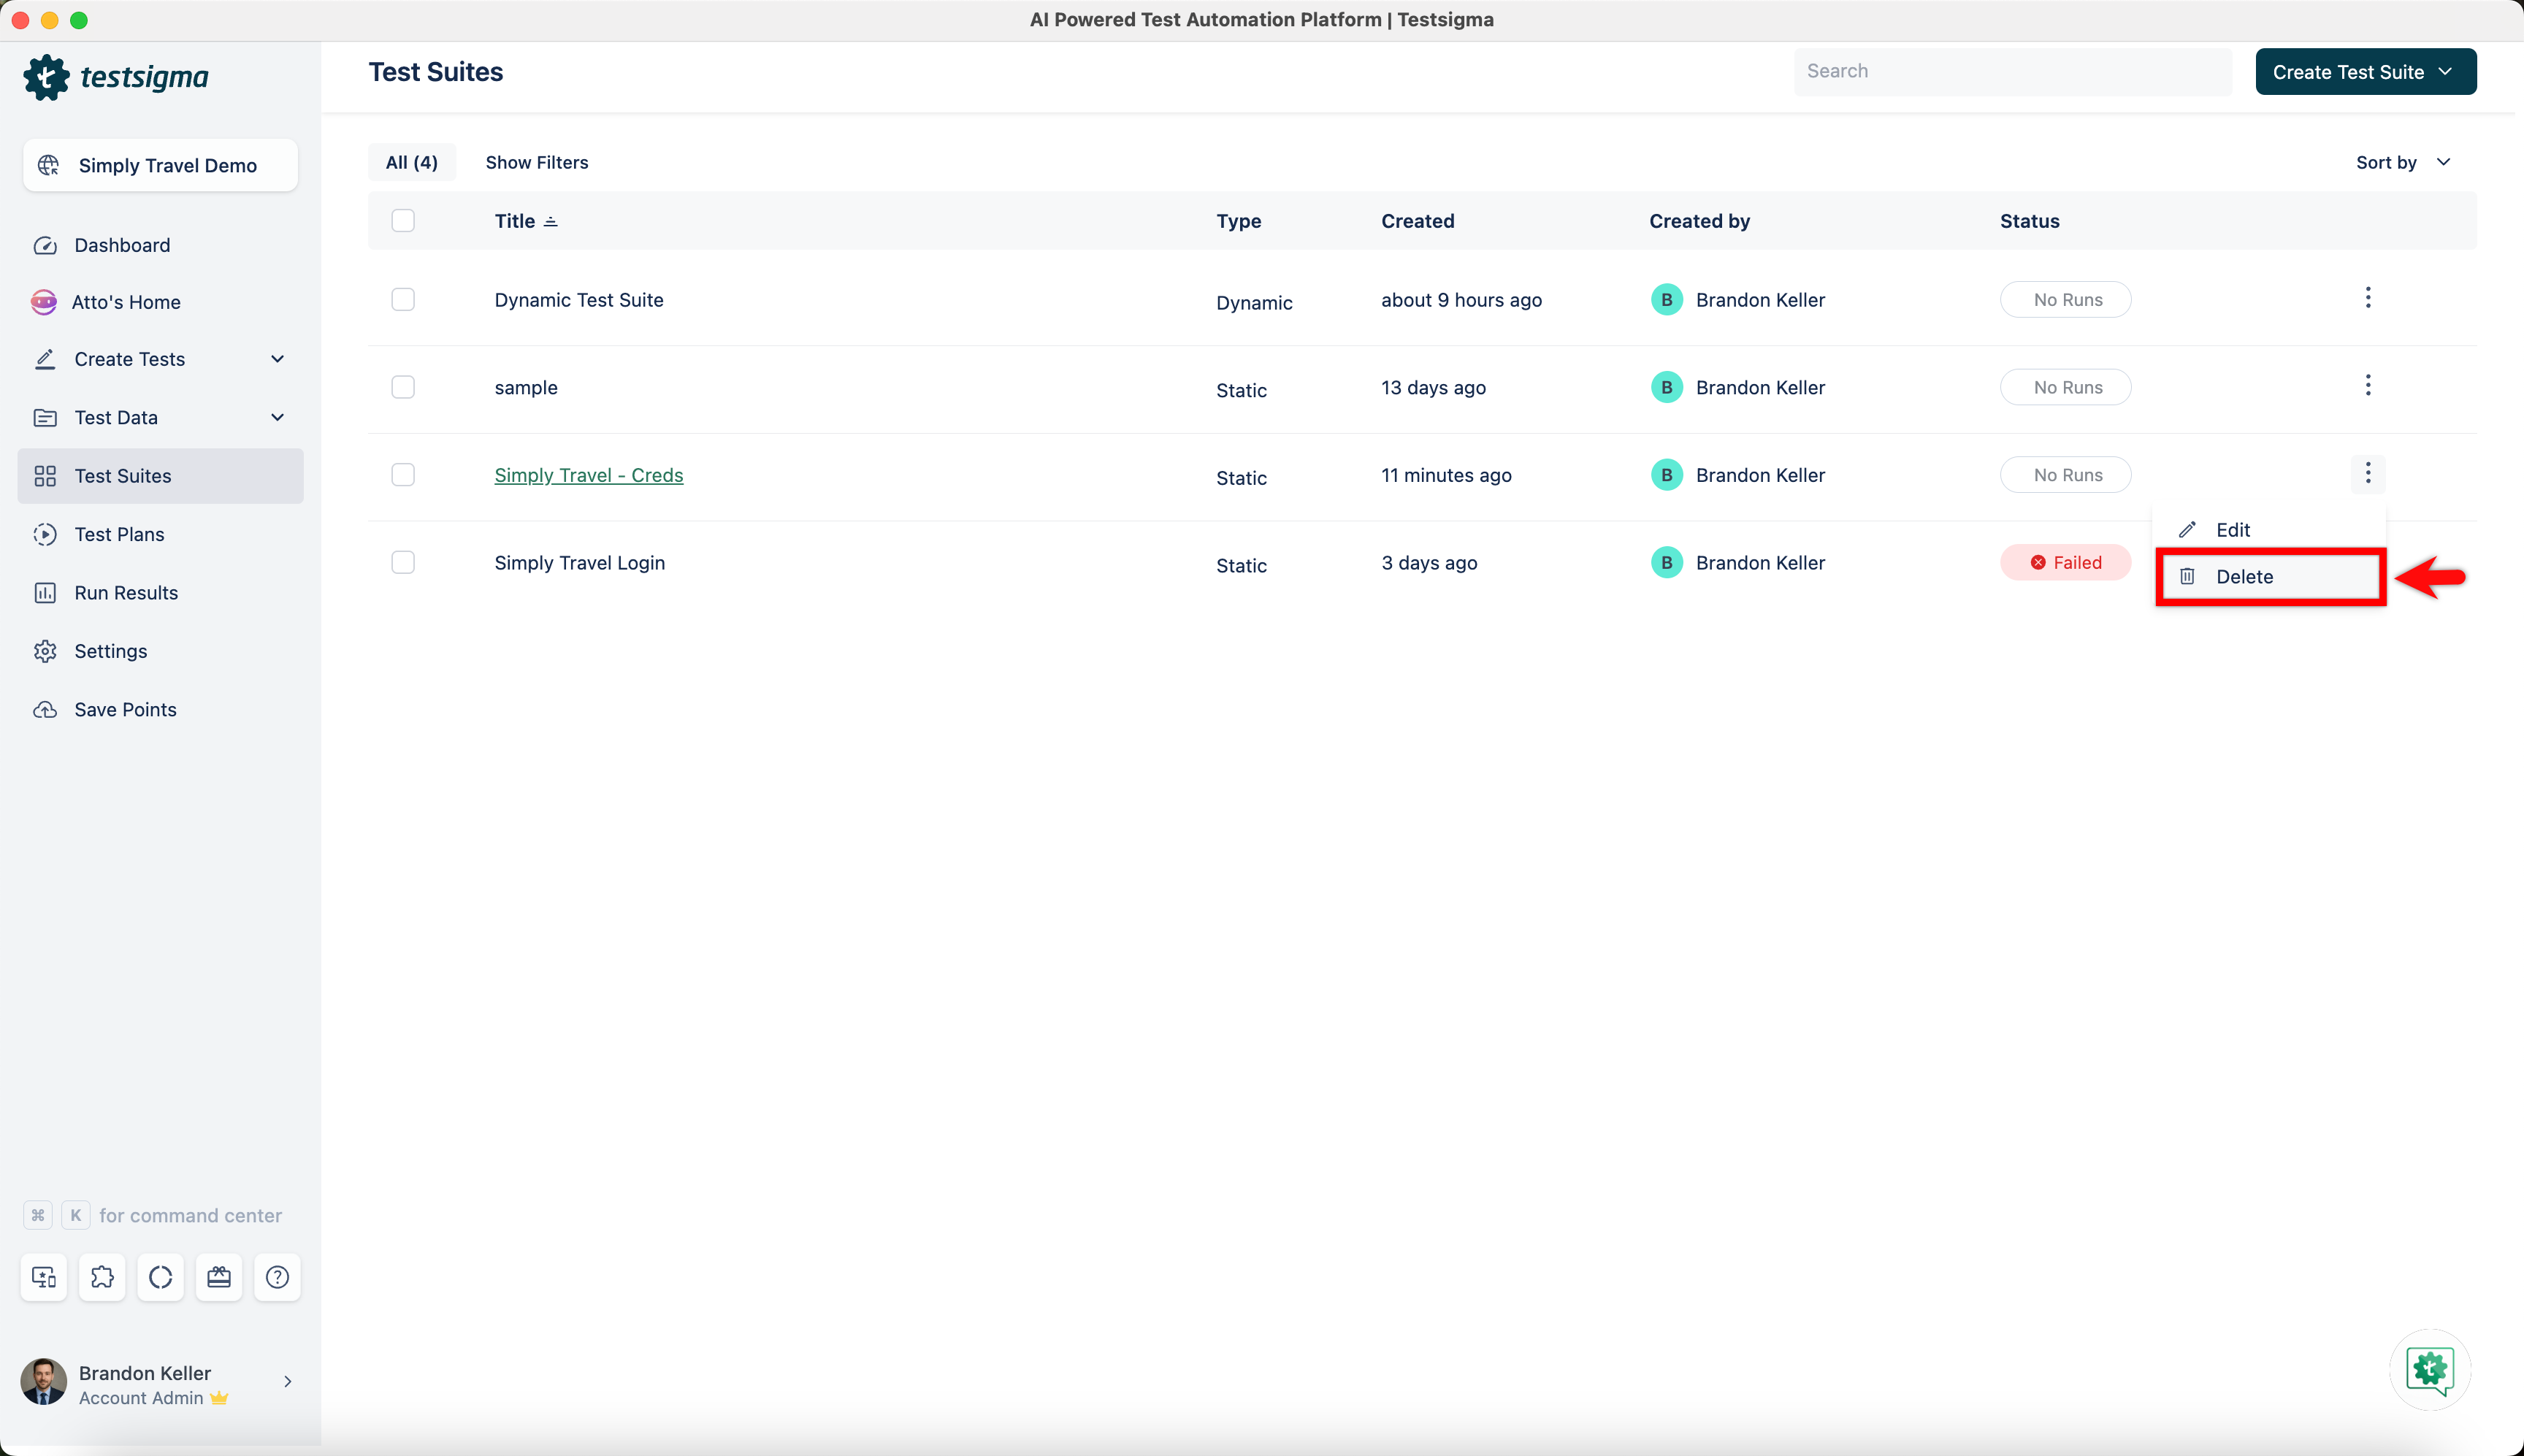
- Click on the ellipsis icon for the Test Suite you want to delete from the Test Suite List page, and select Delete from the drop-down menu to remove the test suite.
-
Click the Test Suite you want to delete and open the Test Suite Details Page. Then, click the Delete Button in the screen's top right corner.
NOTE:Note: If you attempt to delete a Test Suite linked to a Test Plan, the application will display a warning and prevent the deletion. You must remove the Test Suite from the associated Test Plans before trying to delete it again.
- Click on the ellipsis icon for the Test Suite you want to delete from the Test Suite List page, and select Delete from the drop-down menu to remove the test suite.
- A Delete Confirmation pop-up will appear. To delete the Test Suite, you need to confirm the deletion by entering DELETE and then clicking on I understand, delete this Test Suite.
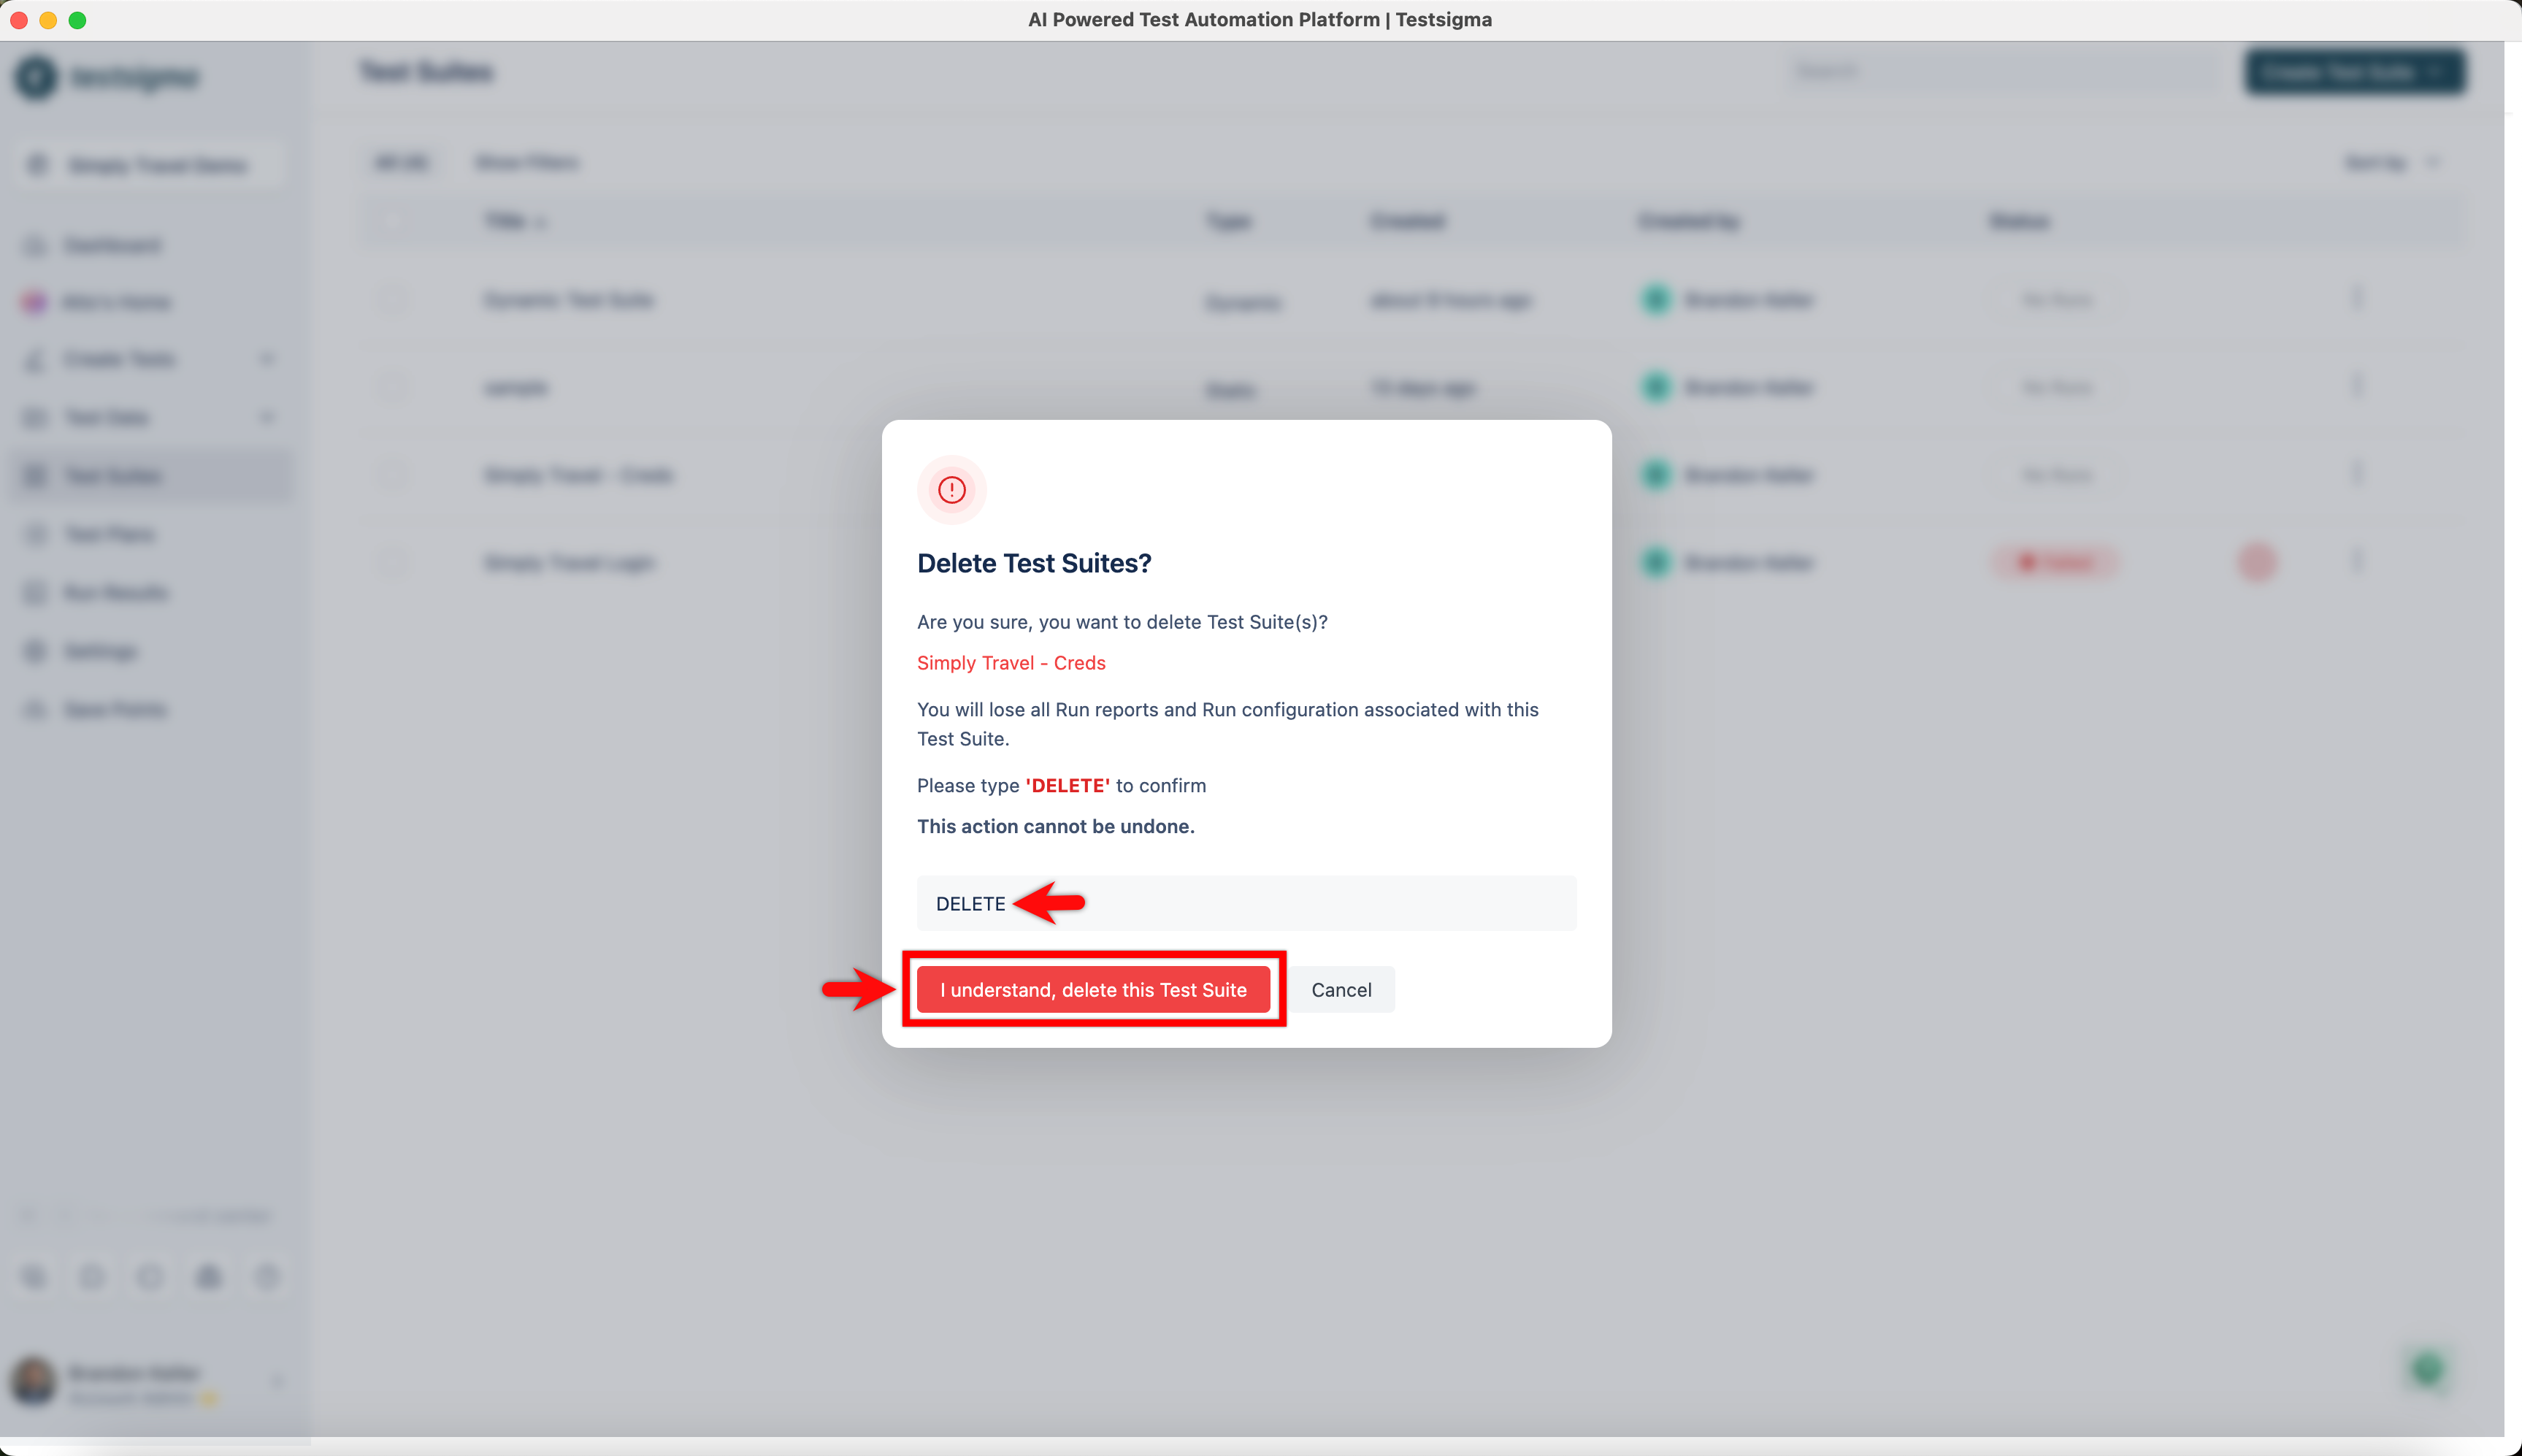
If you delete the Test Suite, you will lose all Run reports and Run configuration associated with it.
Want to contribute or report missing content?