- configuration
 API Keys
- User Settings
- Security
- Configure Organization Settings
- Two-Factor Authentication (2FA)
- Configure Password Policy
- Setting Up Google SSO Login
- Setting Up Okta SSO Login (SAML)
- Setting Up Azure SSO Login (SAML)
- iOS Settings
- Create WDA File
- SMTP Configuration
- Manage Access
Creating WDA File for iOS App Testing
WebDriverAgent (WDA) plays an important role in automating iOS tests. It bridges the code we write for testing and the actual iOS app, which helps us control the app, test how it behaves, and make sure it works correctly. This article discusses the steps and prerequisites for creating WDA files.
Creating a provisioning profile and WDA file is required only for local agent–based executions. If you are running tests exclusively on cloud devices from Testsigma Lab, you do not need to create a WDA file or provisioning profile.
Prerequisites
Before you begin, ensure that you have:
- Paid Apple Developer Account
- Mac Machine
- Xcode and Xcode Command line tools
Steps to Create WDA File
- Download from Appium Github.
-
Open WDA Xcode Project in Xcode.
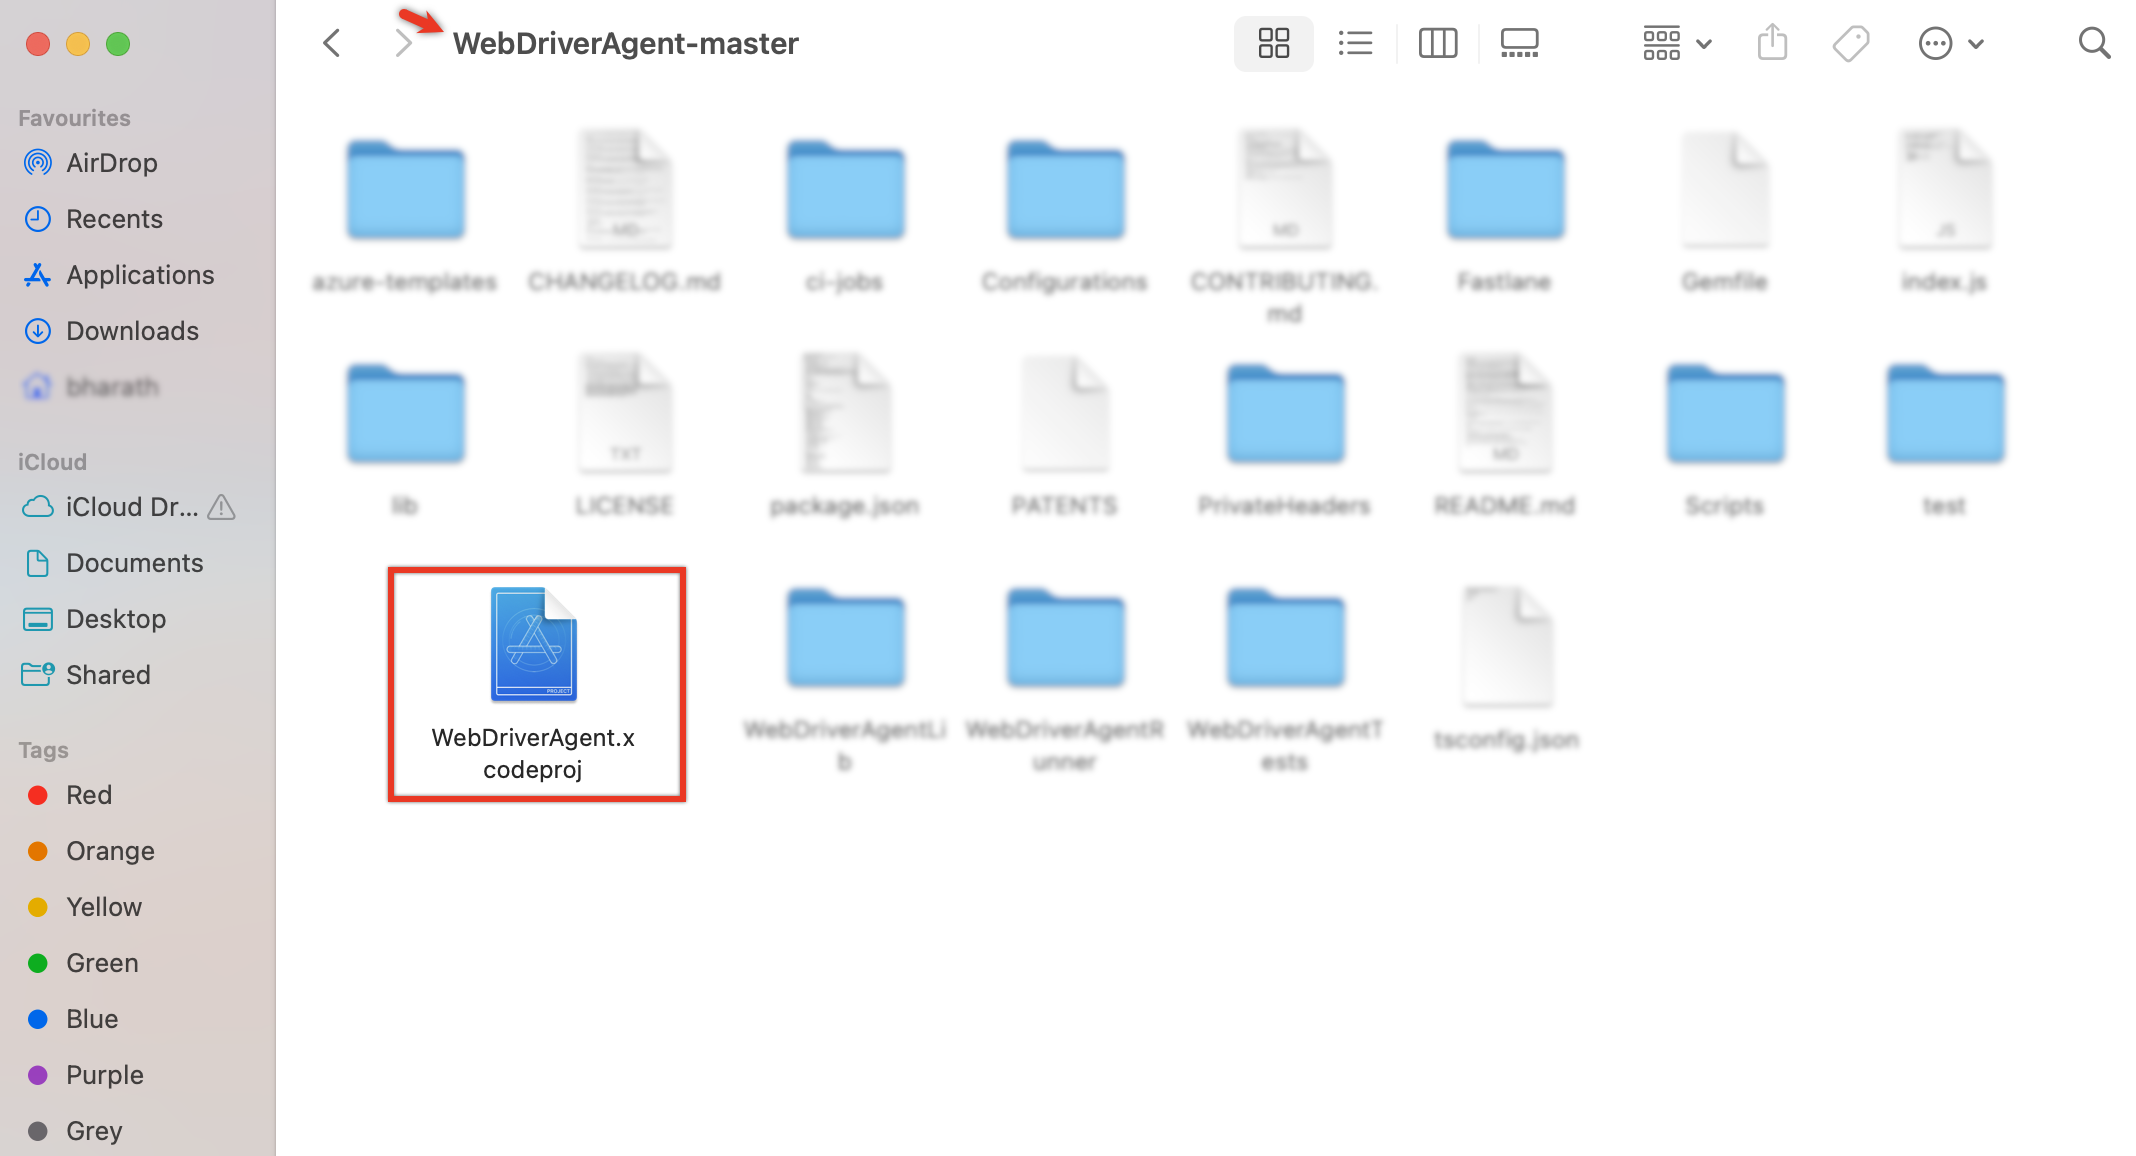
-
On Signing & Capabilities, add Apple Account for wherever necessary in Target OS & Integrations.
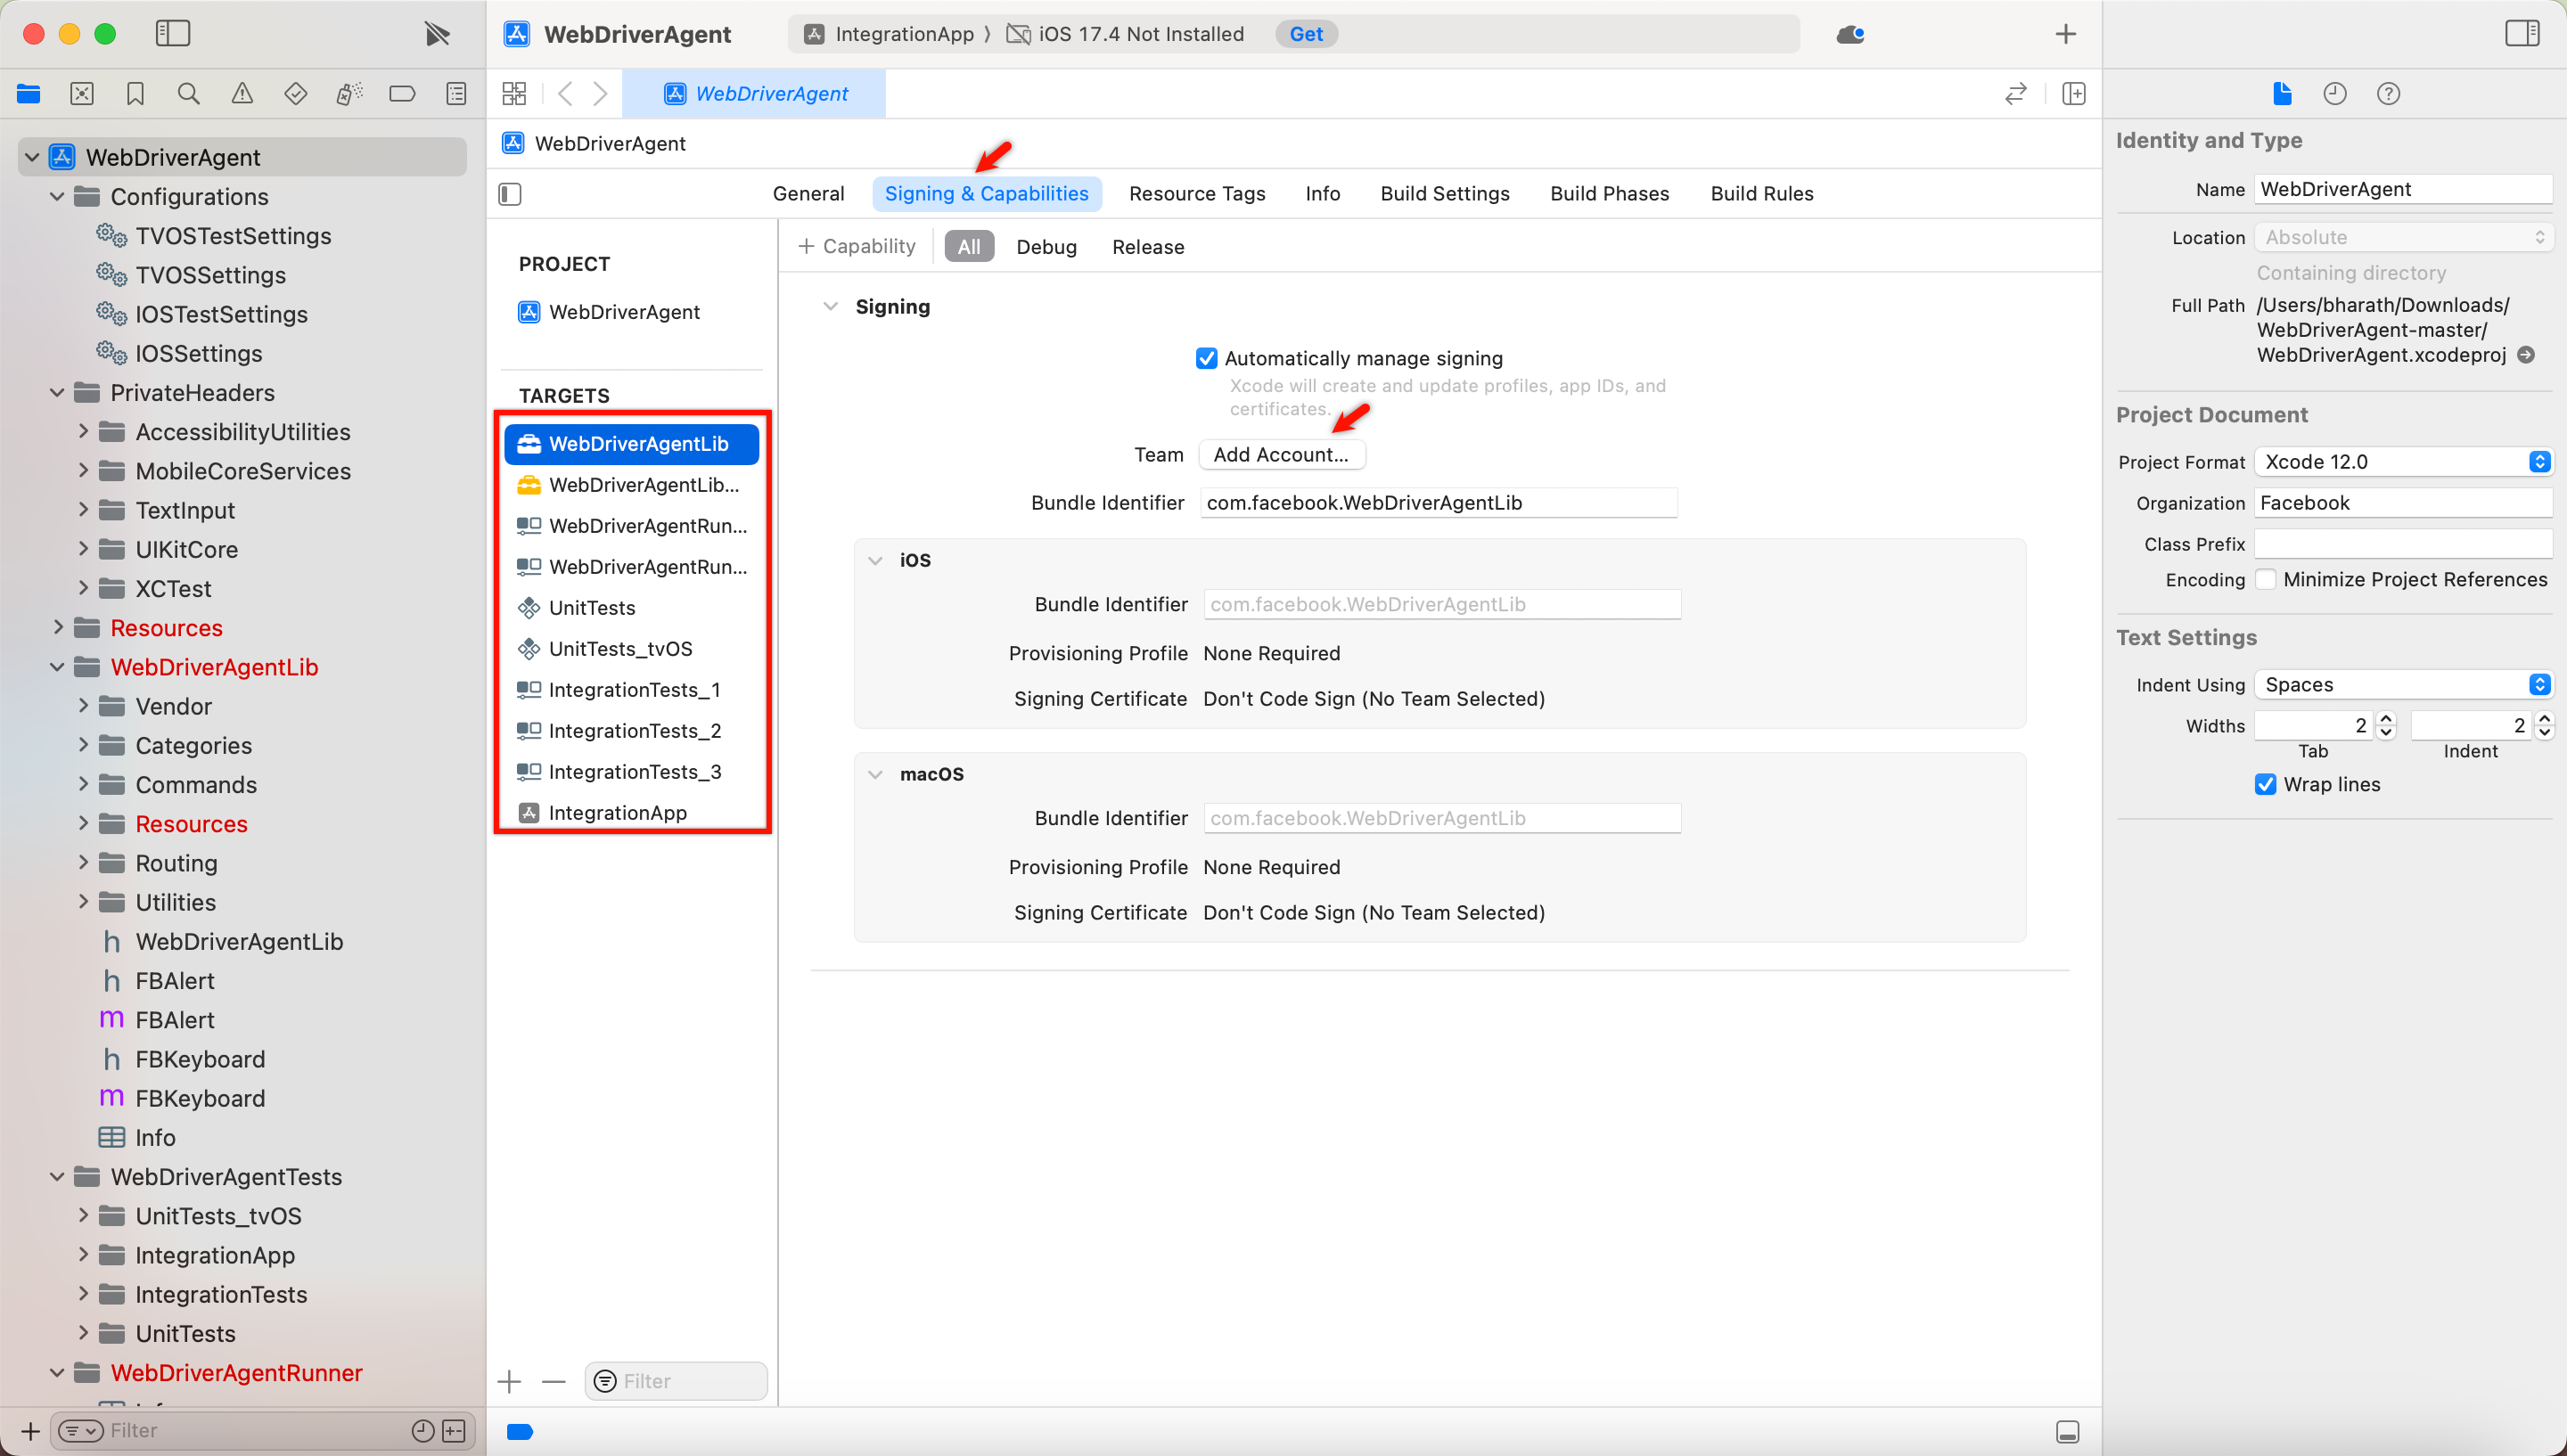
-
Once the signing is done, run the following command to build the latest WDA WebDriverAgent. This command will build the WDA project and prepare it for testing.
xcodebuild build-for-testing \
-project WebDriverAgent.xcodeproj -scheme WebDriverAgentRunner \
-destination 'id=<DEVICE_UDID>'
Replace <DEVICE_UDID> with the actual UDID (Unique Device Identifier) of the iOS device or simulator where you want to run the tests.
-
Create a Zip Archive from the Products Folder
Locate the Products folder within the Xcode derived data directory. The path looks like this:zip/Users/<user>/Library/Developer/Xcode/DerivedData/WebDriverAgent-<RANDOM-STRING>/Build/ProductsHere, you need to replace
with your username and with the random string associated with your WDA build. -
Generating a New WDA for Installation
Run the following commands to create a new WDA package for installation.
xcodebuild -scheme WebDriverAgentRunner -sdk iphoneos -configuration Release -derivedDataPath /tmp/derivedDataPath
cd /tmp/derivedDataPath/Build/Products/Release-iphoneos
mkdir -p Payload
mv WebDriverAgentRunner-Runner Payload
zip Payload wda.zip
mv wda.zip wda.ipa
The above commands will generate a new wda.ipa file.
Want to contribute or report missing content?