- continuous integration
 Test Plan Details
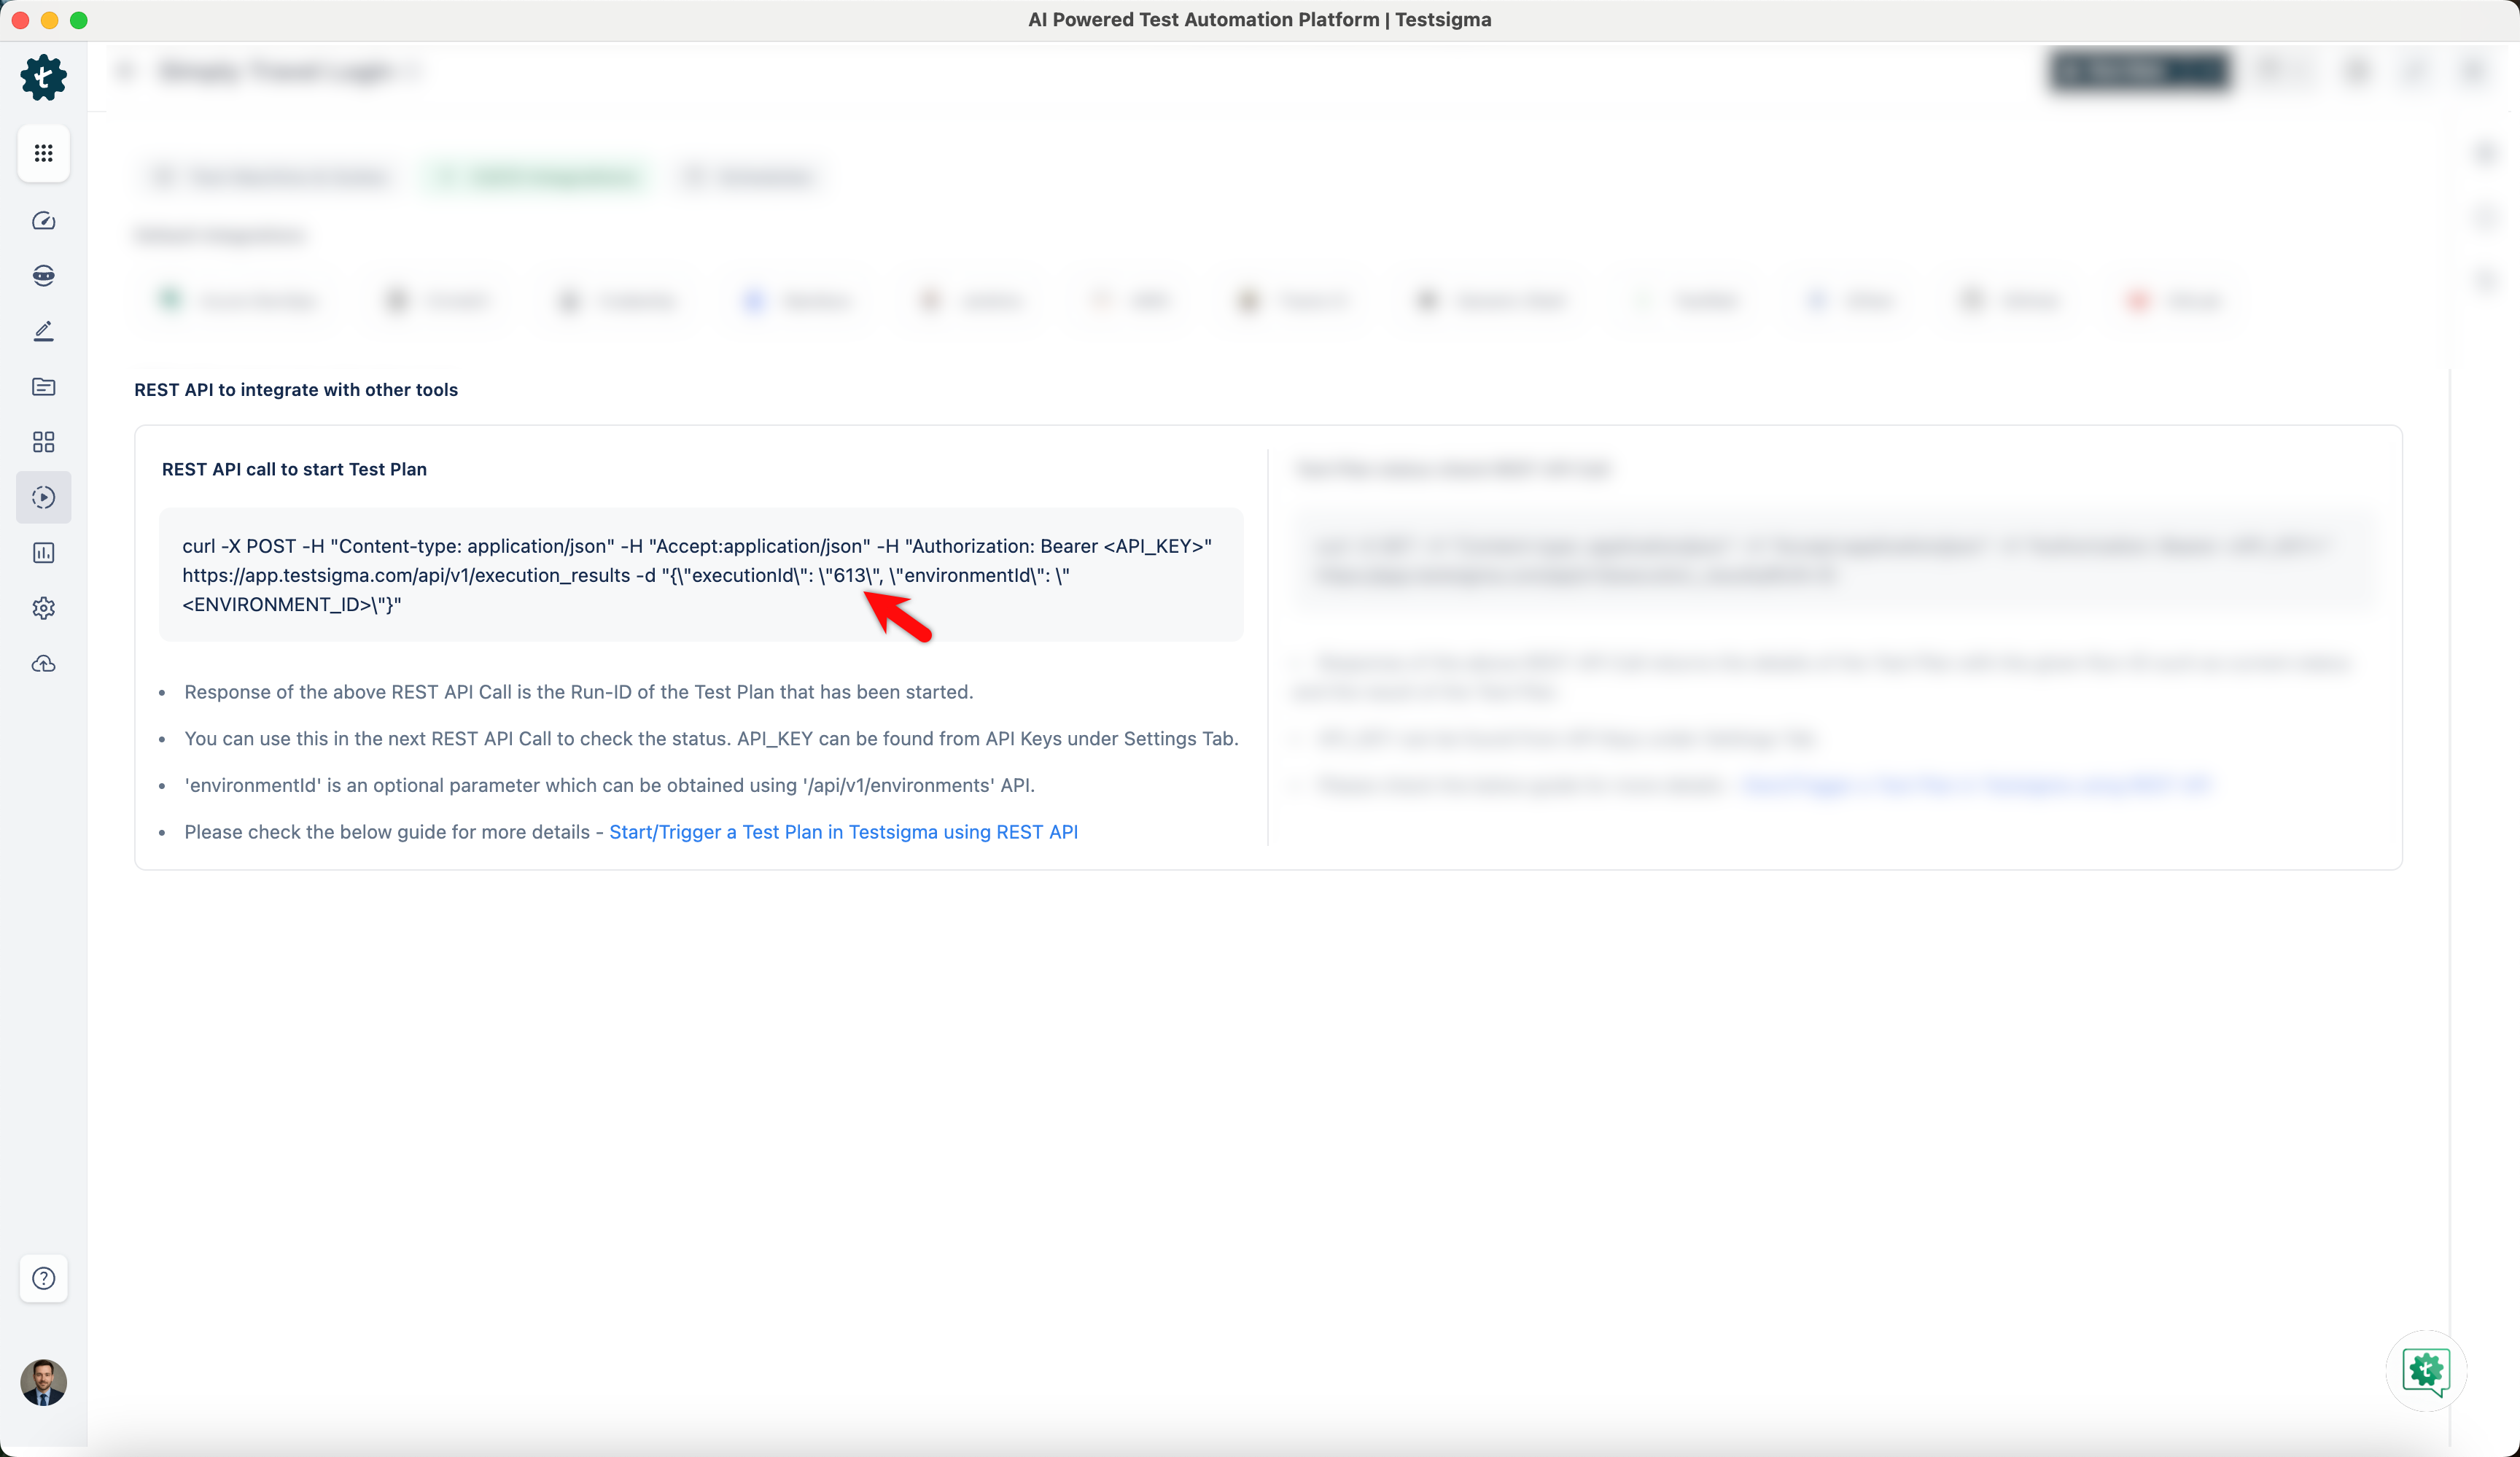
 - REST API (Generic)
- Jenkins
- Azure DevOps
- AWS DevOps
- AWS Lambda
- Circle CI
- Bamboo CI
- Travis CI
- CodeShip CI
- Shell Script(Generic)
- Bitrise CI
- GitHub CI/CD
- Bitbucket CI/CD
- GitLab CI/CD
- Copado CI/CD
- Gearset CI/CD
- Codemagic CI/CD
- Google Cloud Build CI/CD
Integrate Testsigma with AWS DevOps
AWS services that are used as a part of CI/CD pipeline are:
- CodeCommit: AWS CodeCommit is a version control service that enables you to privately store and manage Git repositories in the AWS cloud.
- CodeBuild: CodeBuild compiles your source code, runs unit tests, and produces artifacts that are ready to deploy.
- CodeDeploy: AWS CodeDeploy is a deployment service that enables developers to automate the deployment of applications to instances and to update the applications as required.
This article discusses how to integrate Testsigma with AWS DevOps.
AWS DevOps integration methods:
Below are the 2 methods to integrate and trigger Testsigma tests via AWS DevOps:
- Go to CodeBuild Services, Create a Build Project, and Start a Build using your repository.
- Create CodePipeline with Source, Build, and Pipeline details. We’ll cover both methods.
Go to CodeBuild Services, Create a Build Project, and Start a Build using your repository:
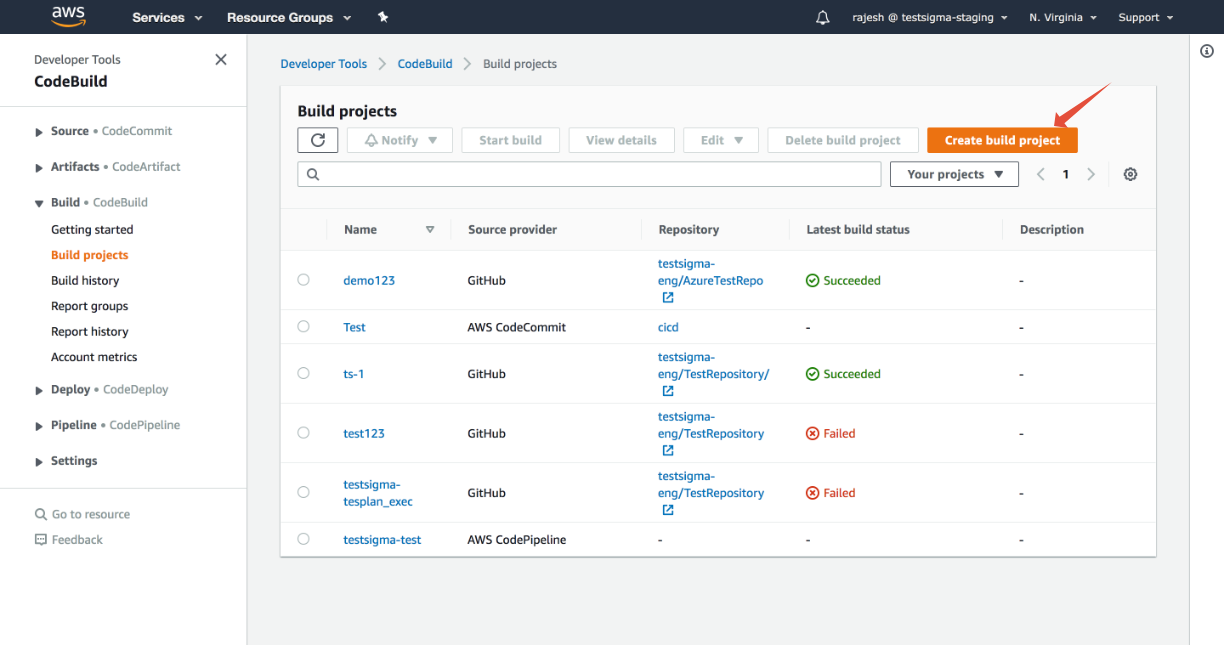
- Click on the Build projects option under the Build section and Create a new Build Project:
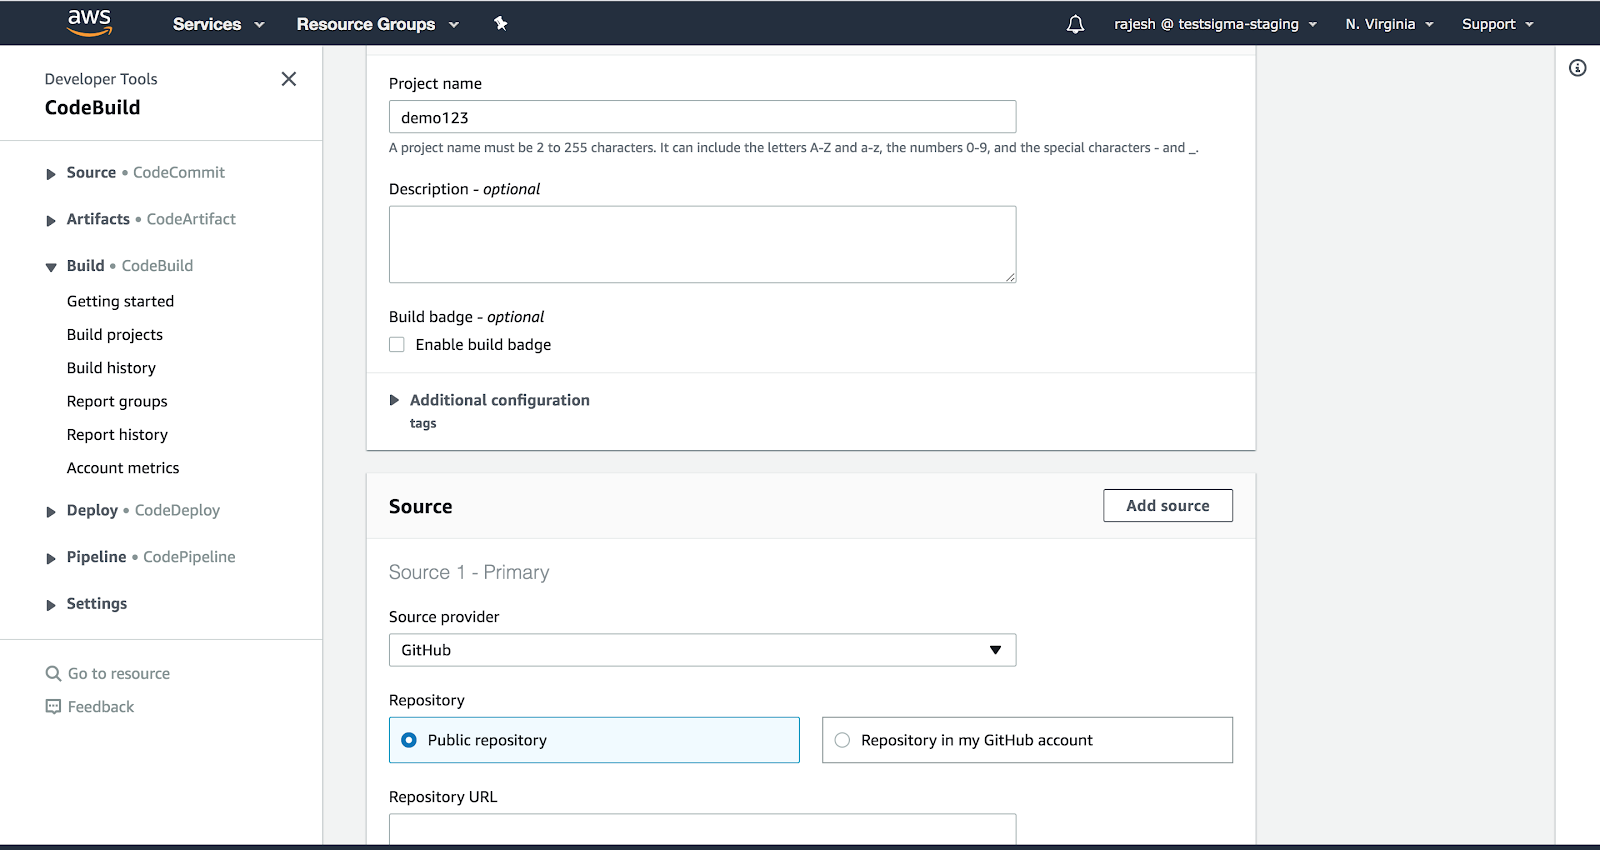
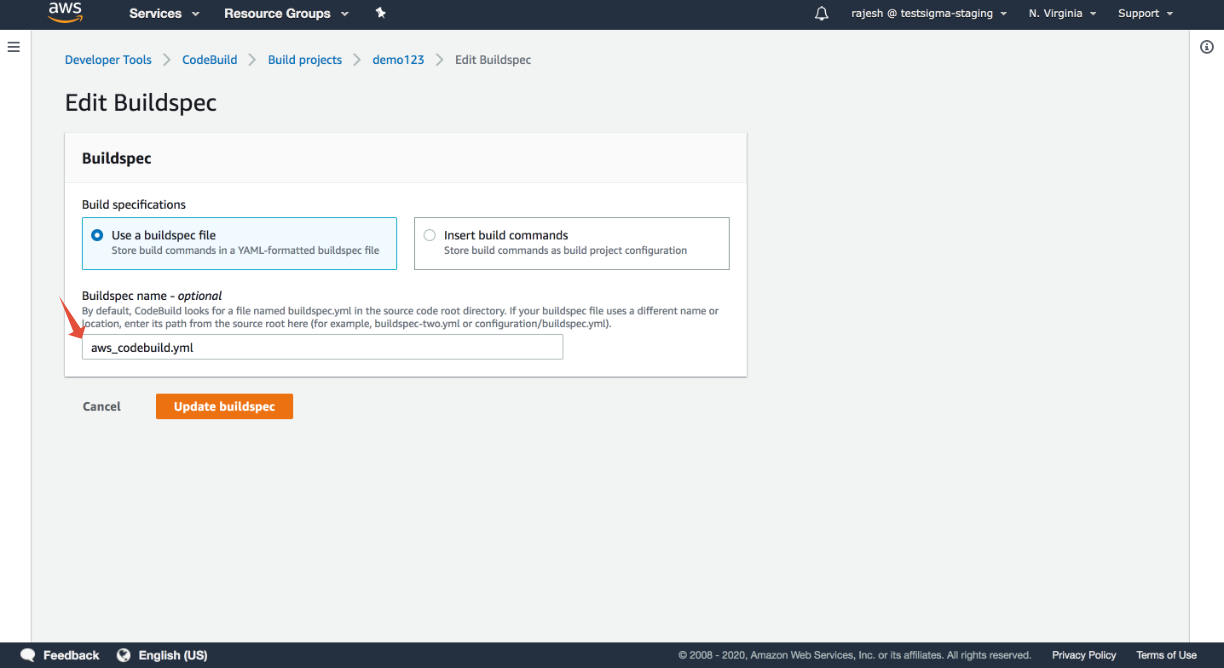
- Fill in the project configuration details and select the Source Provider and Repository accordingly. Here we have selected Github as our repository and give Buildspec name as your .yml file name
- Once this is done, please update the .yml file in the repository with the below code. In this case, we have taken a sample file aws_codebuild.yml:
Starter pipeline
Start with a minimal pipeline that you can customize to build and deploy your code
Add steps that build, run tests, deploy, and more:
version: 0.2
phases:
  install:
    runtime-versions:
      java: corretto11
  pre_build:
    commands:
      - echo Nothing to do in the pre_build phase...
  build:
    commands:
      - bash cicd-api.sh
  post_build:
    commands:
      - echo Build completed on `date`
As shown in the above code, the file cicd-api.sh under commands needs to be updated with test plan details and added to the repository. We have taken a sample file.
Add the documentation on getting test plan details and documentation on configuring API key to the .sh file which you need to trigger:
#********START USER_INPUTS ********

TESTSIGMA_API_KEY= <Give in an API Key Generated in the Configuration-> API Keys tab in Testsigma>

TESTSIGMA_TEST_PLAN_ID= <Test Plan ID for the run which you need to trigger>
MAX_WAIT_TIME_FOR_SCRIPT_TO_EXIT=180
REPORT_FILE_PATH=./junit-report.xml
RUNTIME_DATA_INPUT="buildurl=http://test.testsigma.com,data1=testdata"

#********END USER_INPUTS***********- Now in the AWS CodeBuild, click on start build:
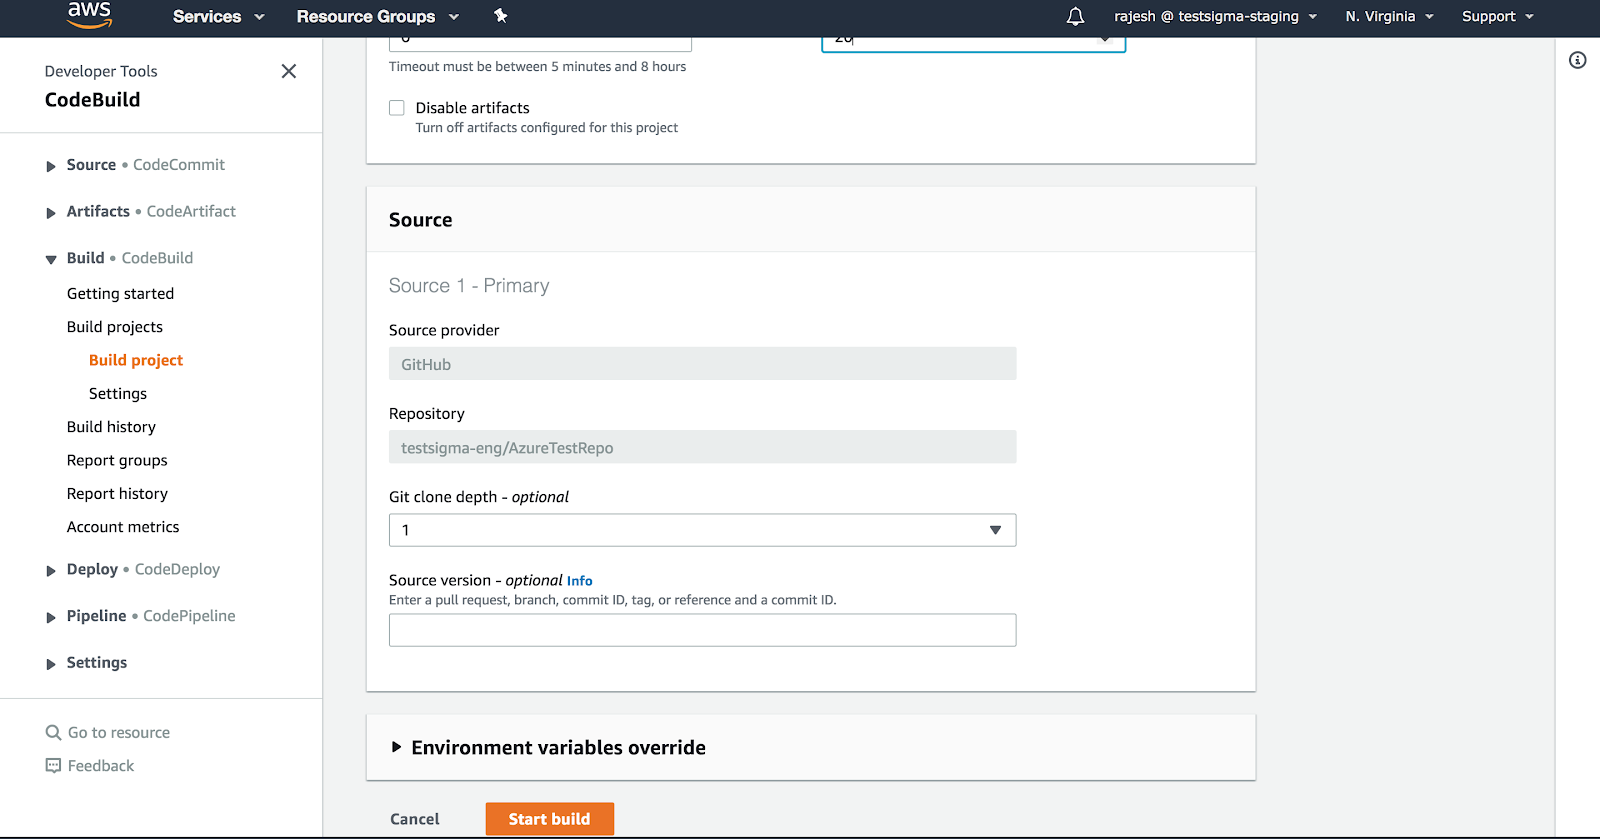
-
Once Build has been initiated you can check the progress and build logs as shown in the screenshot below:
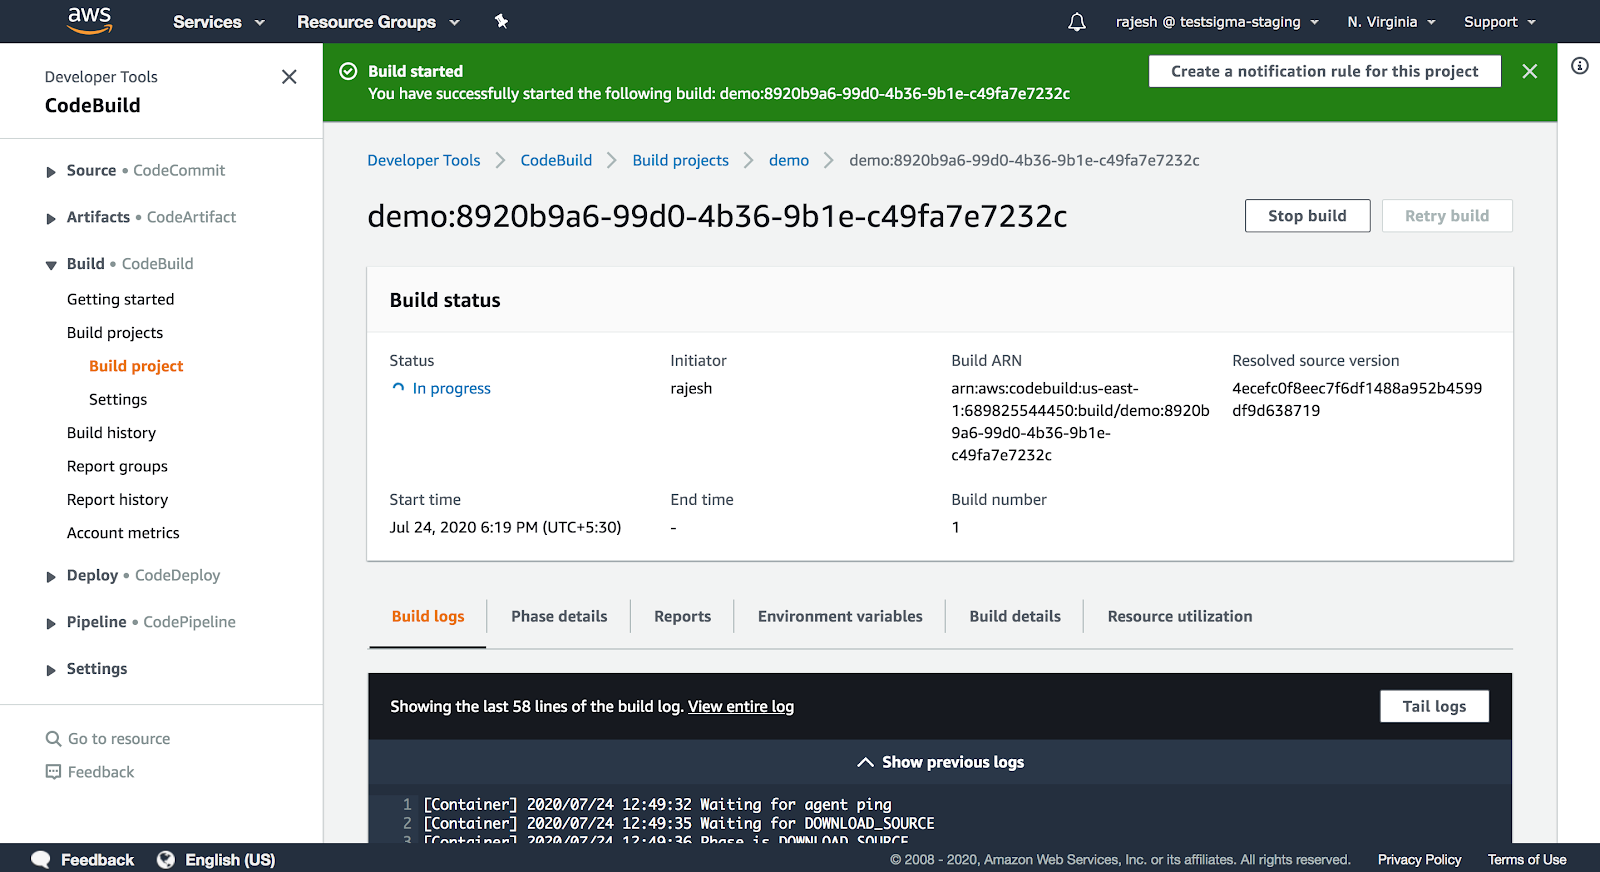
You will find the execution ID for the Test Plan within the REST API call to start Test Plan section.
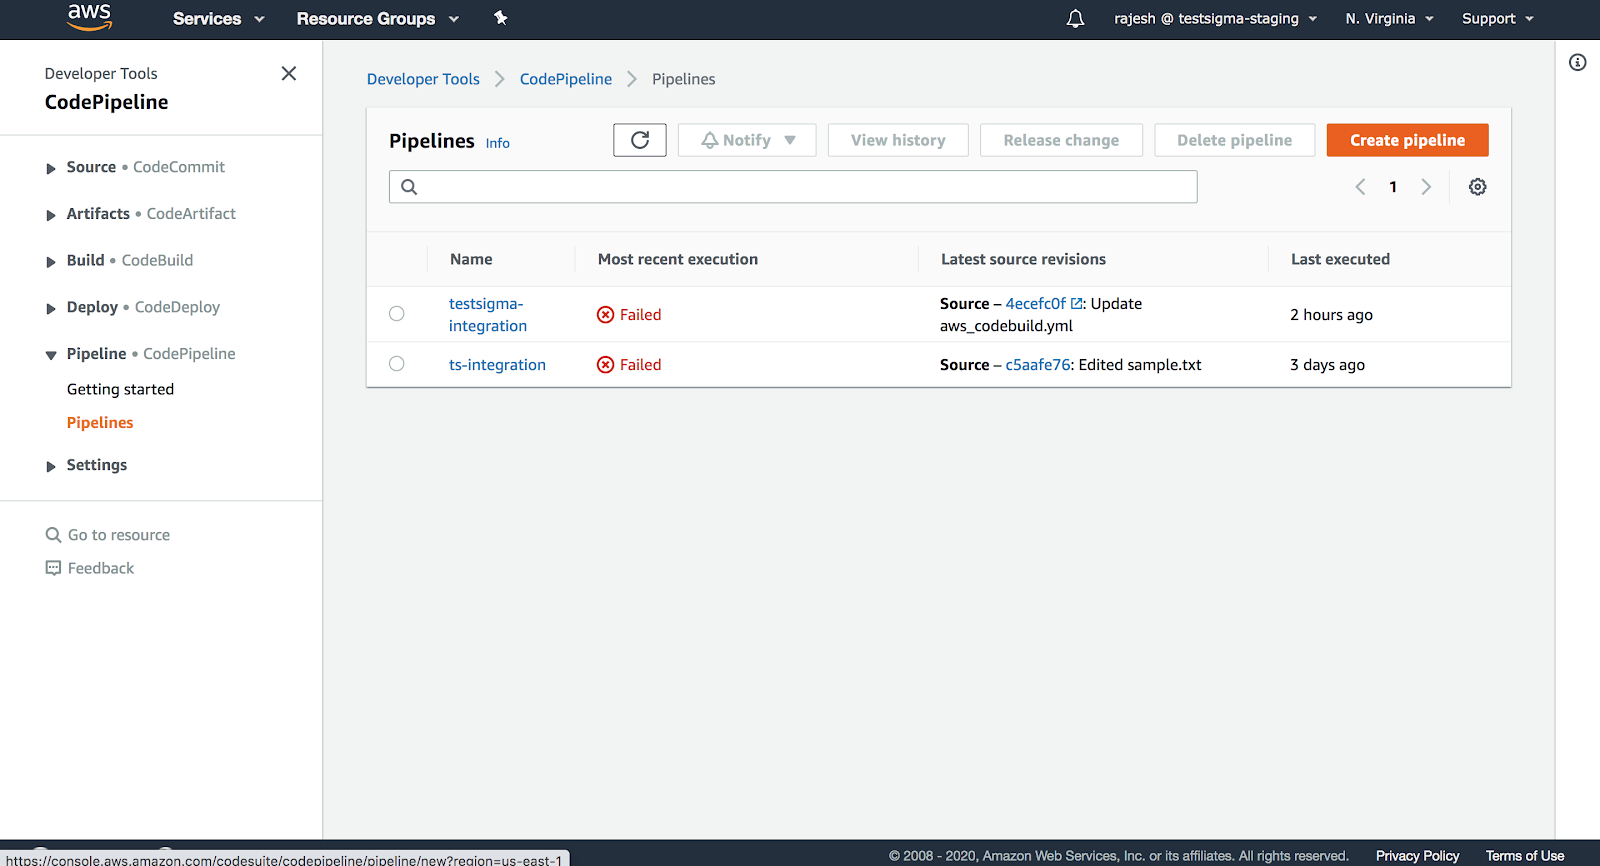
Create CodePipeline with Source, Build, and Pipeline details
Similarly, you can go to the CodePipeline service in AWS and create a pipeline for running the Source, Build and Deploy together. You can use the same project created in CodeBuild earlier inside your CodePipeline.
Follow the below steps for creating CodePipeline and triggering the test:
- Click on create a pipeline:
- Fill in the build details (selecting the repository accordingly) and select the project which you want to add to your pipeline. In the below screenshot you can see that the project which we created earlier in CodeBuild "demo123" is visible here and we will be selecting that only.

- Once you have given the details for the Pipeline settings, Source, Deploy stage then you can review the details and click on Create Pipeline:
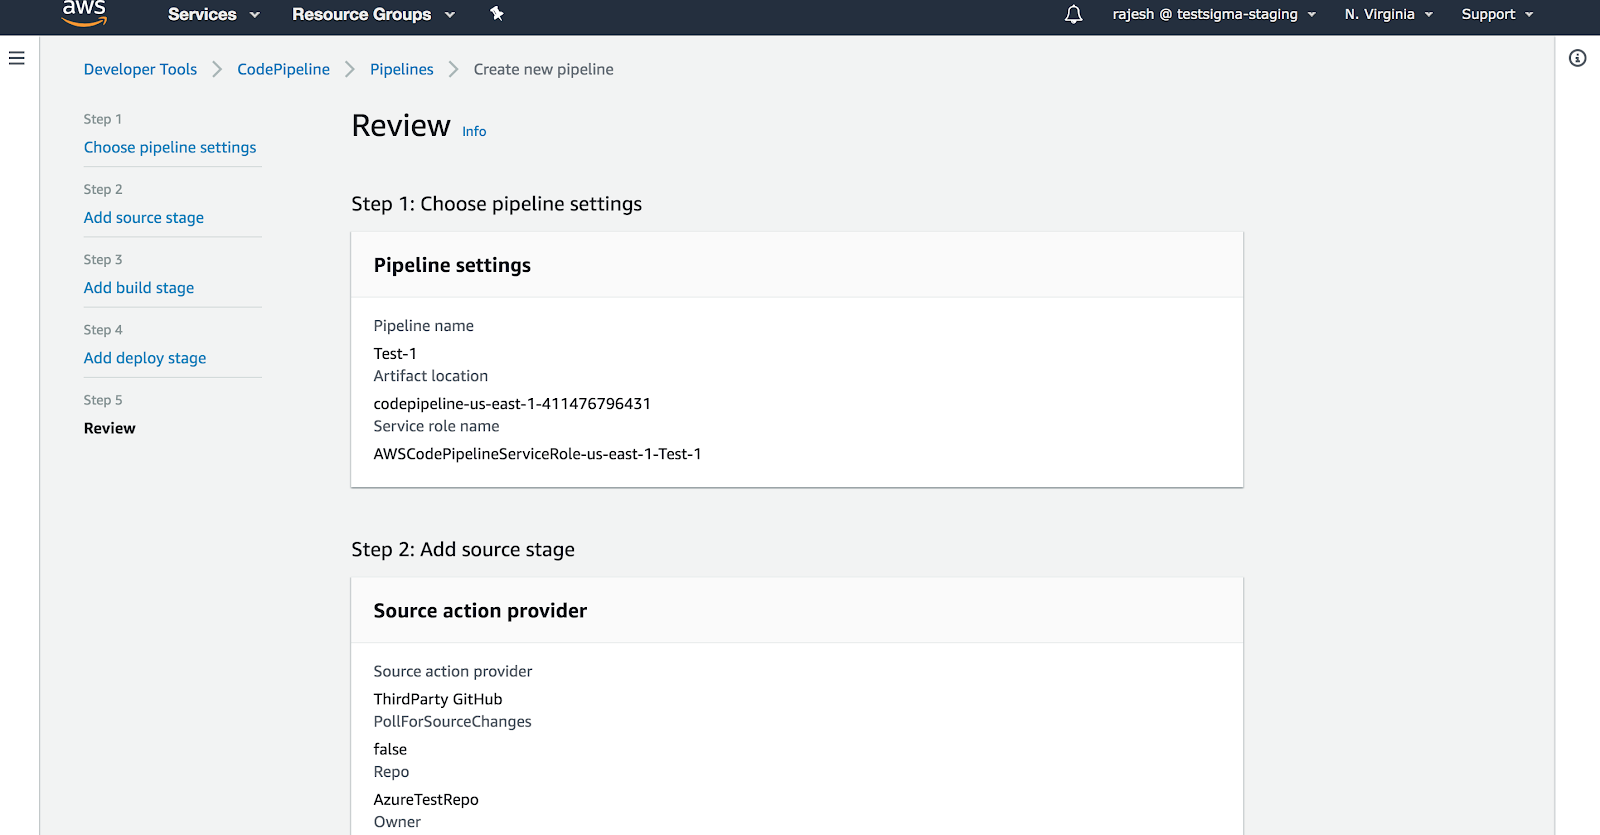
As soon as you click on create pipeline the run will be triggered:
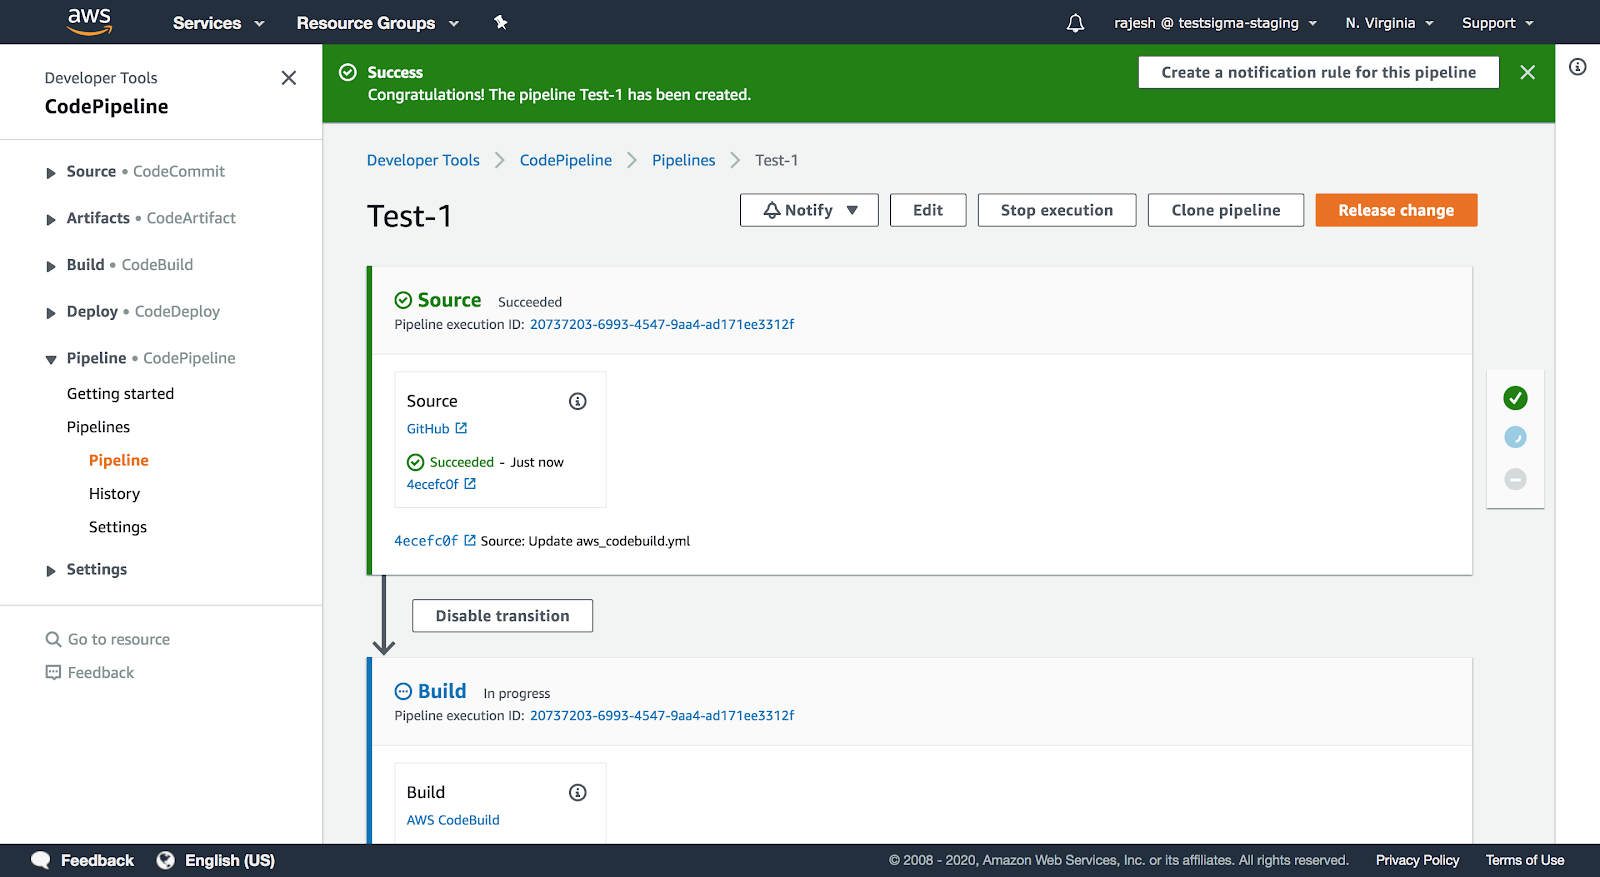
That's all we need to automate Test Execution when a successful build is triggered using the AWS DevOps.
Source: https://docs.aws.amazon.com/codepipeline/index.html
Want to contribute or report missing content?