- create test cases
 Organizing Test Cases in Folders
- Test Cases for Web Applications
- Test Cases for Mobile Applications
- Test Cases for Mobile Web Applications
- Manage Test Cases for Web Applications
- Manage Test Cases for Android & iOS Apps
- Manage Test Cases for Mobile Web Applications
- Test Case List Actions
- Importing Postman Collections and Environments
- Custom Fields for Test Cases
- Label Management
- Update Test Case Result in a Test Plan
- Test Case: Advanced Options Guide
- Test Step Types
- Type: Natural Language
- Type: REST API
- Type: Step Group
- Type: For Loop
- Type: While Loop
- Type: Block
- Type: If Condition
- Nested Step Groups
- Image Injection
- Cross-application testing
Test Step Type: Step Groups
Sometimes, a group of steps is common across multiple test cases.
For example:
- You must log in to an account before performing a fund transfer.
- You must log in to an account before deleting a beneficiary account.
- You must log in to an account before downloading an account statement.
Logging in to an account is a common prerequisite. Instead of duplicating these steps in each test case, you can create a step group and reuse it wherever required. This article describes how to create and use step groups in Testsigma.
Create a New Step Group
- From the left navigatio bar, go to Create Tests > Step Groups, click Create Step Group.
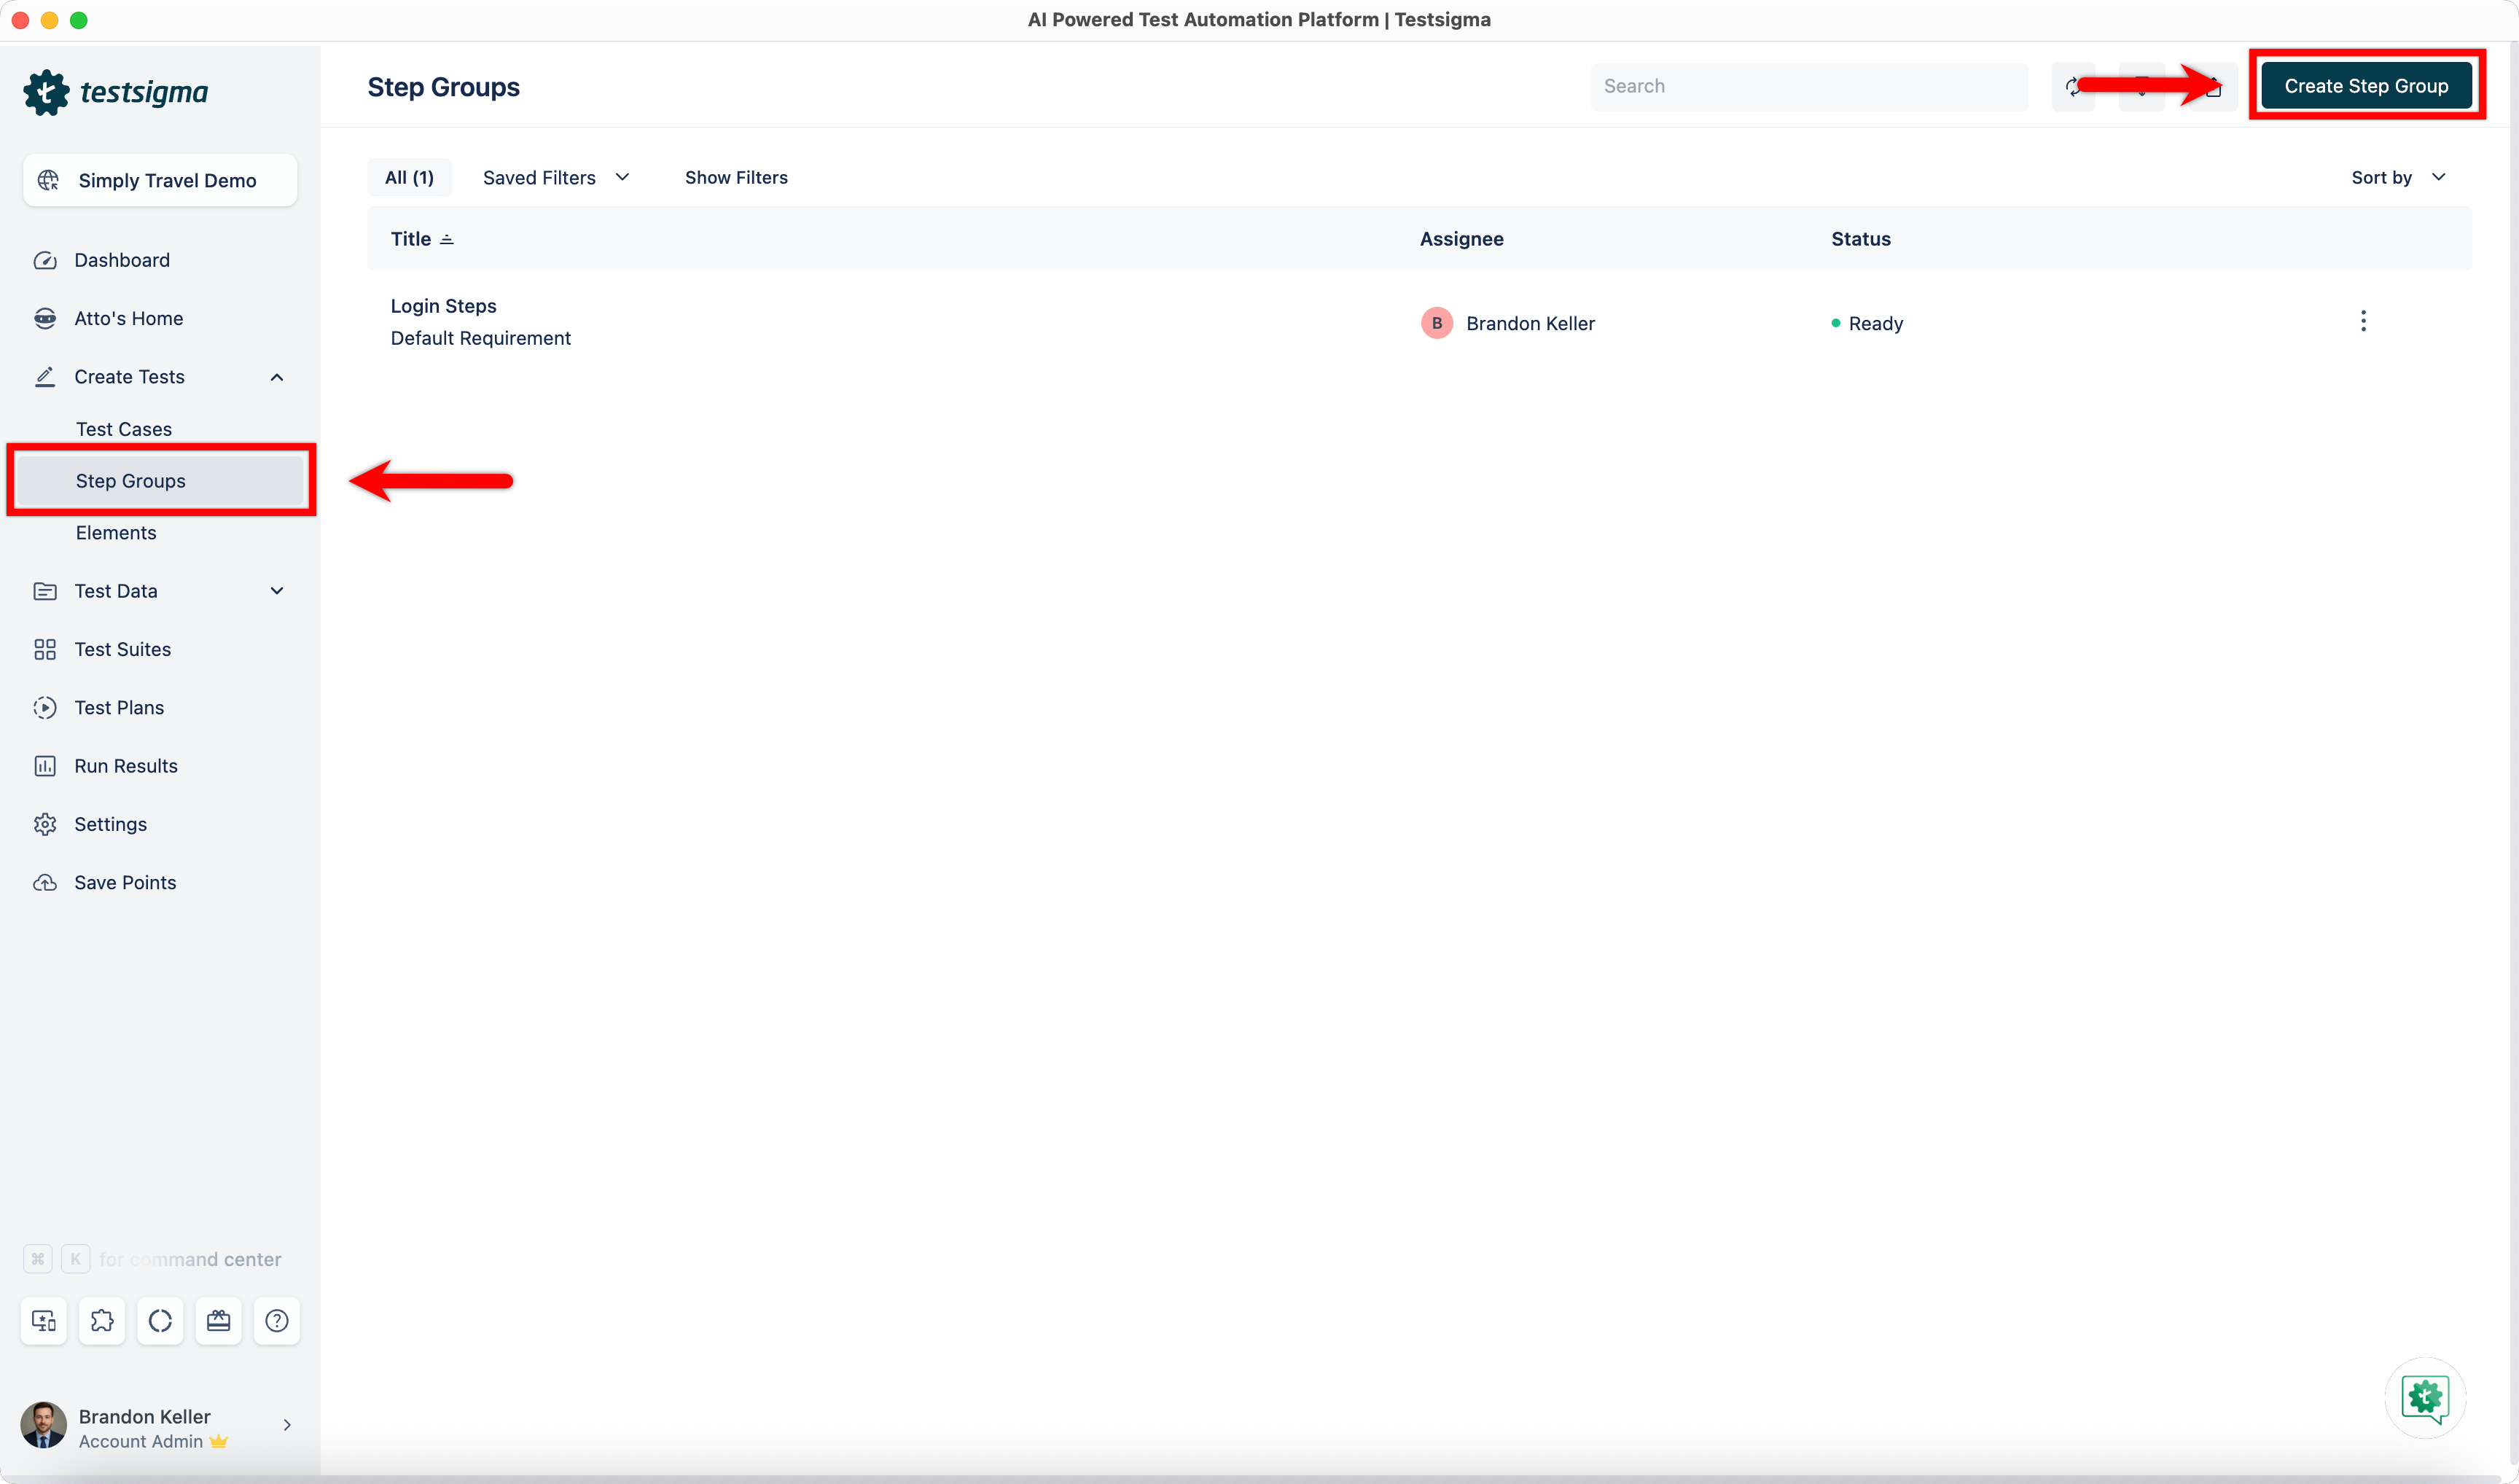
-
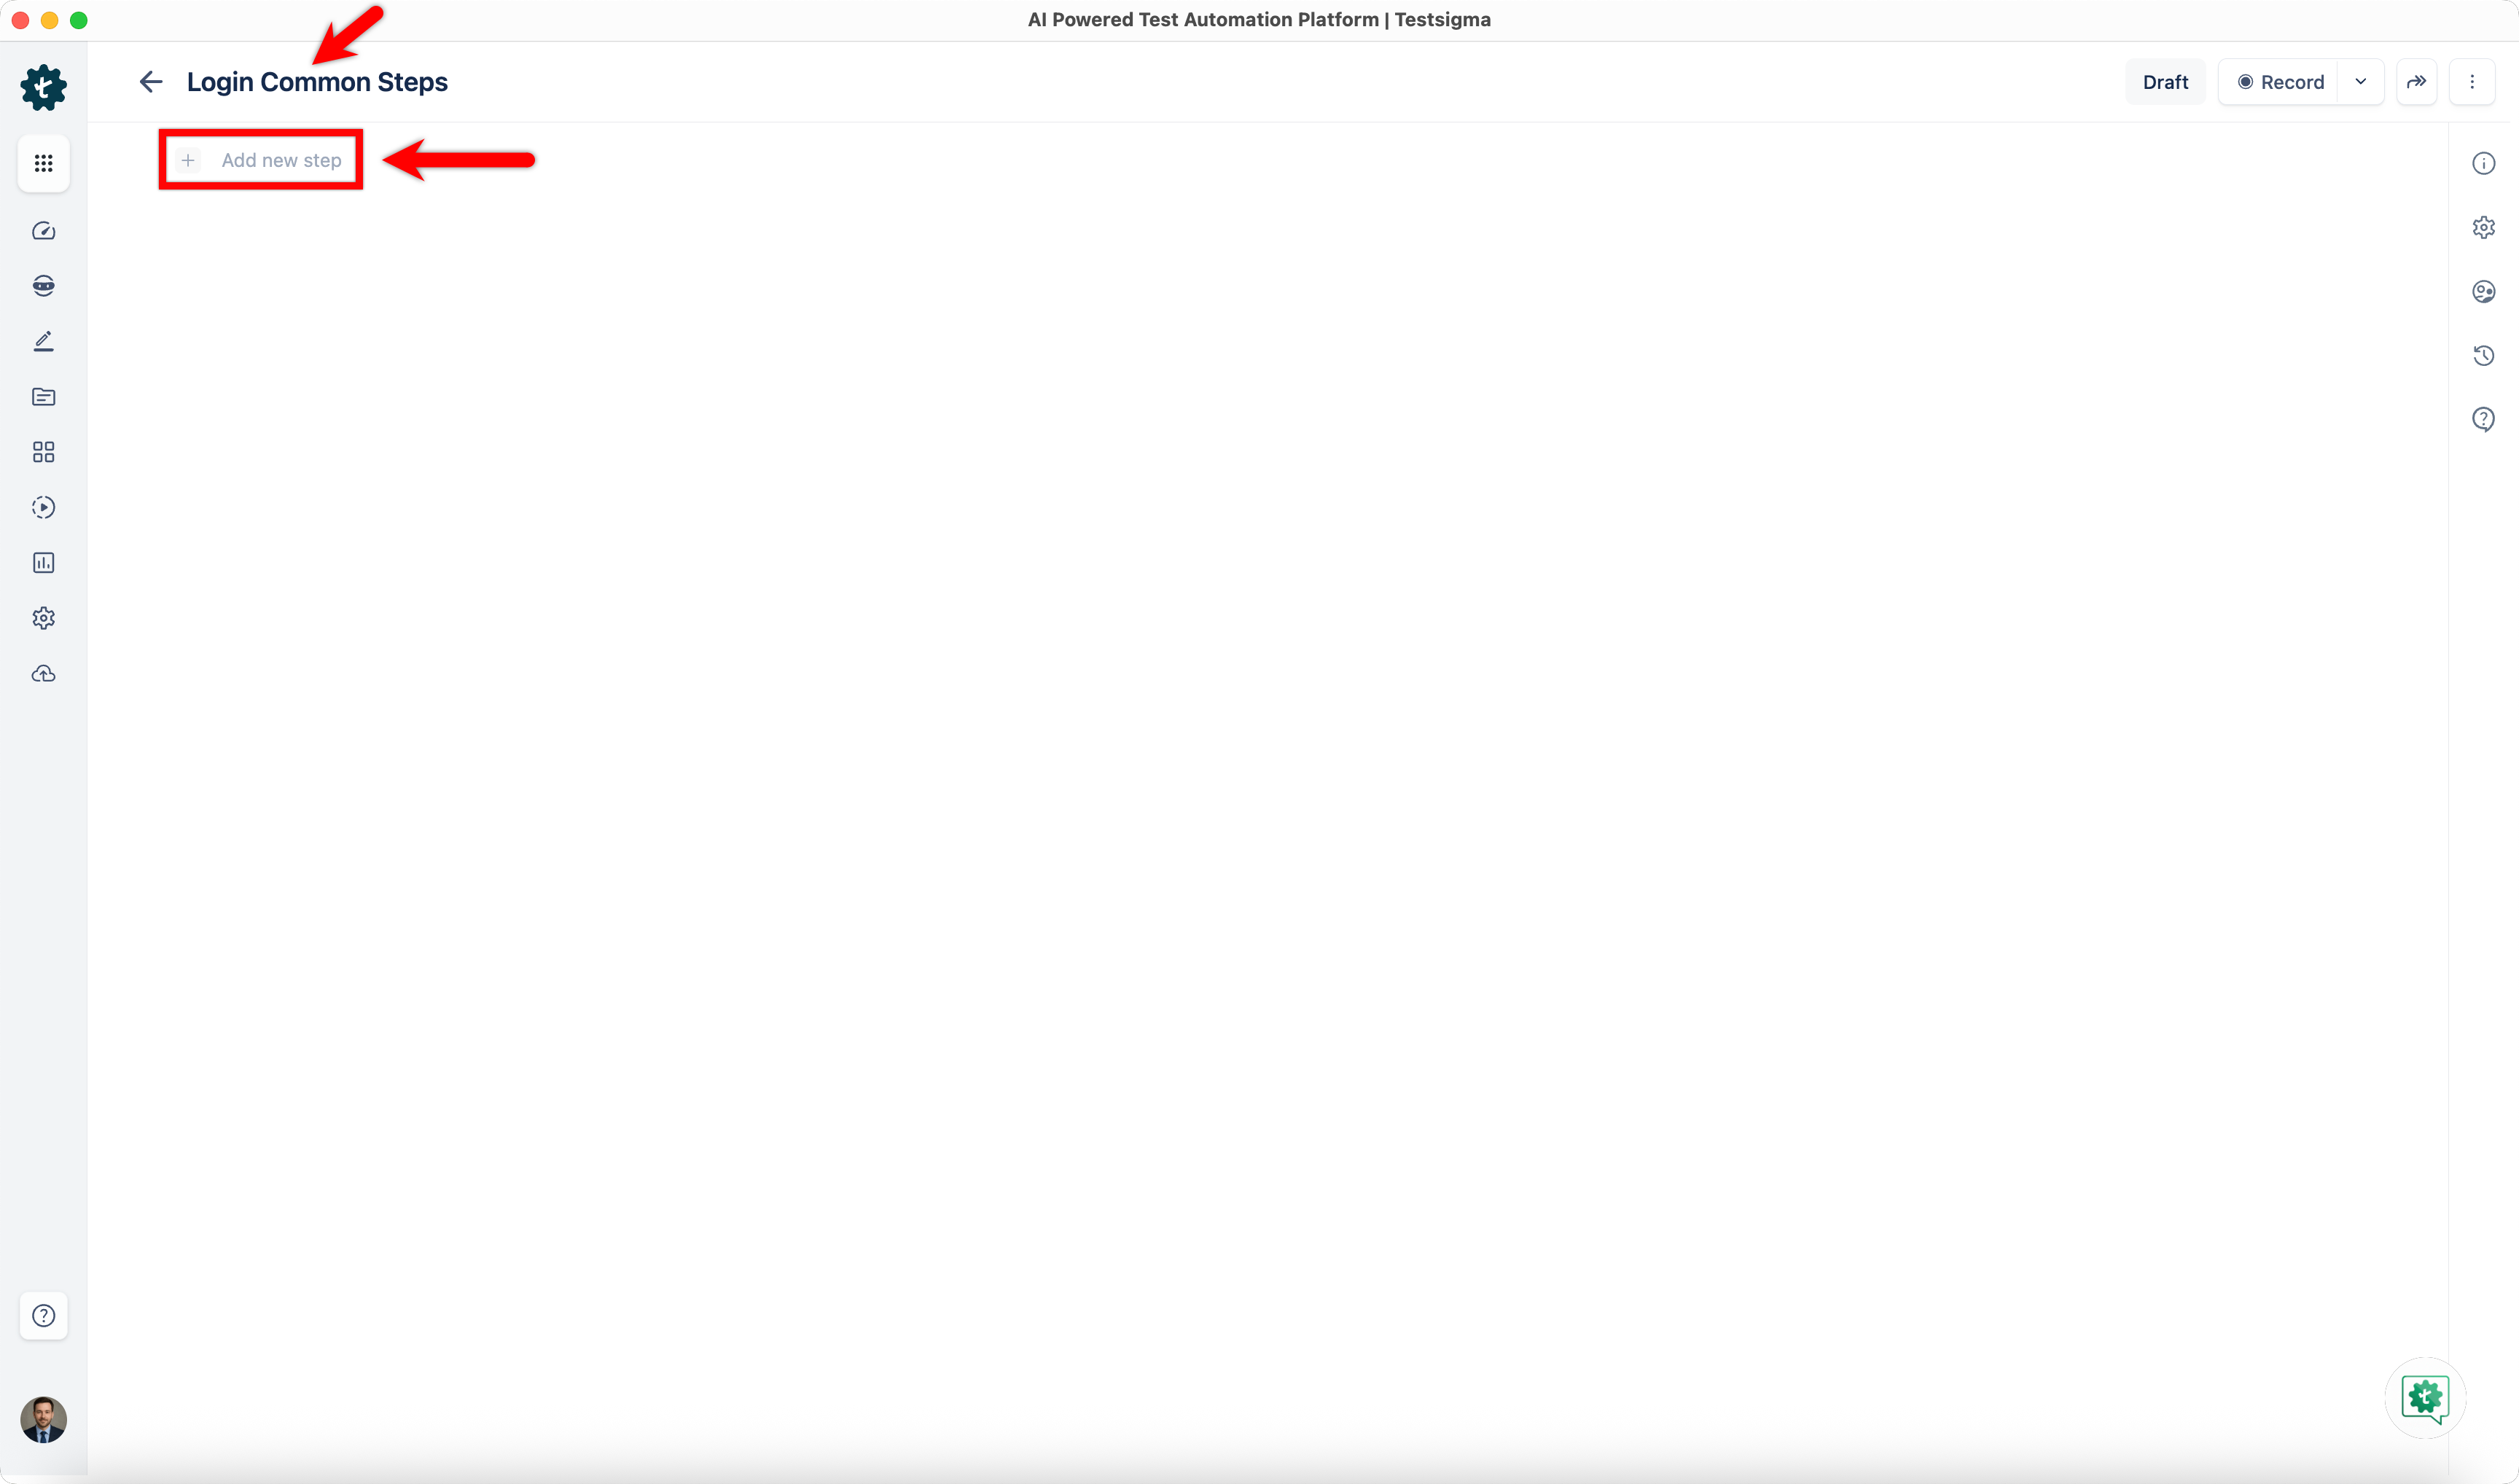
Enter Name and create steps manually by clicking Add new step.
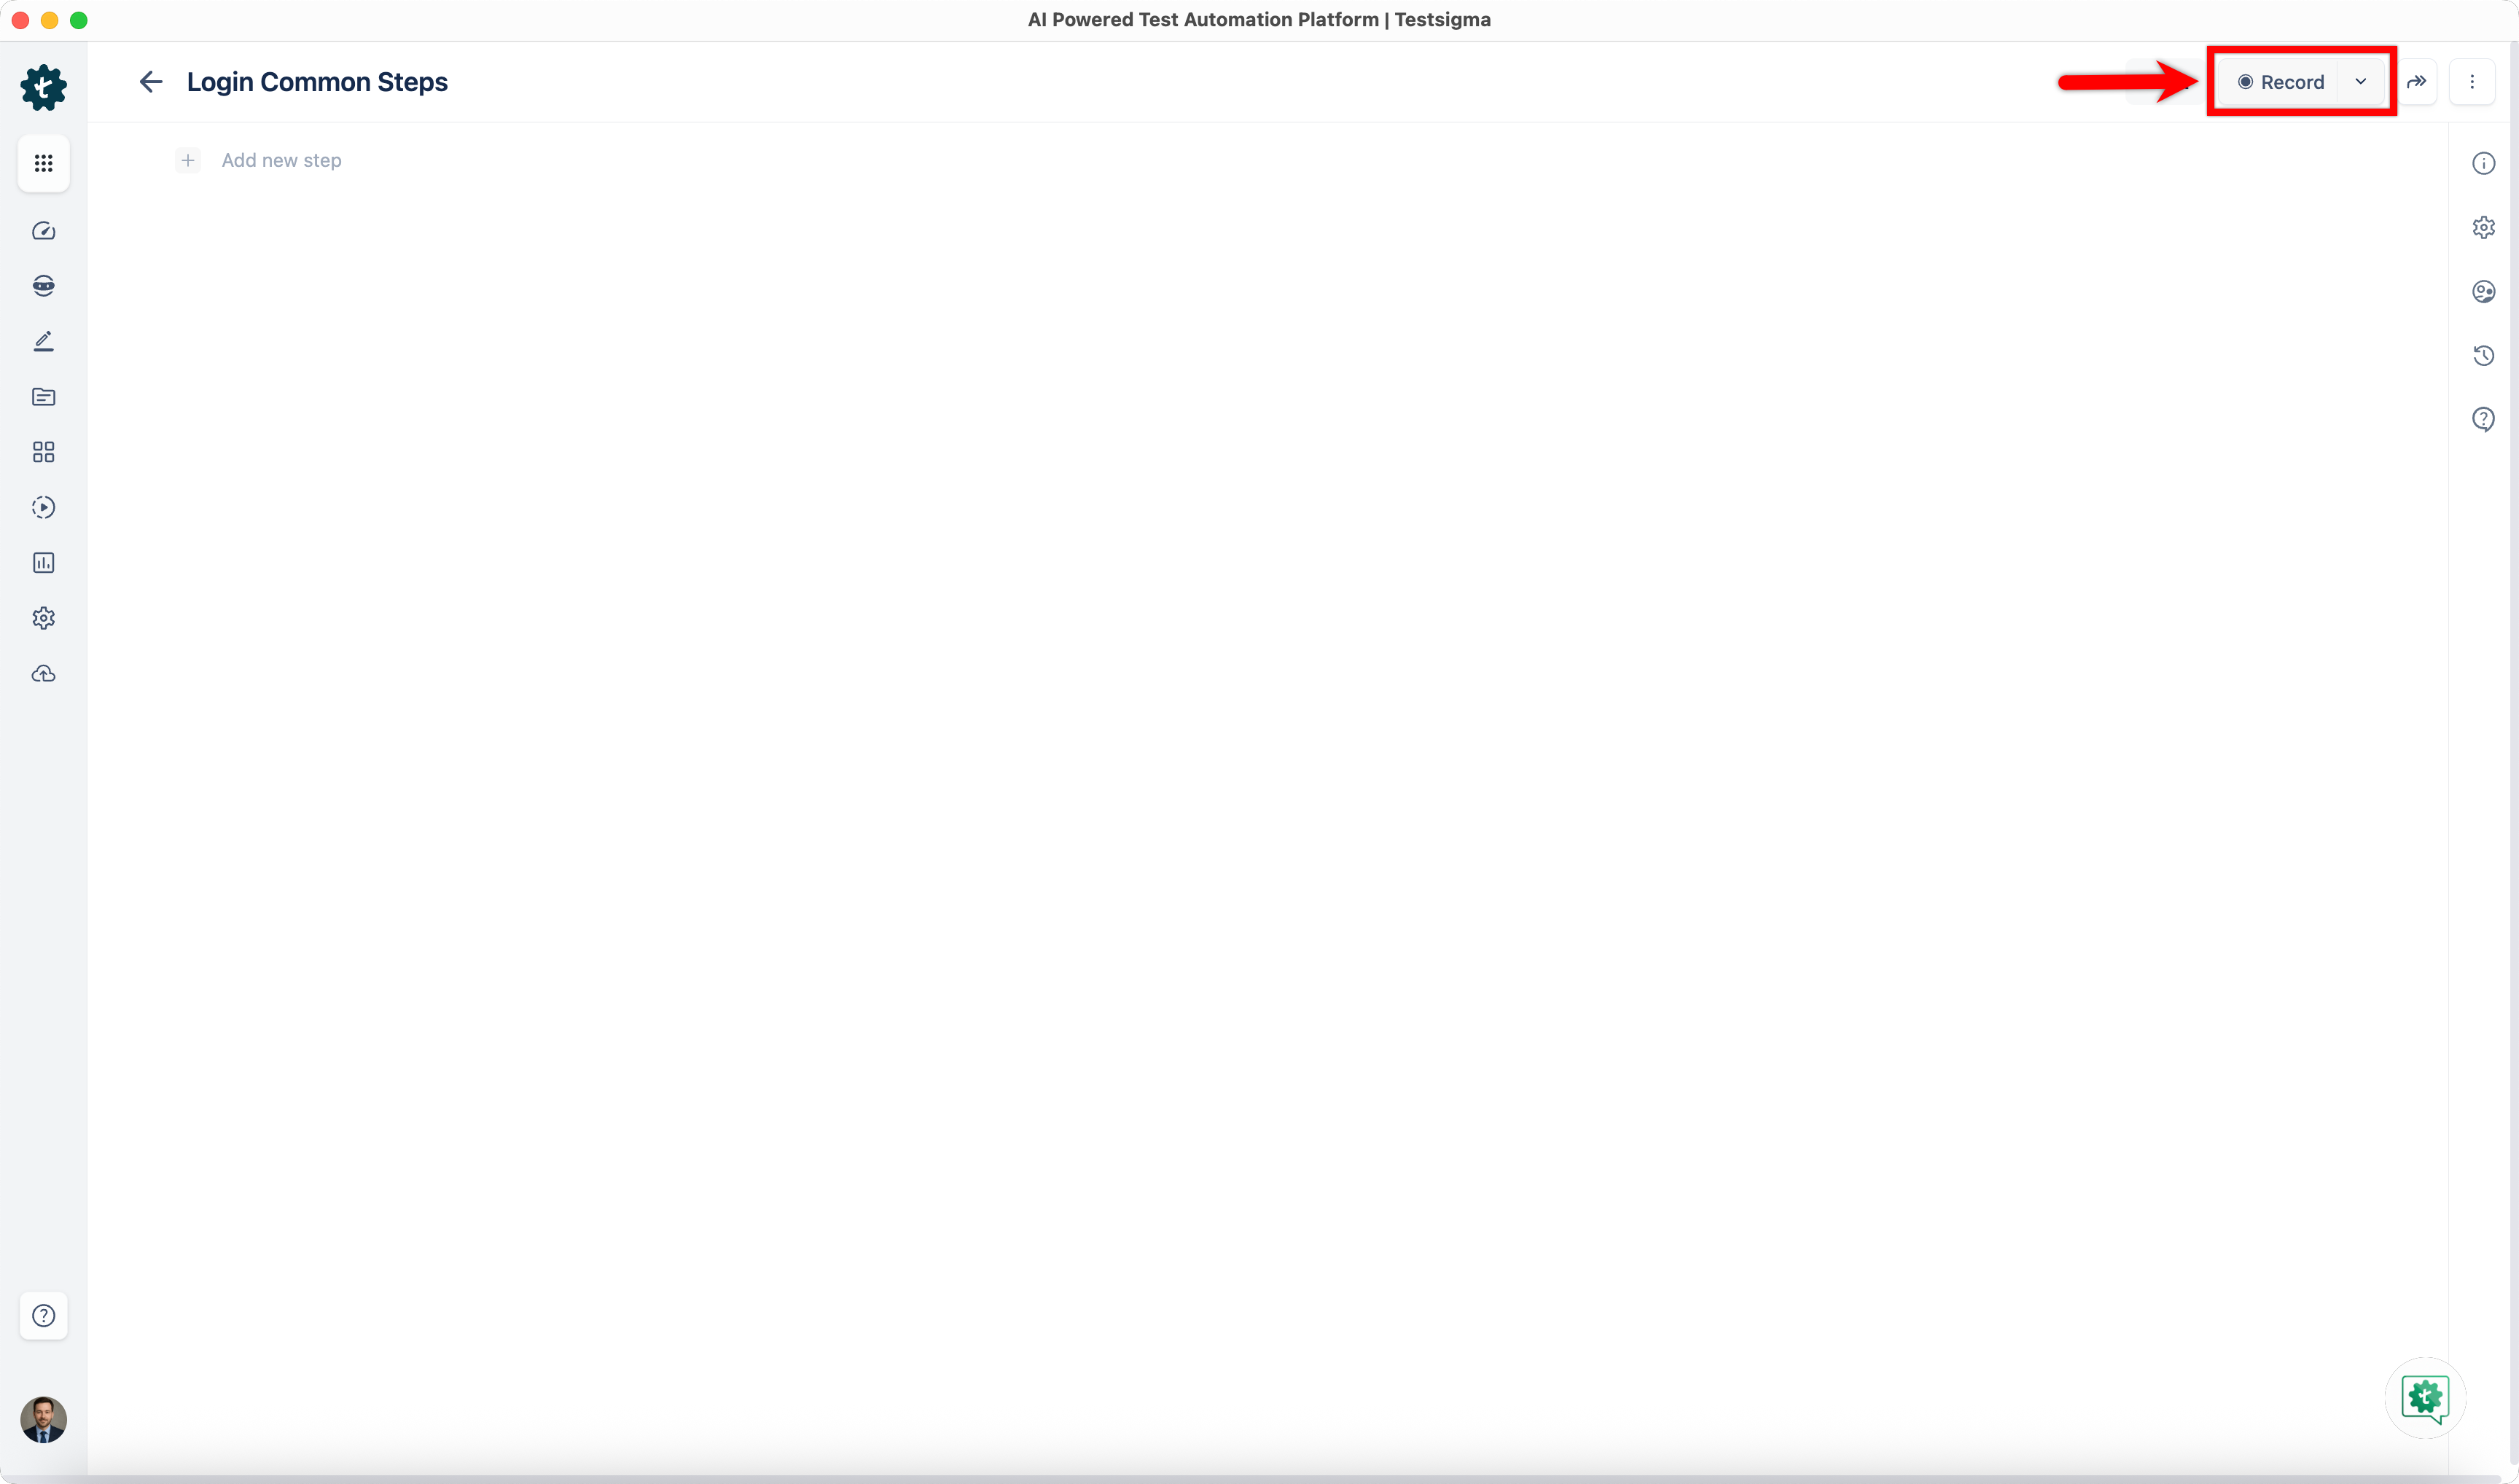
Alternatively, you can click Record to record steps for the step group.
- After adding all the steps, you can use the step group in any test case.
You can also create a data driven step group by associating a test data profile from the step group settings. Follow the steps below to associate a test data profile.
- Create a step group and click Step Group Settings.
-
On Step Group Settings,
- Select the Test Data Profile you want to associate with the Step Group.
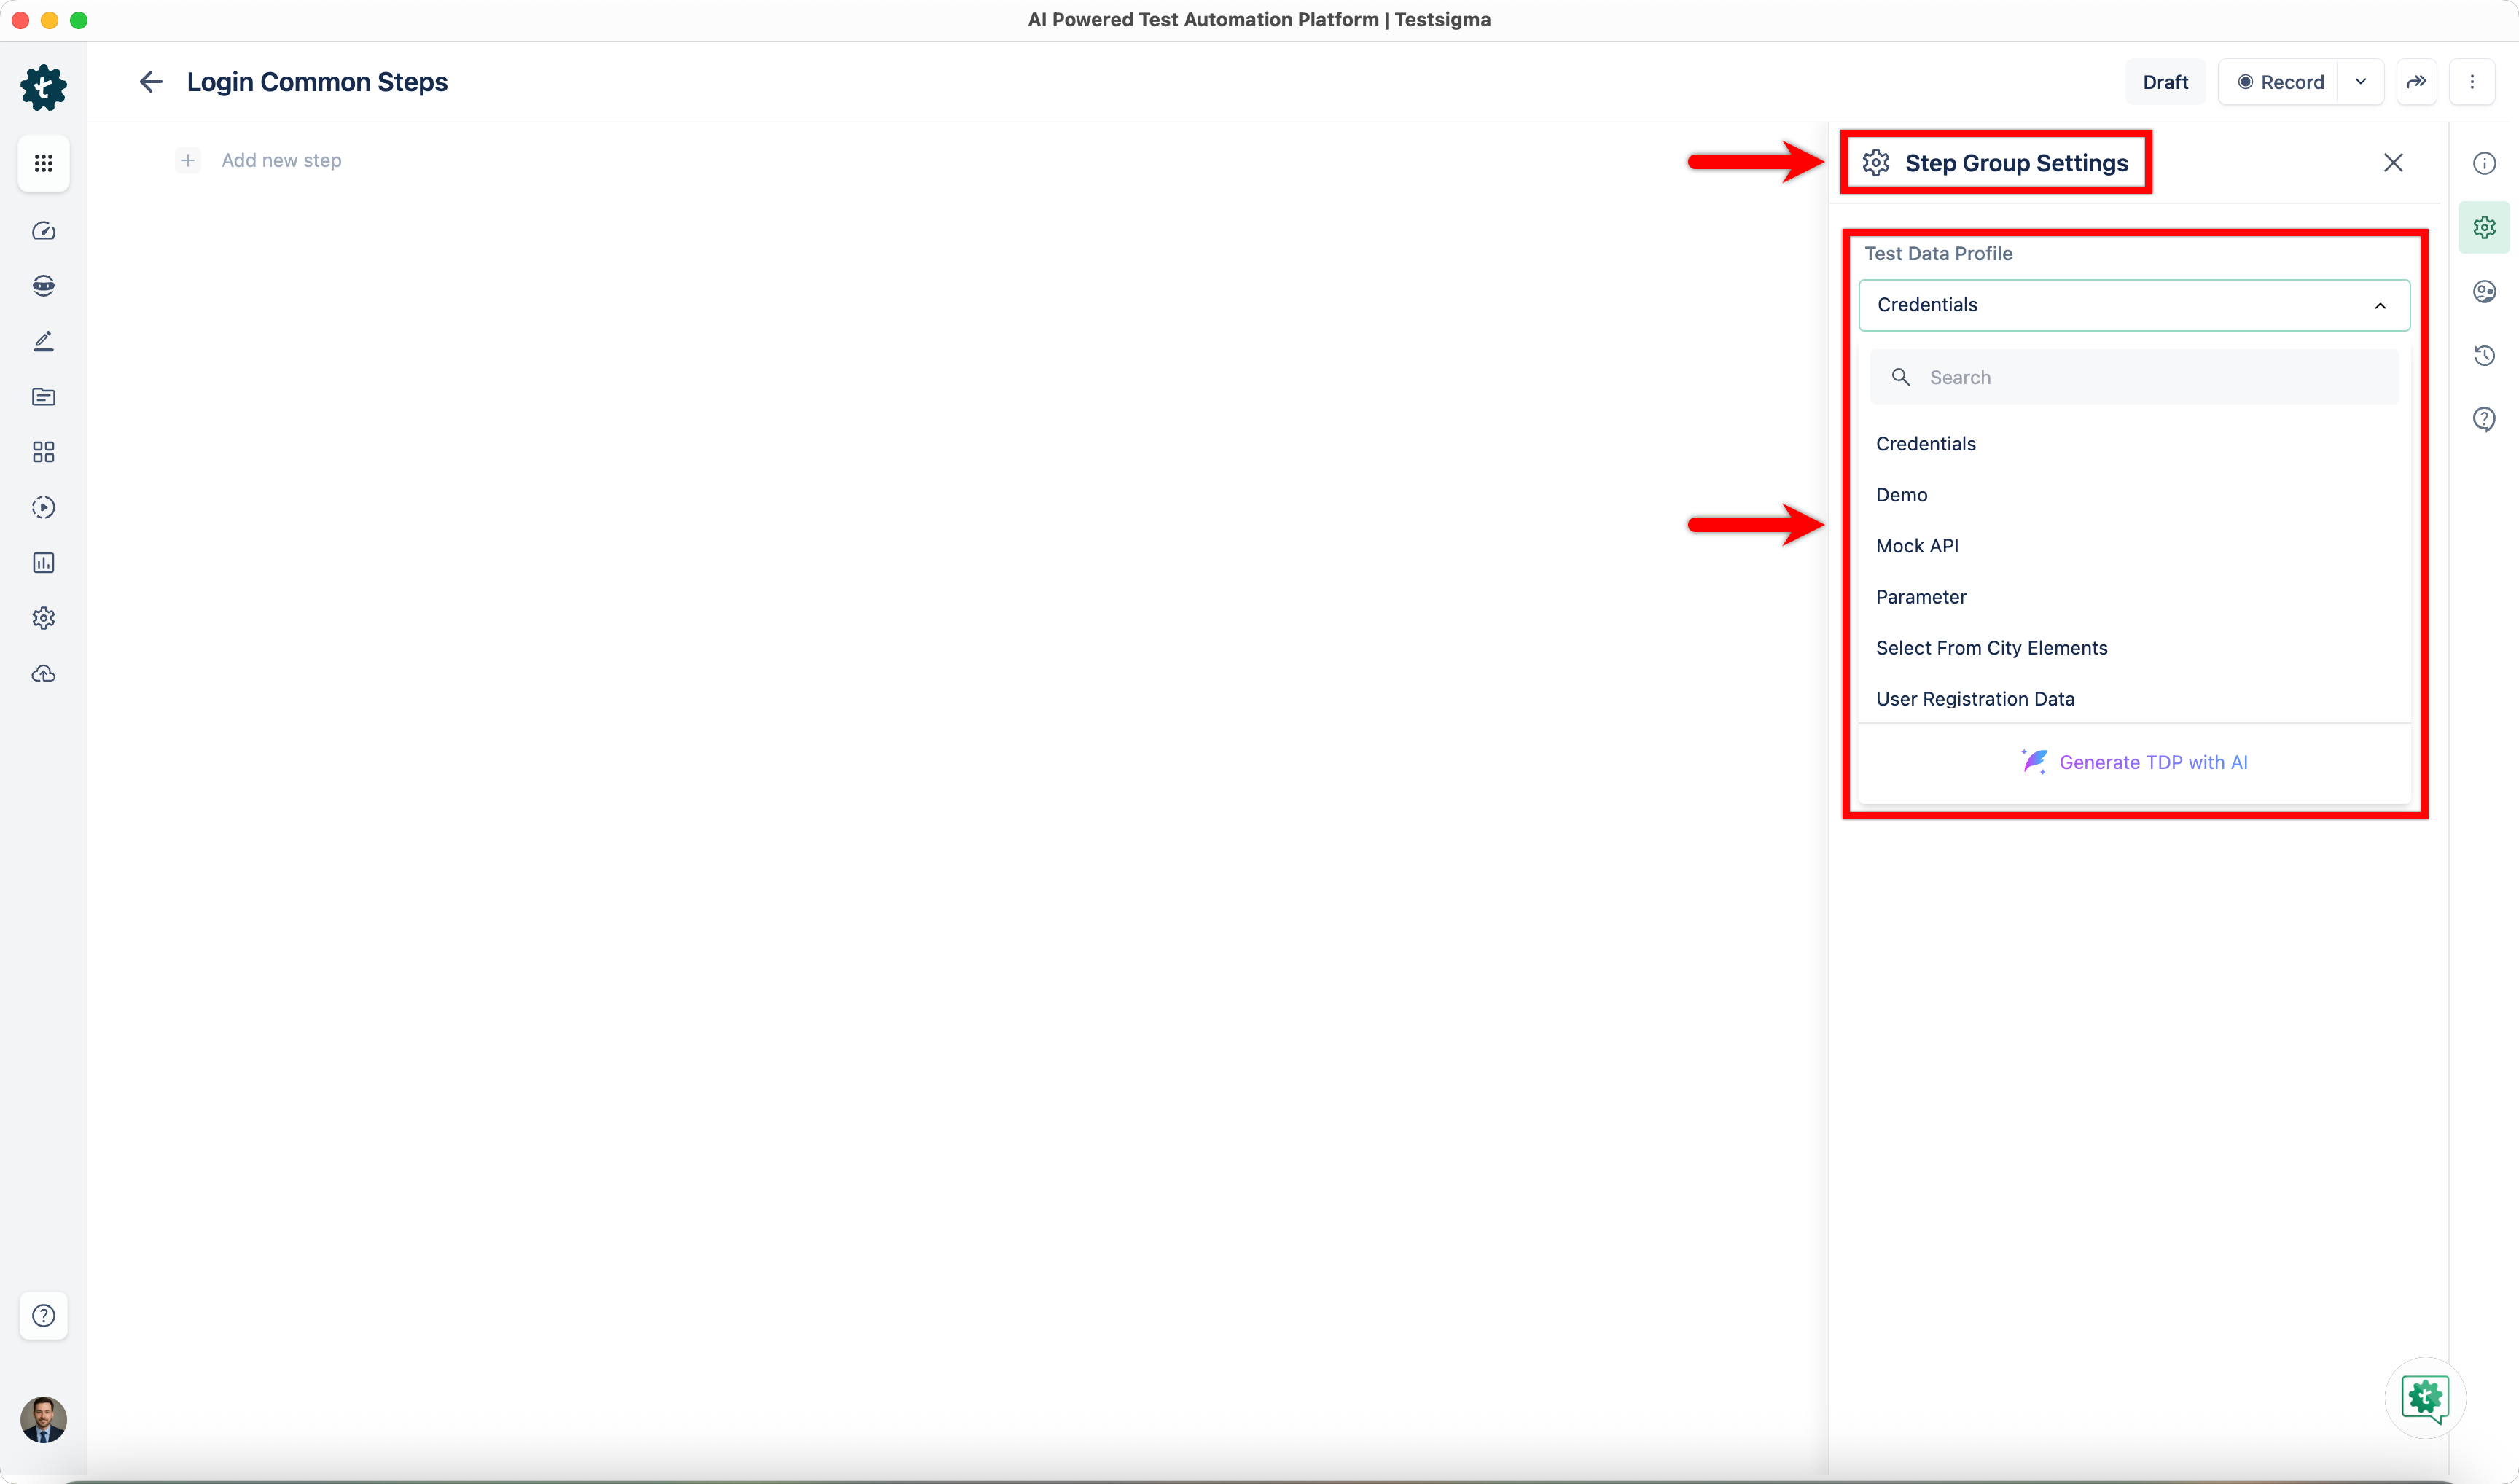
- Enable the Data Driven toggle.
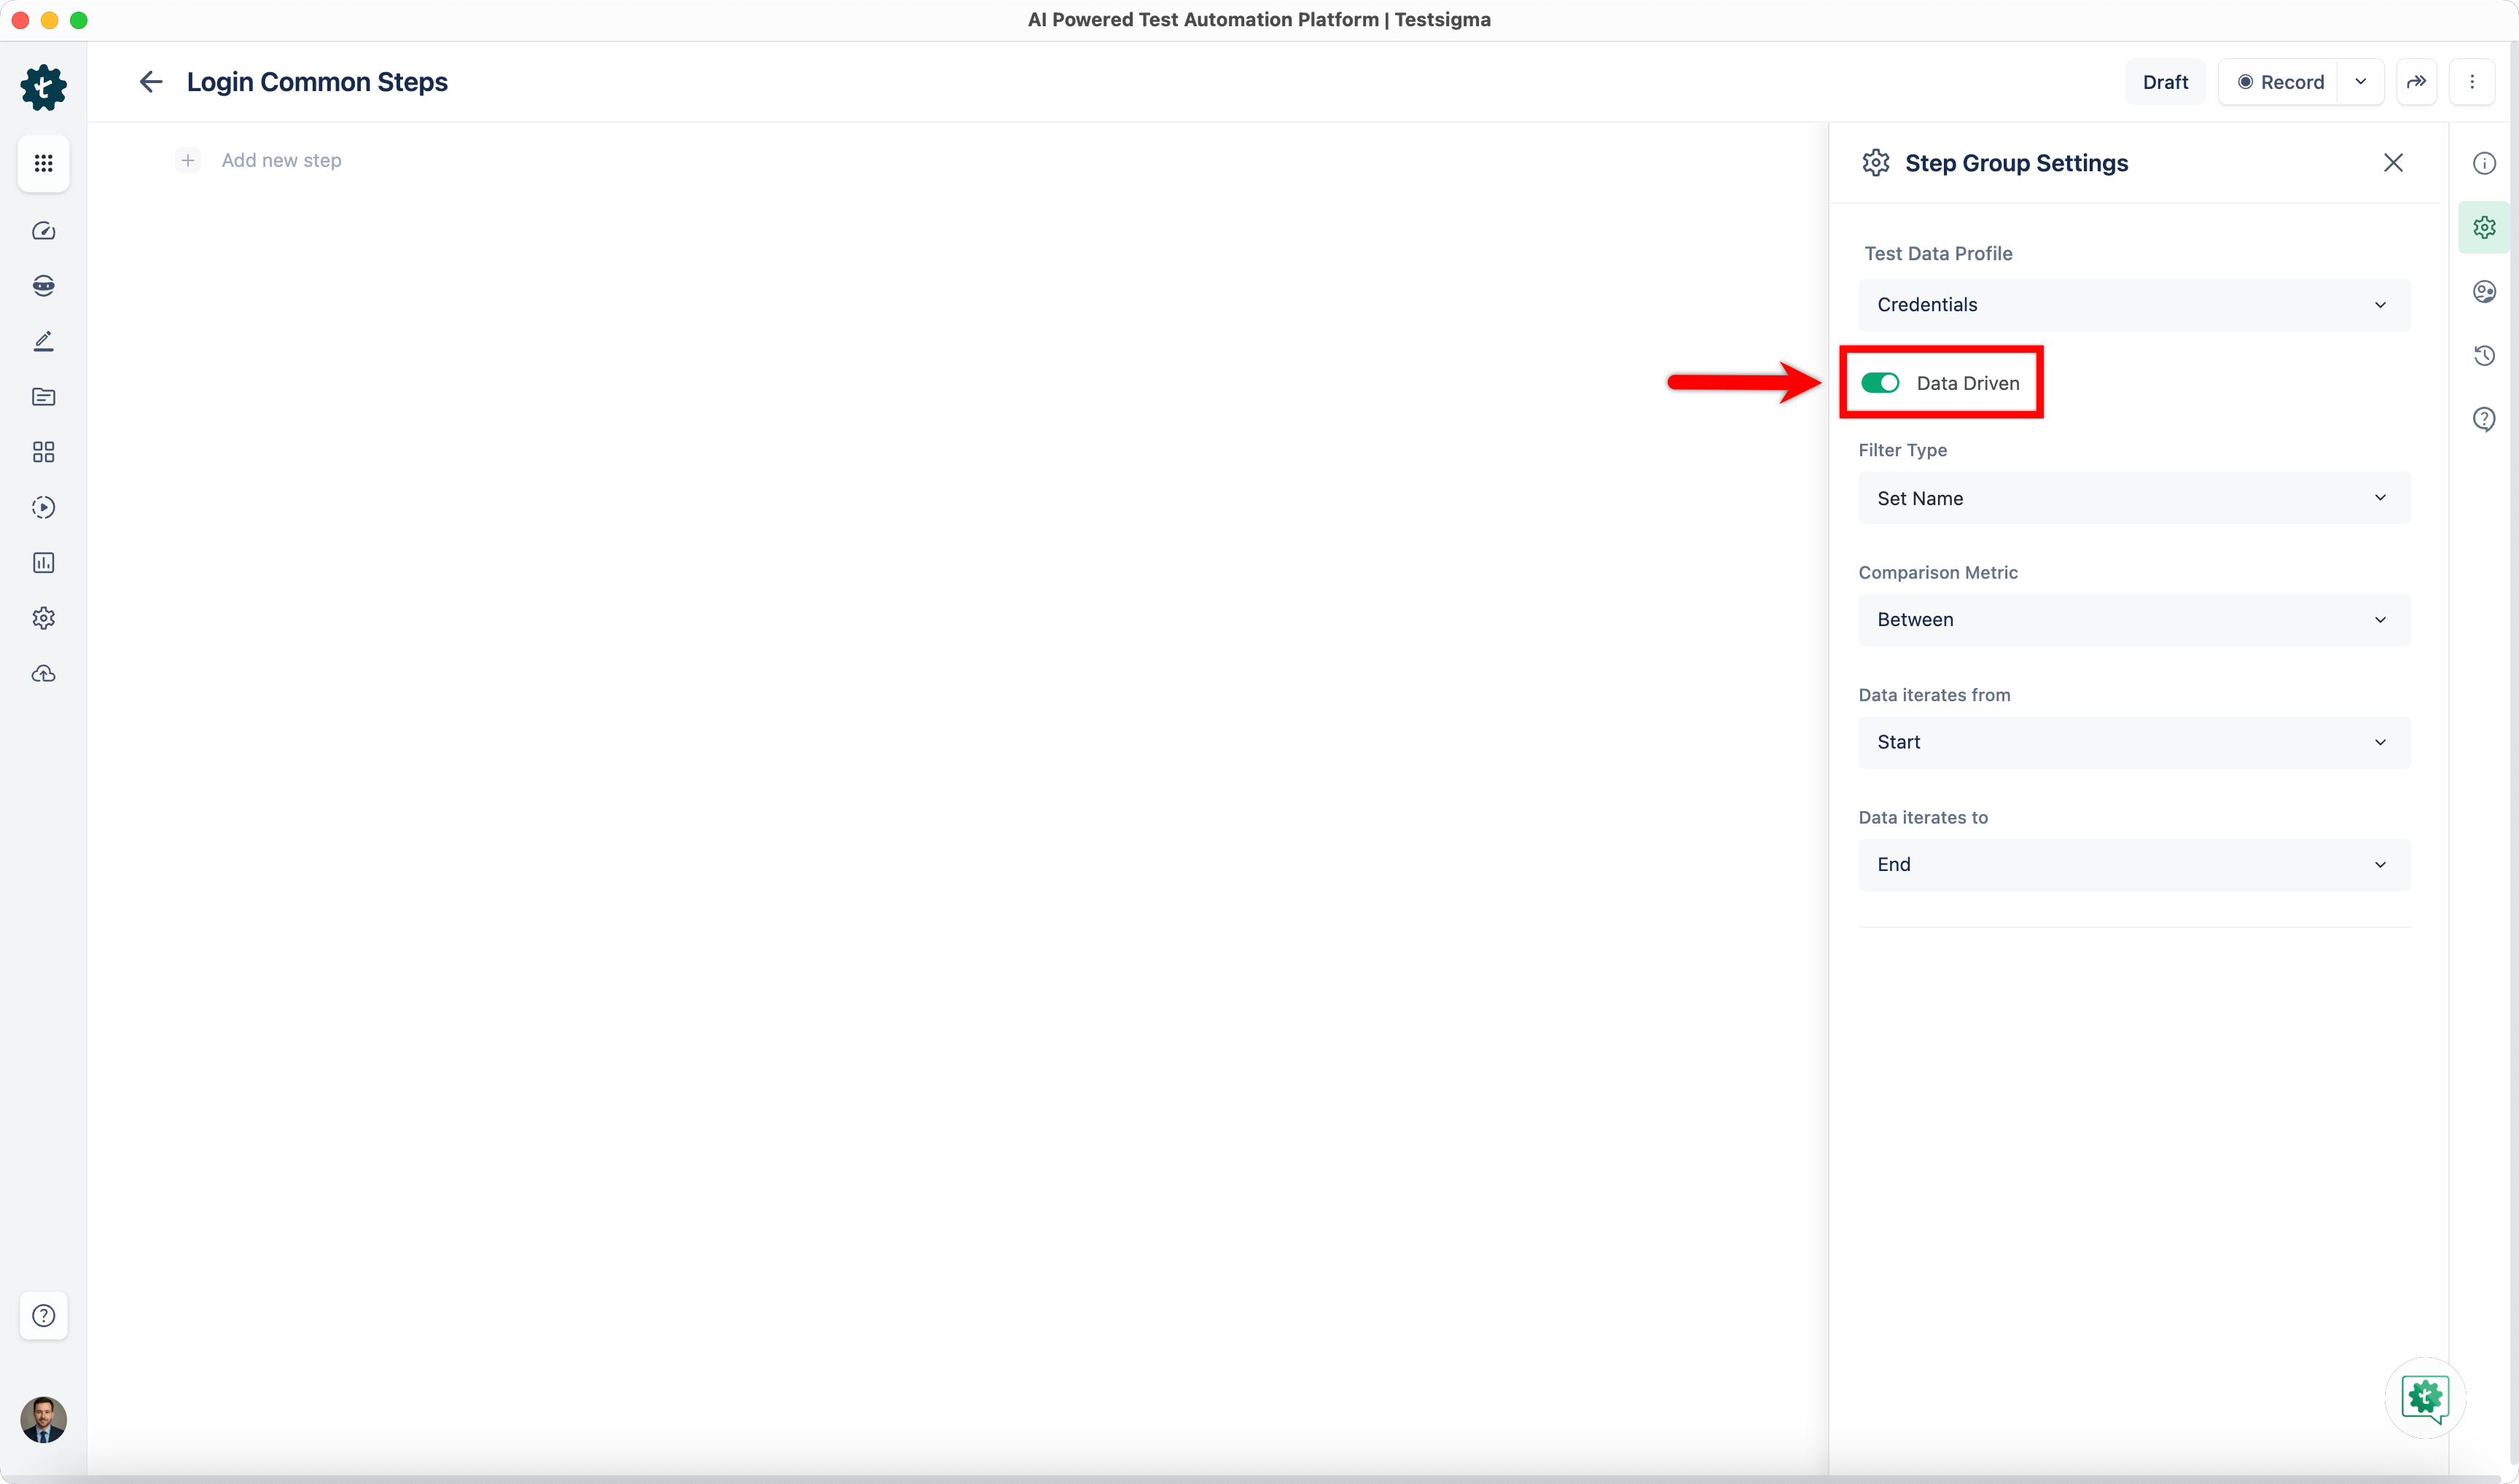
- Now, create all the steps and your data-driven step group will be ready to use across test cases.
- Select the Test Data Profile you want to associate with the Step Group.
Edit a Step Group
- From the left navigatio bar, go to Create Tests > Step Groups.
-
Open the step group you want to update and make the changes.
NOTE:The changes will affect all the test cases that use the step group.
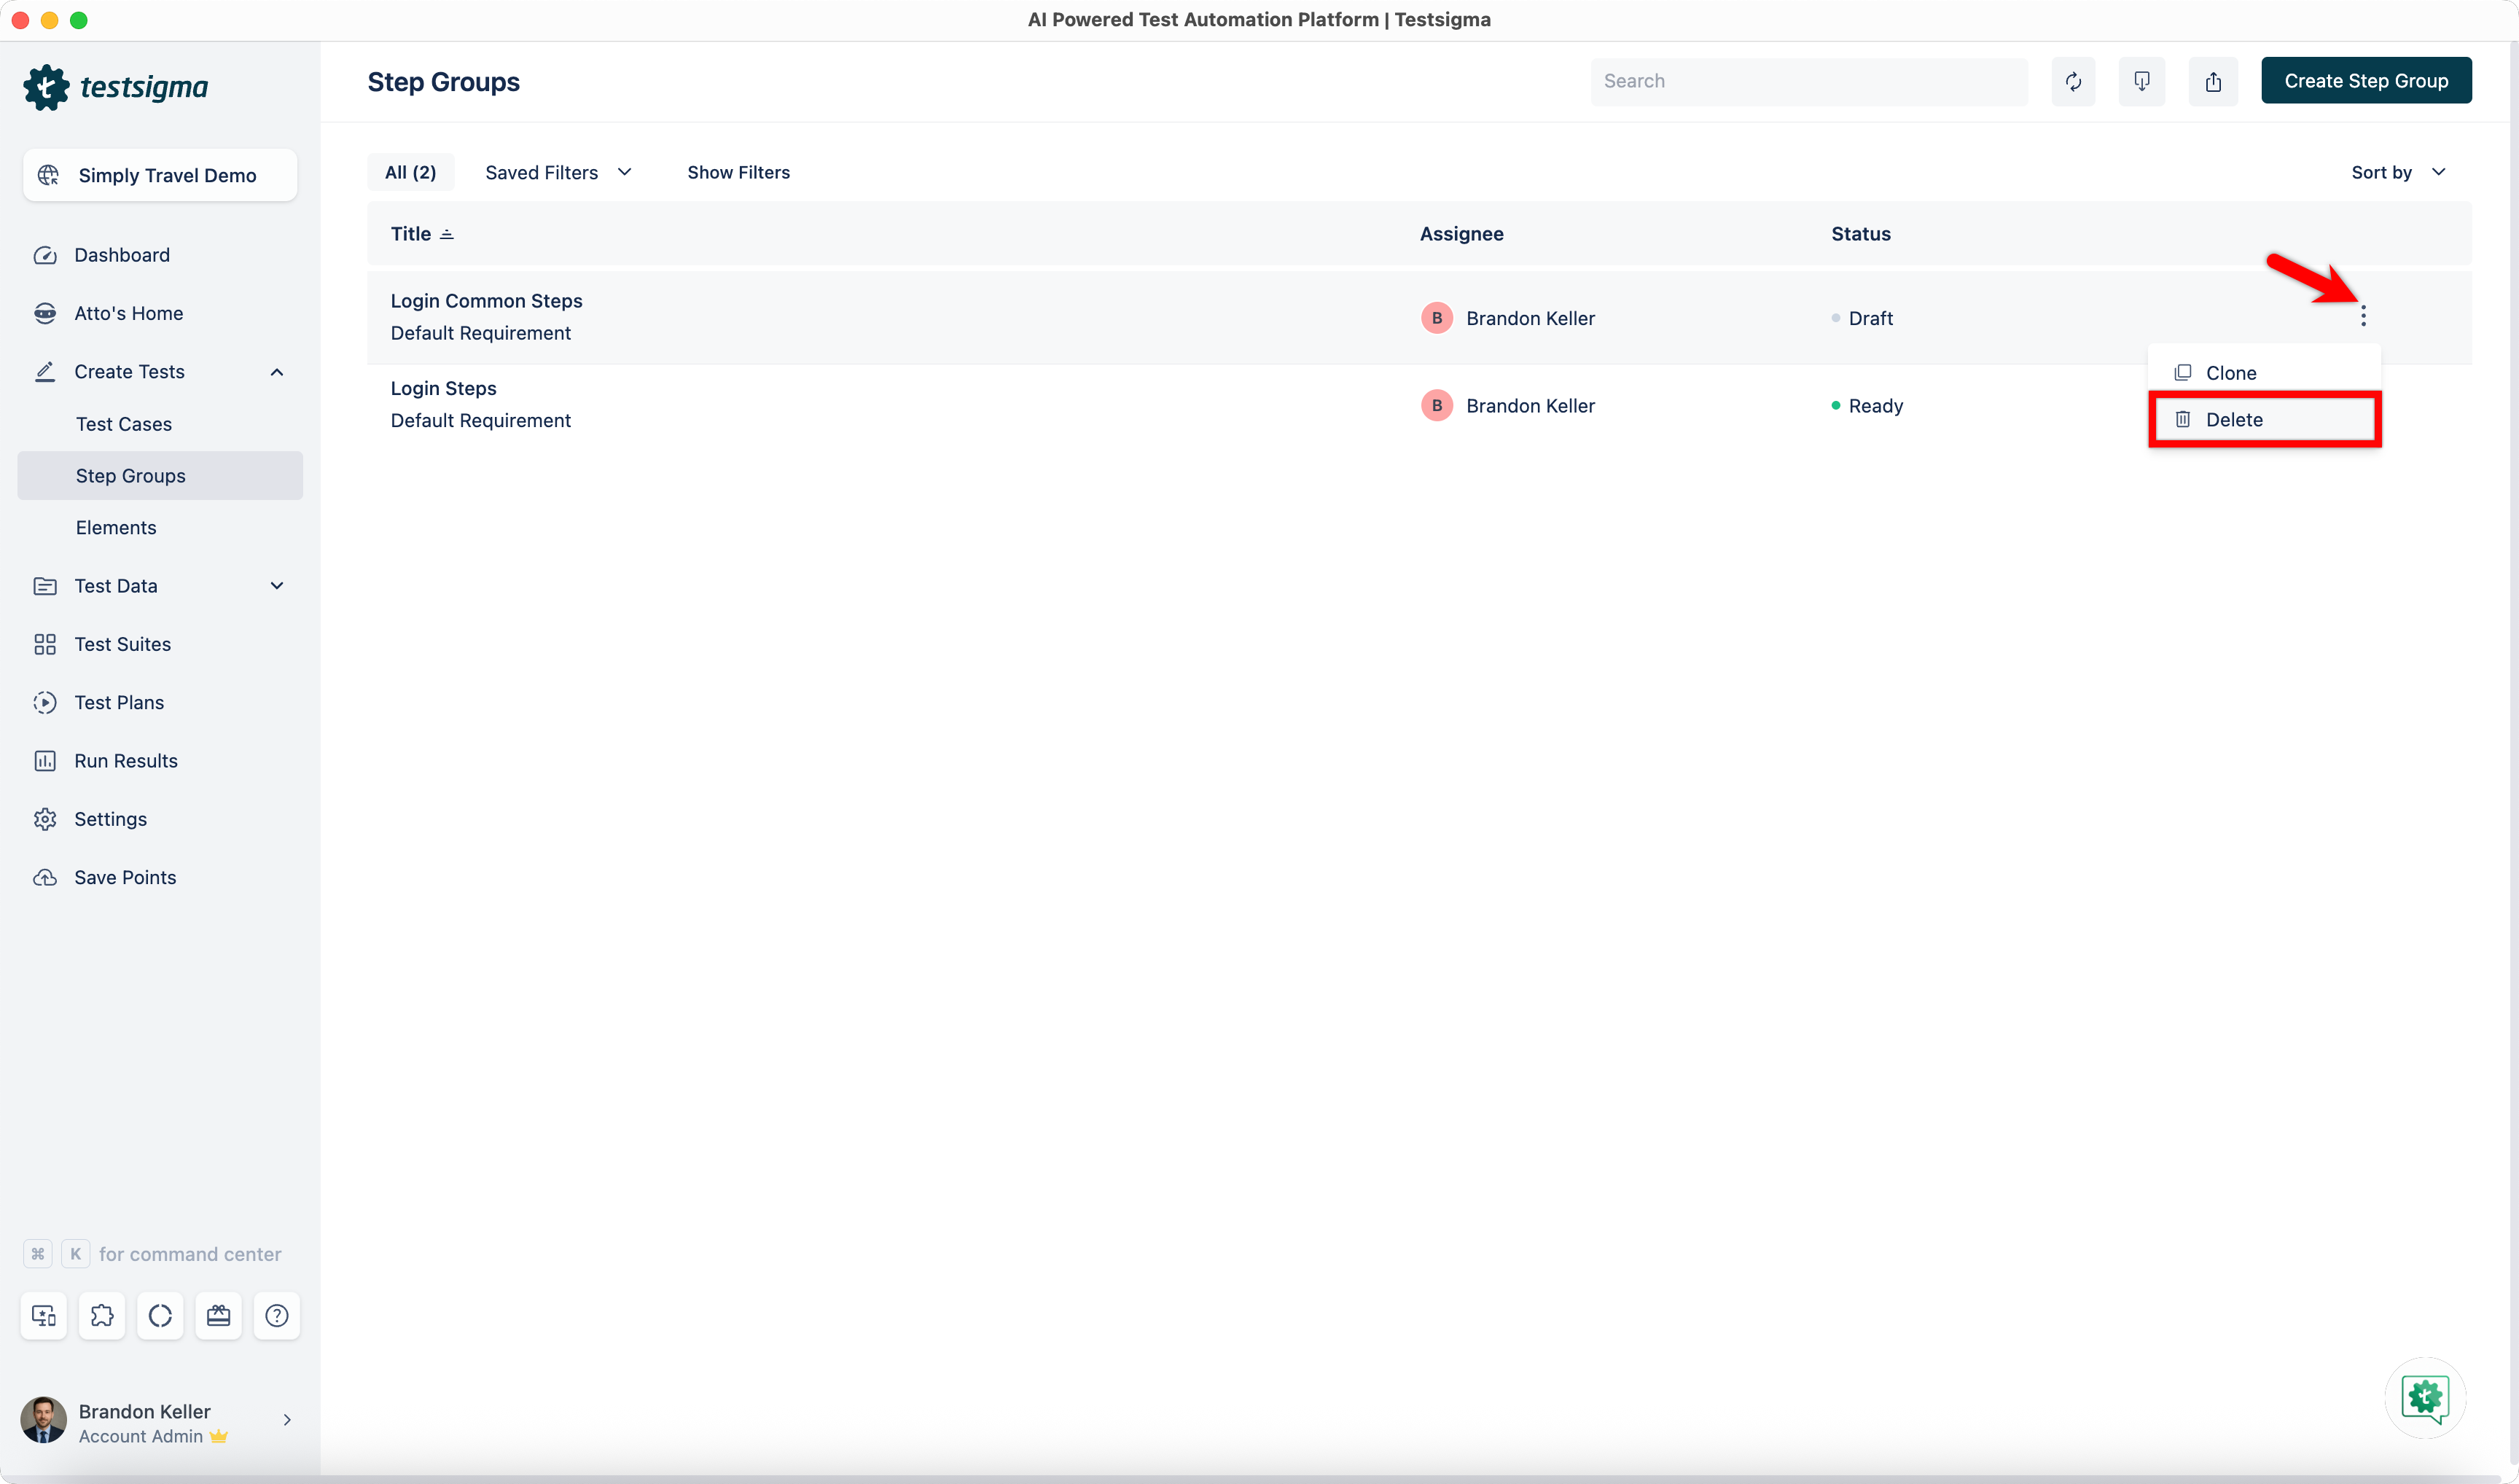
Delete a Step Group
- From the Step Group list page, click kebab menu next to the step group you want to delete and click Delete.
-
This will open Deletion Warning popup.
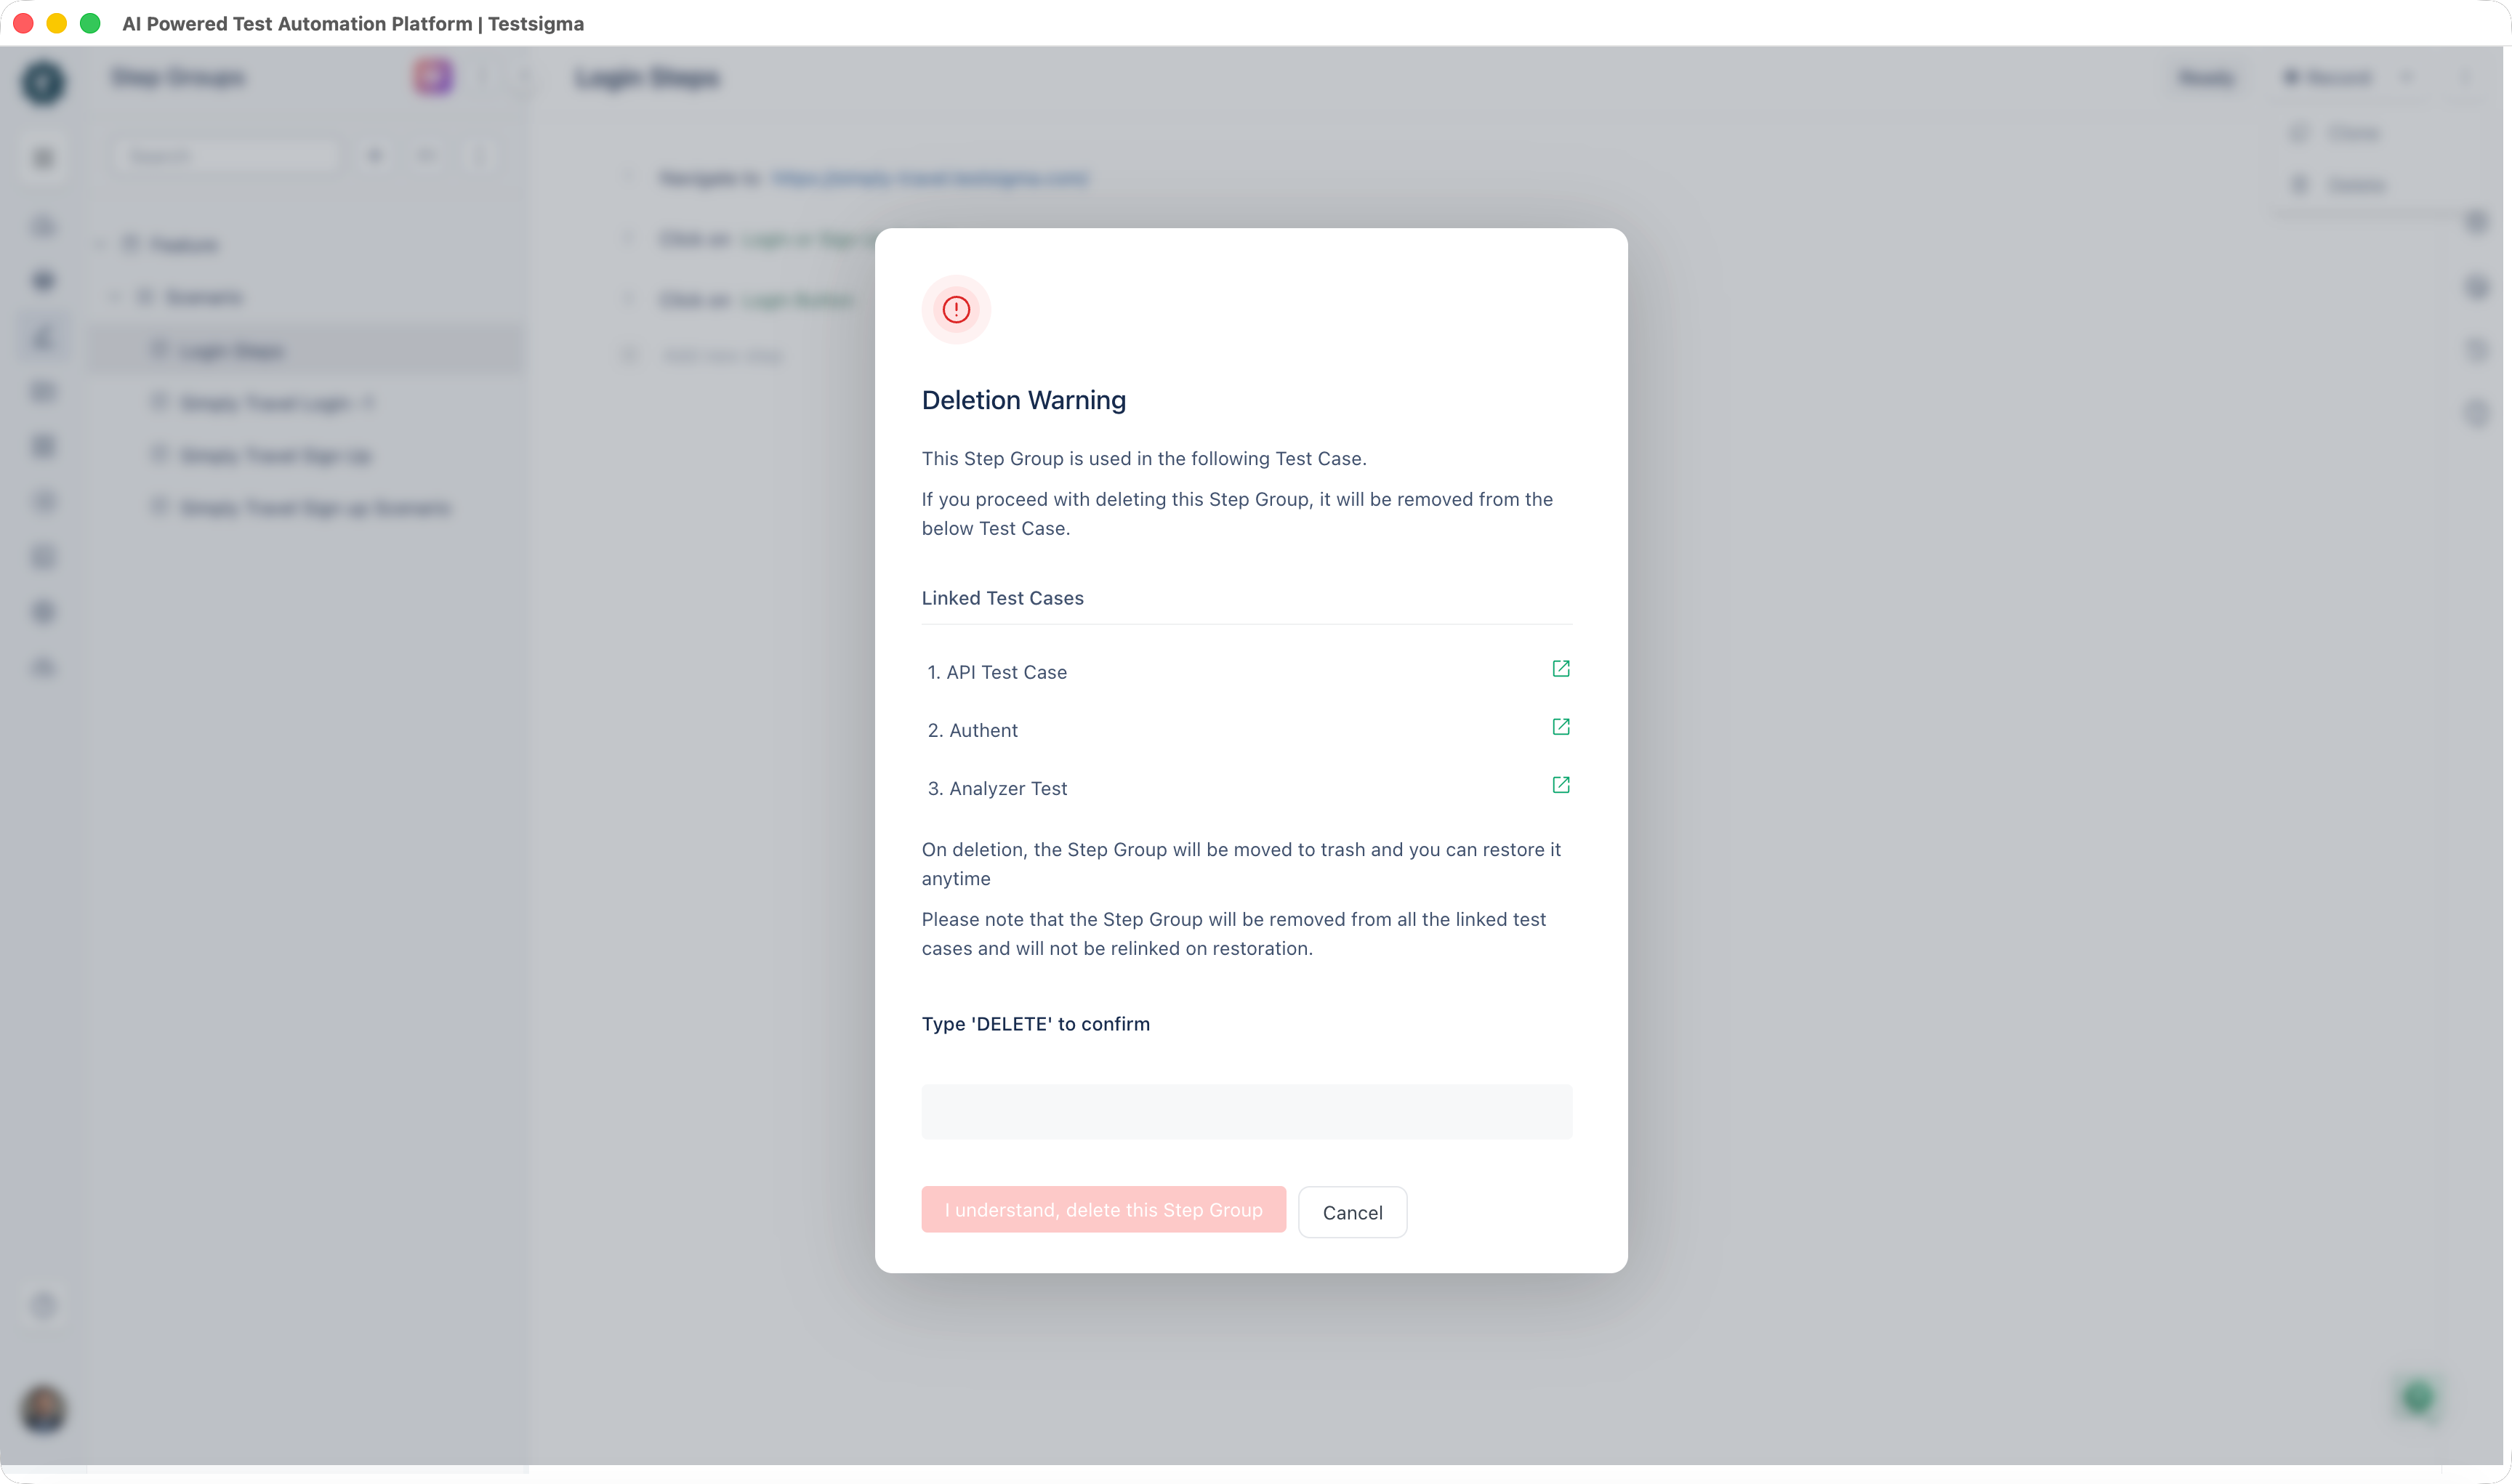 NOTE:
NOTE:This will show the list of affected test cases. Deletion of the step group will remove the step group in the linked test cases.
- Enter DELETE and click I understand, delete this Step Group.
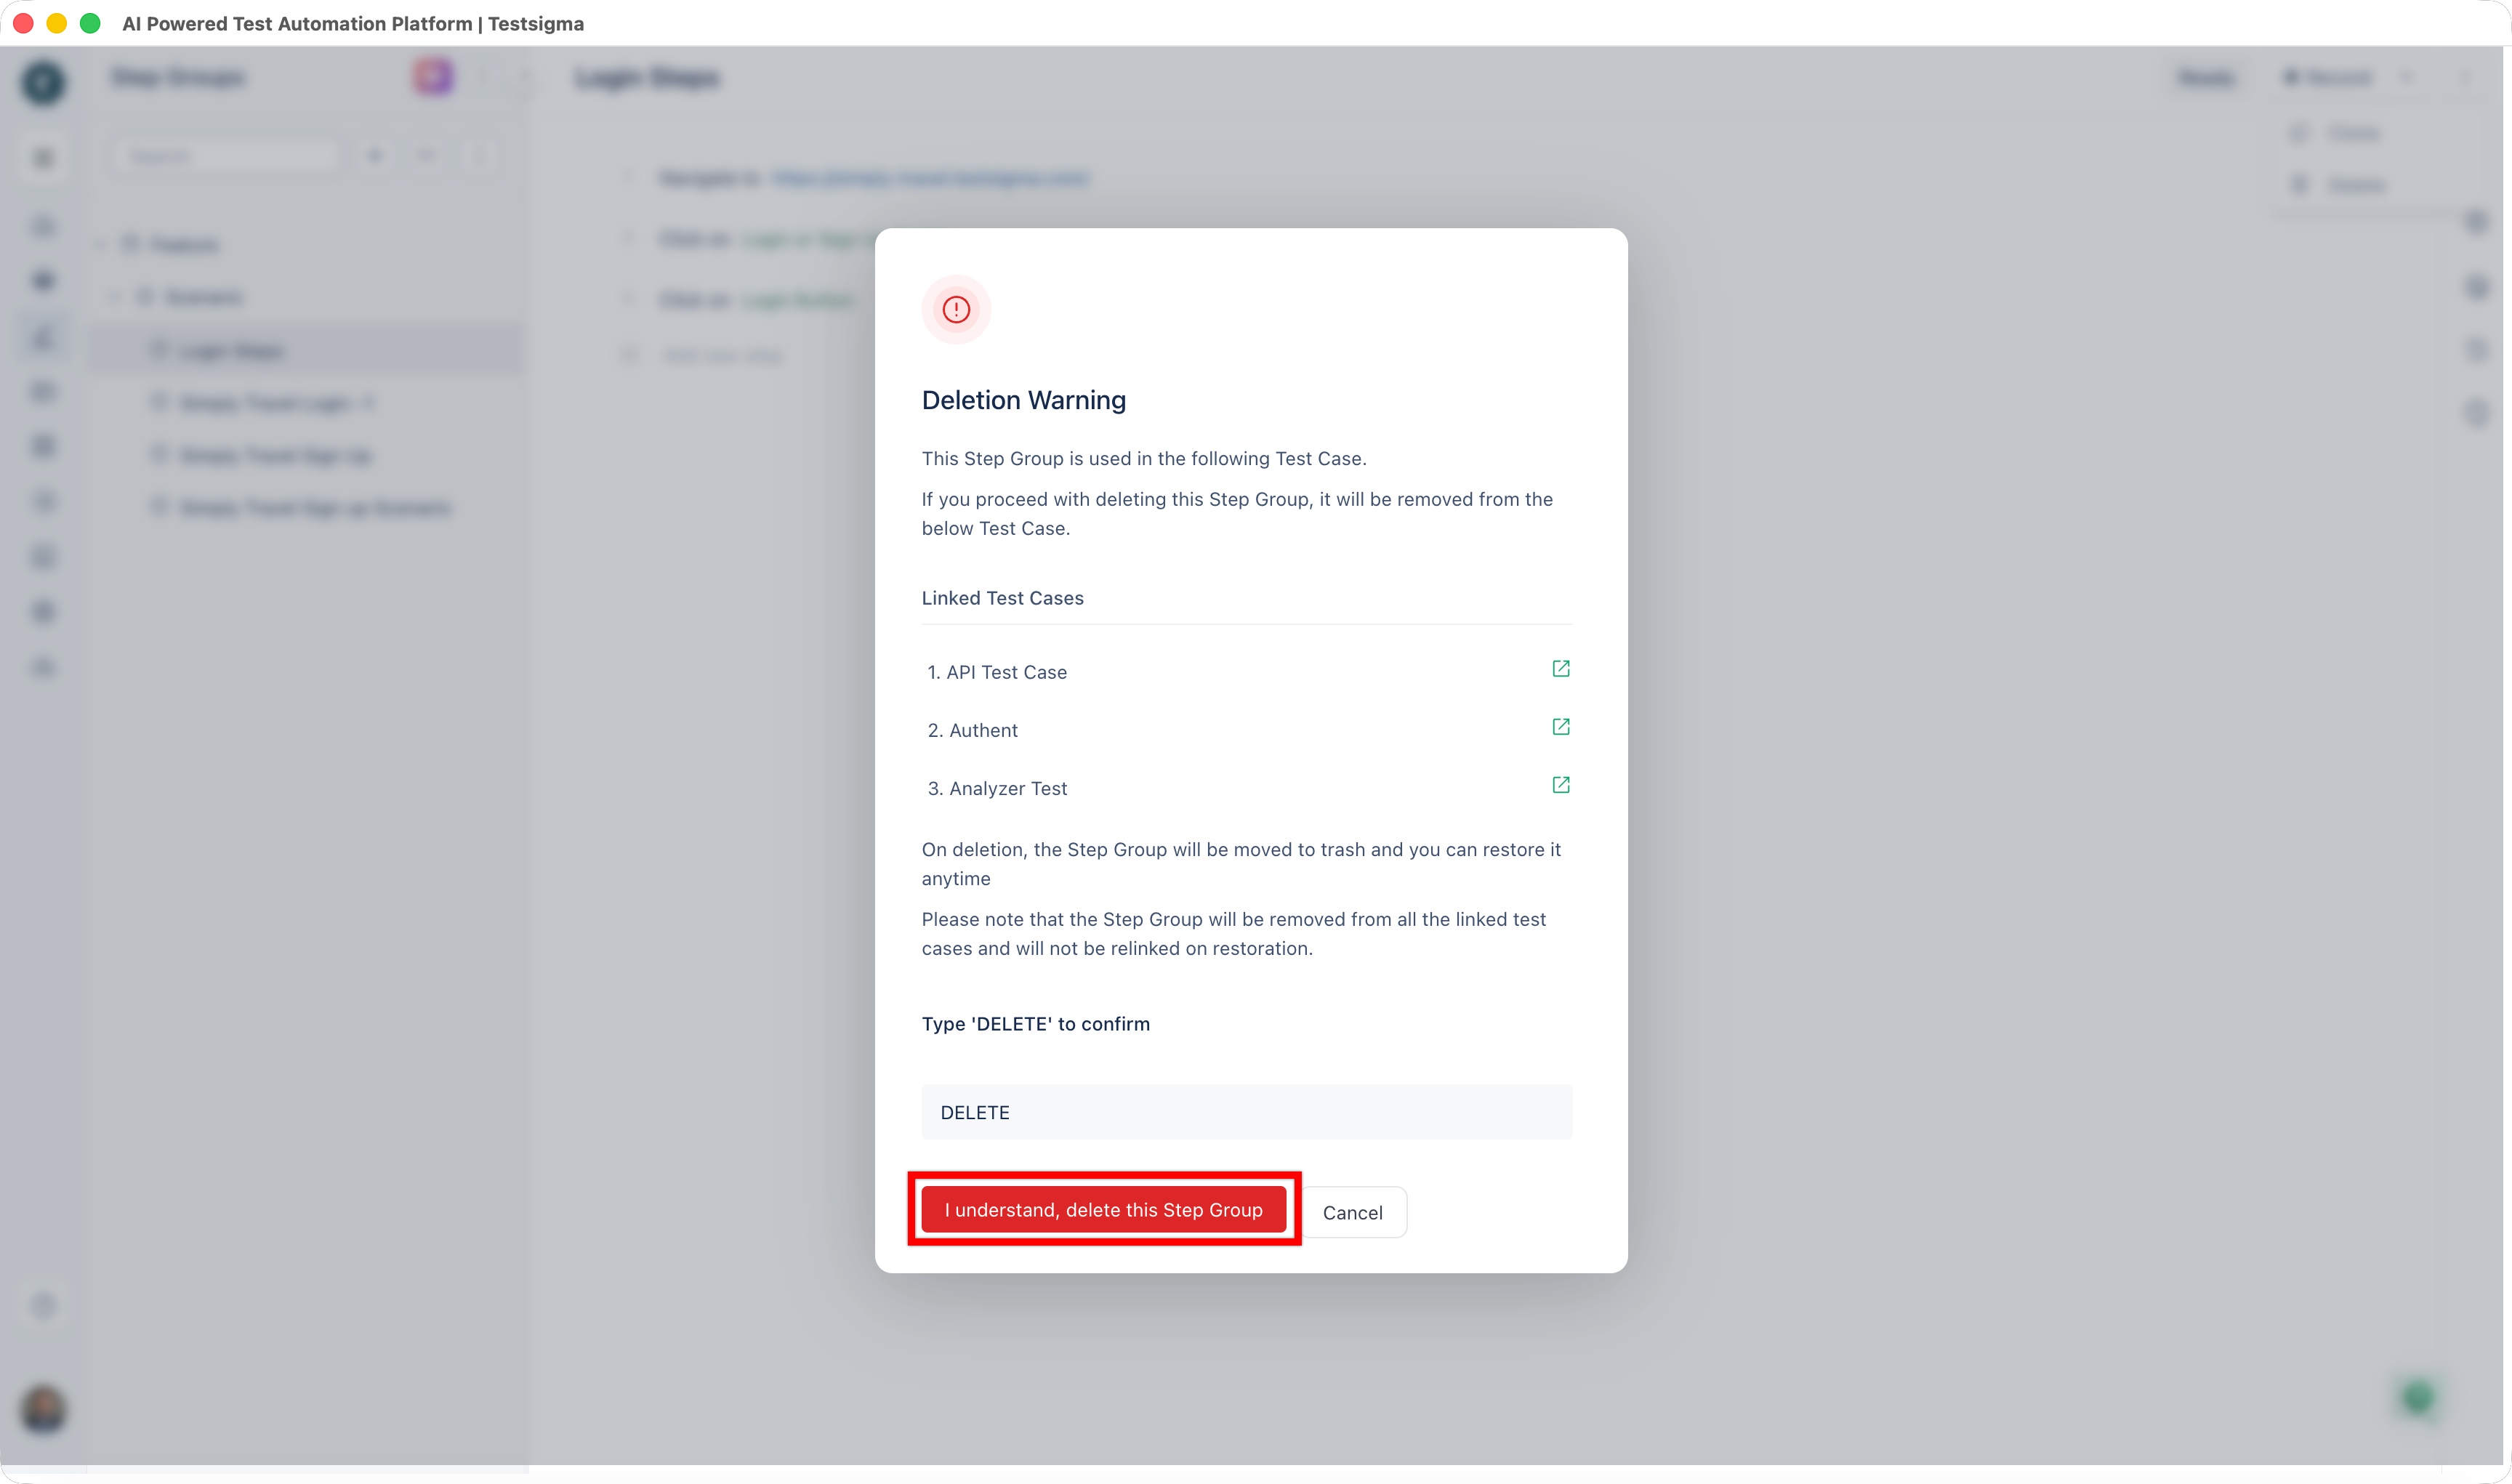
- The step group will be deleted successfully.
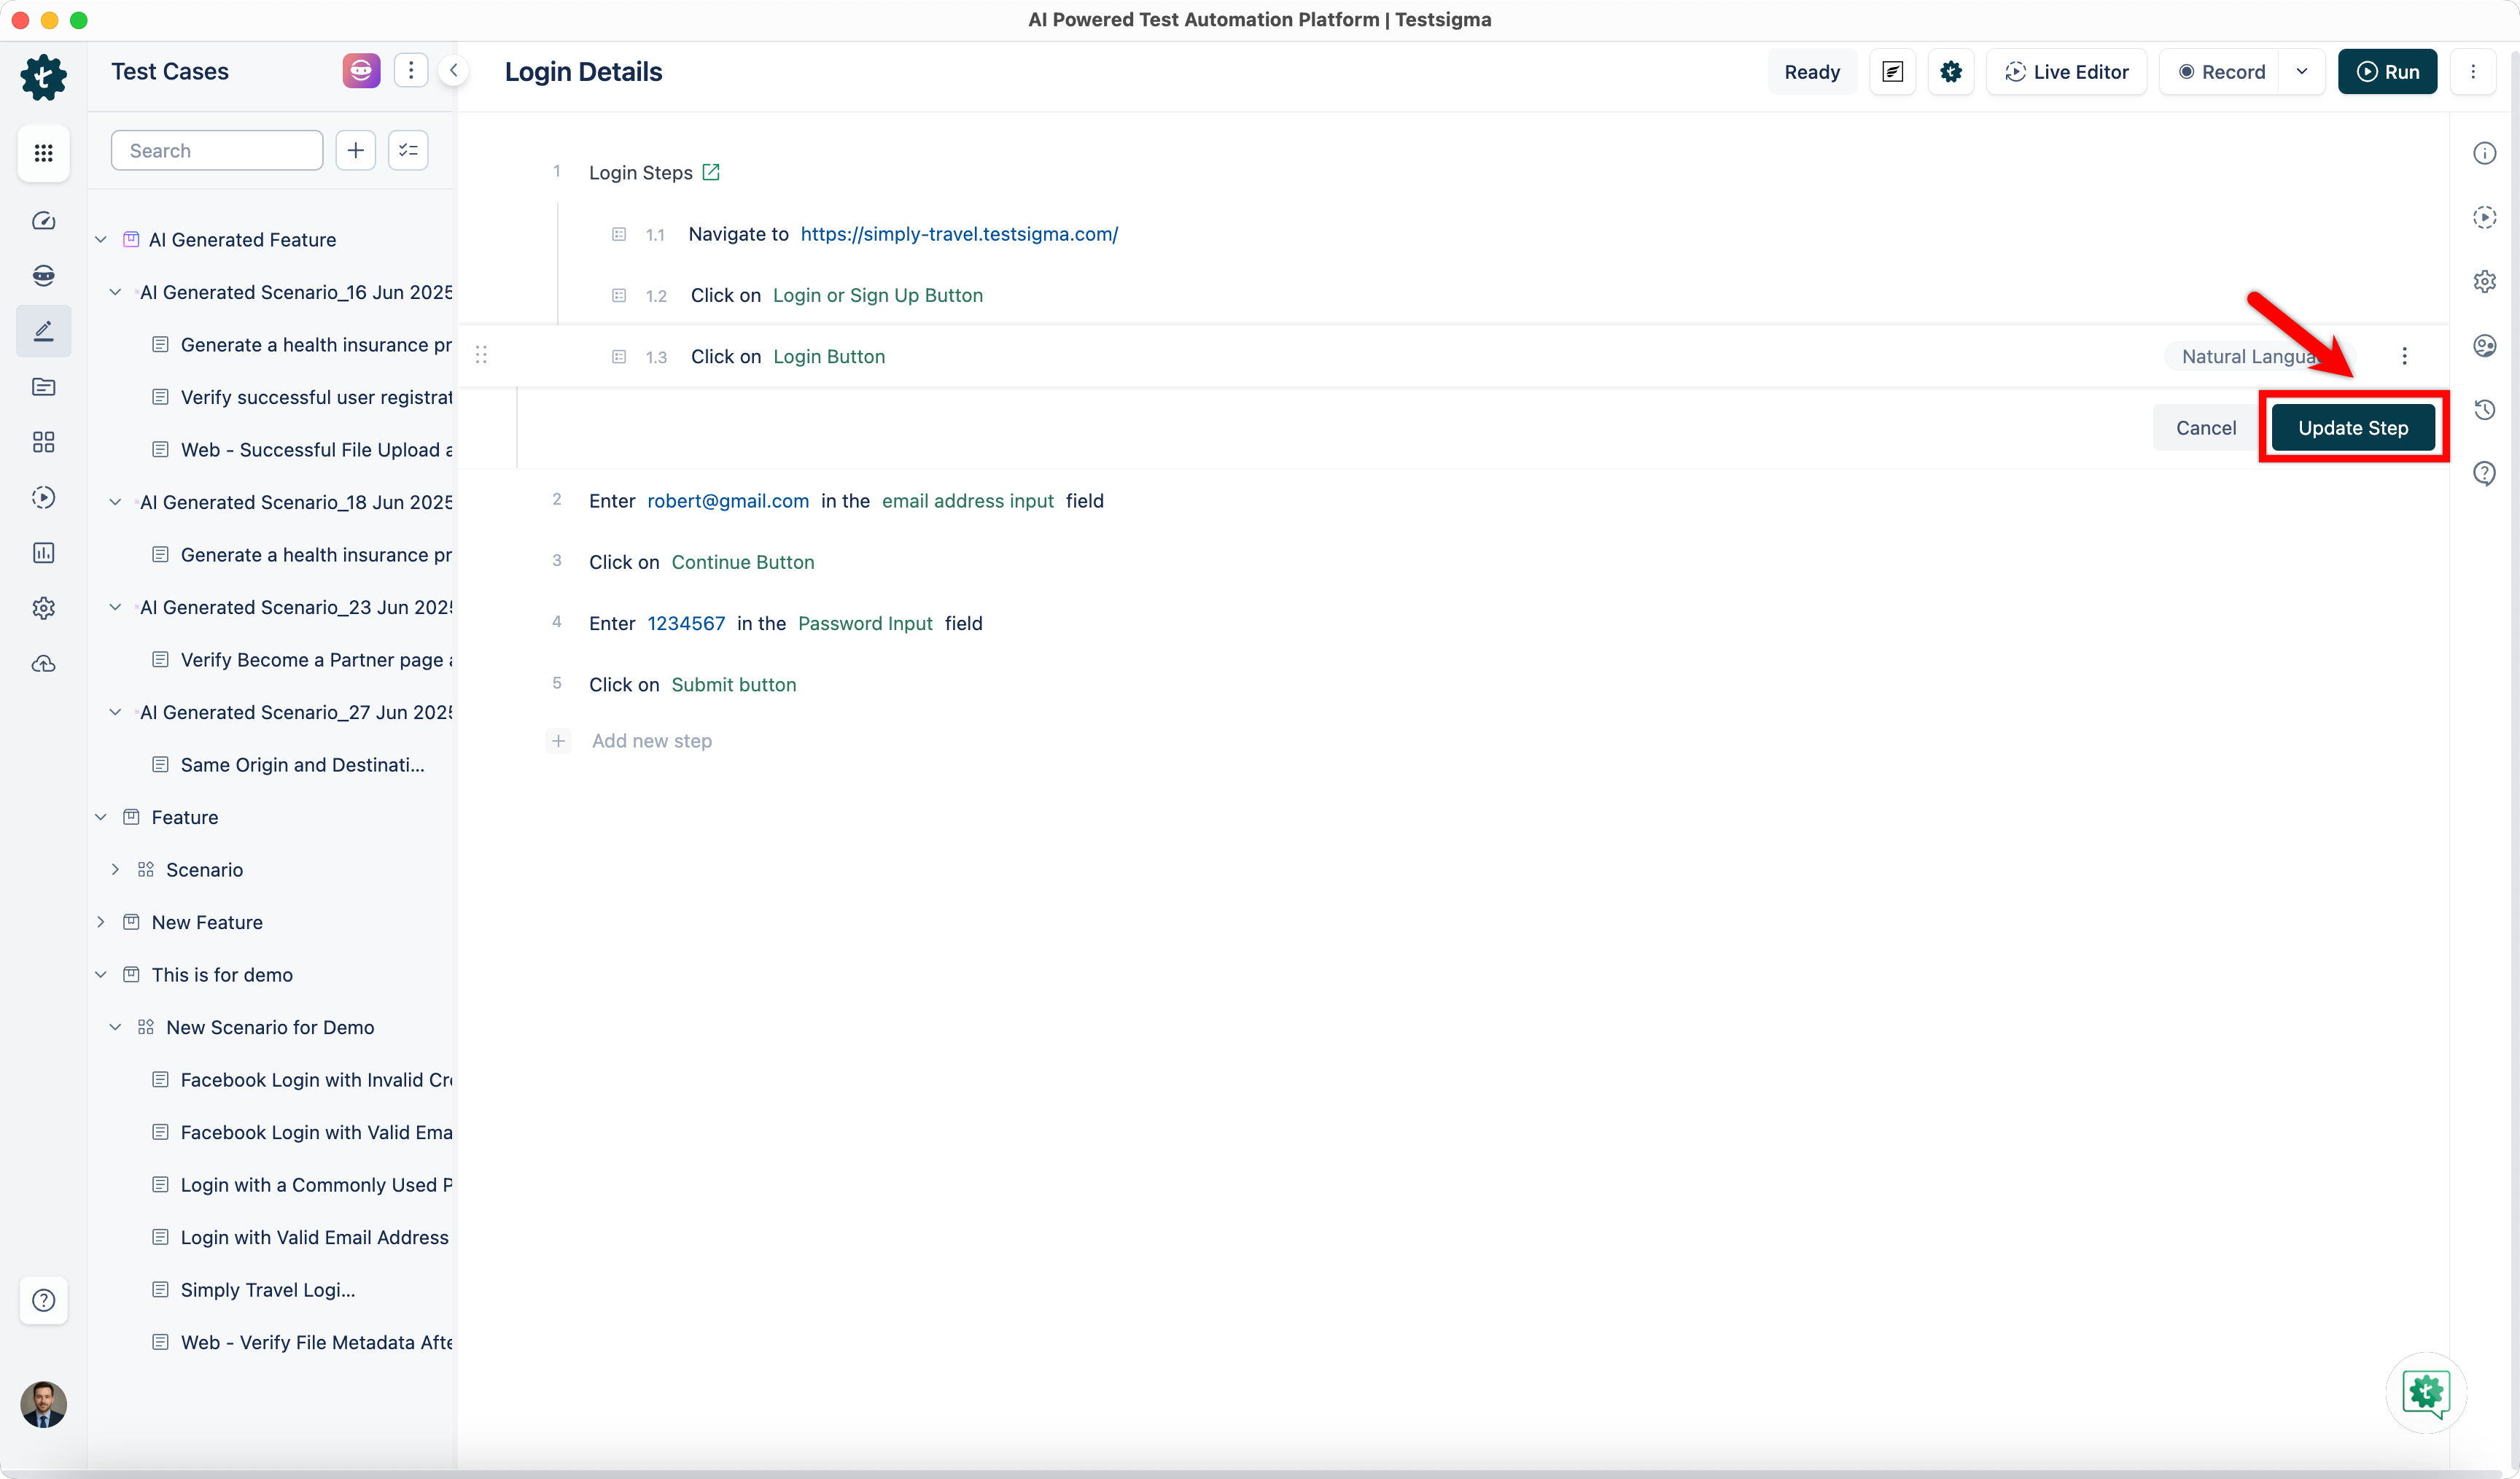
Edit a Step Group for a Specific Test Case
- From the left navigatio bar, go to Create Tests > Test Cases.
- Open the Test Case in which you want to edit the Step Group.
- Expand the Step Group to edit any test data or element being used in the step group.
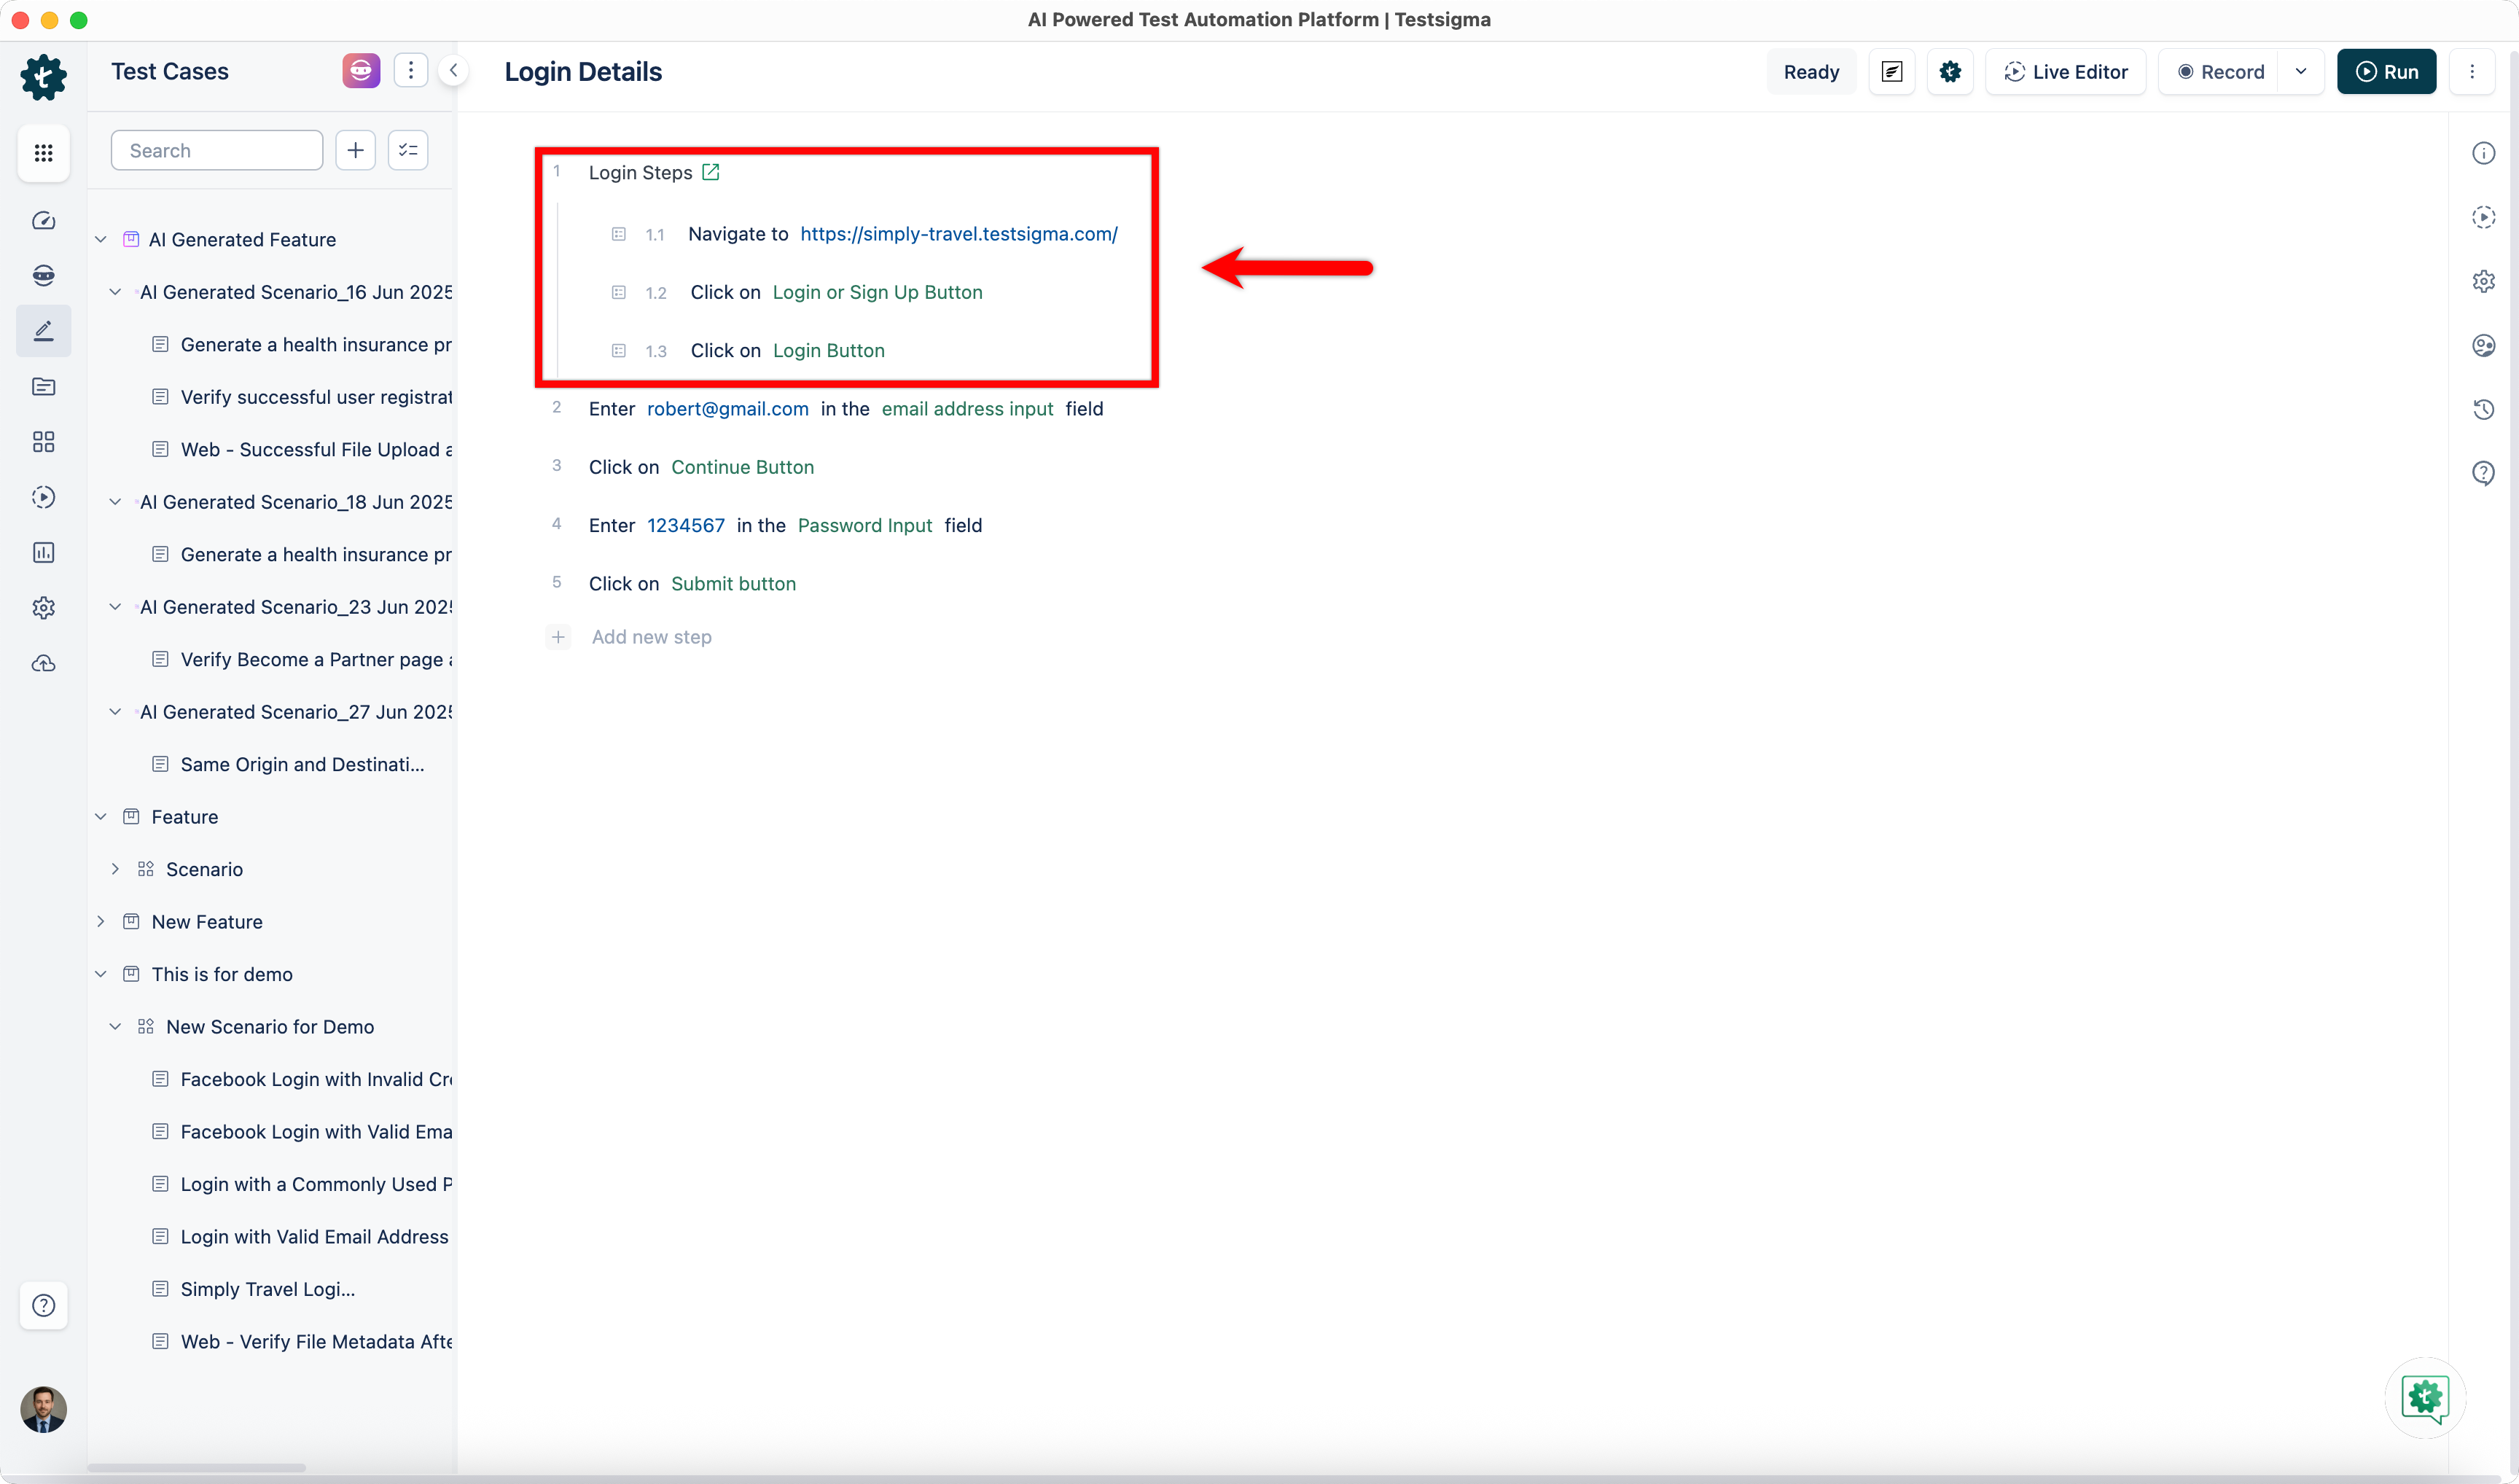
- After updating any step click Update Step to save the changes.
- You can edit test data and elements for specific test cases but not the NLP.
- Edits made for a step group within a test case do not affect the original step group.
Create a Step Group From a Test Case
- From the left navigatio bar, go to Create Tests > Test Cases.
- Open the Test Case from you want to create a step group.
- Once you start selecting the test steps, an option bar will appear on top of the test steps. Select all the steps you want in a step group and click on Create Step Group.
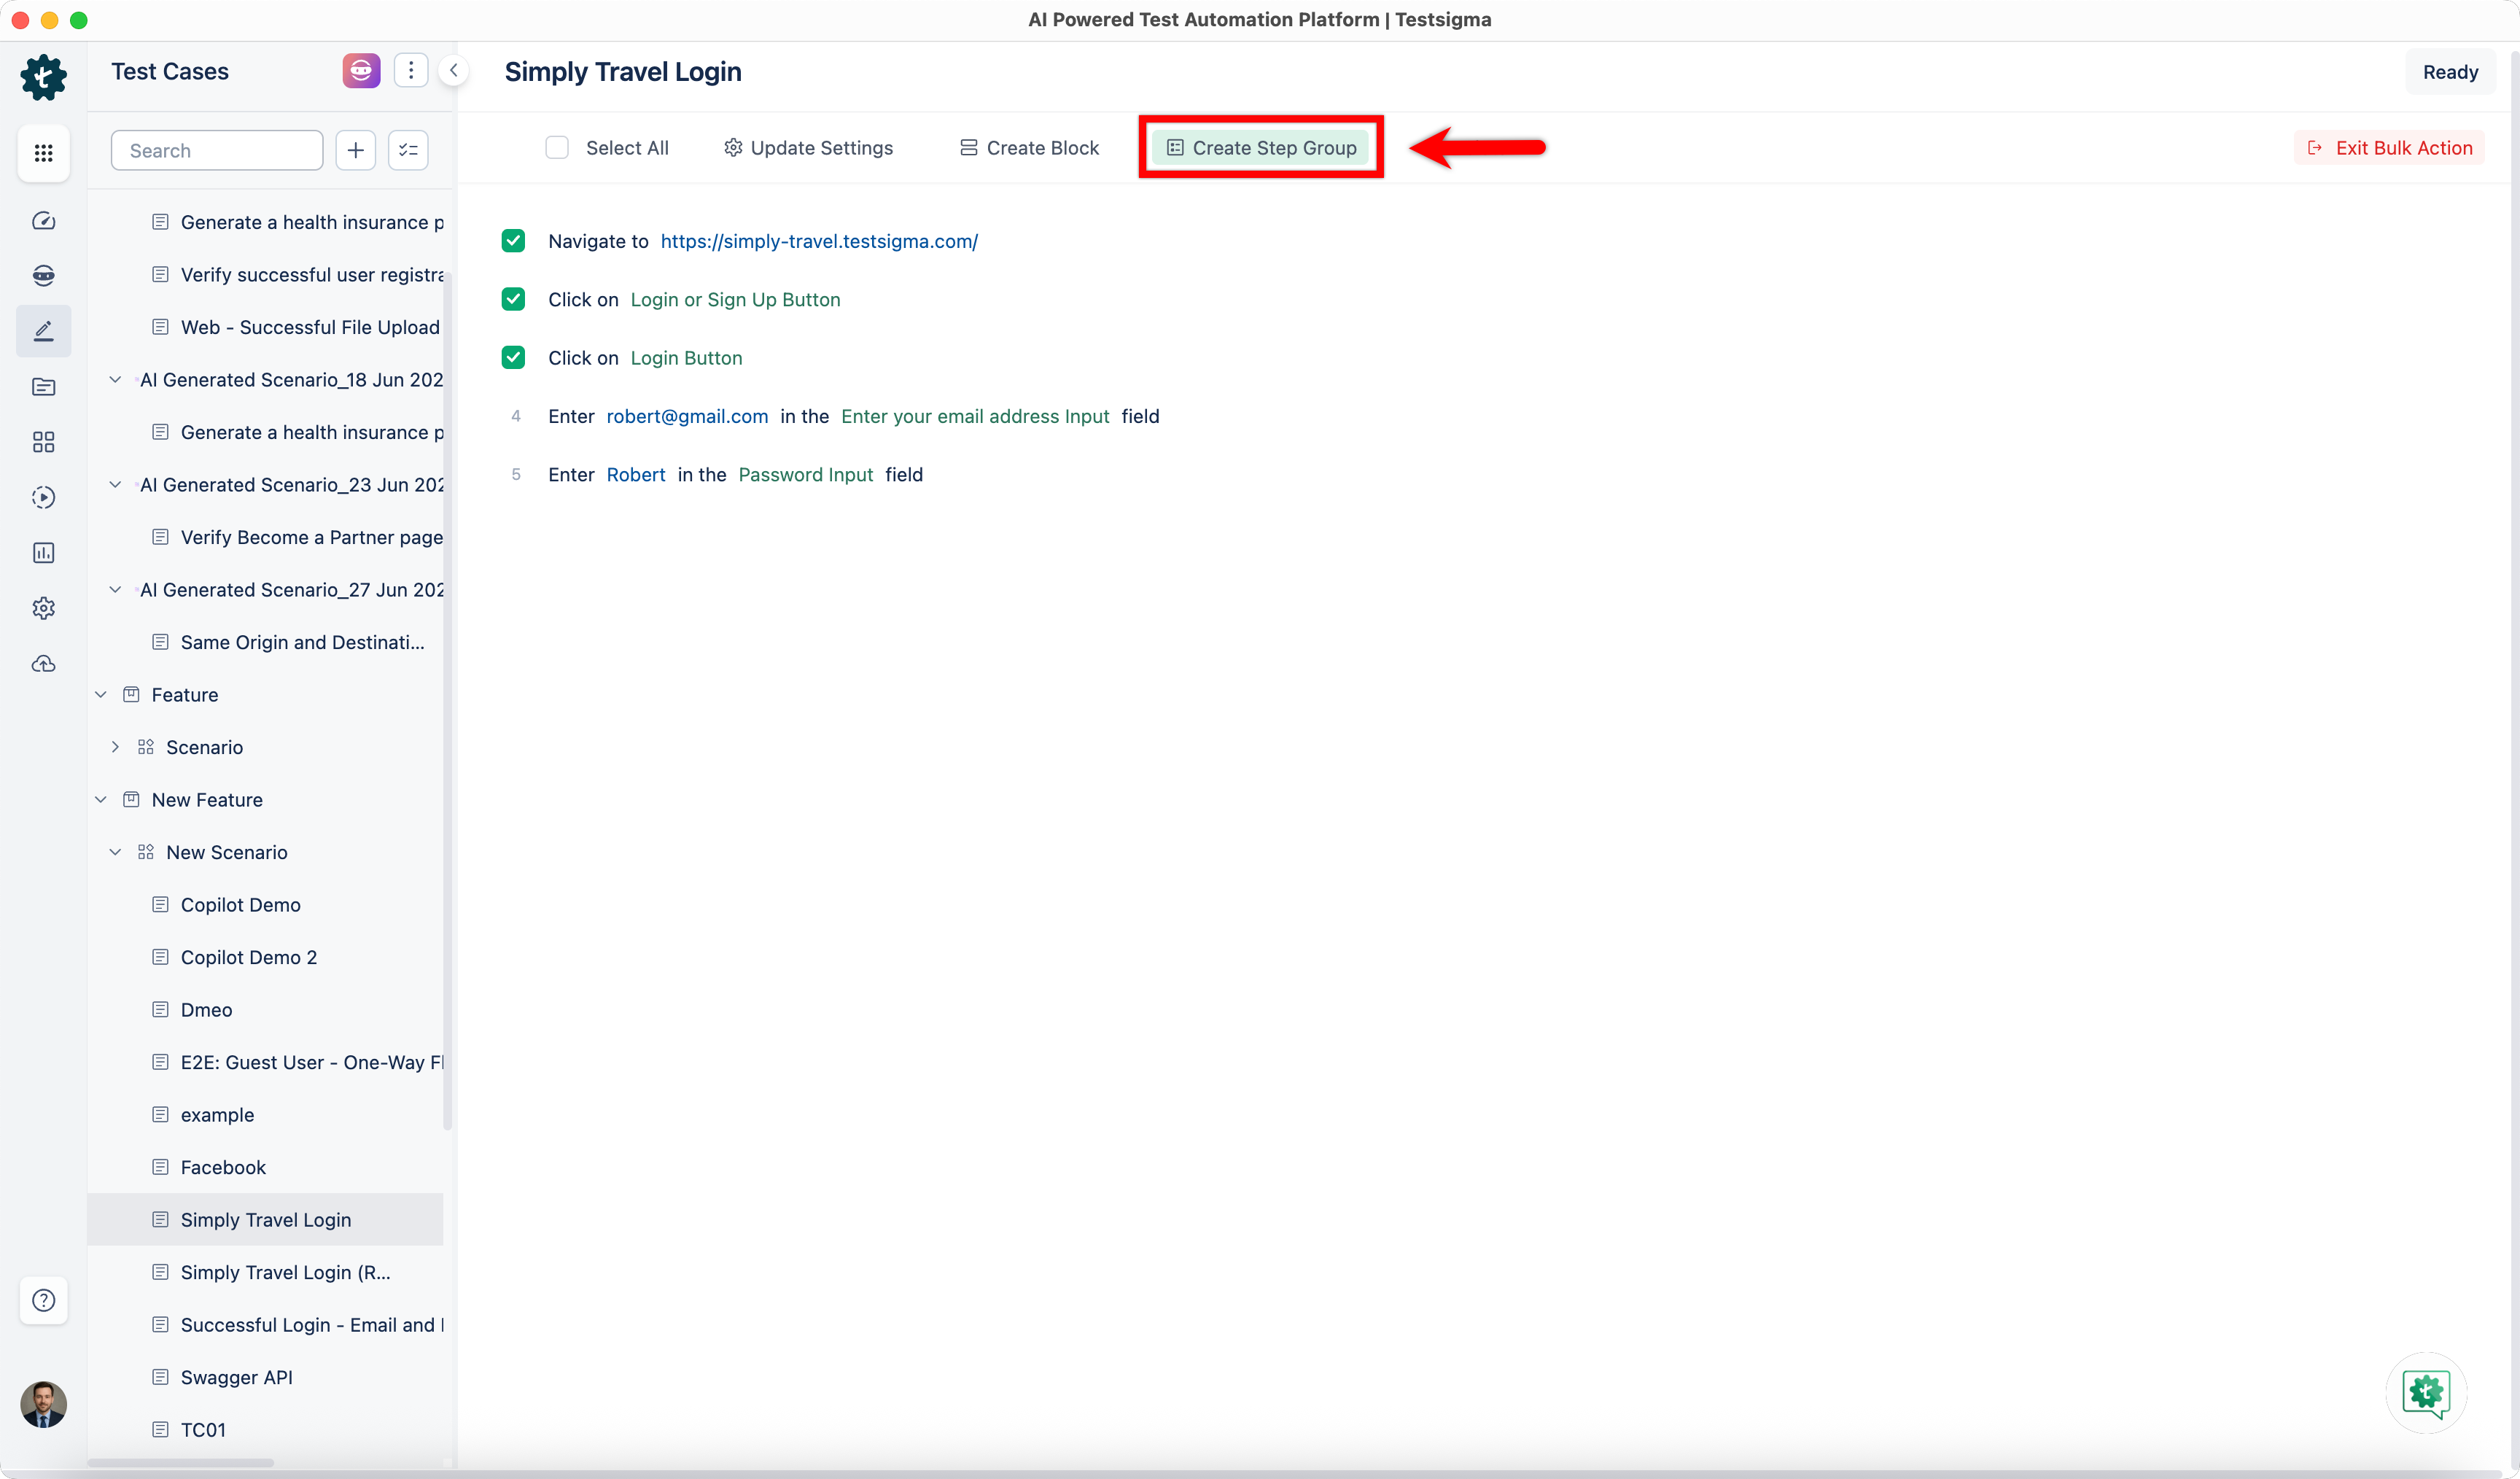
-
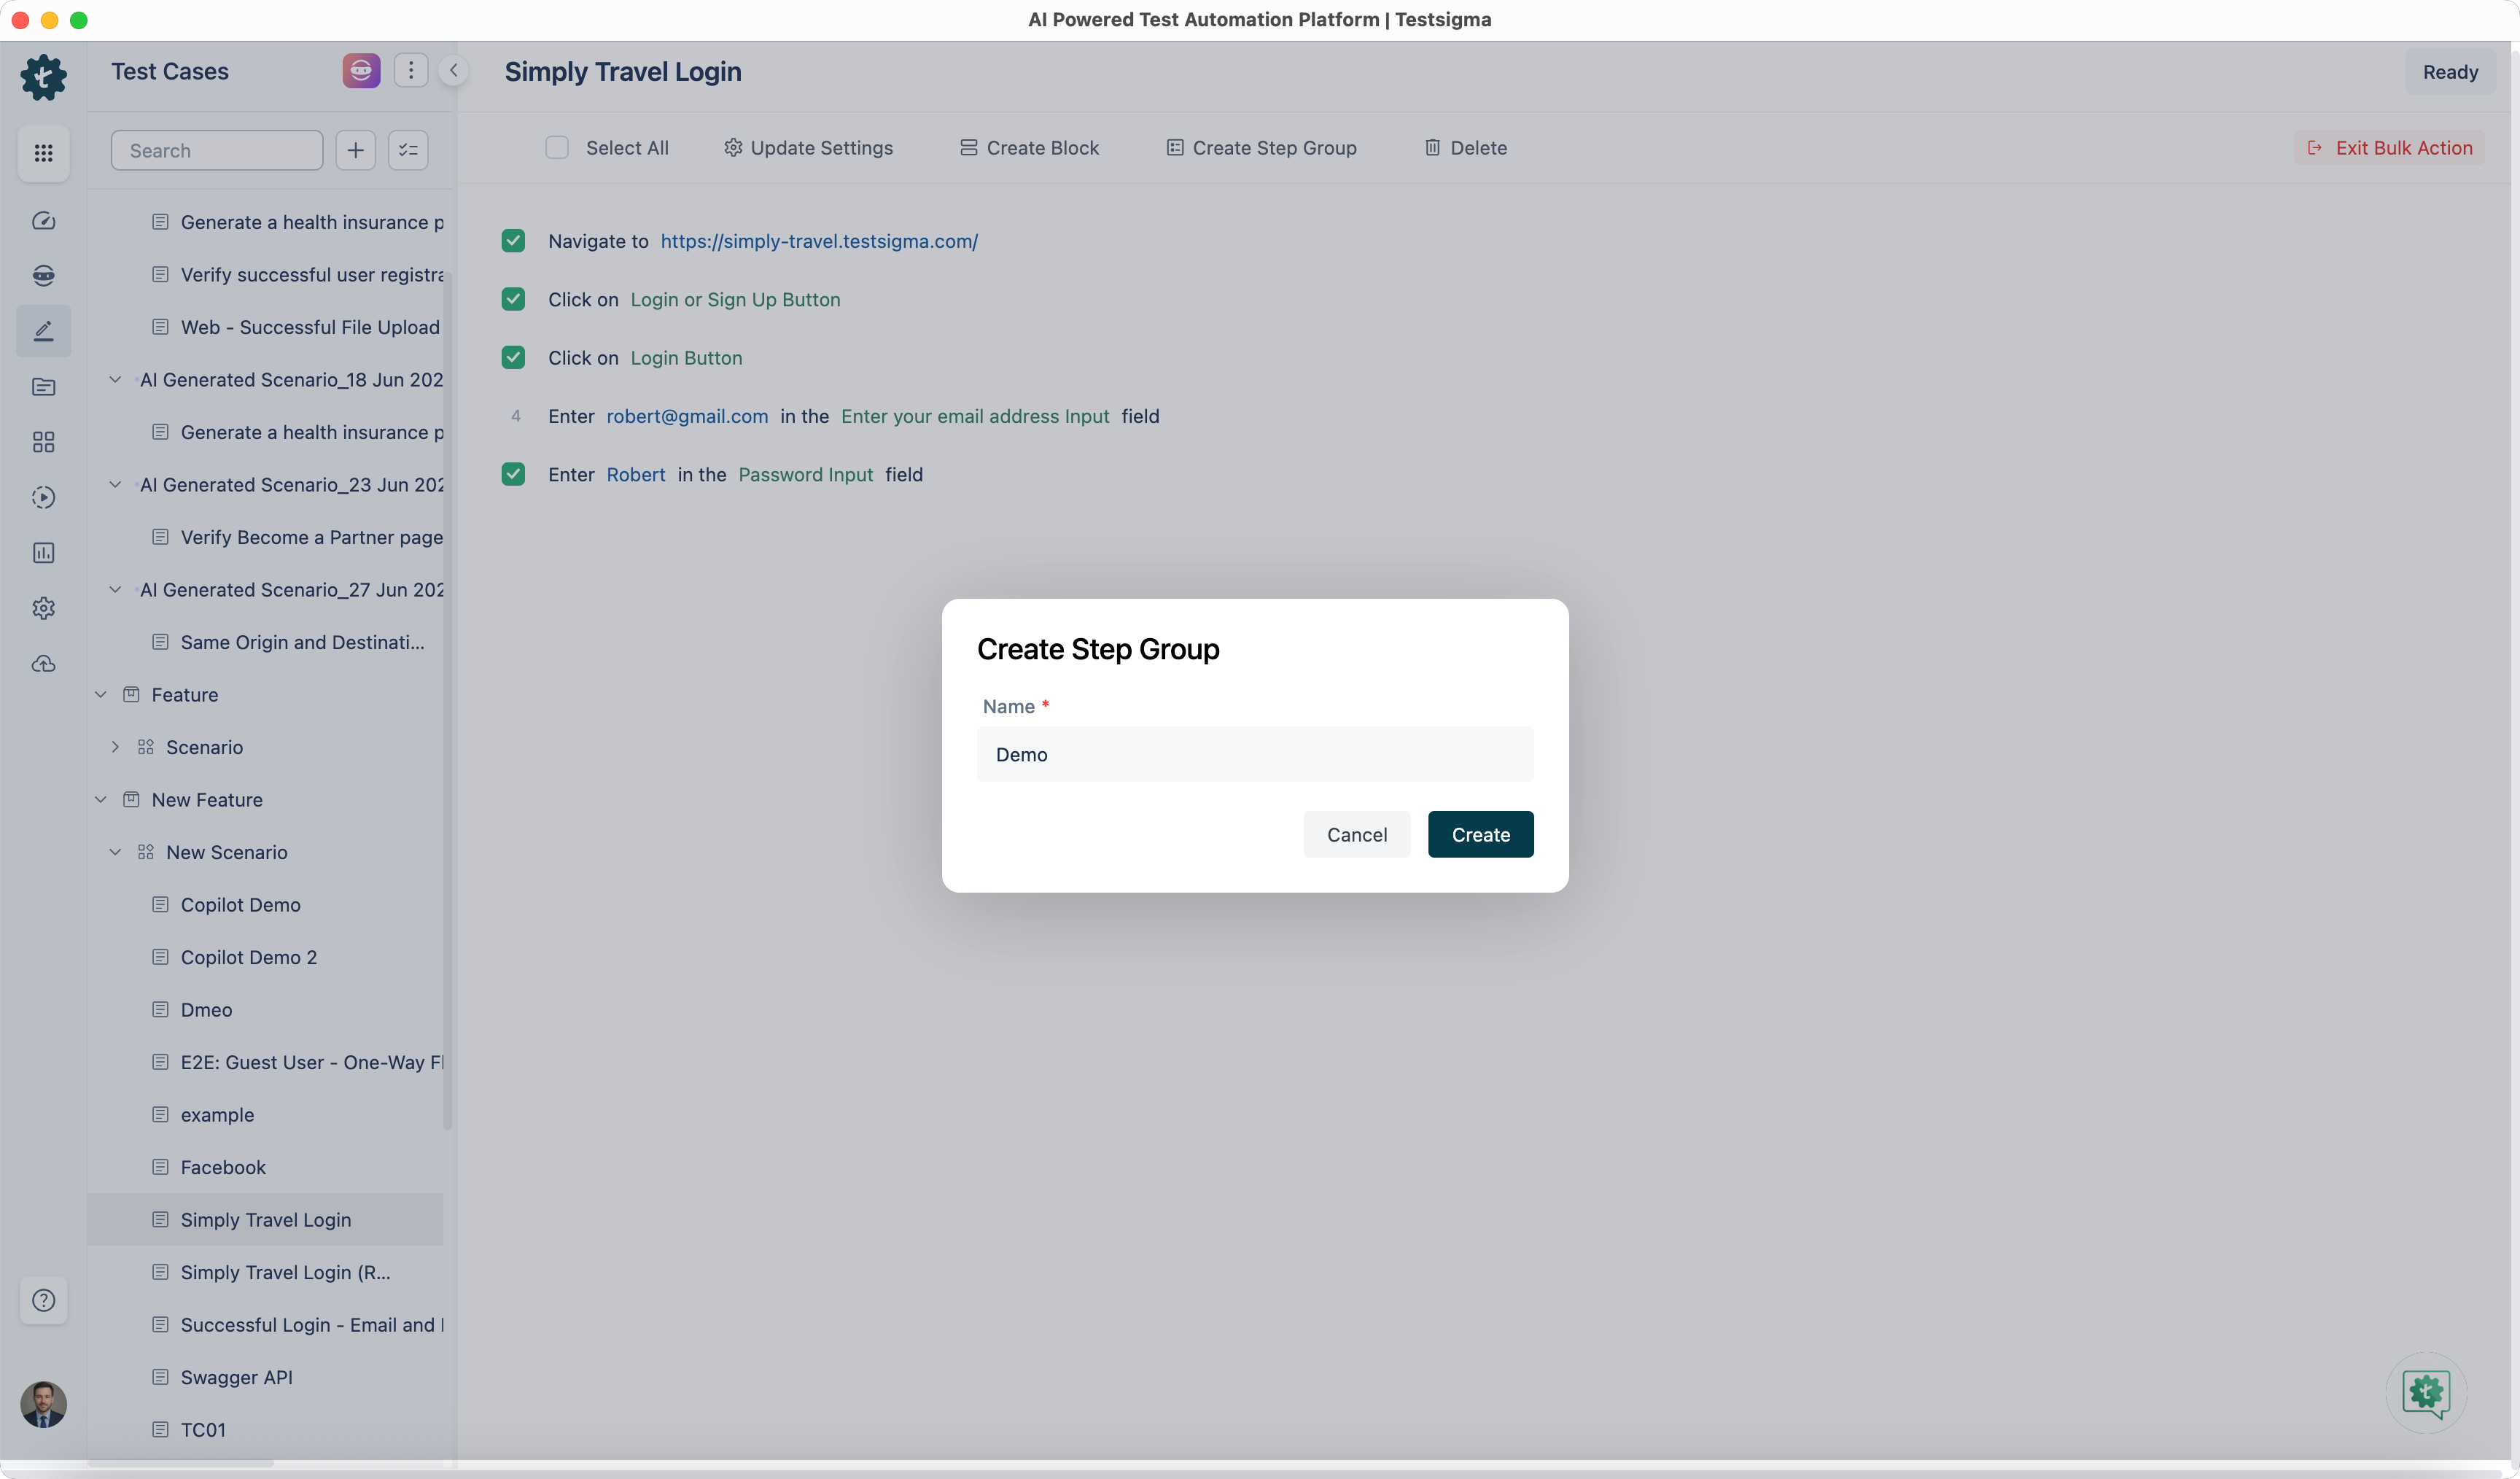
This will open a pop-up as below:

- If you click on the Create, a new step group with the selected test steps and the given name would be created.
- If you click on the Create and Replace button, a new step group with the selected test steps and the given name would be created and the selected test steps would be replaced by the created step group.
If you don't select consecutive test steps then the pop-up that appears won't show you the Create and Replace button.
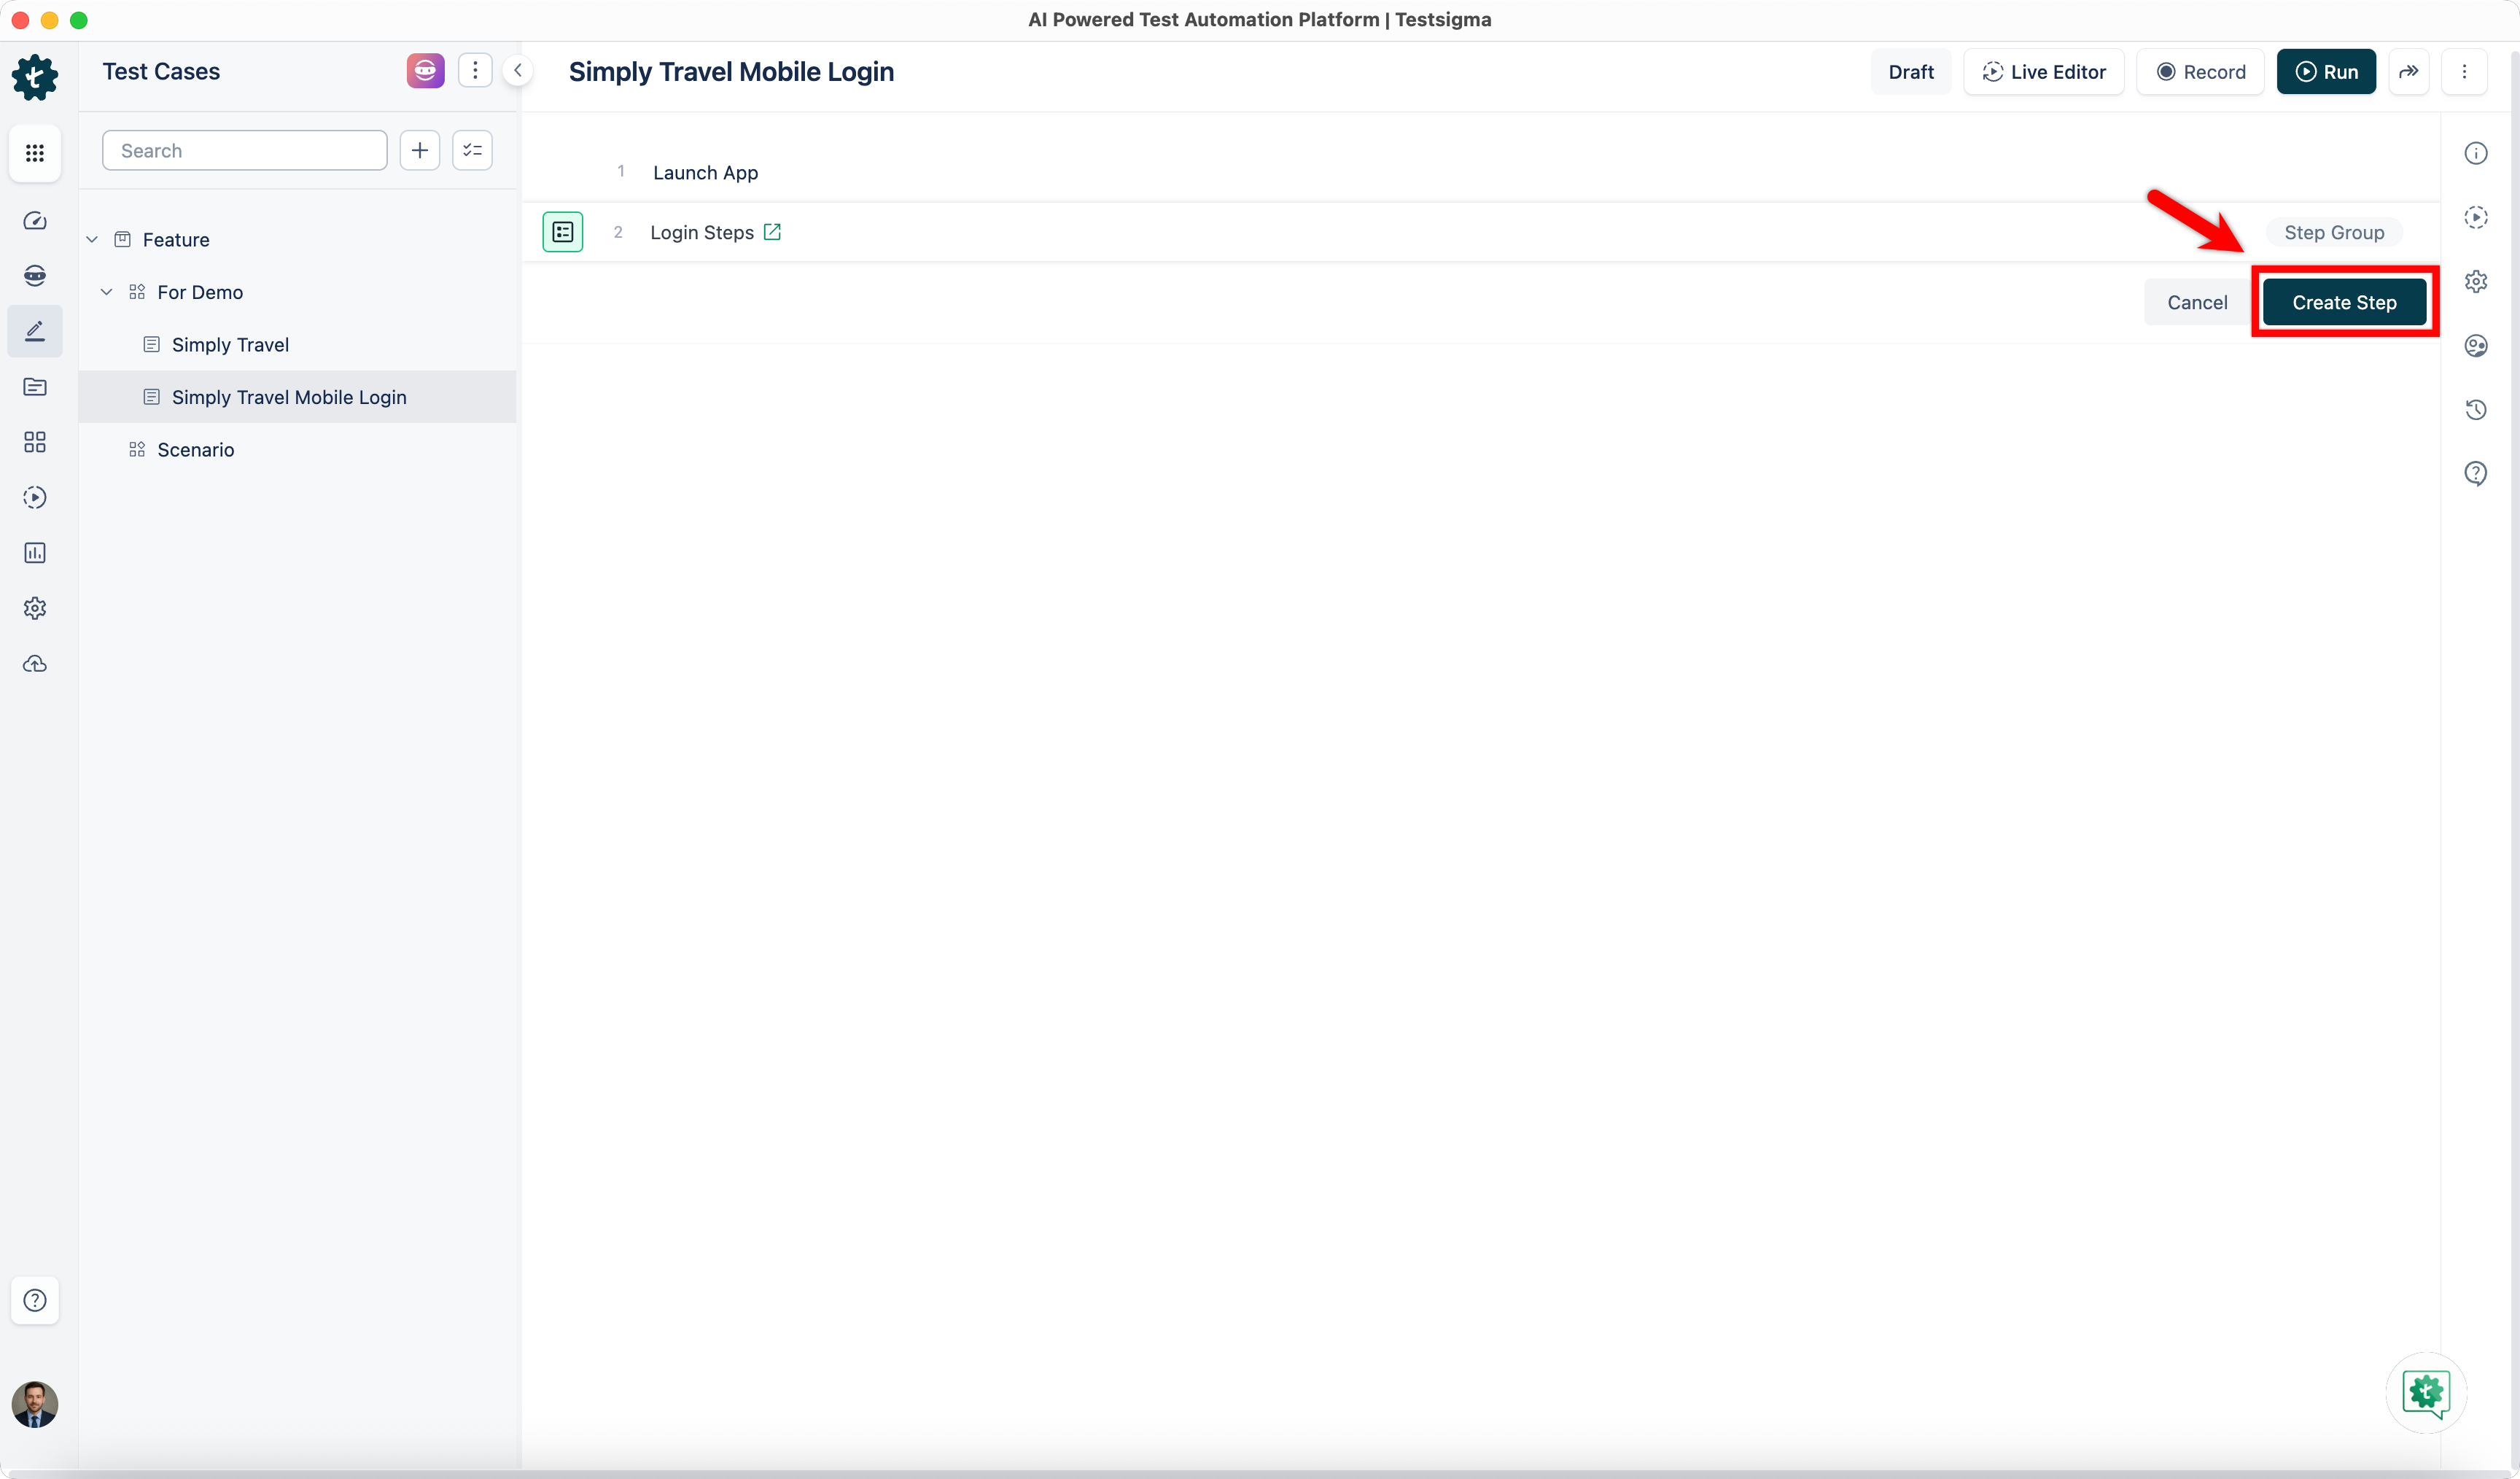
Use Step Group in a Test Case
- From the left navigatio bar, go to Create Tests > Test Cases.
- Expand a Feature, then expand a Scenario, and click ‘+’ next to the scenario where you want to add the test case or open a Test Case in which you want to add a step group.
- On the test case details page, click the option on the left side of the test step and select Step Group.
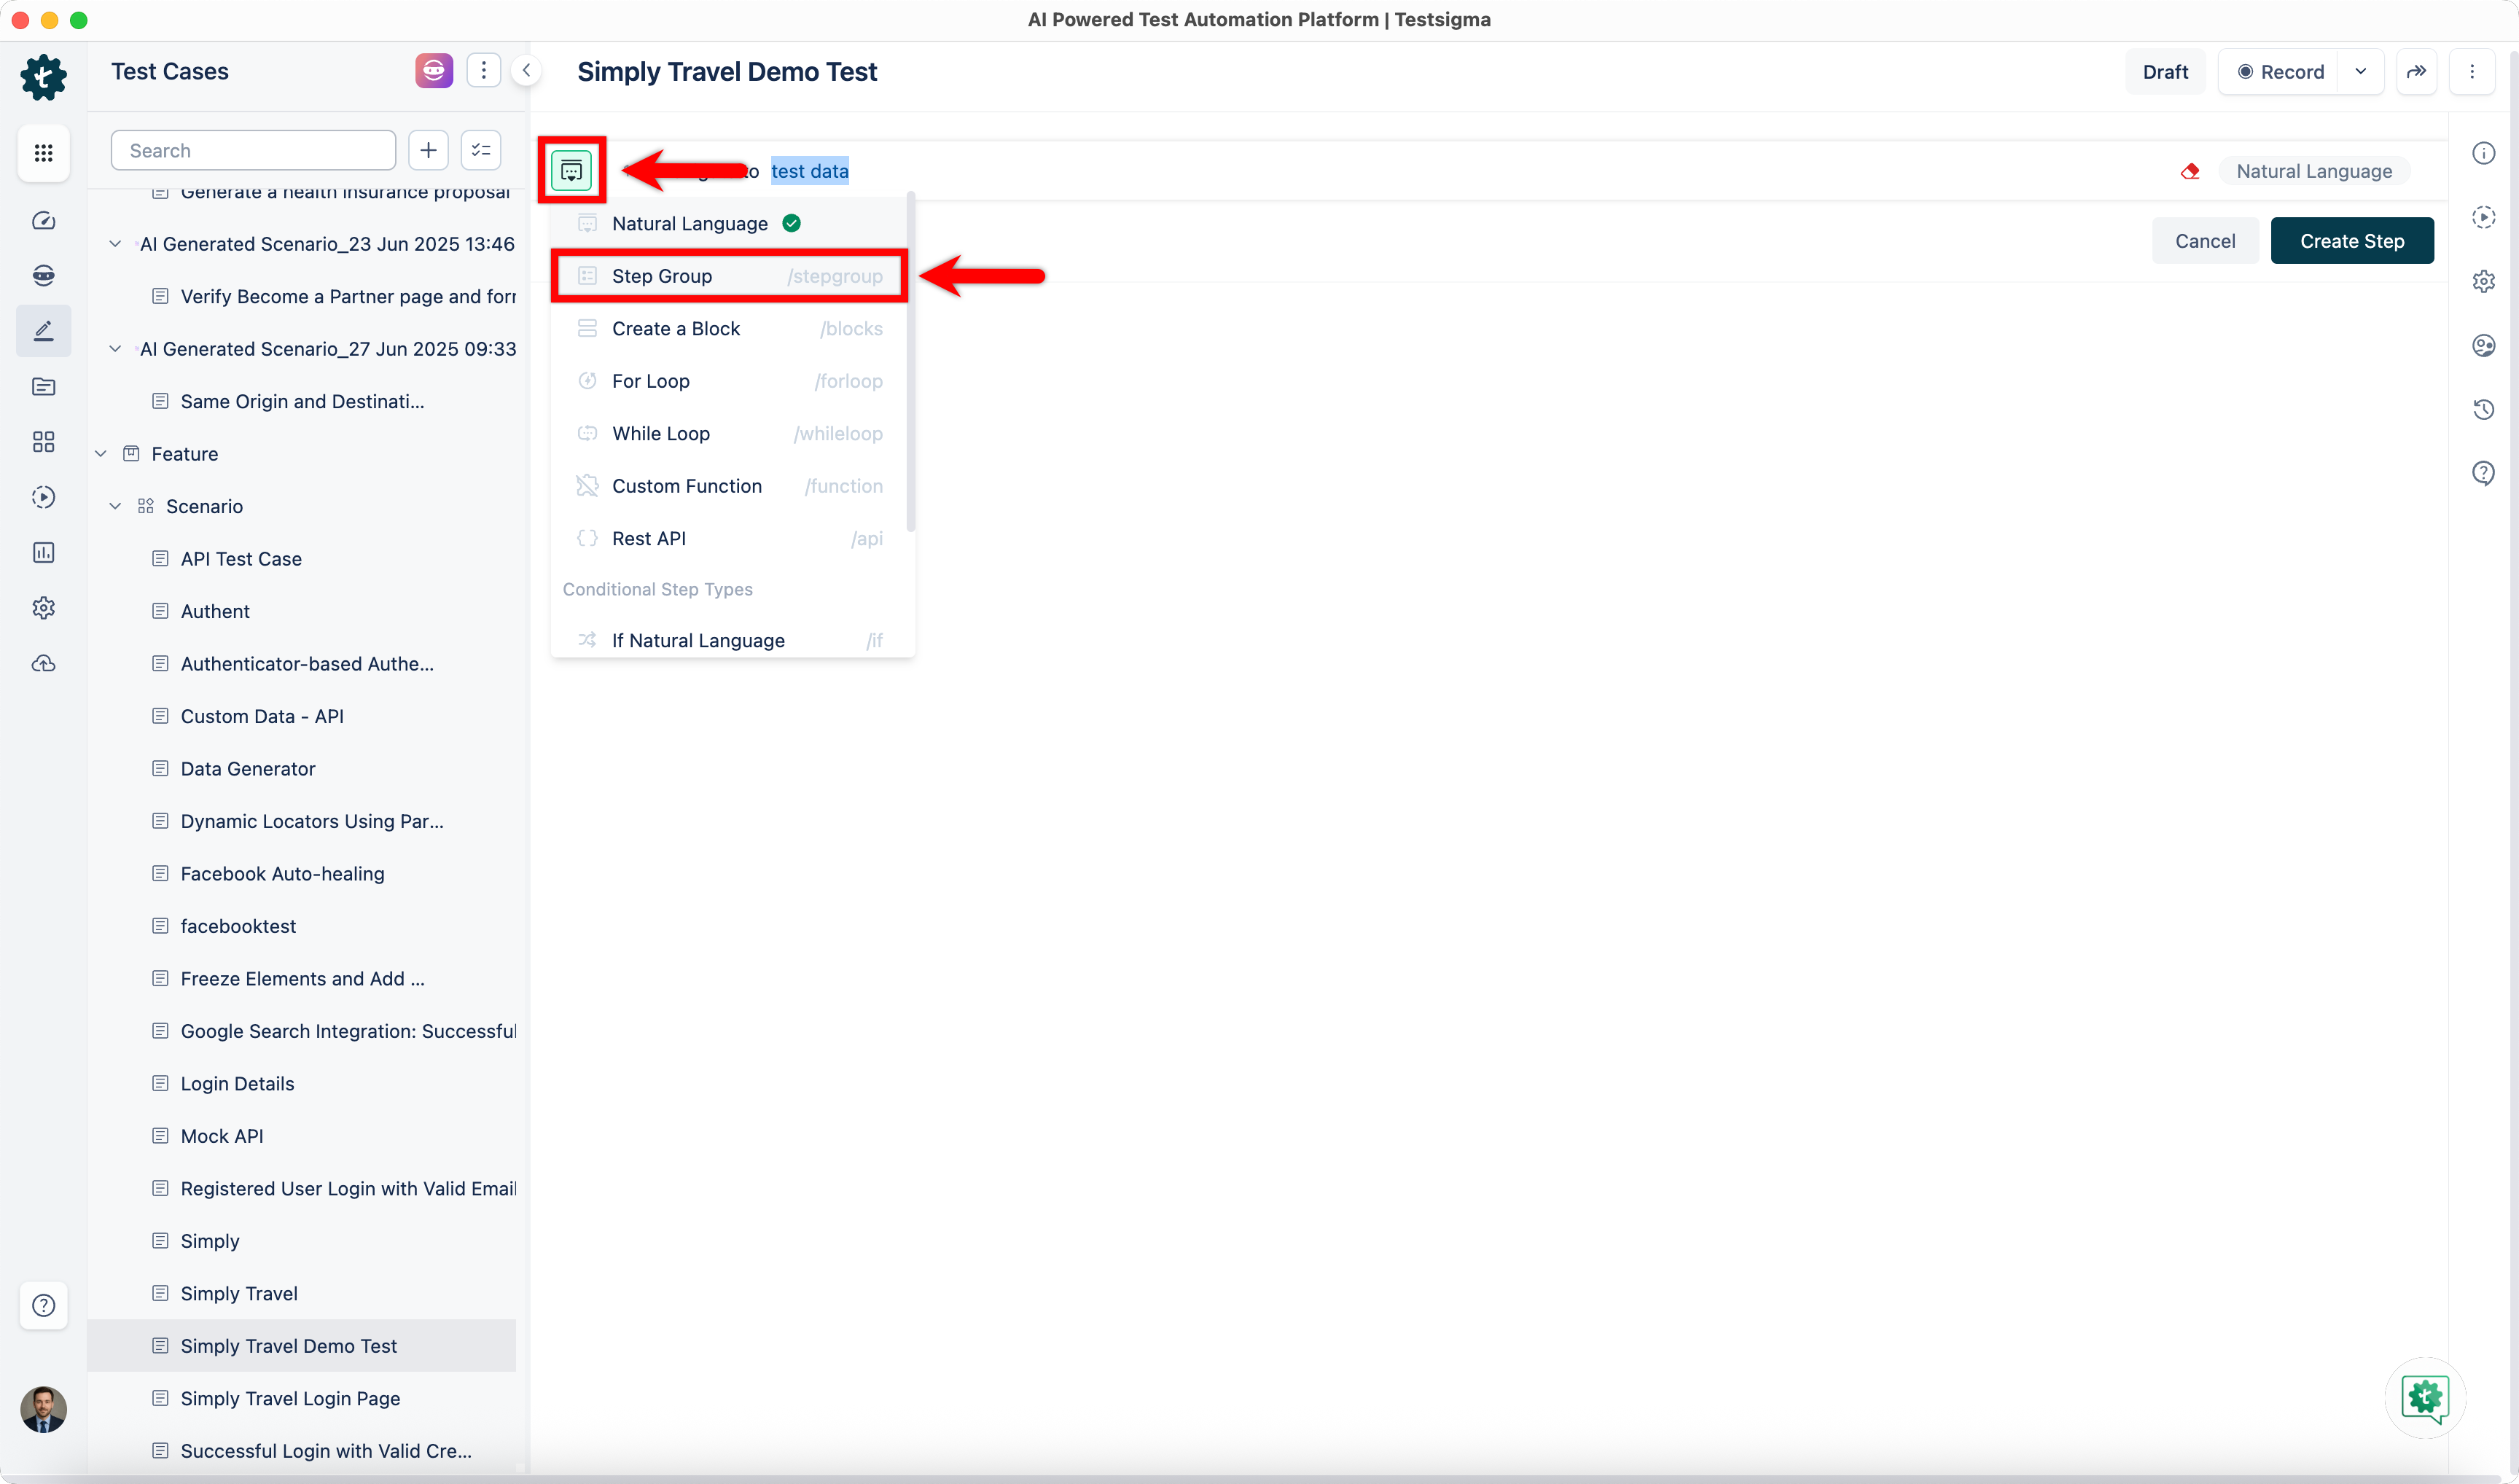
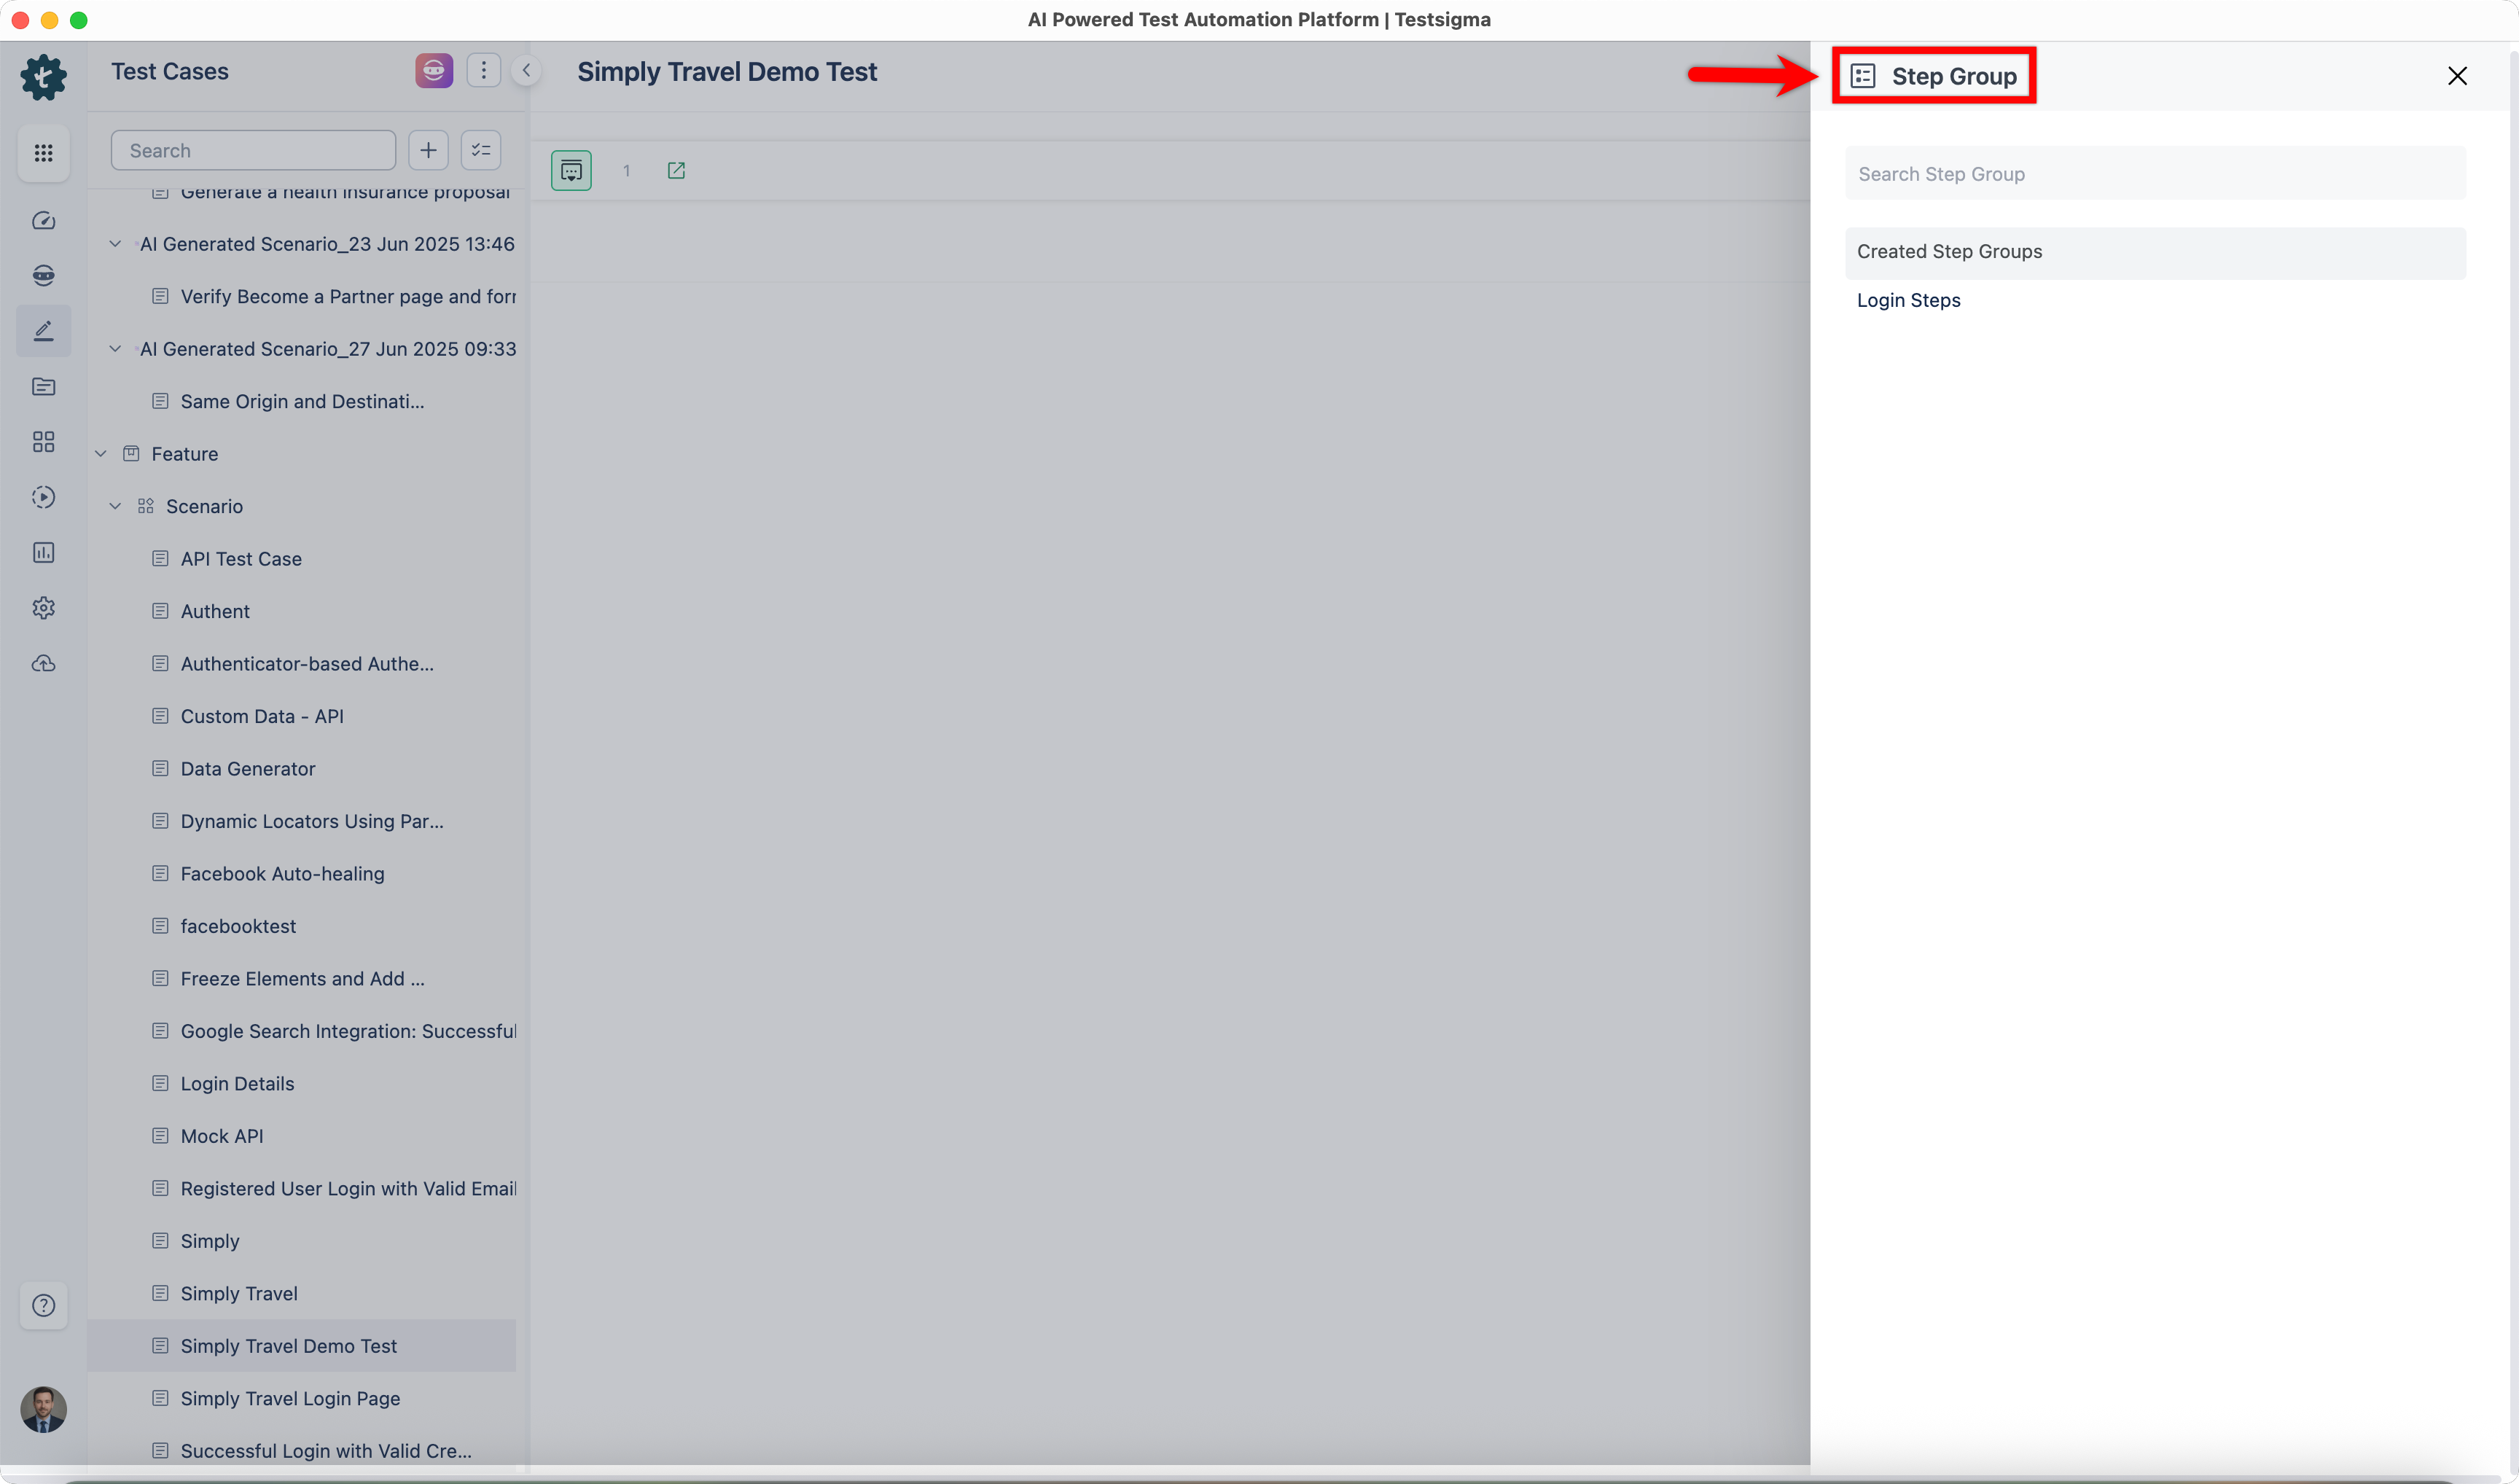
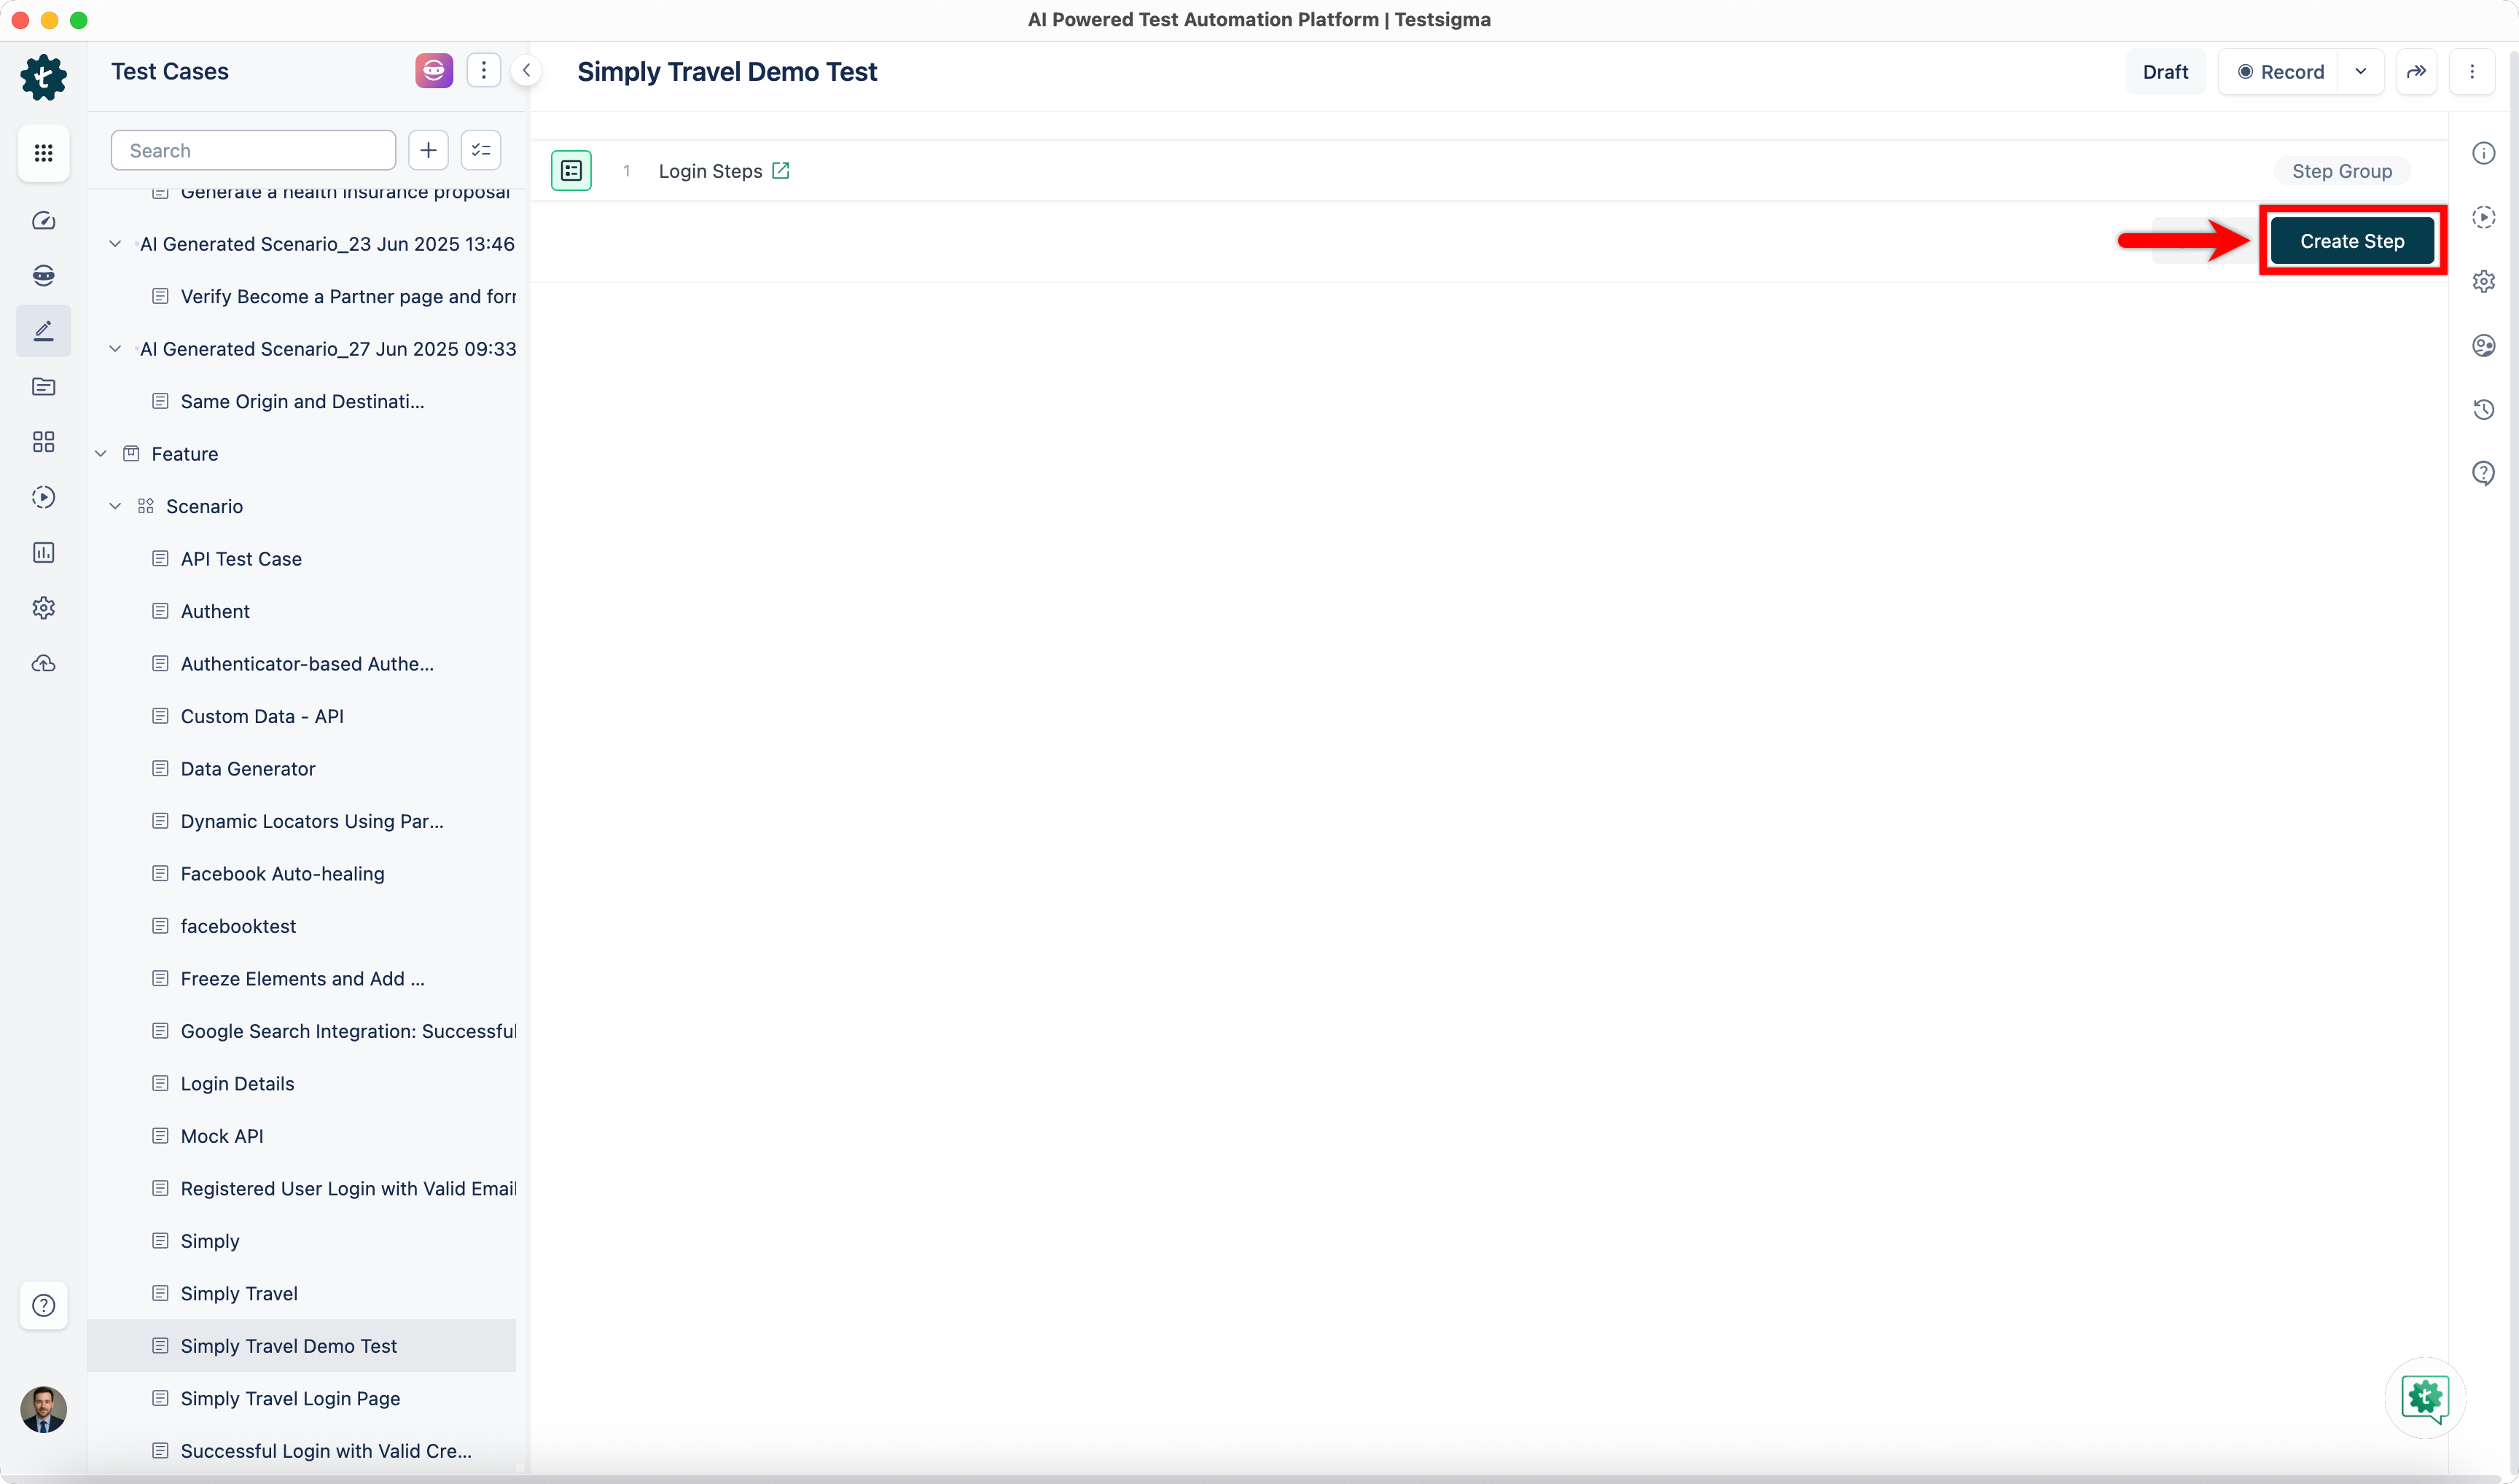
- From the Step Group list overlay, select the step group you want to add.
- Click Create Step.
You can also add a data driven step group to a data driven test case. This allows iterating through multiple data sets via the step group for every single iteration of your data-driven test case.
Use a Step Group Between Projects
- From the left navigation bar, go to Create Tests > Test Cases.
- Expand a feature, expand a scenario, and click + next to the scenario where you want to add a test case. Alternatively, open a test case in which you want to add a step group.
- On the test case details page, click the option icon next to the test step, and then select Step Group.
- In the Step Group list overlay, click Reuse Step Group.
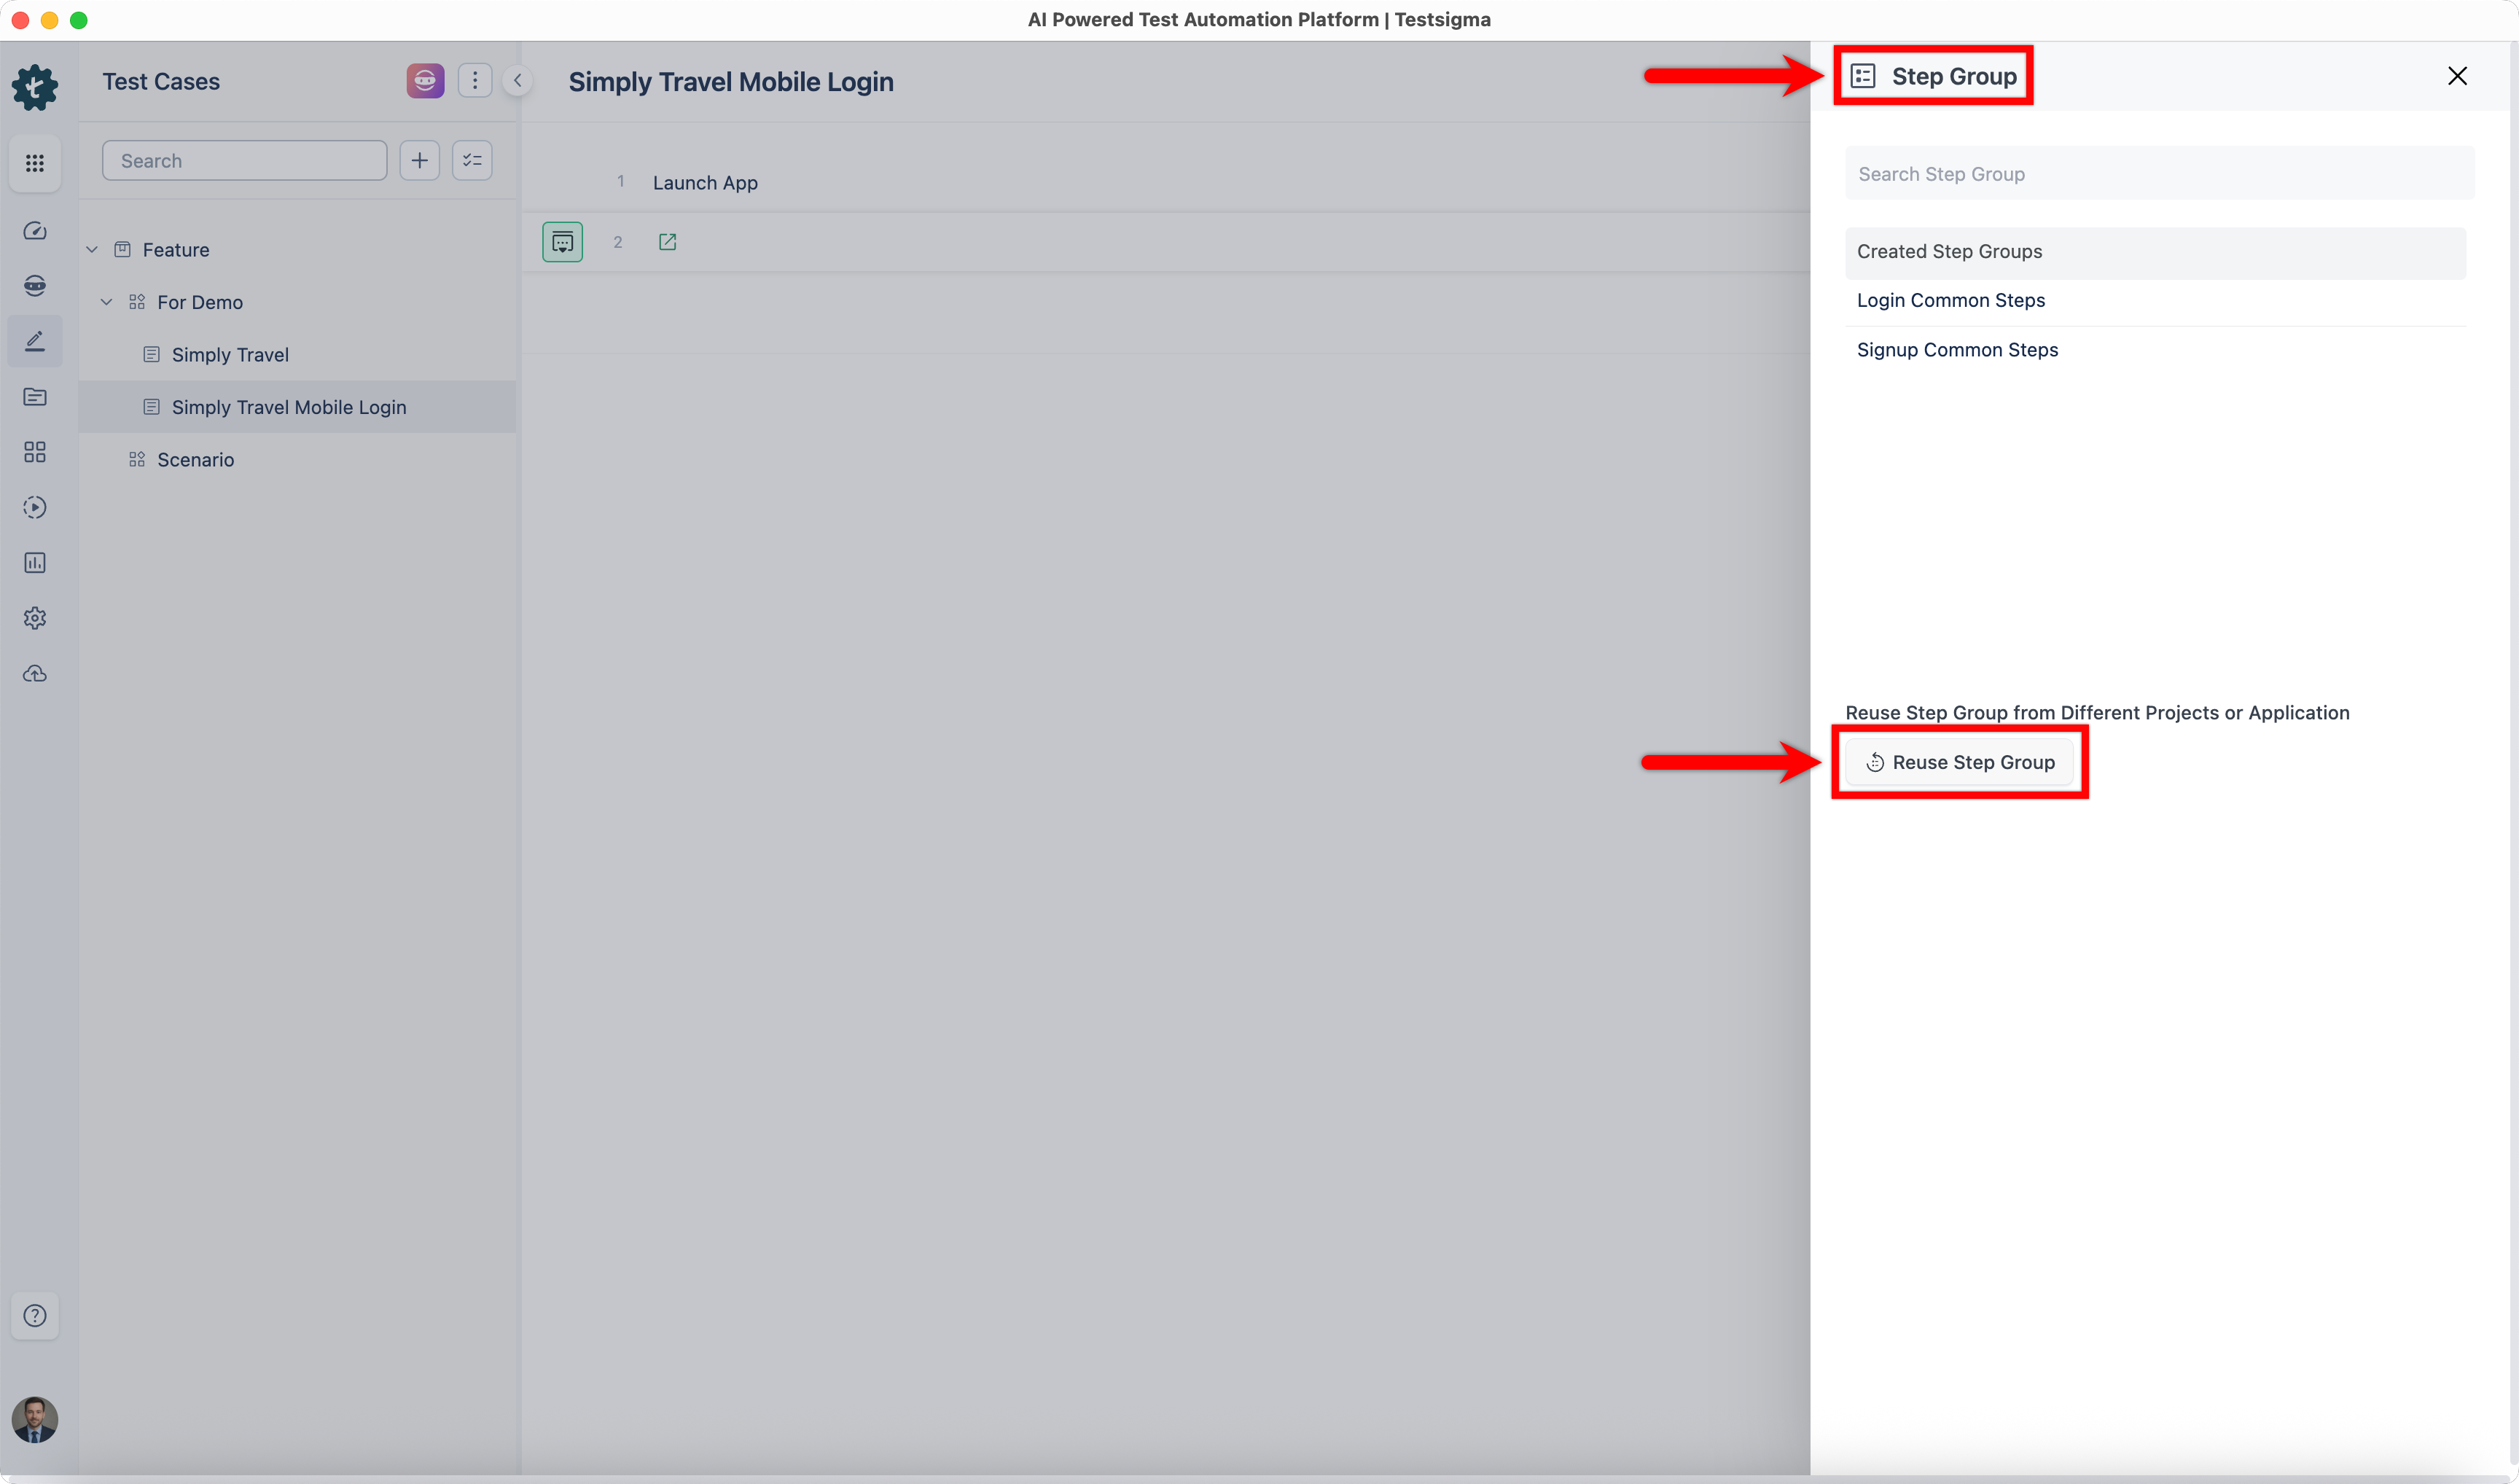
-
In the Reuse Step Group dialog:
- Select the project, application, and version.
- Select a step group from the Reuse Step Group dropdown list.
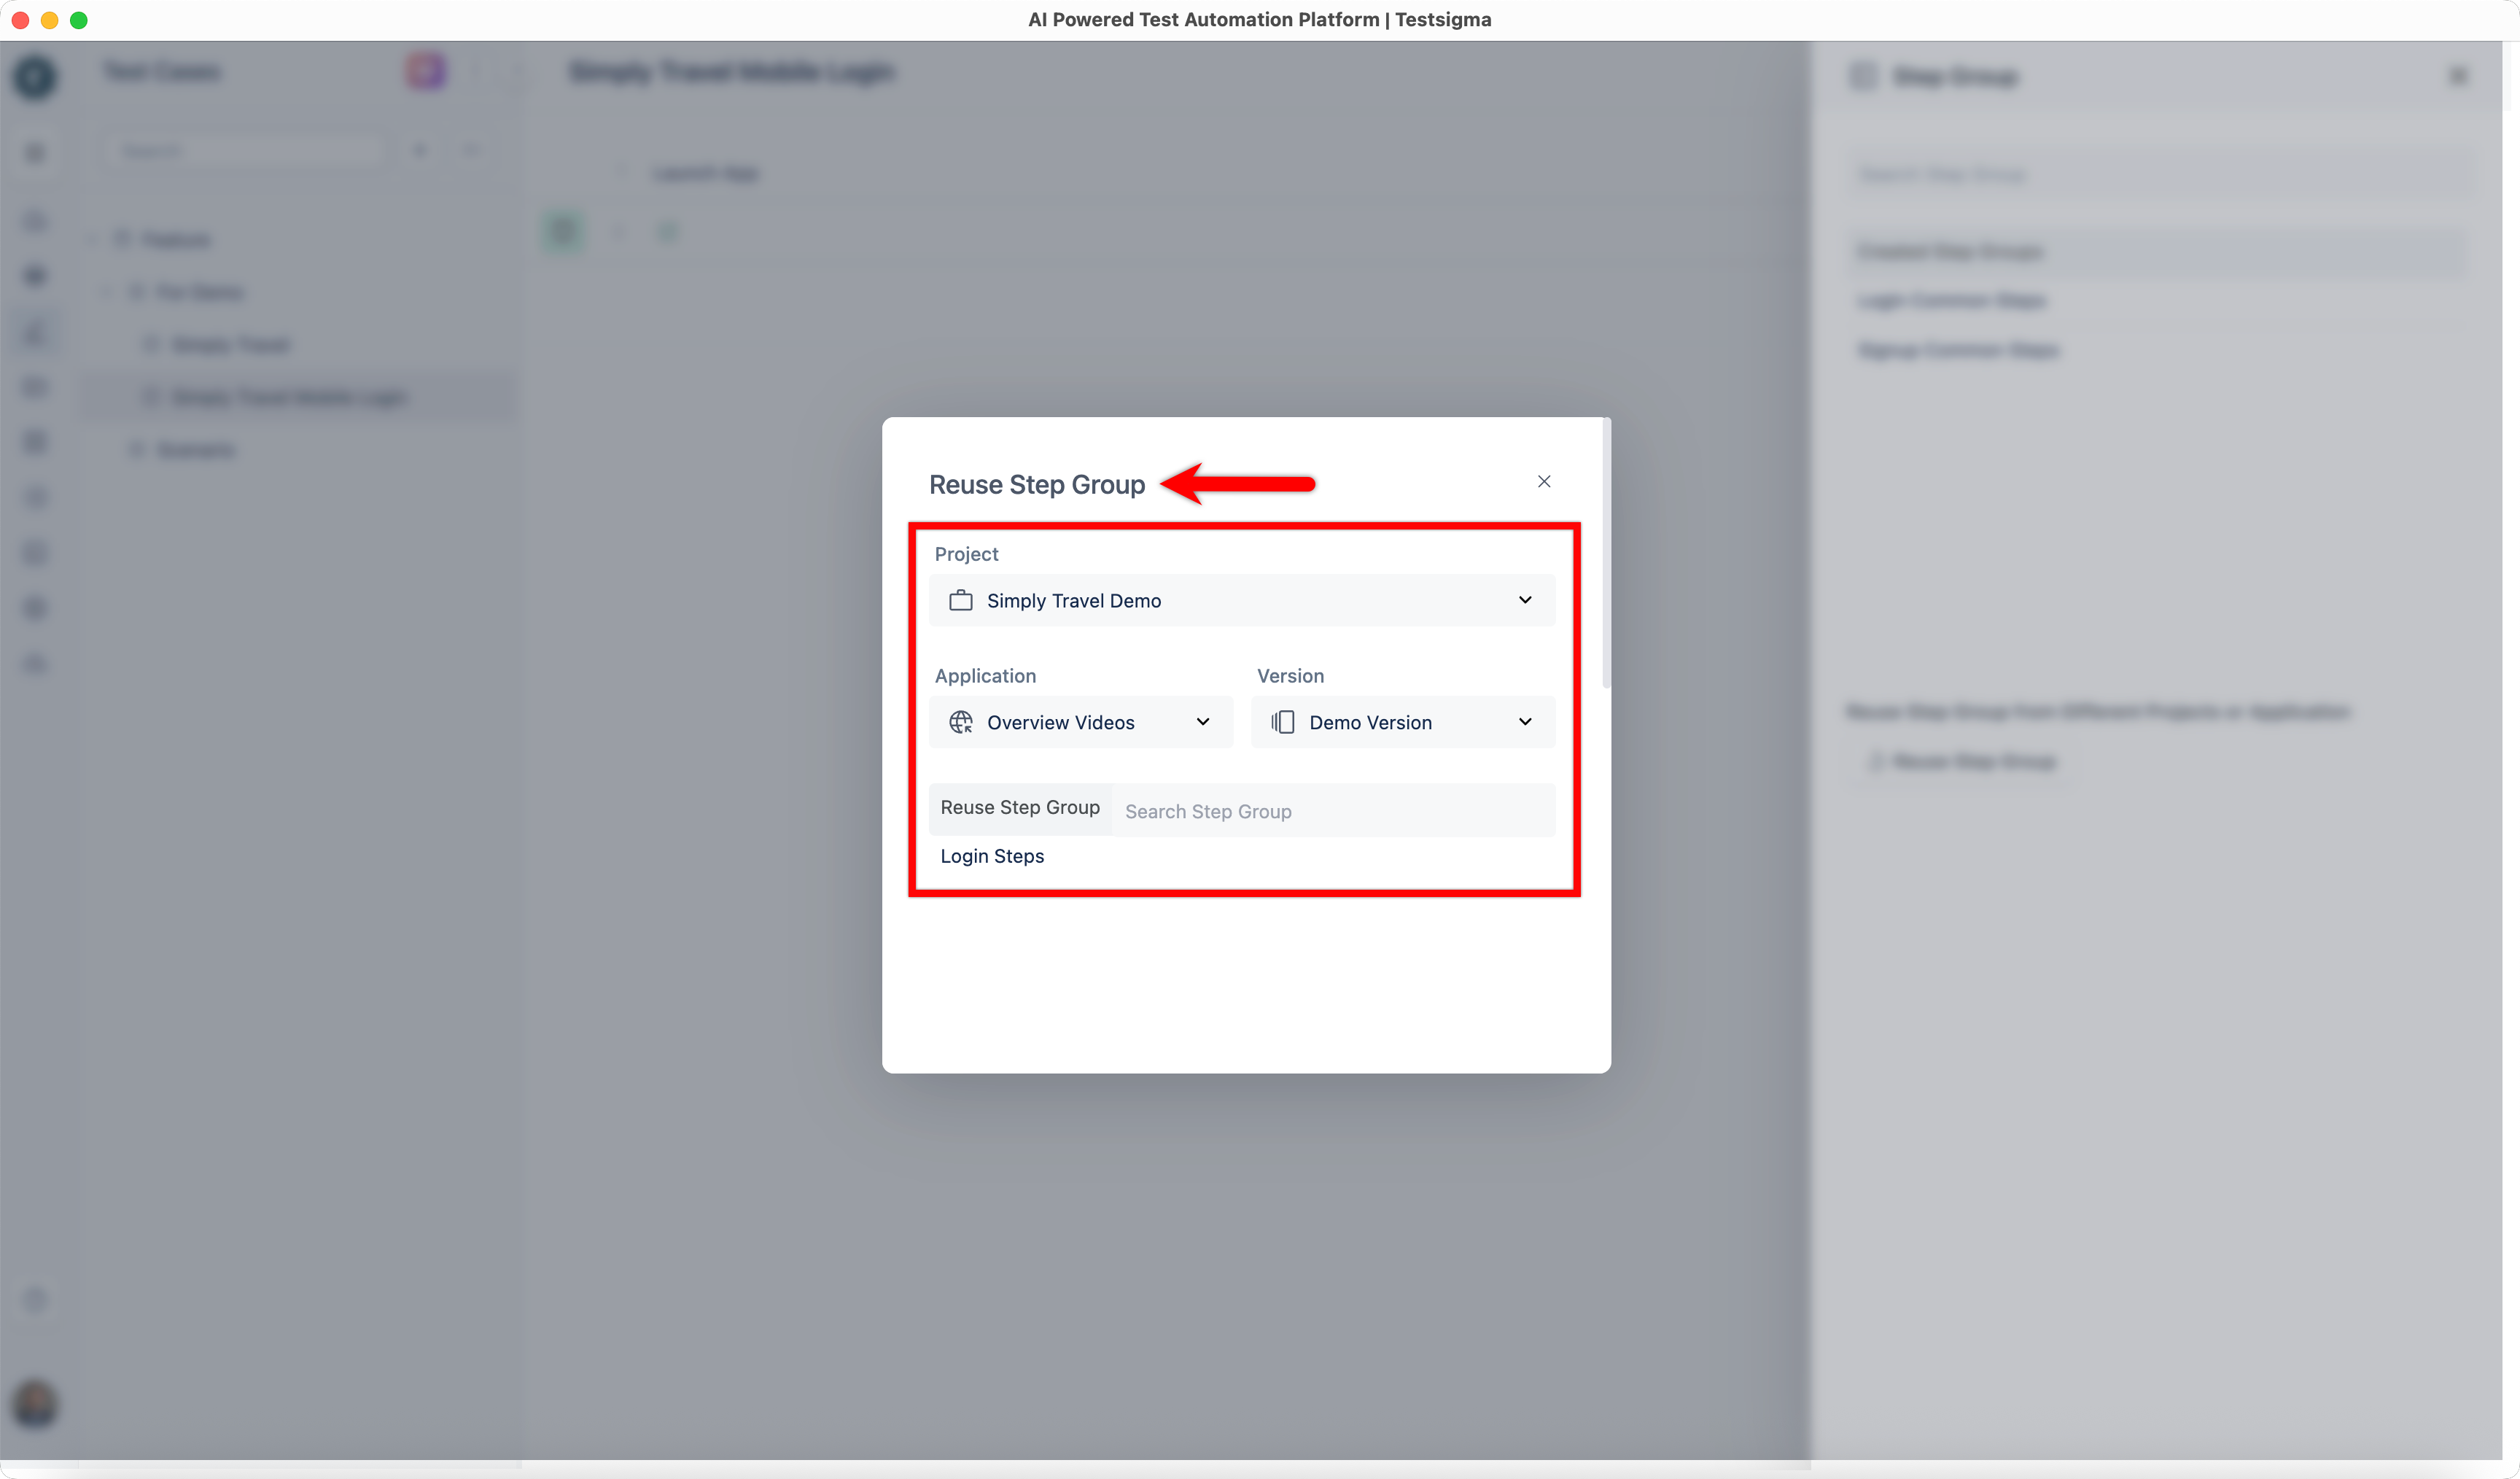
- Click Create Step.
- The step group is added from the selected project.
Step groups reused across different application types may contain element locators that do not match the target application. Verify and update the locators before executing the test case.
Additional actions possible on iteration count
- Store: In a step group, when a test data profile is being iterated - an additional action is possible. The iteration count can be stored into a variable for later use. (Iteration count is the current count that is being iterated over the associate test data profile in the step group in Testsigma.)
- If: The test data set values, from a test data profile being iterated, can be compared within an if condition too. Below screenshot shows the NLP (The NLP can be added as a part of add-on String Compare. You can find the add-ons to use here: https://testsigma.com/addons):
Want to contribute or report missing content?