- integrations

Integrating MS Teams with Testsigma
Integrate Microsoft Teams with Testsigma to receive test plan execution notifications in a Teams channel in real time. The webhook is created using the Workflows app in Teams, powered by Power Automate.
Prerequisites
Before you begin, ensure that:
- You have owner or admin access to the Microsoft Teams channel where notifications are posted.
- You have access to Power Automate, which is included with Team Workflows.
- Your Testsigma account has permissions to manage Settings > Integrations.
- A test plan exists. For more information, refer to the documentation on creating test plans.
Create a Webhook in Microsoft Teams
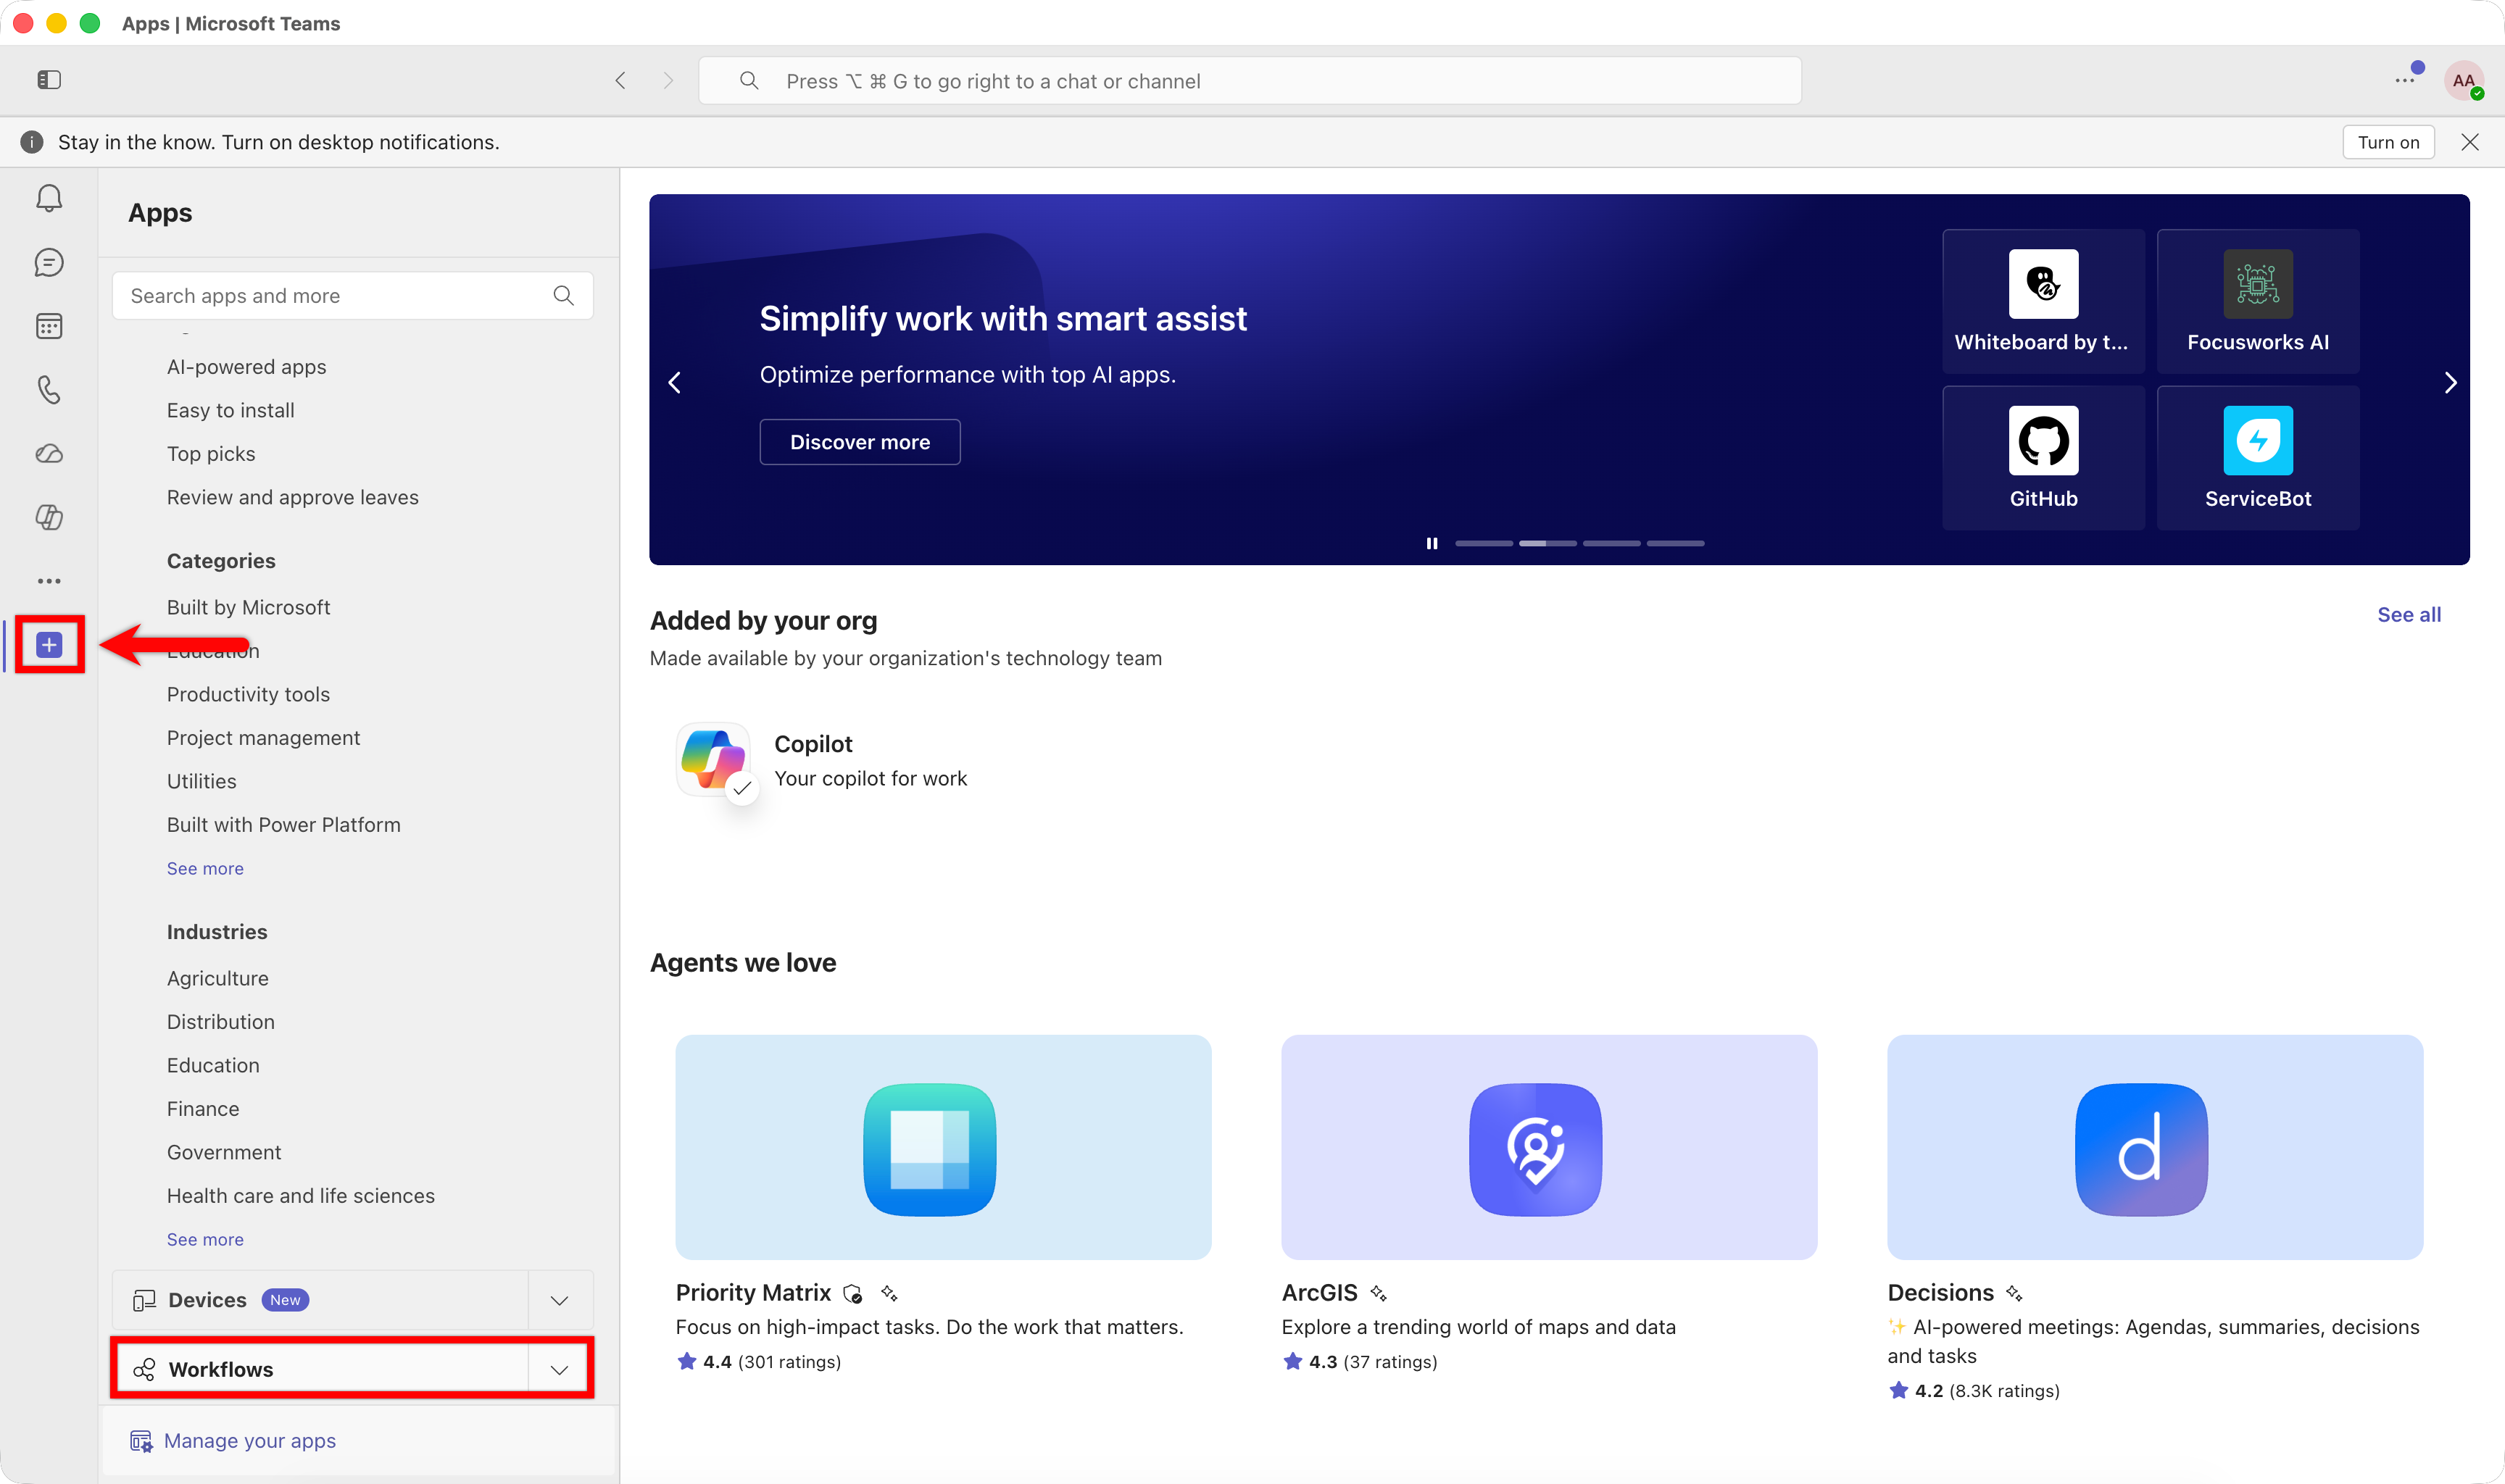
- In Microsoft Teams, go to Apps and search for and select Workflows.
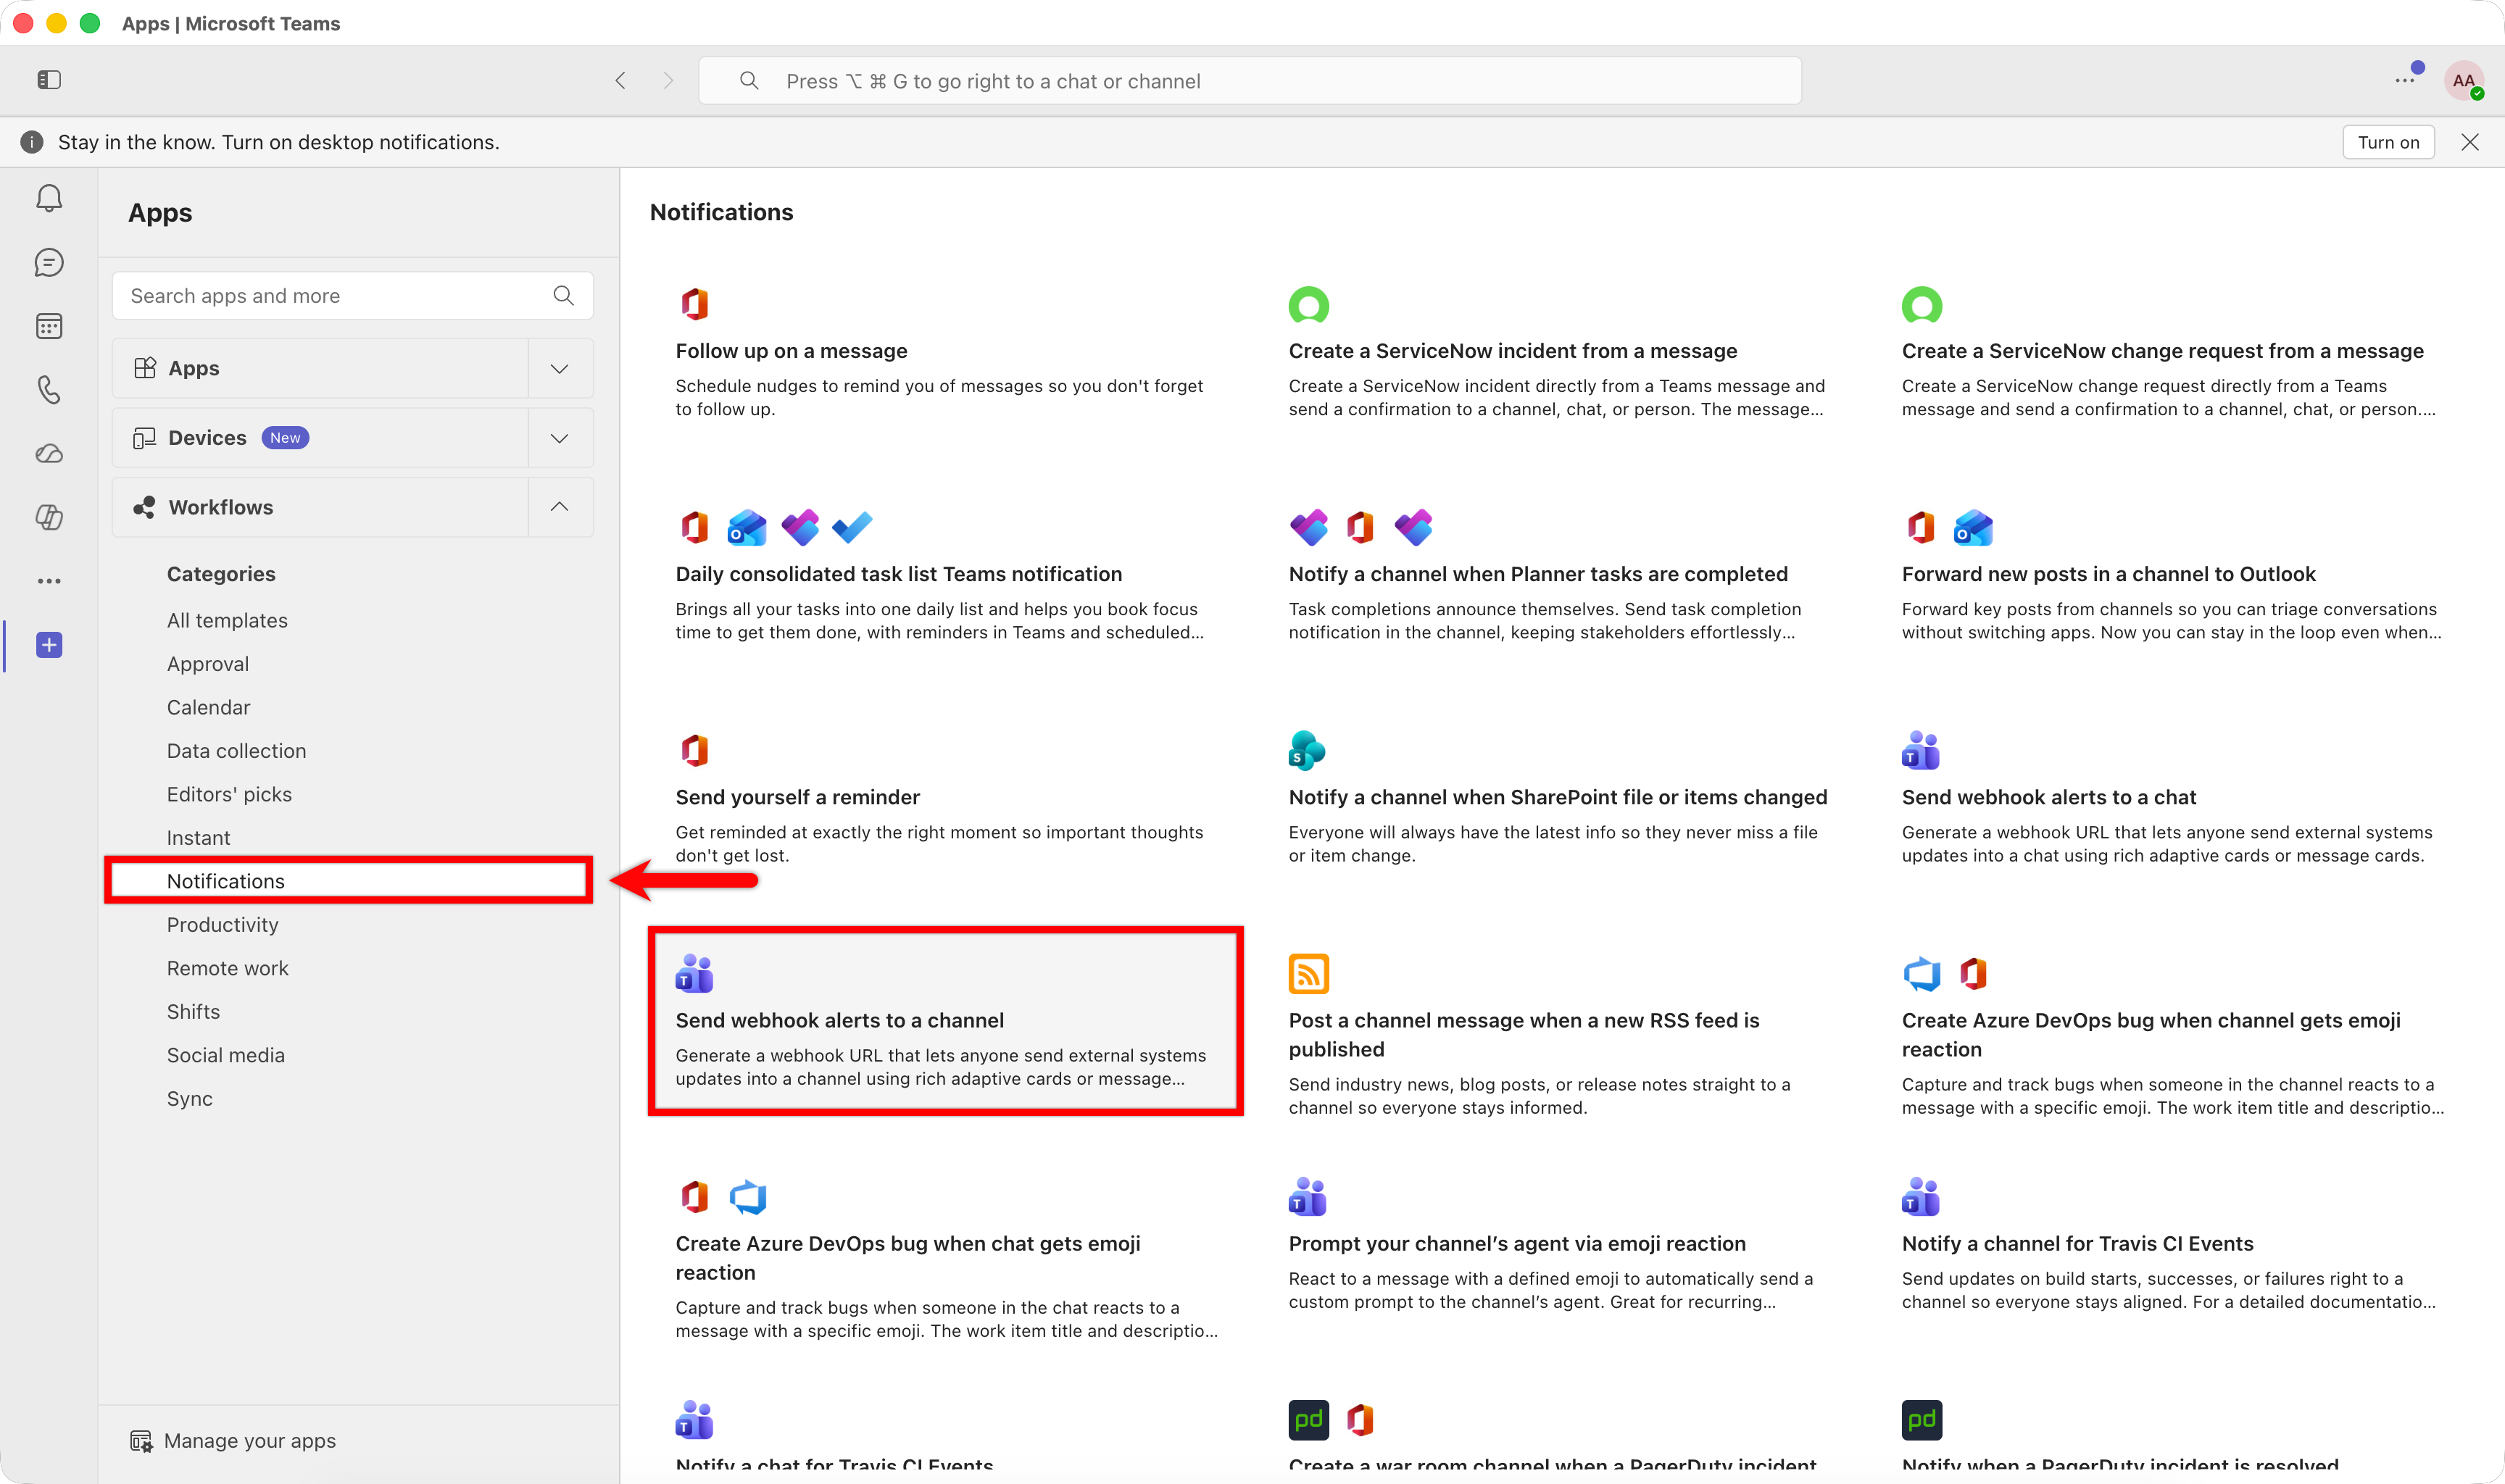
- From the list of templates, select Notifications > Send webhook alerts to a channel.
-
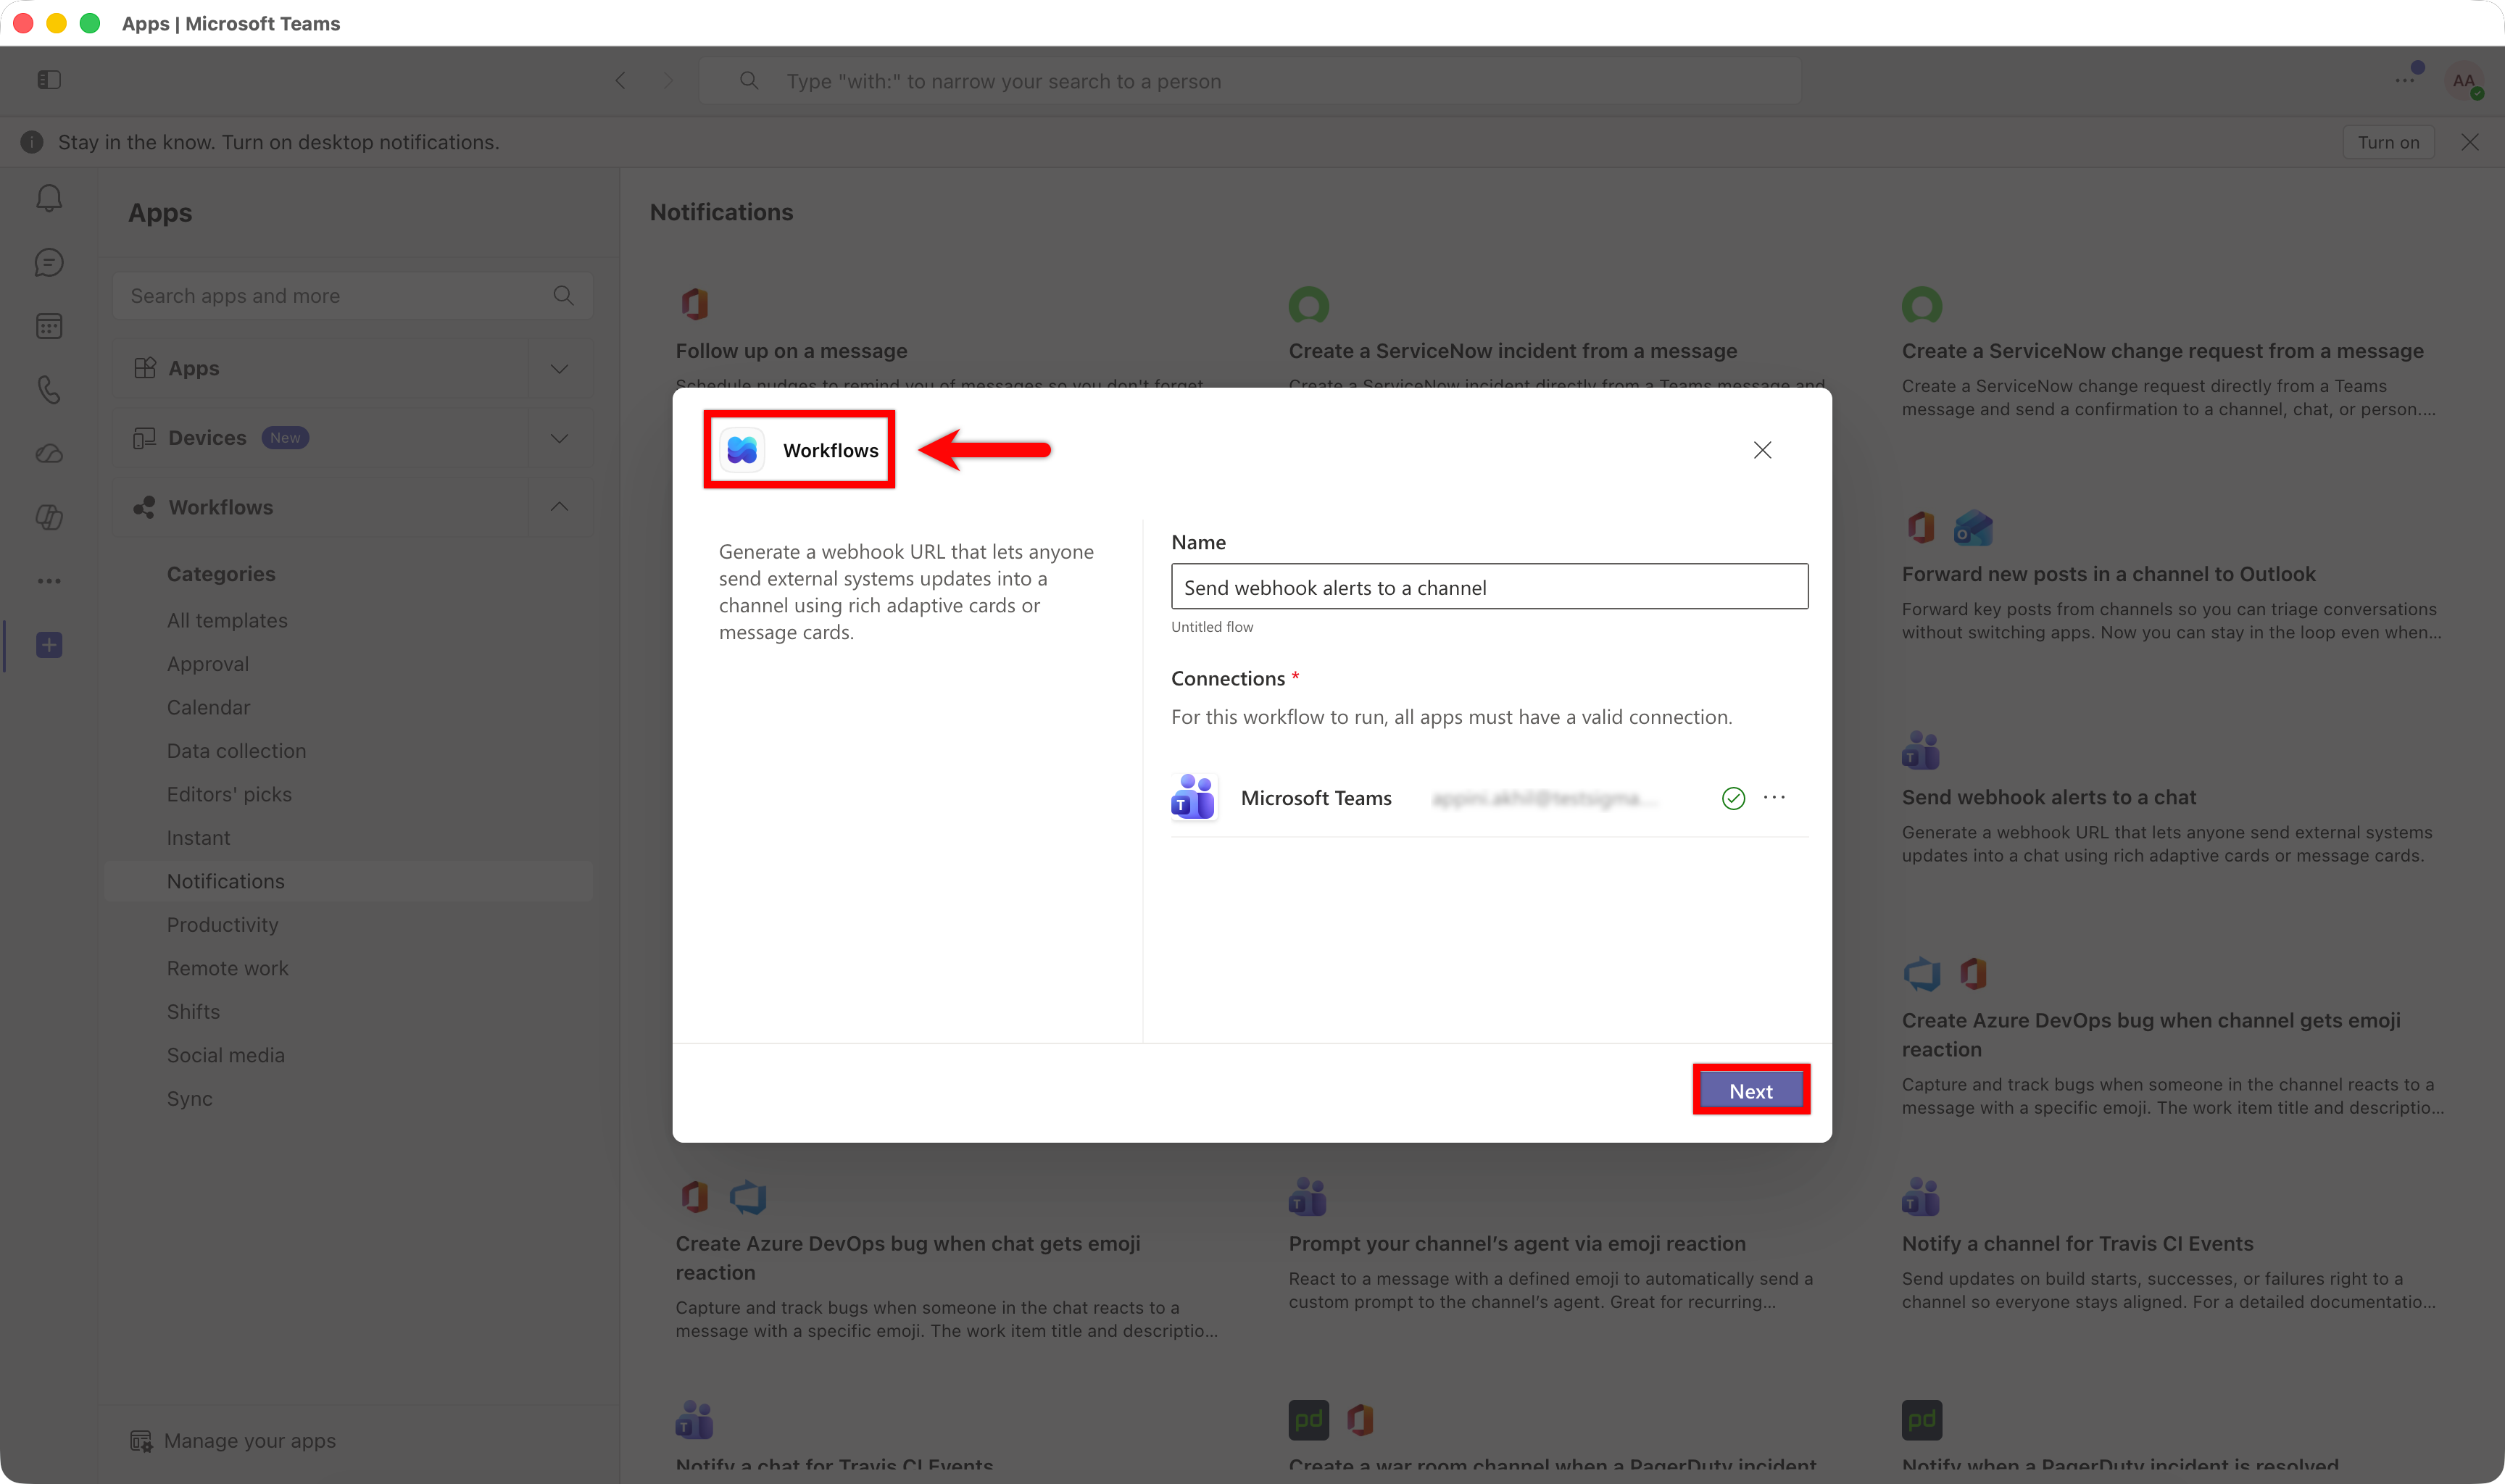
In the Workflows dialog:
- Wait for the details to load and click Next.
- Select the Team and Channel where you want Testsigma notifications to be posted.
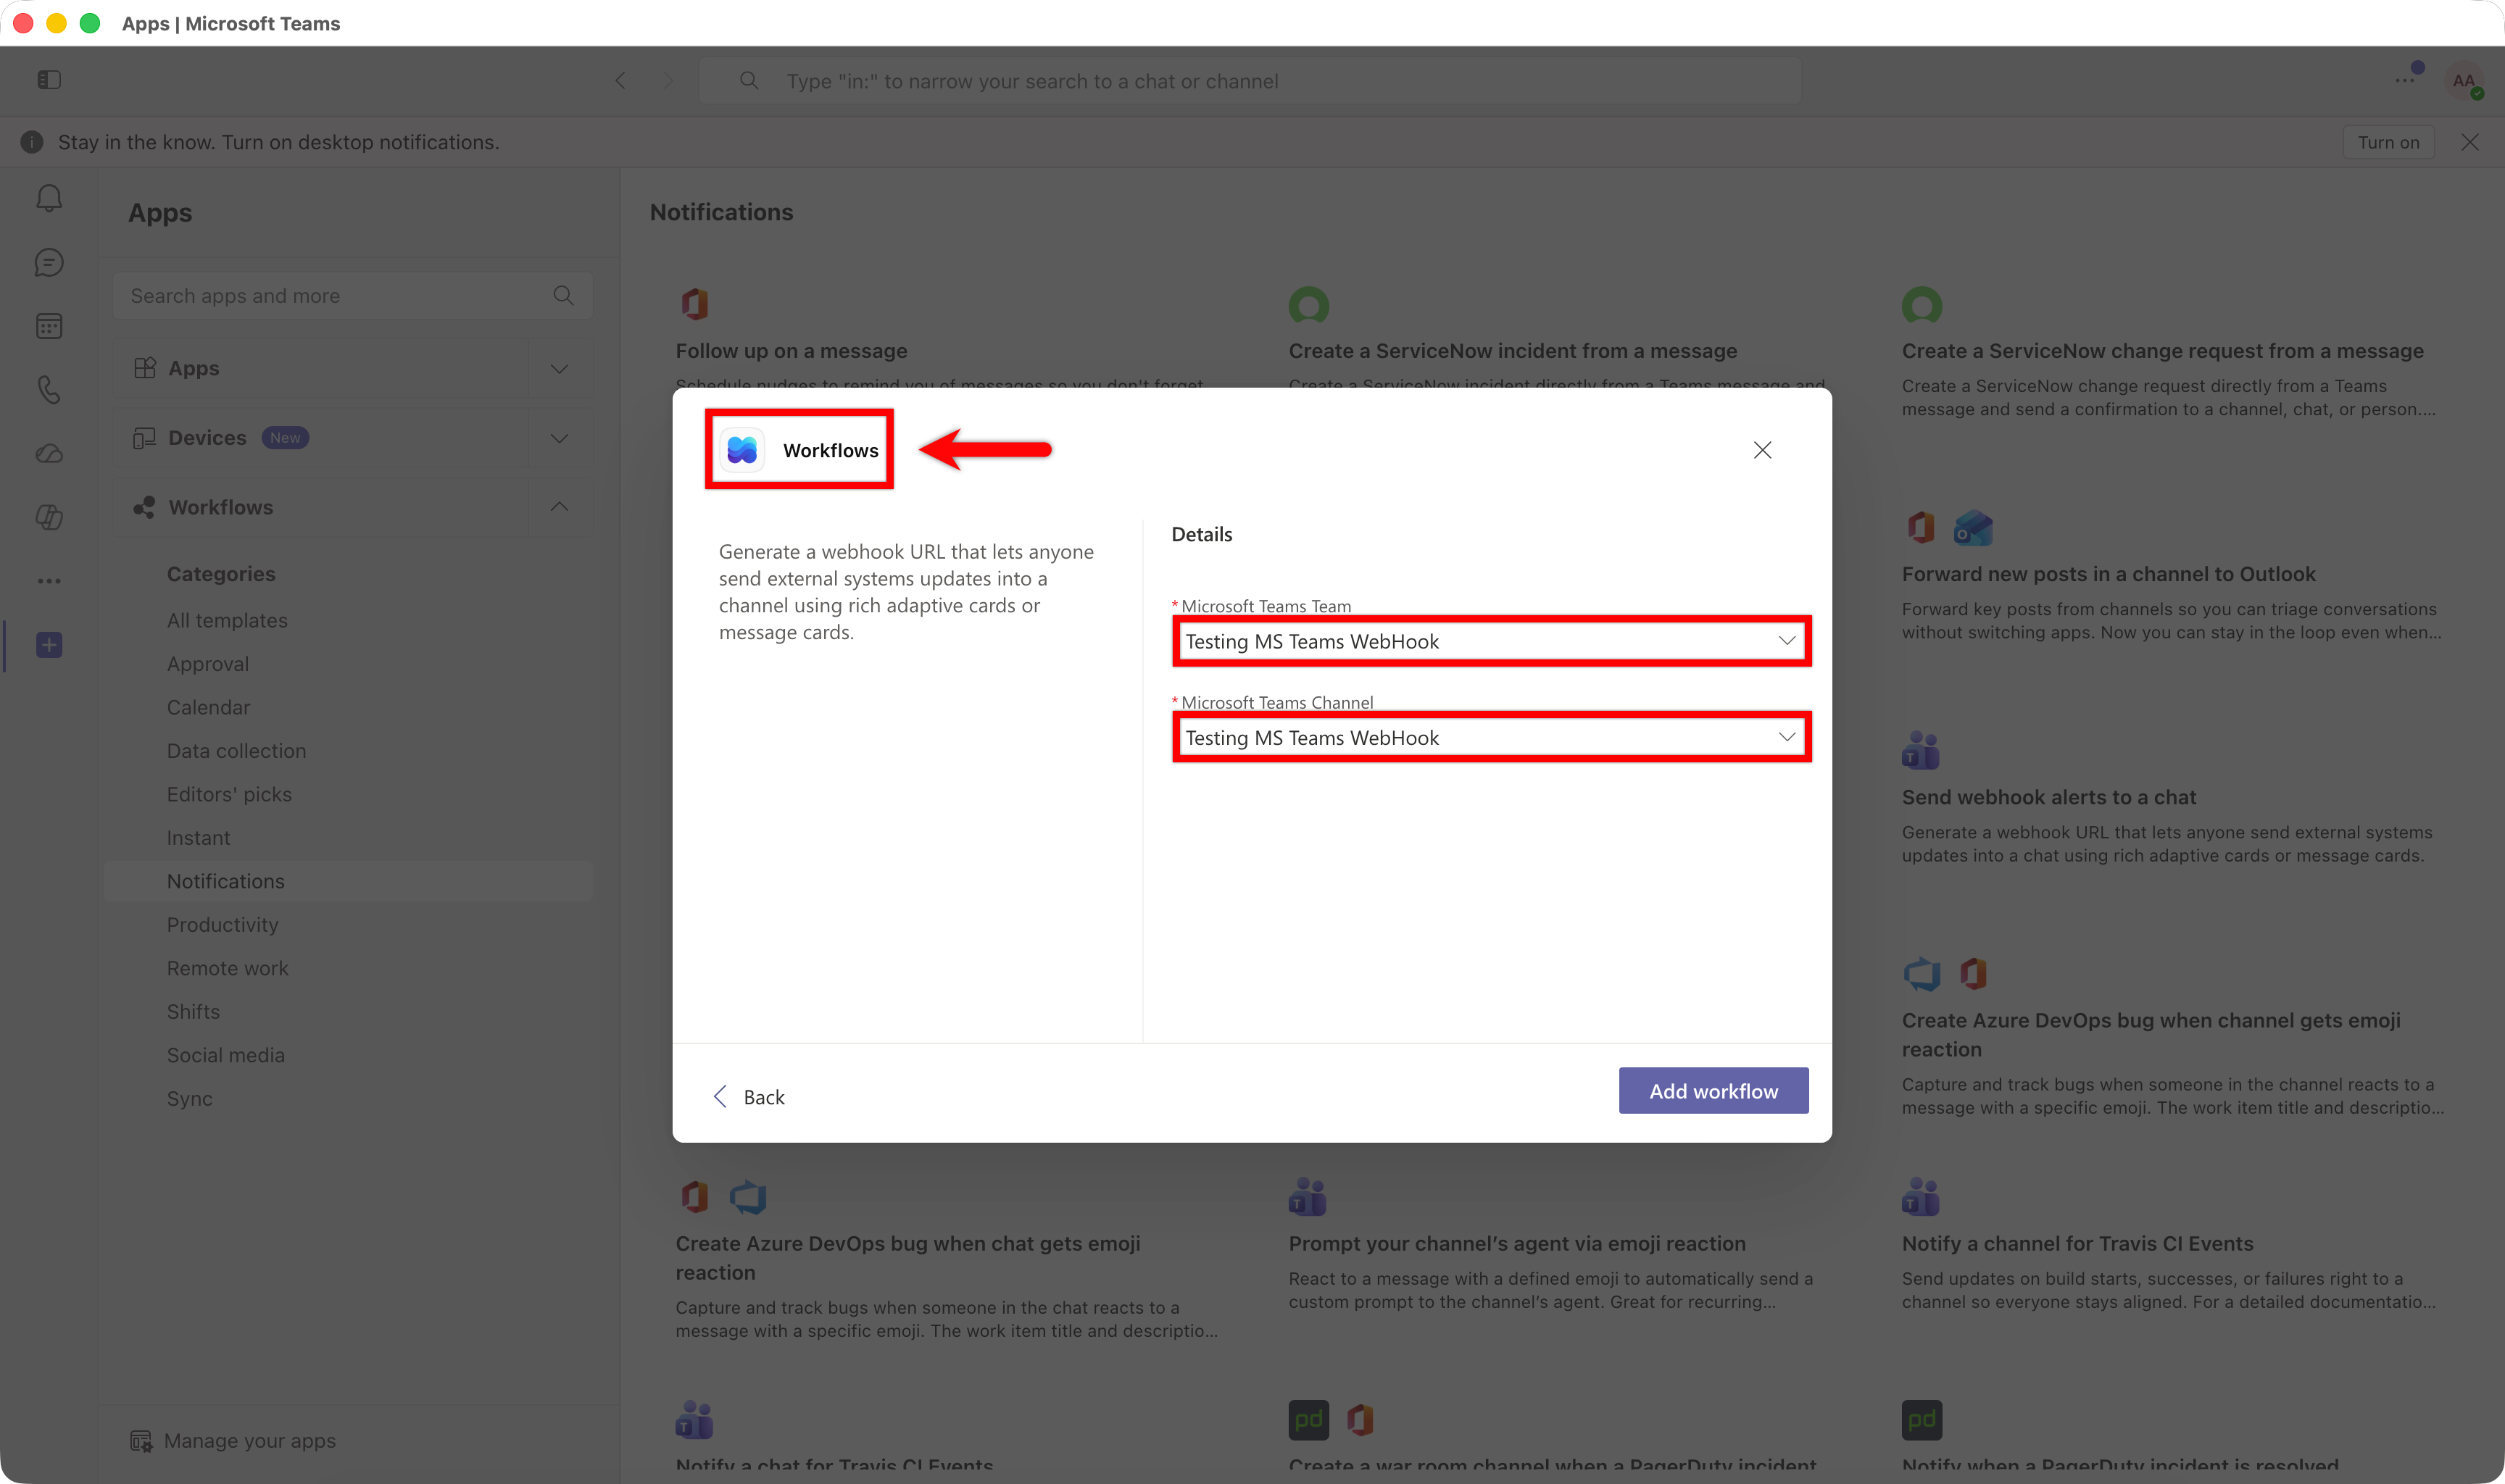
- Click Add workflow. Teams generates a unique Webhook URL.
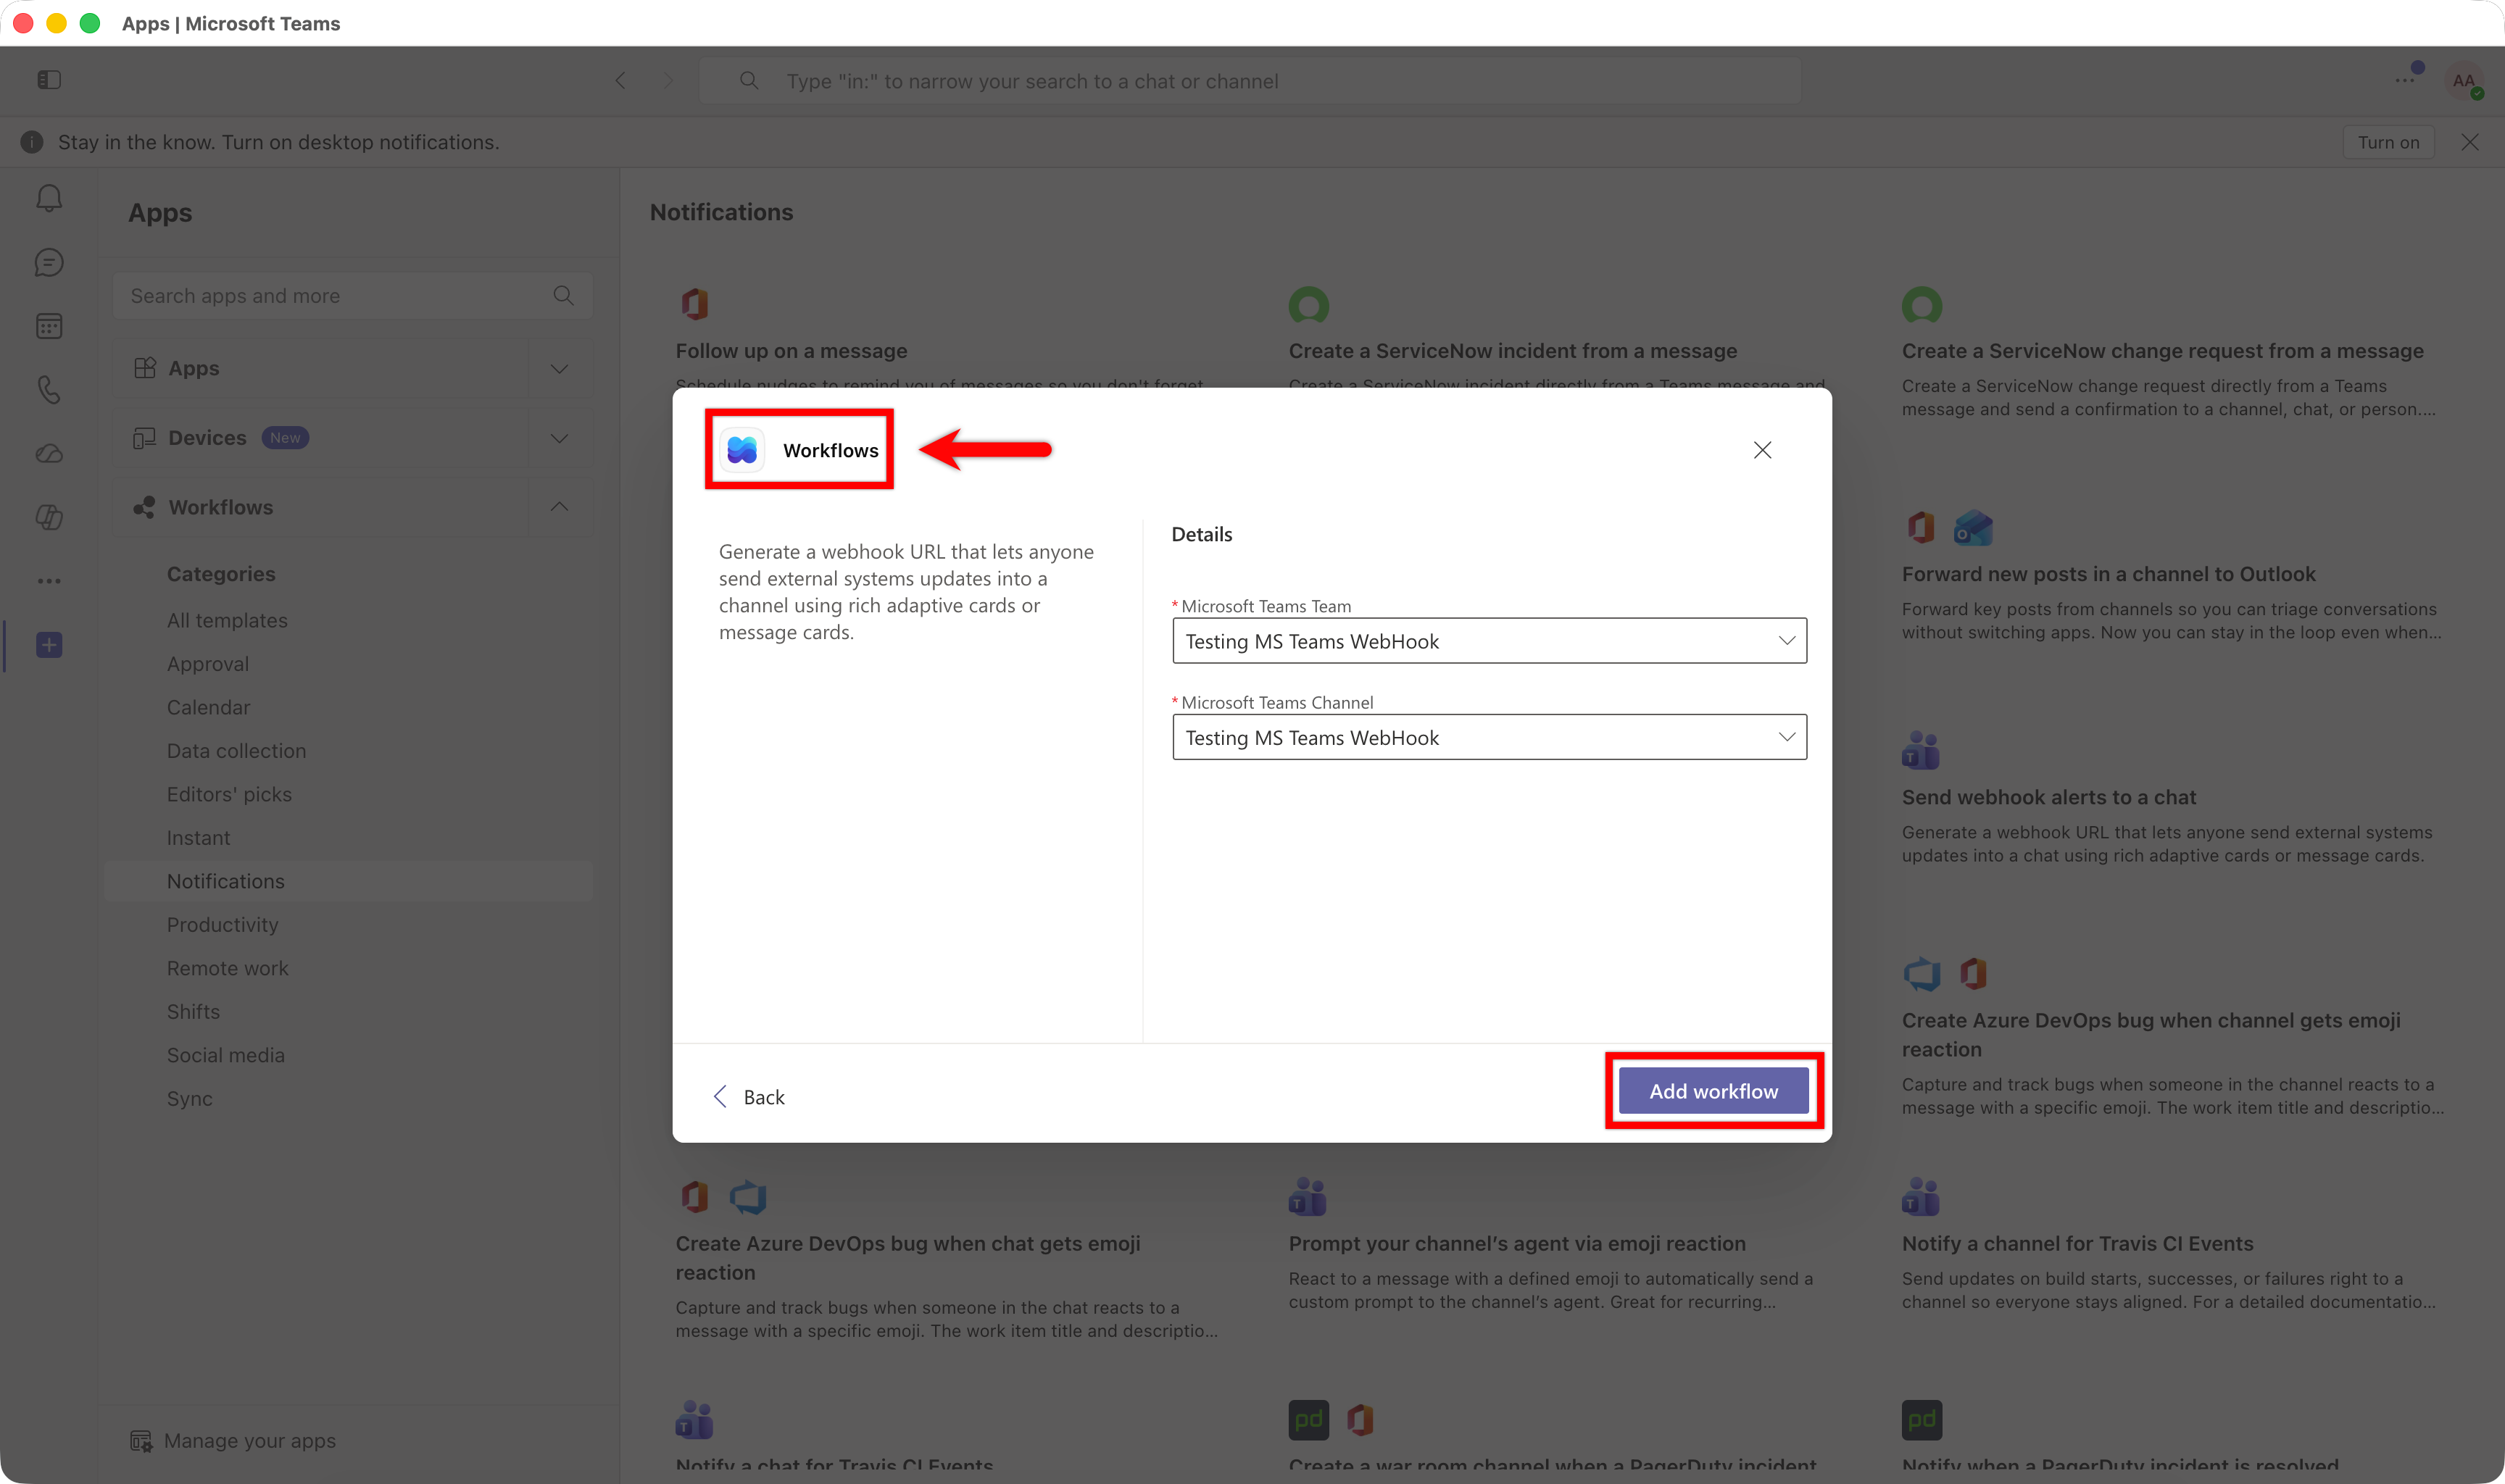
- Wait for the details to load and click Next.
- Copy the Webhook URL.
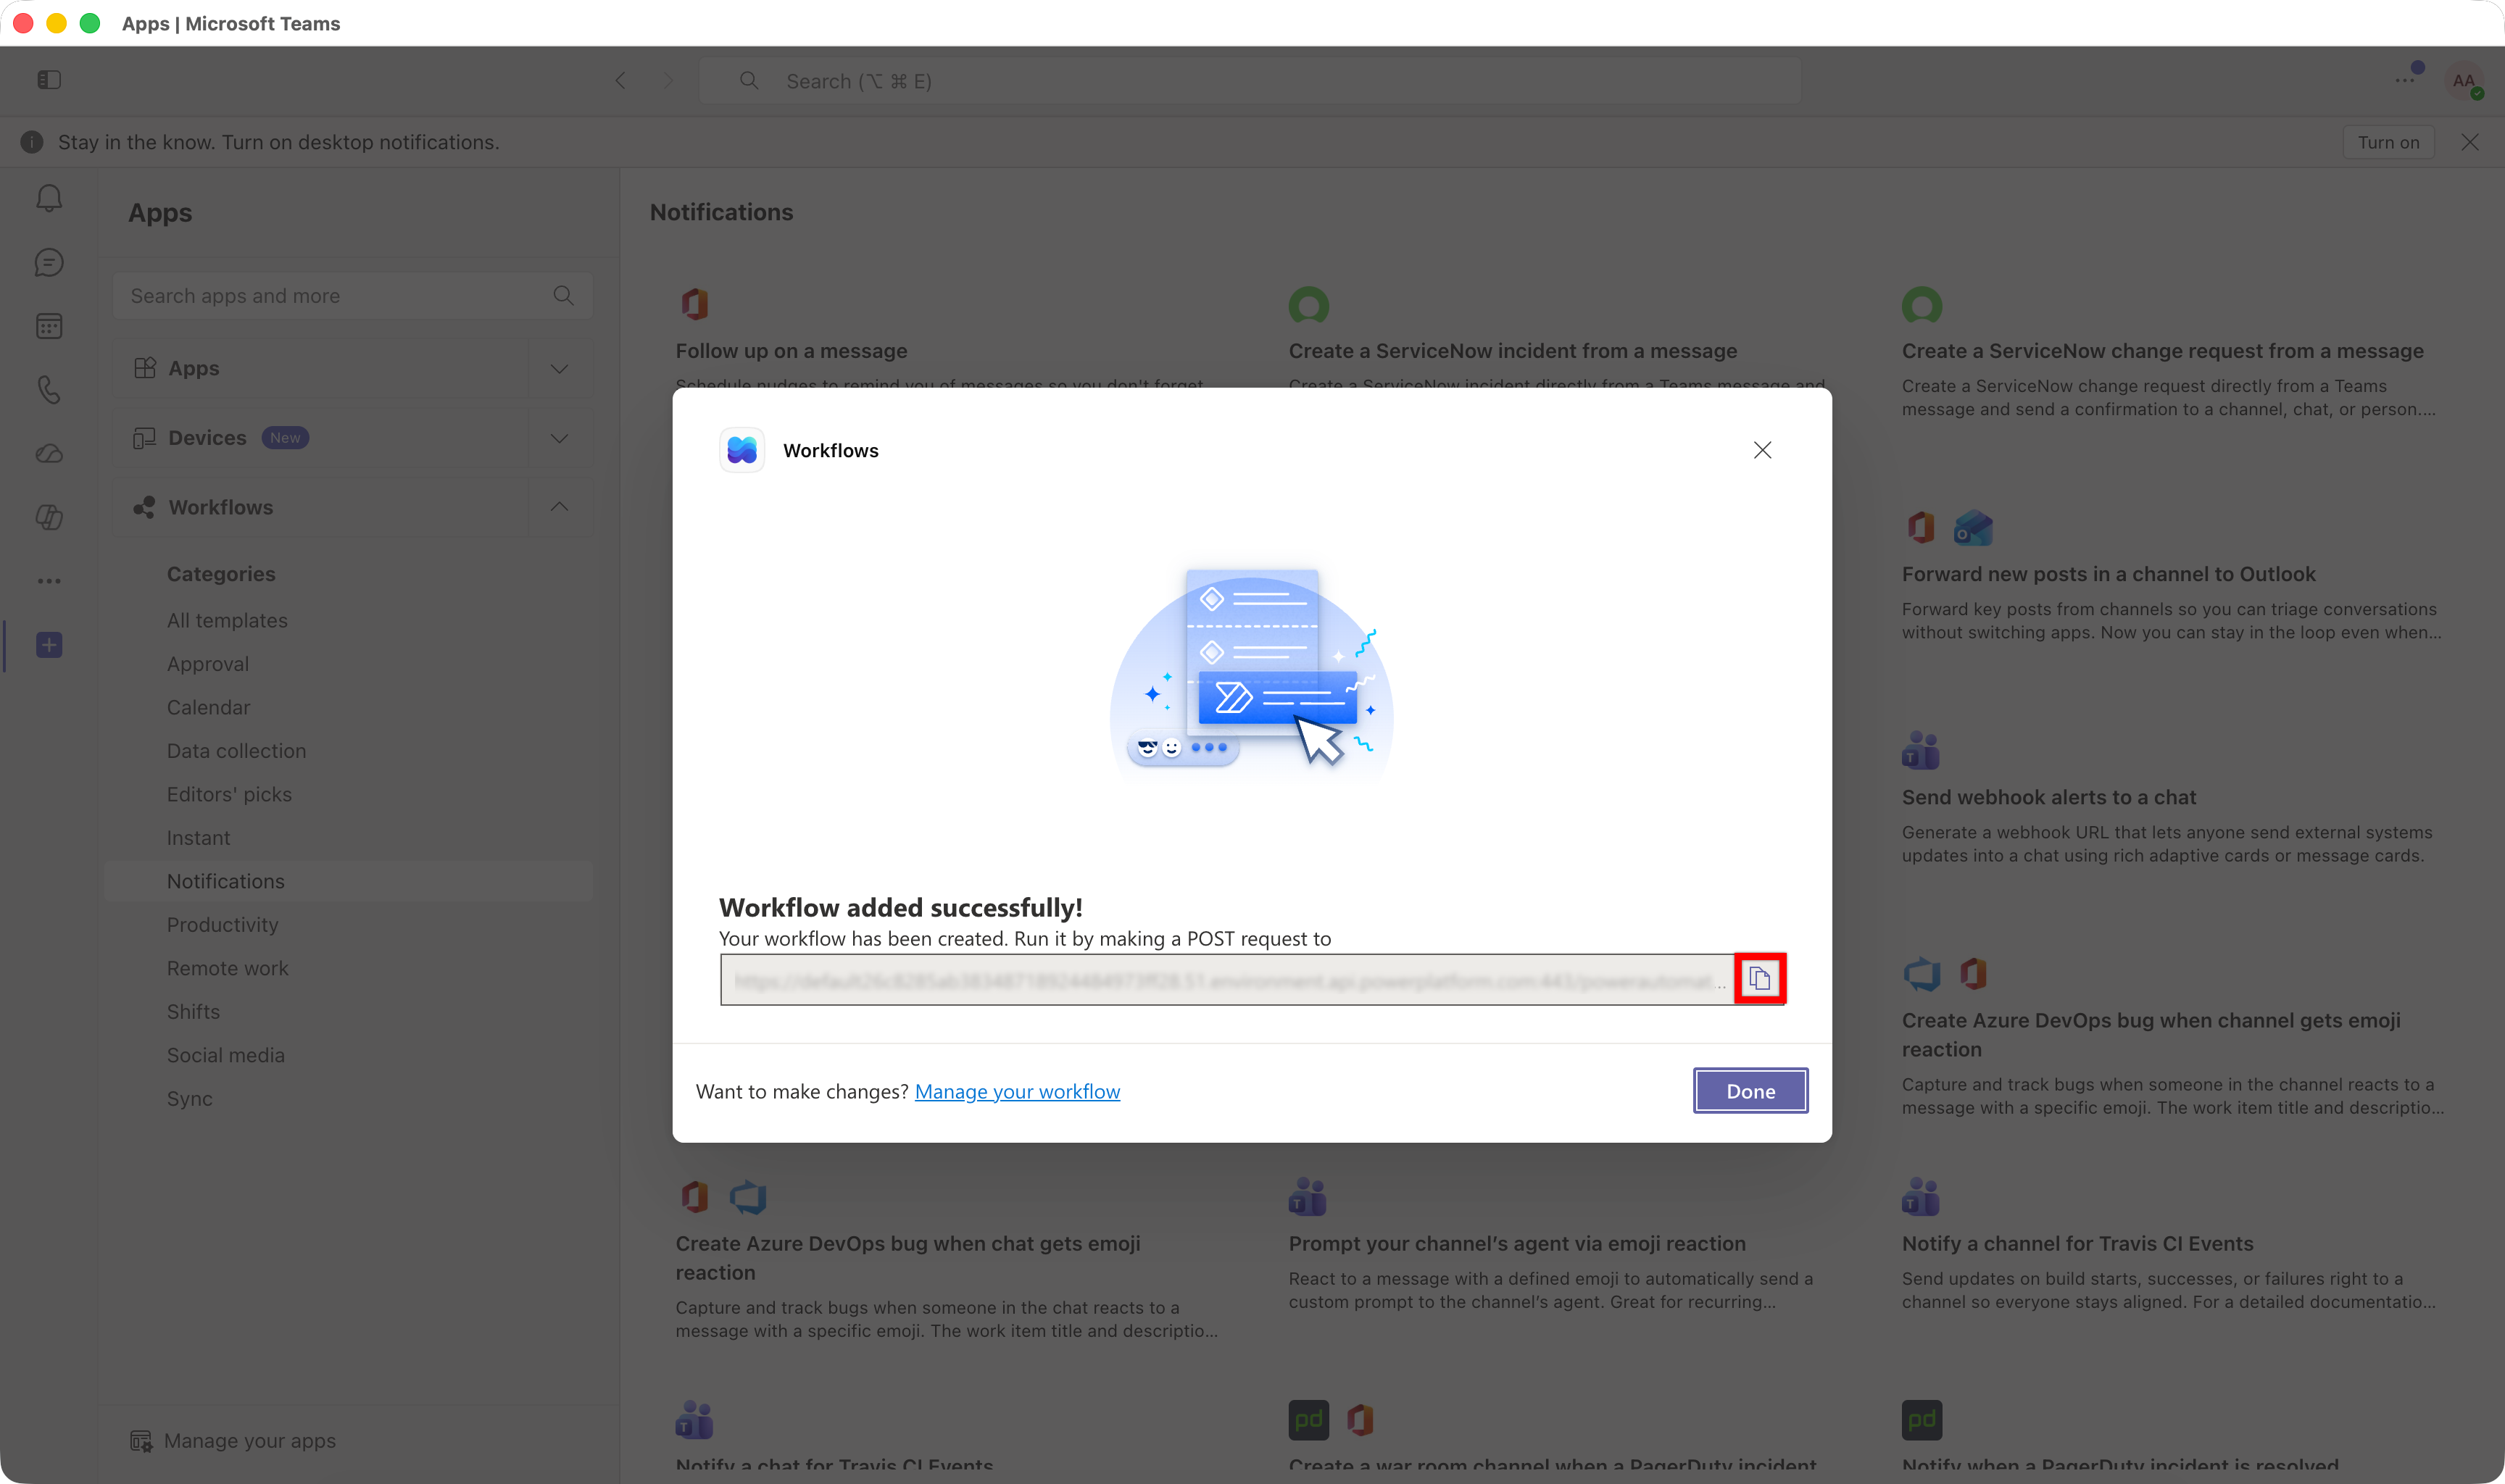
Save the webhook URL in a safe location. The URL is unique to the Team and Channel combination you selected and cannot be recovered from the Teams UI later without reopening the workflow.
Configure the Webhook in Testsigma
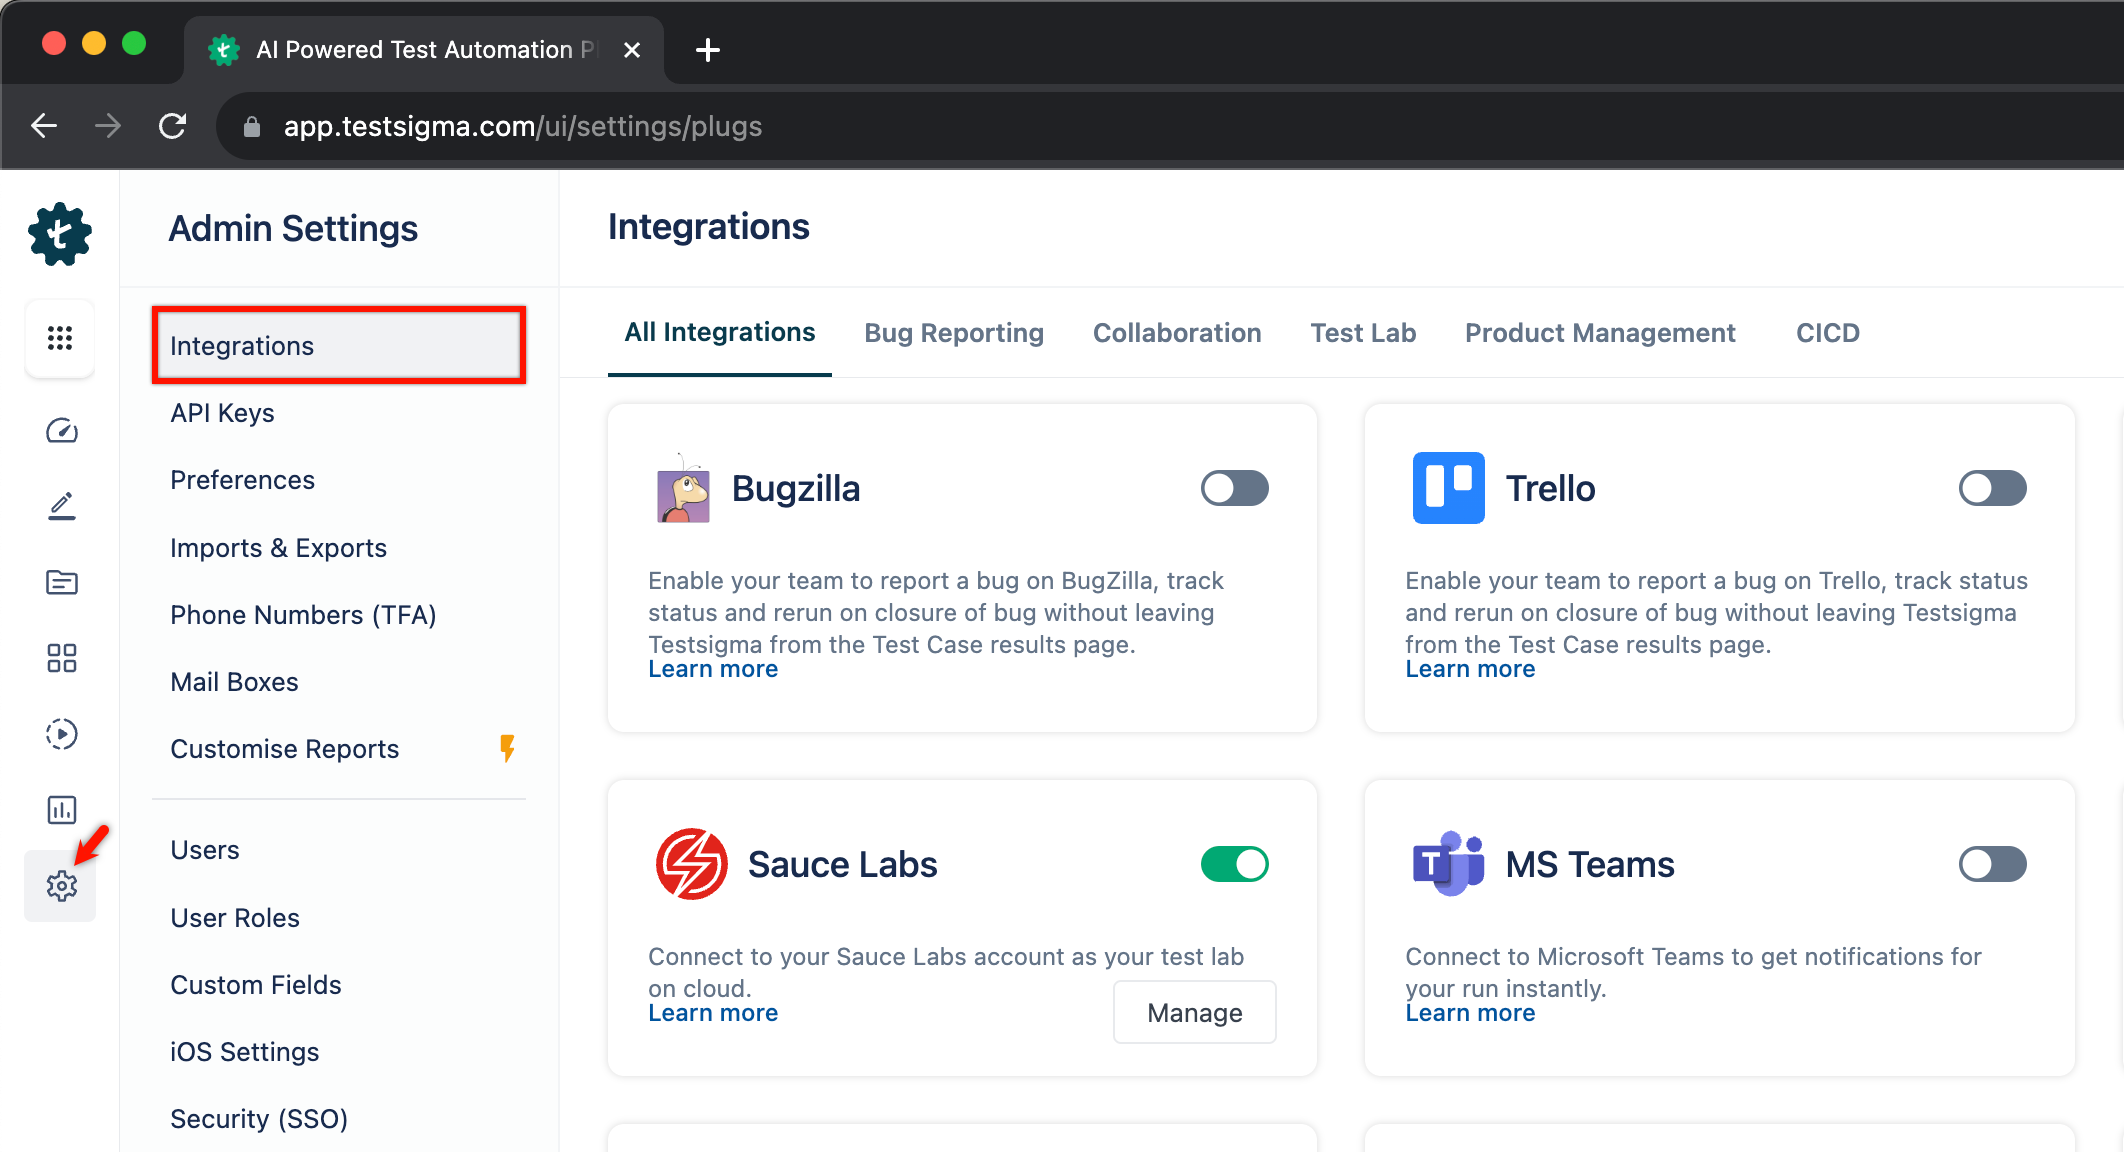
- From the left navigation bar, go to Settings > Integrations > Collaborations > Microsoft Teams.
- Enable the Toggle.
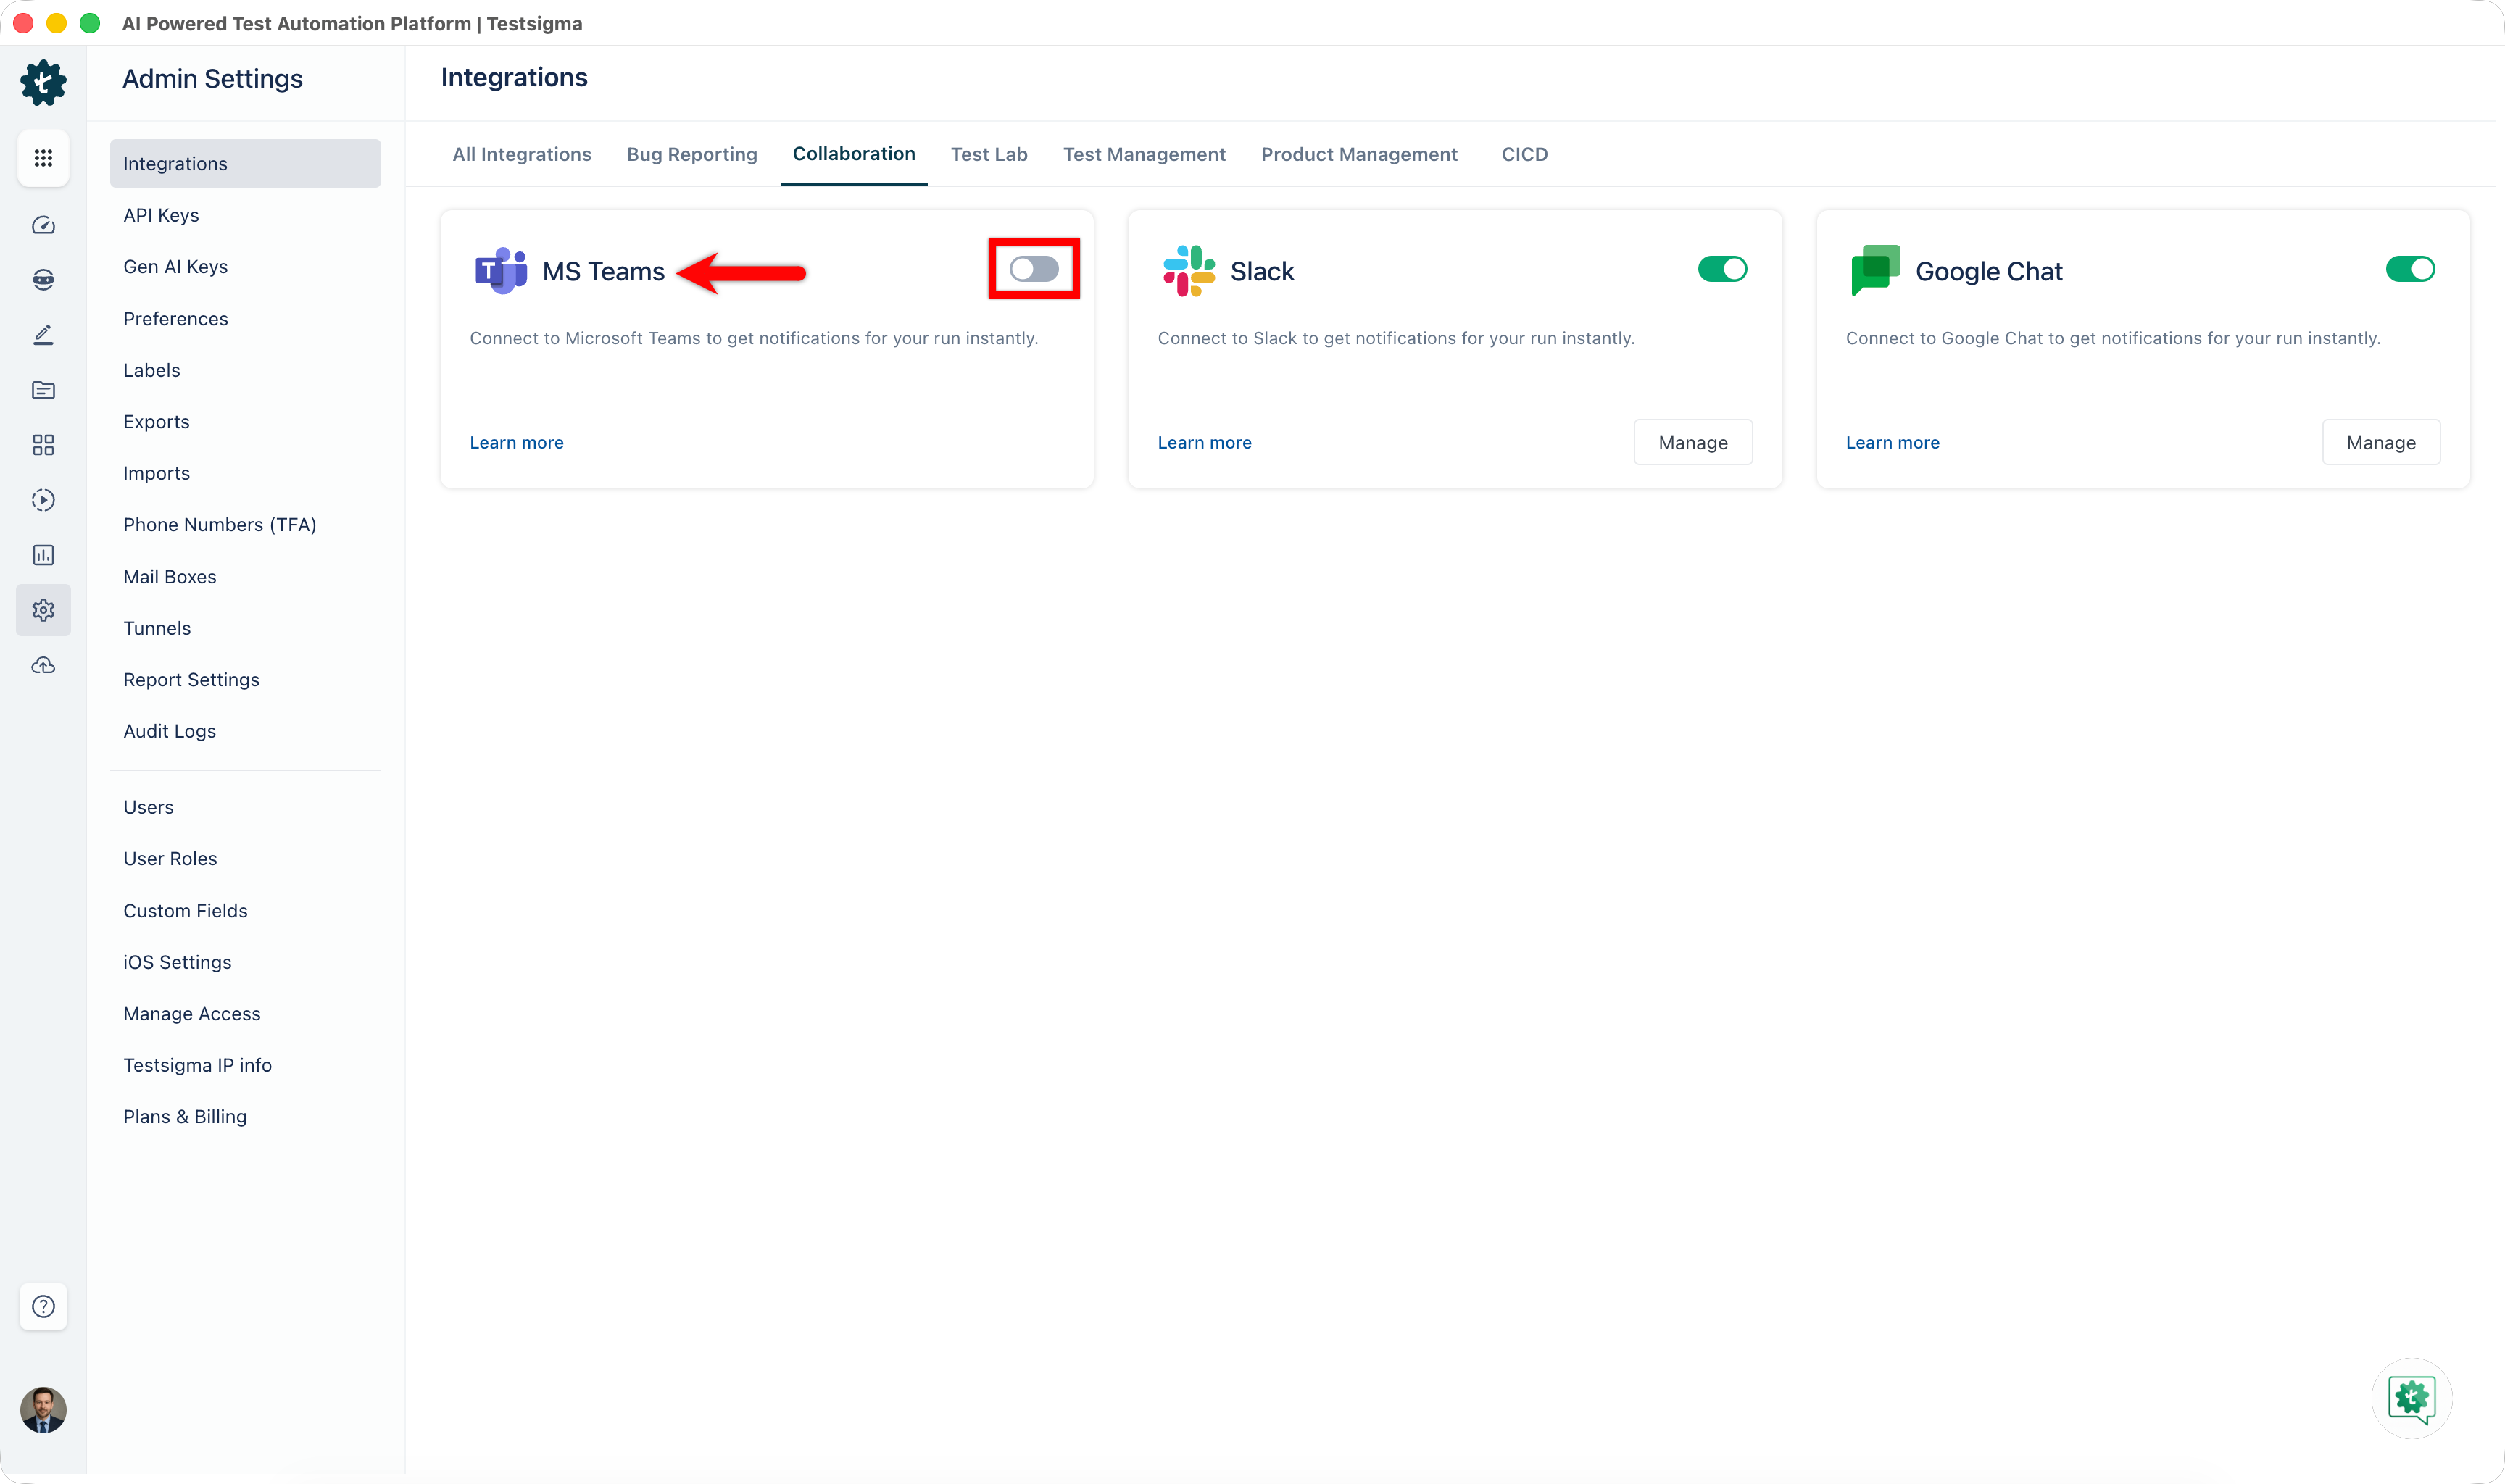
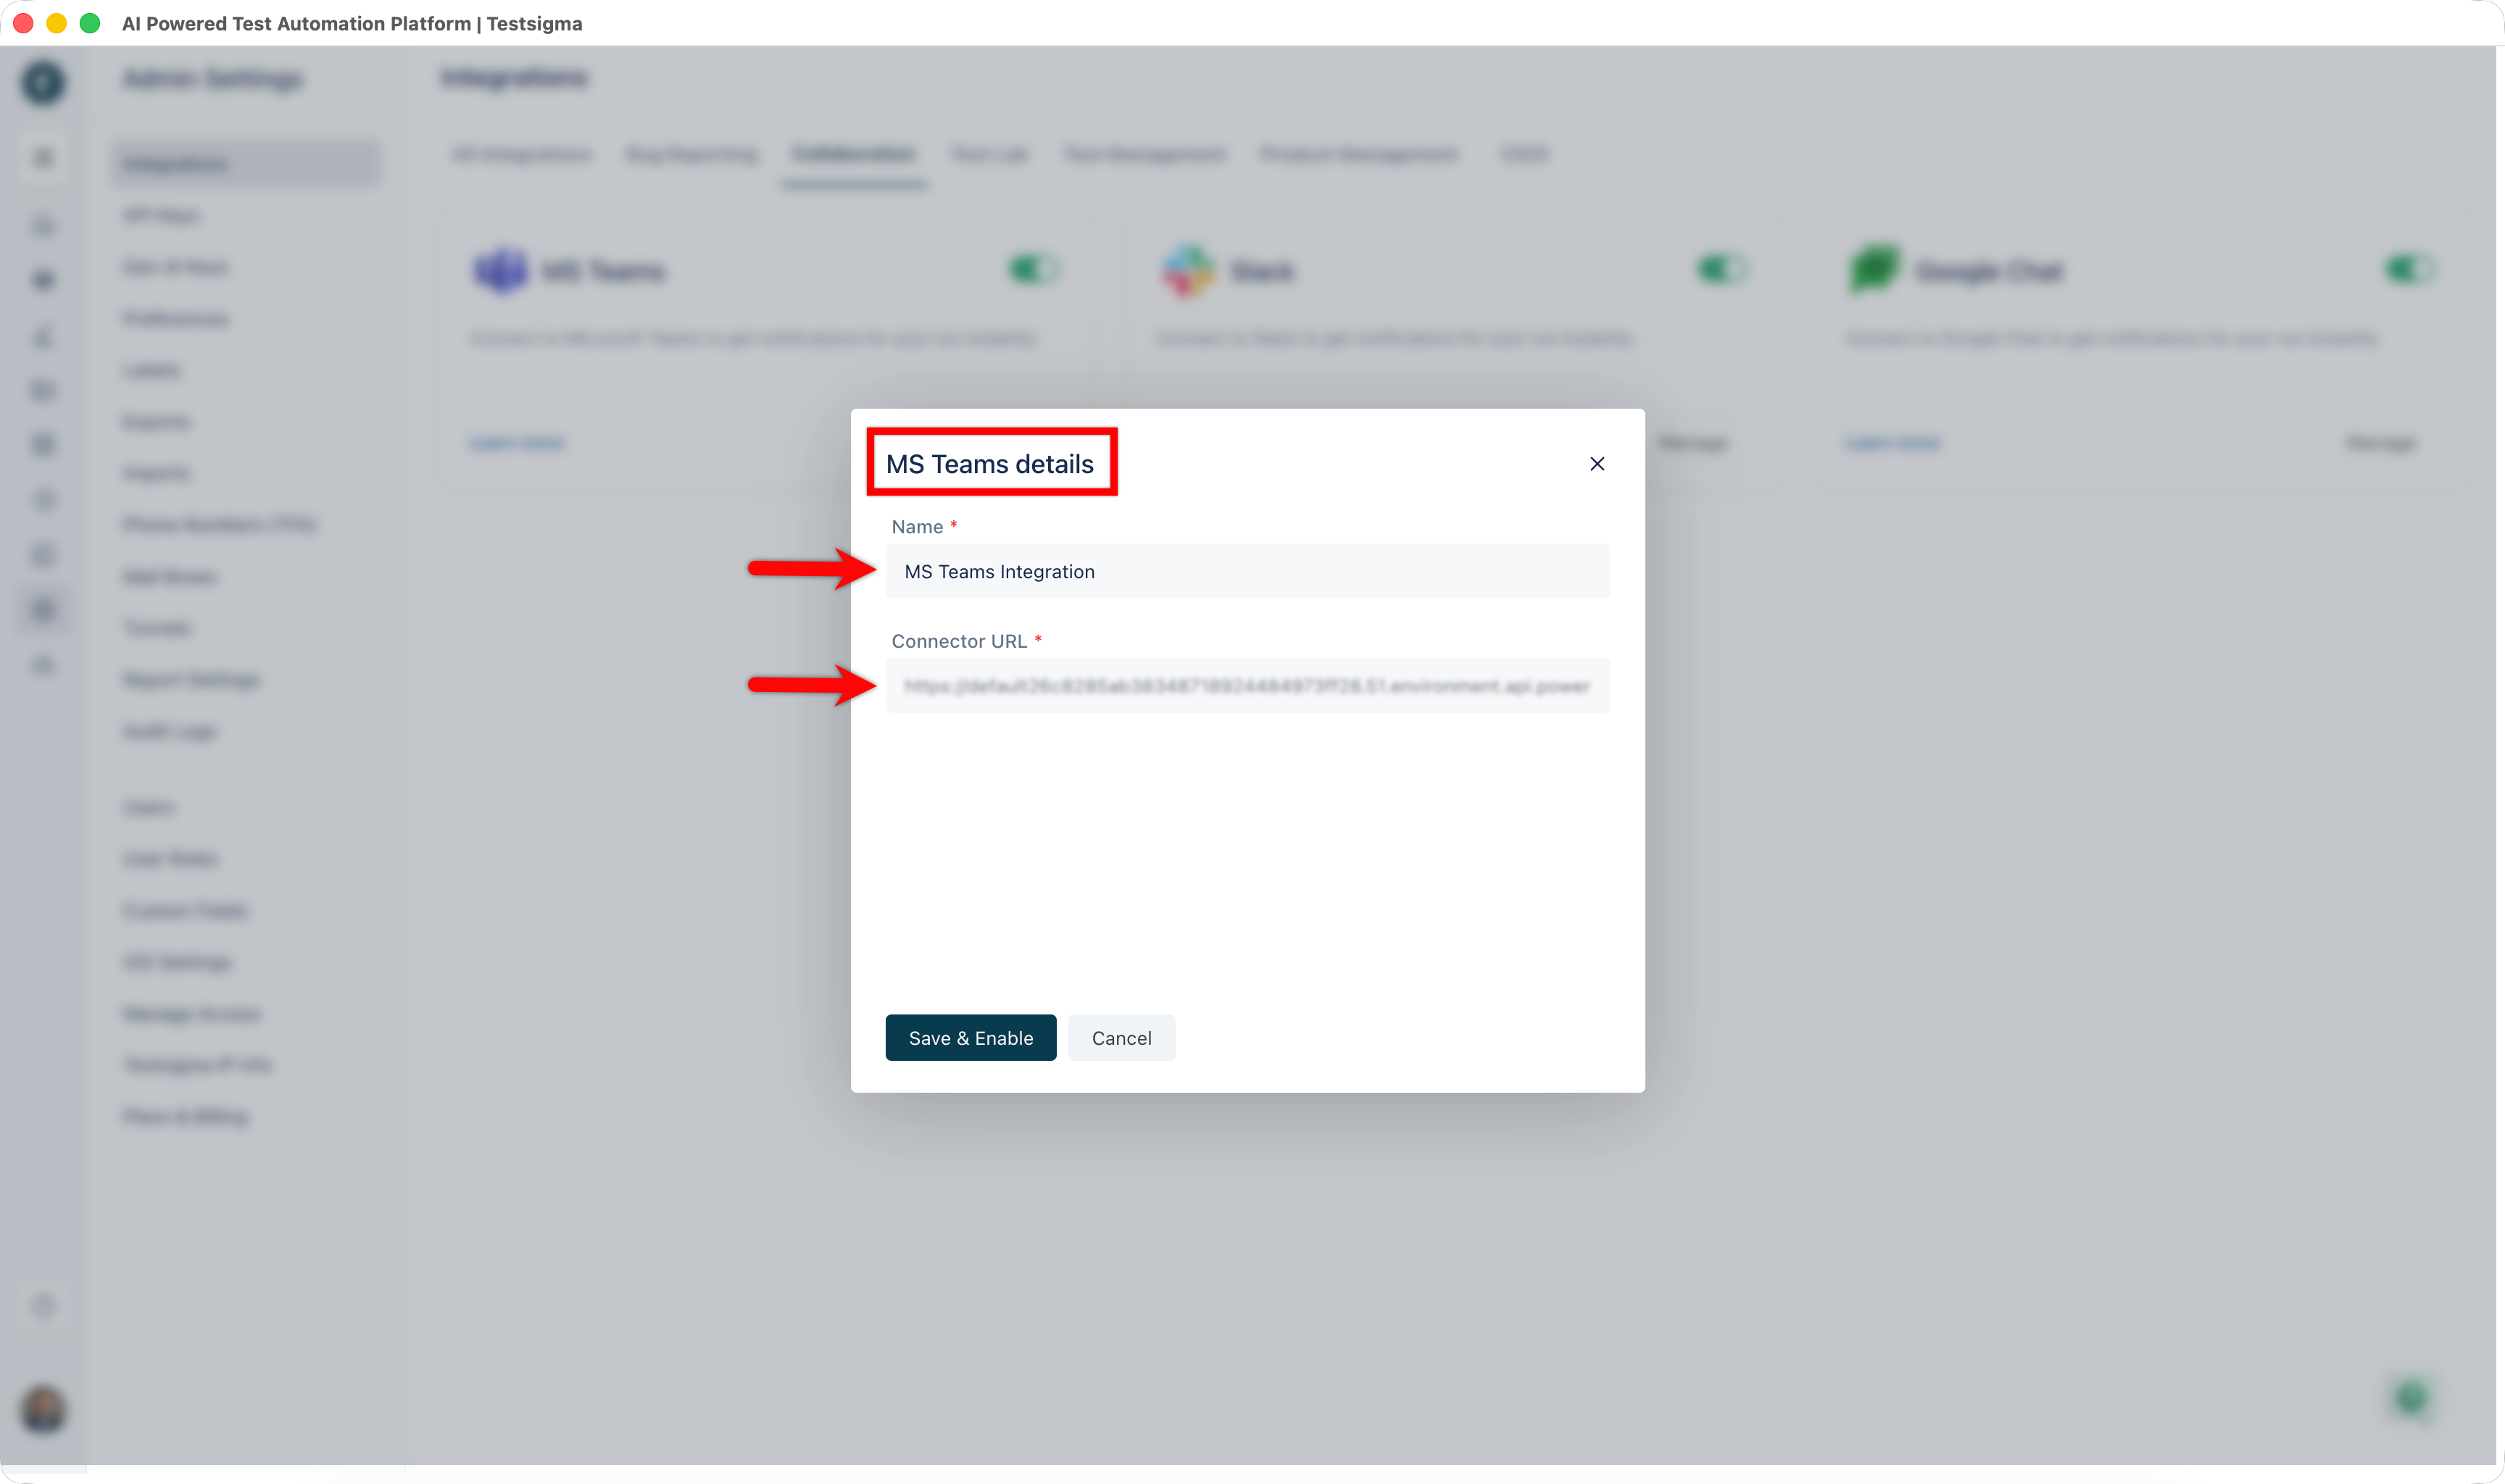
- In the MS Teams details dialog, enter a Name and paste the webhook URL you copied from Microsoft Teams.
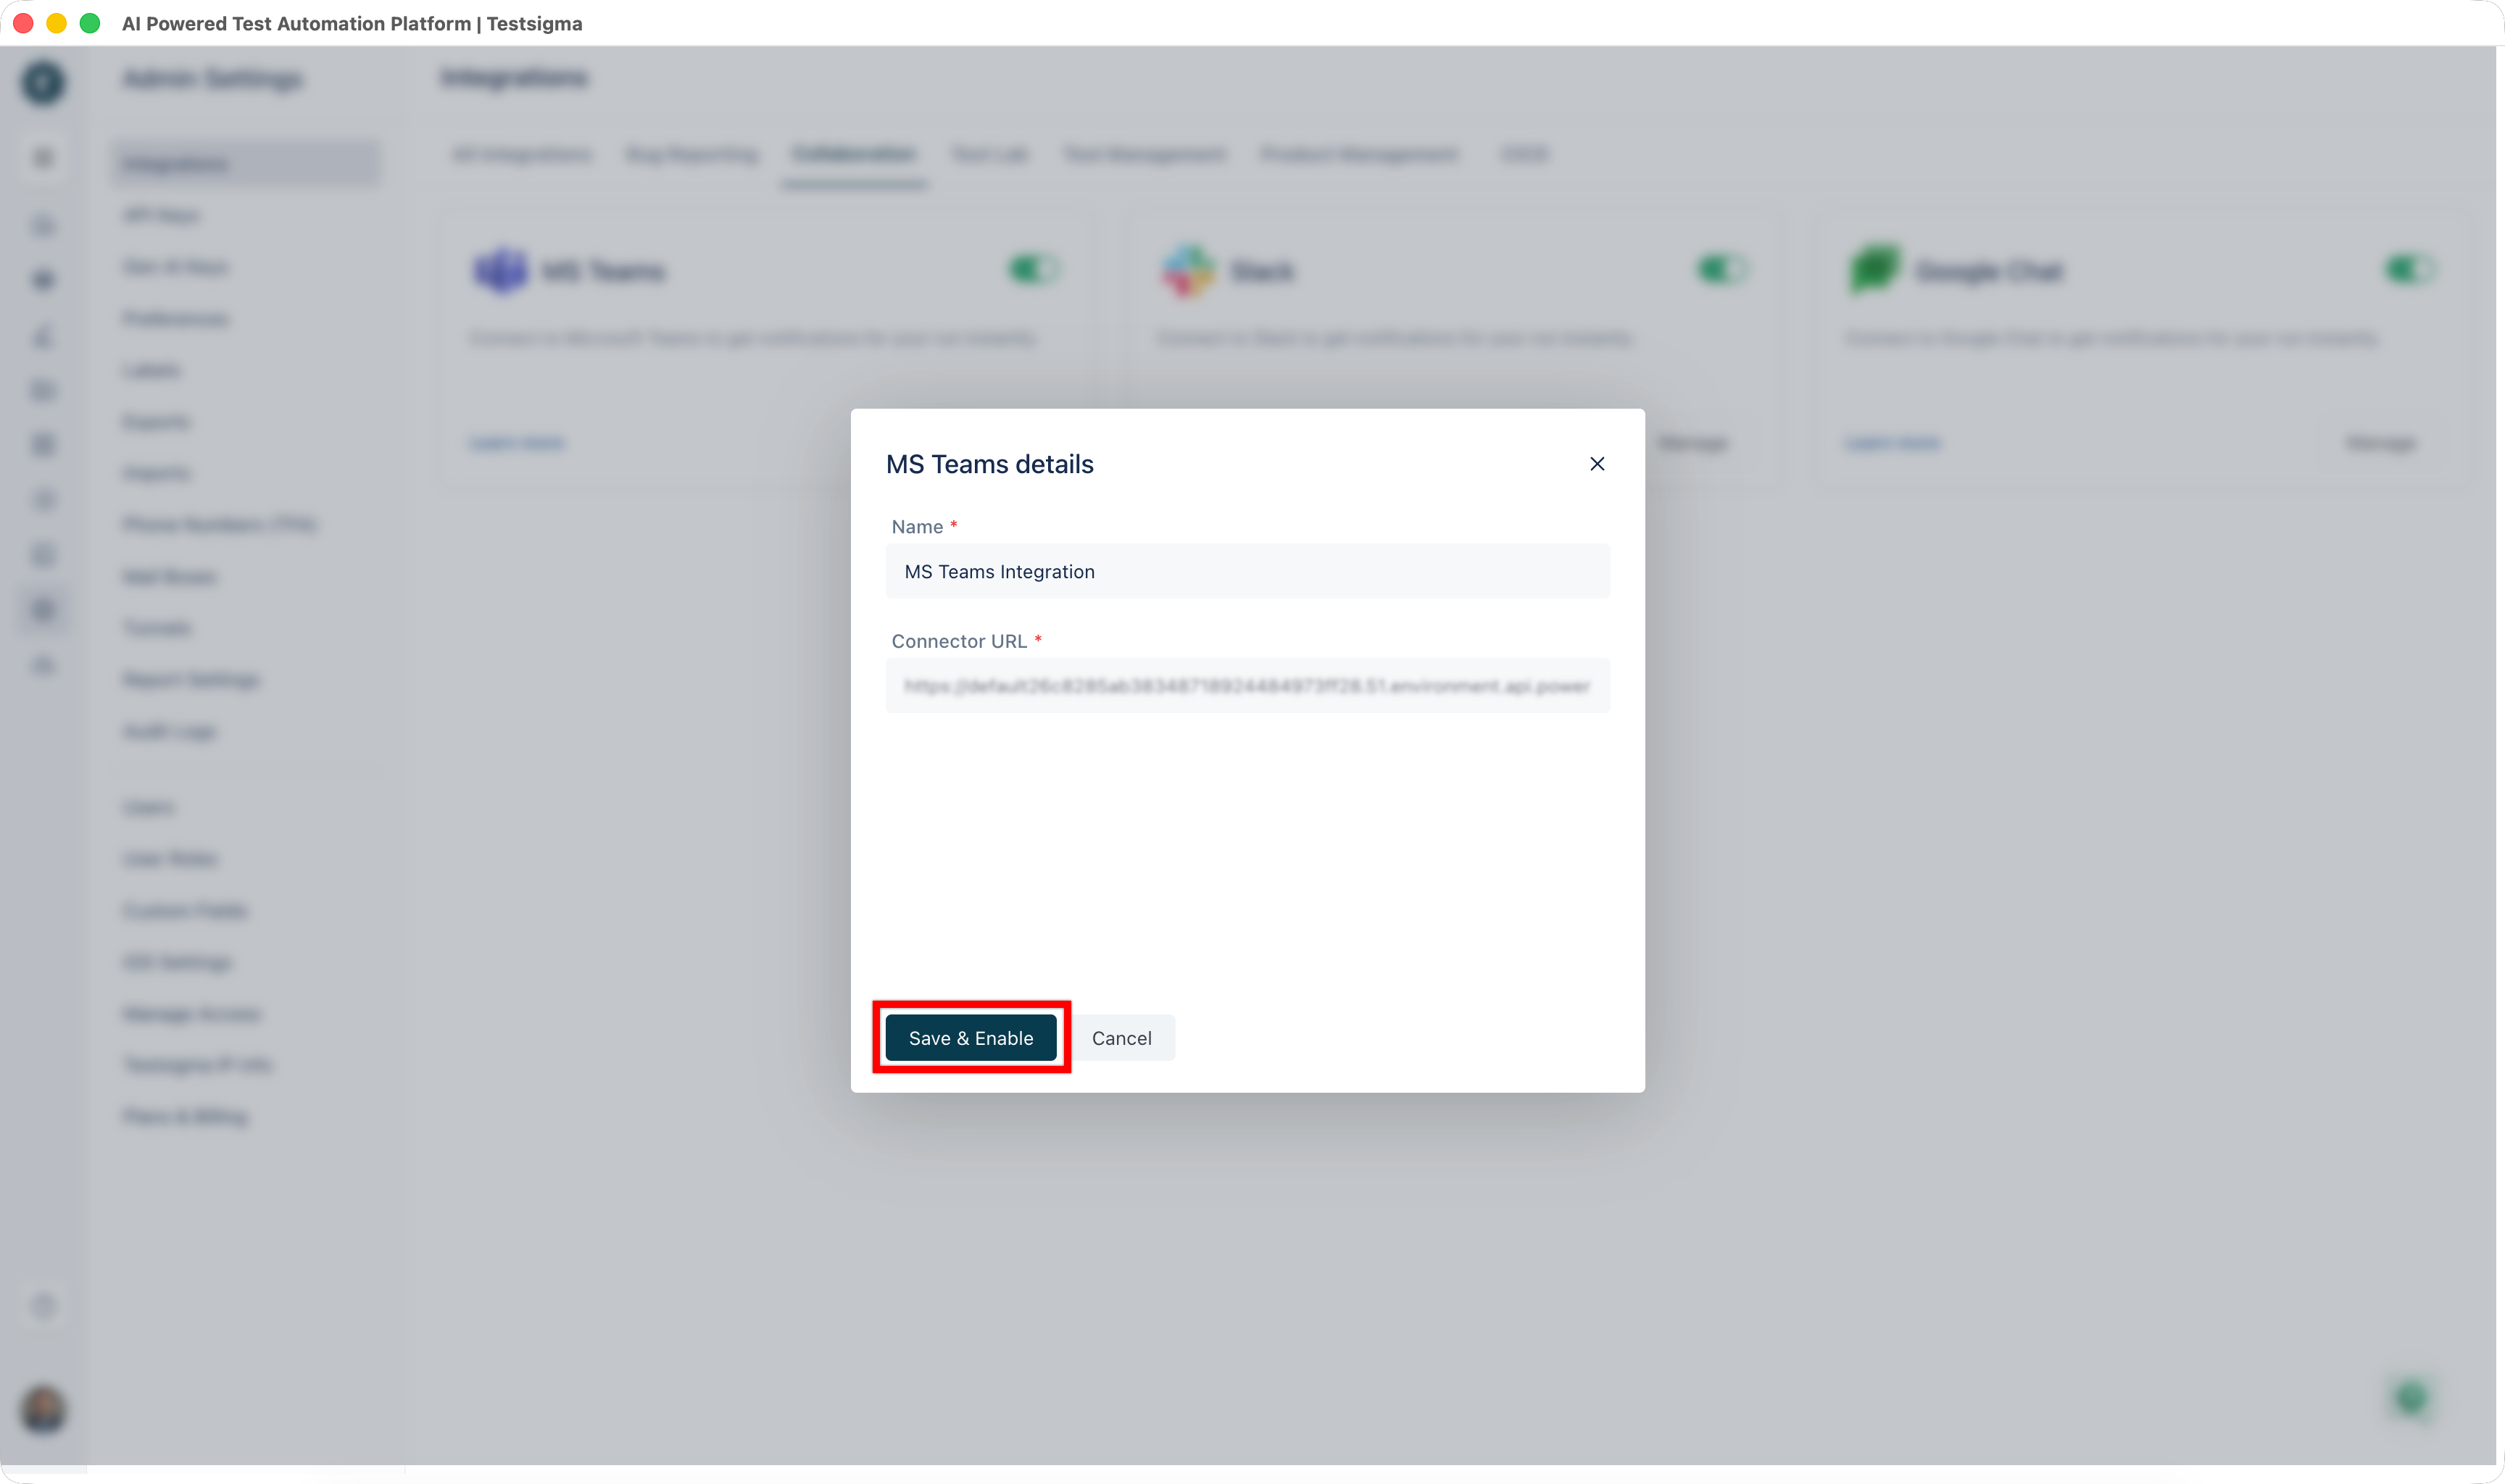
- Click Save & Enable.
Verify the Power Automate Flow
If the Team and Channel fields in the auto-generated workflow hold a stale or default reference, notifications may fail to post even though the webhook URL is valid. Re-select both fields in Power Automate to bind the flow to the correct destination.
- In Microsoft Teams, open the channel you selected while creating the webhook.
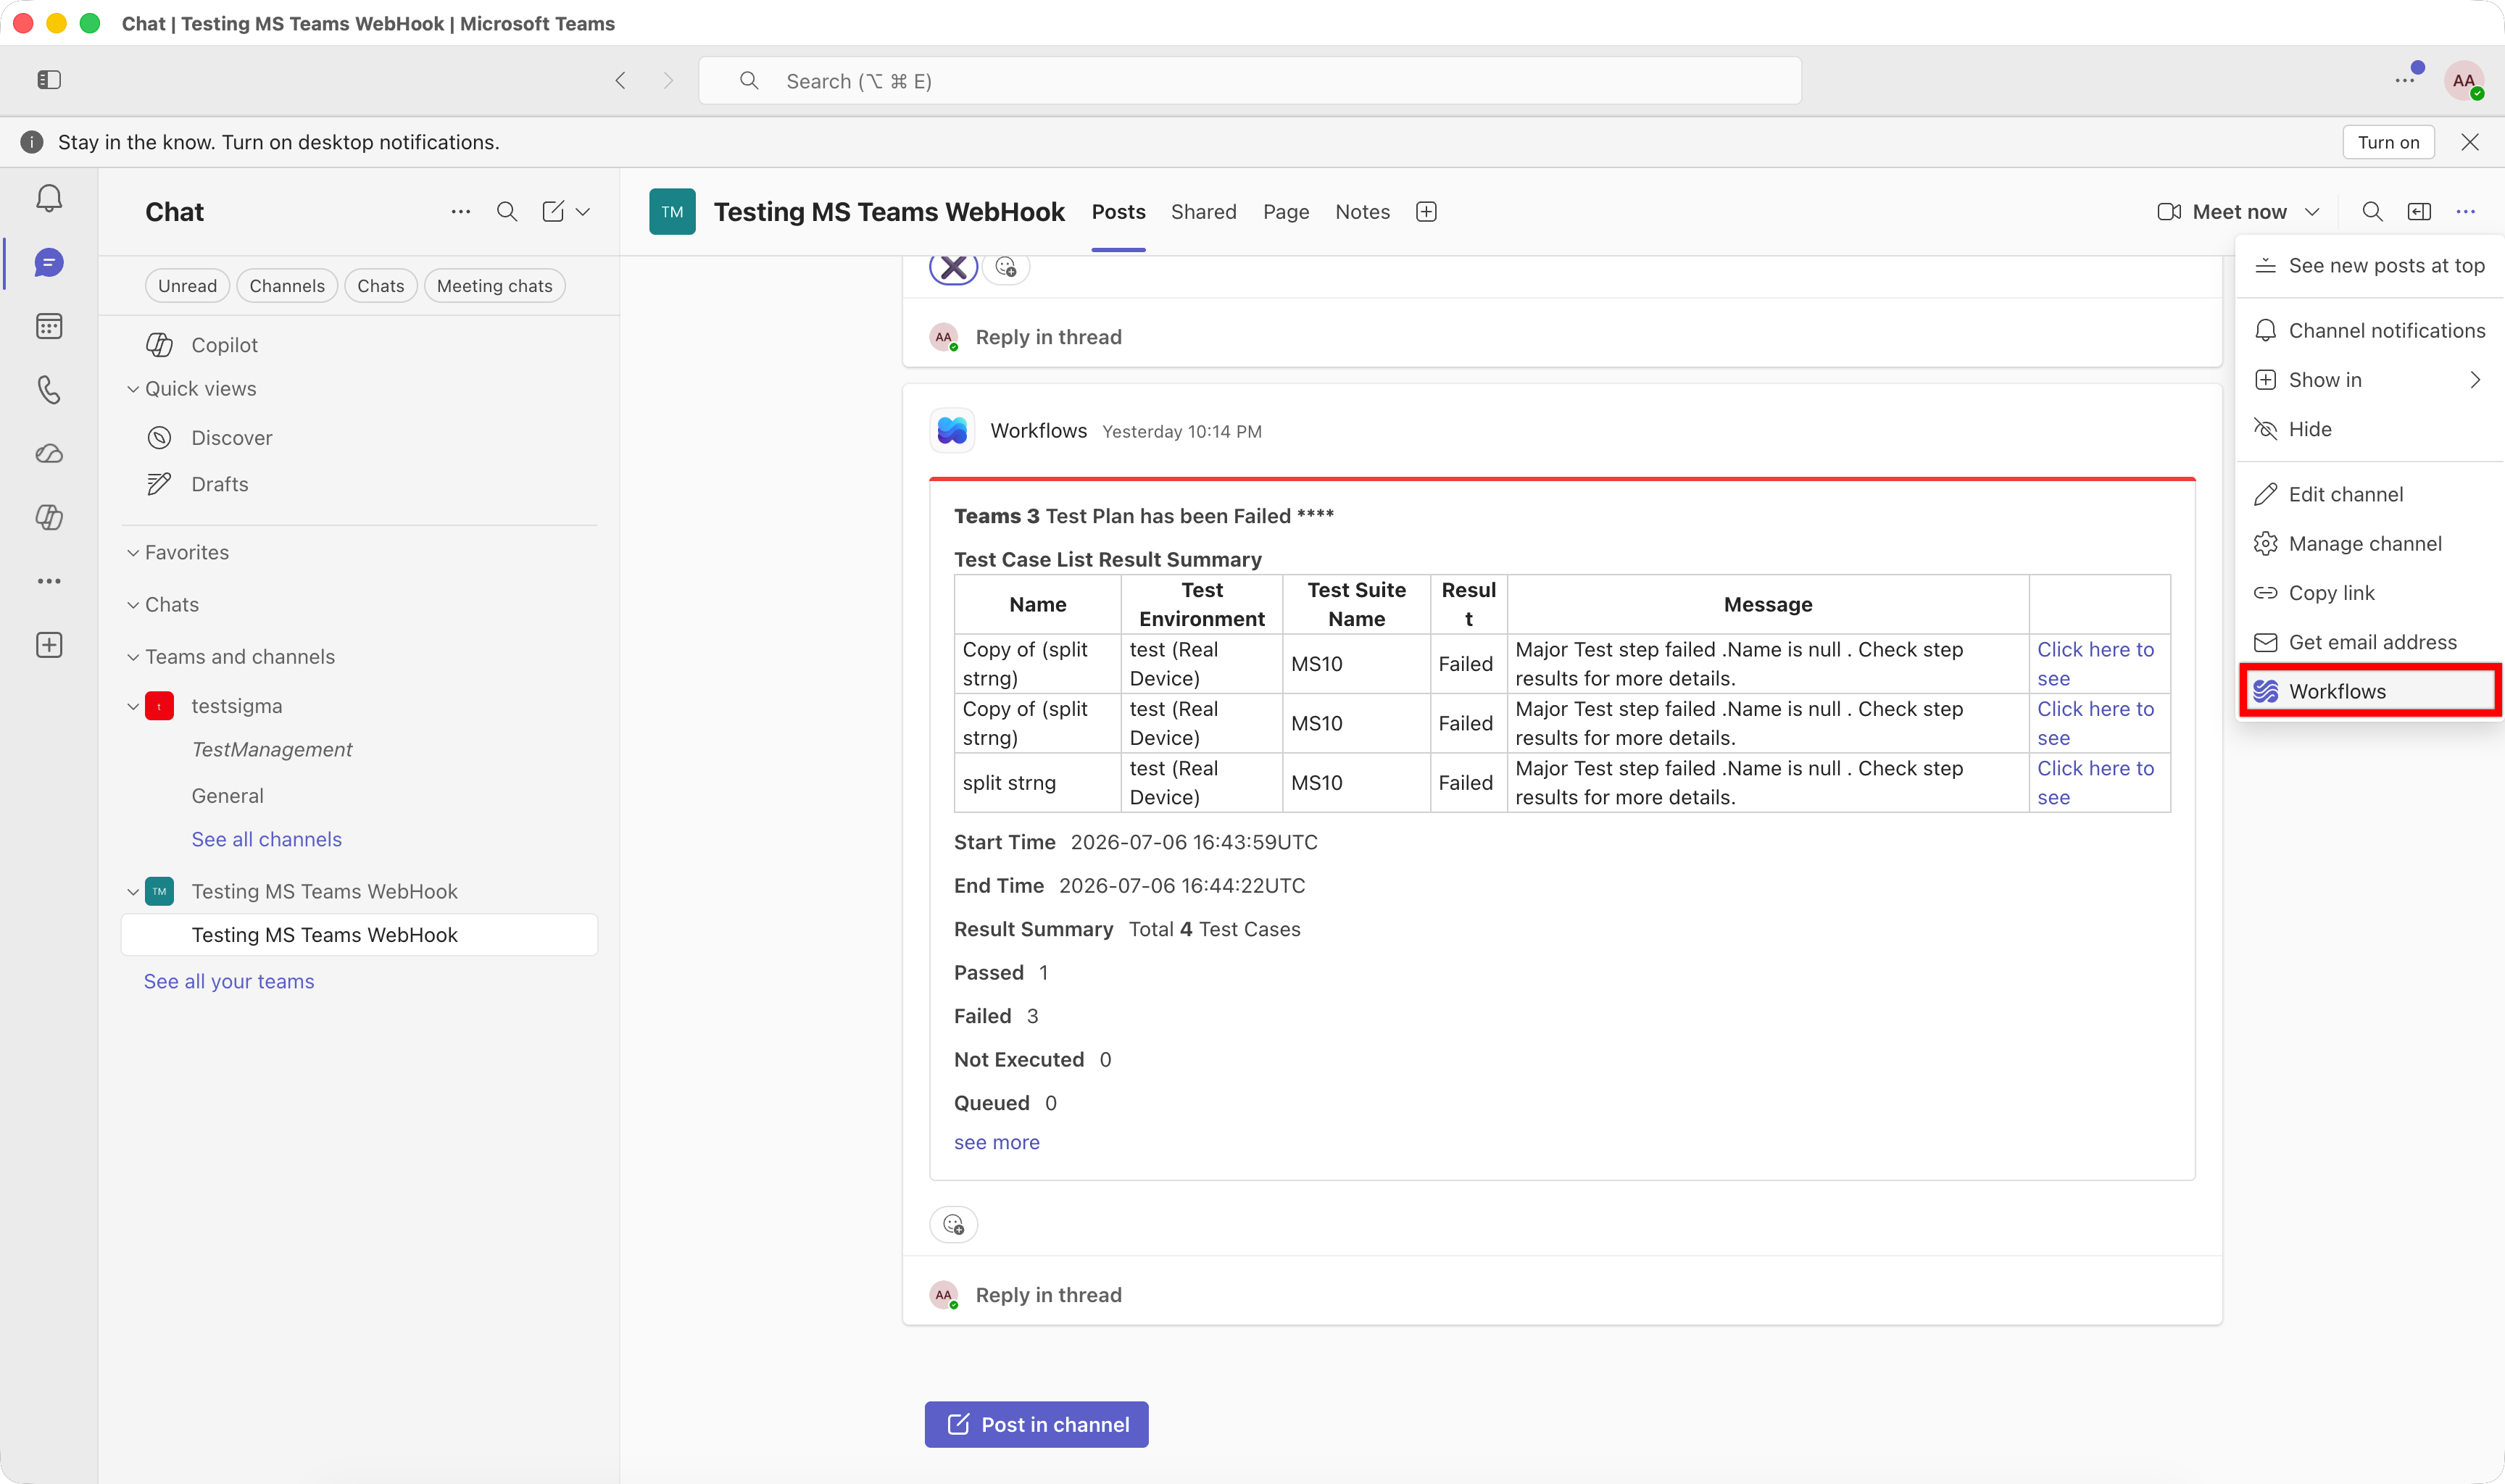
- Click the more options menu in the channel header, then select Workflows.
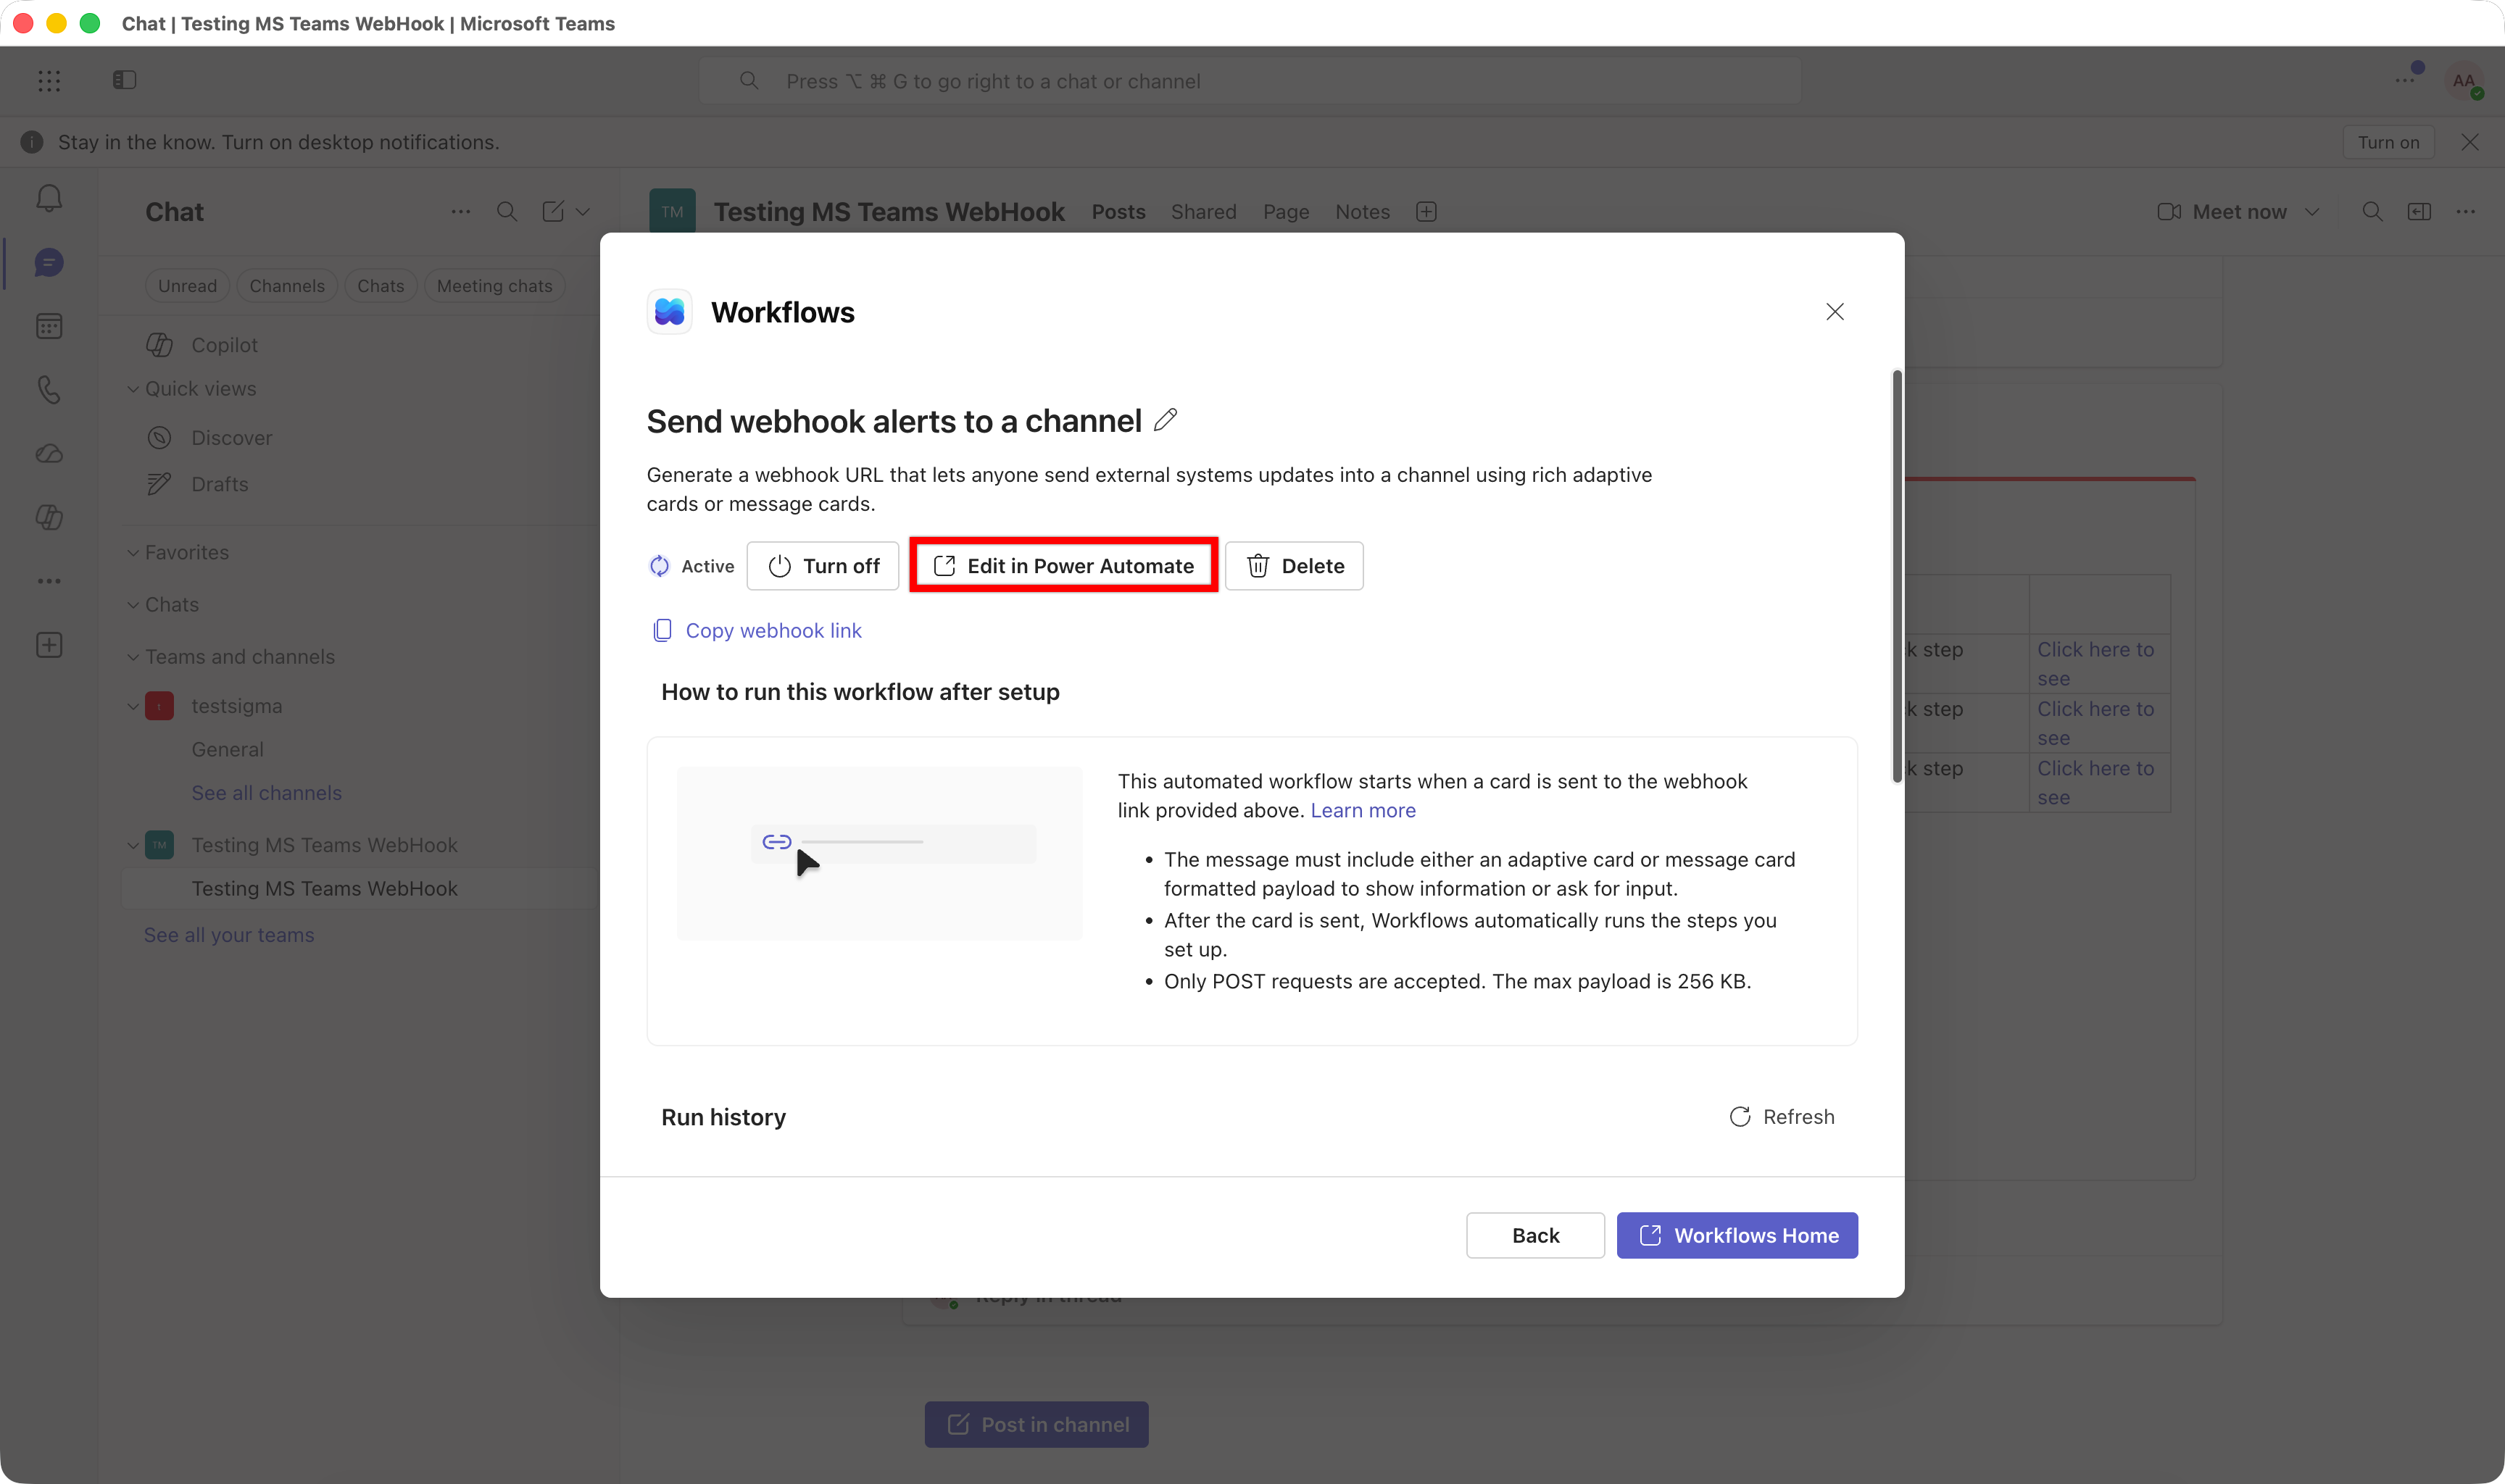
- Locate the workflow you created and select Edit in Power Automate.
- In the flow editor, expand the section containing Attachments and open the Post card in a chat or channel action.
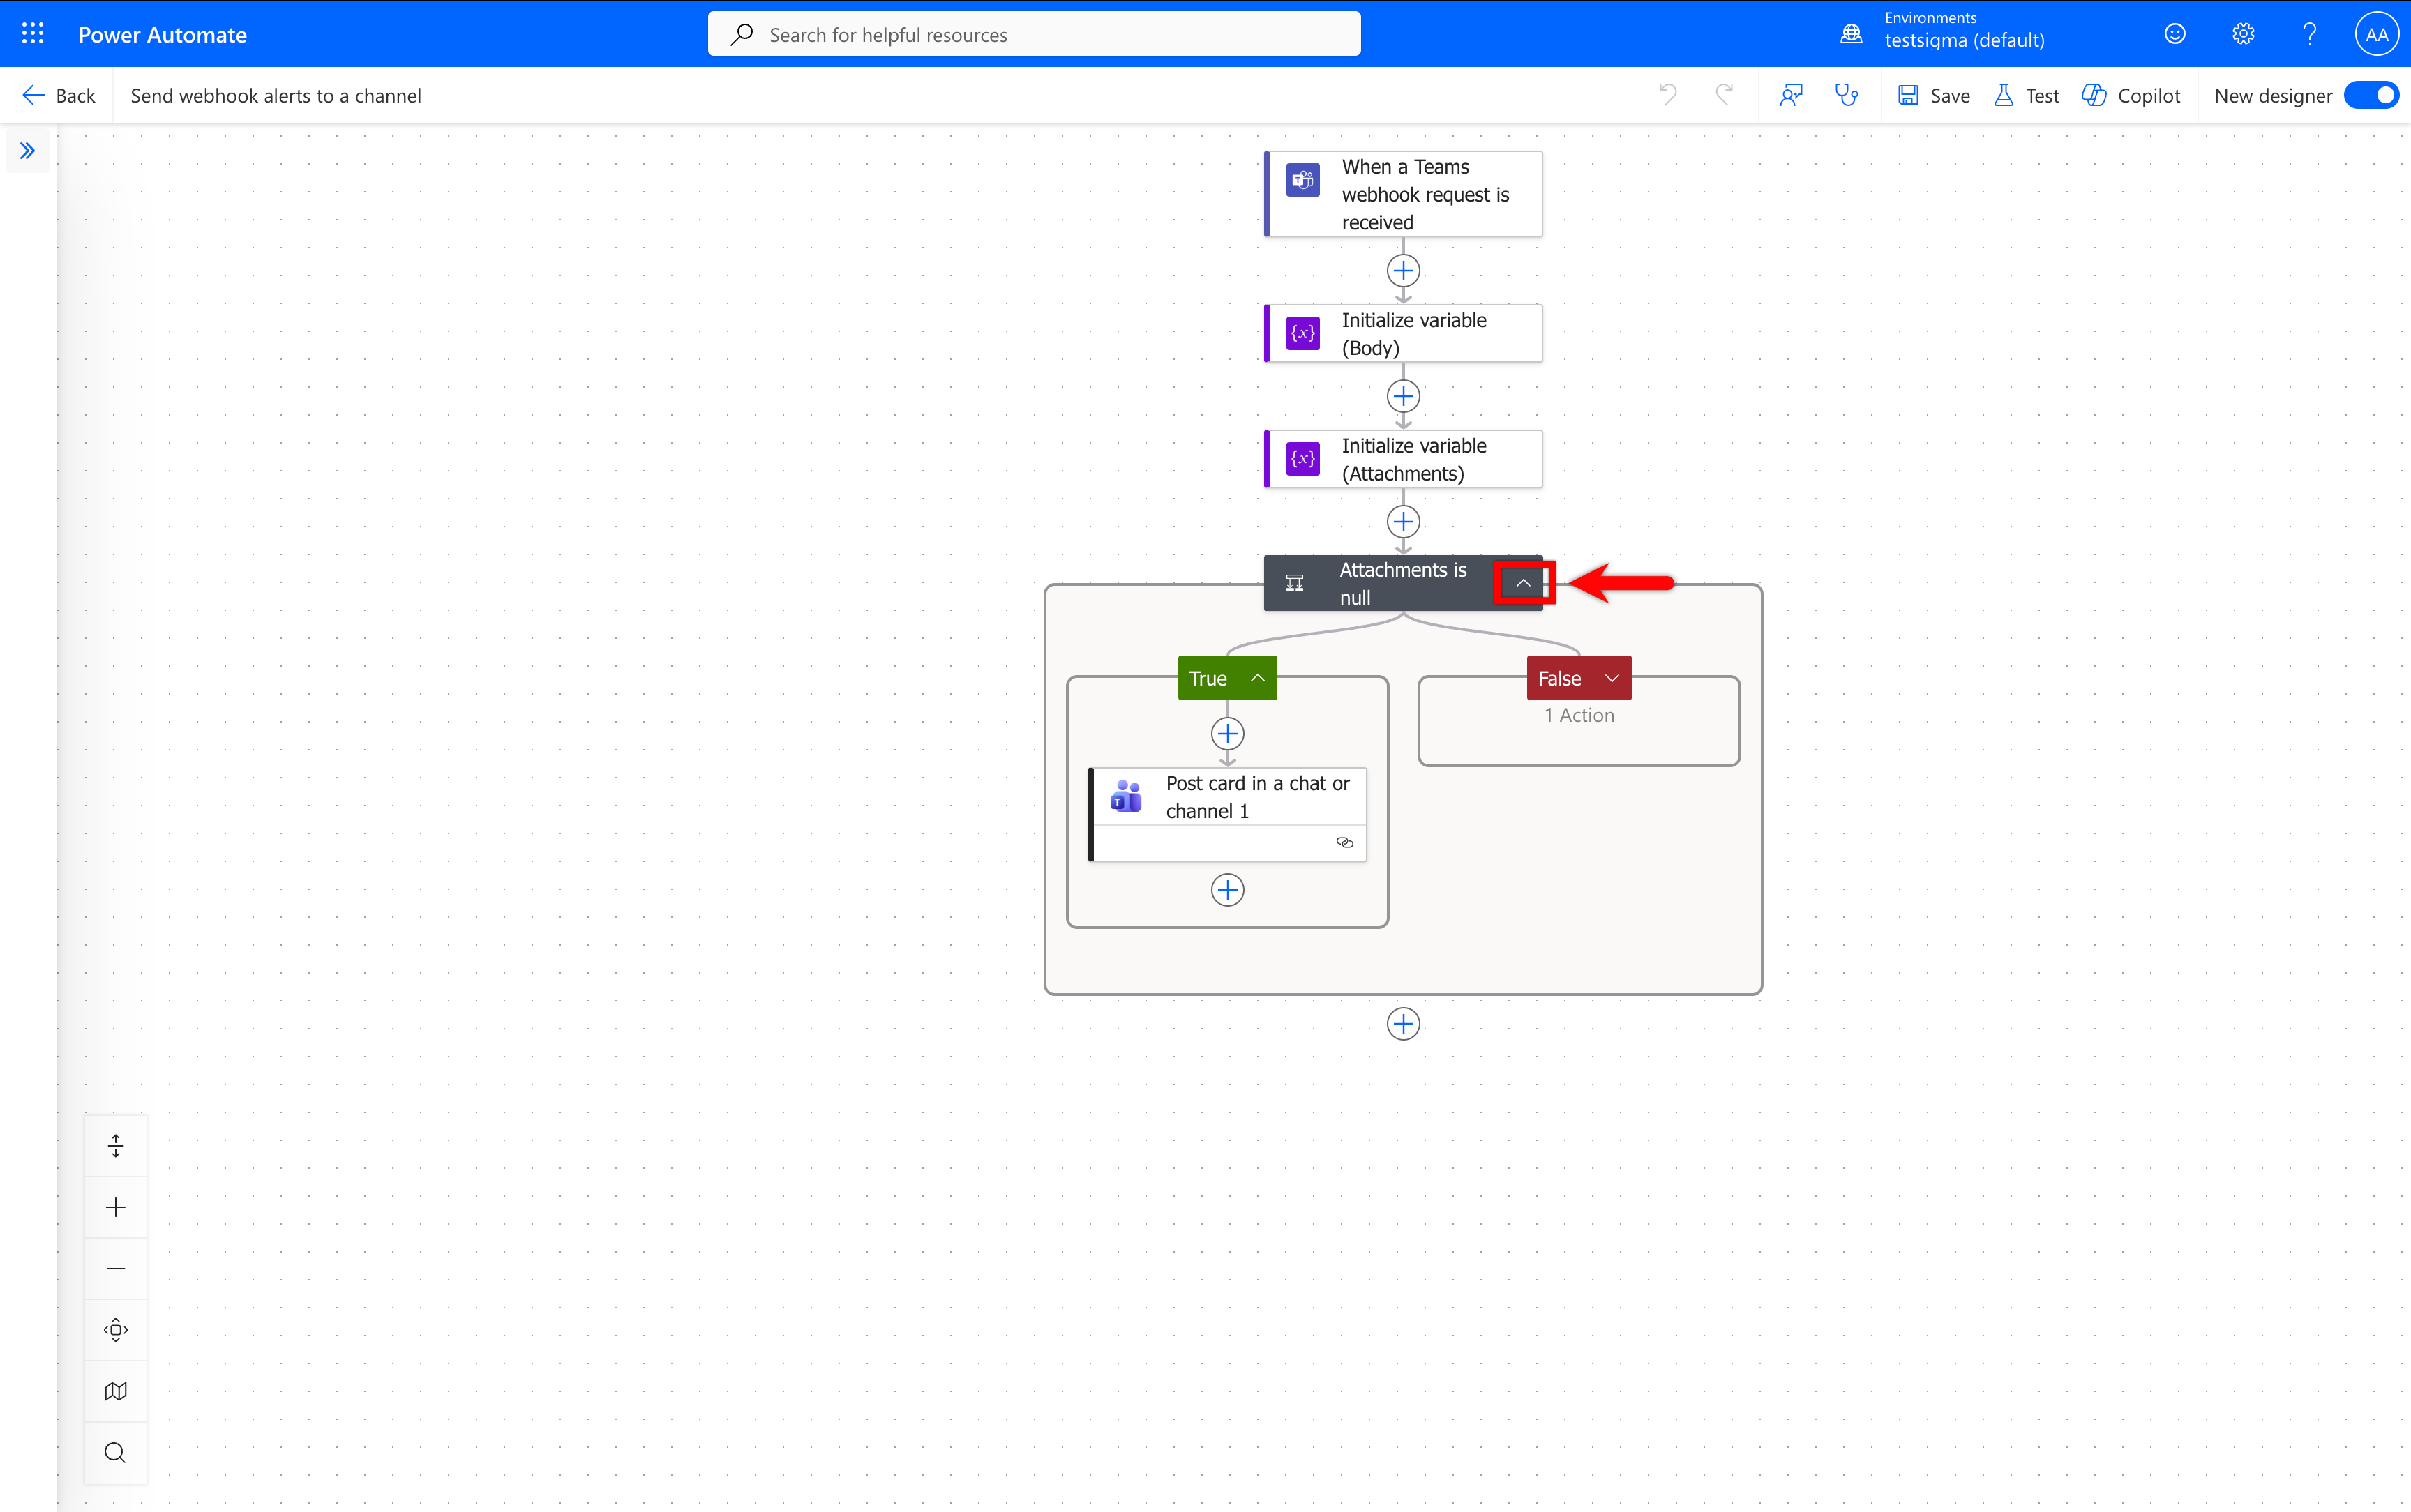
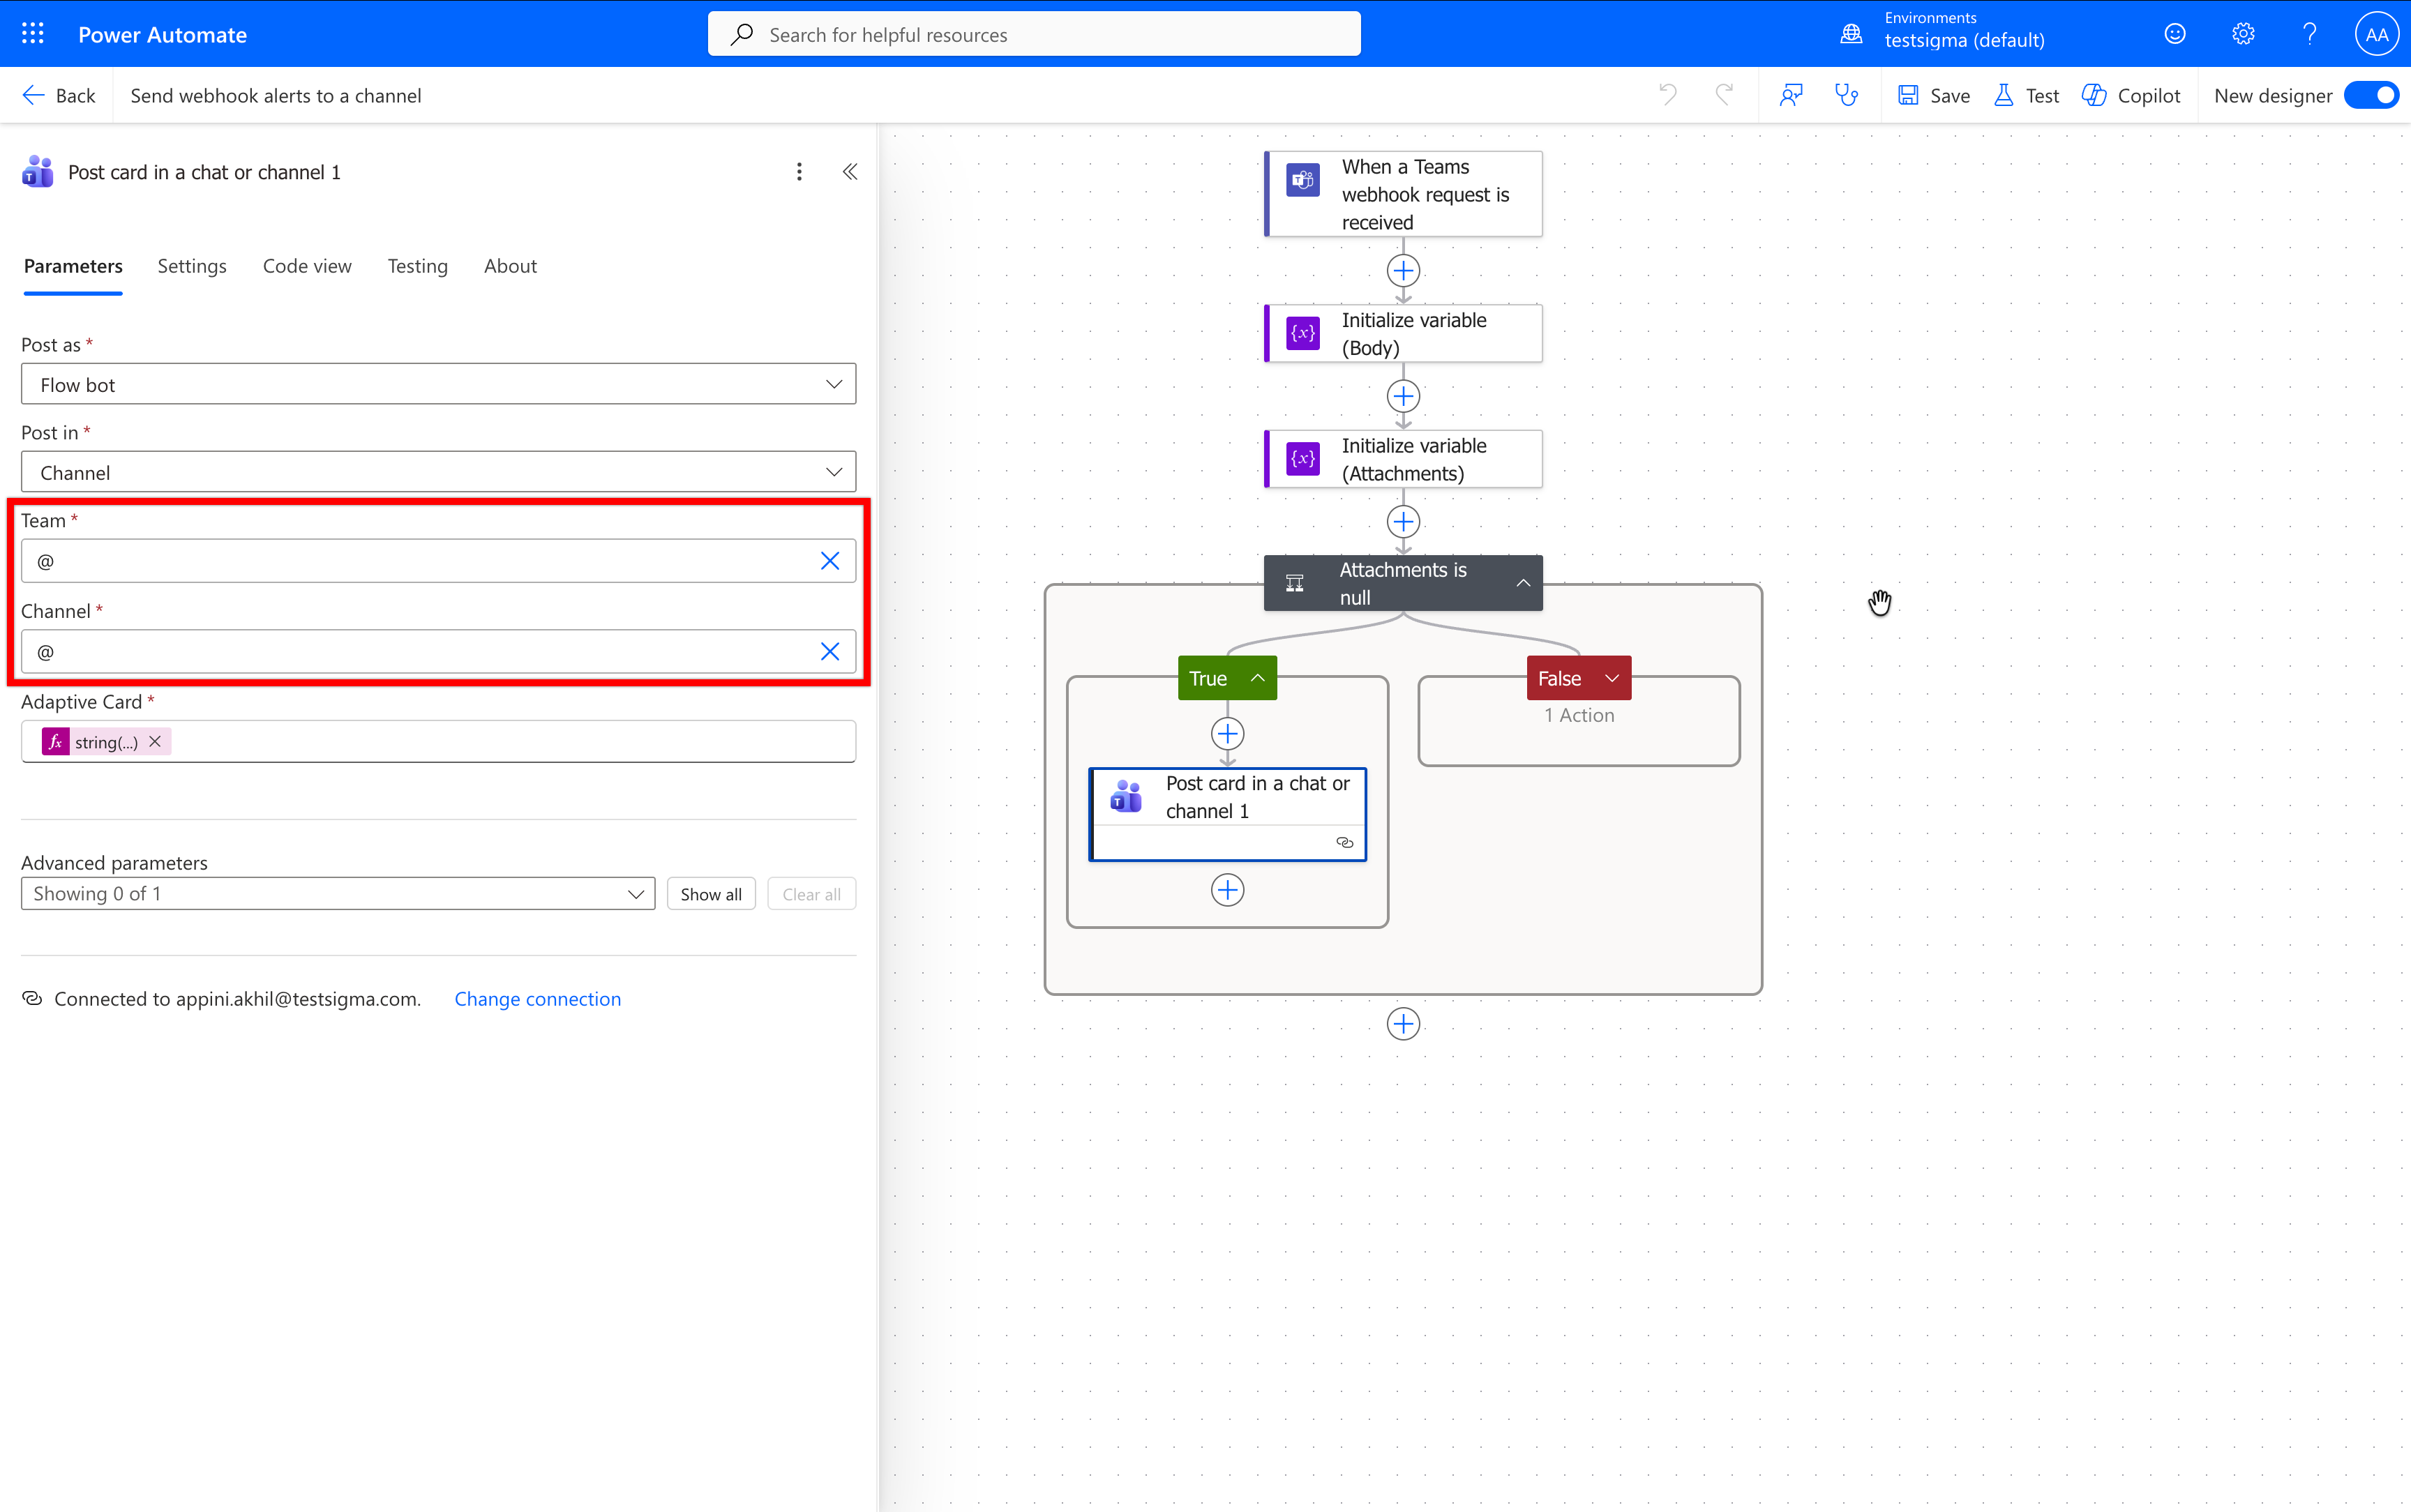
- In the Team & Channel fields, remove the existing values and re-select the same Team & Channel you used when creating the webhook.
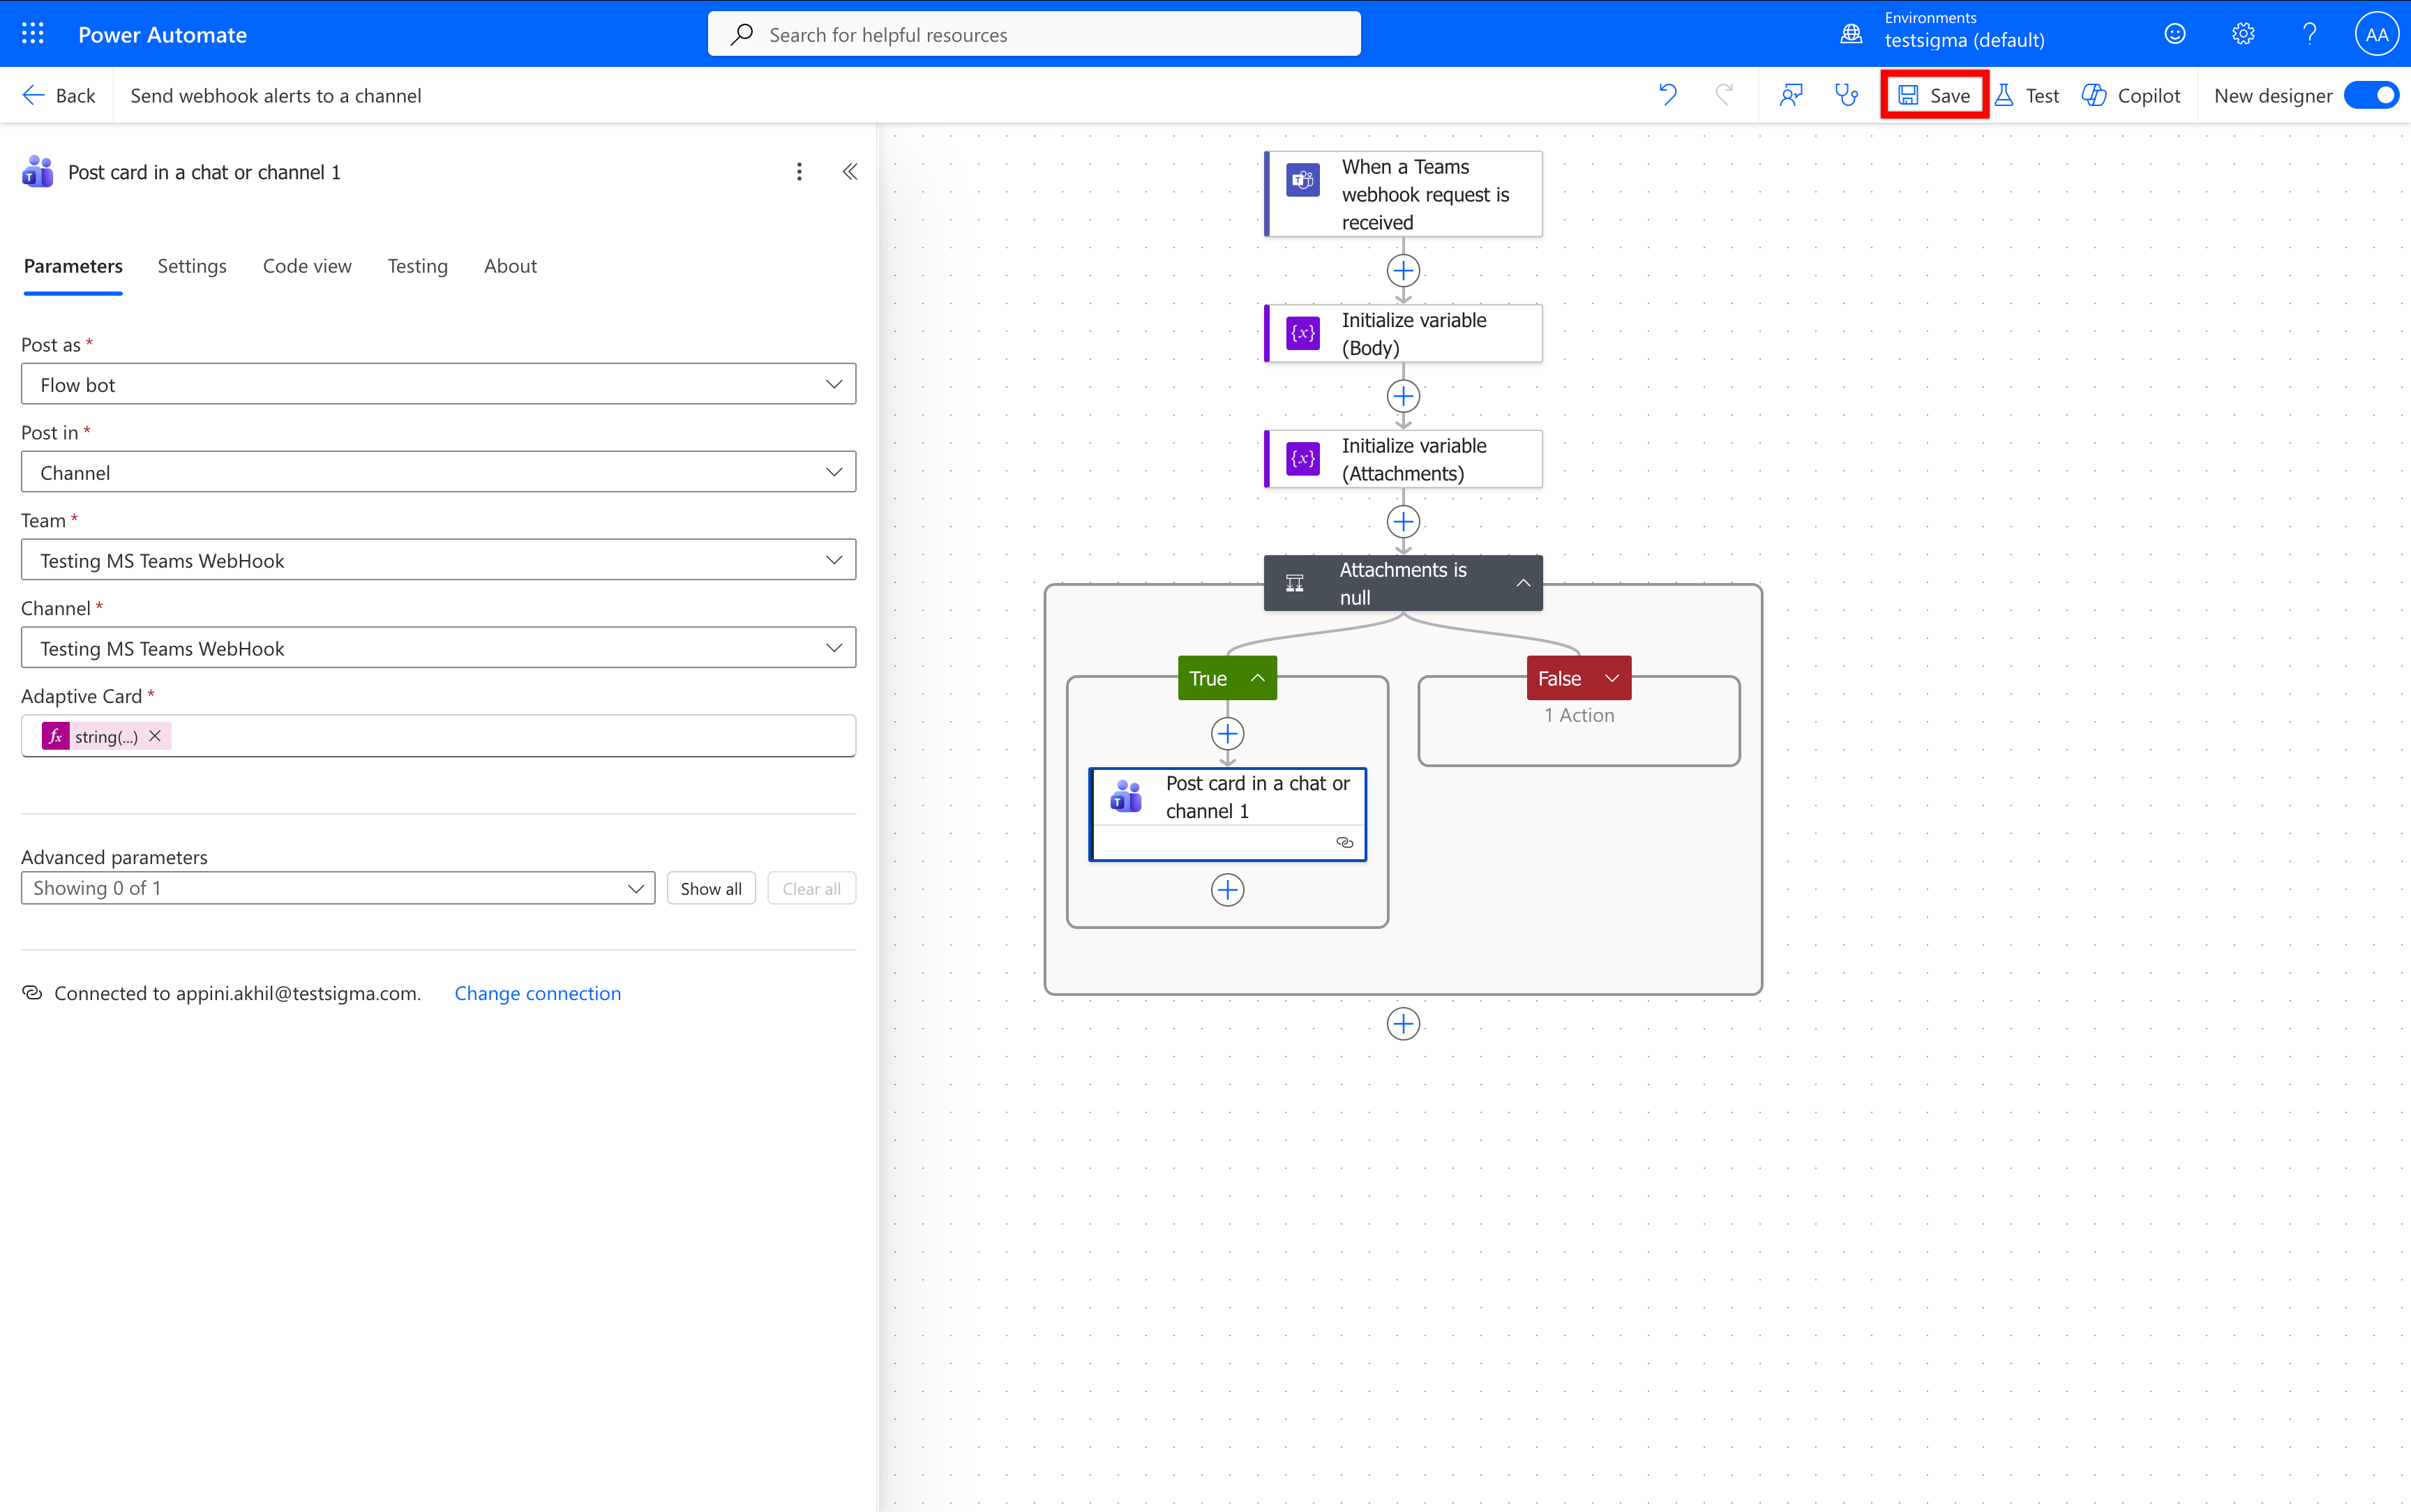
- Click Save at the top of the Power Automate page.
Enabling MS Teams Notifications in Test Plan
Once the MS Teams integration is added, you can enable MS Teams notifications while creating or editing a test plan.
- On the Create Test Plan/Edit Test Plan page, click Test Plan Settings.
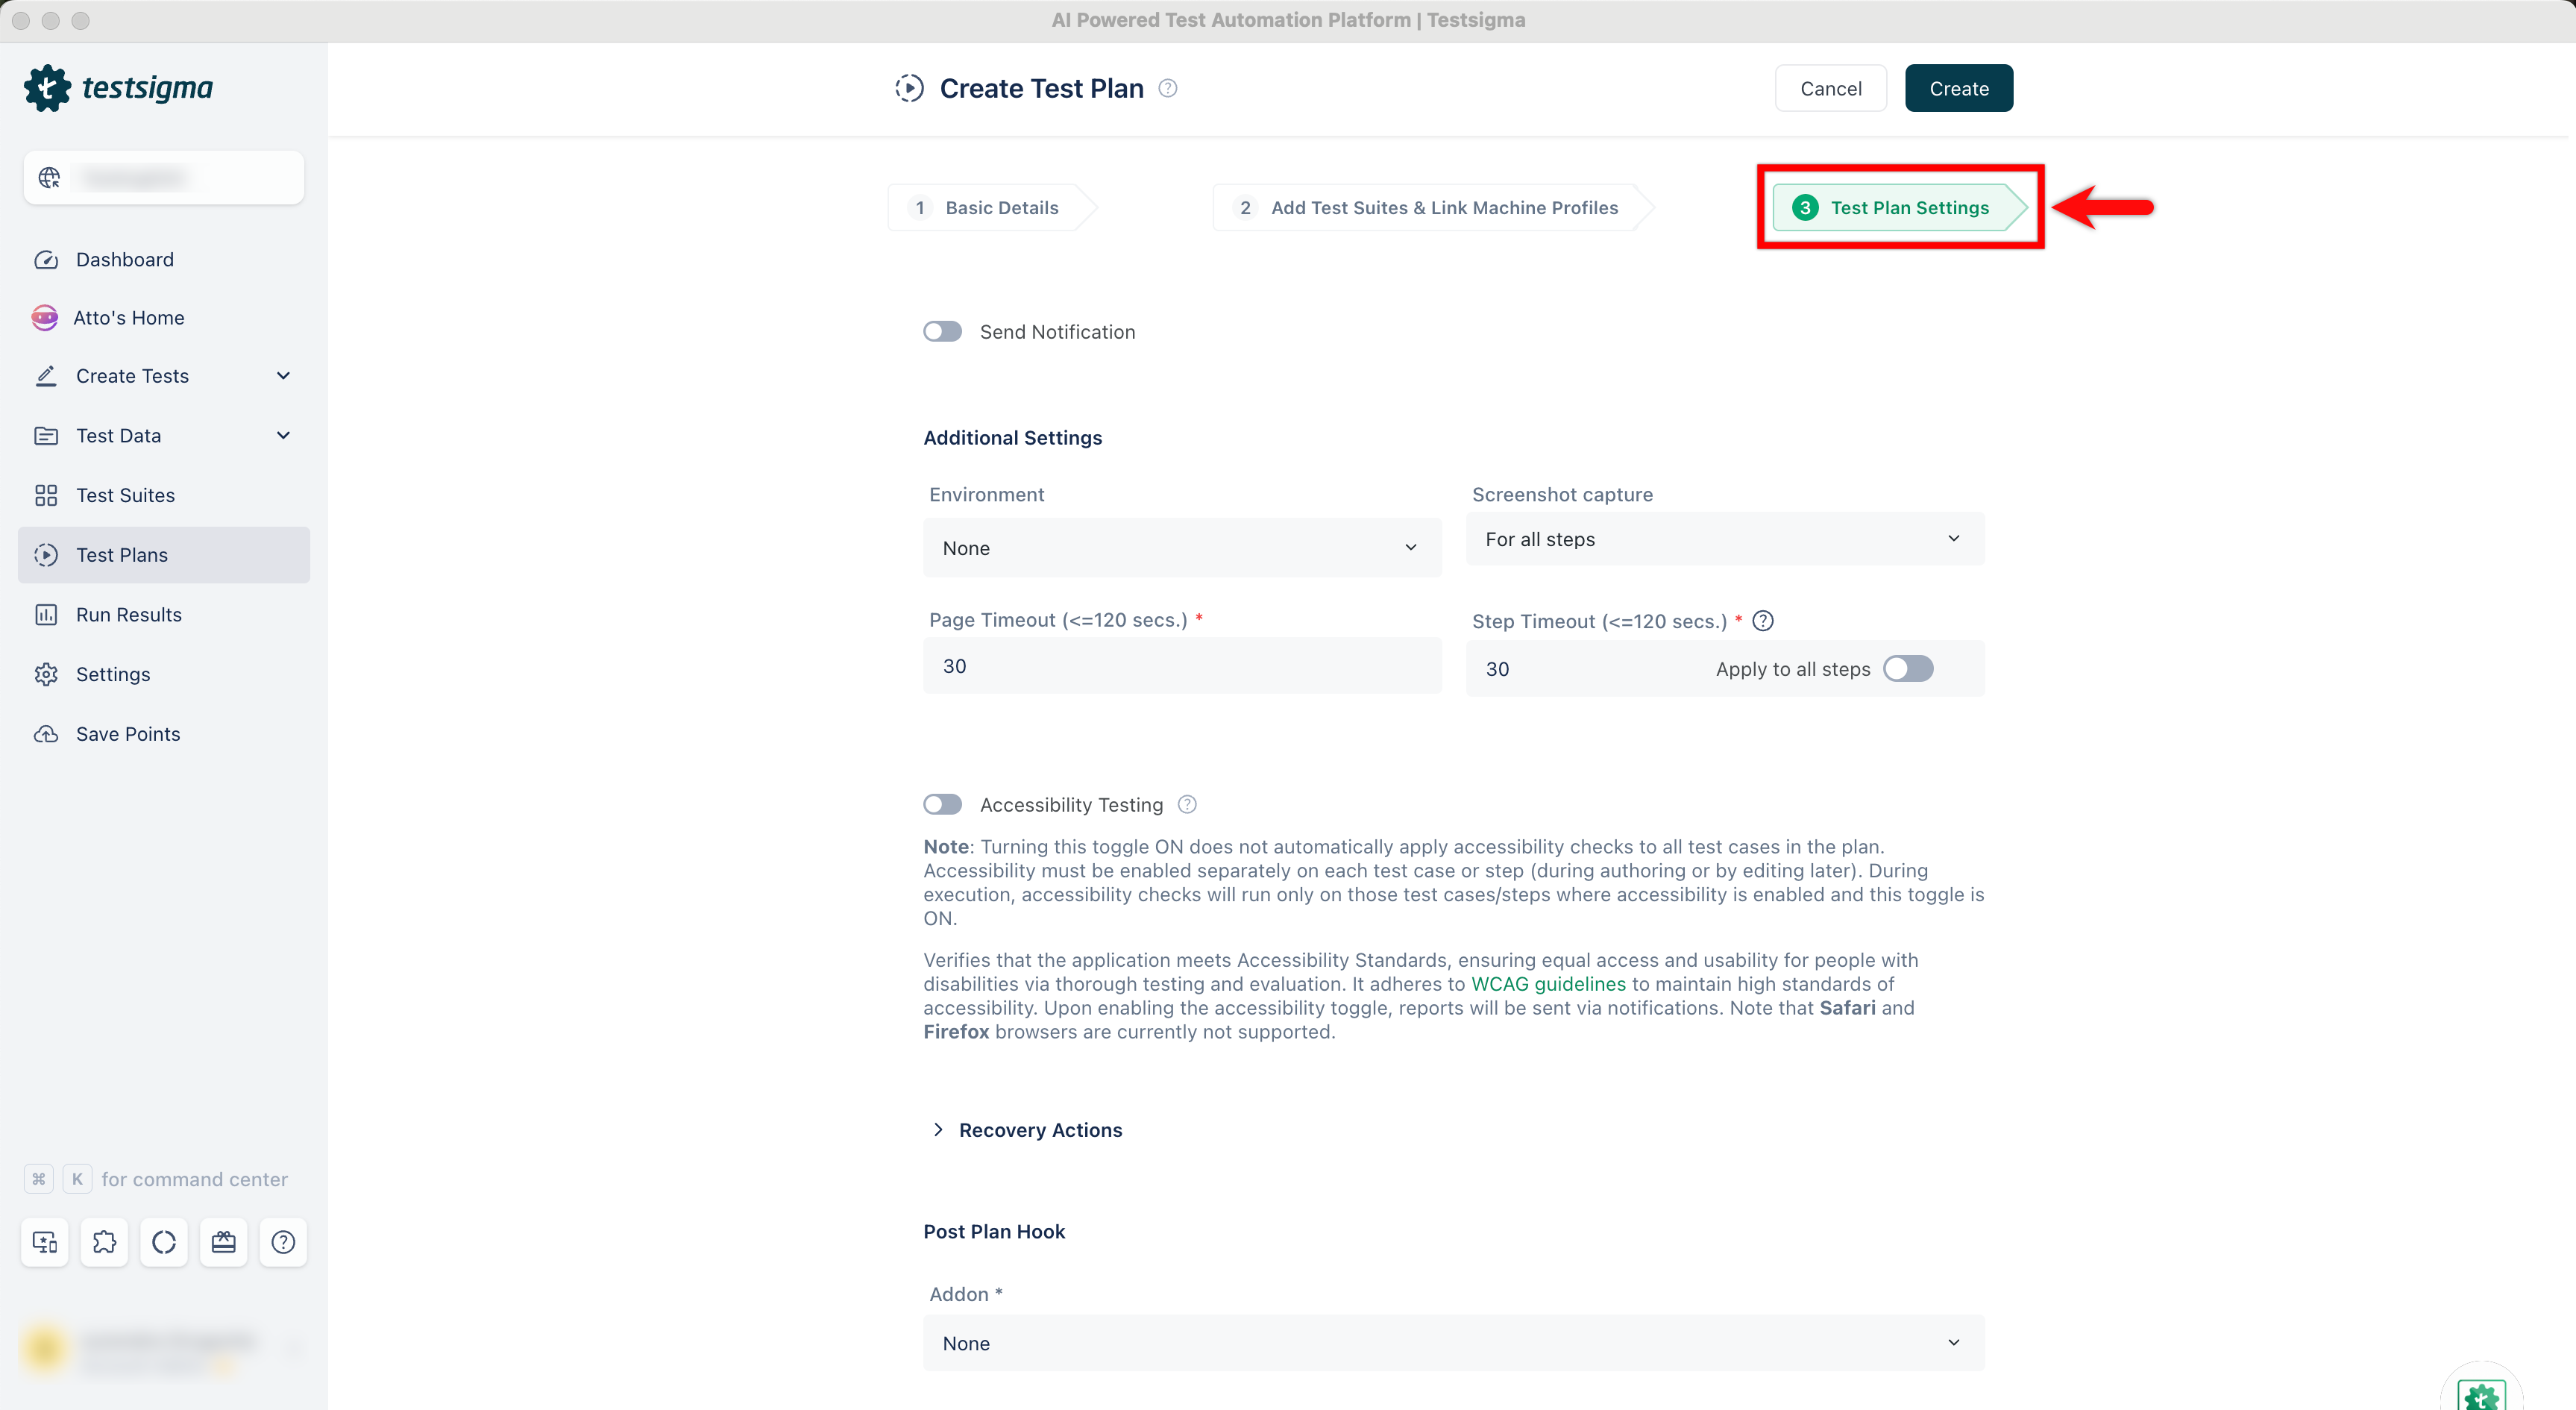
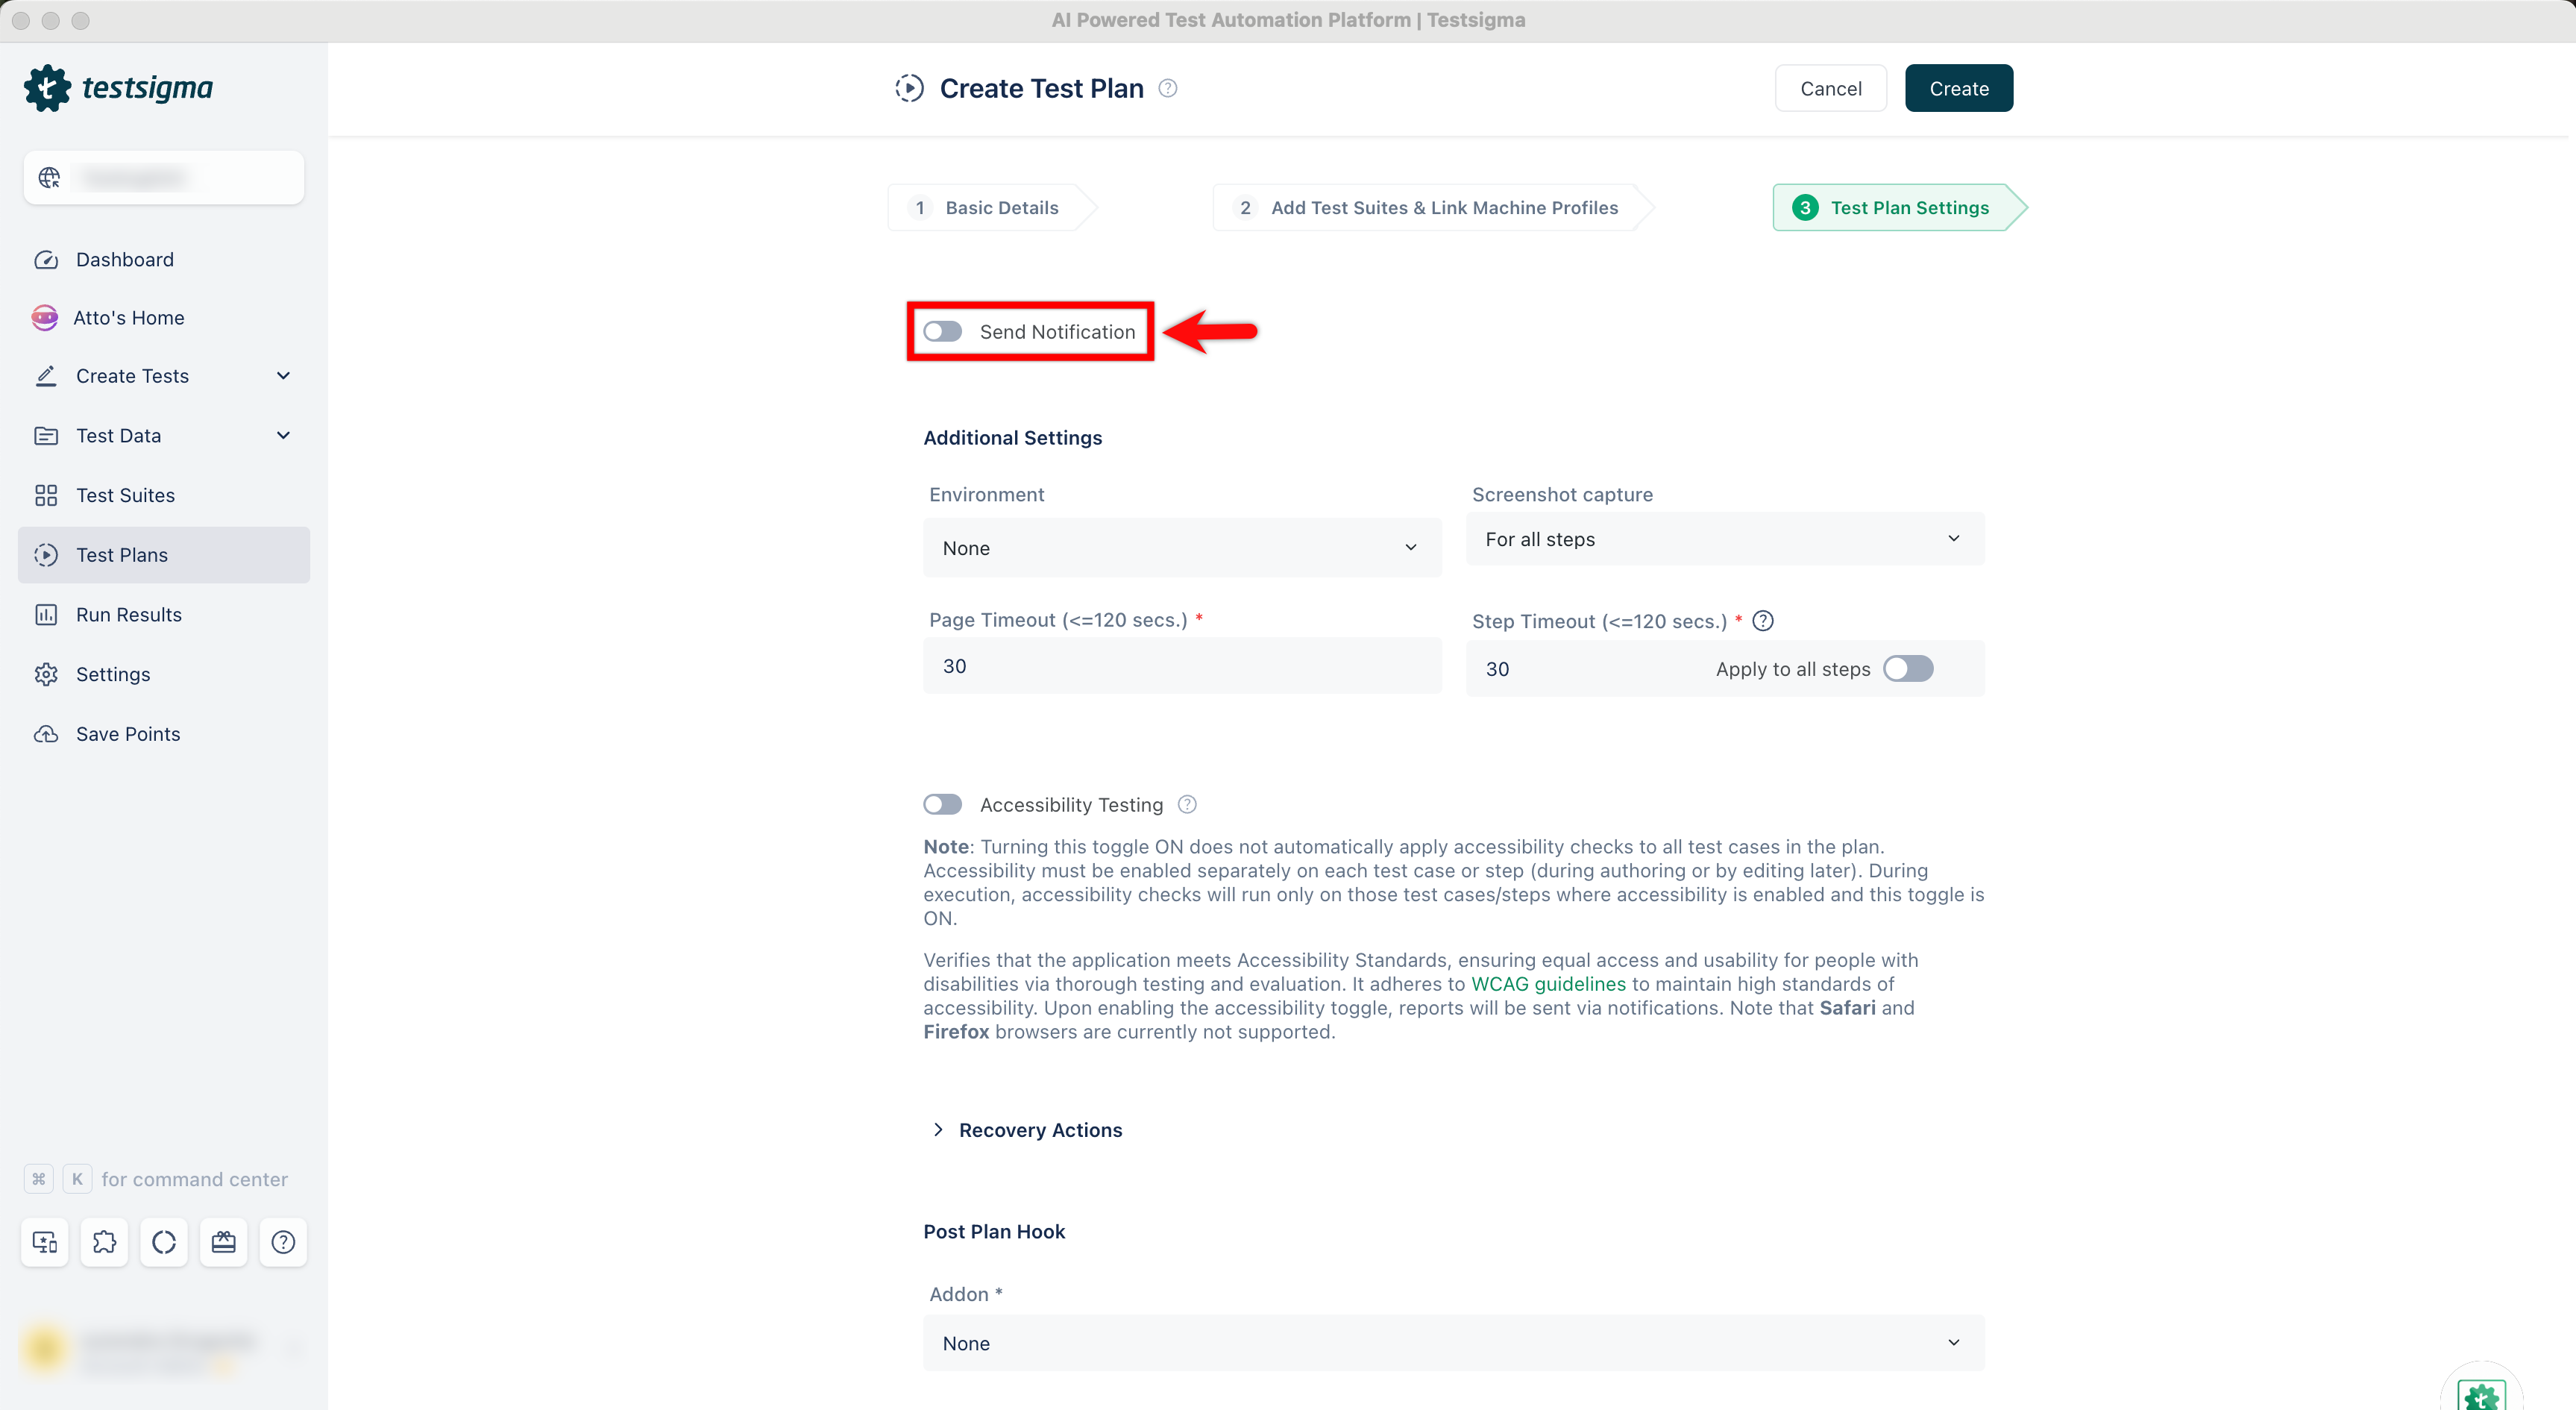
- Enable the Send Notification toggle.
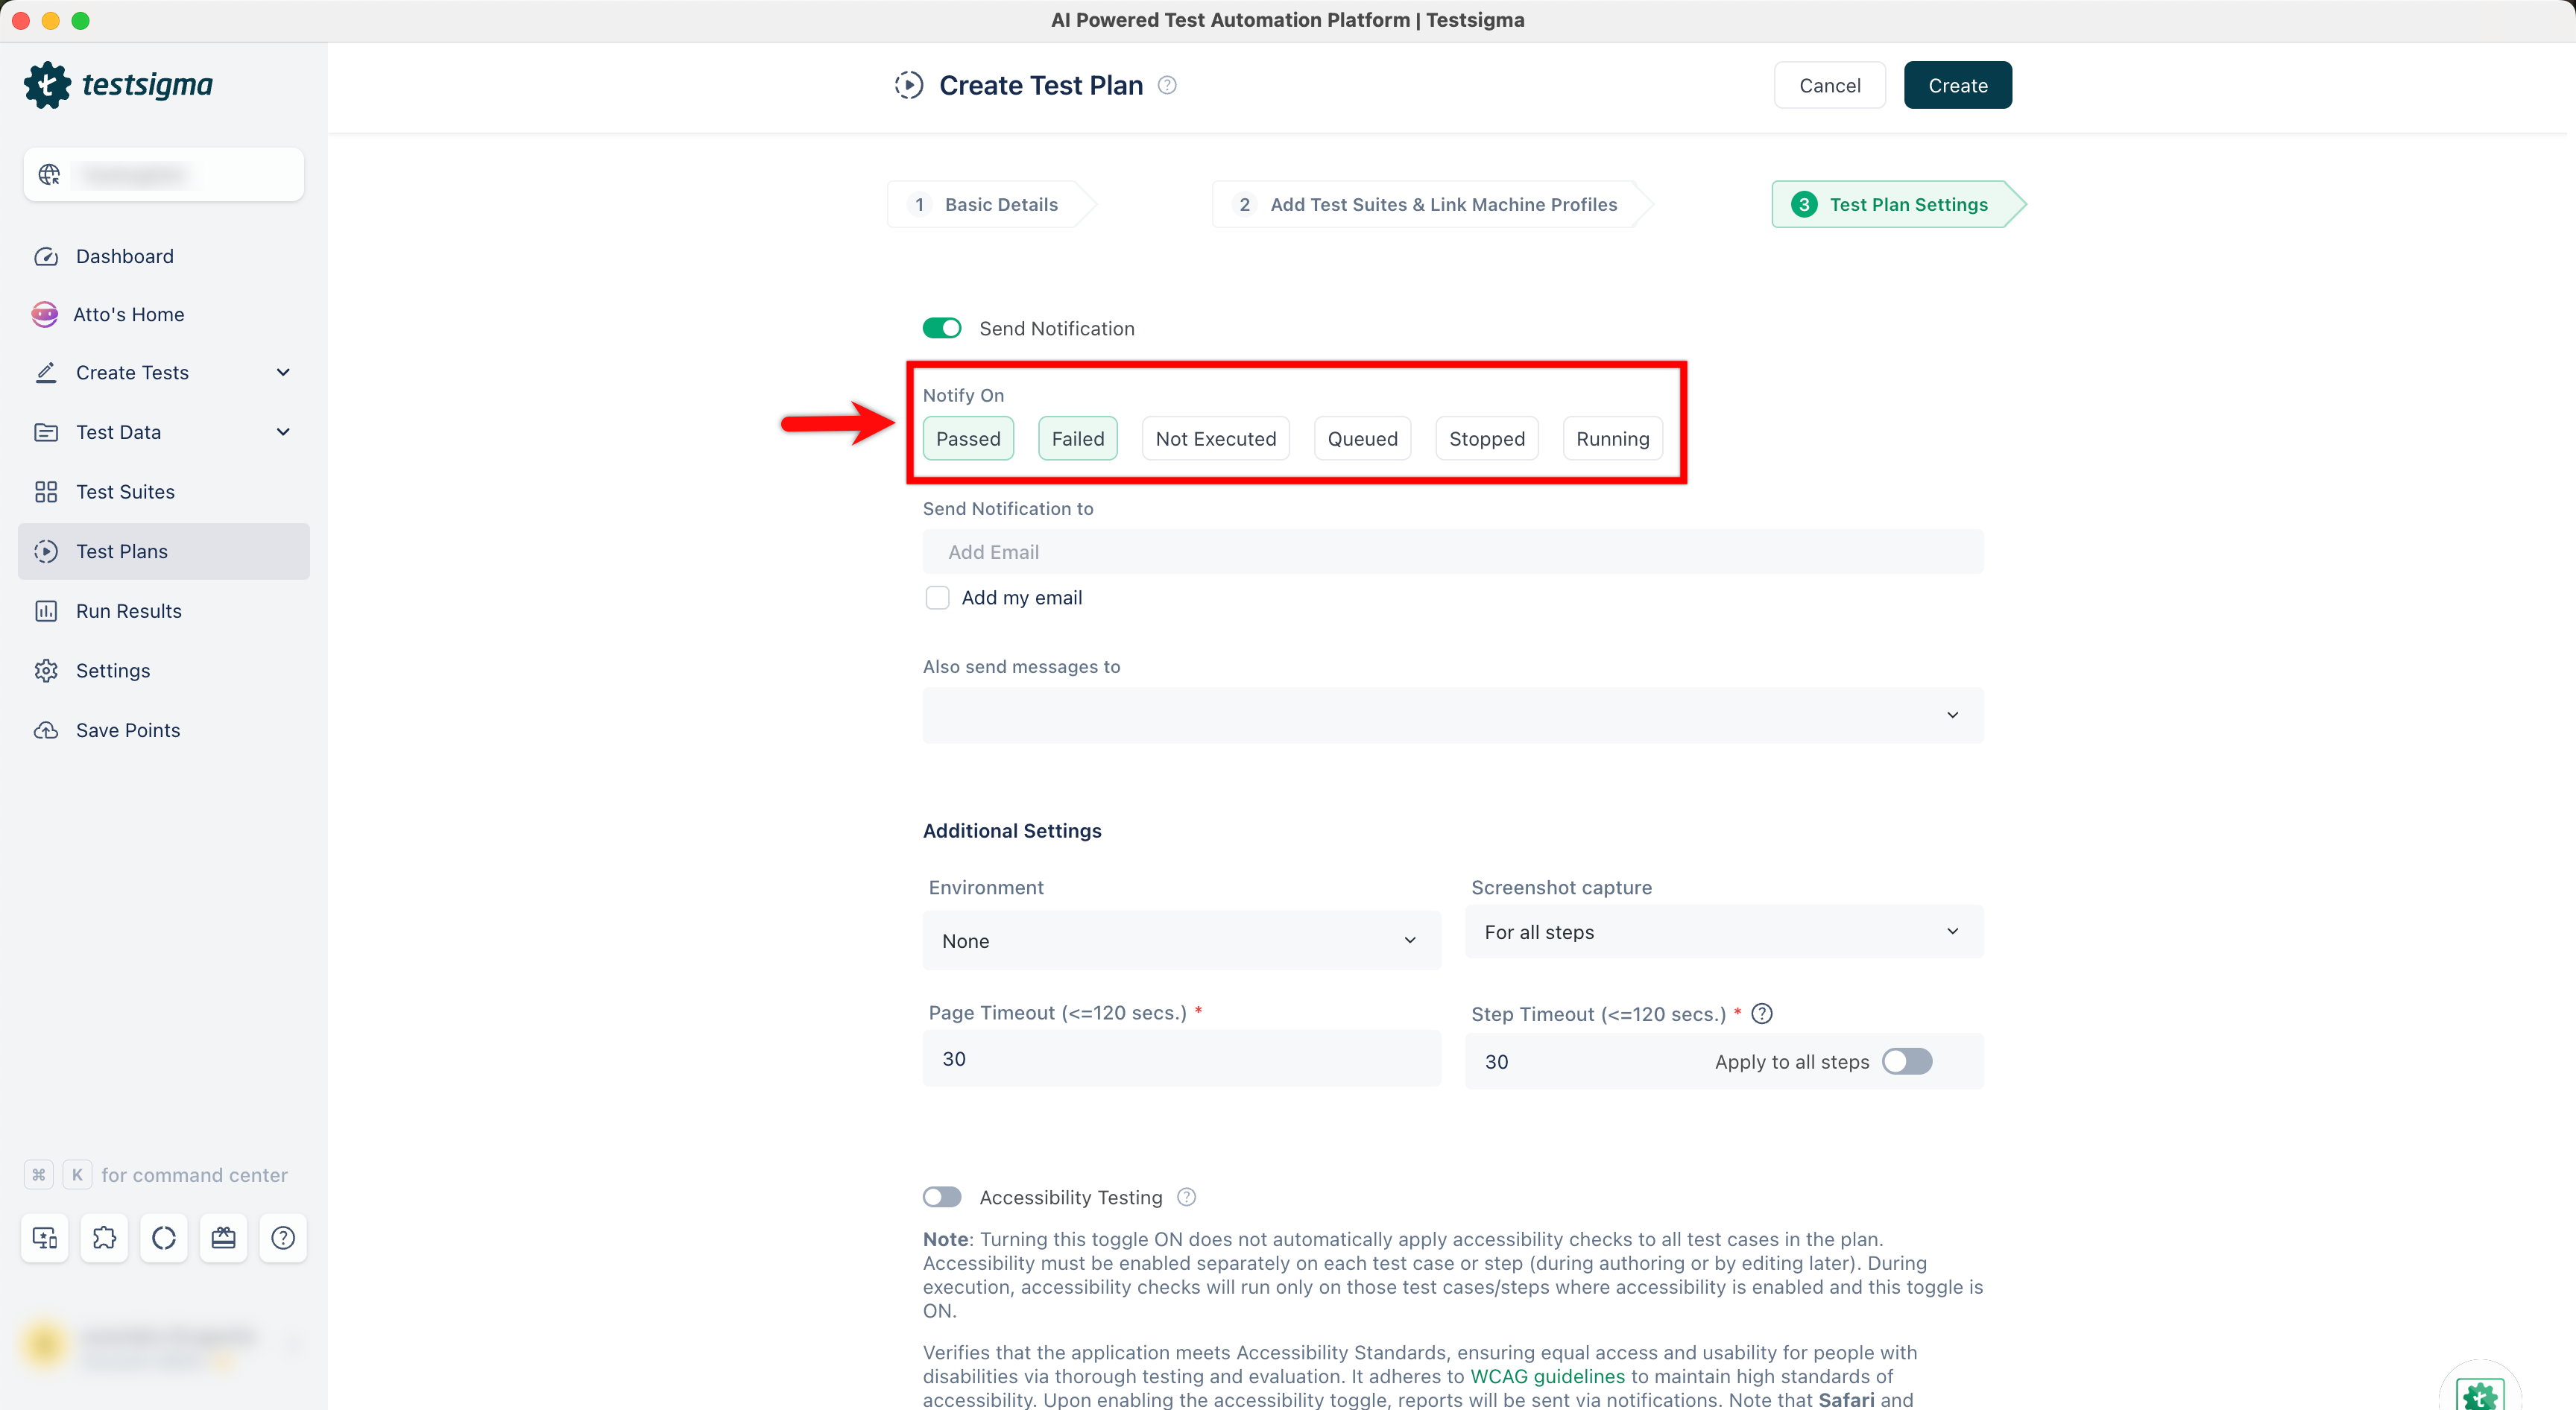
- Under the Notify On section, select the statuses for which you want to be notified.
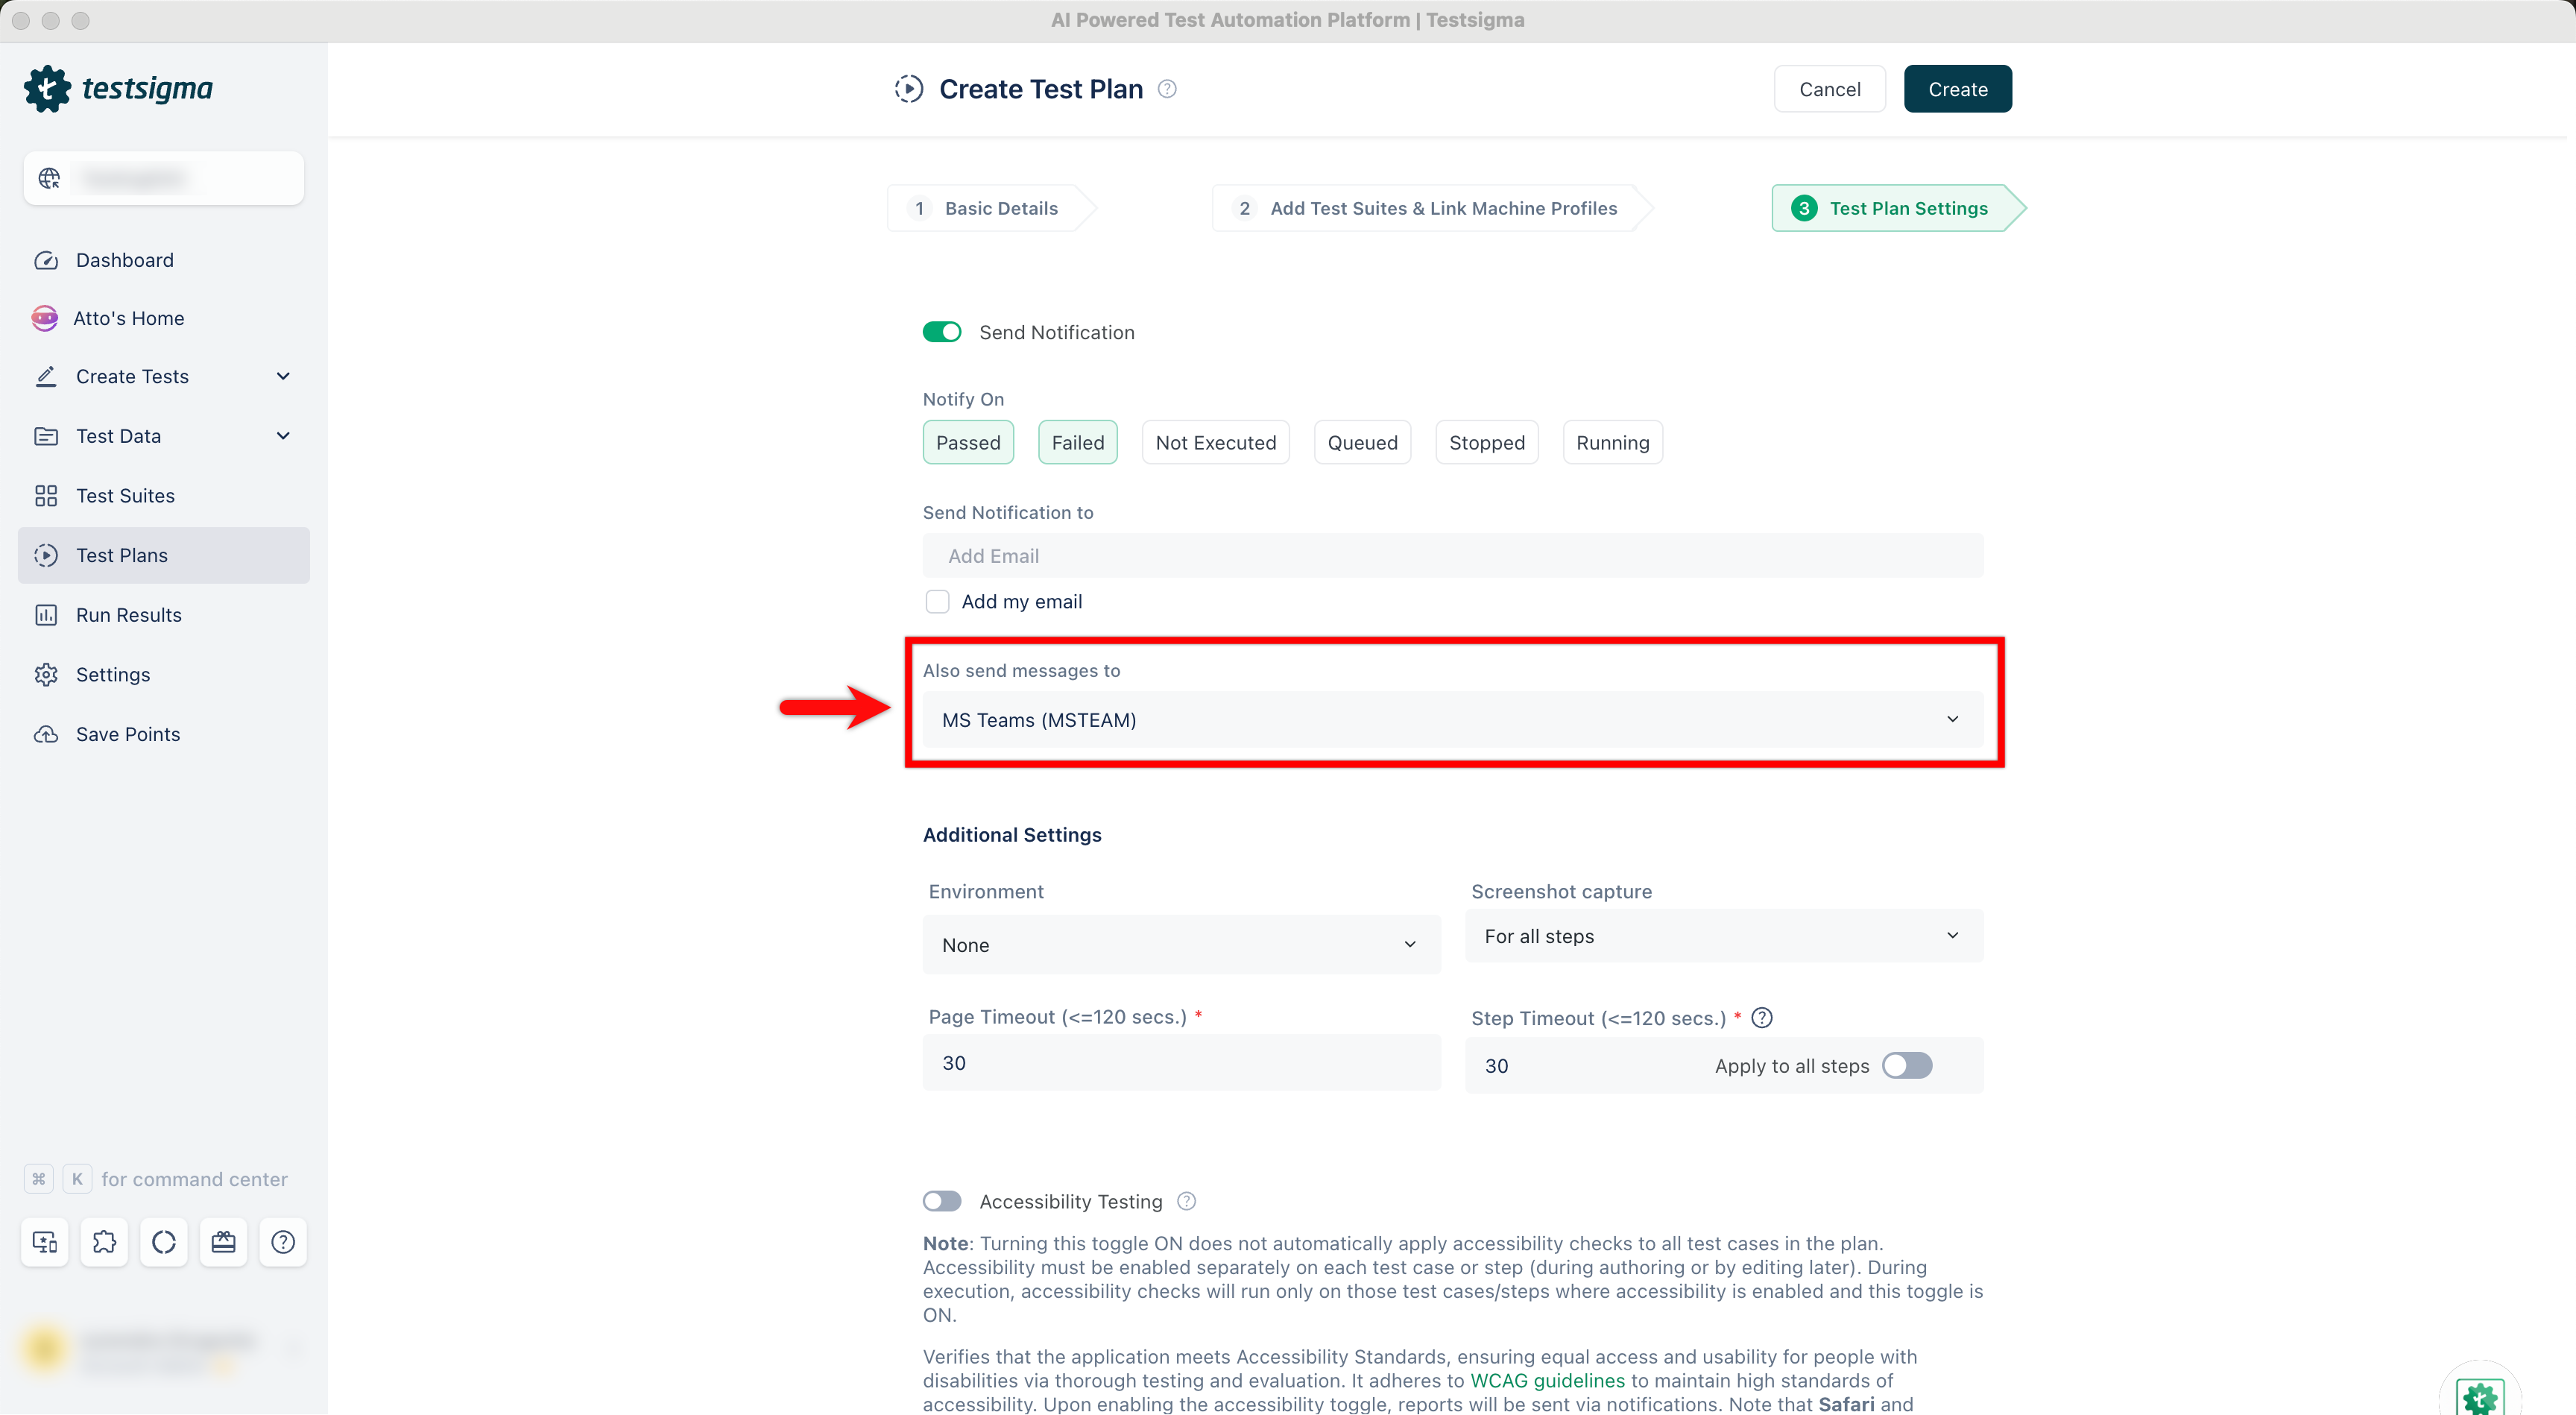
- Under the Also send messages to dropdown, select MS Teams. If an older webhook was configured earlier, replace it with the webhook you created in this guide.
- Save the test plan.
- Run the test plan and confirm that the notification is posted to the selected Teams channel.
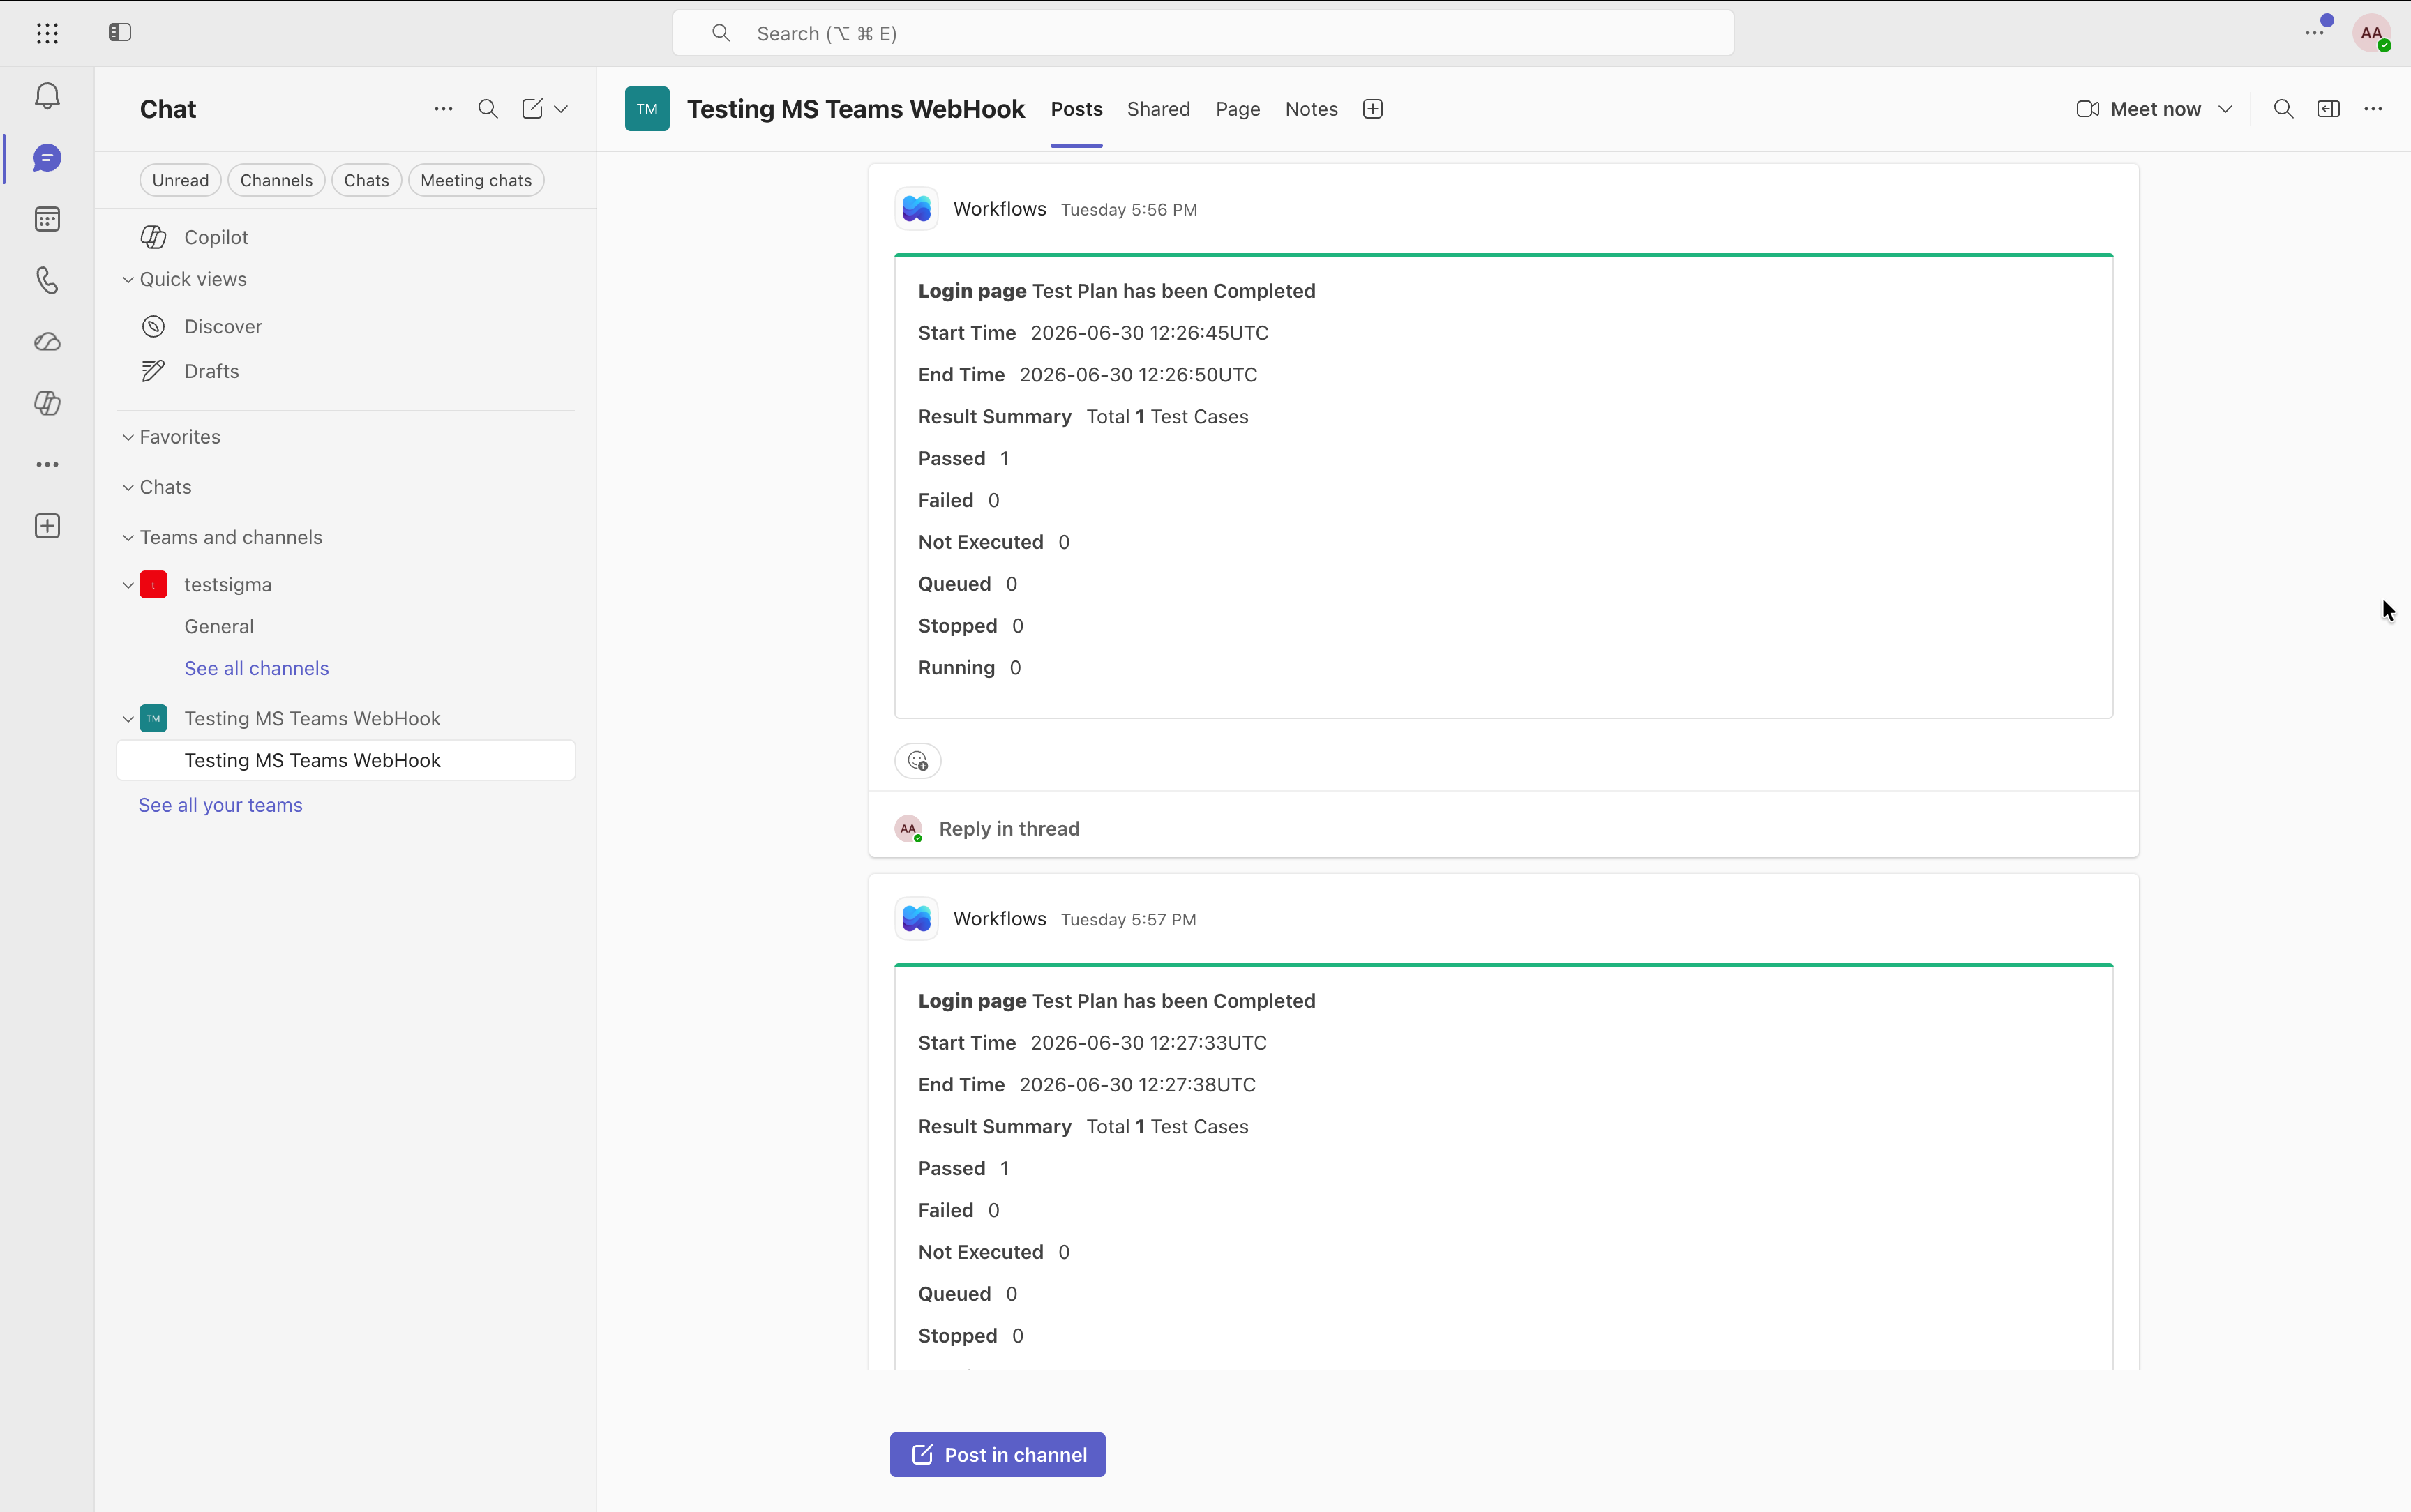
Here's what the notification looks like on MS Teams:

Want to contribute or report missing content?