- Testsigma Agent
 Pre-requisites
- Setup: Windows, Mac, Linux
- Setup: Android Local Devices
- Setting Up iOS Local Devices
- Arguments Usage Details
- Agent Upgrade Guide
- Update Agent Manually
- Update Drivers Manually
- Delete Corrupted Agent
- Delete Agents: Soft & Permanent
- Triggering Tests on Local Devices
- Testsigma Agent - FAQs
- troubleshooting
- How to Fix Agent Startup & Registration Errors?
- How to Configure Agent Logs?
- How to Upgrade Testsigma Agent Automatically?
- How to Add Max Sessions for Agents?
- How to Resolve Access Blocked Errors When Downloading the Agent?
- Why is Testsigma Agent Not Detecting My Installed Browser?
- How do I Configure Proxy Settings for the Testsigma Agent?
Setting up Android Local Devices
Testsigma allows you to run tests on your local Android devices in addition to Testsigma cloud machines/devices. This article discusses how to set up Android local devices in Testsigma.
Prerequisites
Before you begin, ensure that:
- You have referred to the documentation on setting up Testsigma Agent.
- You have enabled Developer options in your Android device.
Setup Instructions:
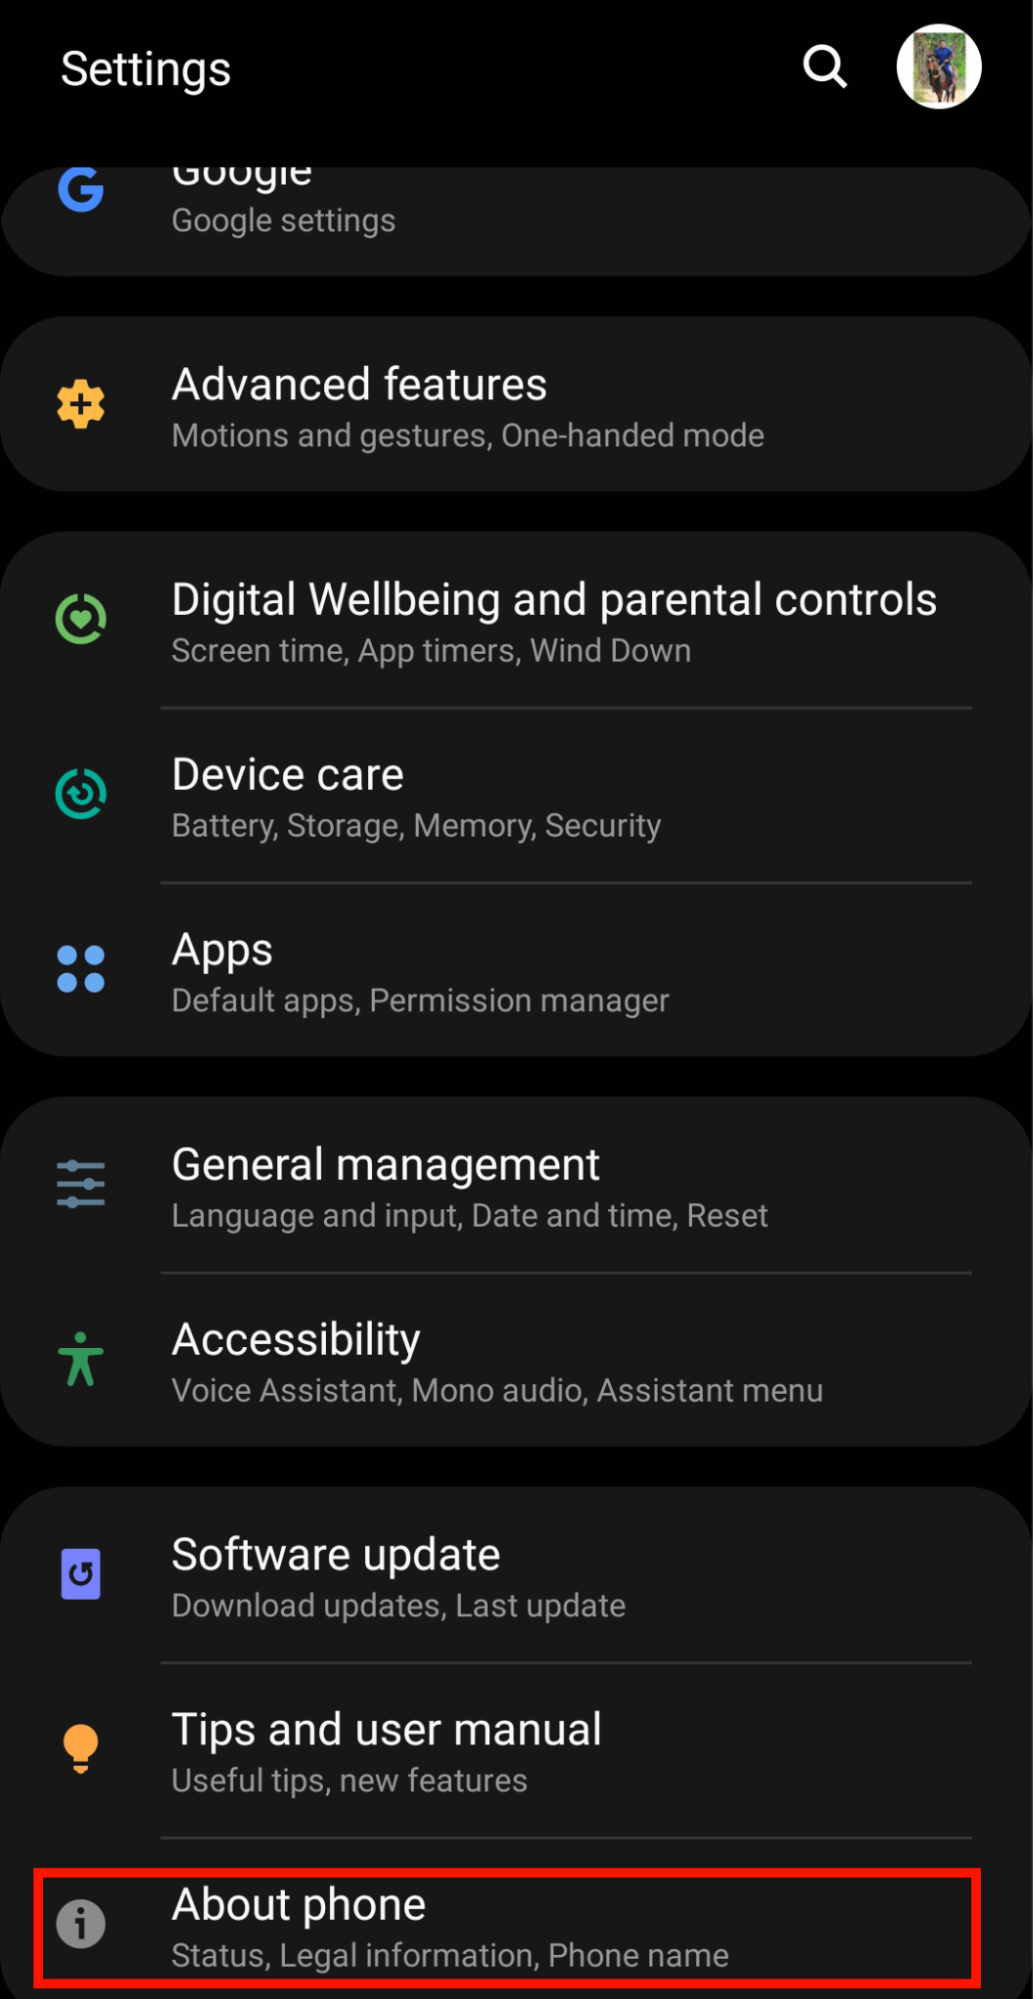
- Open Settings and tap on About Phone.
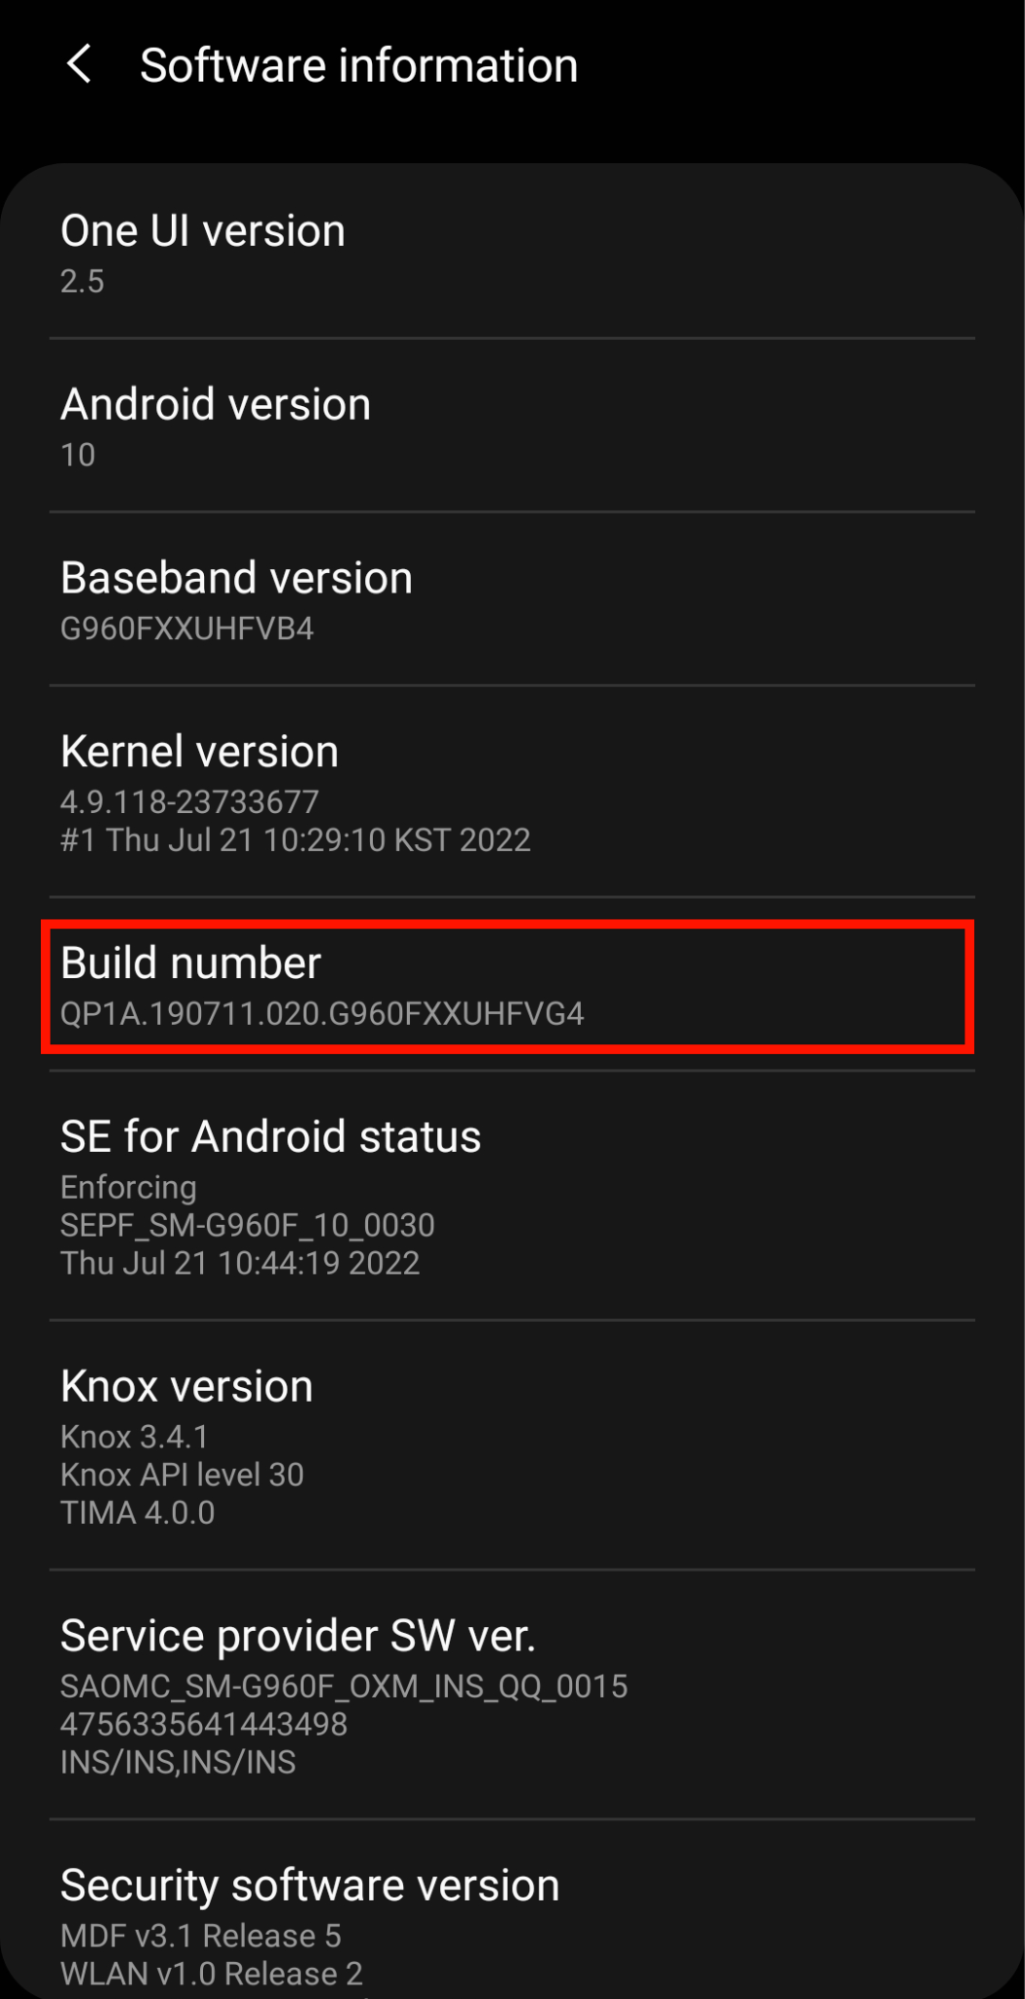
- Go to Software information and tap on Build number 7 times.
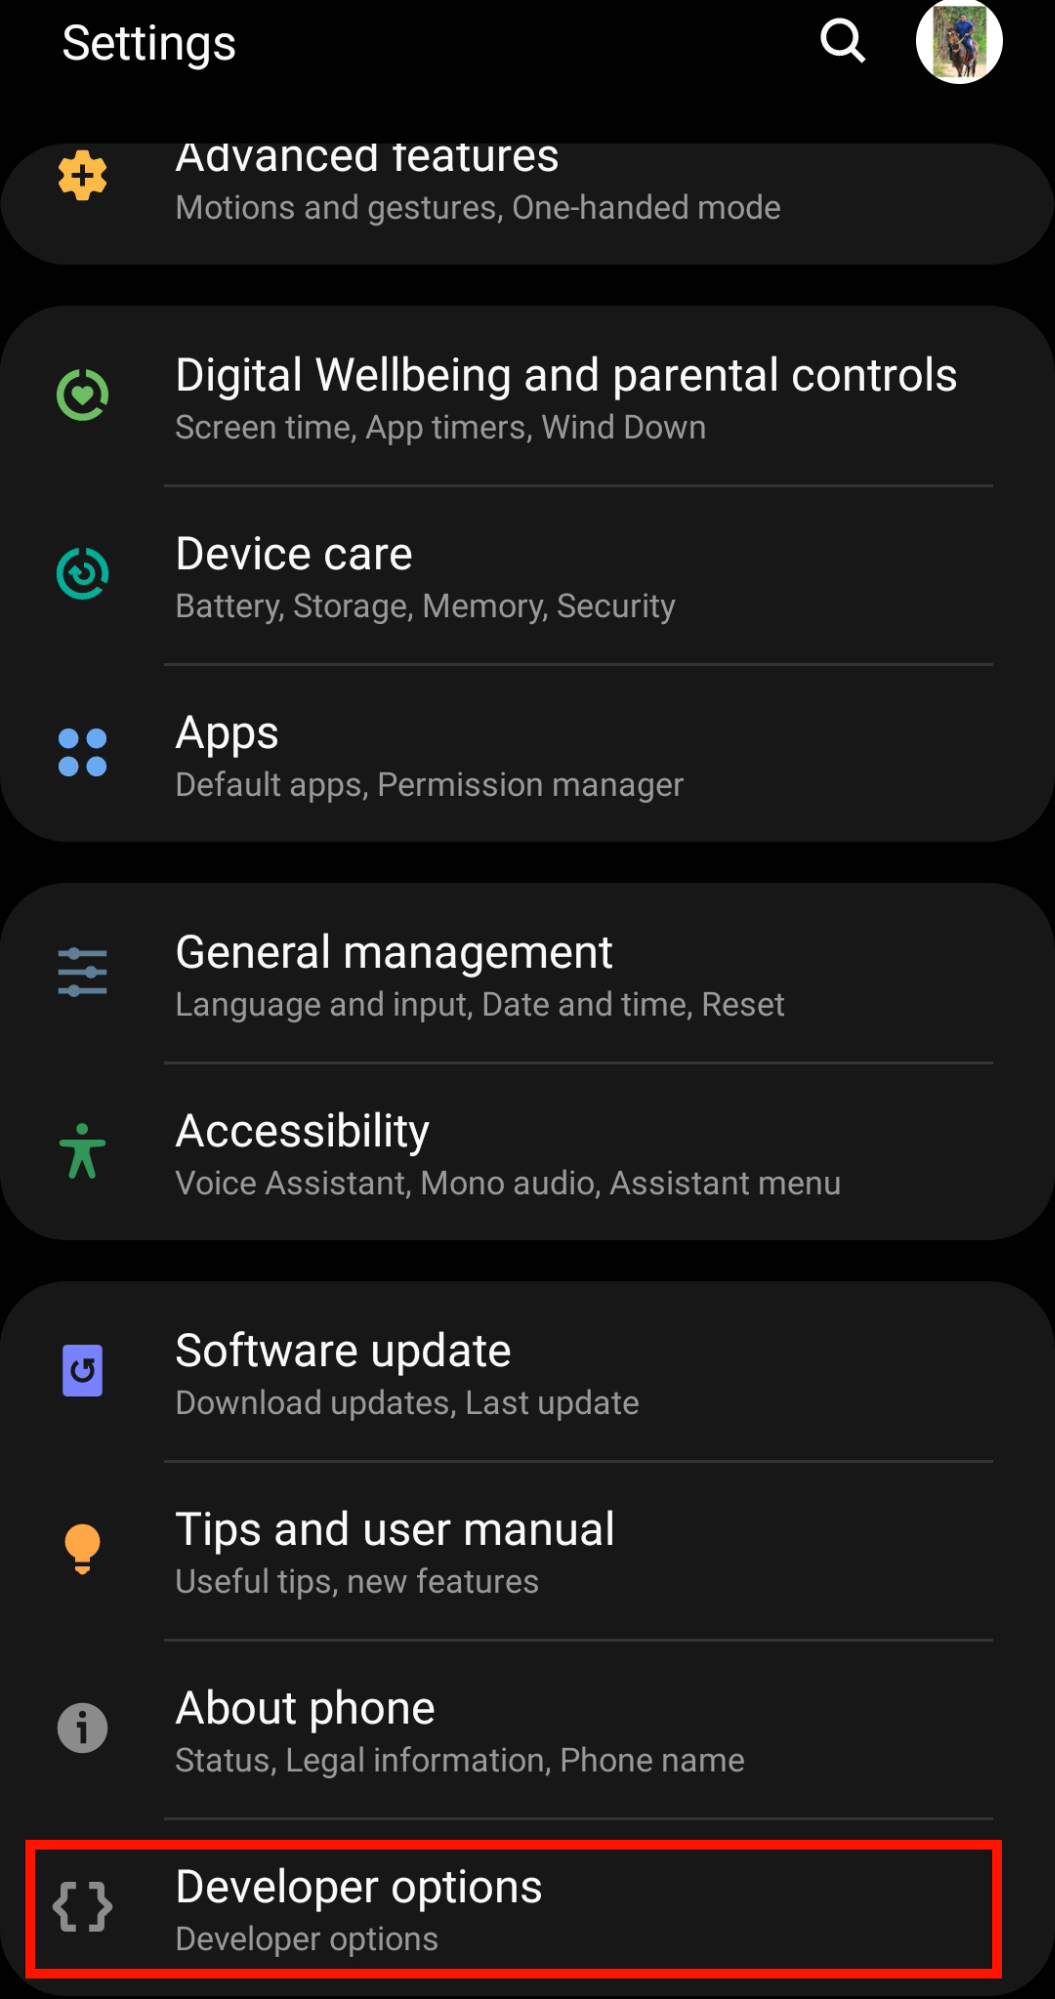
- Open Developer Options from Settings.
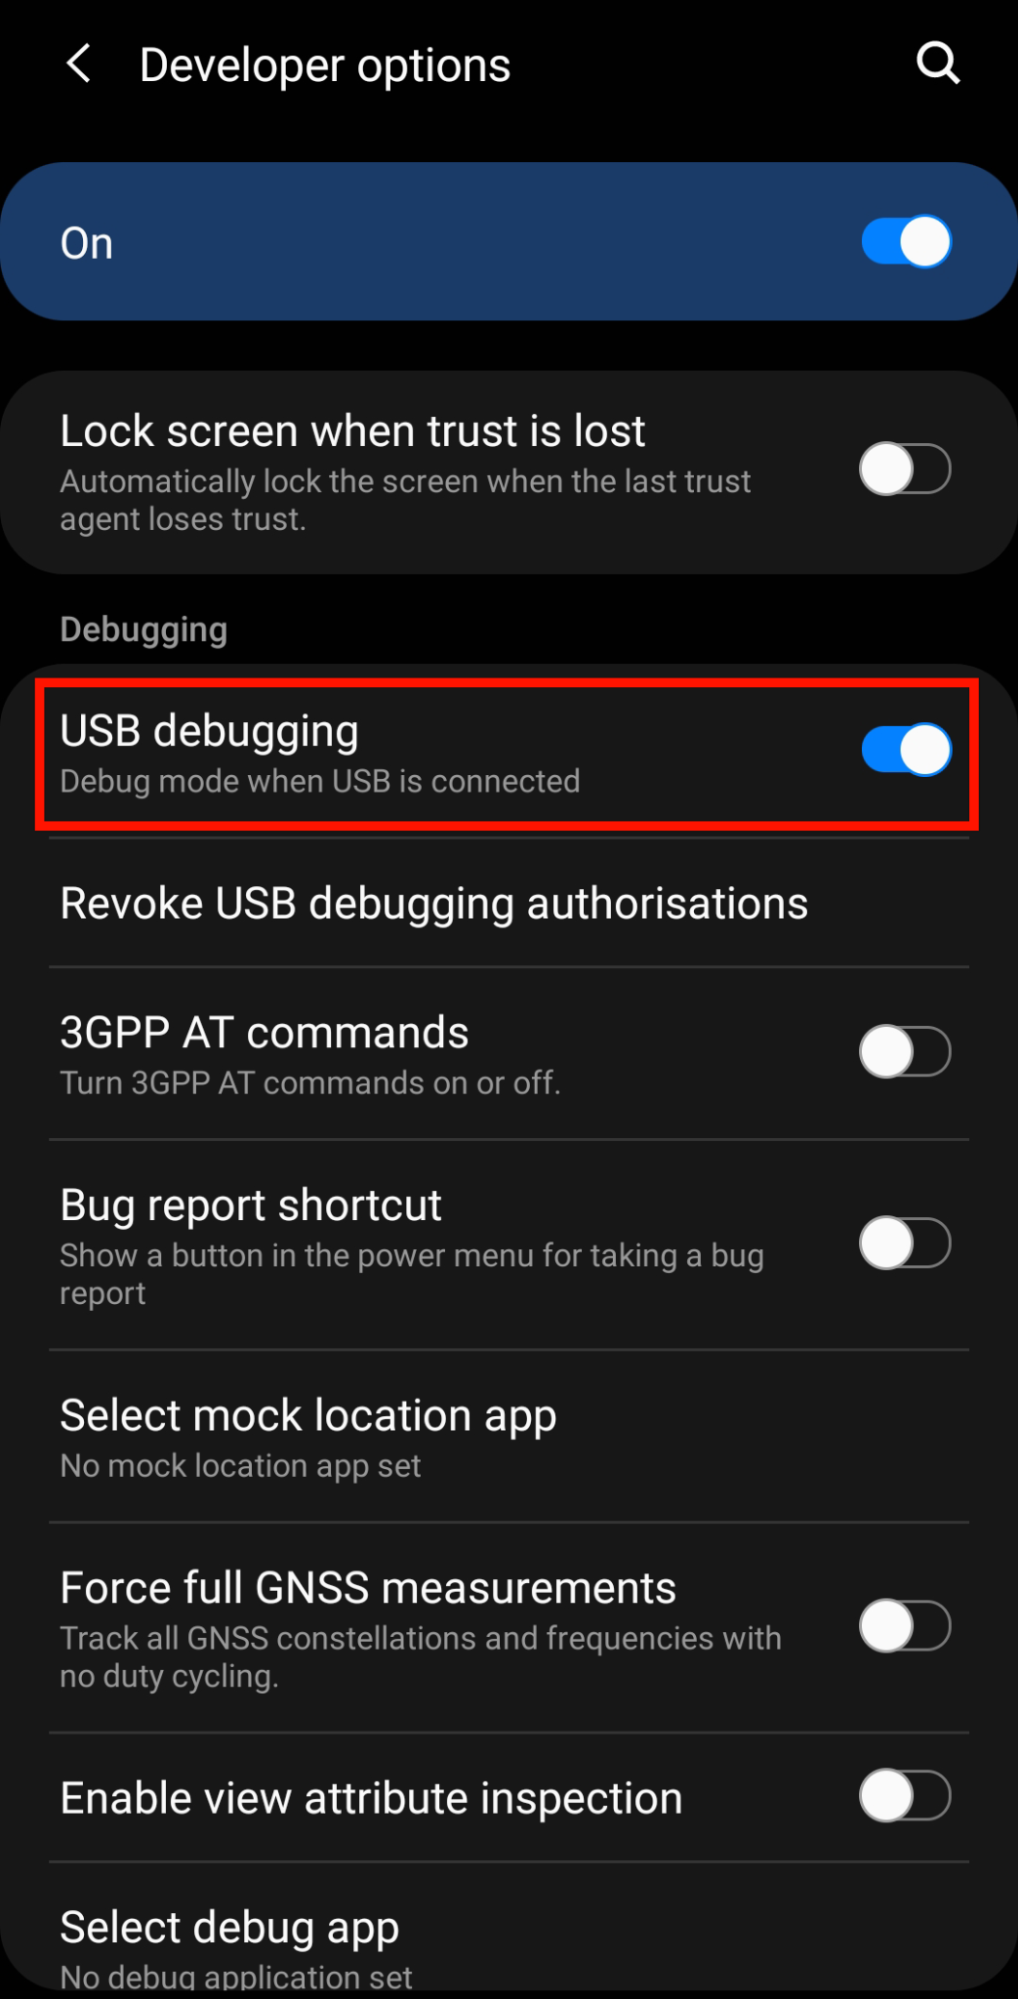
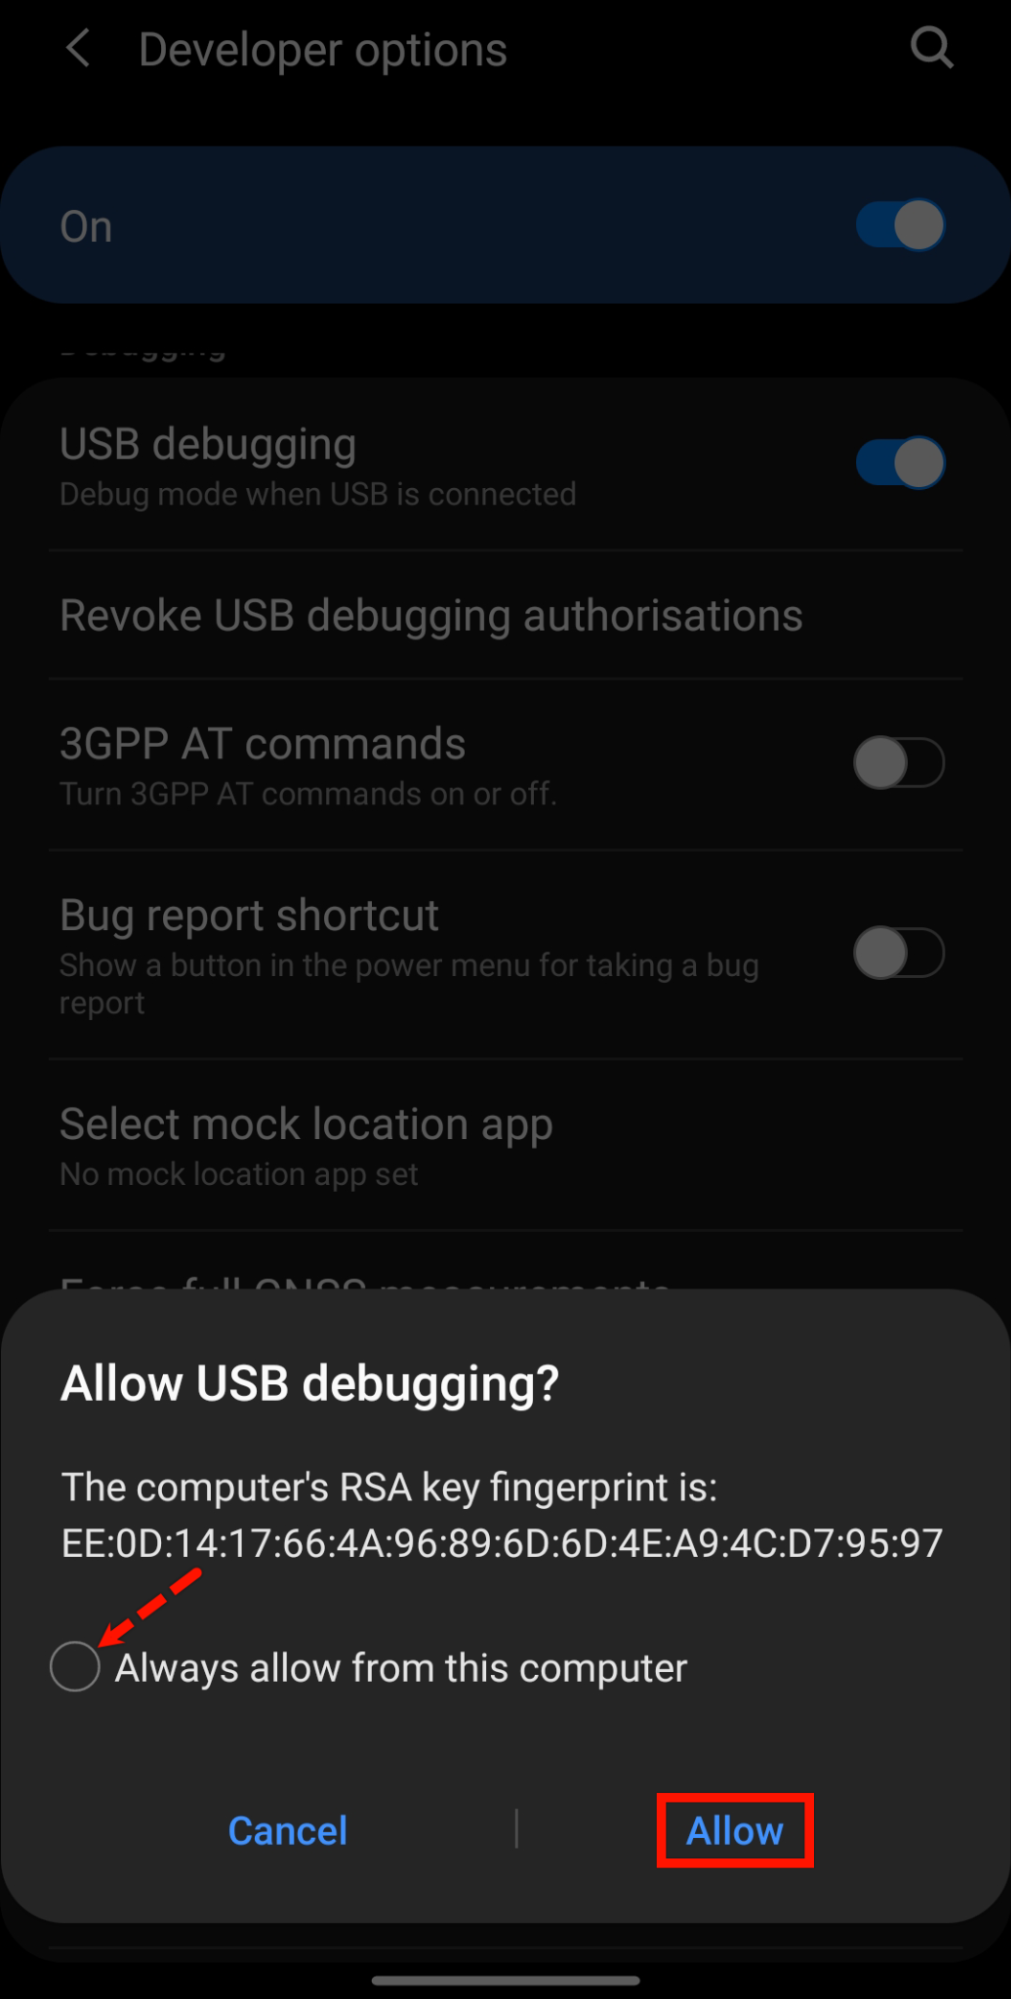
- Enable USB Debugging toggle.
- Connect your Android device to the machine (Where Testsigma Agent is installed and registered). Accept the alert Allow USB Debugging. You can select the checkbox Always allow from this computer if present.
- Navigate to Agents page in Testsigma app and click on the registered agent.
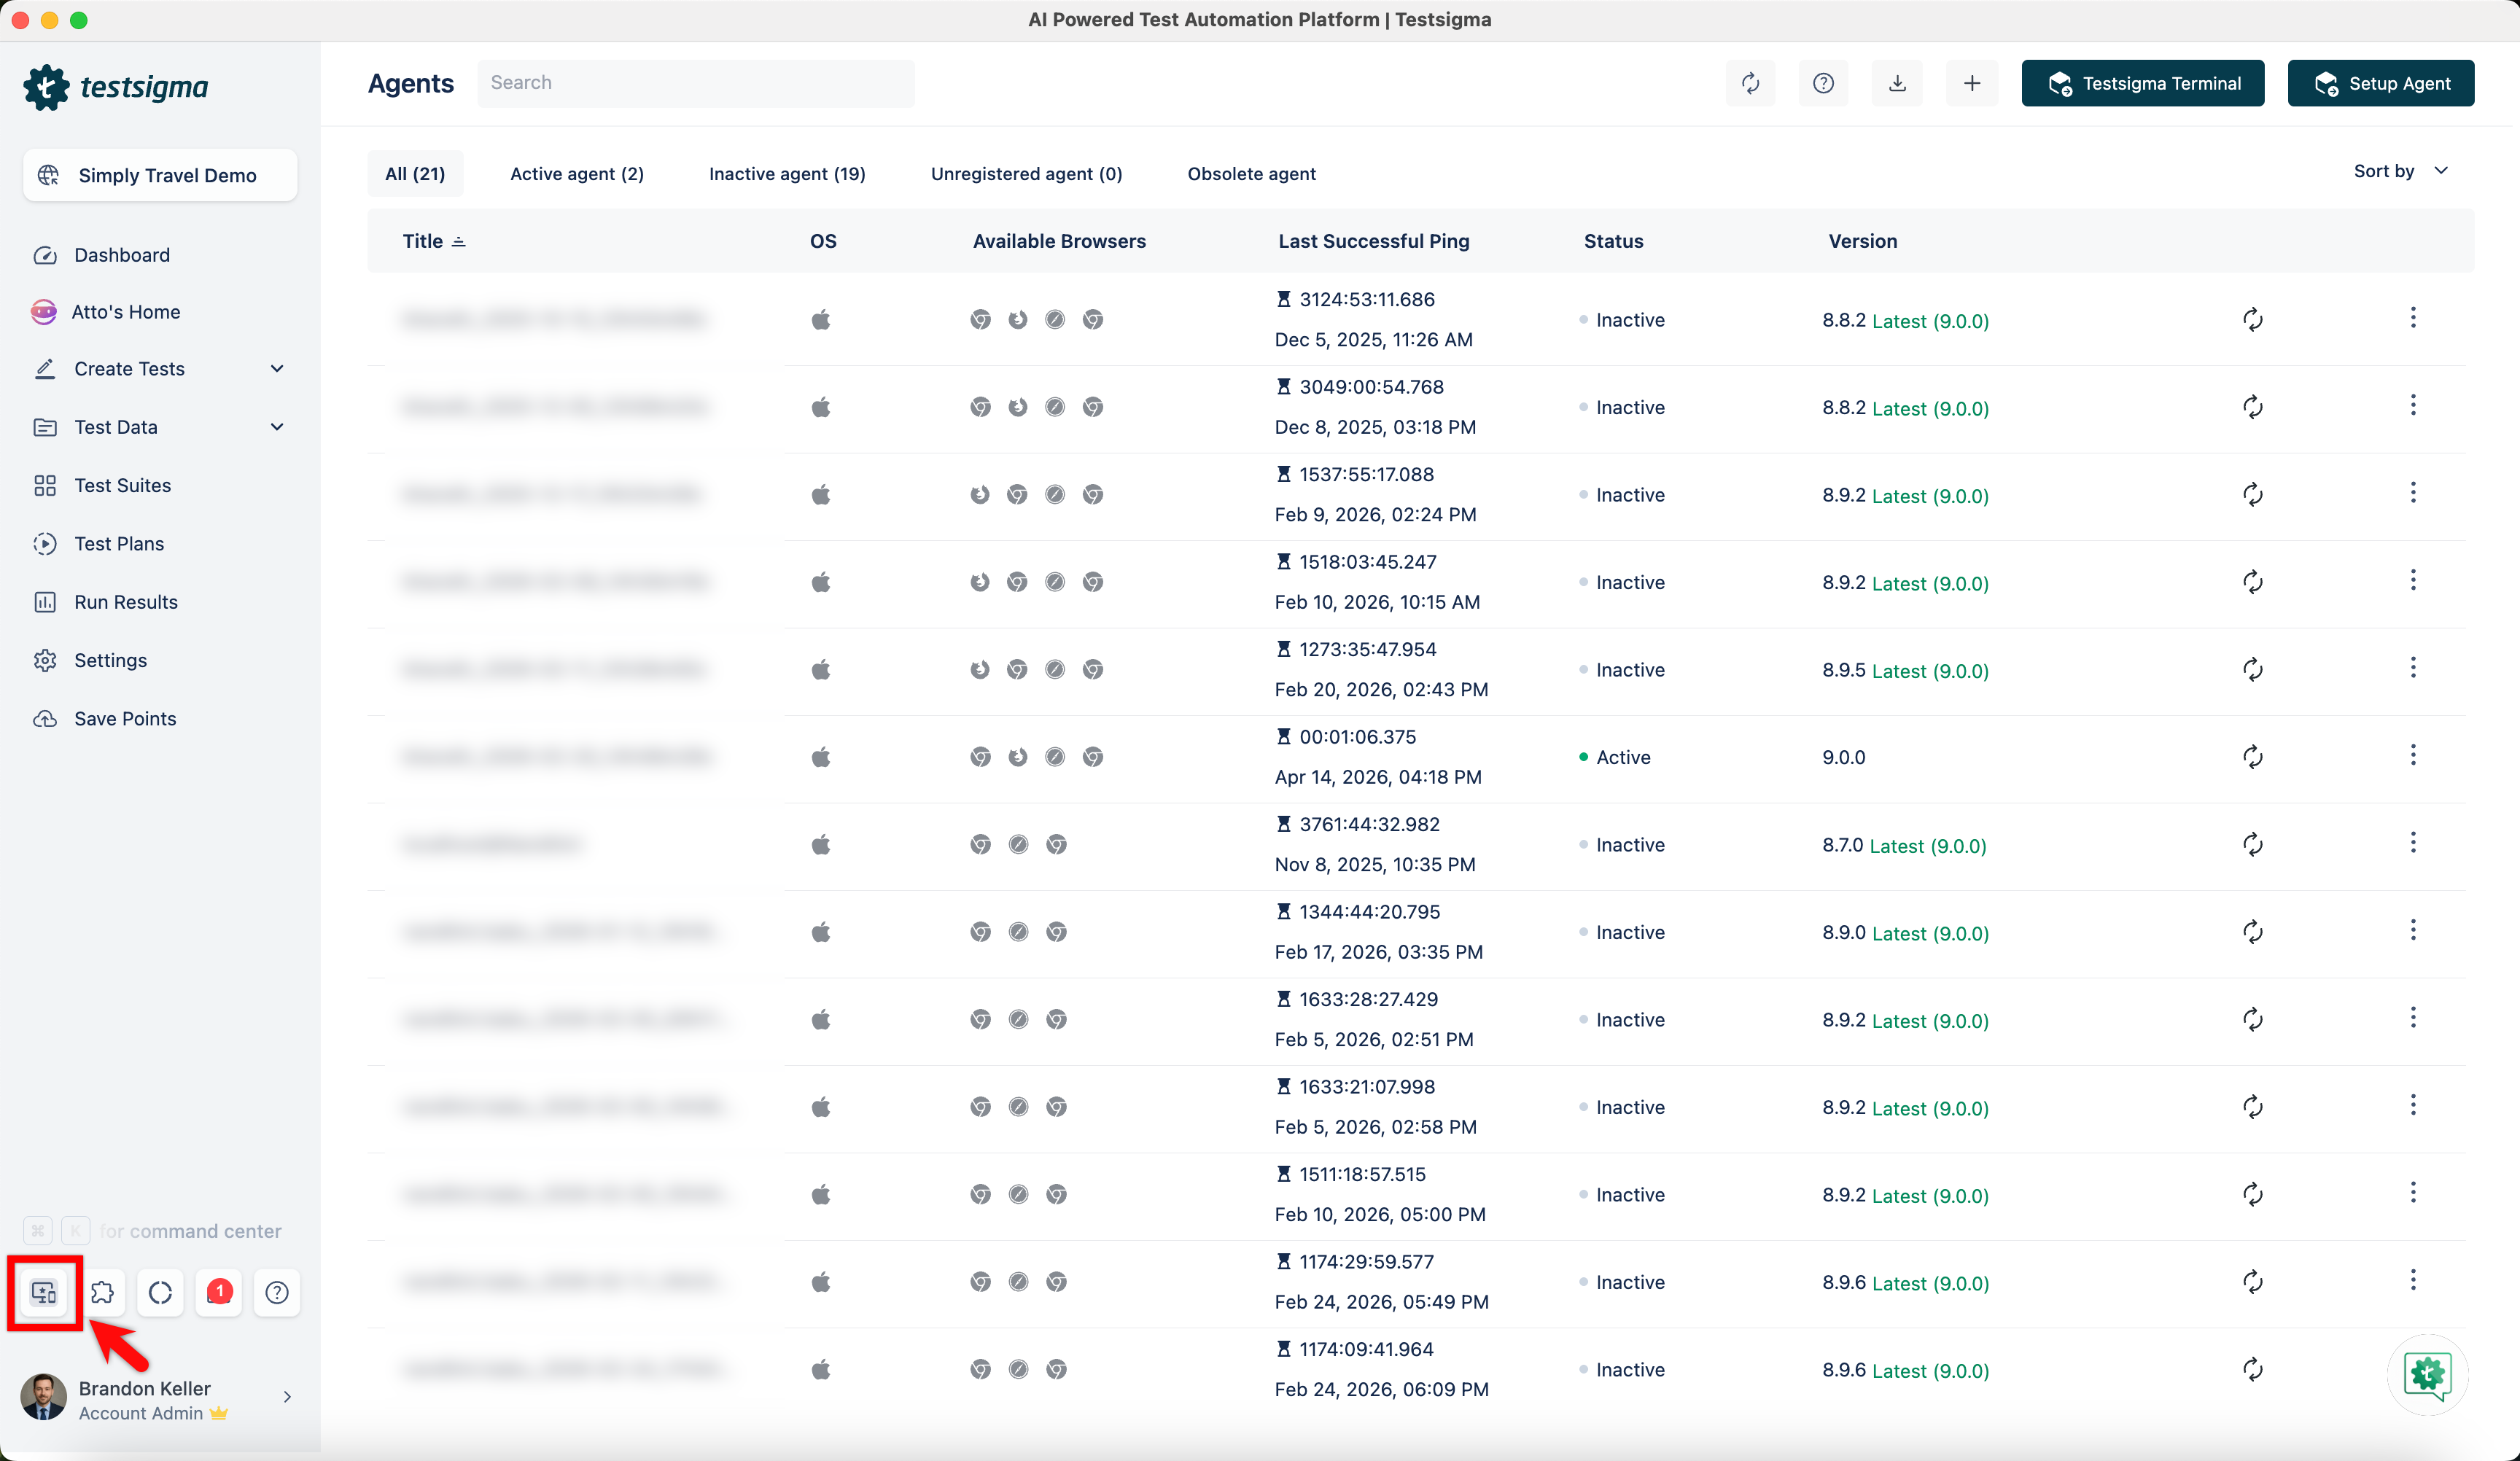
- Under Devices, you can see the device that is connected to the registered agent as shown below.
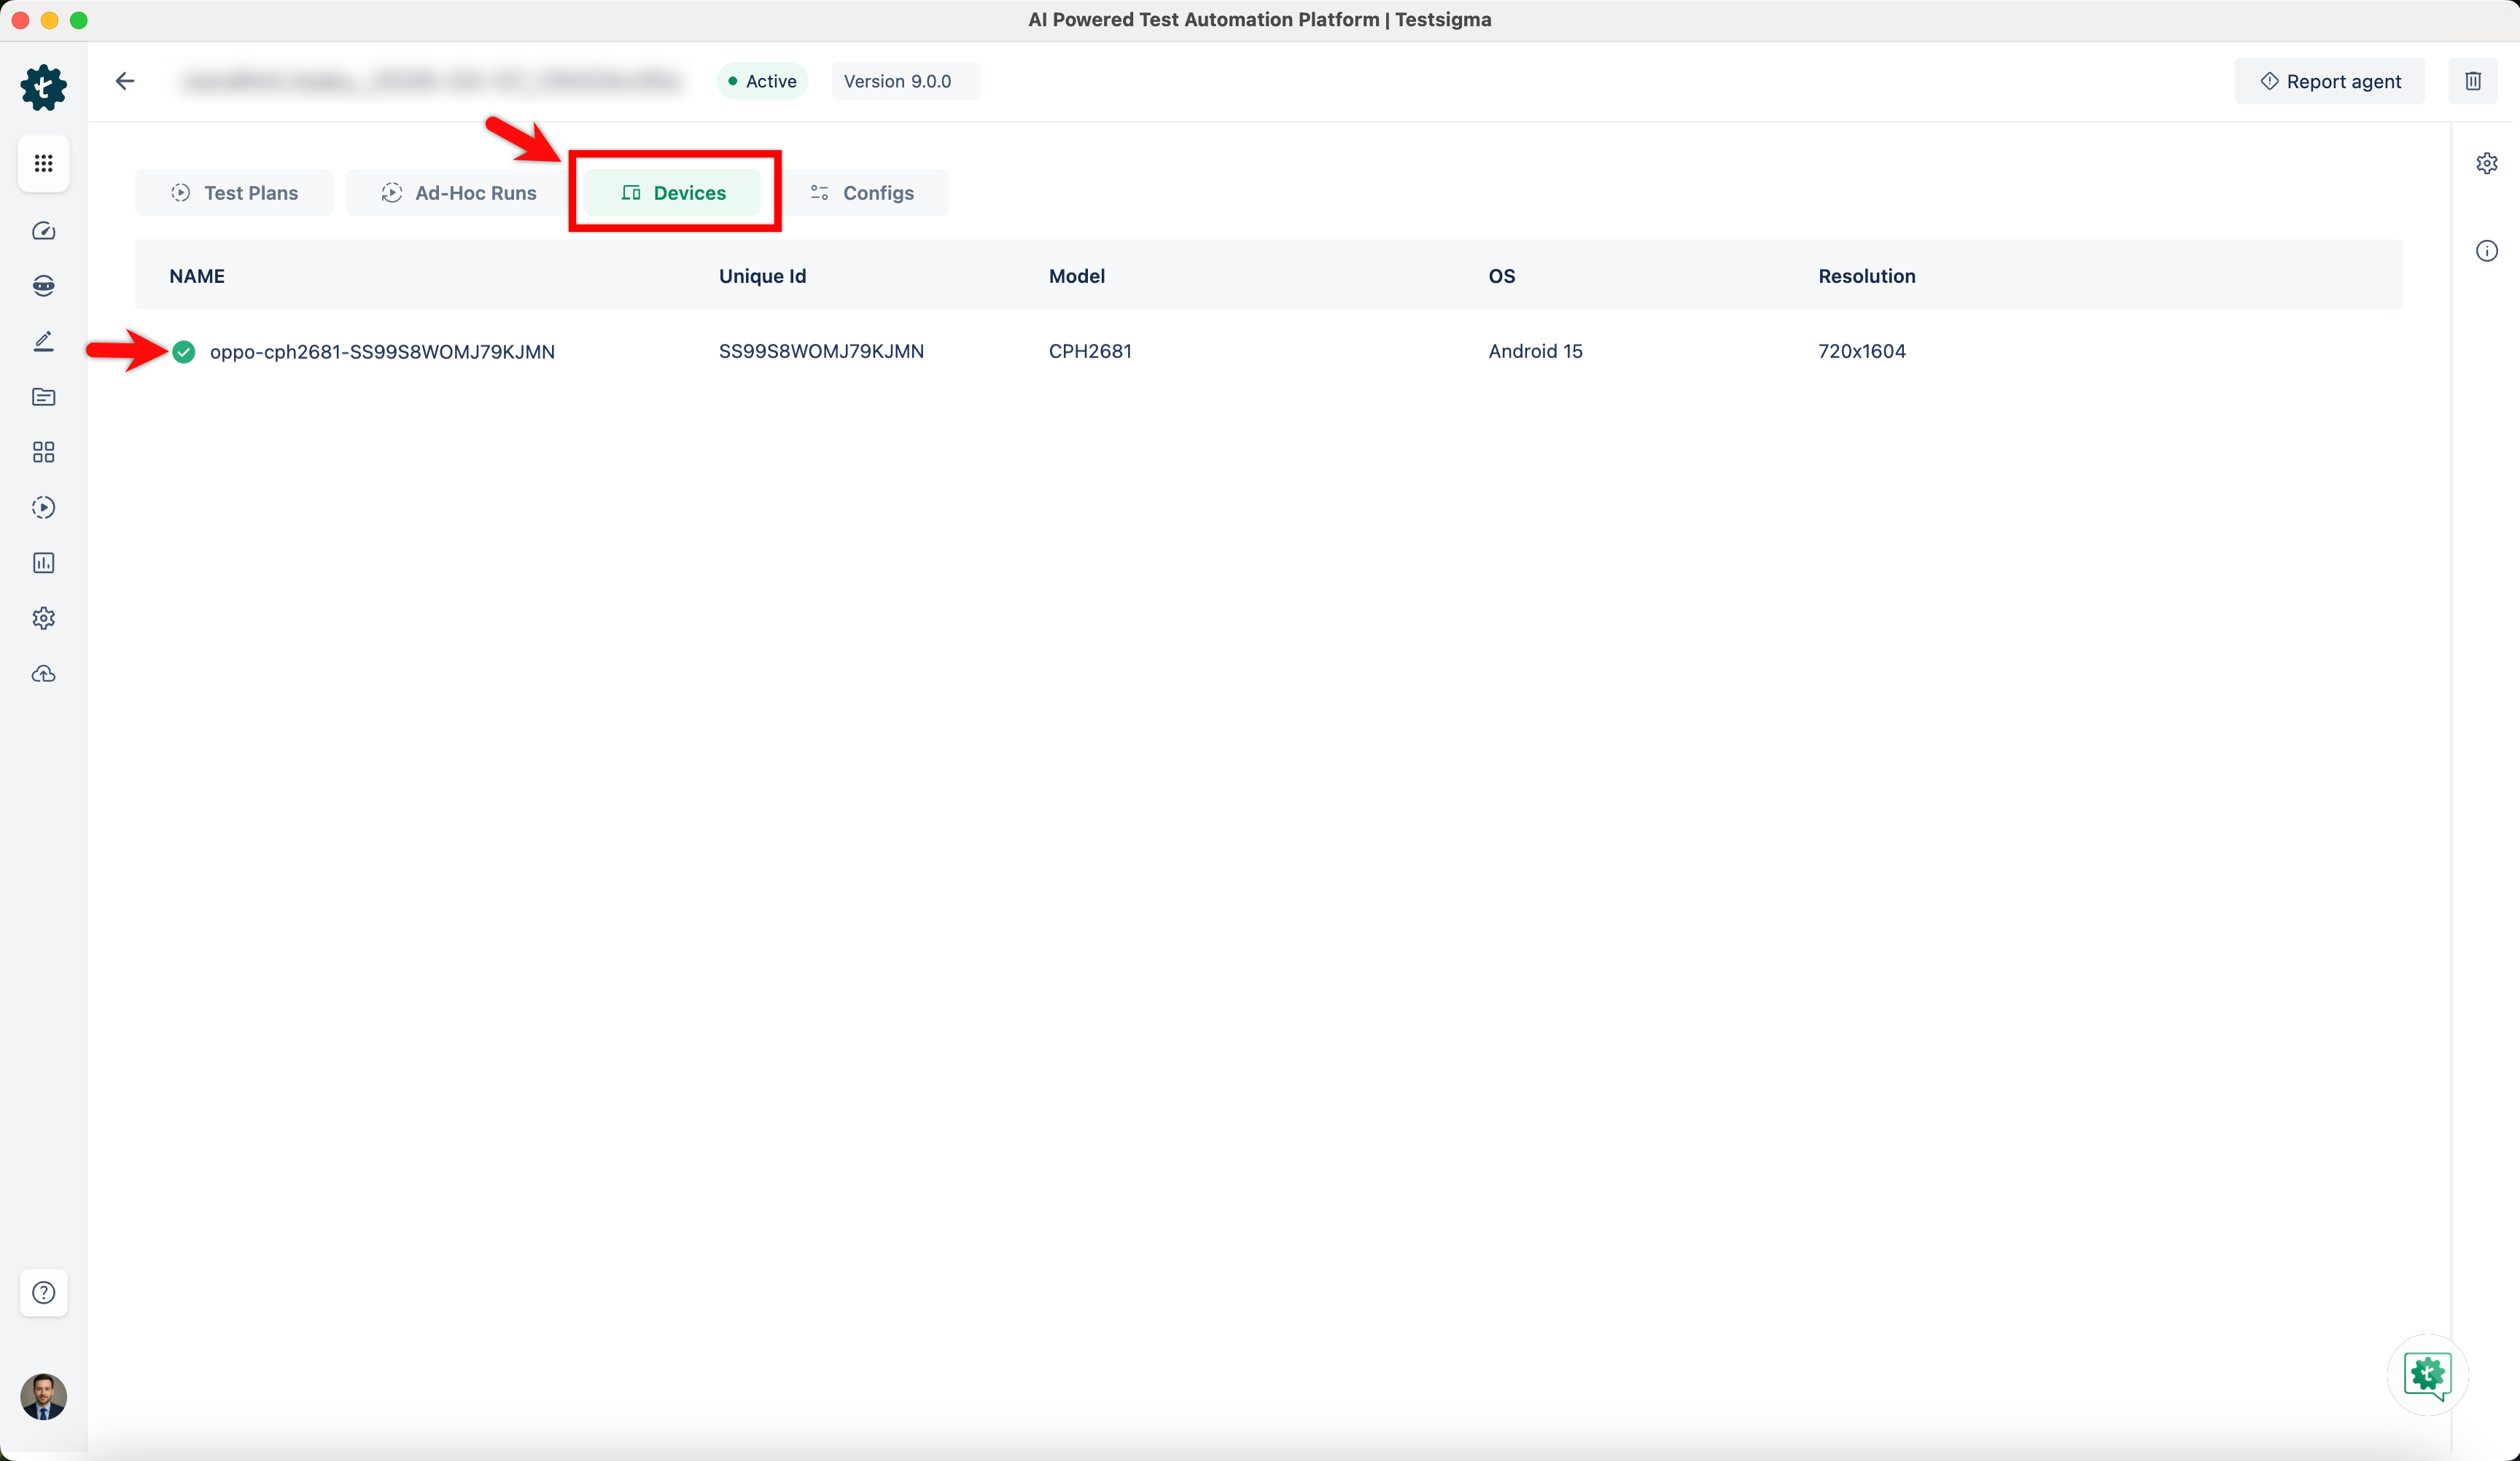
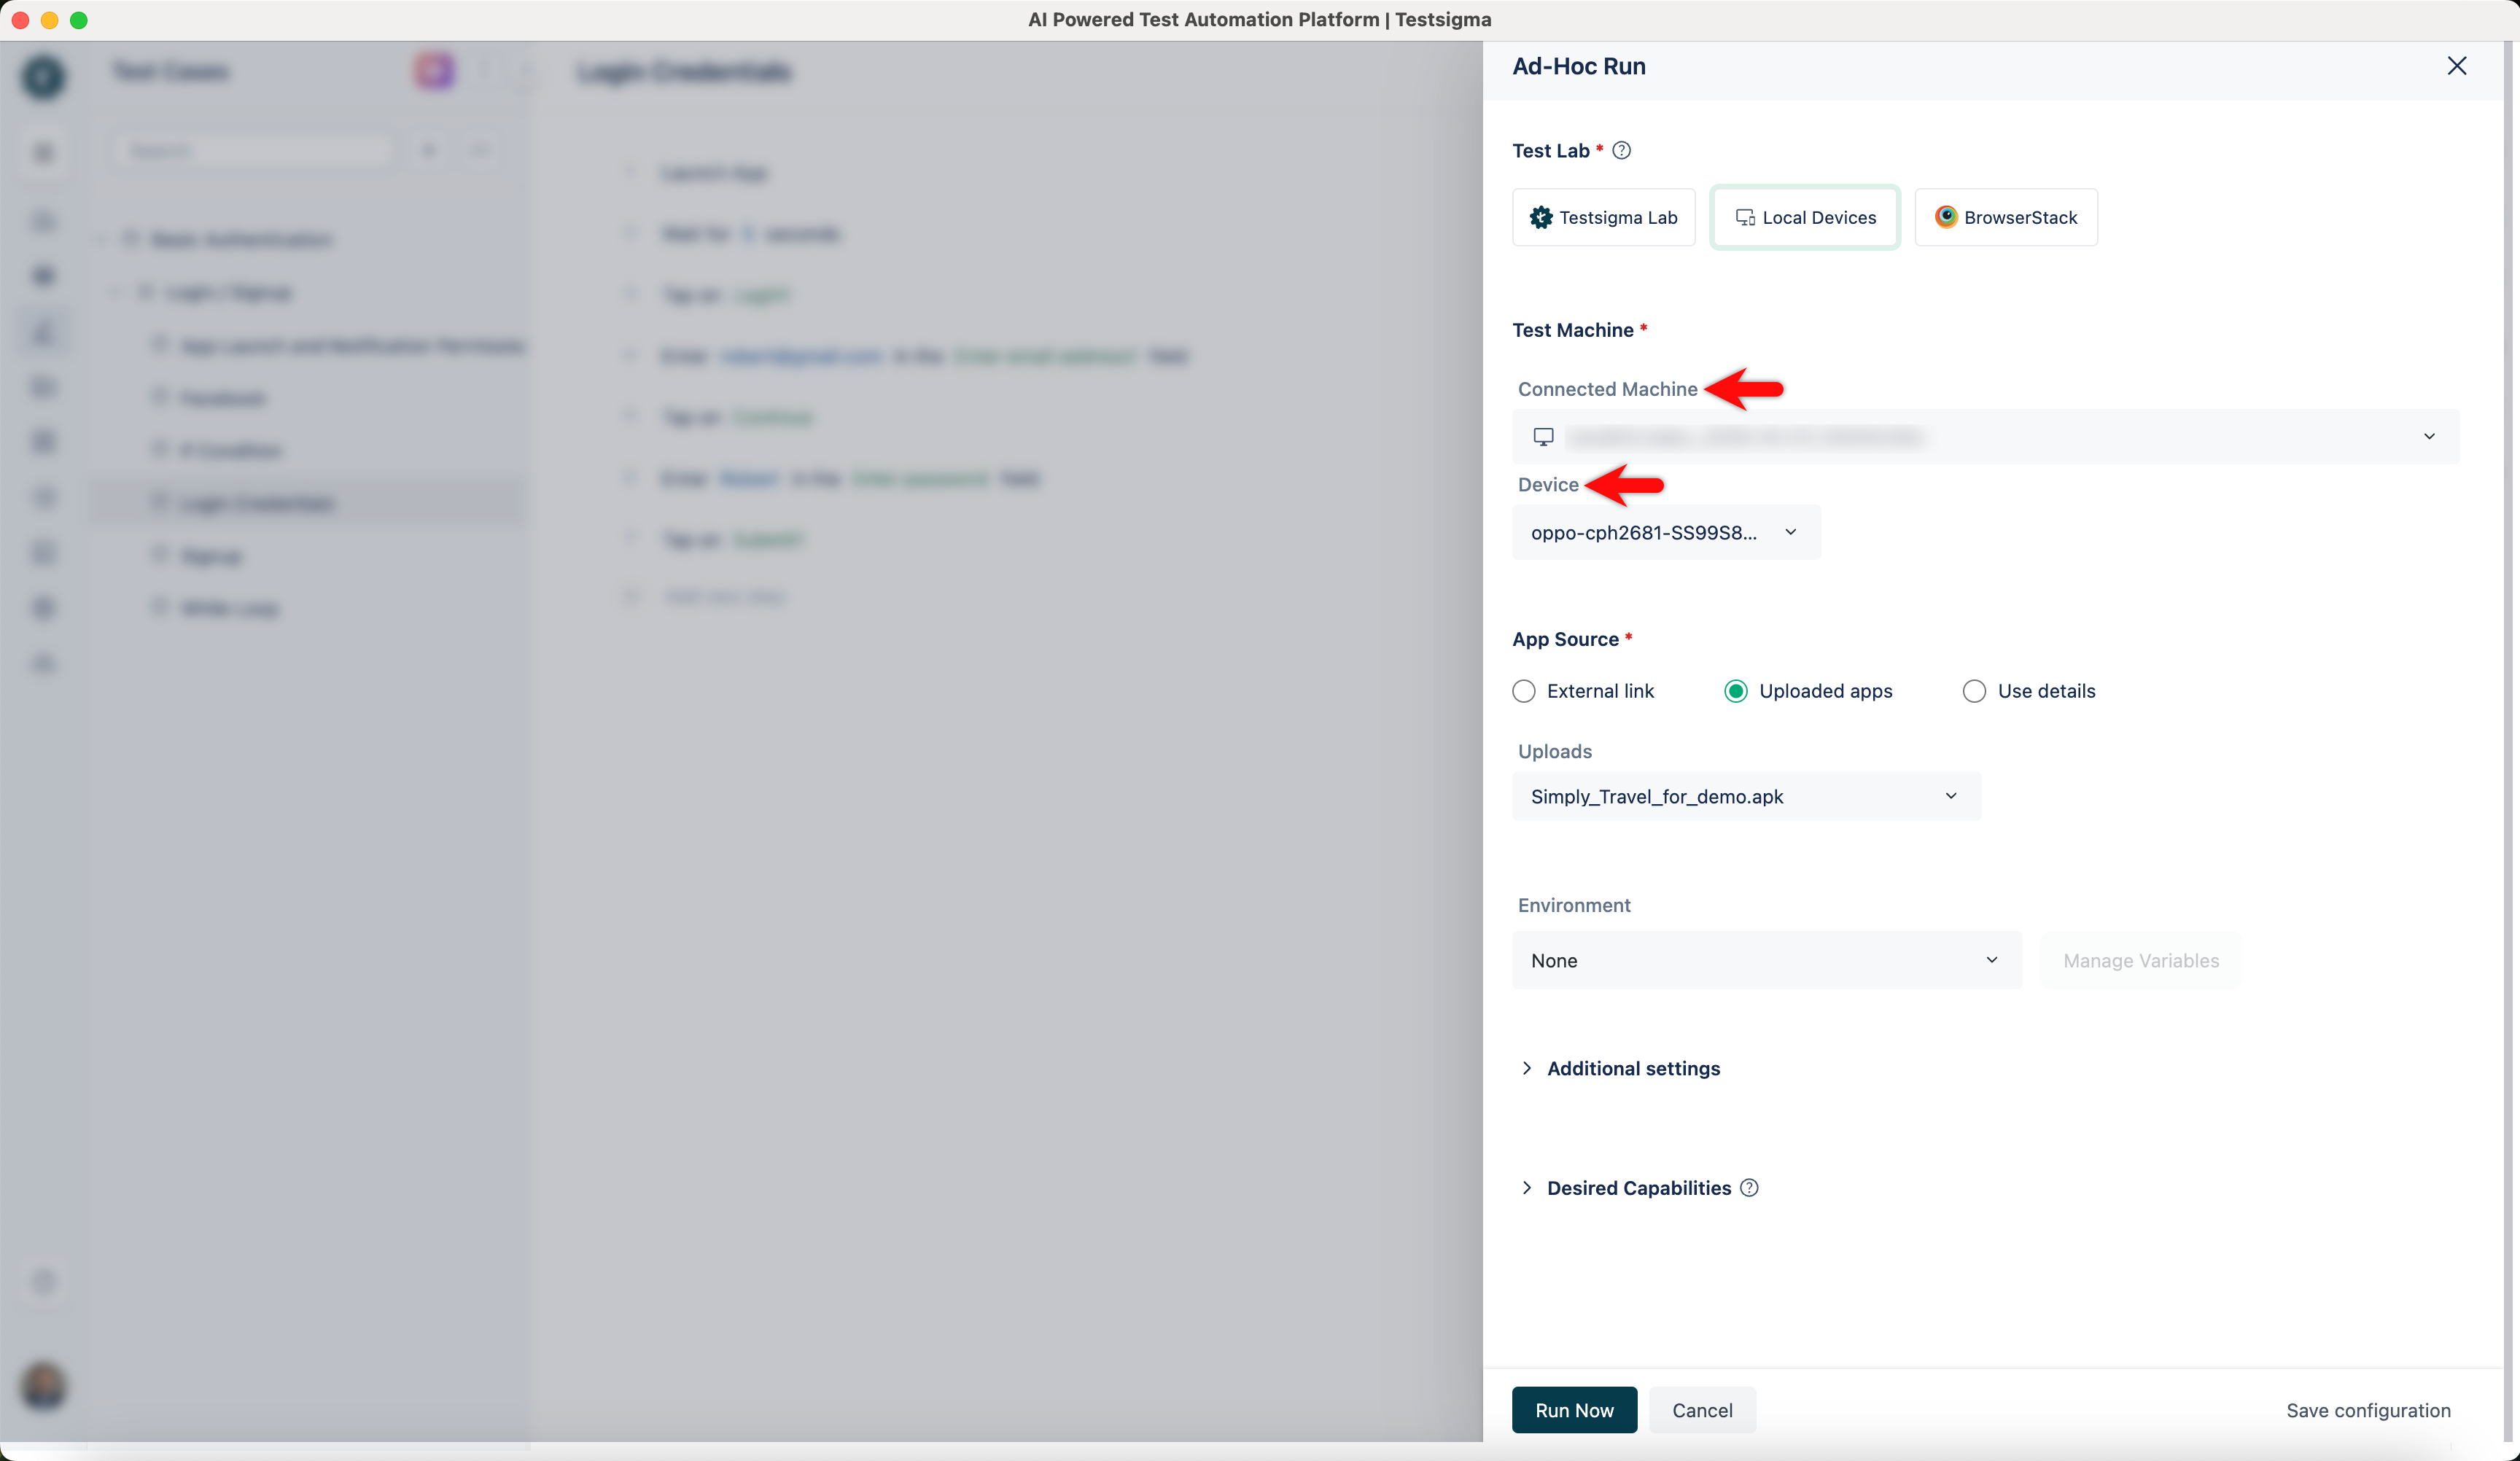
- To execute android tests on this Device, you can select the Connected Machine and Device.
NOTE:
For more info on executing Tests on local devices, refer to:
Want to contribute or report missing content?