- create test cases
 Organizing Test Cases in Folders
- Test Cases for Web Applications
- Test Cases for Mobile Applications
- Test Cases for Mobile Web Applications
- Manage Test Cases for Web Applications
- Manage Test Cases for Android & iOS Apps
- Manage Test Cases for Mobile Web Applications
- Test Case List Actions
- Importing Postman Collections and Environments
- Custom Fields for Test Cases
- Label Management
- Update Test Case Result in a Test Plan
- Test Case: Advanced Options Guide
- Test Step Types
- Type: Natural Language
- Type: REST API
- Type: Step Group
- Type: For Loop
- Type: While Loop
- Type: Block
- Type: If Condition
- Nested Step Groups
- Image Injection
- Cross-application testing
Verifications
In Testsigma, you can check whether the Rest API is functioning correctly by adding verification and assertions. This involves testing the API endpoints, the data returned, and the response codes. Verification also includes validating the API against the requirements and ensuring that the API is secure. For verification, you need to add an API request and click Create to check the response. At the bottom of the screen, you can see the response and add verification. There are some steps to adding verification.
Verification Types
These types of verification are available for JSON and XML:
| Verification Types | Function |
|---|---|
| Strict | In strict verification, all conditions and rules must be met exactly as specified. If any requirements are met, the verification will succeed. |
| Strict Order | In strict order verification, the conditions and rules must be met in the specified order. The verification will only succeed if any requirement is met or is in order. |
| Lenient | In lenient verification, some conditions and rules may be ignored or relaxed, and the verification will still pass as long as the essential requirements are met. |
| Non-extensible | In non-extensible verification, the verification rules cannot be modified or extended. Only the pre-defined rules can be applied. |
| Schema | A schema is a set of rules defining data or documents' structure, format, and constraints. It can validate, verify, or transform data in different contexts, such as databases, APIs, or file formats. |
Response Body Verification
It is important to verify the response body to ensure that the data returned is accurate and complete. This can be done by comparing the response body to the expected output. Additionally, it is important to check that the response body contains all the necessary fields and that the data is in the correct format. It is also important to check that the response body does not contain any unexpected fields or data.
You can verify the response body in three ways.
- Add Verification in response body
- Copy Response from response body
- Verify Response body
Add Verification in Response body
- Send an API request, and at the bottom of the screen, the response body will appear for the request you sent.
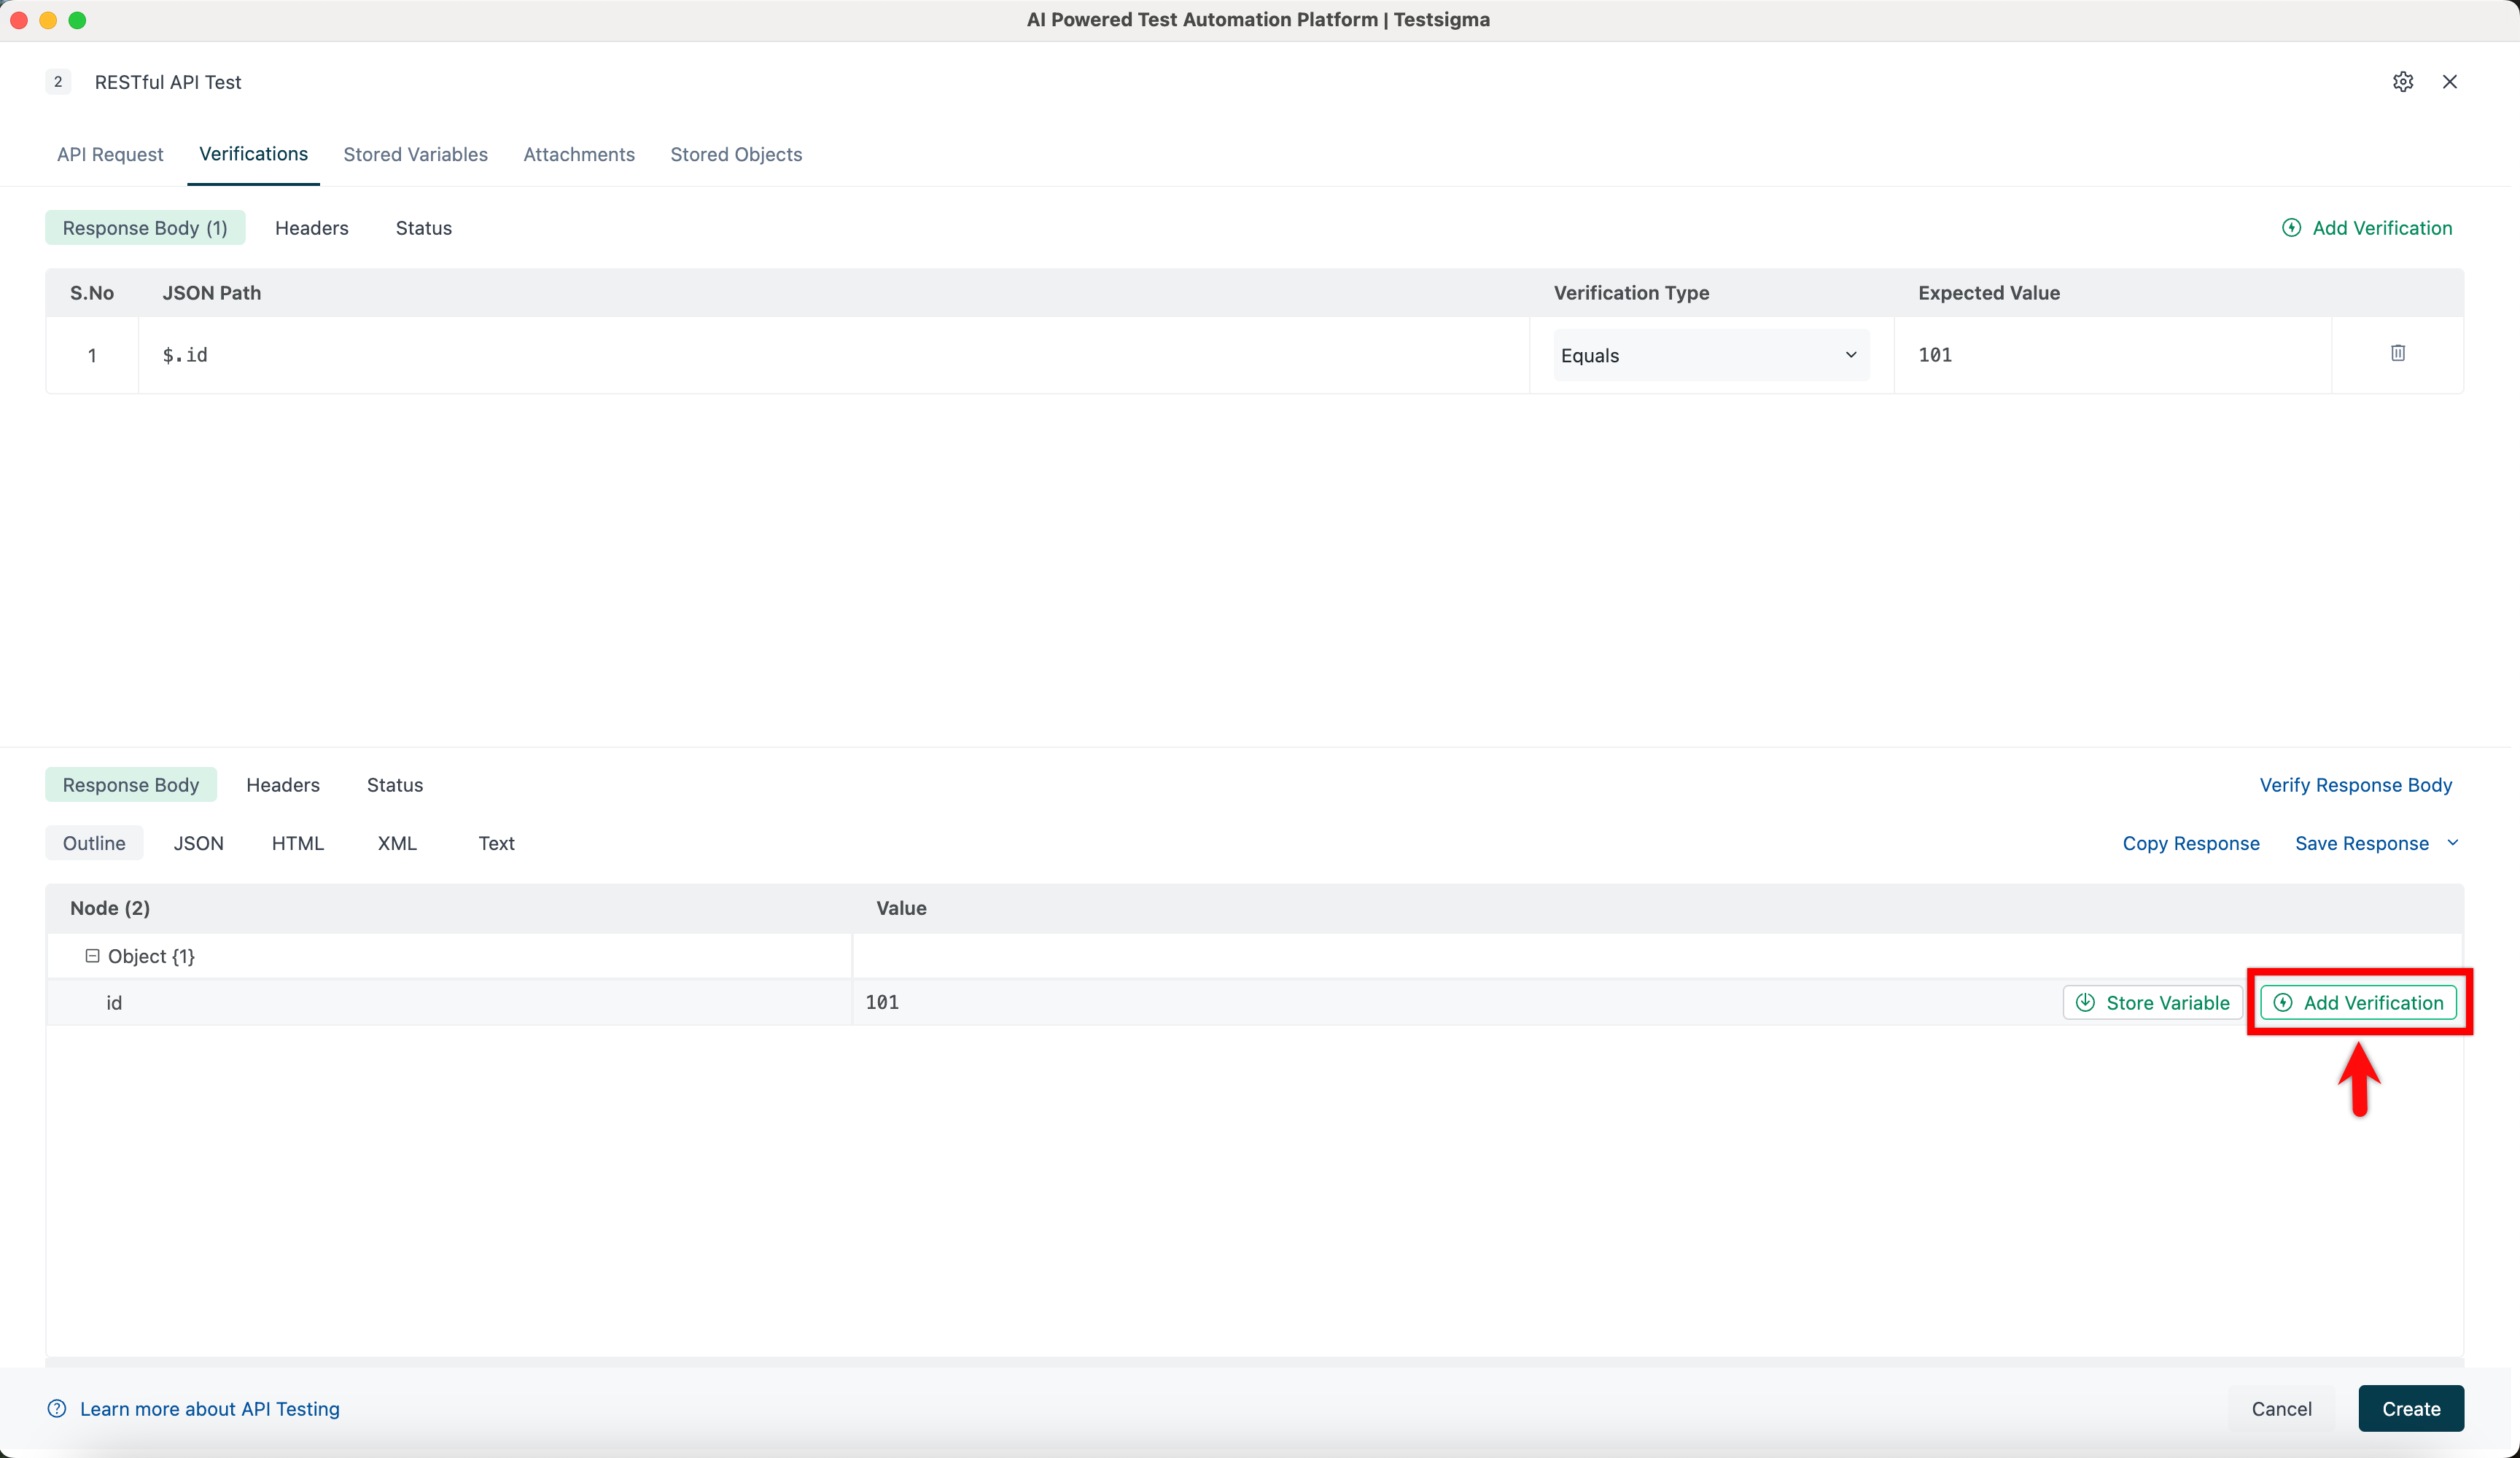
-
Click Outline, then select Add verification to upload it directly into Verification tab.
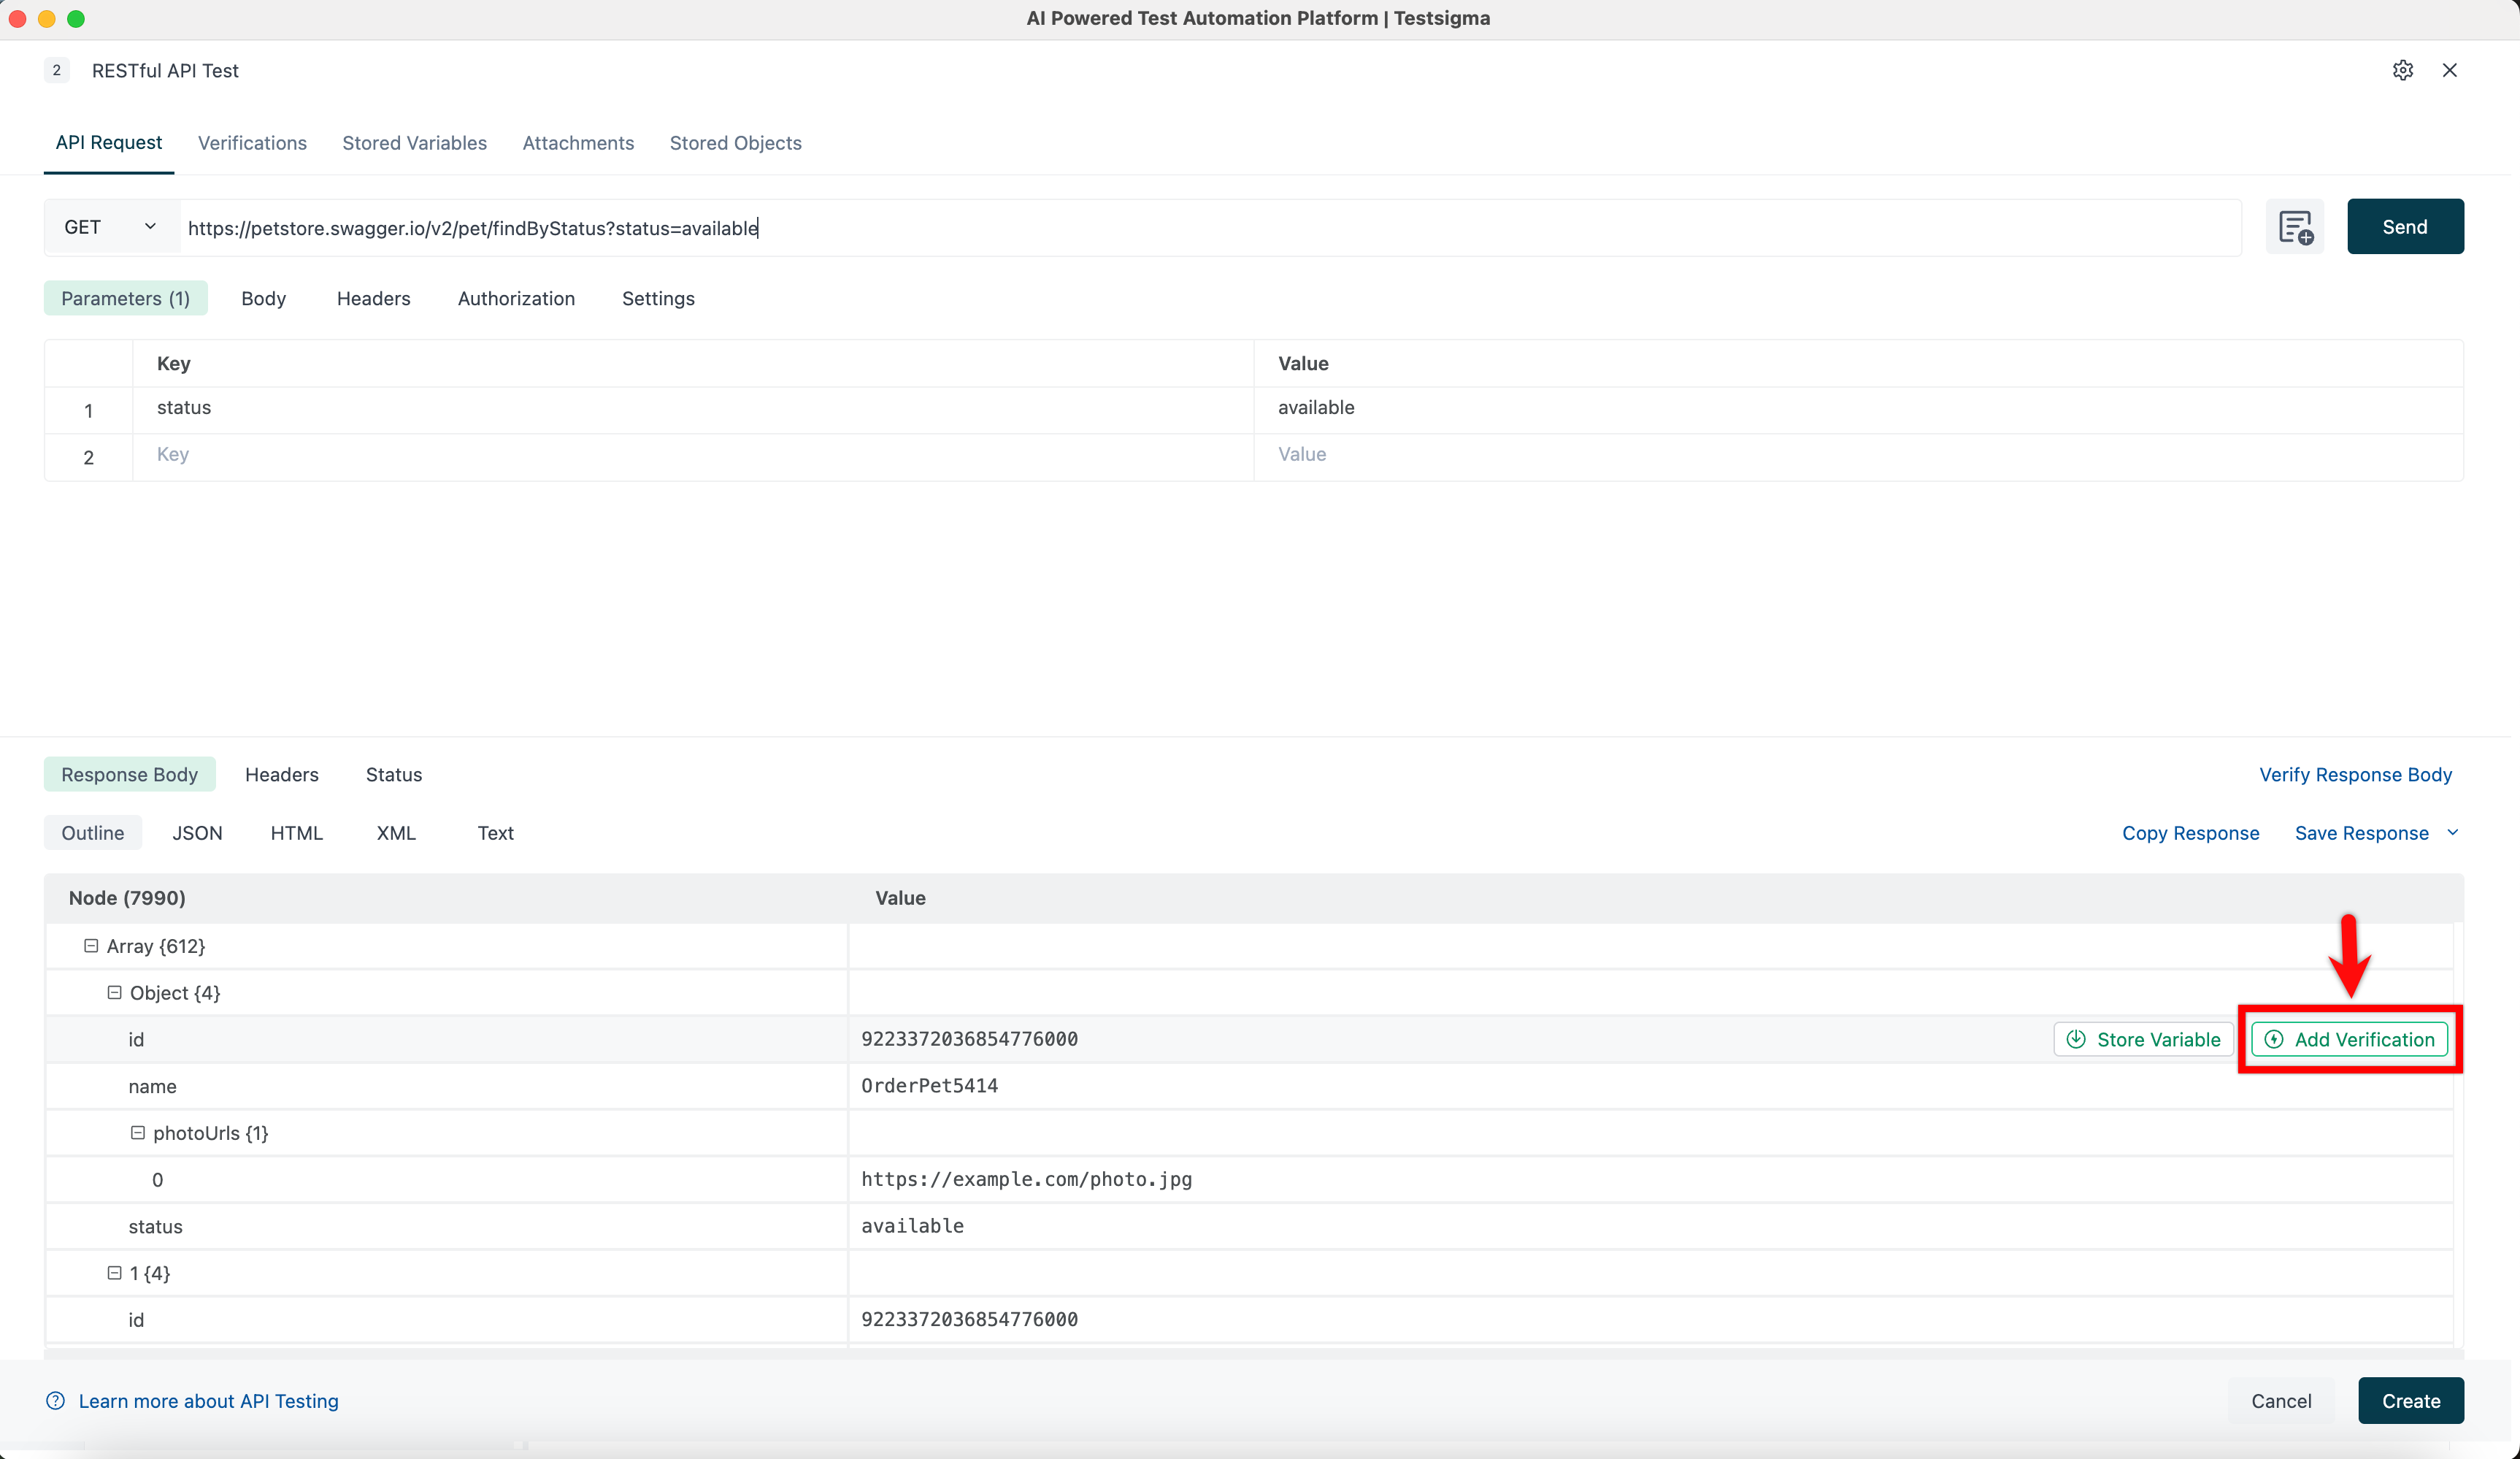
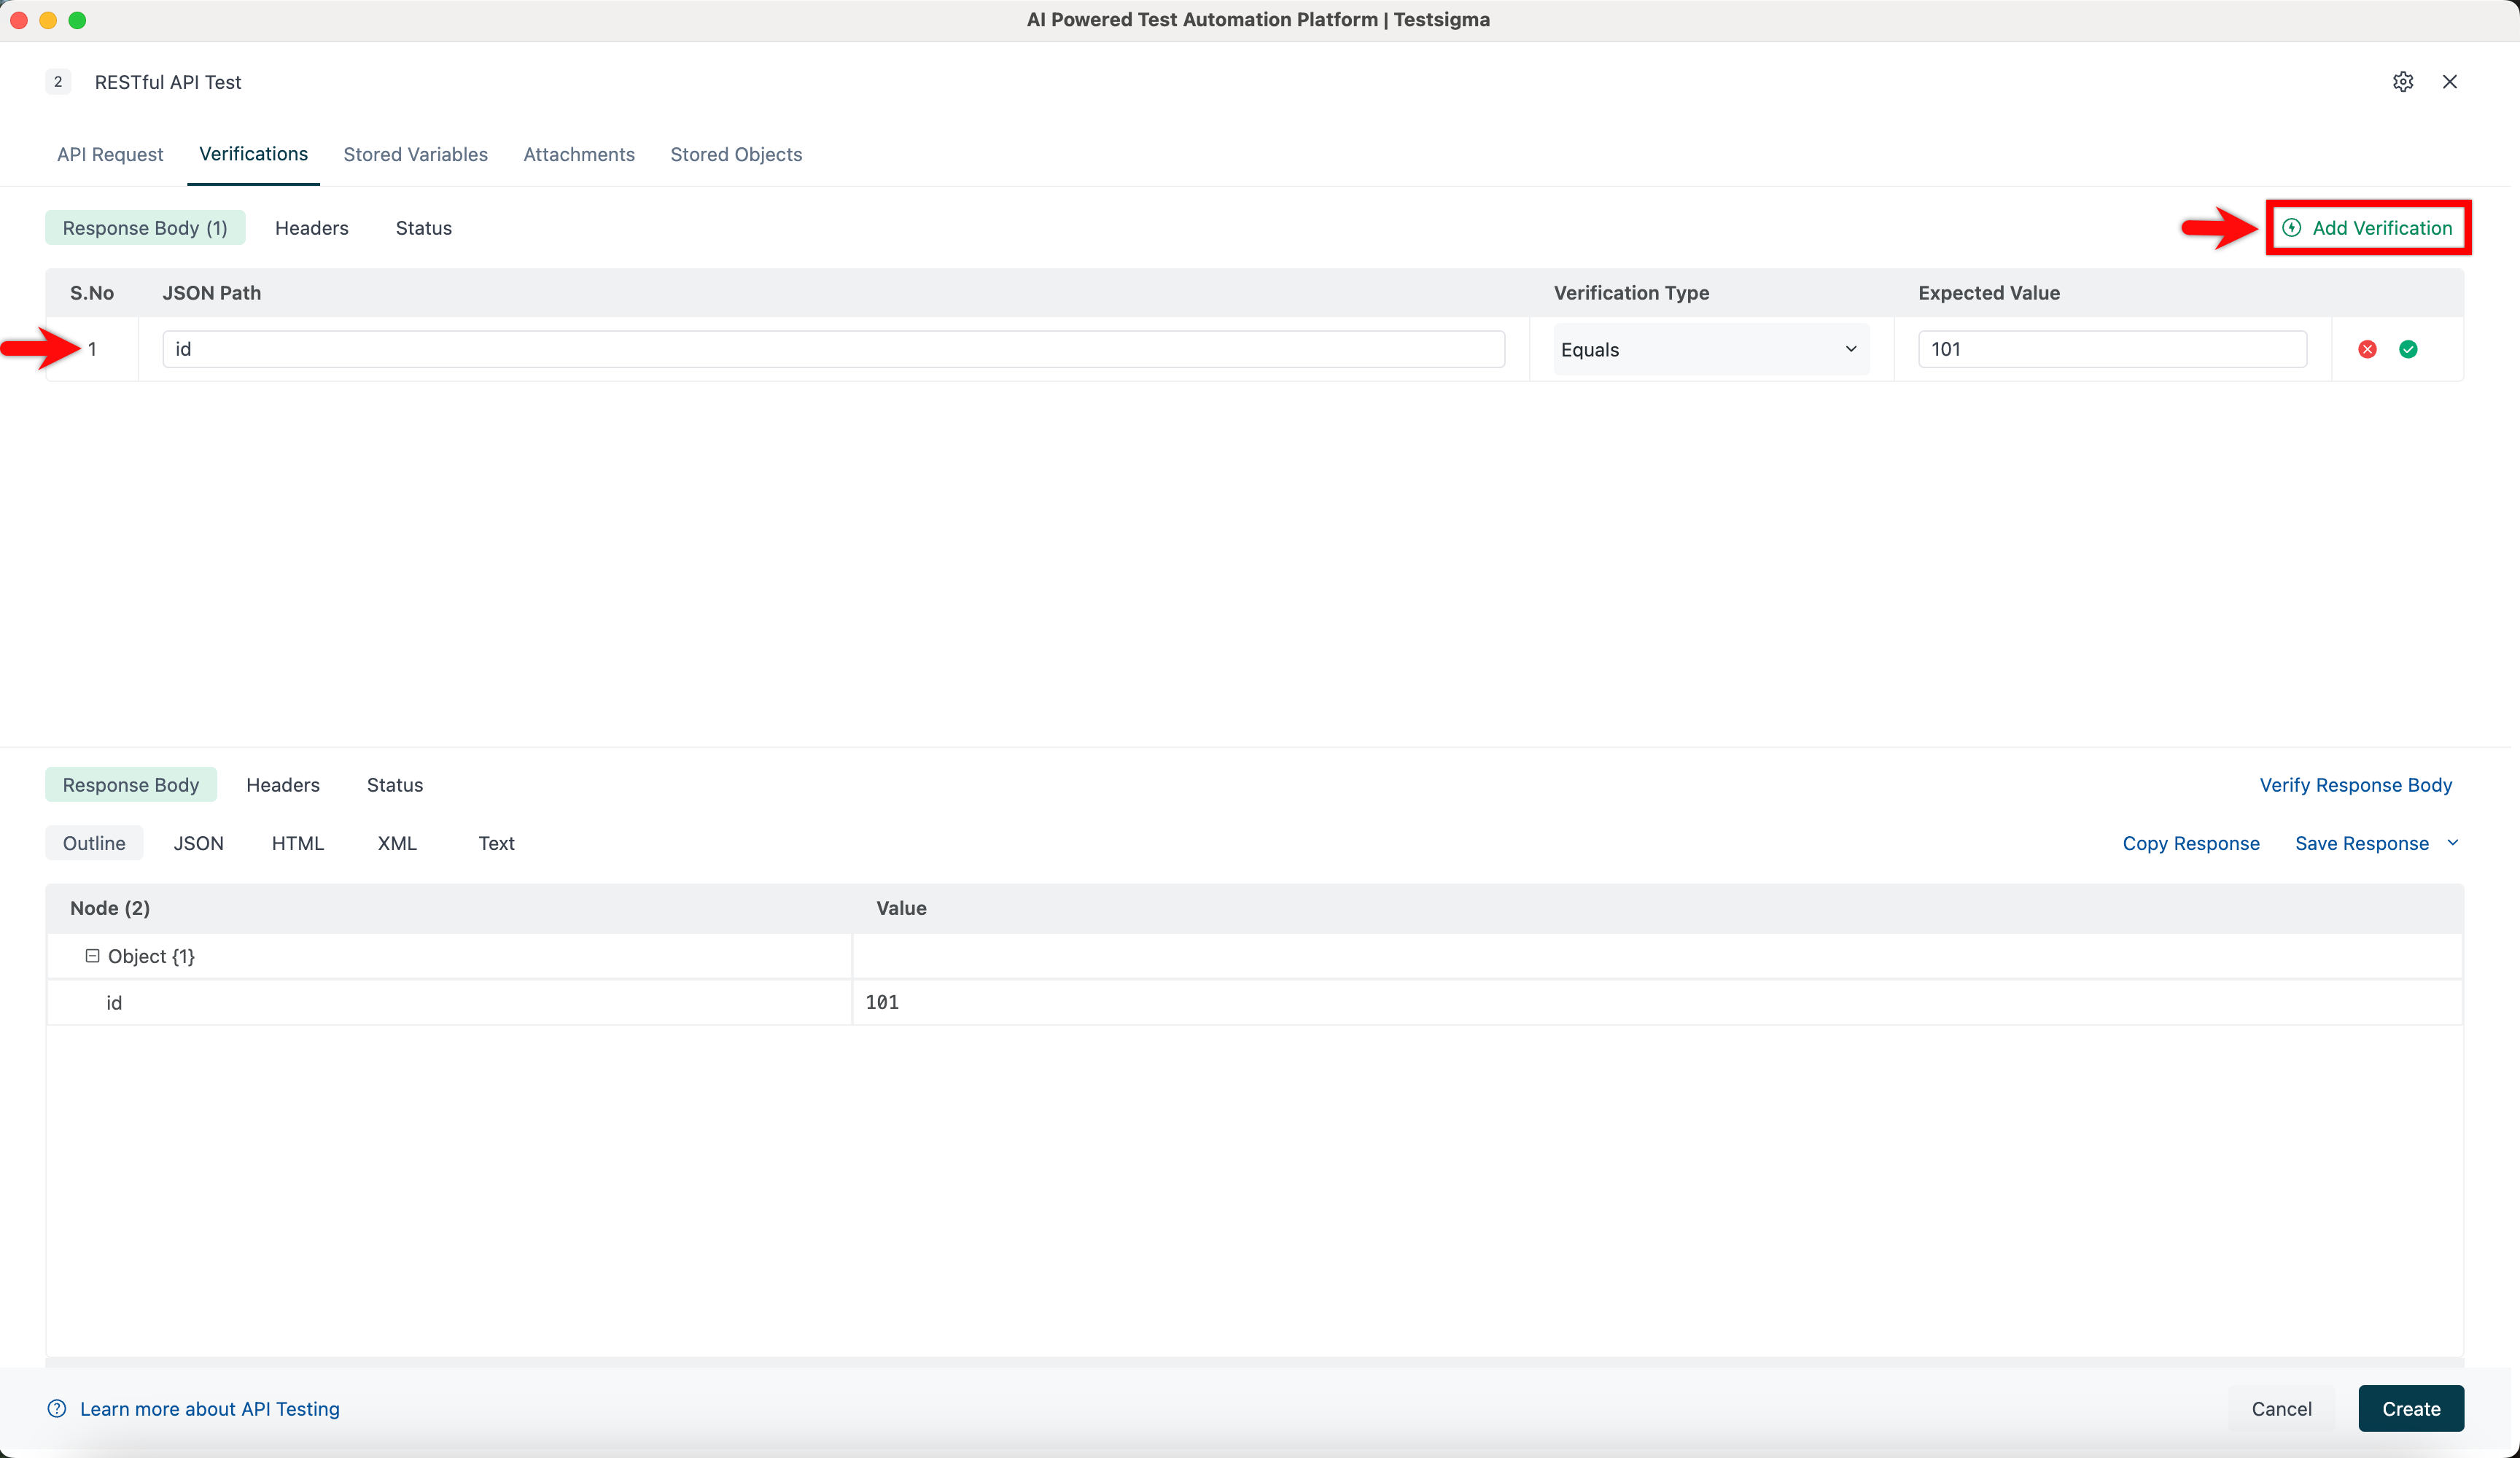
- Navigate to Verification > Response Body tab, and click Add Verification to add the field manually.
- Validate values of a key received in a response body.
Add Verification in Response Body (HTML)
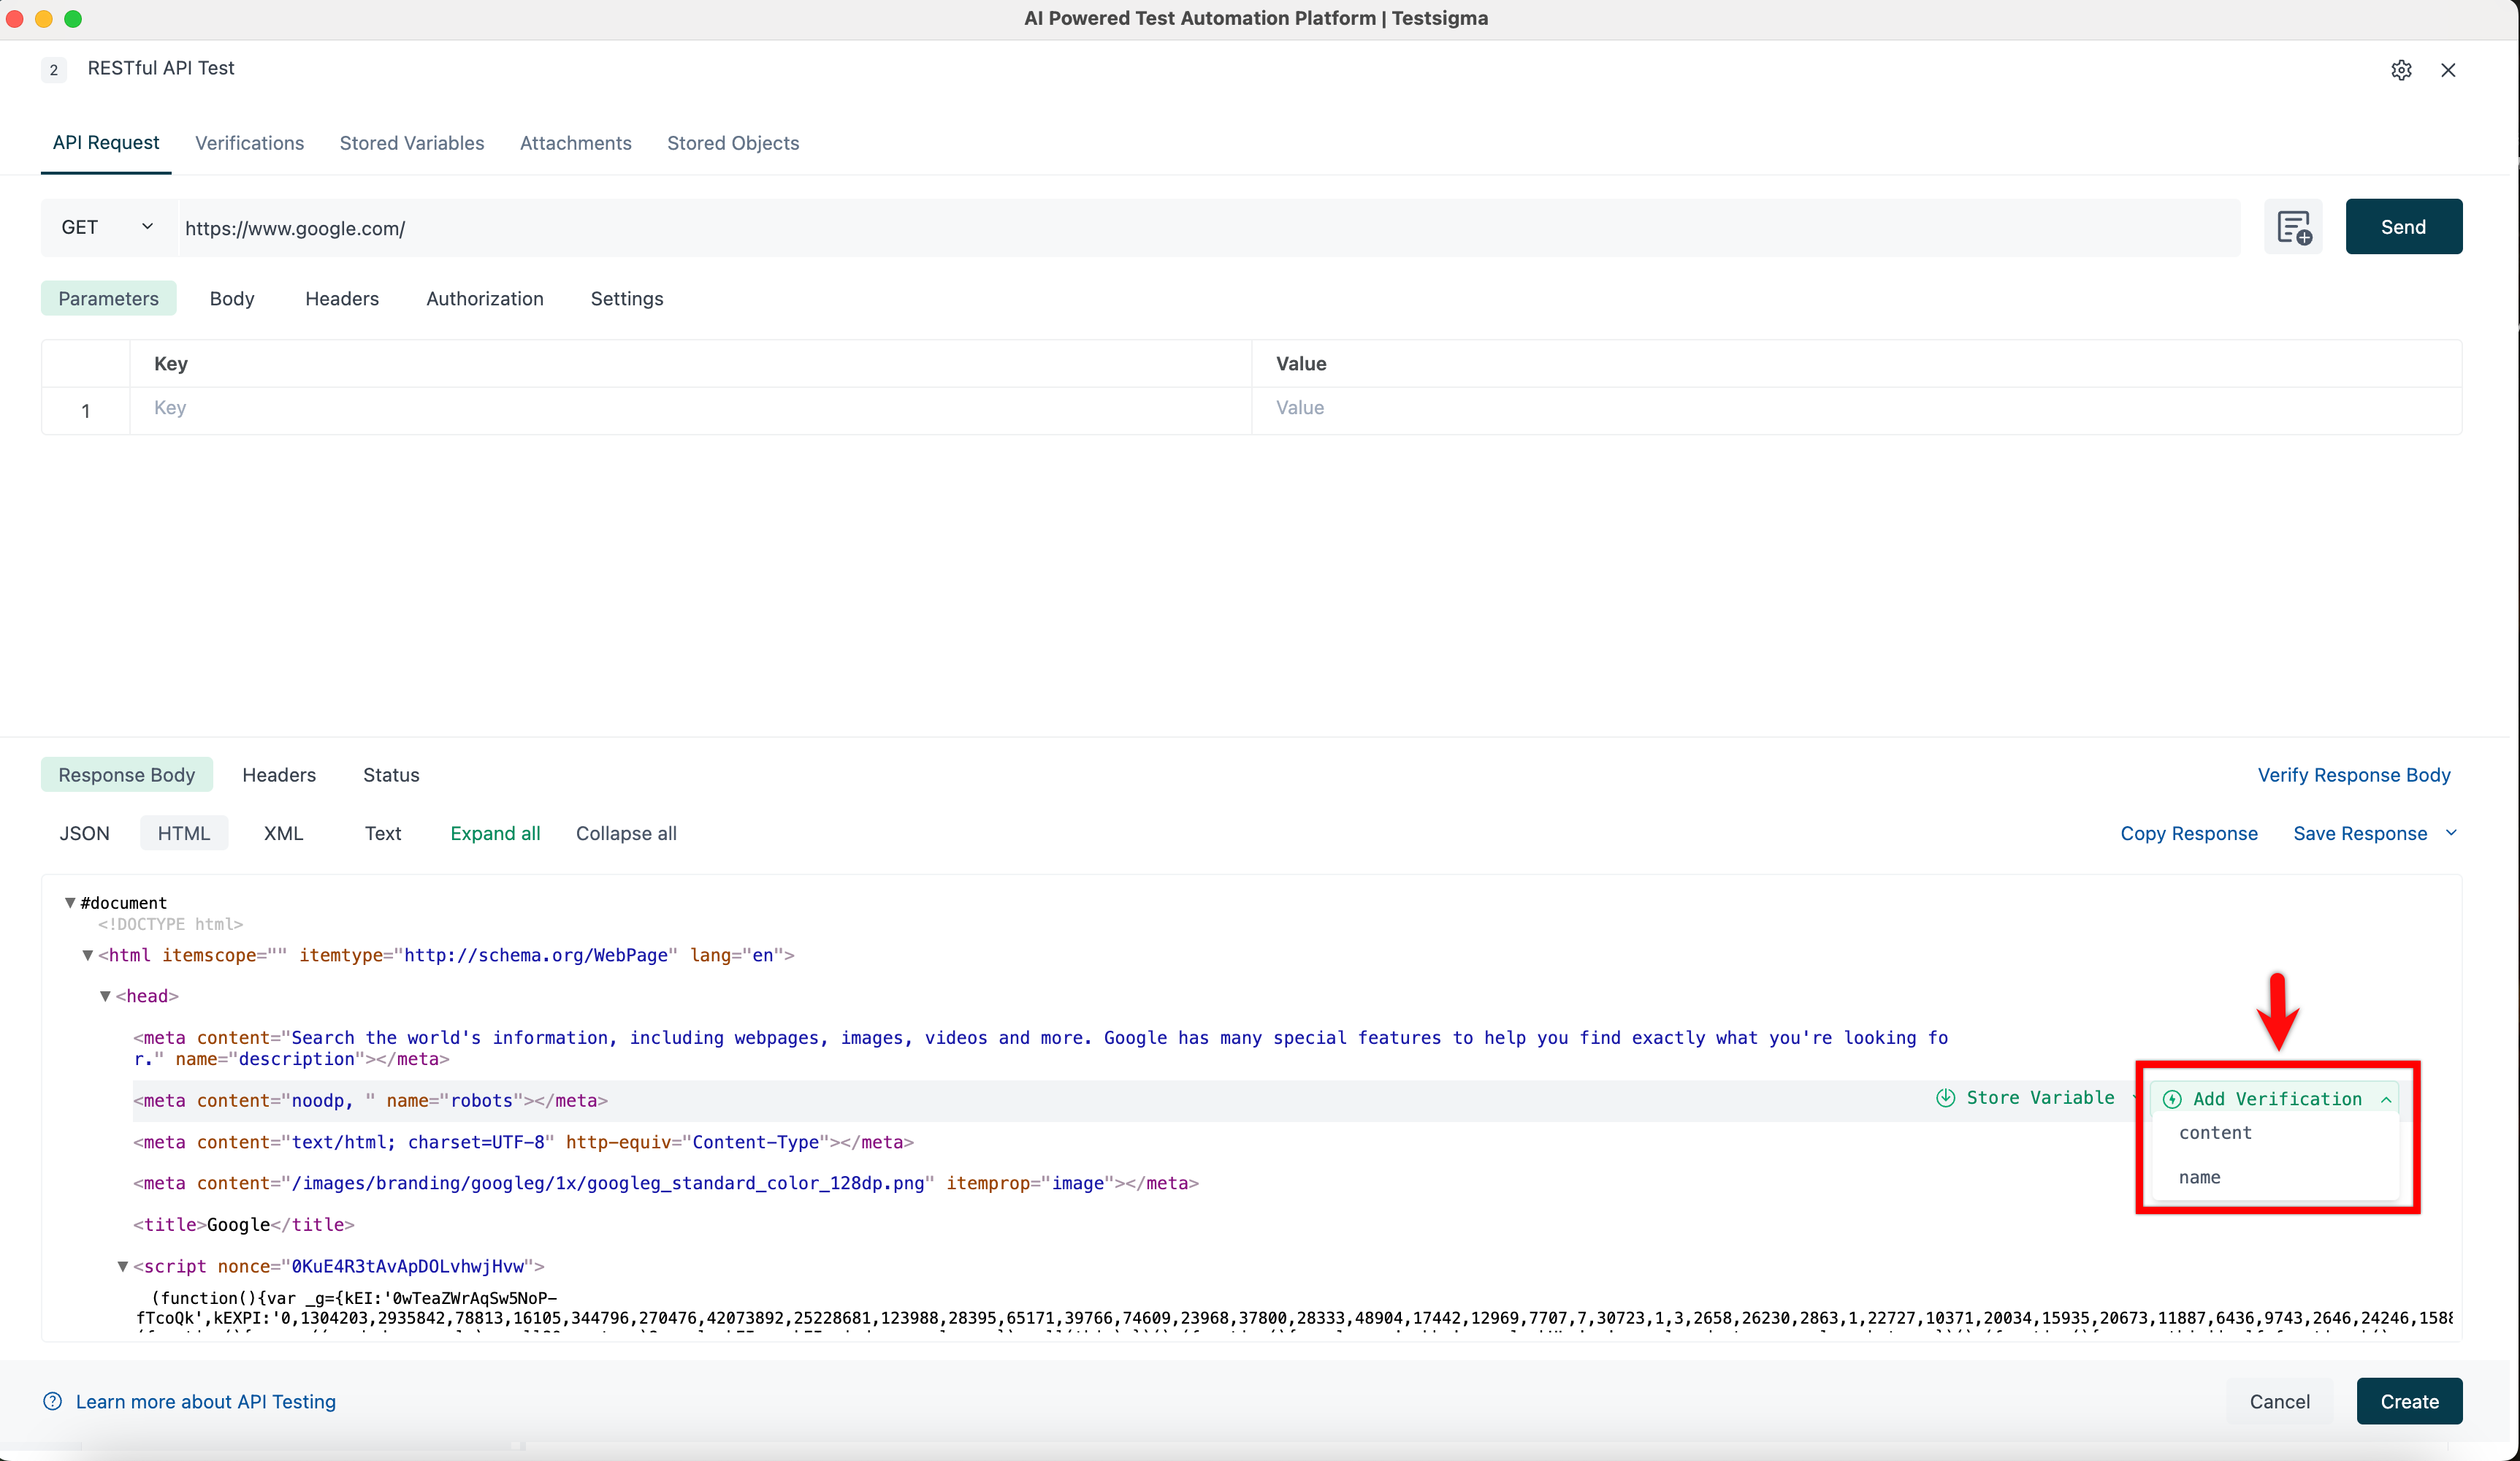
- Send an API Request. The Response Body for your request will appear at the bottom of the screen.
-
Hover over the HTML lines in the Response Body and select the attribute to add for verification. This action automatically adds the attribute and its value to the Verifications tab.
Copy Response from Response body
Click copy response.
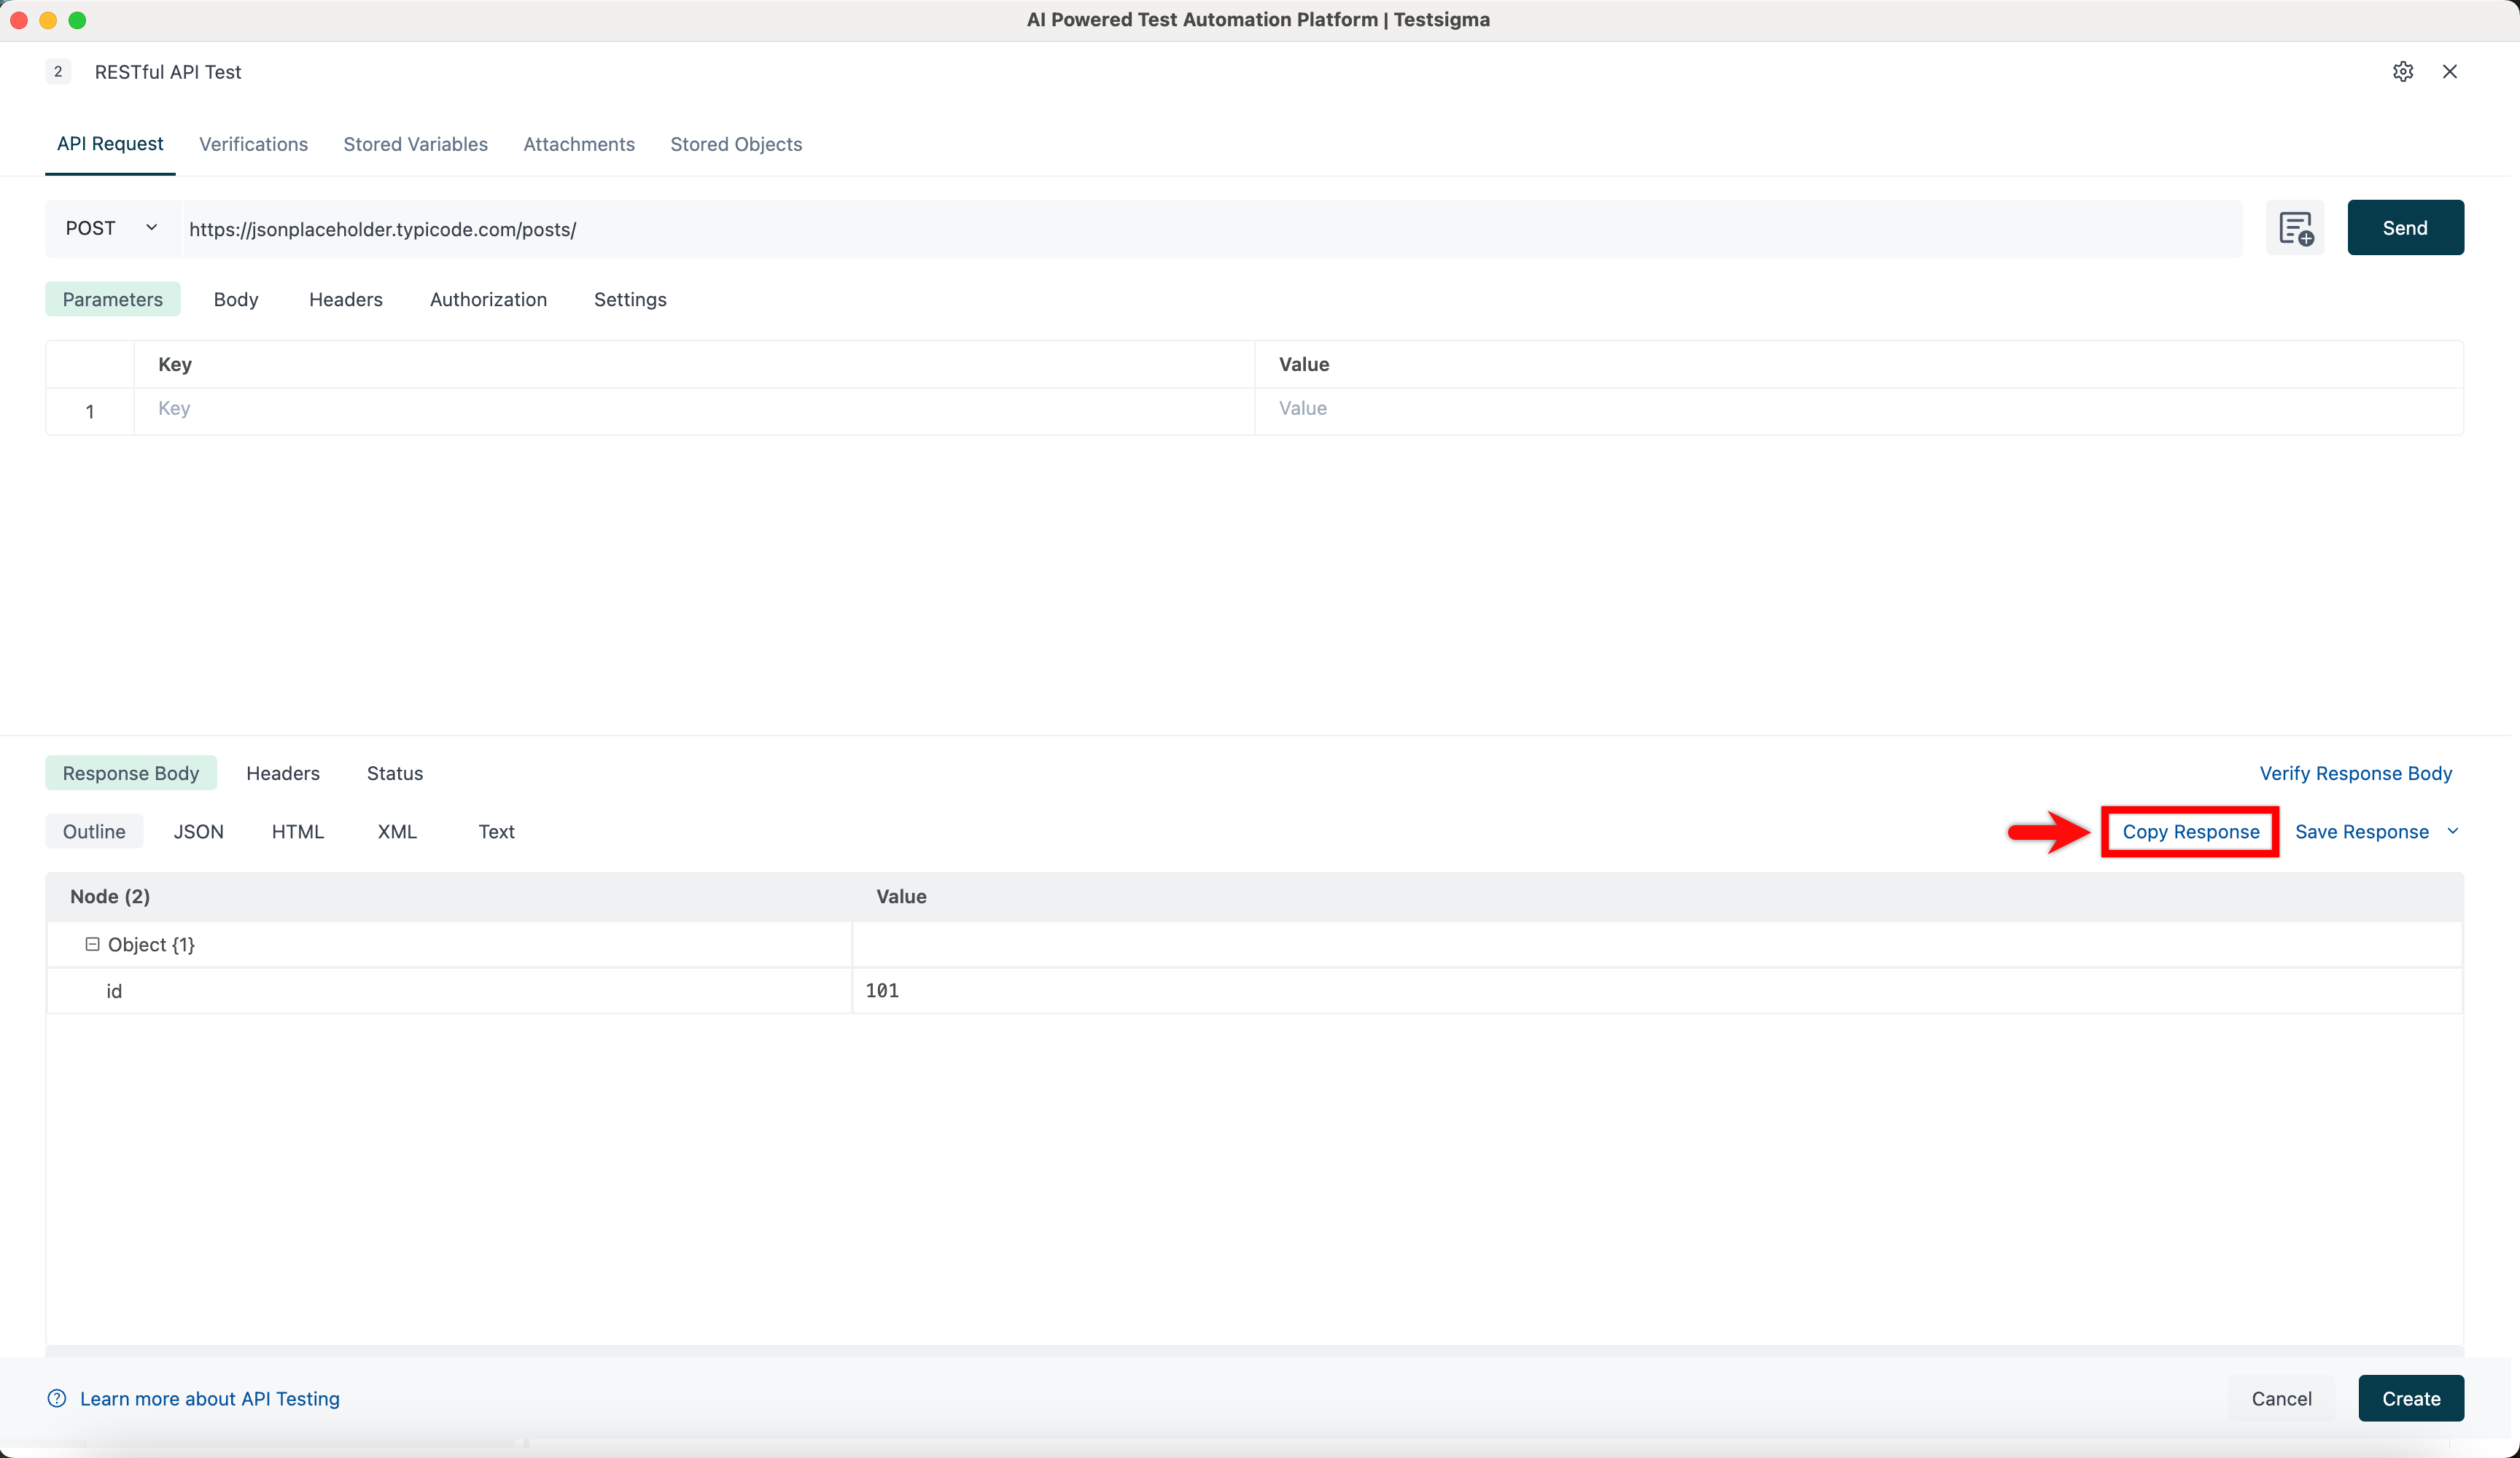
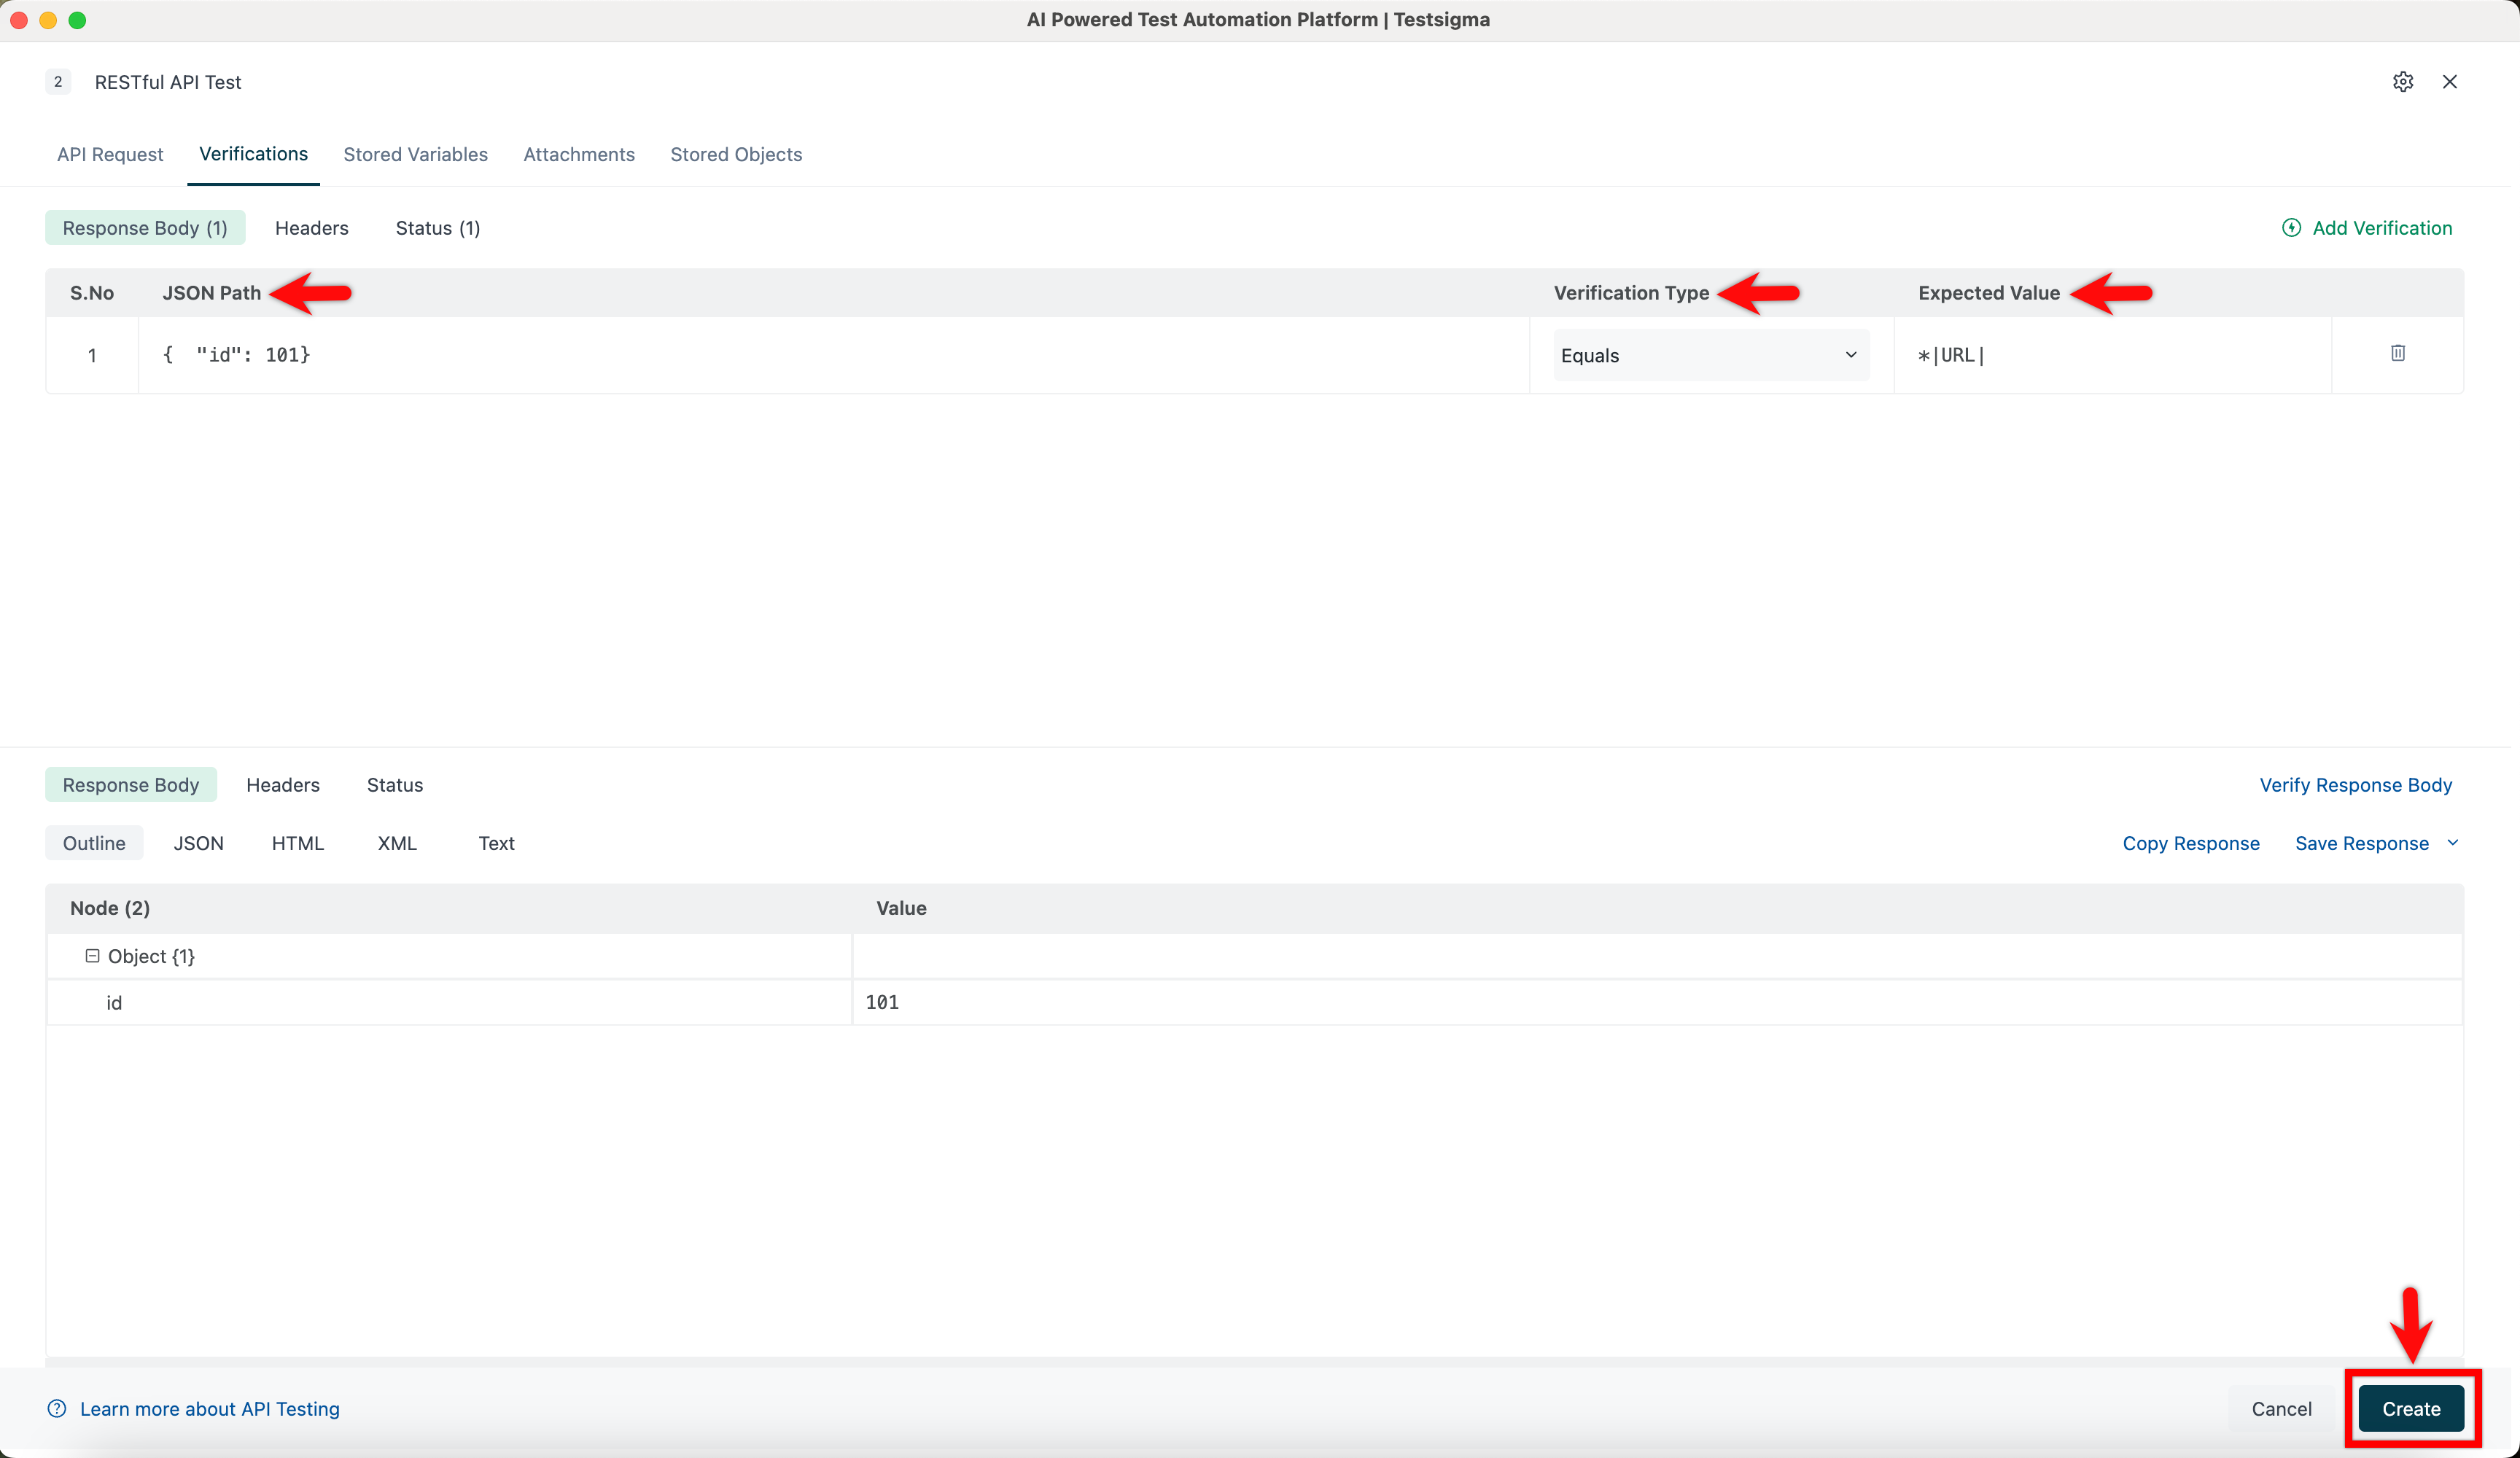
It will copy to the clipboard, paste the JSON or XPATH path field, and select the verification type from the drop-down list. Enter an expected value by using plain text or test data types. Click Create to add verification.
Verify Response body
The following are two ways to verify the response body.
-
Before Invoking API
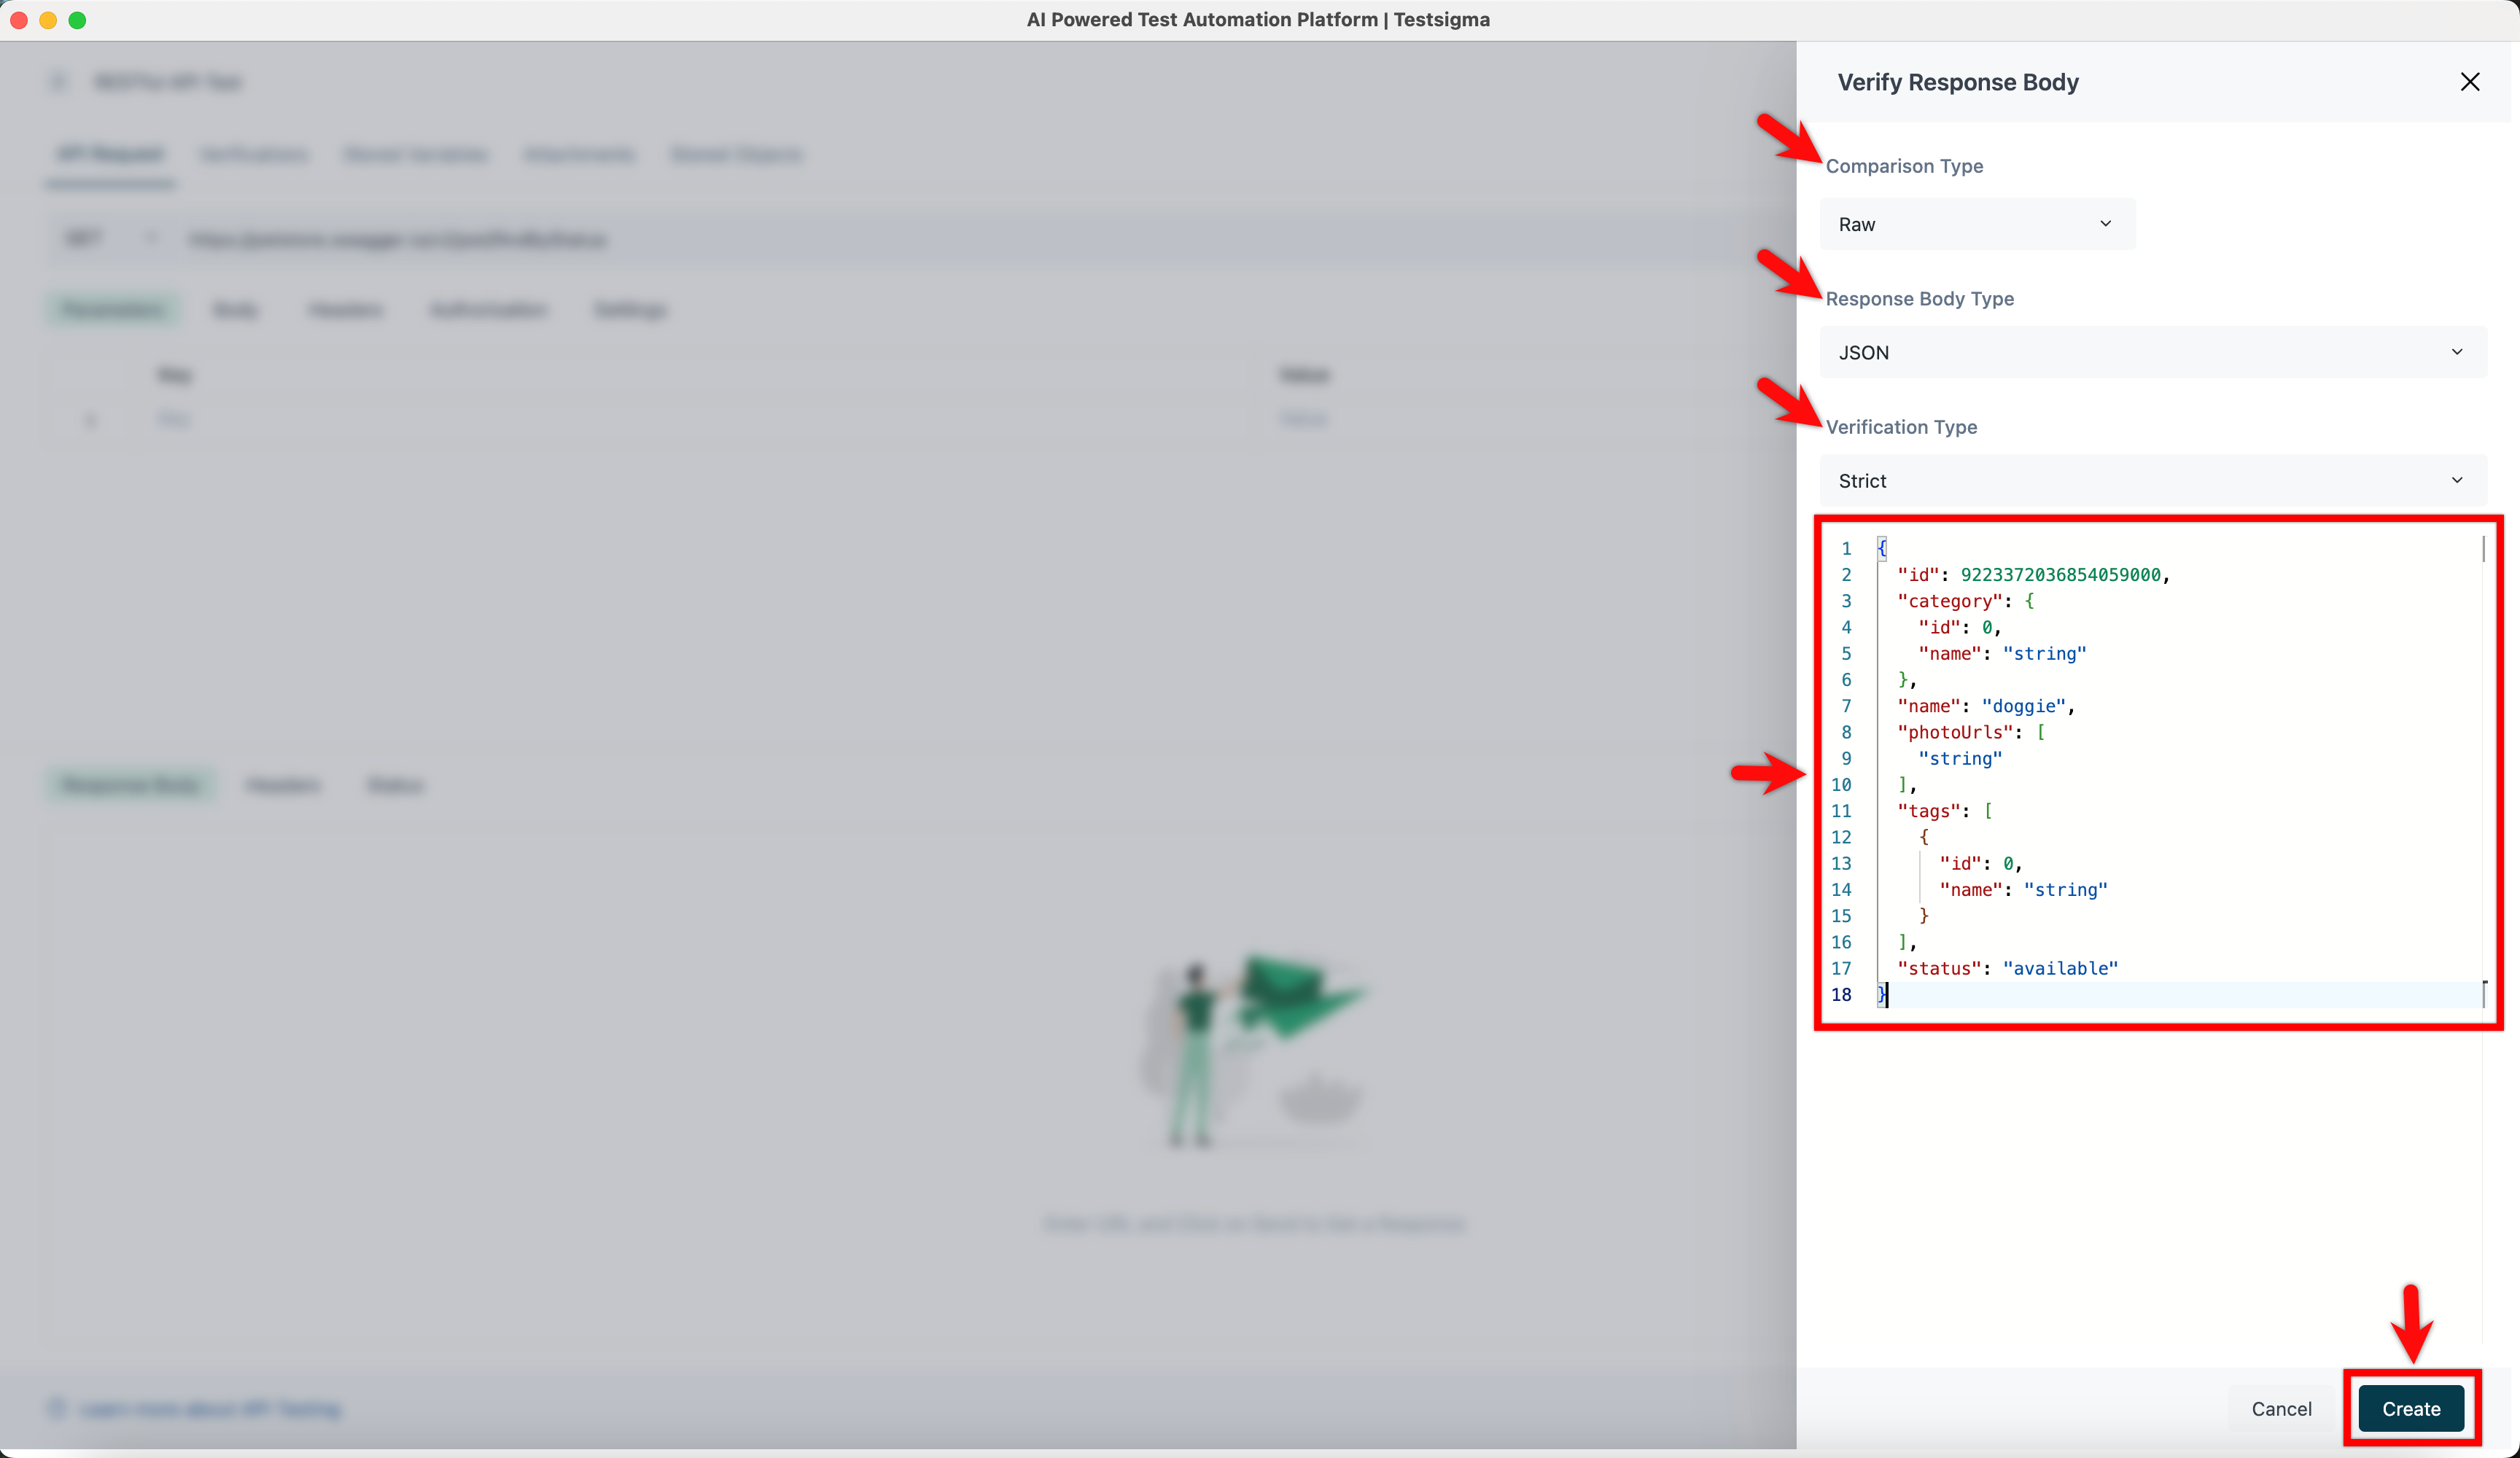
- Click the Verify Response Body. This will open the Verify Response Body overlay screen.
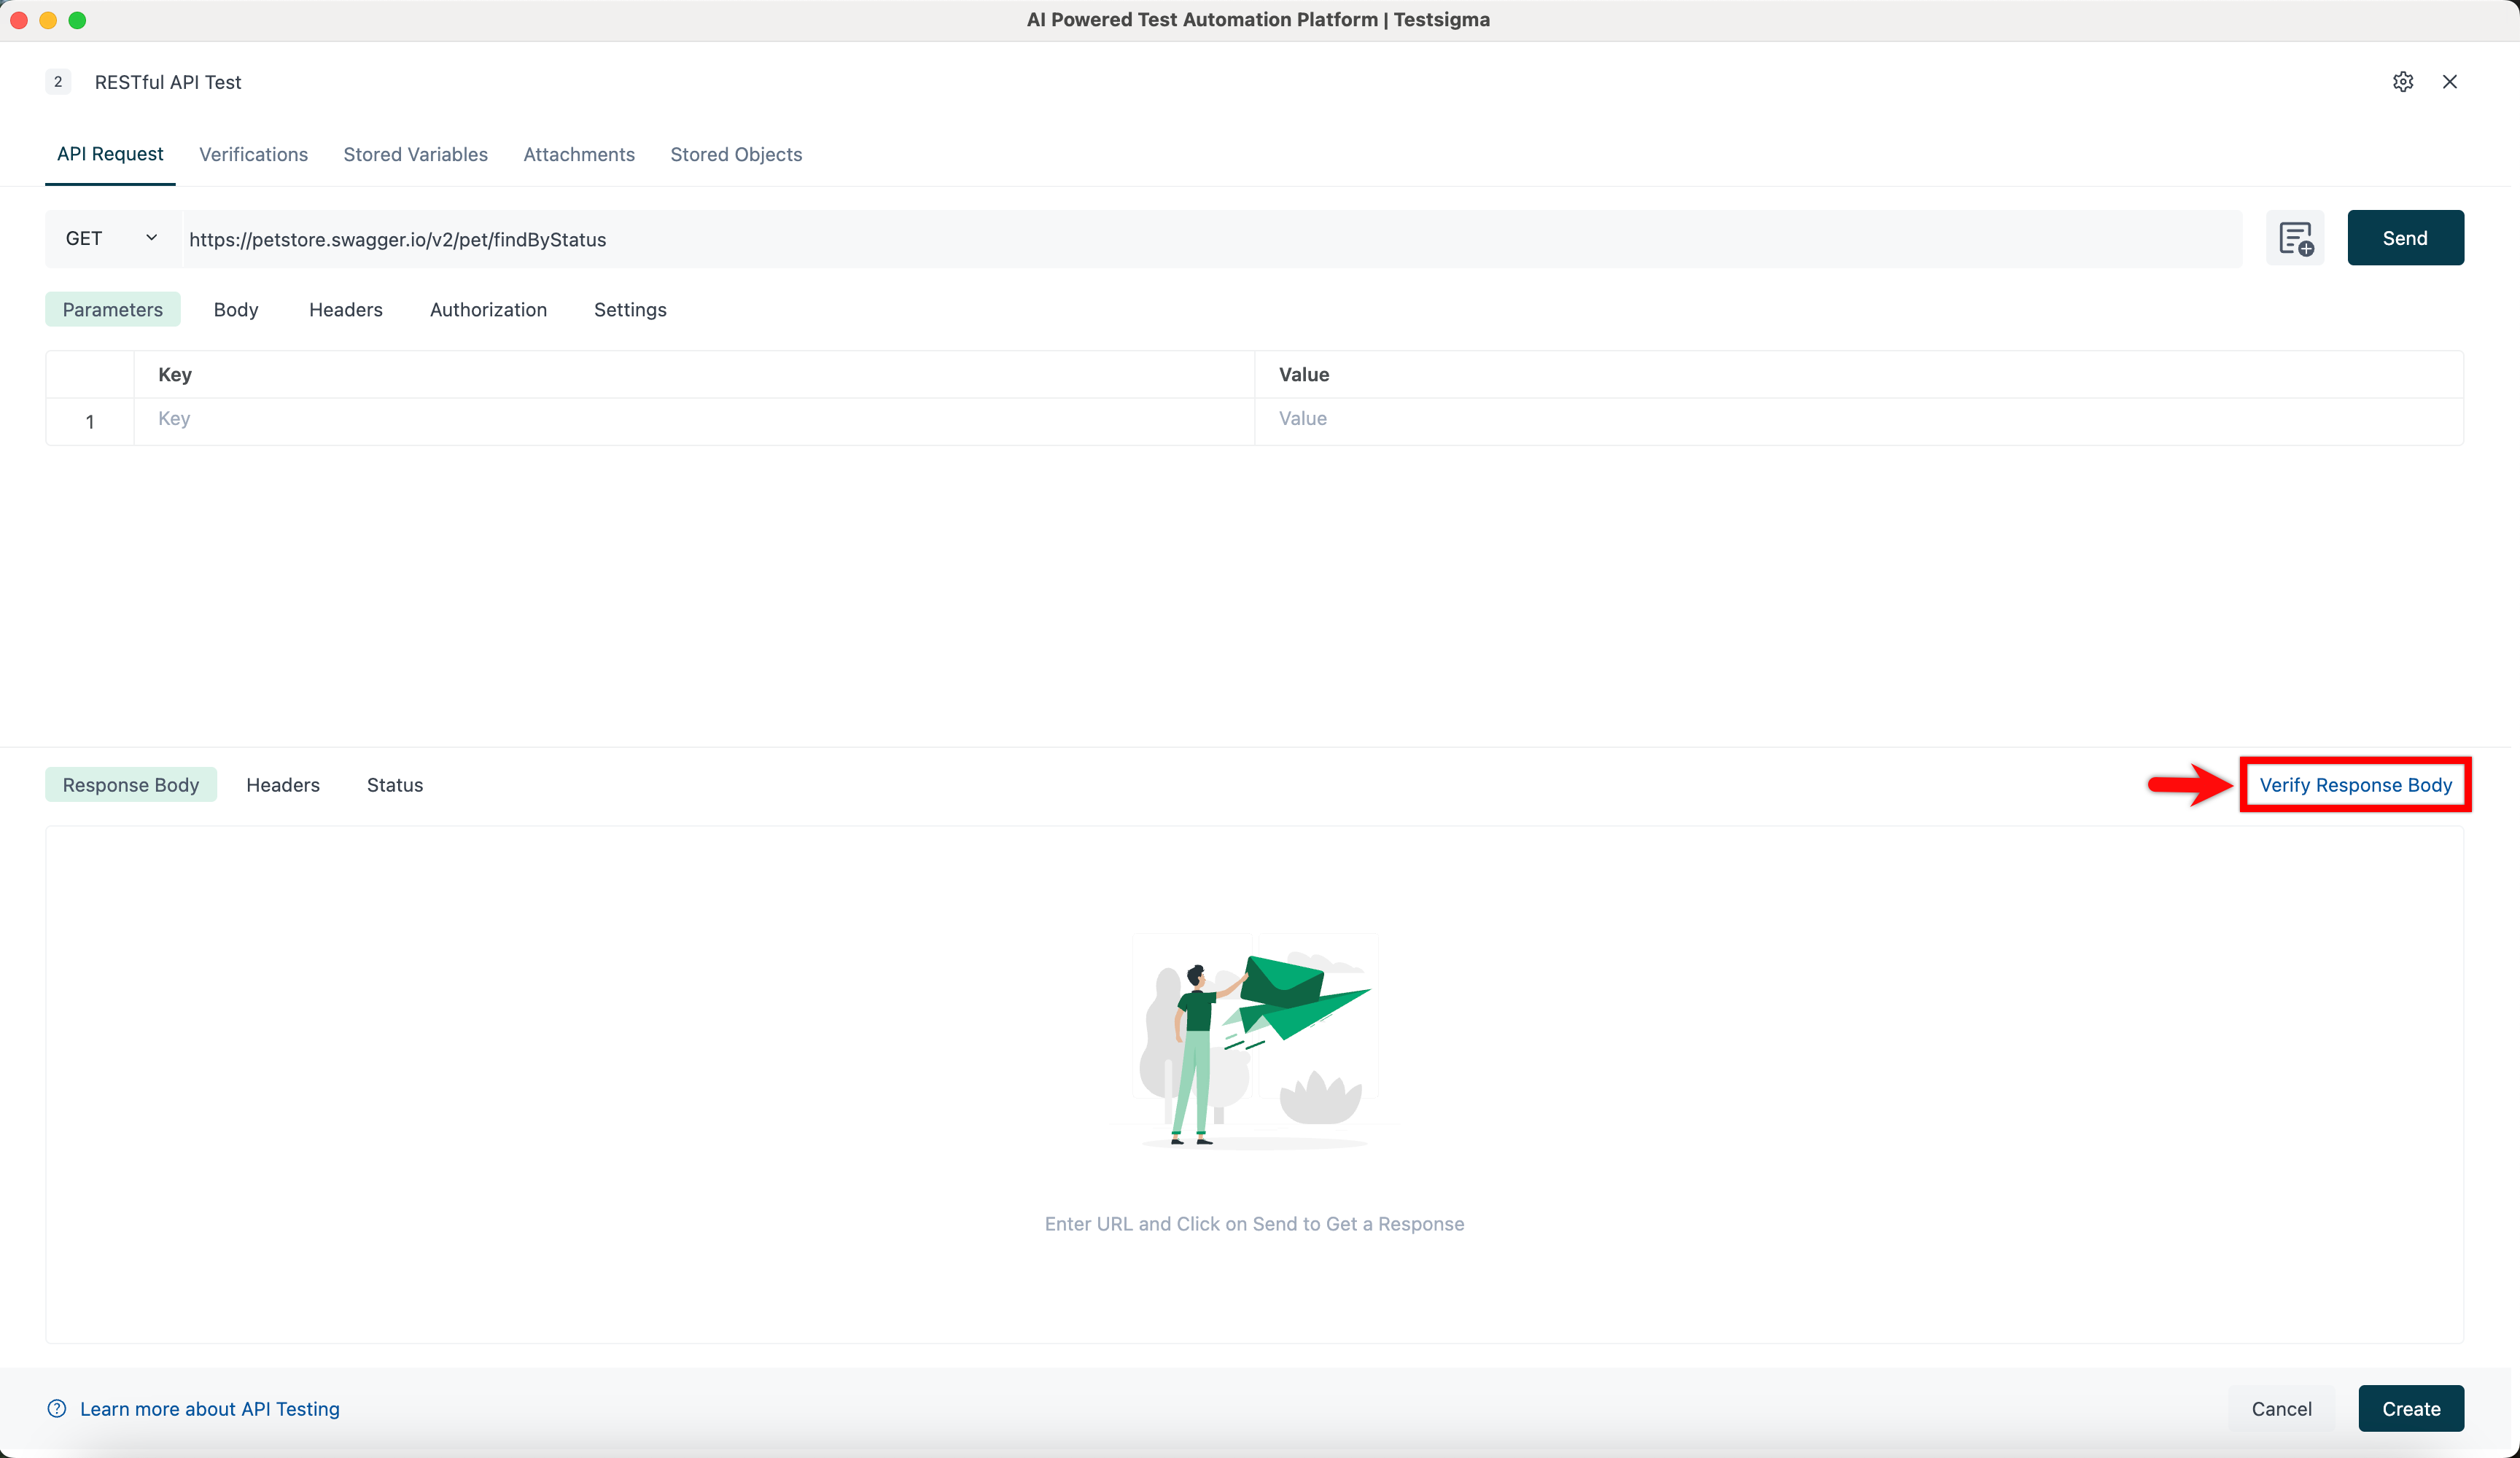
- Select the Comparison Type, Response Body Type, and Verification type from the drop-down list. Enter the expected value that you wish to compare and verify, then click the Create to save your API.
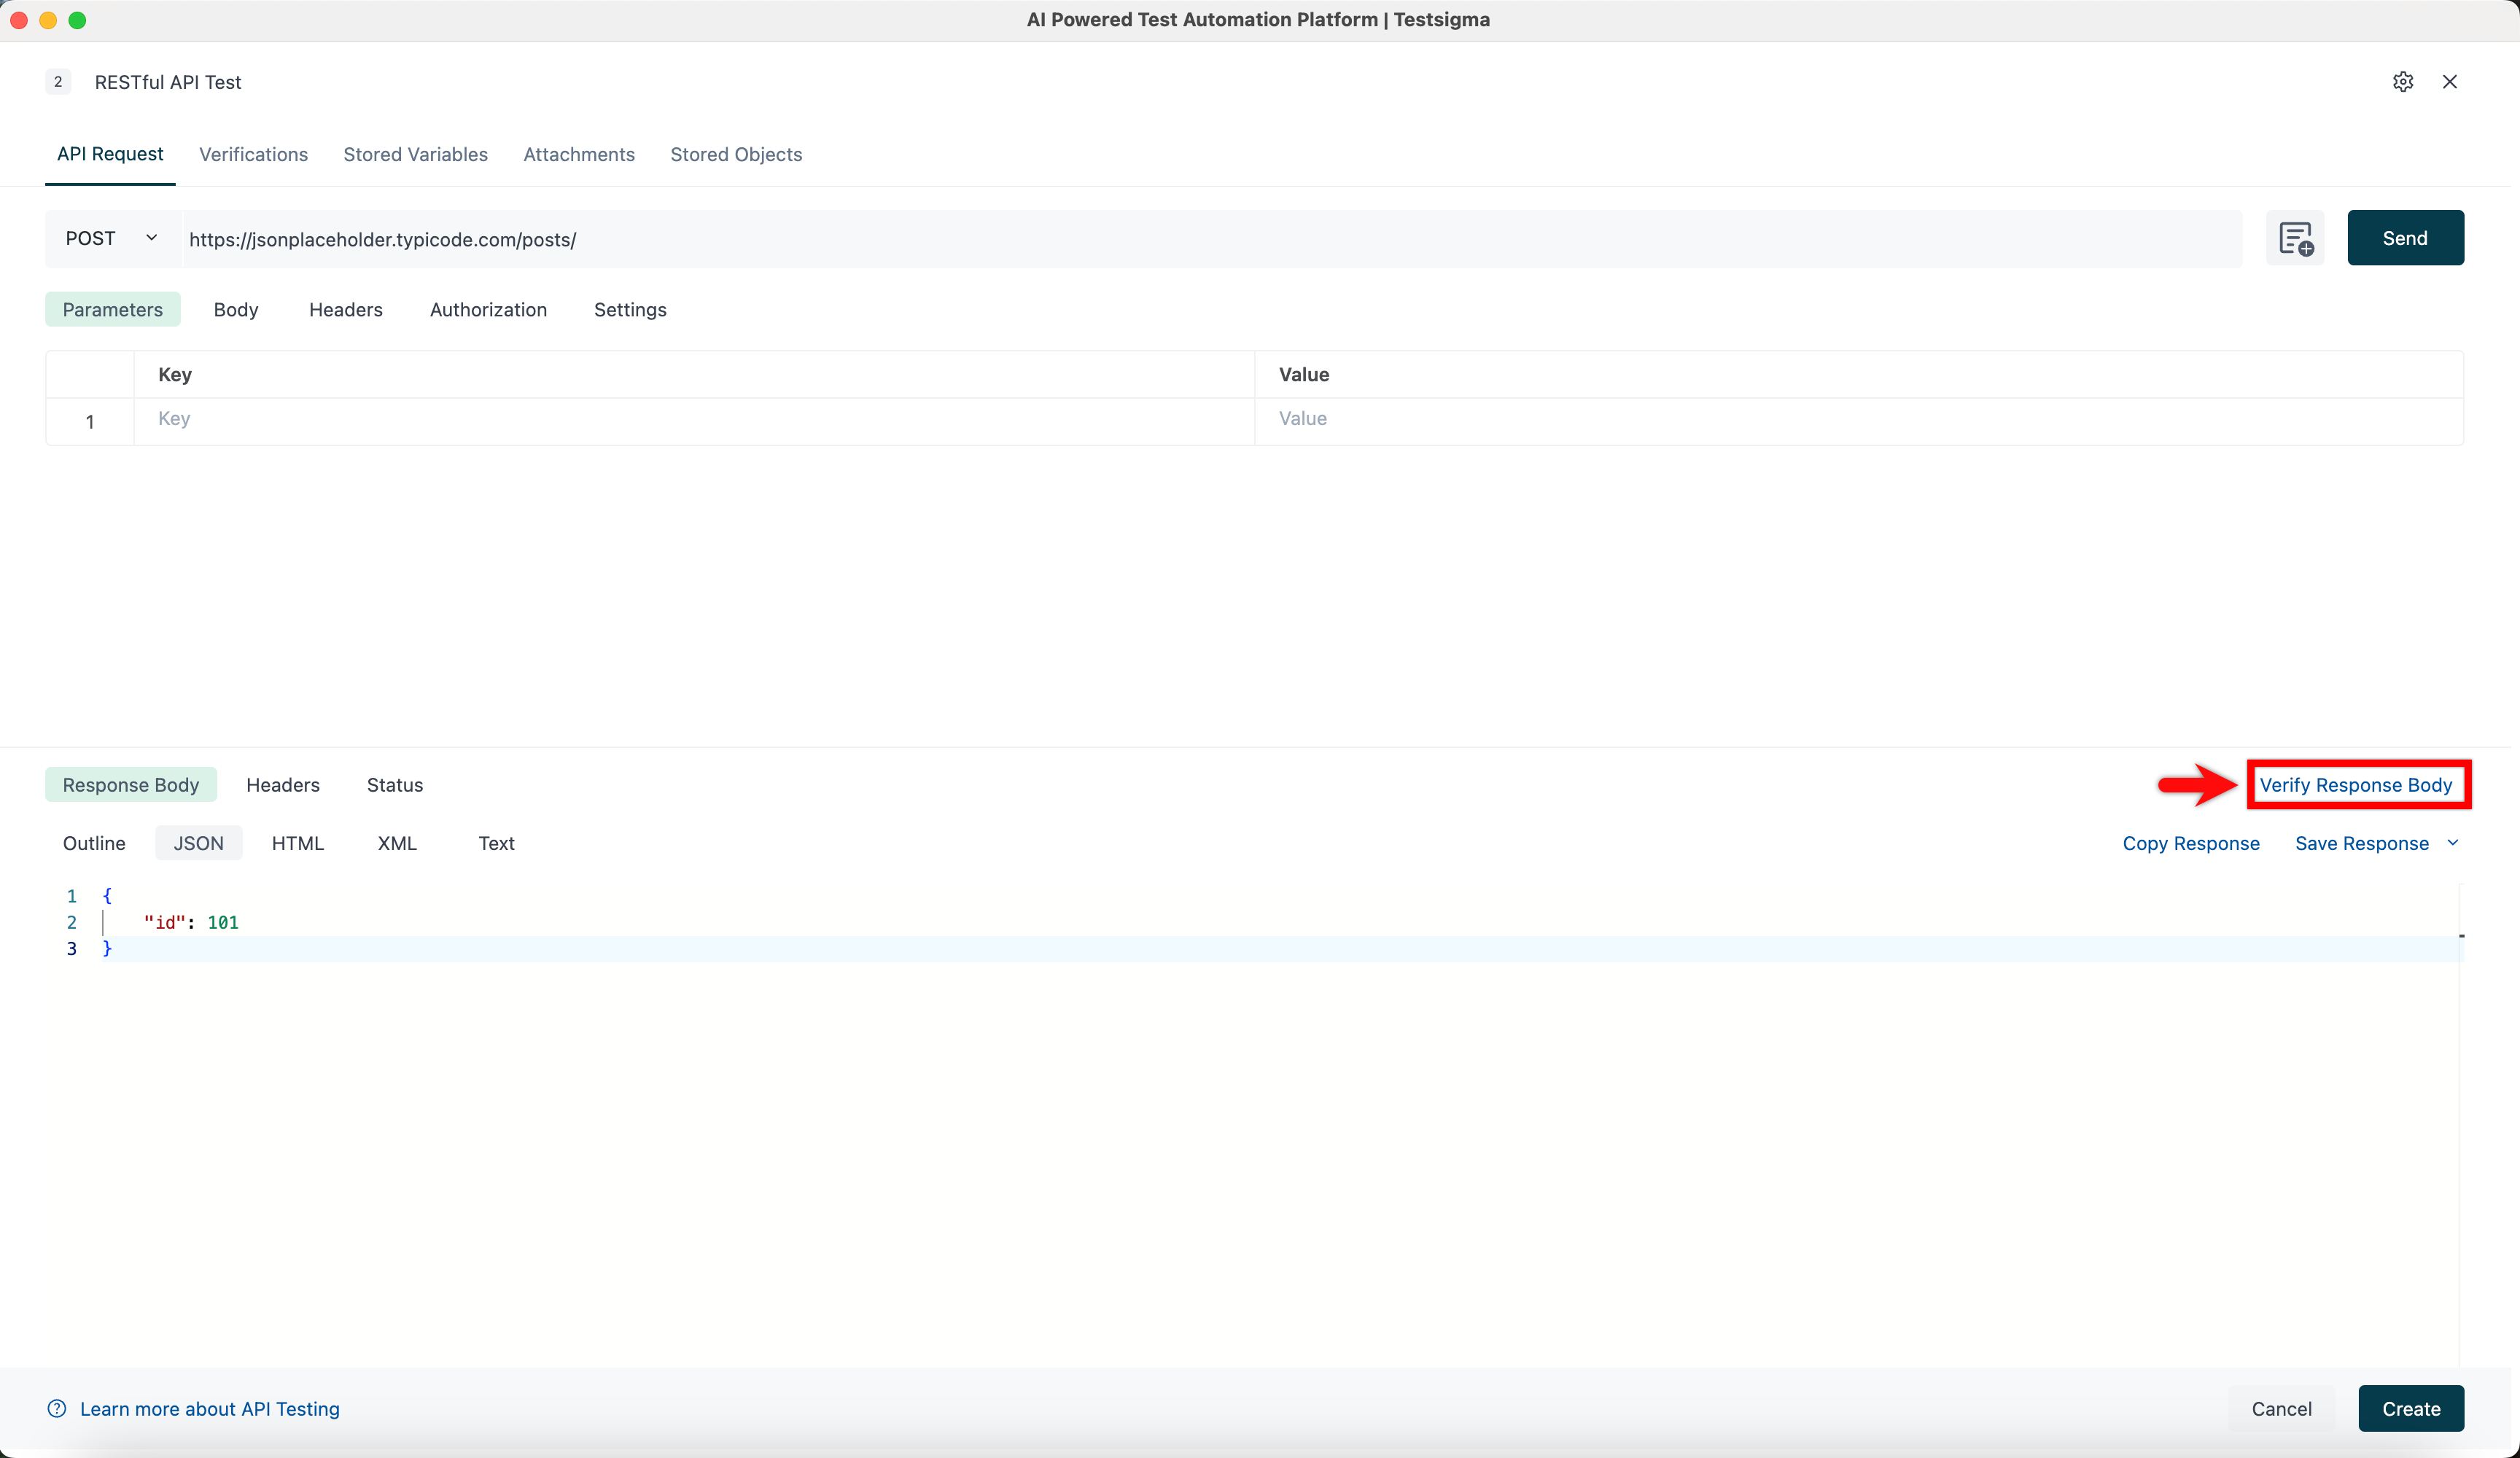
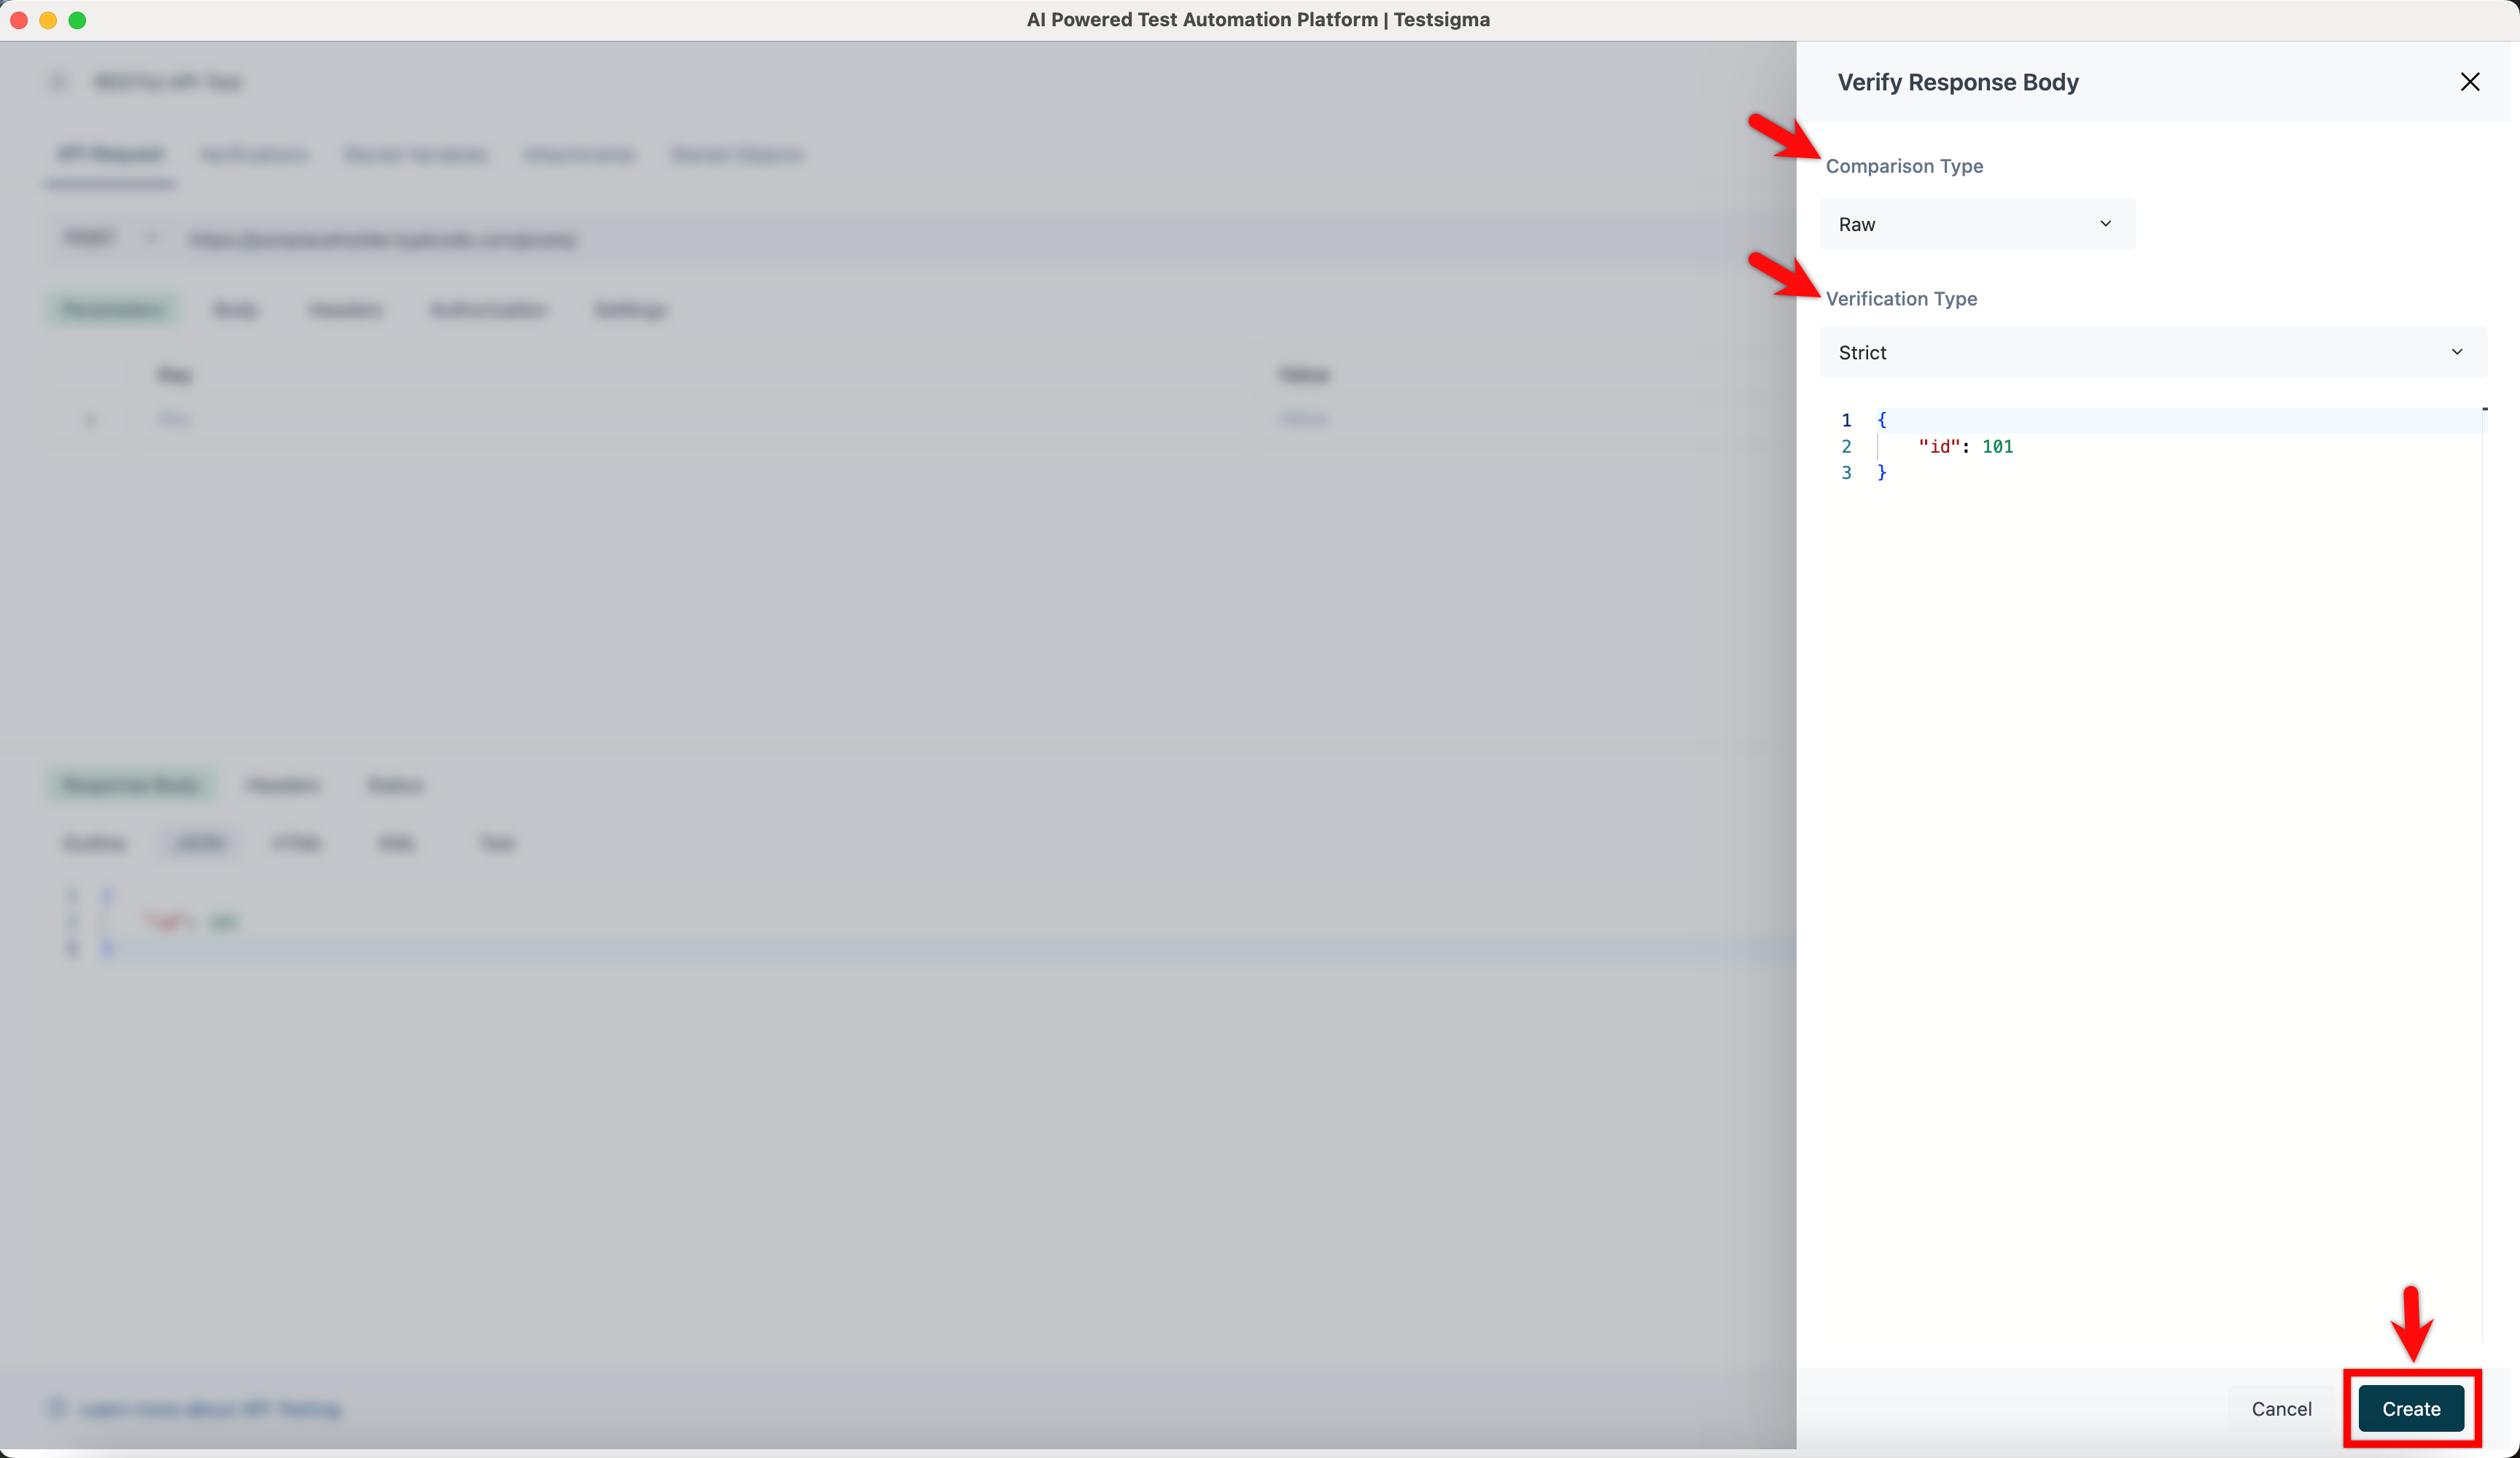
- Click the Verify Response Body. This will open the Verify Response Body overlay screen.
-
After Invoking API
Headers Verification
Headers Verification in RESTful API Testing is the process of verifying that the response headers returned by the API are as expected. This includes verifying the status code, content type, and other headers that are returned. It is important to ensure that the headers are correct, as they can affect how the API is used and how the response is interpreted.
Add Verification in Headers Tab
Click Add Verification in the Headers tab. Enter the JSON path, enter the expected value in the field, and you can enter test data types in the Value field. Choose the verification type from the drop-down list. Click Create to add verification.
Mousehover to Response Field
At the bottom of the page, click the Headers tab, mouse over to the variable, and click Add Verification; it will update in the Verification headers tab.
Status Verification
Status verification in RESTful API testing is the process of verifying that the response from the API is in the expected format and contains the expected data. This is done by comparing the response from the API to the expected response.
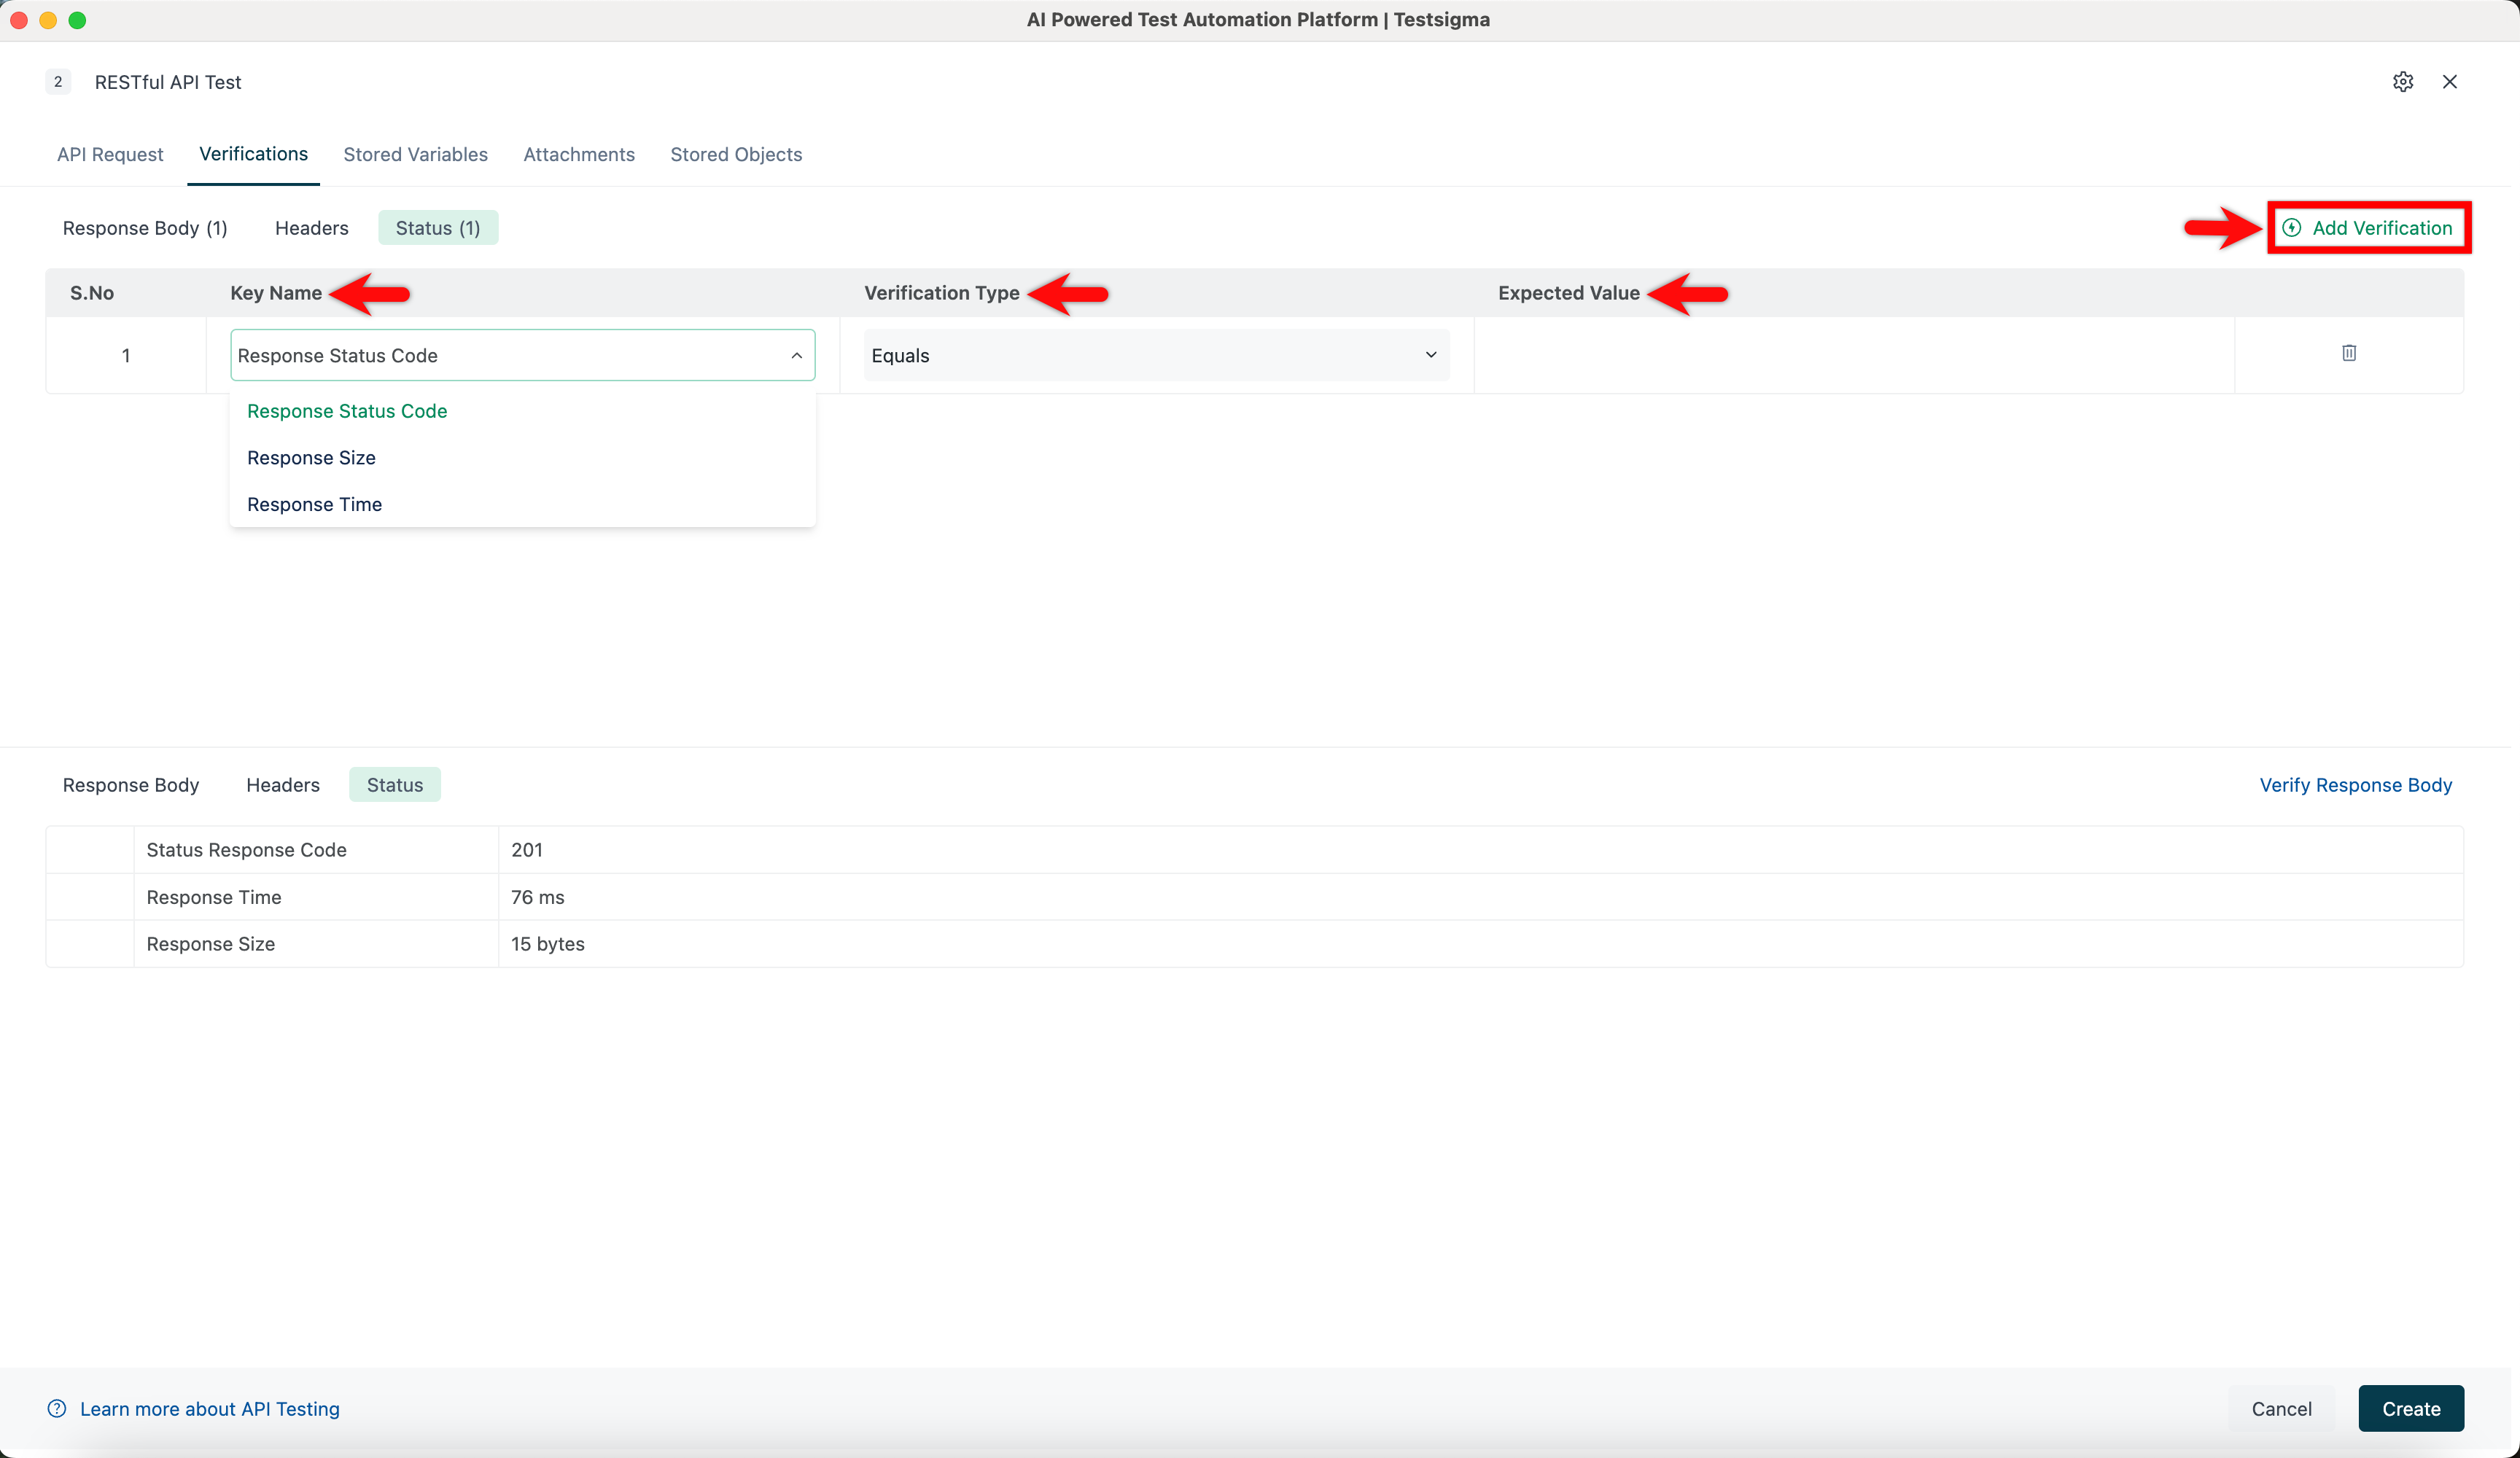
Add Verification in Status Tab
Click Add Verification in the Status tab. Select the key name from the drop-down list, enter the expected value in the field, and you can enter test data types in the Value field. Select the verification type from the drop-down list.
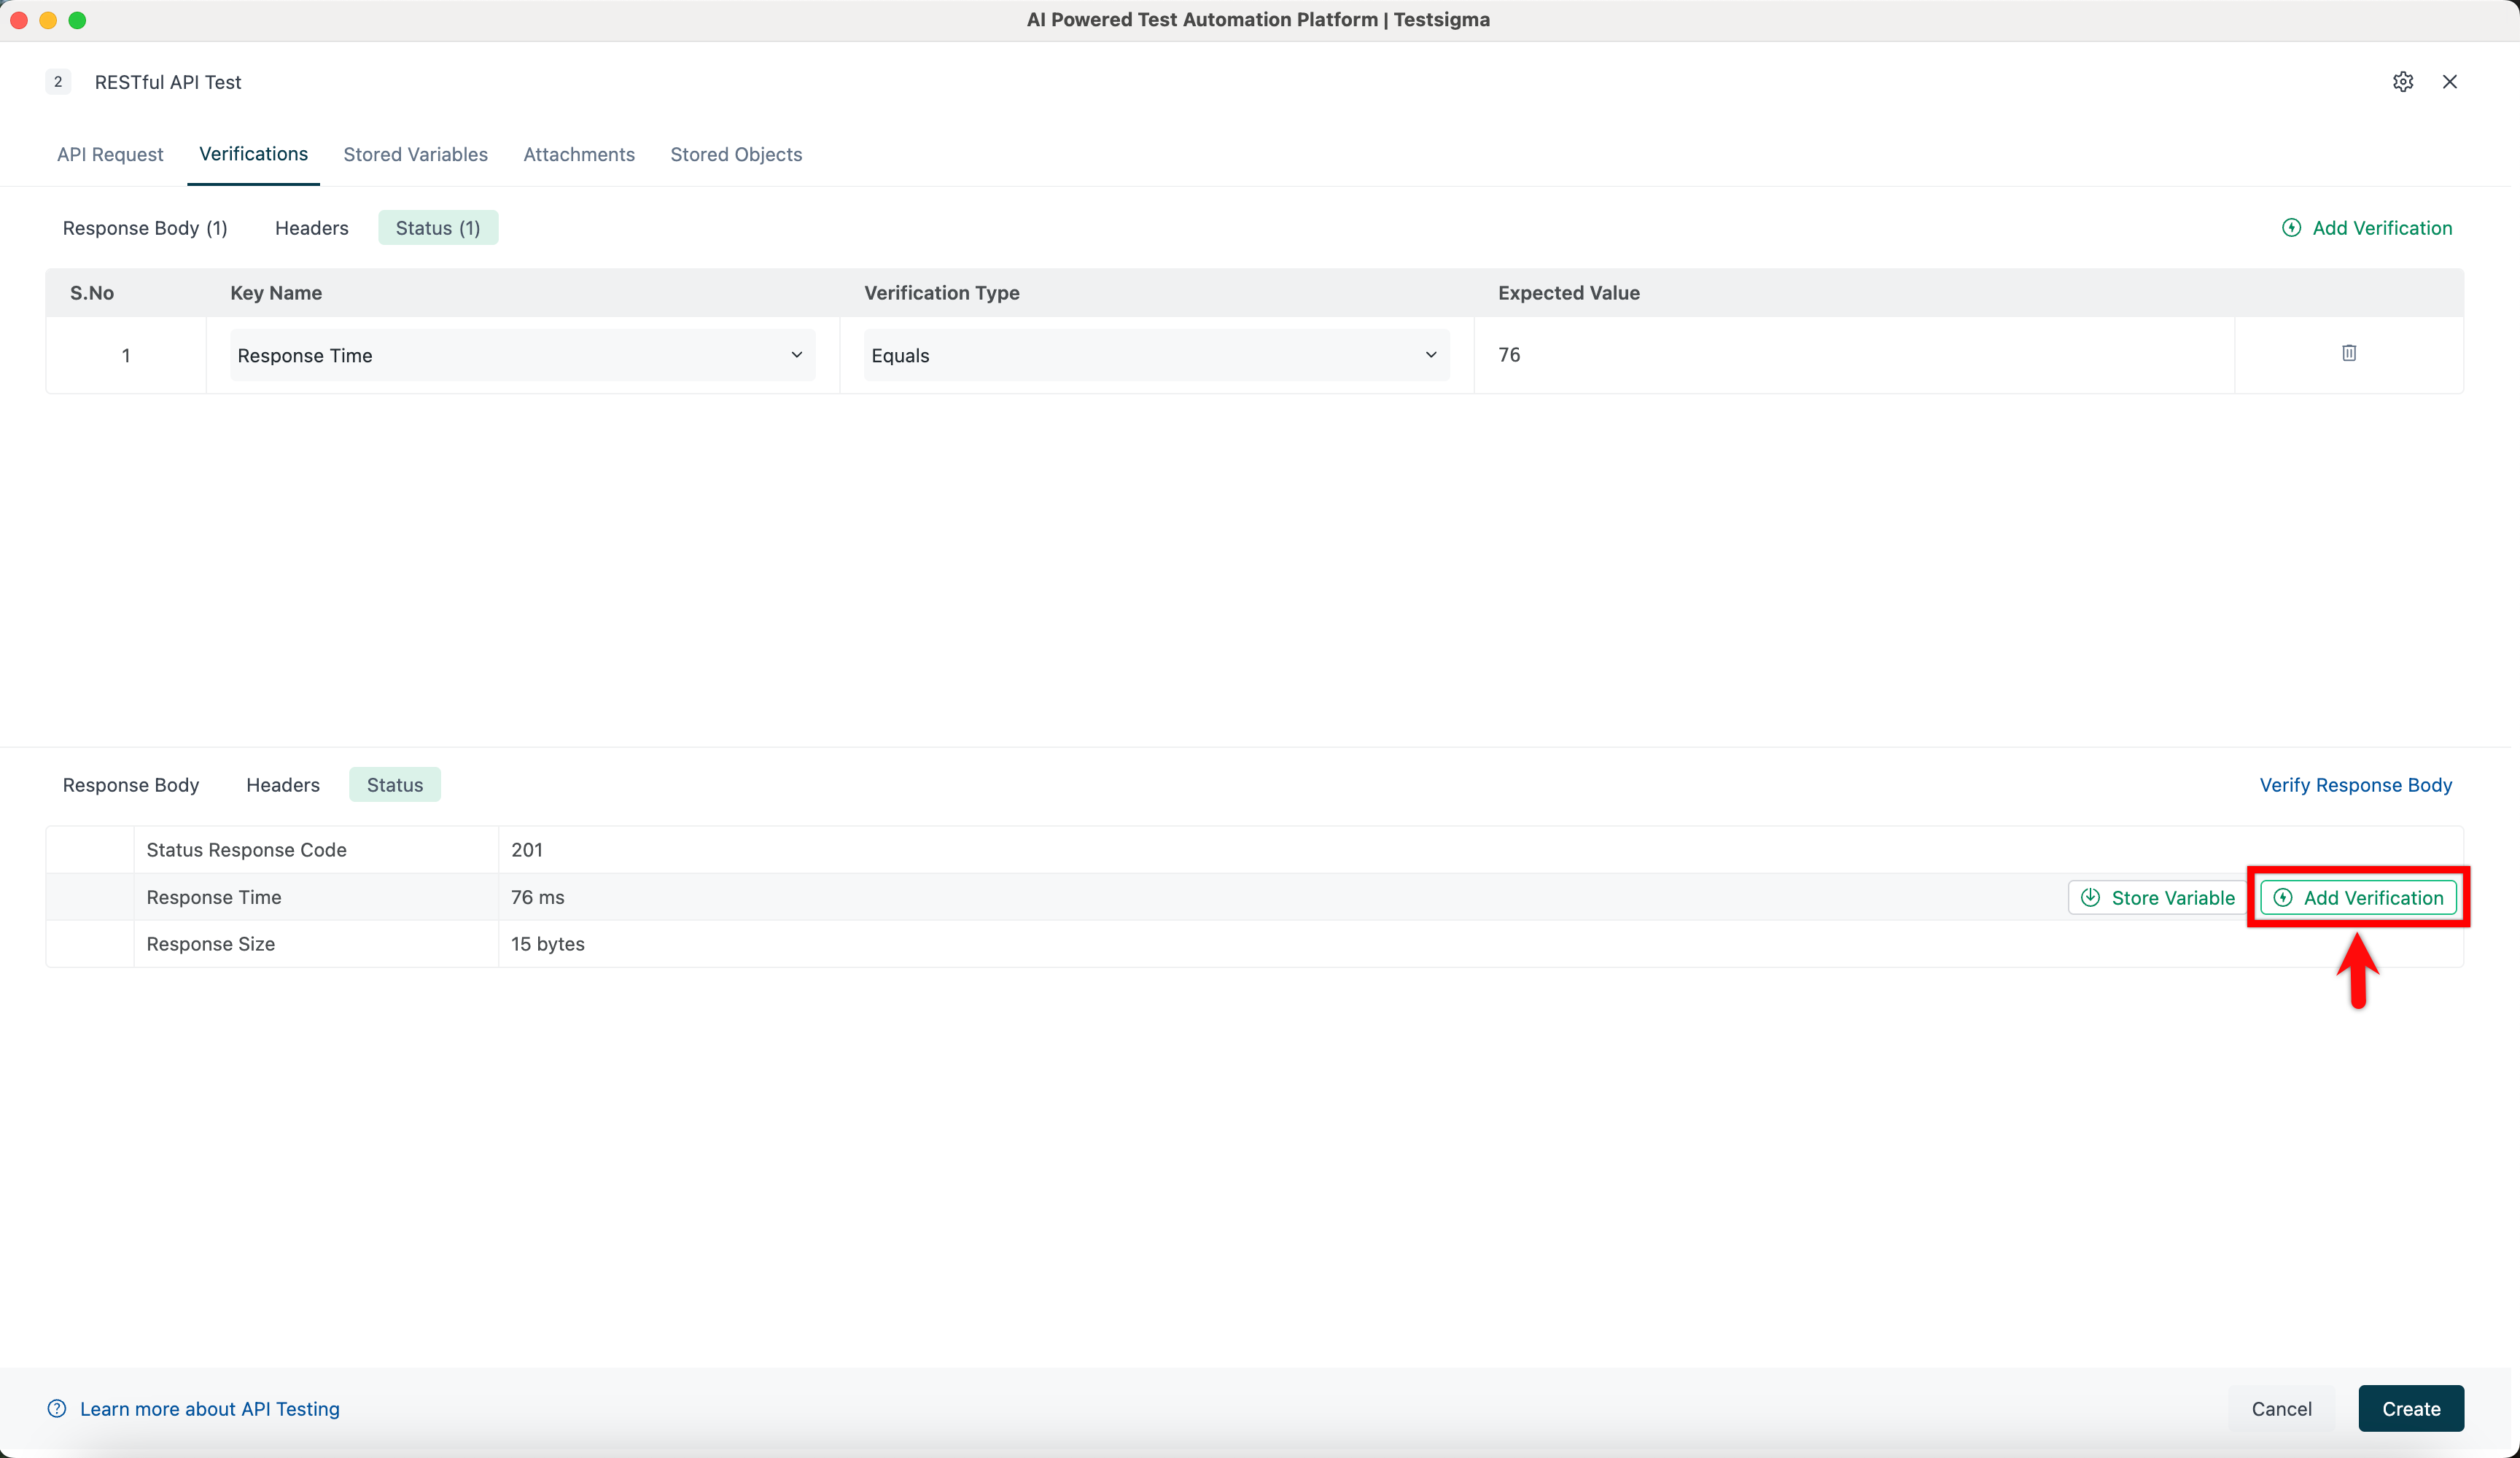
Mousehover to Response Field
At the bottom of the page, click the Status tab, mouse over to the variable, and click Add Verification; it will update in the Verification Status tab.
Want to contribute or report missing content?