- continuous integration
 Test Plan Details
 - REST API (Generic)
- Jenkins
- Azure DevOps
- AWS DevOps
- AWS Lambda
- Circle CI
- Bamboo CI
- Travis CI
- CodeShip CI
- Shell Script(Generic)
- Bitrise CI
- GitHub CI/CD
- Bitbucket CI/CD
- GitLab CI/CD
- Copado CI/CD
- Gearset CI/CD
- Codemagic CI/CD
- Google Cloud Build CI/CD
Integrate Testsigma with Azure DevOps
Integrate Testsigma with Azure DevOps to trigger Test Plan executions from your CI/CD pipeline. Azure DevOps runs a shell script that calls the Testsigma API to start a Test Plan and fetch its results.
Prerequisites
Before you begin, ensure that you have referred to:
- Documentation on generic Shell script to get the script file.
- Documentation on generating API keys.
- Documentation on getting test plan ID.
Prepare the Shell Script
- Copy the Unix shell script from the documentation on generic Shell script.
Use the Unix shell script if your system runs macOS or Linux. Use the script under For Powershell Script on the same page if your system runs Windows.
- Generate an API key from Configurations > API Keys. The link is mentioned in the prerequisites.
- Get the Test Plan ID from the CI/CD Integrations tab on the Test Plan details page. The link is mentioned in the prerequisites.
- Replace TESTSIGMA_API_KEY and TESTSIGMA_TEST_PLAN_ID in the script with the values from steps 2 and 3.
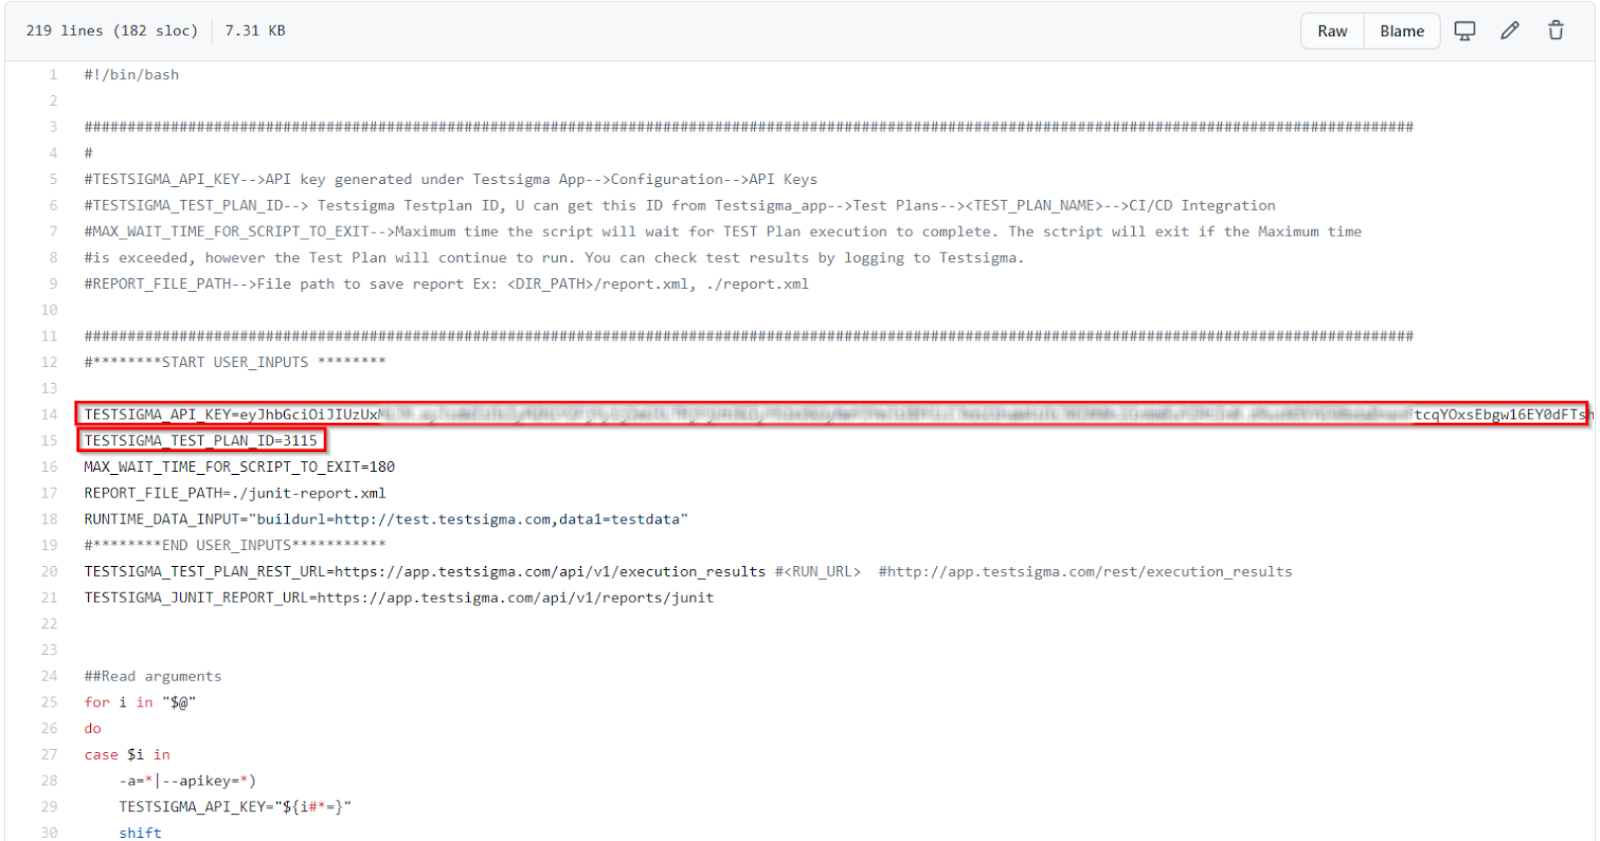
- Save the script in the code repository that you'll use for the Azure DevOps pipeline. Name it cicd-api.sh.
This script triggers the Test Plan execution and returns the result once the run is complete.
Create the Azure DevOps Pipeline
- Sign in to your Azure DevOps account.
- Create a Project.
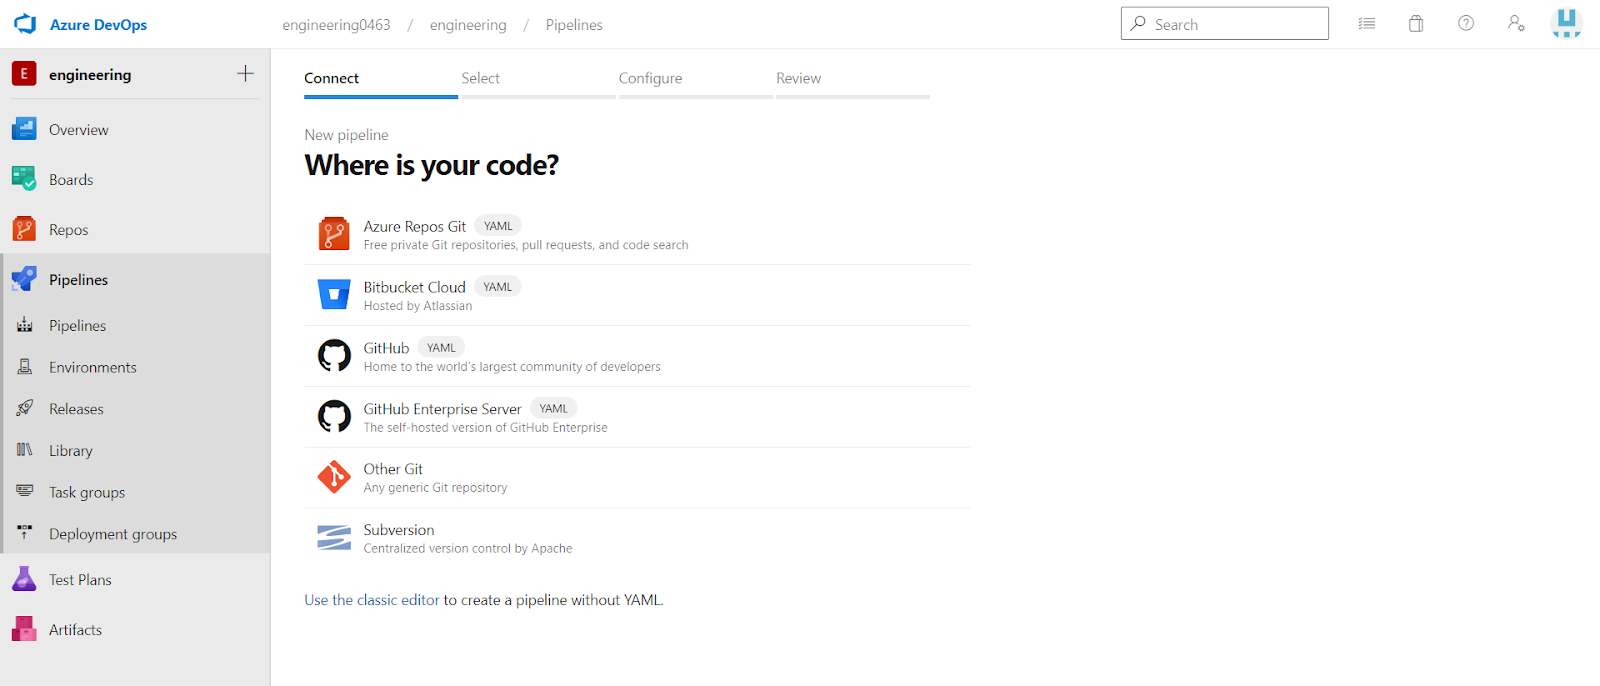
- Navigate to Pipelines and click New Pipeline.

- Select the version control system (VCS) where your code repository, including cicd-api.sh, is stored.
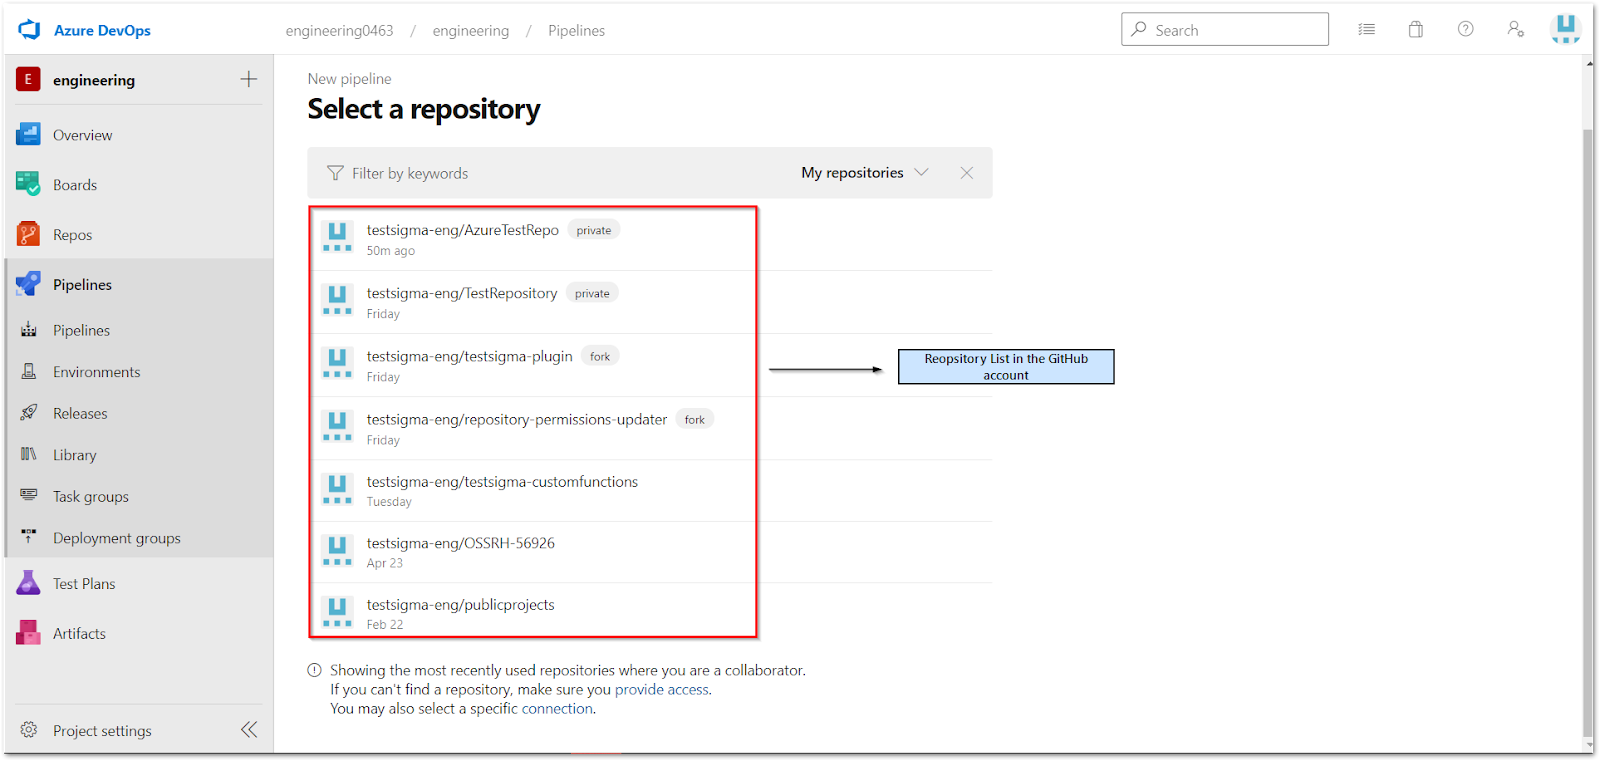
Azure DevOps requires a YAML file in your code repository to configure the CI/CD pipeline. If your repository doesn't have one, Azure DevOps creates a sample YAML file in your repository once you grant access.
- Select the repository that contains your configuration YAML file.
-
On the Configure your pipeline page, select Existing Azure Pipelines YAML file if your repository already has one, or select Starter pipeline to create a sample file.
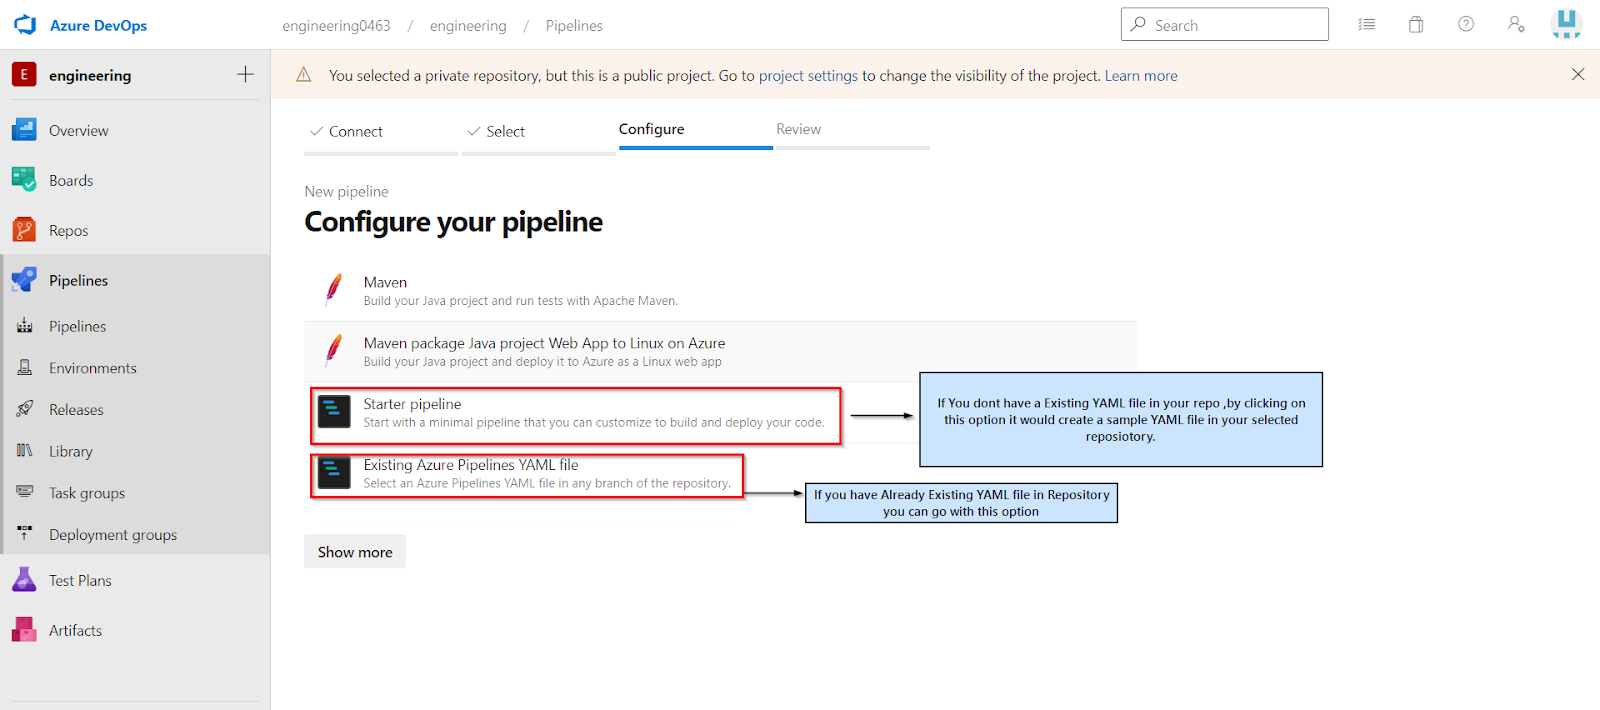
(If using an existing file): Enter the branch and path of the YAML file in your repository.
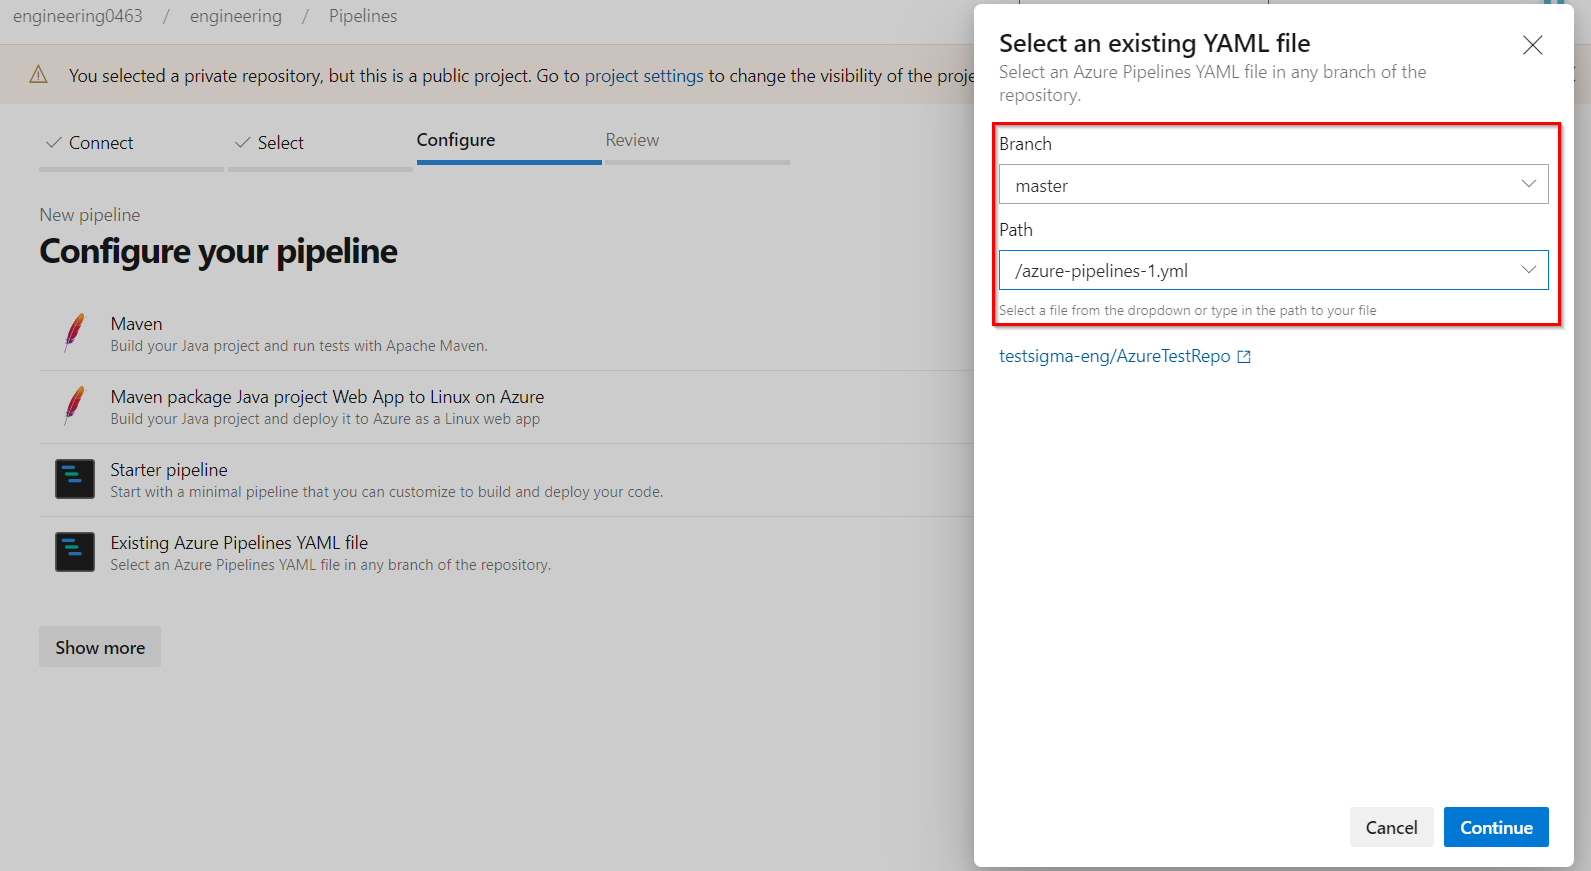
- Review the CI configuration, then click Continue.
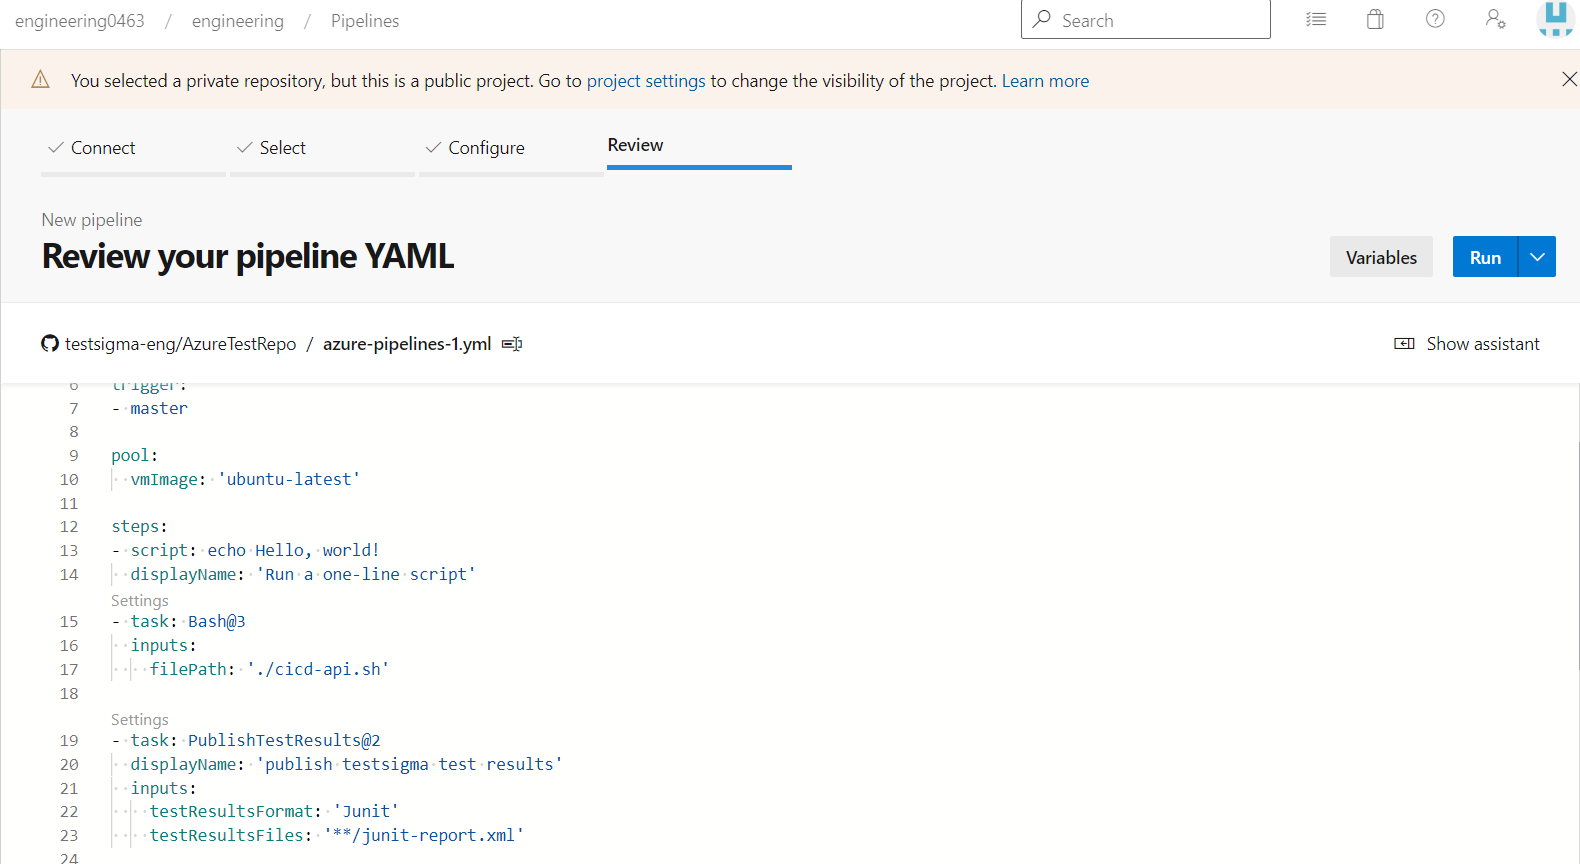
- In the YAML file, enter the path to cicd-api.sh in the
filePathfield:
# Azure Pipelines YAML file
trigger: master

pool:
  vmImage: 'ubuntu-latest'

steps:
- script: echo Hello, world!
  displayName: Run a one-line script

- task: Bash@3
  displayName: Run Shell Script (./cicd-api.sh)
  inputs:
    filePath: ./cicd-api.sh

- task: PublishTestResults@2
  displayName: publish test-results
  inputs:
    testResultFormat: JUnit
    testResultsFiles: '**/*junit-report.xml'
Run the Pipeline and View Results
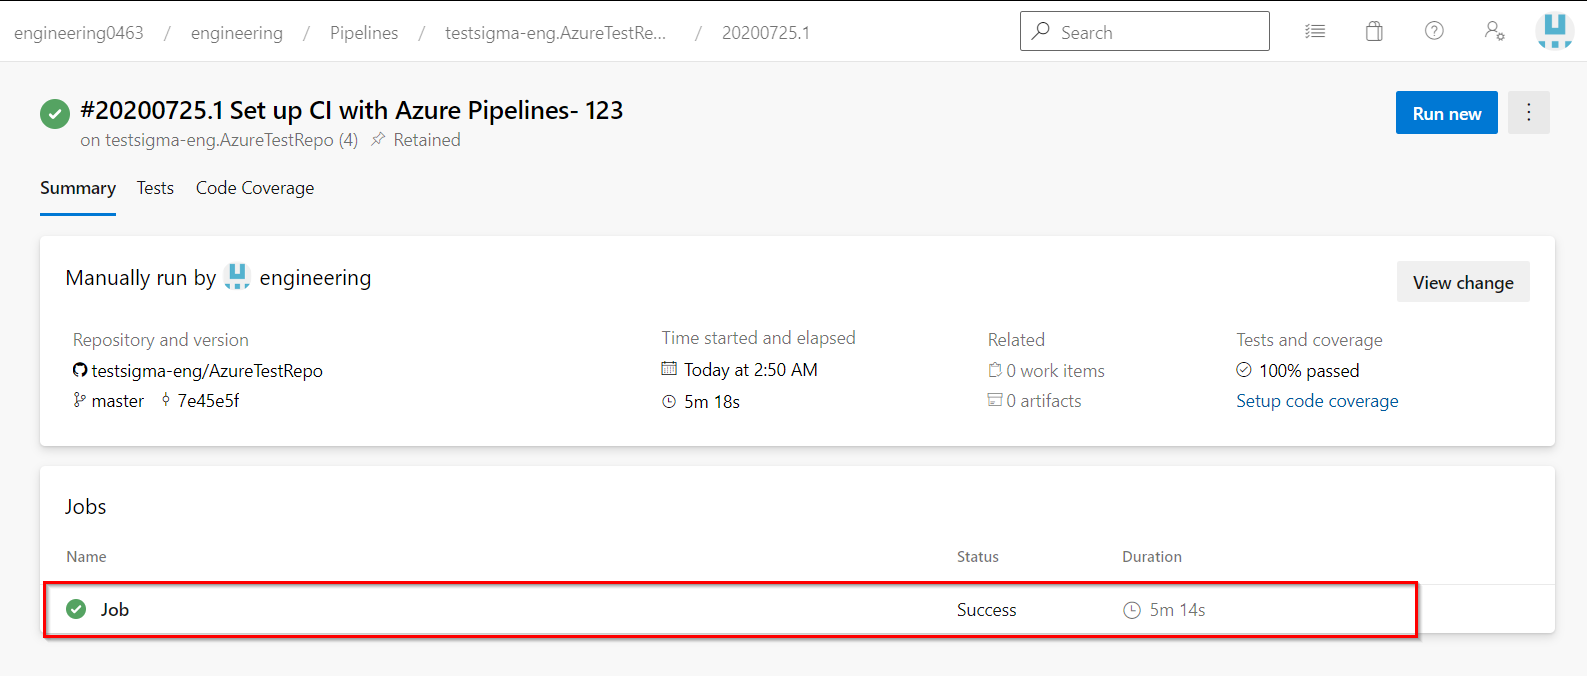
- Click Run to start the pipeline job.
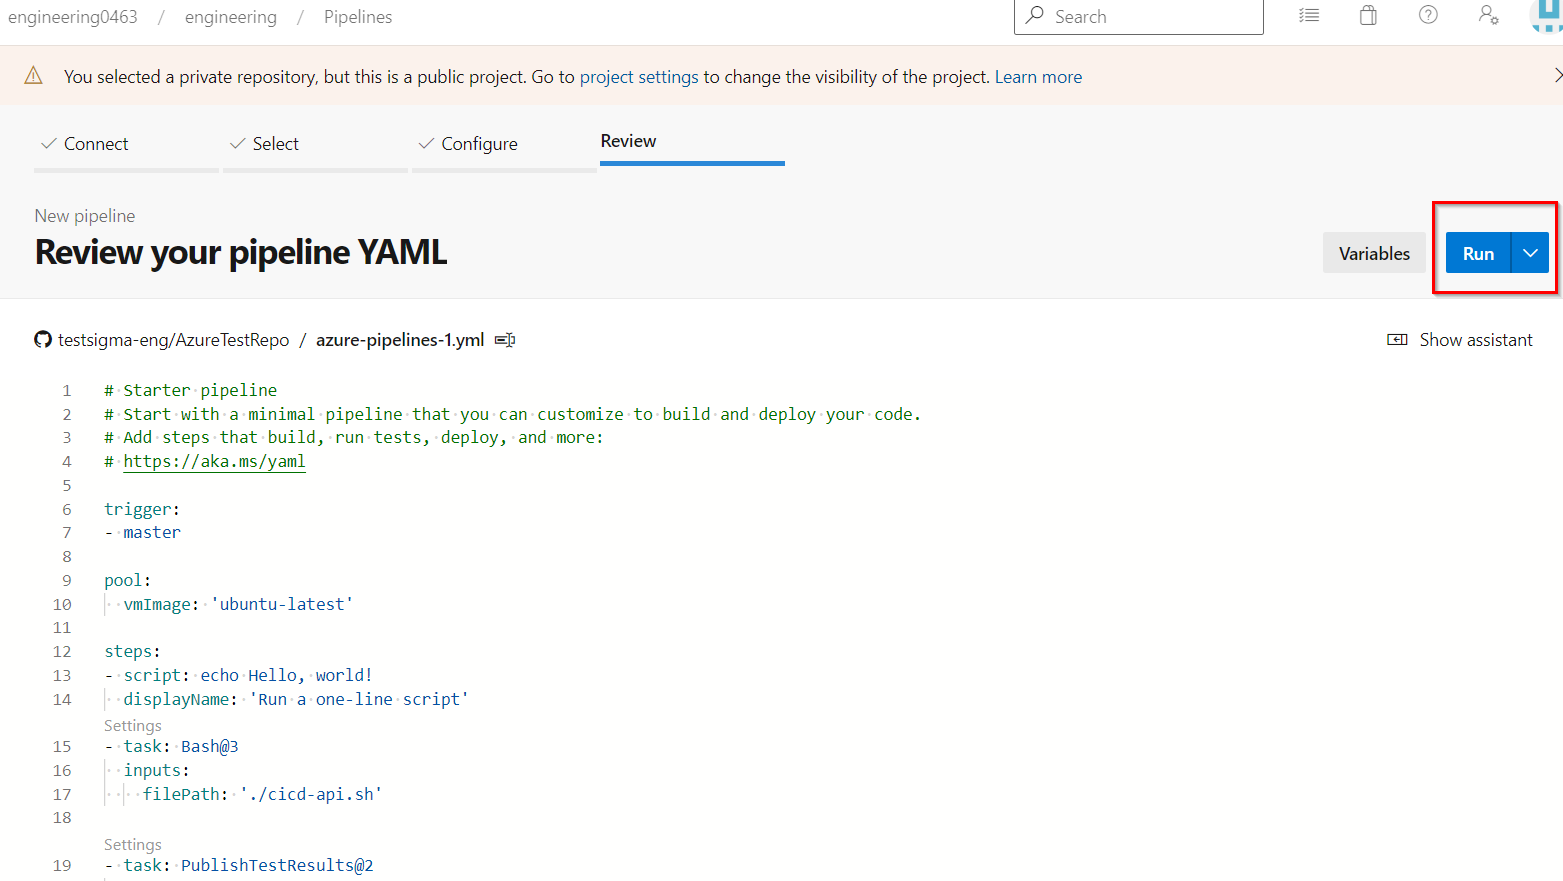
- Track the run on the pipeline results page.
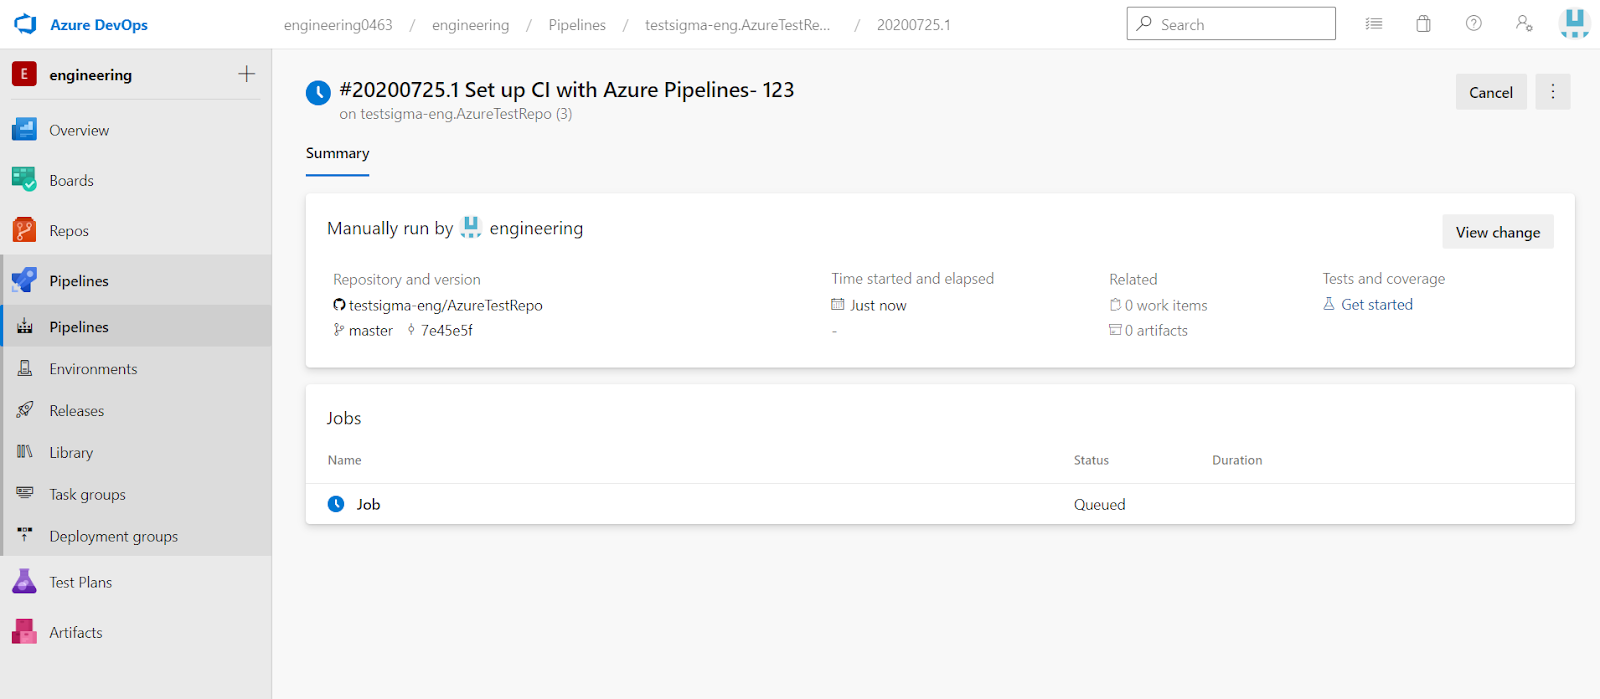
- Once the job completes, the job status shows Success.
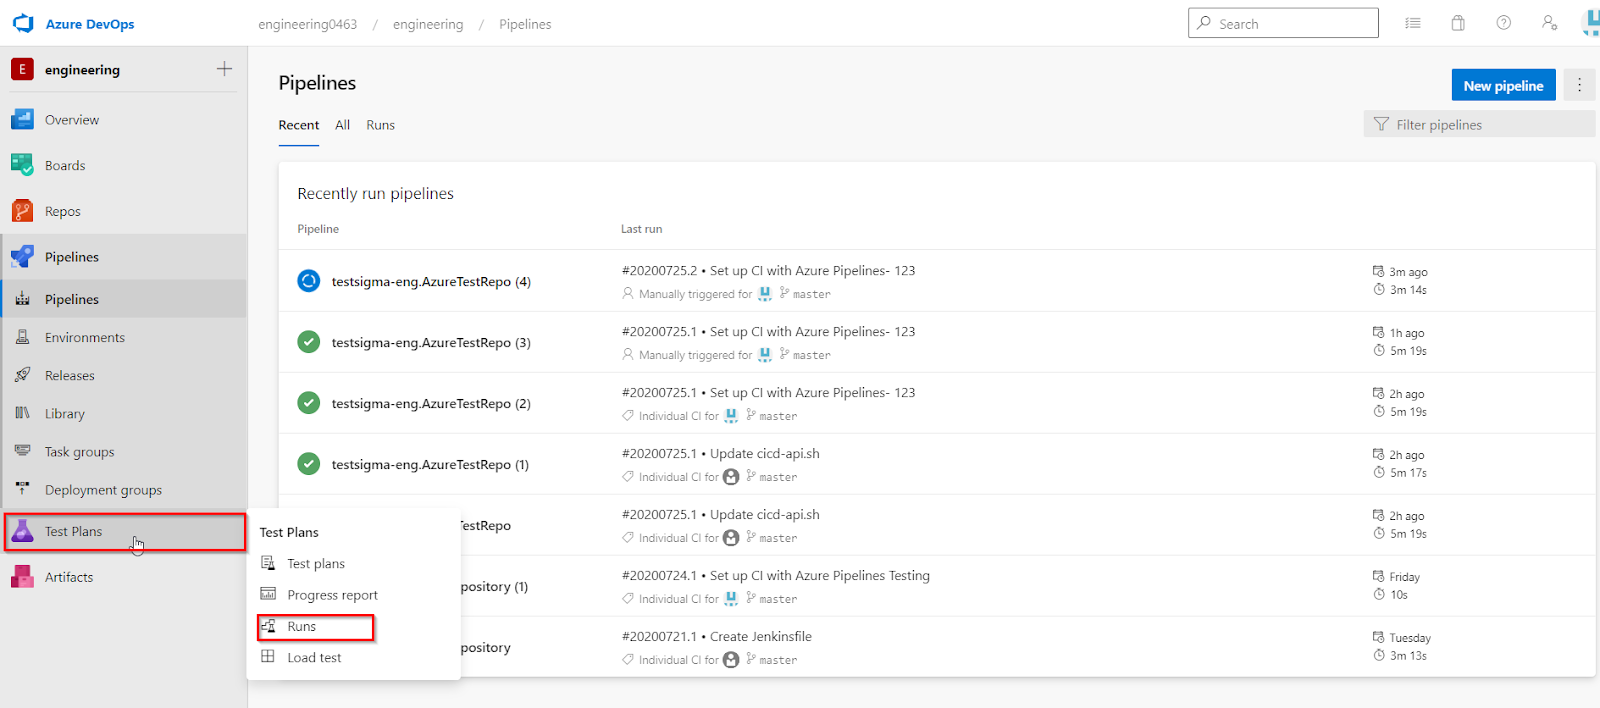
- Navigate to Test Plans > Runs to view the reports.
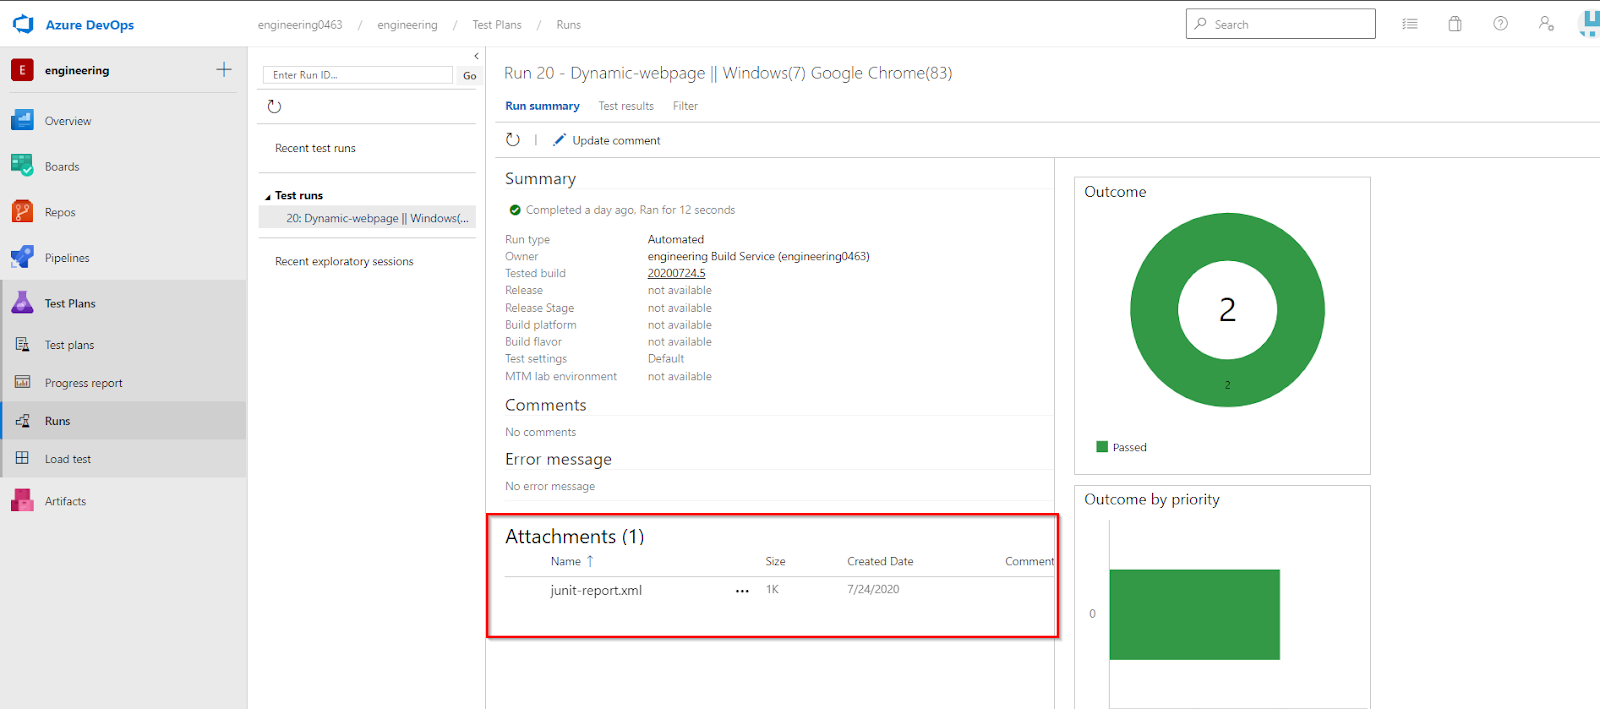
- Select Runs, then select the Test Plan whose report you want to view. Download the JUnit report in XML format from this page.
Use a separate shell script to convert the JUnit XML report into HTML format.
Want to contribute or report missing content?