- addons
 What is an Addon?
- Addons Community Marketplace
- Install and Use Community Addons in Testsigma
- Prerequisites for creating add-ons
- Create an Addon
- Update Addon
- Addon Types
- Create a Post Plan Hook add-on in Testsigma
- Create OCR Text Extraction Addon
Install and Use Community Addons in Testsigma
Community Addon in Testsigma extend the functionality of your test cases by allowing you to use pre-built actions created by the community. This guide explains how to install and use these addon in your test cases.
Installing a Community Addon
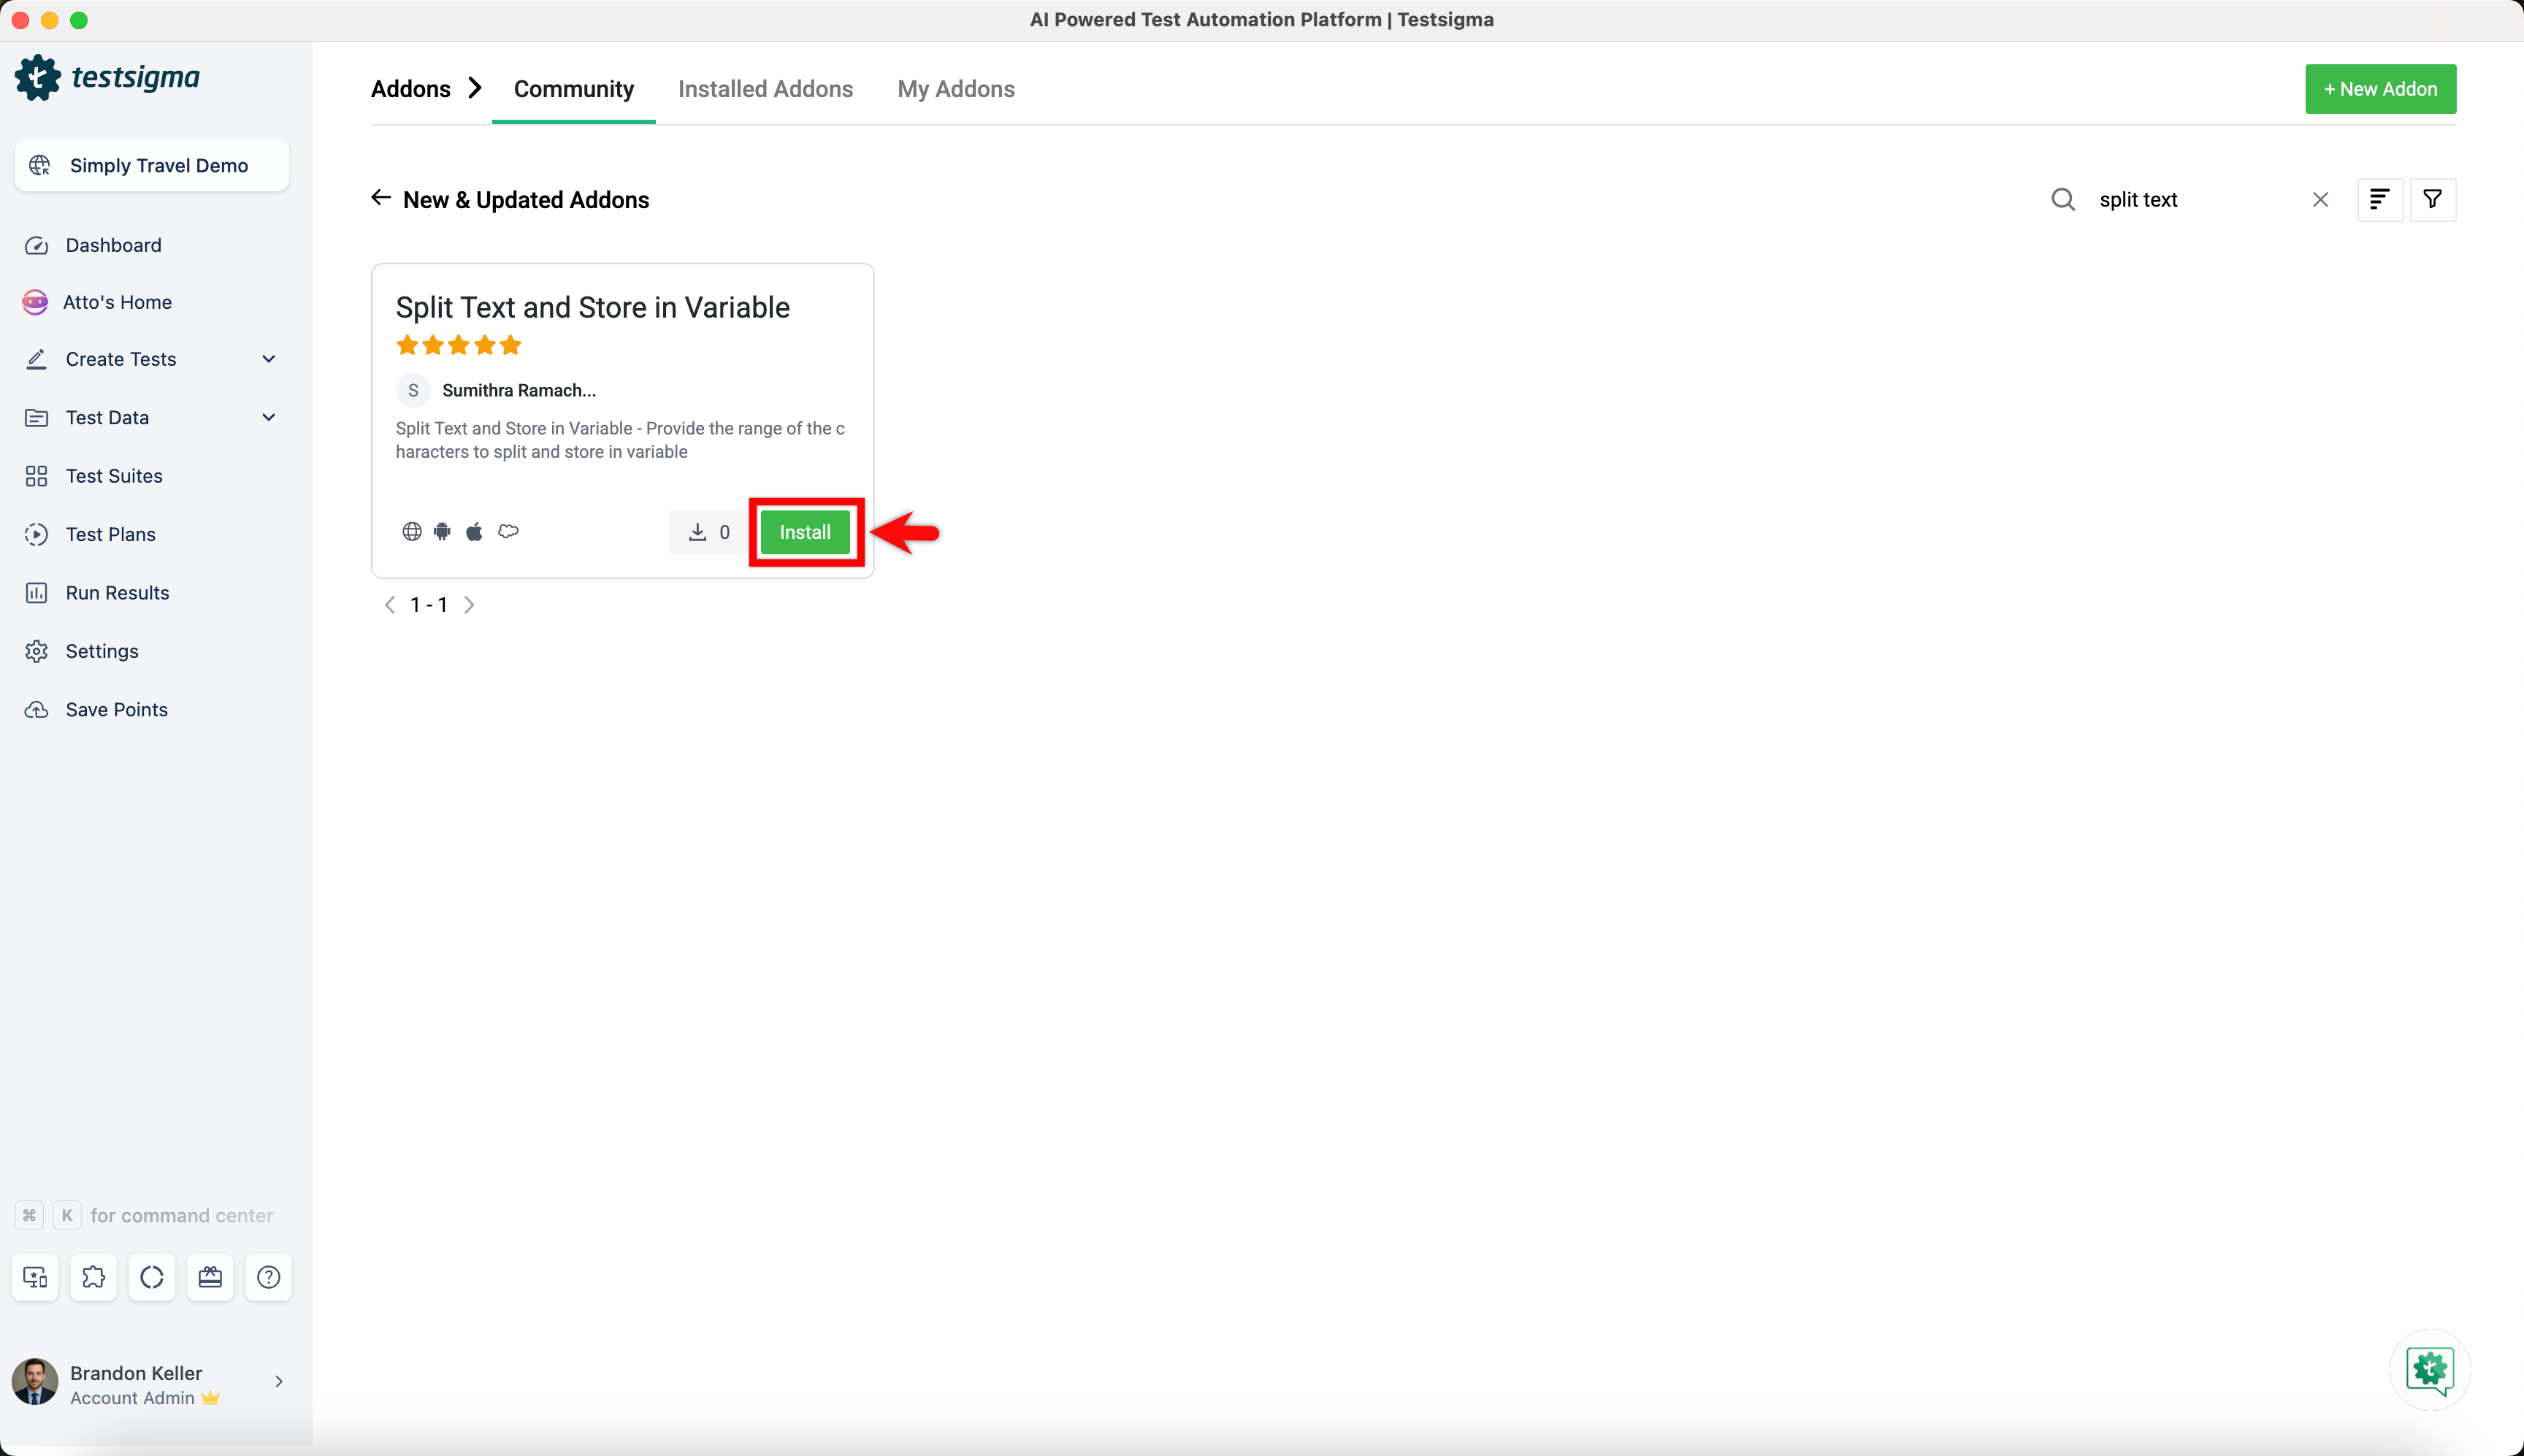
- Click on the Addons icon from the left navigation bar.
- On the Addon Marketplace Page, you will find a list of all available addons in the Community tab. You can either browse through the list or use the search function to find a specific addon by name or description.
- Click Install button you wish to install addon.
- The addon will be installed and available for use in your test cases after refreshing the page.
Using an Installed Addon
Once you've installed an addon, you can use it in your test cases:
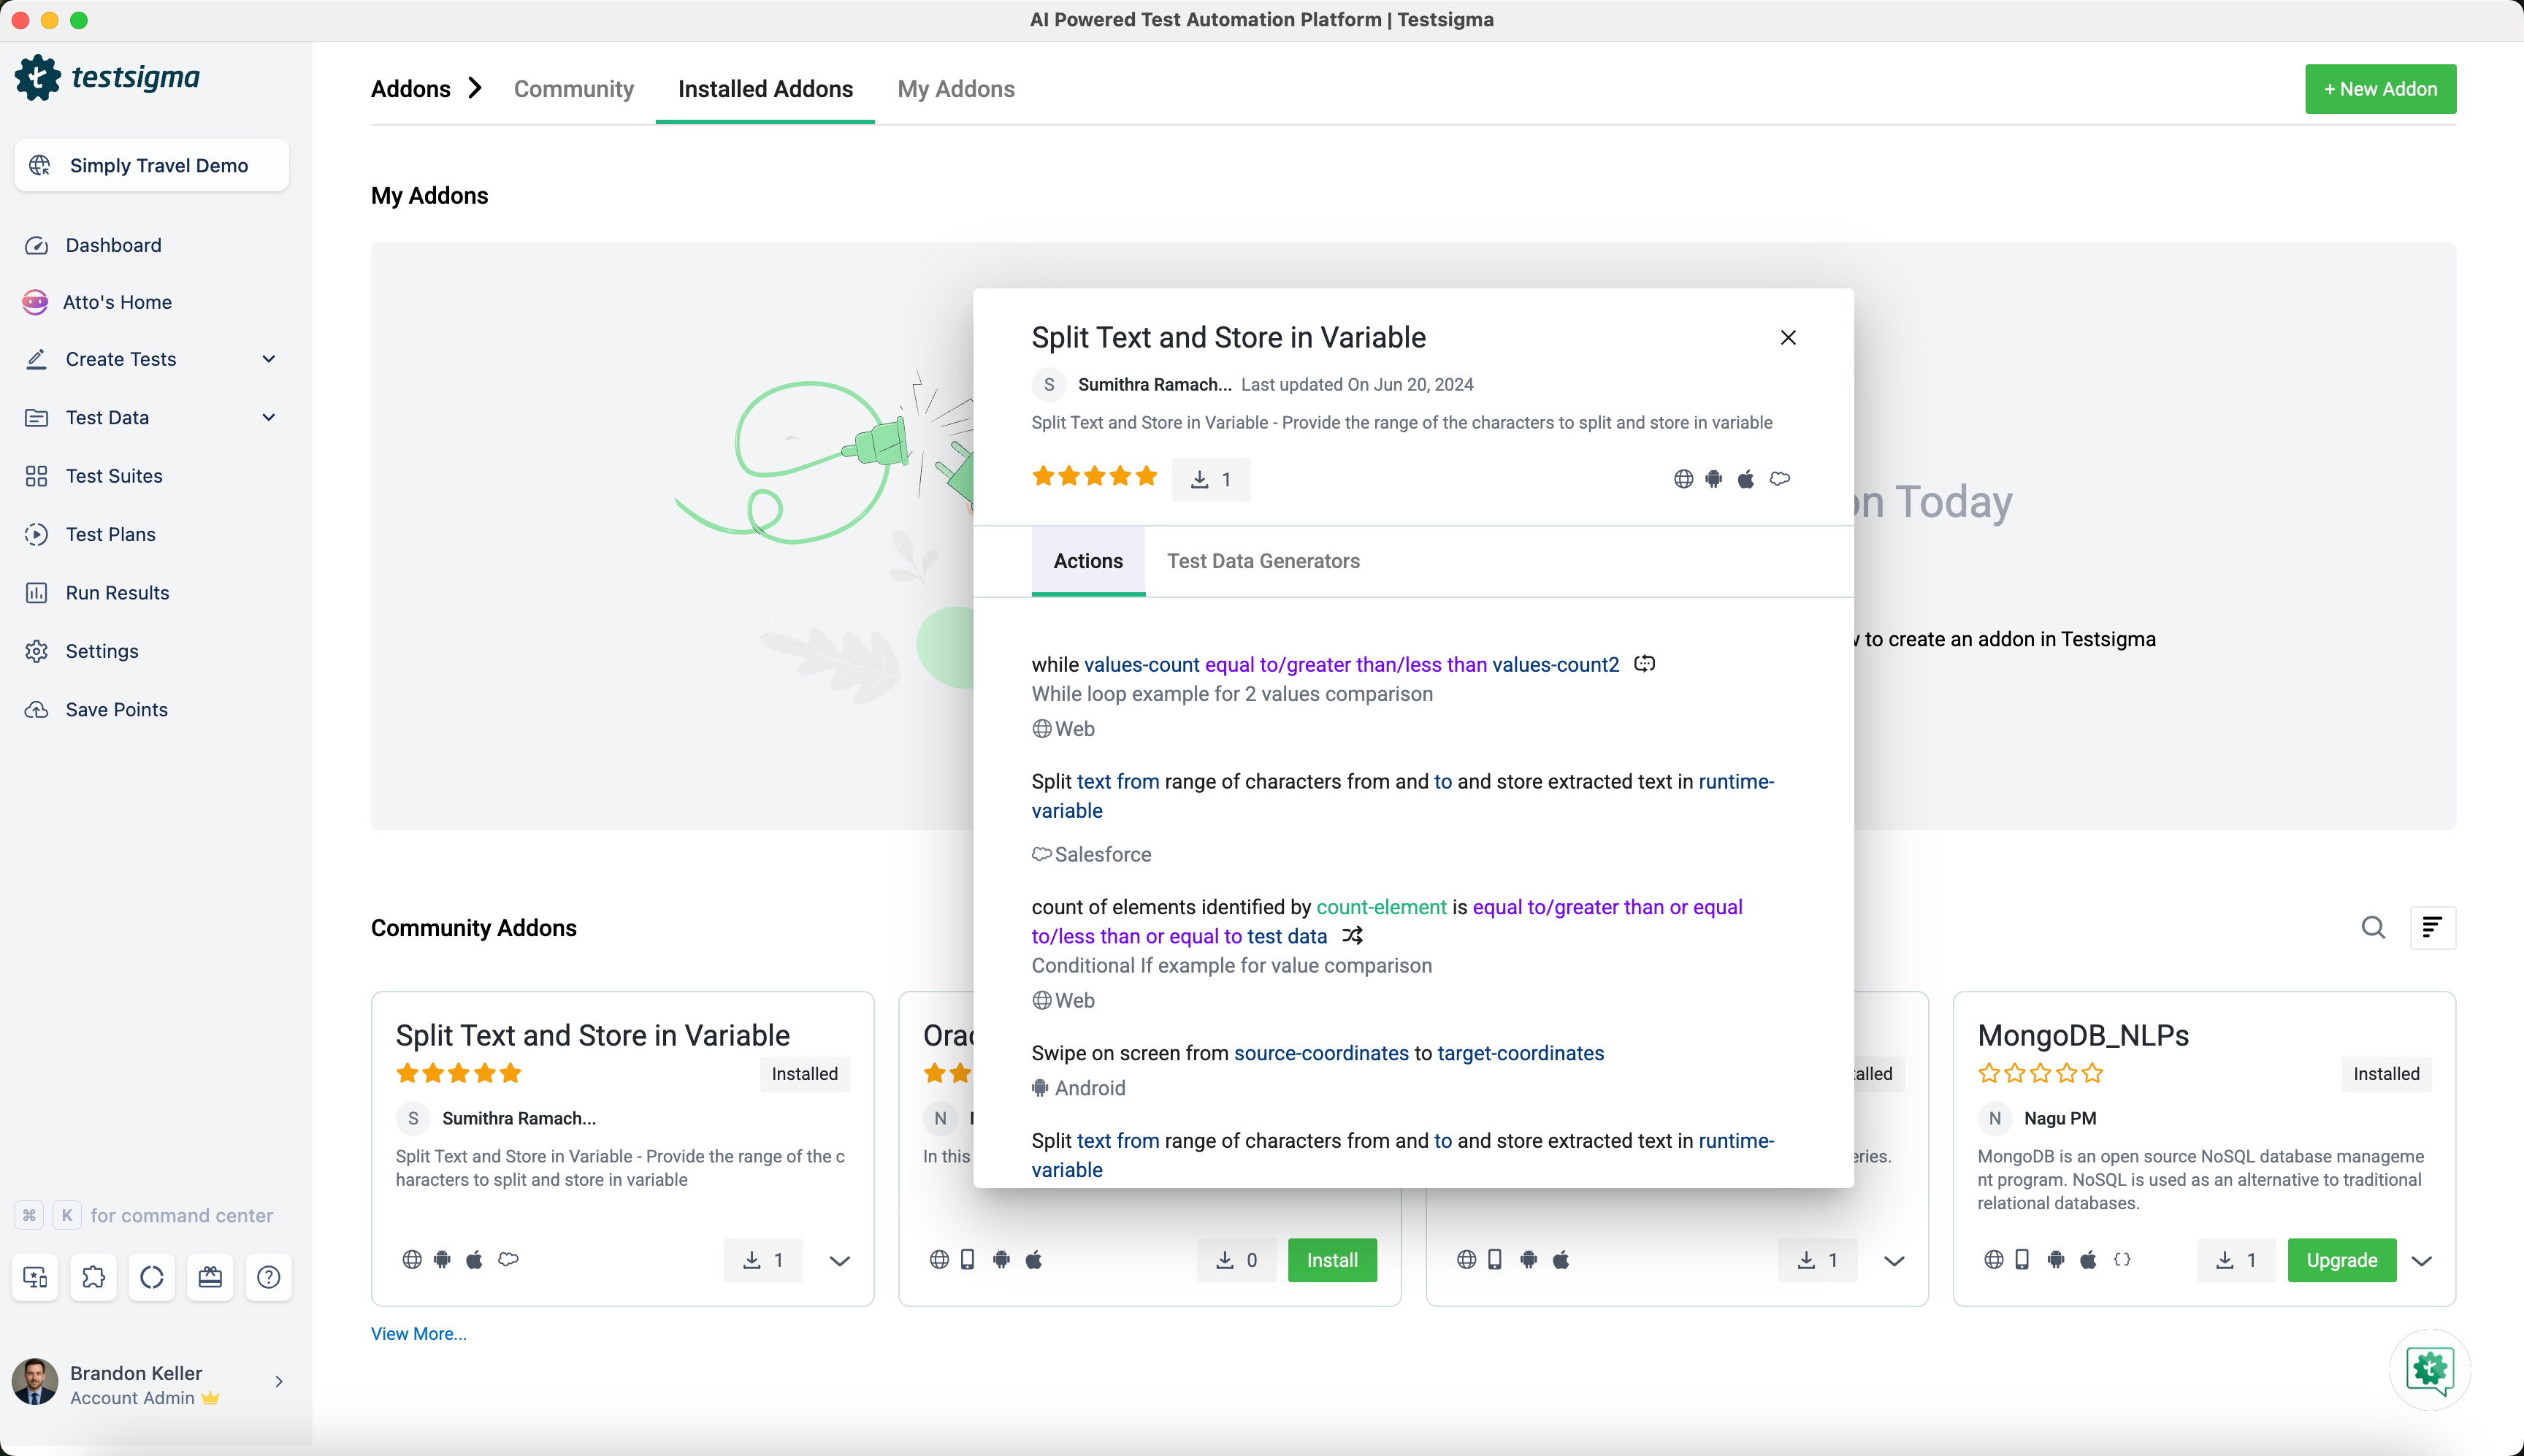
- Go to the Addon page from the Dashboard and switch to the Installed Addon tab.
- Click on the installed addon to view its details. A popup will display the addon's available actions.
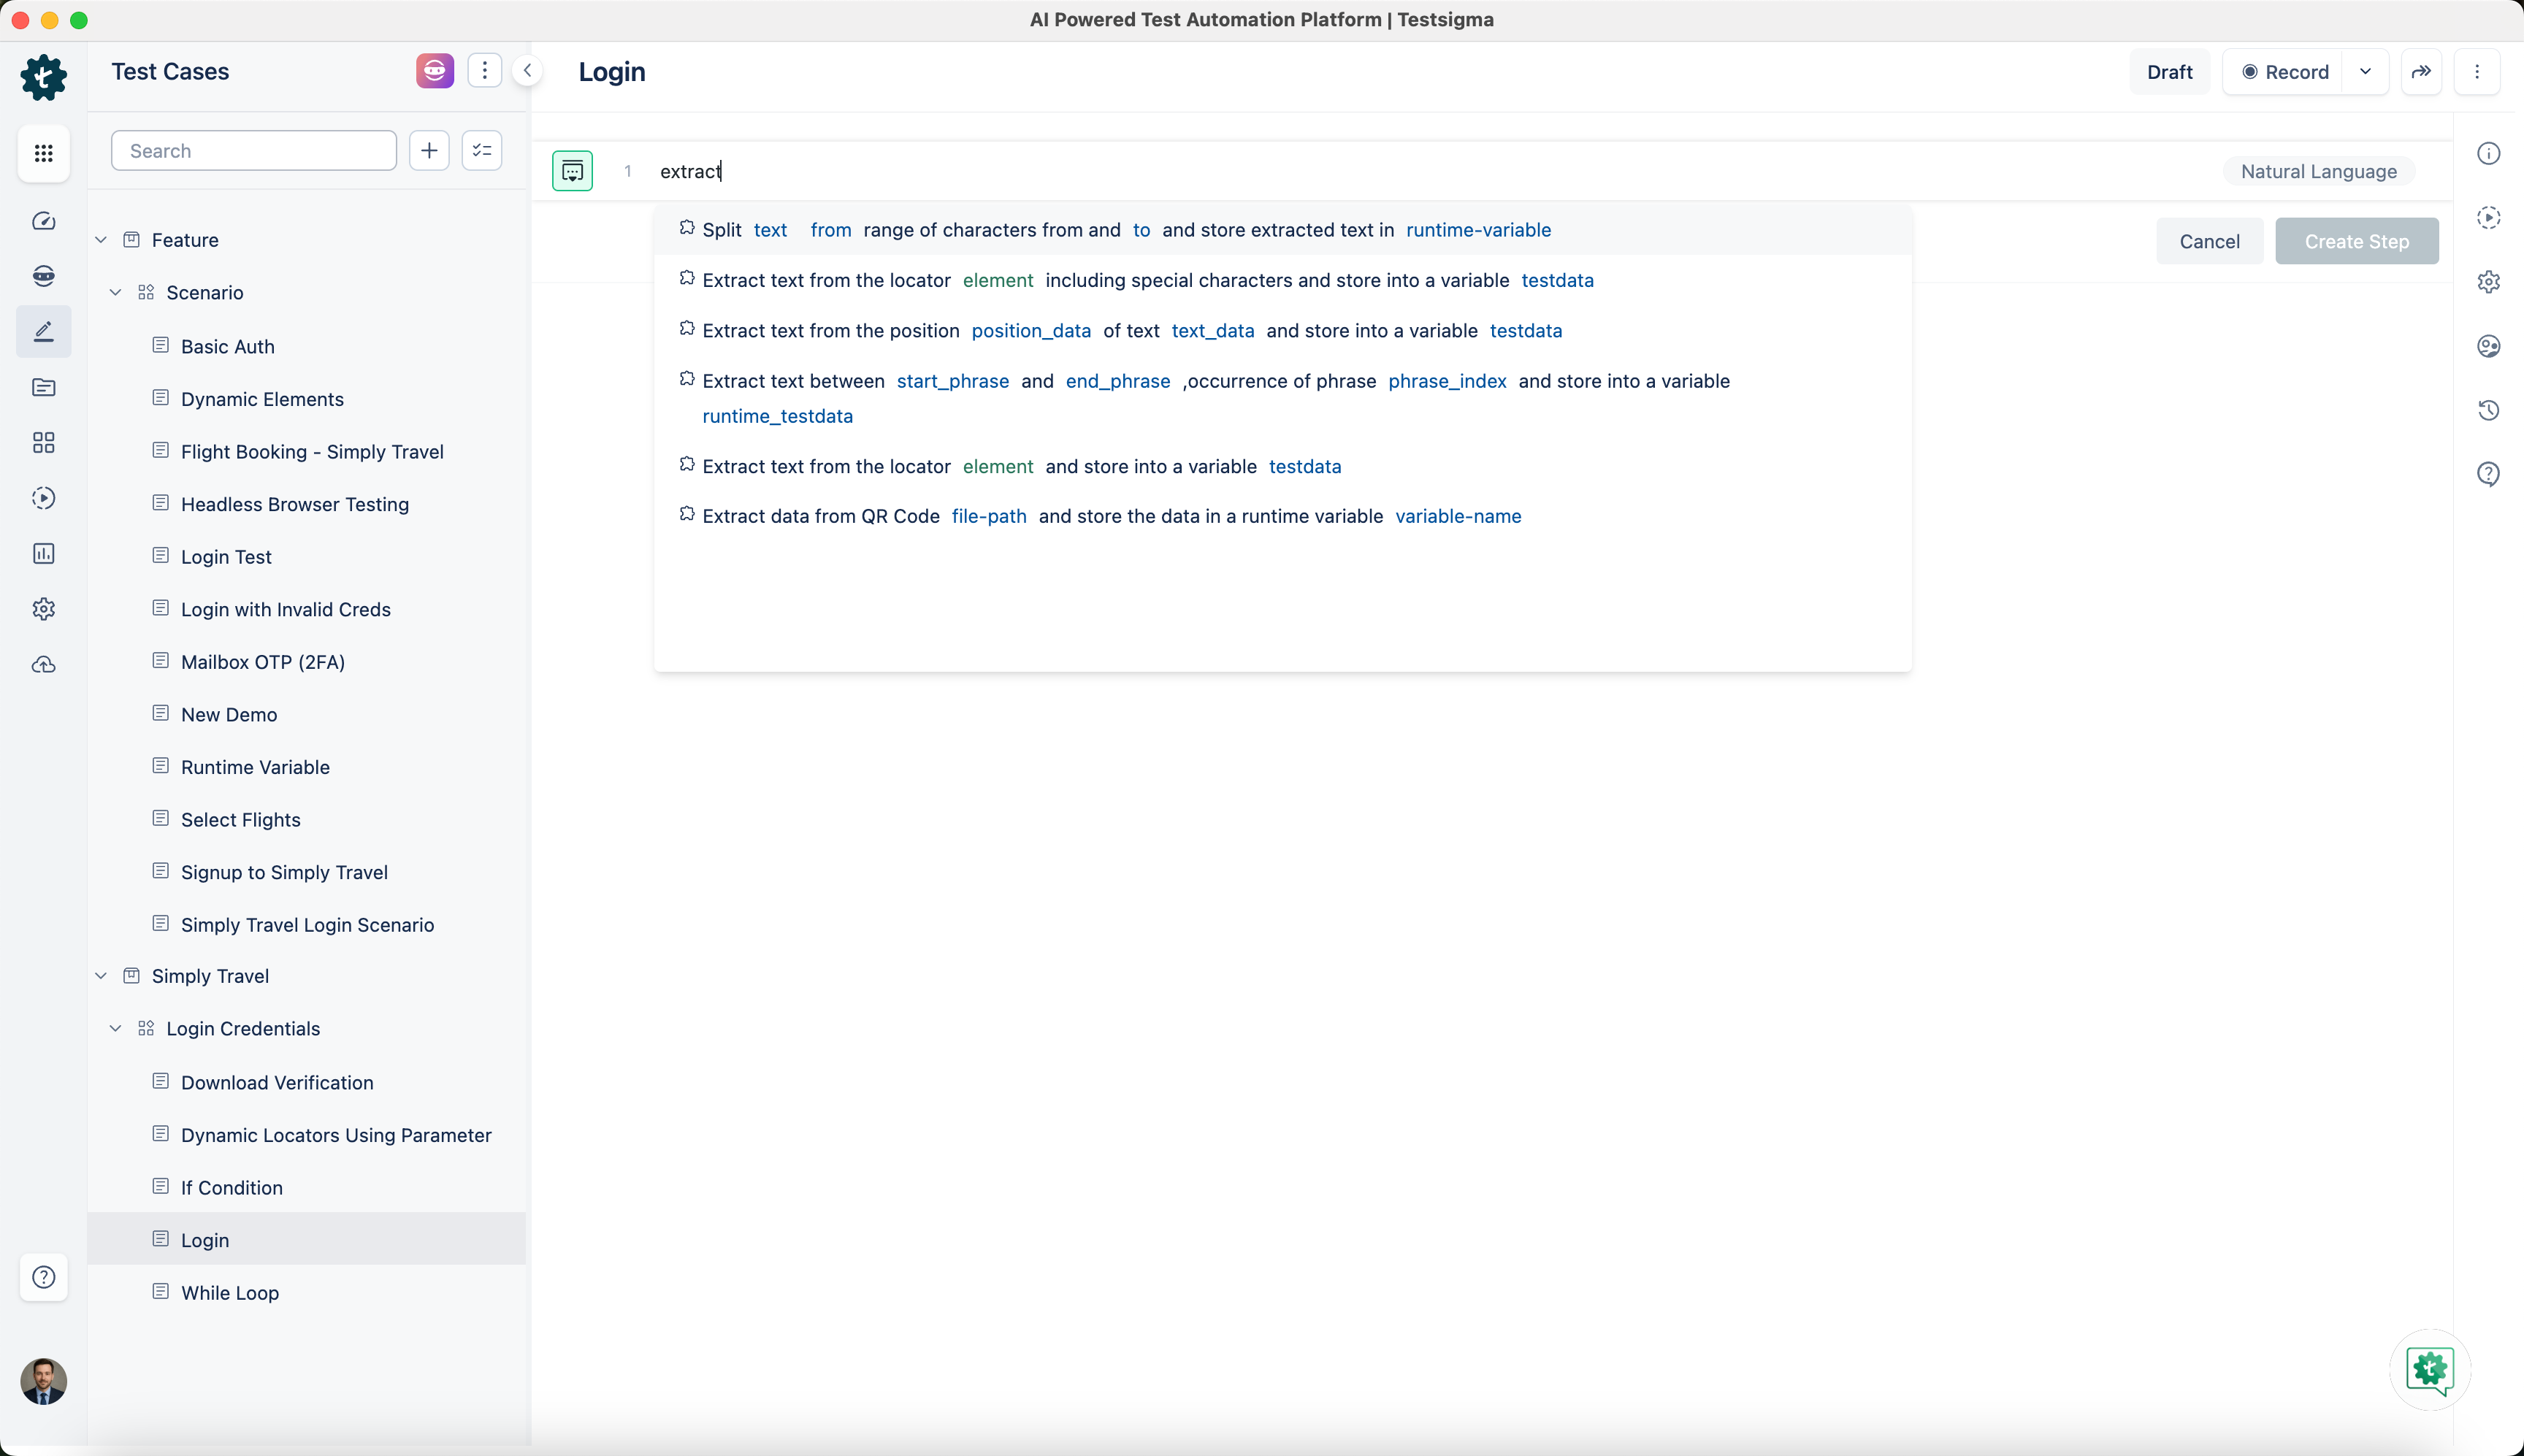
- When authoring a test case, start typing the action related to the installed addon in the test step.
- The action will appear in the suggestions list, and you can select it to include in your test step.
NOTE:
- Refresh the Page: After installing an addon, always refresh the page to ensure the actions become available in your test cases.
- Custom Actions: Installed addon offer custom actions that you can integrate into your test steps, simplifying the test authoring process.
Want to contribute or report missing content?