
Visual Testing
Testsigma allows you to check your app's appearance during tests using its Visual Testing feature. You can ensure a great user experience as the UI remains consistent and design changes are spotted early. Visual Testing is turned off by default for test steps, but you can switch it on for specific steps that require visual validation. This guide will show you how to activate Visual Testing in Test Steps and mark Baseline Images in Testsigma.
Prerequisites
Before you begin, ensure that you have referred to:
Enable Visual Testing in Test Steps
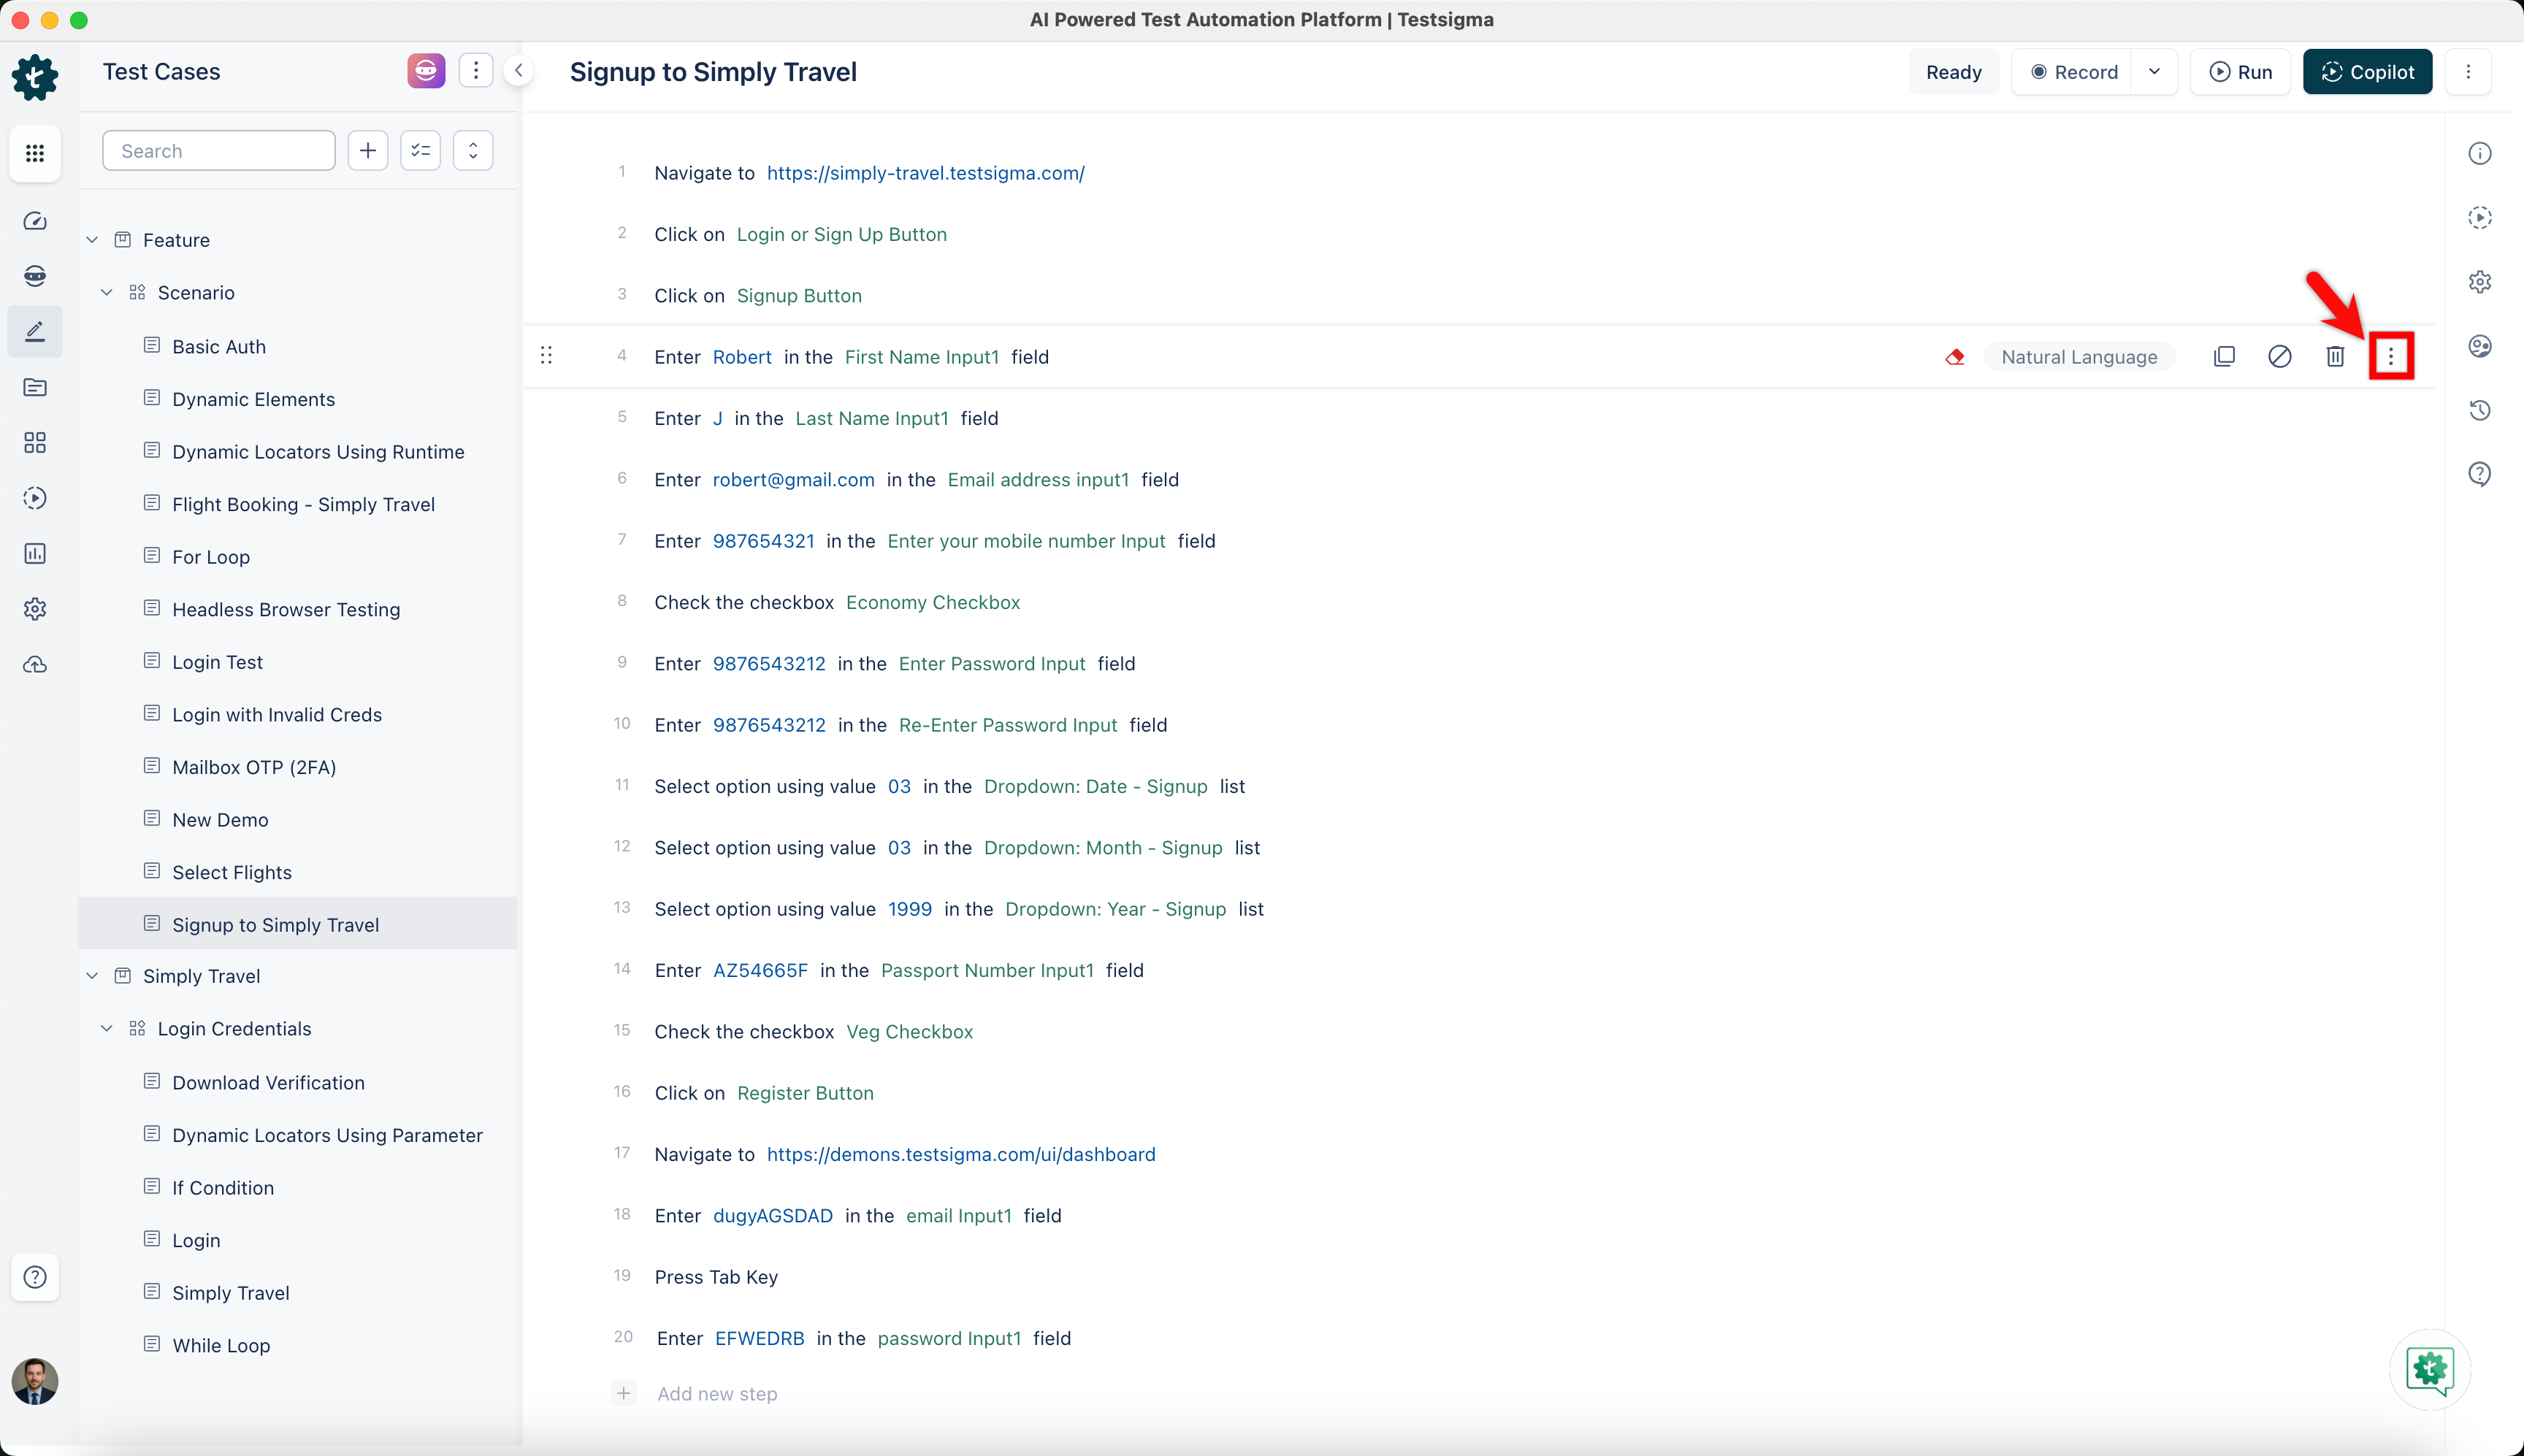
You can configure the visual testing for a test step on a test case details page or a test step recorder. Here are the steps to do it:
- Enable visual testing in the test step by clicking the ellipsis button (Test Step Options).
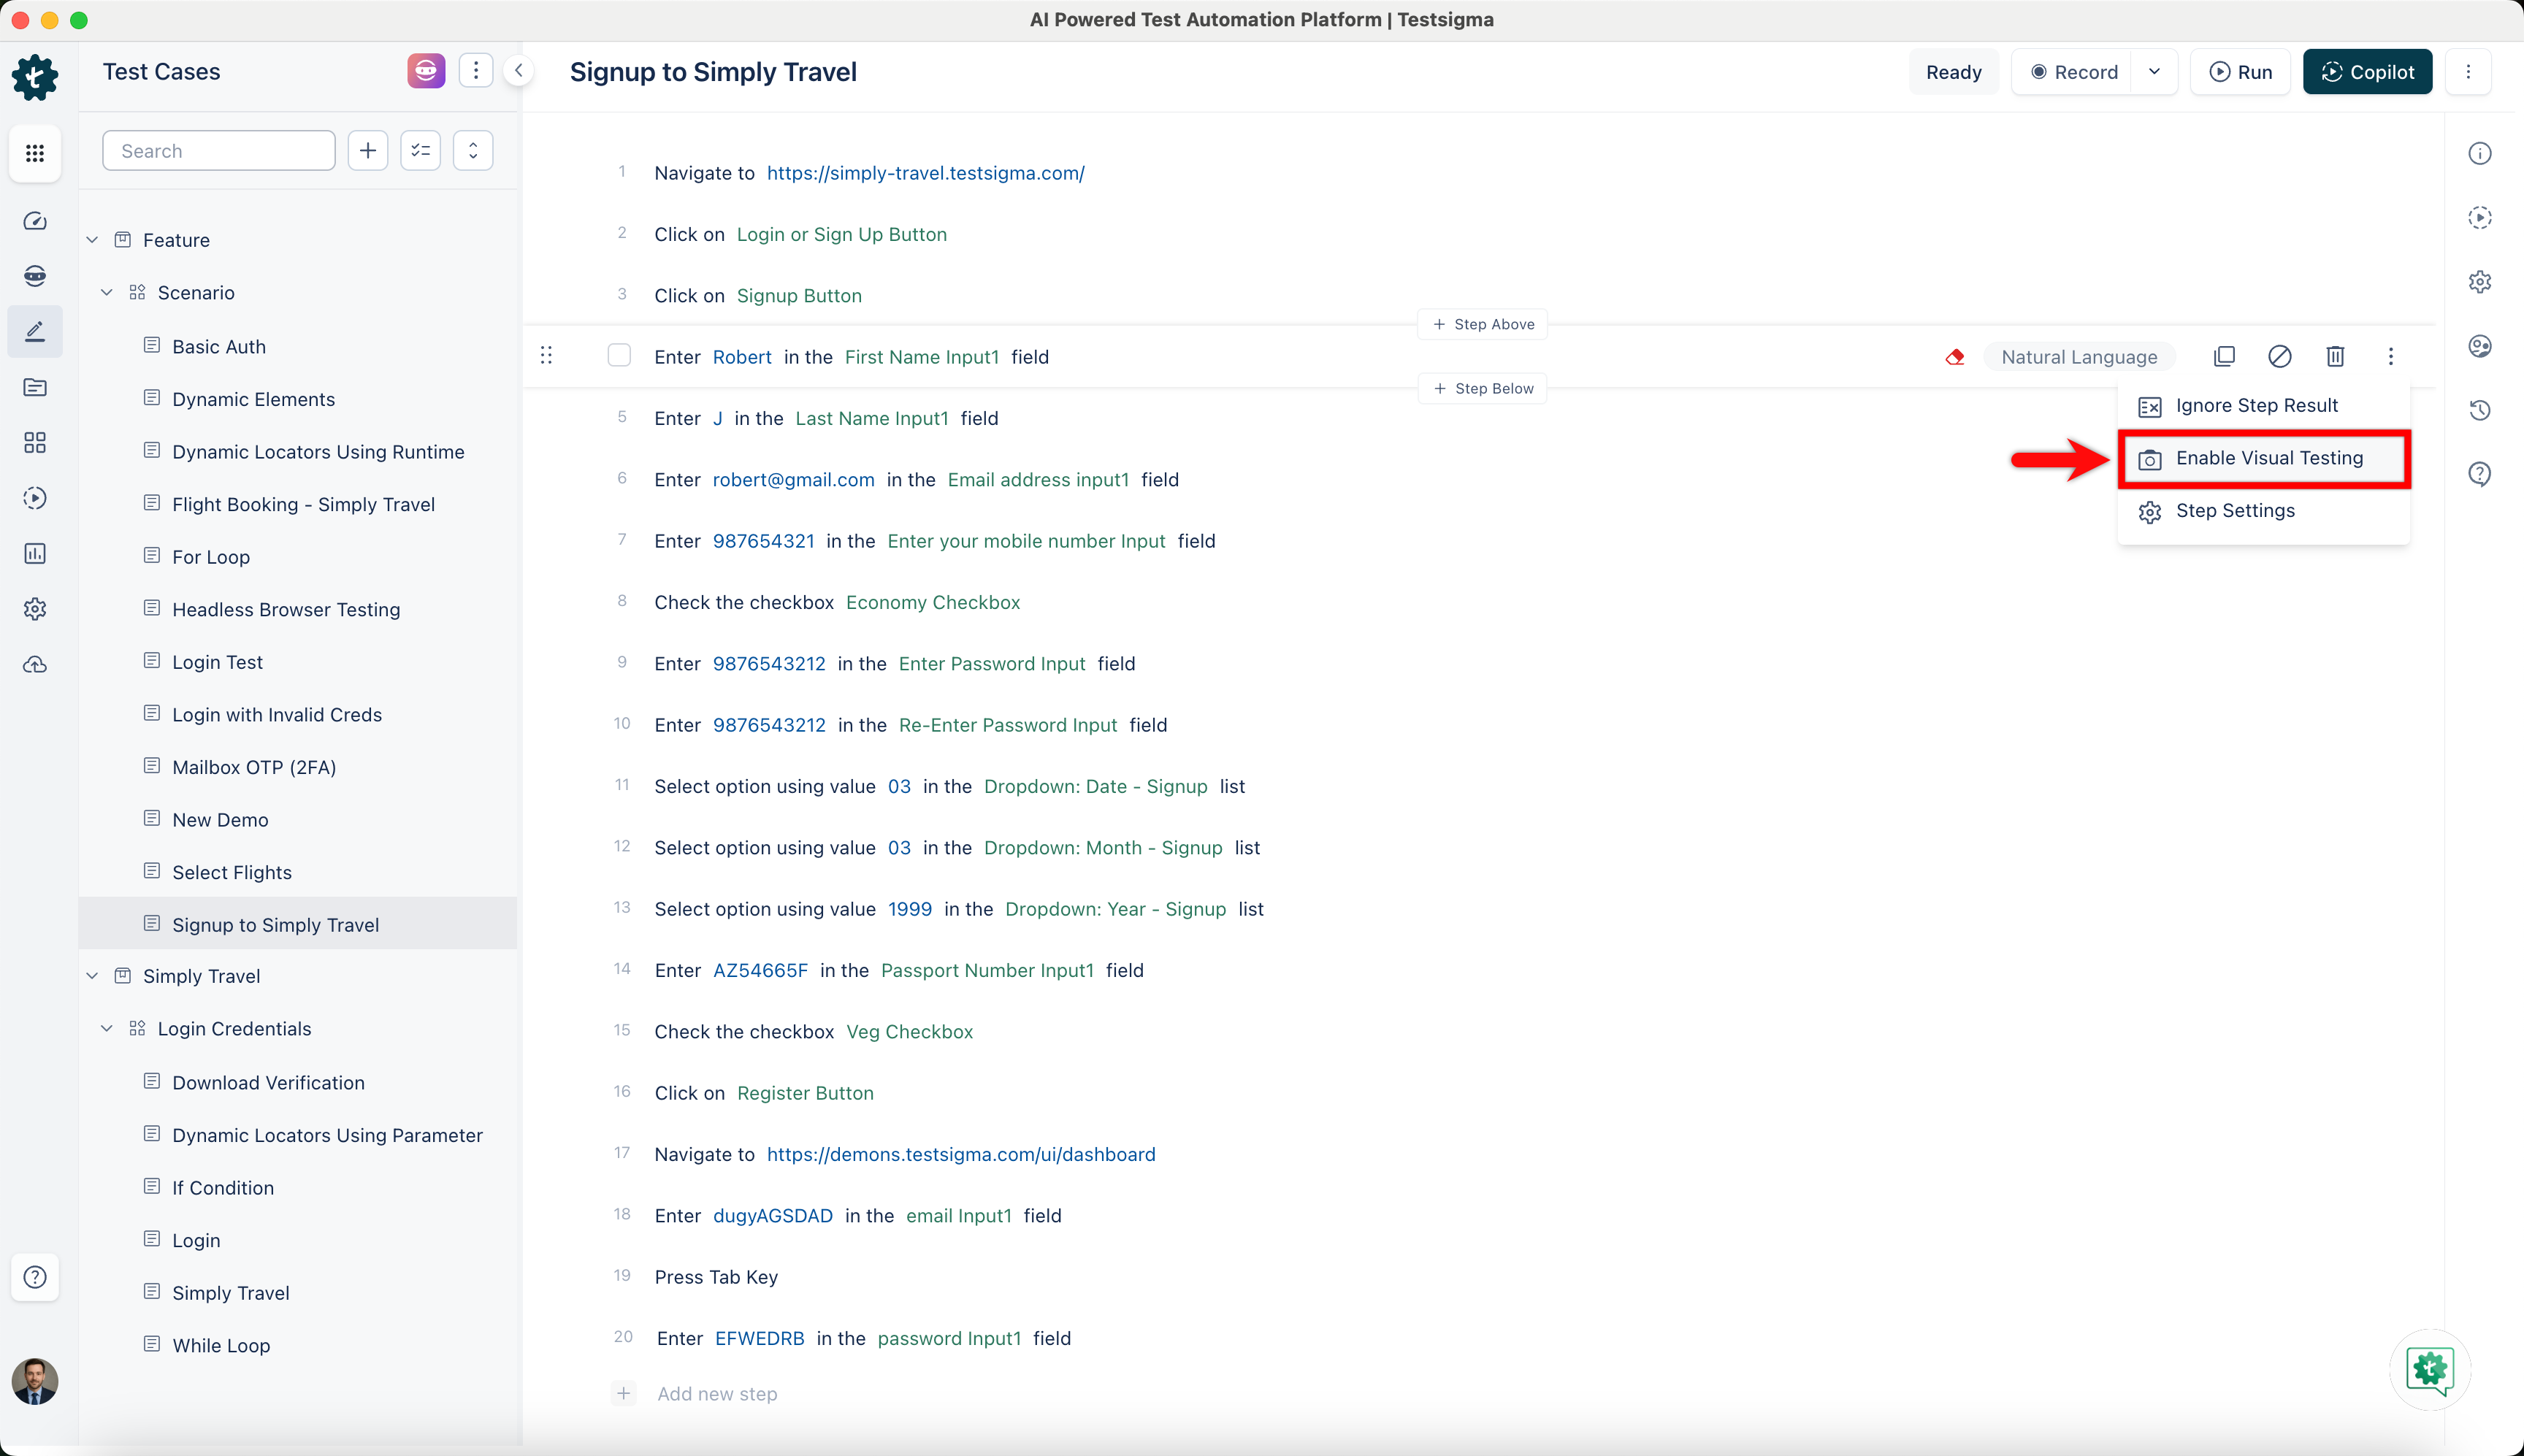
- Select Enable Visual Testing from the drop-down list that will appear.
- Click Update Step after enabling Visual Testing for the step.
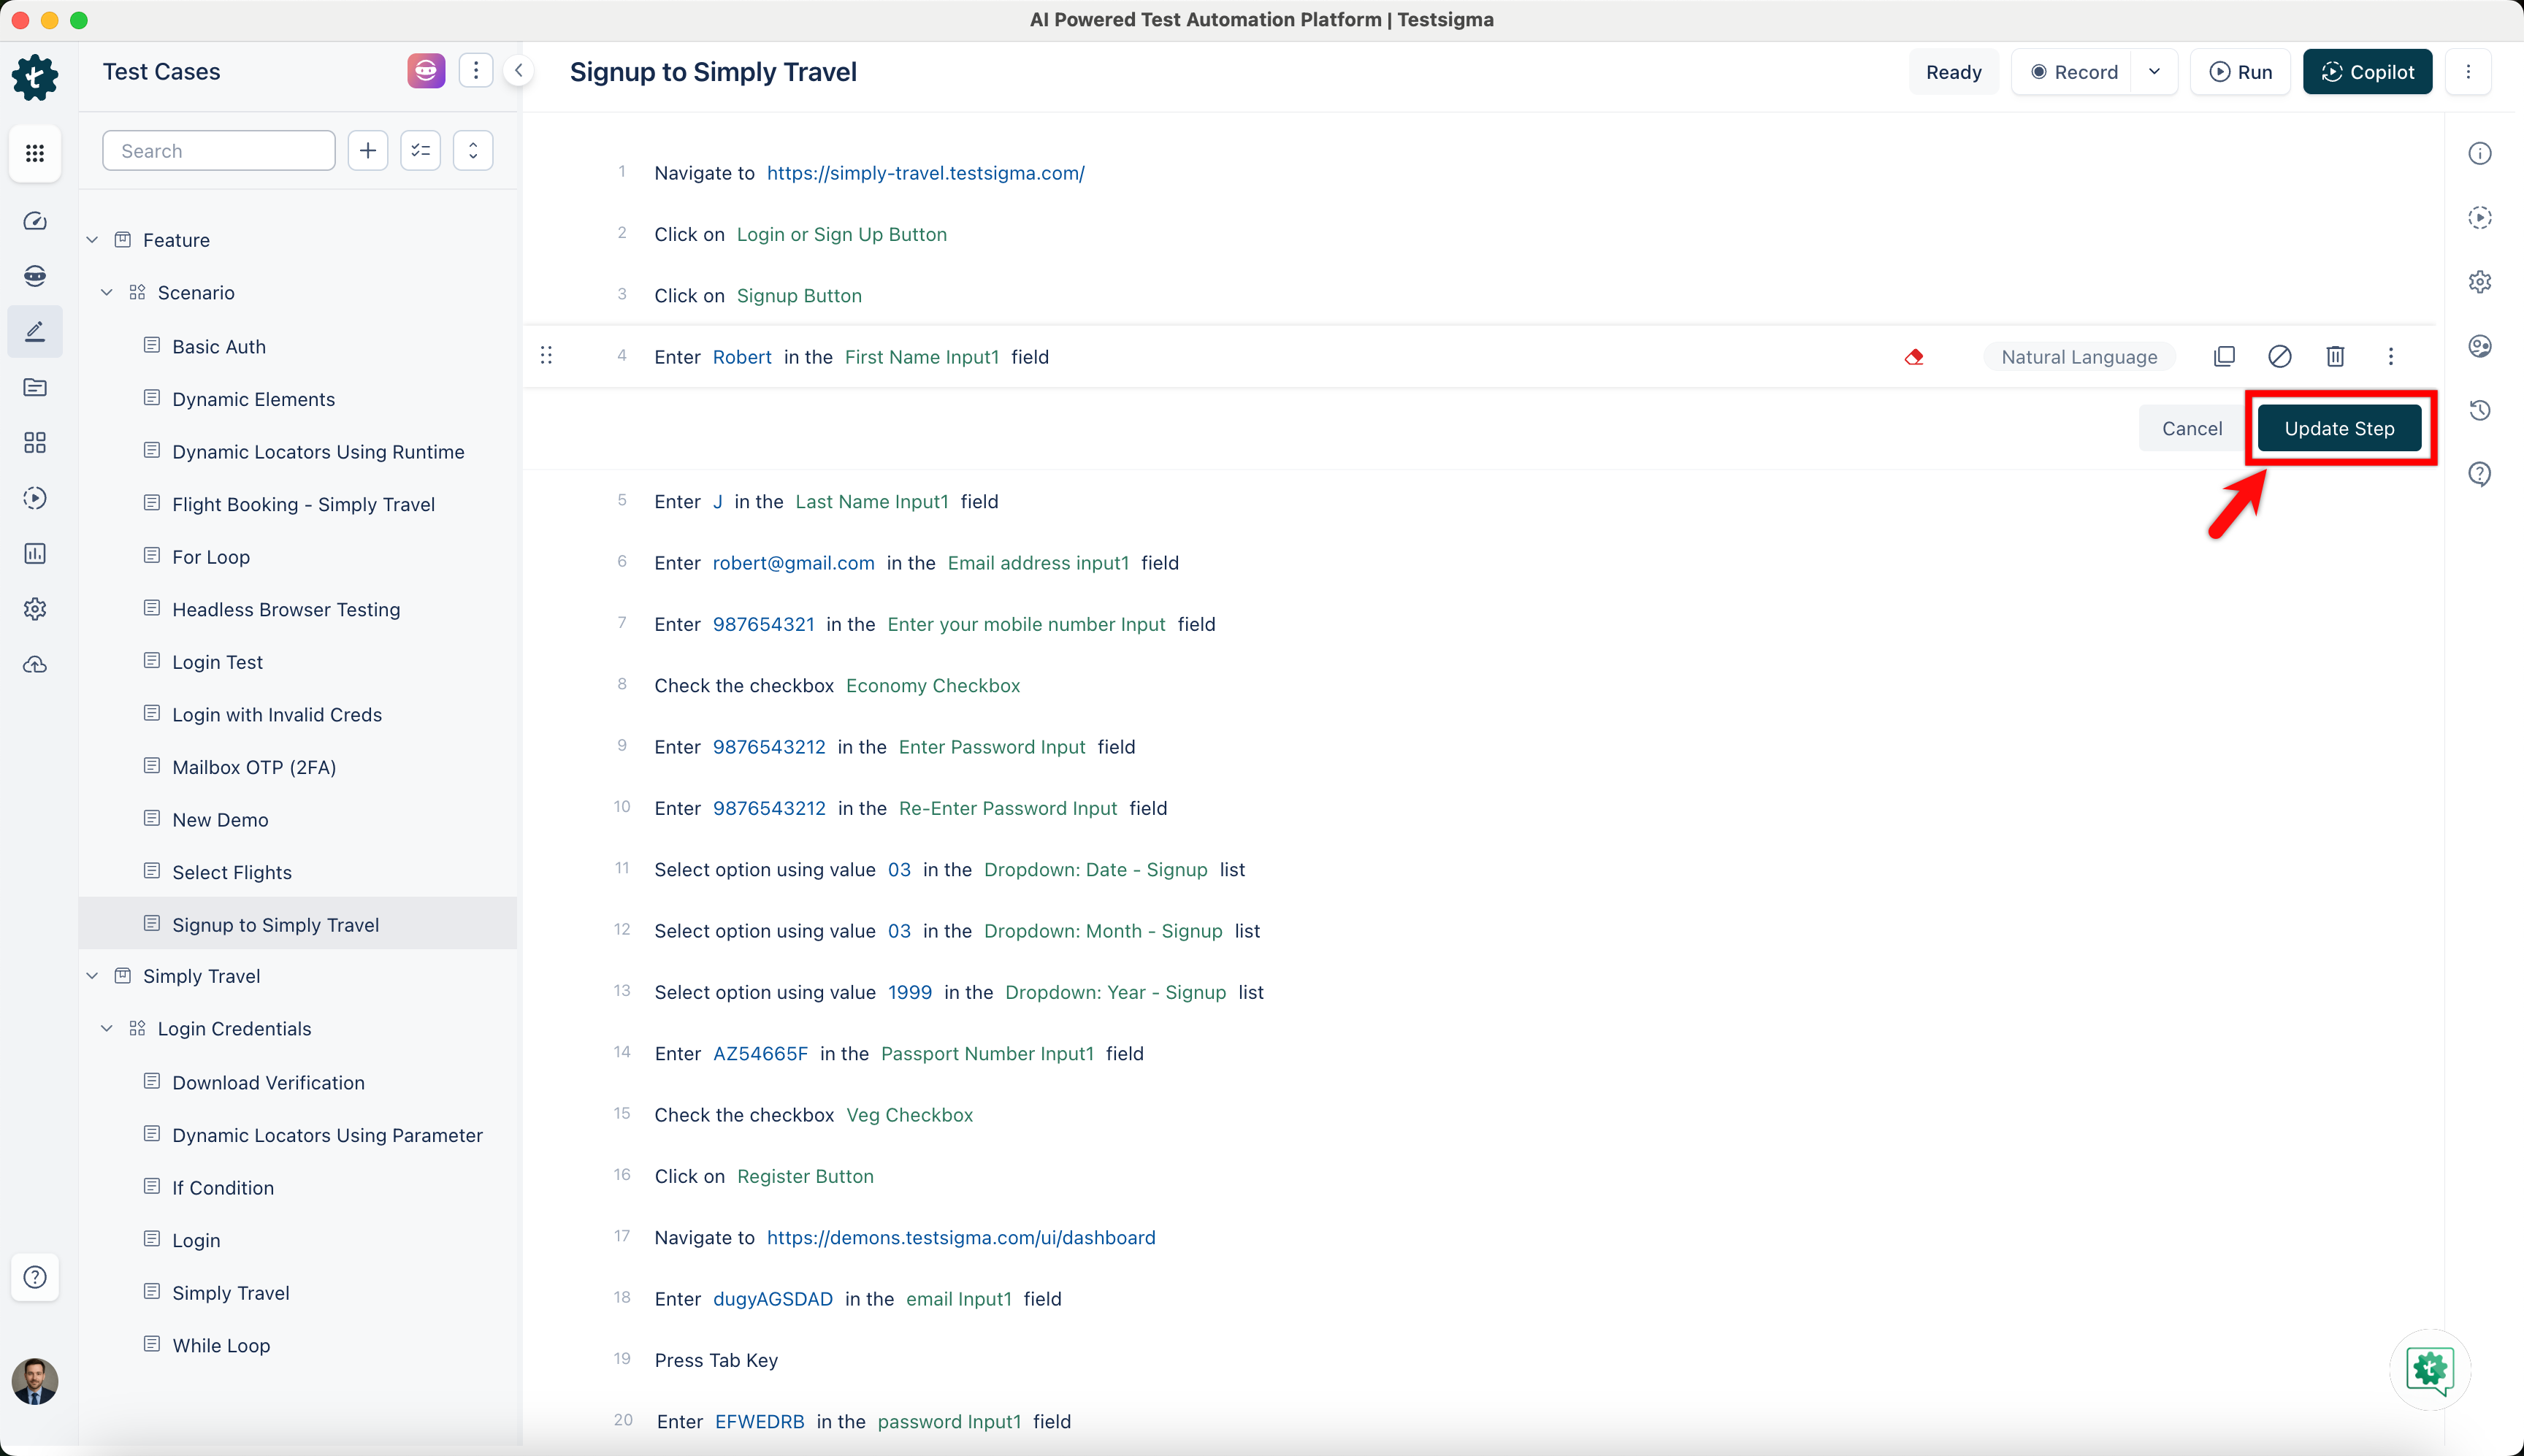
After you enable visual testing, Testsigma requires a baseline image corresponding to the test step for executing visual testing. Visual testing will be available only after the next successful run, as Testsigma needs this baseline image.
Bulk Action for Visual Testing Steps
In Testsigma, you can save time and reduce redundant efforts by selecting multiple steps in a test case and simultaneously turning on/off the visual testing settings. Testsigma supports bulk action of steps for this purpose.
- Select the multiple test steps by clicking on checkboxes to enable Visual Testing.
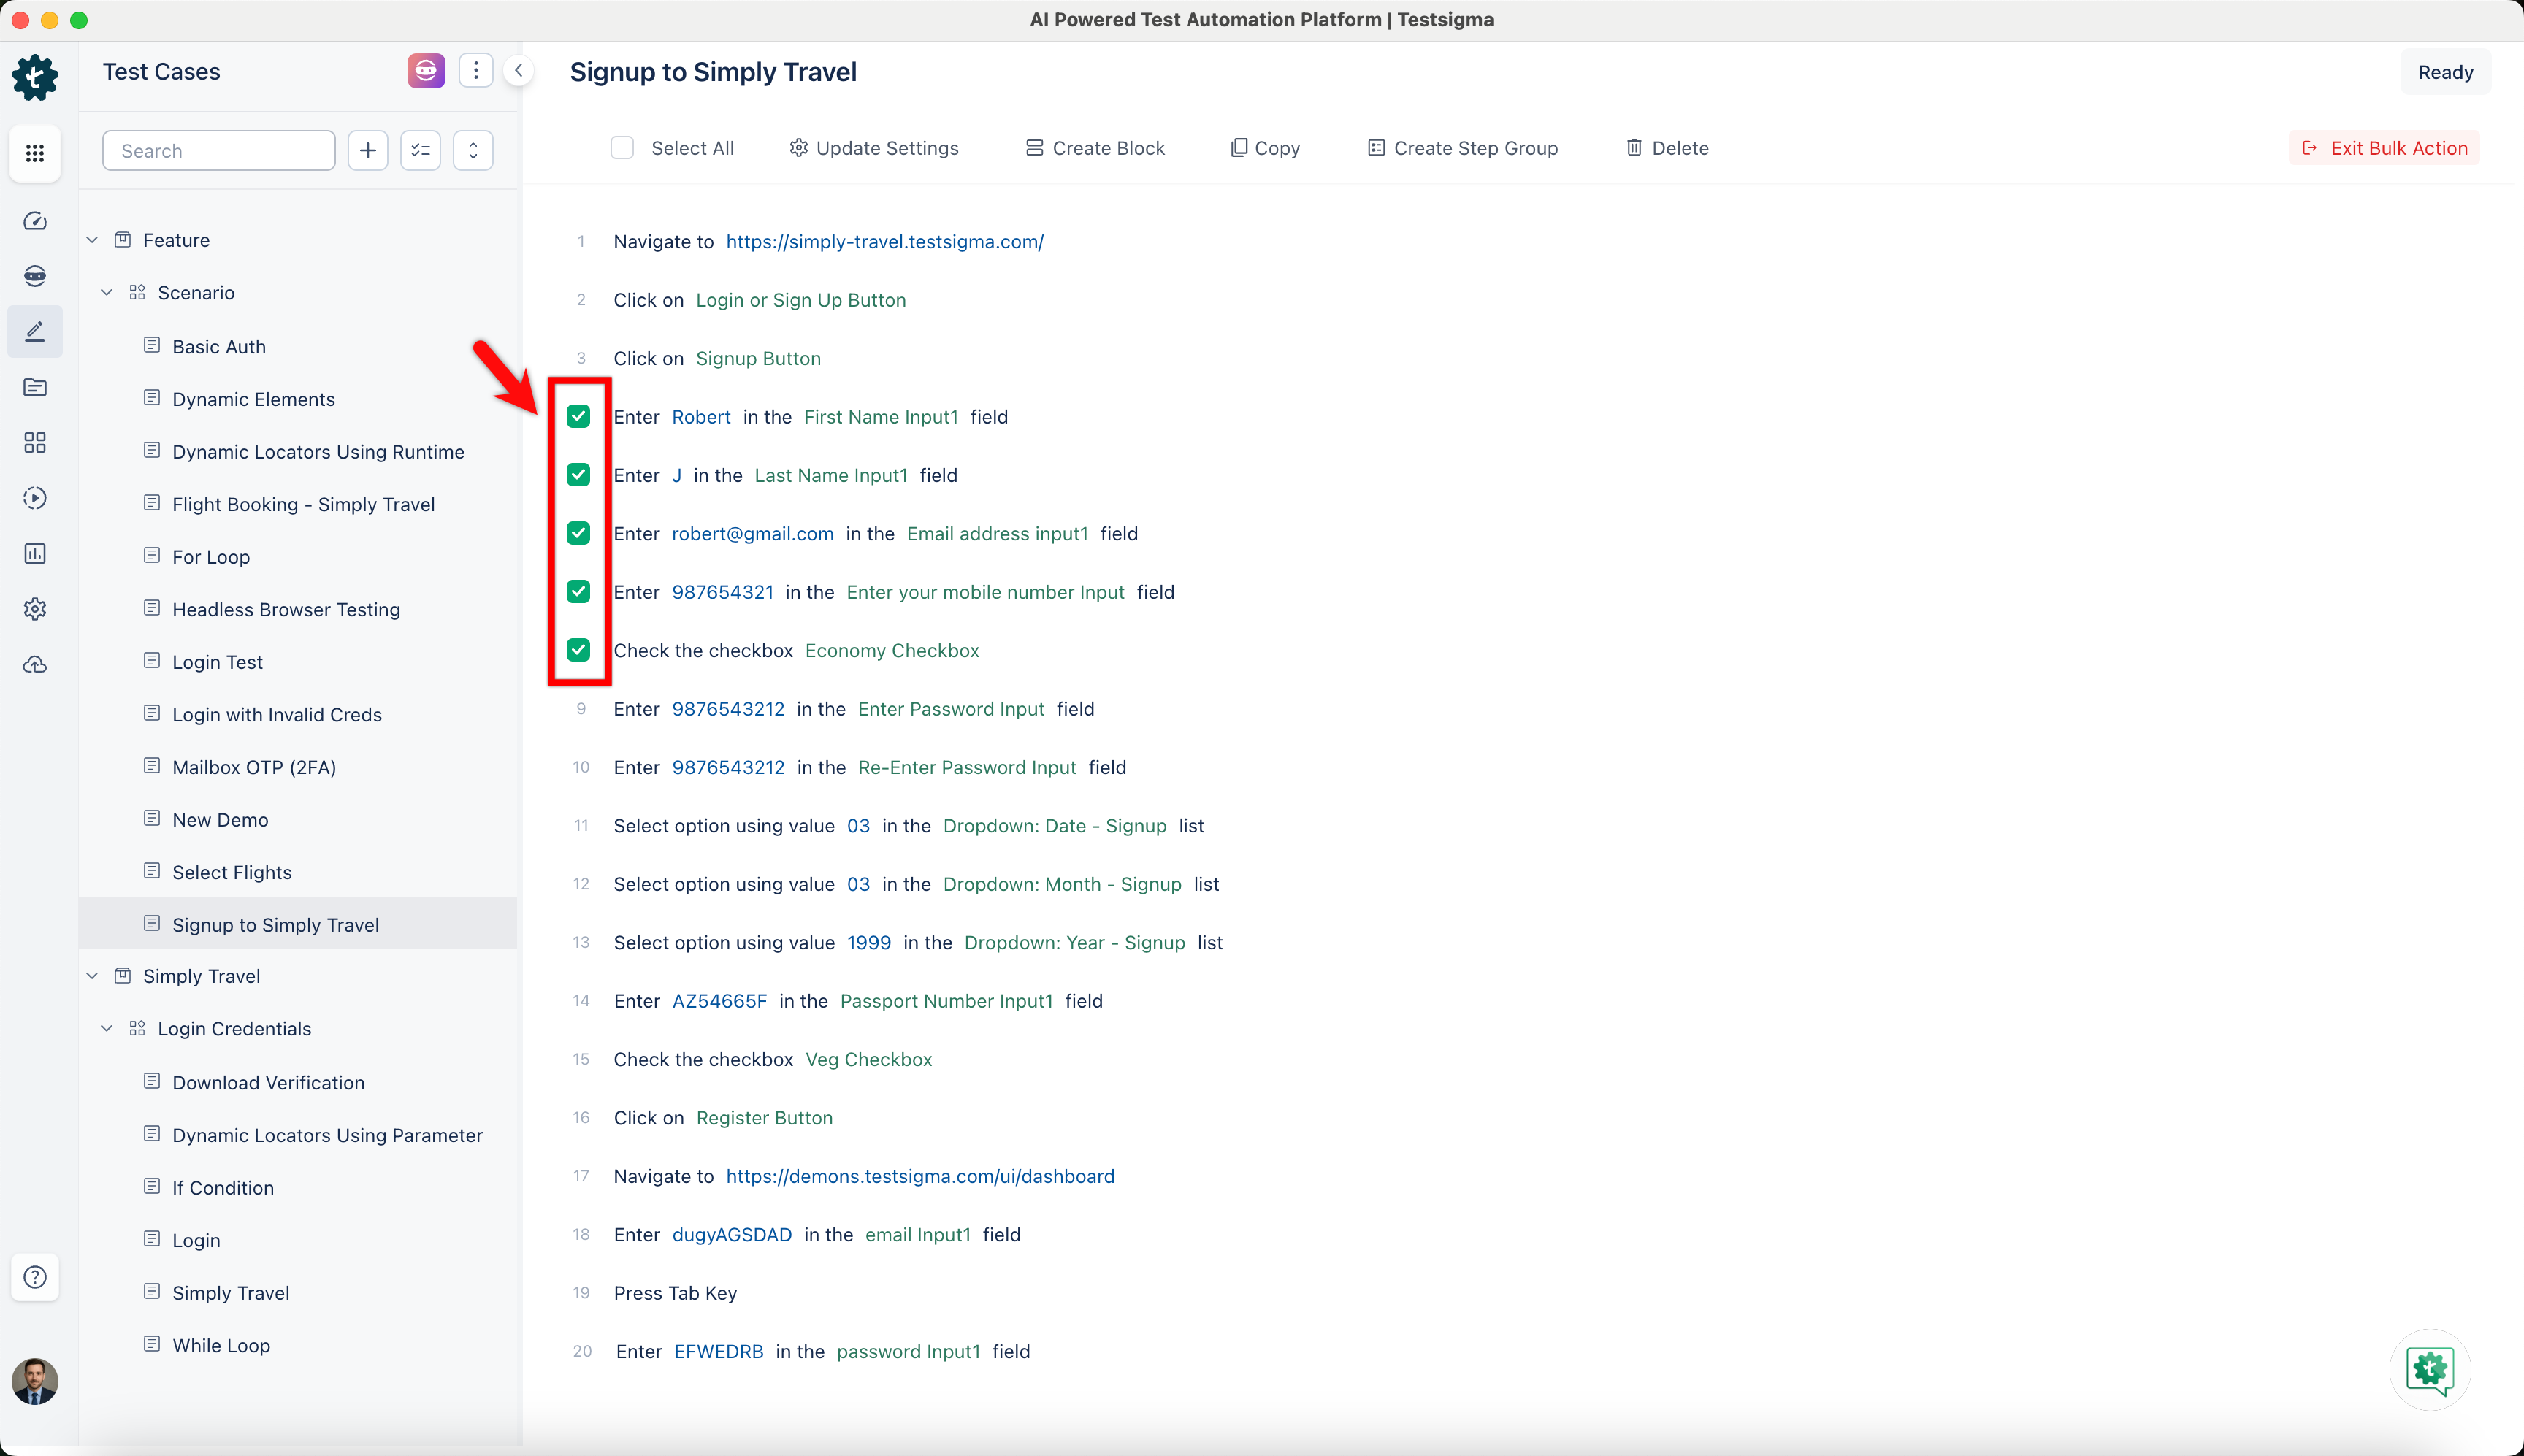
- In the menu bar, click on Update Settings.
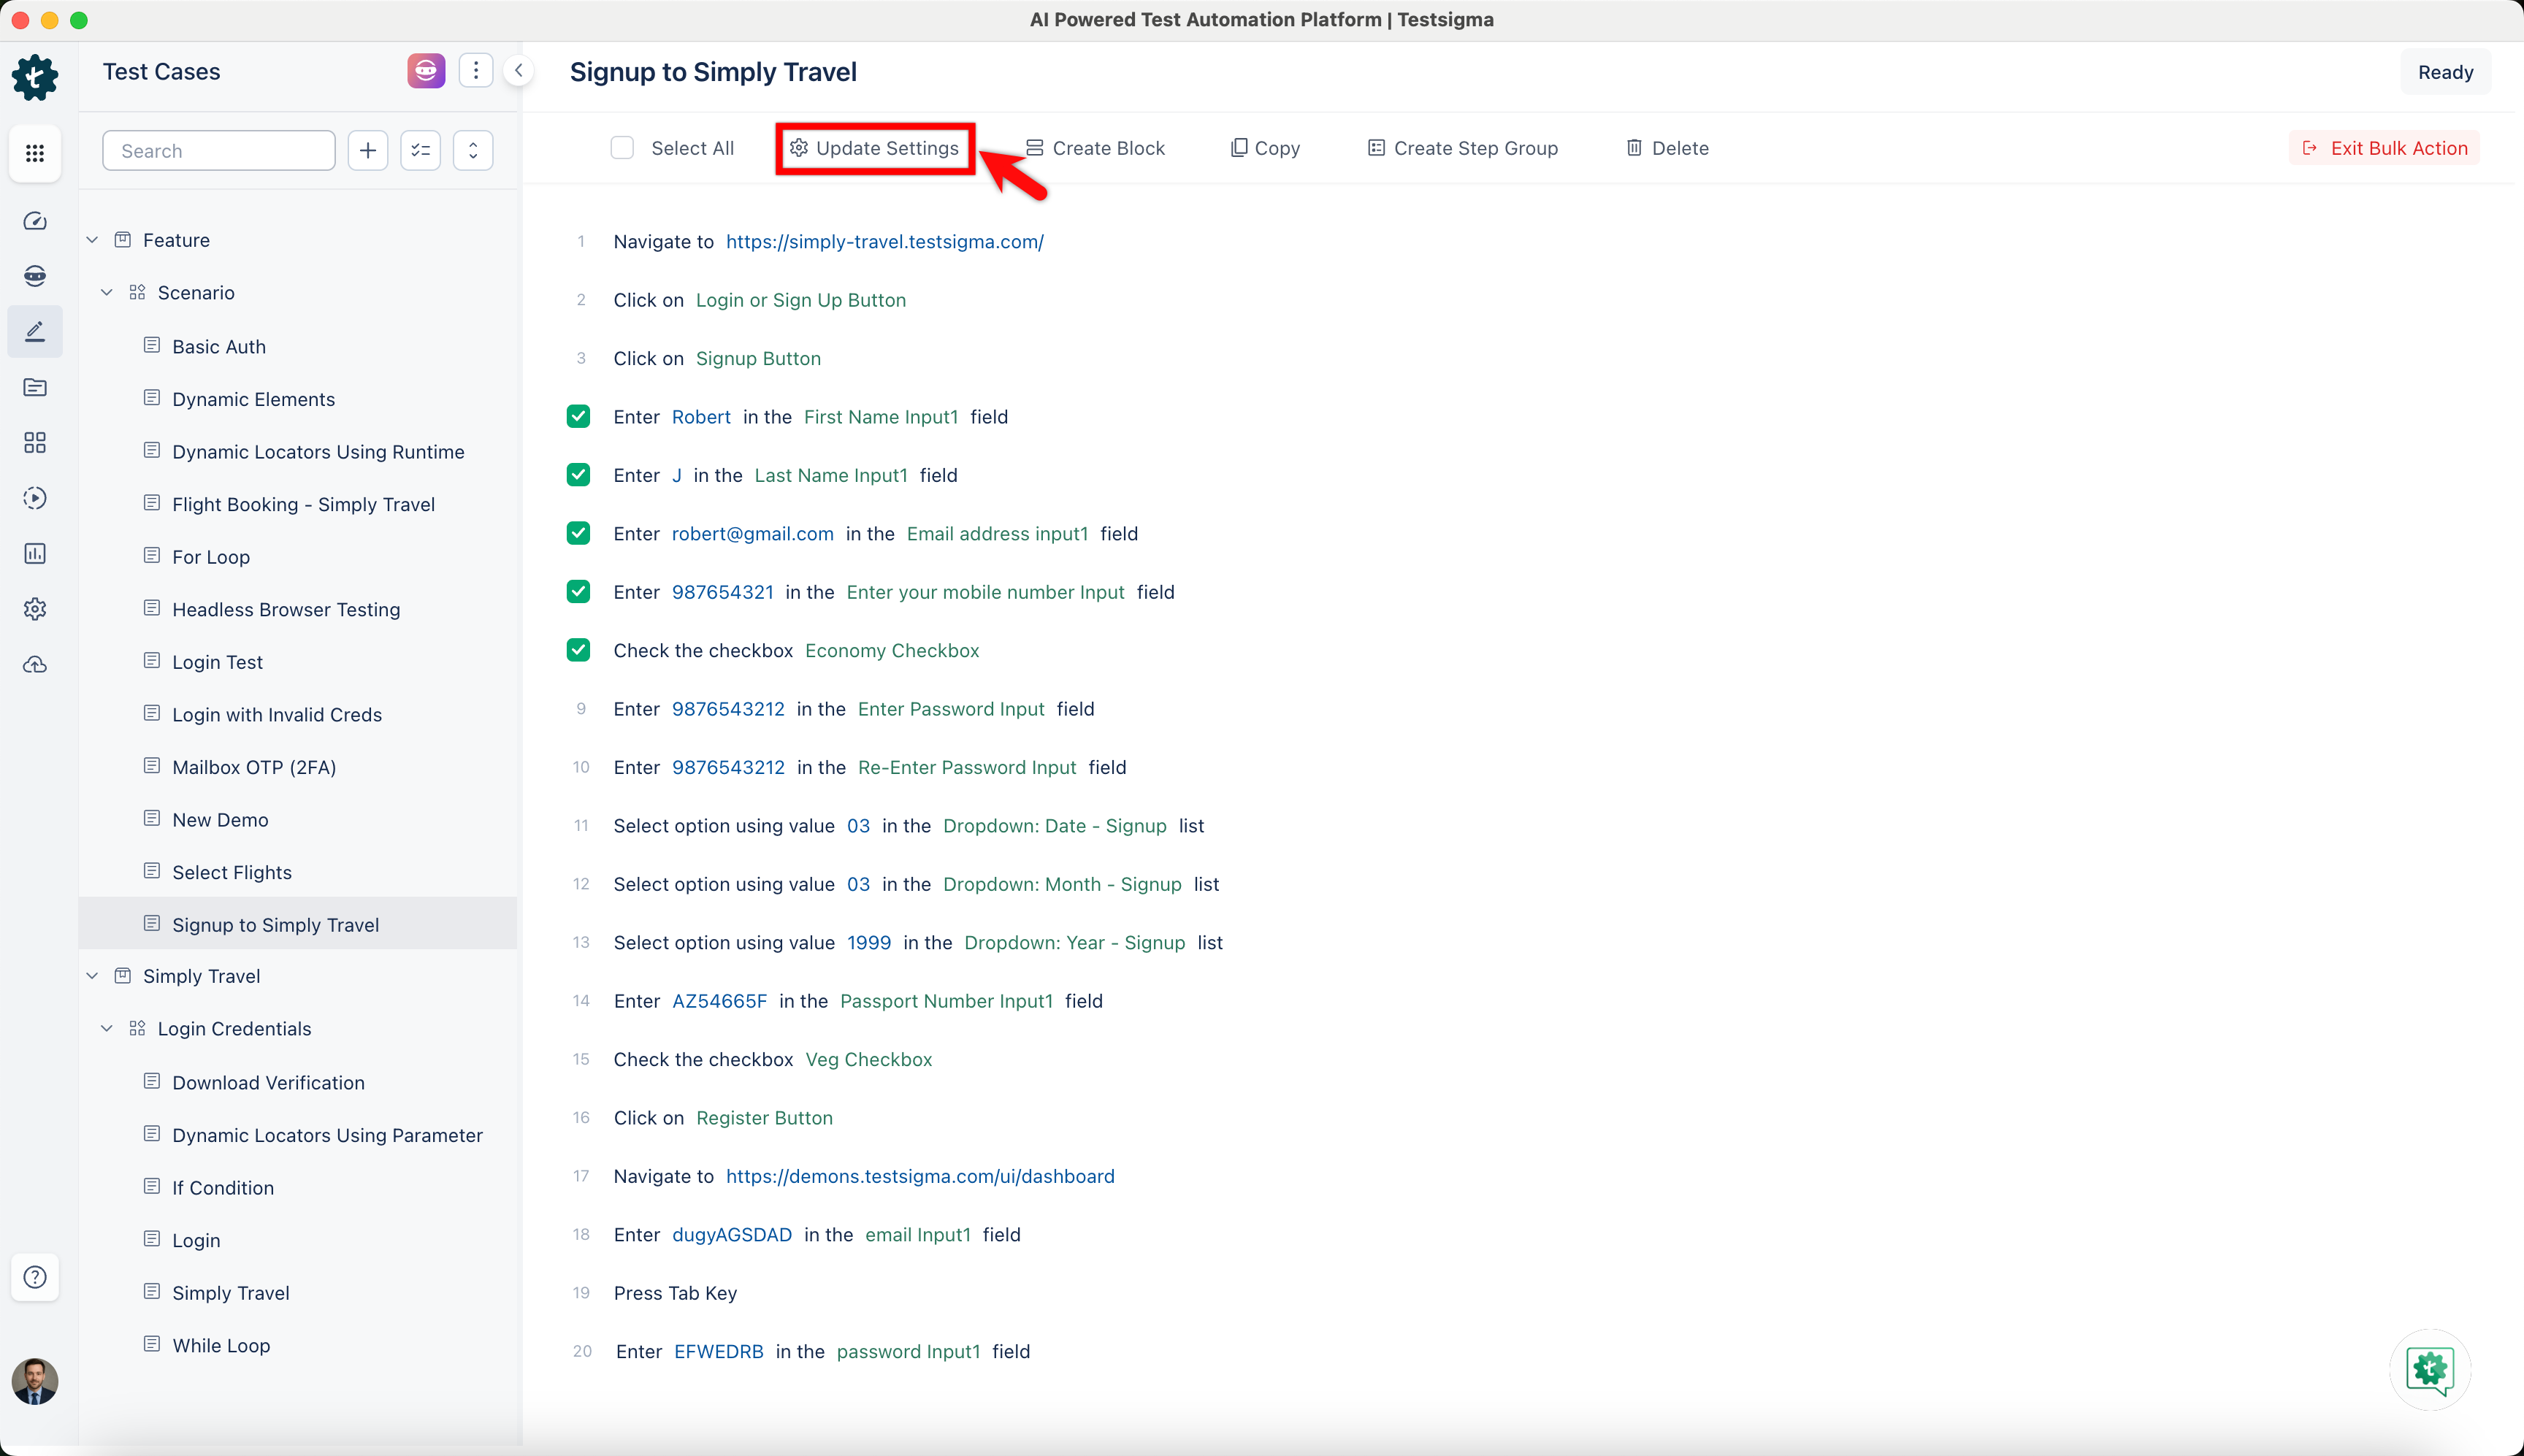
- In the Bulk Update Settings overlay, select the Enable Visual Testing checkbox and click Update after enabling Visual Testing for the steps.

- Run the Test Case to view the visual difference.
Mark Baseline Image
When you conduct visual testing using Testsigma, you should compare the current image (reference image) with the original image (baseline image) and ensure that the reference image matches the baseline image. You should update the baseline image whenever you apply changes to the UI using the following steps:
- You have two options to enable visual testing in your test steps: Documentation on enabling visual testing in test steps or Documentation on bulking action for visual testing steps. Run the test case after enabling it in Test Step.
- Re-Run the test case to enable visual testing and see any visual differences.
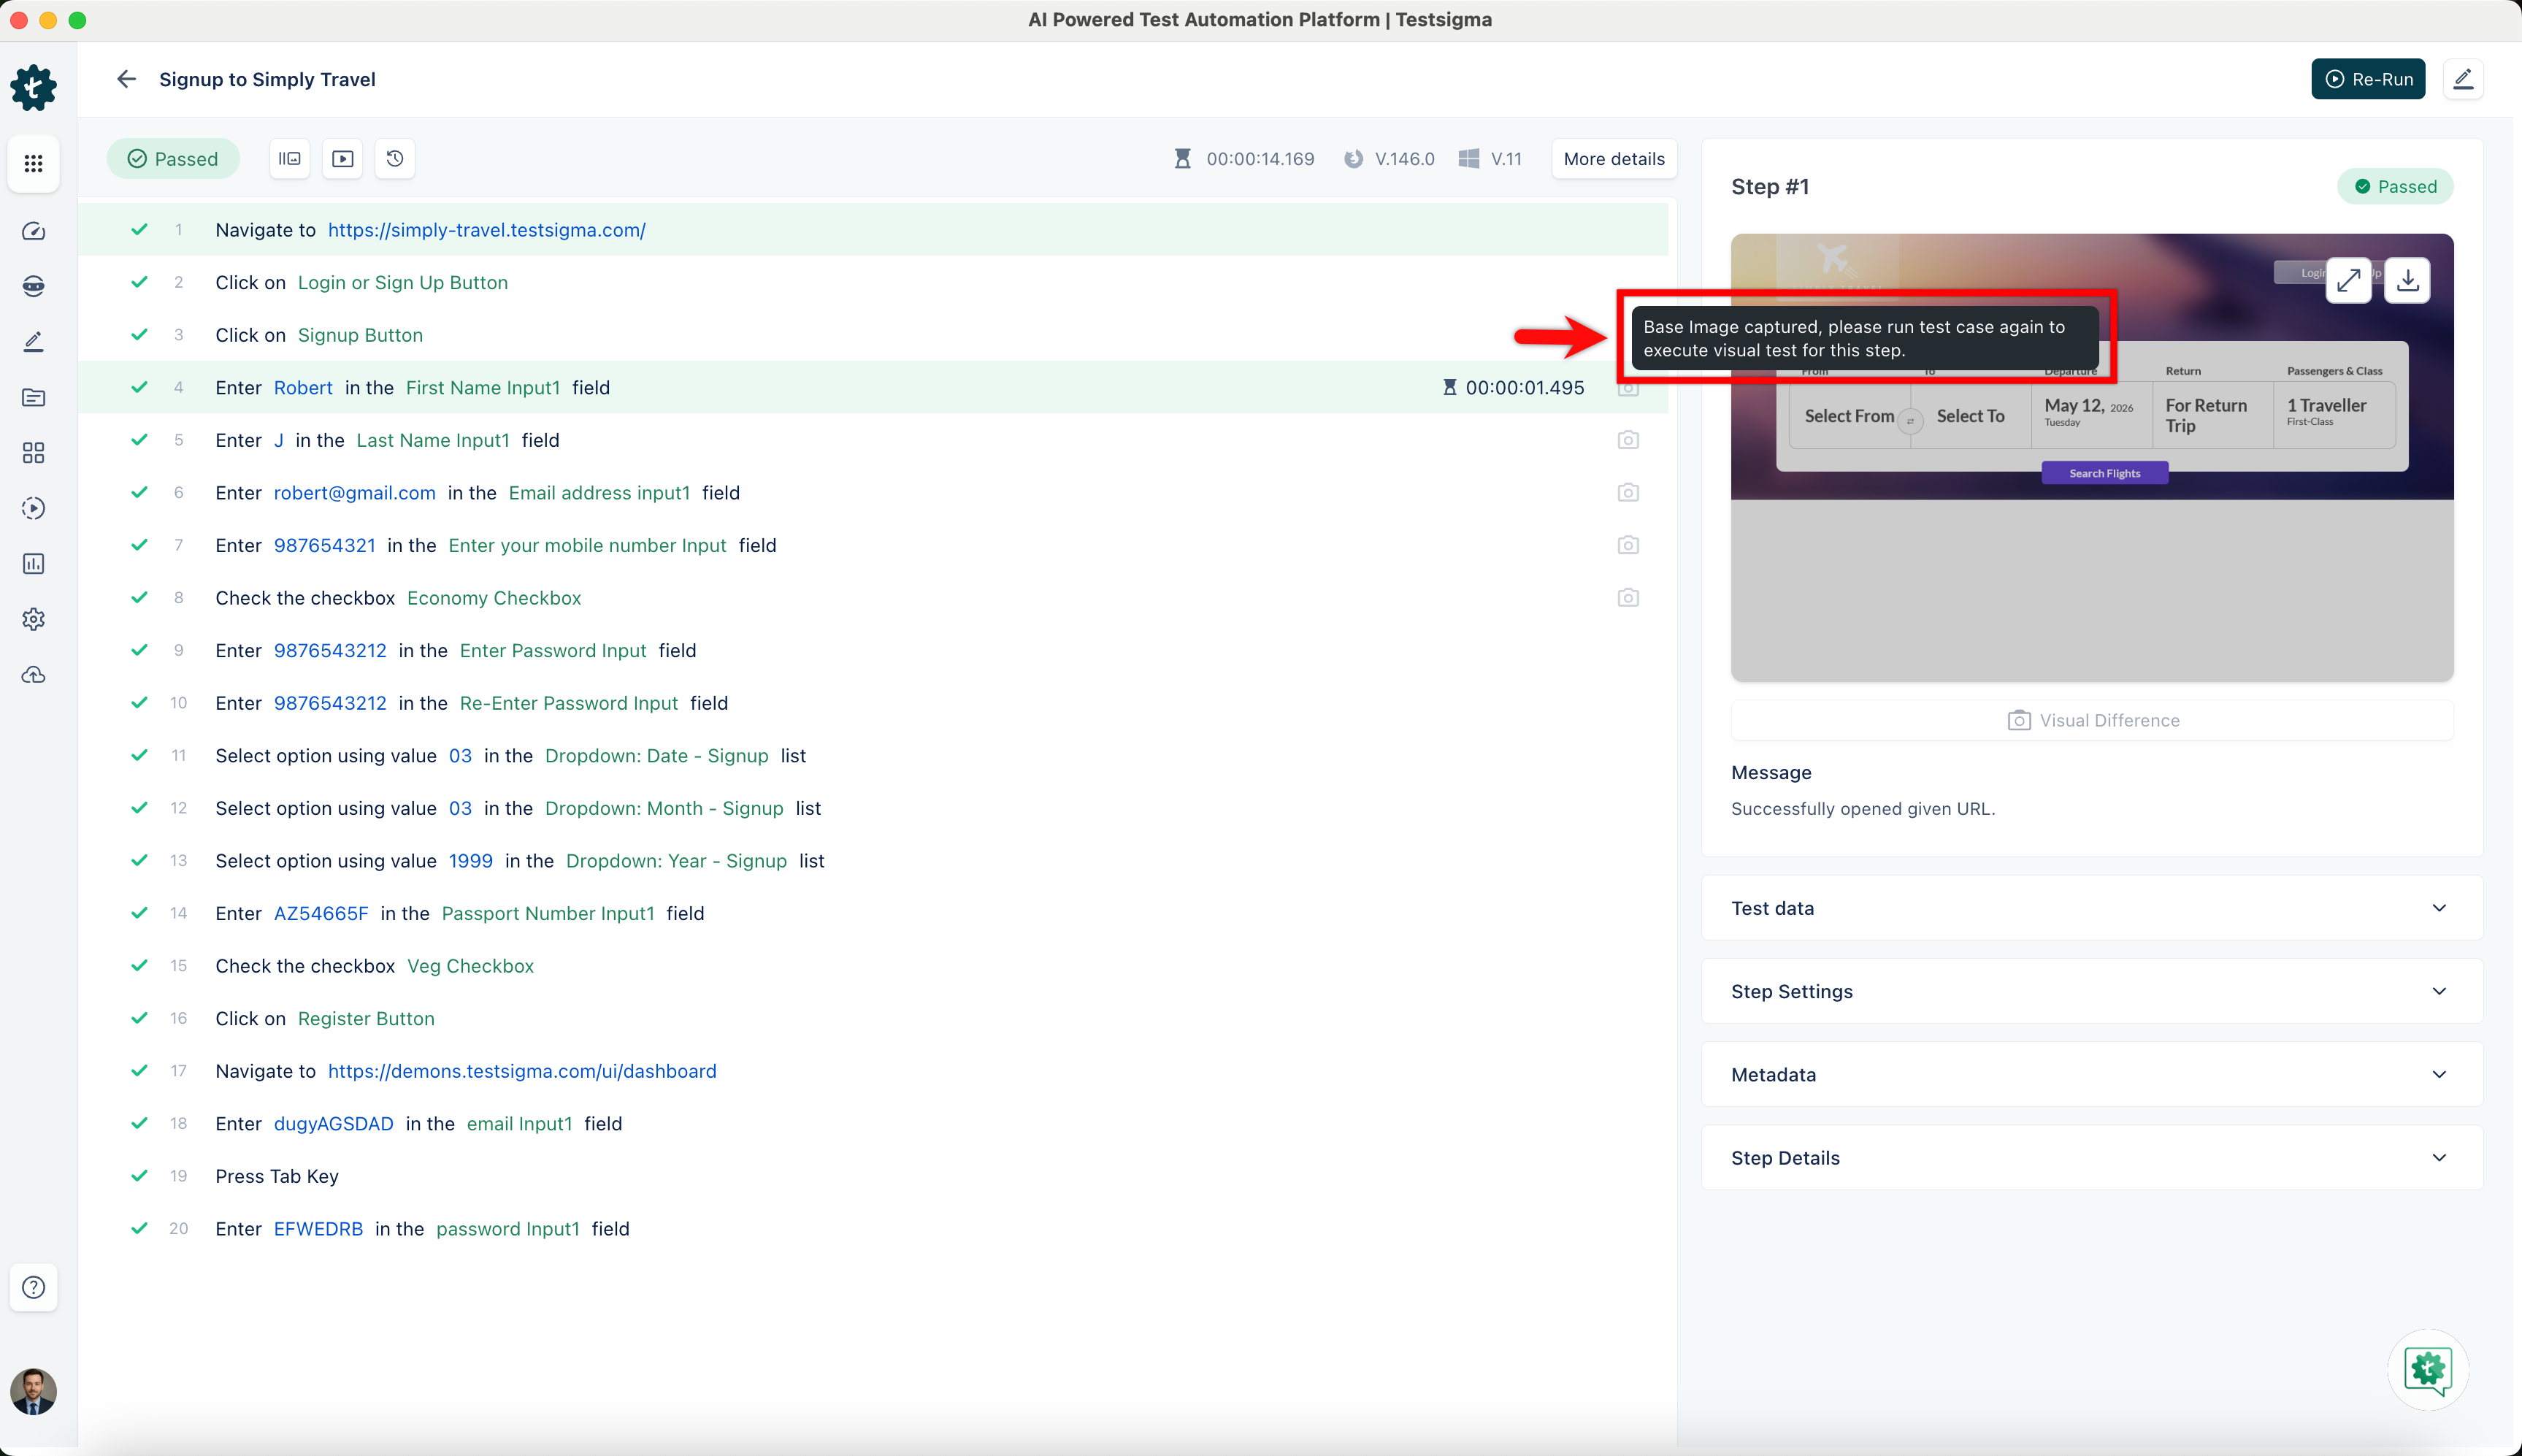
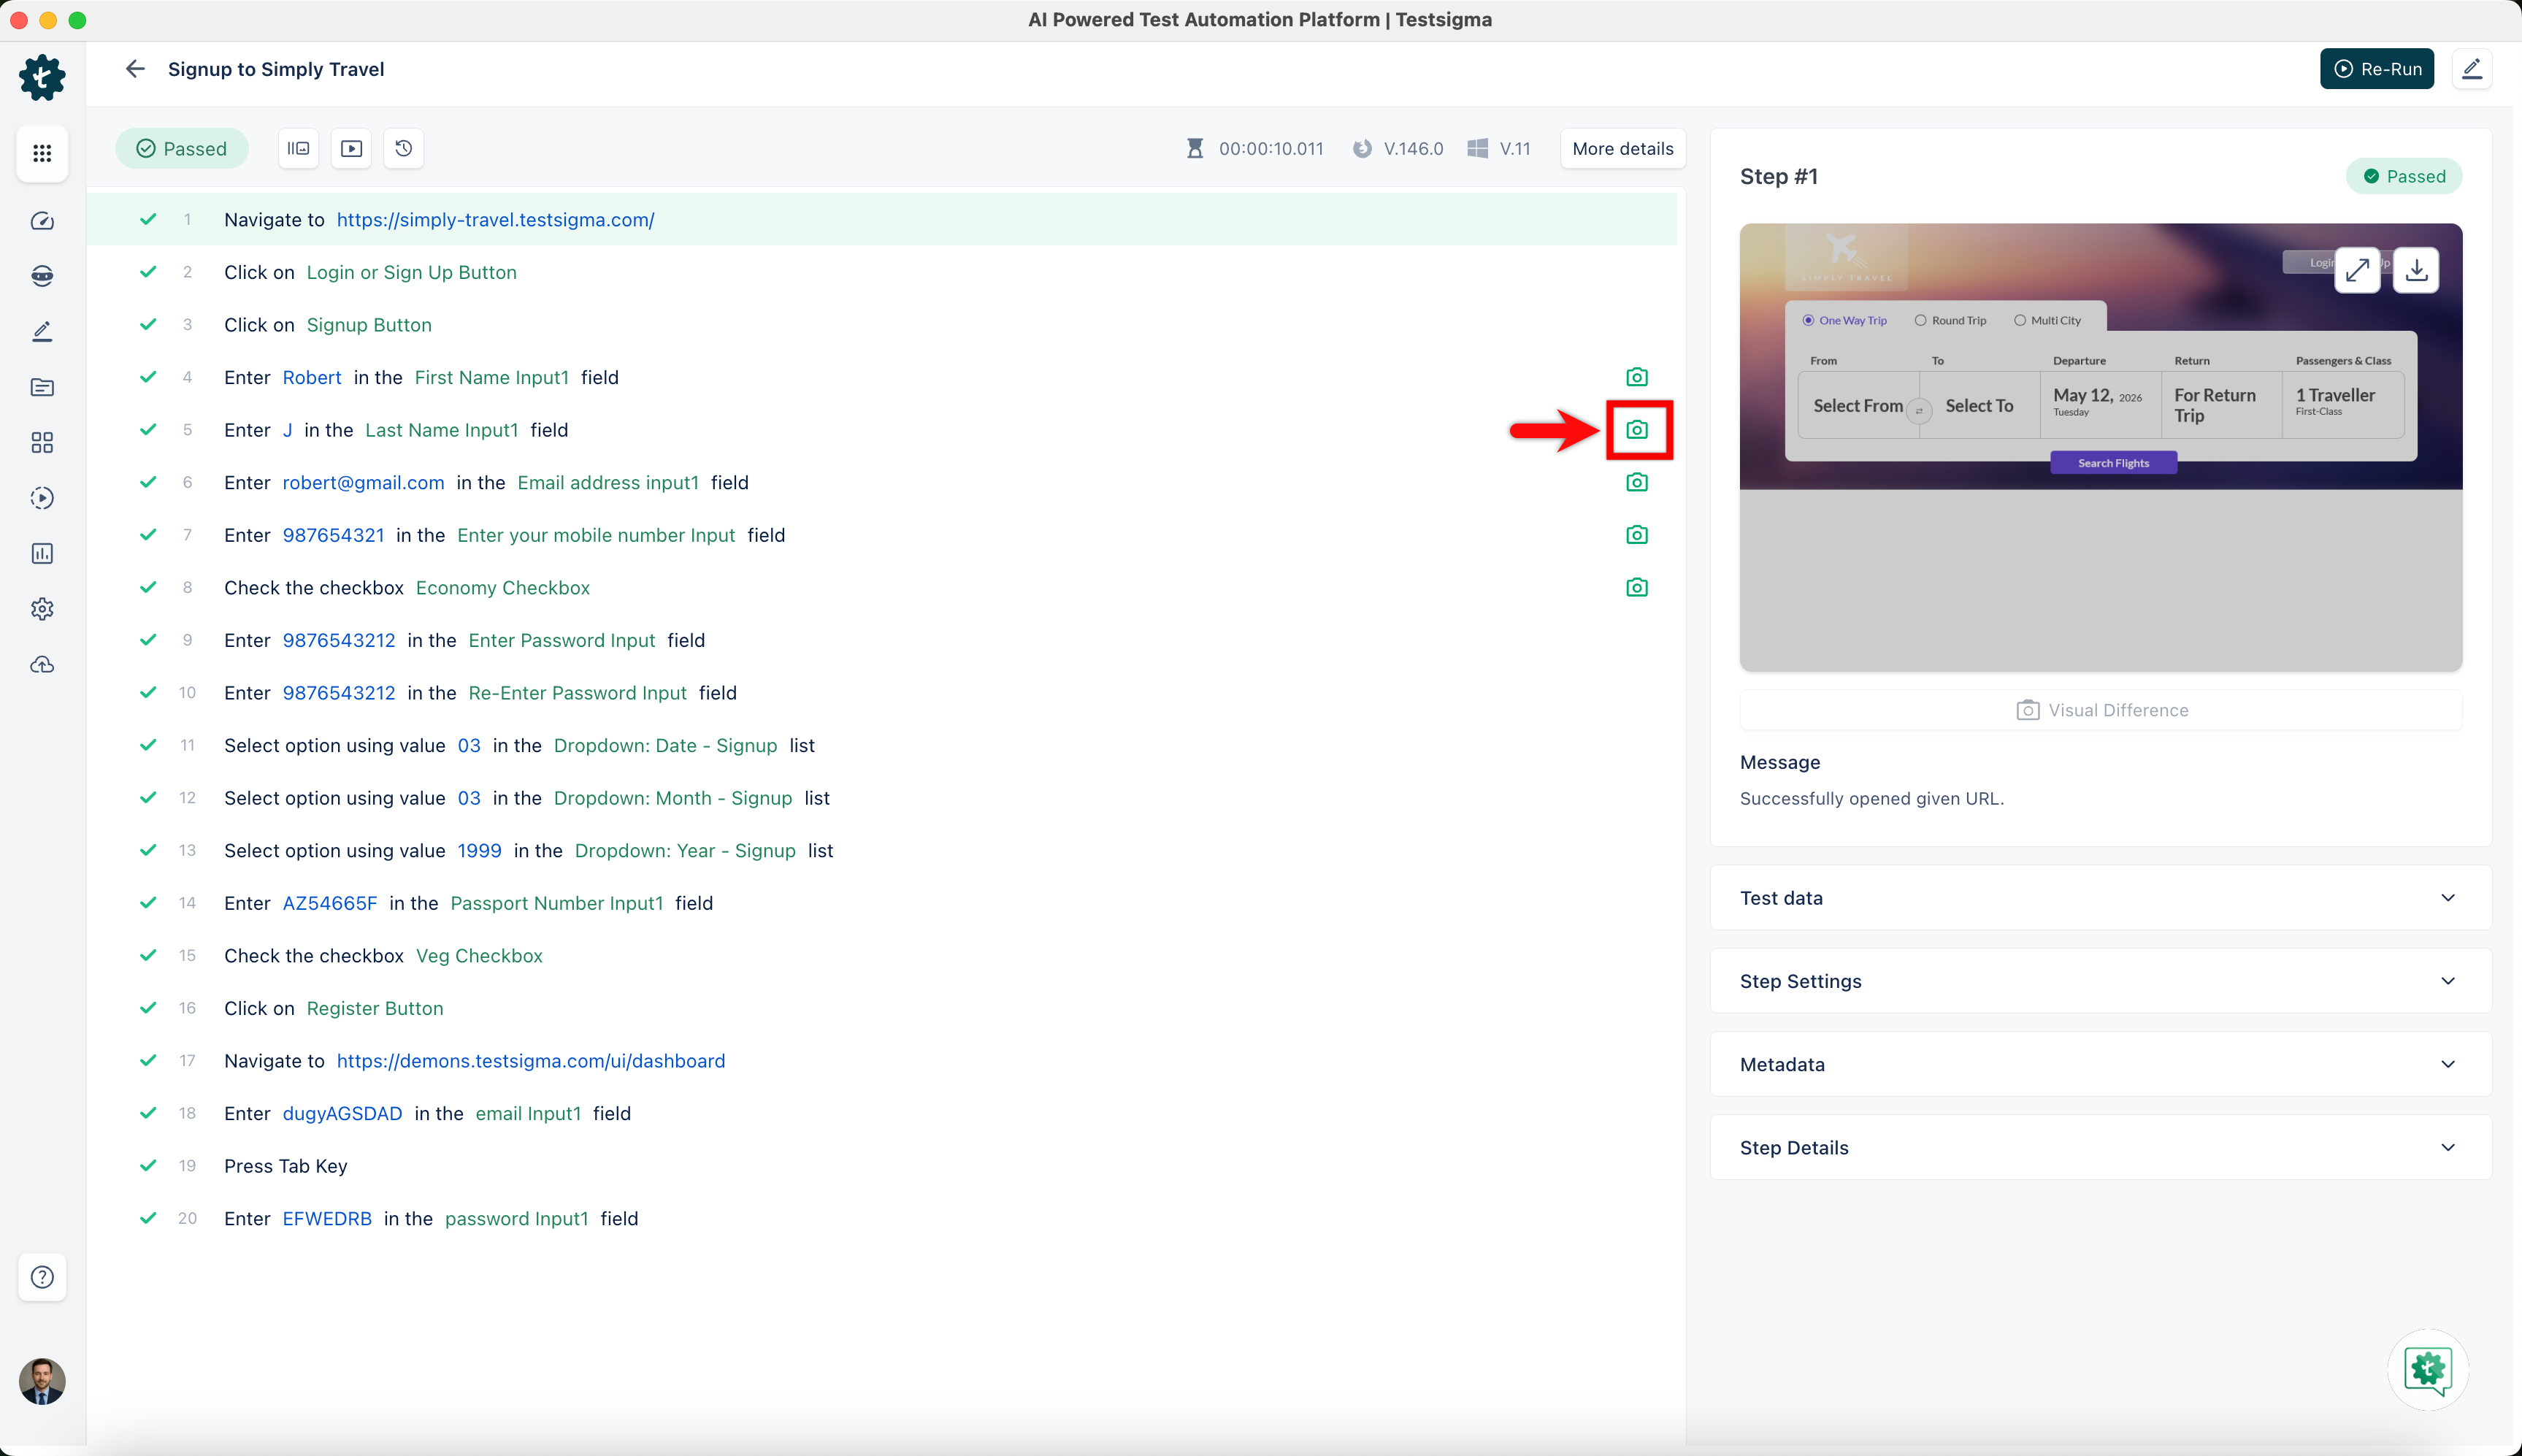
- After executing a test case for visual testing, the Test Case Result page will display a green camera icon on steps with no visual differences between the reference and baseline images and a red camera icon where there are visual differences.
- Click on the camera icon to open the Visual Difference overlay screen.

- Then, go to the top right of the page and check the box Mark as base image as Current Image. This action will update your base image to match your current reference image.
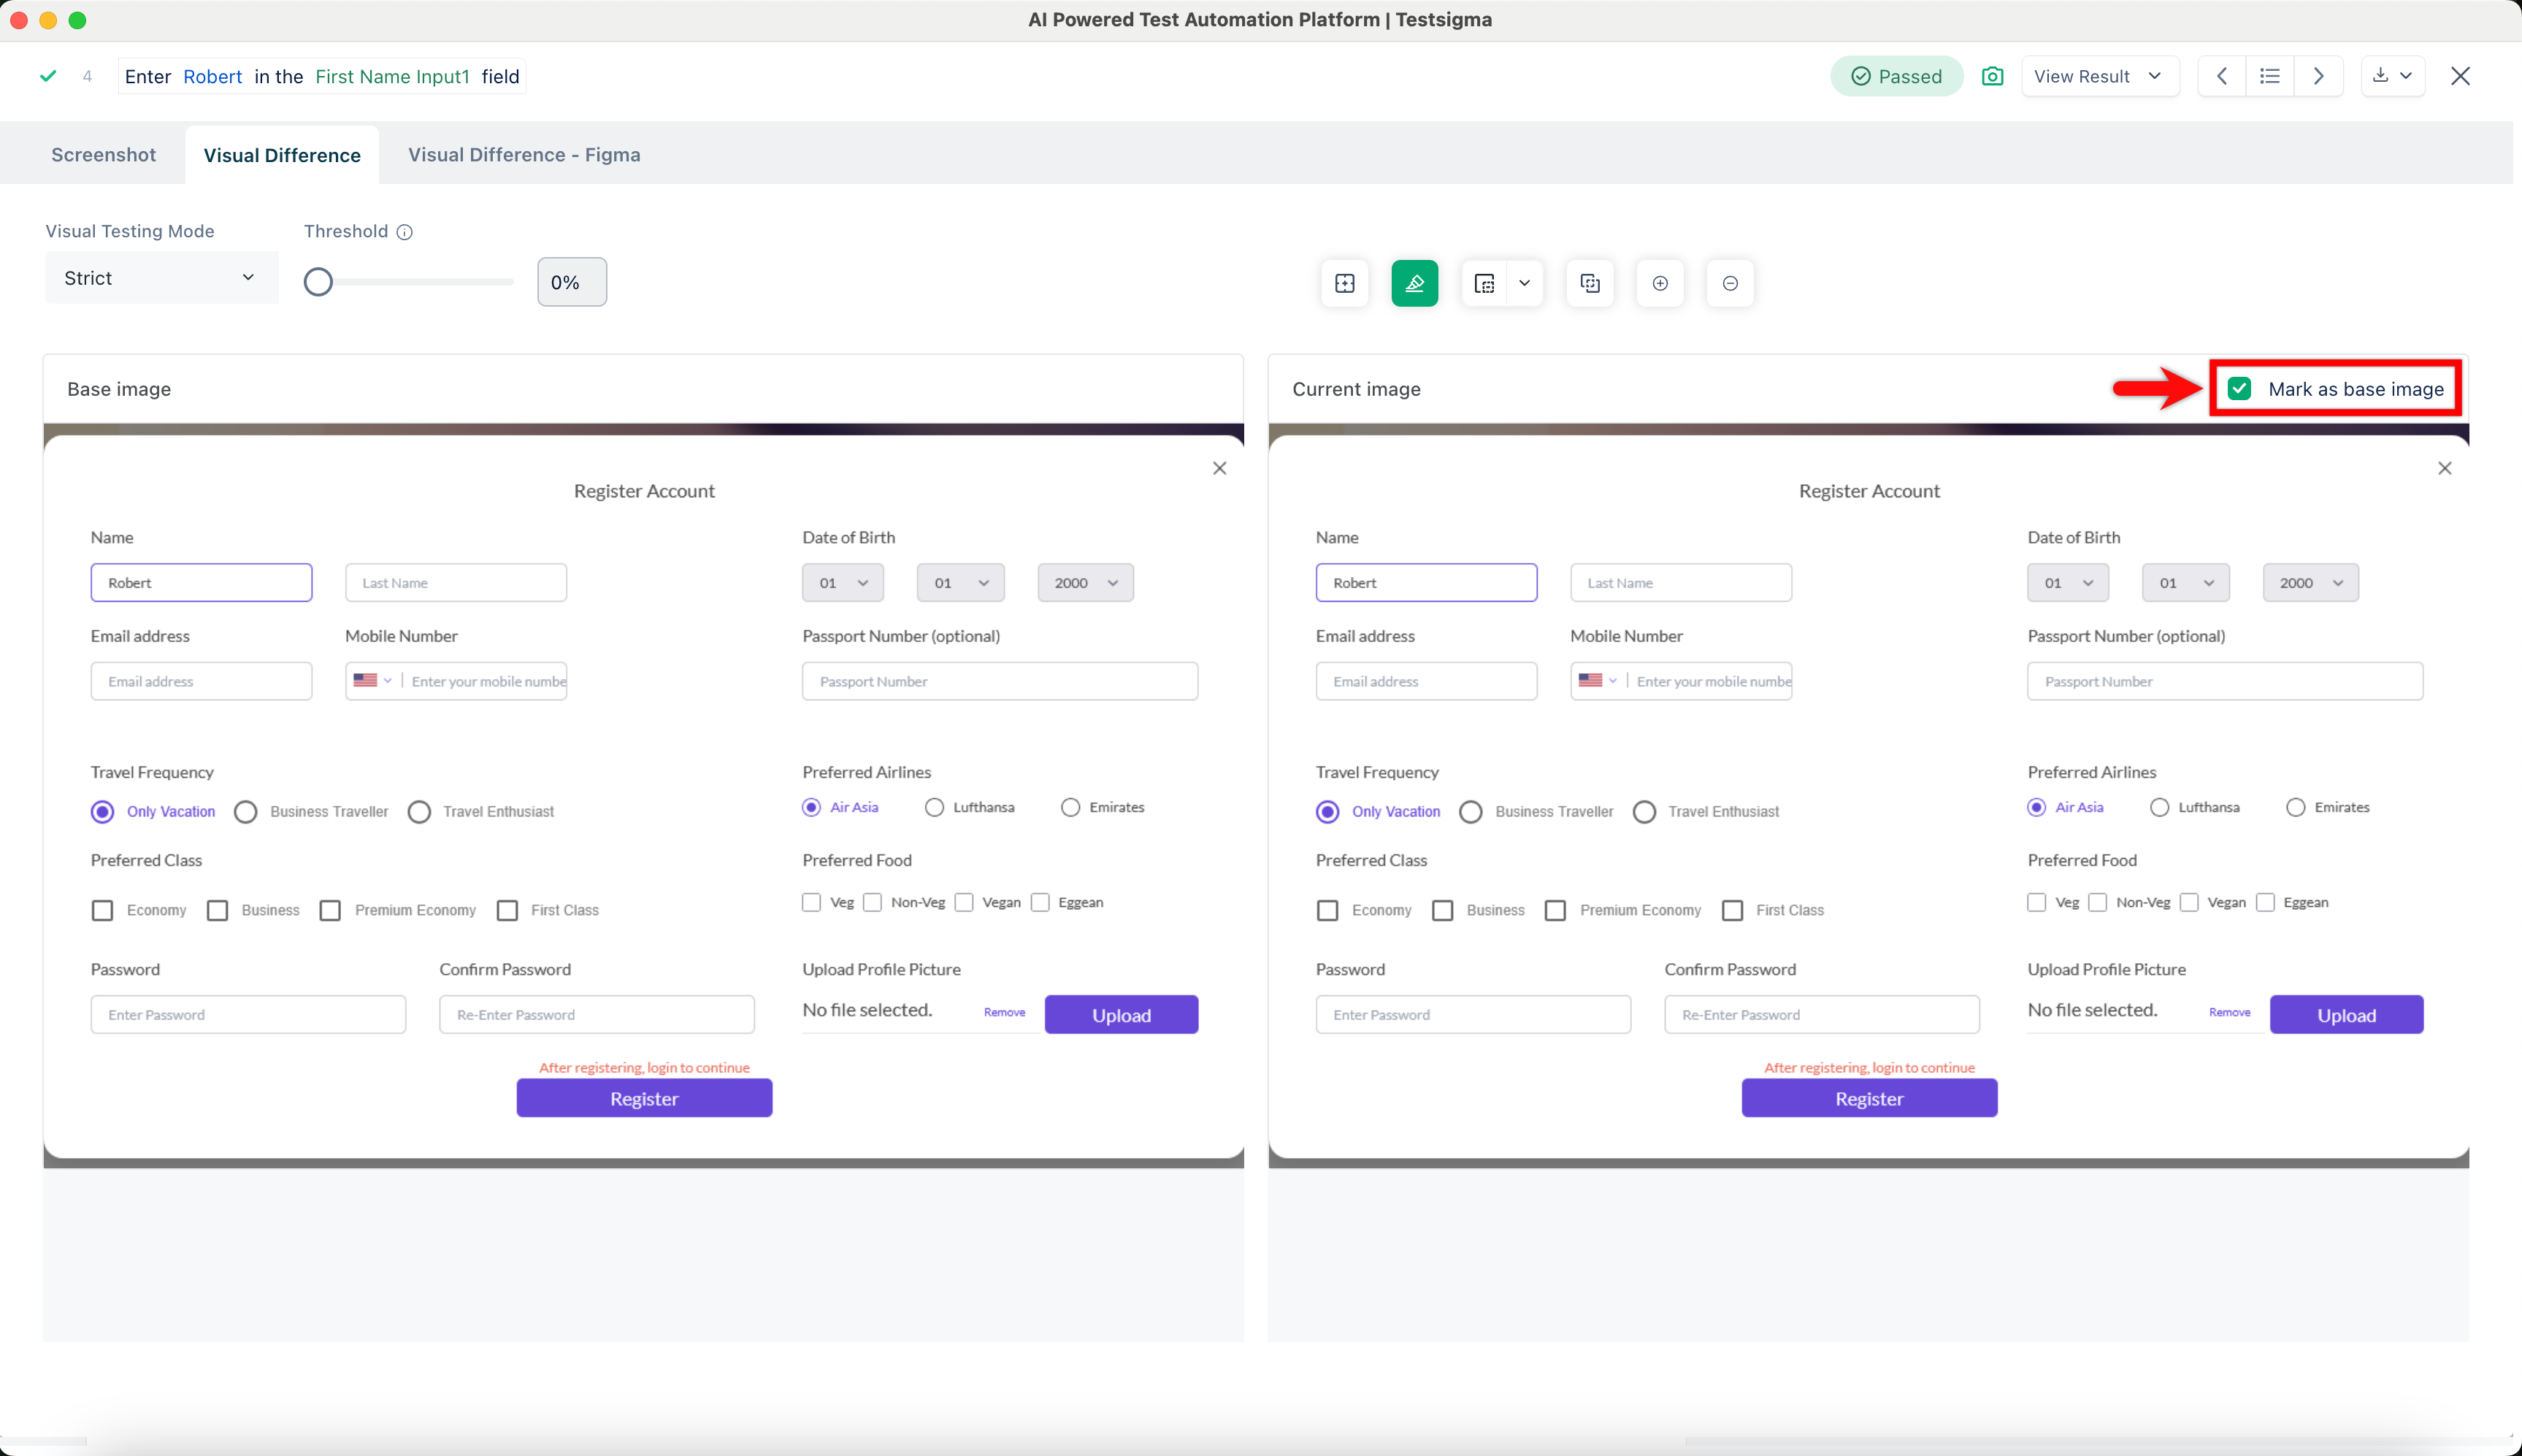
-
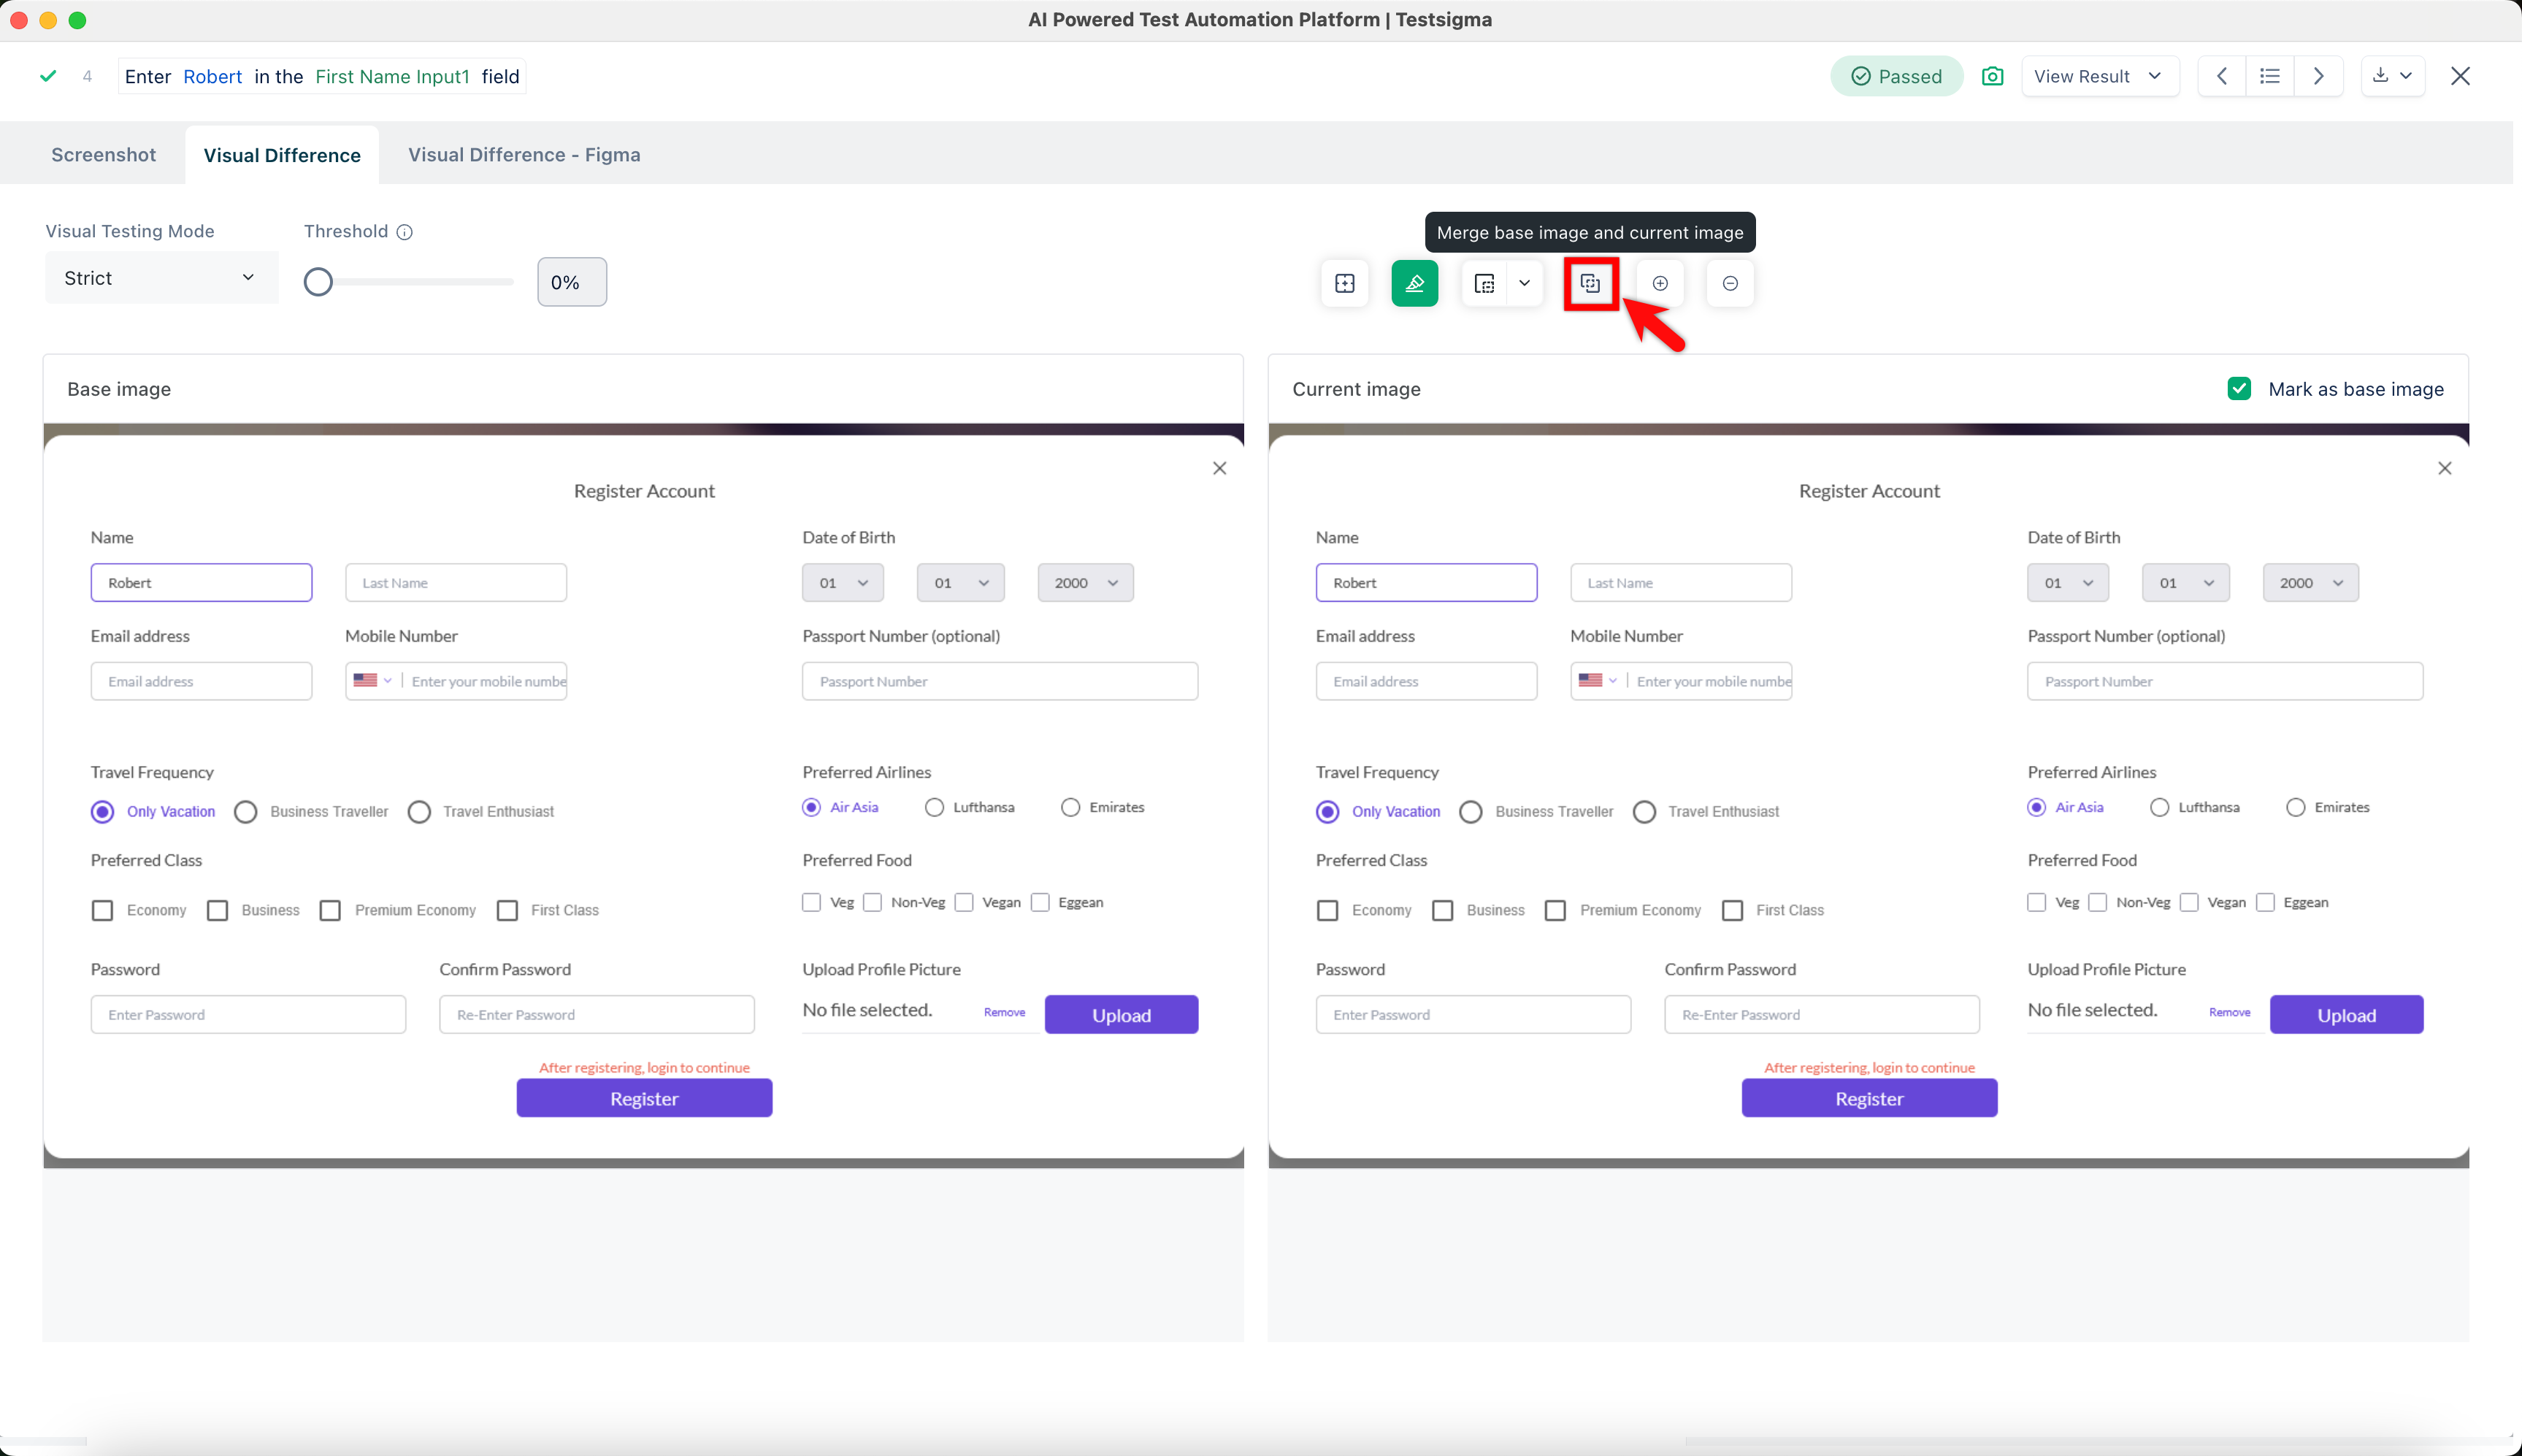
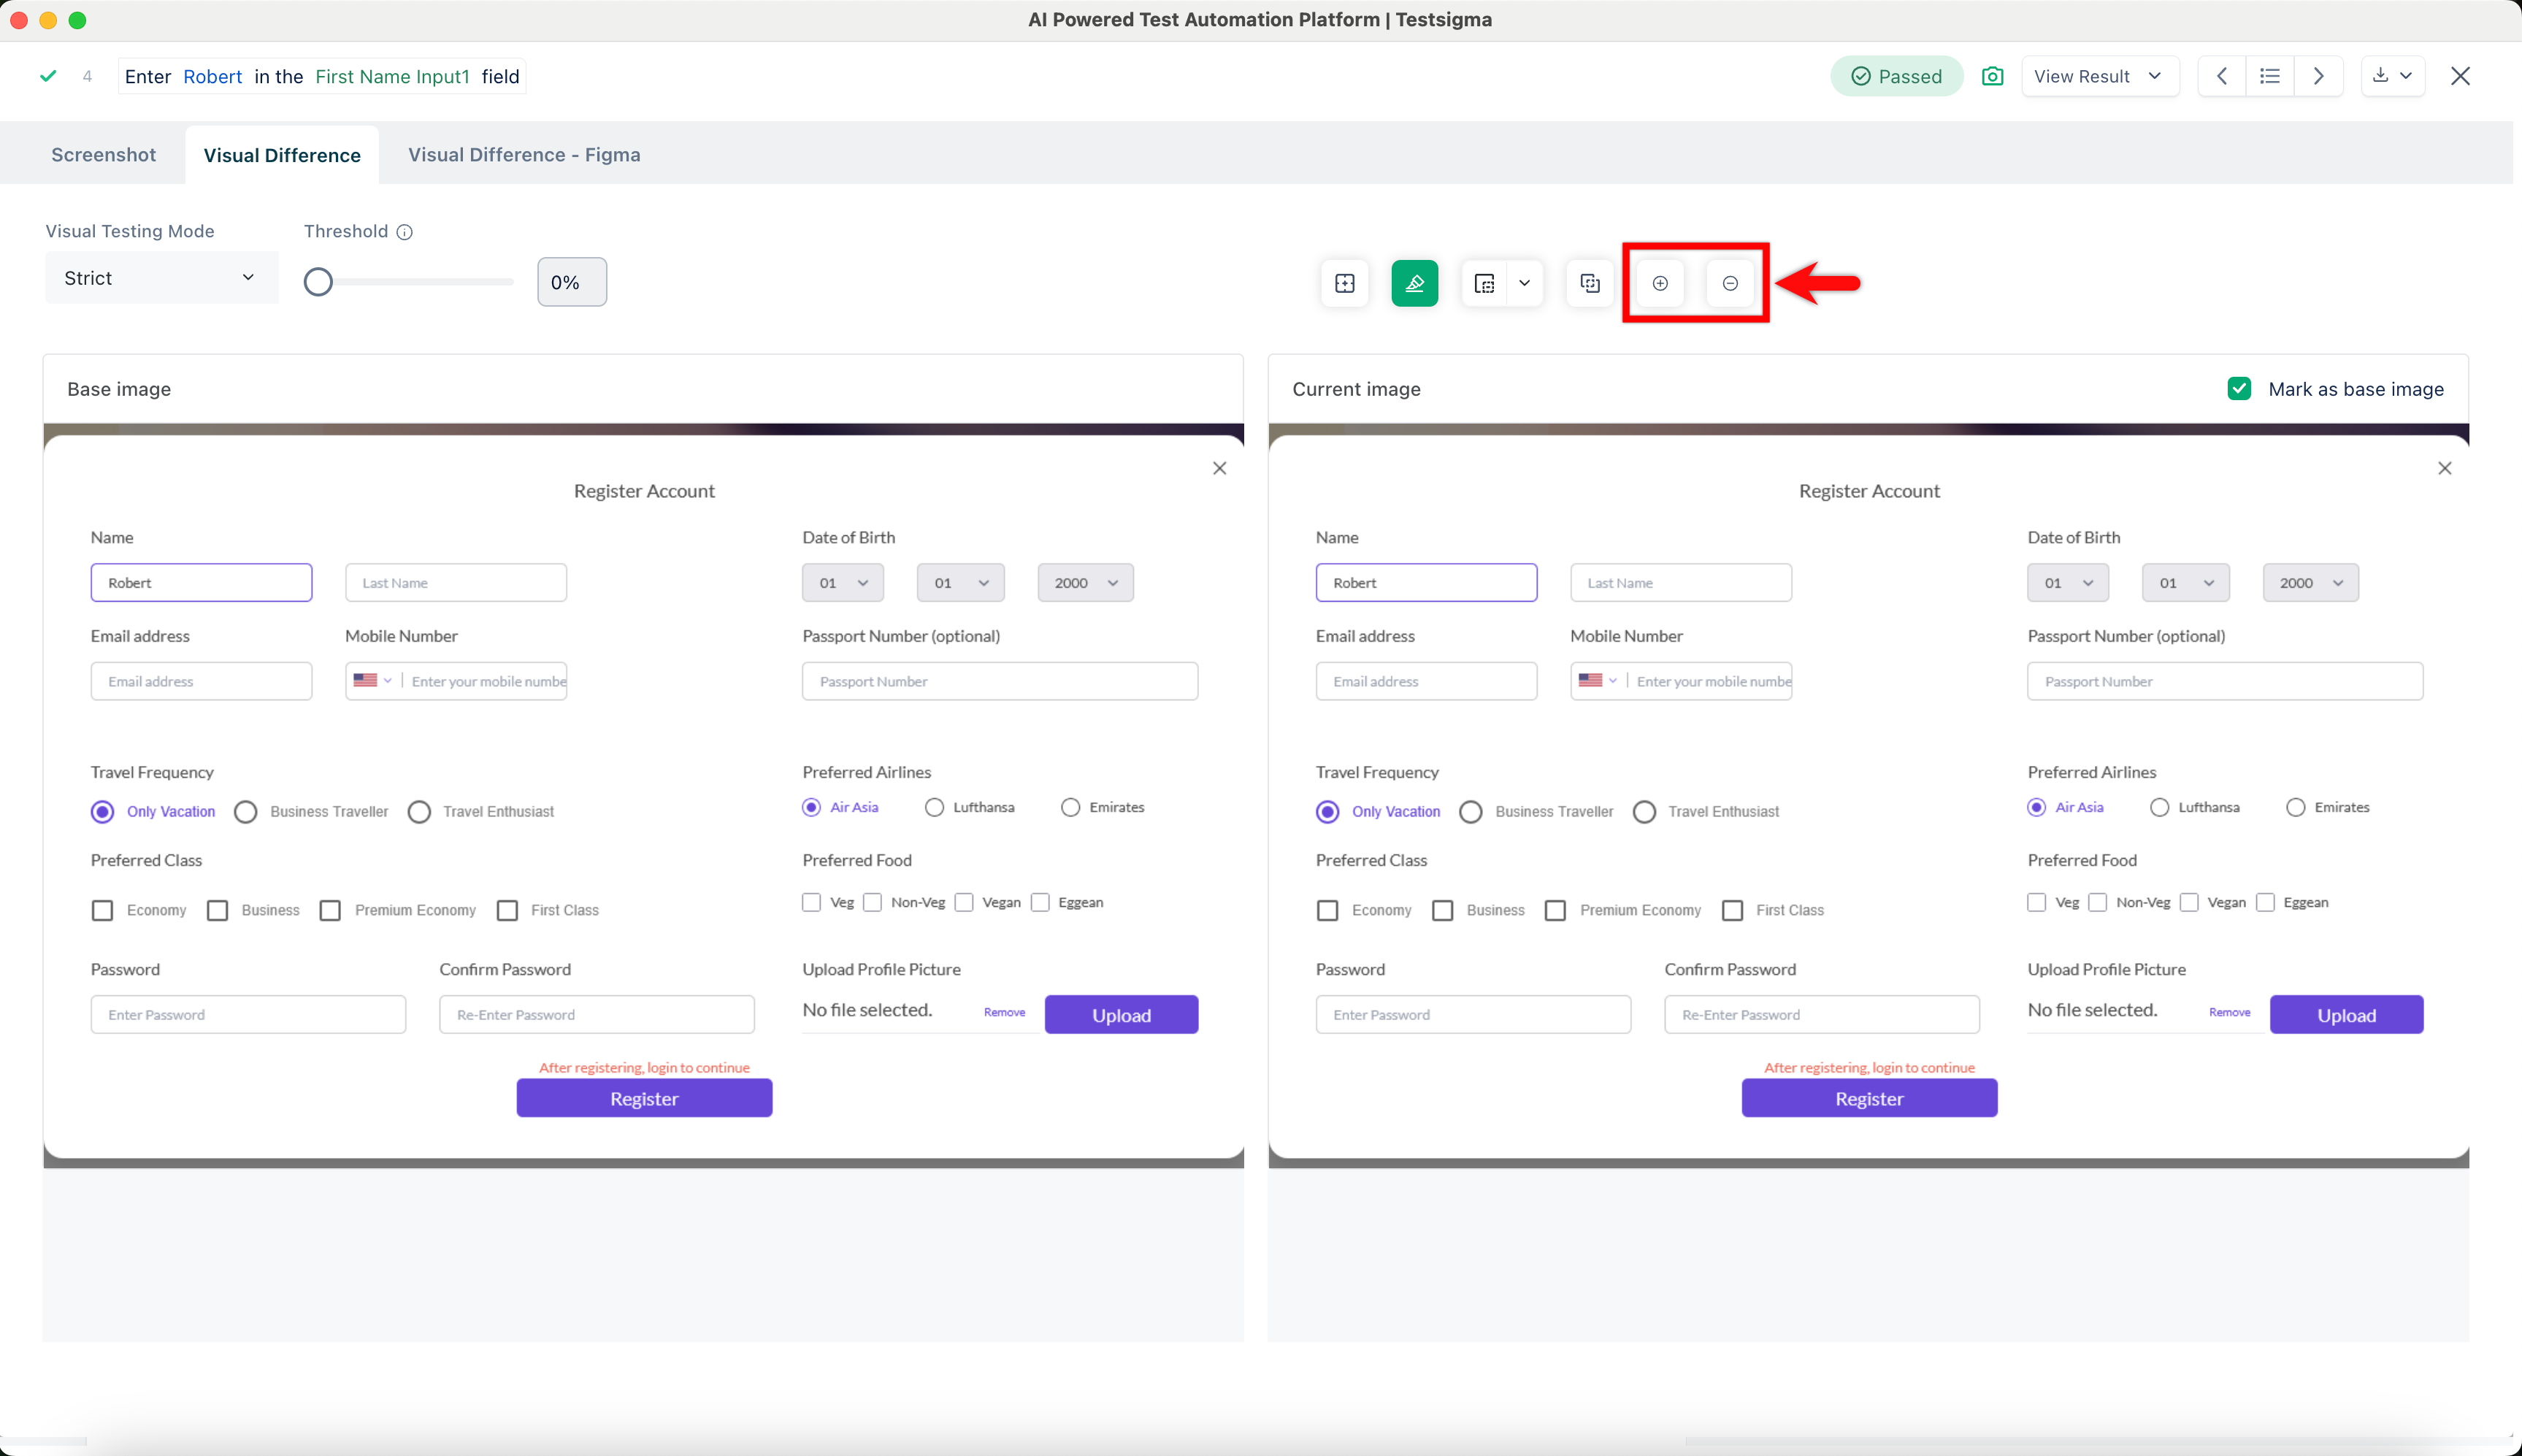
In Visual Difference overlay, you can perform the following options:
- Highlight Differences: Highlight variations in the display.
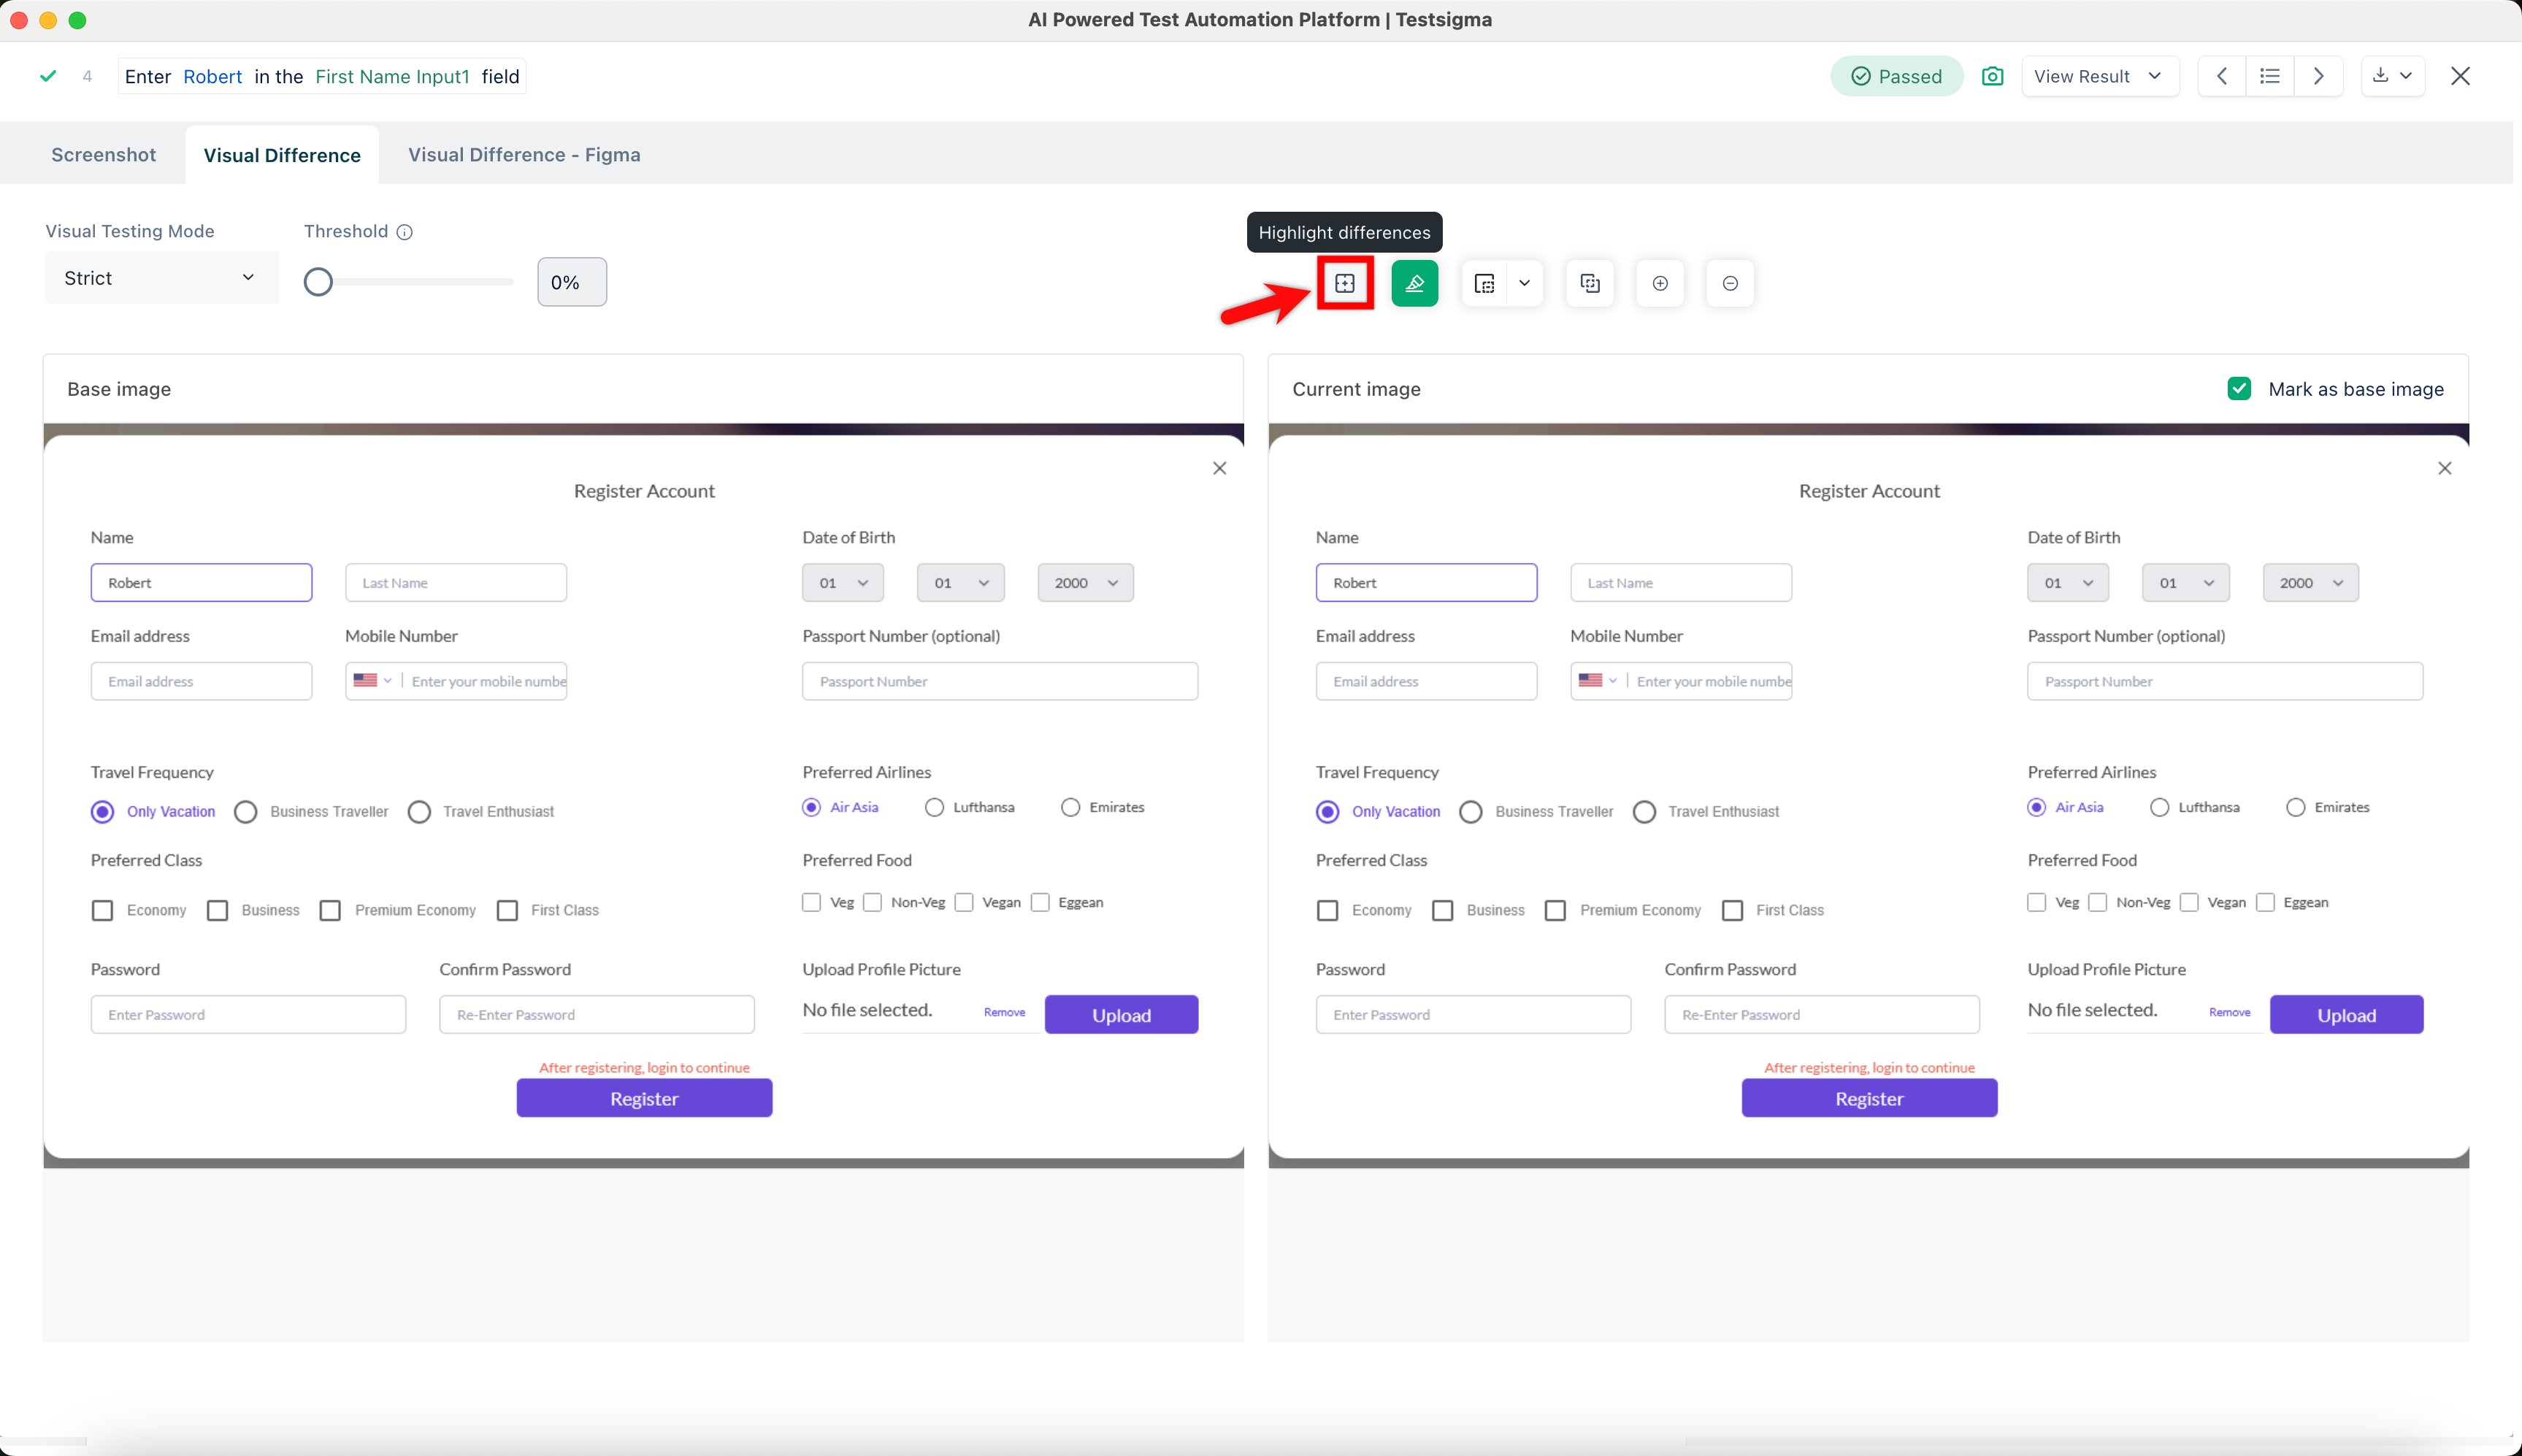
- Hide Visual Differences: Conceal any visible disparities.
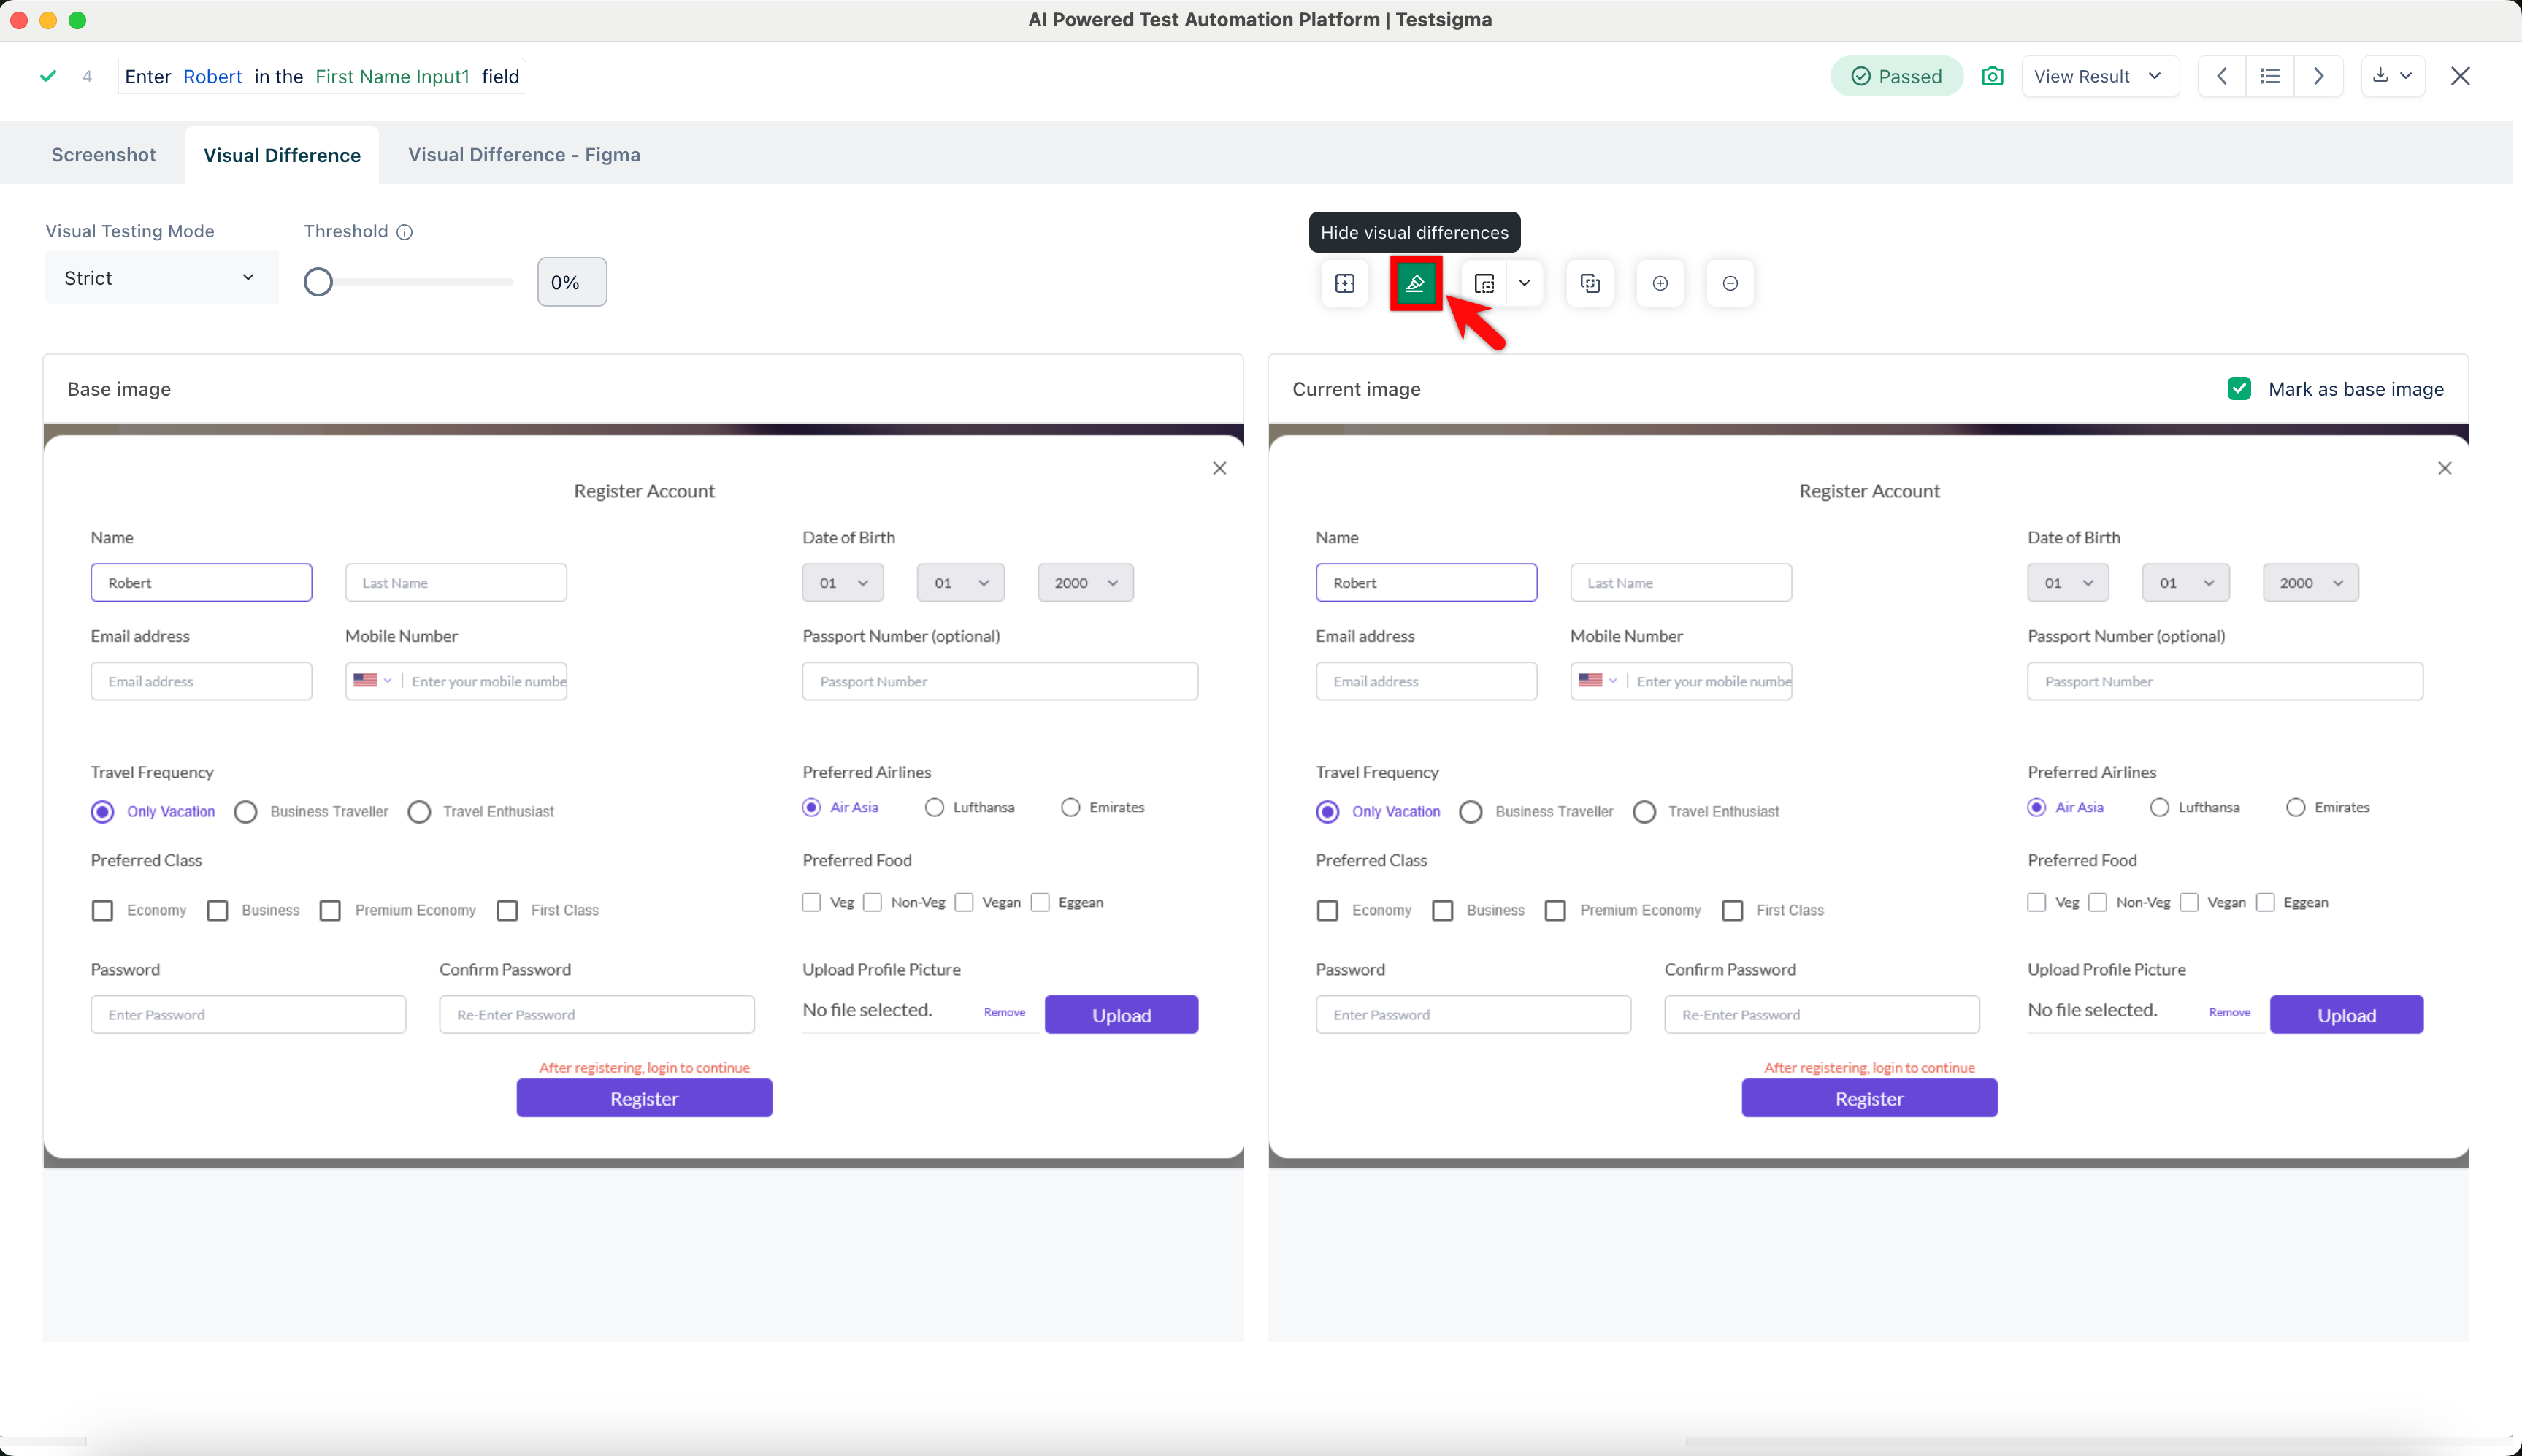
- Select region to ignore from visual comparison: Select areas not to compare visually.

- Merge base image and current image: Combine the original and current images for comparison.
- Zoom in and Zoom out: Enlarge or reduce the view for closer inspection.
- Highlight Differences: Highlight variations in the display.
- Next time you run the test case, you will compare the visuals from future runs with the new base image.
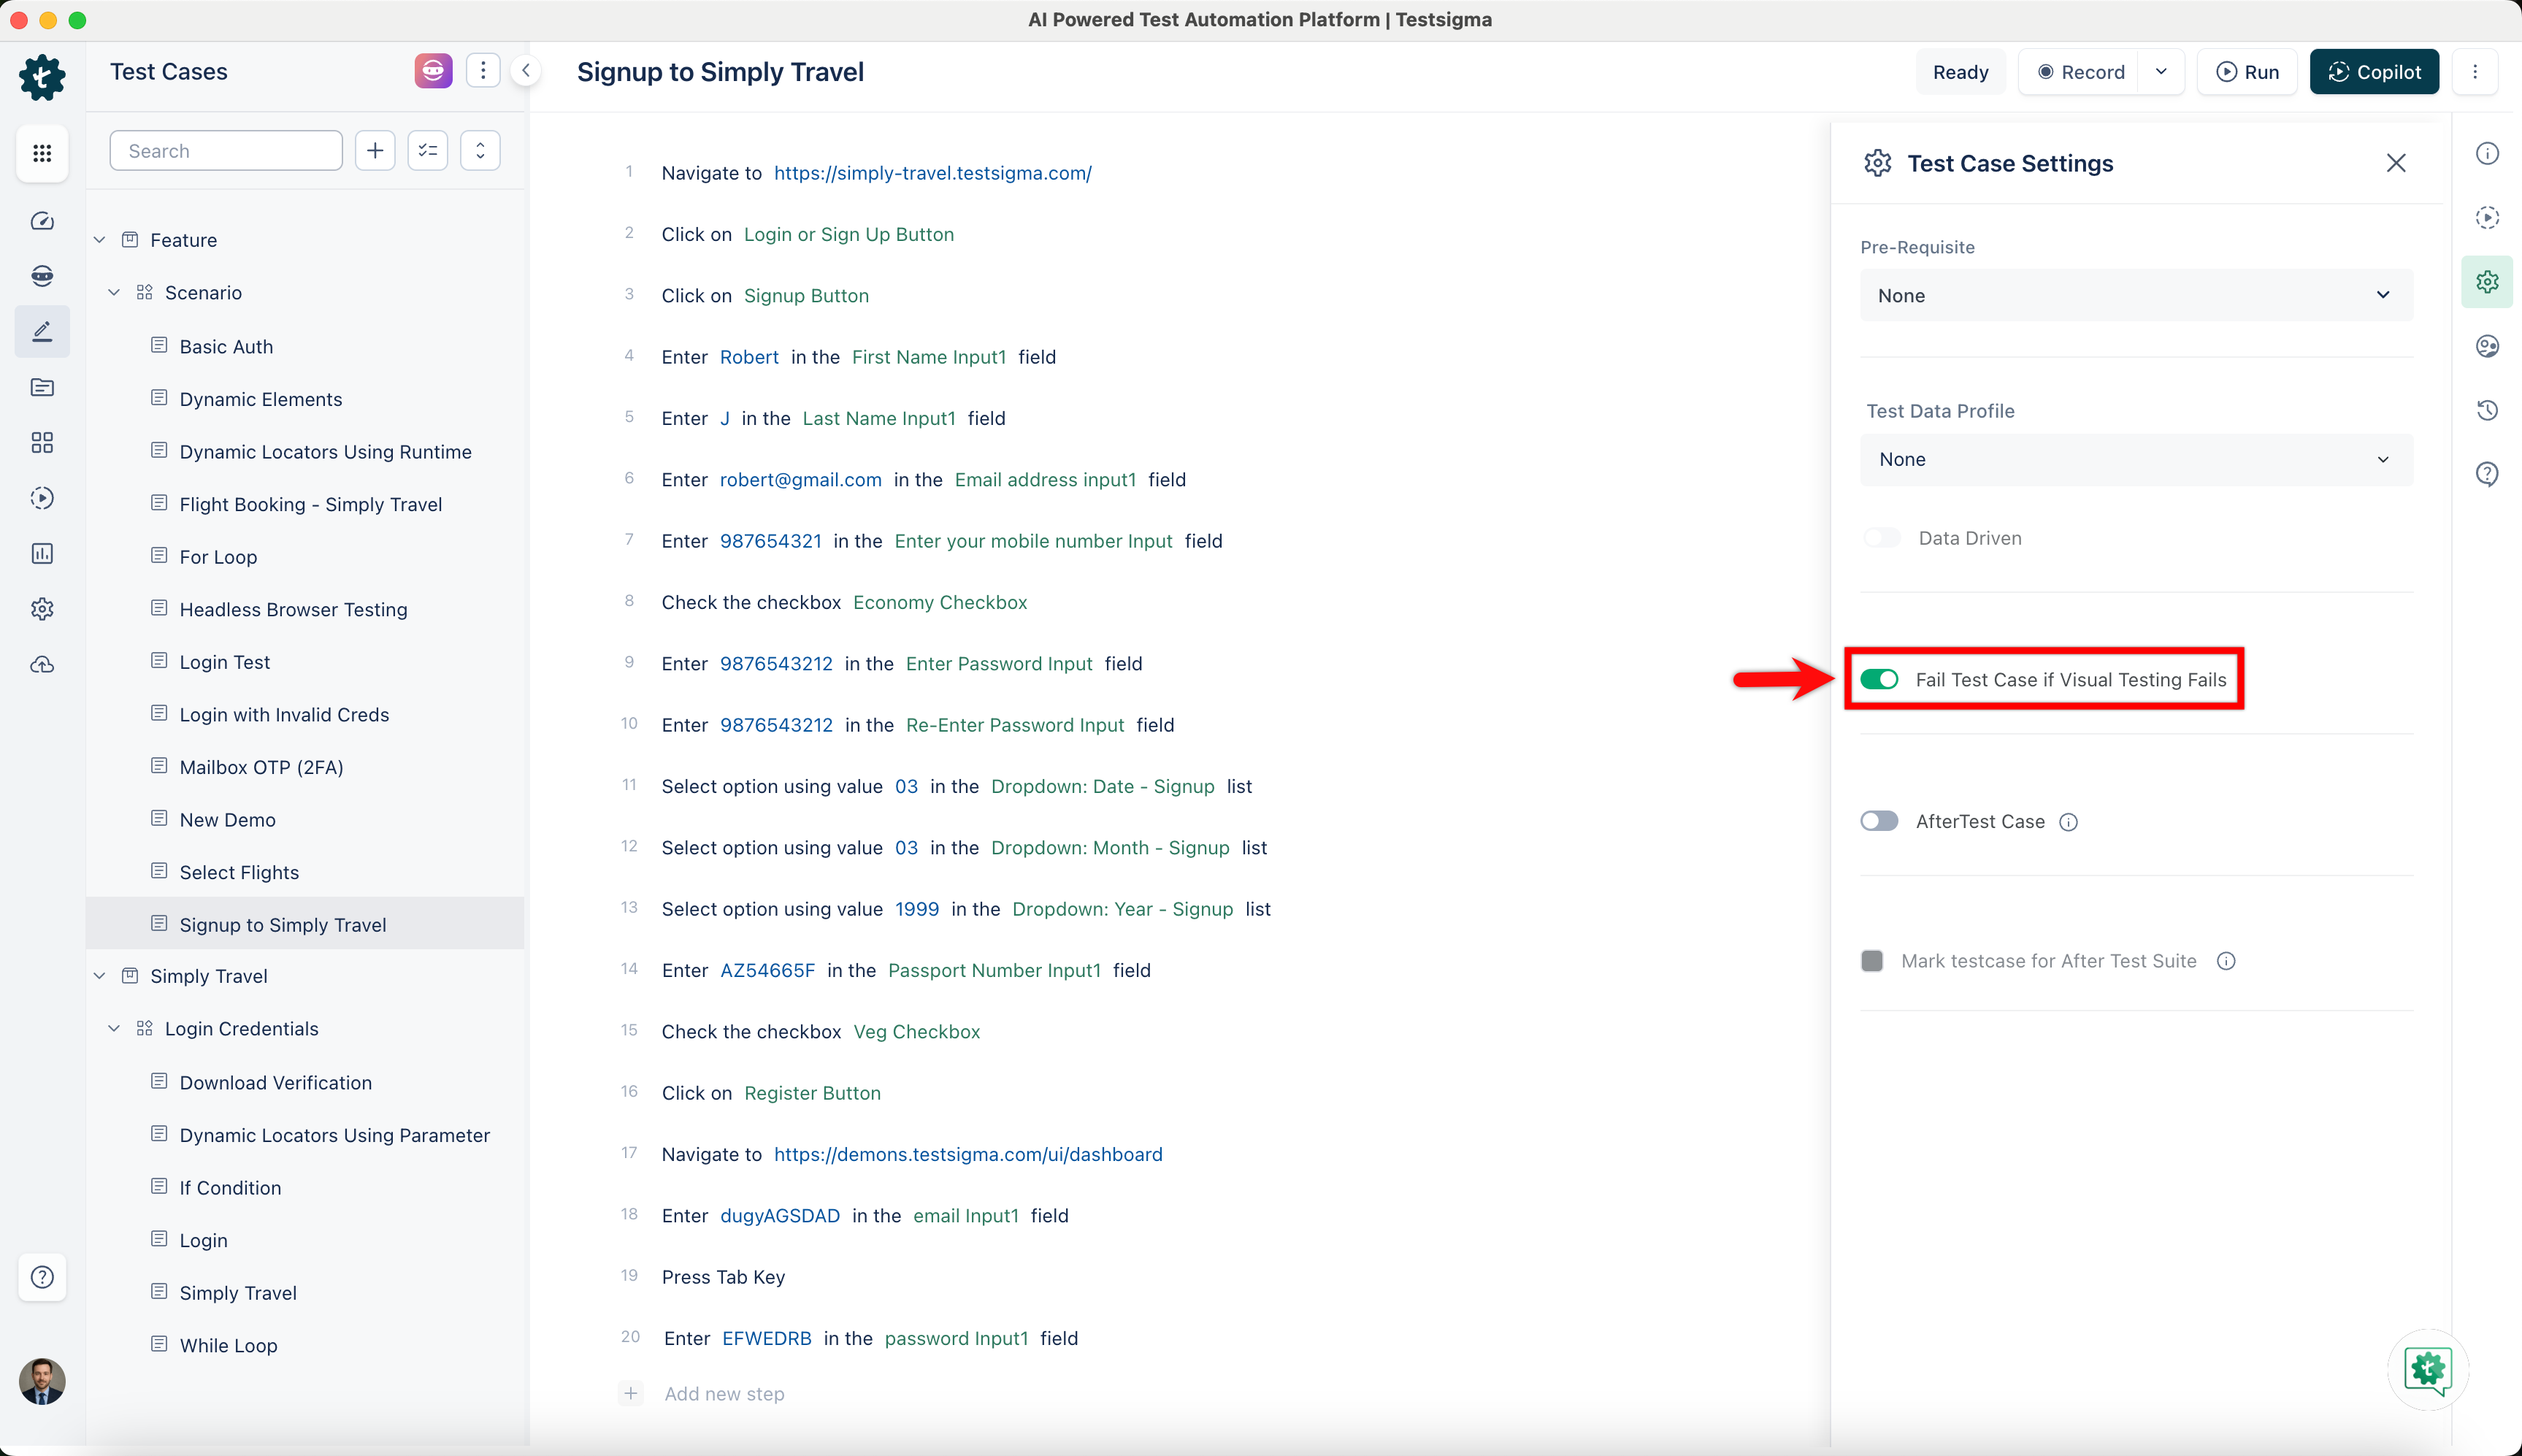
Perform Visual Testing in Test Case
- Follow the steps in the above section to Enable Visual Testing in Test Steps using documentation on utilising test step options or documentation on updating settings. Refer to the documentation on marking the baseline image and run the test case to identify visual differences in the UI.
- Click on Test Case Settings in the right-side navbar and enable the Fail Test Case if Visual Testing Fails toggle to automatically mark a test case as failed if it detects visual differences during execution.
Optimizing Visual Testing with Ignore Sections
Ignoring specific sections will exclude dynamic elements from the comparison process, which reduces false positives from content such as ads, timestamps, or user-specific data. This ensures that only meaningful changes are flagged for review.
Steps to Configure Ignore Sections for Visual Testing
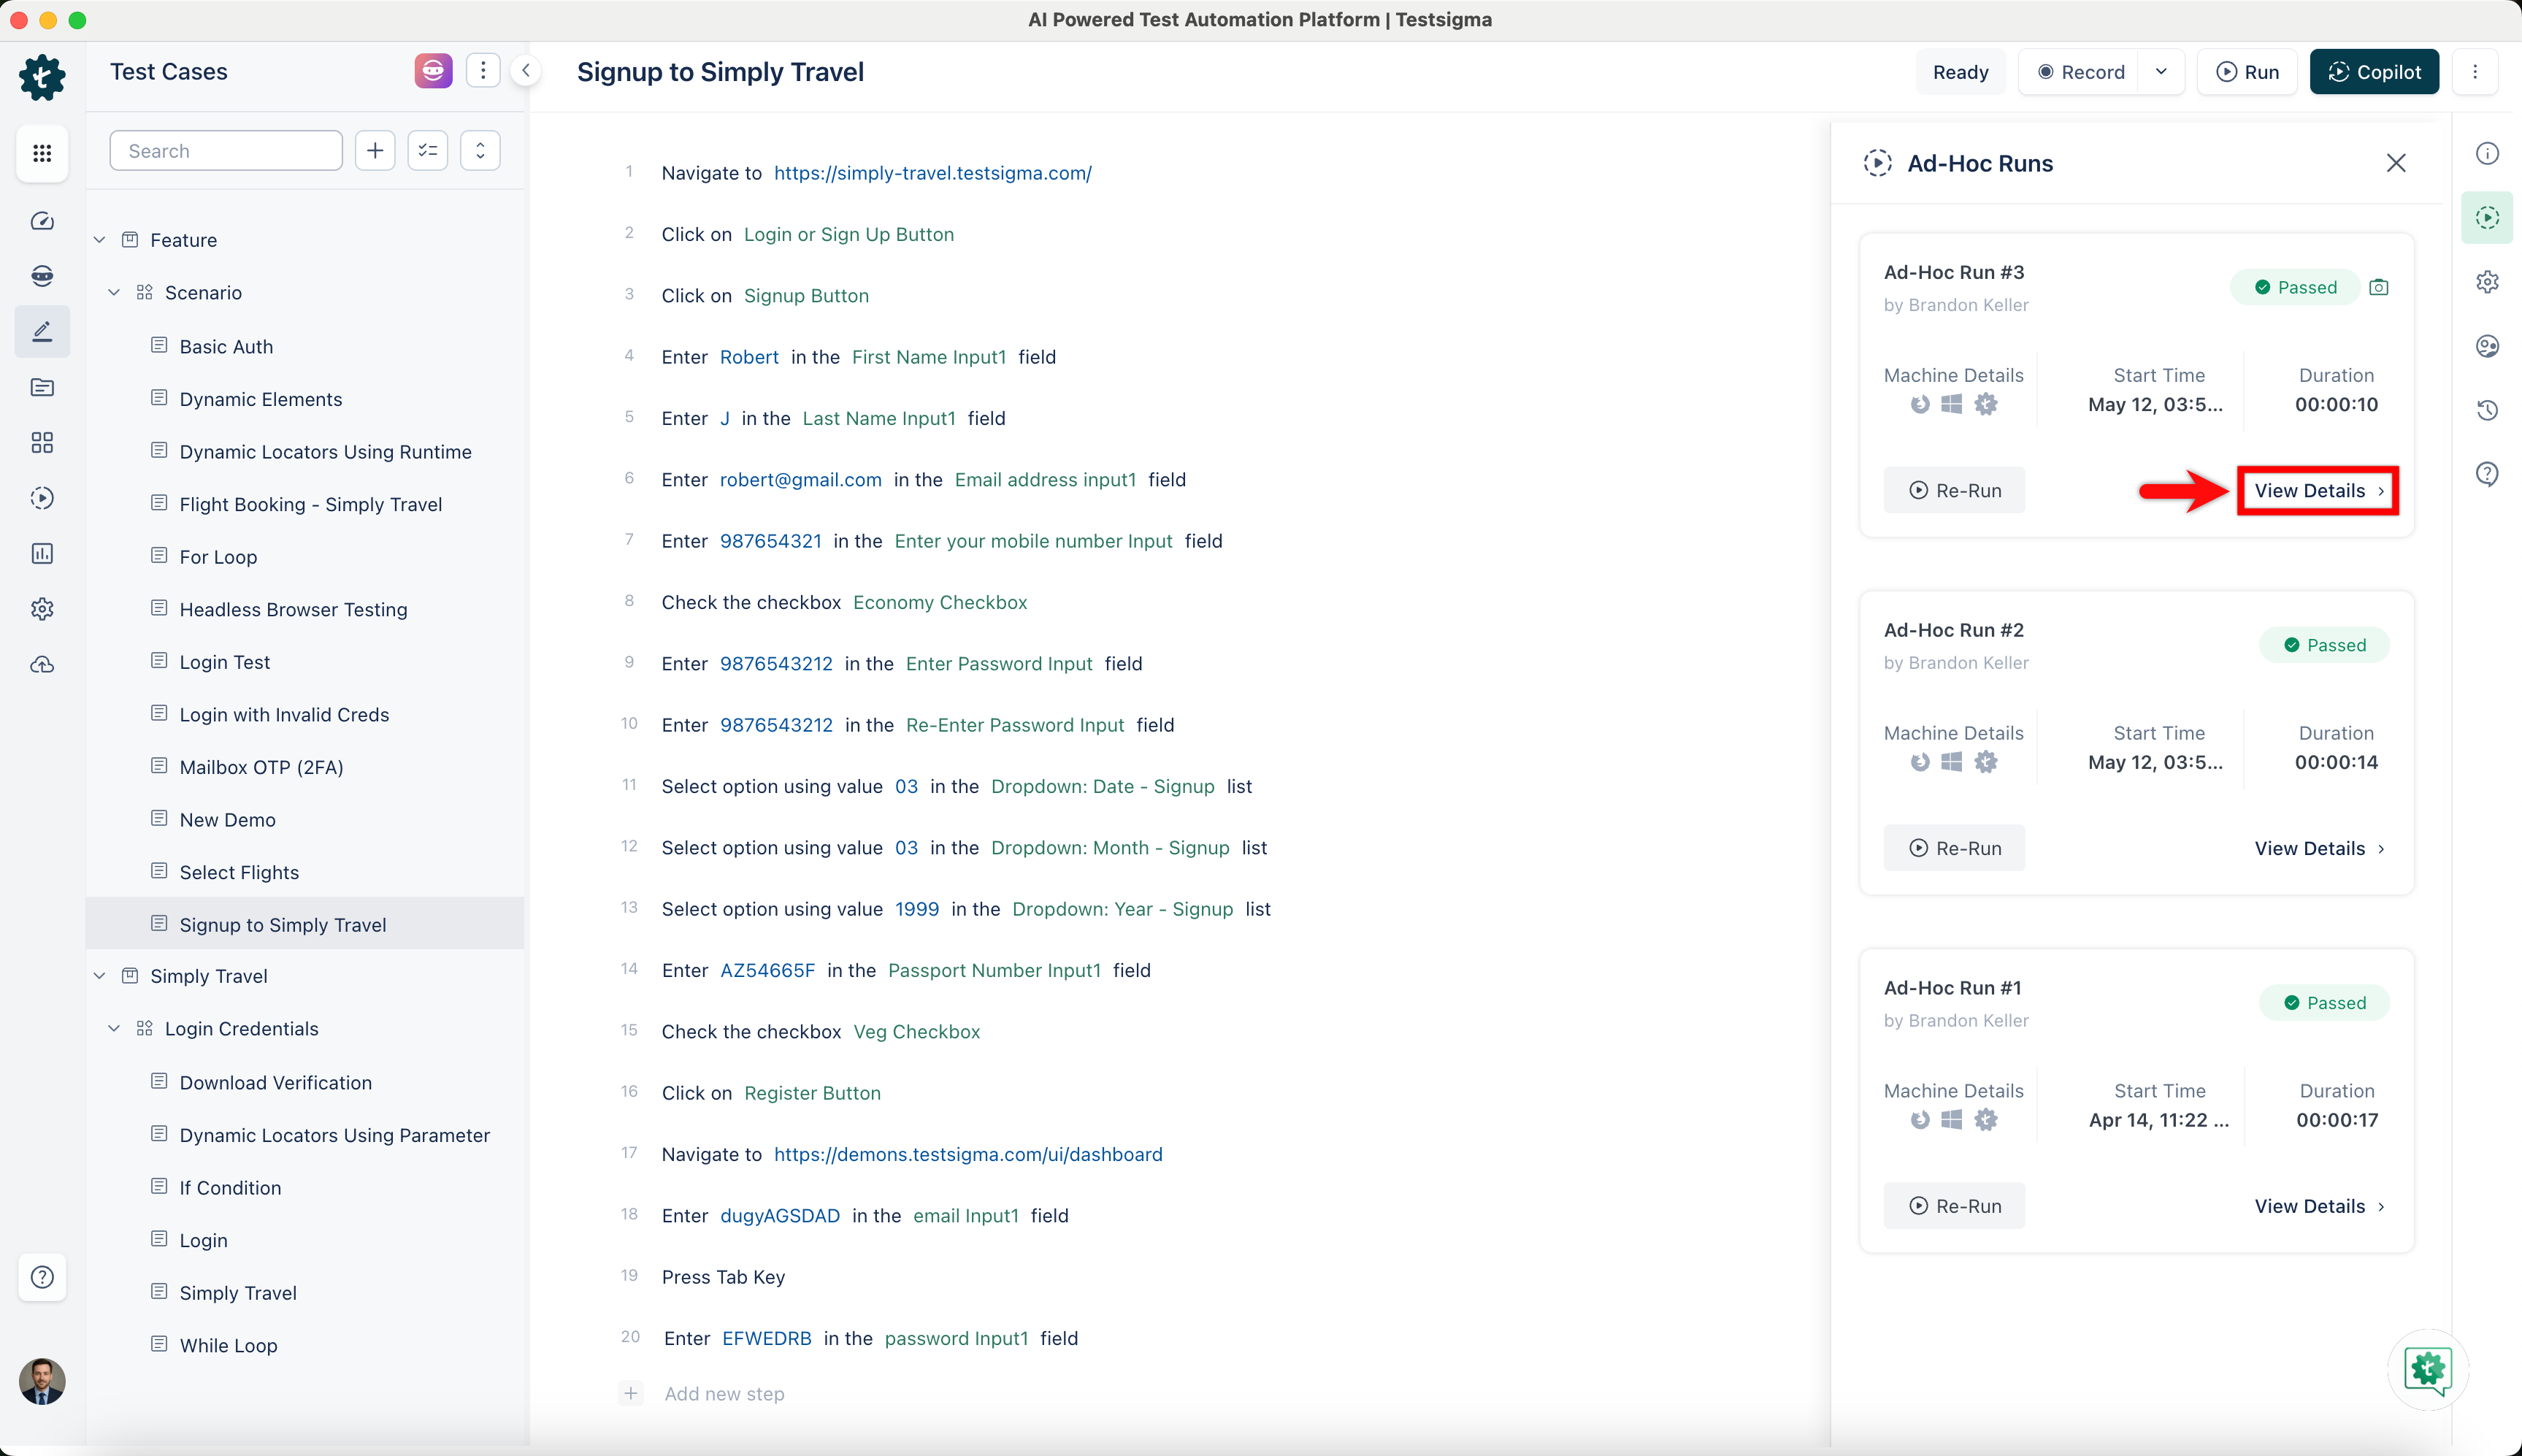
- Click Ad-hoc Runs in the right navigation bar, then click View Details to open the test case result page.
- Click the Camera icon to open the Visual Difference overlay screen.
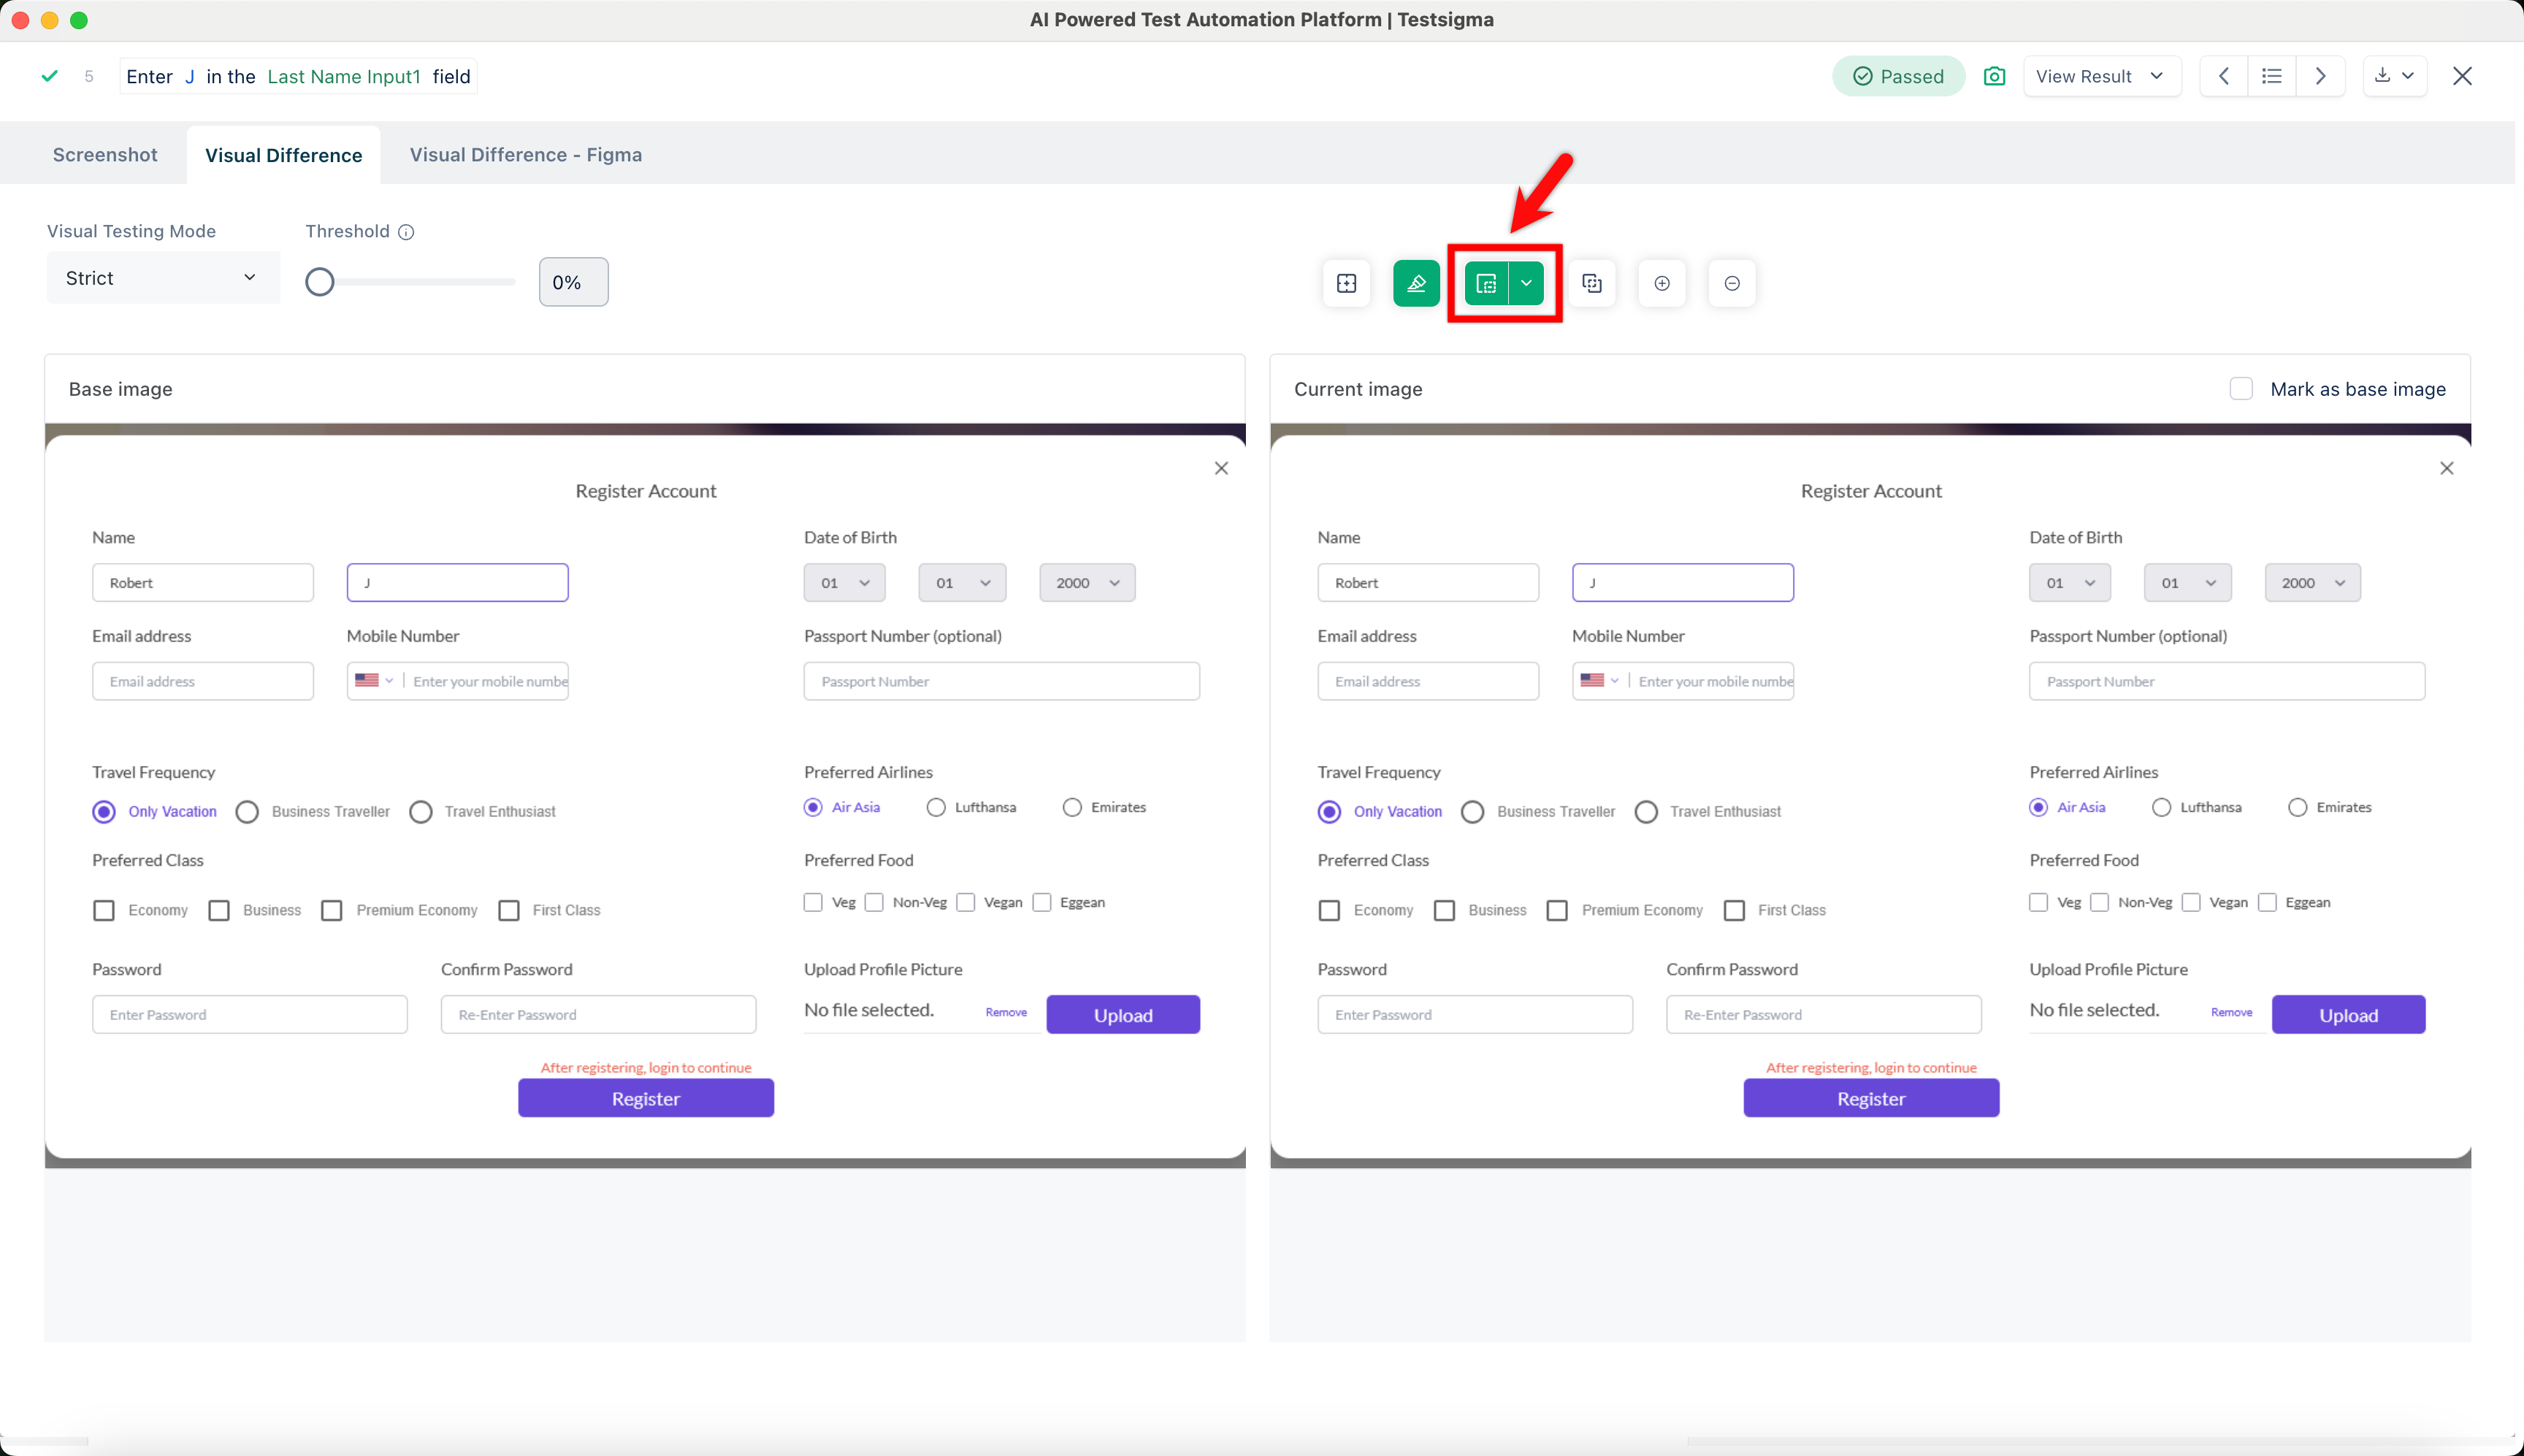
- Select Select region to ignore from visual comparison and choose the areas you want to exclude from the visual comparison.
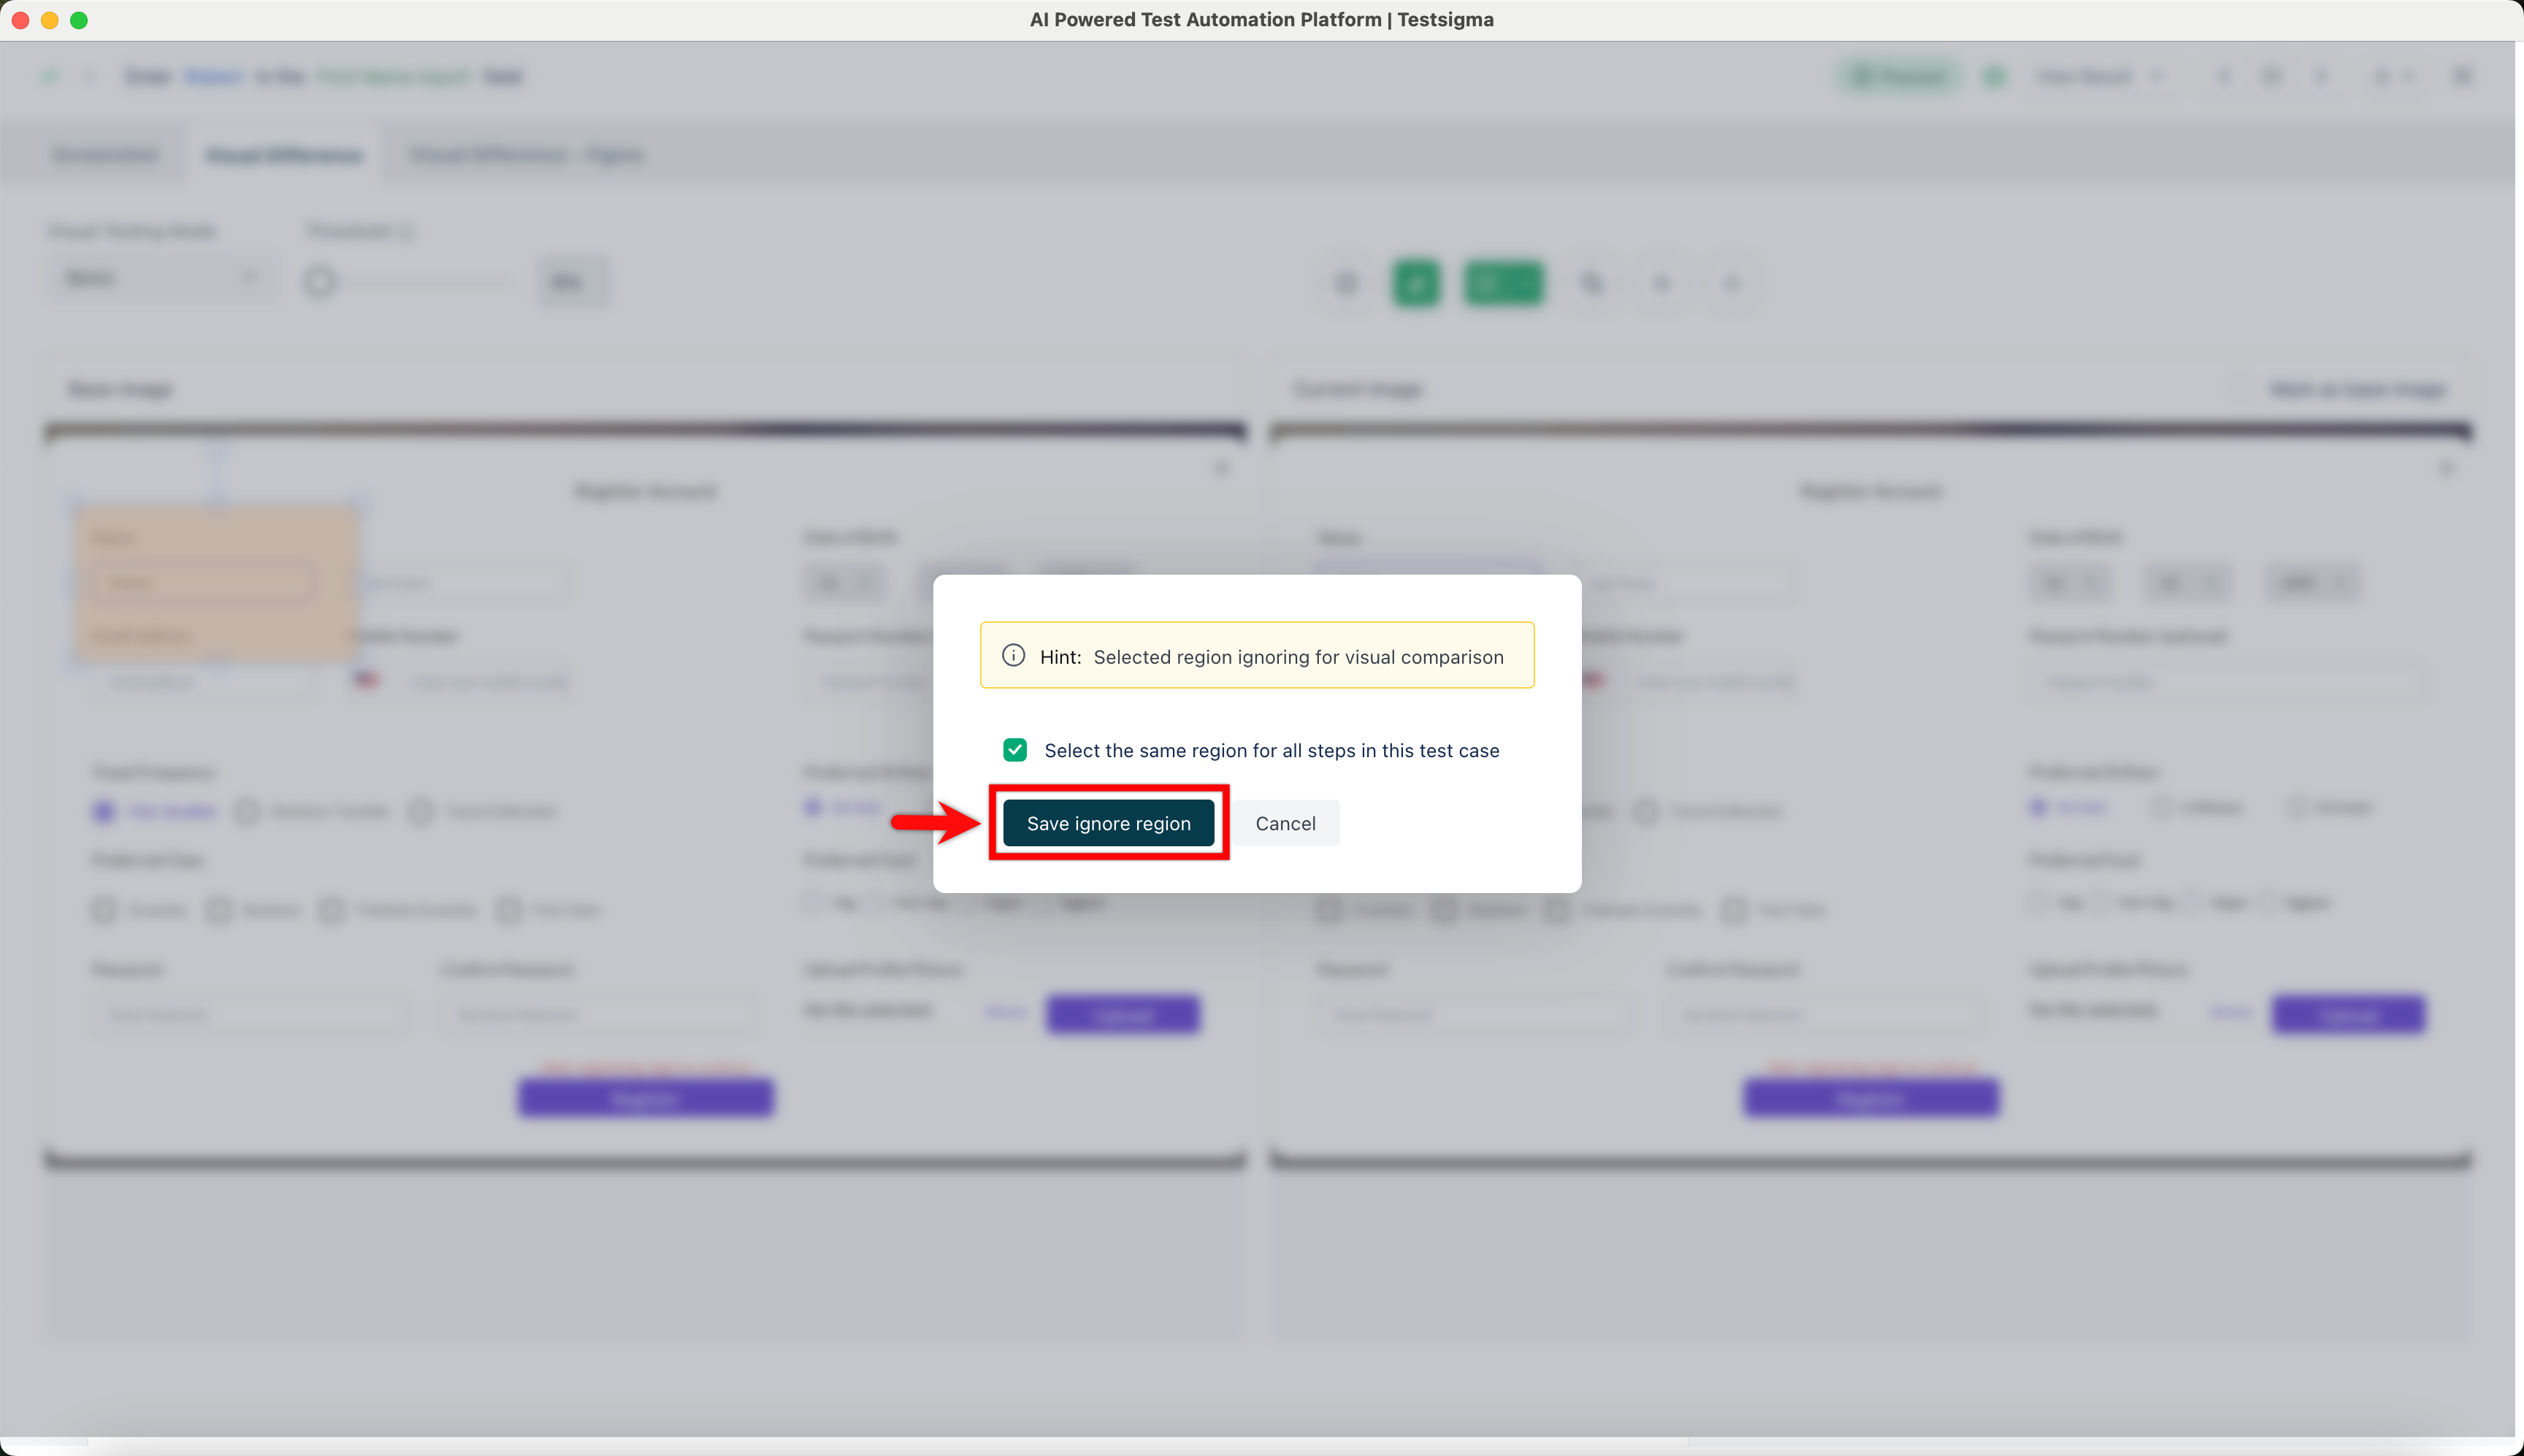
- On the dialog box, click Save ignore region.
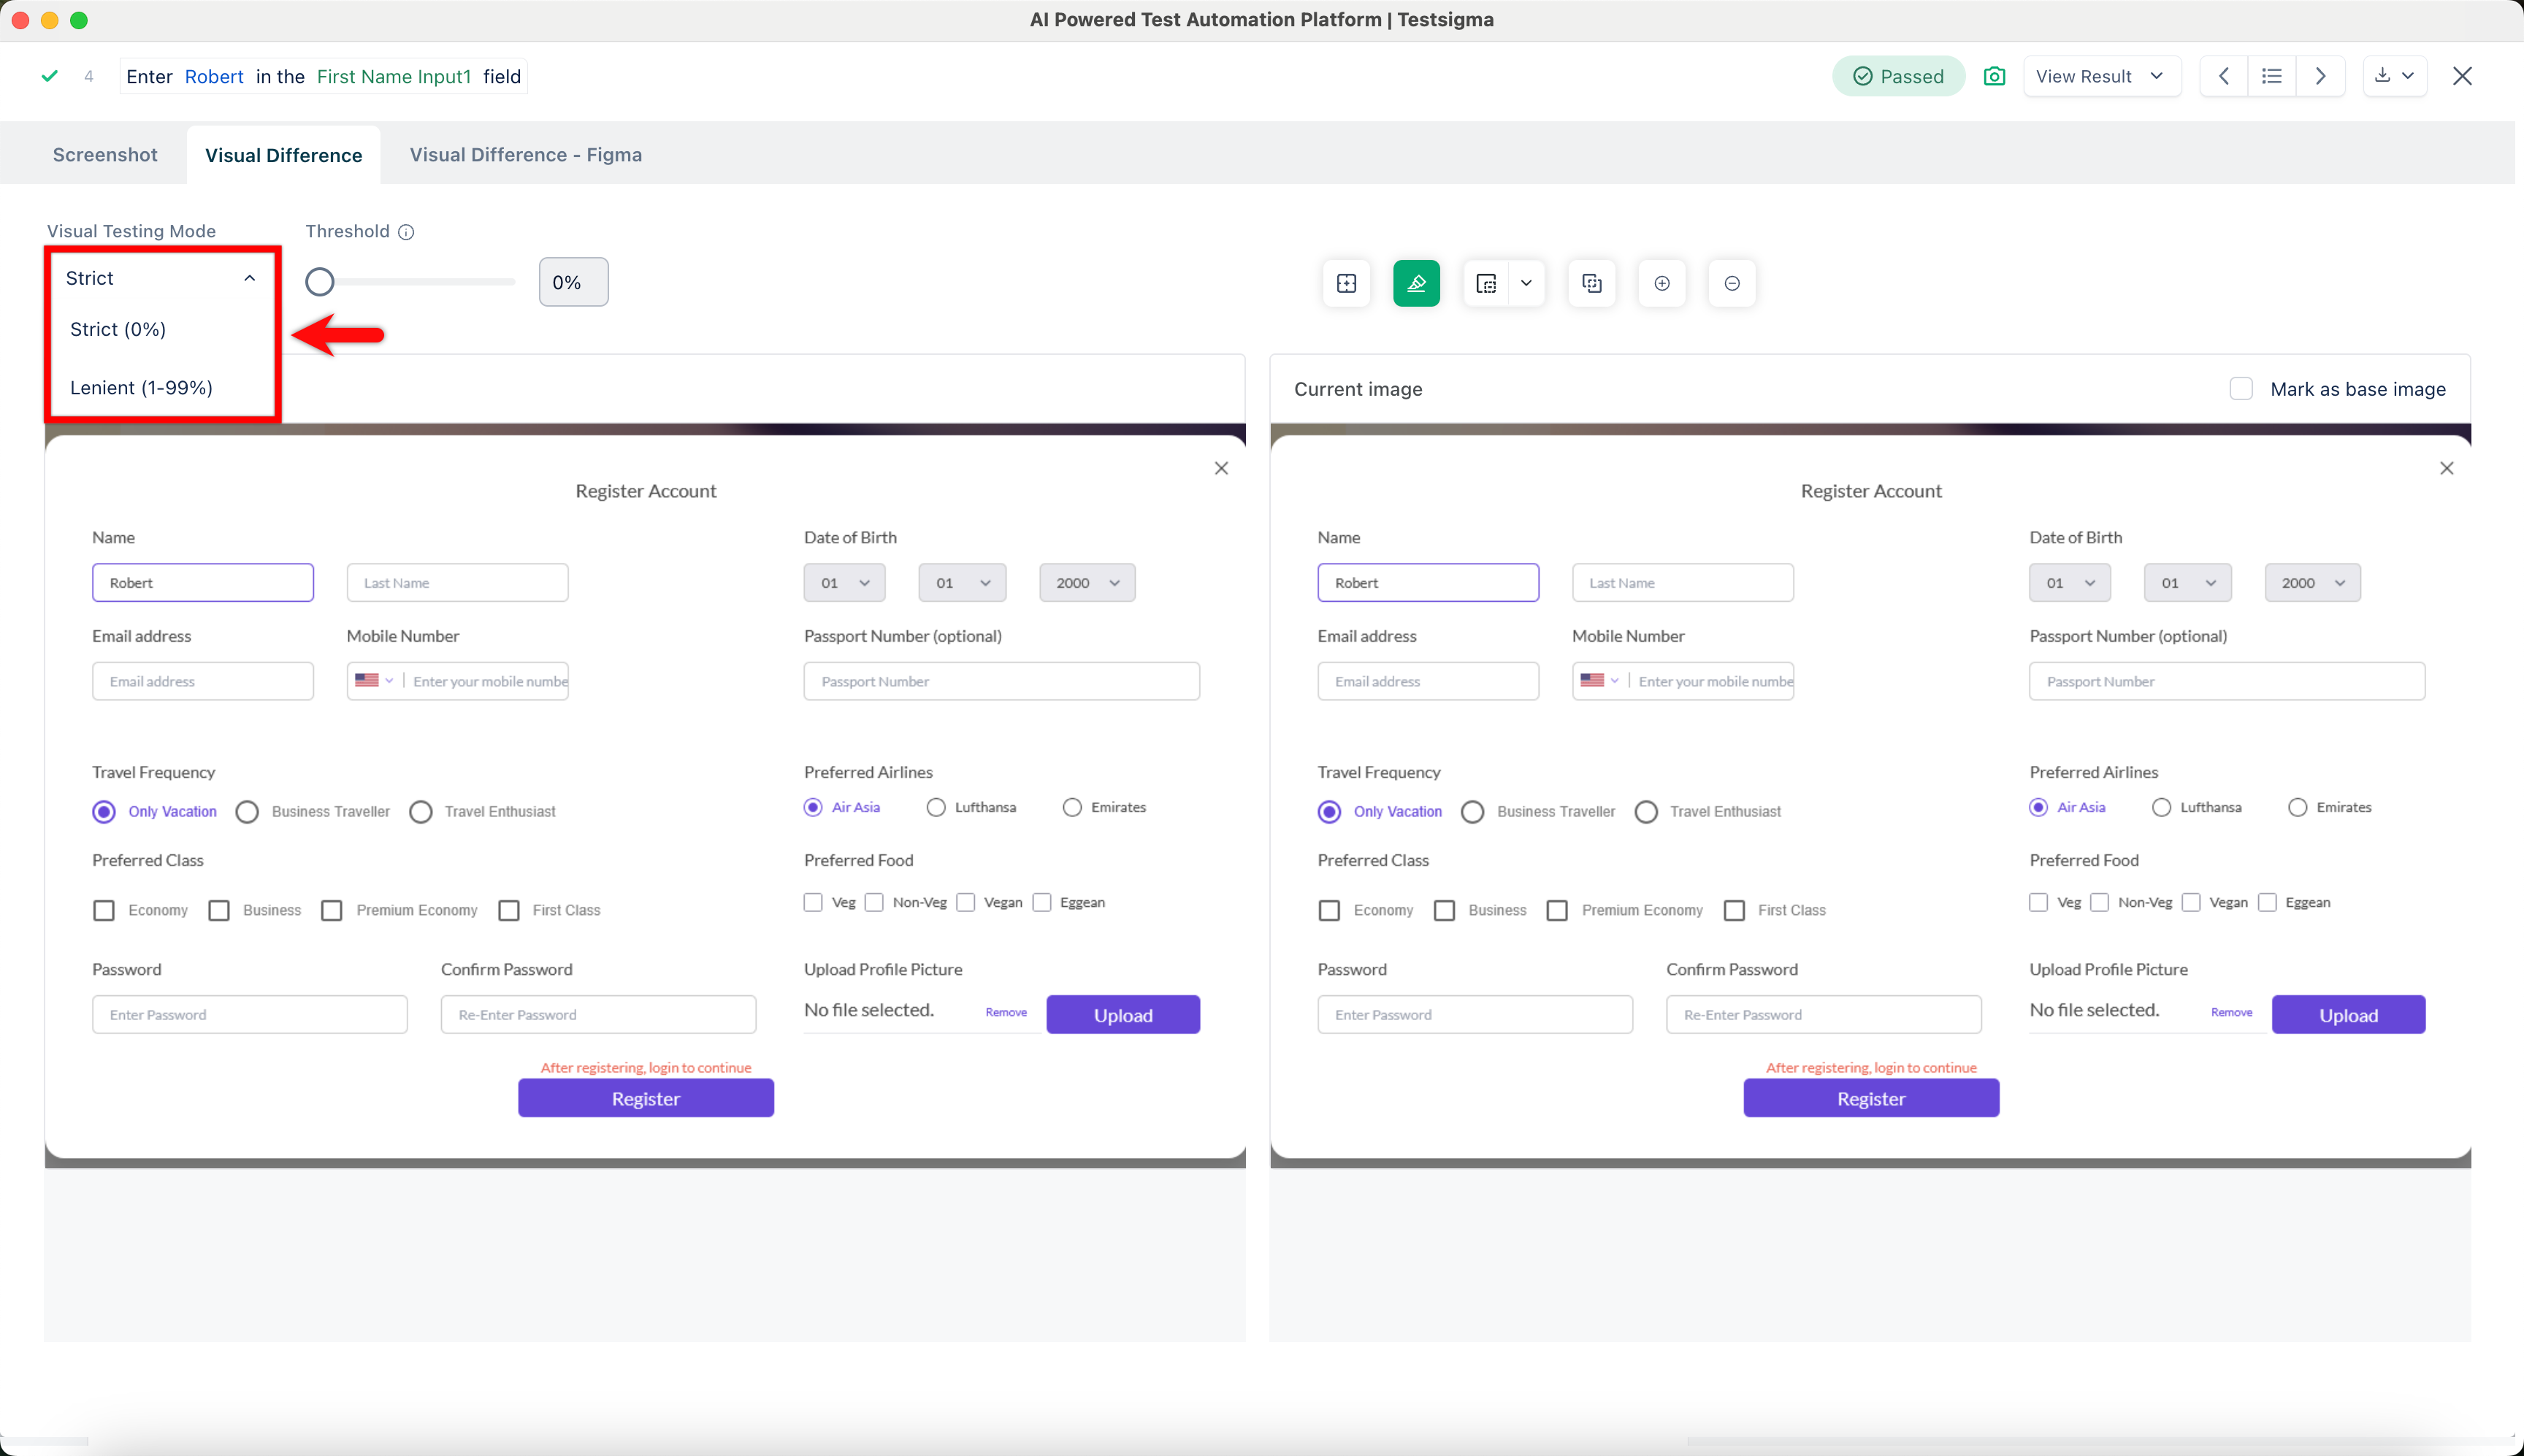
Visual Testing Mode
In Testsigma, Visual Testing helps compare base and current images using two modes: Strict and Lenient. Strict mode performs a full pixel-by-pixel comparison for exact matches. Lenient mode also compares pixel by pixel but allows you to set a threshold percentage. For example, if you set the threshold to 70%, Testsigma checks that 70% of the pixels are identical and ignores differences in the other 30%.
If you don’t want to compare entire images, you can focus on specific areas using the Select Region feature and apply Strict or Lenient mode as needed. Similarly, the Ignore Region option lets you exclude certain areas from comparison.
Steps to Set the Visual Testing Mode
- Click Ad-hoc Runs in the Utility Panel, then click View Details to open the test case result page.
- Click the Camera icon to open the Visual Difference overlay screen.
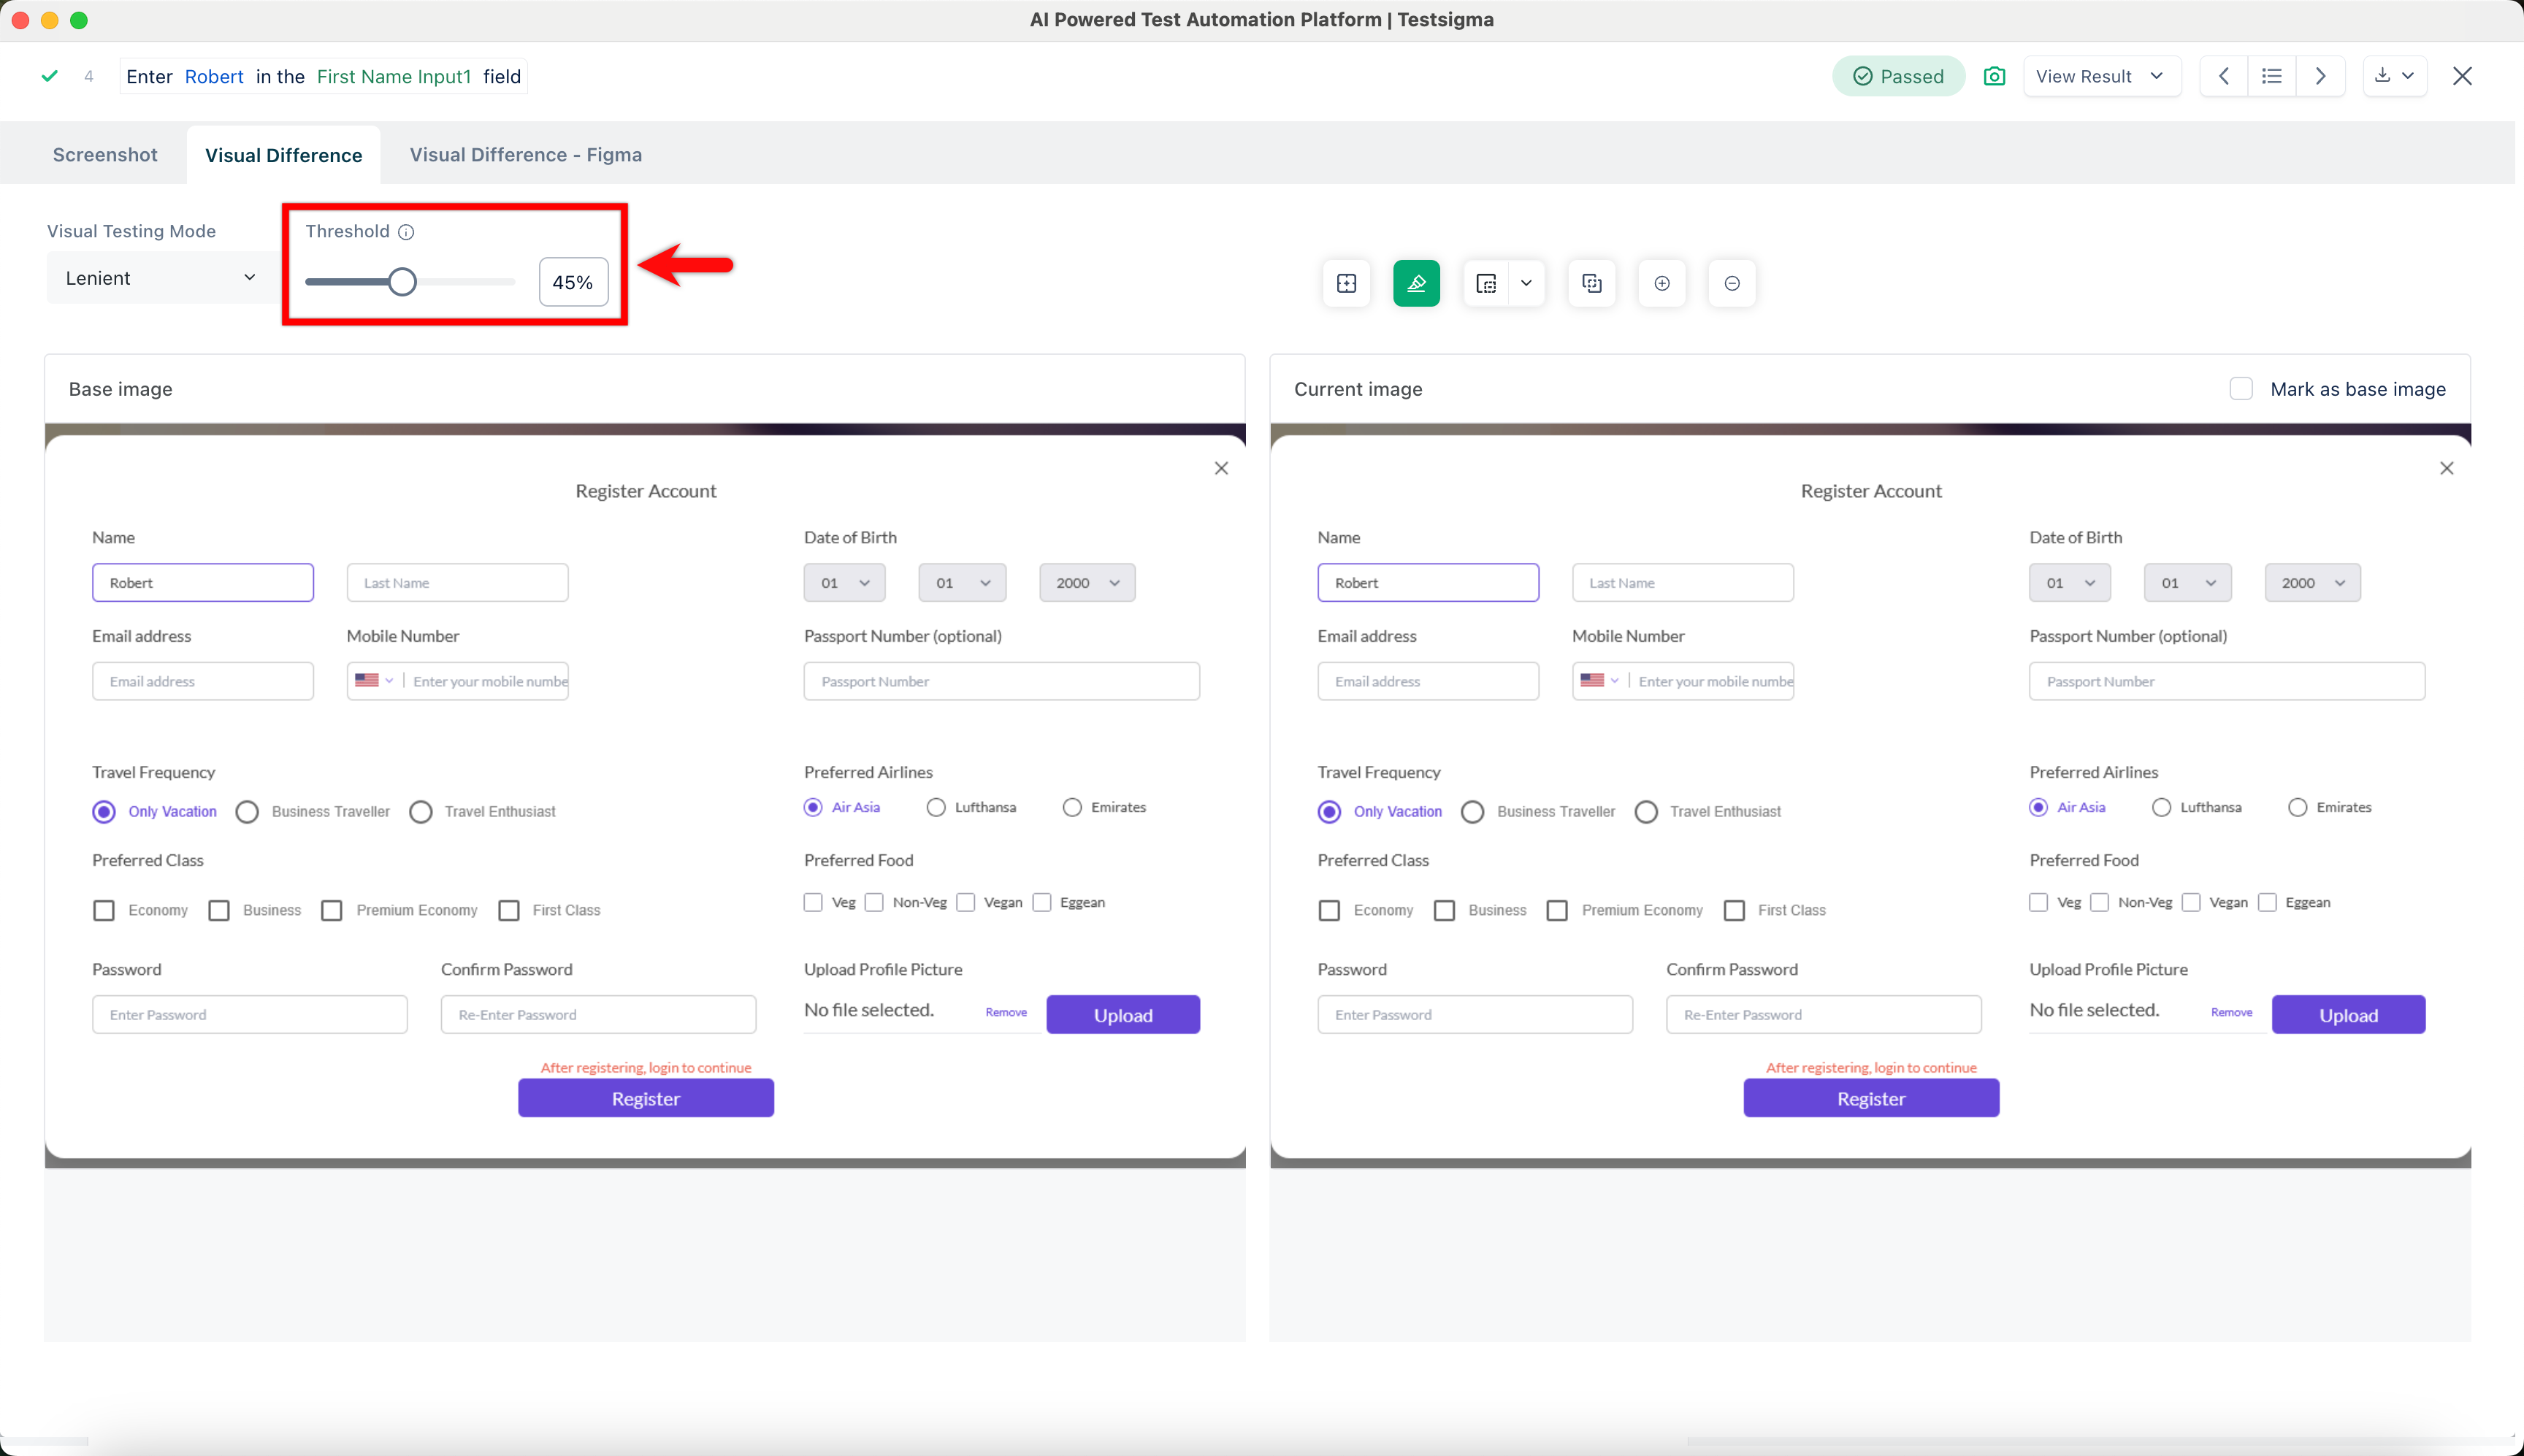
- Expand the Visual Testing Mode field and select Strict or Lenient.
- If you select Lenient, enter the desired percentage in the Threshold field.
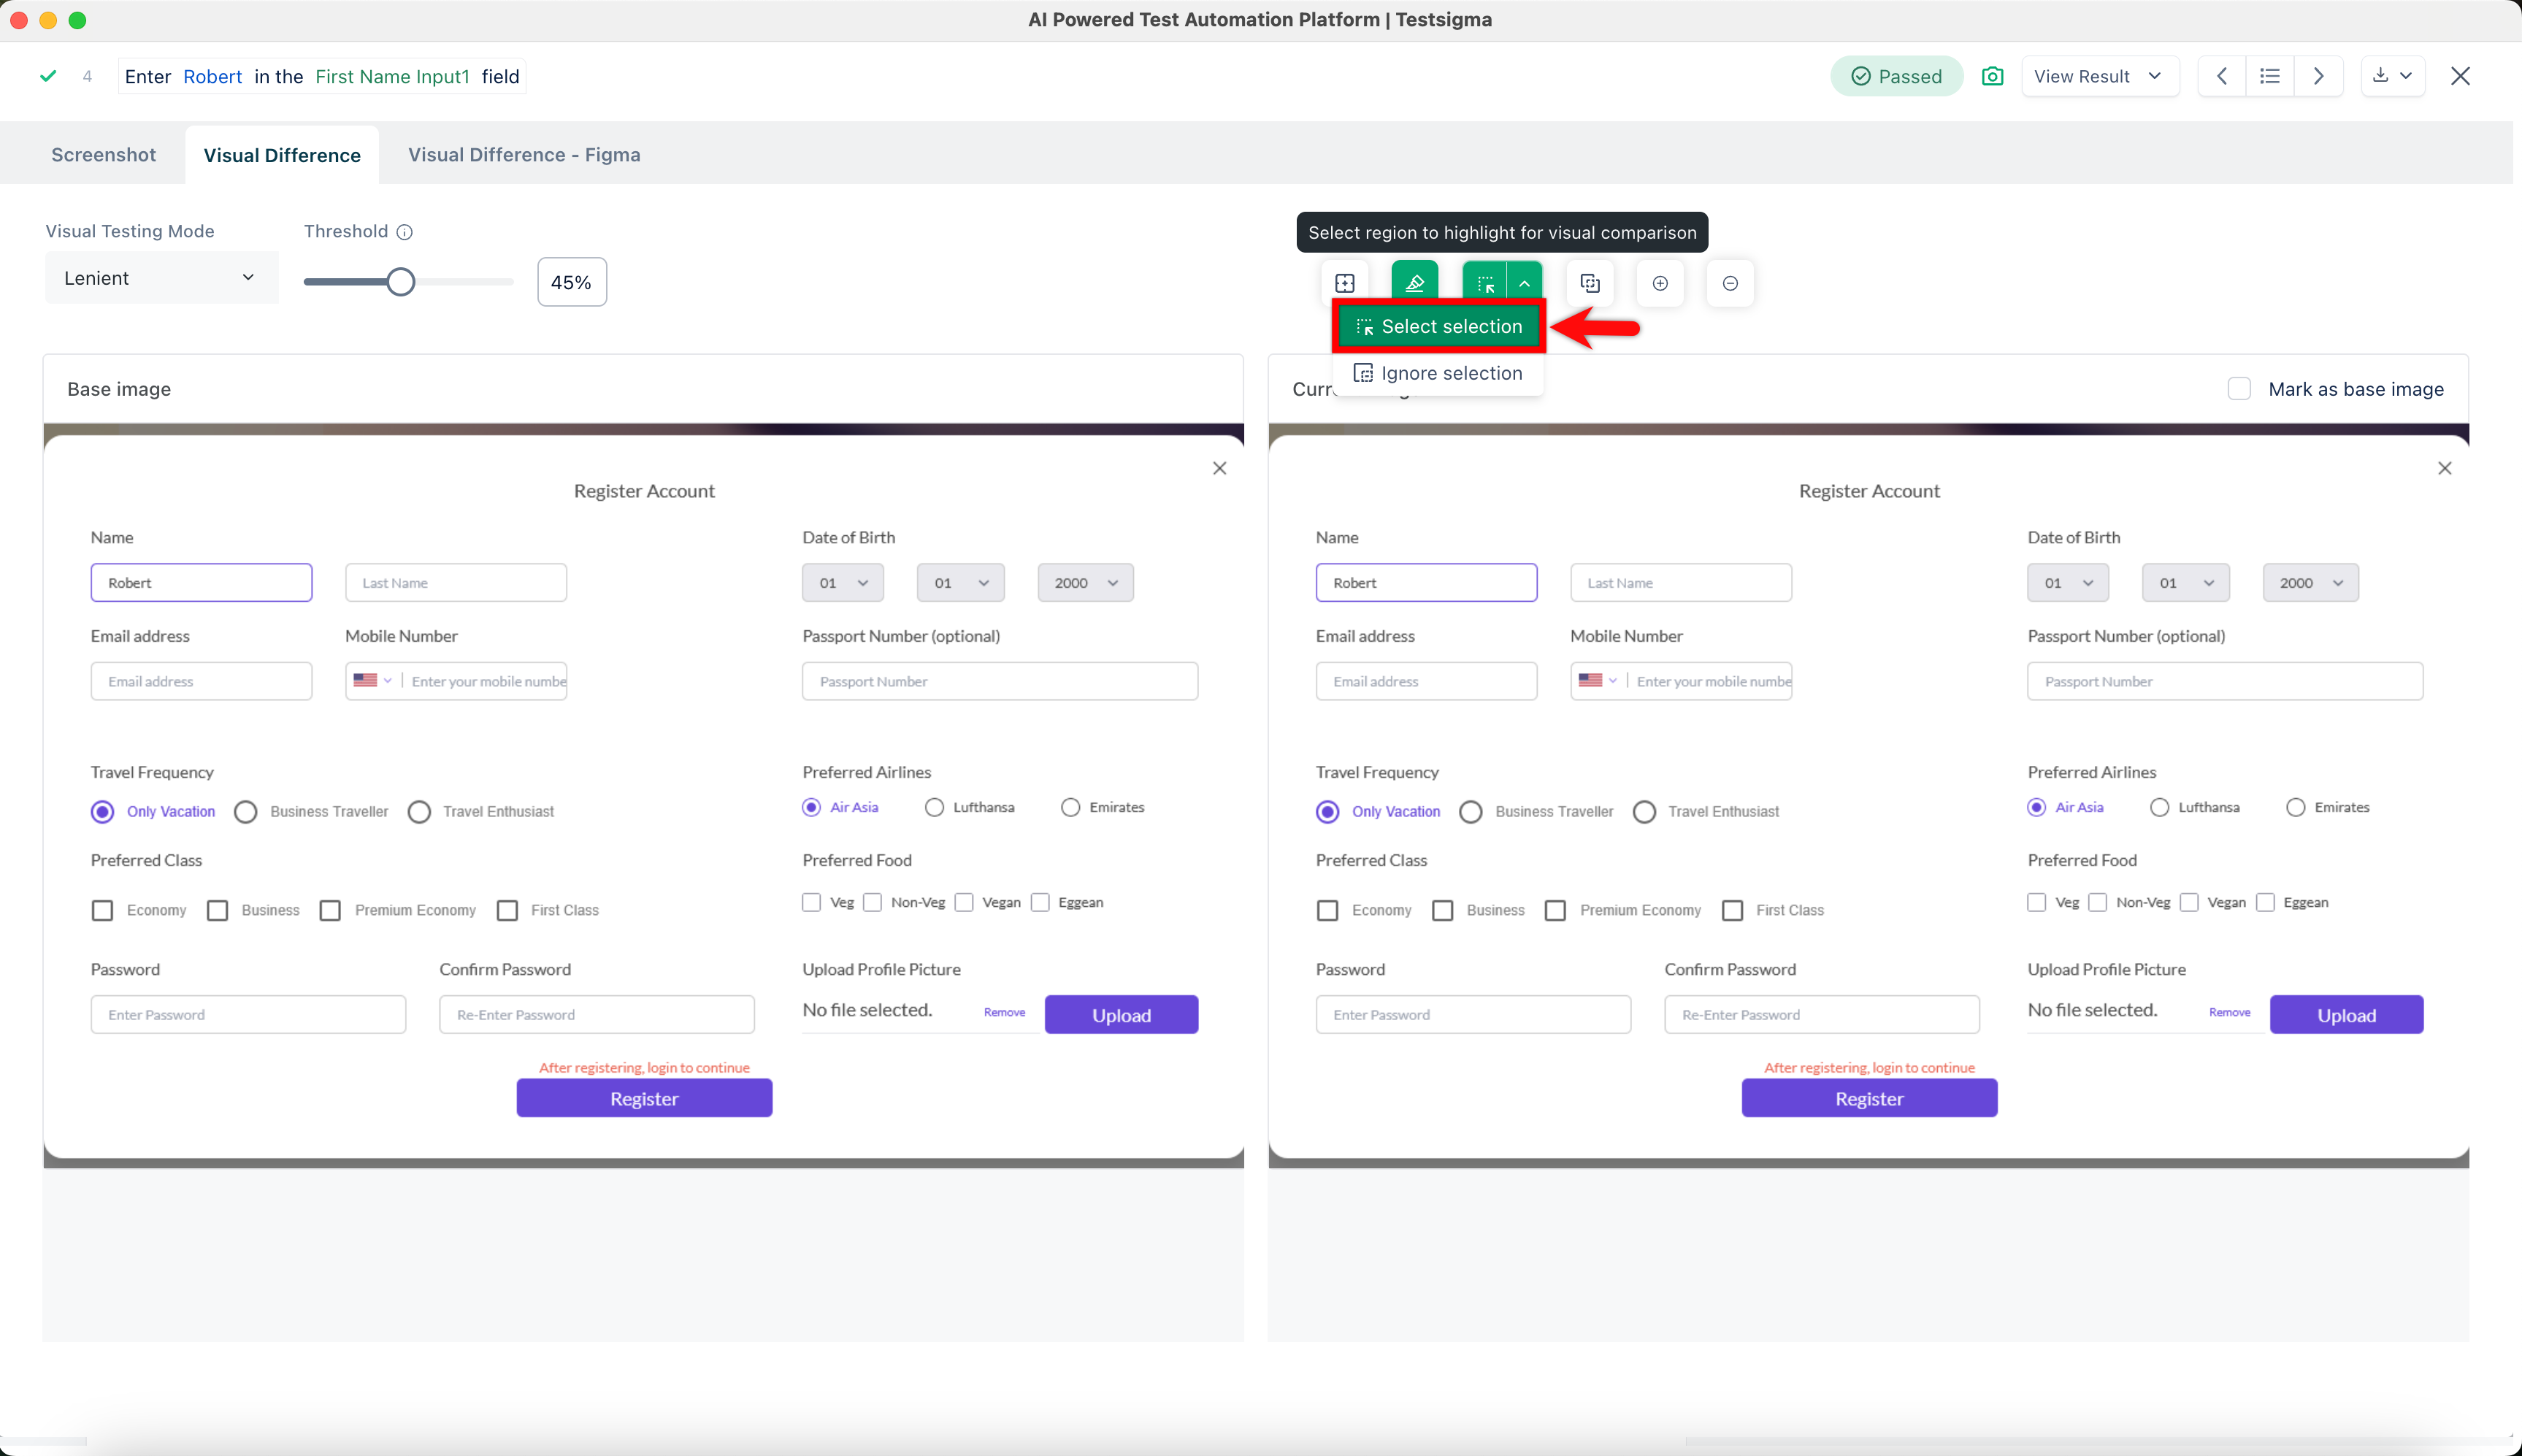
To apply Lenient mode to a specific area of the base image, click the Select region to highlight for visual comparison icon to enable it. Then expand the option and choose Select selection.
AI Insights in Testsigma provides a detailed UI Difference Analysis Report whenever visual differences are detected between the base and current images. This report helps you quickly identify the root cause of UI mismatches and offers suggestions for resolution. You can also copy these insights for debugging purposes.
Benefits of Visual Testing
| Benefits | Description |
|---|---|
| Early Detection of Visual Defects | You can identify visual regressions and inconsistencies early in the development cycle by using Visual Testing, which prevents them from reaching production. |
| Time Savings | Automating visual comparisons saves time and effort by eliminating the need for manual verification. |
| Cross-Platform Validation | Visual Testing ensures that different devices, browsers, and operating systems display your application's visual consistency. |
| Improved User Experience | You enhance customer satisfaction by catching visual defects and providing a consistent and polished user experience. |
| Regression Testing Efficiency | Regression testing includes Visual Testing, ensuring UI changes do not impact existing functionality. |
Want to contribute or report missing content?