- salesforce testing
 Intro: Testsigma for Salesforce Testing
- Creating a Connected App
- Creating a Salesforce Project
- Test Salesforce Connection
- Creating Metadata Connections
- Adding User Connections
- Build Test Cases: Manual+Live
- Salesforce Element Repositories
- Intro: Testsigma Special NLPs
- SOQL as Test Step
- Query Builder for Salesforce Testing
- Automating Listview Table NLPs
- Error Handling On Metadata Refresh
Creating a Connected App
Creating a connected app is important to link external applications and the Salesforce ecosystem. With a connected app, you can integrate APIs, enable single sign-on (SSO), and build applications. This article discusses how to create a connected app in Salesforce.
Prerequisites
Before you begin, ensure you have a Salesforce organization setup.
Steps to Enable Connected Apps
- Log into your Salesforce instance.
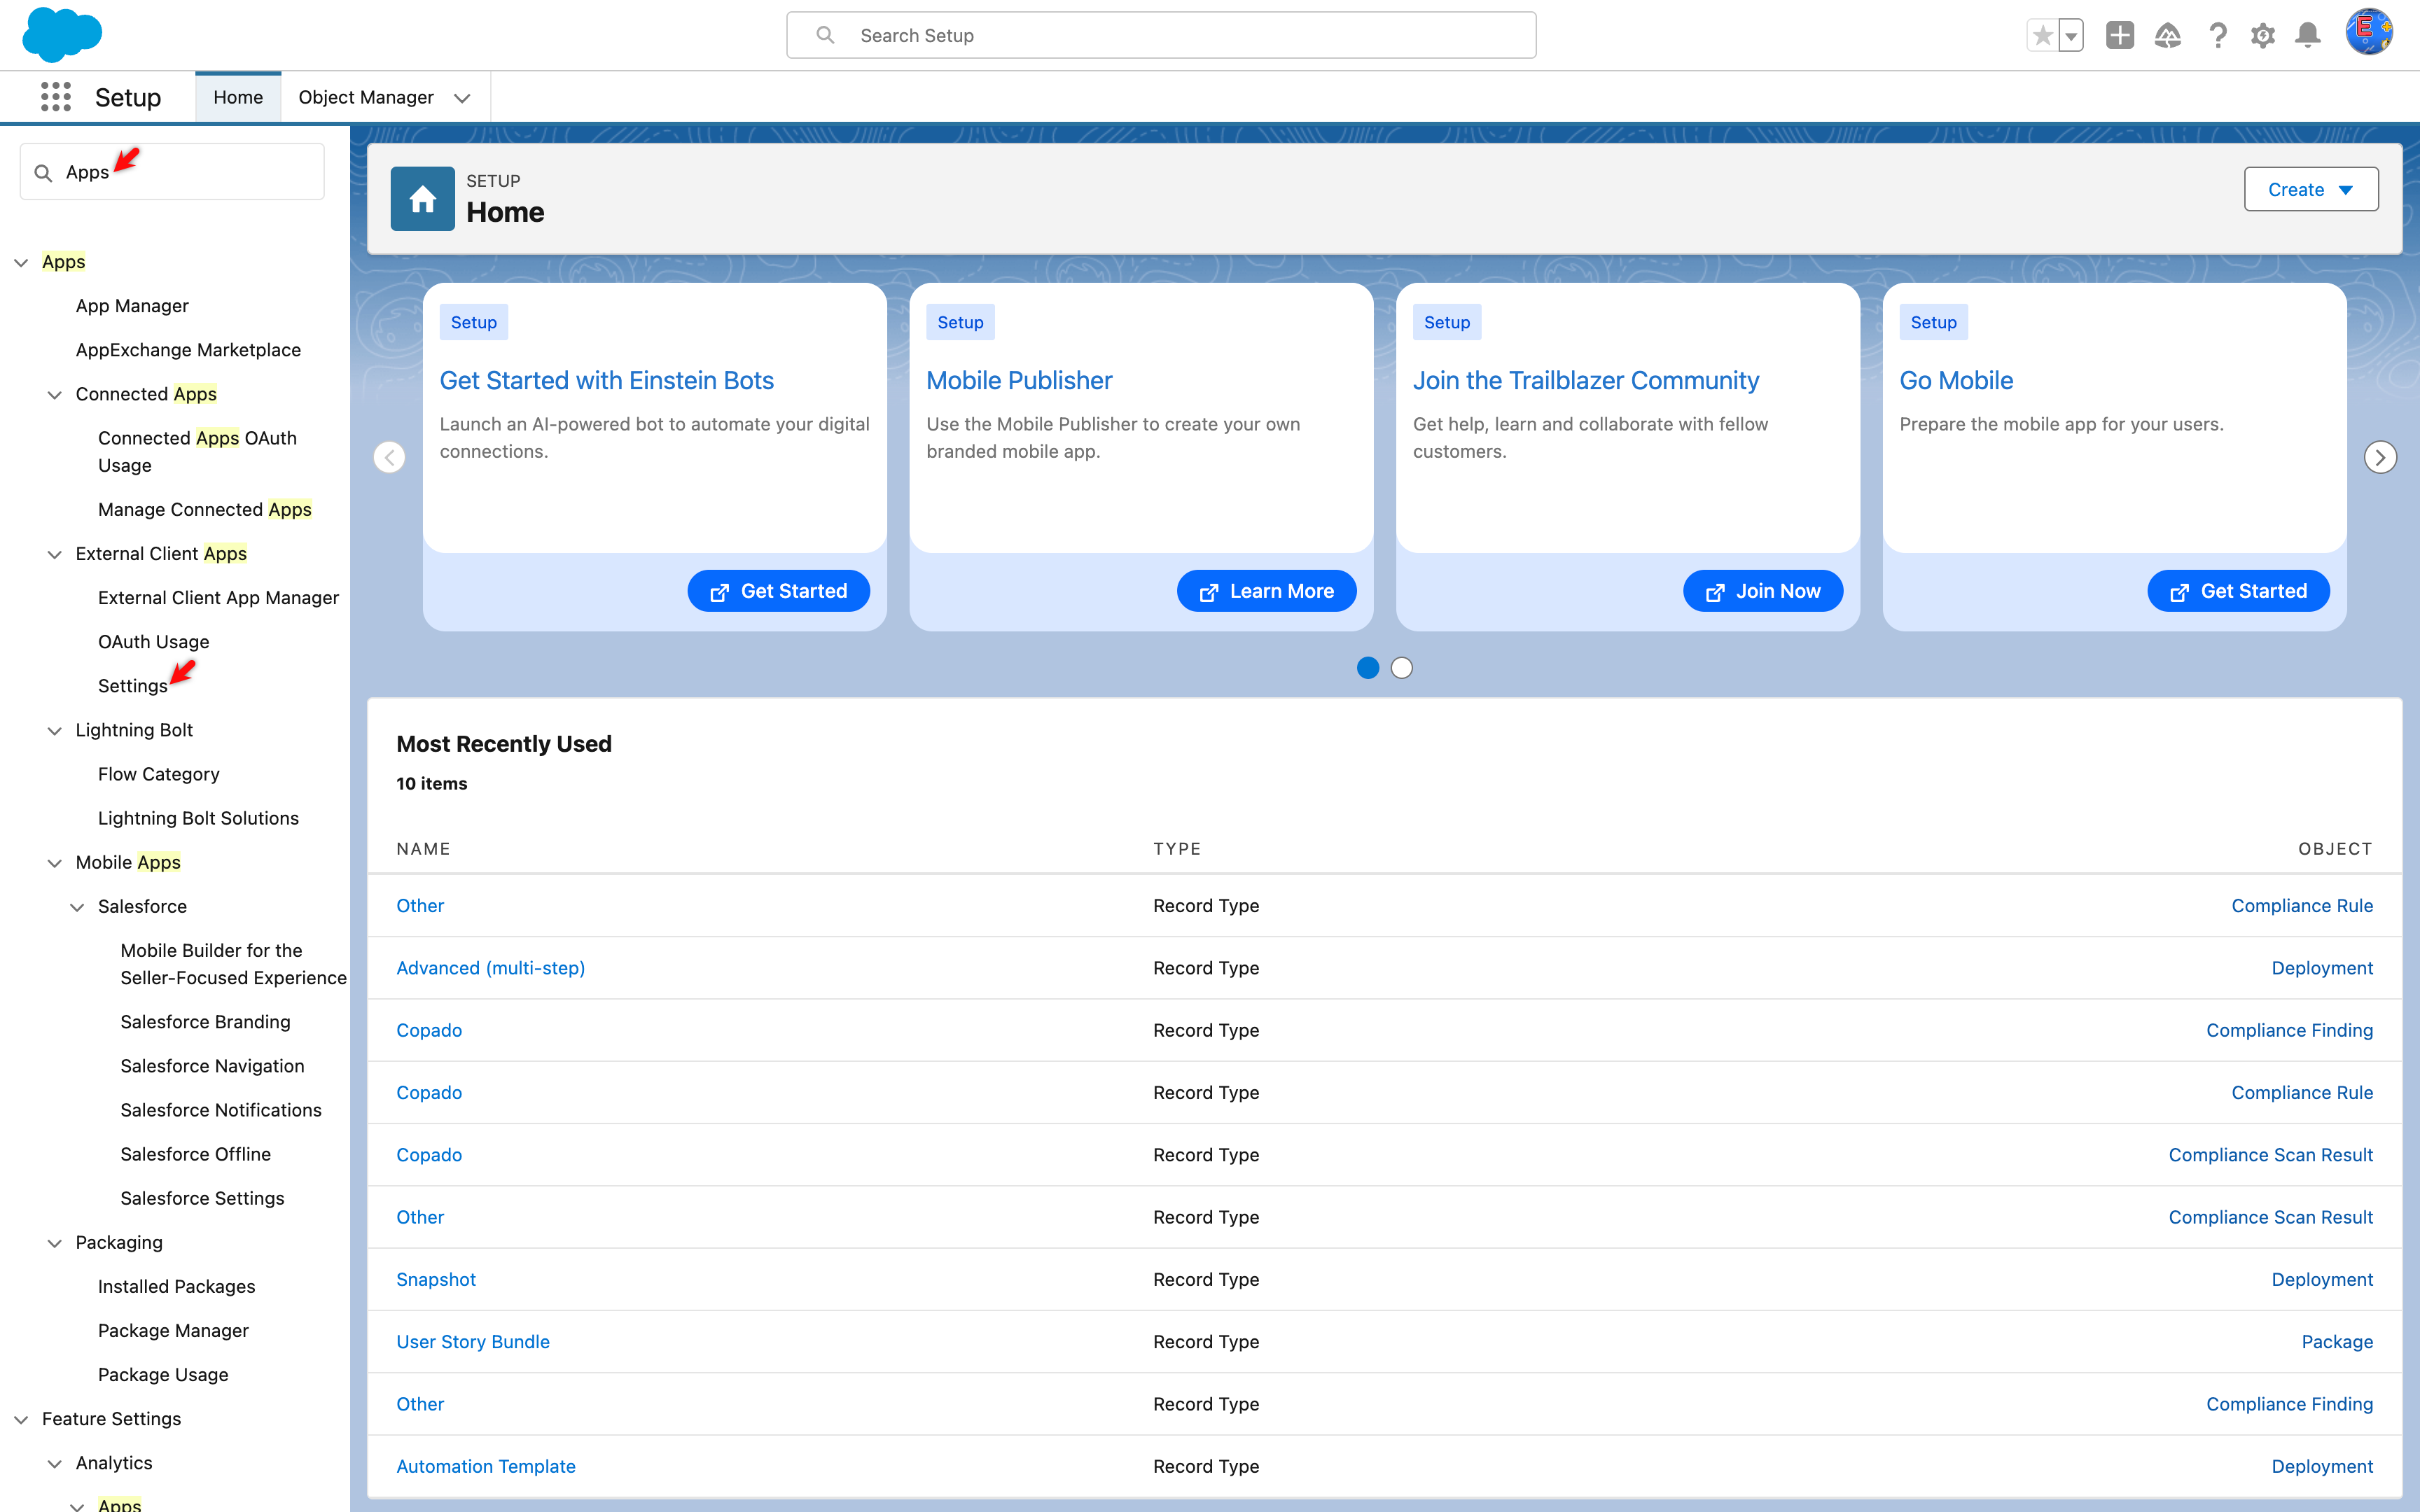
- On the Setup page, enter Apps in the quick finder, and click Settings under External Client Apps.
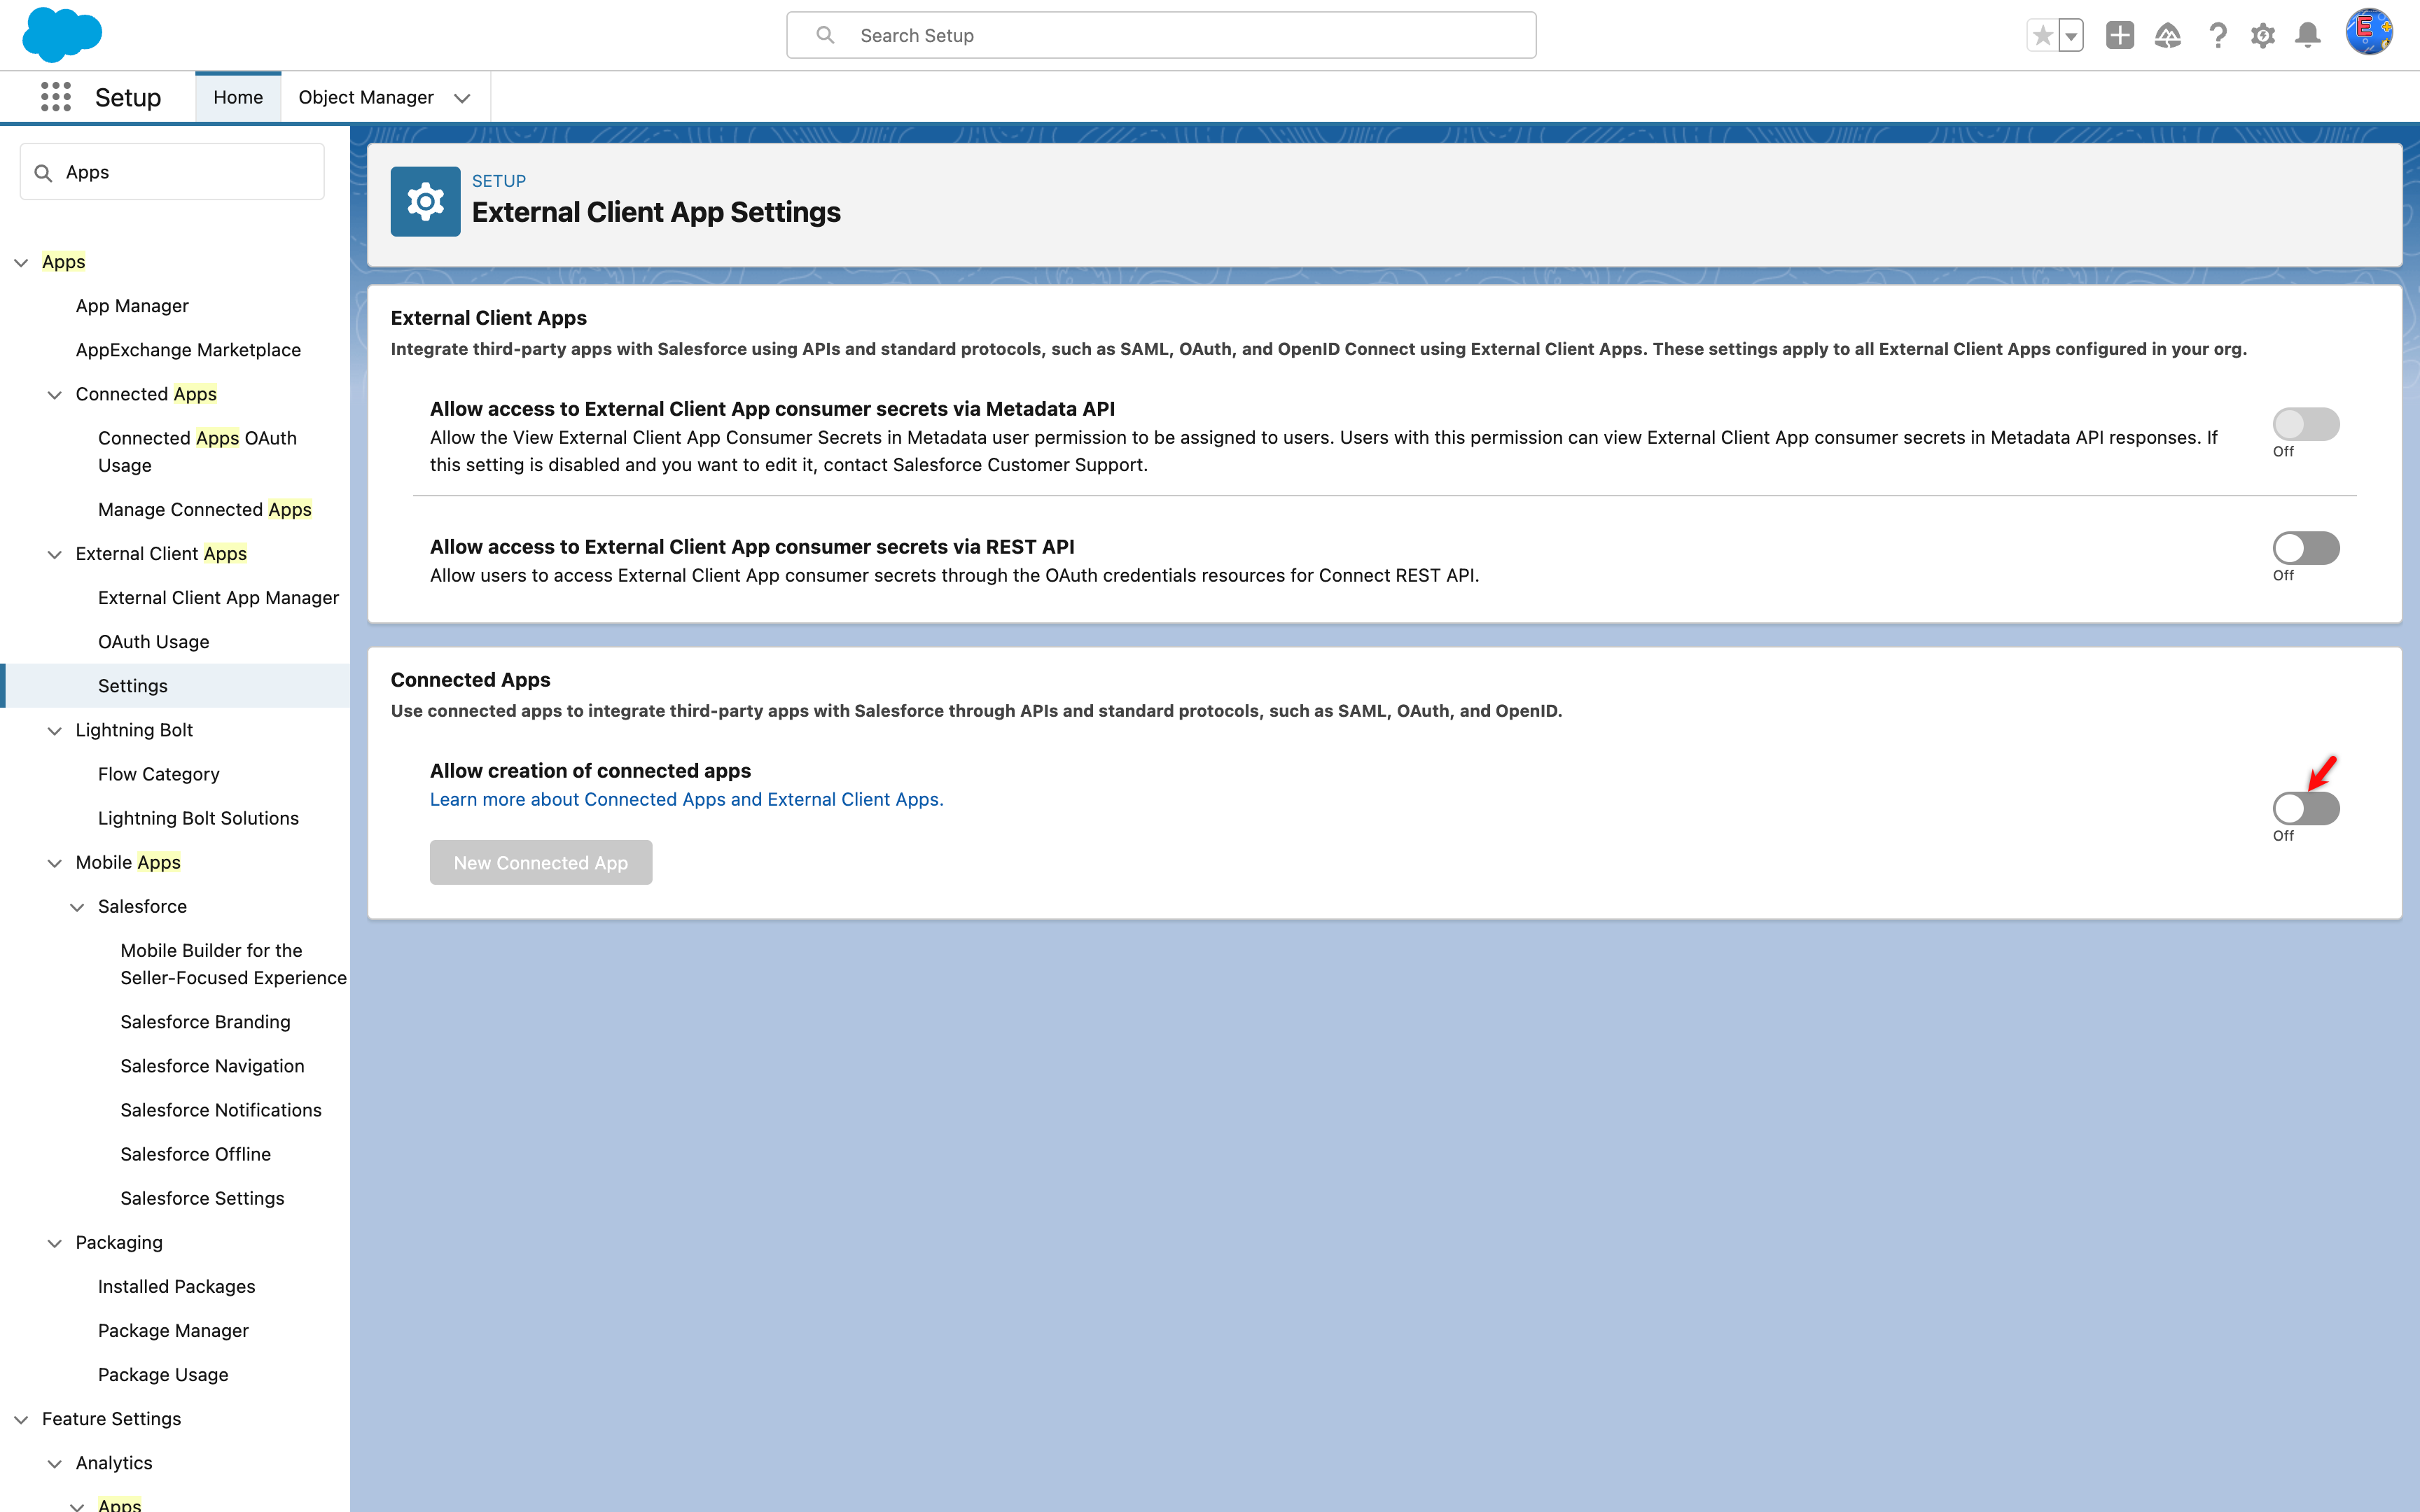
- On the External Client App Settings page, under the Connected Apps section, enable the Allow creation of connected apps toggle.
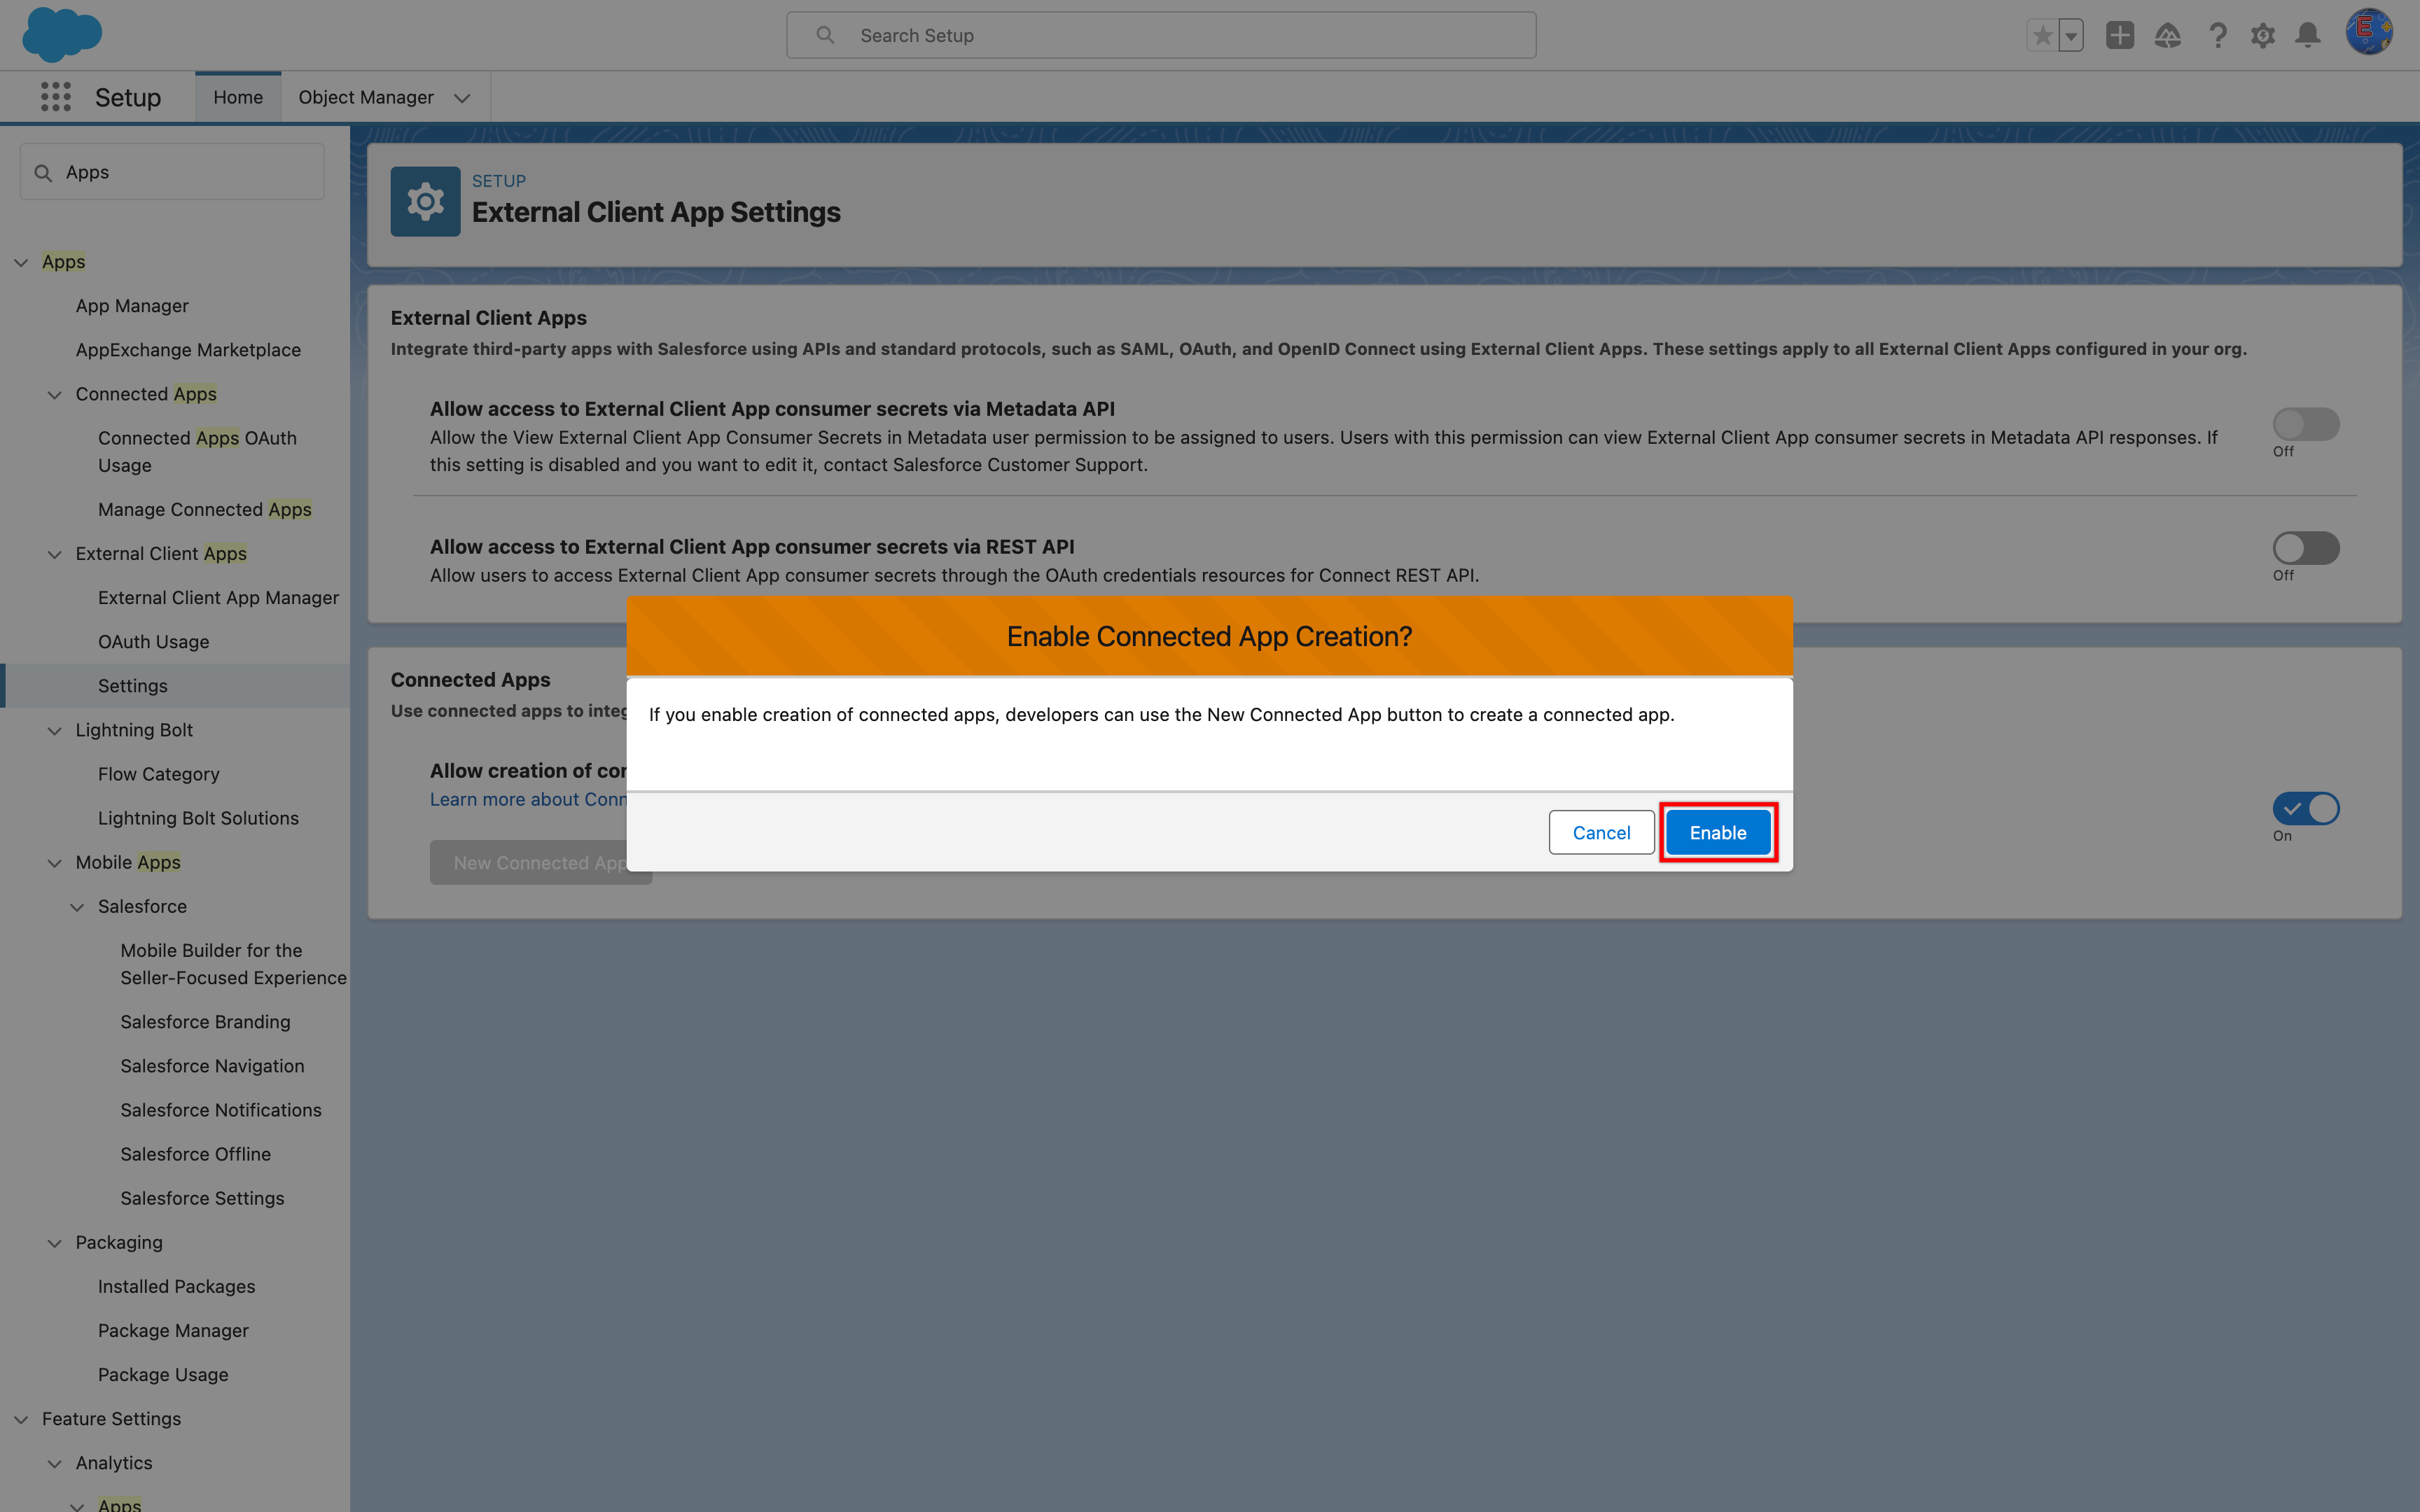
- On the Enable Connected Apps Connection? dialog, click Enable.
Steps to Create a Connected App
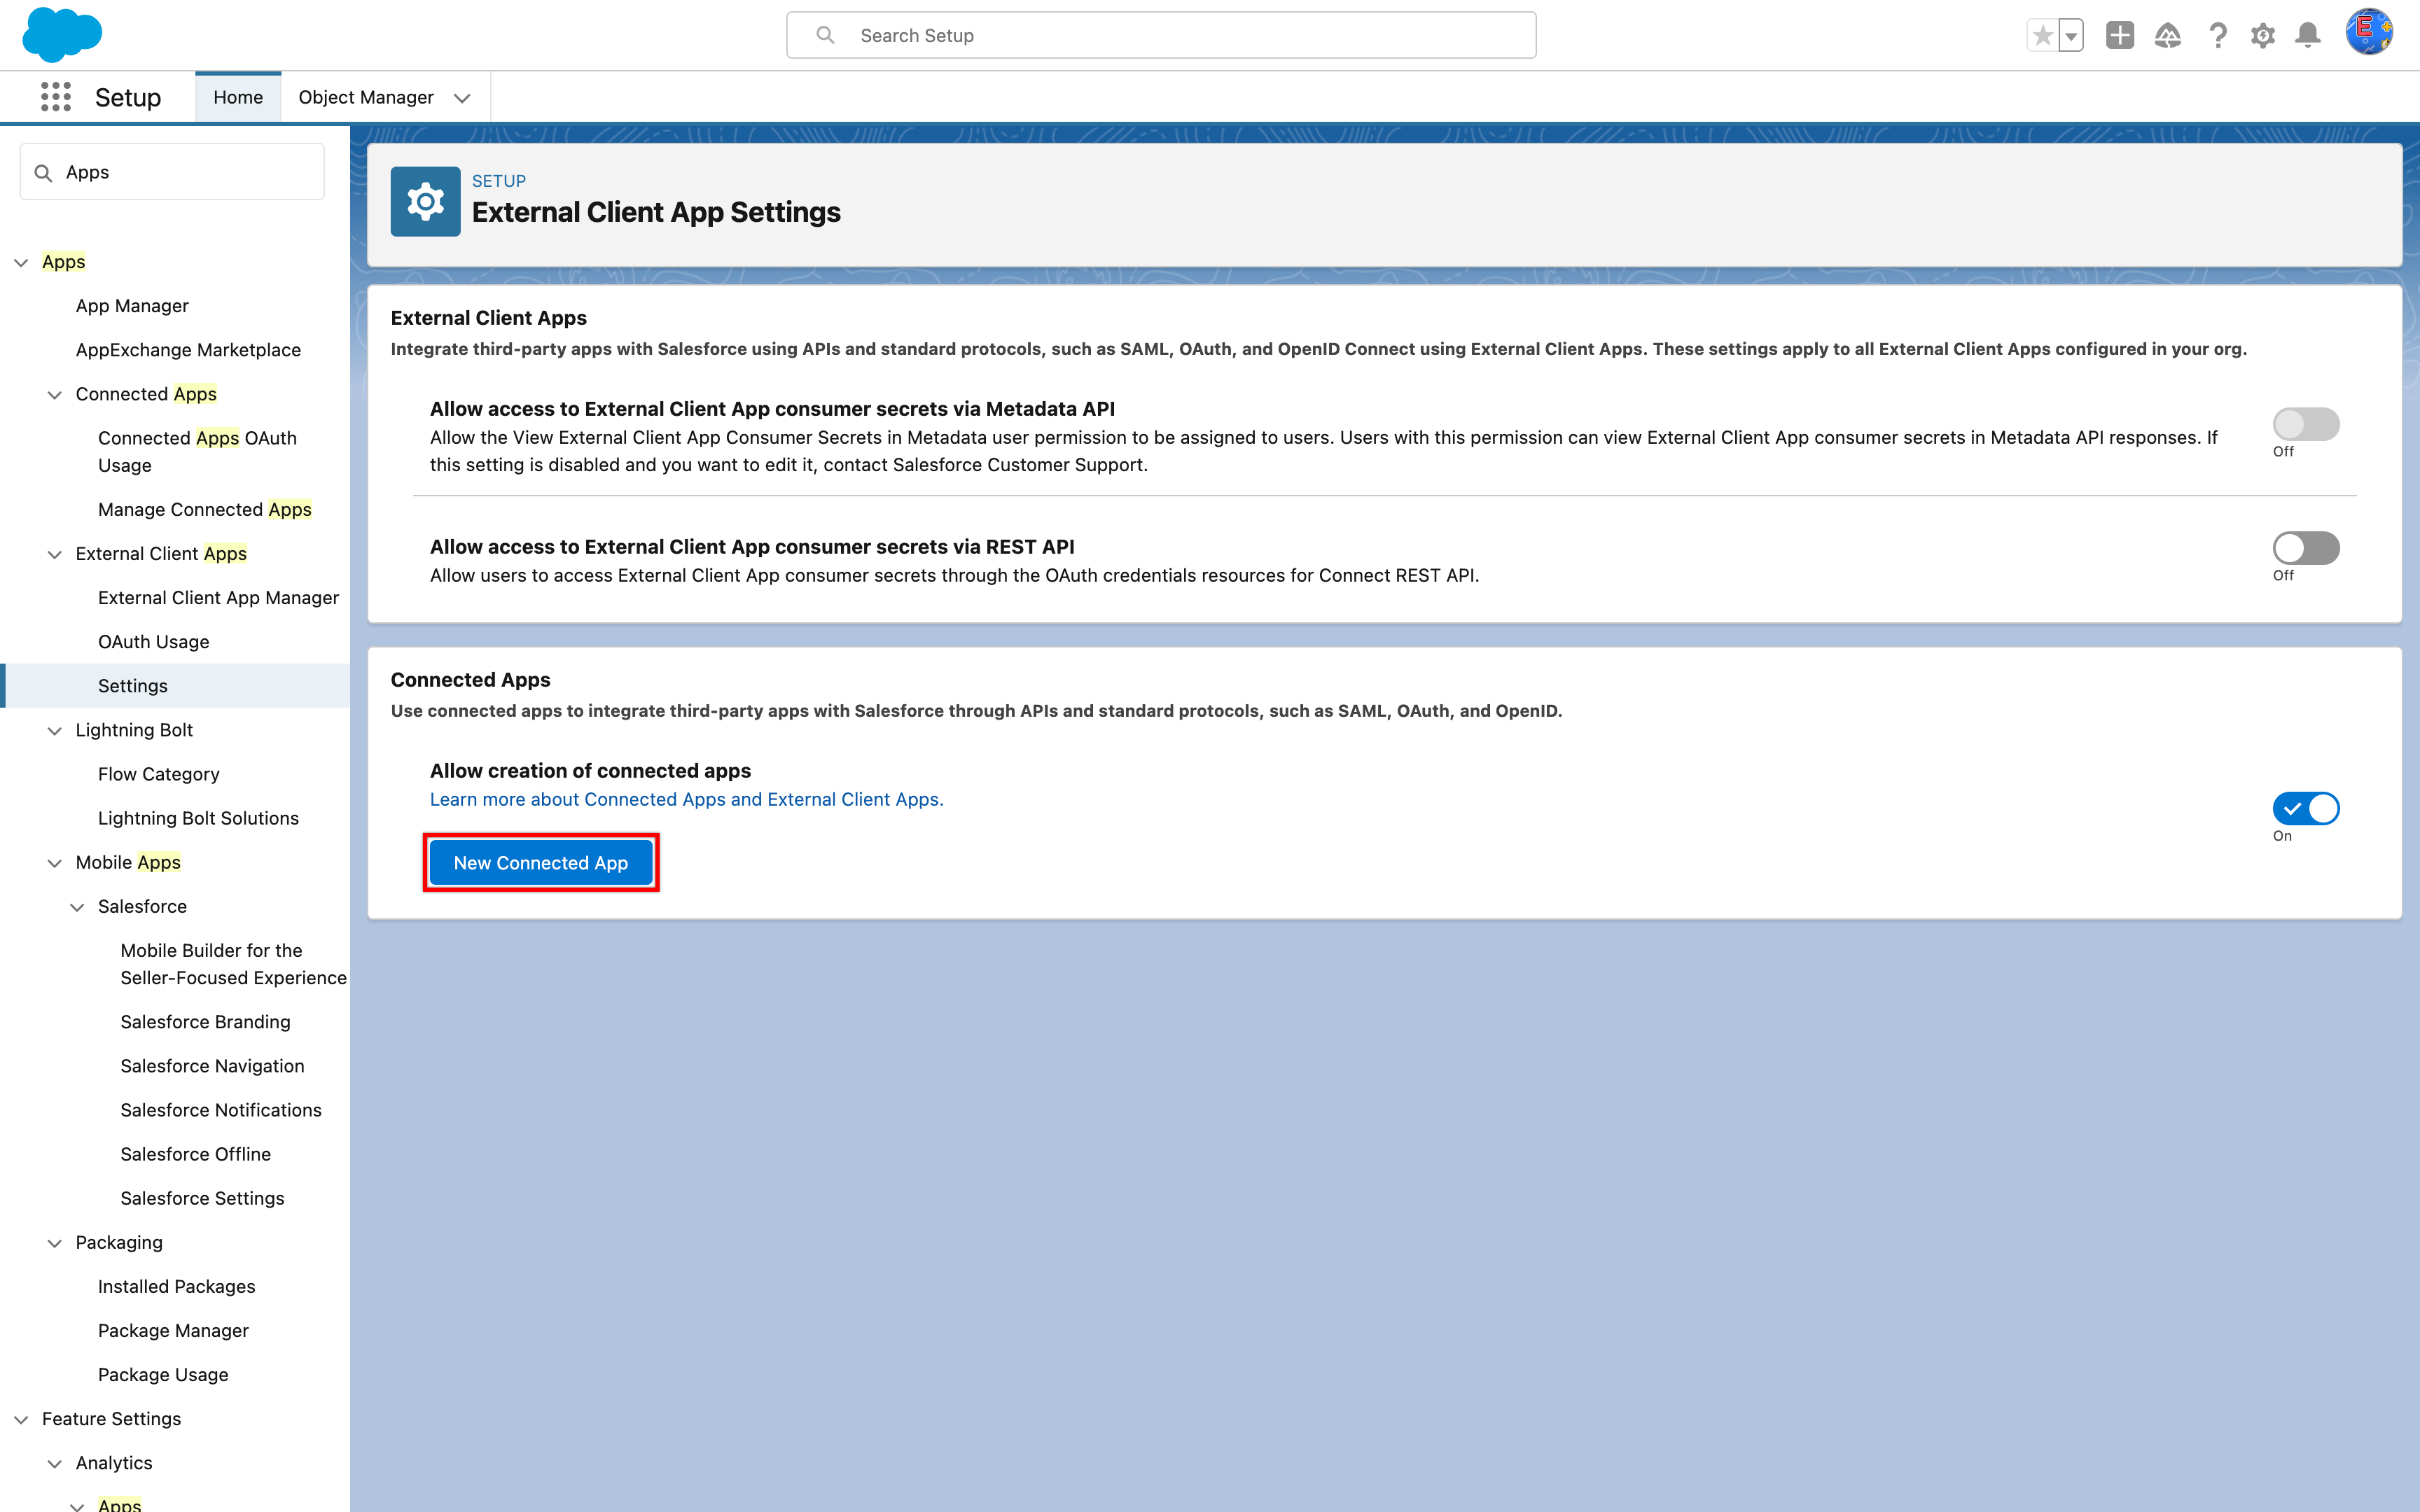
- On the External Client App Settings page, click New Connected App.
- In the Basic Information section, enter Connected App Name, API Name, and Contact Email.
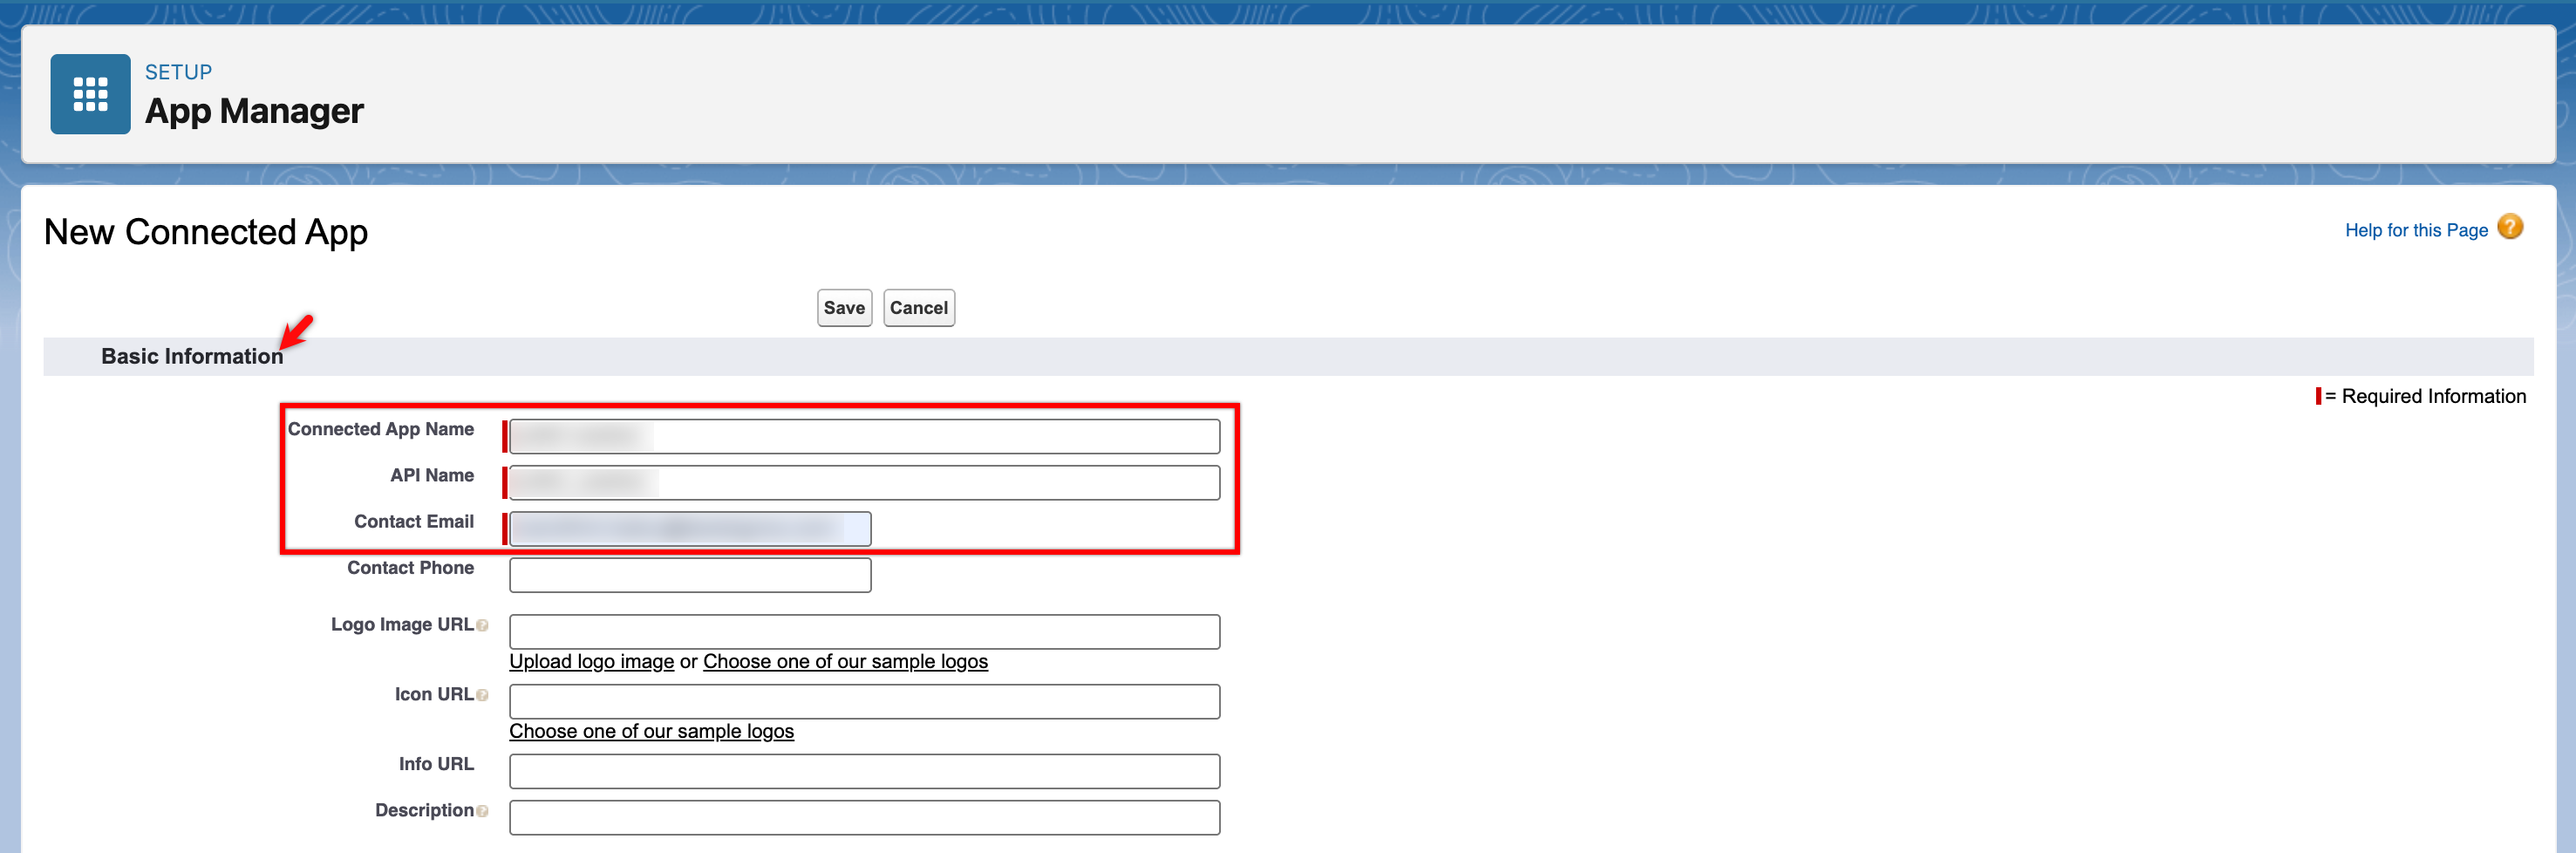
- Salesforce automatically fills in the API Name input field.
- Other input fields are optional.
-
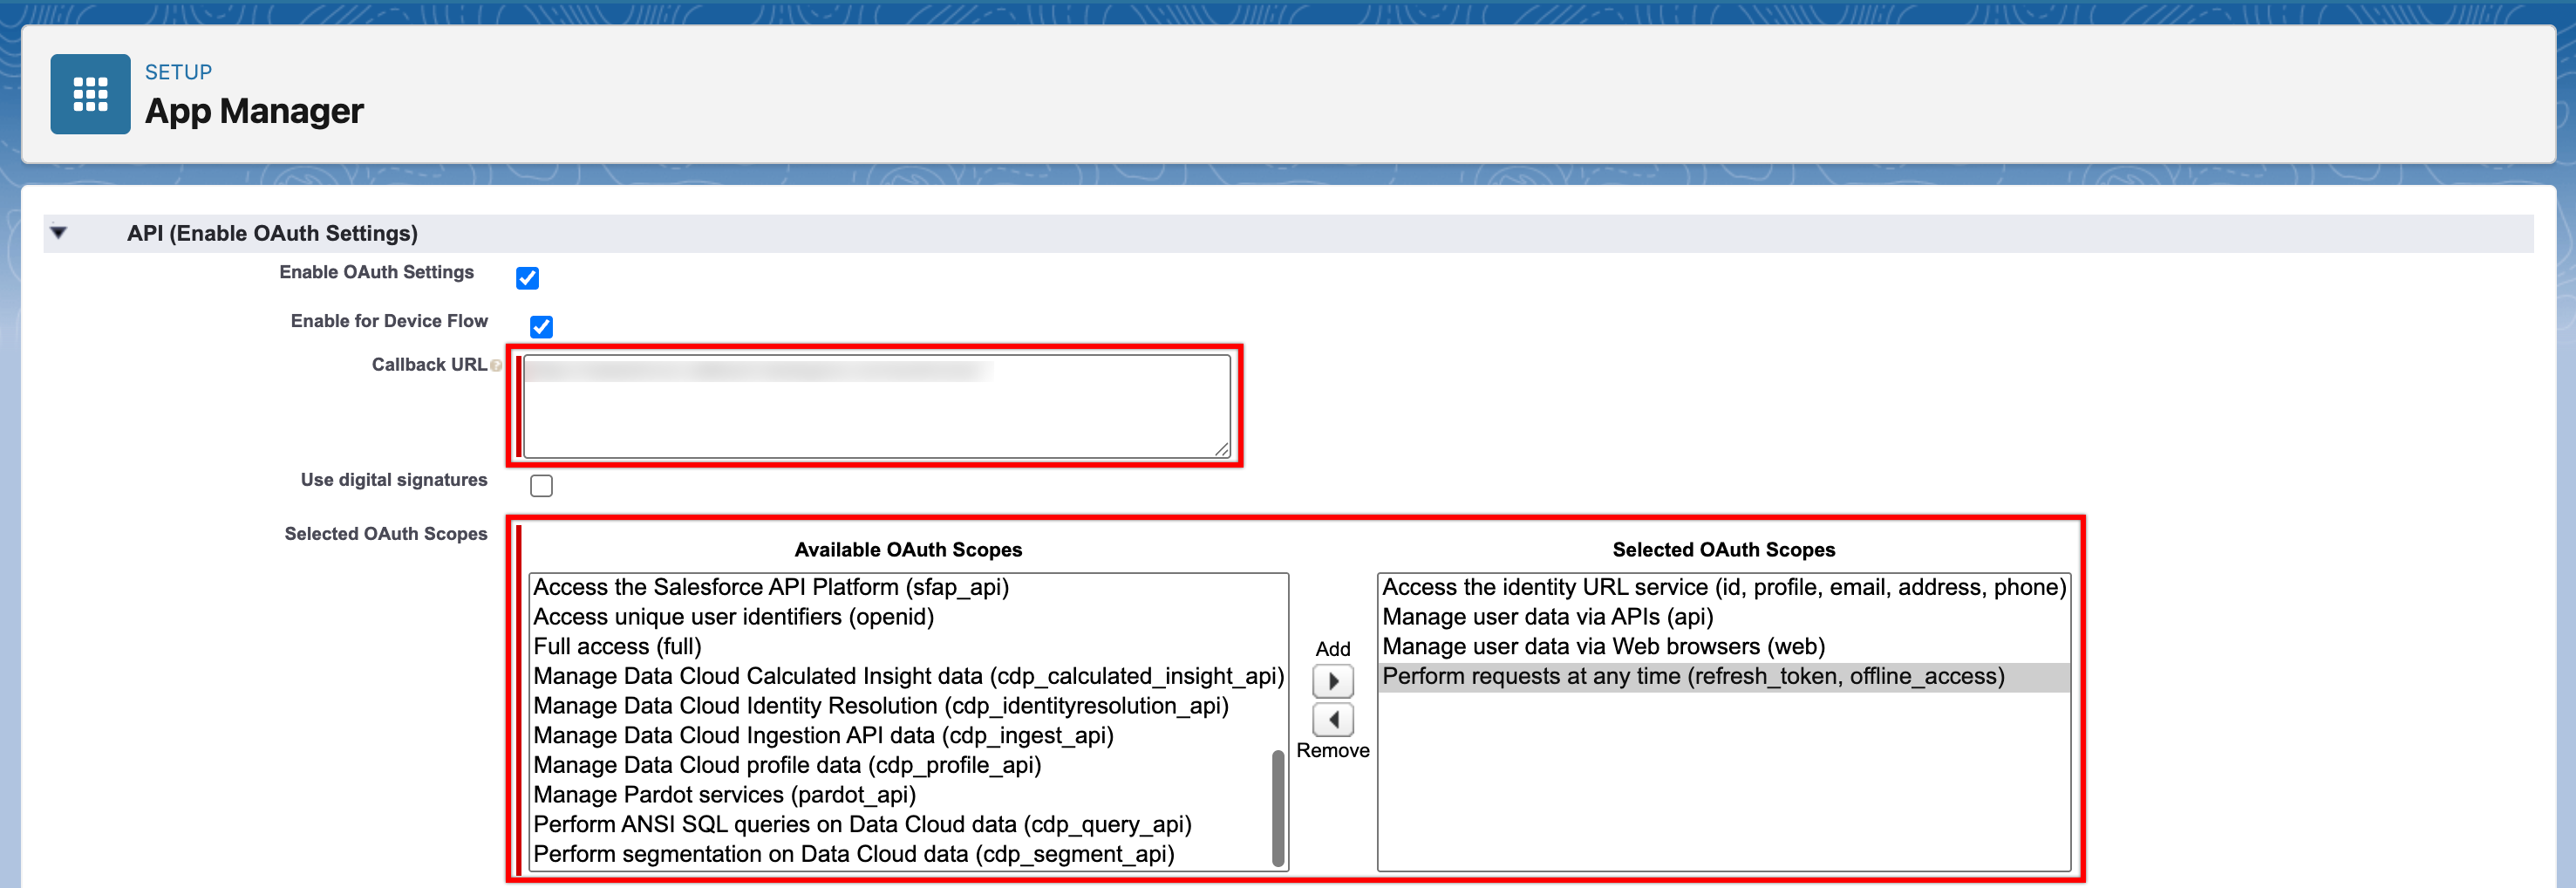
In the API section, select the Enable OAuth Settings checkbox to set Callback URL and Selected OAuth Scopes. The Selected OAuth Scopes are mandatory in the Connected App to connect & download the metadata.
- Use this Callback URL: https://salesforce-callback.testsigma.com/authorize/
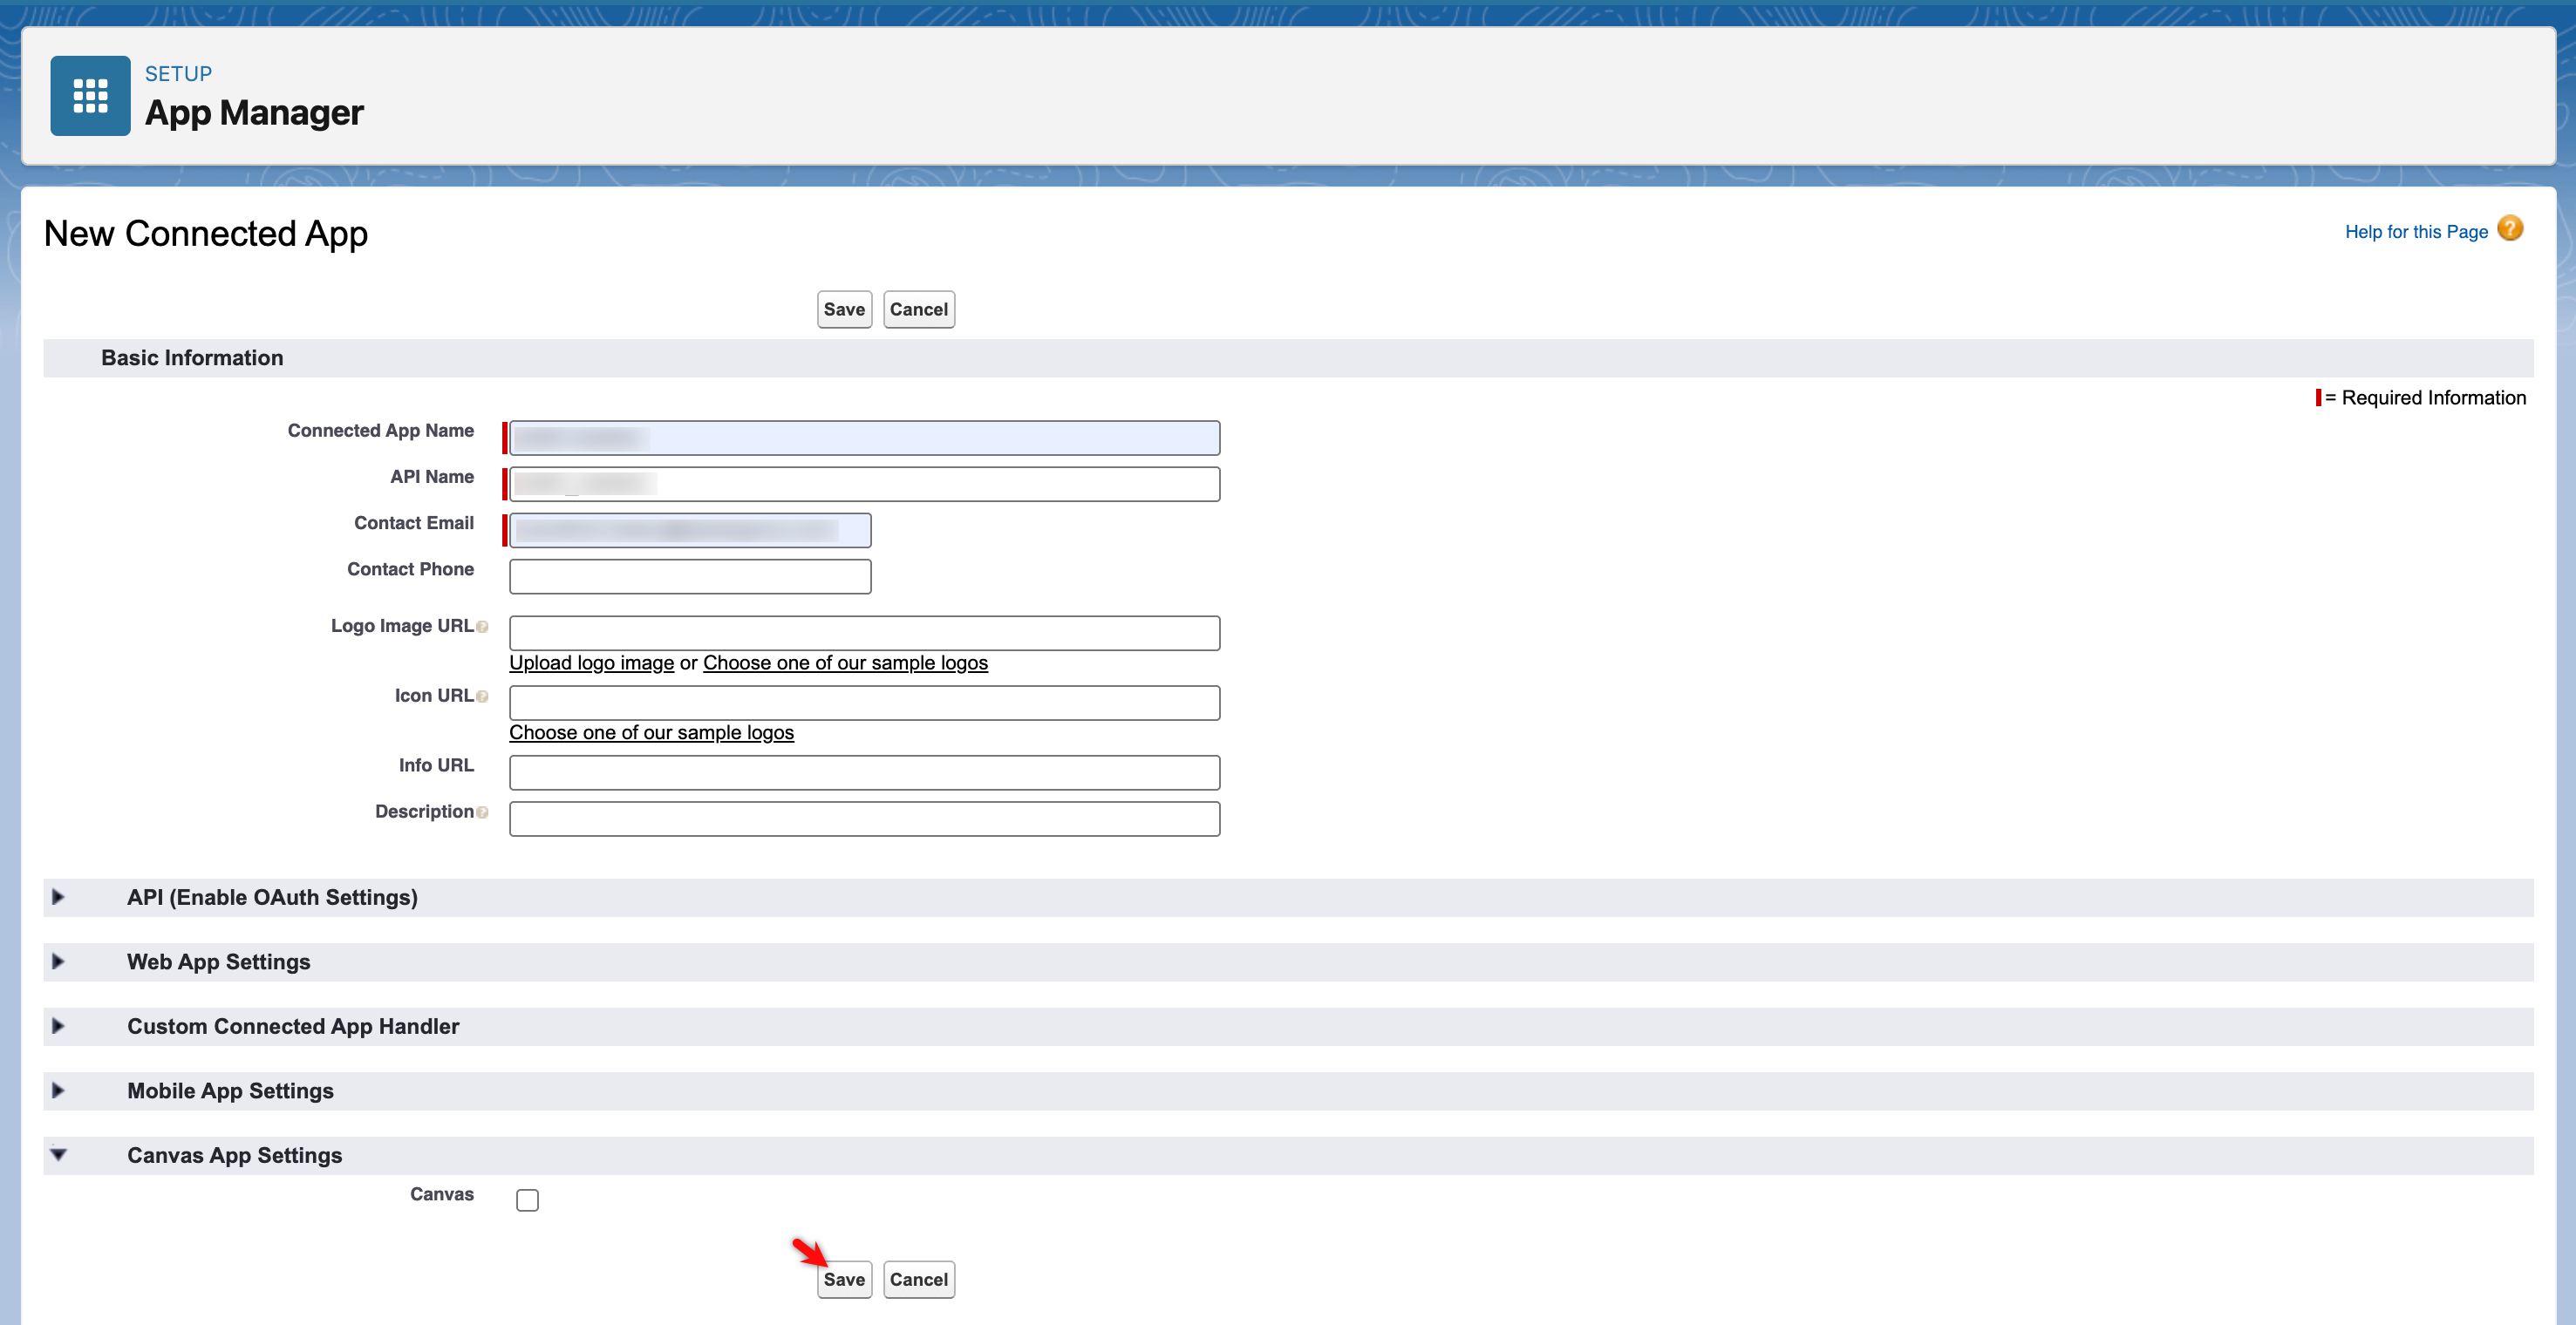
- Click on Save.
- Please wait for 10 - 15 minutes after creating the app, before trying to establish a connection.
- A connected app is limited to only a few approvals. The system can revoke the oldest approval when the limit exceeds automatically. As a best practice, you can create a different connected app for each new application connection/connection.
- Some Salesforce editions do not have API access. Generally, these editions are not used in development or production environments, and it is not possible to create connections within them.
For more information on these editions, refer to the Salesforce editions with API access.
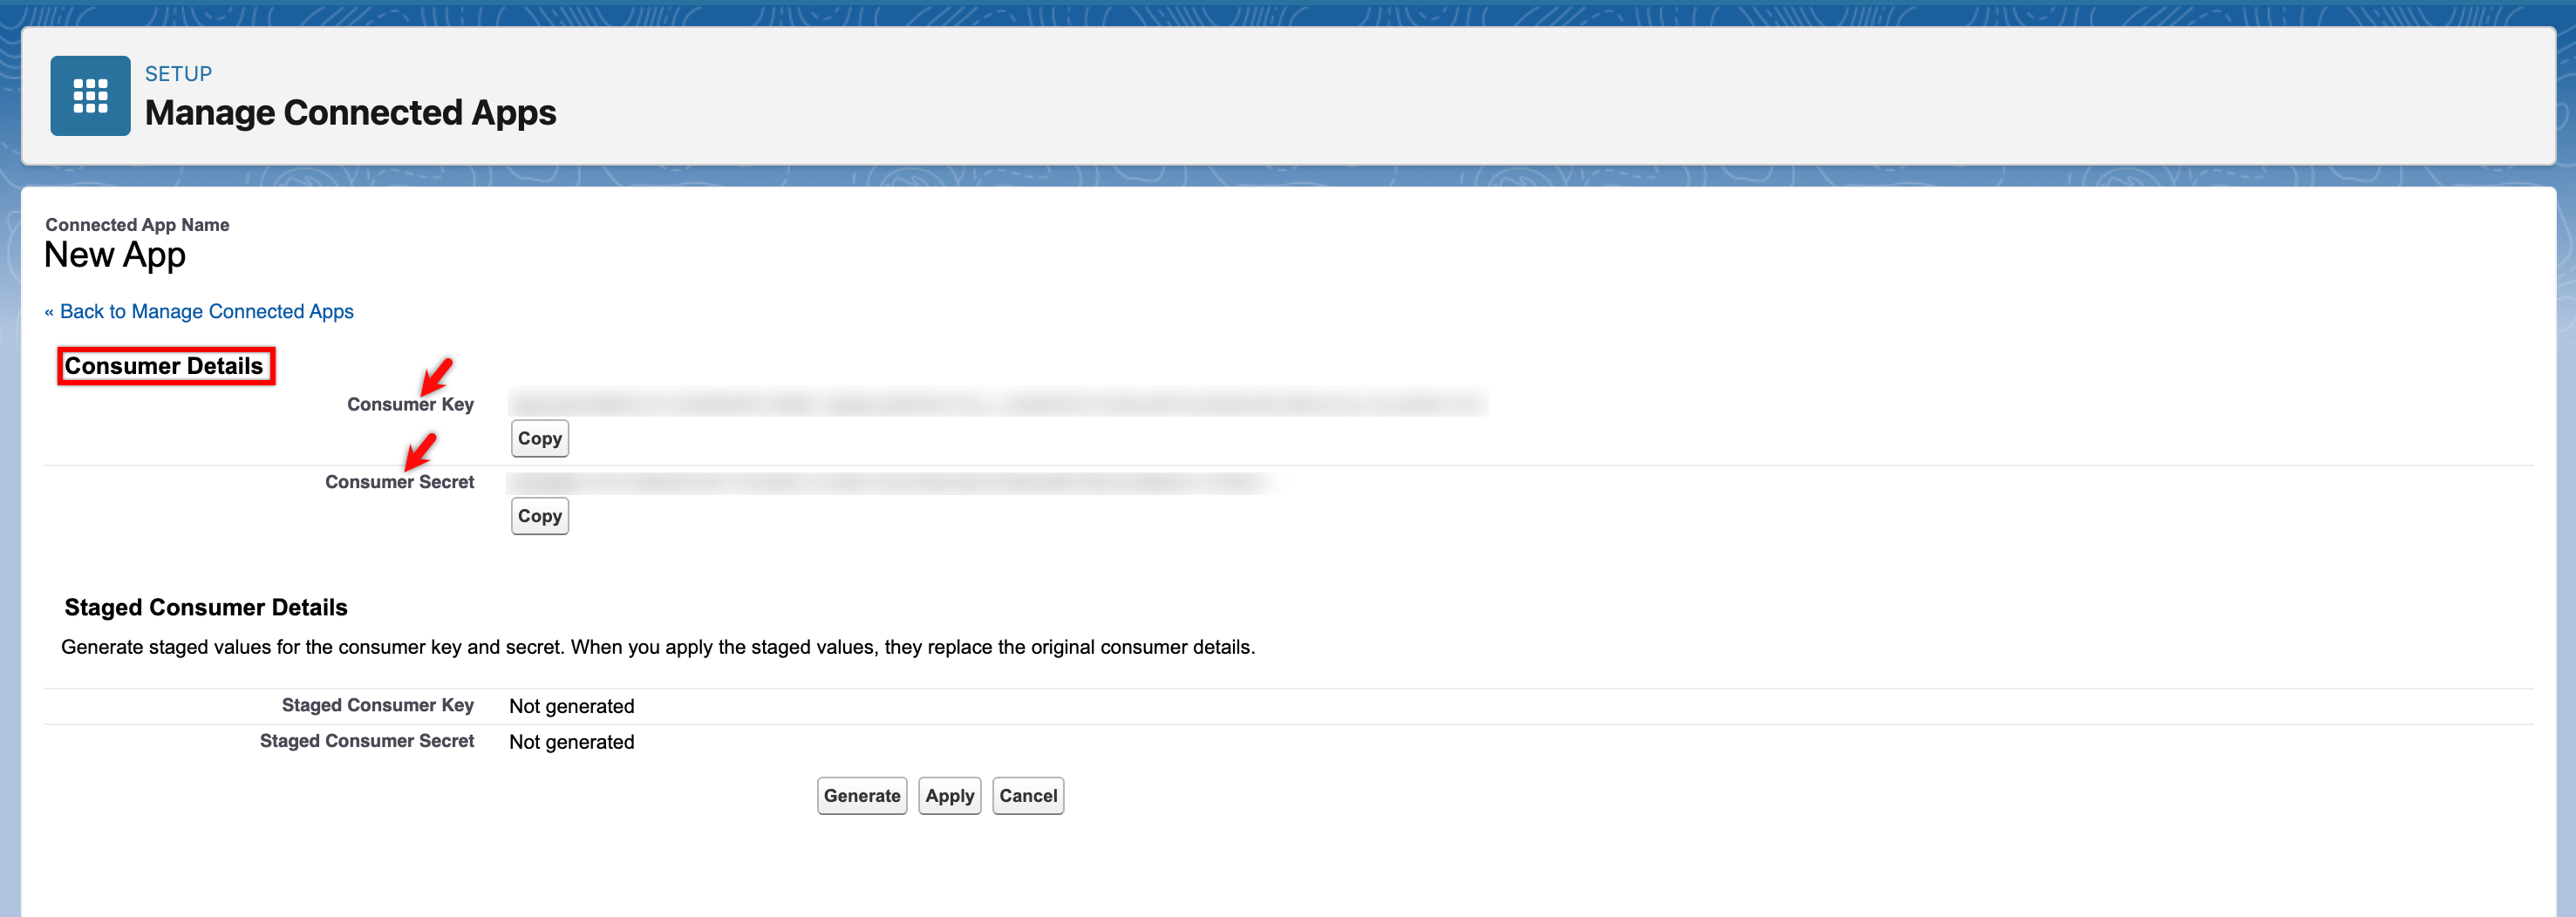
Fetch Consumer Details
- Edit the connected app and click on Manage Consumer Details. This will open a new window.
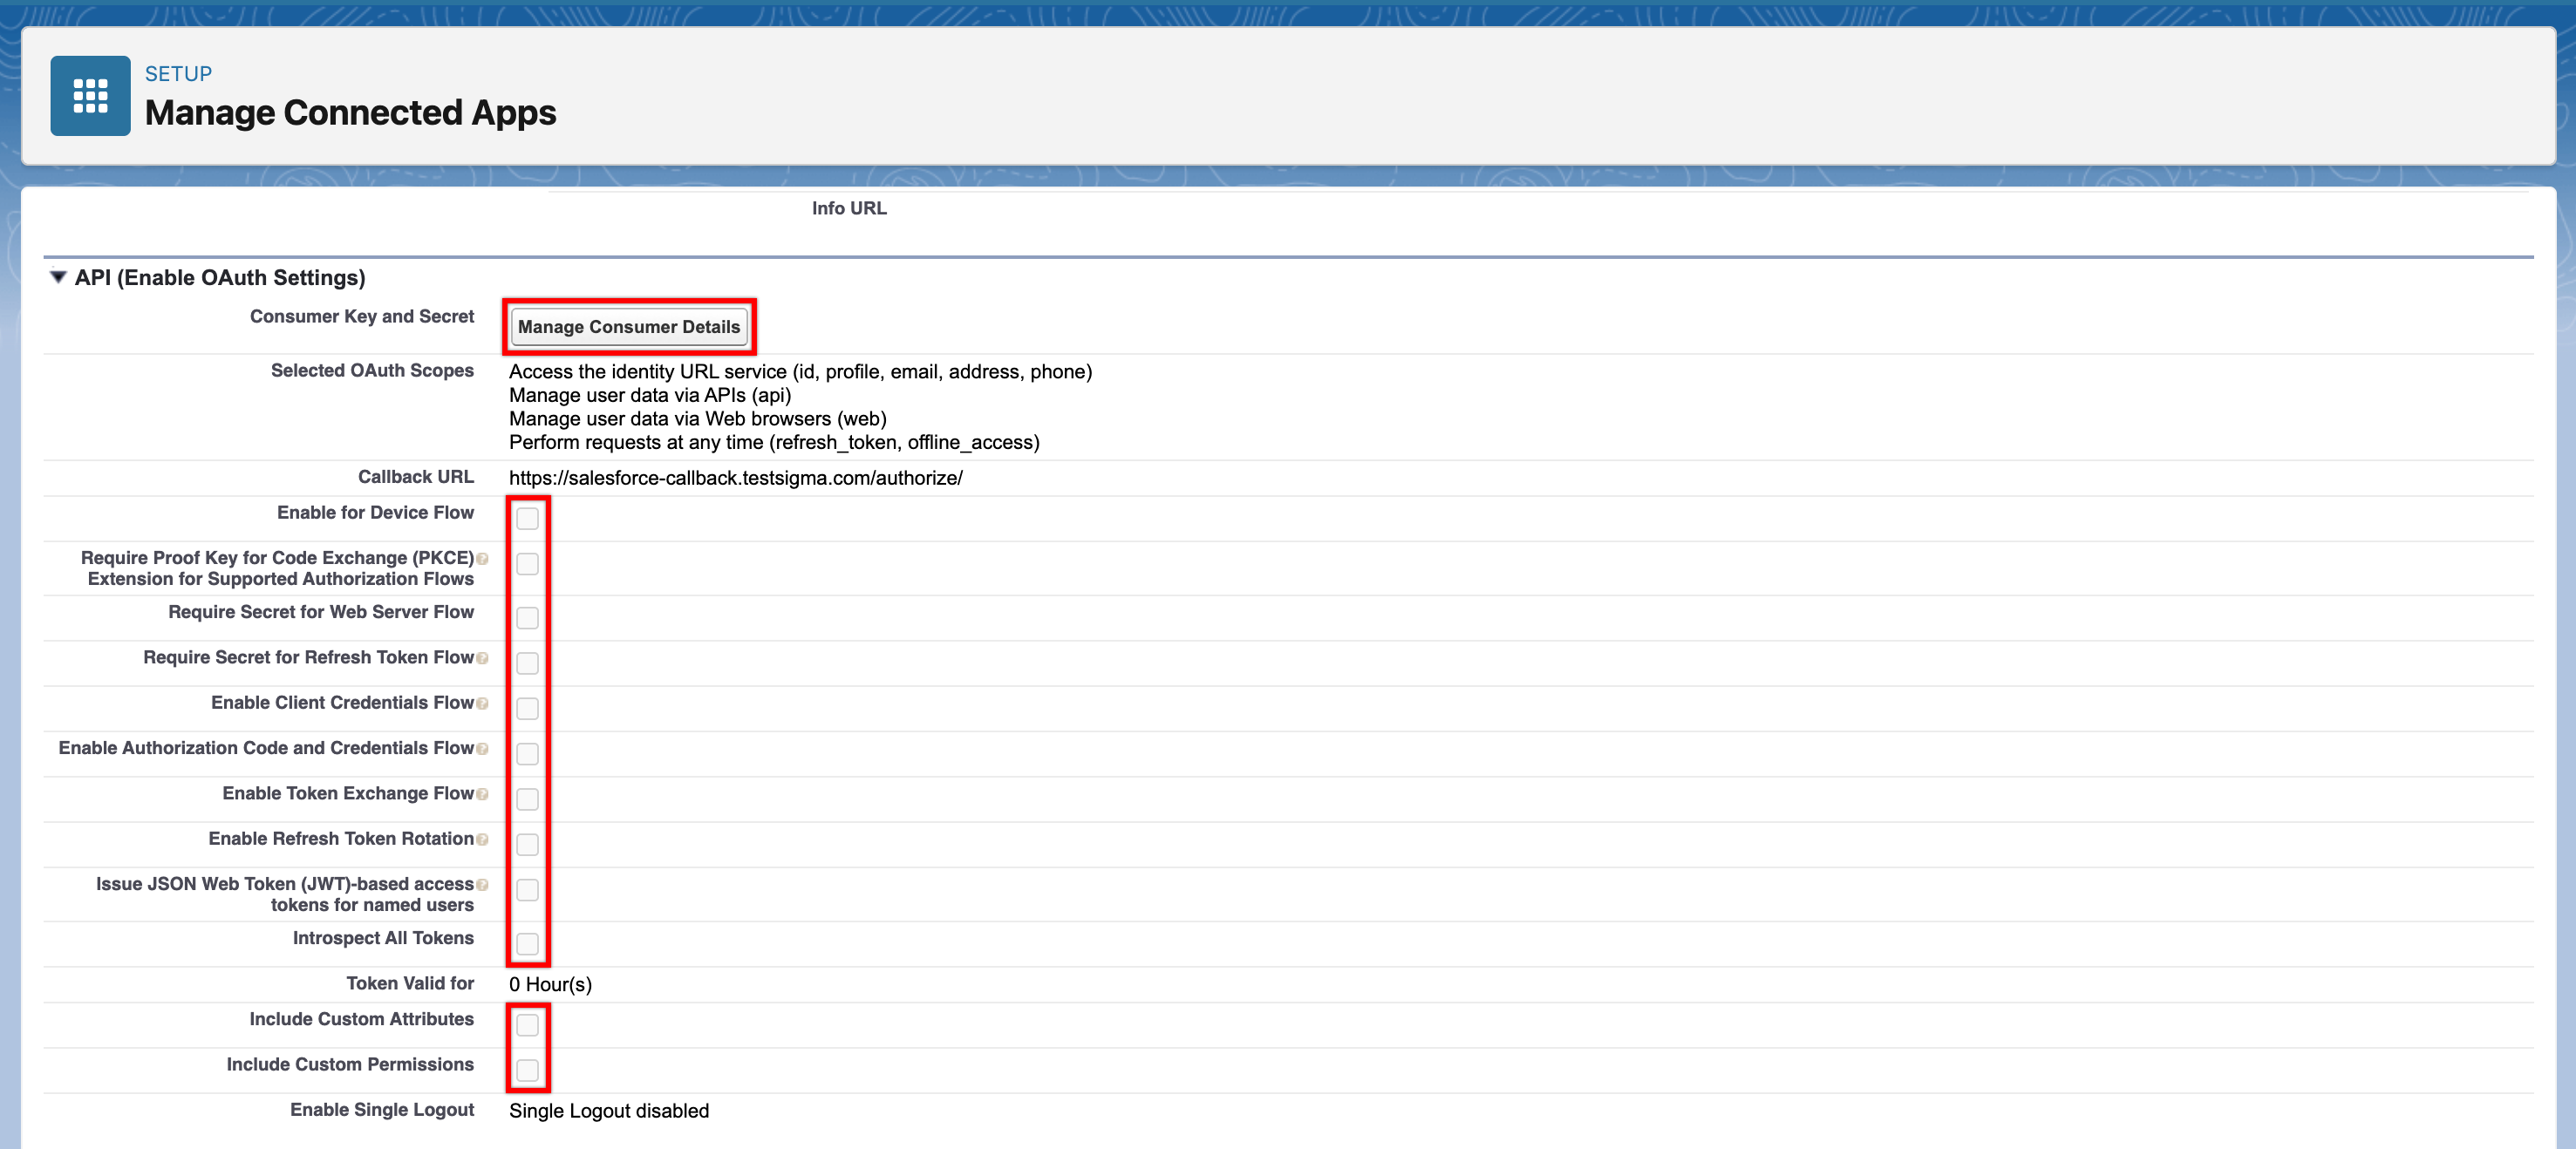
Ensure that none of the checkboxes in the API section are selected.
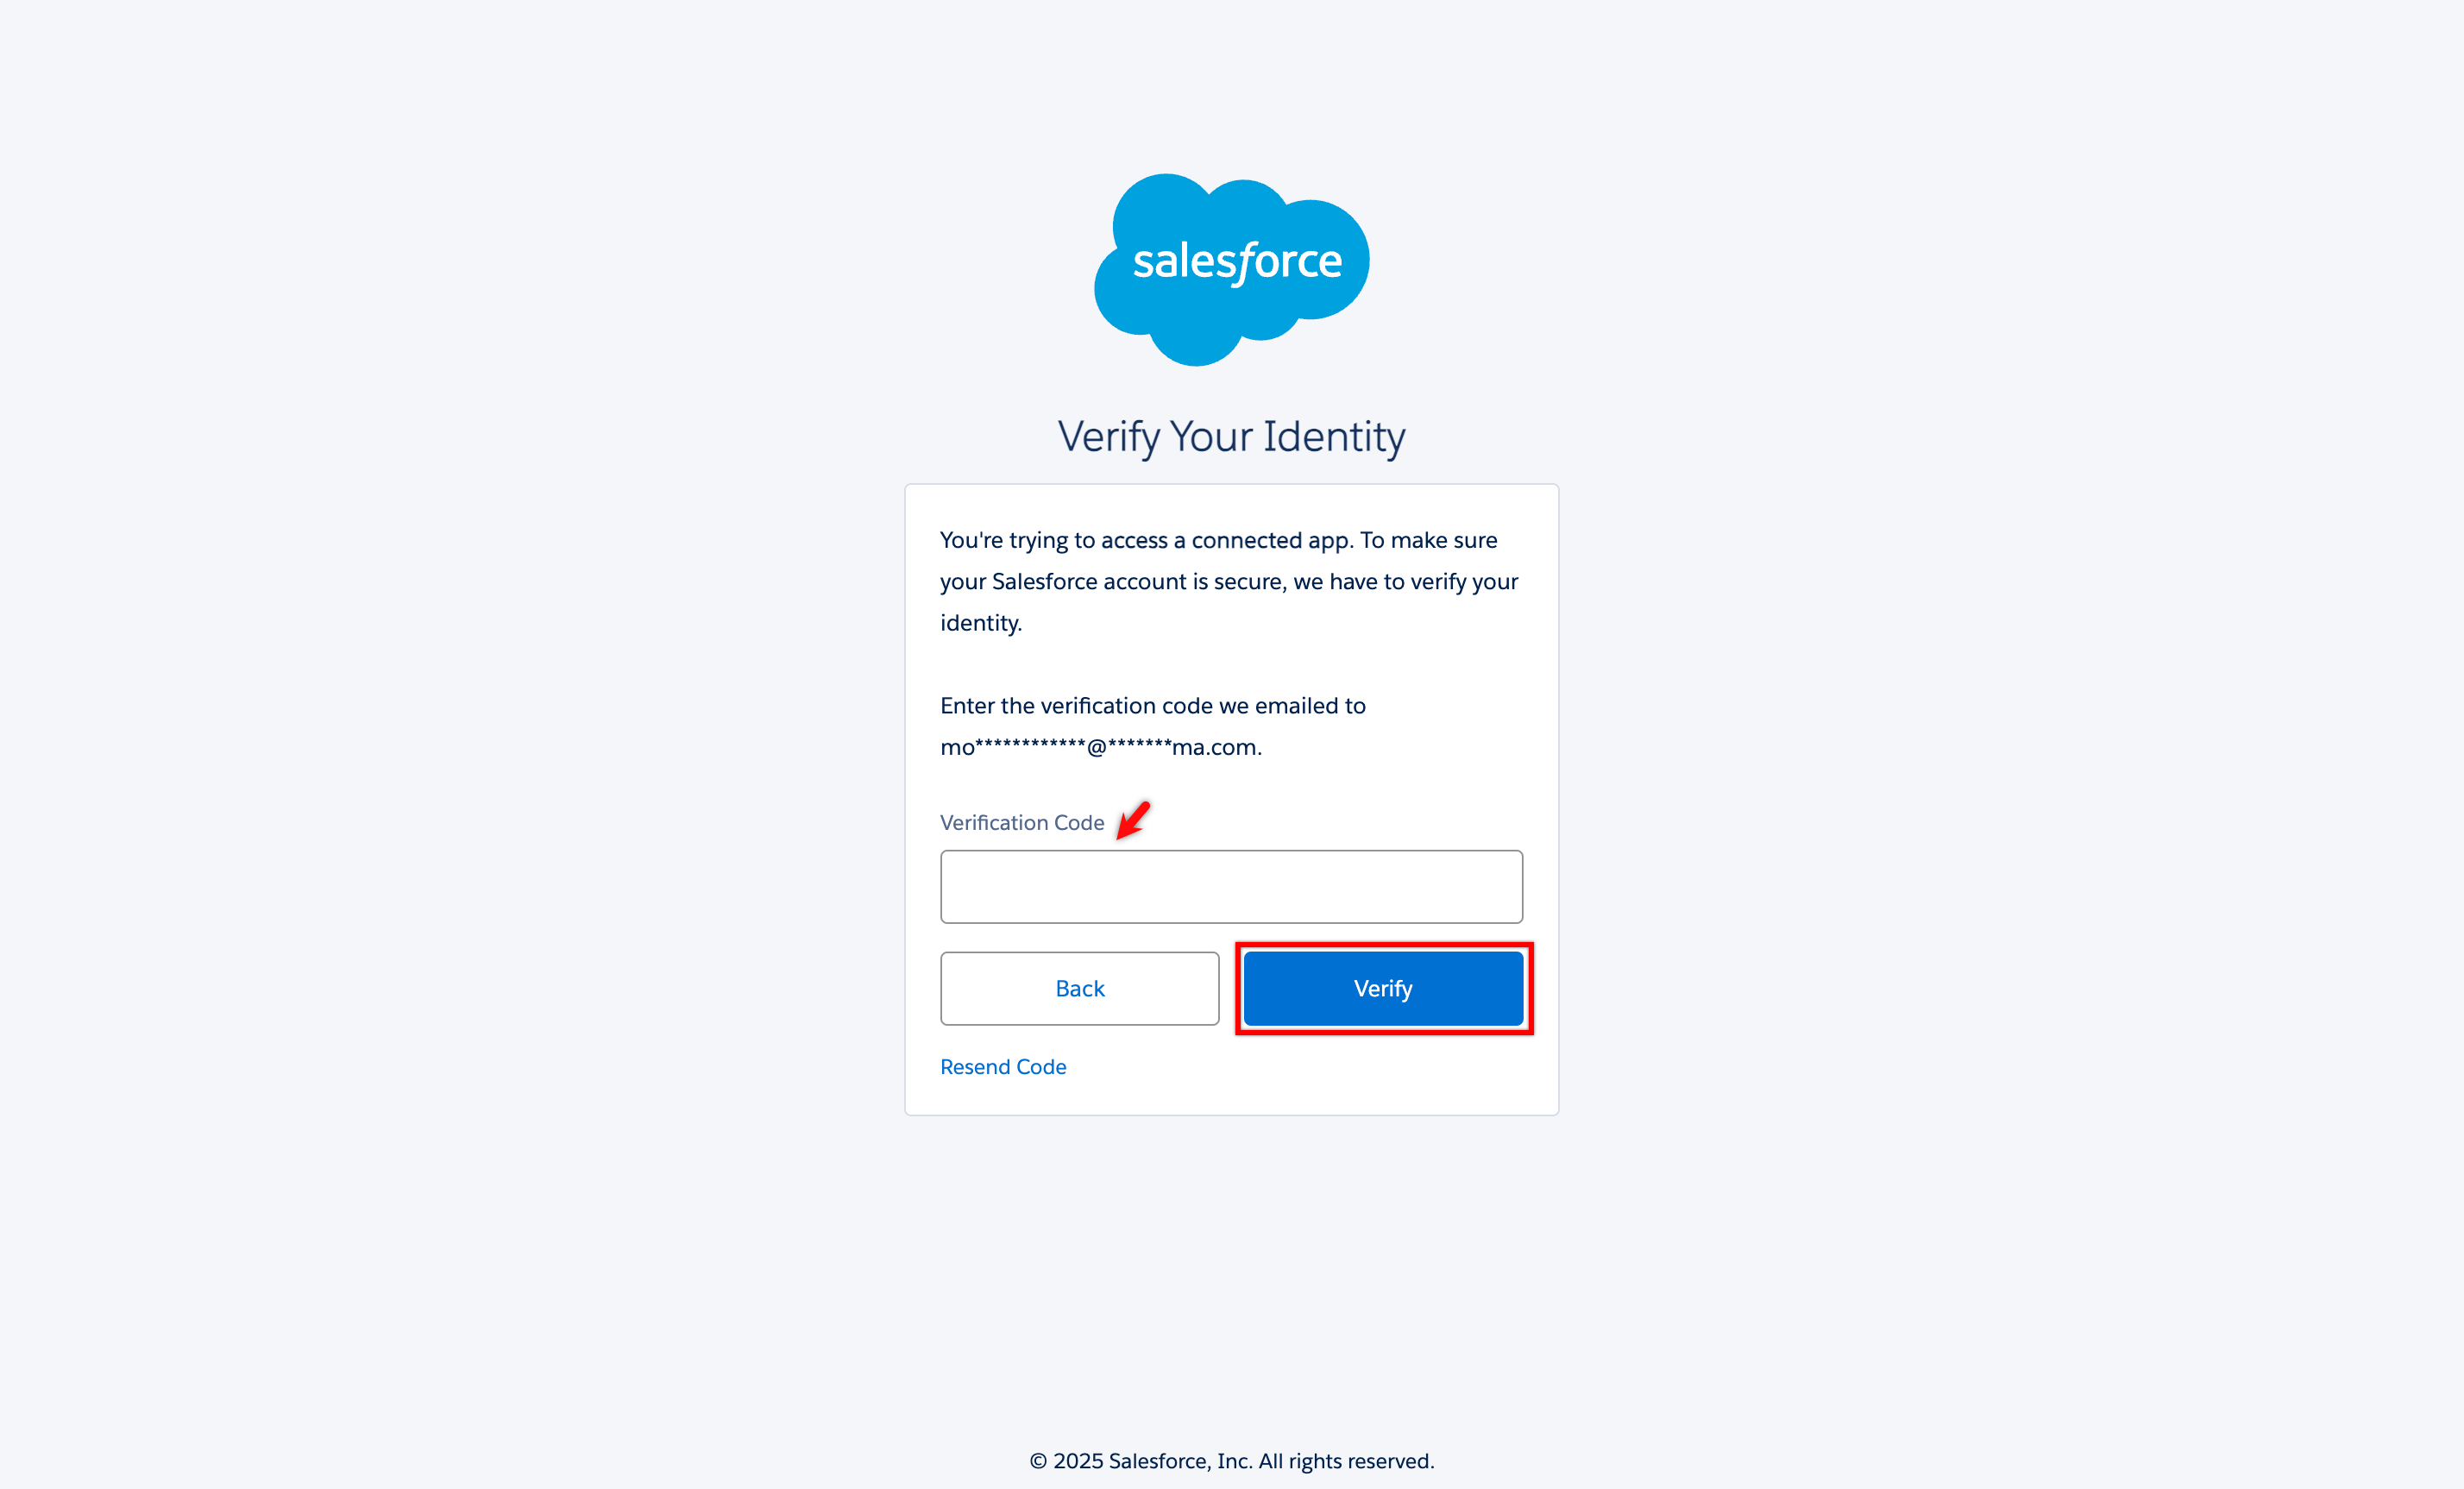
- On the Verify Your Identity window, enter OTP sent to the admin email.
- Upon verification, the Consumer Details page will be displayed with Consumer Key and Consumer Secret.
- For Security Token, go to My Personal Information > Reset My Security Token and click on Reset Security Token. A new token will be sent to admin mail. Please refer to Salesforce for more information.
Refer to the documentation on Salesforce troubleshooting guide for the most common issues while creating a connected app.
Want to contribute or report missing content?