- configuration
 API Keys
- User Settings
- Security
- Configure Organization Settings
- Two-Factor Authentication (2FA)
- Configure Password Policy
- Setting Up Google SSO Login
- Setting Up Okta SSO Login (SAML)
- Setting Up Azure SSO Login (SAML)
- iOS Settings
- Create WDA File
- SMTP Configuration
- Manage Access
Configuring Local iOS Device with Provisioning Profile
Testsigma allows you to seamlessly test your applications on local iOS devices as well as on Testsigma Cloud machines. To achieve this, you need to properly configure your provisioning profiles or WebdriverAgent (WDA) on the Testsigma platform. This guide provides the step-by-step process for configuring your provisioning profiles and troubleshooting any potential errors encountered within Testsigma.
Prerequisites
Before you begin, ensure that:
- You have a valid Apple Developer account.
- You have referred to the documentation on installing Testsigma Agent on your local machine.
- For Windows machines, you must install iTunes to connect the iOS device for automation. Click here to download it.
Steps to Create Provisioning Profile
Follow these steps to generate a Certificate Signing Request (CSR) and upload it to the Apple Developer portal to run Testsigma tests on your local iOS device:
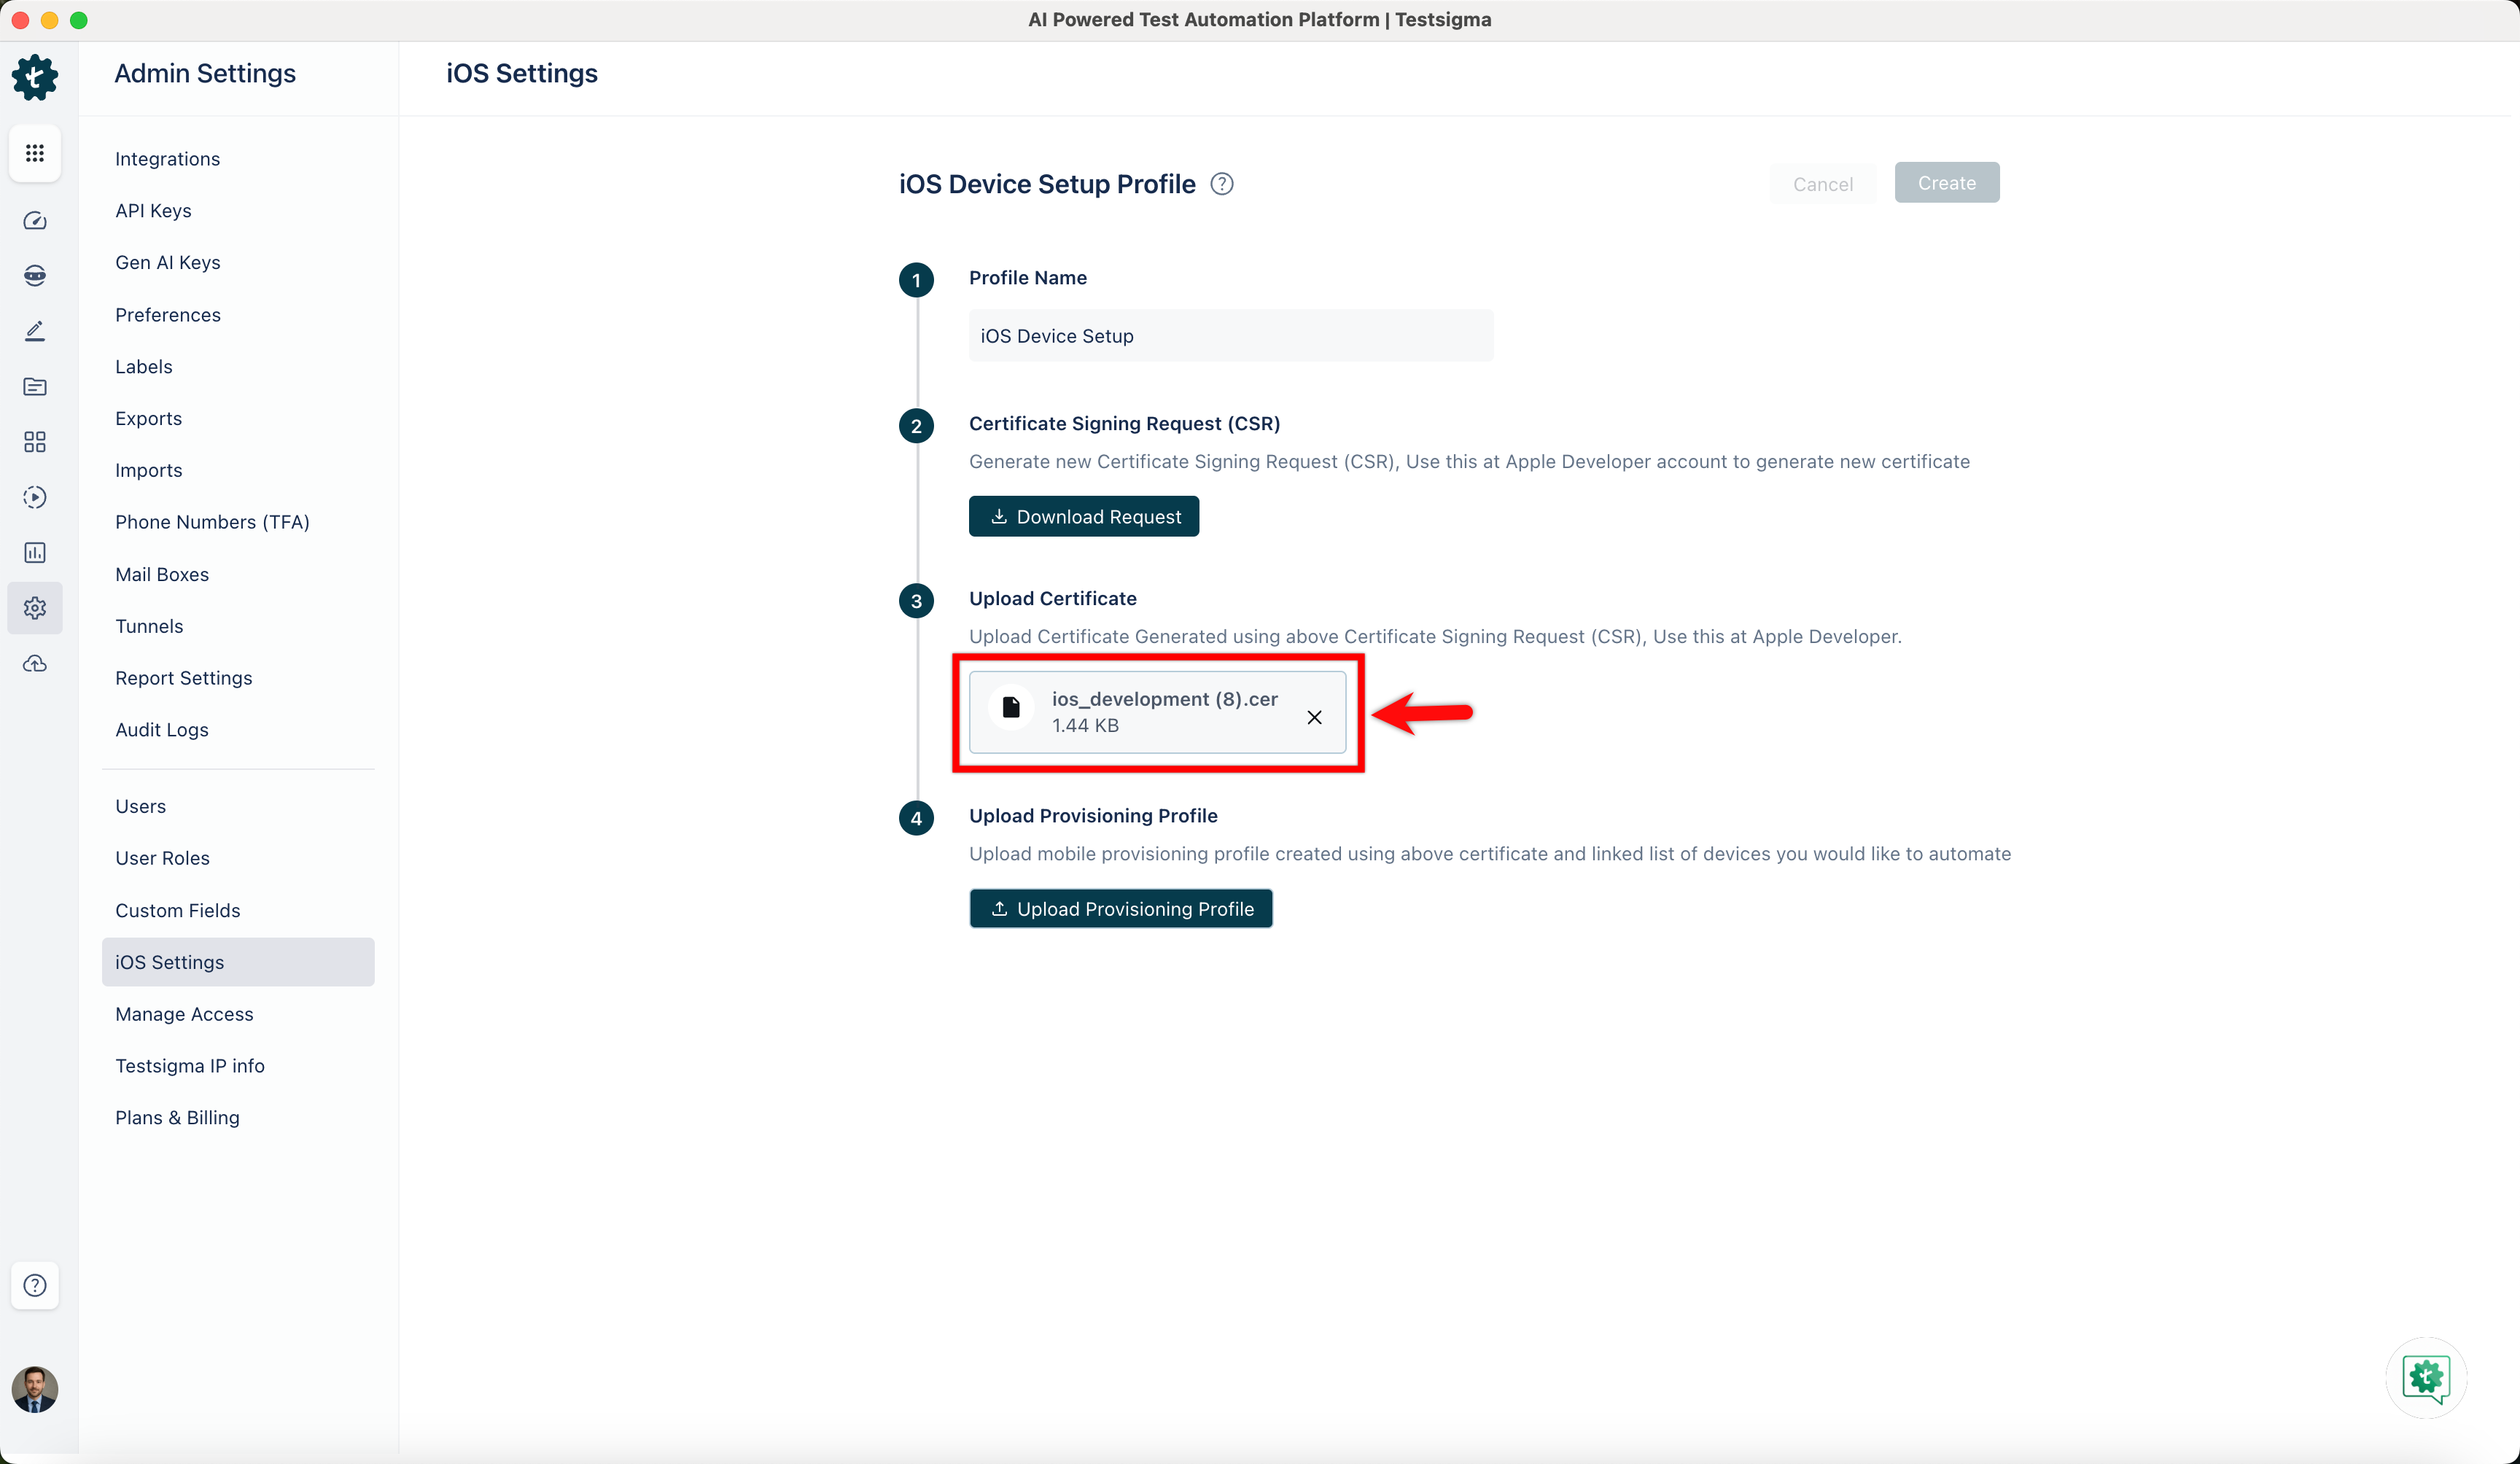
- Navigate to Settings > iOS Settings.
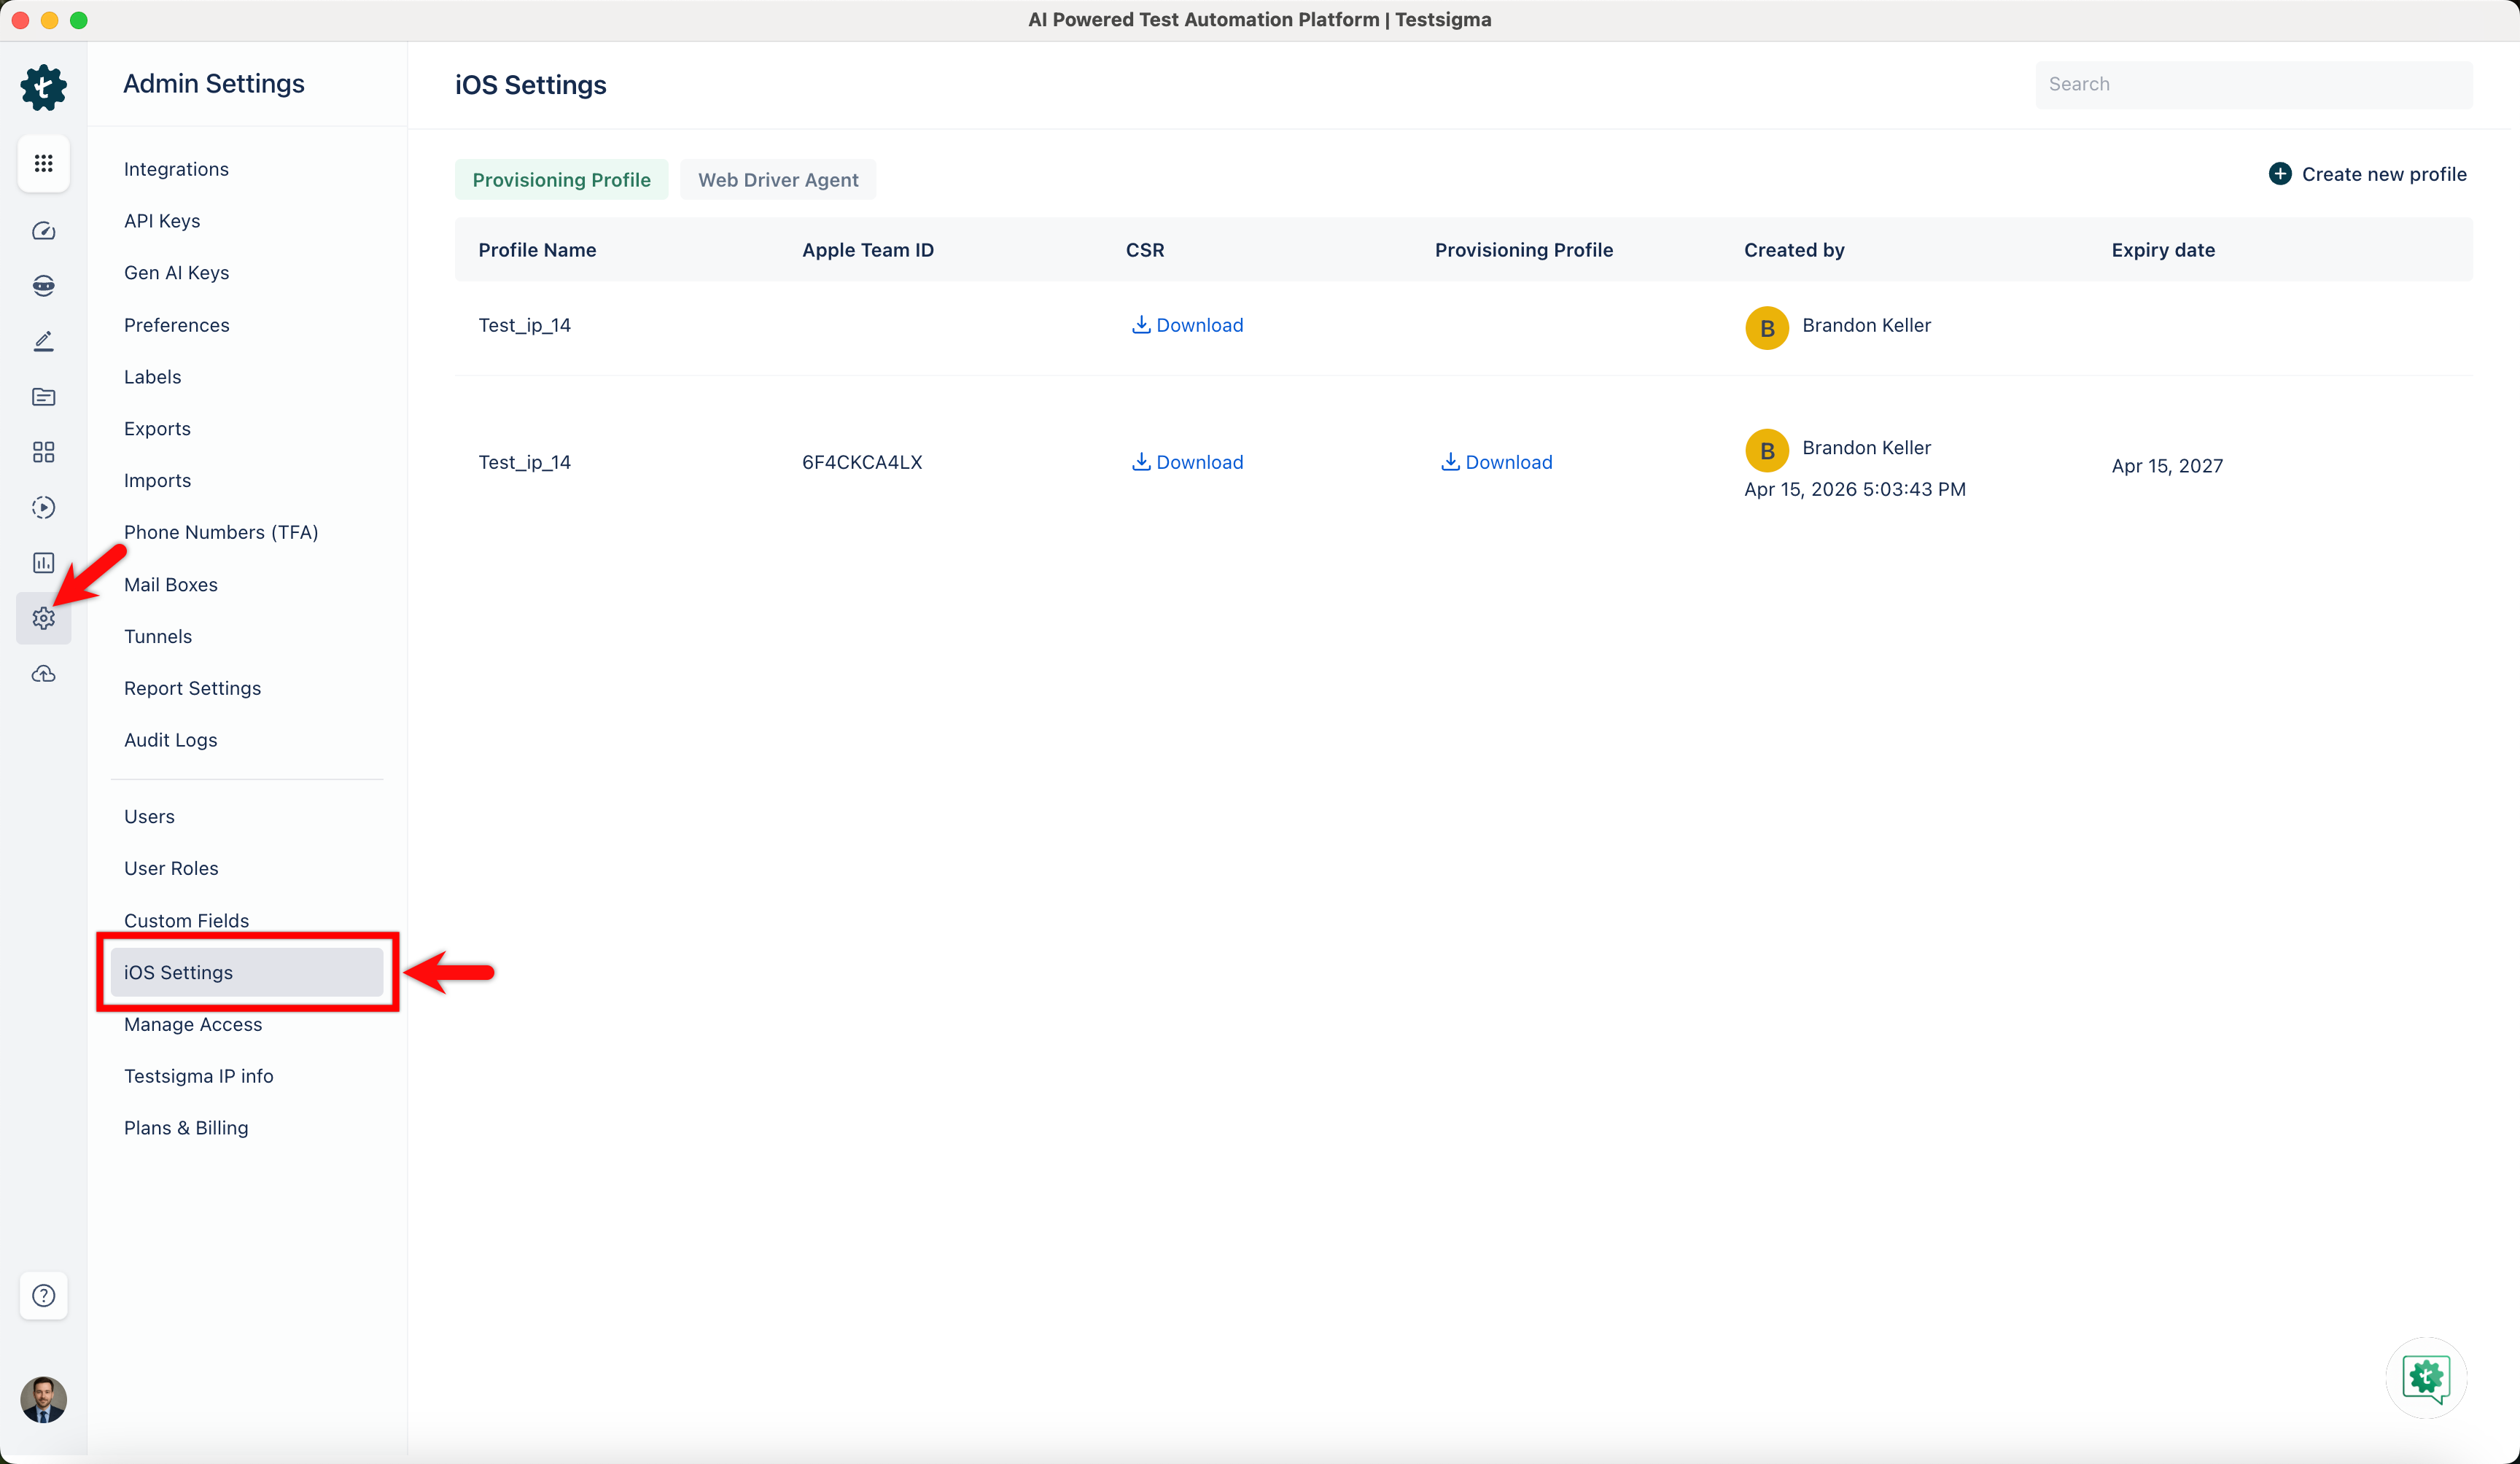
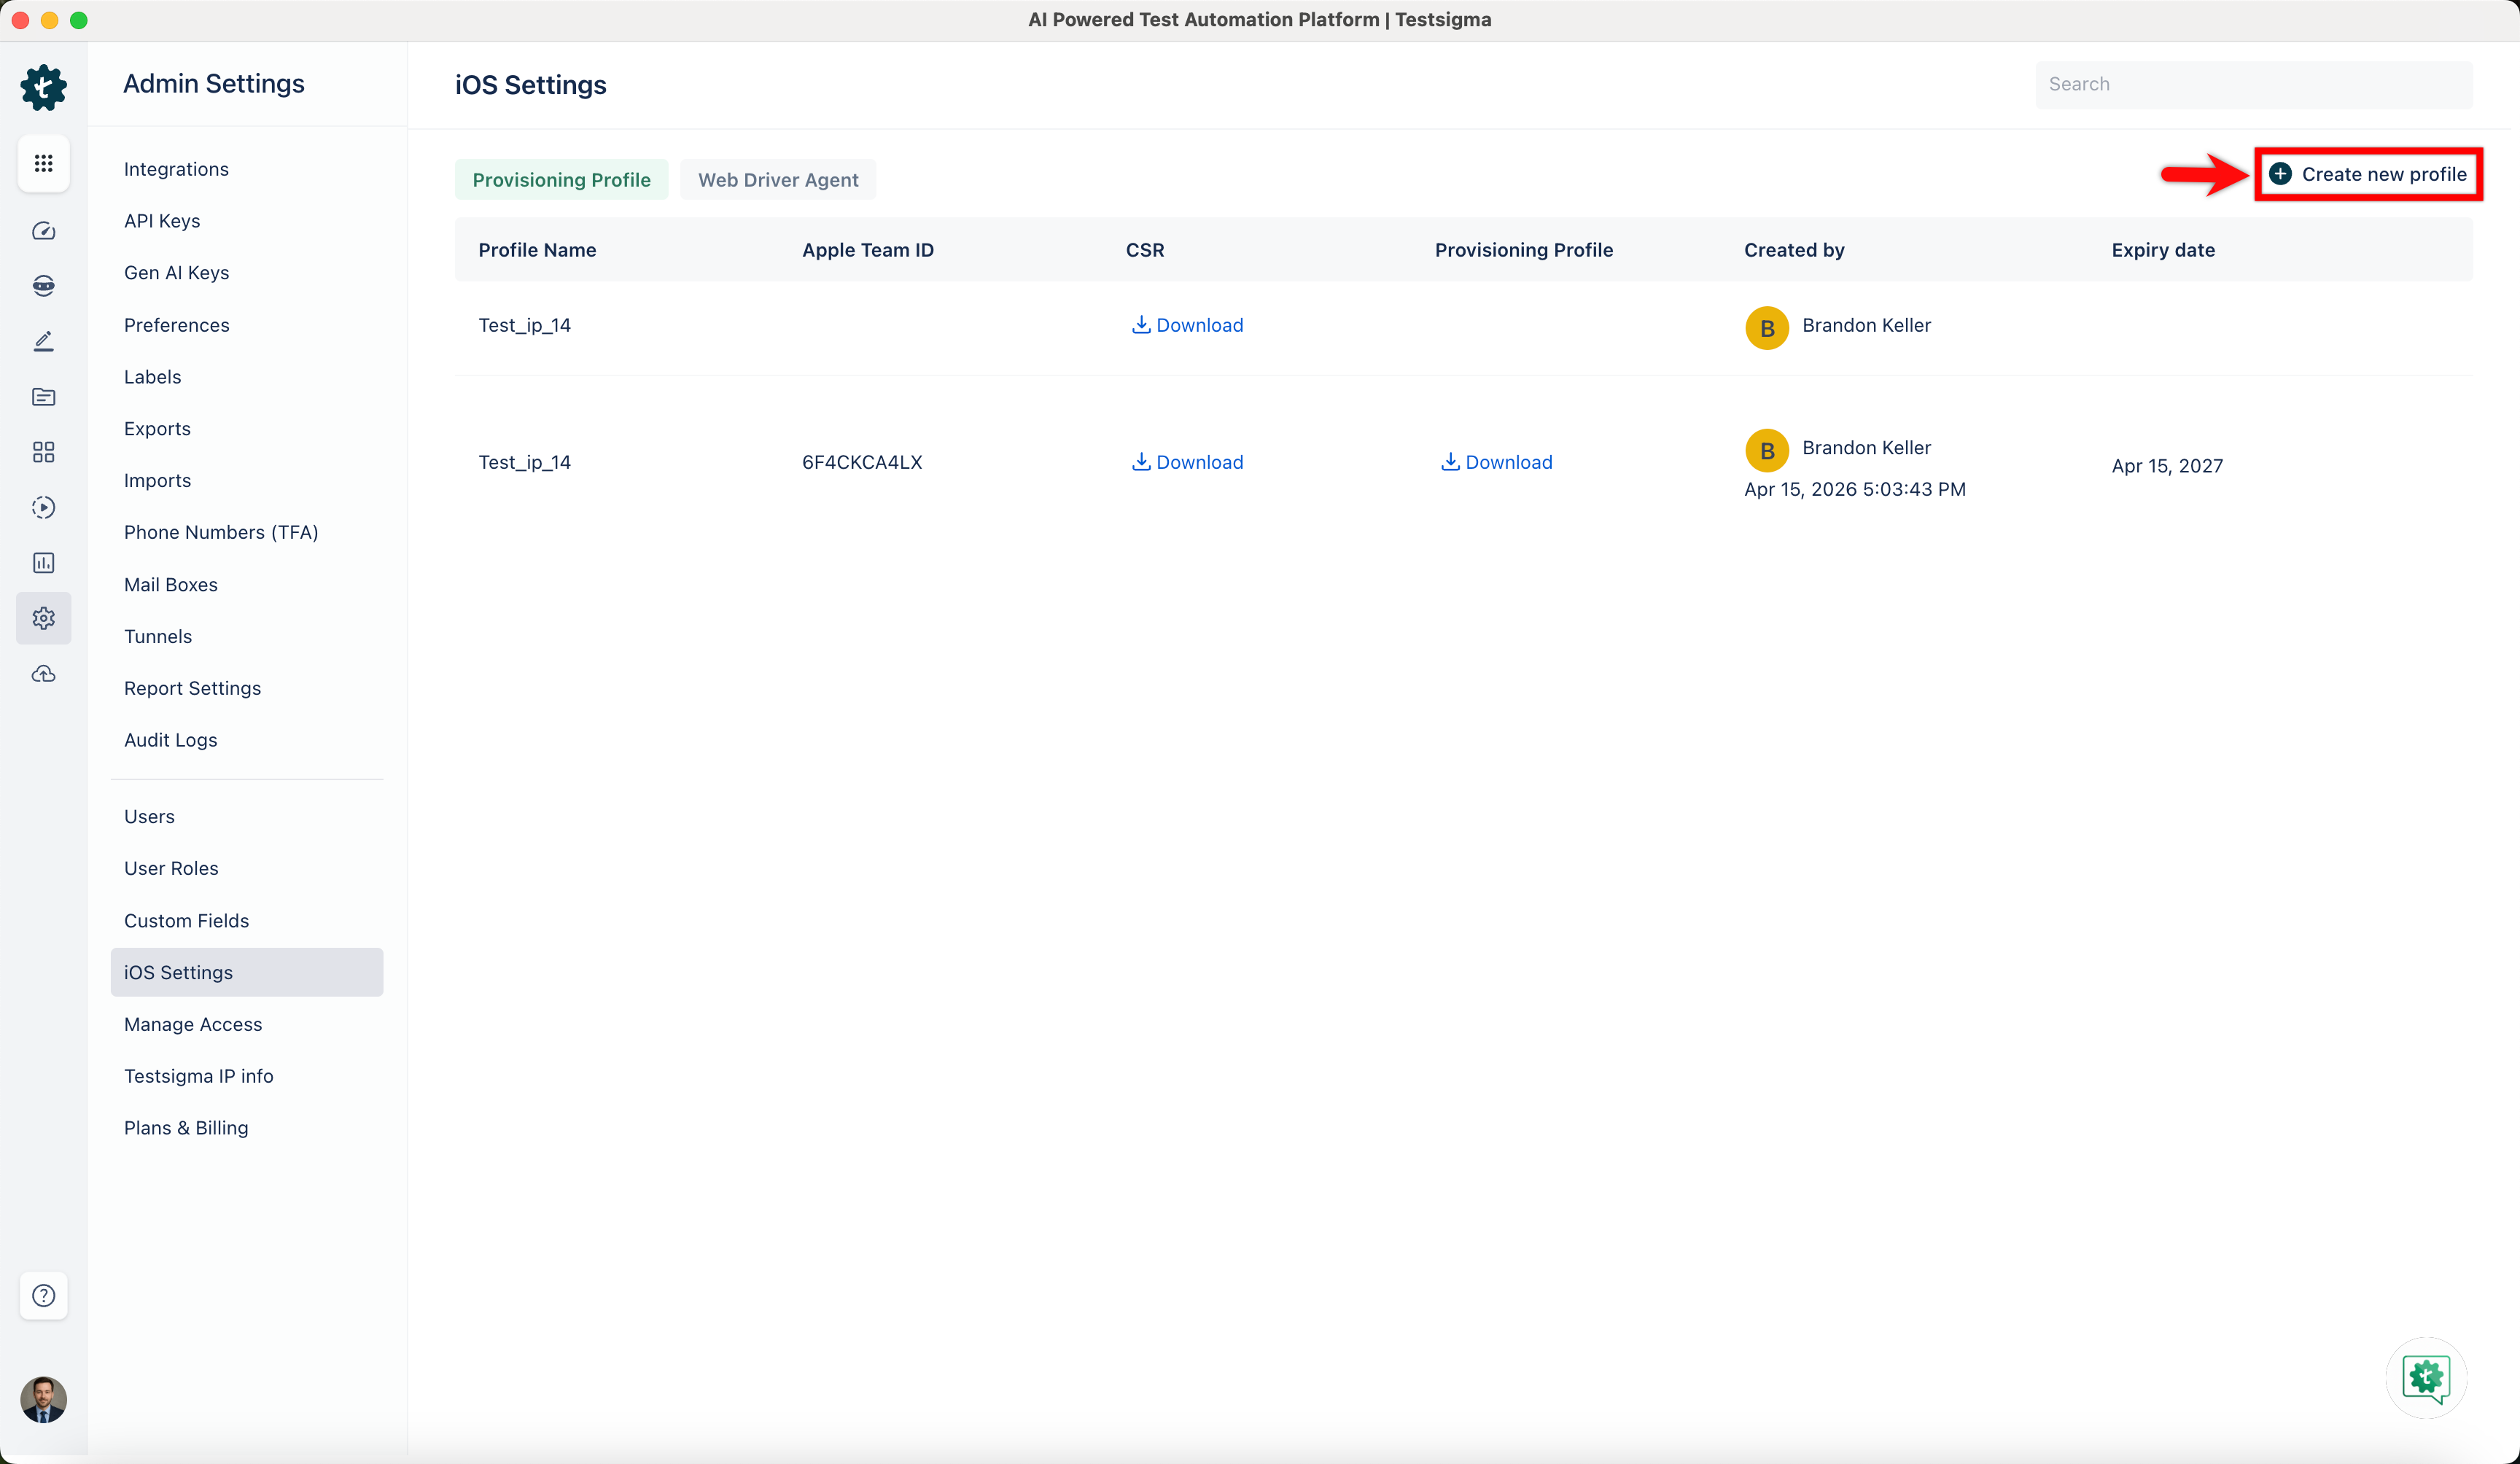
- In the iOS Settings screen, under the Provisional Profile tab, click + Create new profile.
- Enter a name for the profile in the Profile Name field.
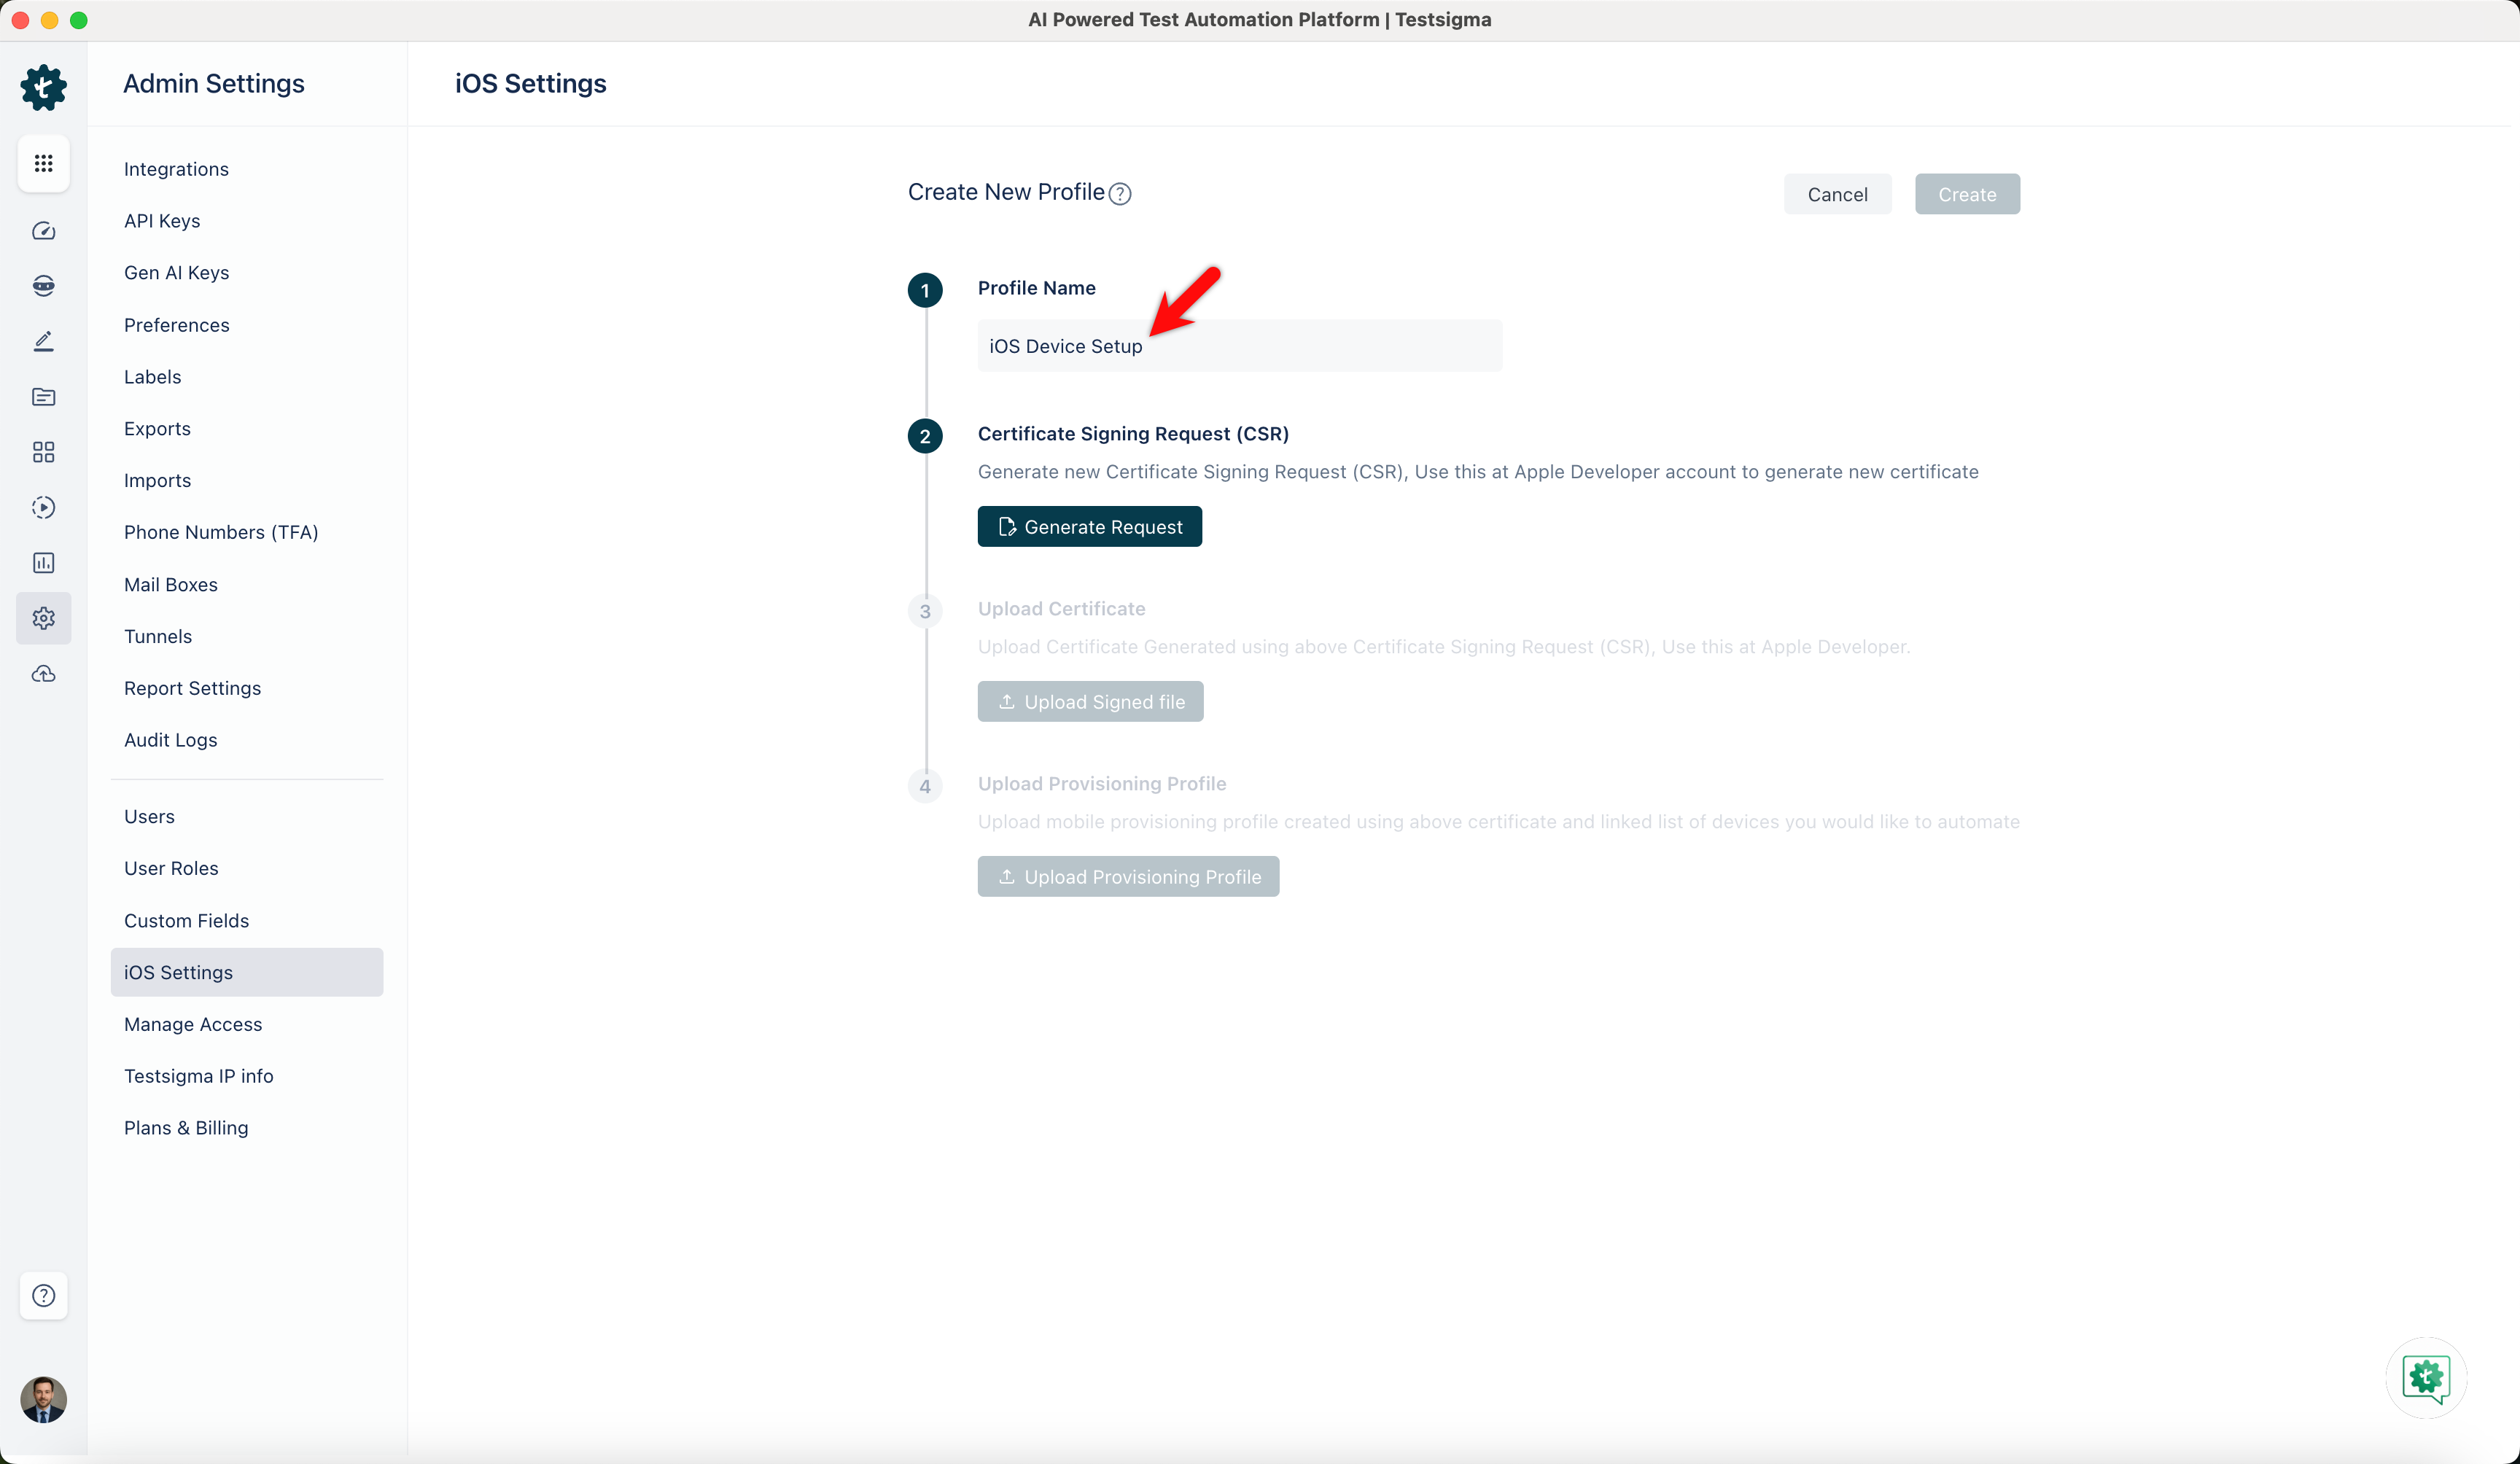
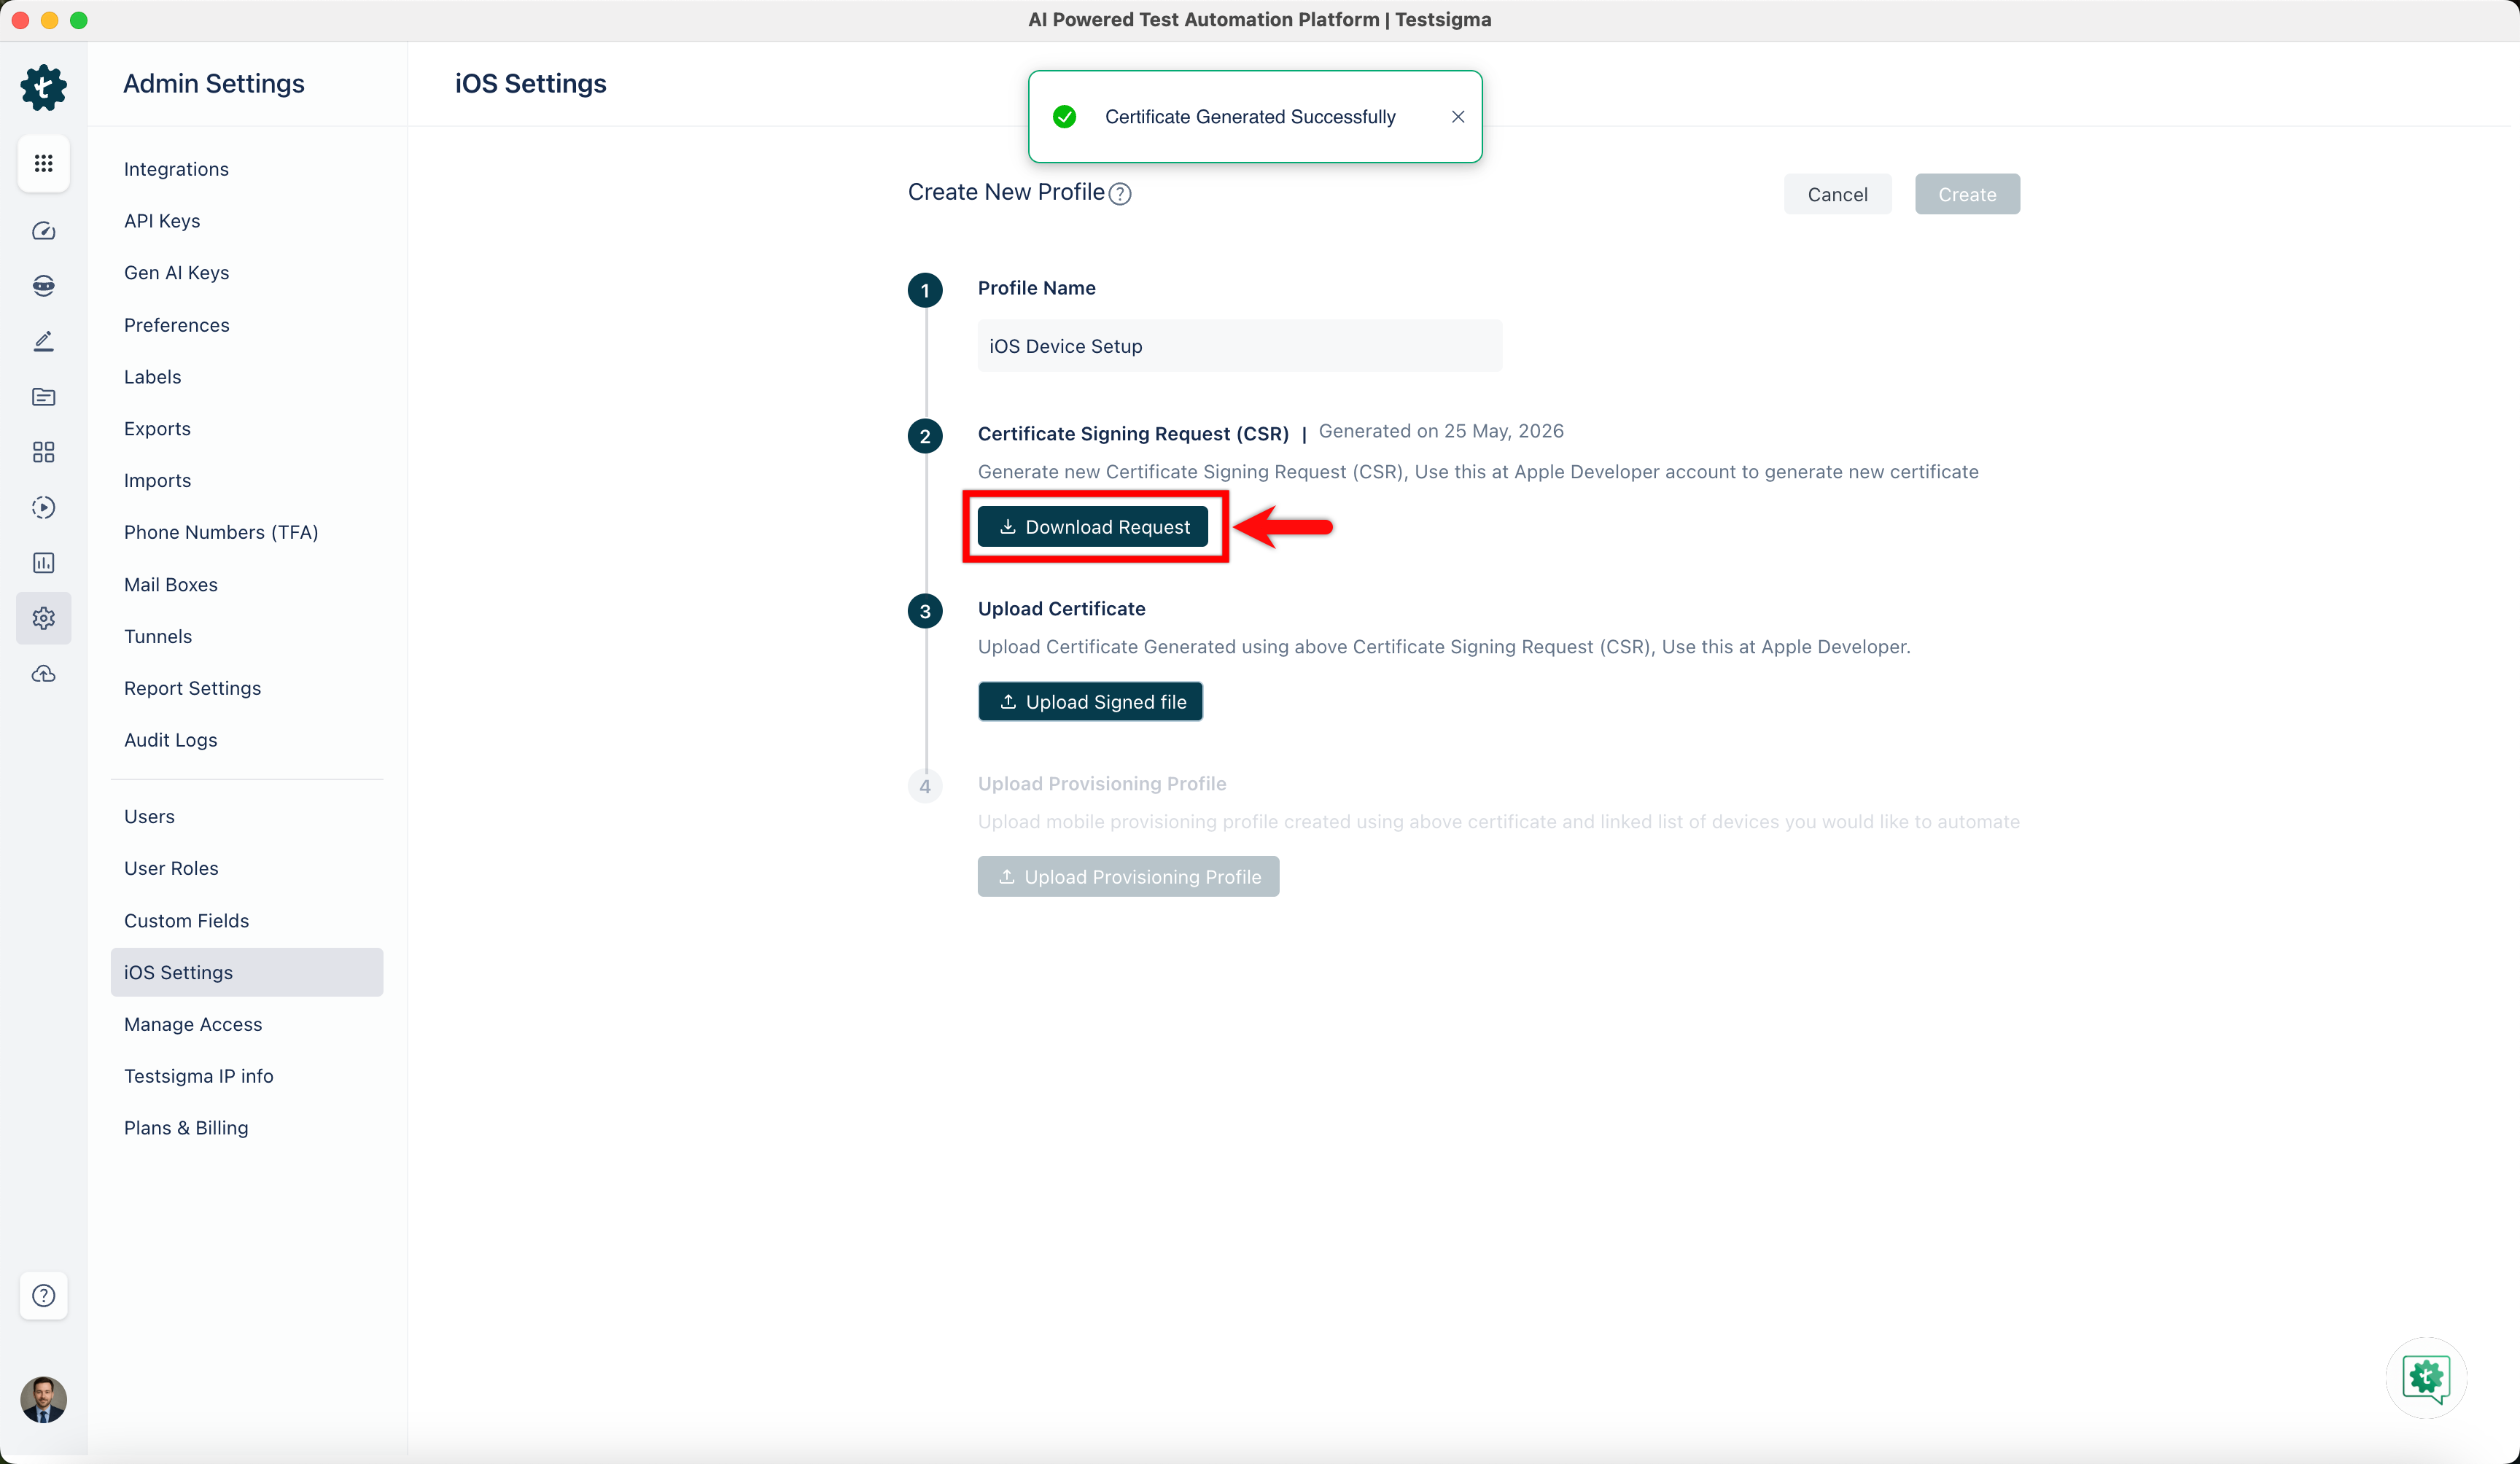
- Click Generate Request to create a Certificate Signing Request (CSR), and then click Download Request to save the CSR file.
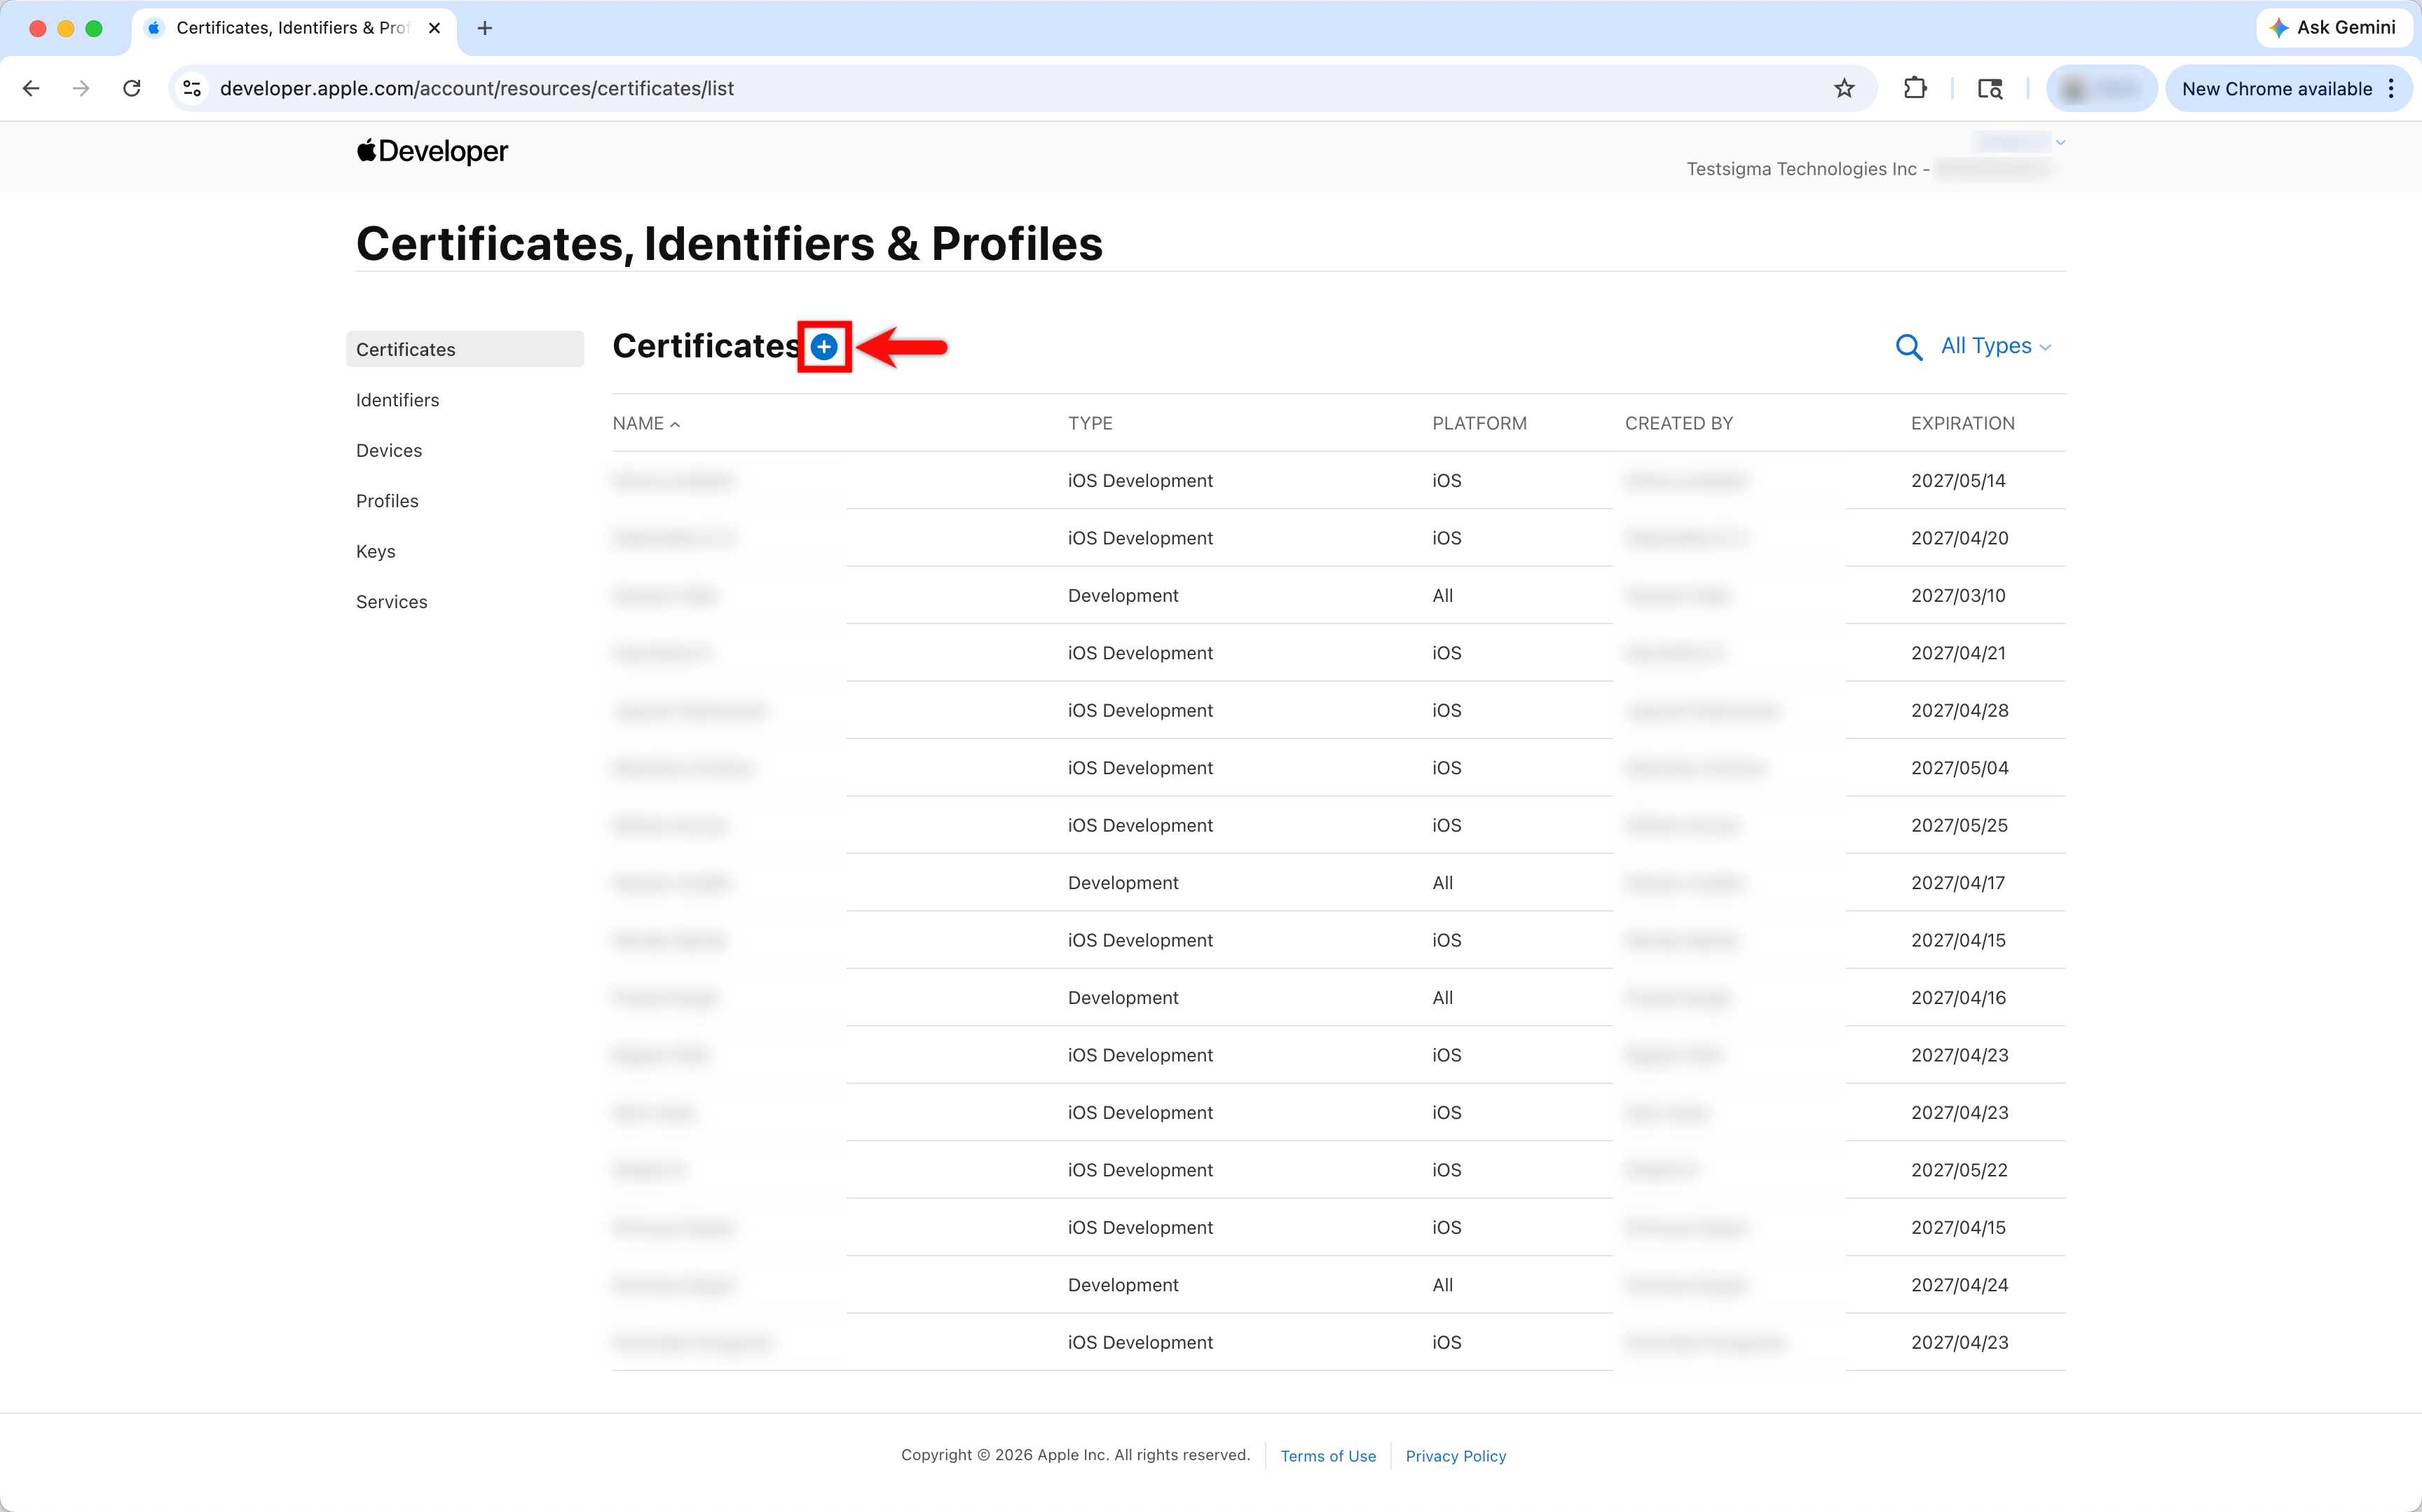
- Visit the Apple Developer portal and go to the Certificates, Identifiers & Profiles section and click the + icon next to Certificates.
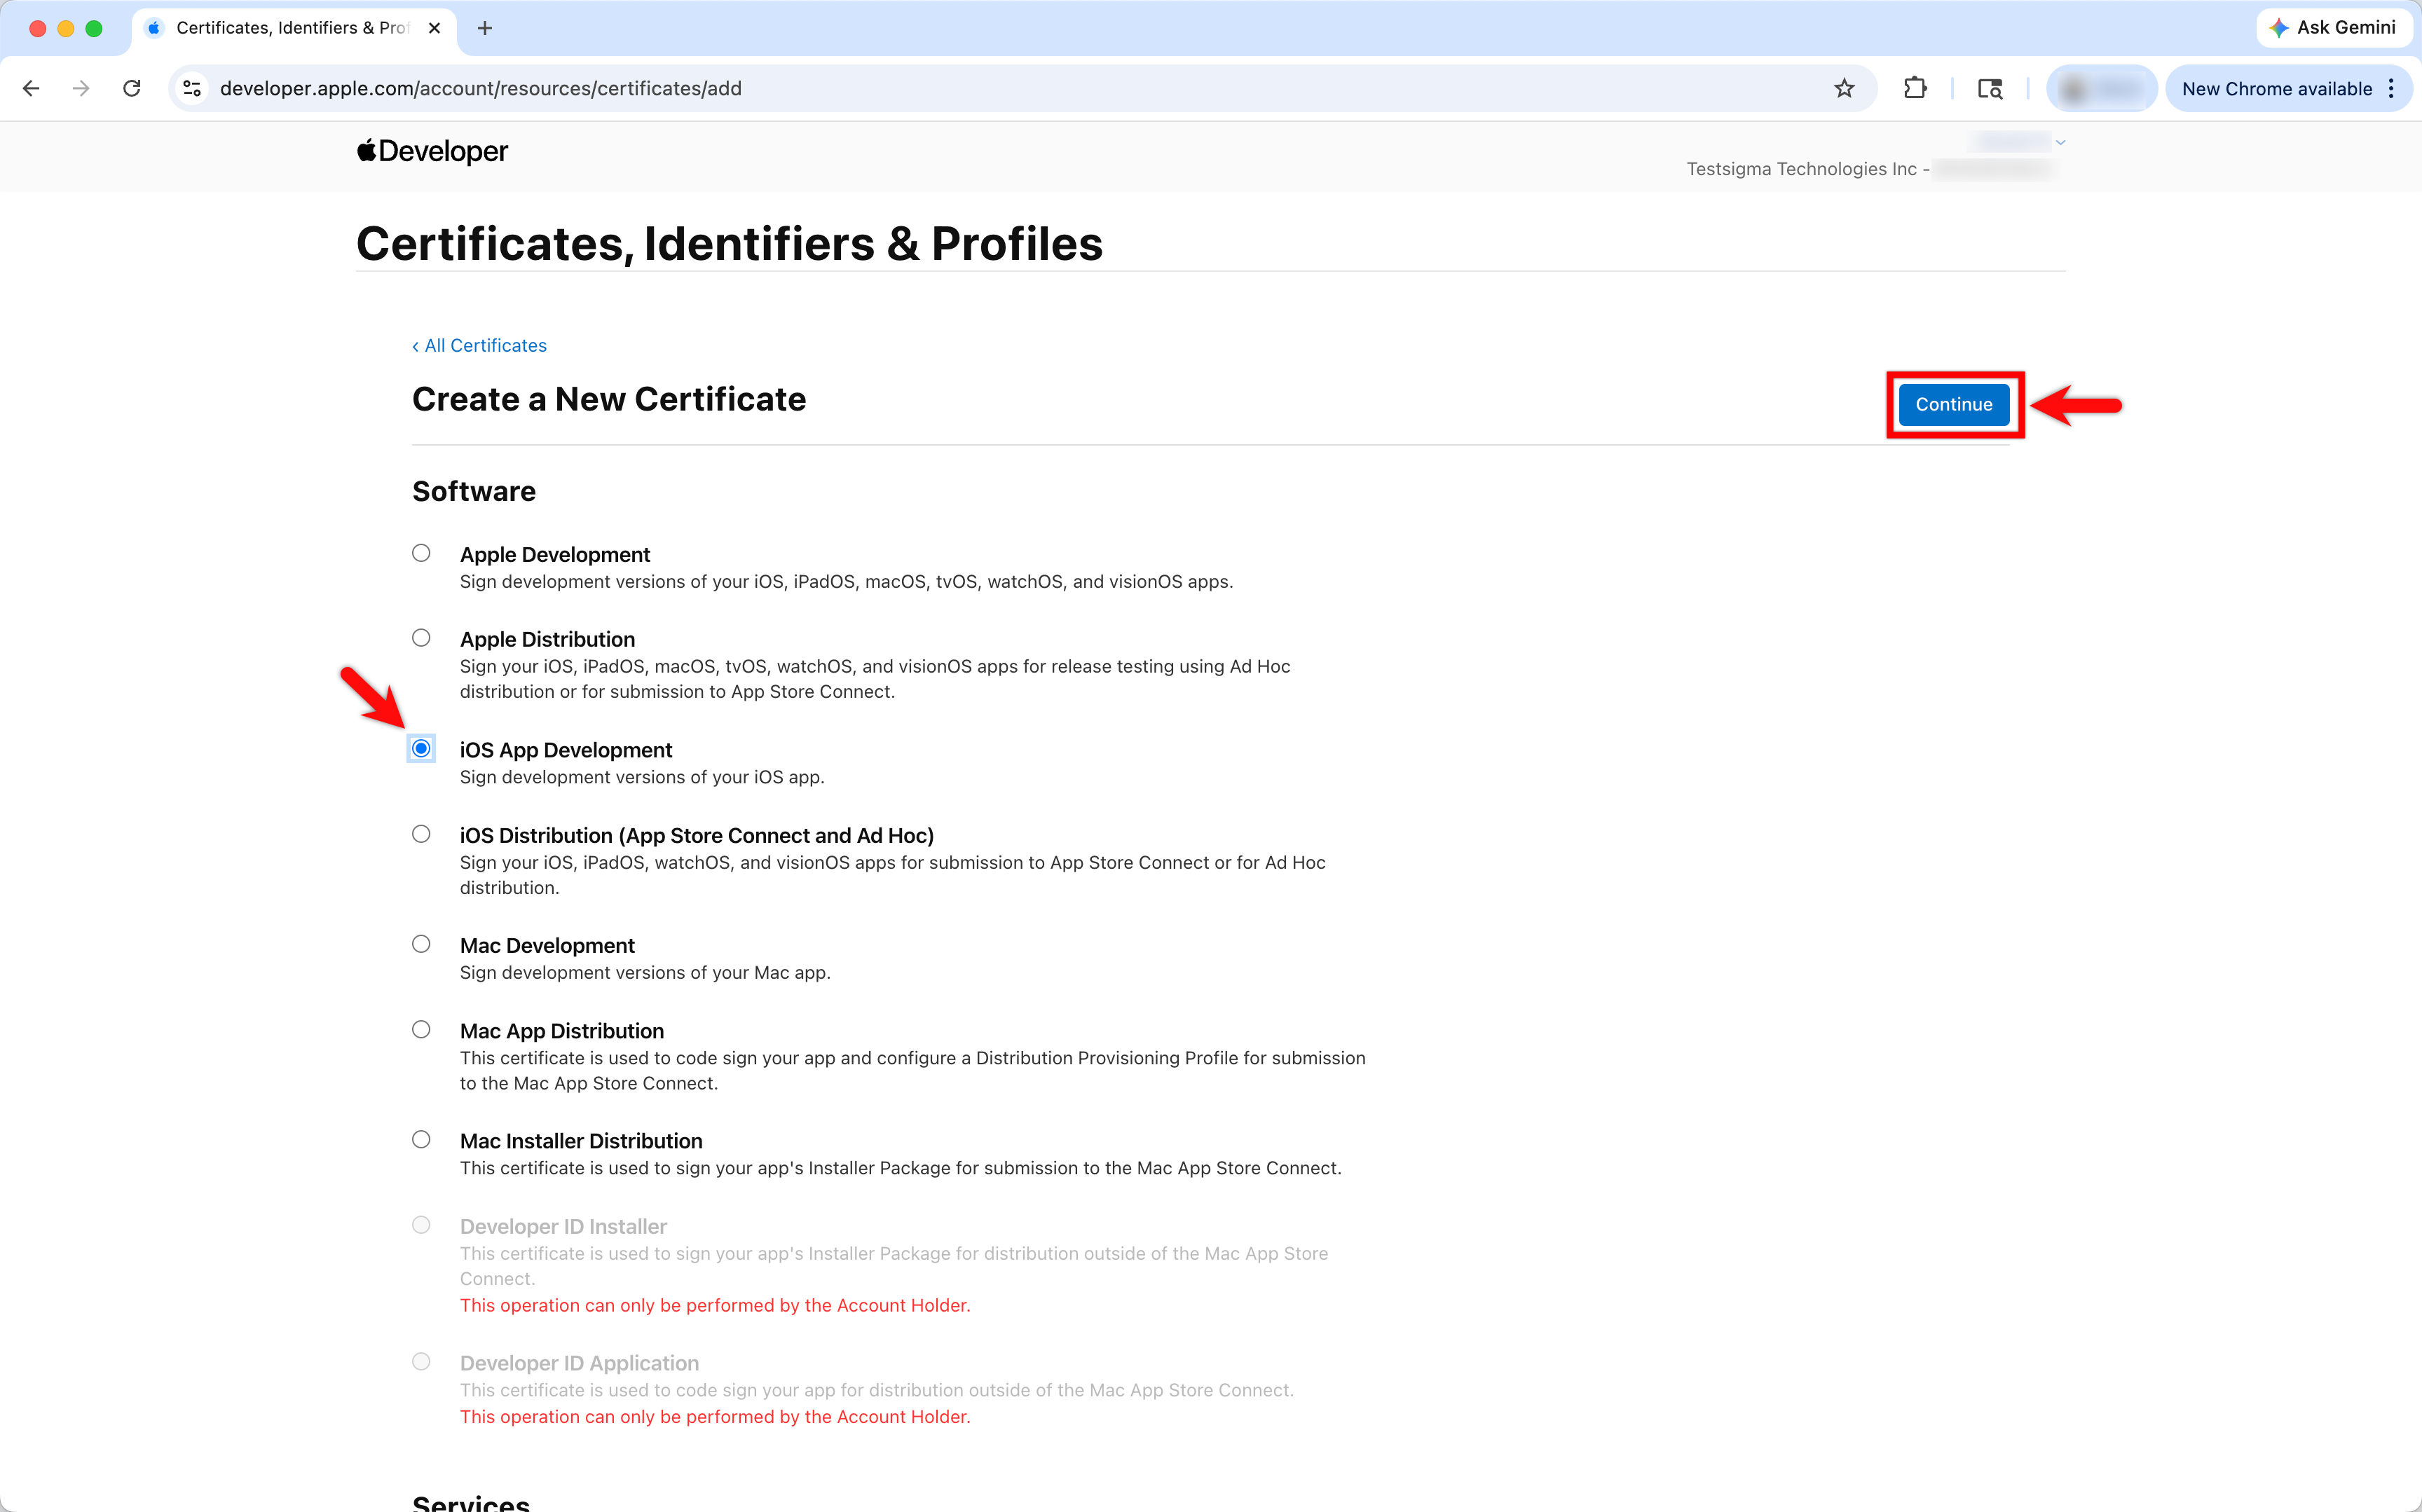
- In the Create a New Certificate screen, select iOS App Development under Software and click Continue.
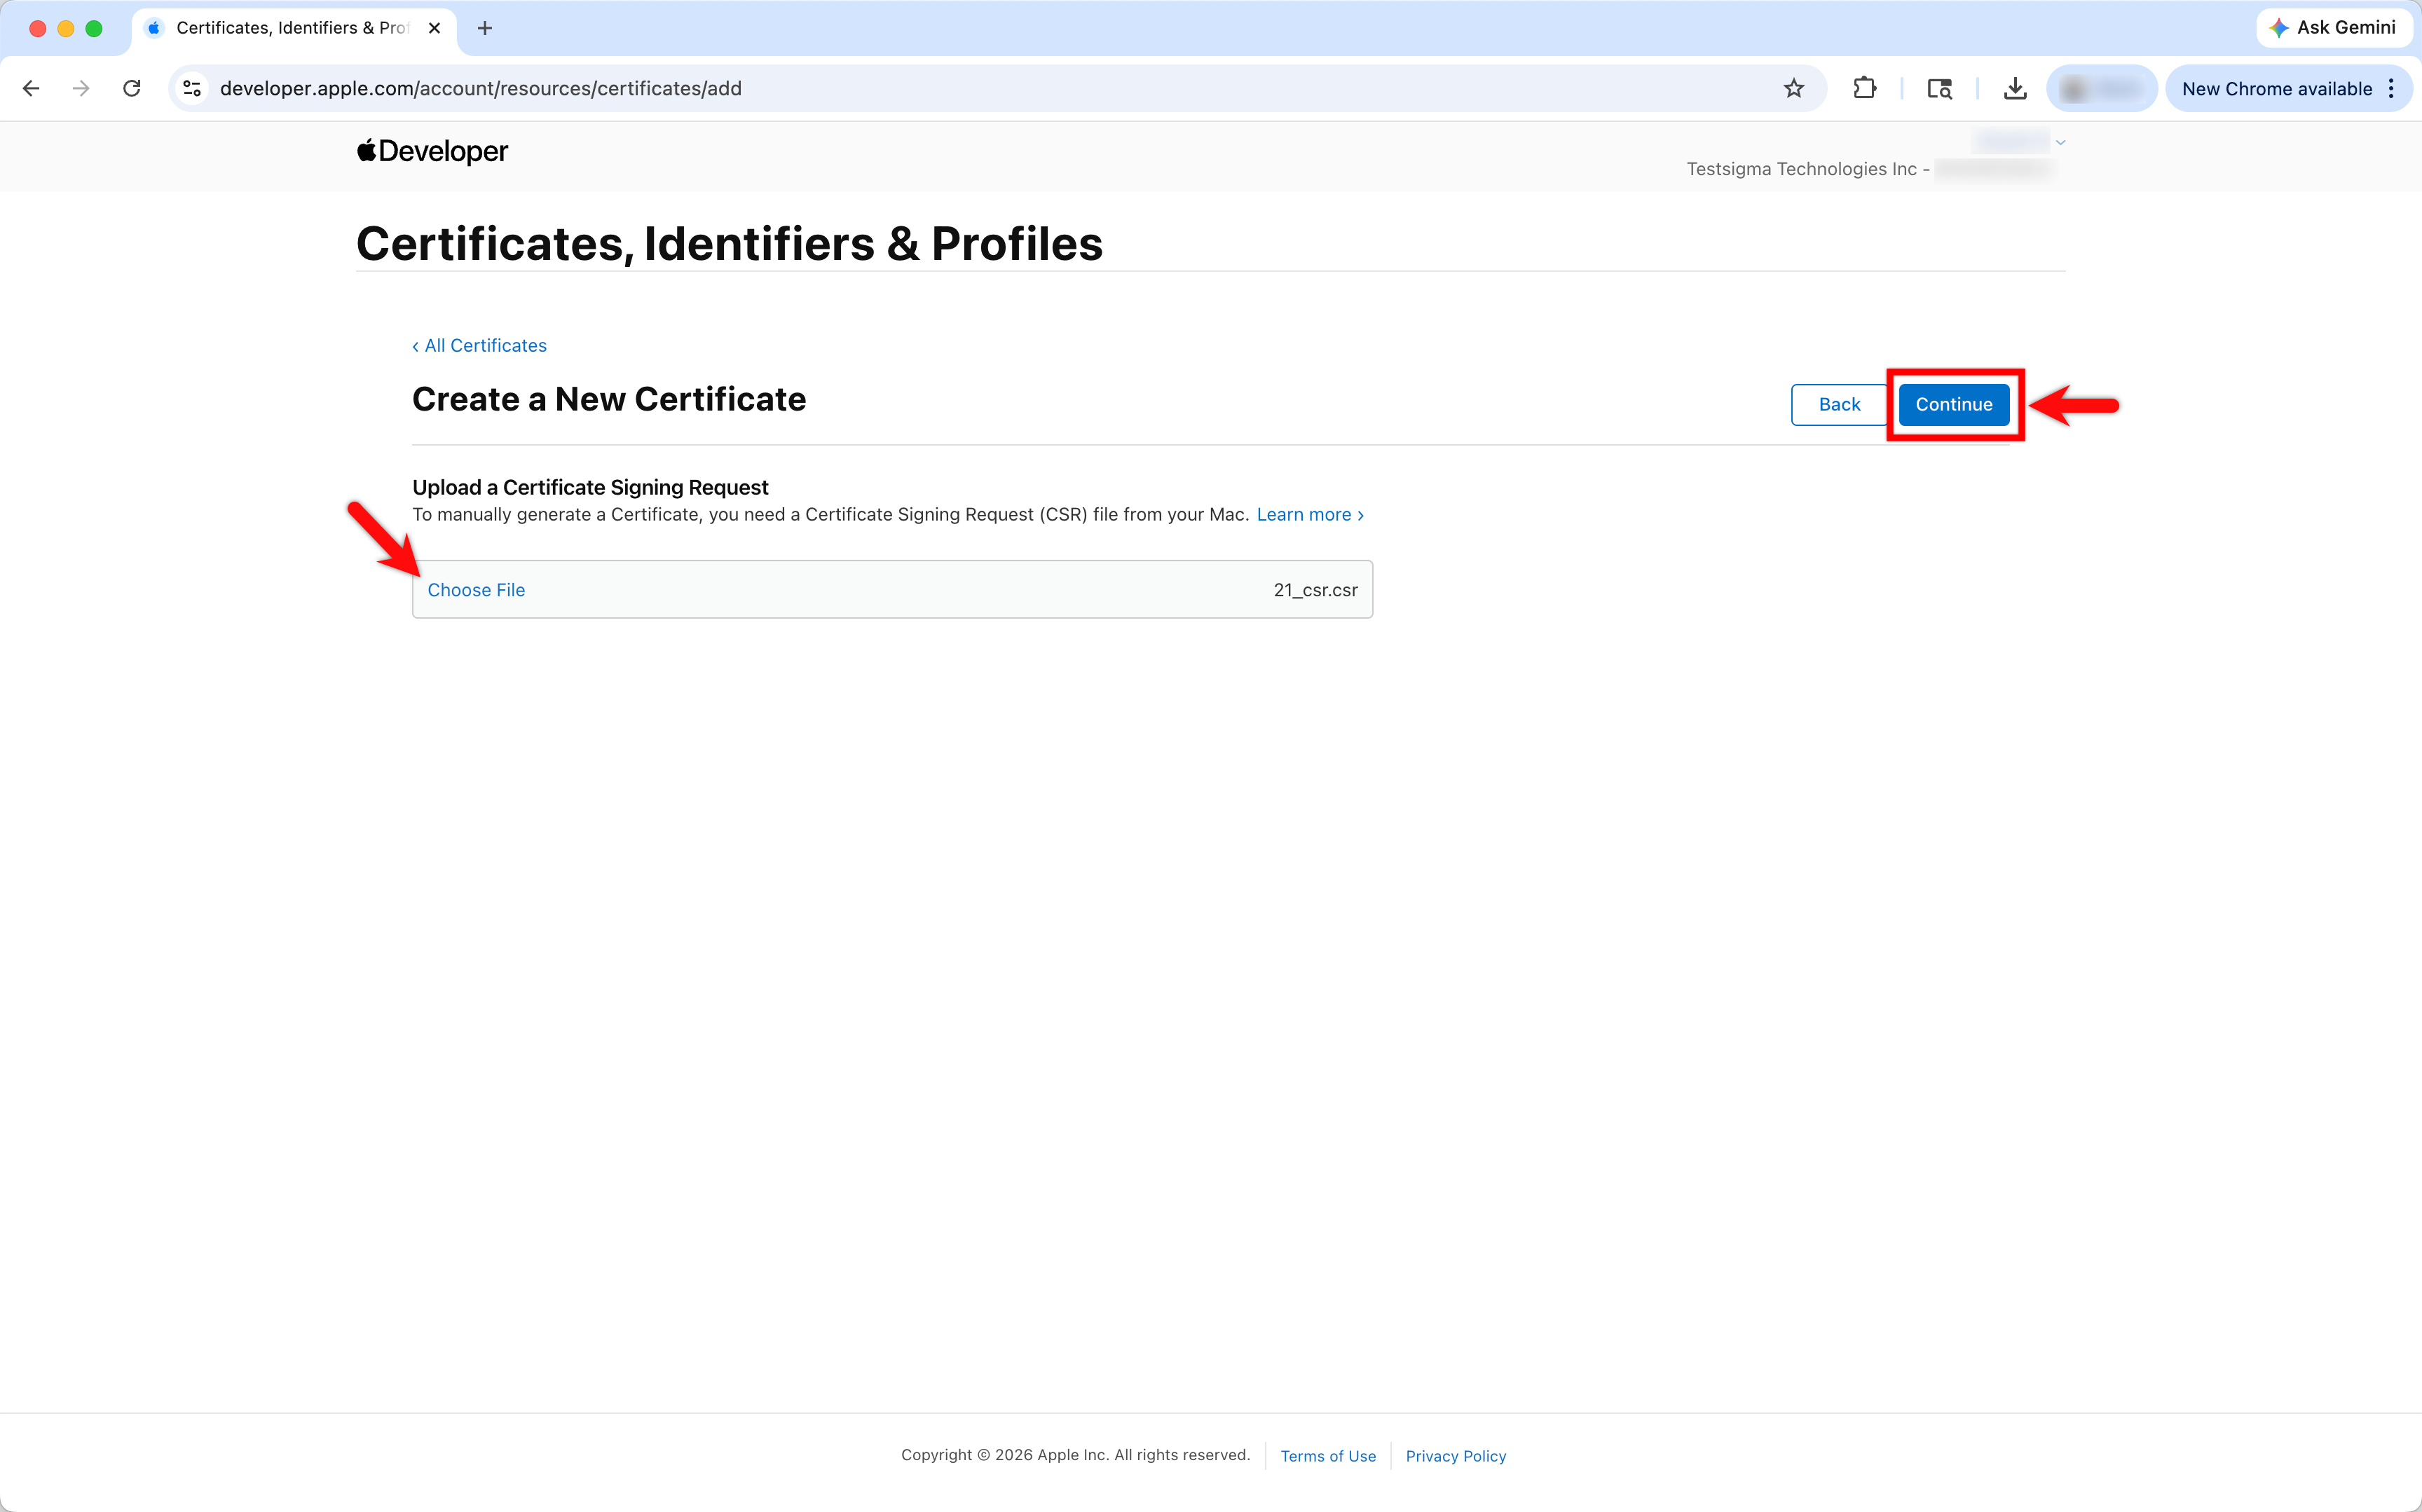
- Upload the CSR file downloaded from Testsigma, click Continue.
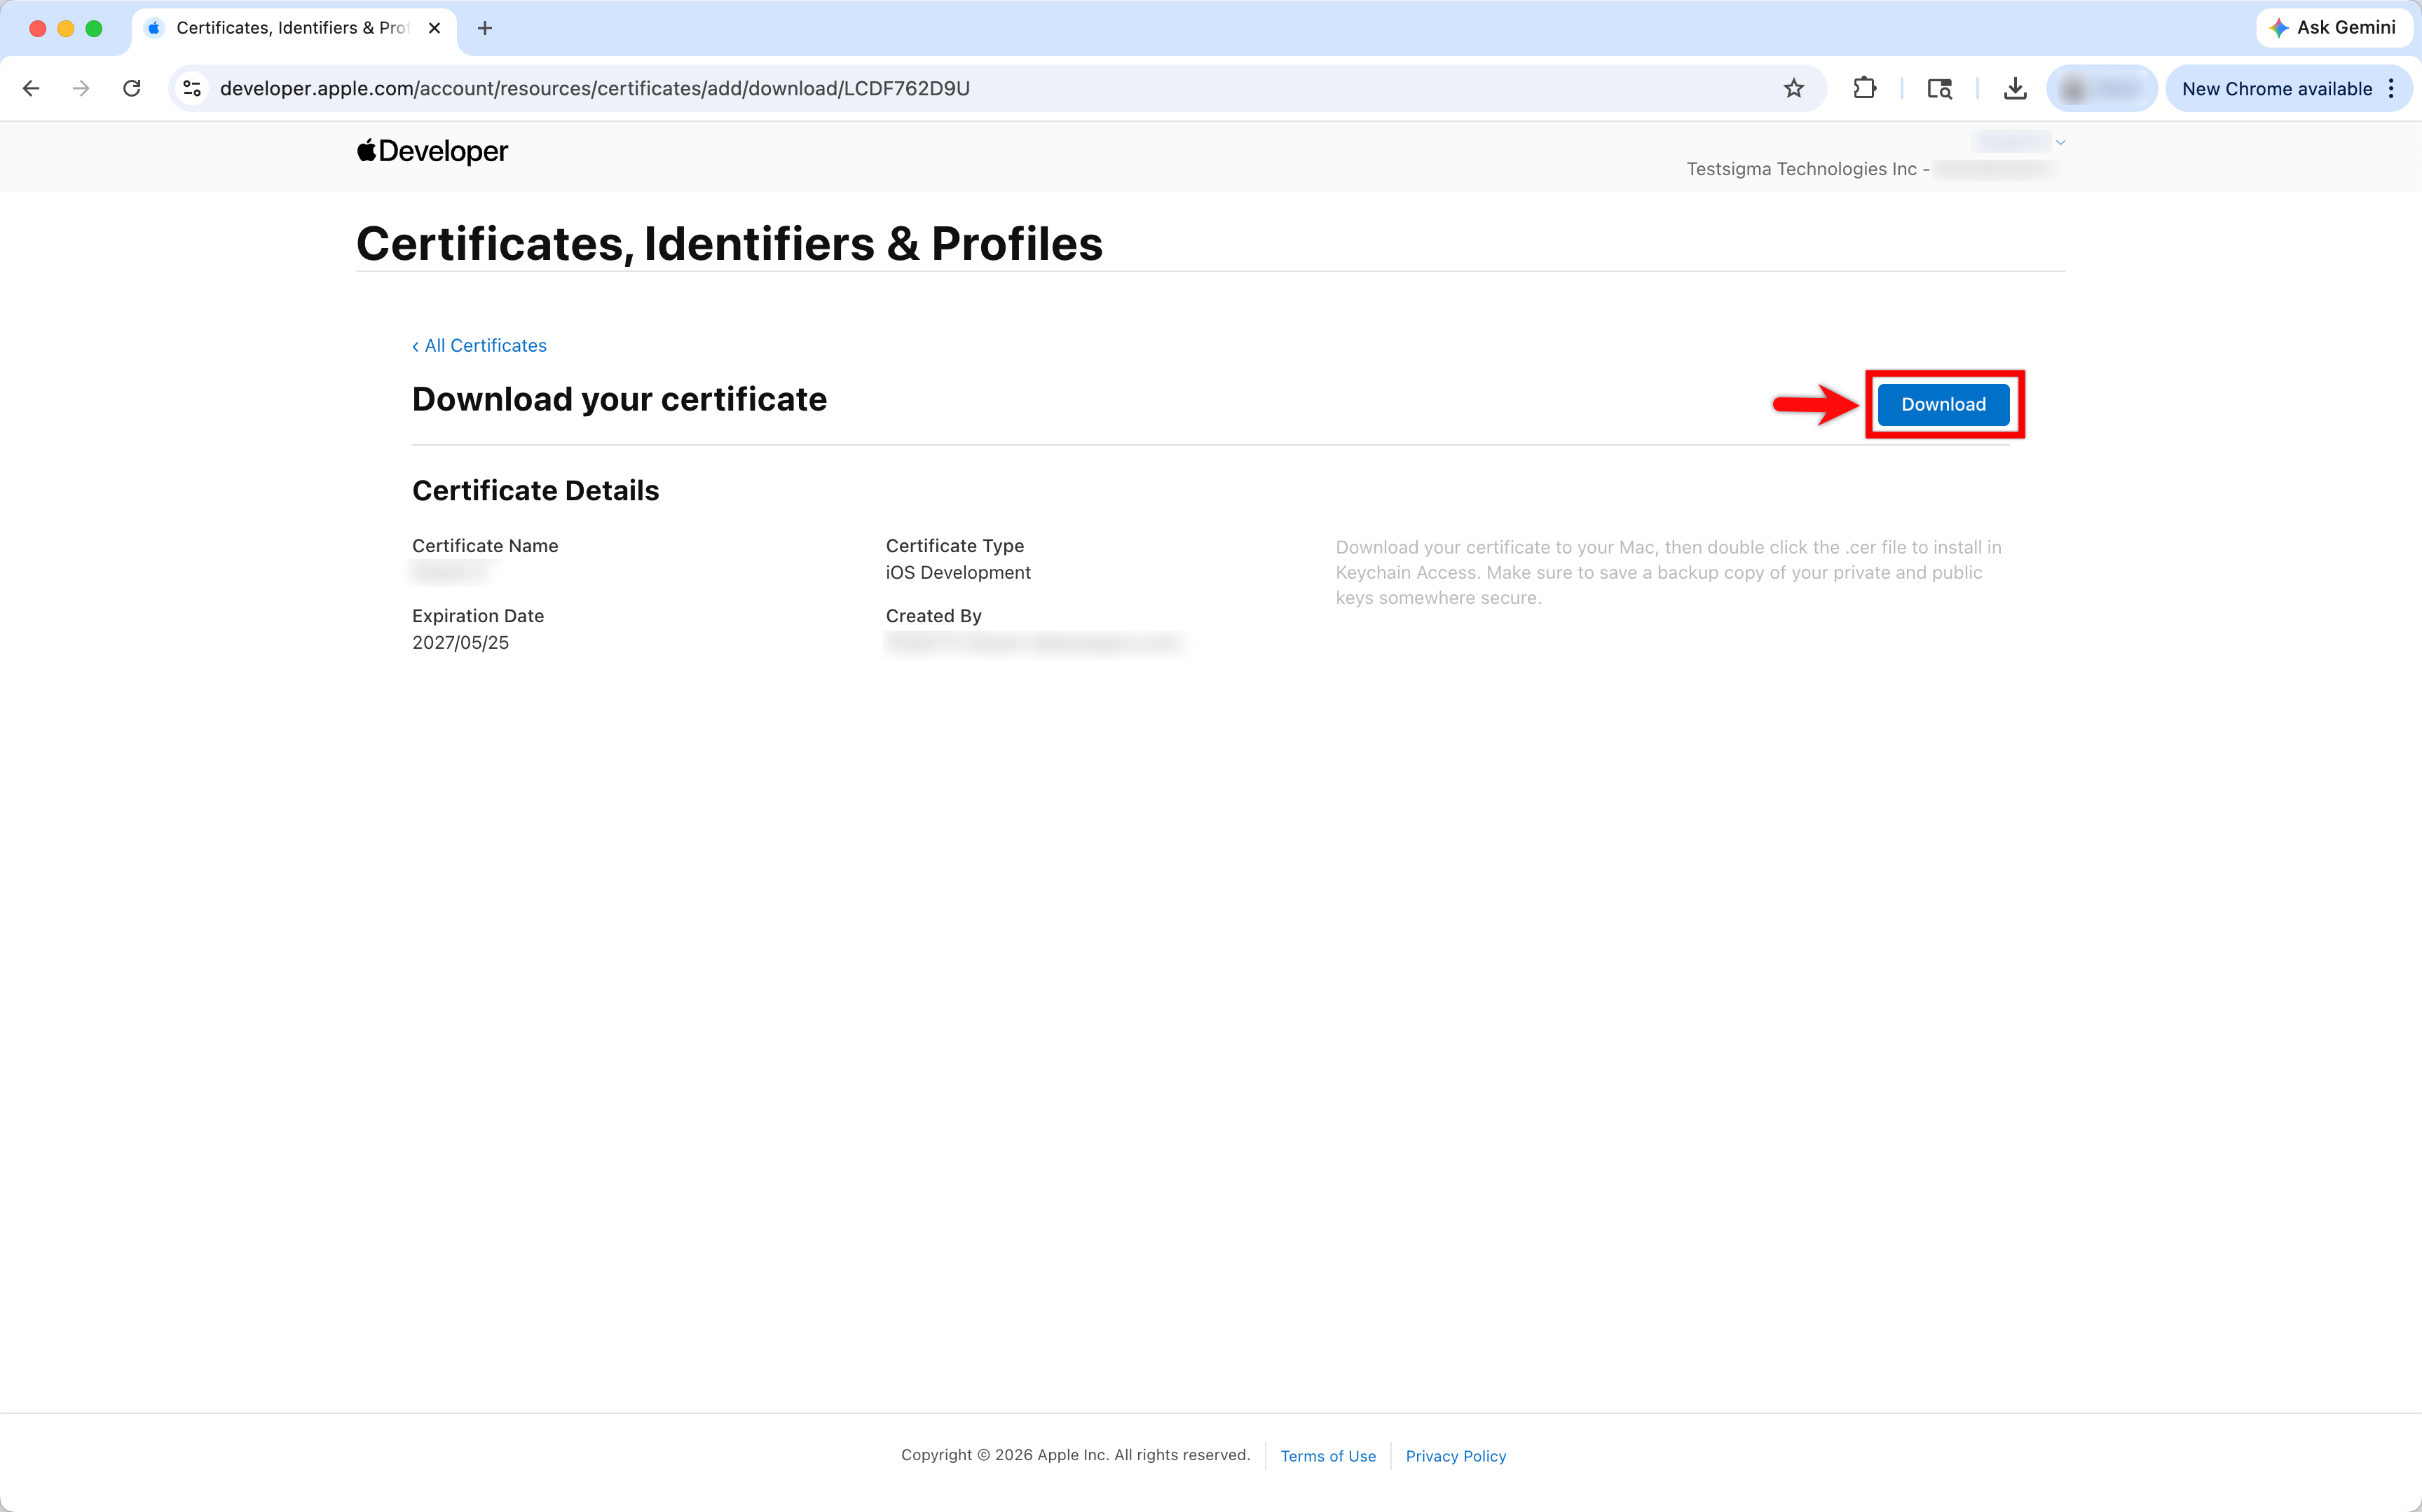
- In the Download your certificate screen, click Download to download the certificate file from the Apple Developer Portal.
- In Testsigma, click Upload Signed file under Upload Certificate and select the downloaded certificate file.
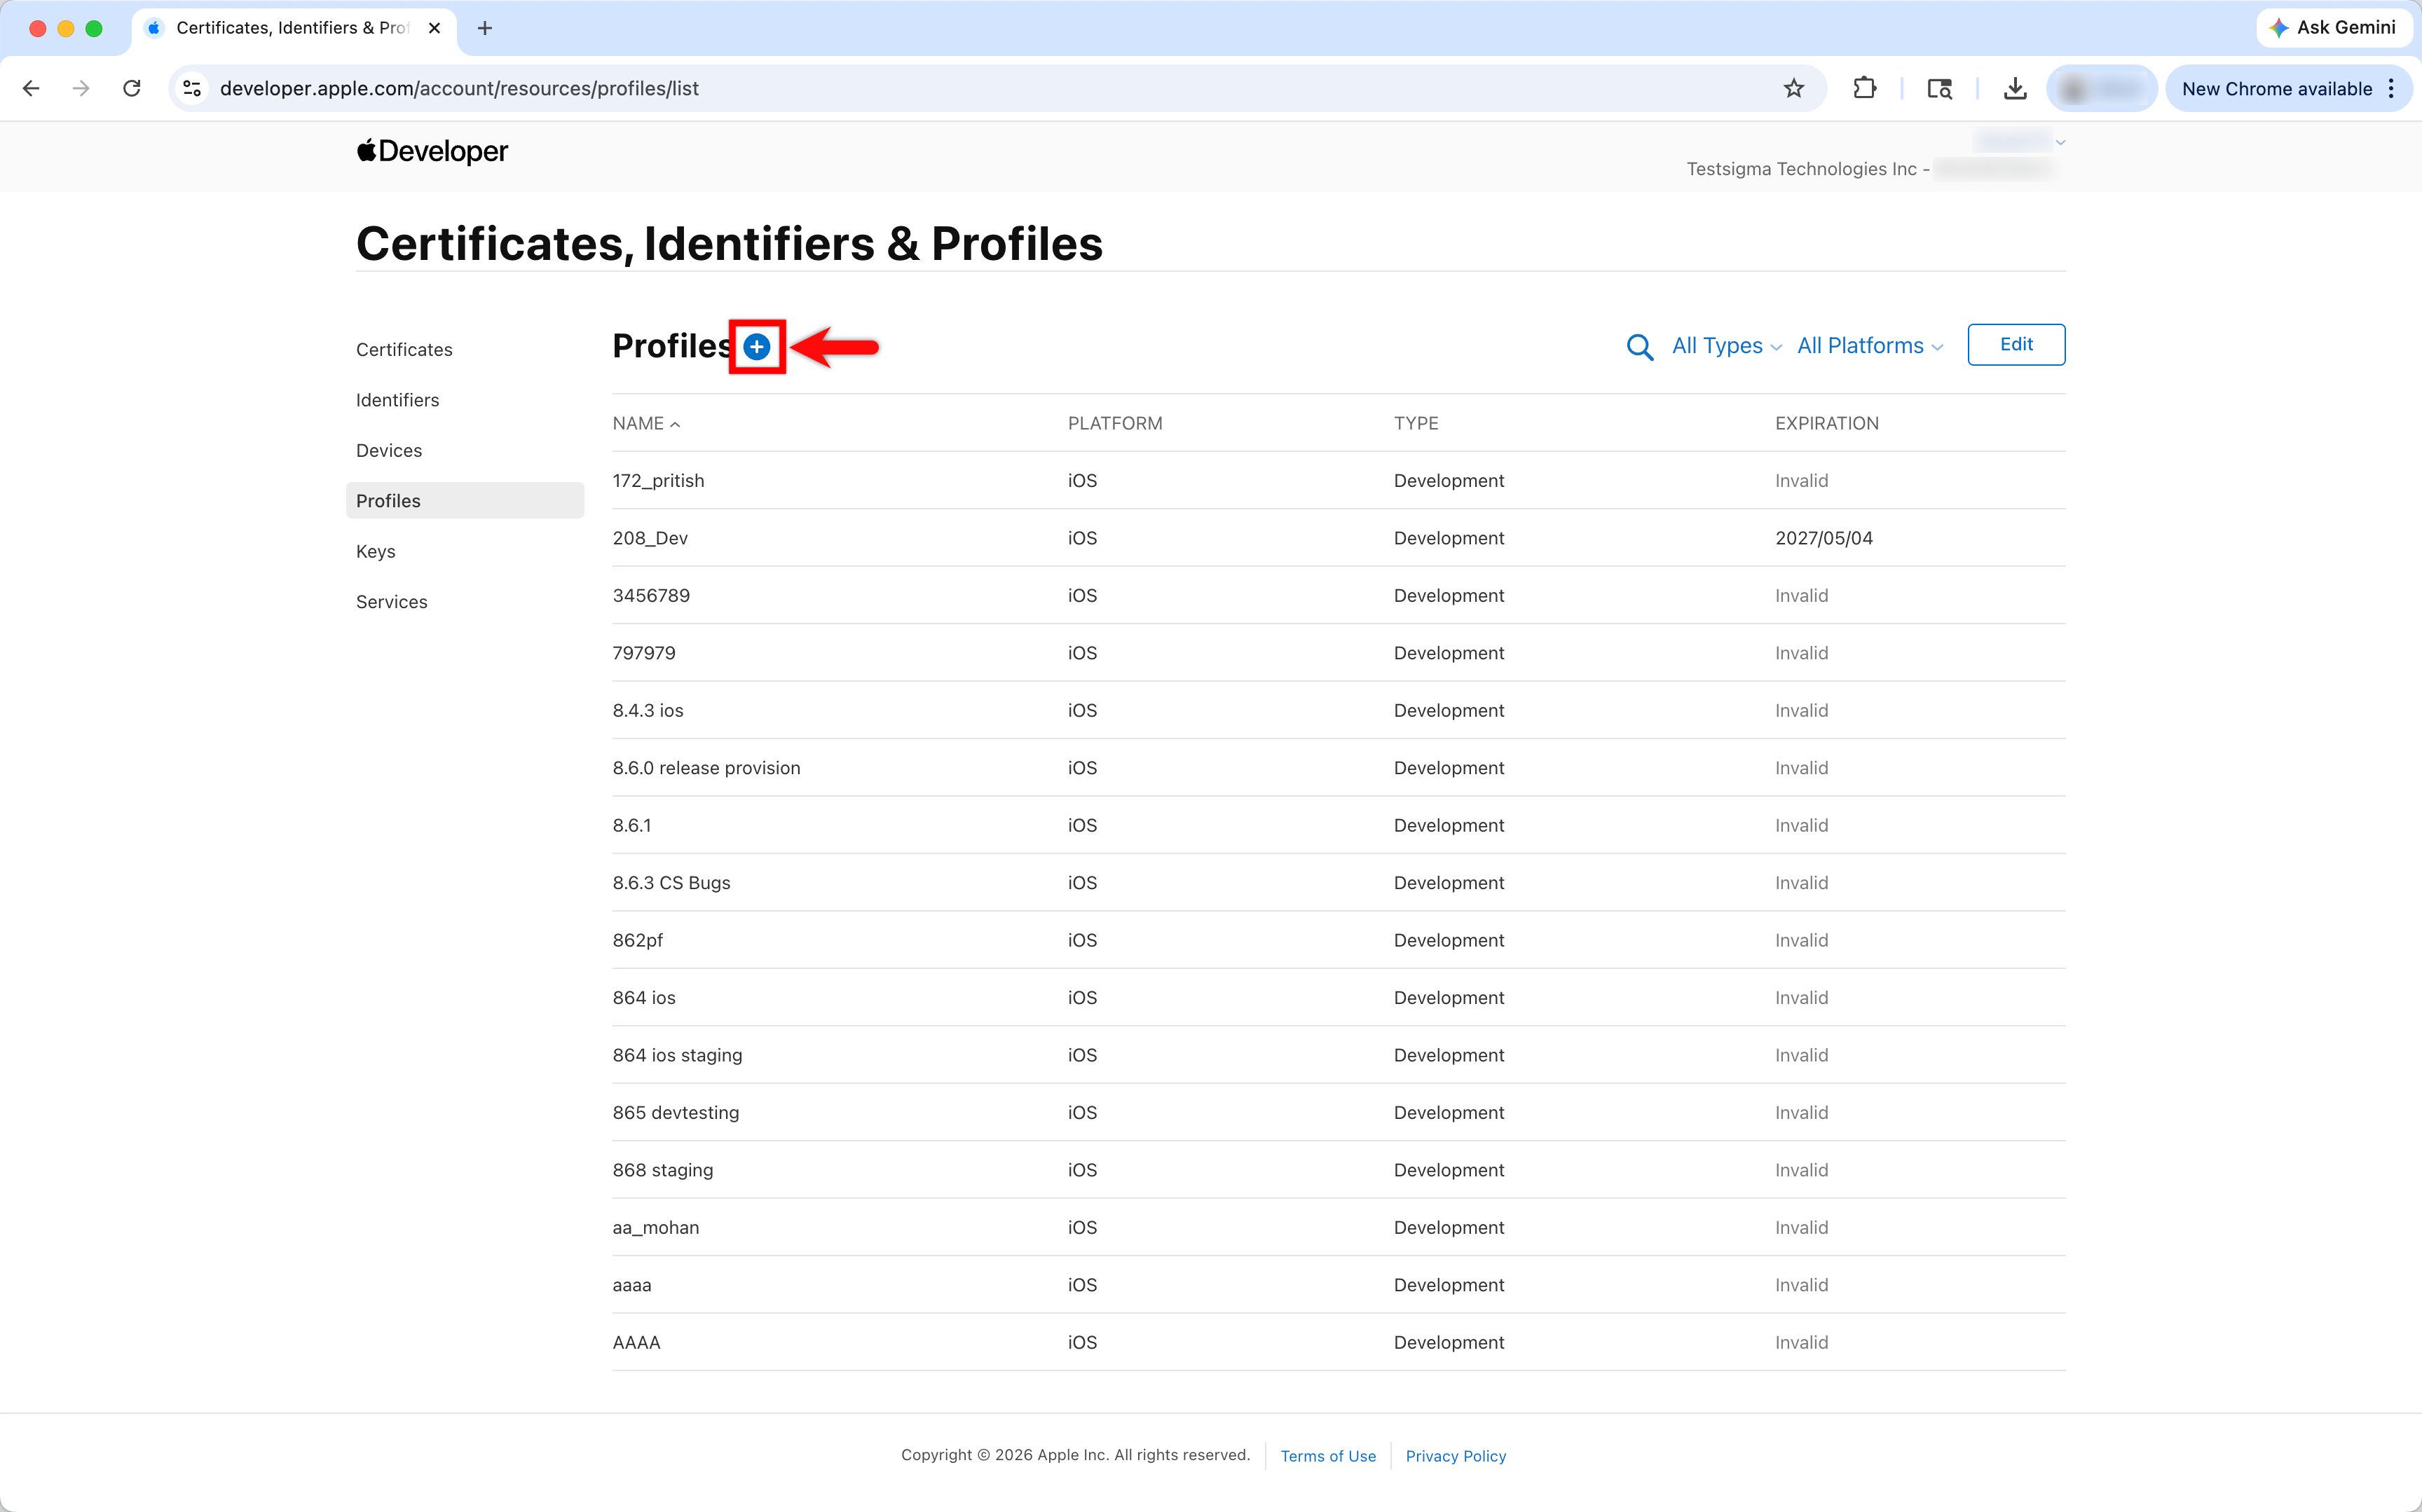
- Go back to the Apple Developer Portal and navigate to the Certificates, Identifiers & Profiles > Profiles section click the + icon next to Profiles.
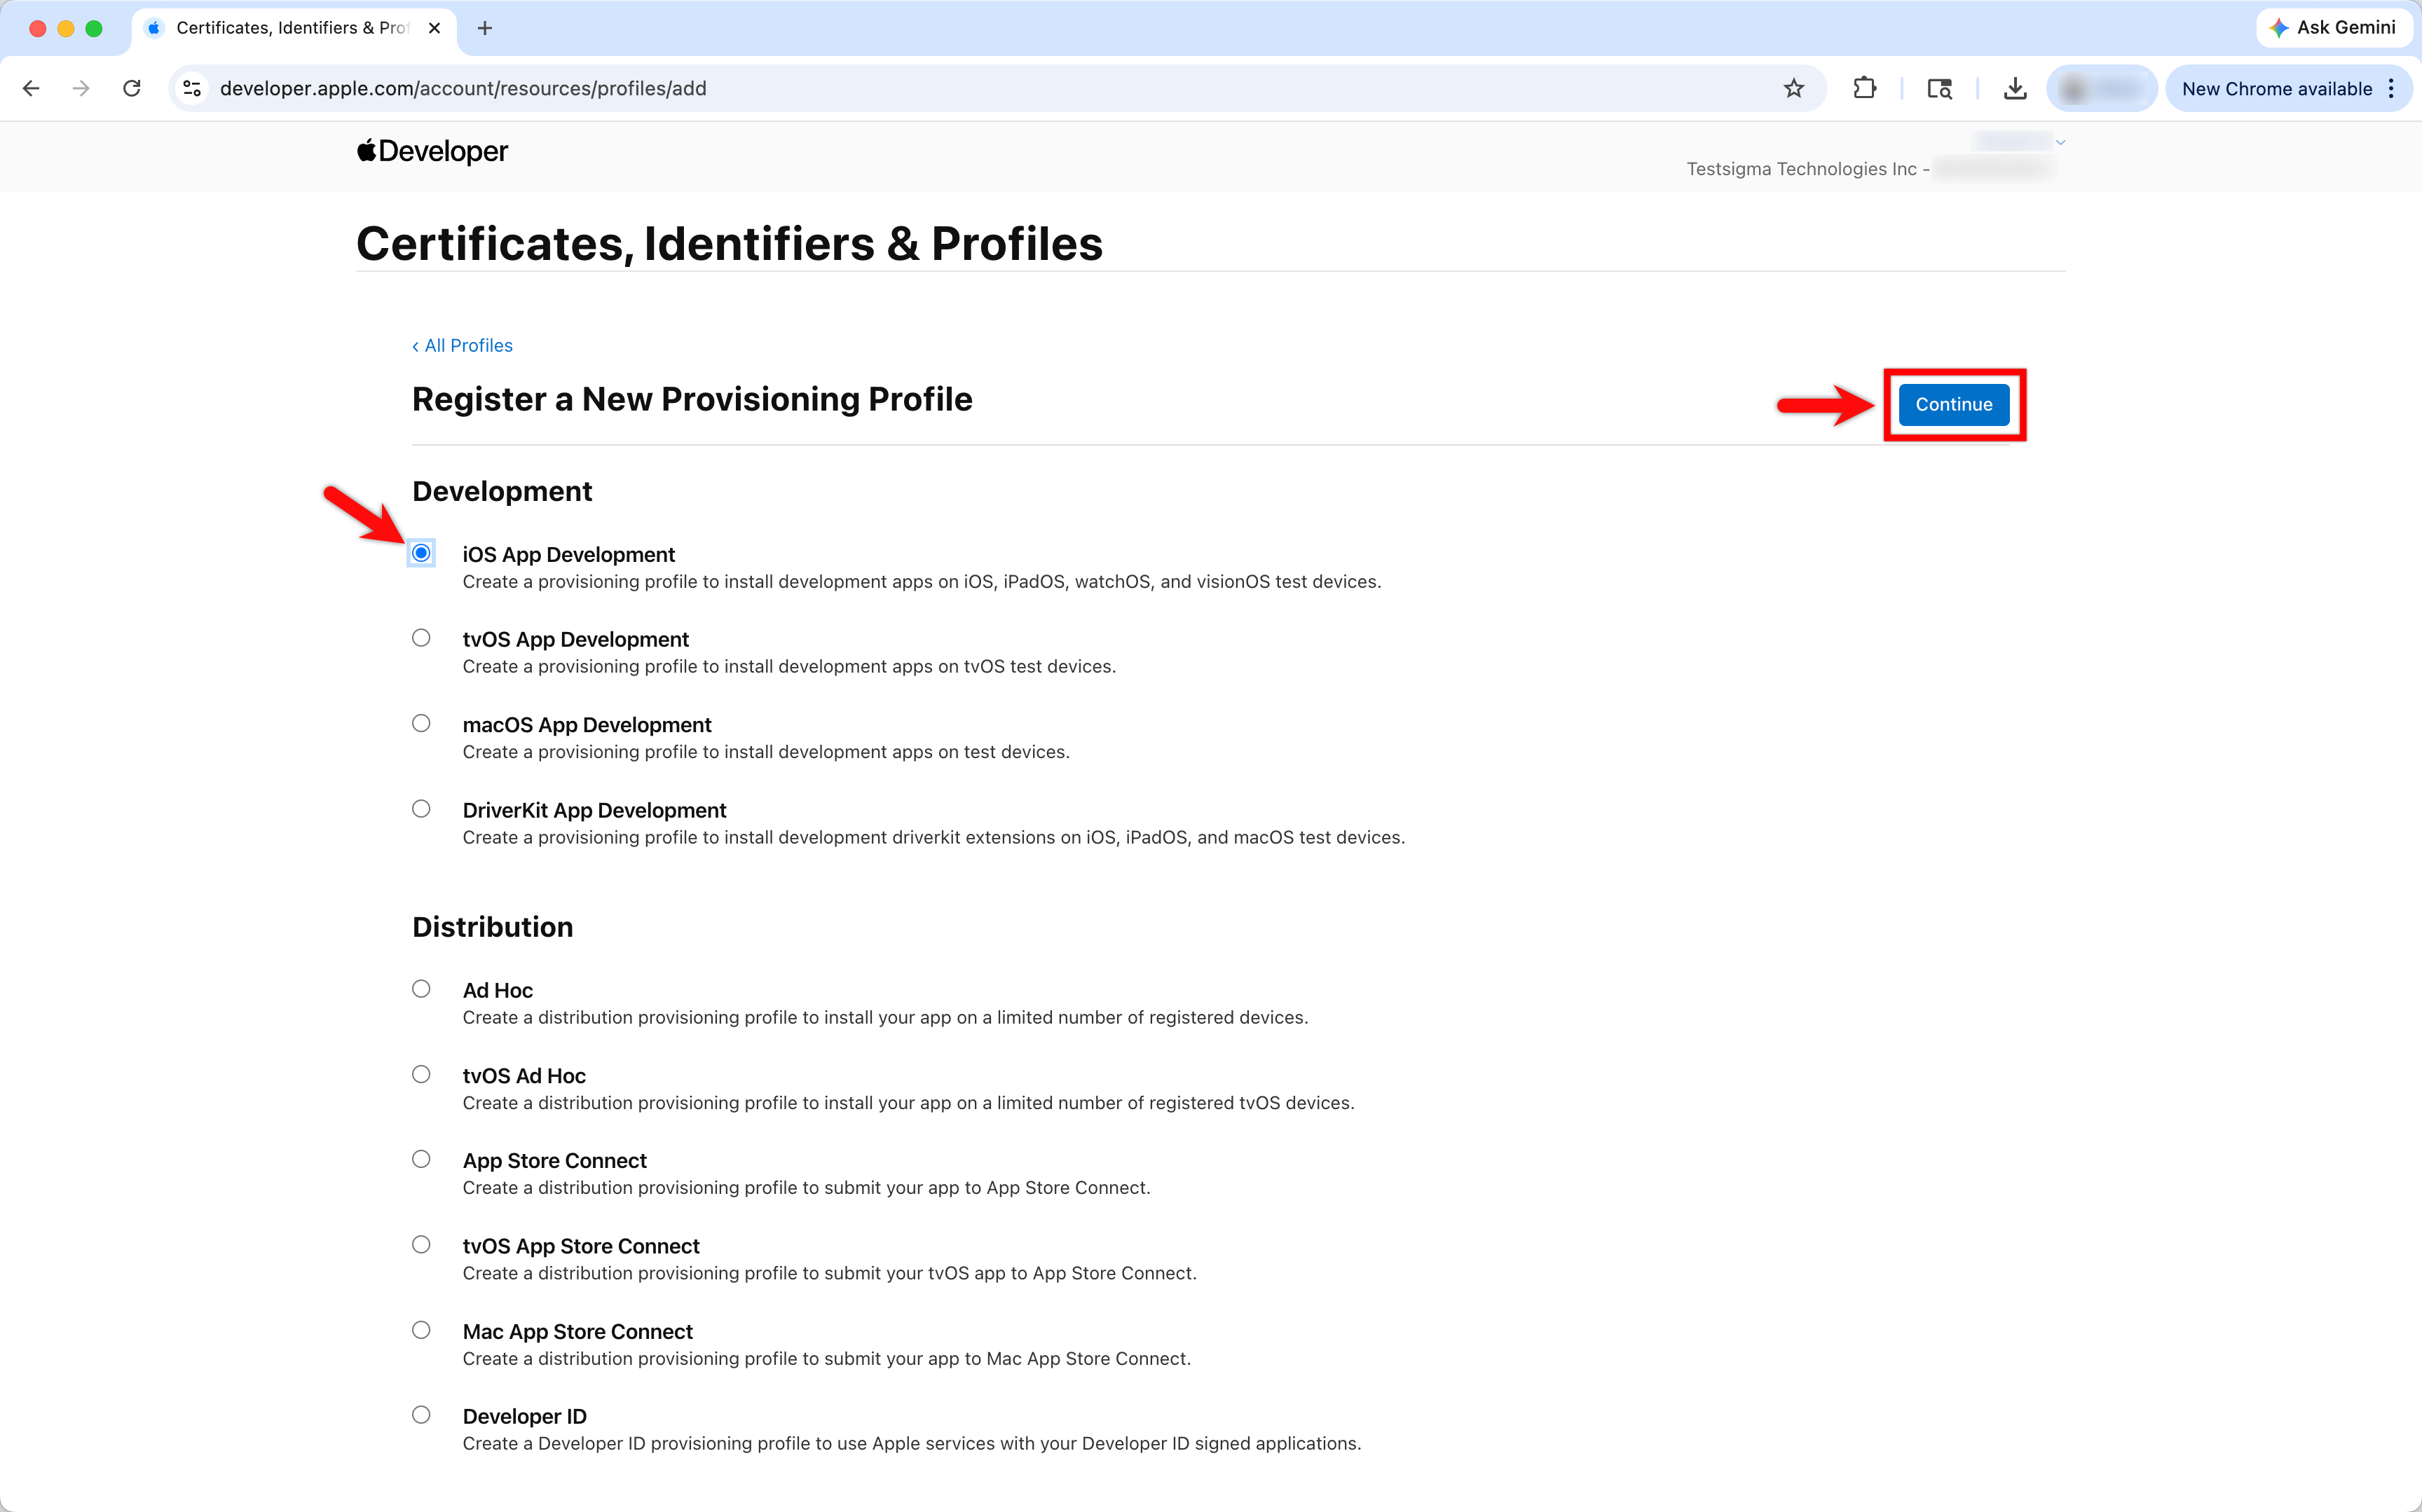
- In the Register a New Provisioning Profile screen, select iOS App Development under Development and click Continue.
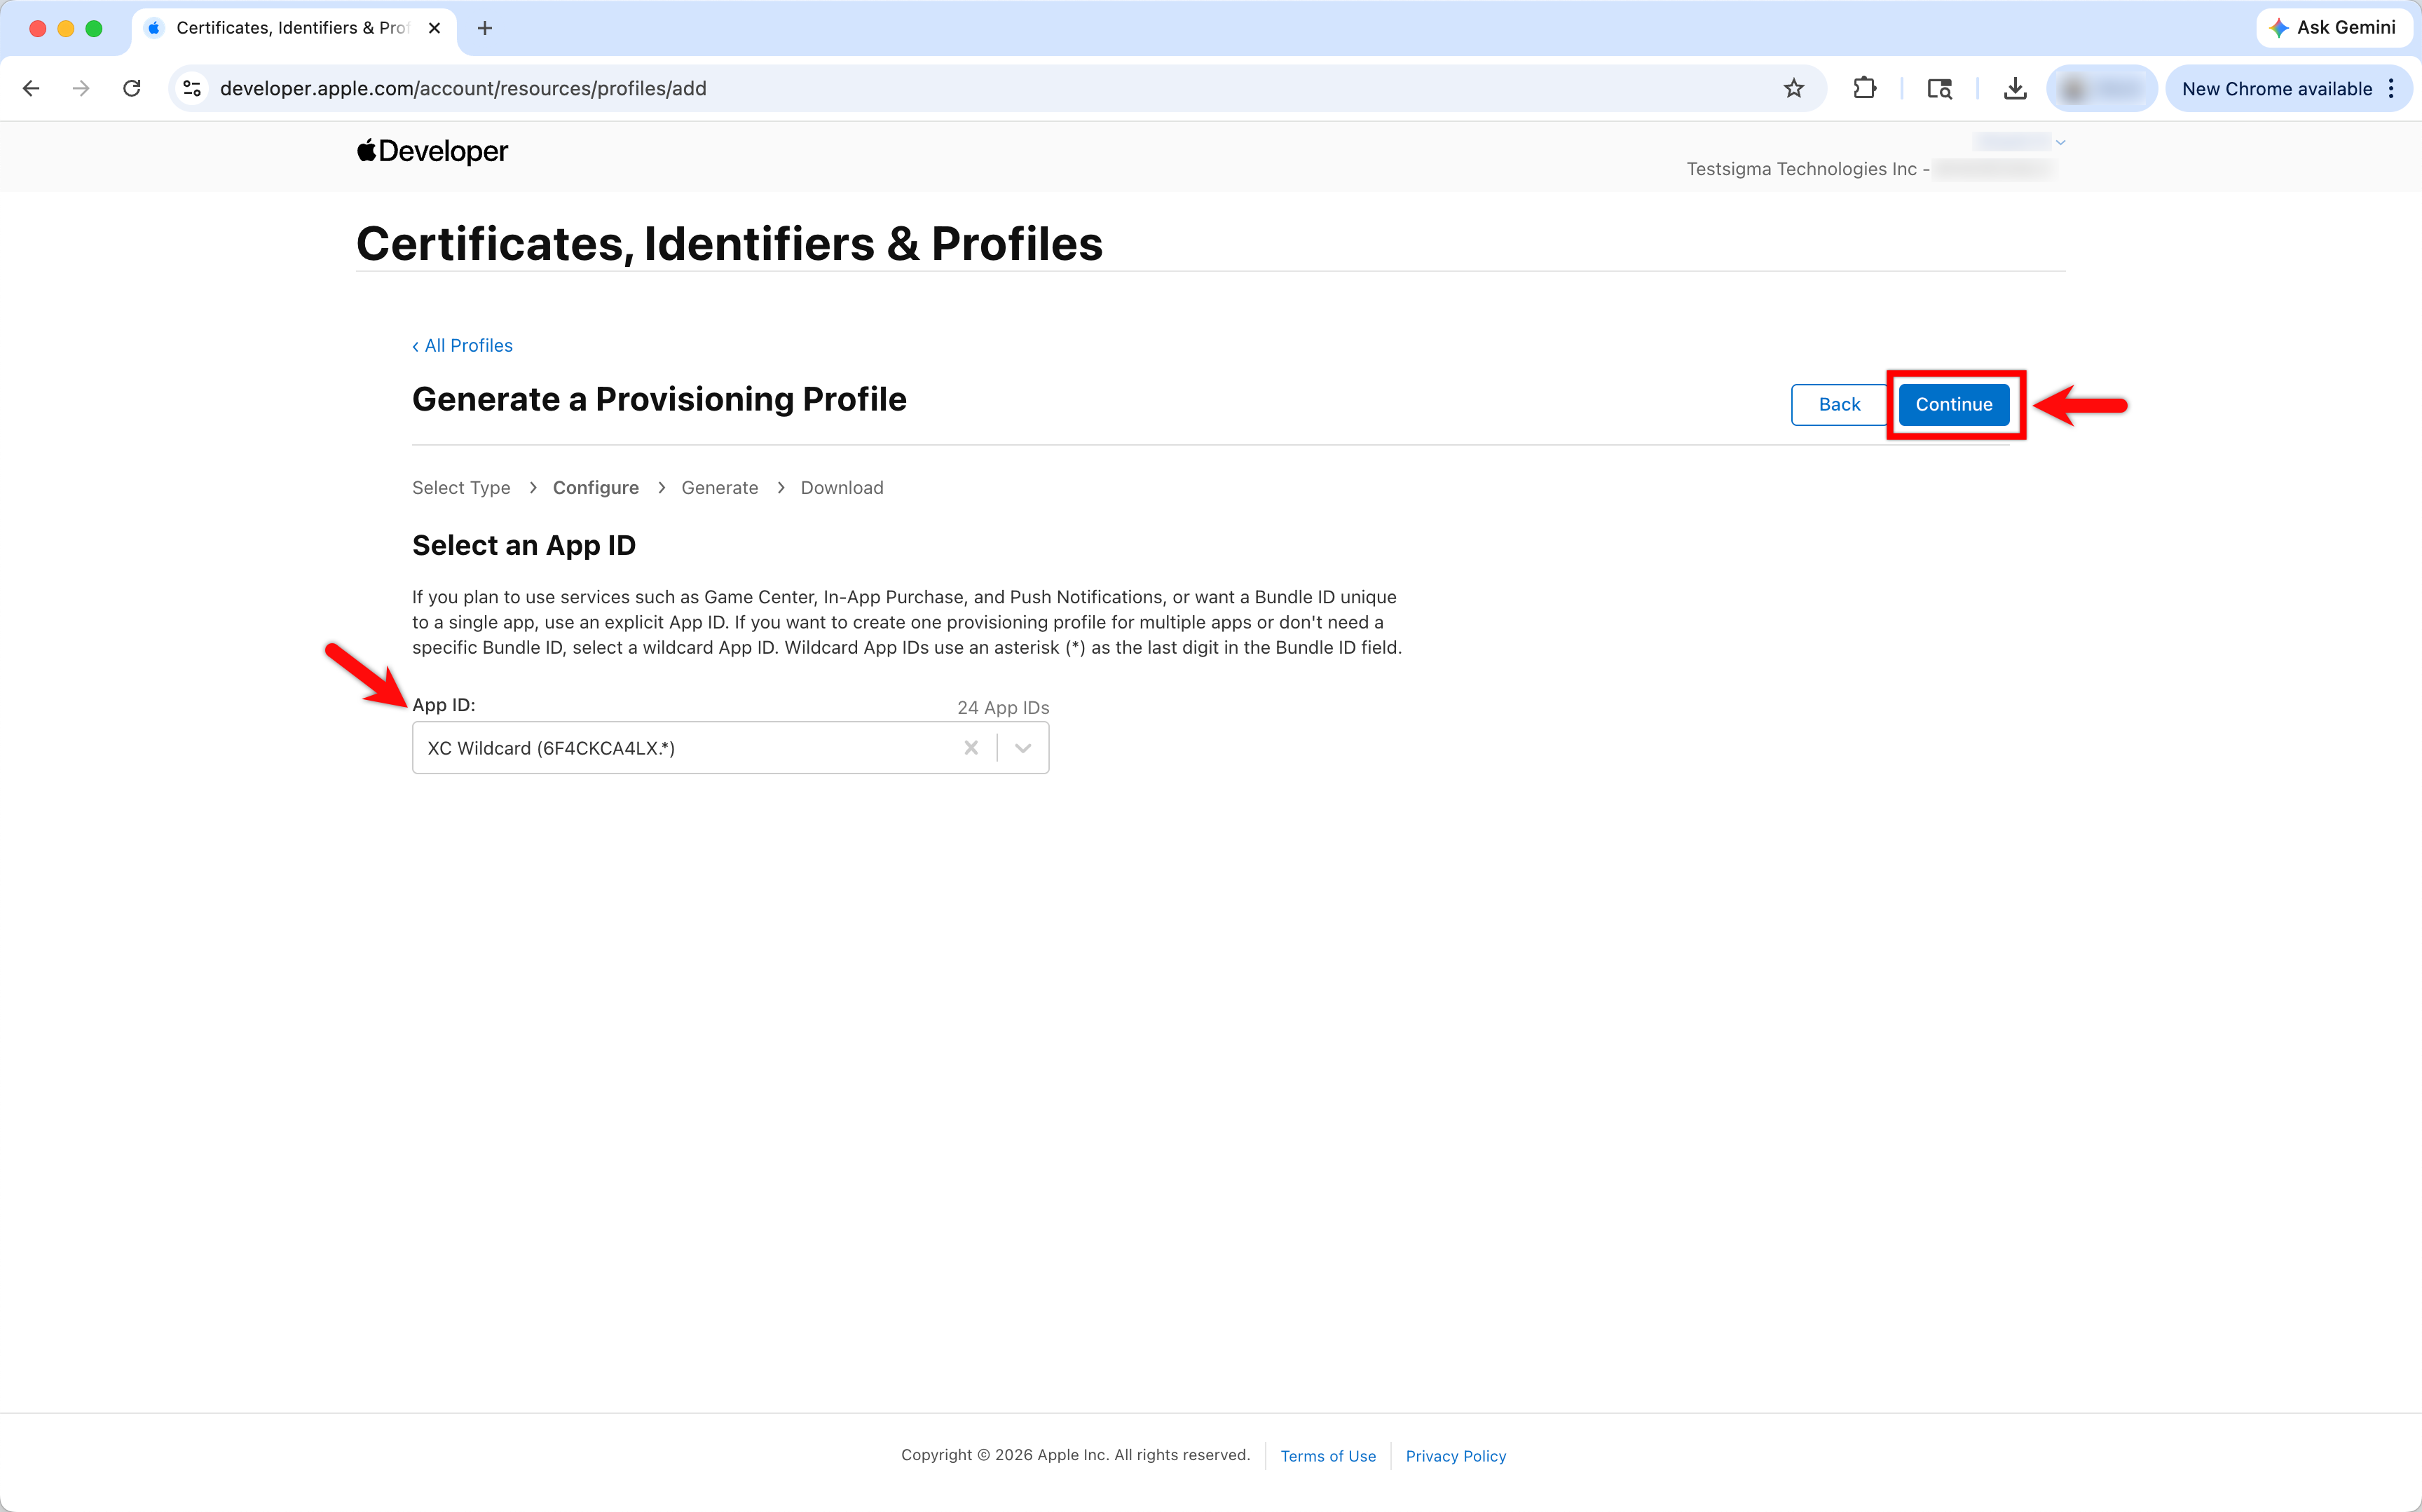
- Click the drop-down menu under Select an App ID section, select an App ID, and click Continue to proceed to the next step.
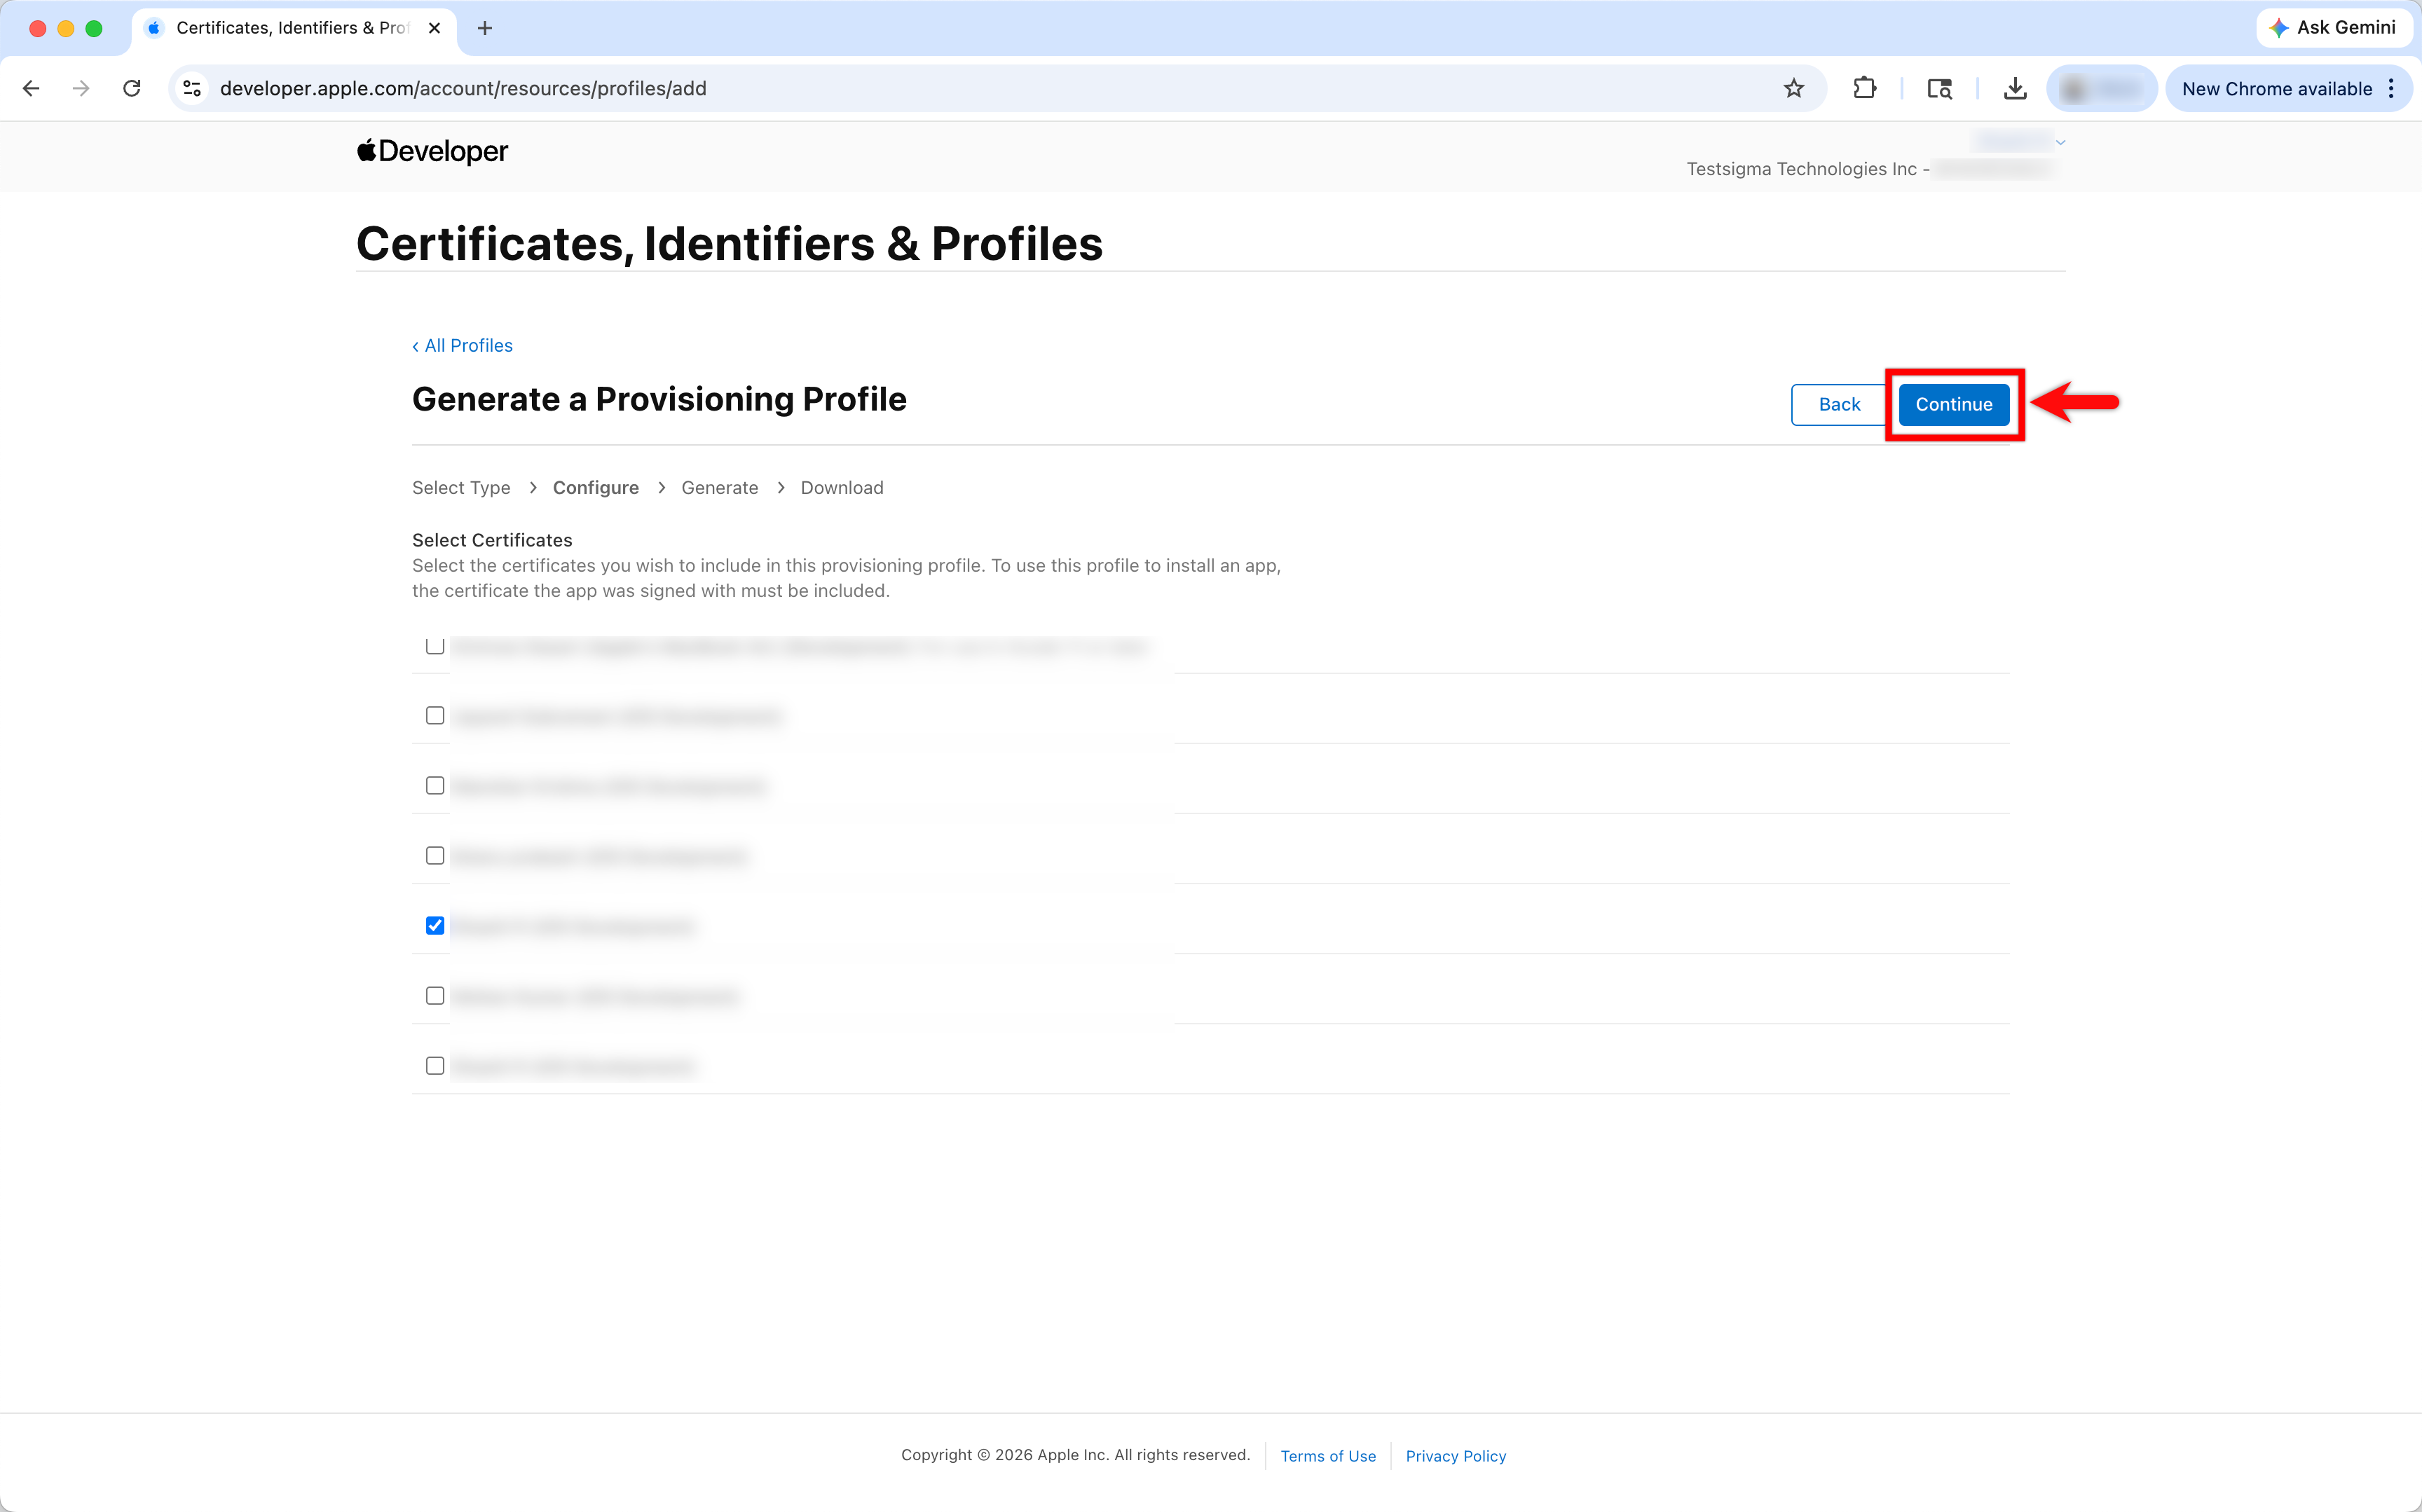
- Select the certificates that you wish to include in the provisioning profile and click Continue.
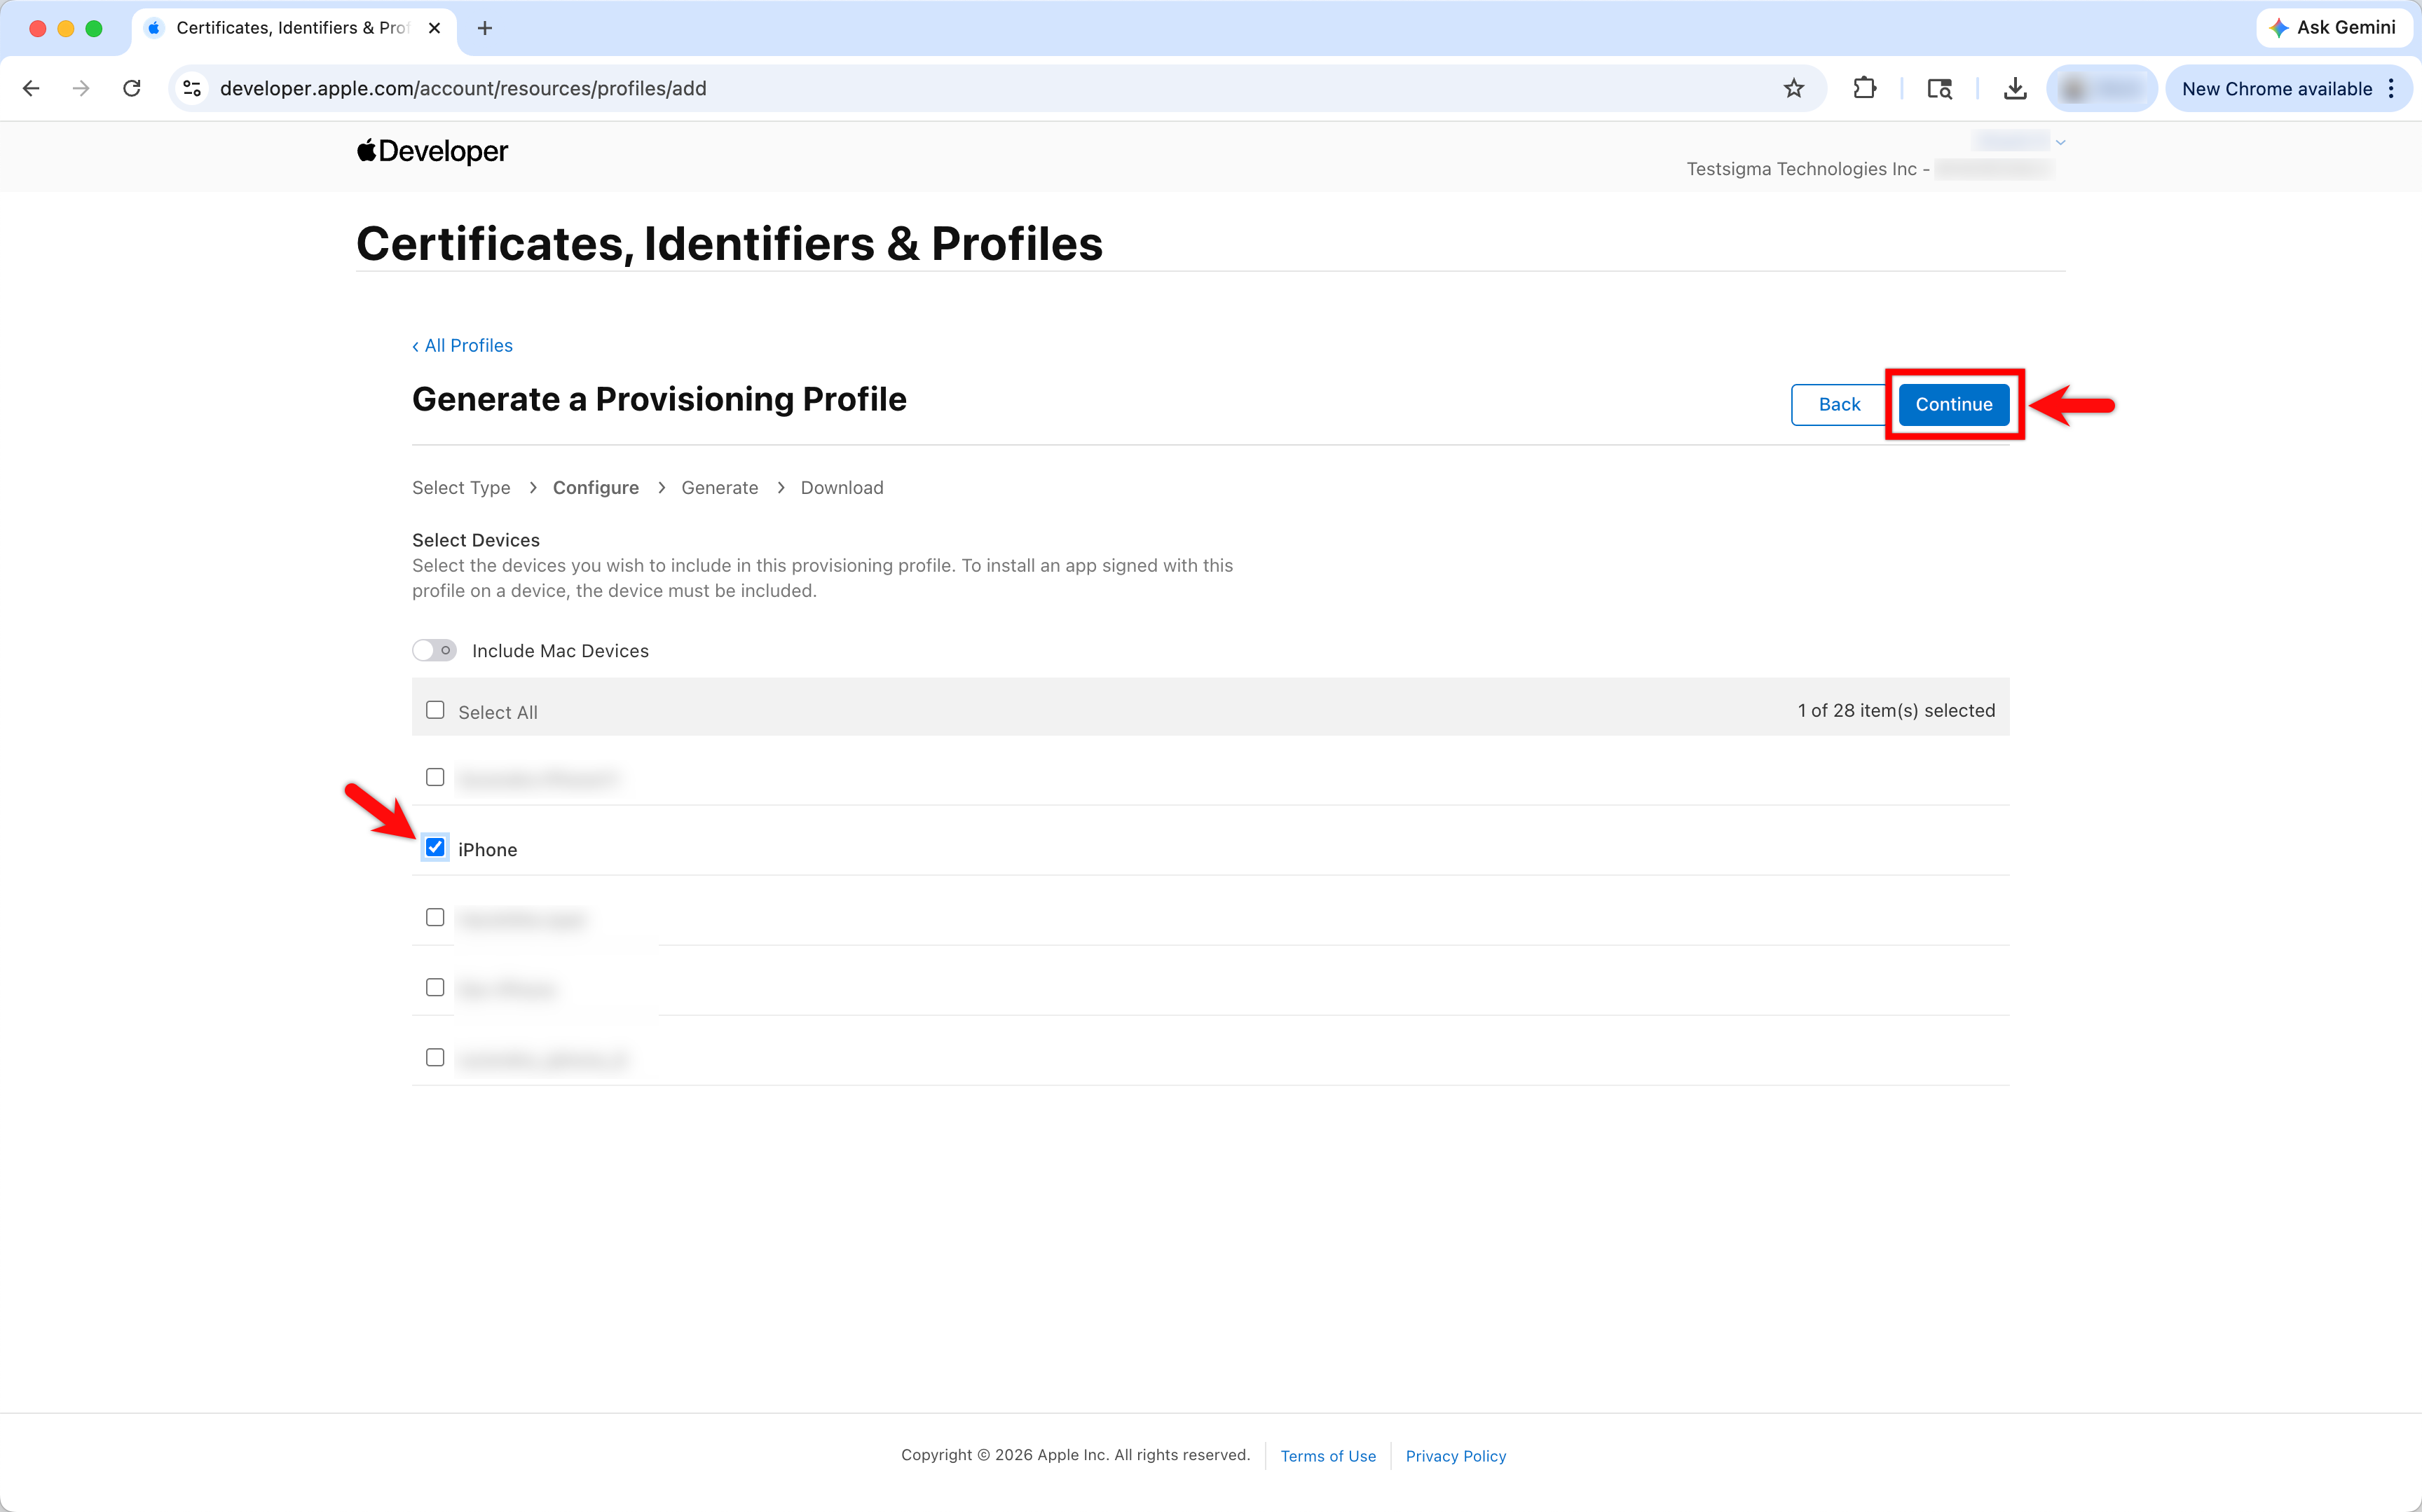
- Select the Devices that you want to include in this provisioning profile and click Continue.
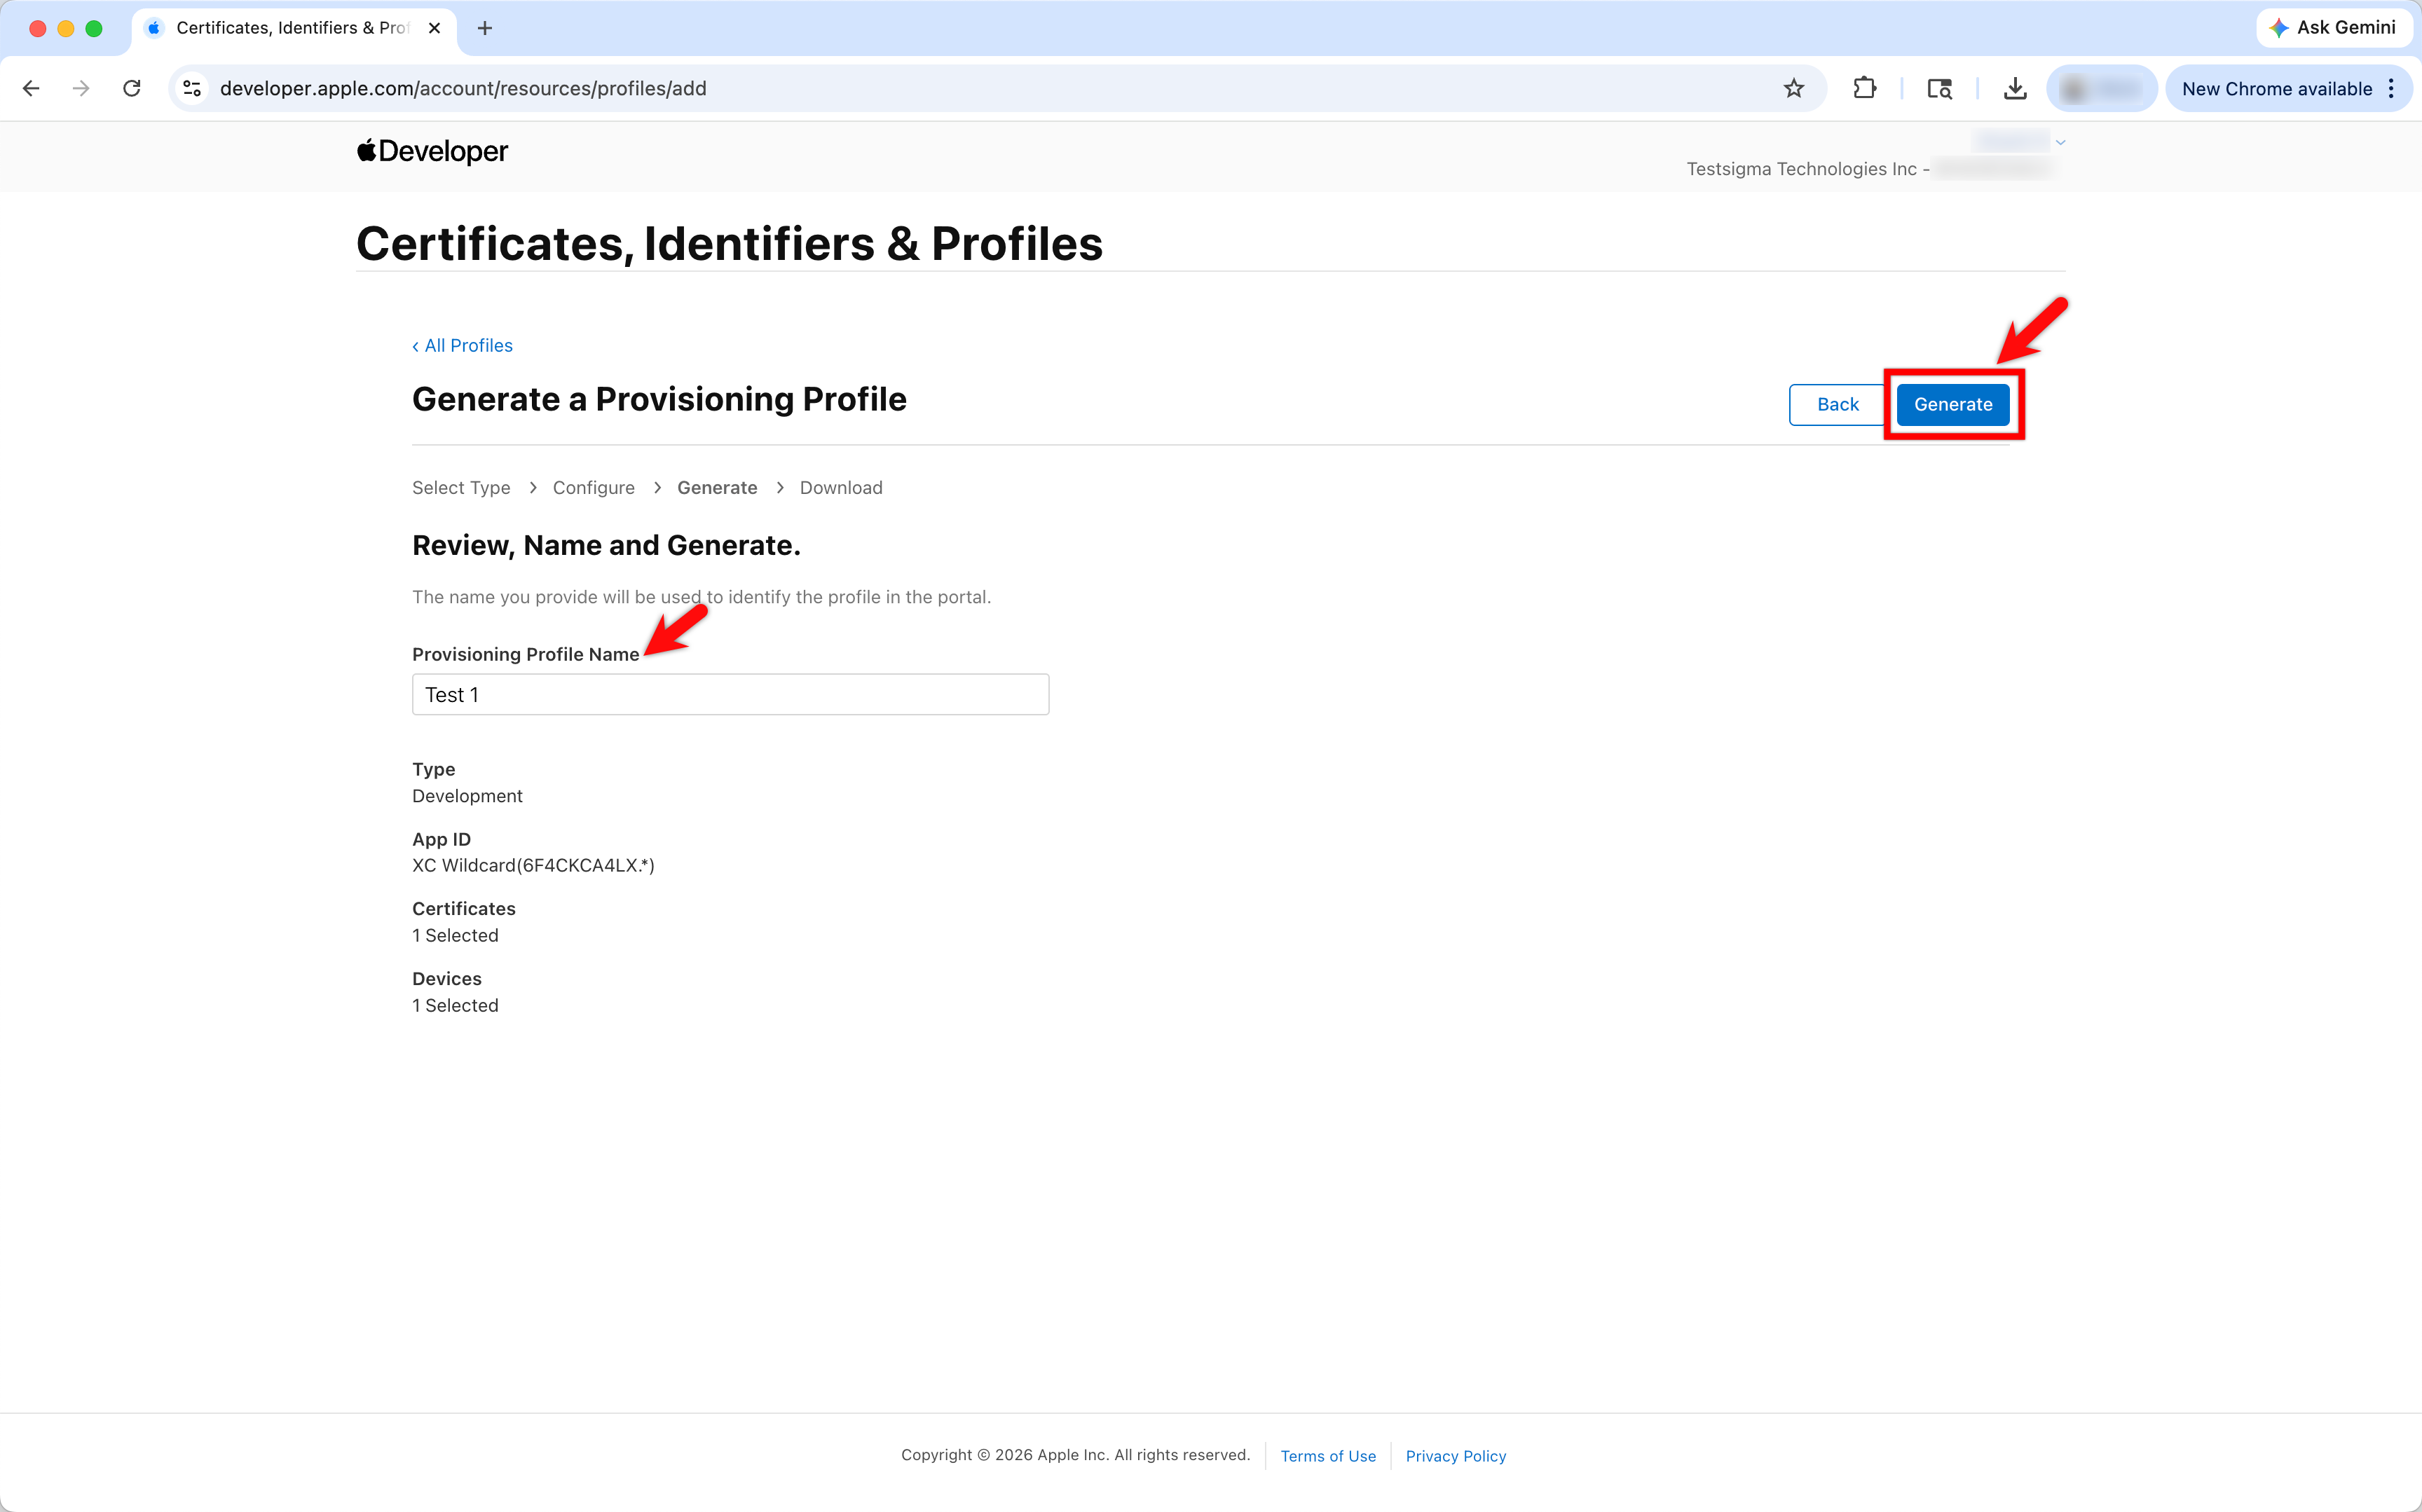
- Enter a name for your Provisioning Profile and click Generate.
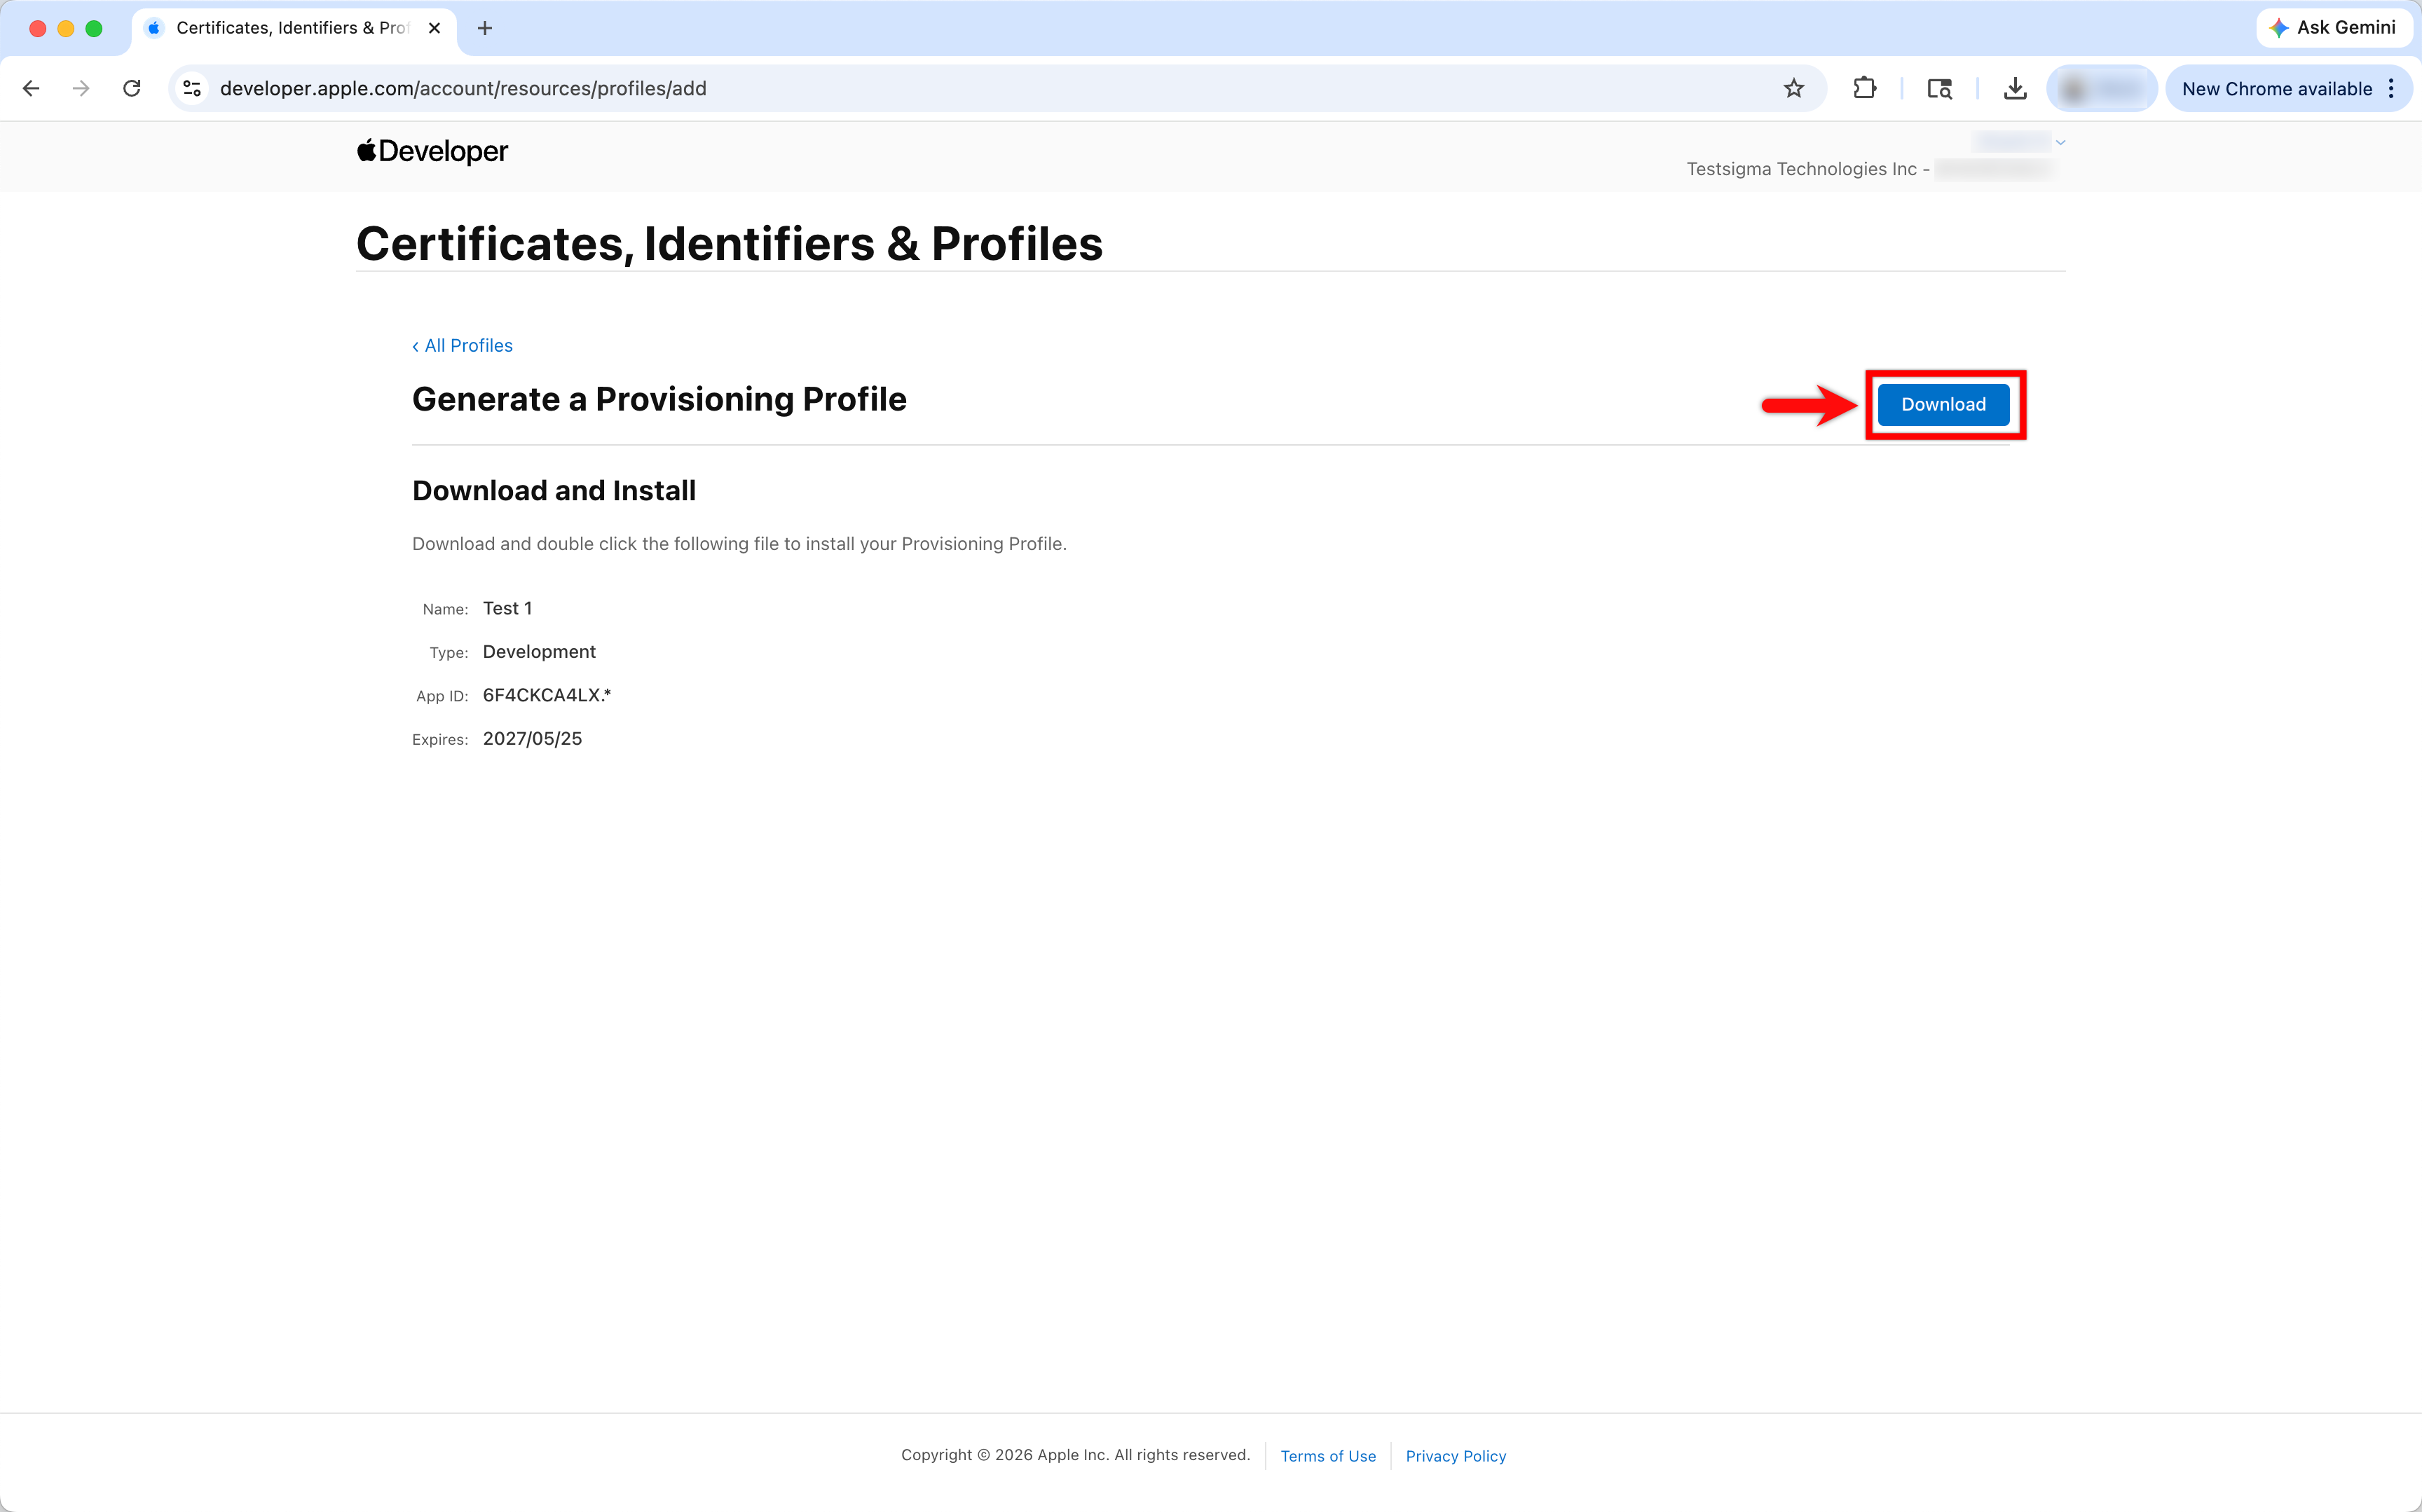
- Click Download to download the Provisioning Profile from the Apple Developer Portal.
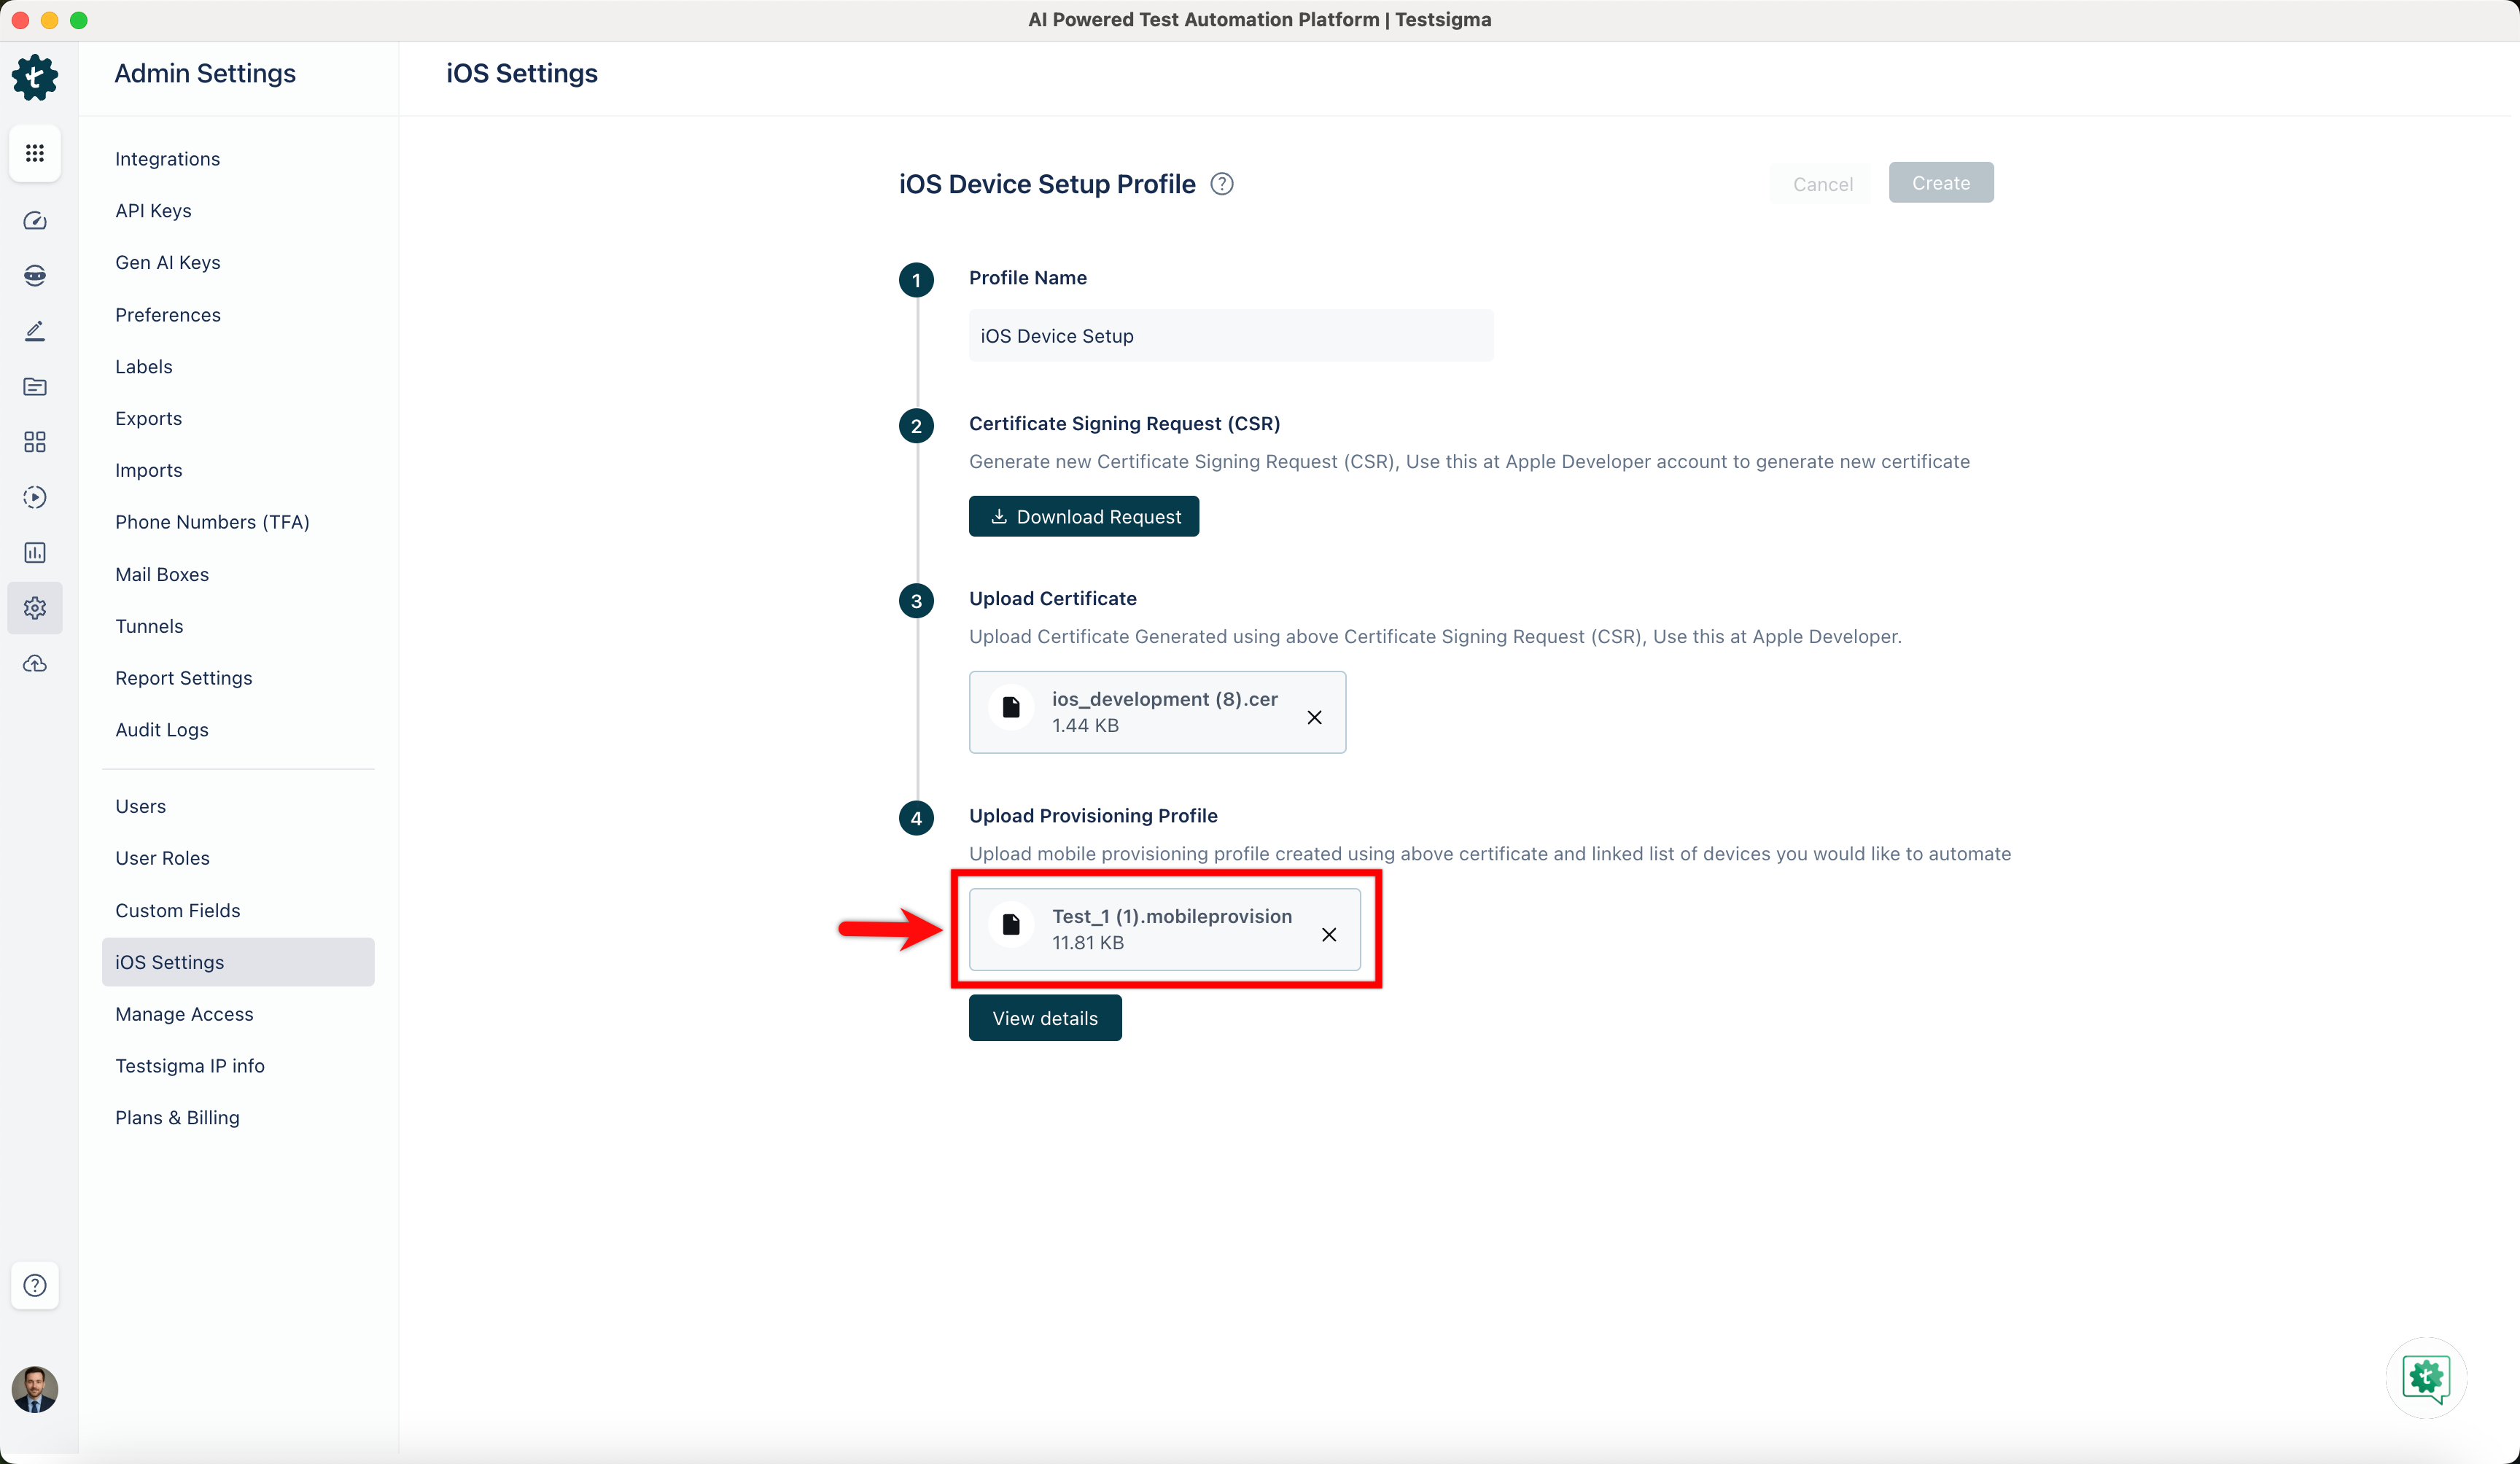
- In Testsigma, click Upload Certificate next to Provisioning Profile and select the downloaded Provisioning Profile file and click Create.
- You should download the iTunes exe installer from Apple's website for Windows. If you have installed it from Microsoft Store, please uninstall it.
- If you have installed iTunes, ensure that Apple Mobile Device Service runs in Task Manager. If it is not running, open iTunes and check again if the service starts running.
You can further manage your certificates by downloading CSR and Provisioned certificates for viewing and checking the validity of the Provisioning Profile certificate. If necessary, you can remove Provisioning Profile certificates by clicking Delete.
Now that you have set up everything, you can record your iOS tests and run them on your iOS device(s).
Troubleshooting Errors
| Error | Troubleshooting |
|---|---|
| Invalid certificate uploaded, please upload a valid certificate. | Check that you have uploaded the correct certificate and it is not corrupted. Ensure you have generated the certificate using the CSR generated in the iOS Settings Profile in Testsigma. |
| Certificate uploaded is not included in this provisioning profile. | Ensure that you select the correct certificate and provisioning profile for the device. When creating the provisioning profile, you should use the same certificate uploaded in iOS Settings in Testsigma. |
| Upload is not resigned | The upload is being re-signed. Once the re-signing process is complete, you can select it after a few minutes. You can track the status of the re-signing process in the Provisioning Profile Details dialogue in the configured iOS Settings Profile. |
| Device initializing | The Testsigma Agent sets up the device and shows errors during setup in the Devices tab on the Agent details page. |
Want to contribute or report missing content?