- create test cases
 Organizing Test Cases in Folders
- Test Cases for Web Applications
- Test Cases for Mobile Applications
- Test Cases for Mobile Web Applications
- Manage Test Cases for Web Applications
- Manage Test Cases for Android & iOS Apps
- Manage Test Cases for Mobile Web Applications
- Test Case List Actions
- Importing Postman Collections and Environments
- Custom Fields for Test Cases
- Label Management
- Update Test Case Result in a Test Plan
- Test Case: Advanced Options Guide
- Test Step Types
- Type: Natural Language
- Type: REST API
- Type: Step Group
- Type: For Loop
- Type: While Loop
- Type: Block
- Type: If Condition
- Nested Step Groups
- Image Injection
- Cross-application testing
Test Step Type: Blocks
In Testsigma, you can combine several test steps into one block using Step Blocks. This feature makes your test cases more organised, efficient, and simpler. You can make logical groups of actions, validations, or other steps that must be done together. This guide will explain how to use Step Blocks in Testsigma.
In Testsigma, a step block can be created using two different methods:
- Create a Block using Test Step Type
- Create a Block using Bulk Action
Prerequisites
Before you begin, ensure that you have referred to:
Create a Block using Test Step Type
Follow the below steps to add a block using the test step type:
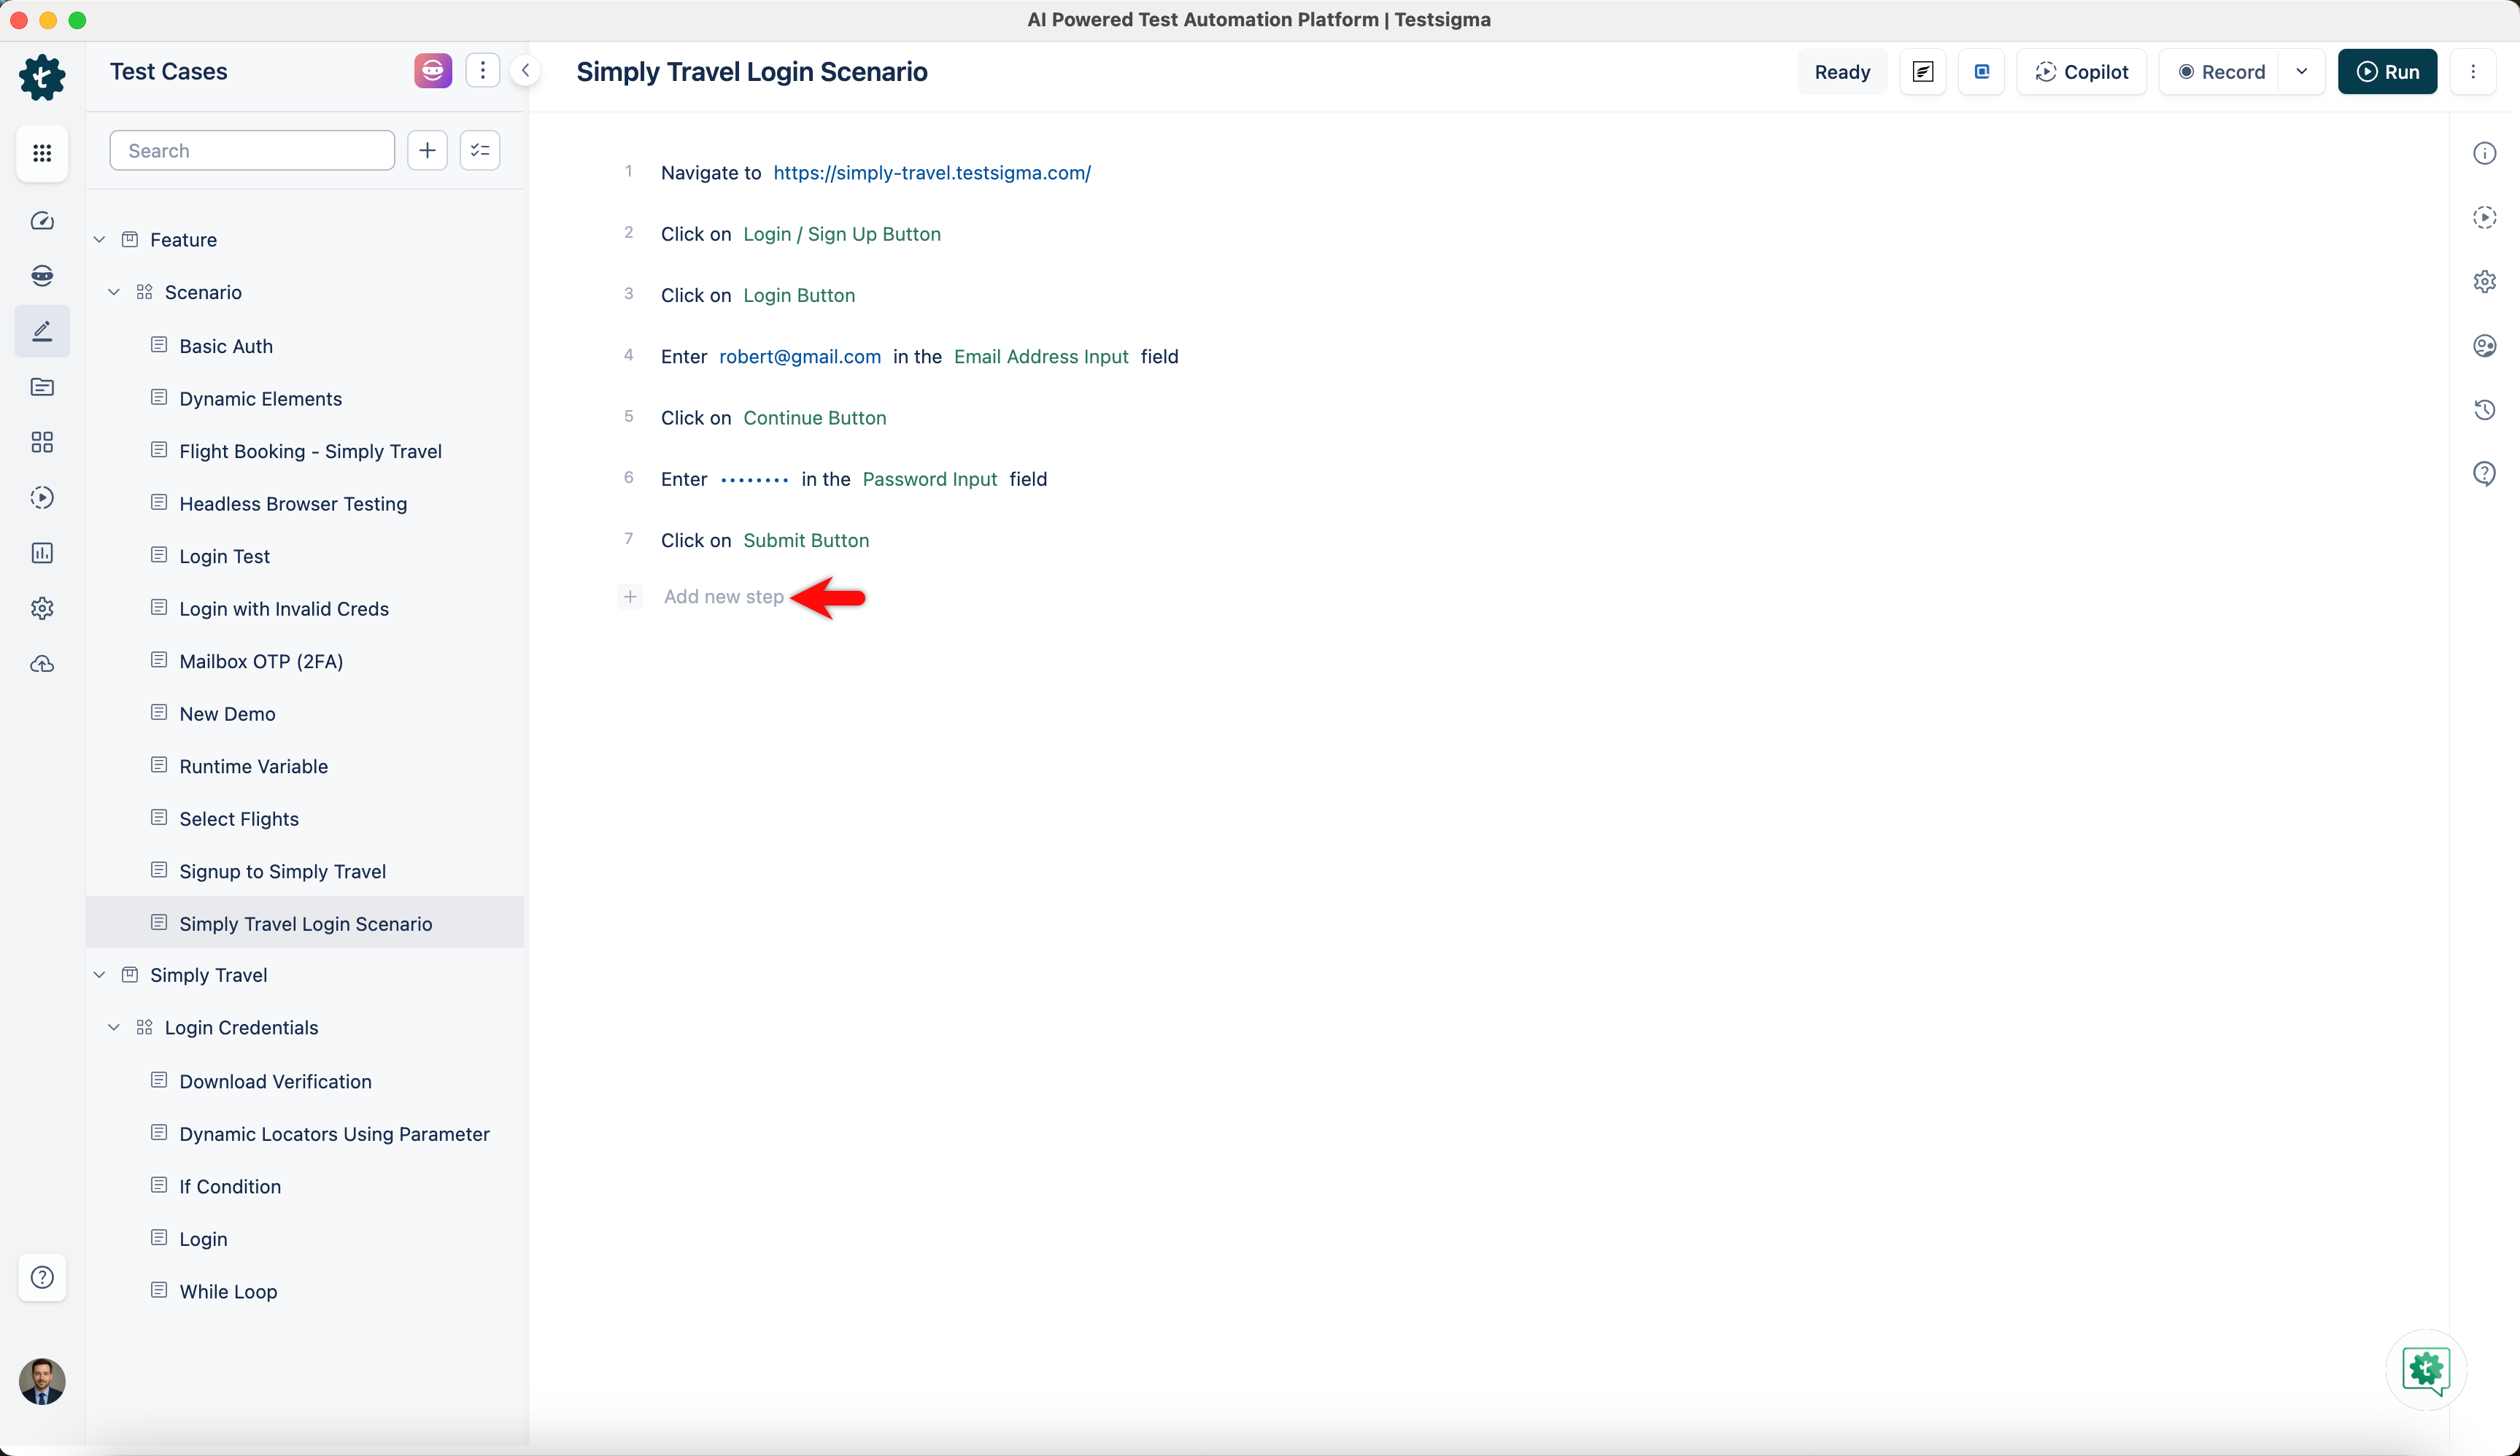
- Click + Add new step on the Test Case Details page where you want to insert a block.
- Click on the Test Step Type button located before the new test step and select Create a Block from the dropdown list that appears.
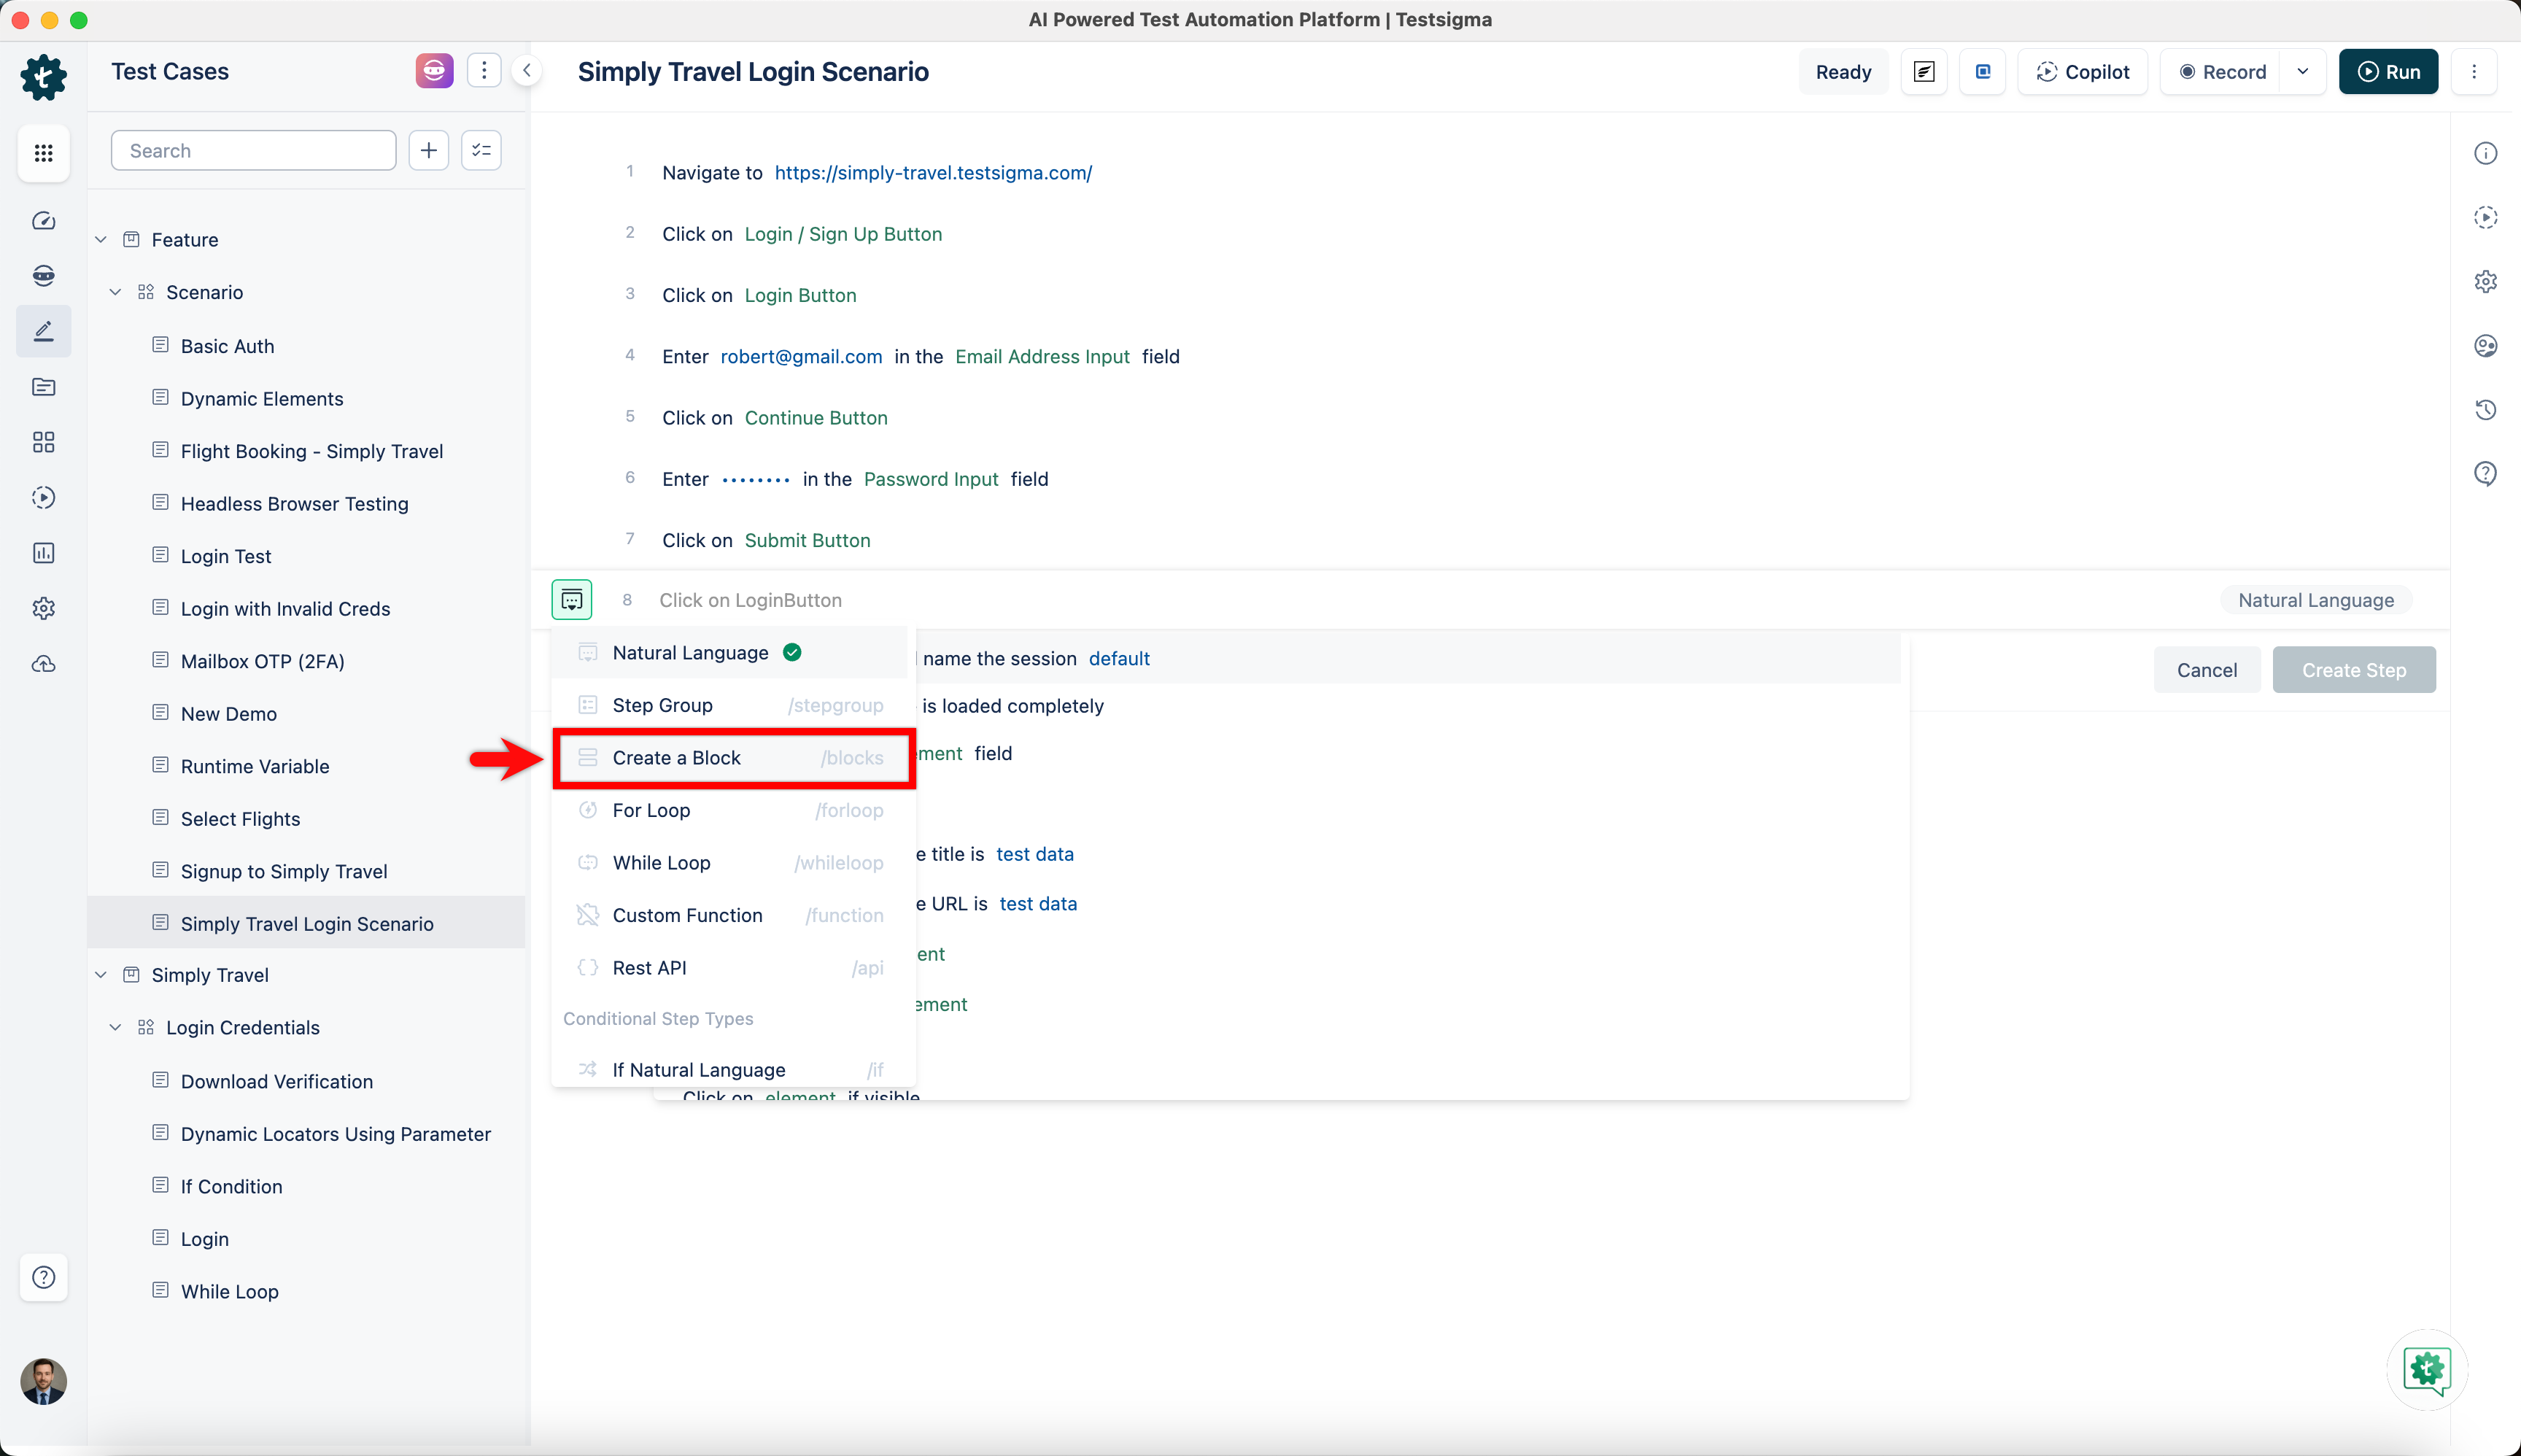
- Once you've selected the block, enter a title and click Create Step.

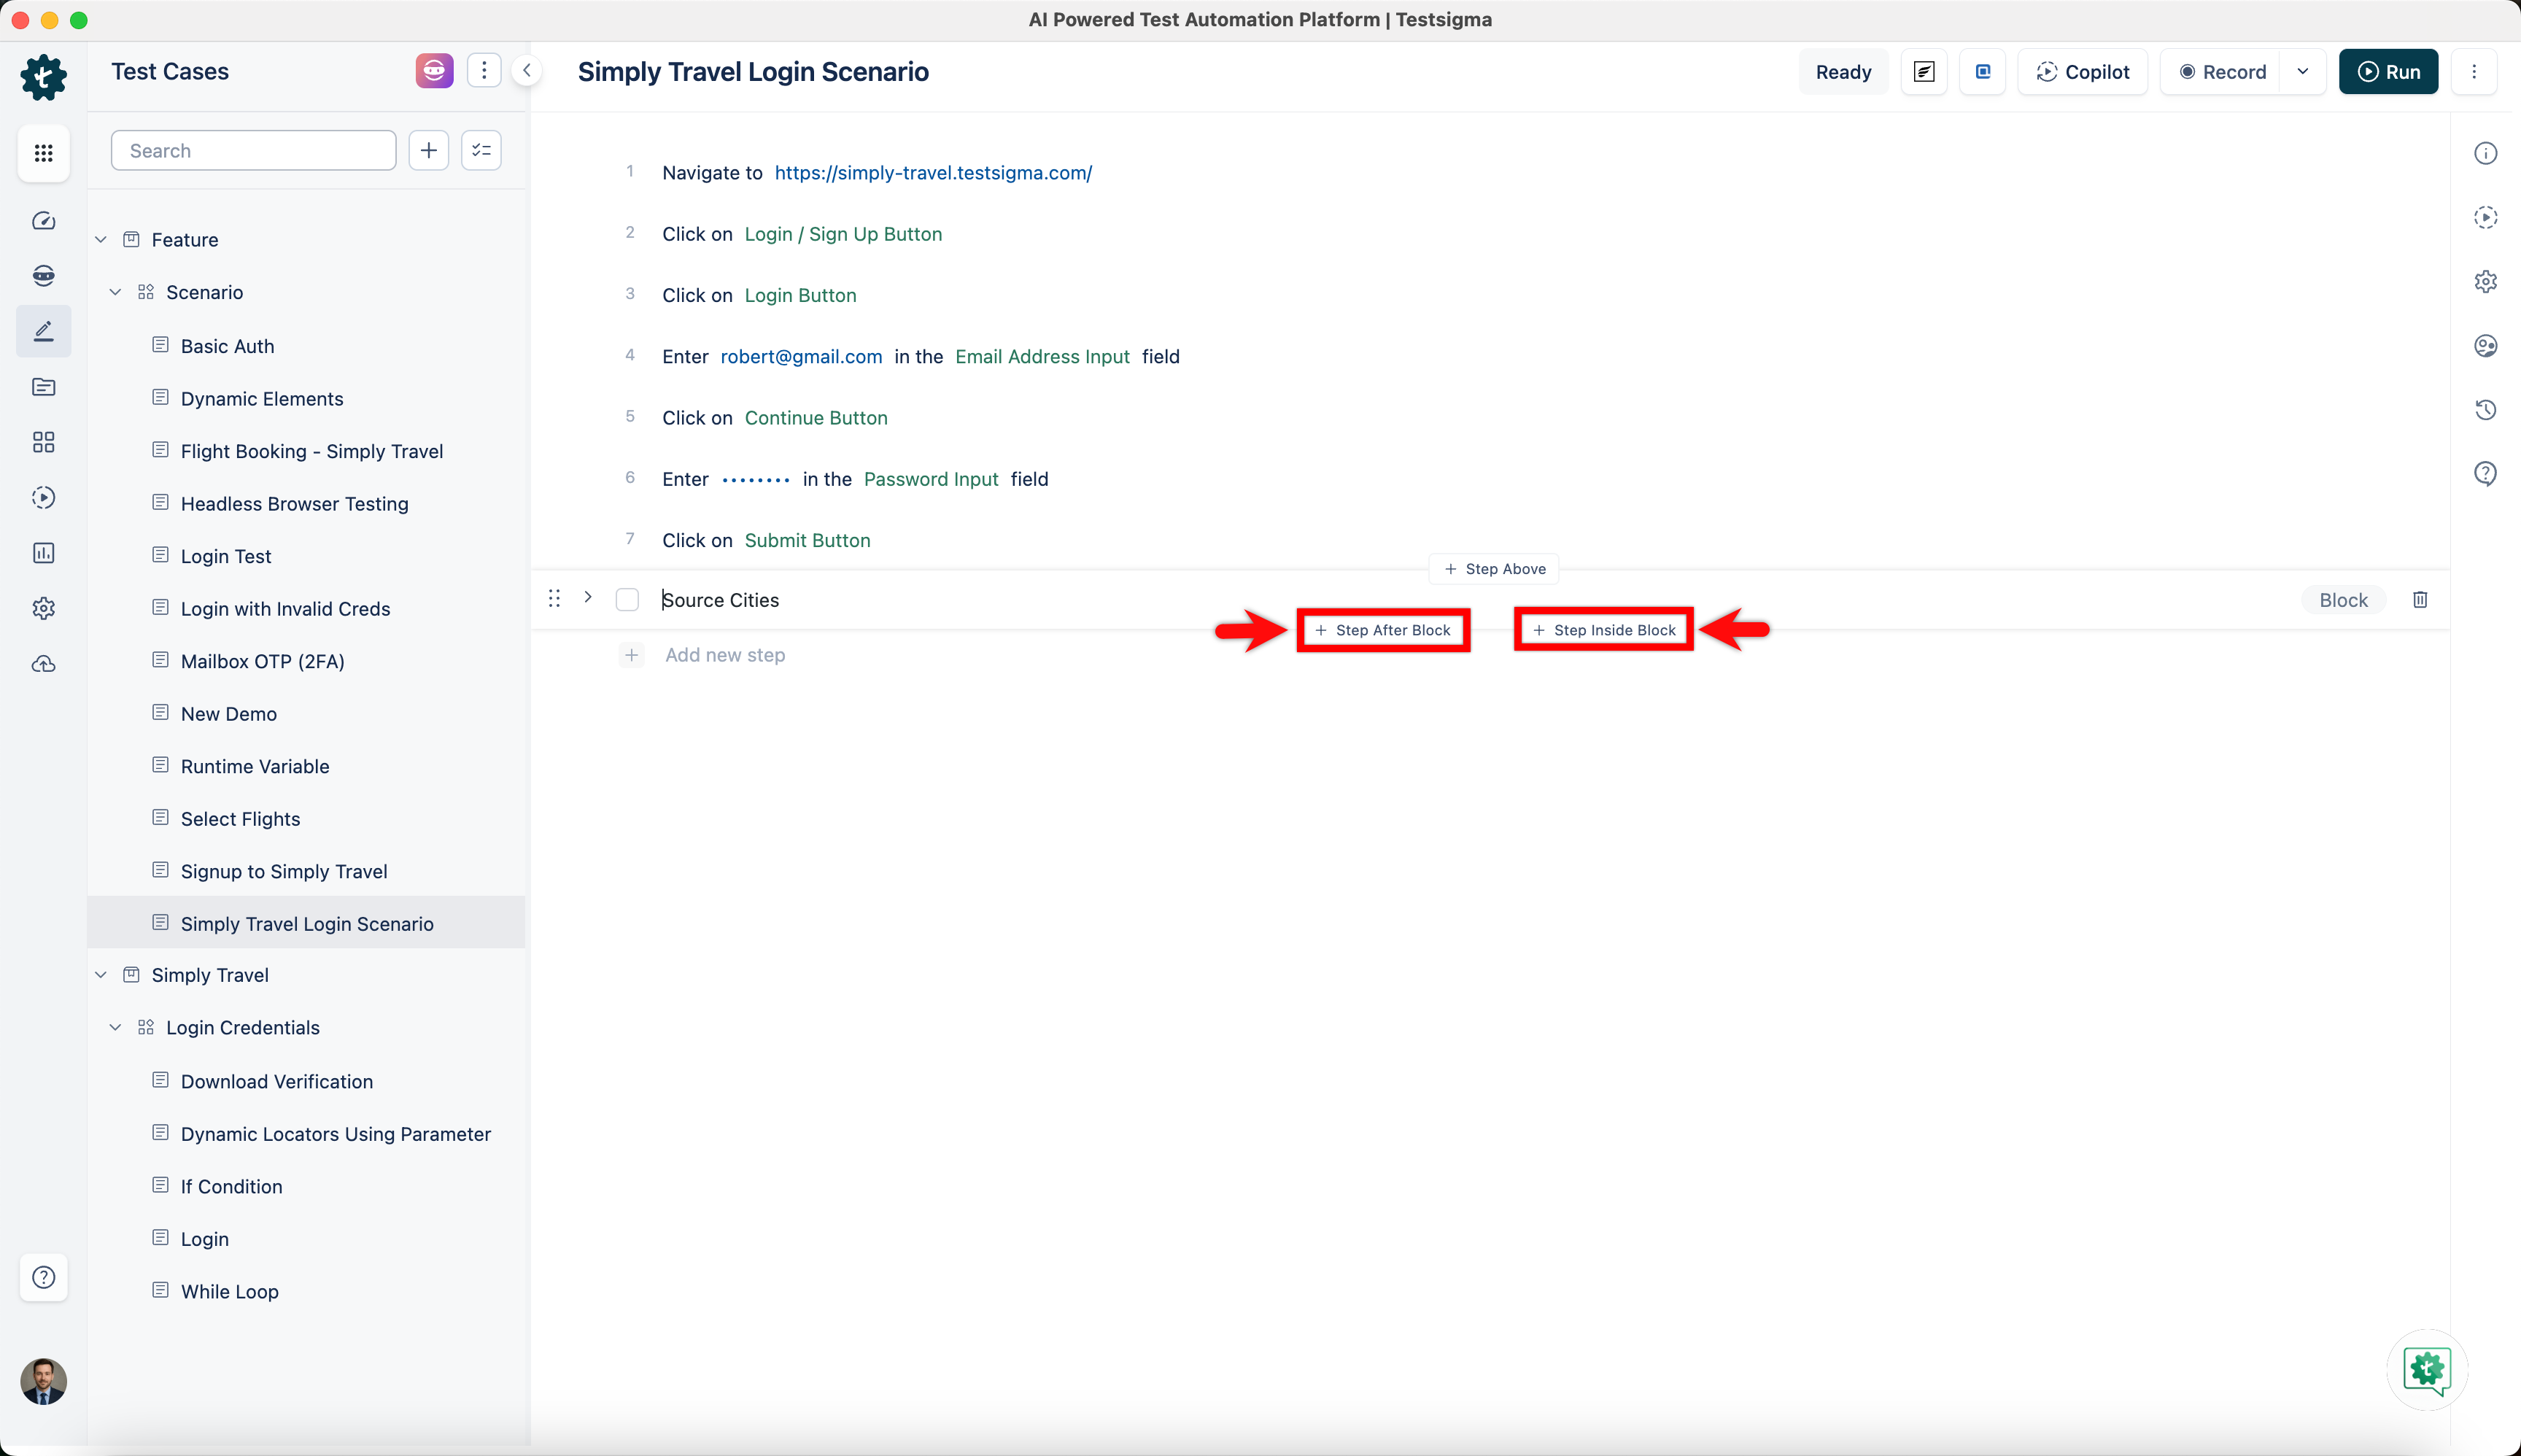
- To add a step within the block, click Step Inside Block, and to add a test step after the block, click Step After Block.
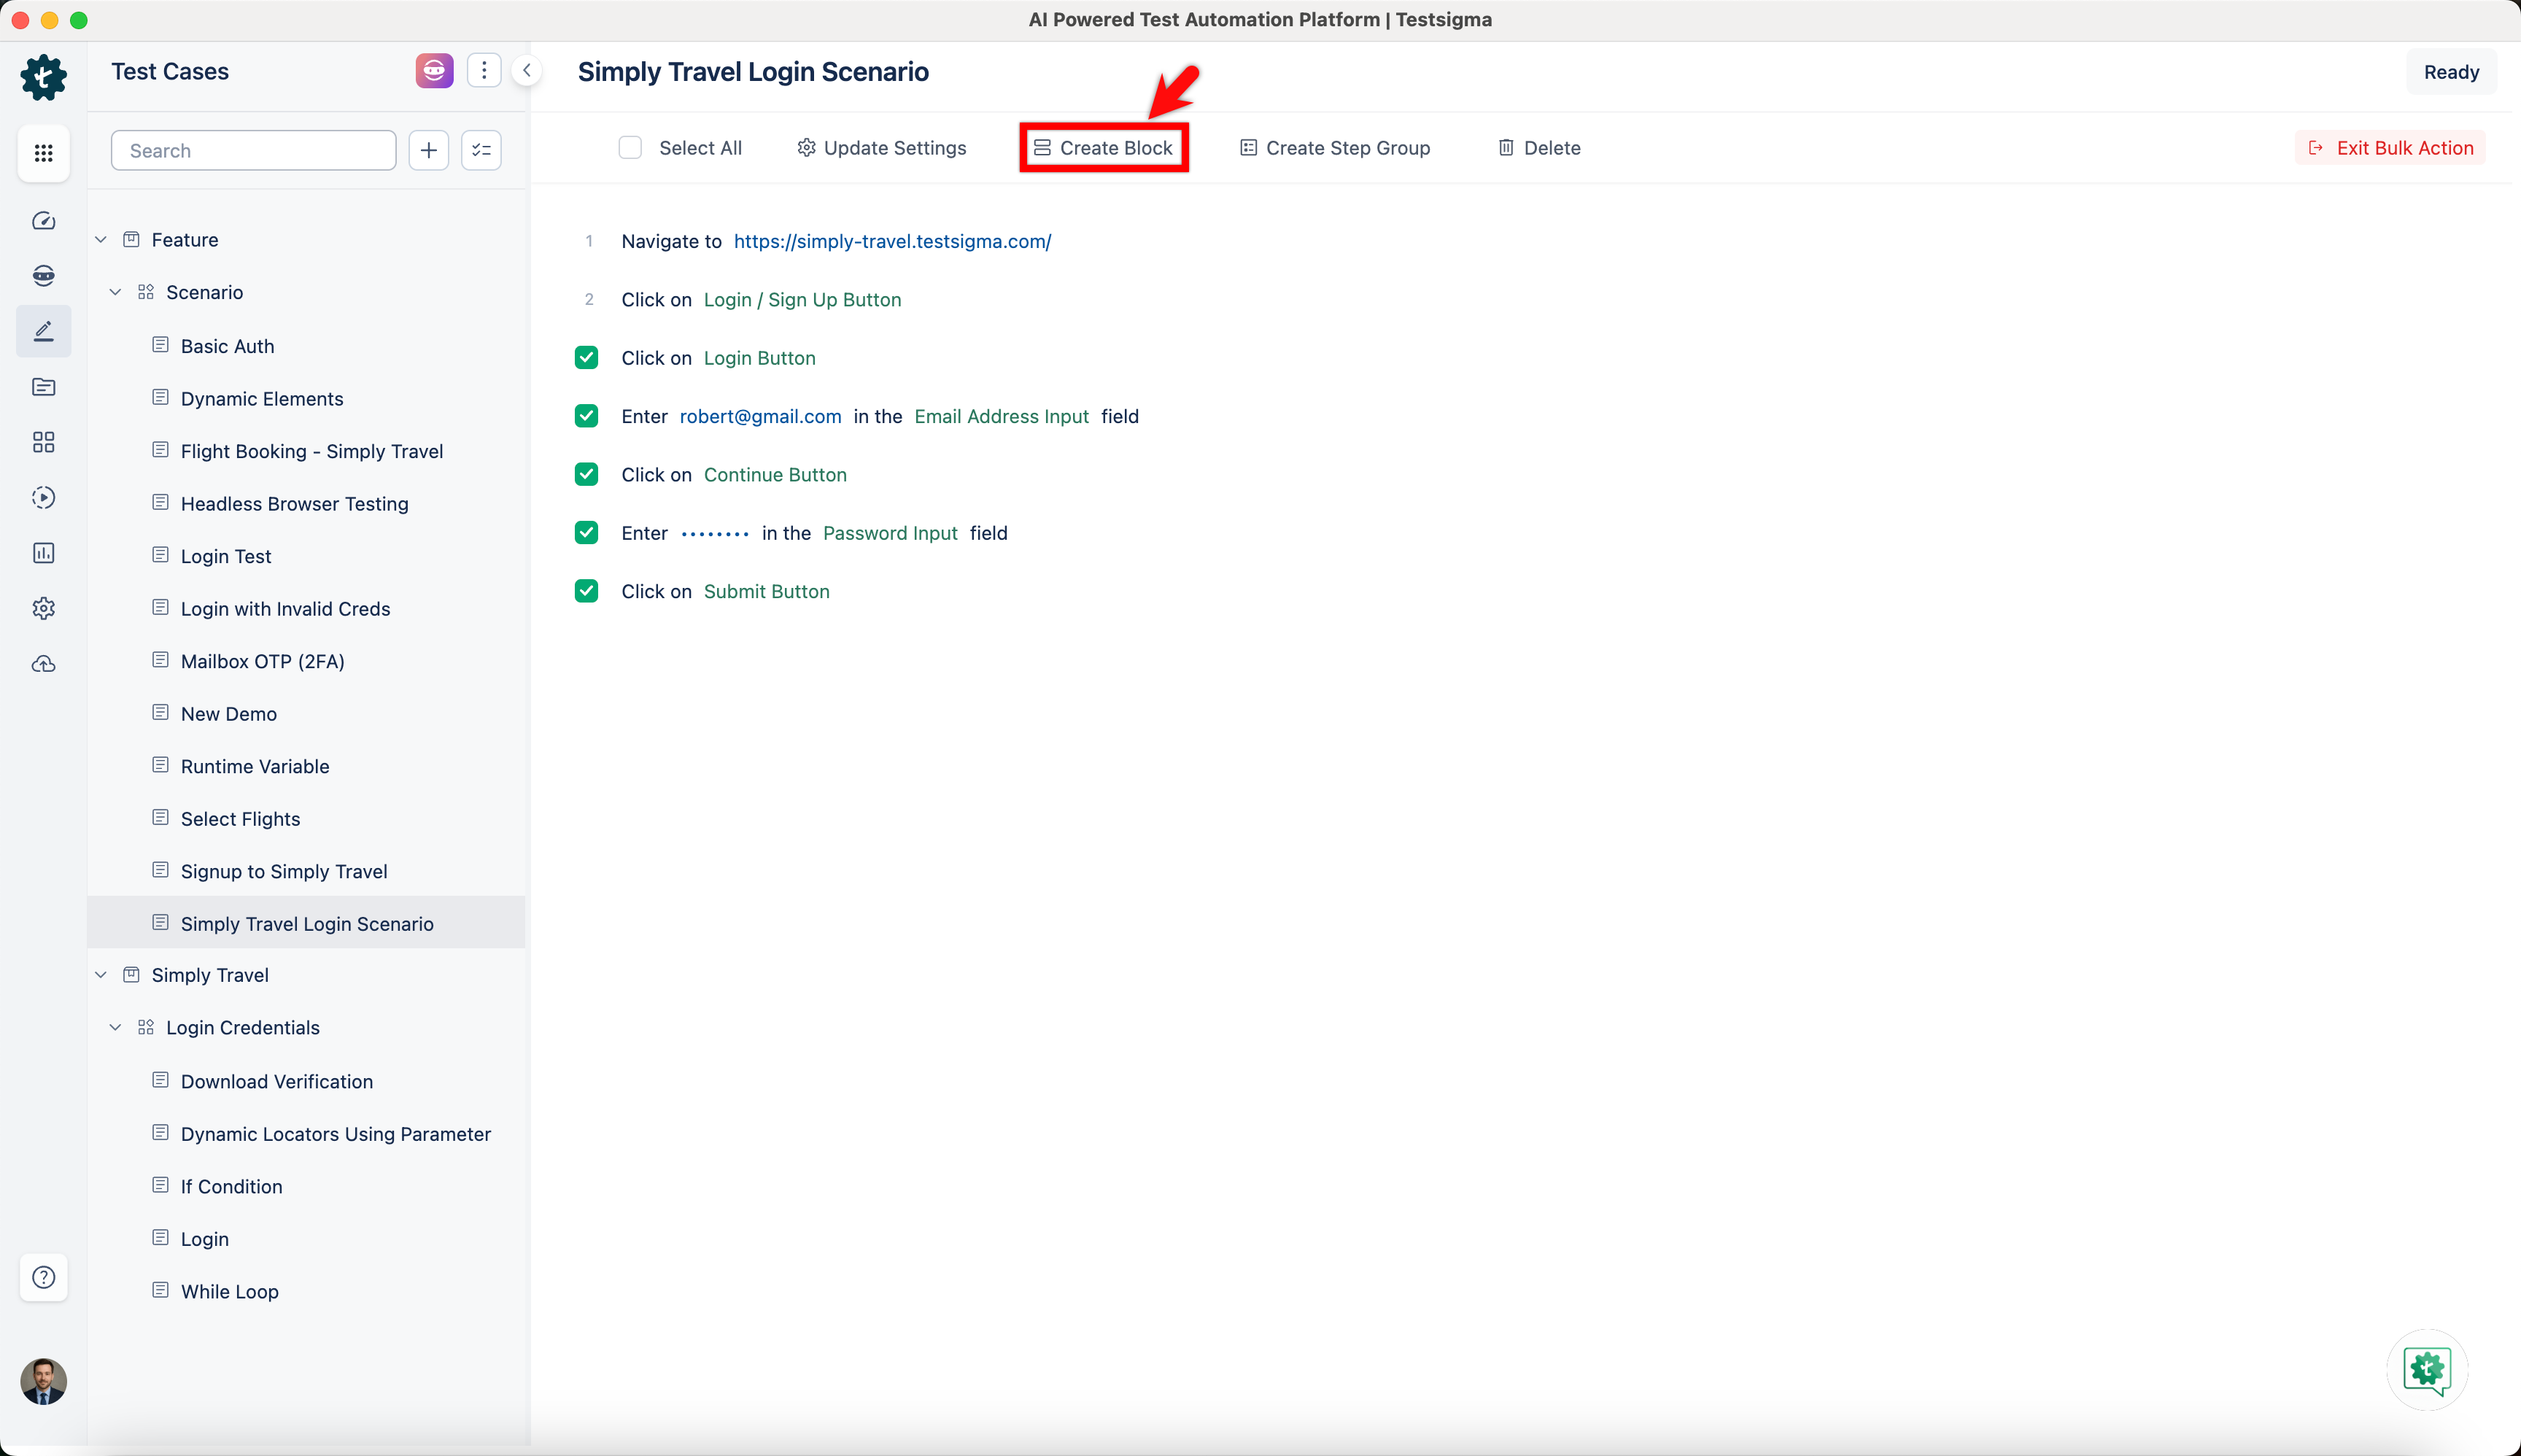
Create a Block using Bulk Action
Follow the below steps to add a block using the bulk action:
- Add the test steps you want to the block by selecting them on the Test Case Details page.
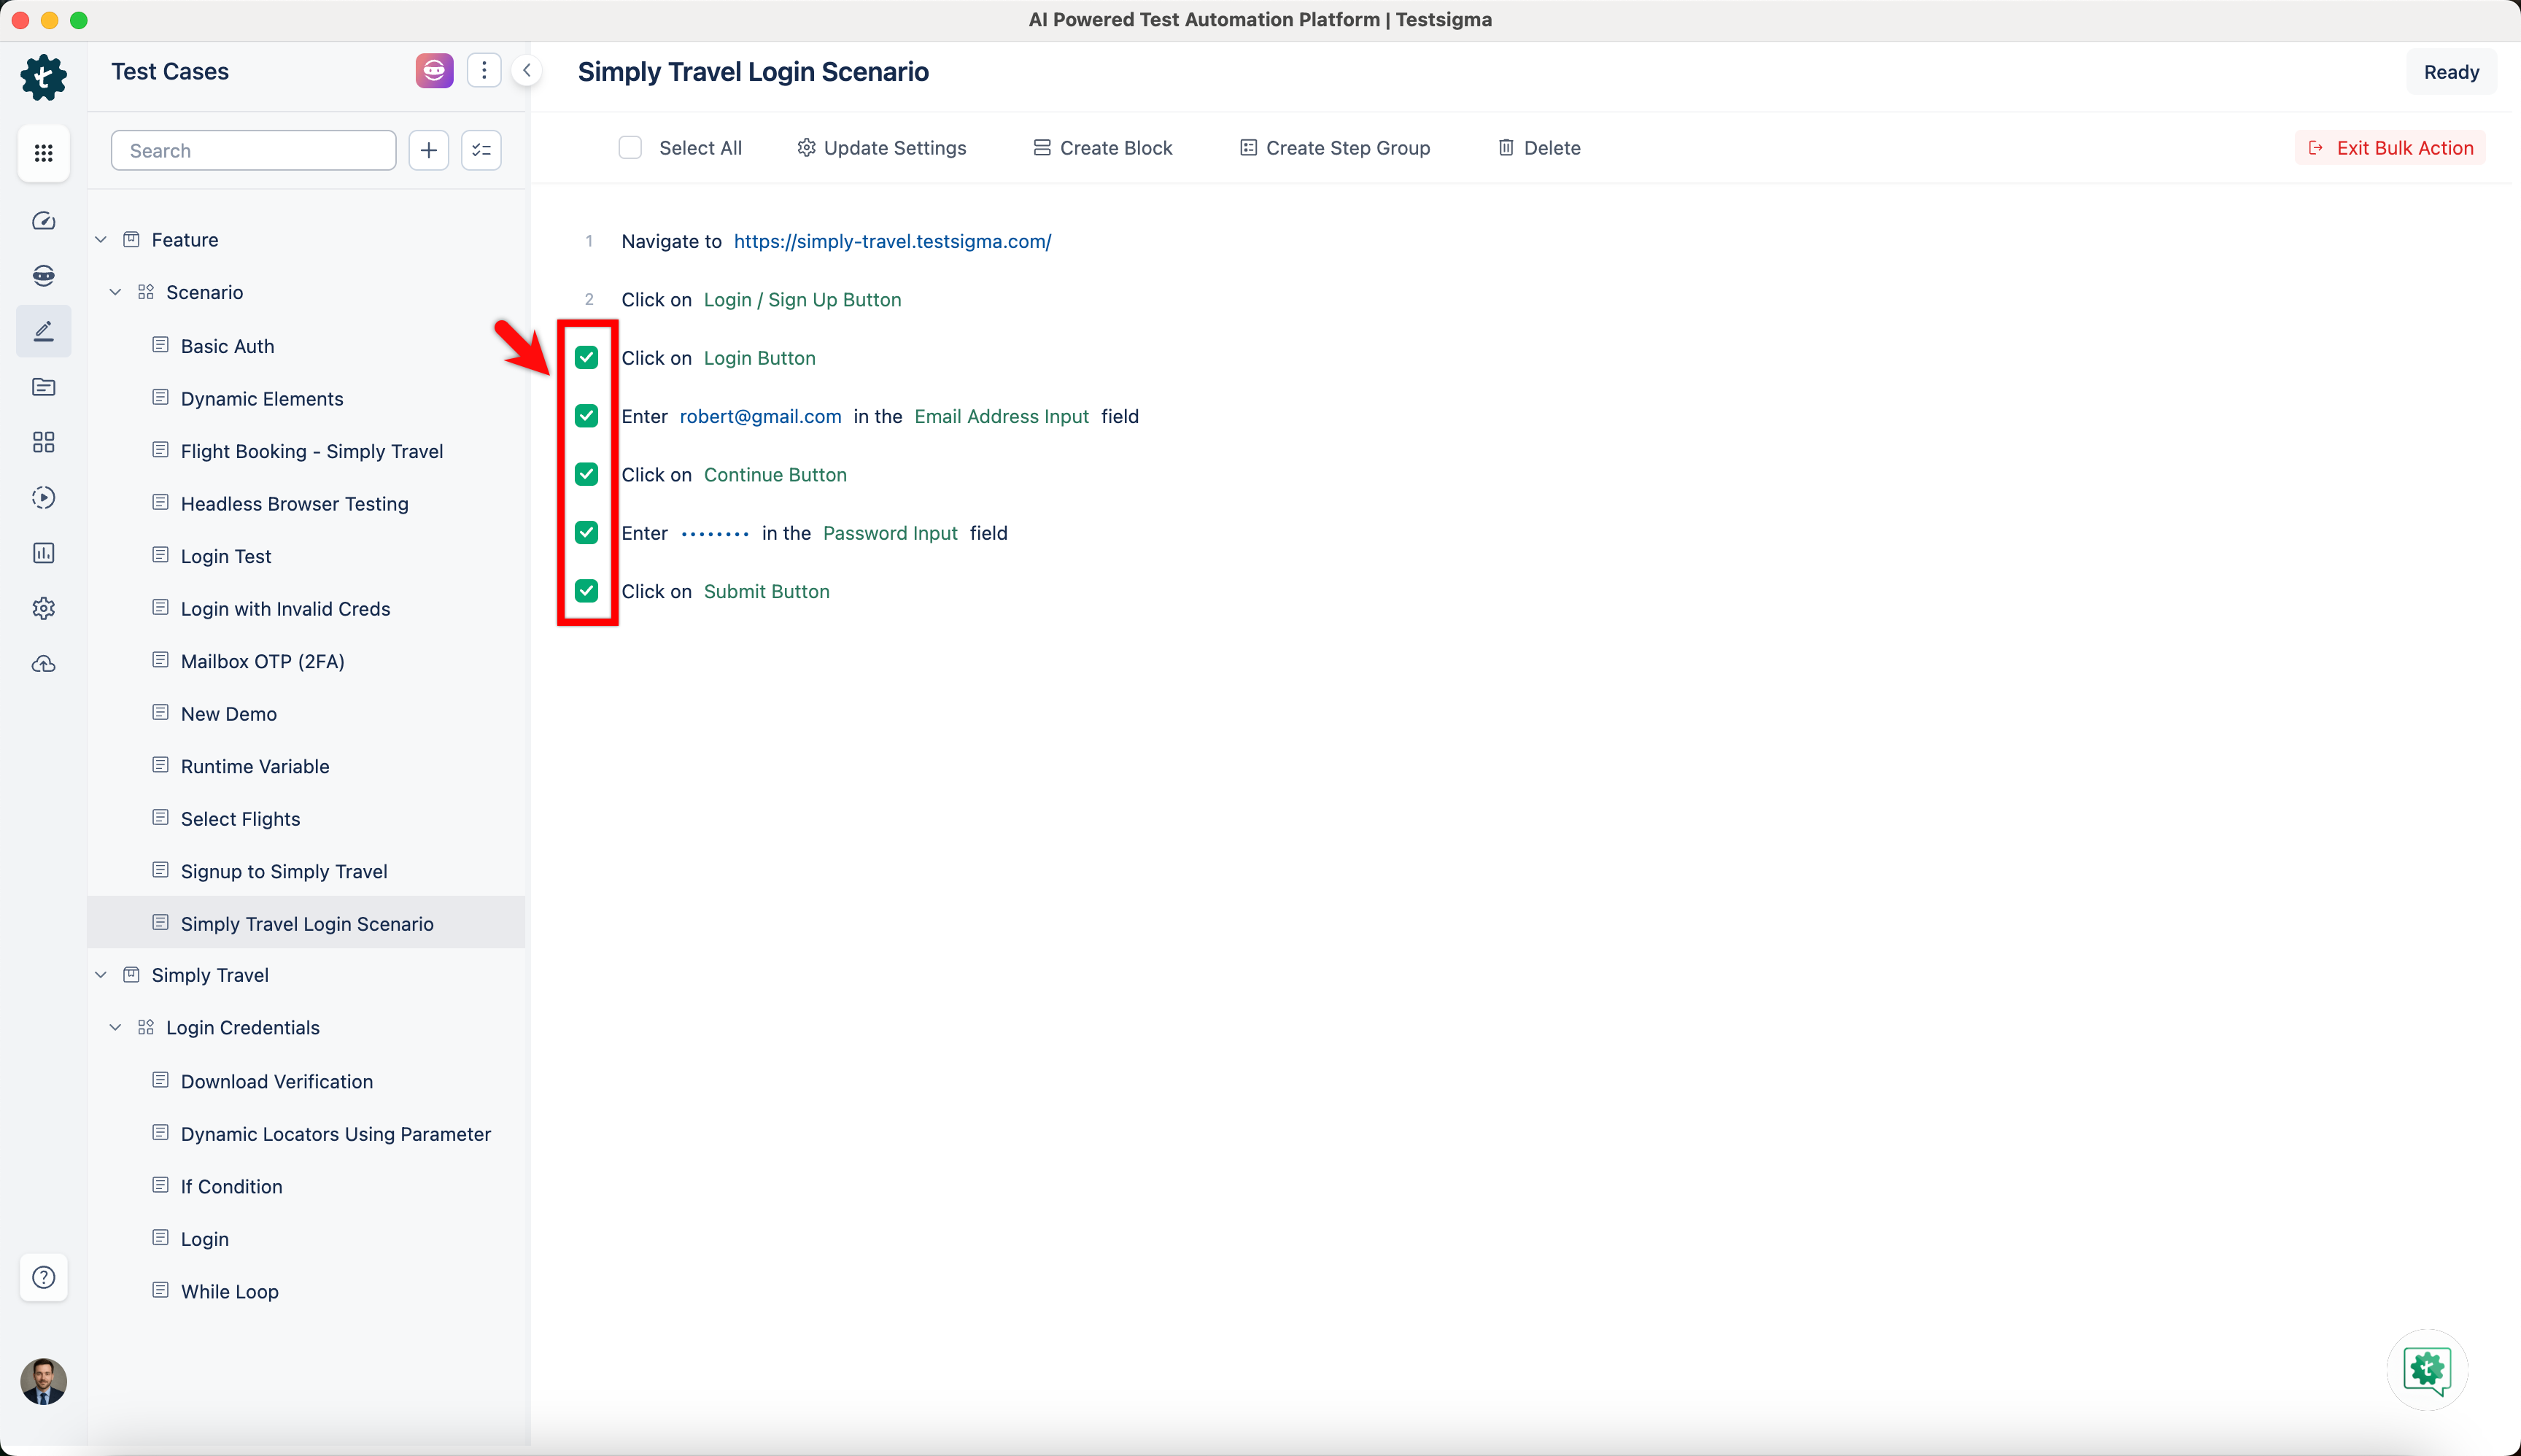
You can only add consecutive test steps to a block.
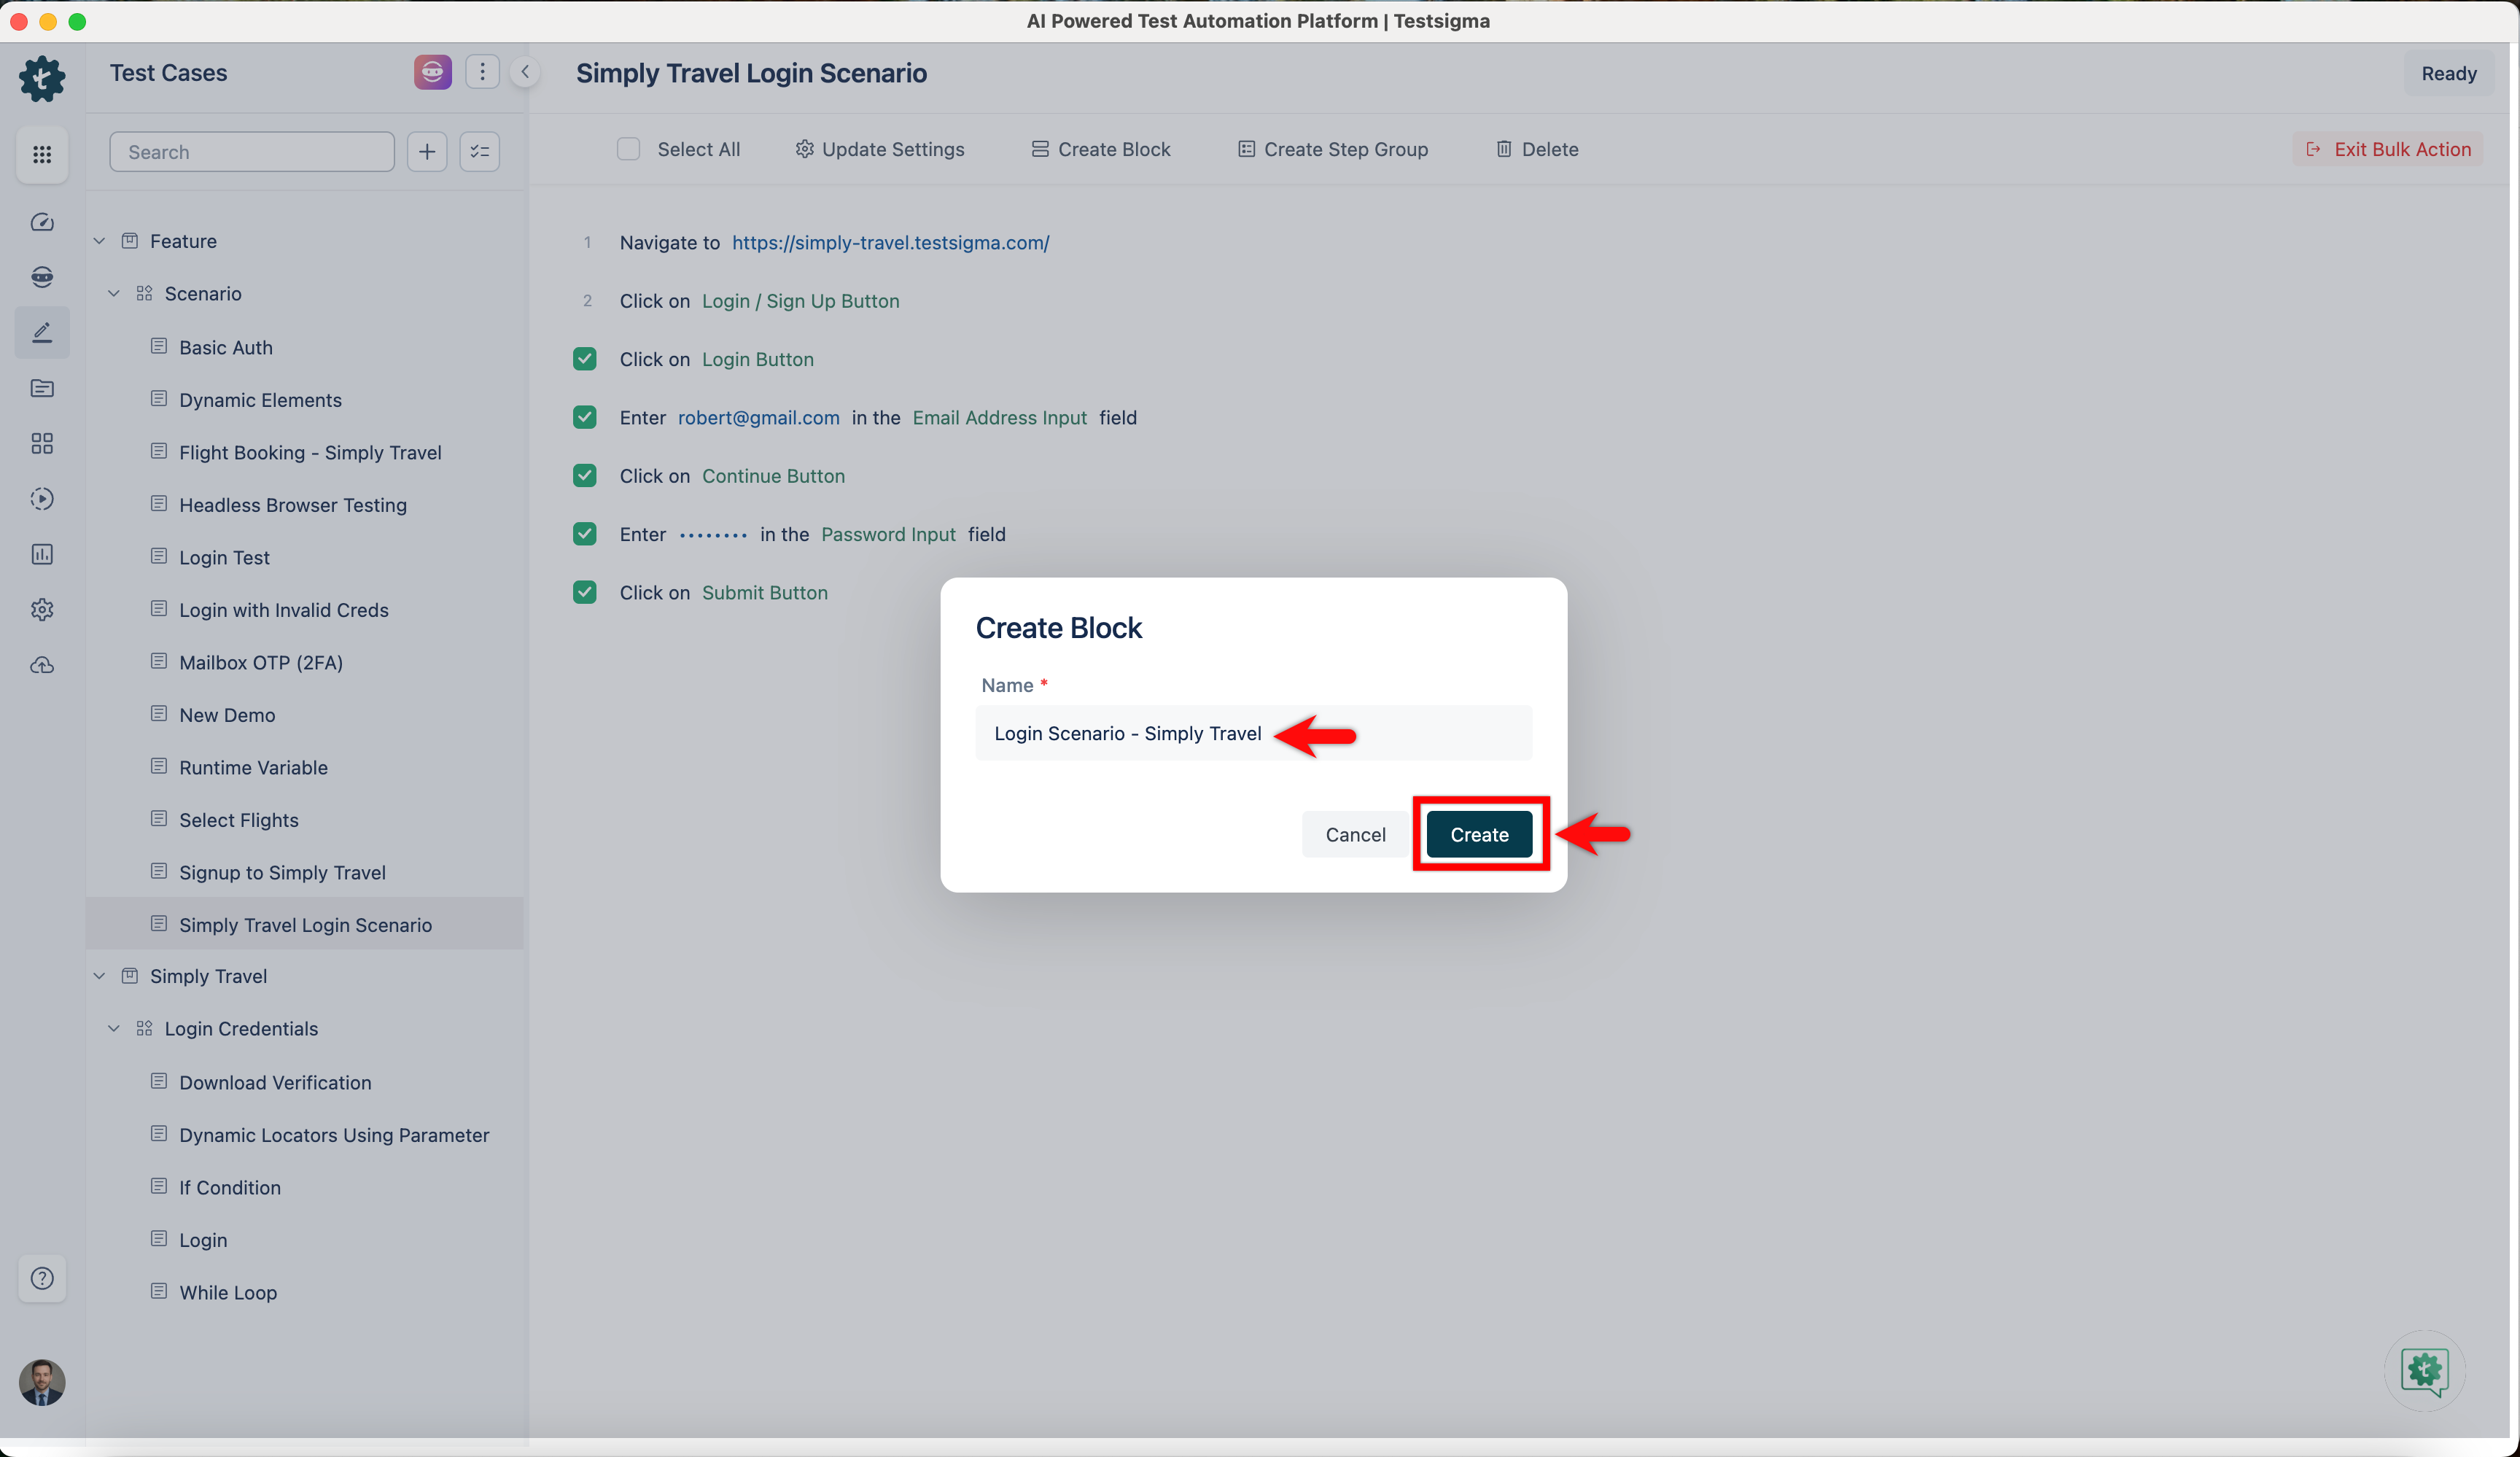
- Click the Create Block option in the menu bar, and a Create Block pop-up window will appear. Enter the title and click Create.
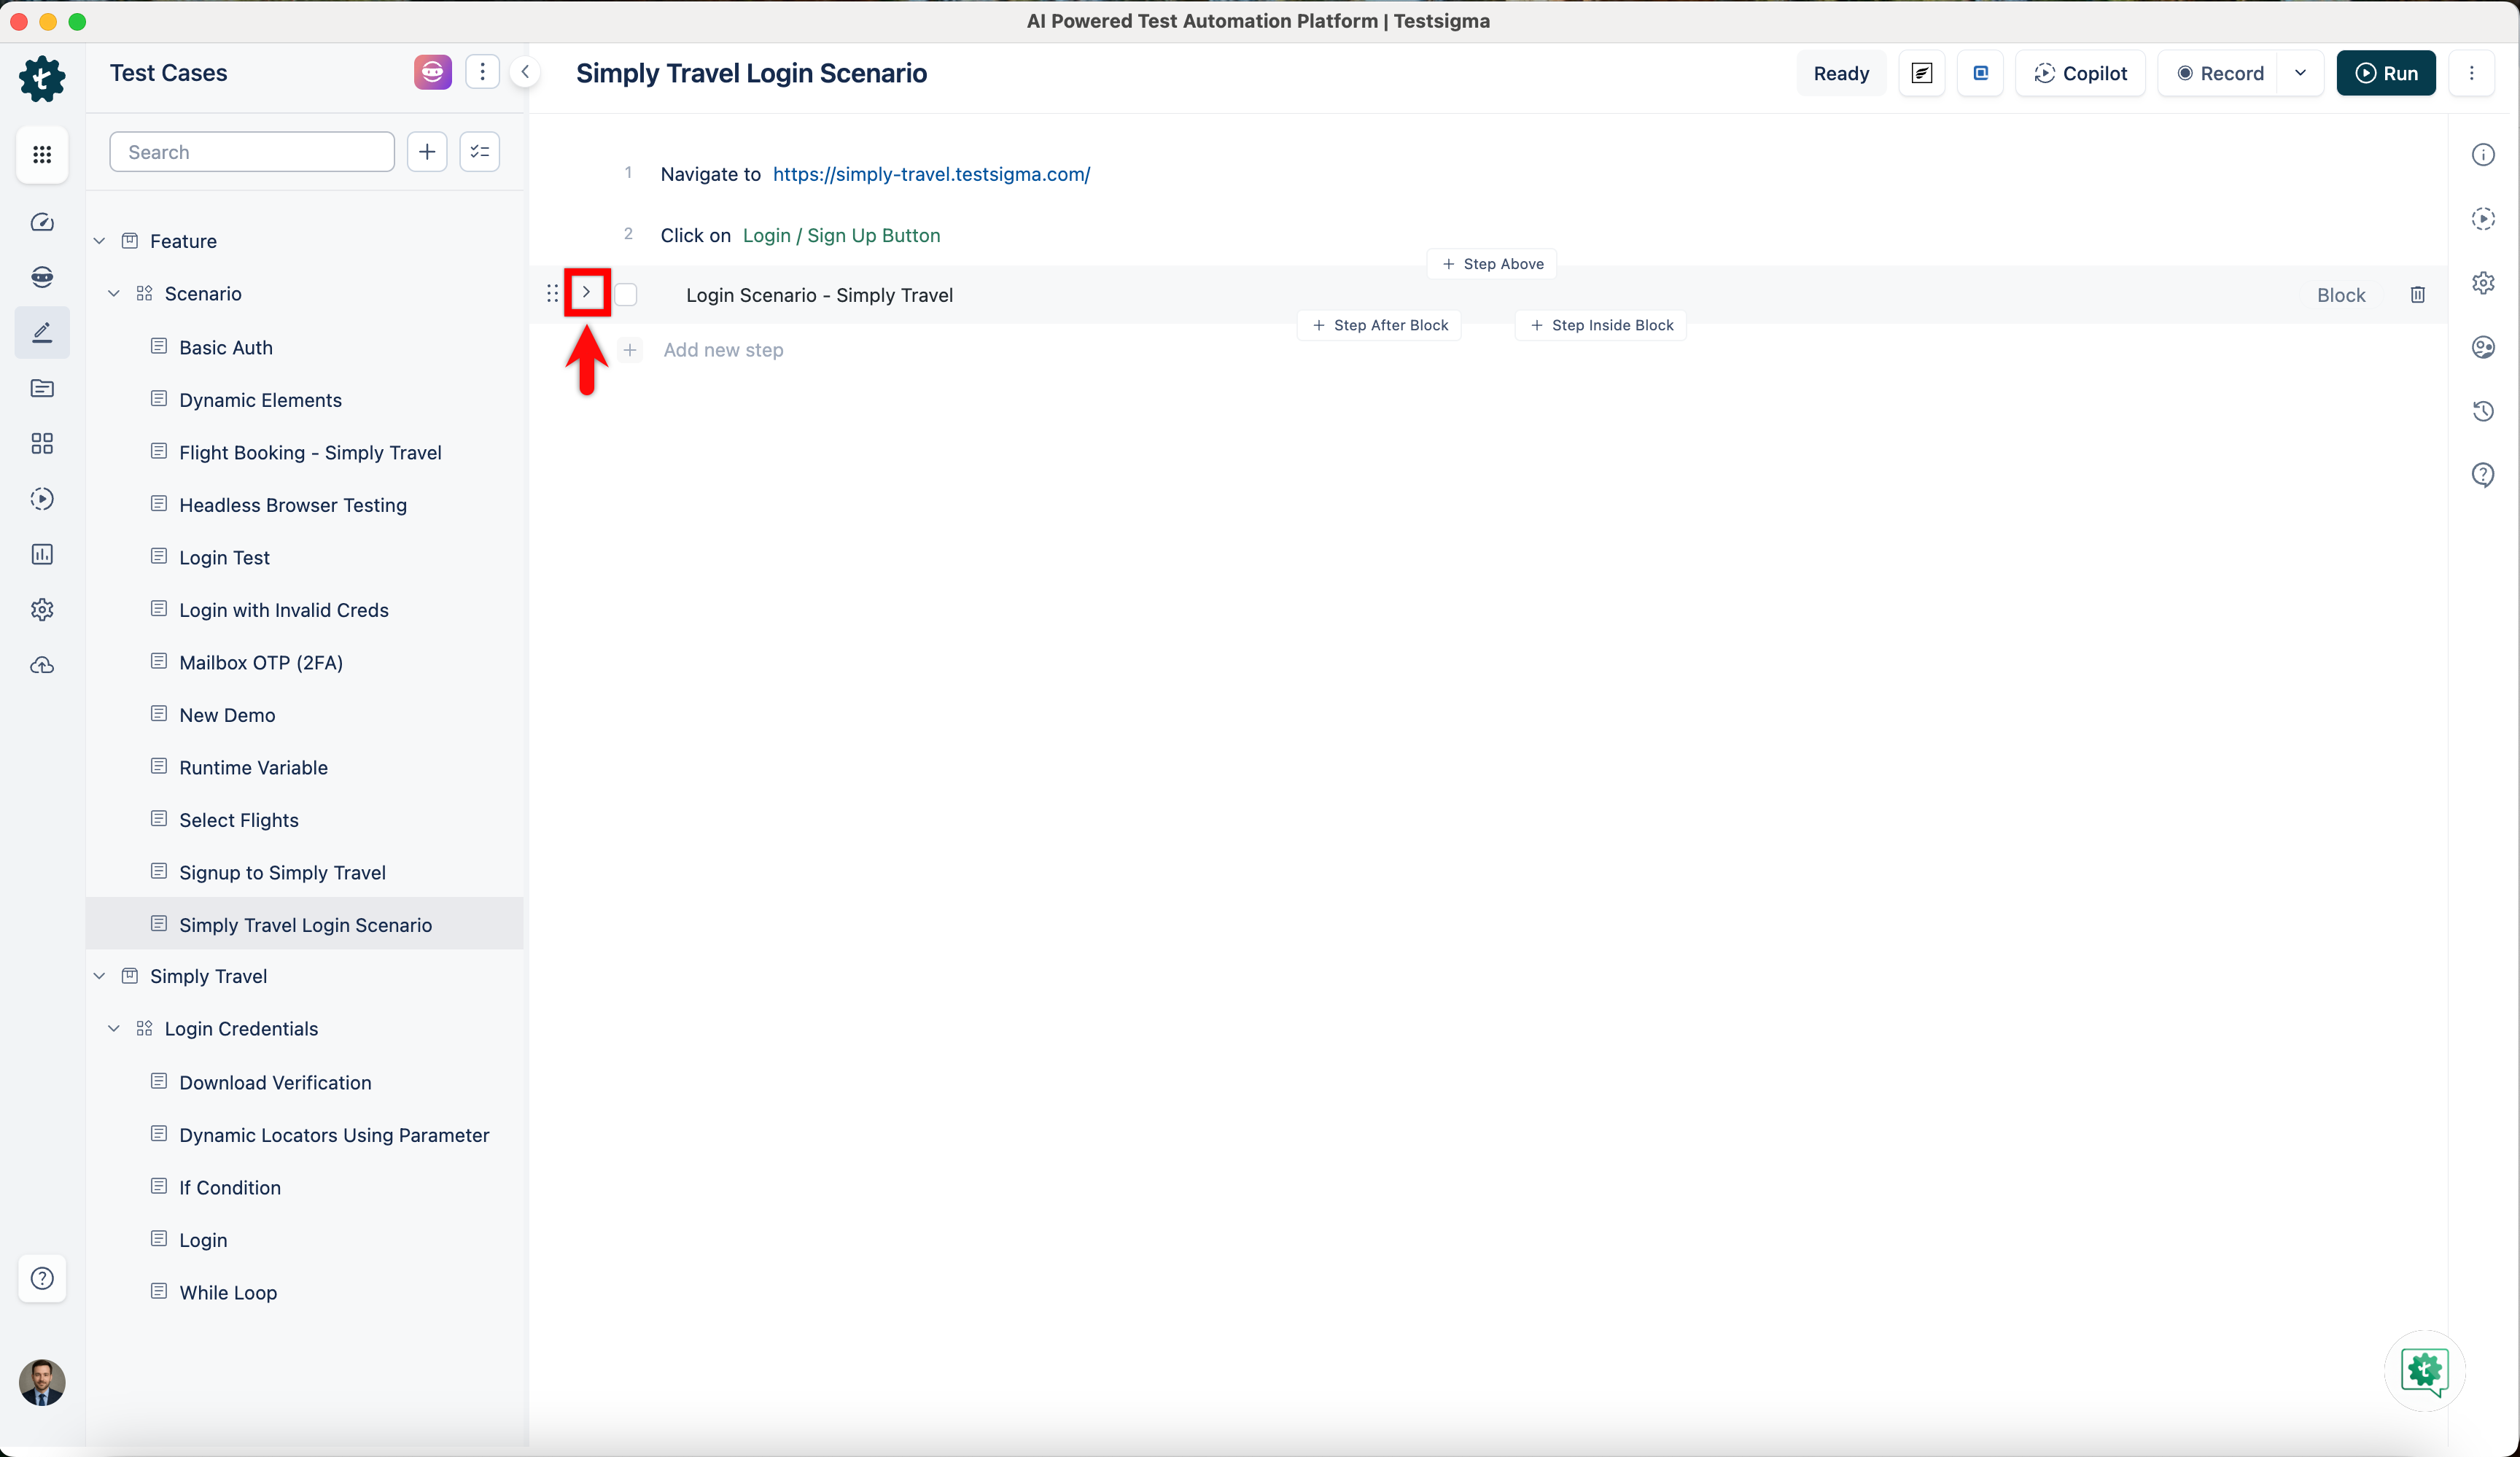
- Click the > icon on the left to expand and view the selected steps within the collapsed block with the given title.
If you selected a Block step in the Test Steps, you cannot create a Block again. Please remove or deselect the Block step and try again.
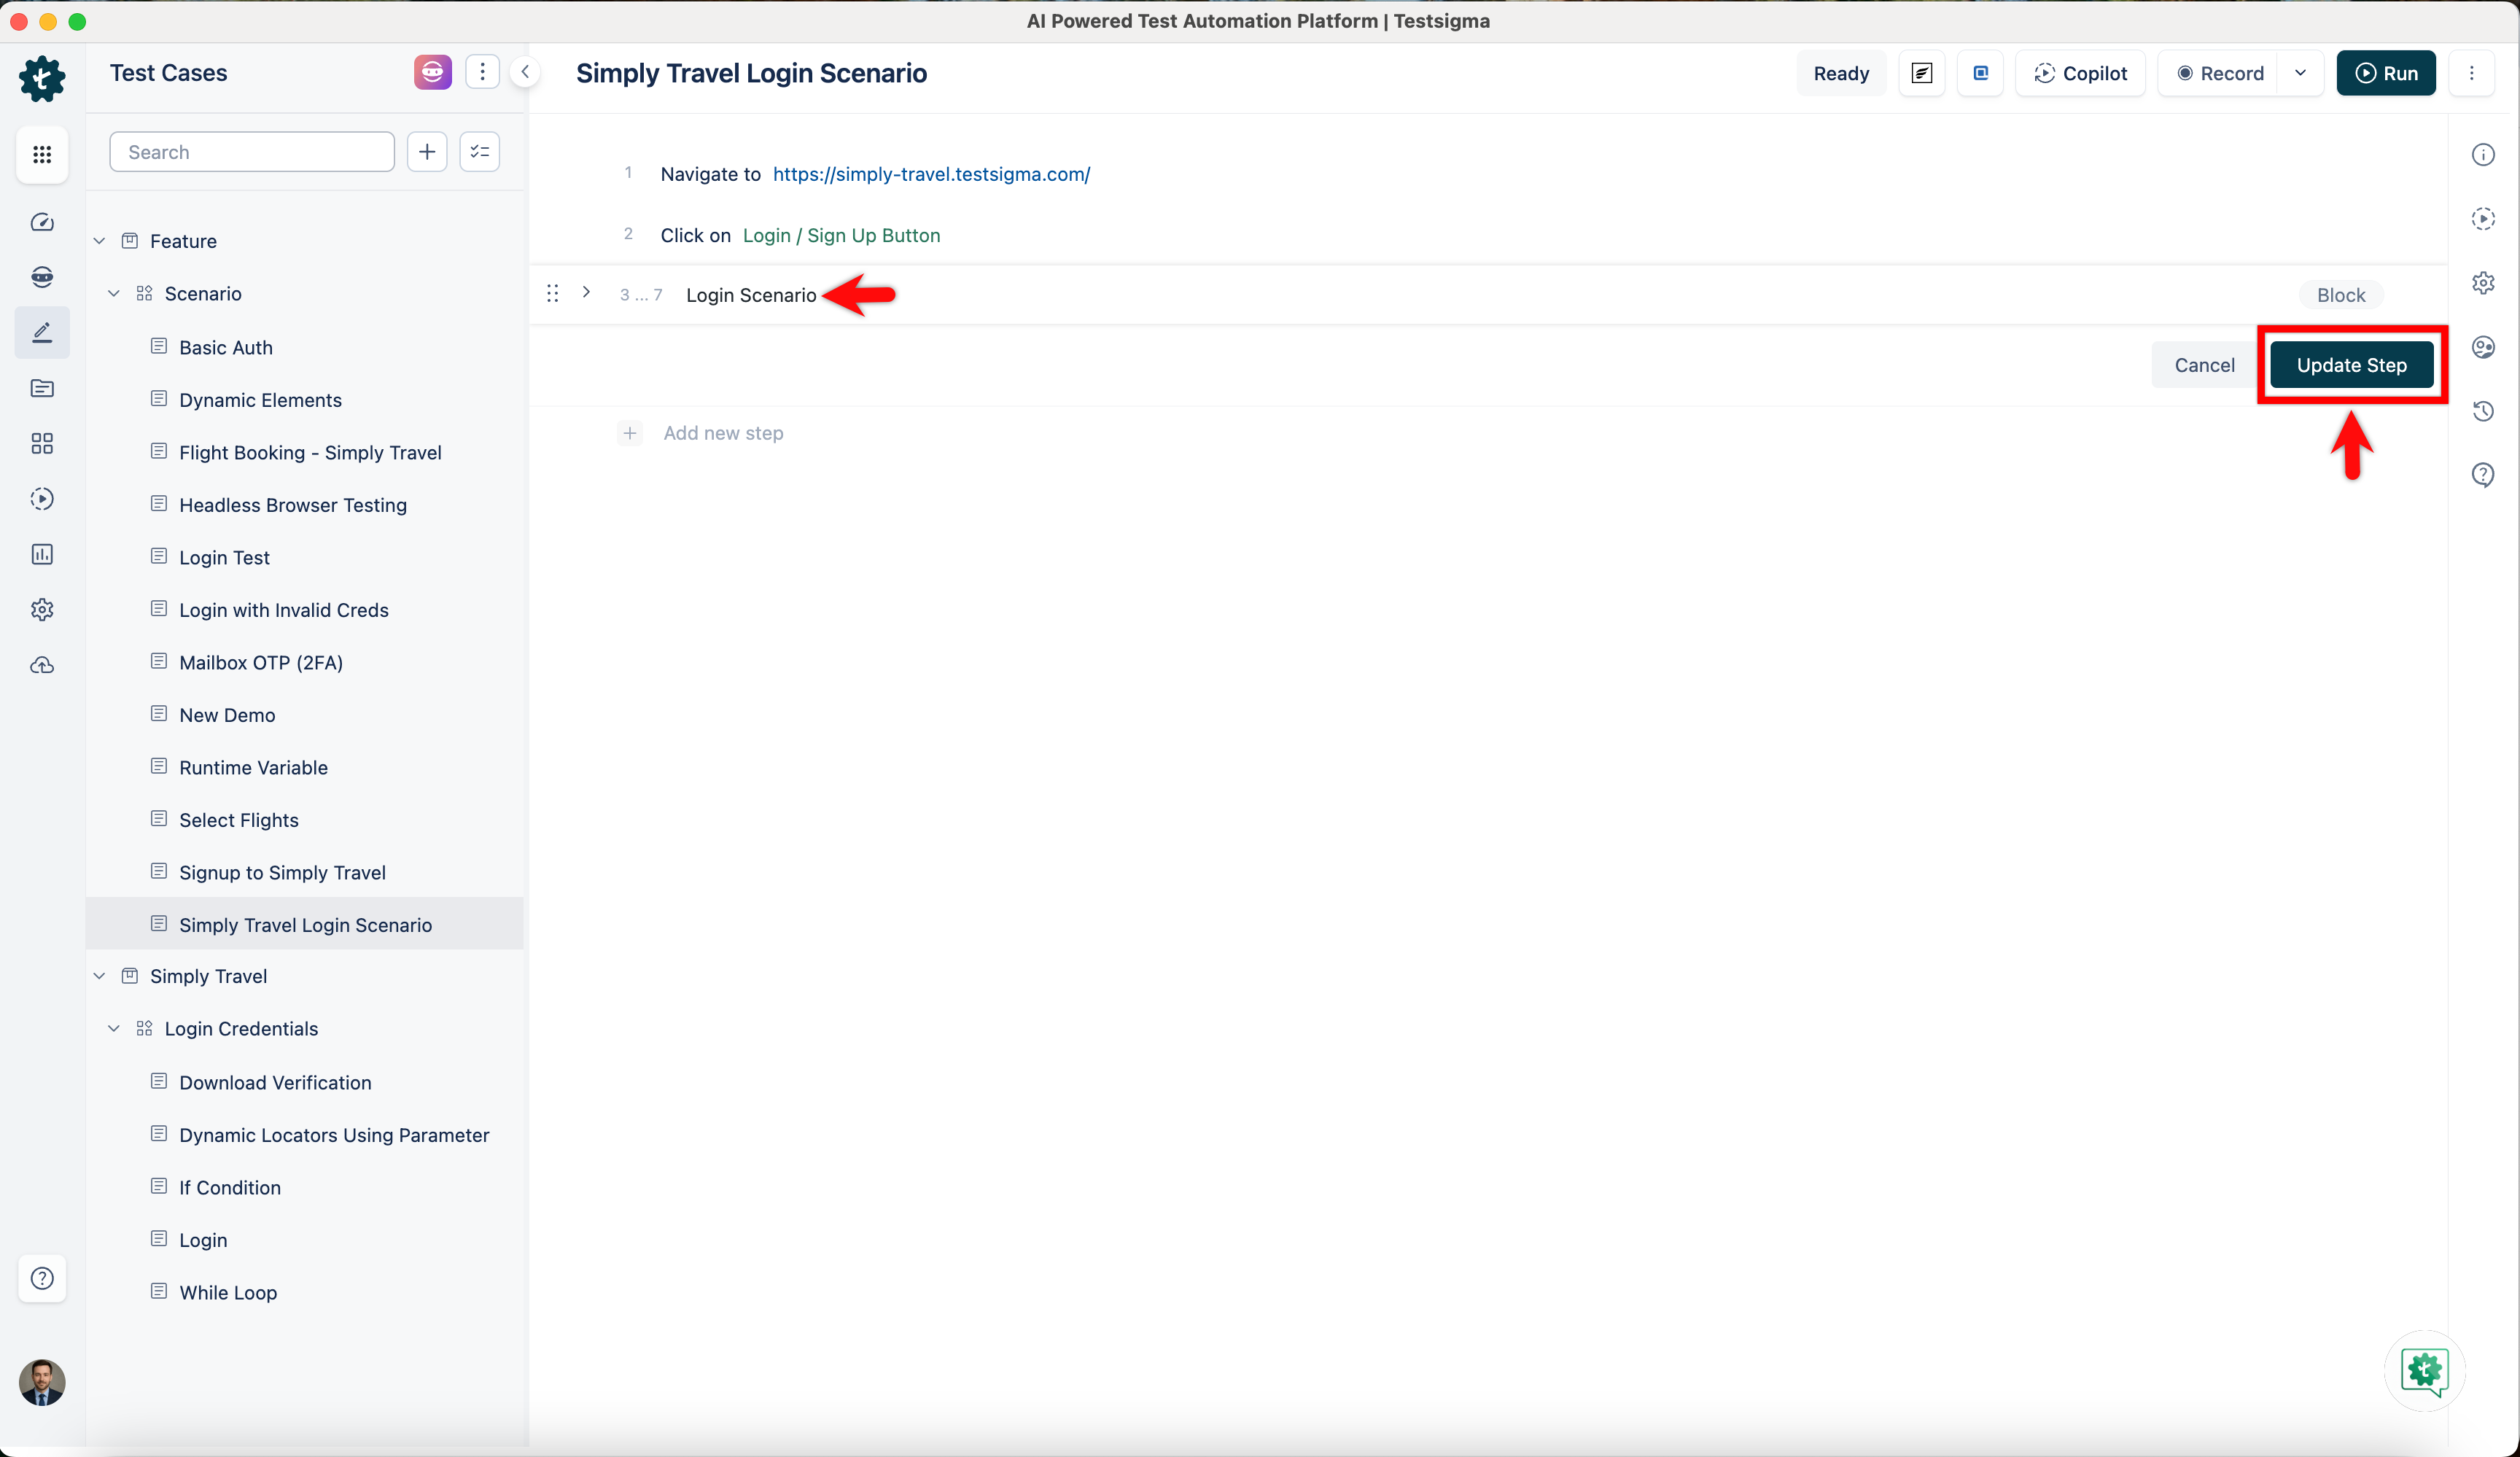
Editing a Block
Open the test case with the Step Block you want to edit. Choose the block, edit its name, and click Update Step to save.
Click the > icon to view the steps within the block. To add a test step, click Step Inside Block, or click the ellipsis icon in the test step to access additional options.
Deleting a Block
To delete a Step Block, open the test case containing it and click the Delete button corresponding to the Block Step.
Clicking on the delete button will delete the block, as it is only considered a label for the test steps, and the test steps inside it will remain intact.
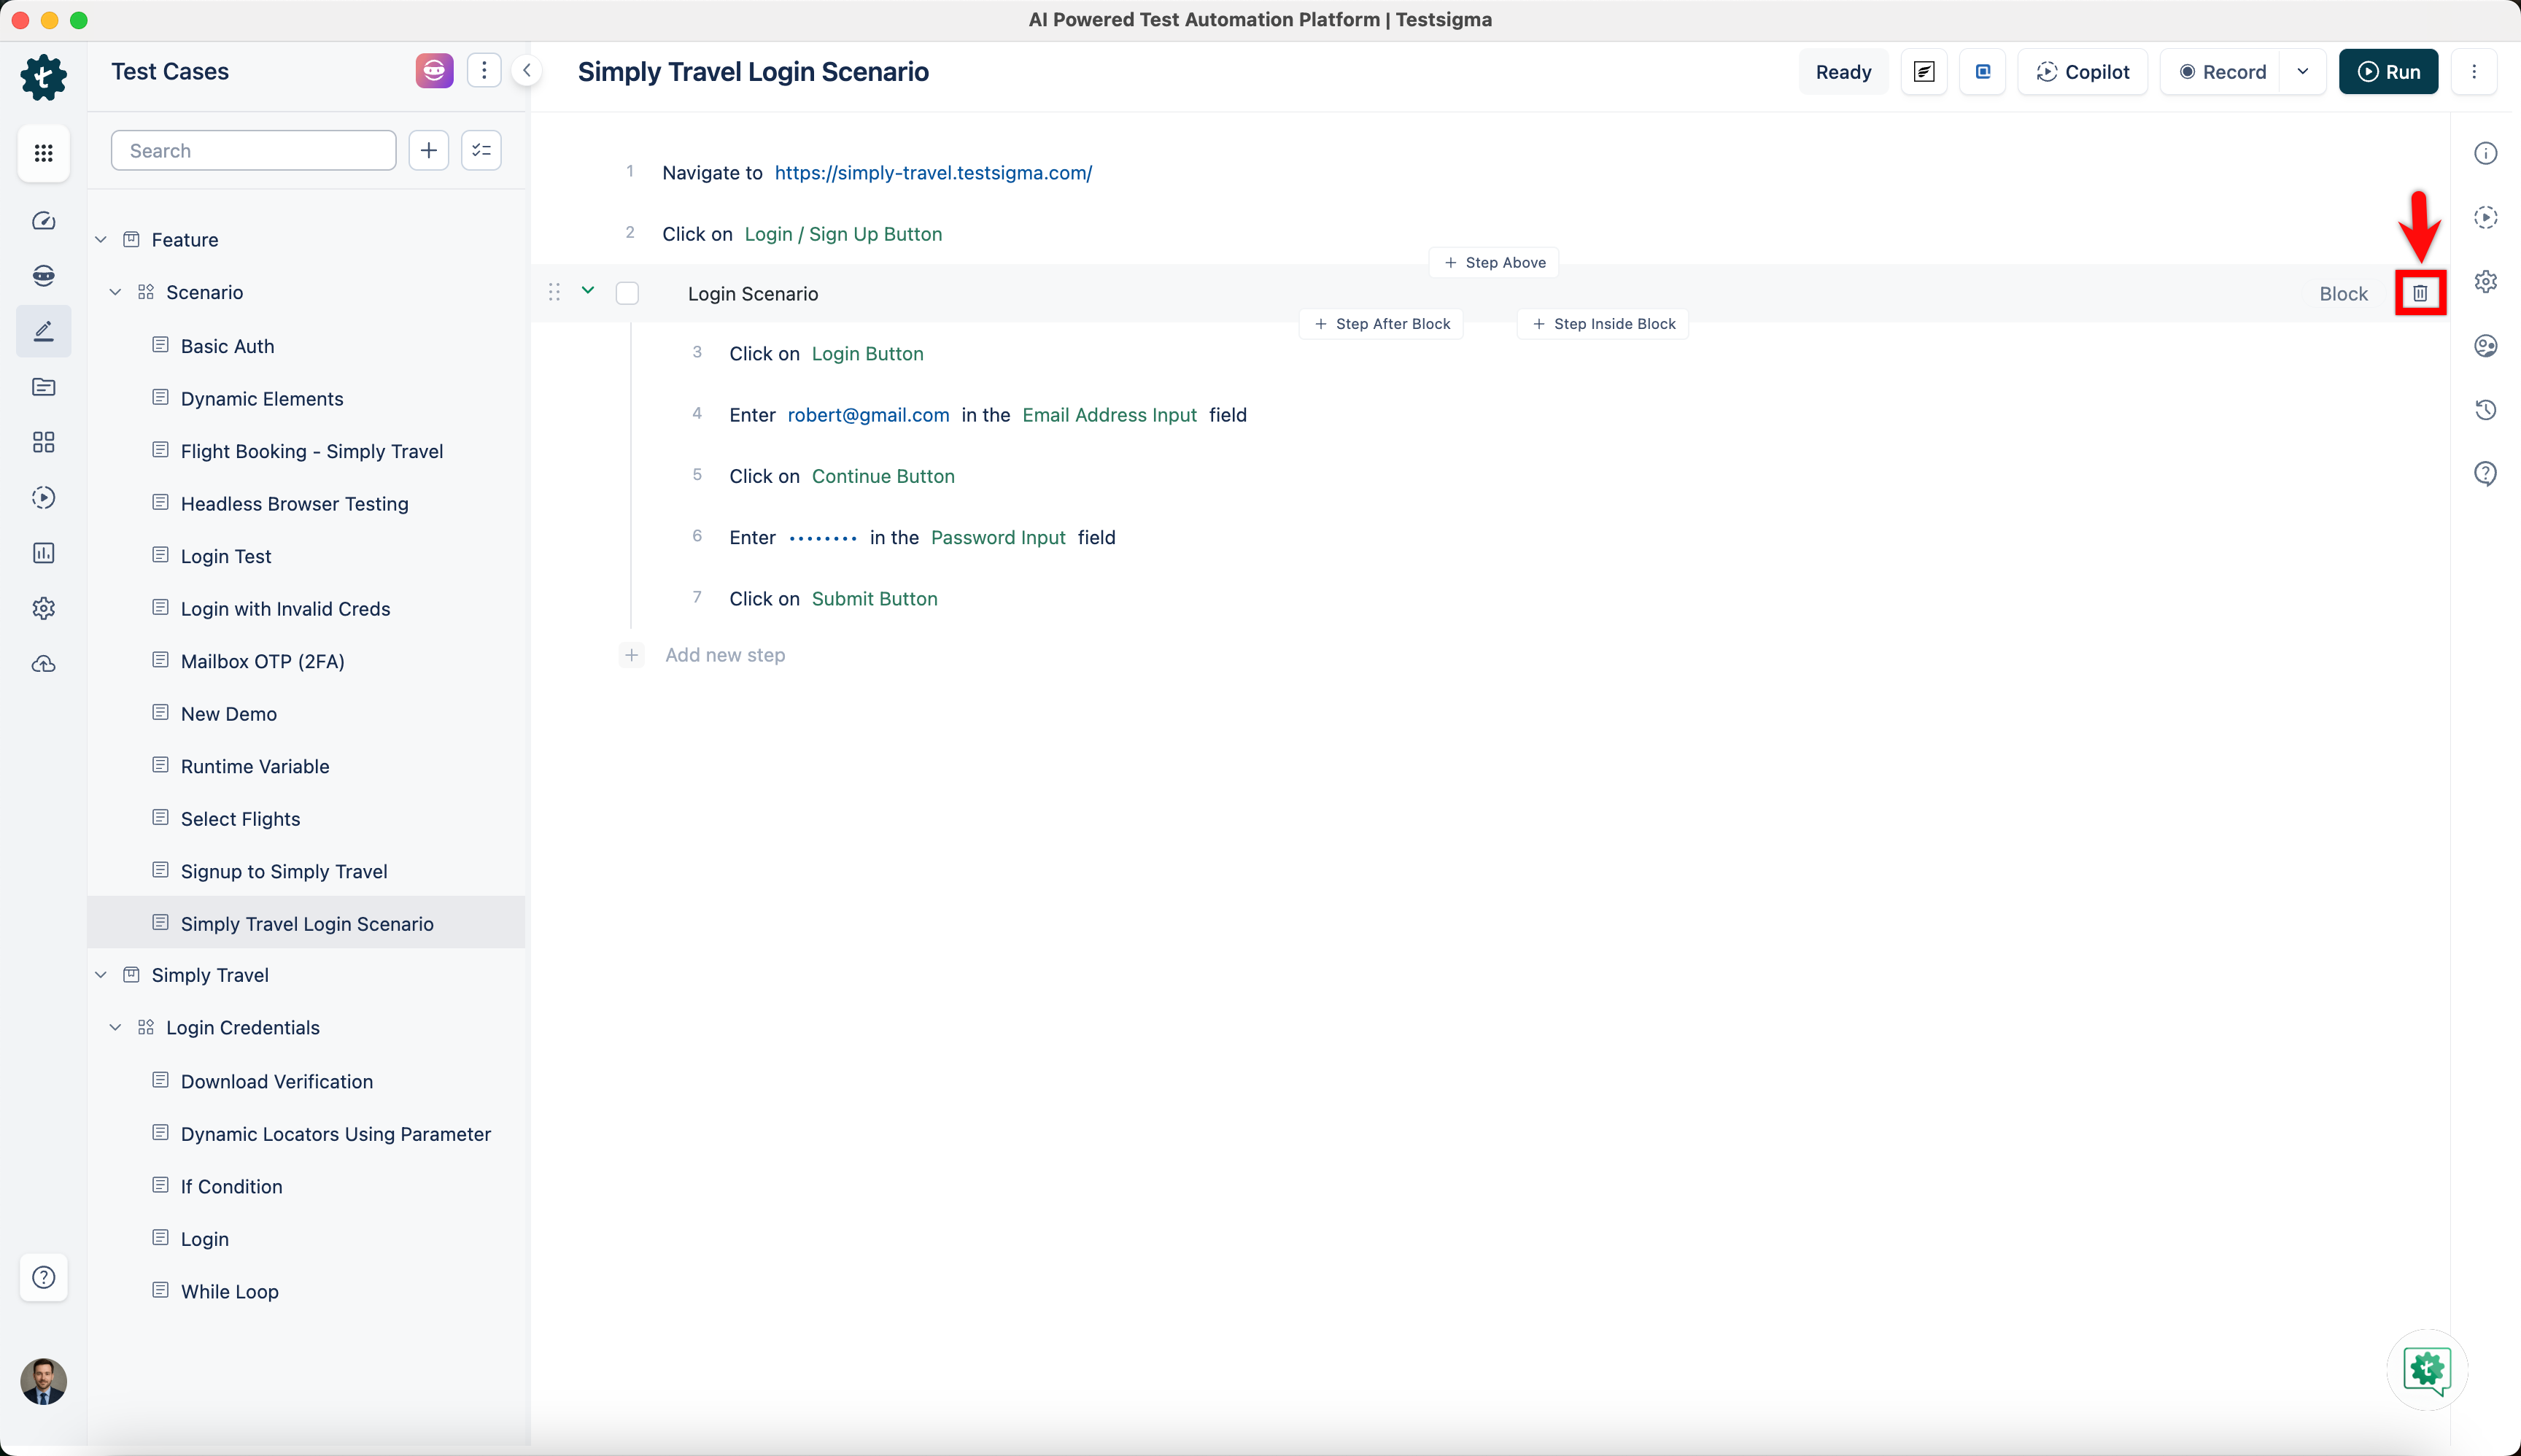
Deleting the block will only remove the block and not delete the steps.
Actions Possible on a Block
- Reordering Steps: Within a Step Block, you can change the order of steps.
- Moving Block: You can move a Step Block and its contained steps to a different location within the same test case.
Actions not Possible on a Block
- Nesting Blocks: You cannot nest Step Blocks inside other Step Blocks.
- Converting to Regular Steps: Once created, you cannot directly convert a Step Block into an individual test step.
Want to contribute or report missing content?