- Test Data Types
 Raw
Raw- Parameter
- Runtime
- Random
- Data Generator
- Phone Number
- Mail Box
- Environment
- Concat Test Data
- Folder Structure for Test Data Profiles
- Create Test Data Profile
- Update Test Data Profile
- Update Value in Test Data Profile
- Import Test Data Profile
- Bulk Deletion of a Test Data Profile
- Create Test Data [Environment]
- data generators
- Default Test Data Generators
- Address Function Type
- ChangeDataType Function Type
- Company Function Type
- DateFunctions Function Type
- DomainFunctions Function Type
- EmailFunctions Function Type
- File Function Type
- Friends Function Type
- IdNumber Function Type
- Internet Function Type
- MailboxAliasFunctions Function Type
- MailboxFunctions Function Type
- Name Function Type
- NameFunctions Function Type
- Number Function Type
- NumberFunctions Function Type
- Phone Number Function Type
- PhoneNumberFunctions Function Type
- Random String Function Type
- RandomText Function Type
- StringFunctions Function Type
- TestDataFromProfile Function Type
Test Data Type: Mail Box
Testsigma provides a digital inbox called Mail Box to verify OTP accuracy, check for received emails, open and read them, process them, validate email content in various languages, and test the speed at which a user can read a promotional email during testing. This guide will help you access and manage the Mail Box.
Testsigma designed the Mail Box feature to retrieve relevant details from the first email, including content, OTP, and subject information.
Prerequisites
Before you begin, ensure that you have referred to:
- You can enable Mail Box for your account by contacting support@testsigma.com or using the instant chat option.
- You can now access the Mail Box & Phone Numbers outside of test executions. This allows you to retrieve messages, OTPs, and authentication codes when you enable the toggle.
- For test executions, the toggle does not affect the execution. The test will continue to run regardless of whether the toggle is enabled or not.
Adding Mail Box in a Test Step
Follow these steps to include an email address provided by Testsigma using the Mailbox test data type in a Test Step:
- Use NLP to create a new step in the Test Case and include a placeholder for test data.
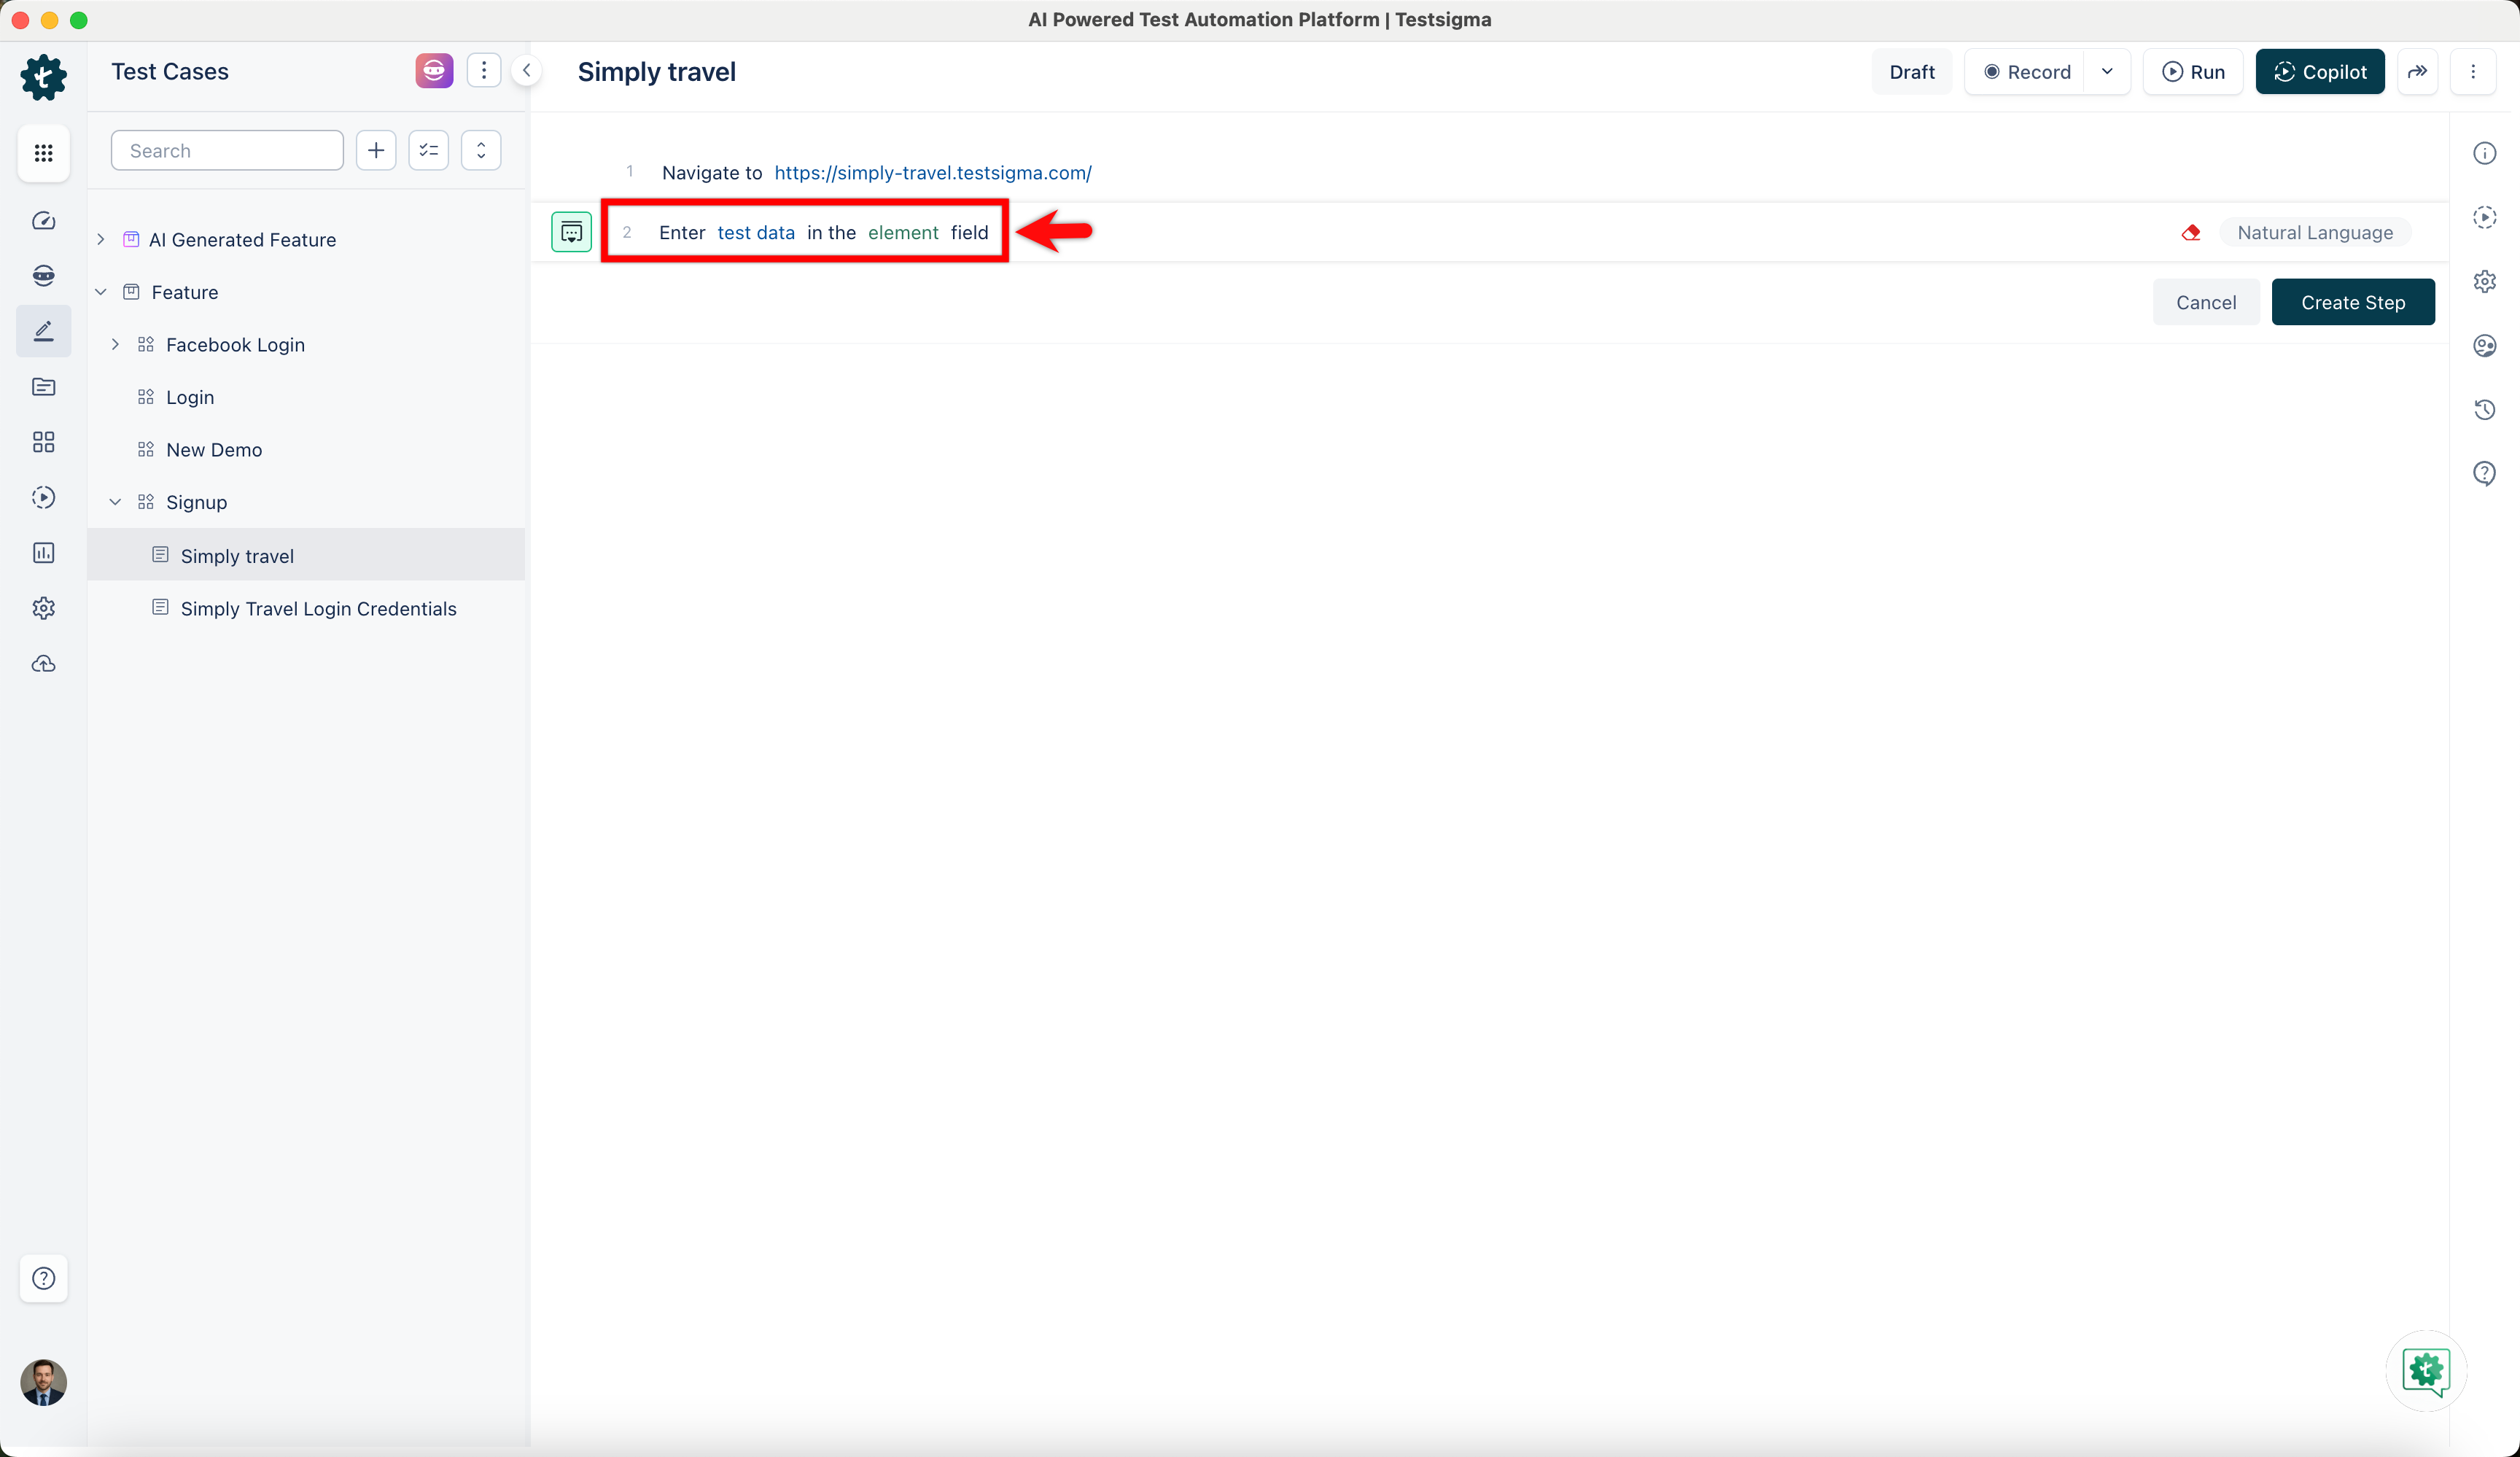
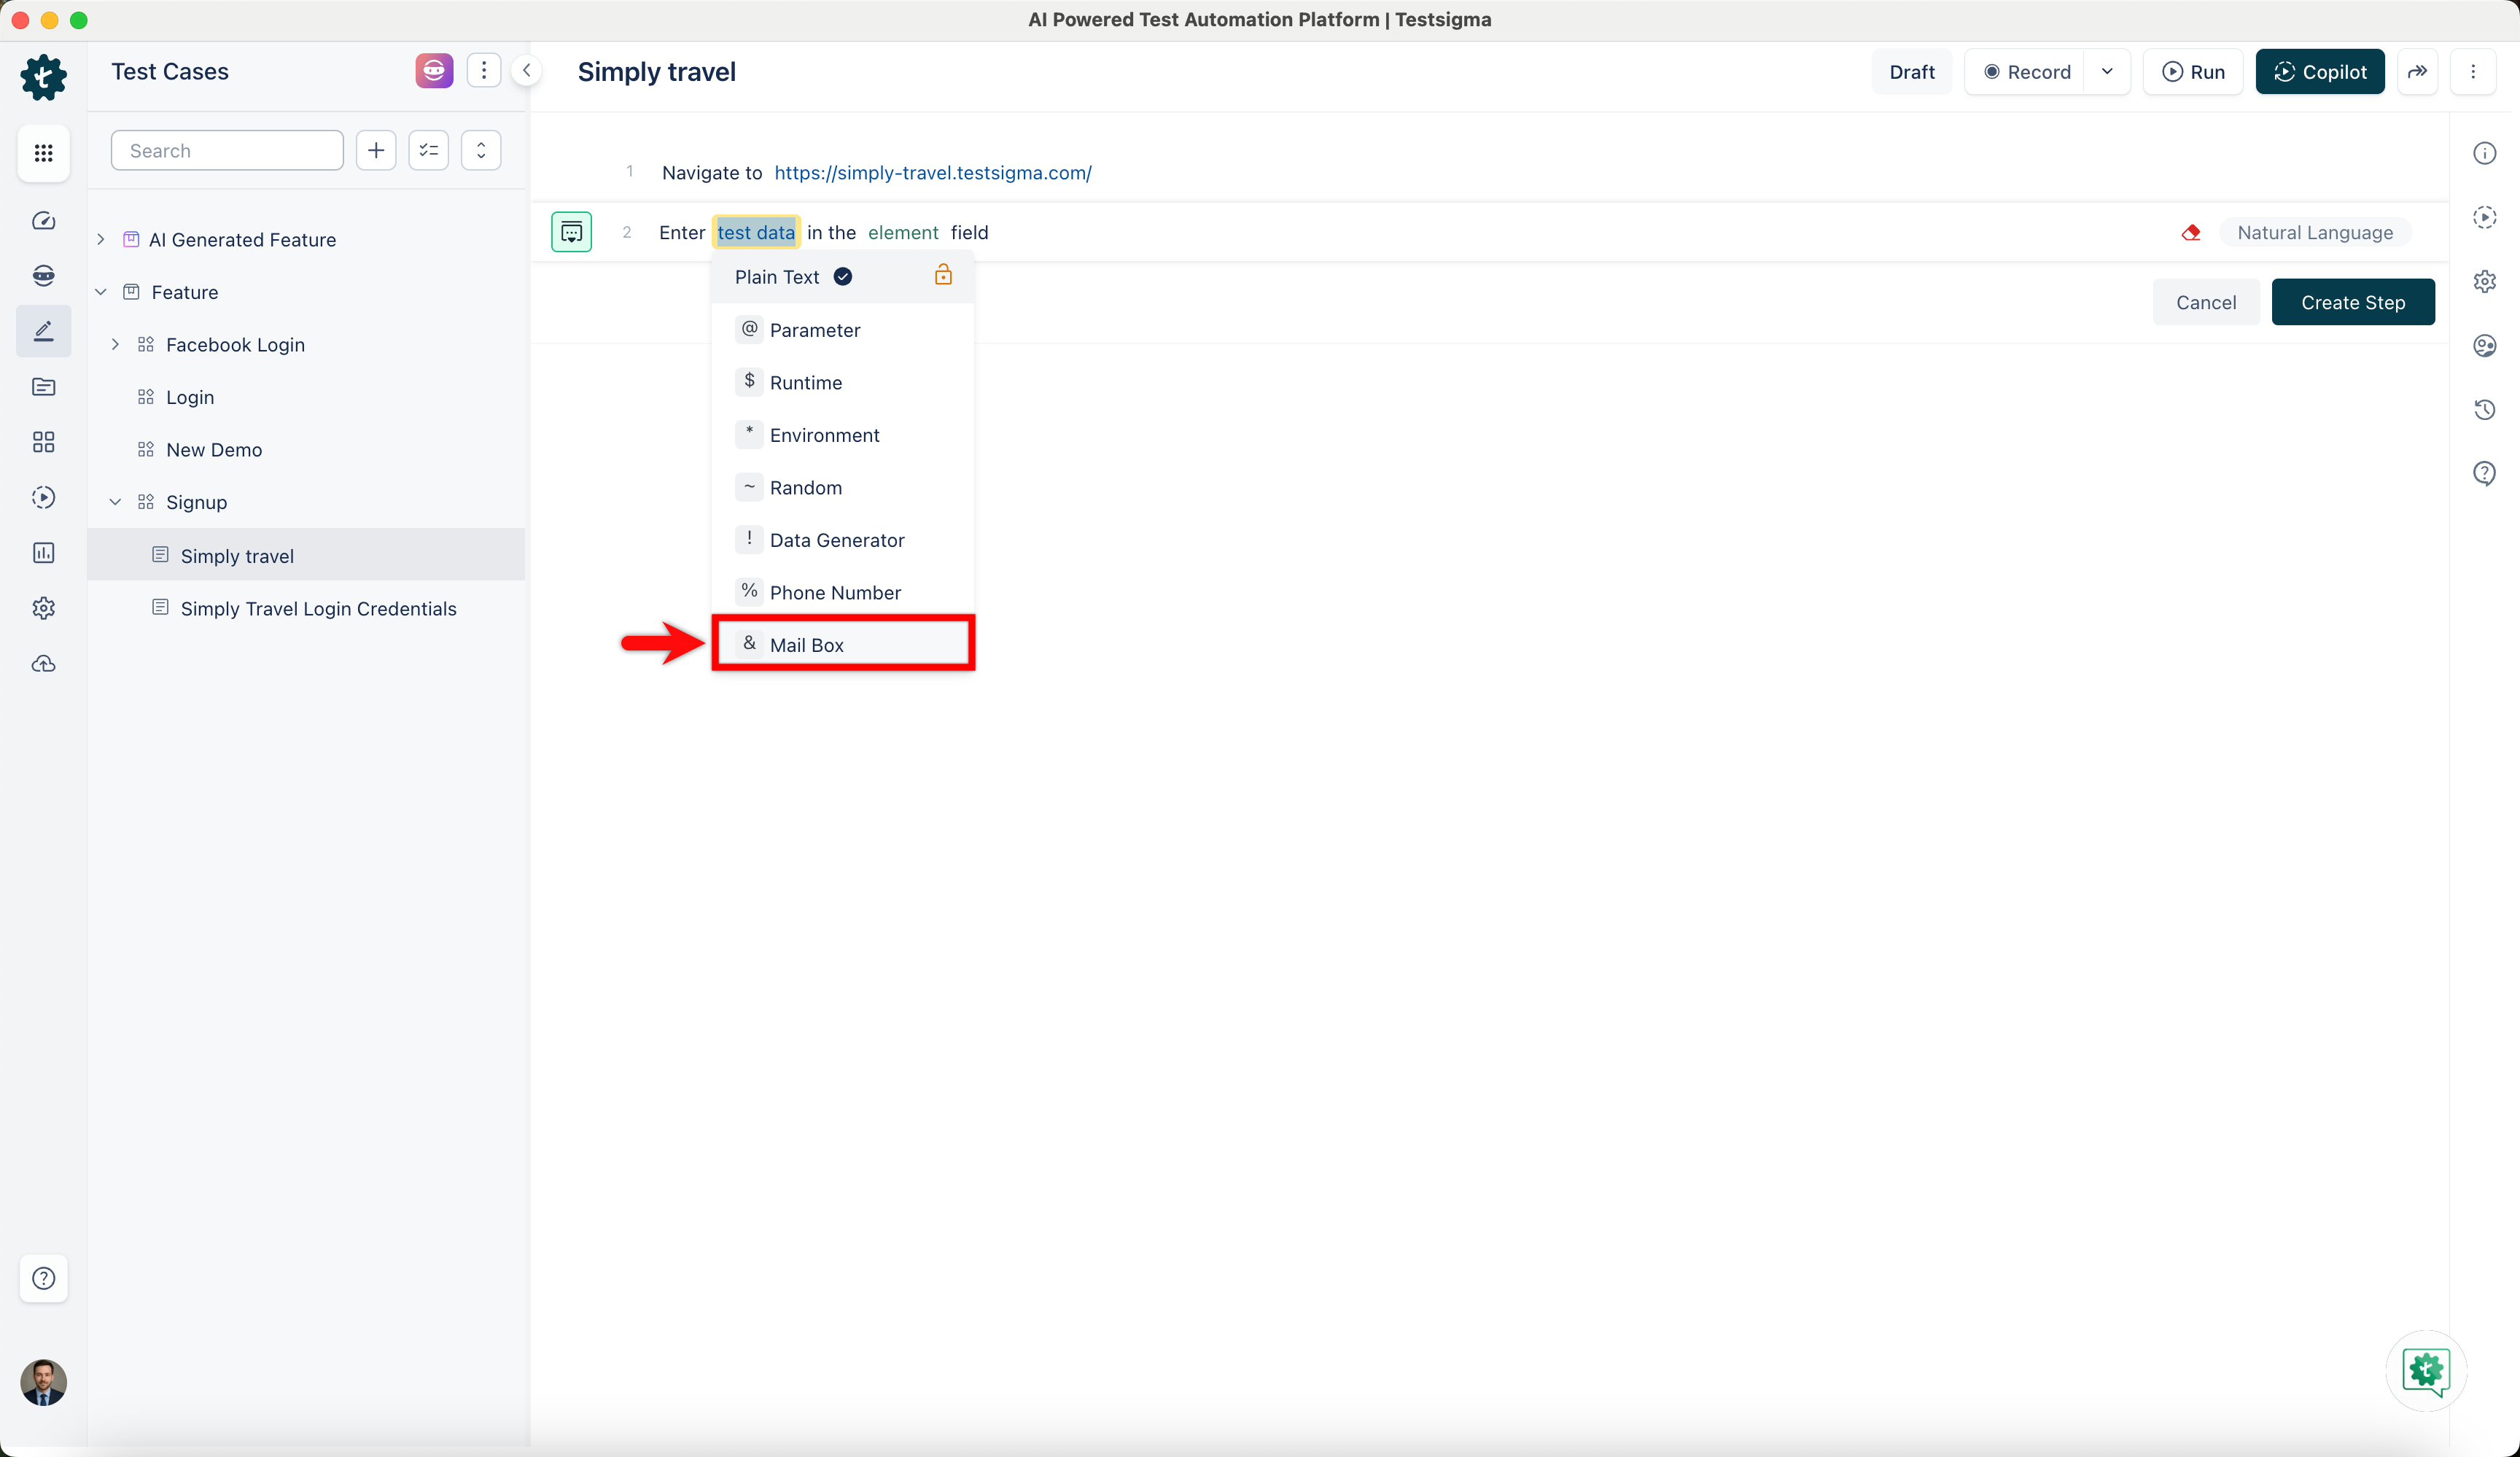
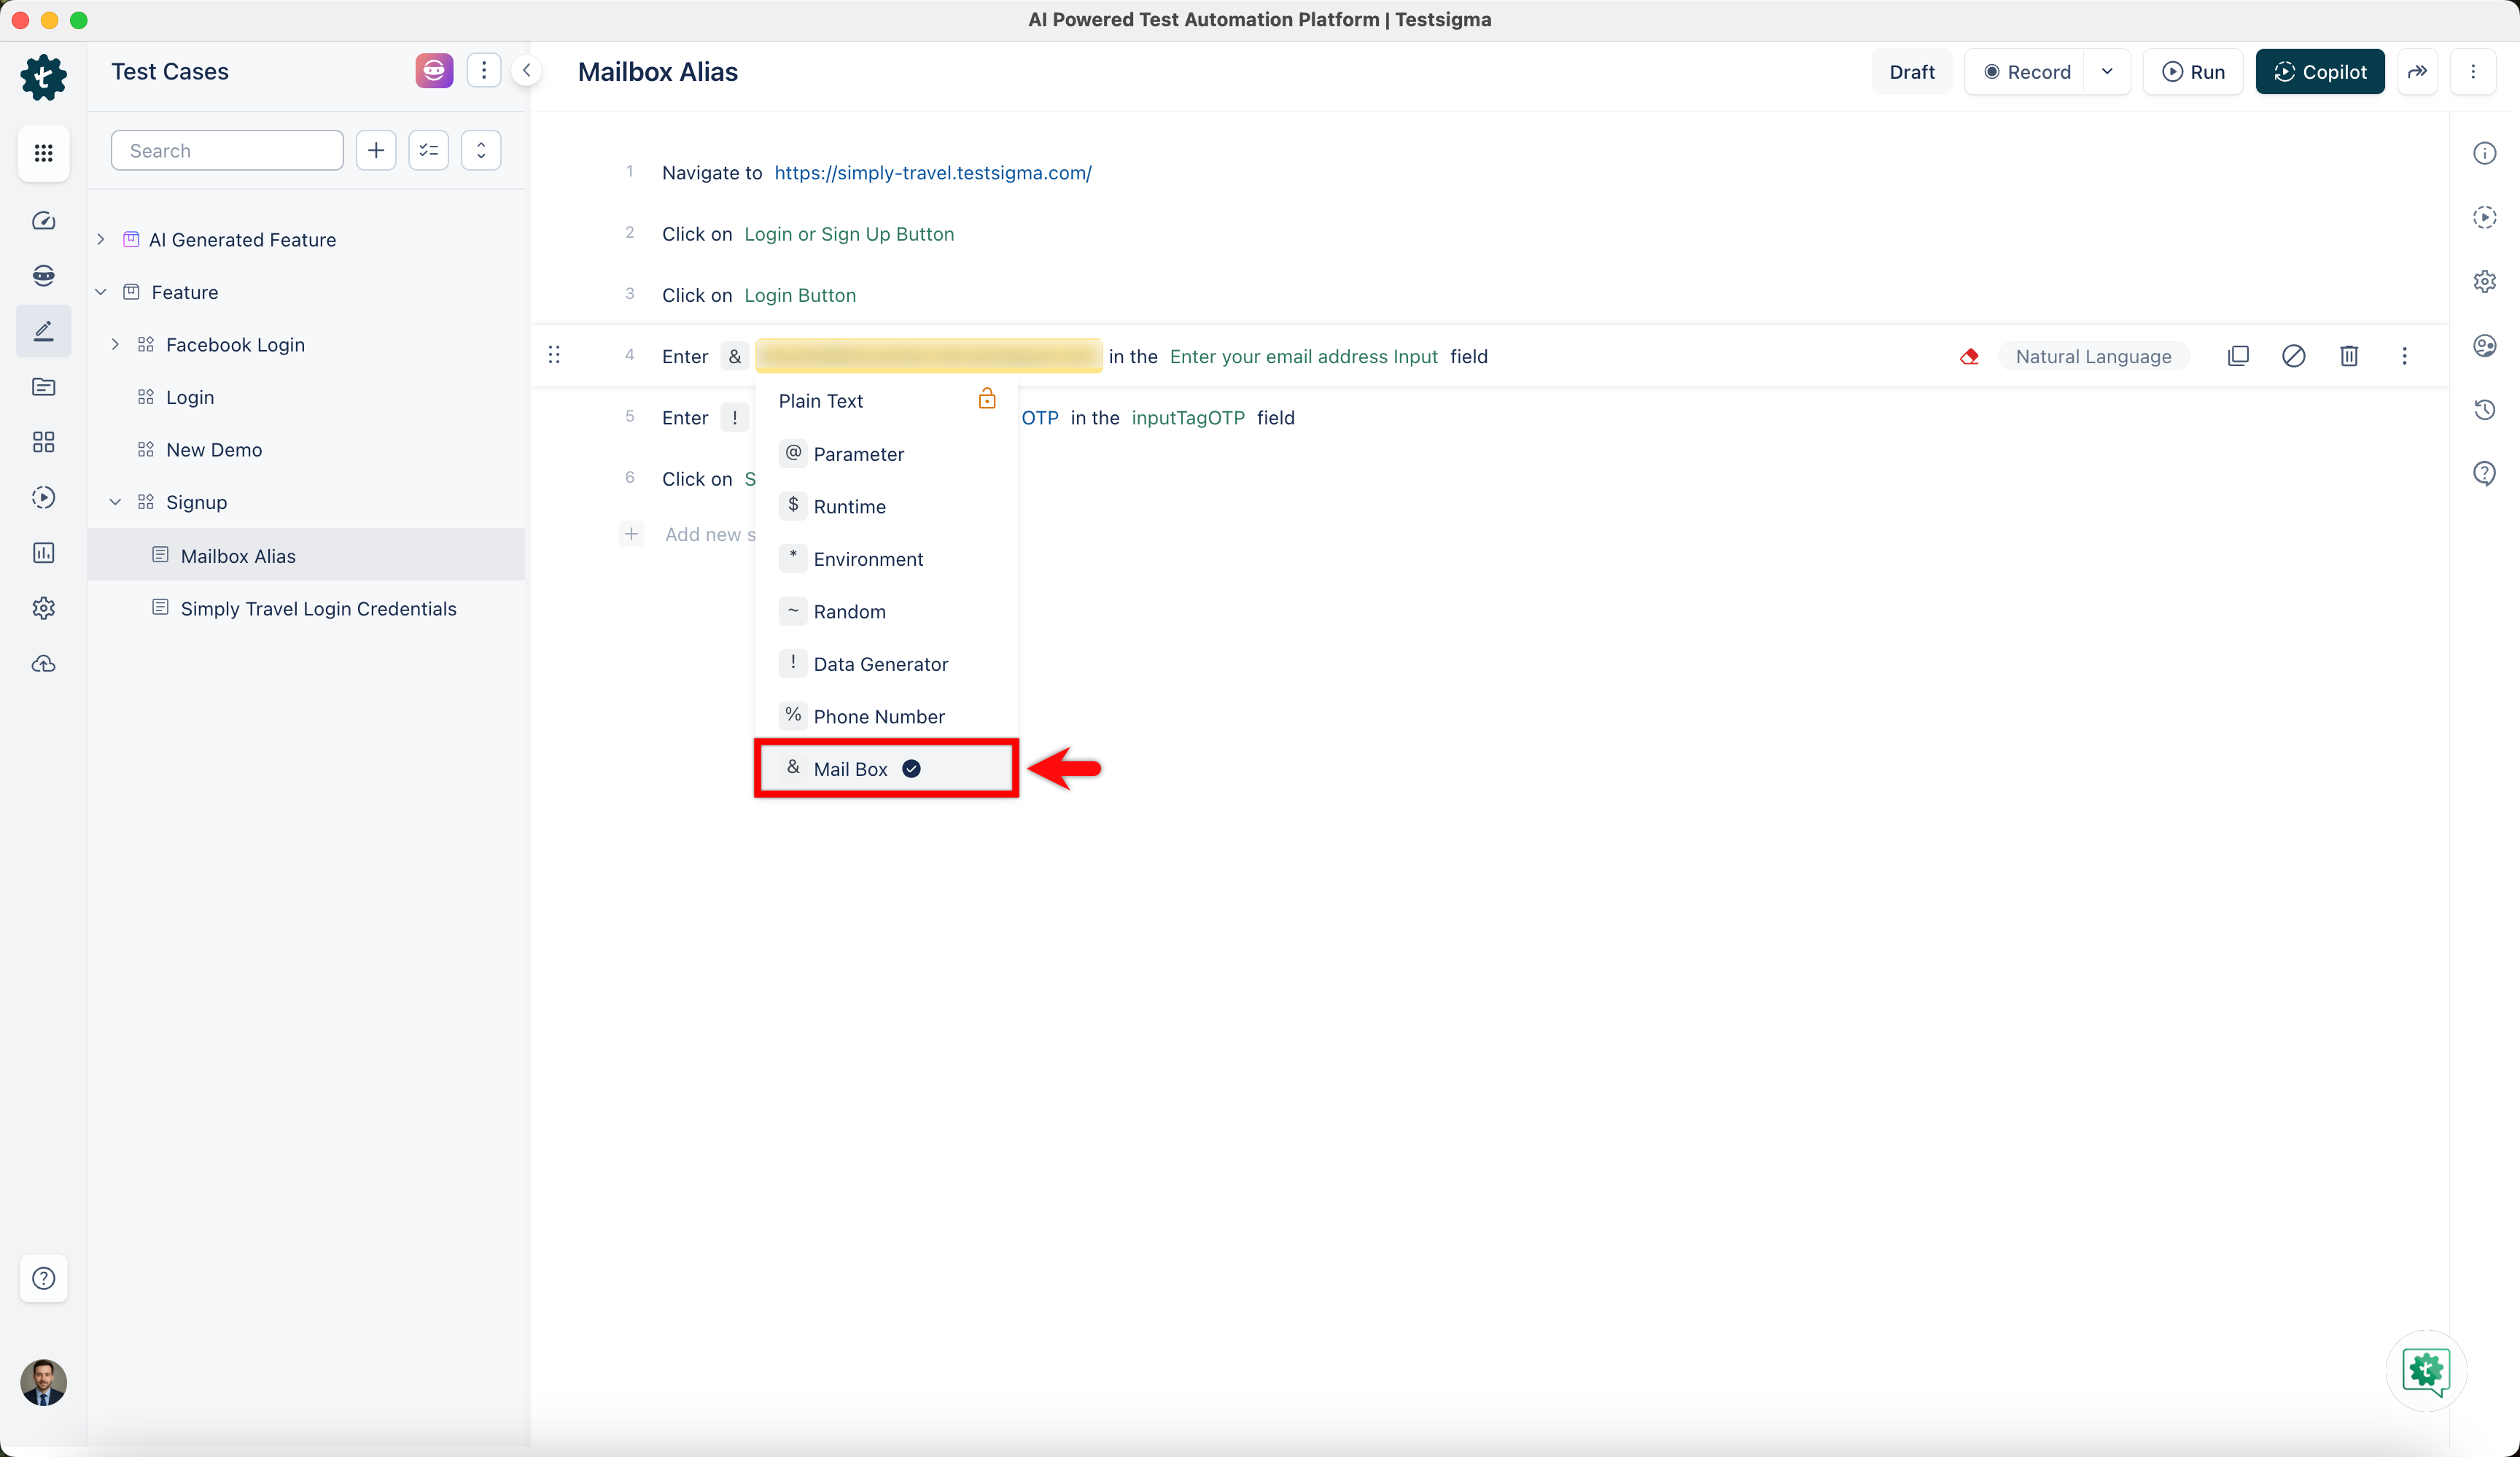
- Click the test data placeholder to replace it, and then select the & Mail Box from the Test Data Types dropdown menu.
- Select the Email from the right-side panel.

Fetching OTP from Mail Box
Follow these steps to retrieve OTP or any data from the selected Mailbox using Test Data Generators in Testsigma:
- Use NLP to create a new step in the Test Case that adds a placeholder for test data and an element for entering the OTP code in the OTP field.

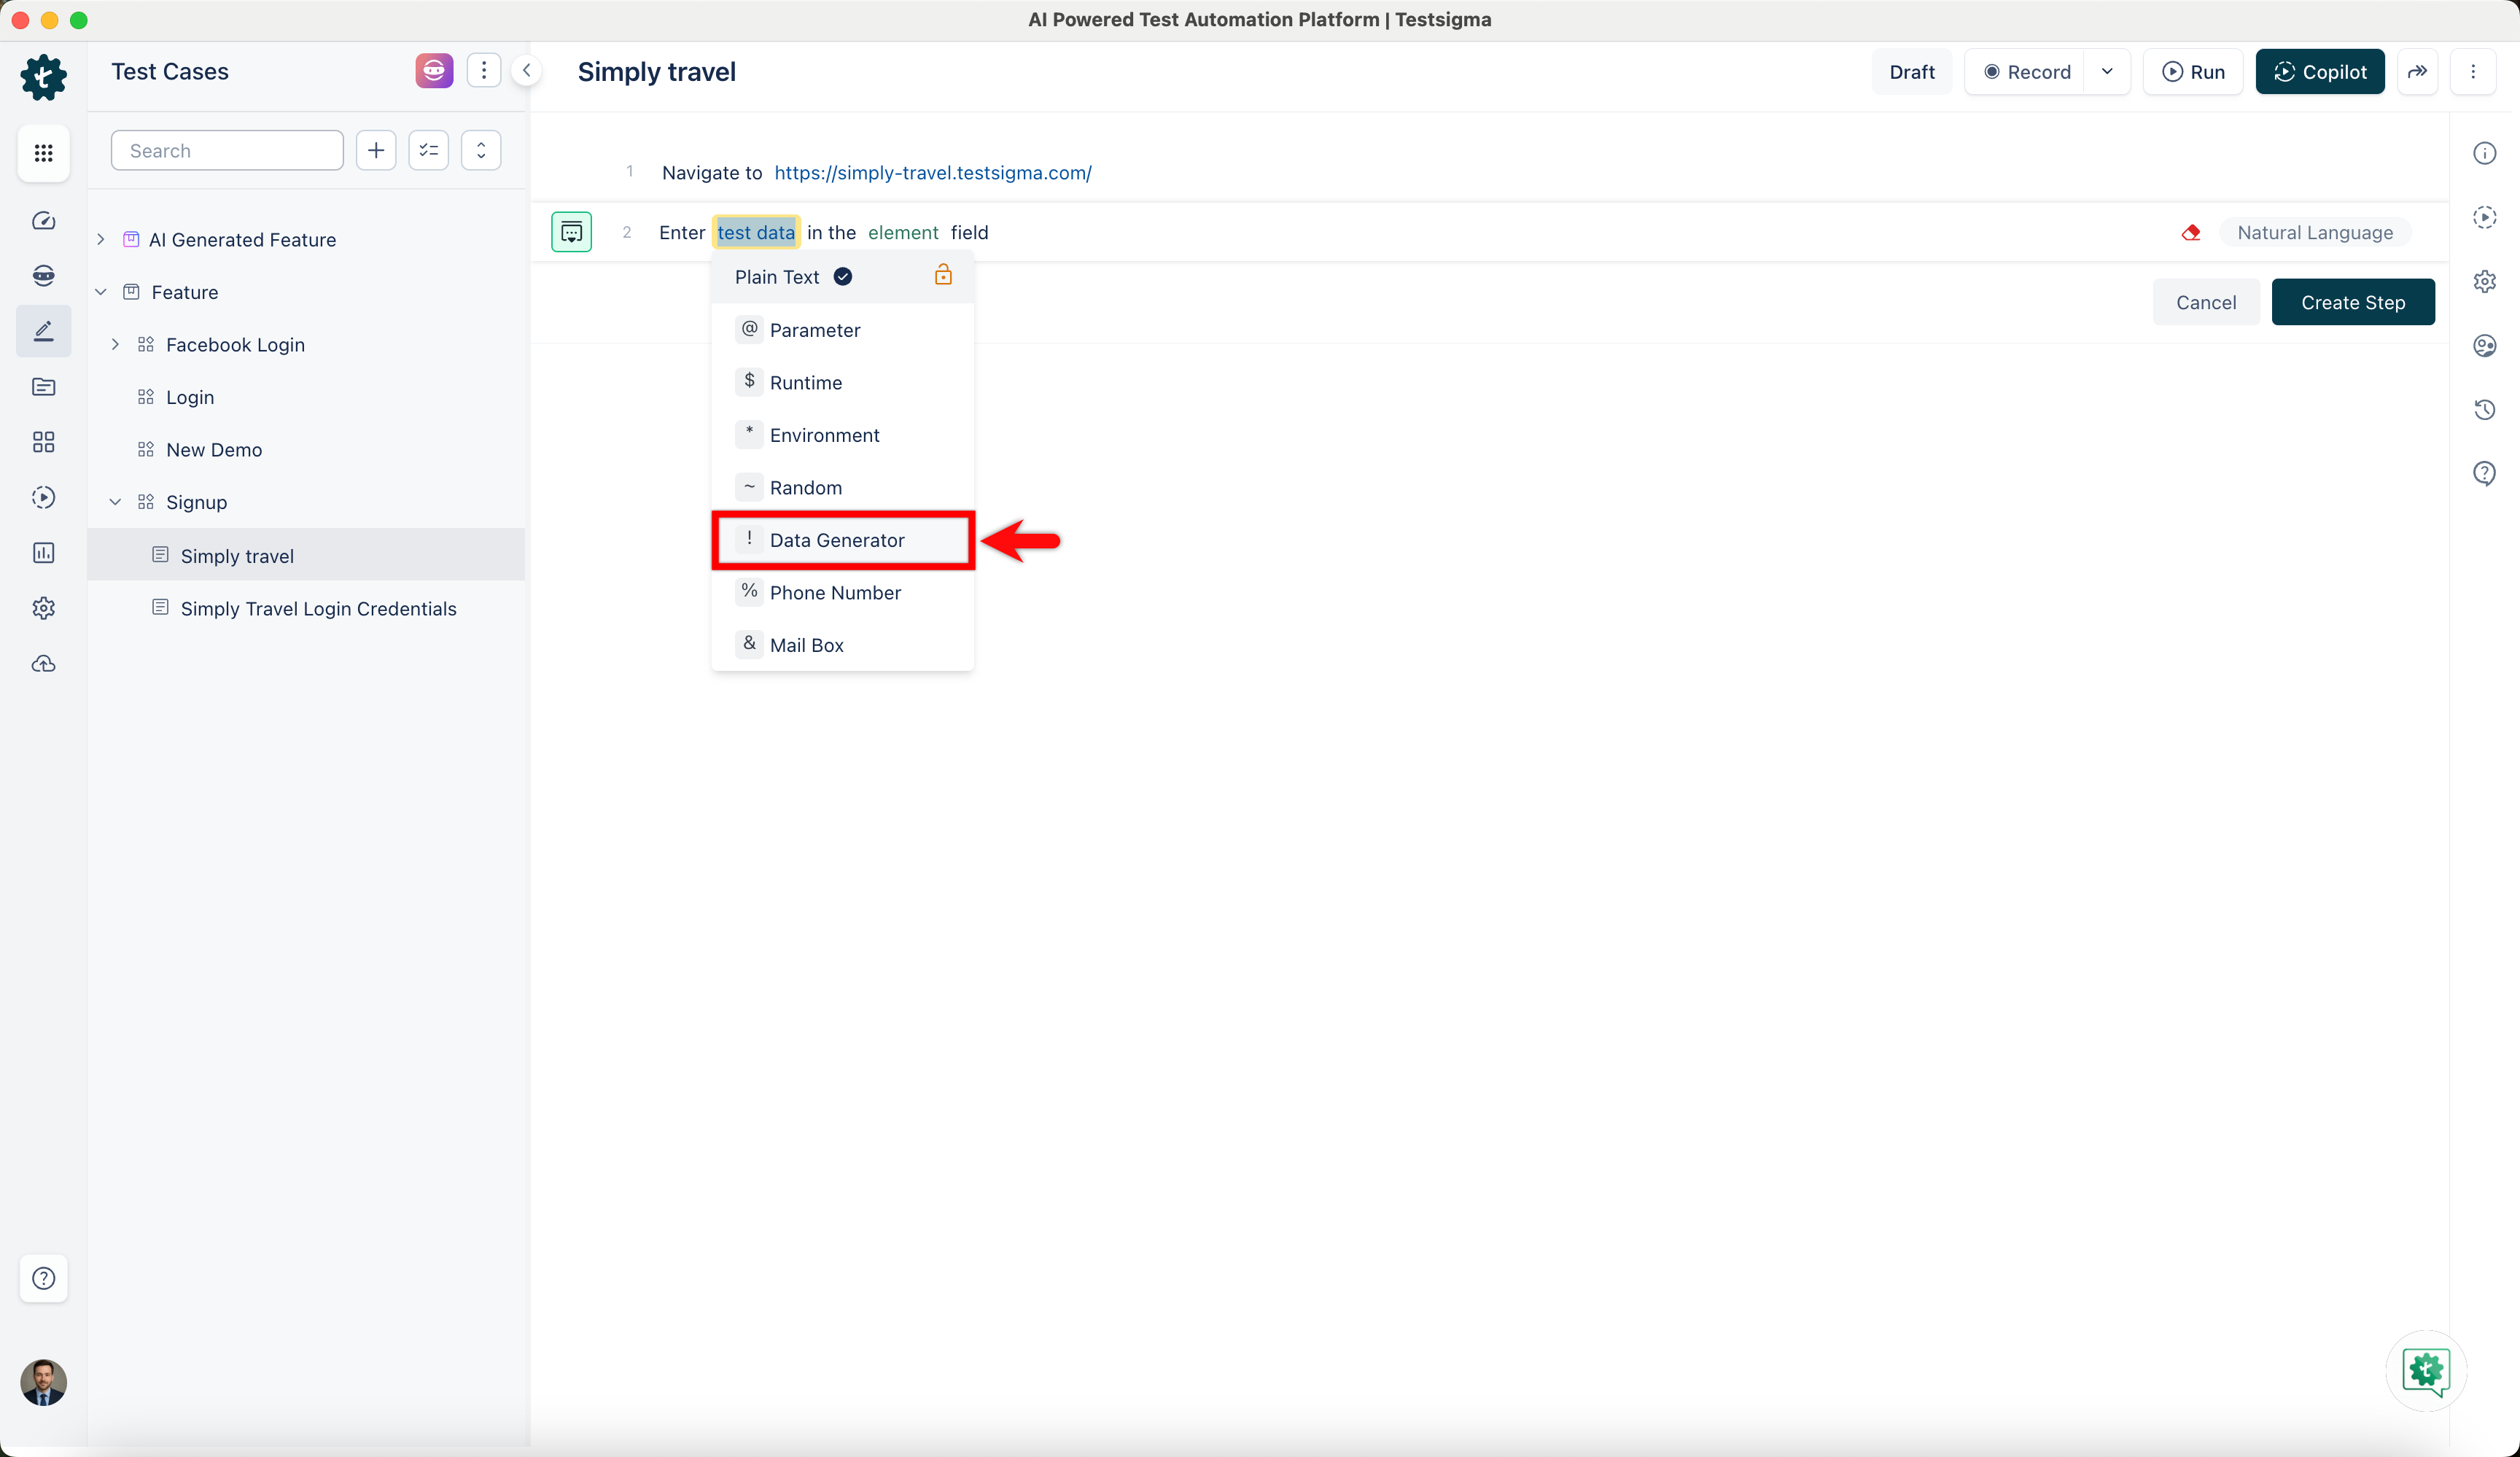
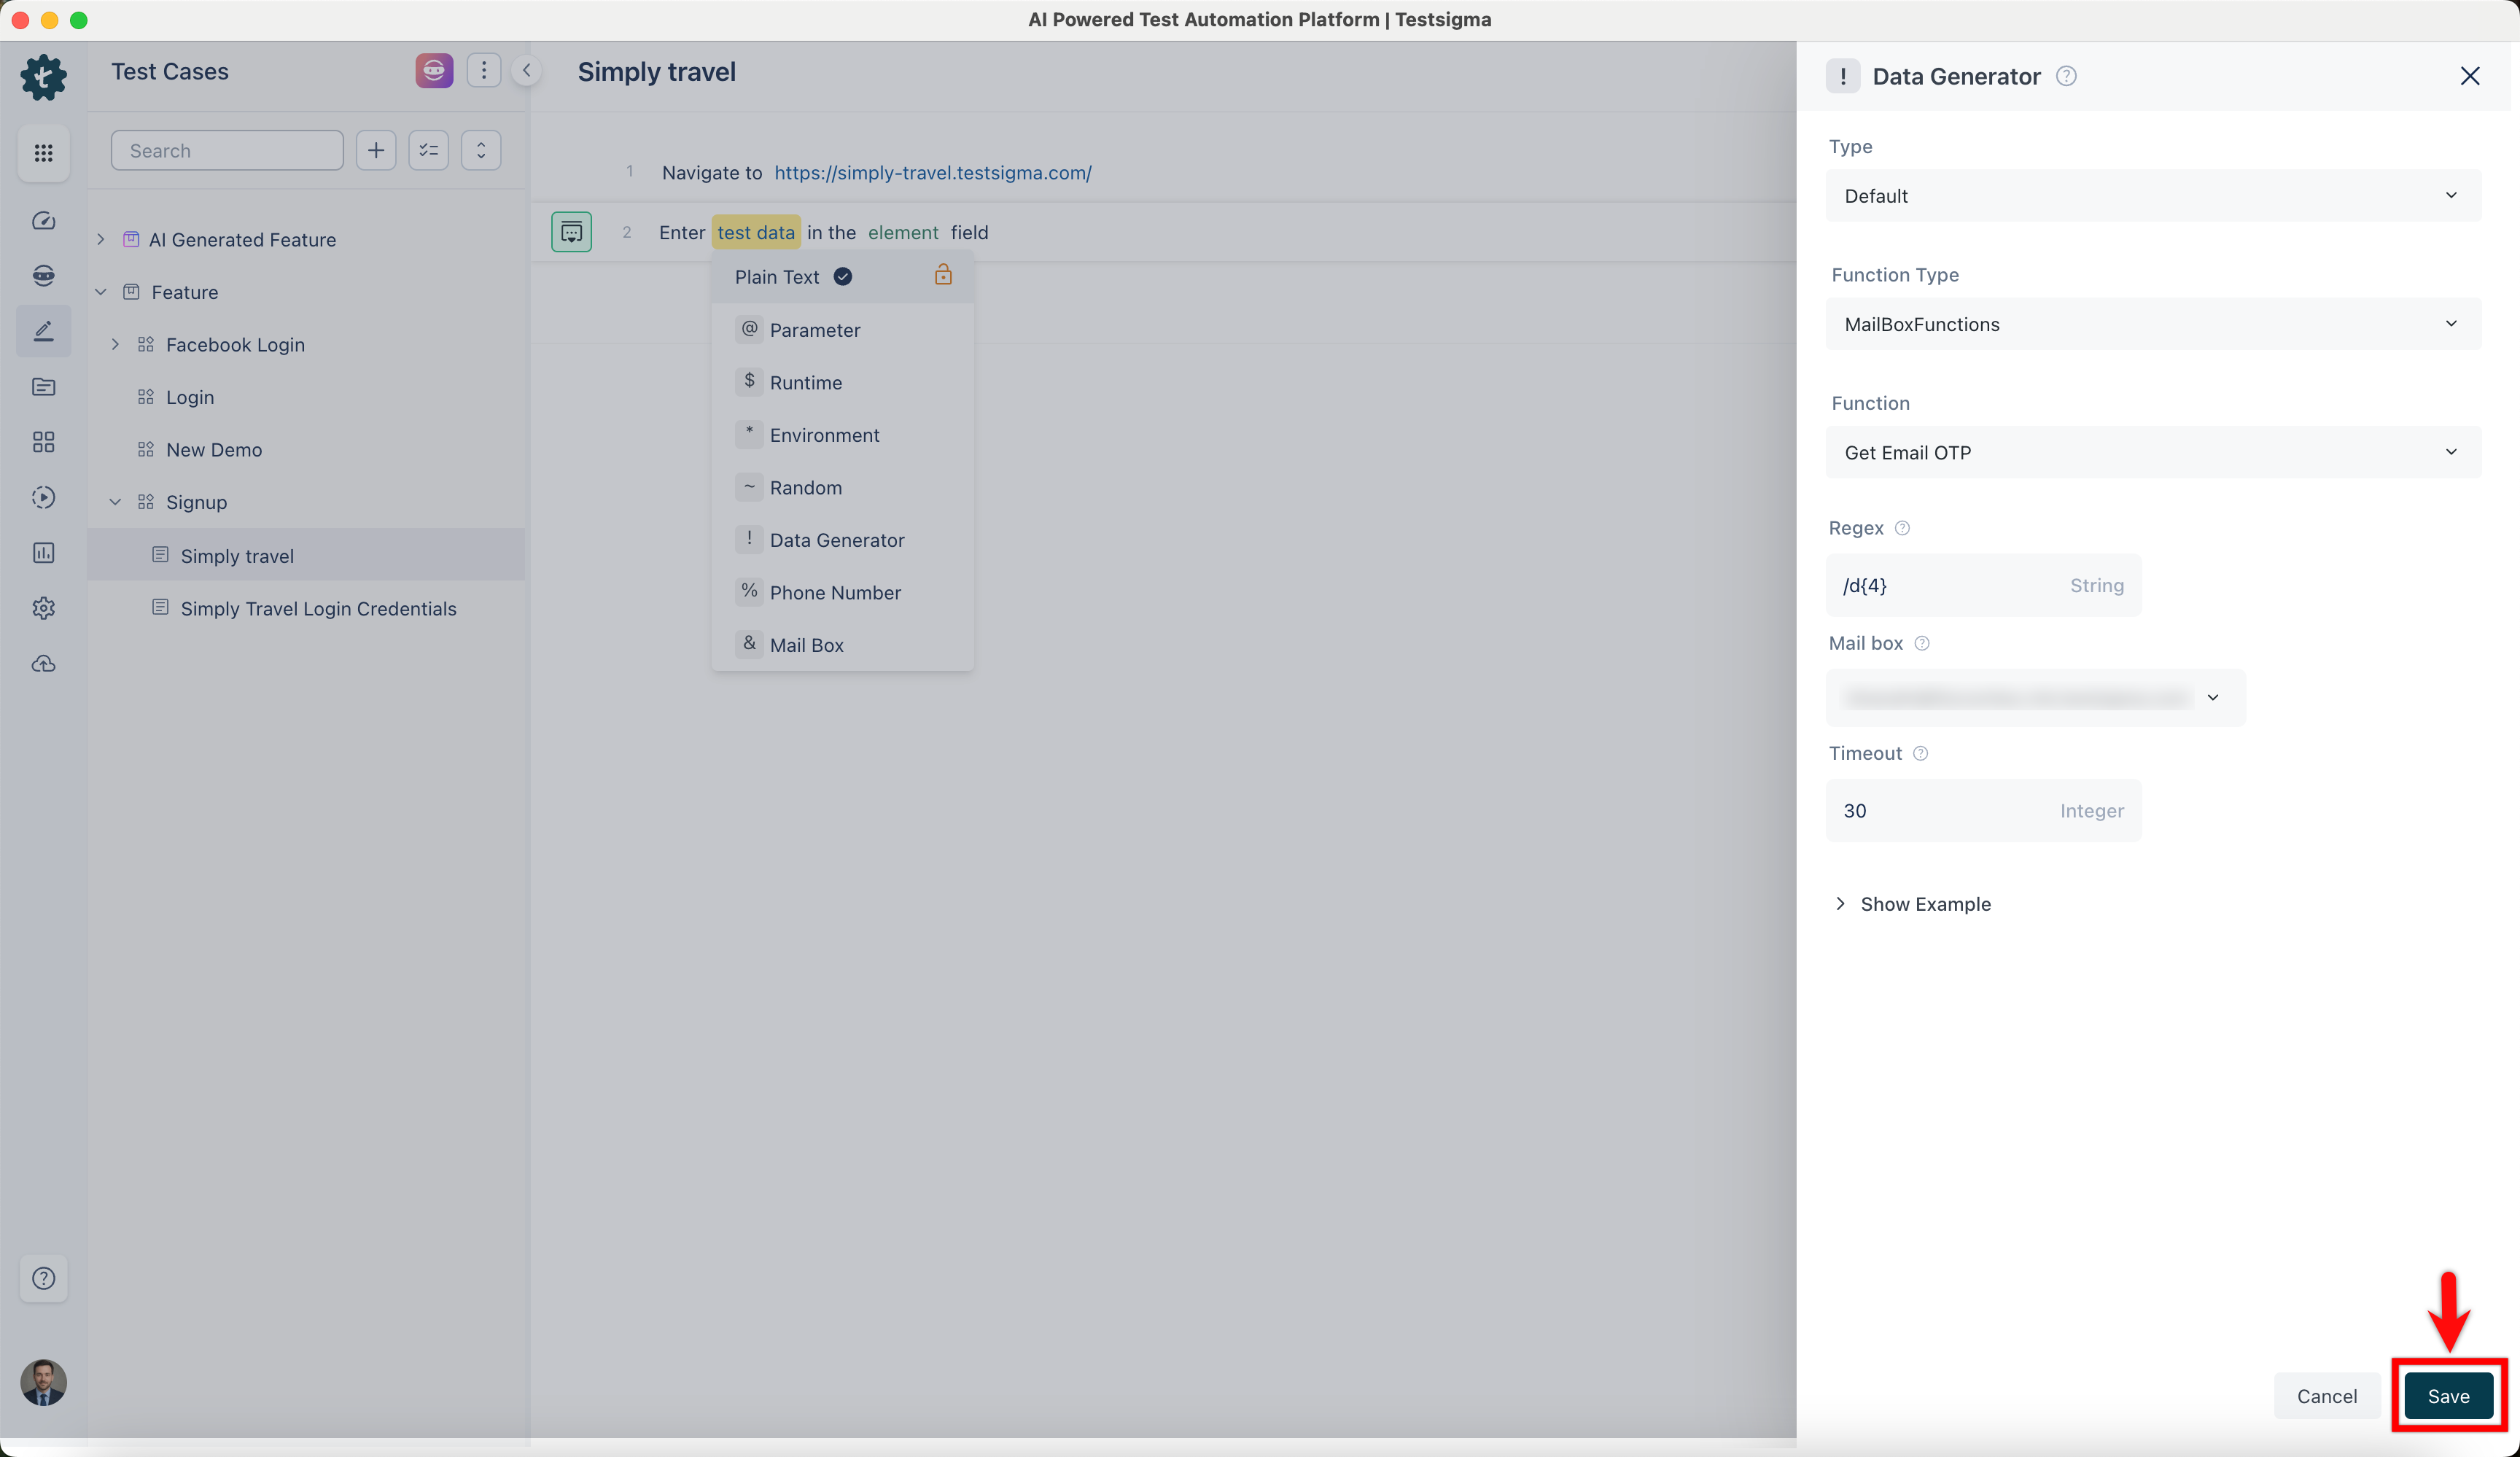
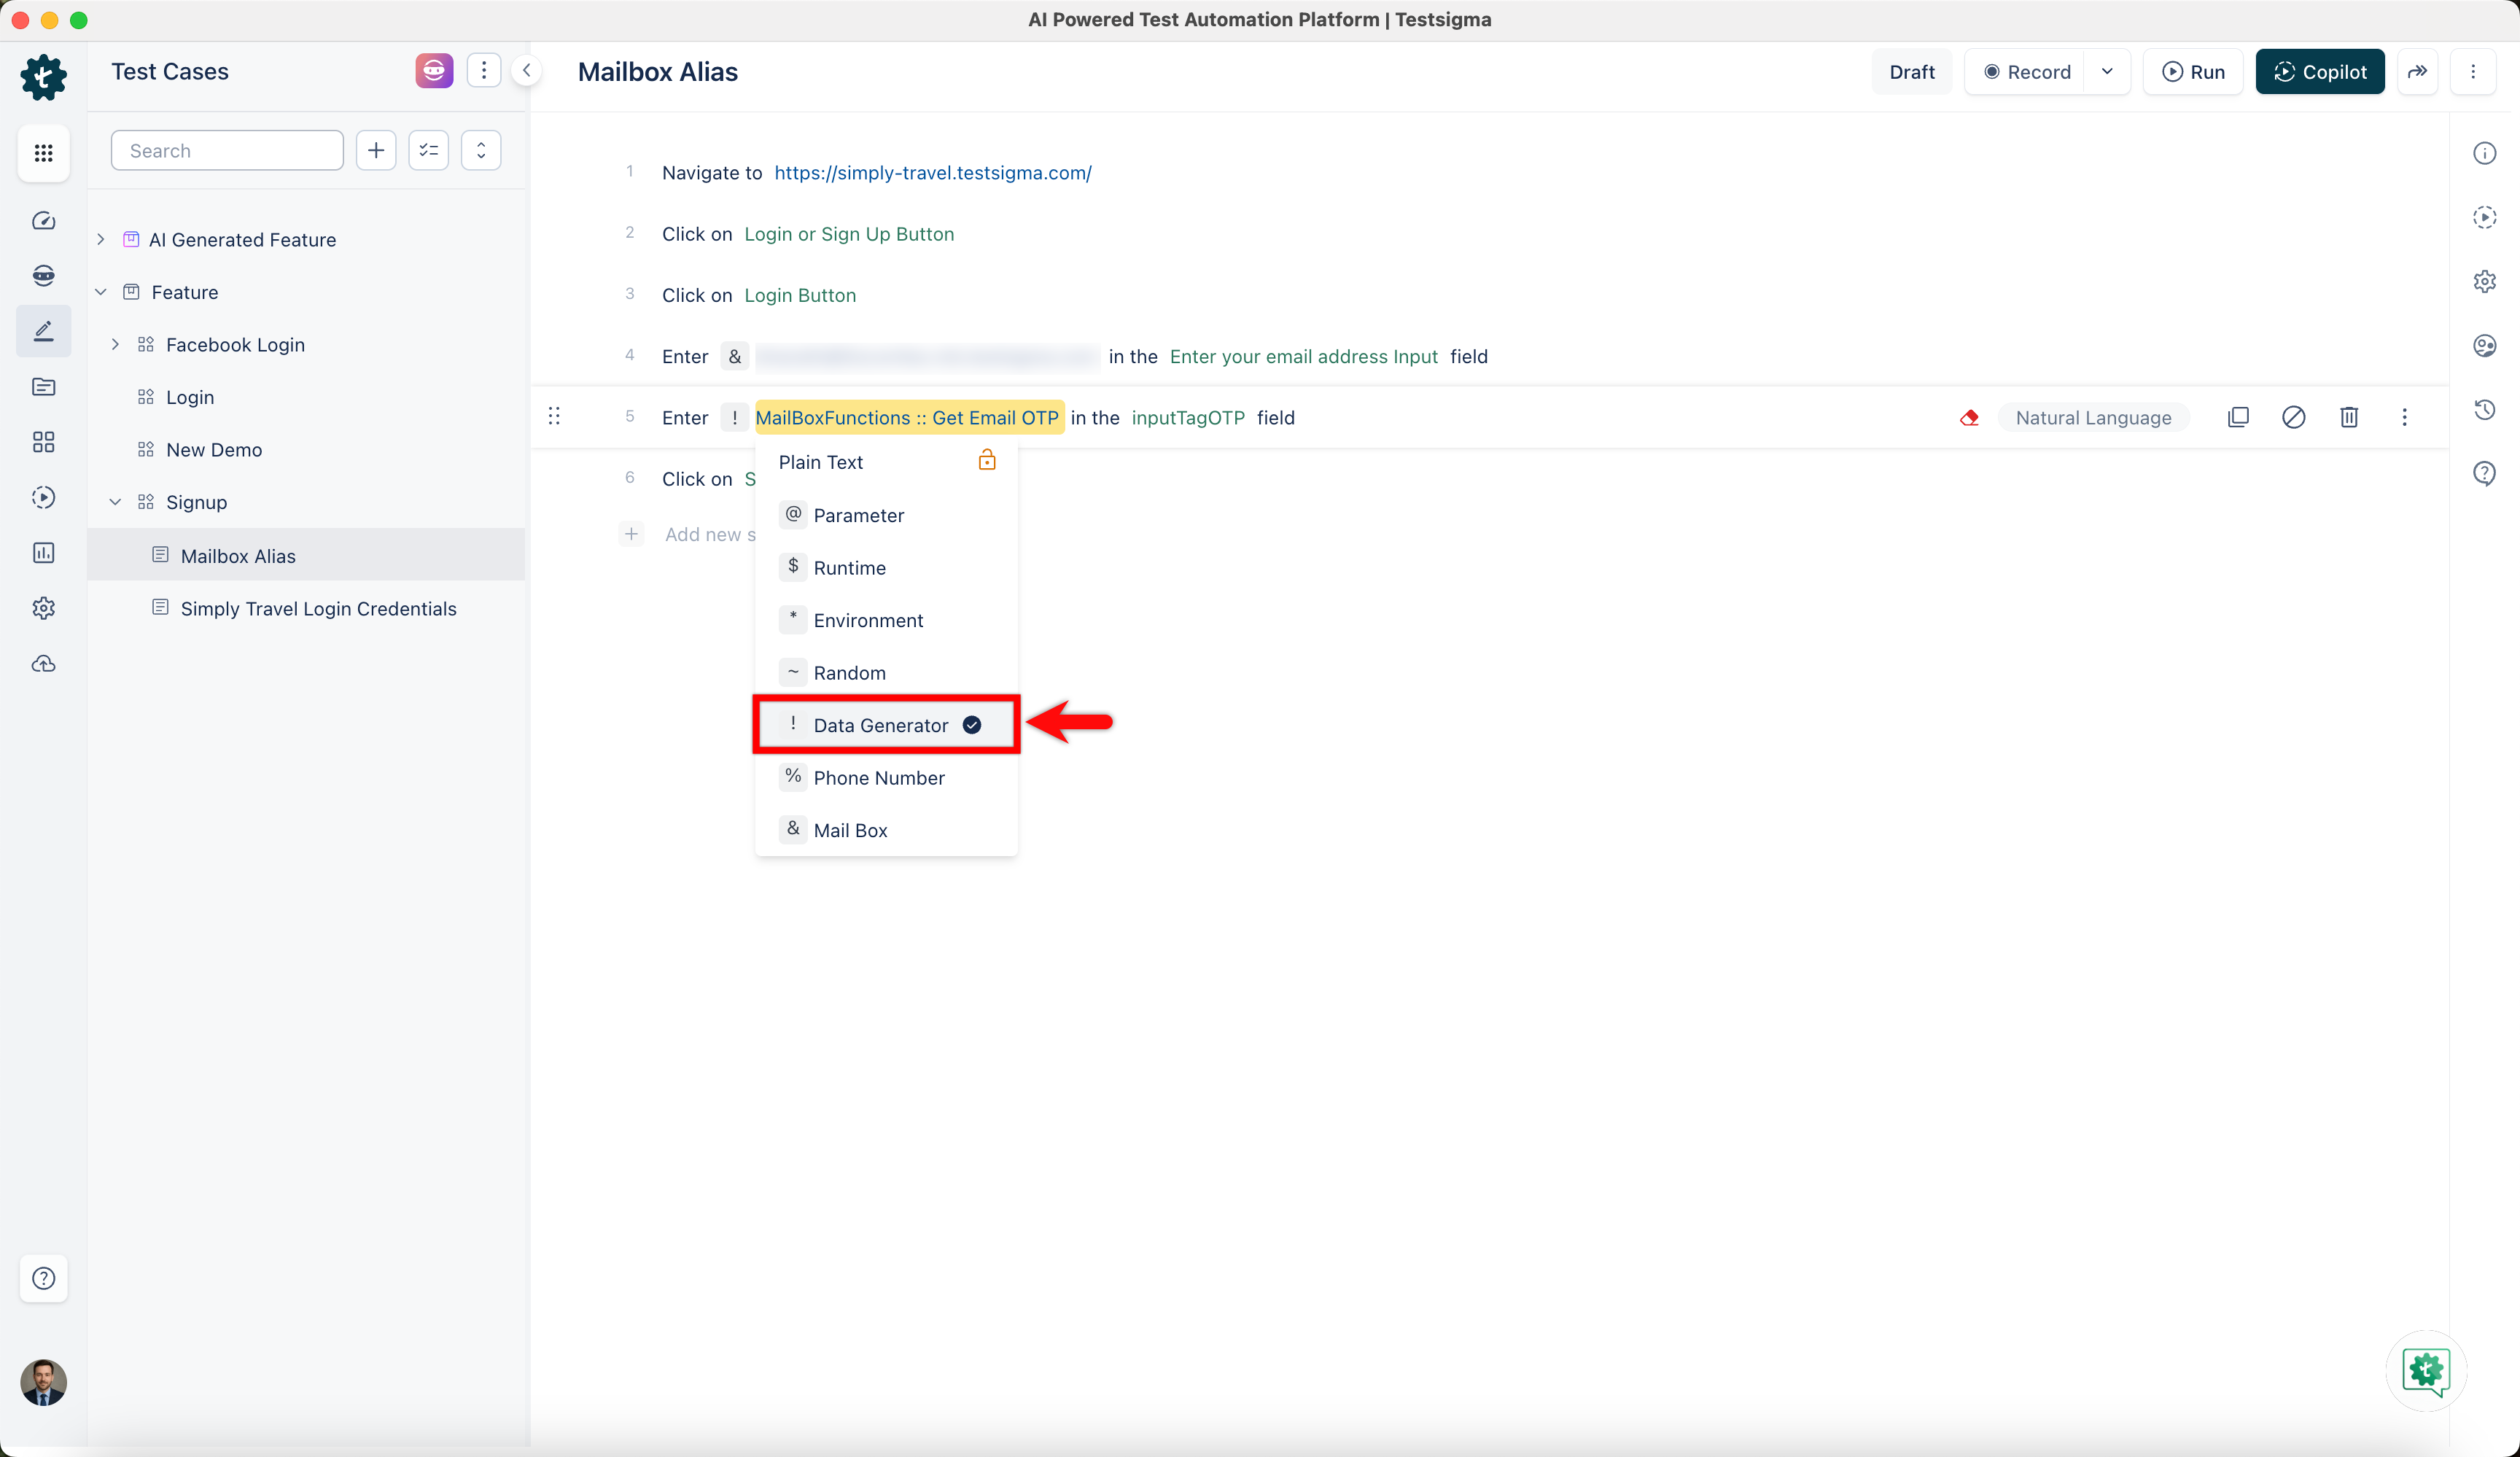
- Click the test data placeholder to replace it, and then select the ! Data Generator from the Test Data Types dropdown menu.
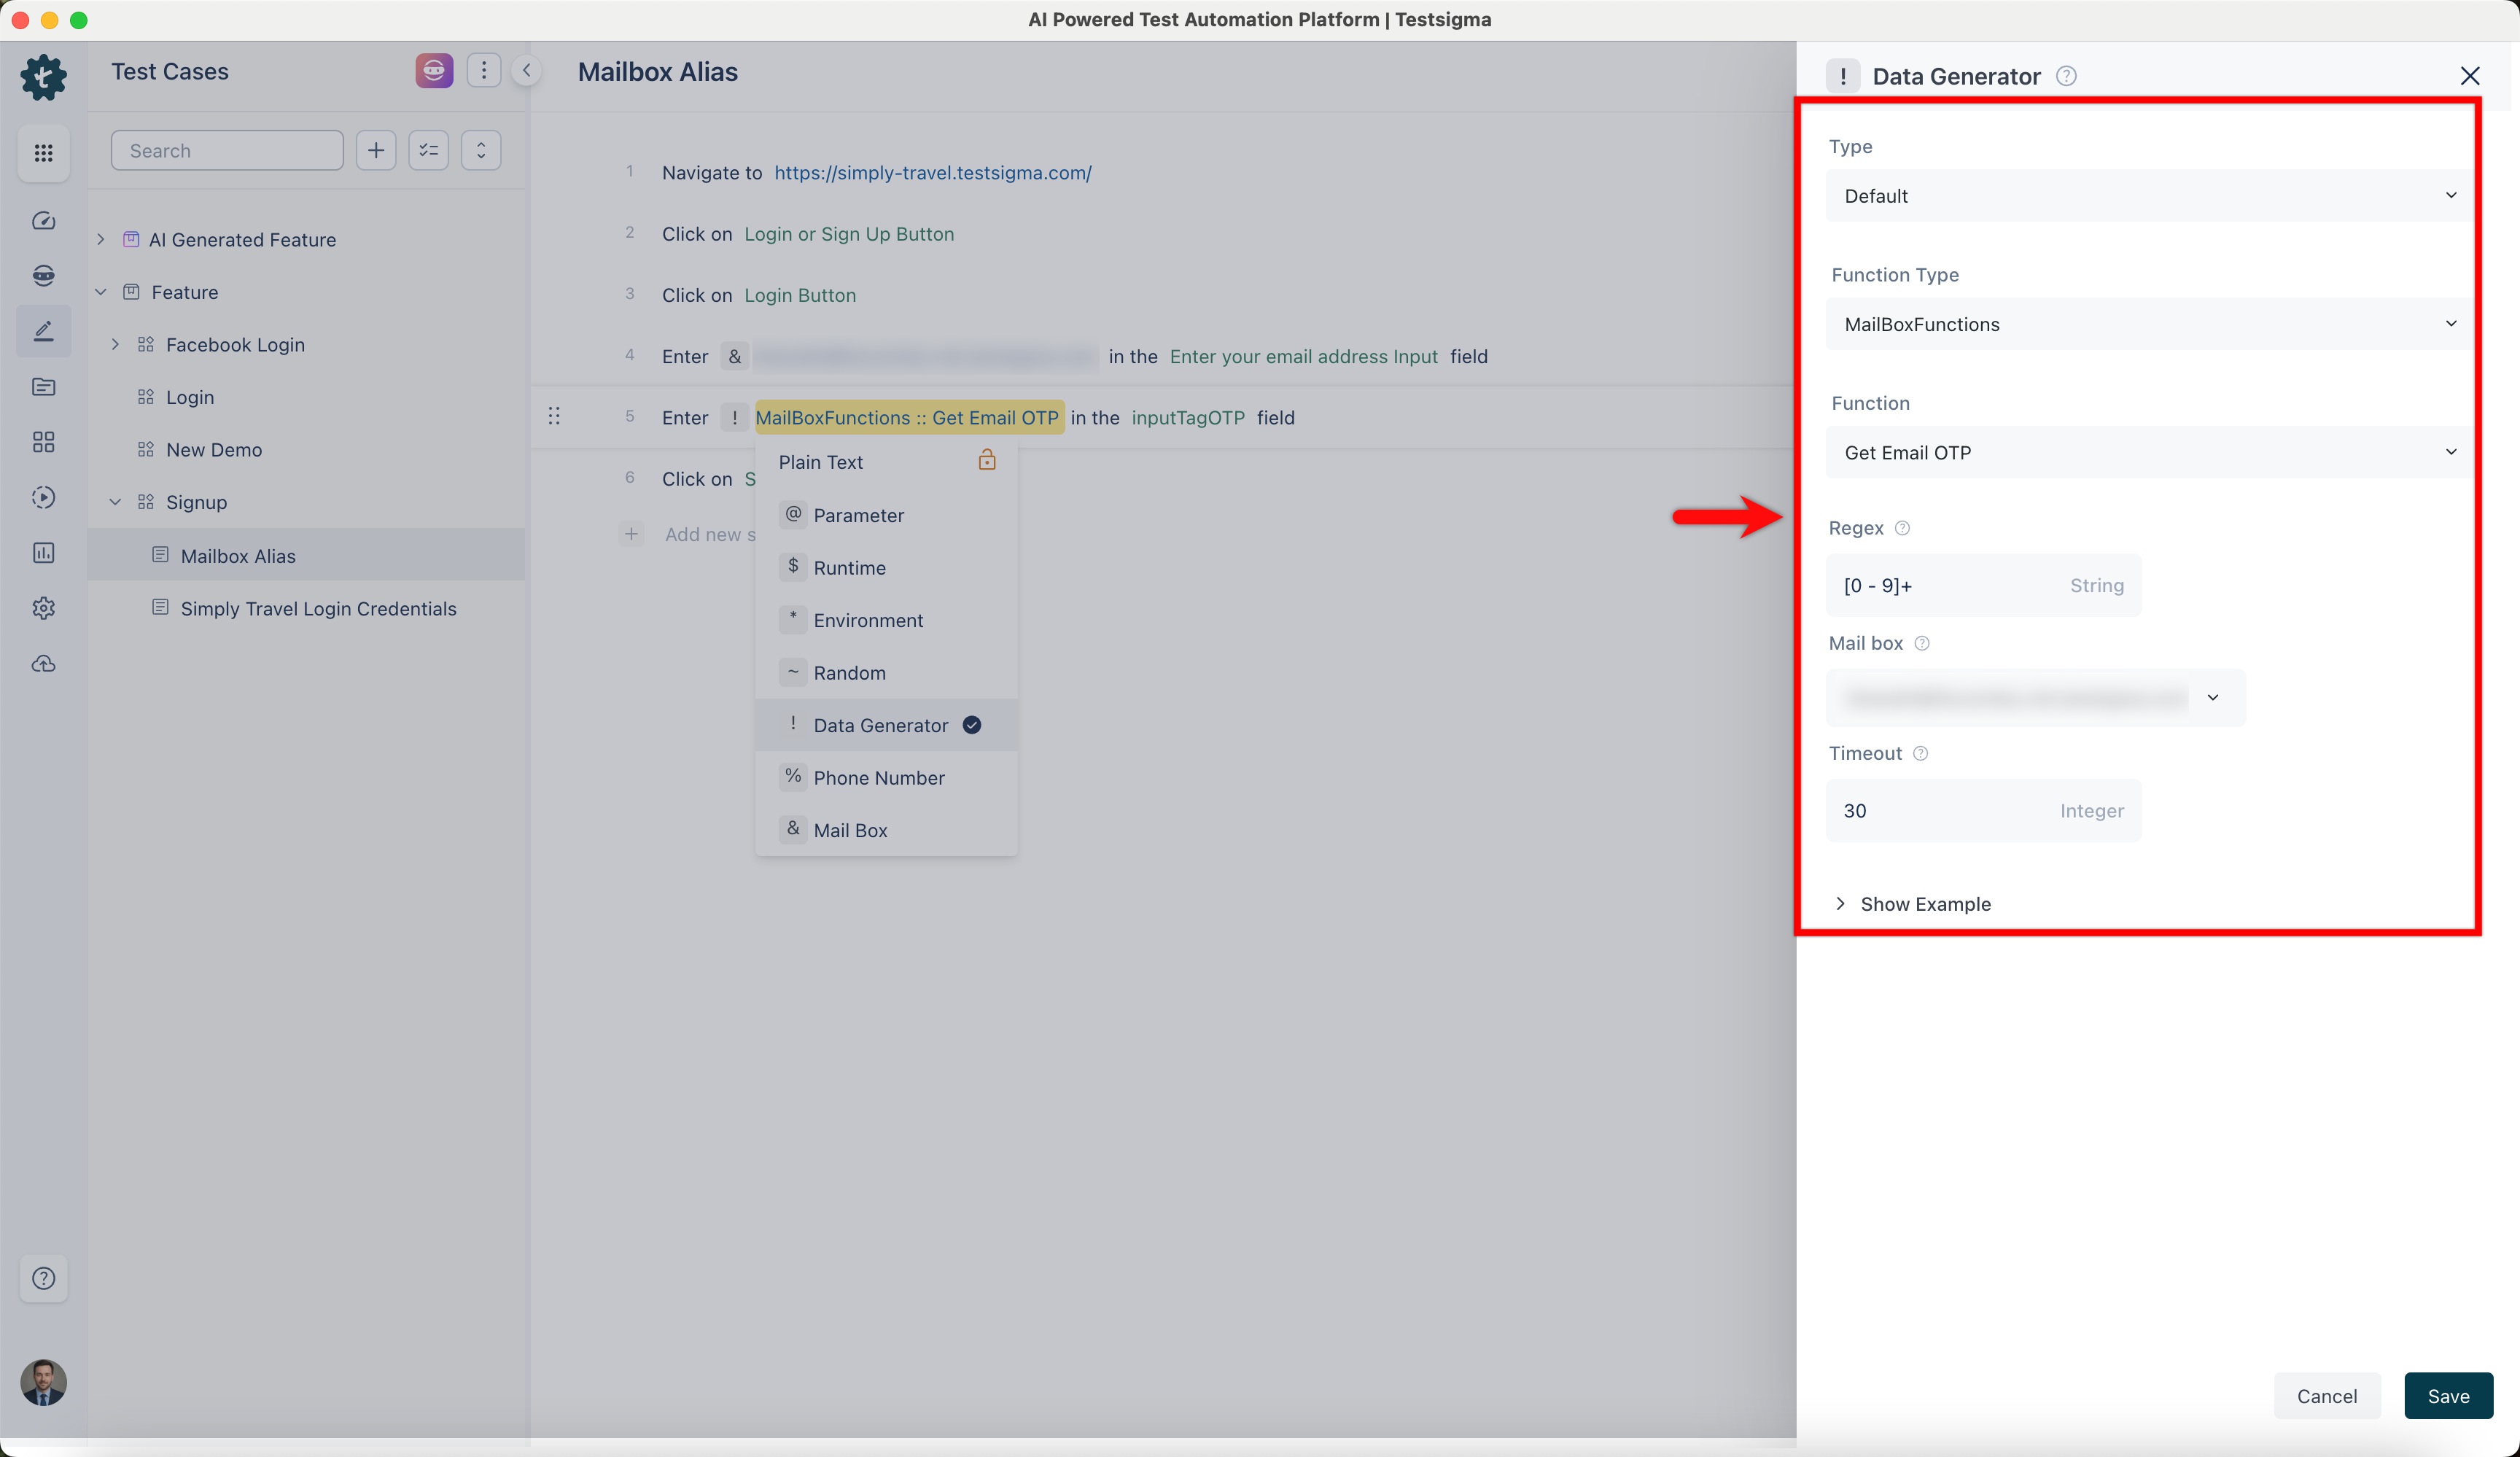
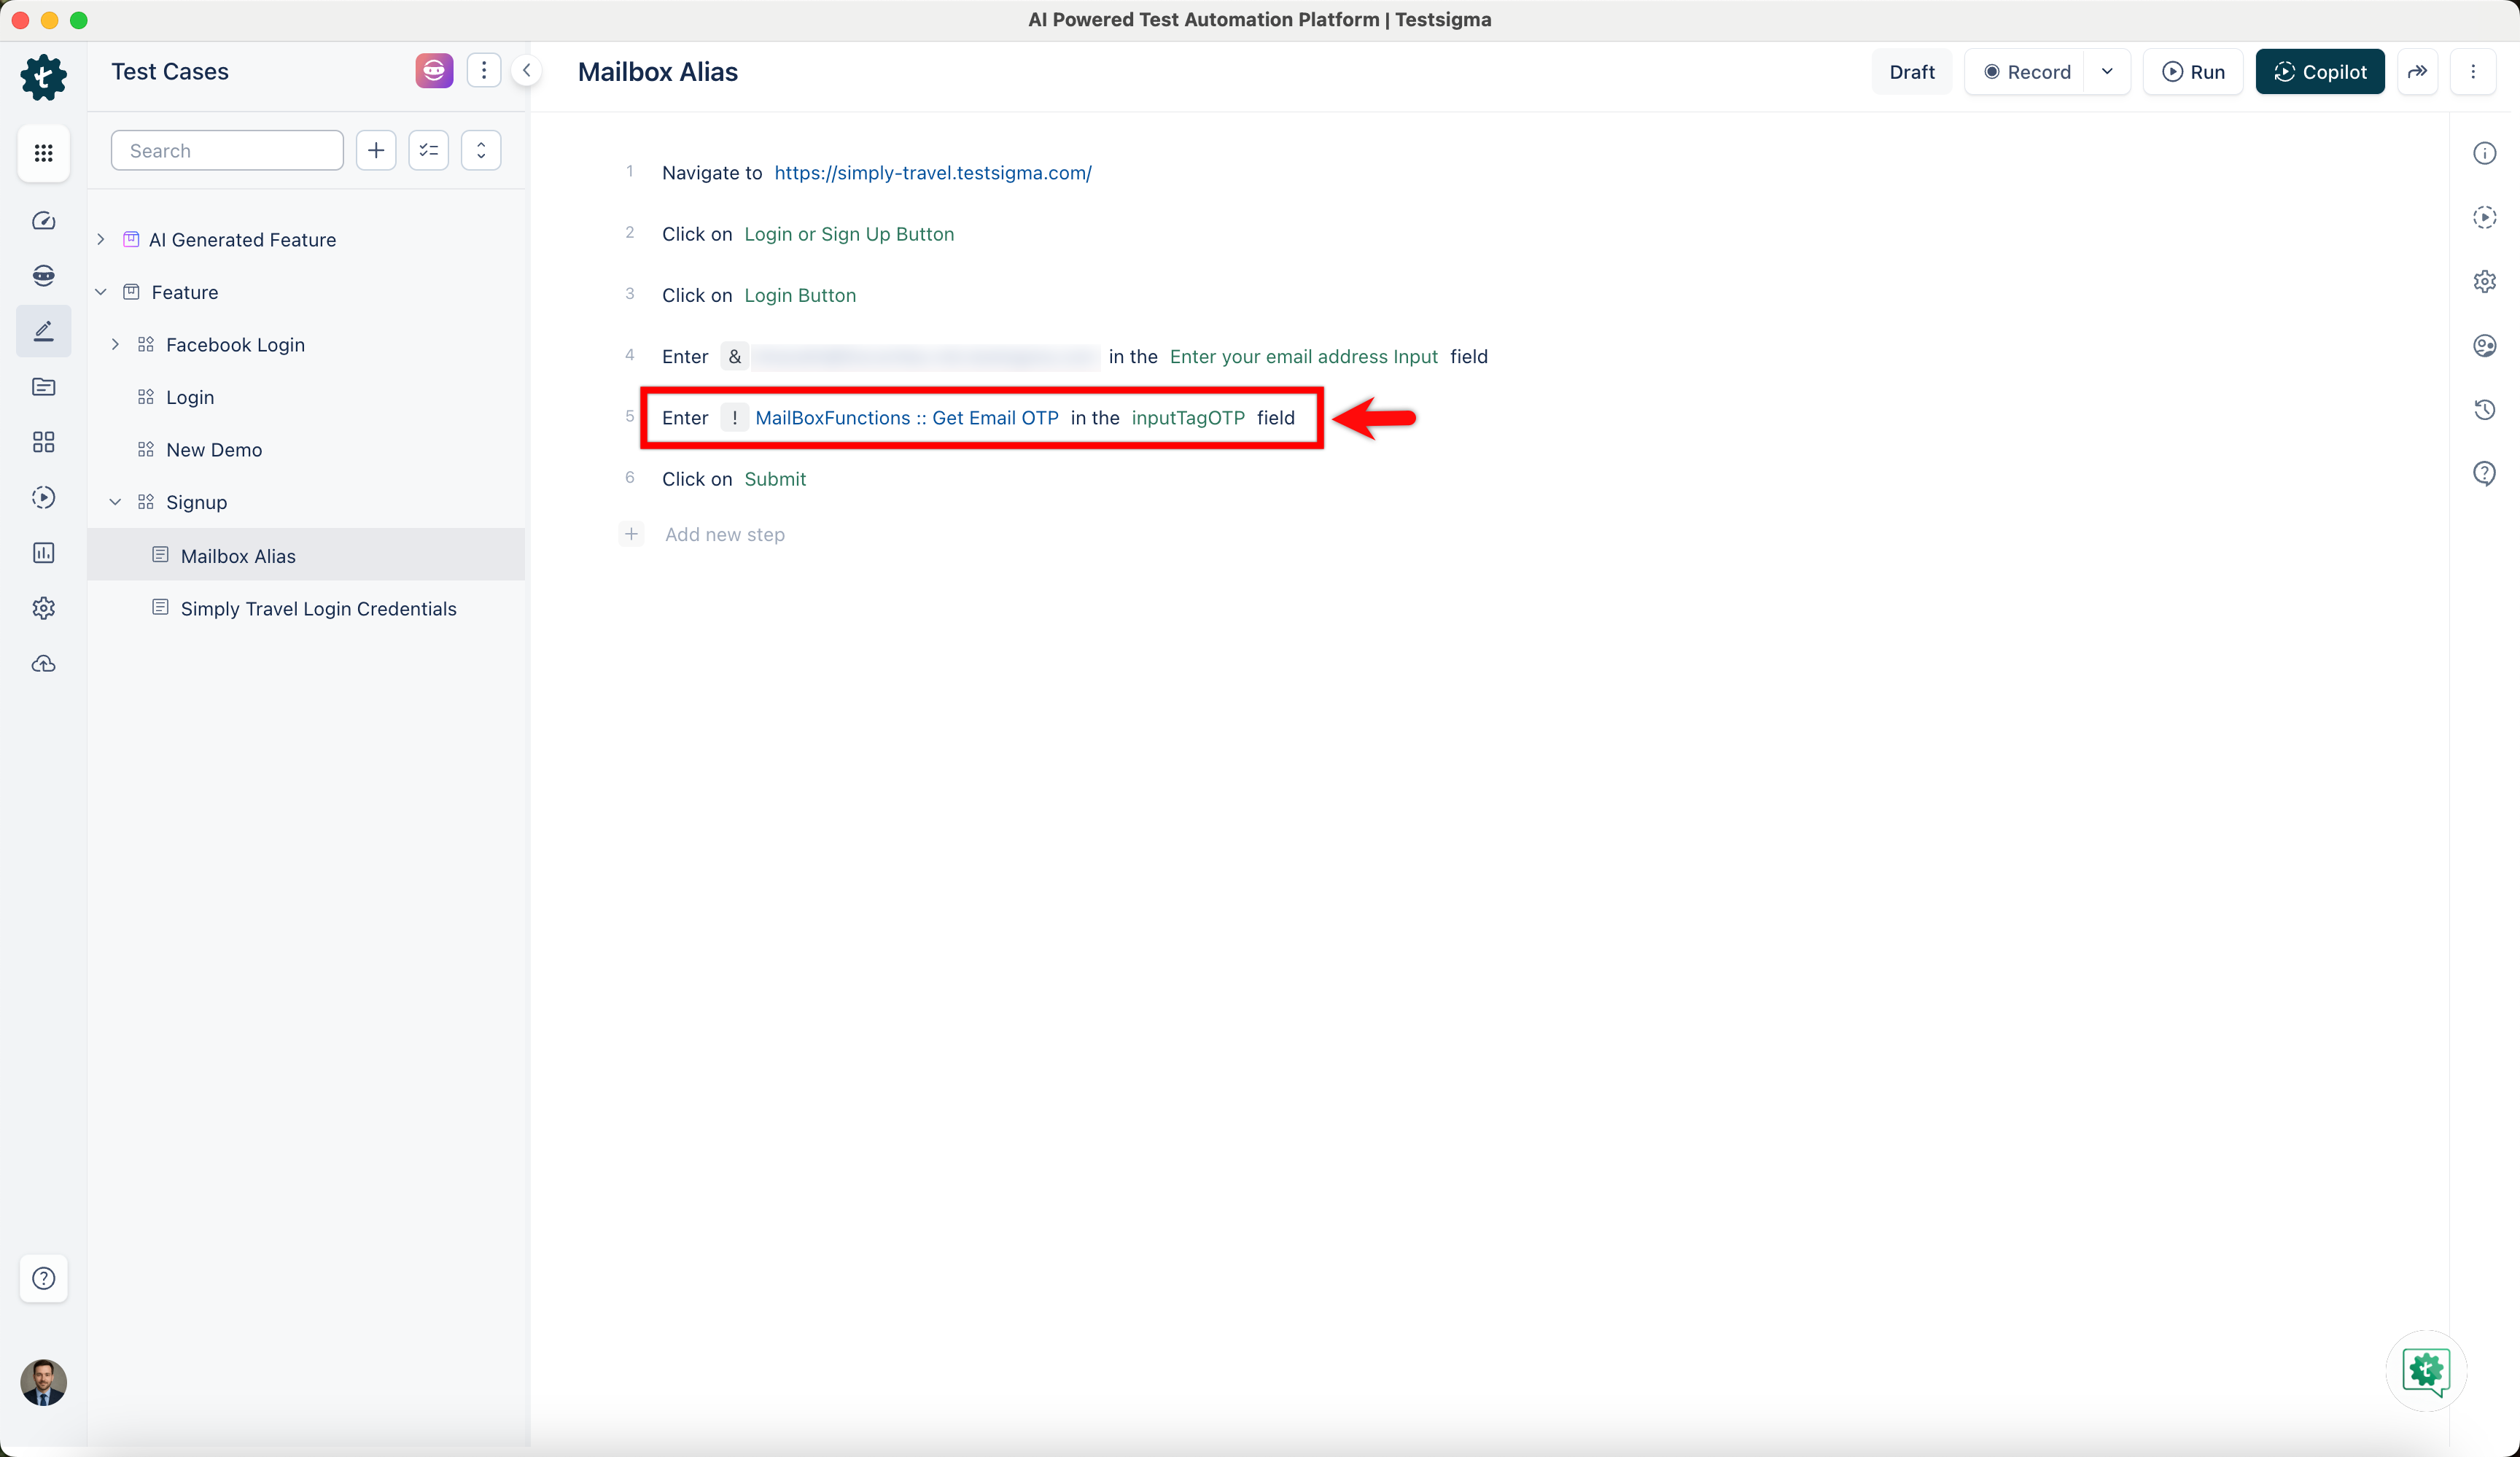
- On the right sidebar, select Data Generator type as the default, Function type as MailBoxFunctions, and choose the function as Get Email OTP from the dropdown menu.

-
Configure the Test Step by providing the necessary details for the function:
- Regex: A search pattern is created by a sequence of characters. For instance, \d{4} matches four consecutive digits (0-9).
- MailBox: Select Mail Box from the drop-down list. It stores incoming email messages.
- Timeout: Set the time for how long a program or system should wait for a specific task to finish. In this example, we will wait for 30 seconds.
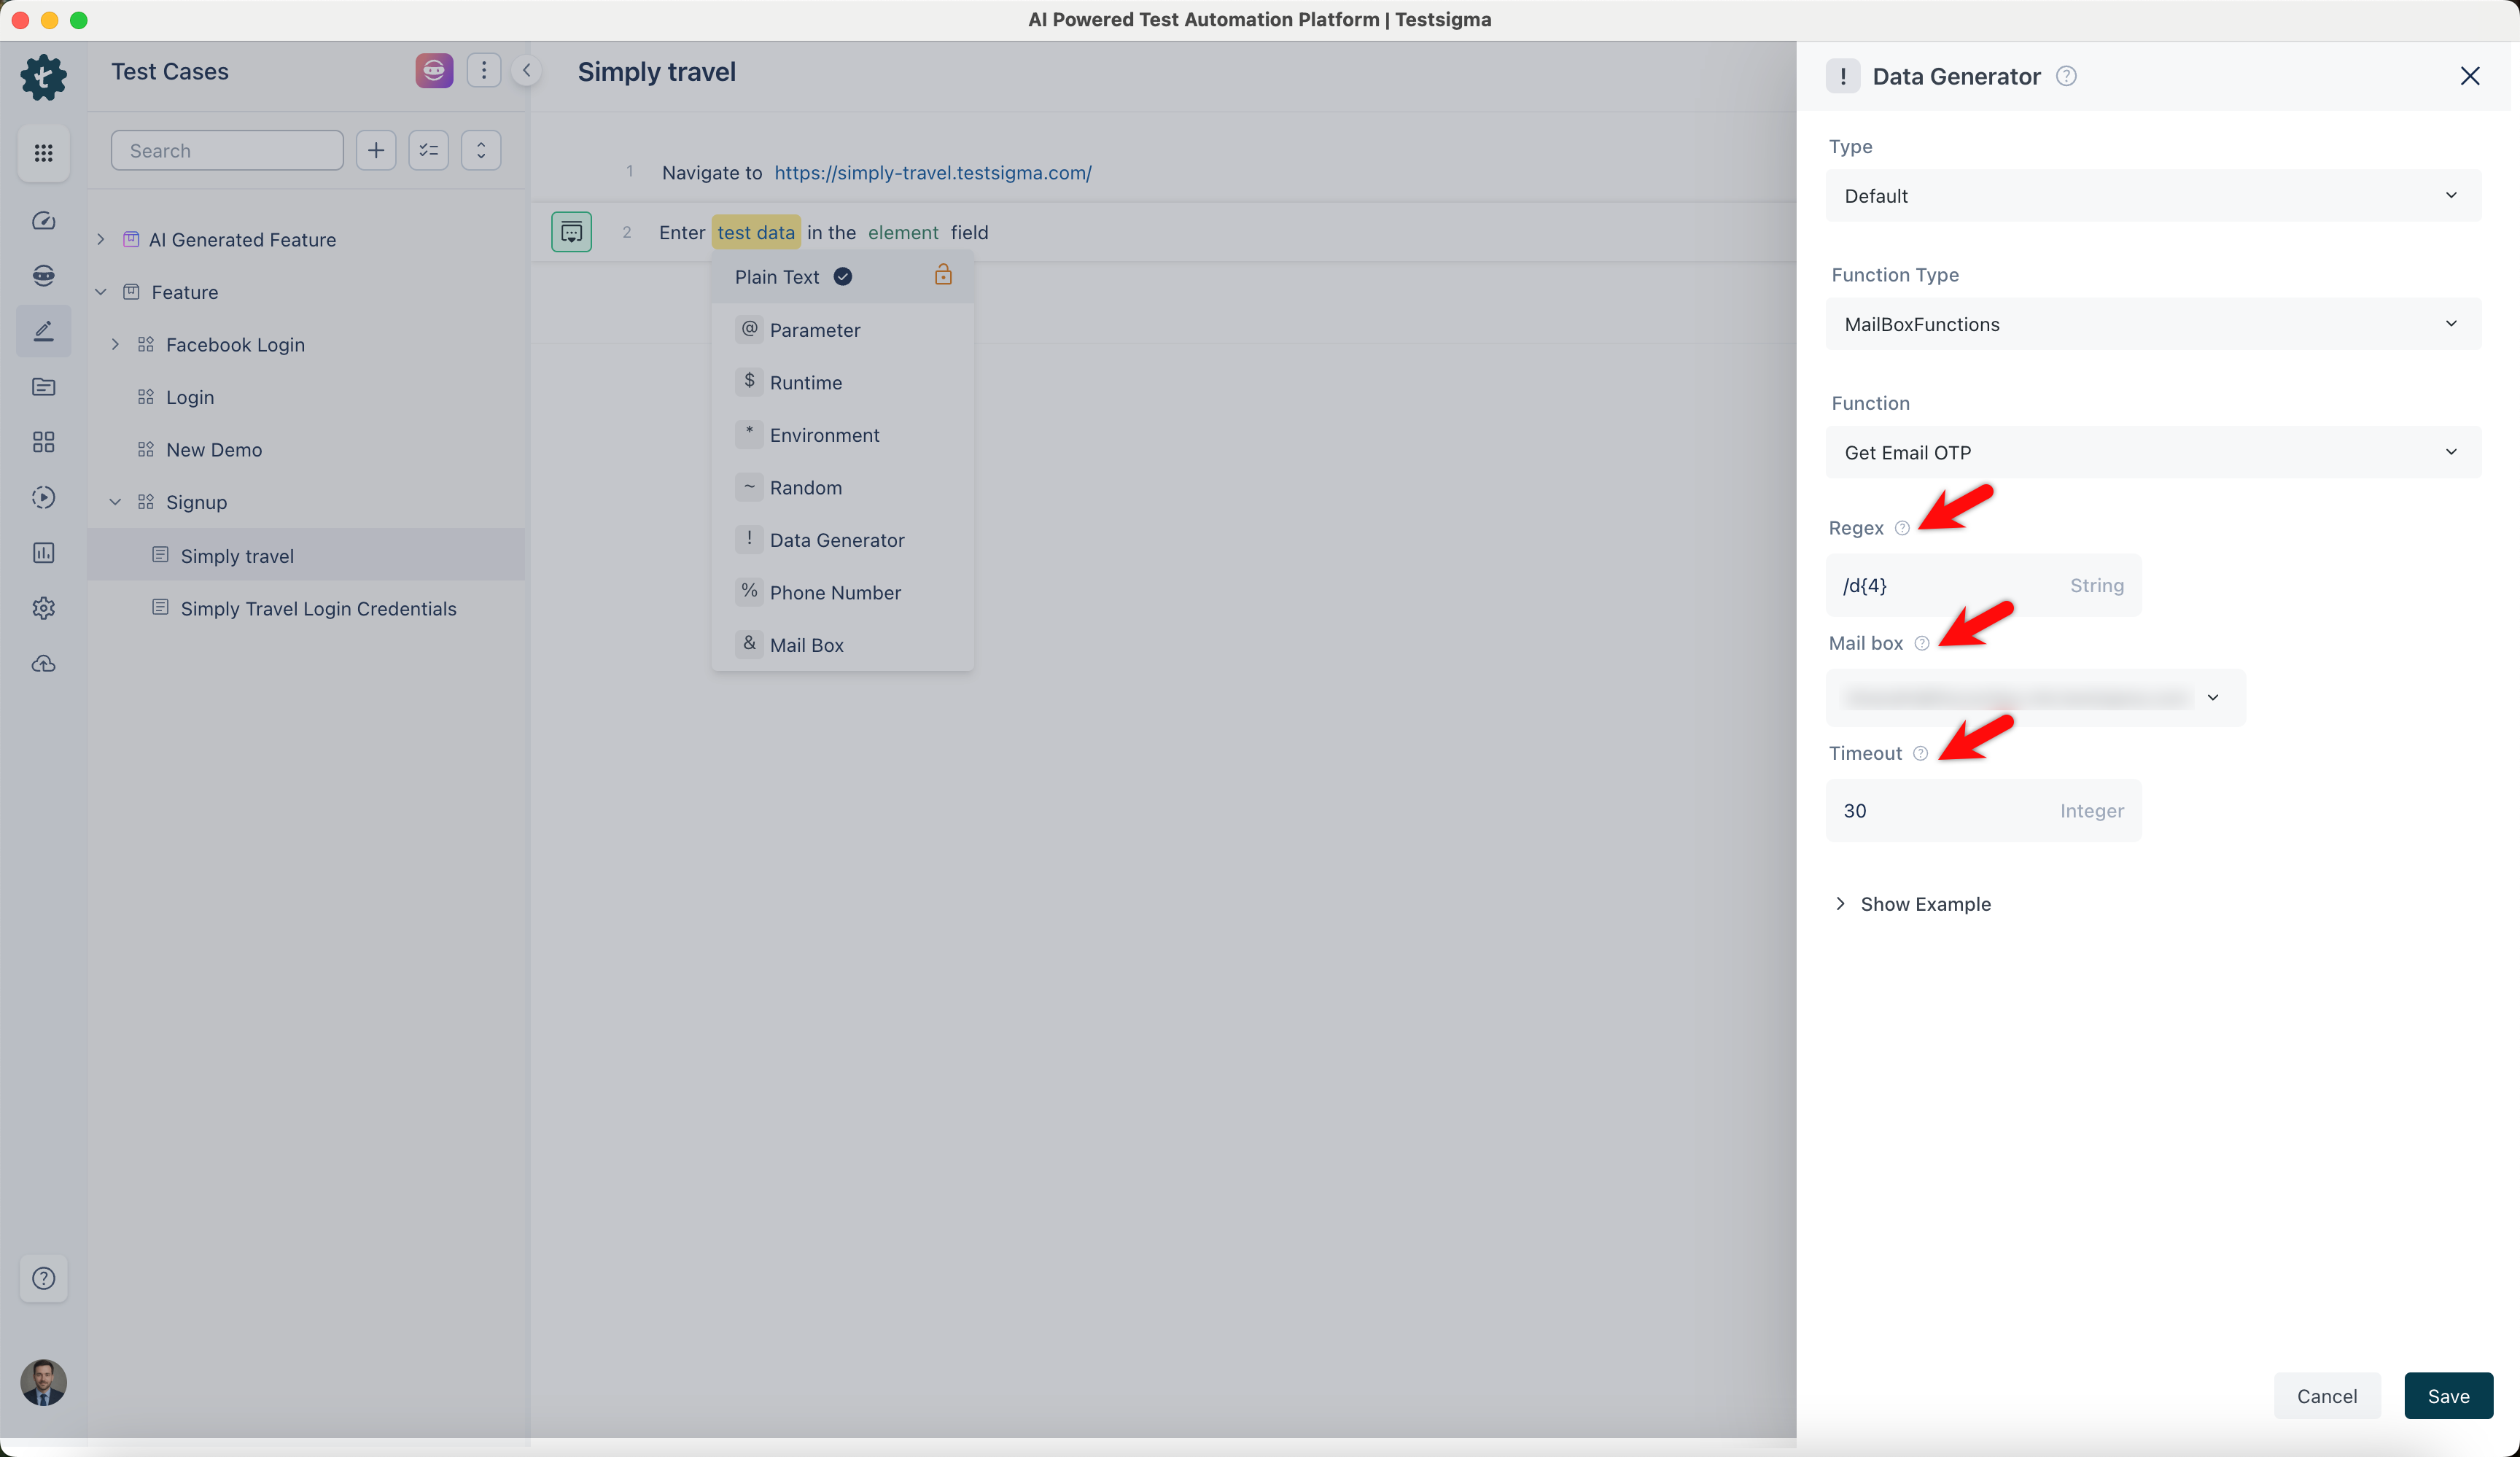
- Click Save to store the provided arguments in the data generator for this test step.
Ensure that you have referred to:
Store Data as a Runtime Variable from Mail Box
Follow the below steps to save the data obtained from the Mailbox as a runtime variable to use later in the test case using Test Data Generators in Testsigma.
- Create a new step in the Test Case using NLP that adds two placeholders for test data to store data as runtime variables.

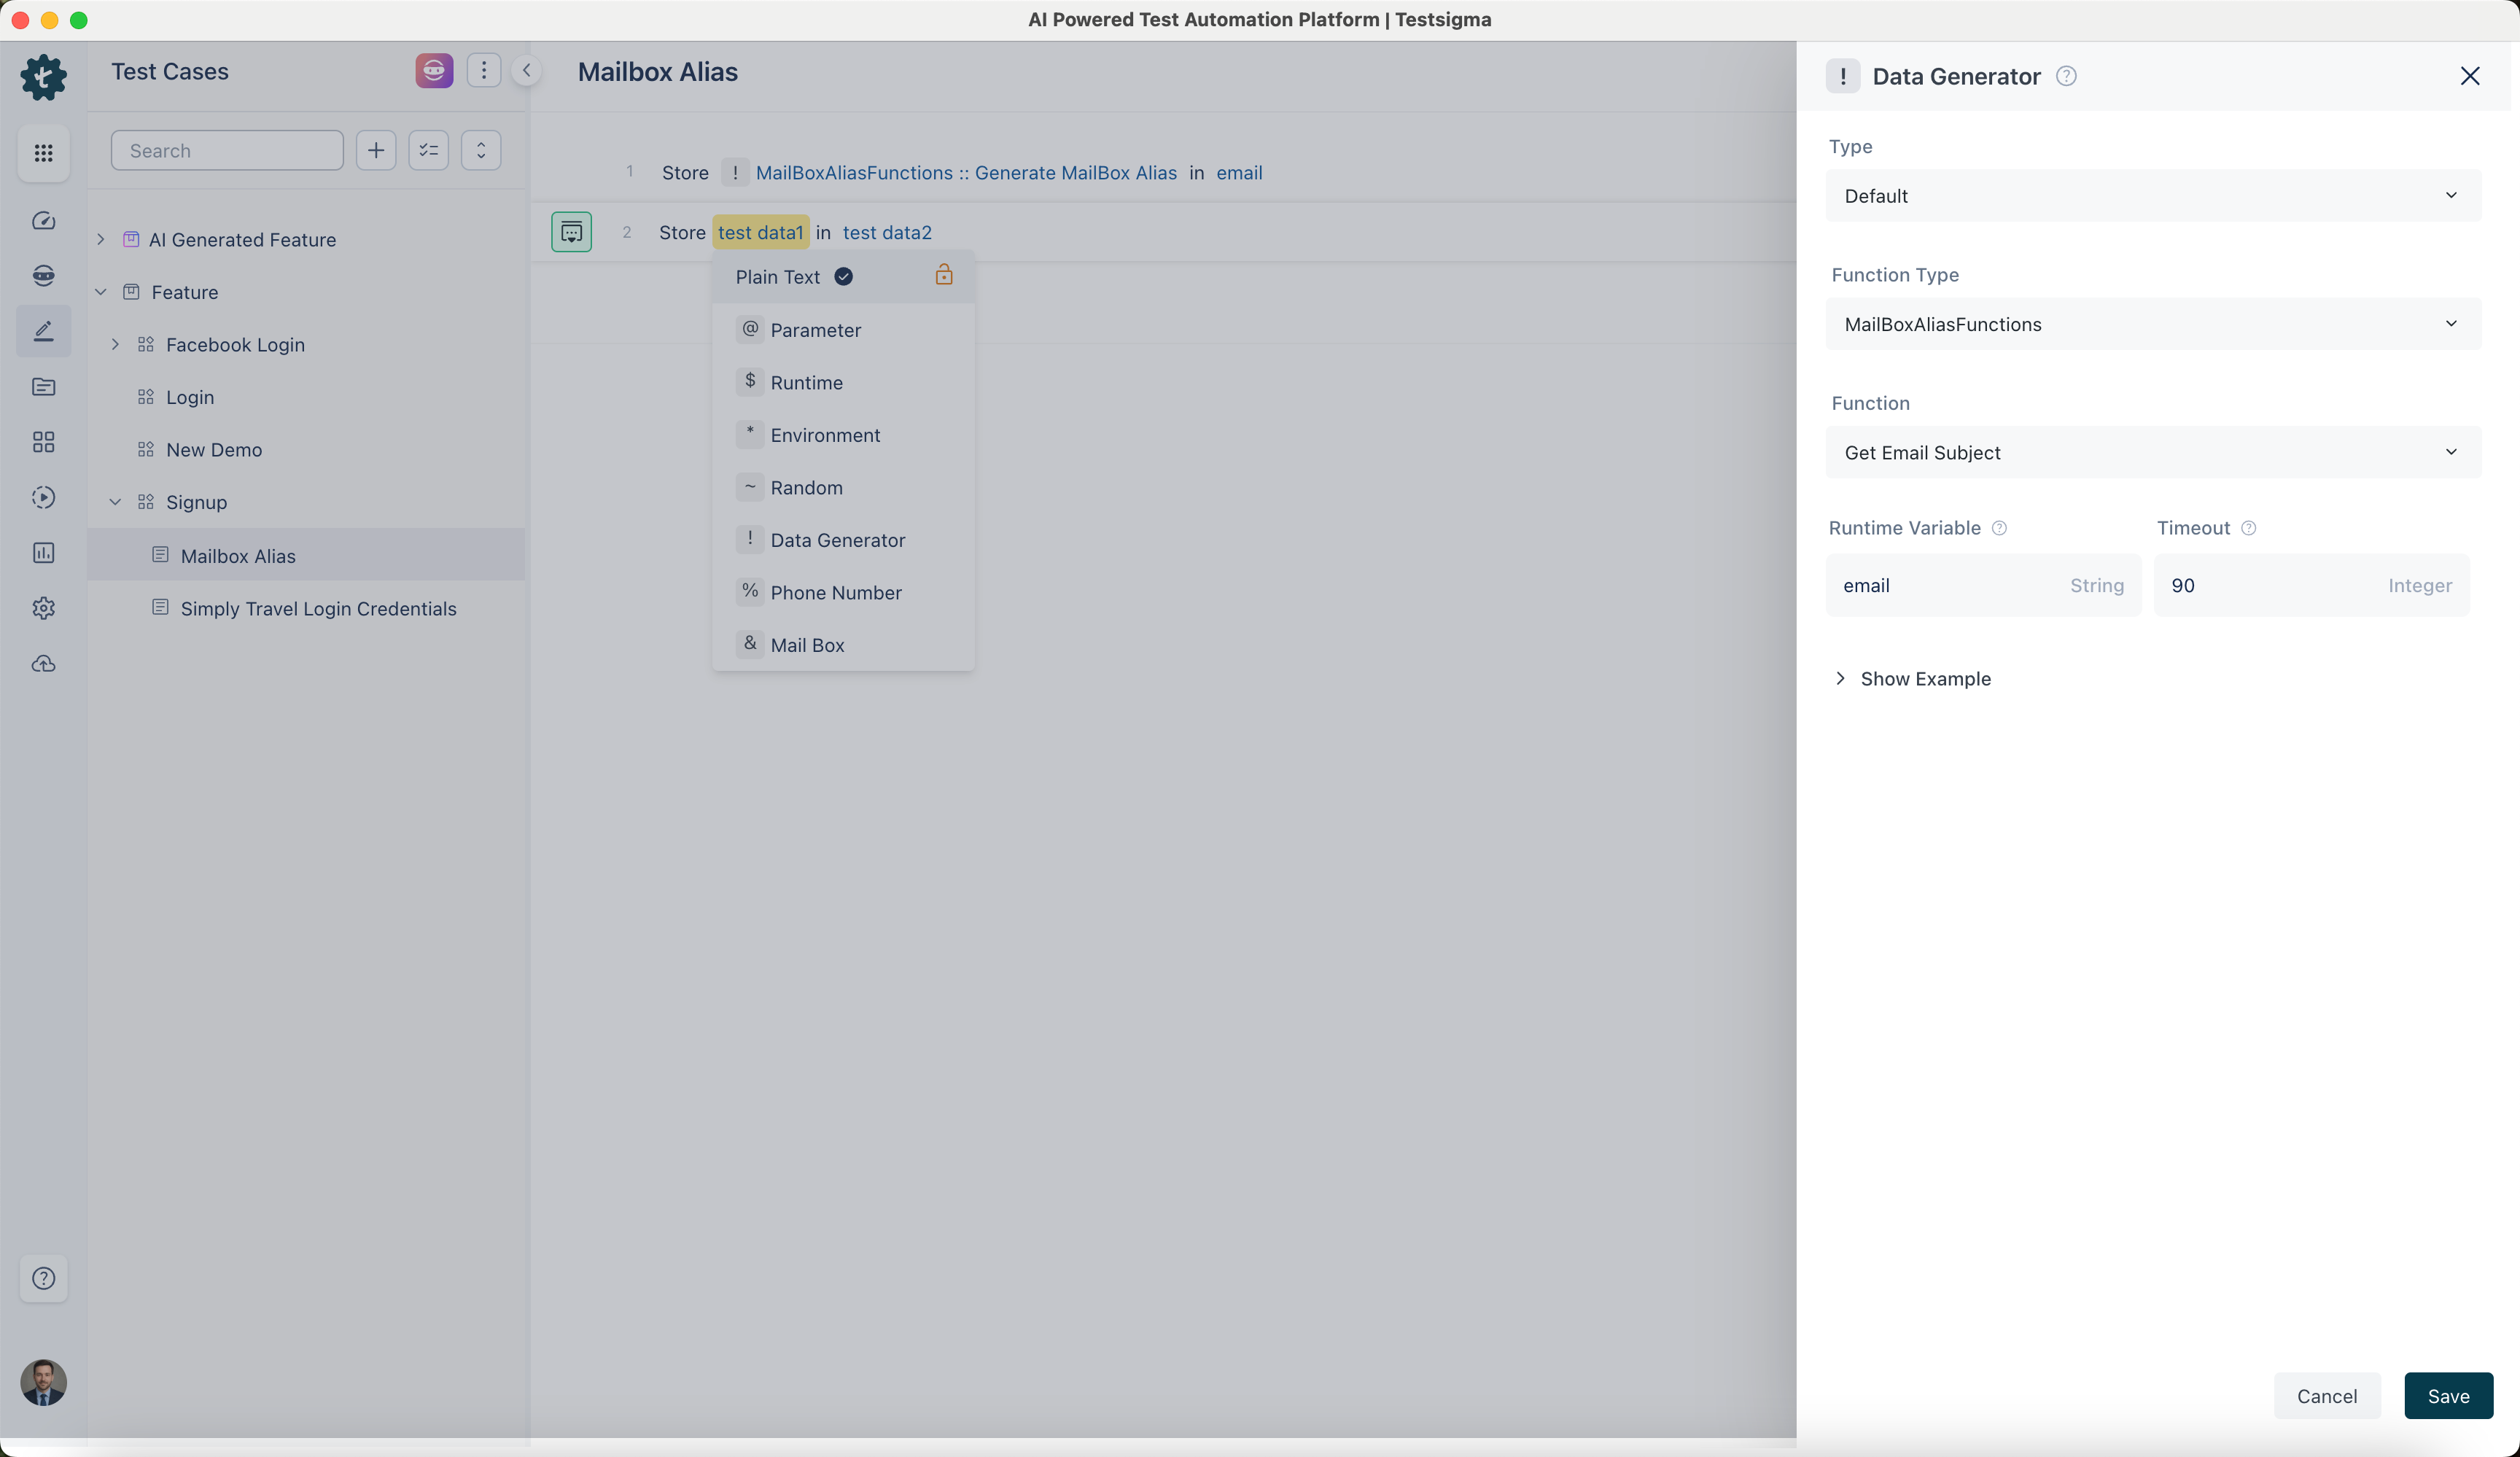
- Click the test data1 placeholder to replace it, and then select the ! Data Generator from the Test Data Types dropdown menu.
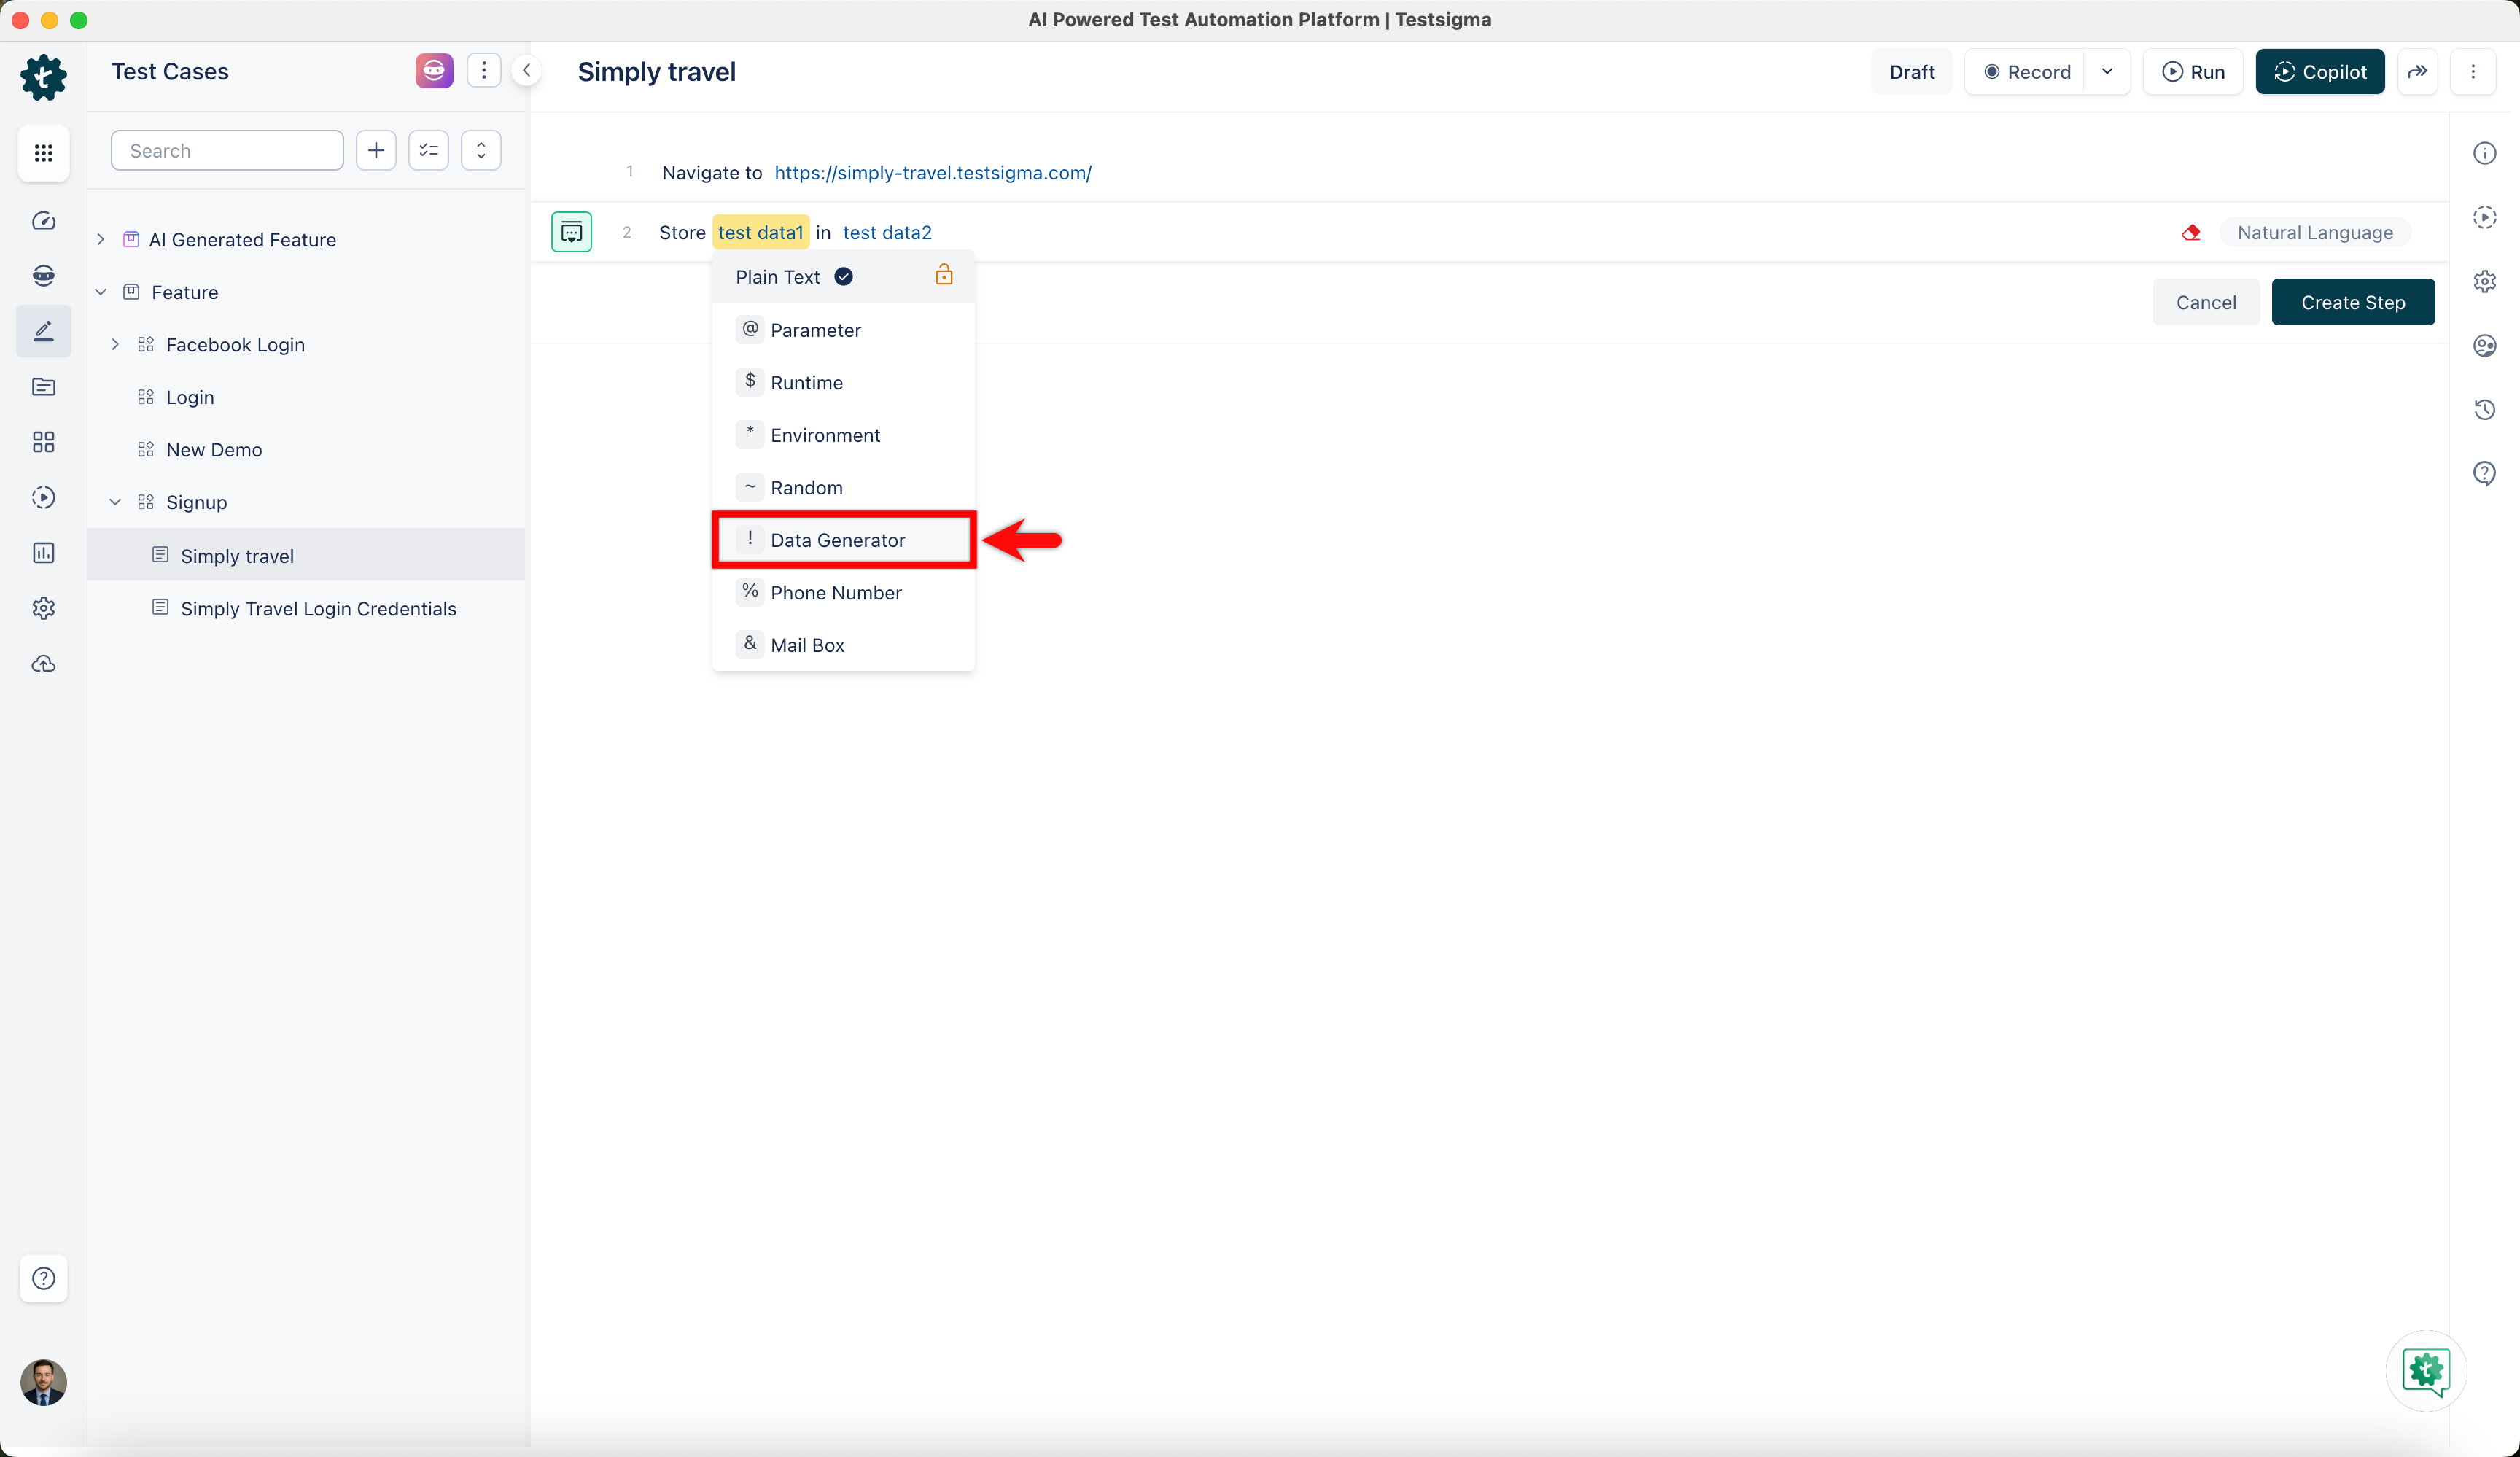
- On the right sidebar, select Data Generator type as the default, Function type as MailBoxFunction, and choose the Function as Content Verification from the dropdown menu.

-
Configure the Test Step by providing the necessary details for the function:
- Regex: A search pattern is created by a sequence of characters. For instance, \d{4} matches four consecutive digits (0-9).
- MailBox: Select Mail Box from the drop-down list. It stores incoming email messages.
- Compare String: Provide the CompareString function, which compares two strings and determines if they are identical.
- Timeout: Set the time for how long a program or system should wait for a specific task to finish. In this example, we will wait for 30 seconds.
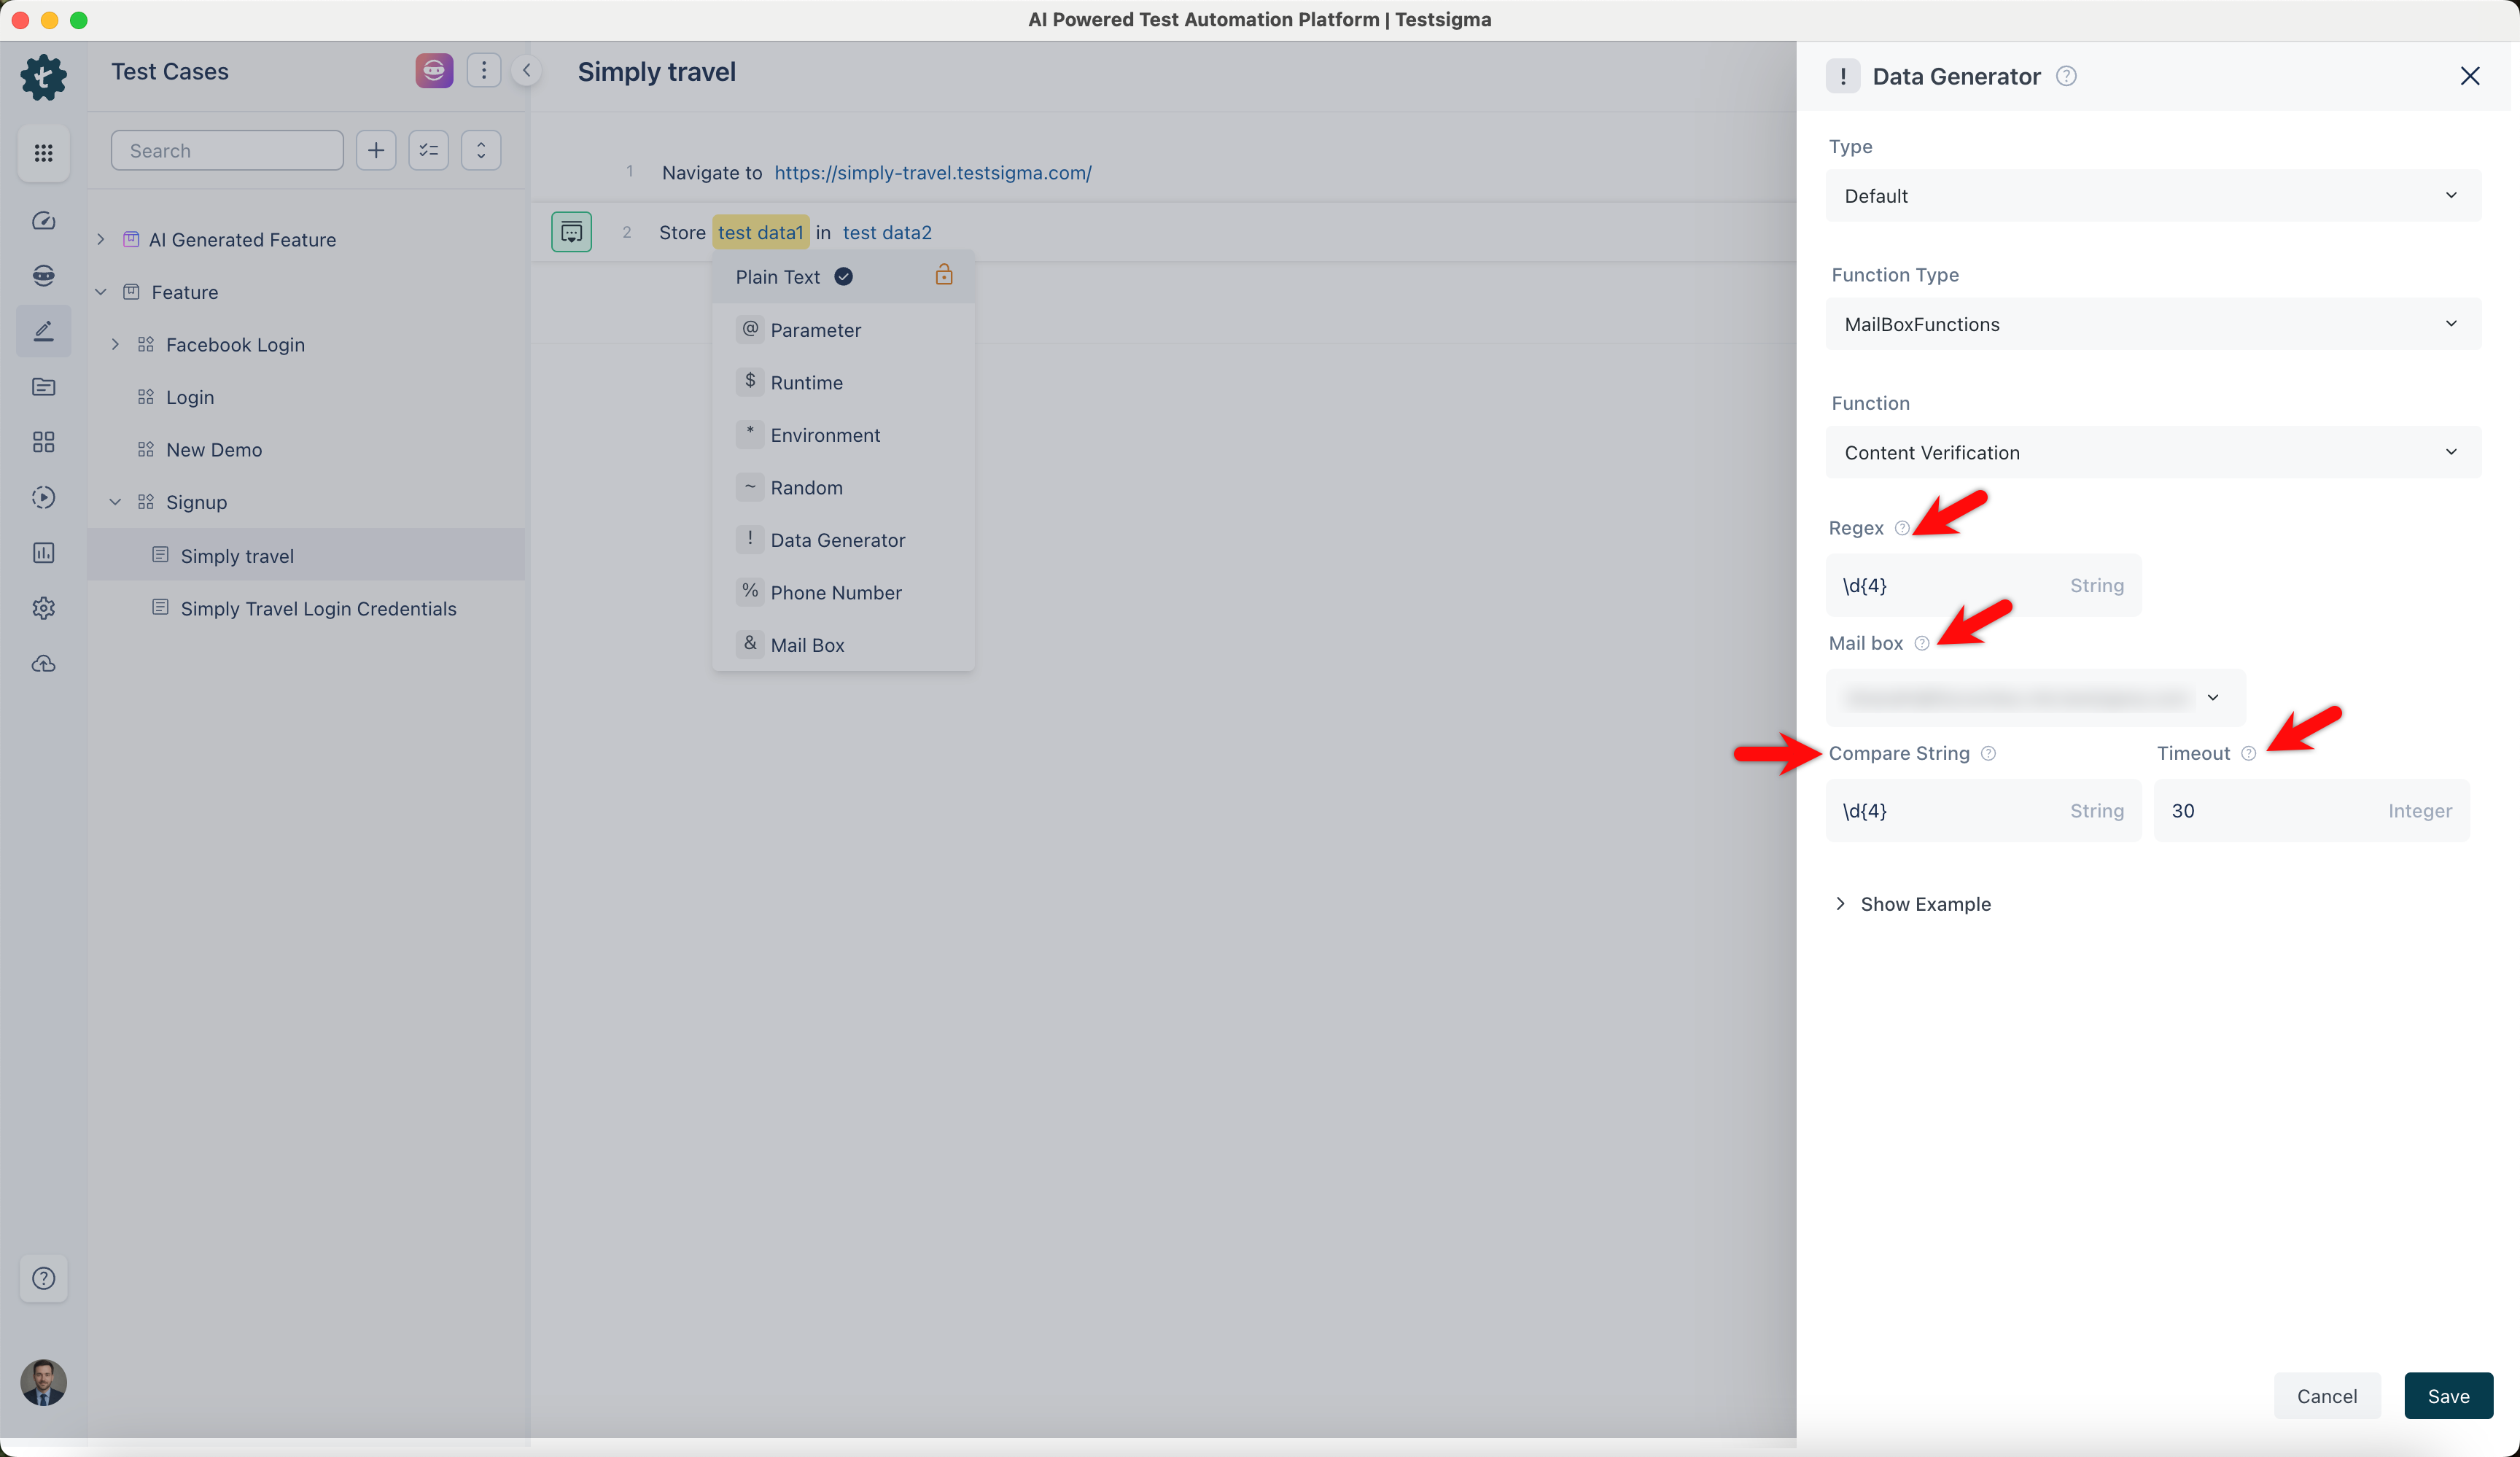
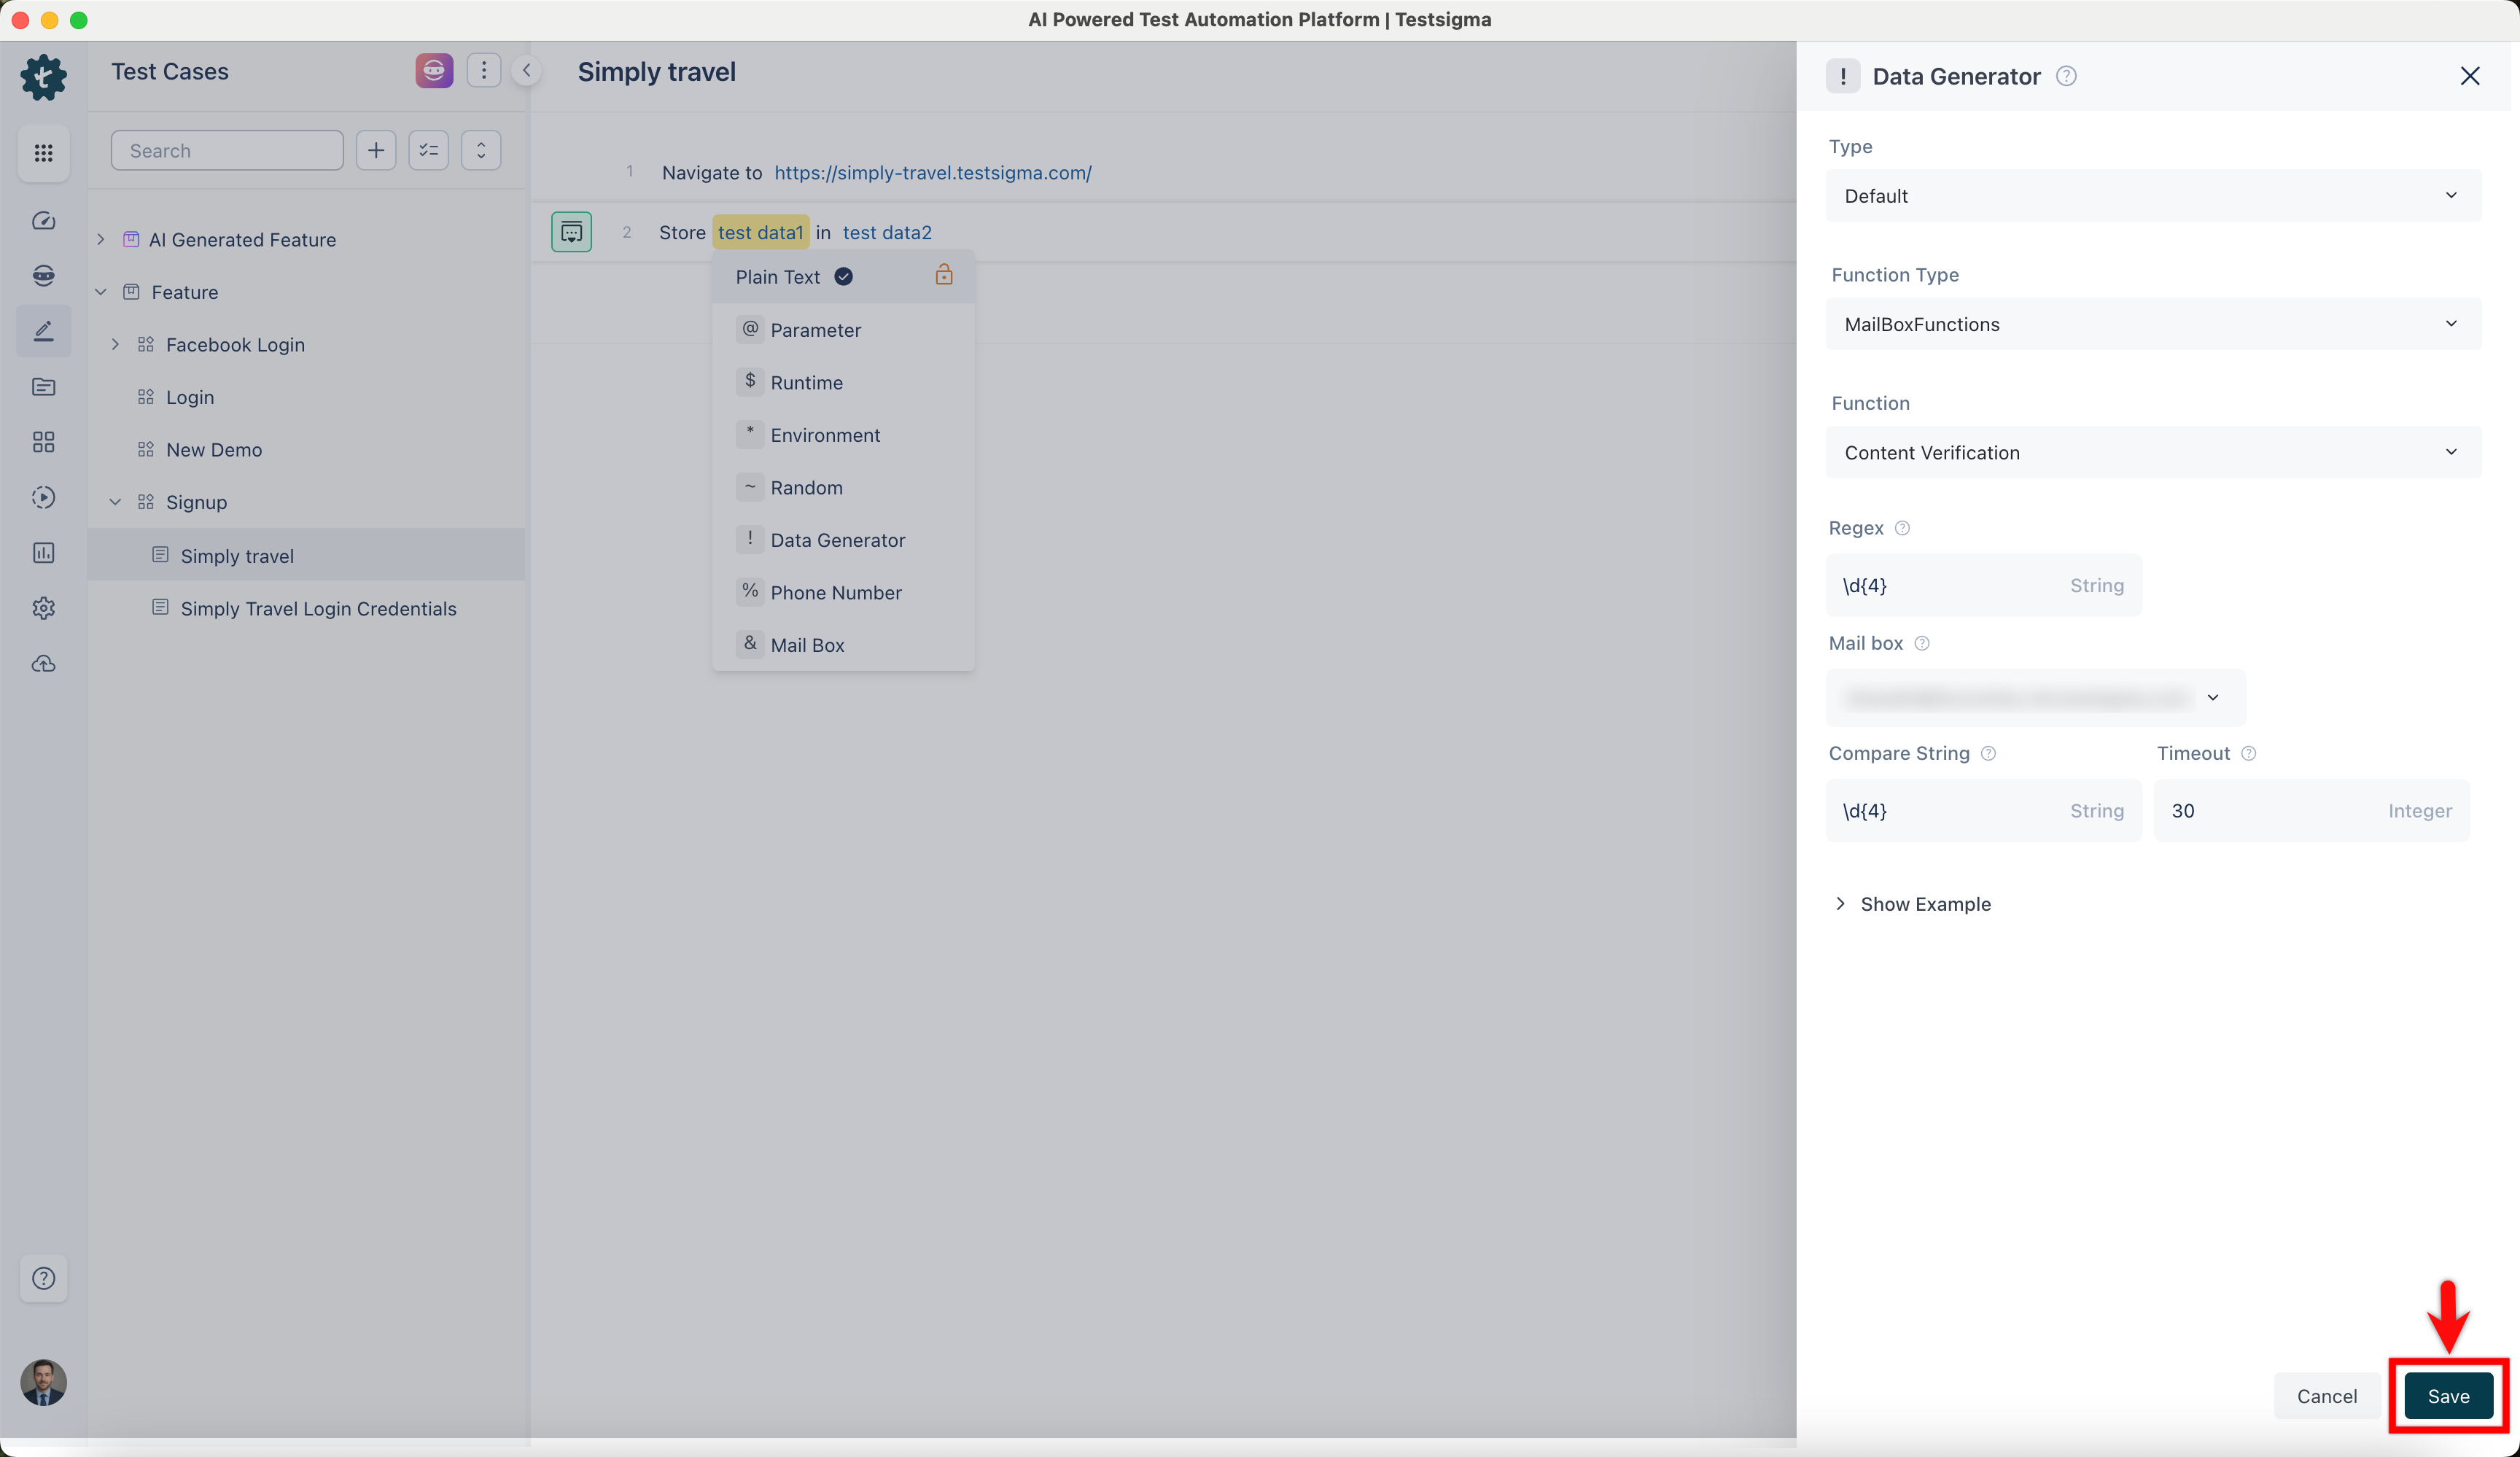
- Click Save to store the provided arguments in the data generator for this test step.
- Substitute specific text for the testdata2 placeholder and create a step to generate a runtime variable that stores the value in that text.
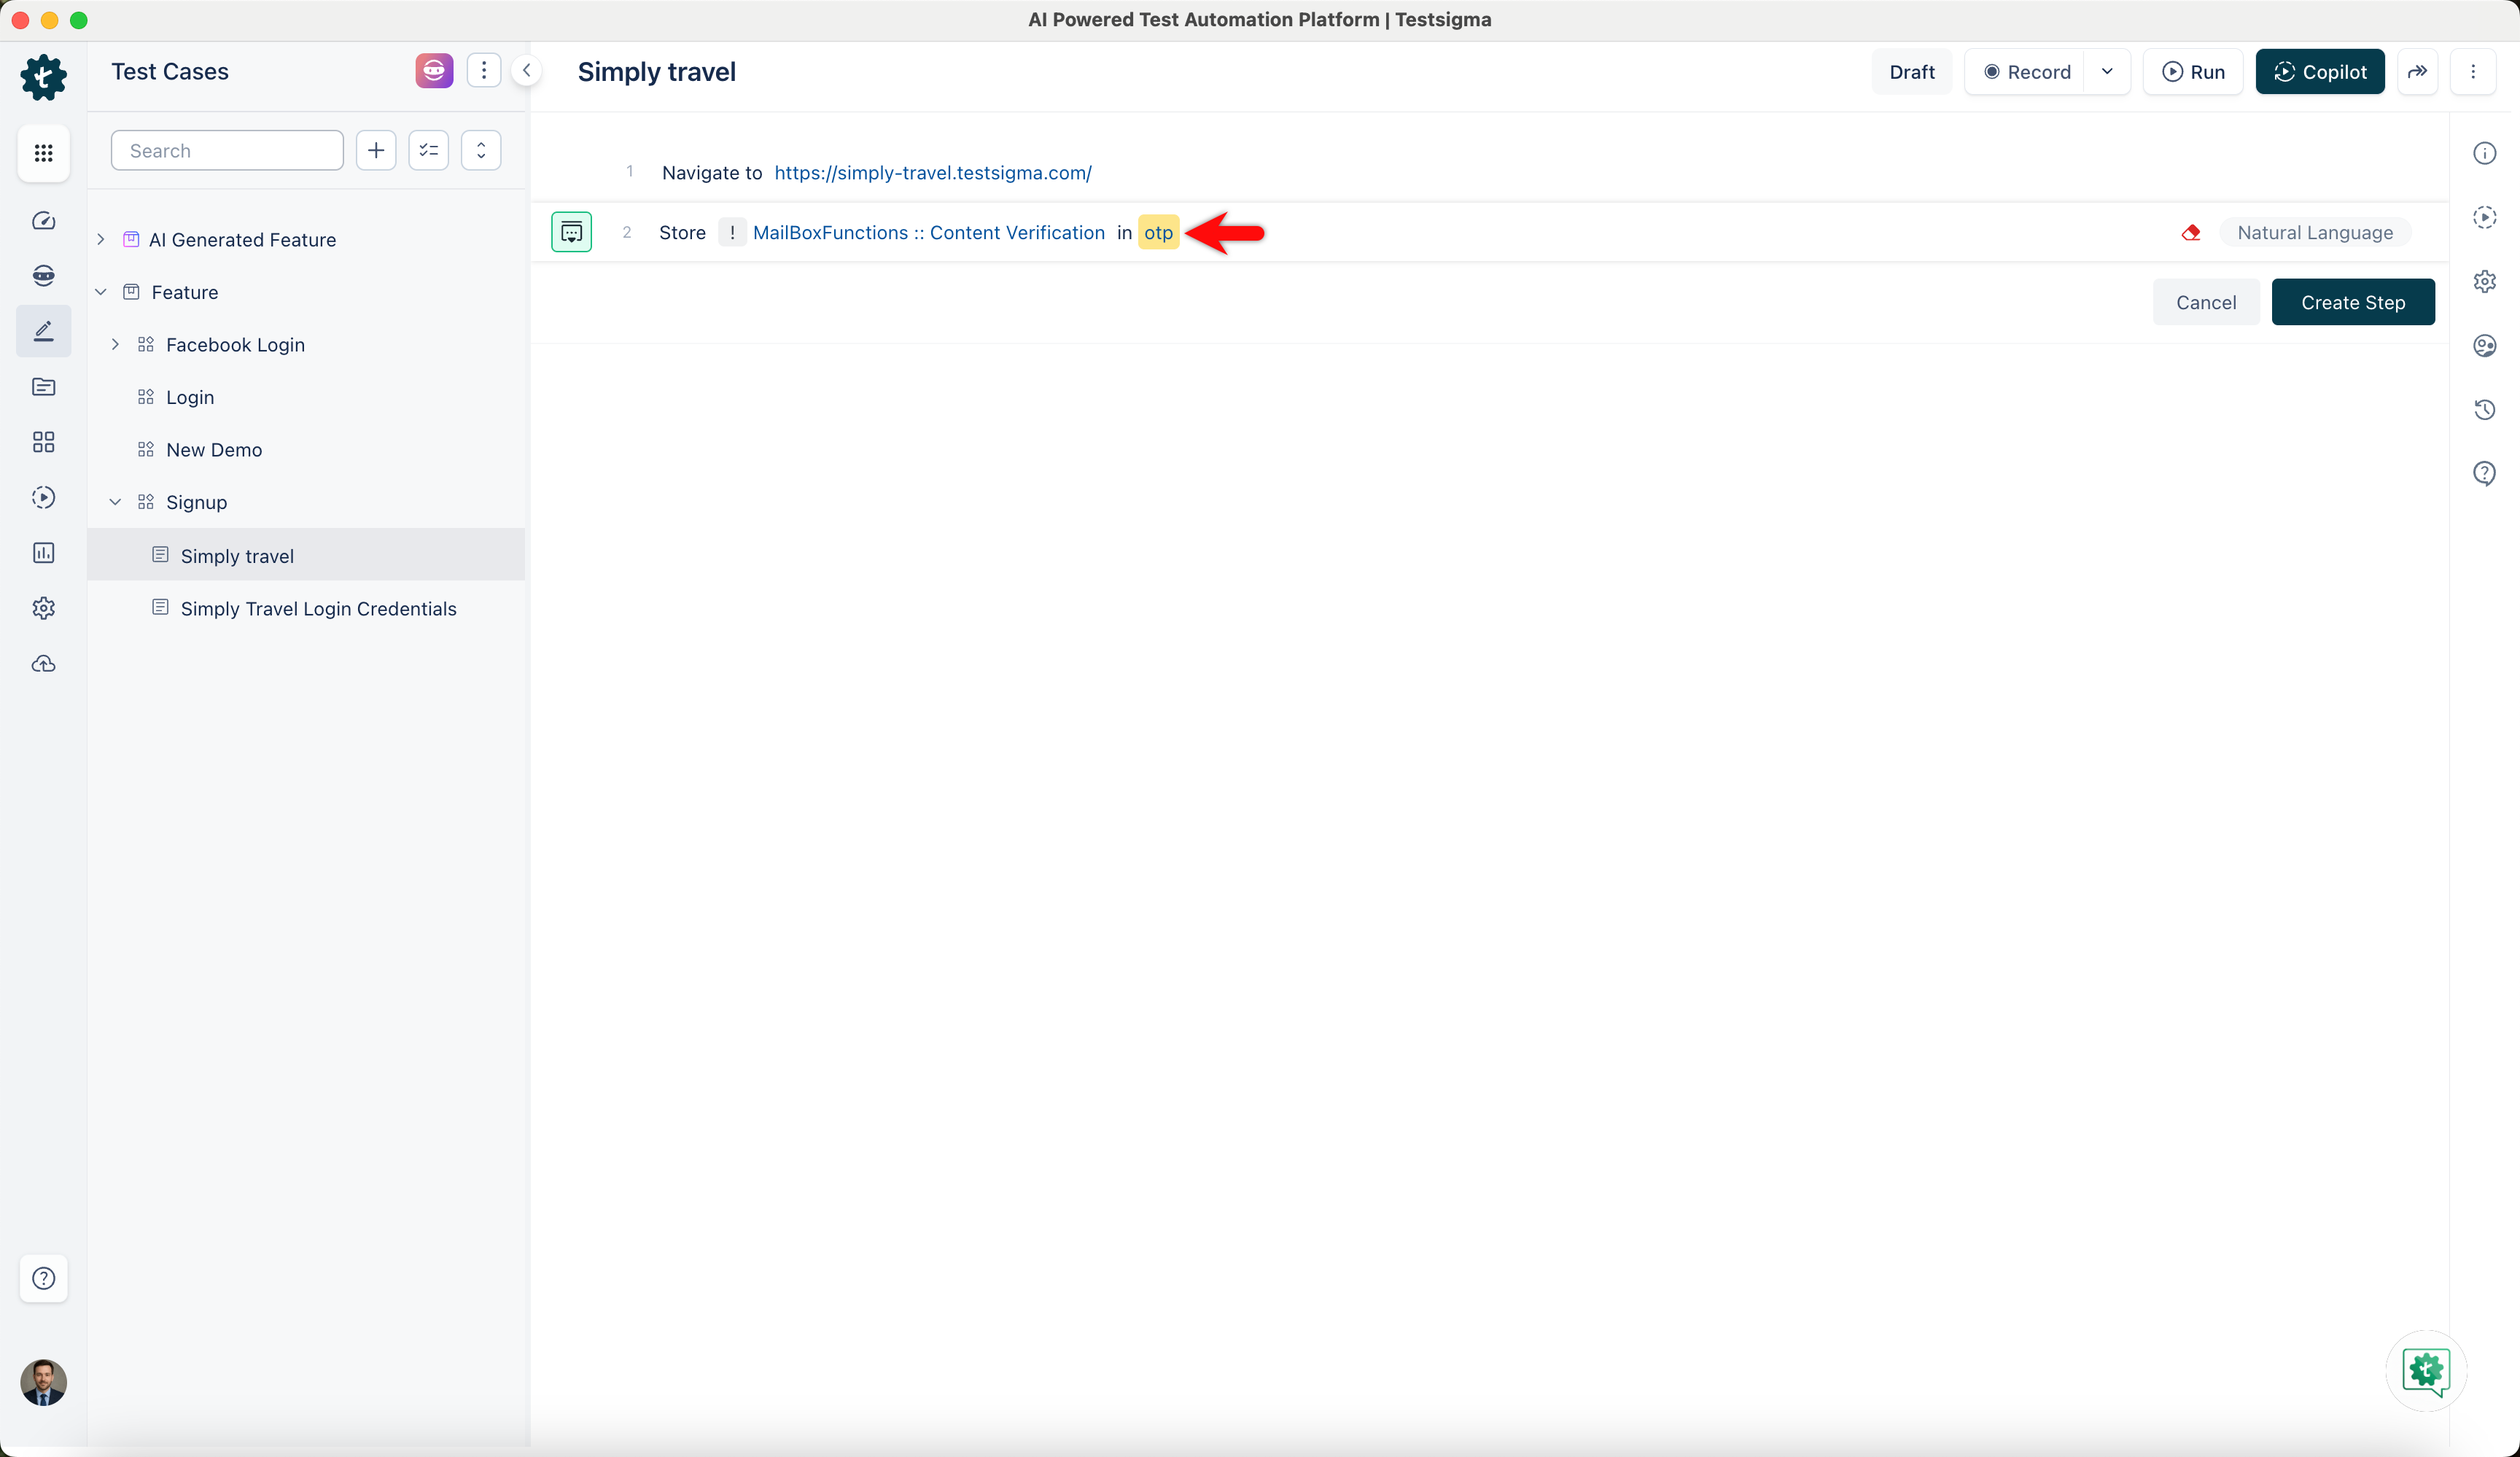
You can store the subject by selecting the Test Data Generator function: ! MailBoxFunctions :: subjectVerification.
Create Mail Box Alias in Test Step
During a test step, you can create a mailbox alias that connects an additional email address to your primary email account. This allows you to generate multiple email addresses that all direct to the same inbox. When you execute the test, it generates a unique mailbox for each alias.
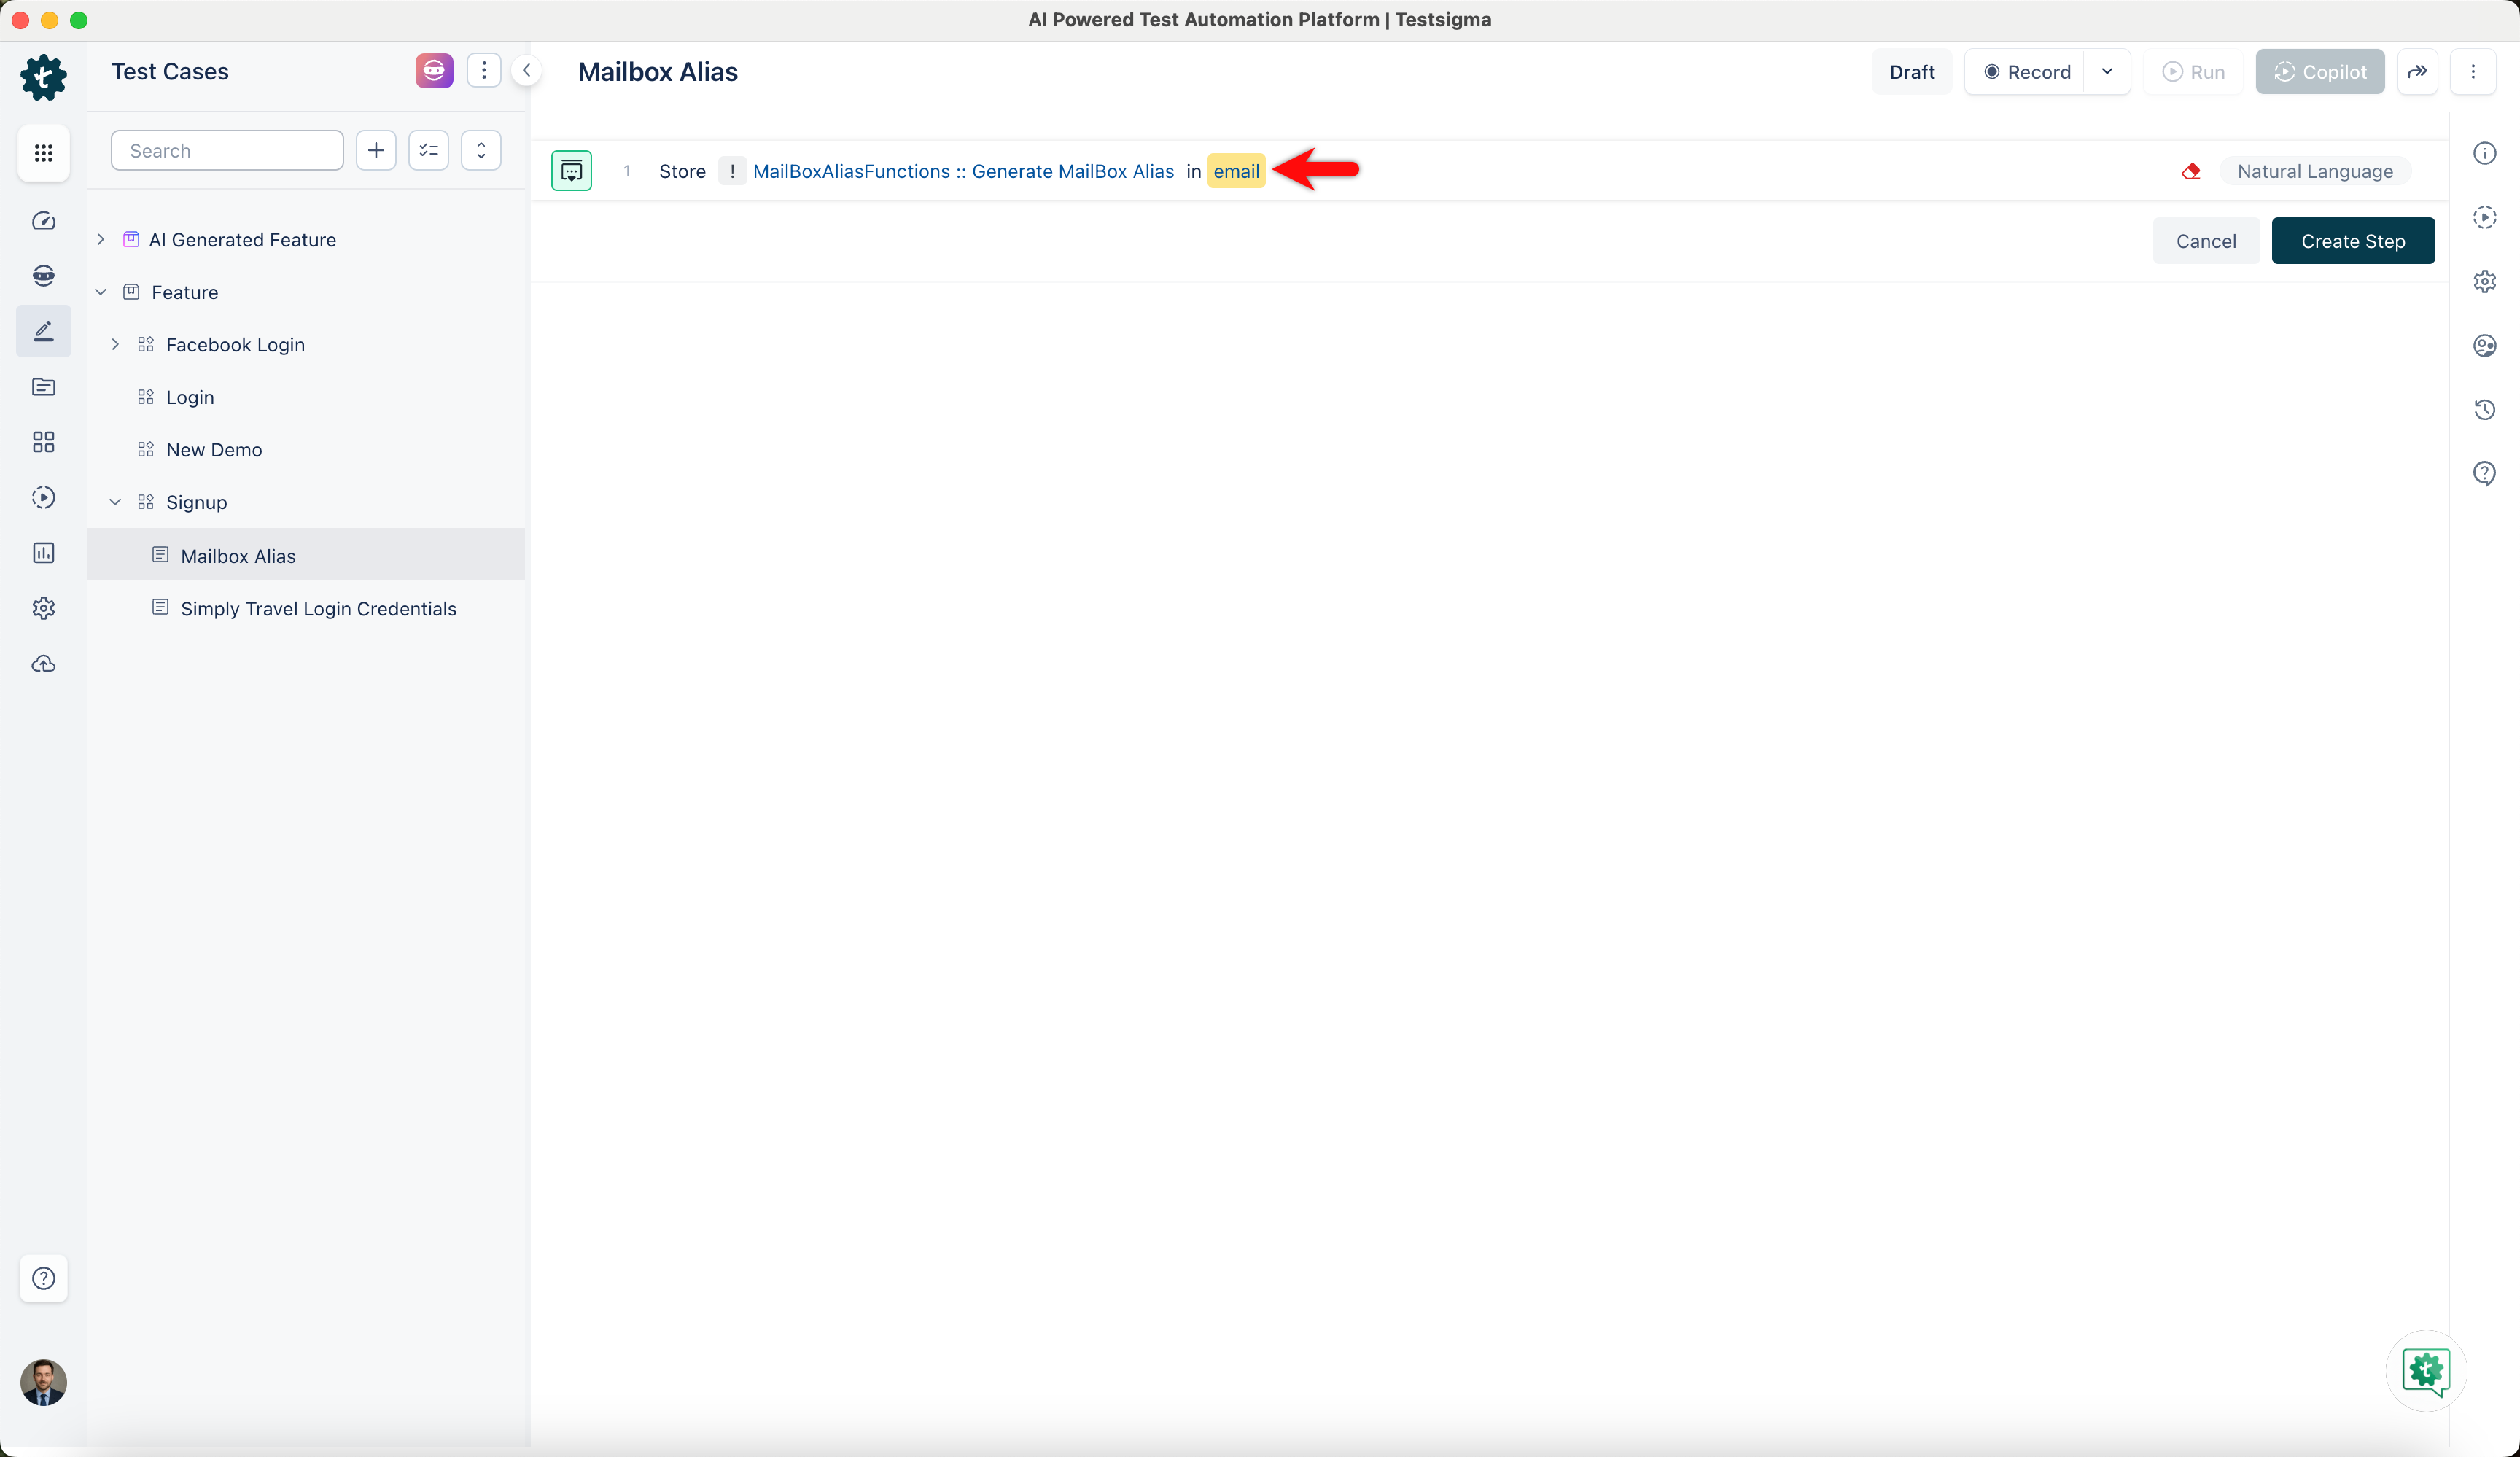
- Create a new step in the Test Case using NLP that adds two placeholders for test data to create a mailbox alias.
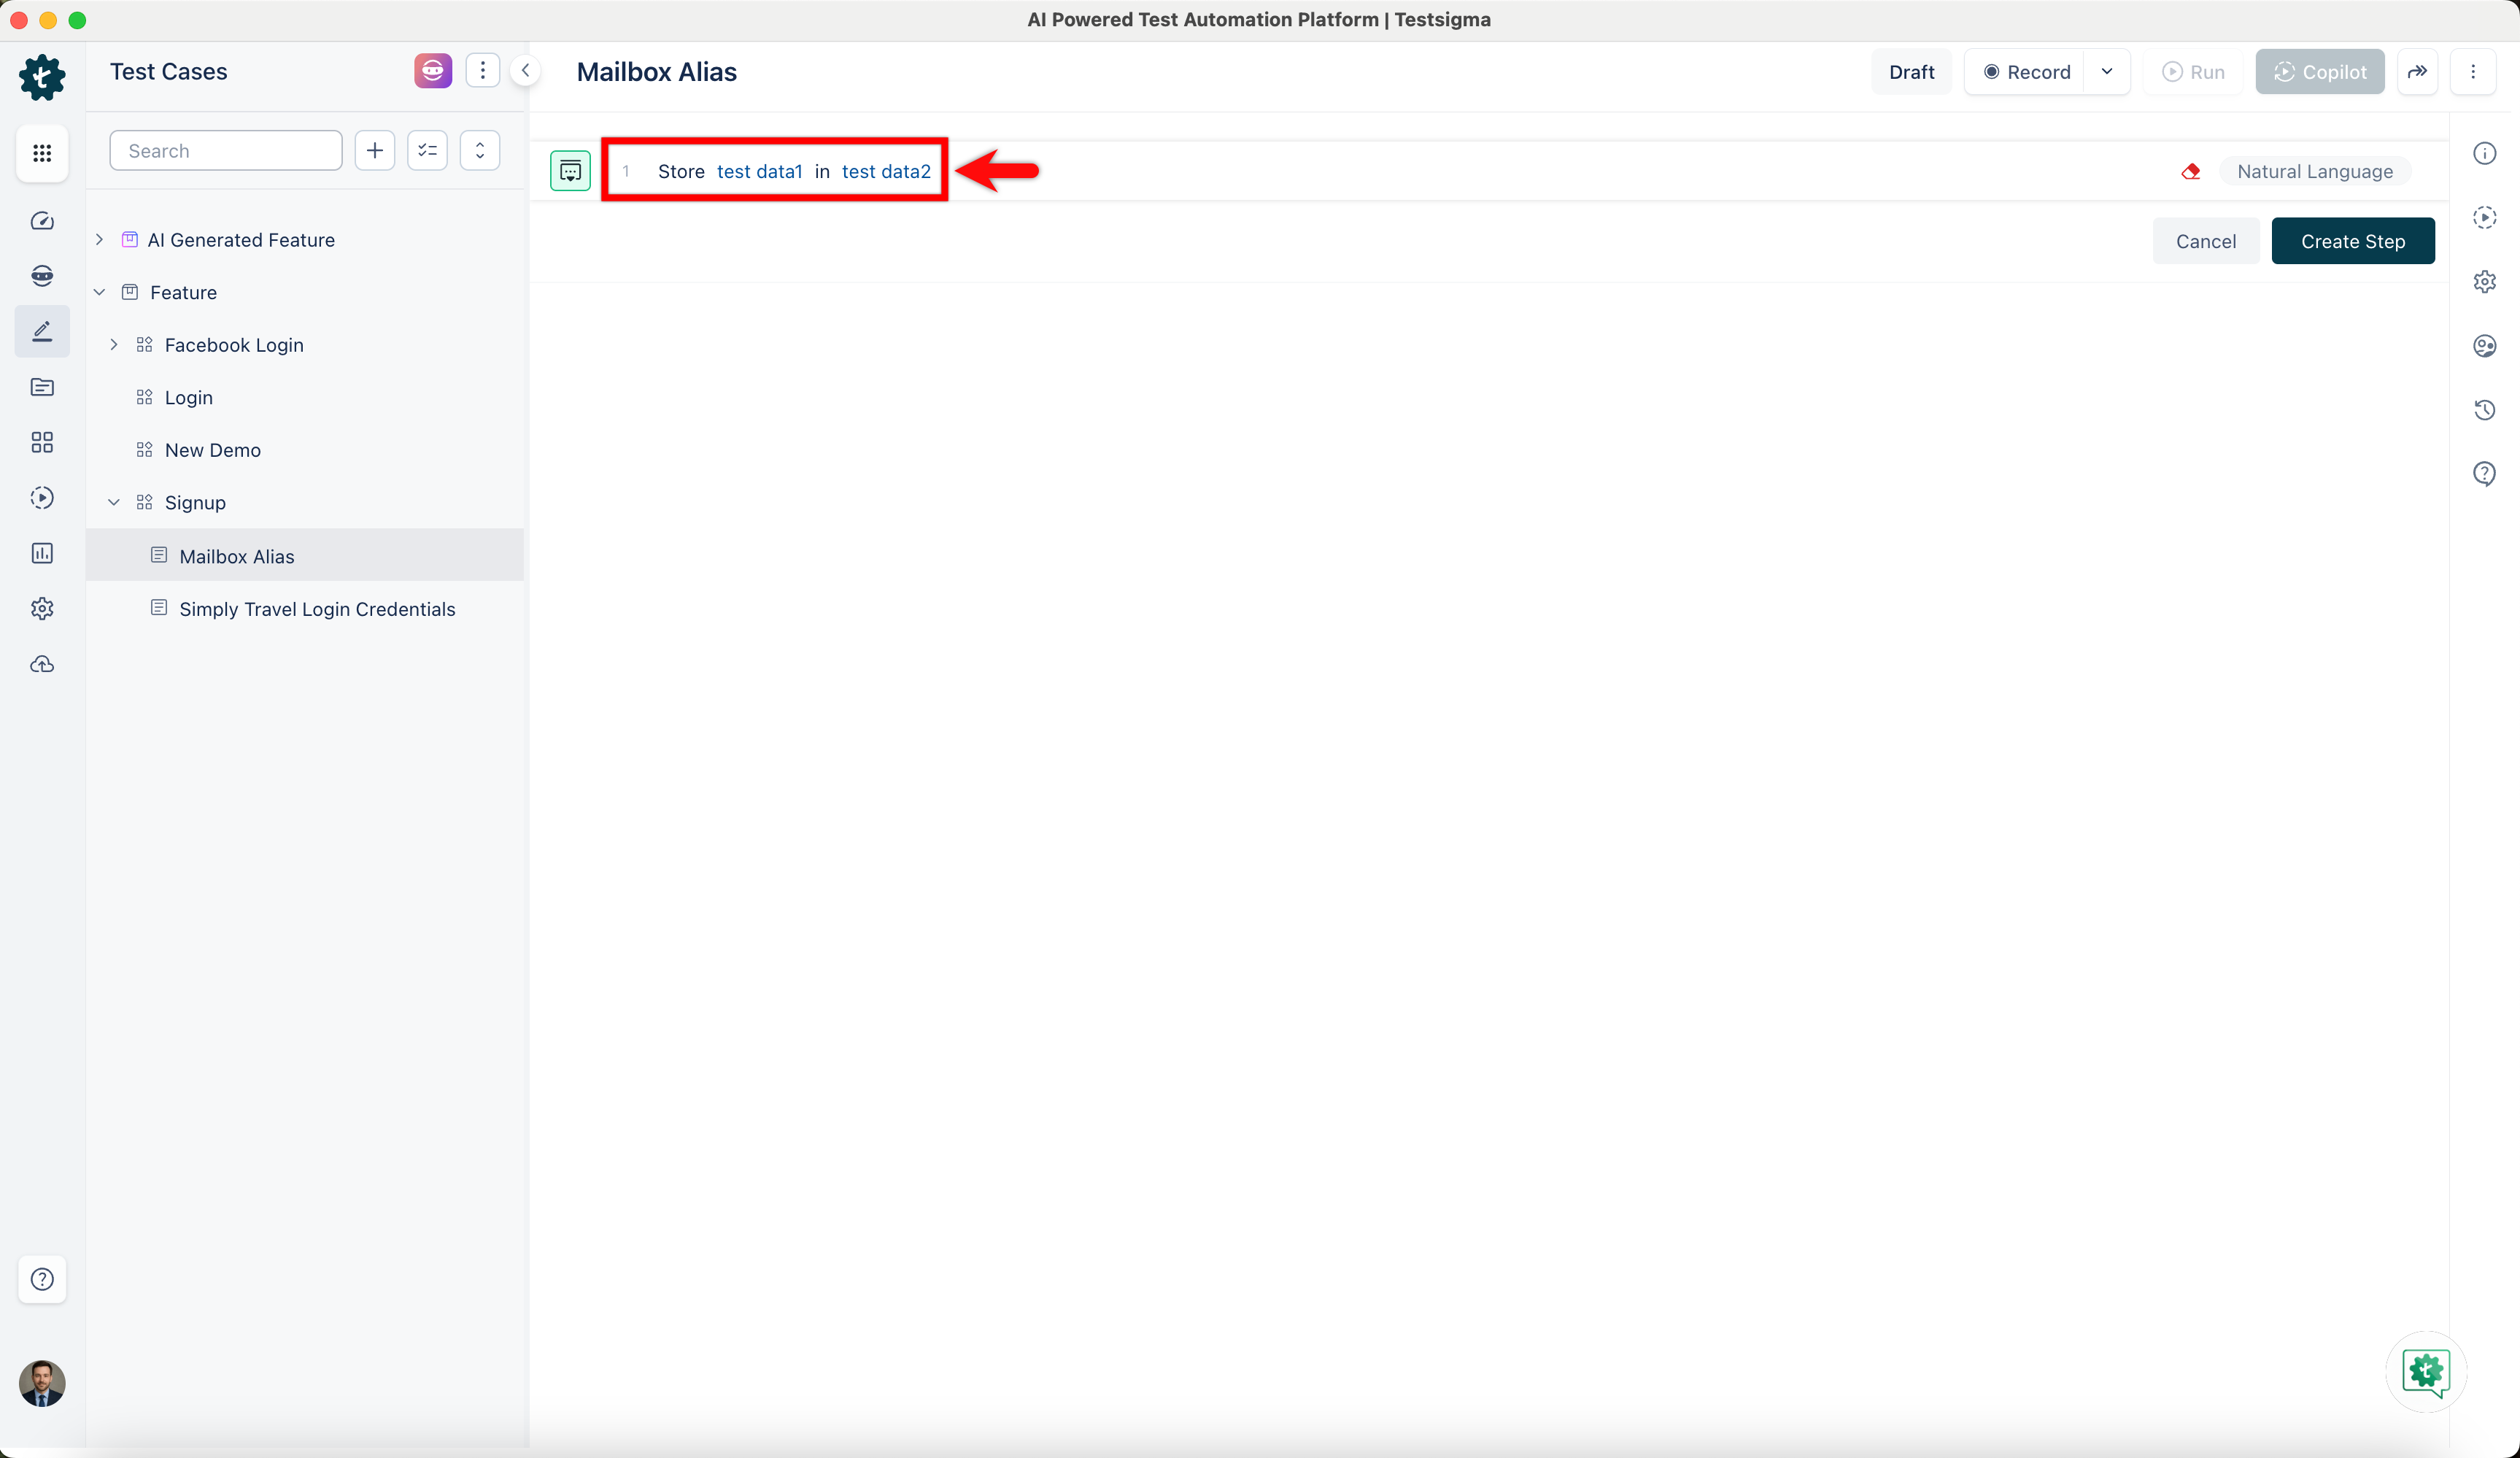
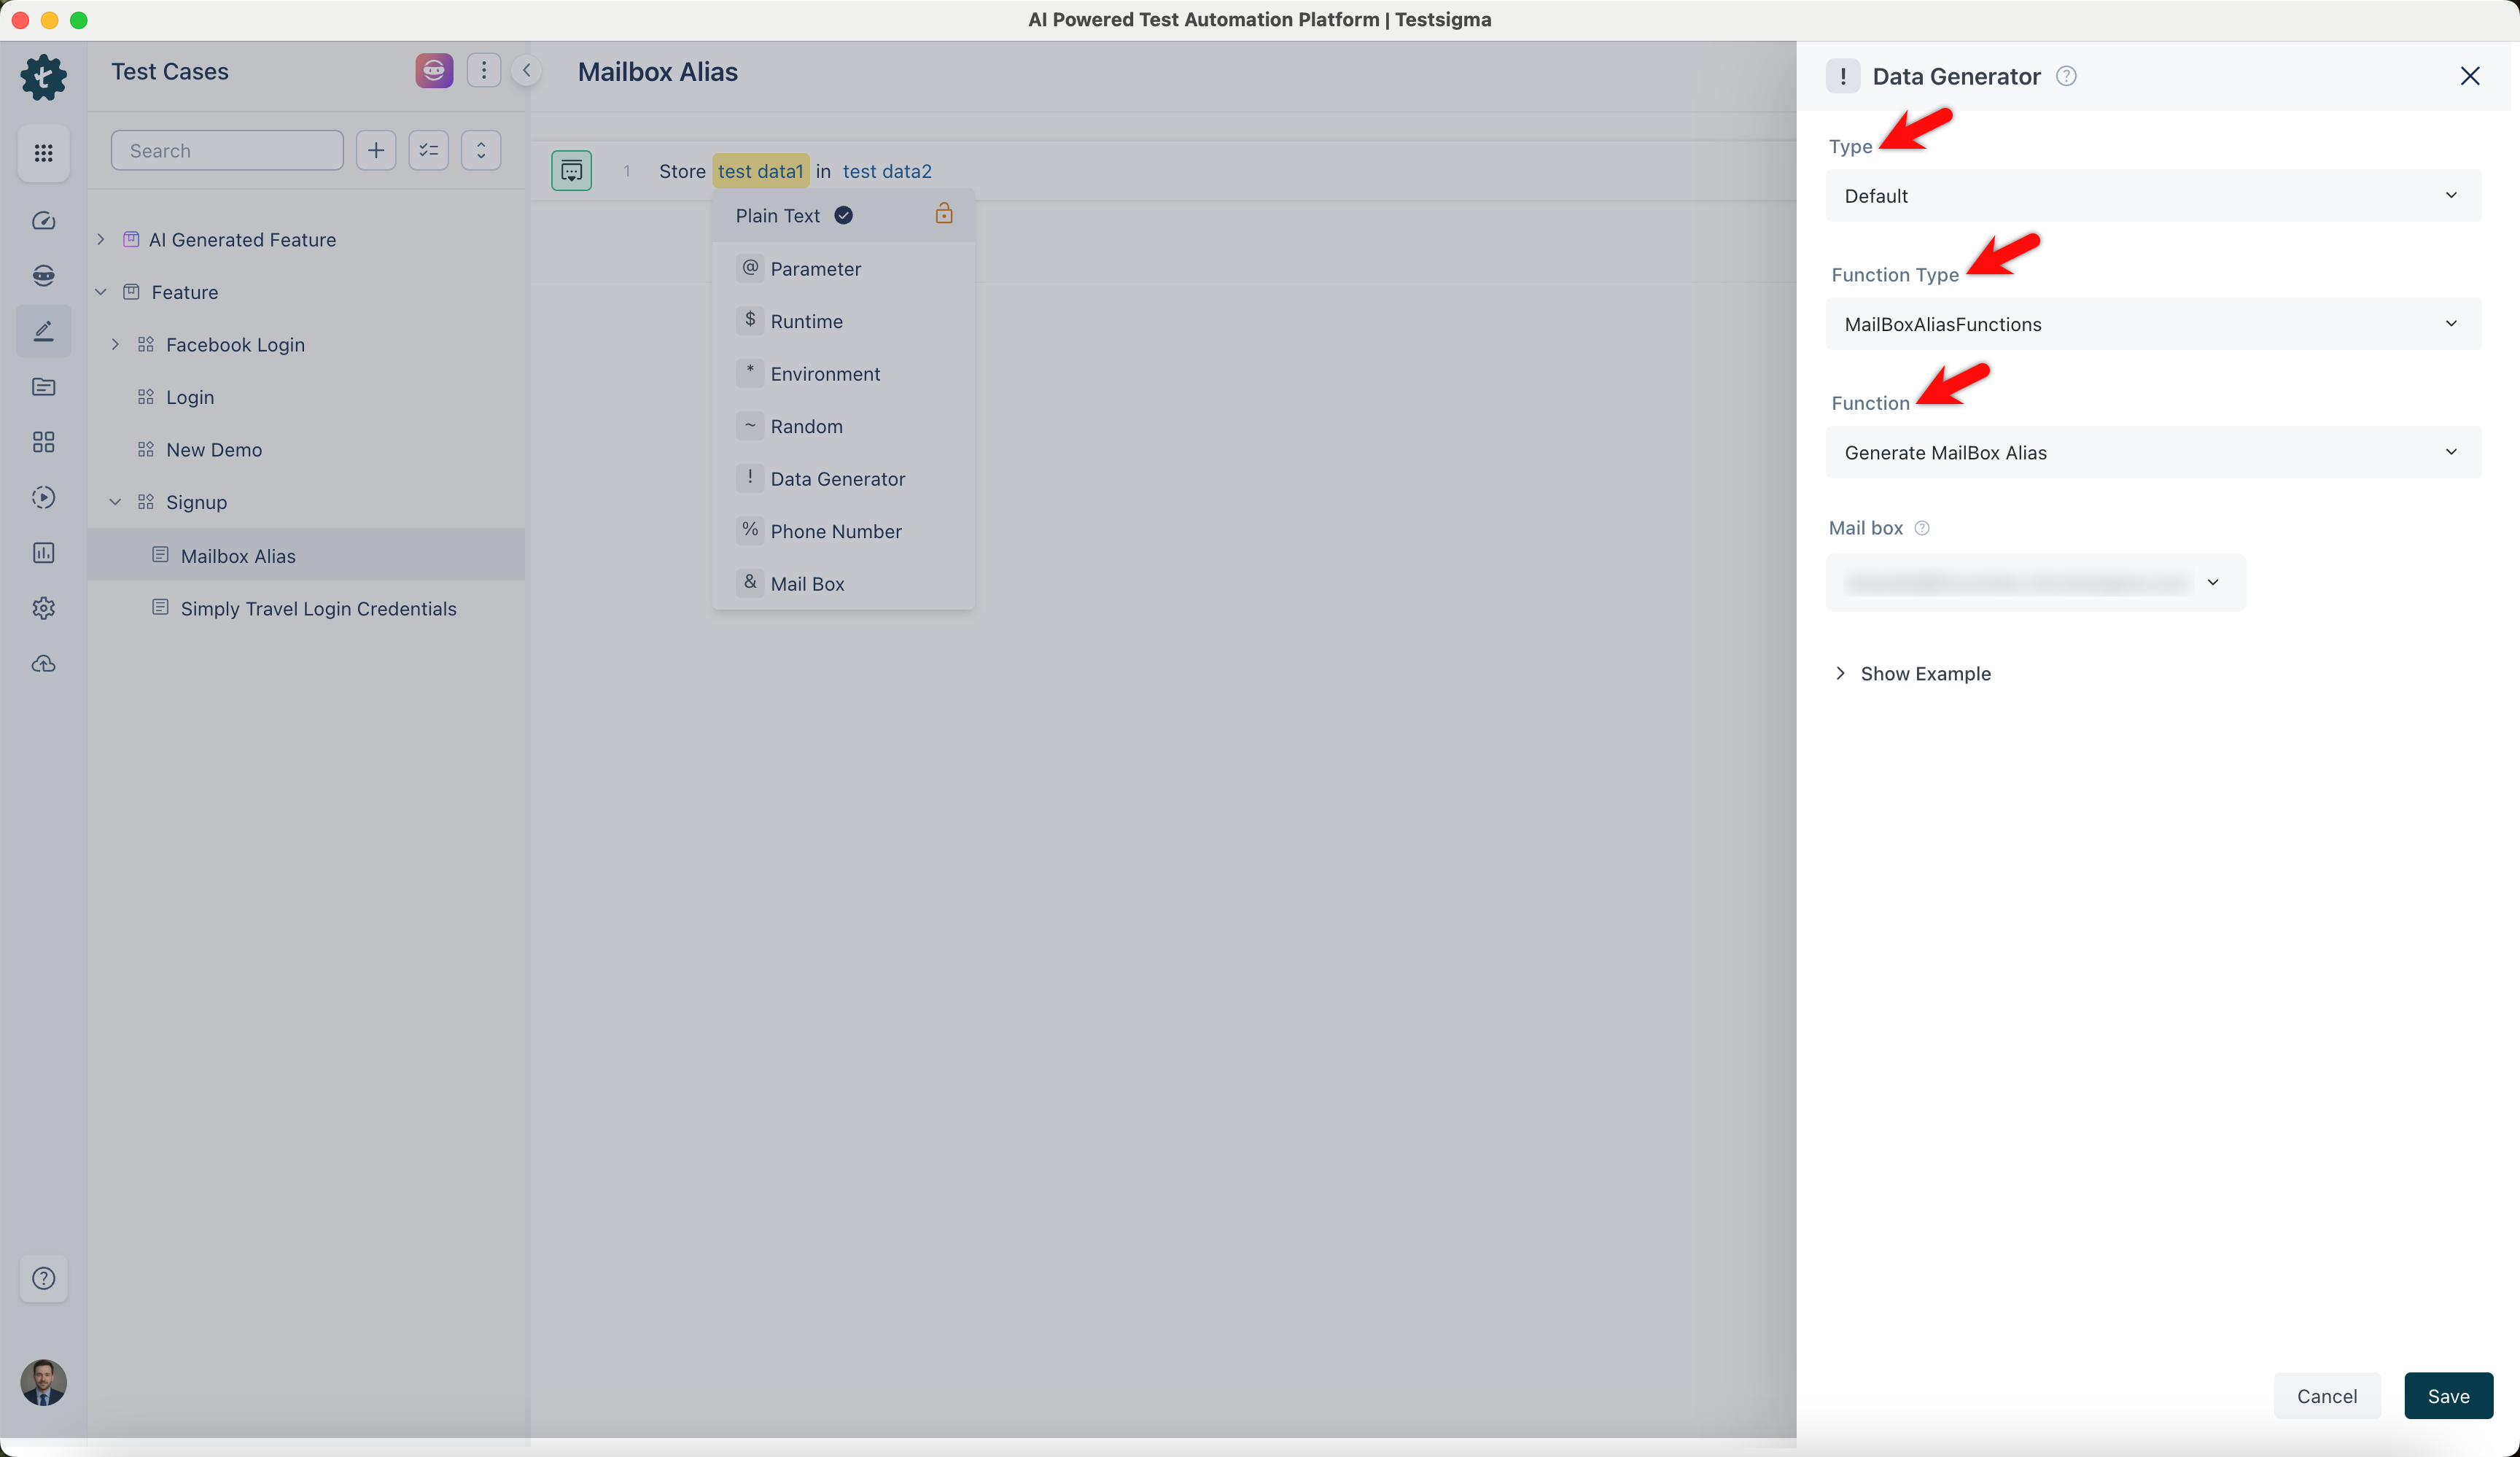
- Click the test data1 placeholder to replace it, and then select the ! Data Generator from the Test Data Types dropdown menu.

- On the right sidebar, select Data Generator type as Default, Function type as MailBoxAliasFunction, and choose the Function as Generate MailBox Alias from the dropdown menu.
- Select Linked Mail Box to create a unique mailbox every time and click Save.
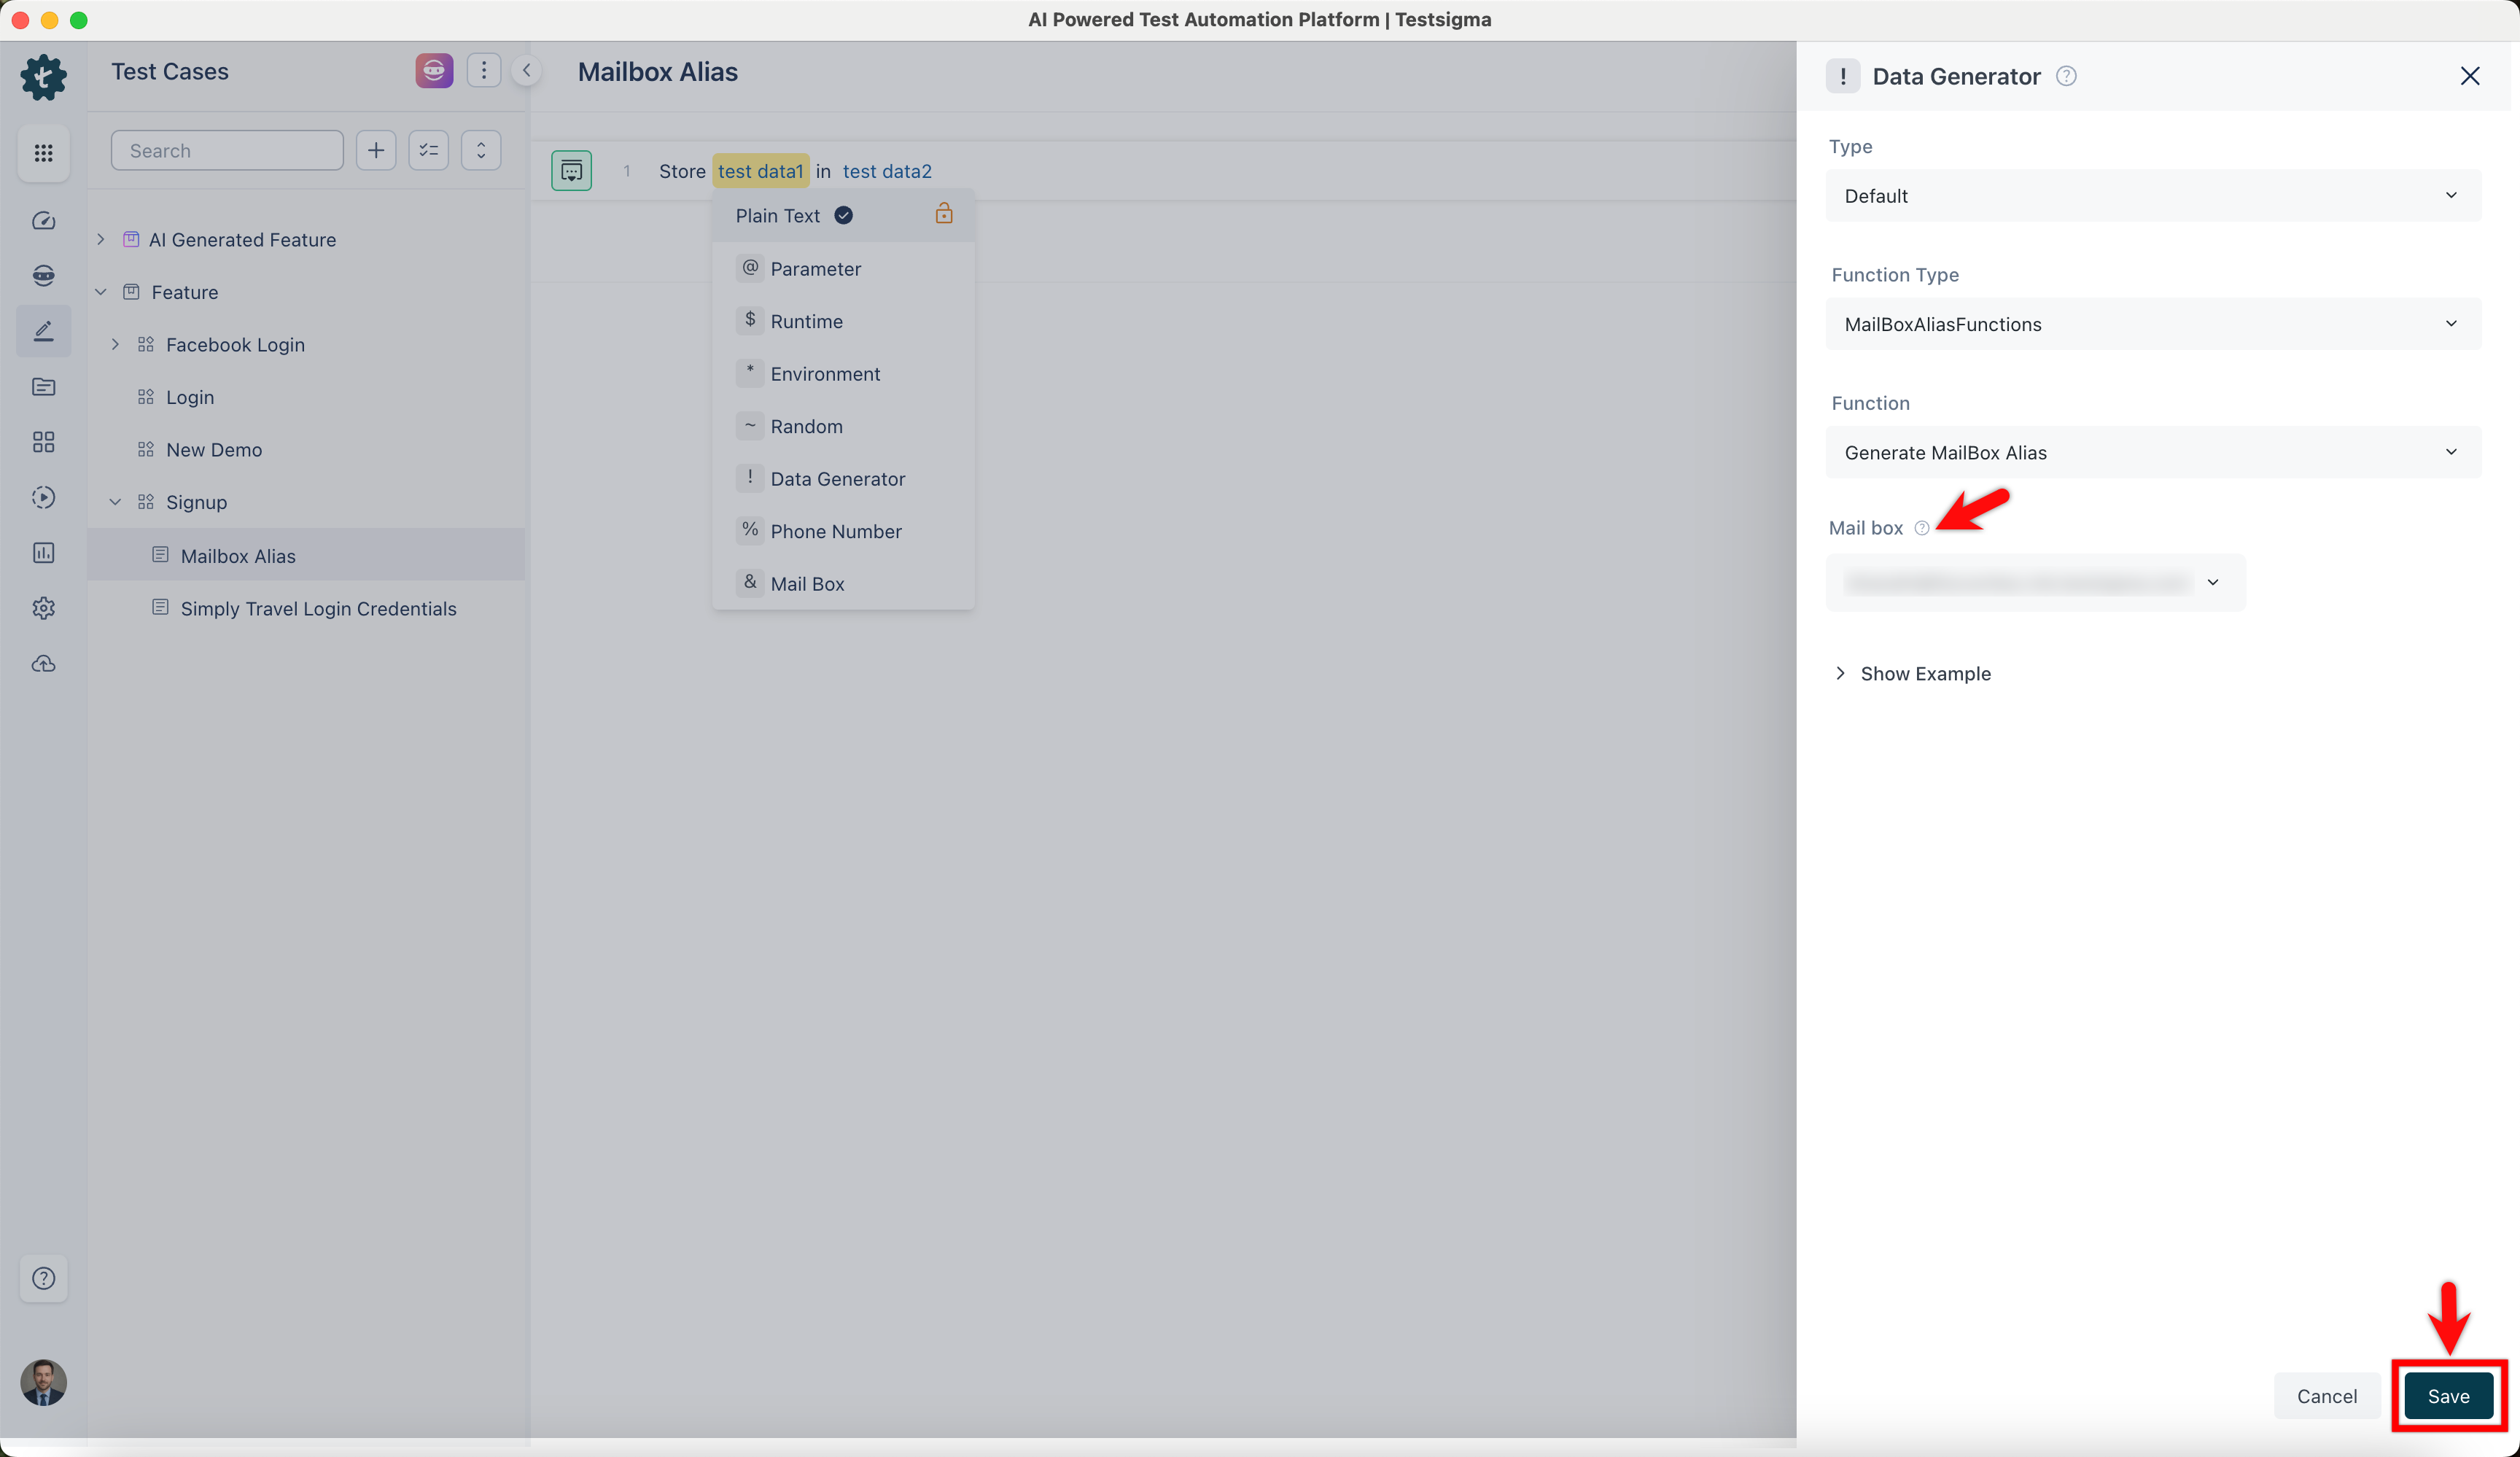
- Substitute specific text for the testdata2 placeholder and click Create Step to save the test step. It stores the mailbox within the text as a runtime variable.
For example, we store the email in a runtime variable named email1. You can use it in the Test Case by selecting $ Runtime from the test data types.
Generate Mail Box Alias for Test Cases Execution
With Testsigma, you can generate new mailbox aliases every time during test case execution, improving efficiency and reusability by making it easy to use in many test steps or test cases. If you have only a few email addresses but need to test functions related to emails for various new accounts, Testsigma can help.
| Data Generators | Actions | Inputs |
|---|---|---|
| ! MailBoxAliasFunctions :: getEmailContent | This will get the entire email's content into a variable. | |
| ! MailBoxAliasFunctions :: getEmailSubject | This will get the entire email's subject into a variable. | |
| ! MailBoxAliasFunctions :: getOTP | This will fetch the OTP sent to the email box into a variable. | |
| ! MailBoxAliasFunctions :: urlWithText | This will fetch the URL that contains some required text. | |
| ! MailBoxAliasFunctions :: urlWhichContains | This will fetch the URL that contains some required parameters. | |
| ! MailBoxAliasFunctions :: urlMatchingRegex | This will fetch the URL that contains a URL matching the required regex. |
Below is a screenshot showing a test case generating a mailbox alias and getting content from the email.
Sample Test Case for 2FA using Mailbox
Two-factor authentication provides additional protection for your application. With Testsigma, you can easily set up Mailbox, retrieve OTP using mailbox functions, and perform tests securely. This article discusses testing 2FA for MailBox.
Prerequisites
Before you begin, ensure that:
- You have referred to the documentation on creating test cases.
- You have referred to the documentation on creating mailbox &
- You have referred to the documentation on creating data generator.
- Also, you need to have a dedicated Mailbox for your account. Contact support@testsigma.com for more information.
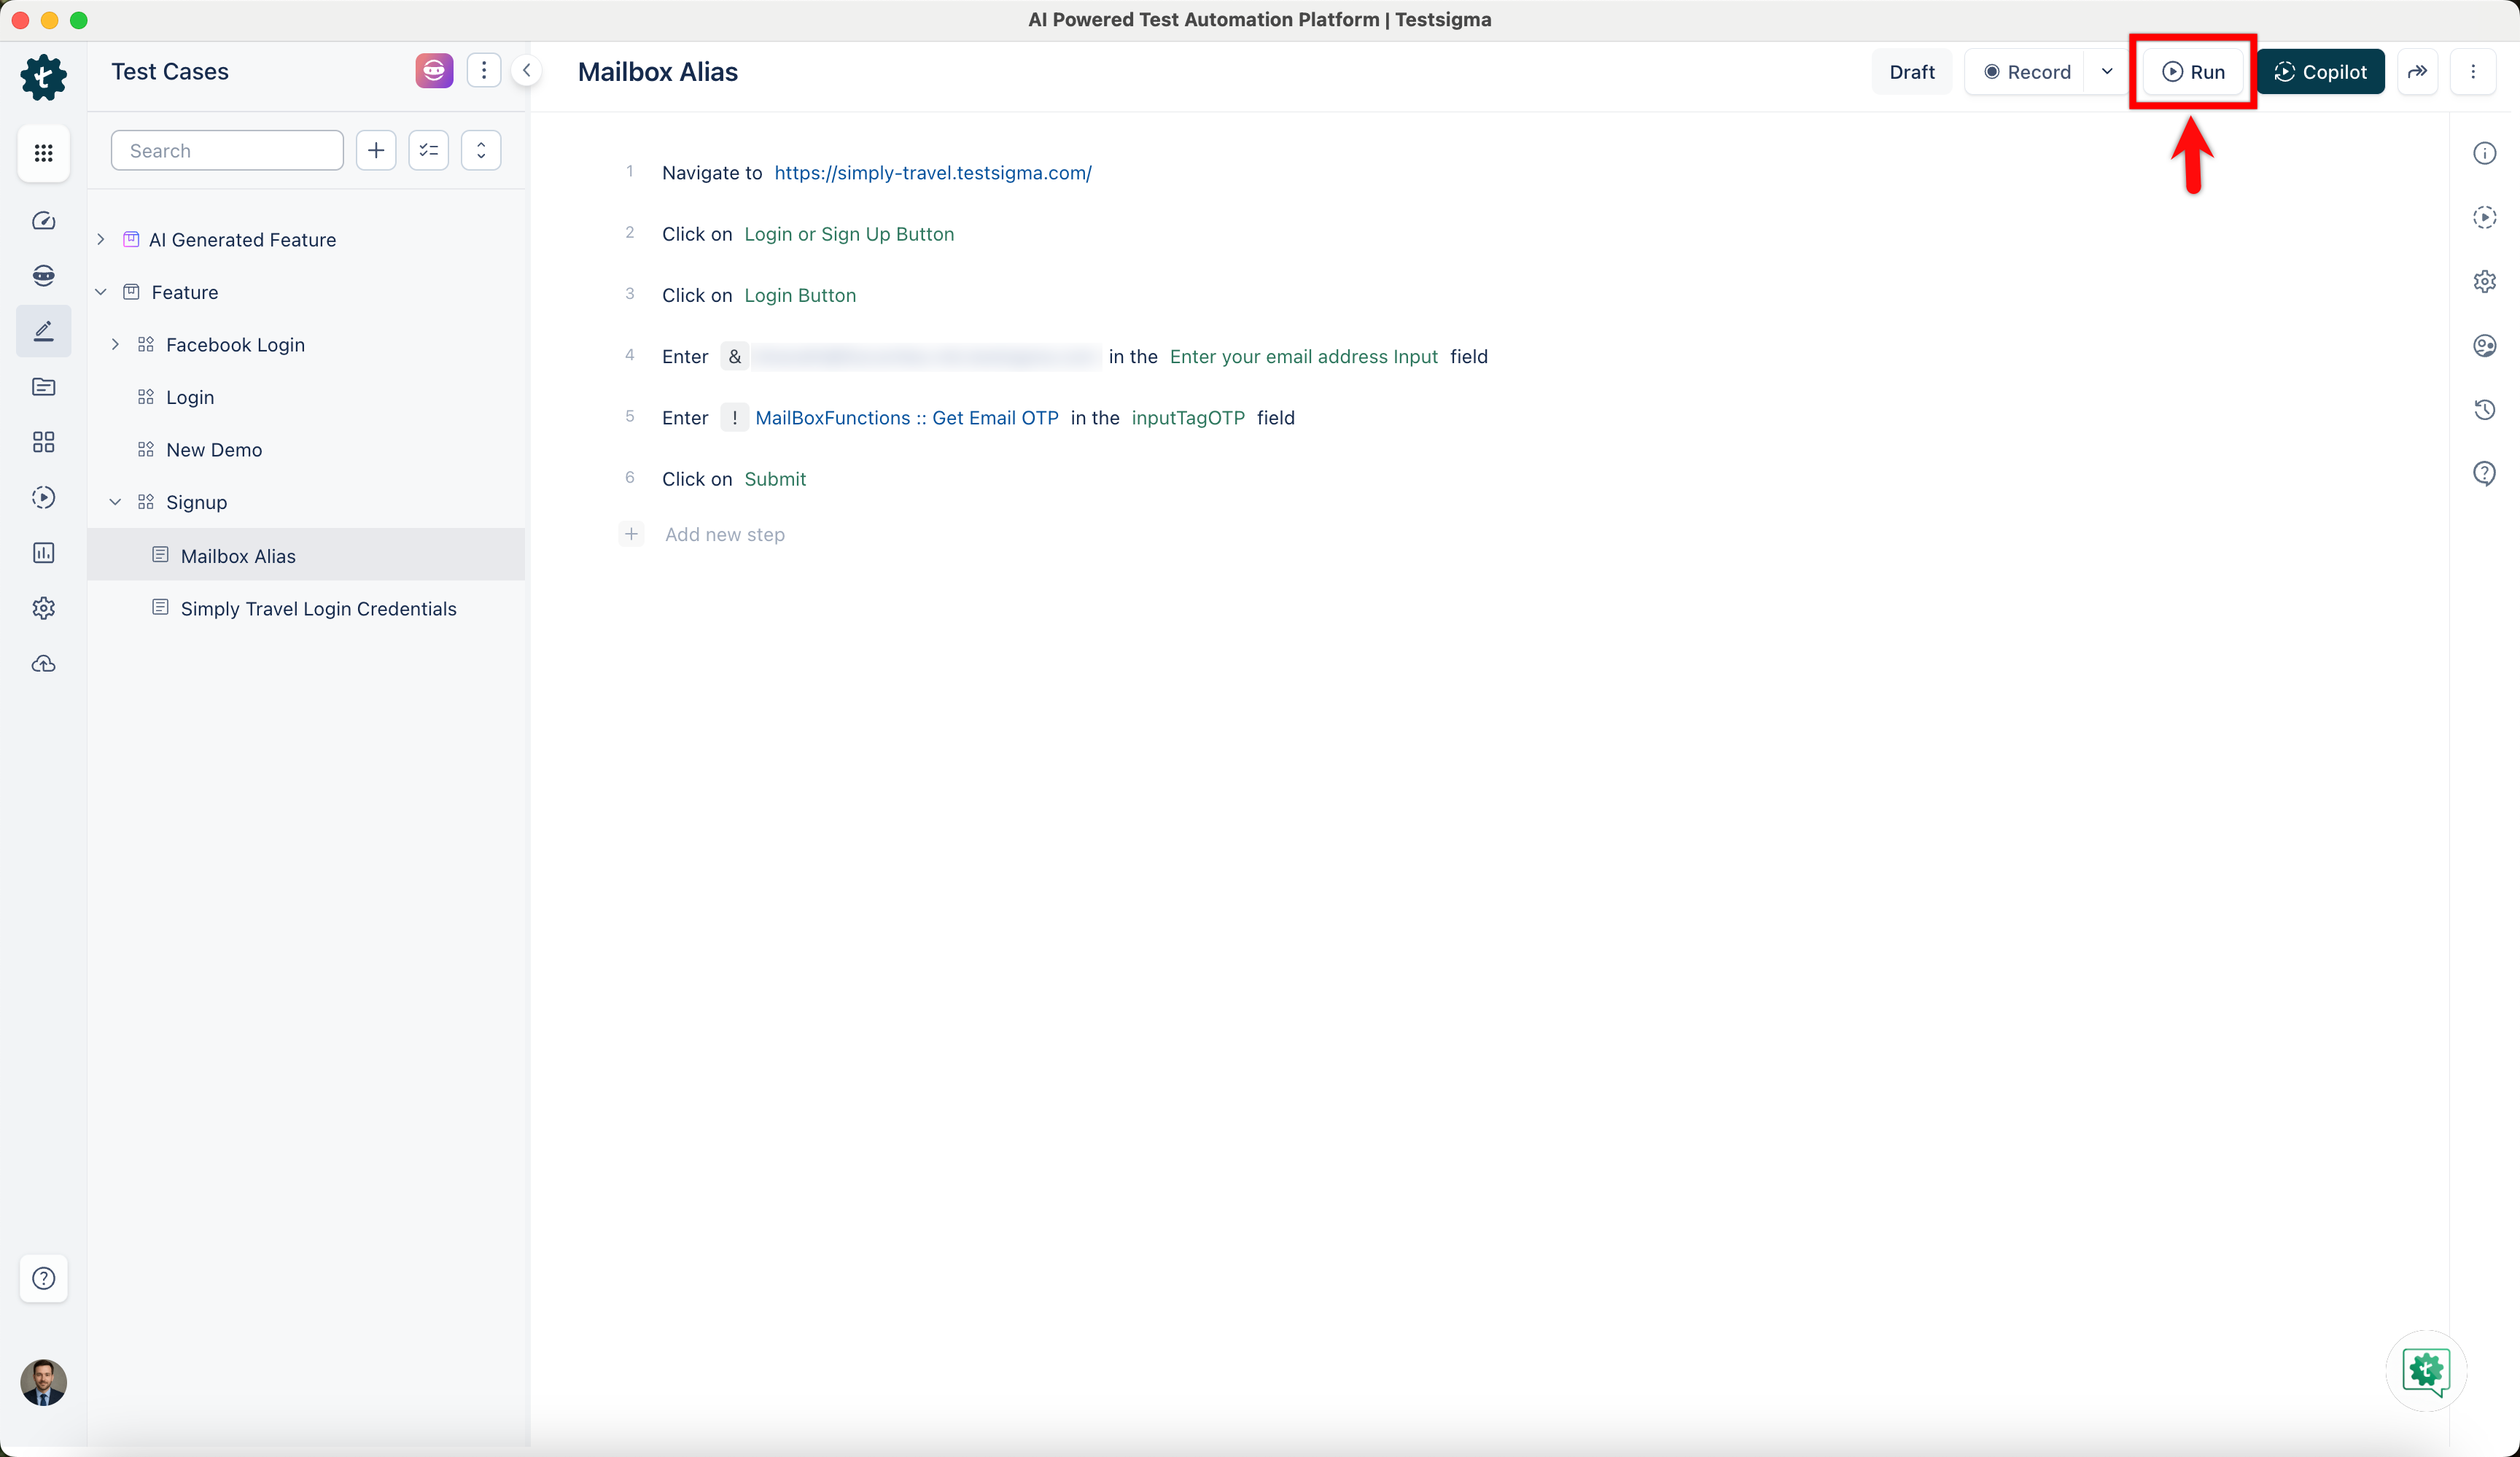
Creating Test Case for 2FA Using MailBox
-
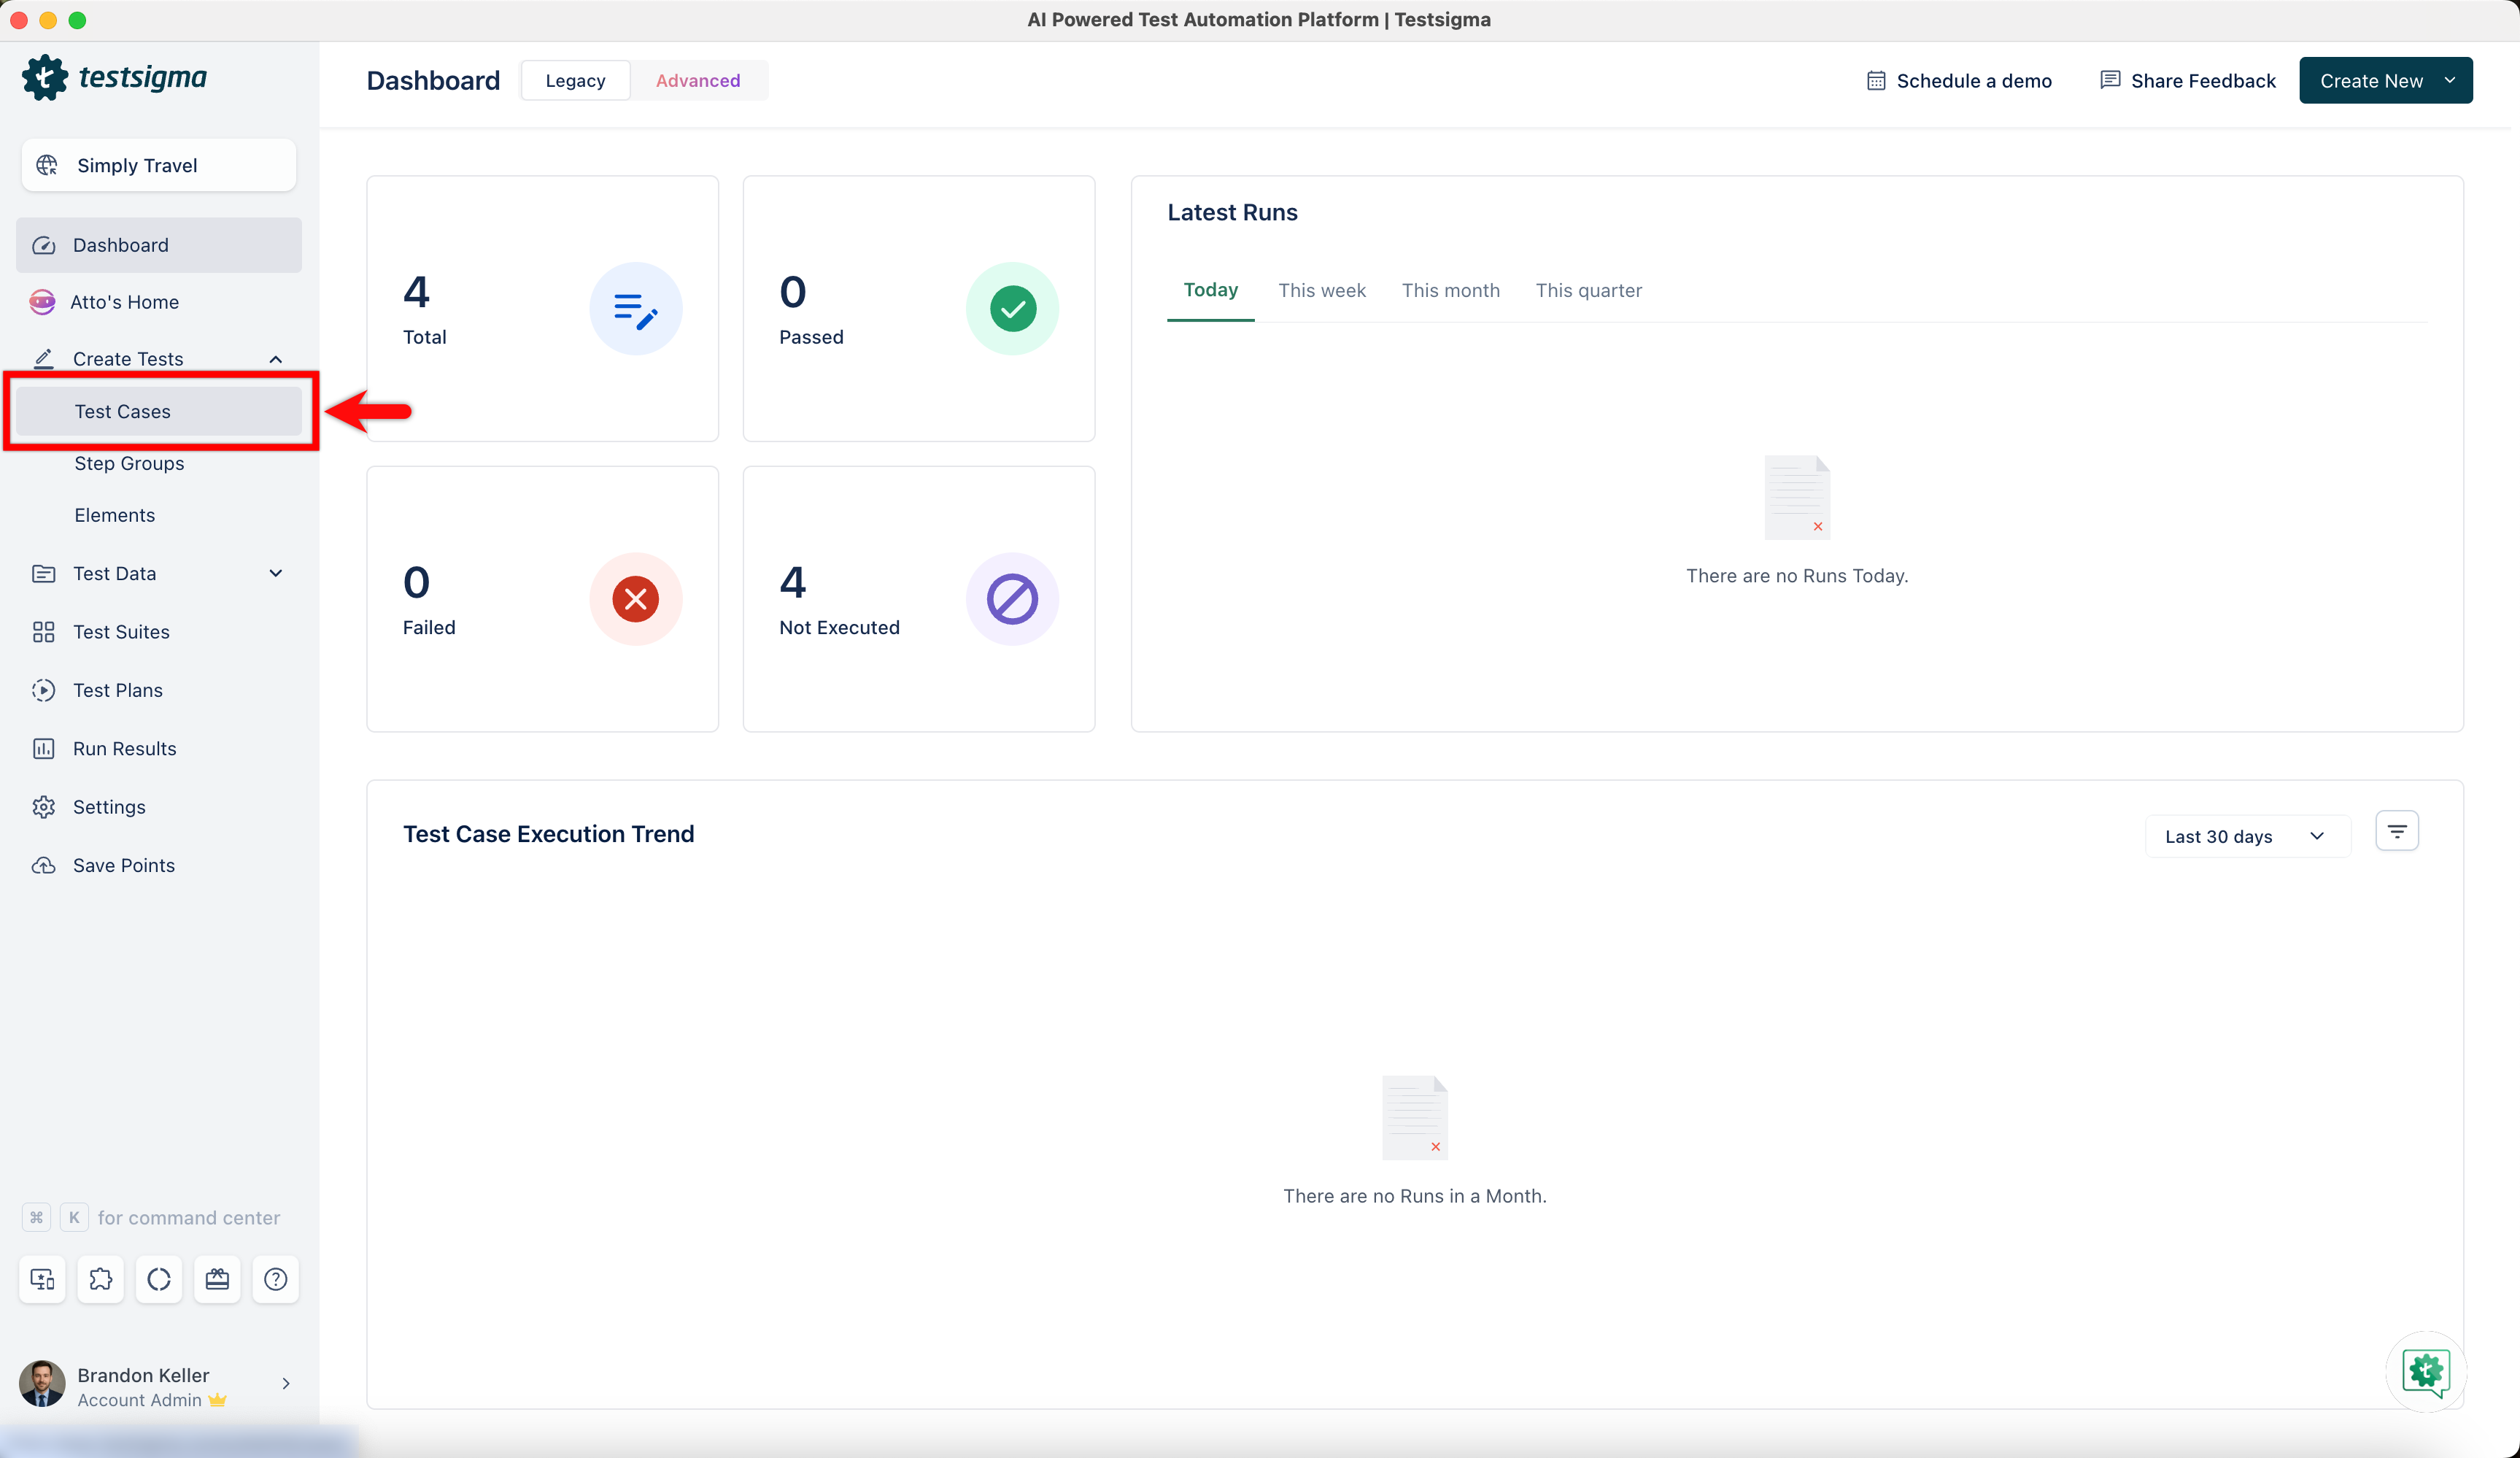
Navigate to Create Tests > Test Cases, and click on Create Test Case.
- On the Test Case details page, create test steps manually or using the recorder.
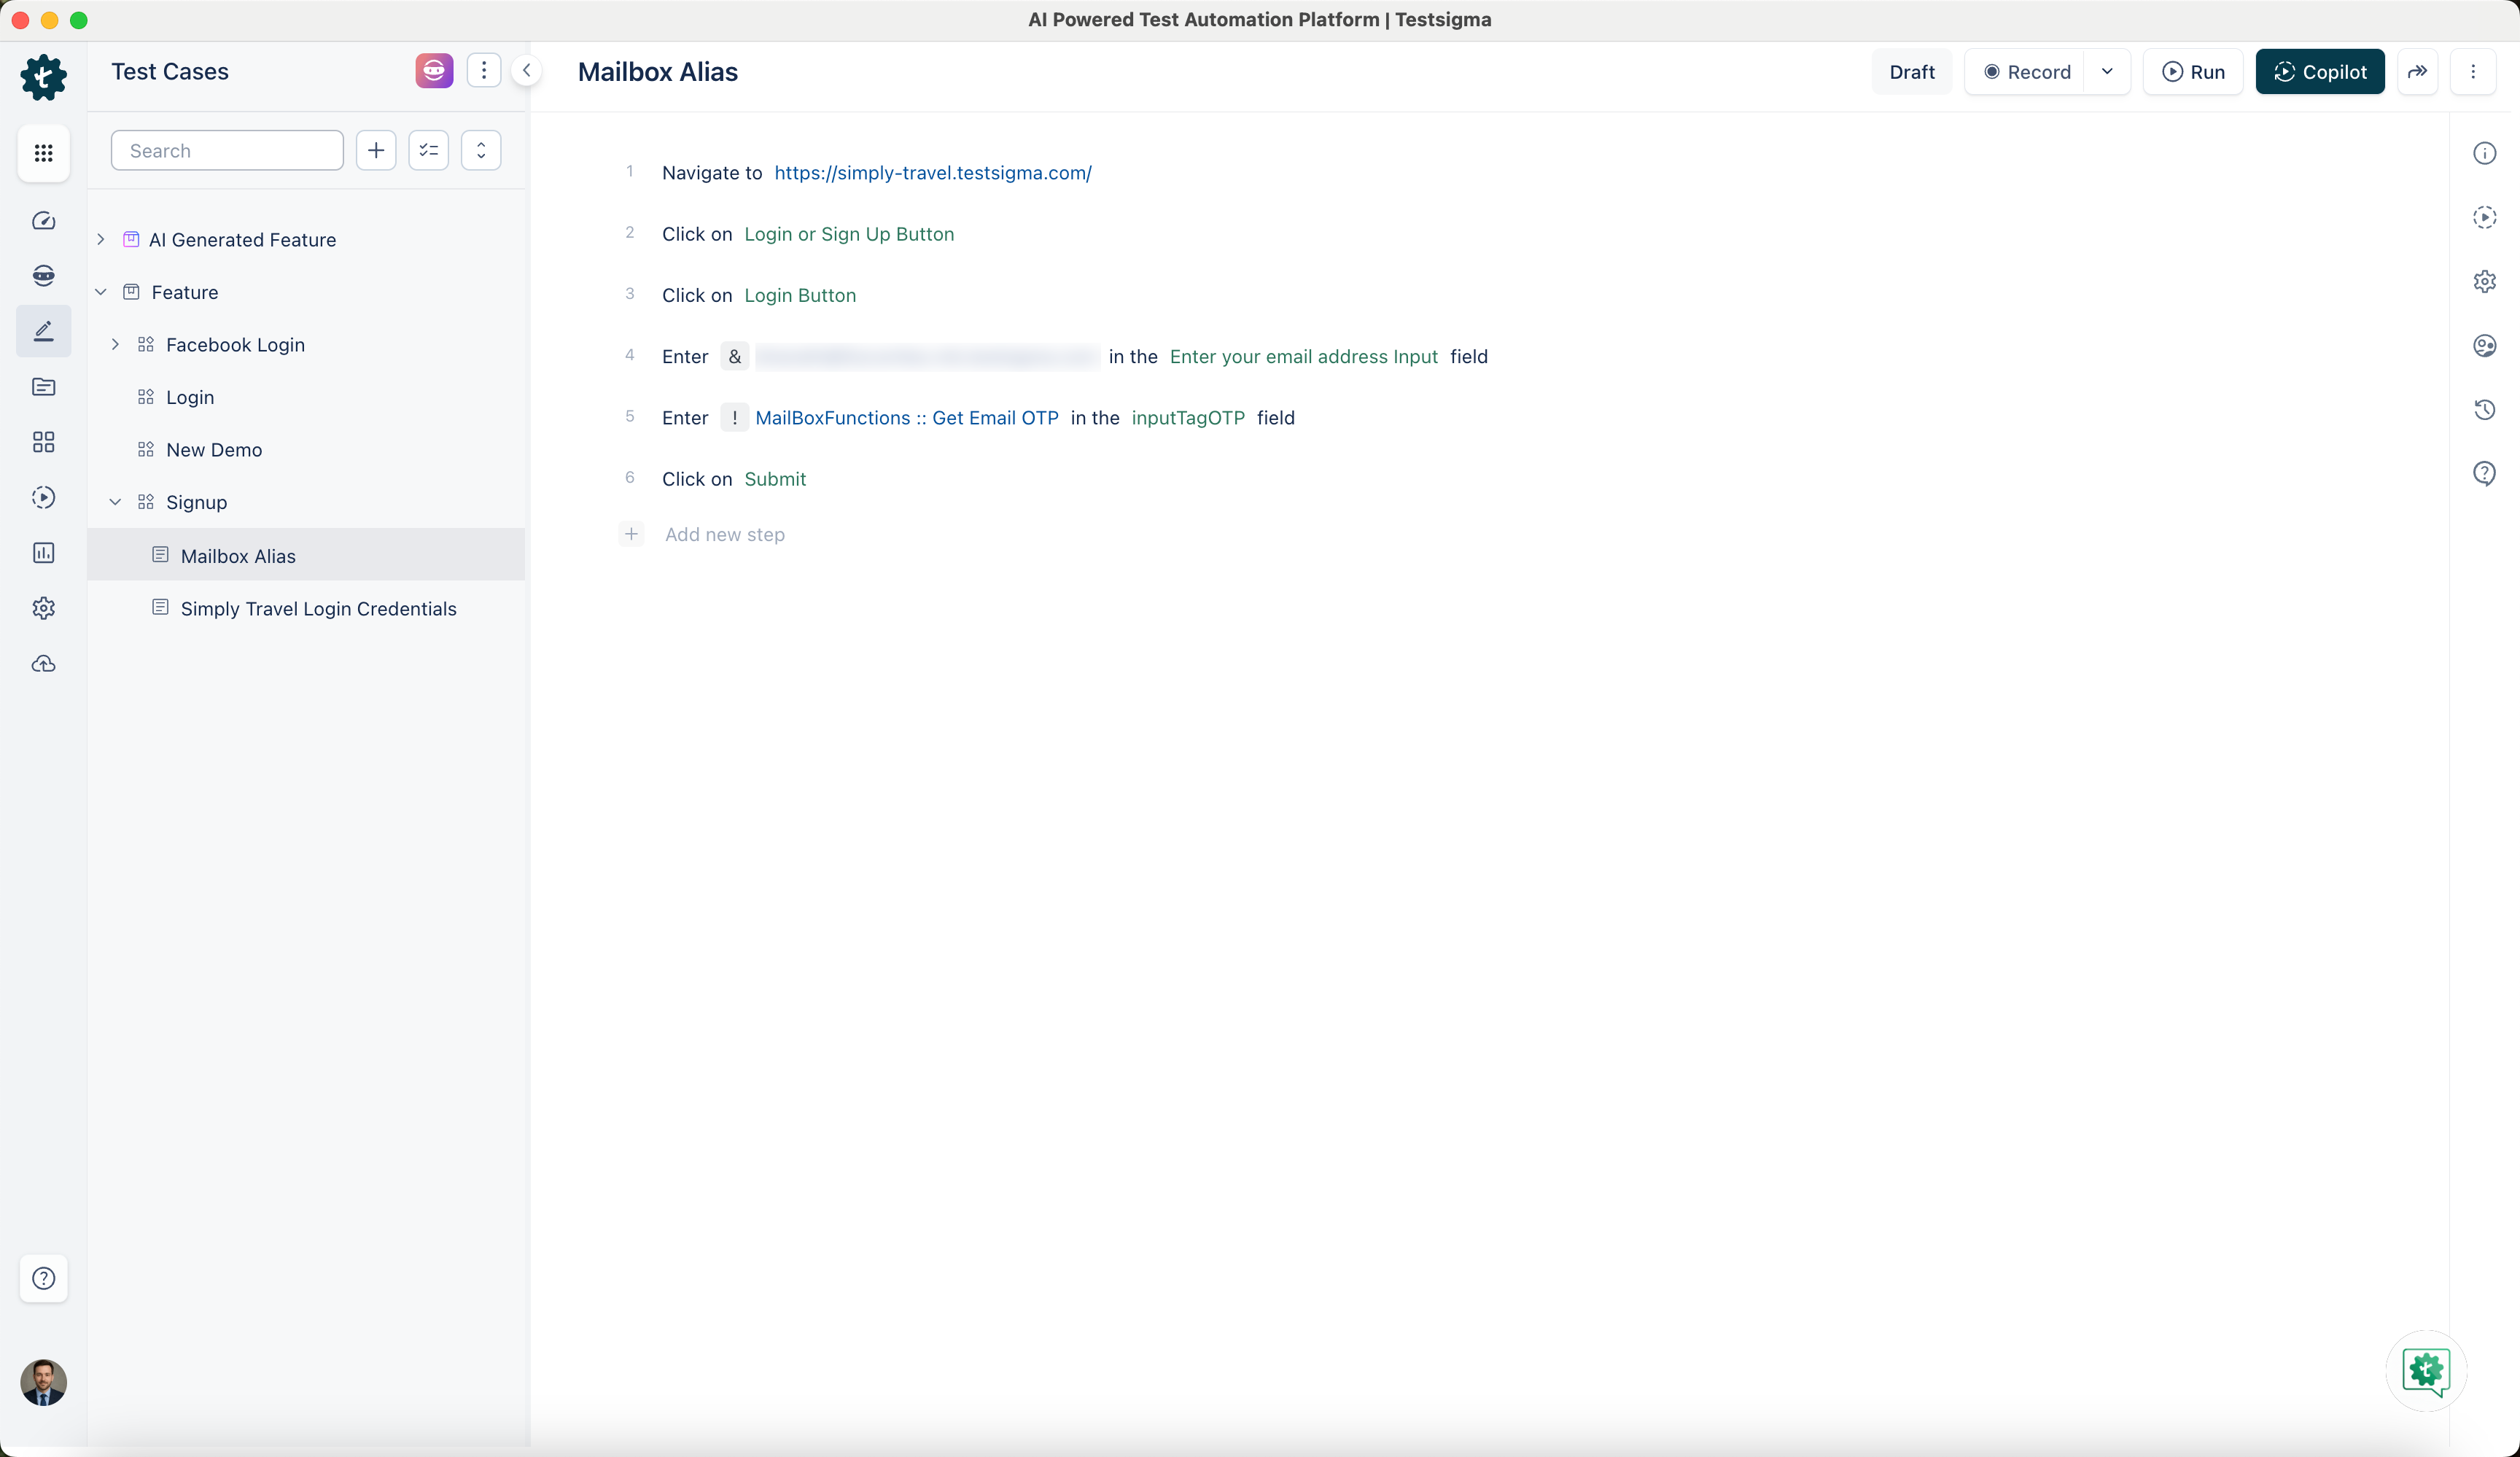
- For Step 4, we use & Mailbox and enter the email linked to the account in the email input field.
- In Step 5, we click on the ! Data Generator. This will open ! Data Generator overlay.
- On the ! Data Generator overlay, select Type, Function Type, Function, Enter Regex, Runtime Variable, Timeout and click on Save. Here, we add regex [0 - 9]+, which extracts the first encountered series of numbers. The extracted data, which is OTP, will be stored in the runtime variable. For more information on examples of regex, refer to https://regex101.com/.
- This will help fetch OTP and enter it in the input element.
- Click on Run to execute the test case.
Setup the Email Forwarding for Automation Mailbox
In some cases, app restrictions will prevent the delivery of OTPs to the Testsigma Mailbox. In this case, you can use the Testsigma SMS Forwarder App, which forwards messages to a designated mailbox and allows you to retrieve OTPs conveniently.
Prerequisites
Before you begin, ensure that:
- You have the Testsigma SMS Forwarder application.
- You have referred to the documentation on creating mailbox &
- You have referred to the documentation on creating data generator.
- Also, you need to have a dedicated Mailbox for your account. Contact support@testsigma.com for more information.
Setting Up Forwarding Rules (Gmail)
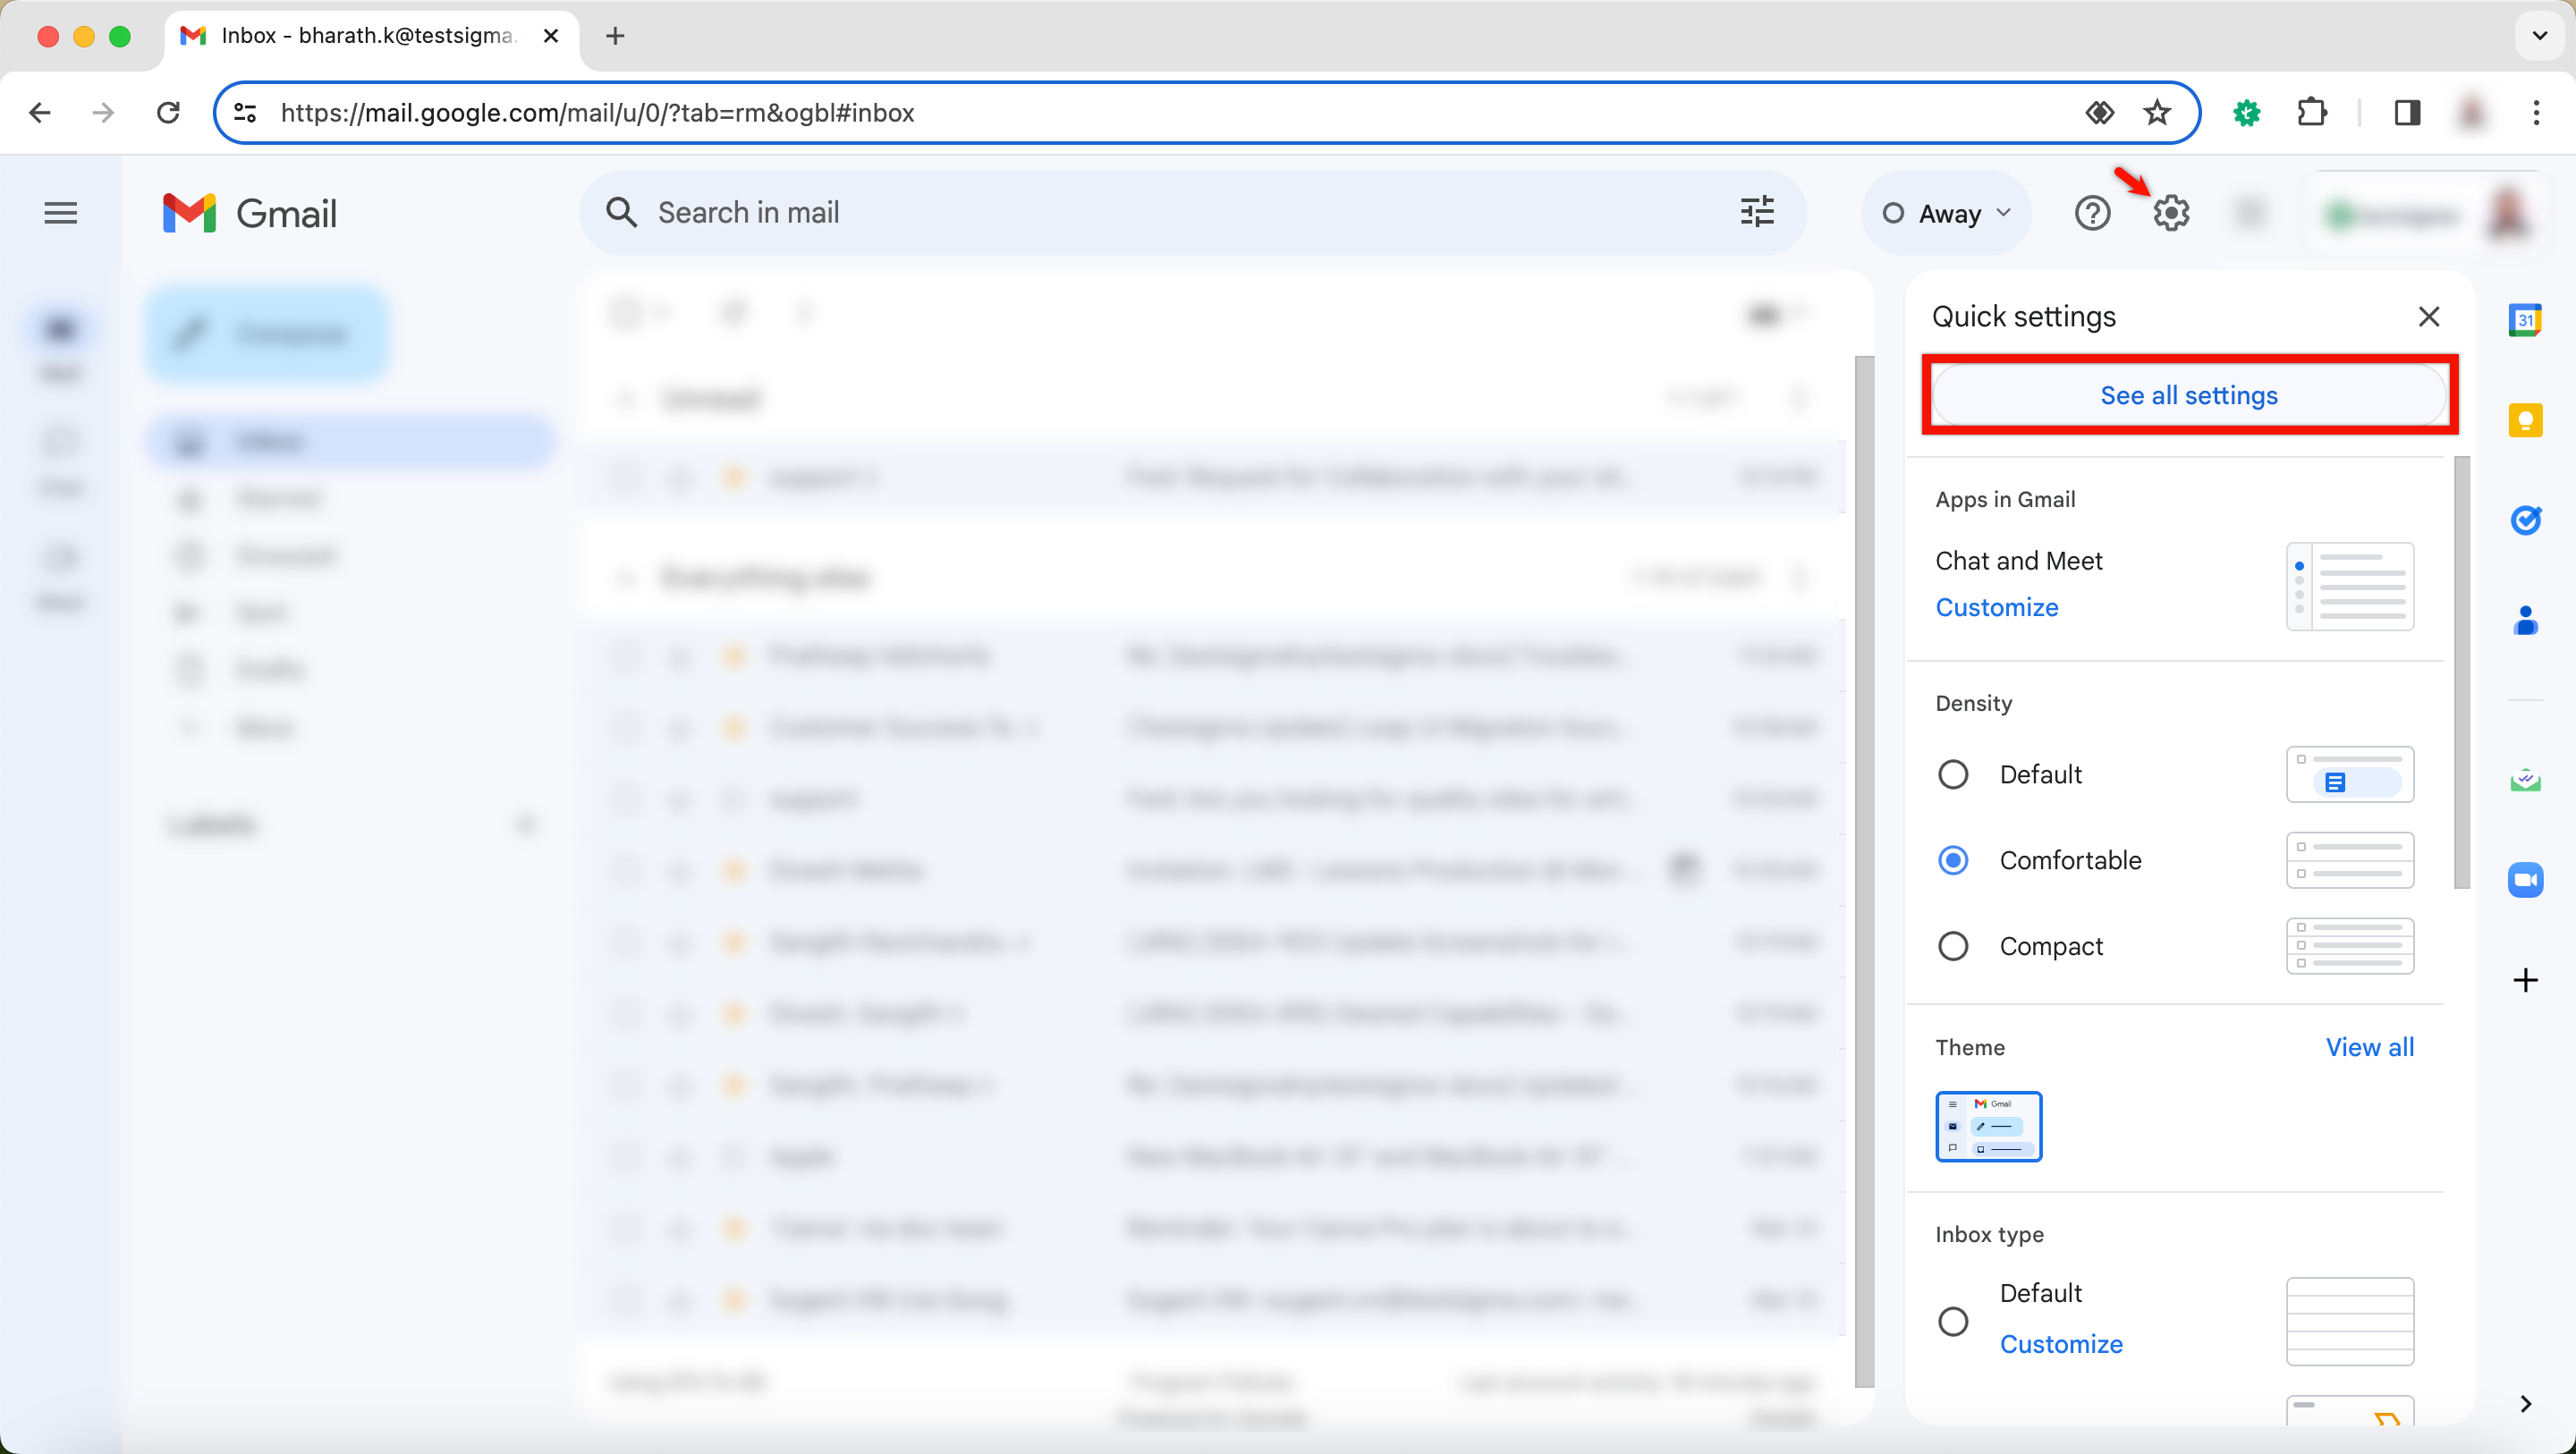
Access Gmail Settings
- Open your Gmail account.
- Click on the gear icon in the upper-right corner.
- Select See all settings.
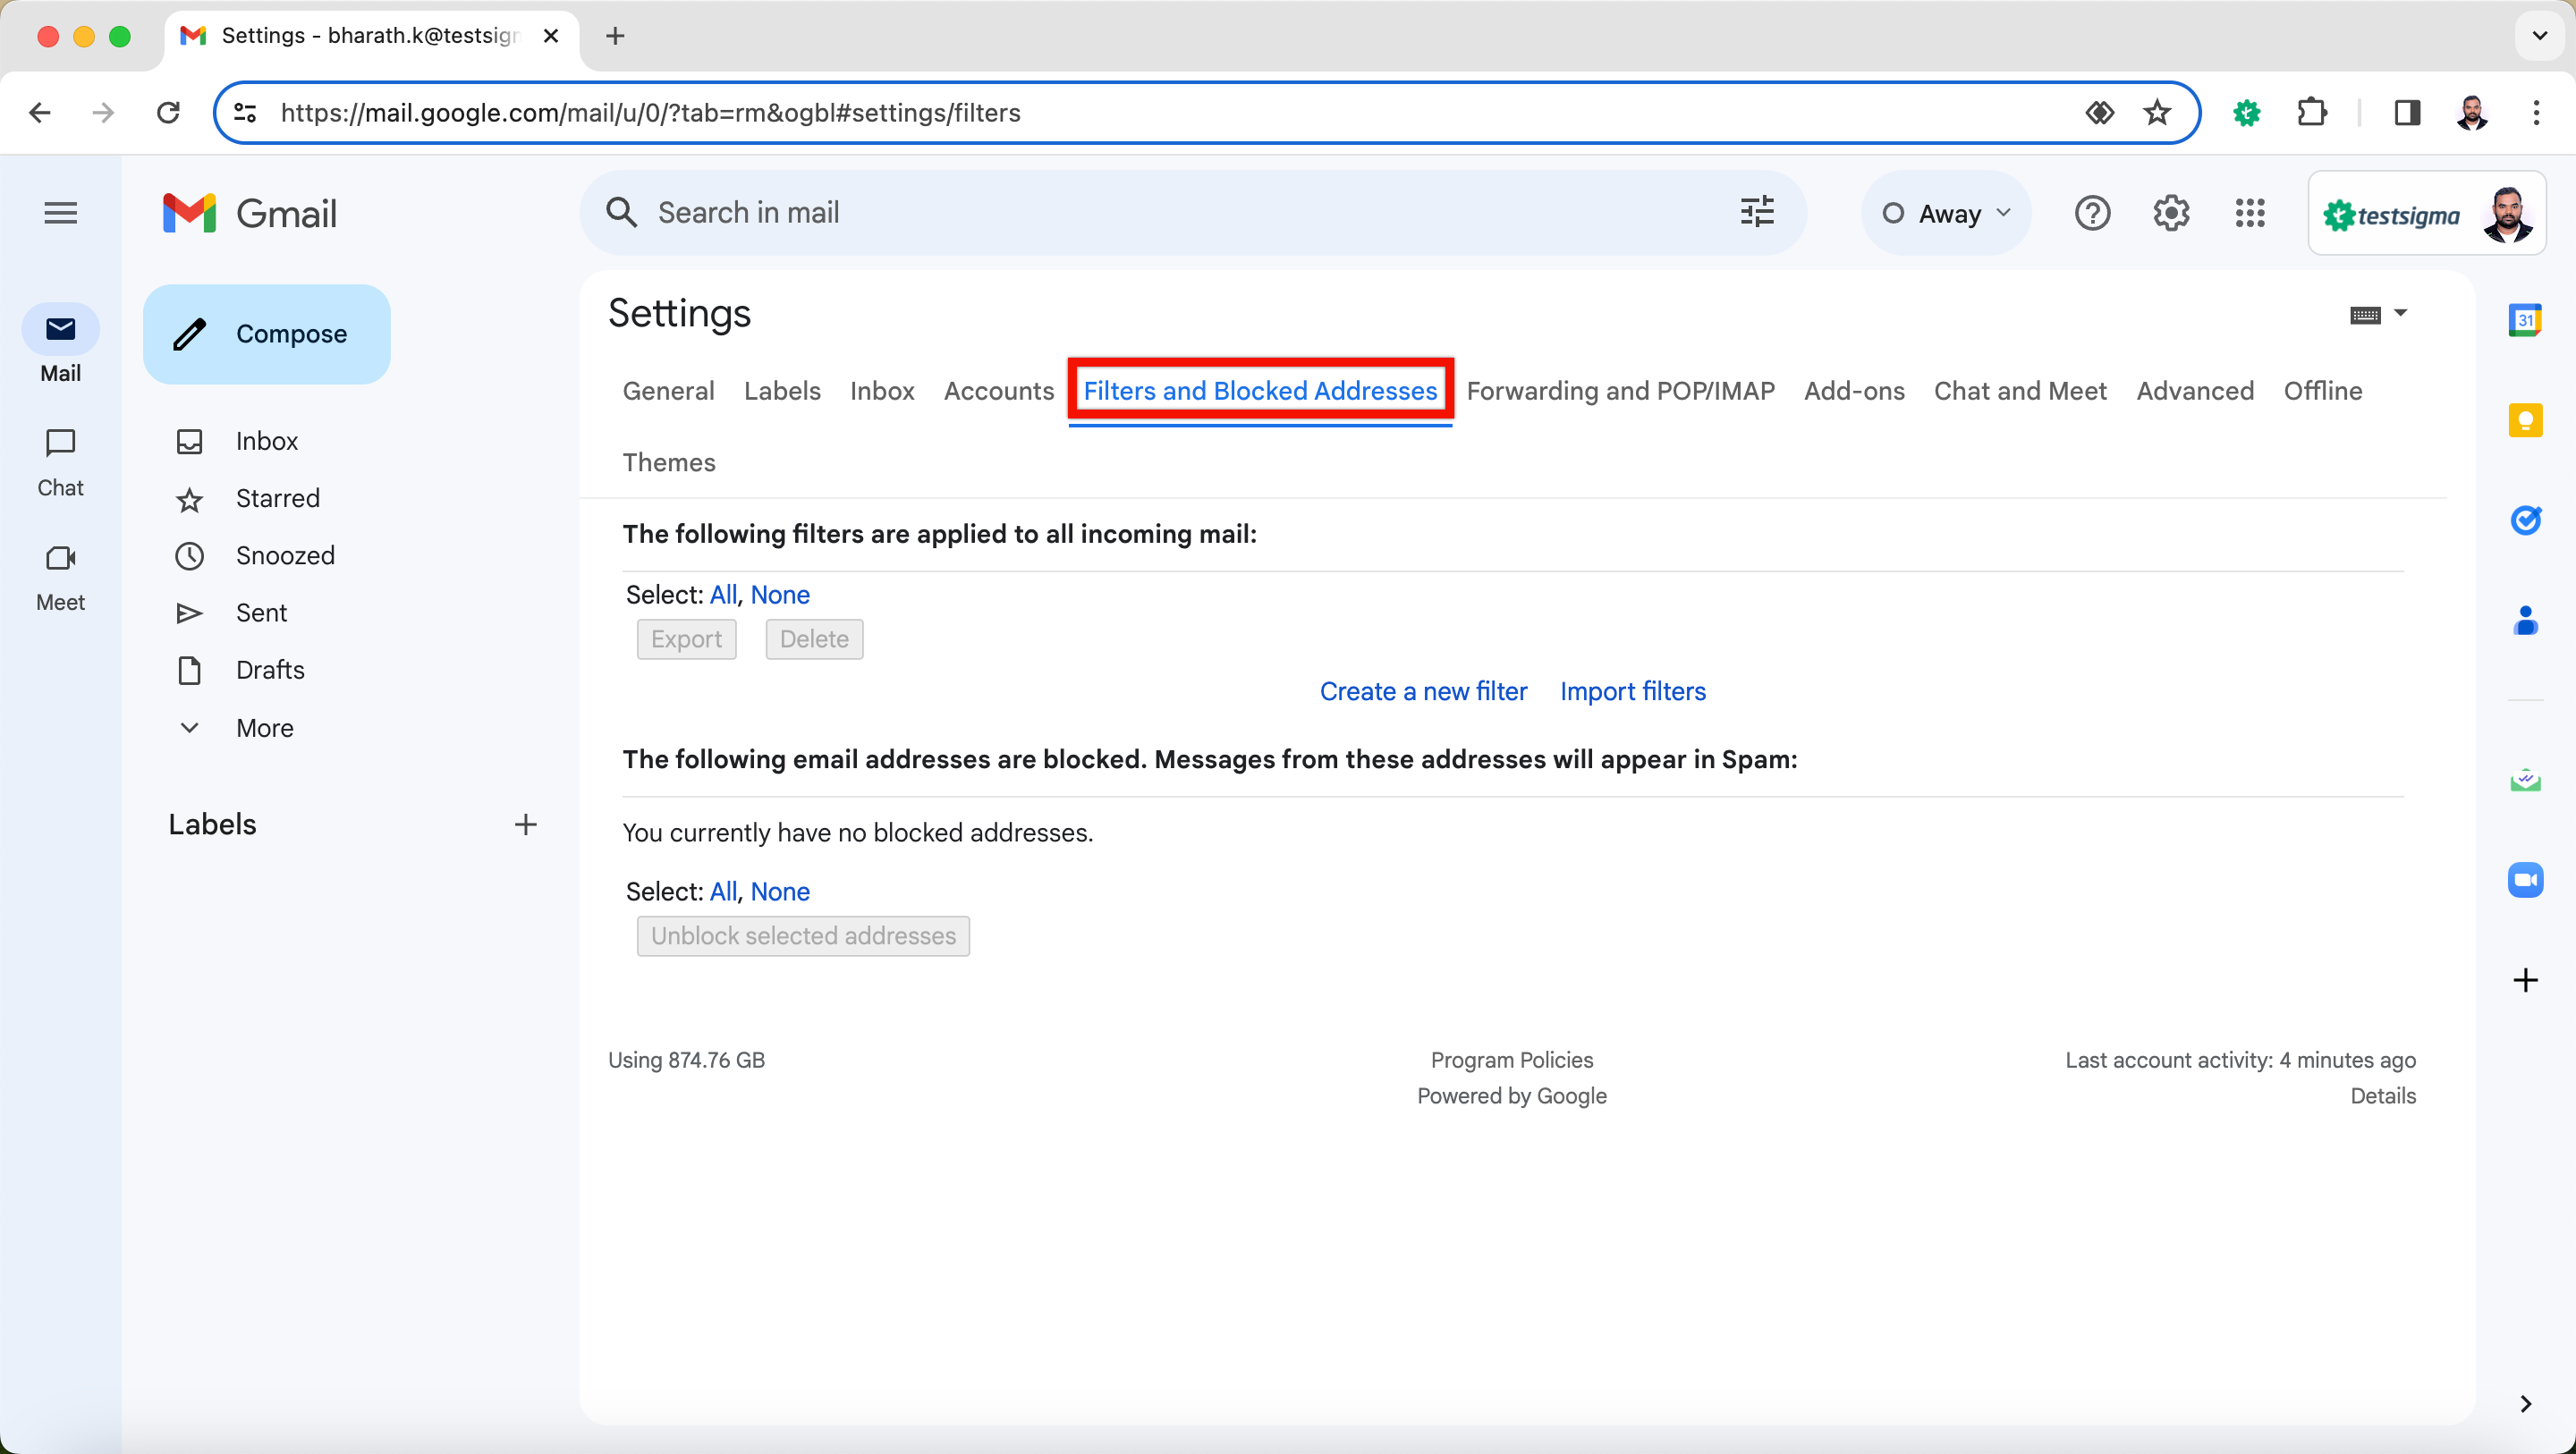
Navigate to Filters and Blocked Addresses
- From the settings, click on the Filters and Blocked Addresses tab.
- Create a filter to forward emails with specific content or subject. In this case, we can have text that is constant and is present in all emails that we want to forward.
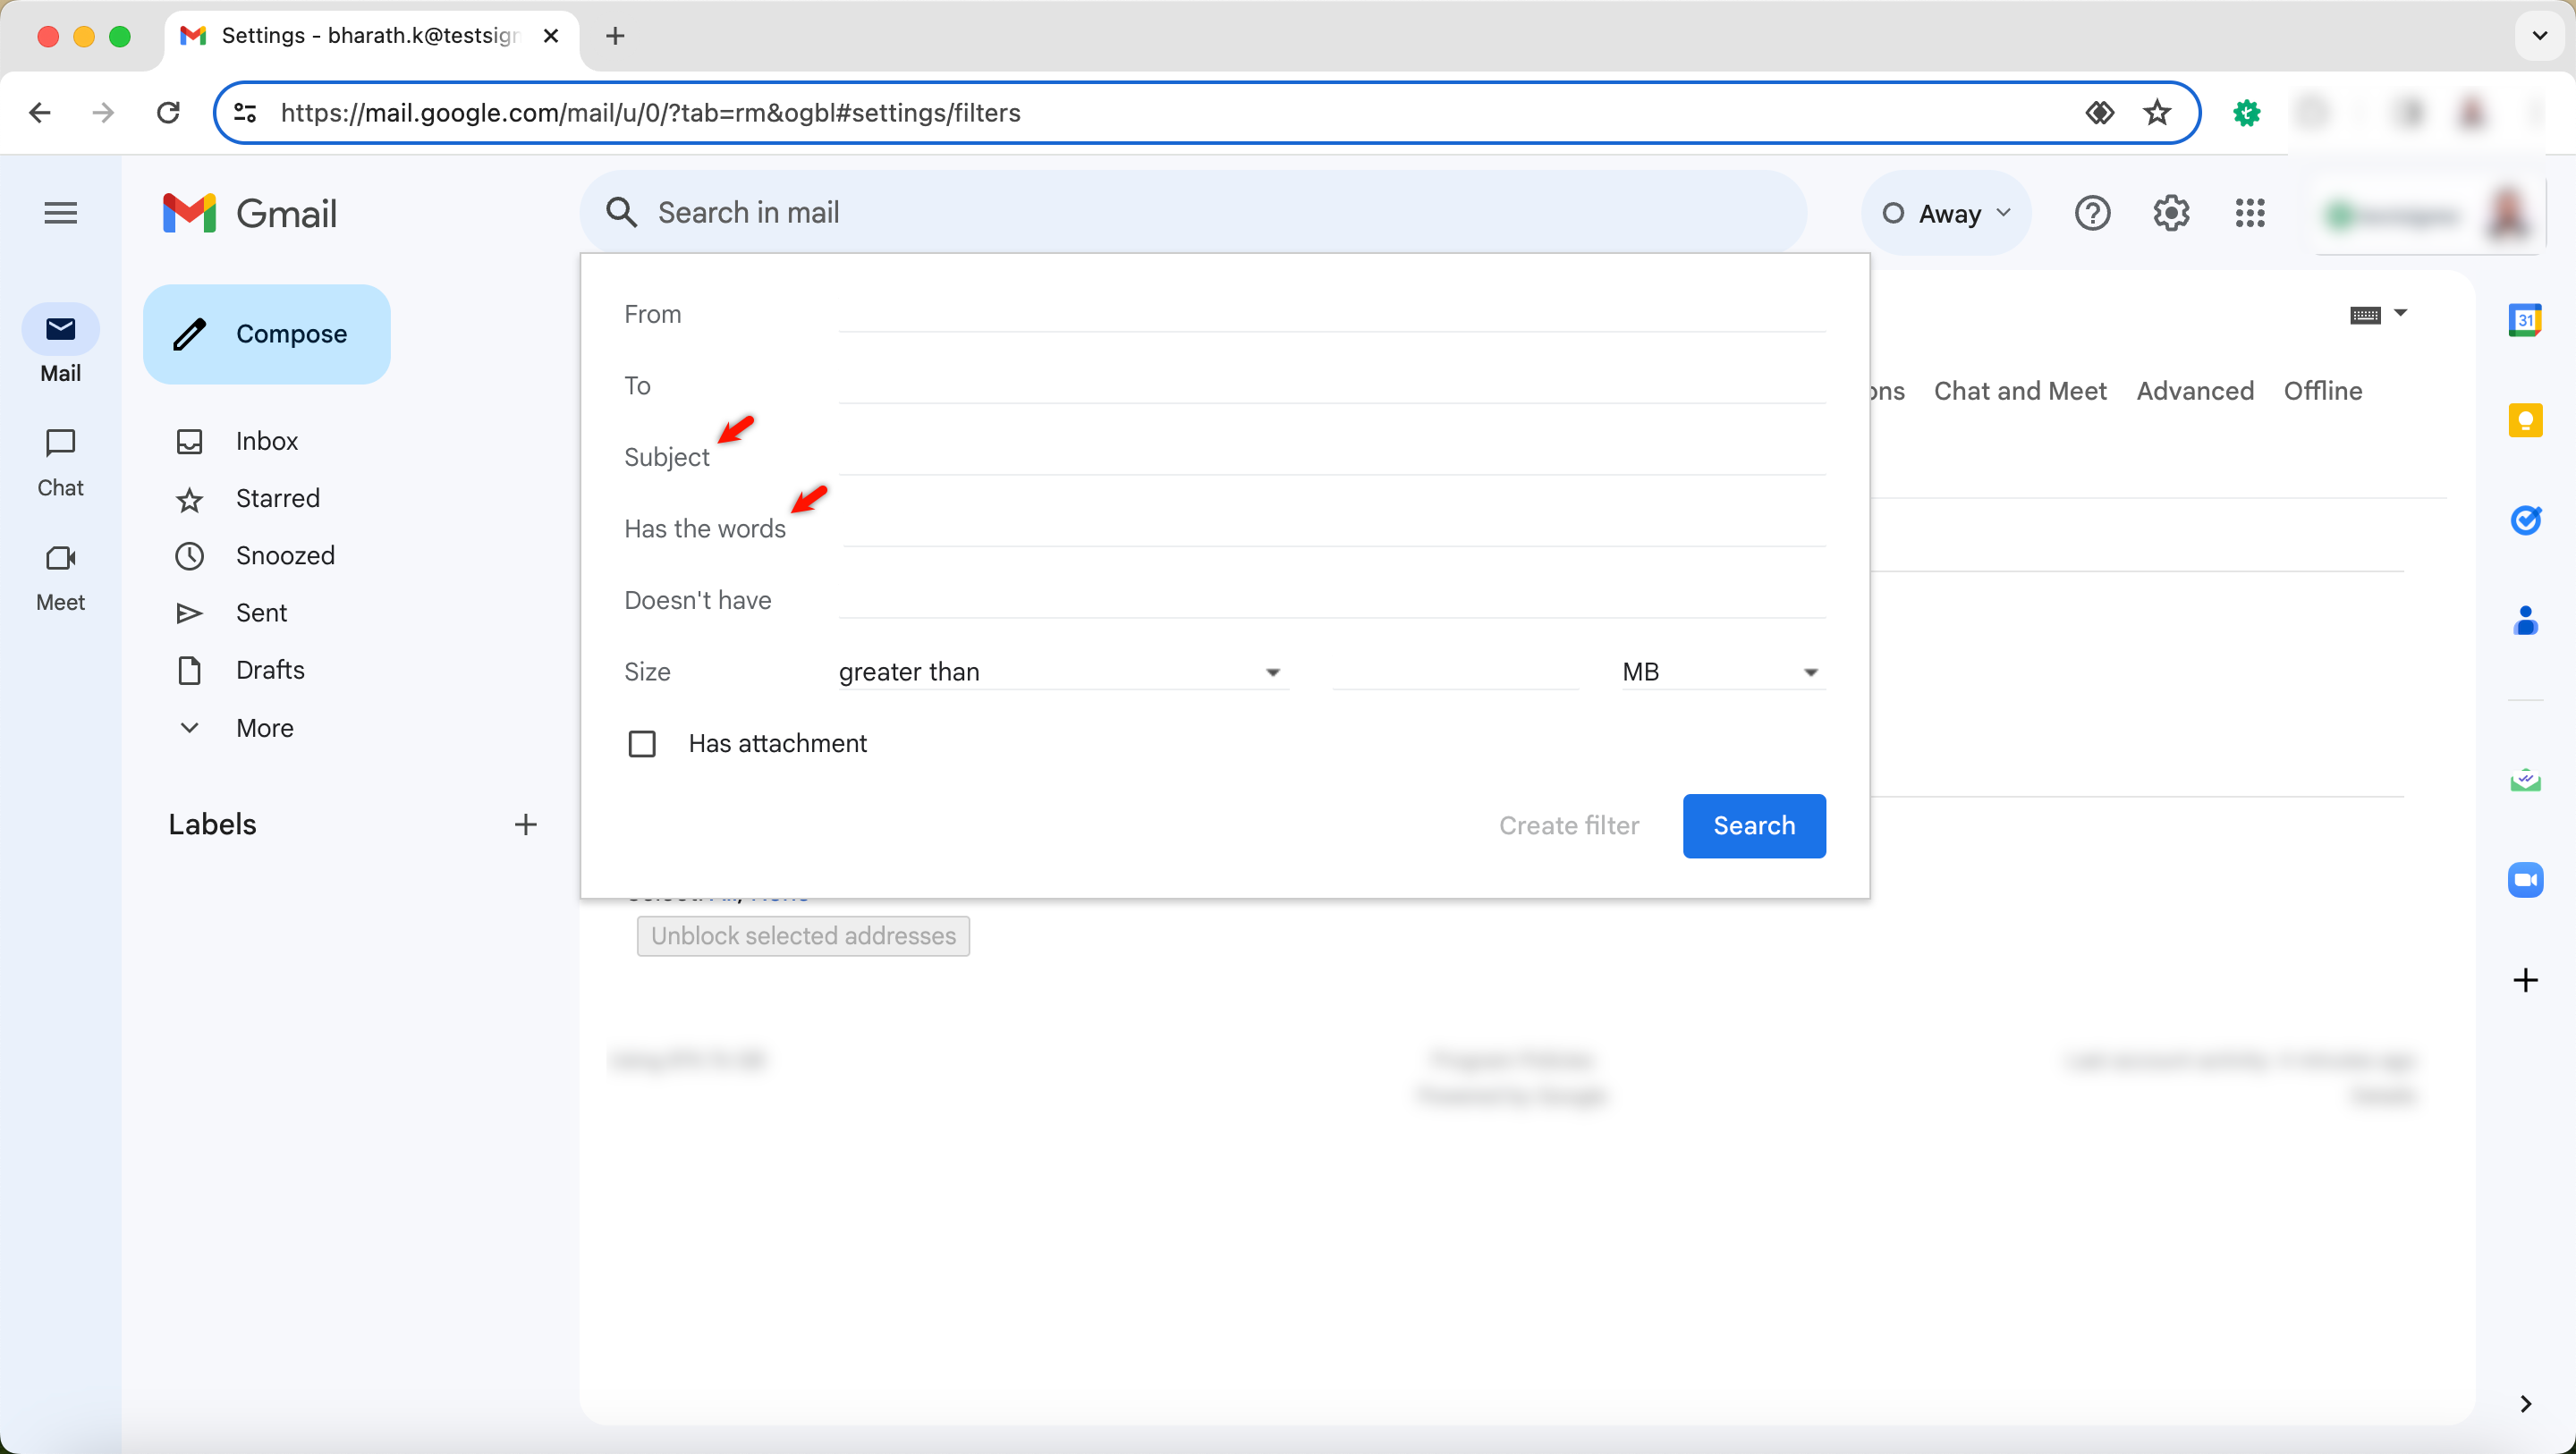
Create a New Filter
- Click on Create a new filter.
-
Specify the criteria for the filter:
- Subject: Define the subject of the email that you wish to forward.
- Has the words/Doesn’t have words: Include text that is present in all emails you want to forward.
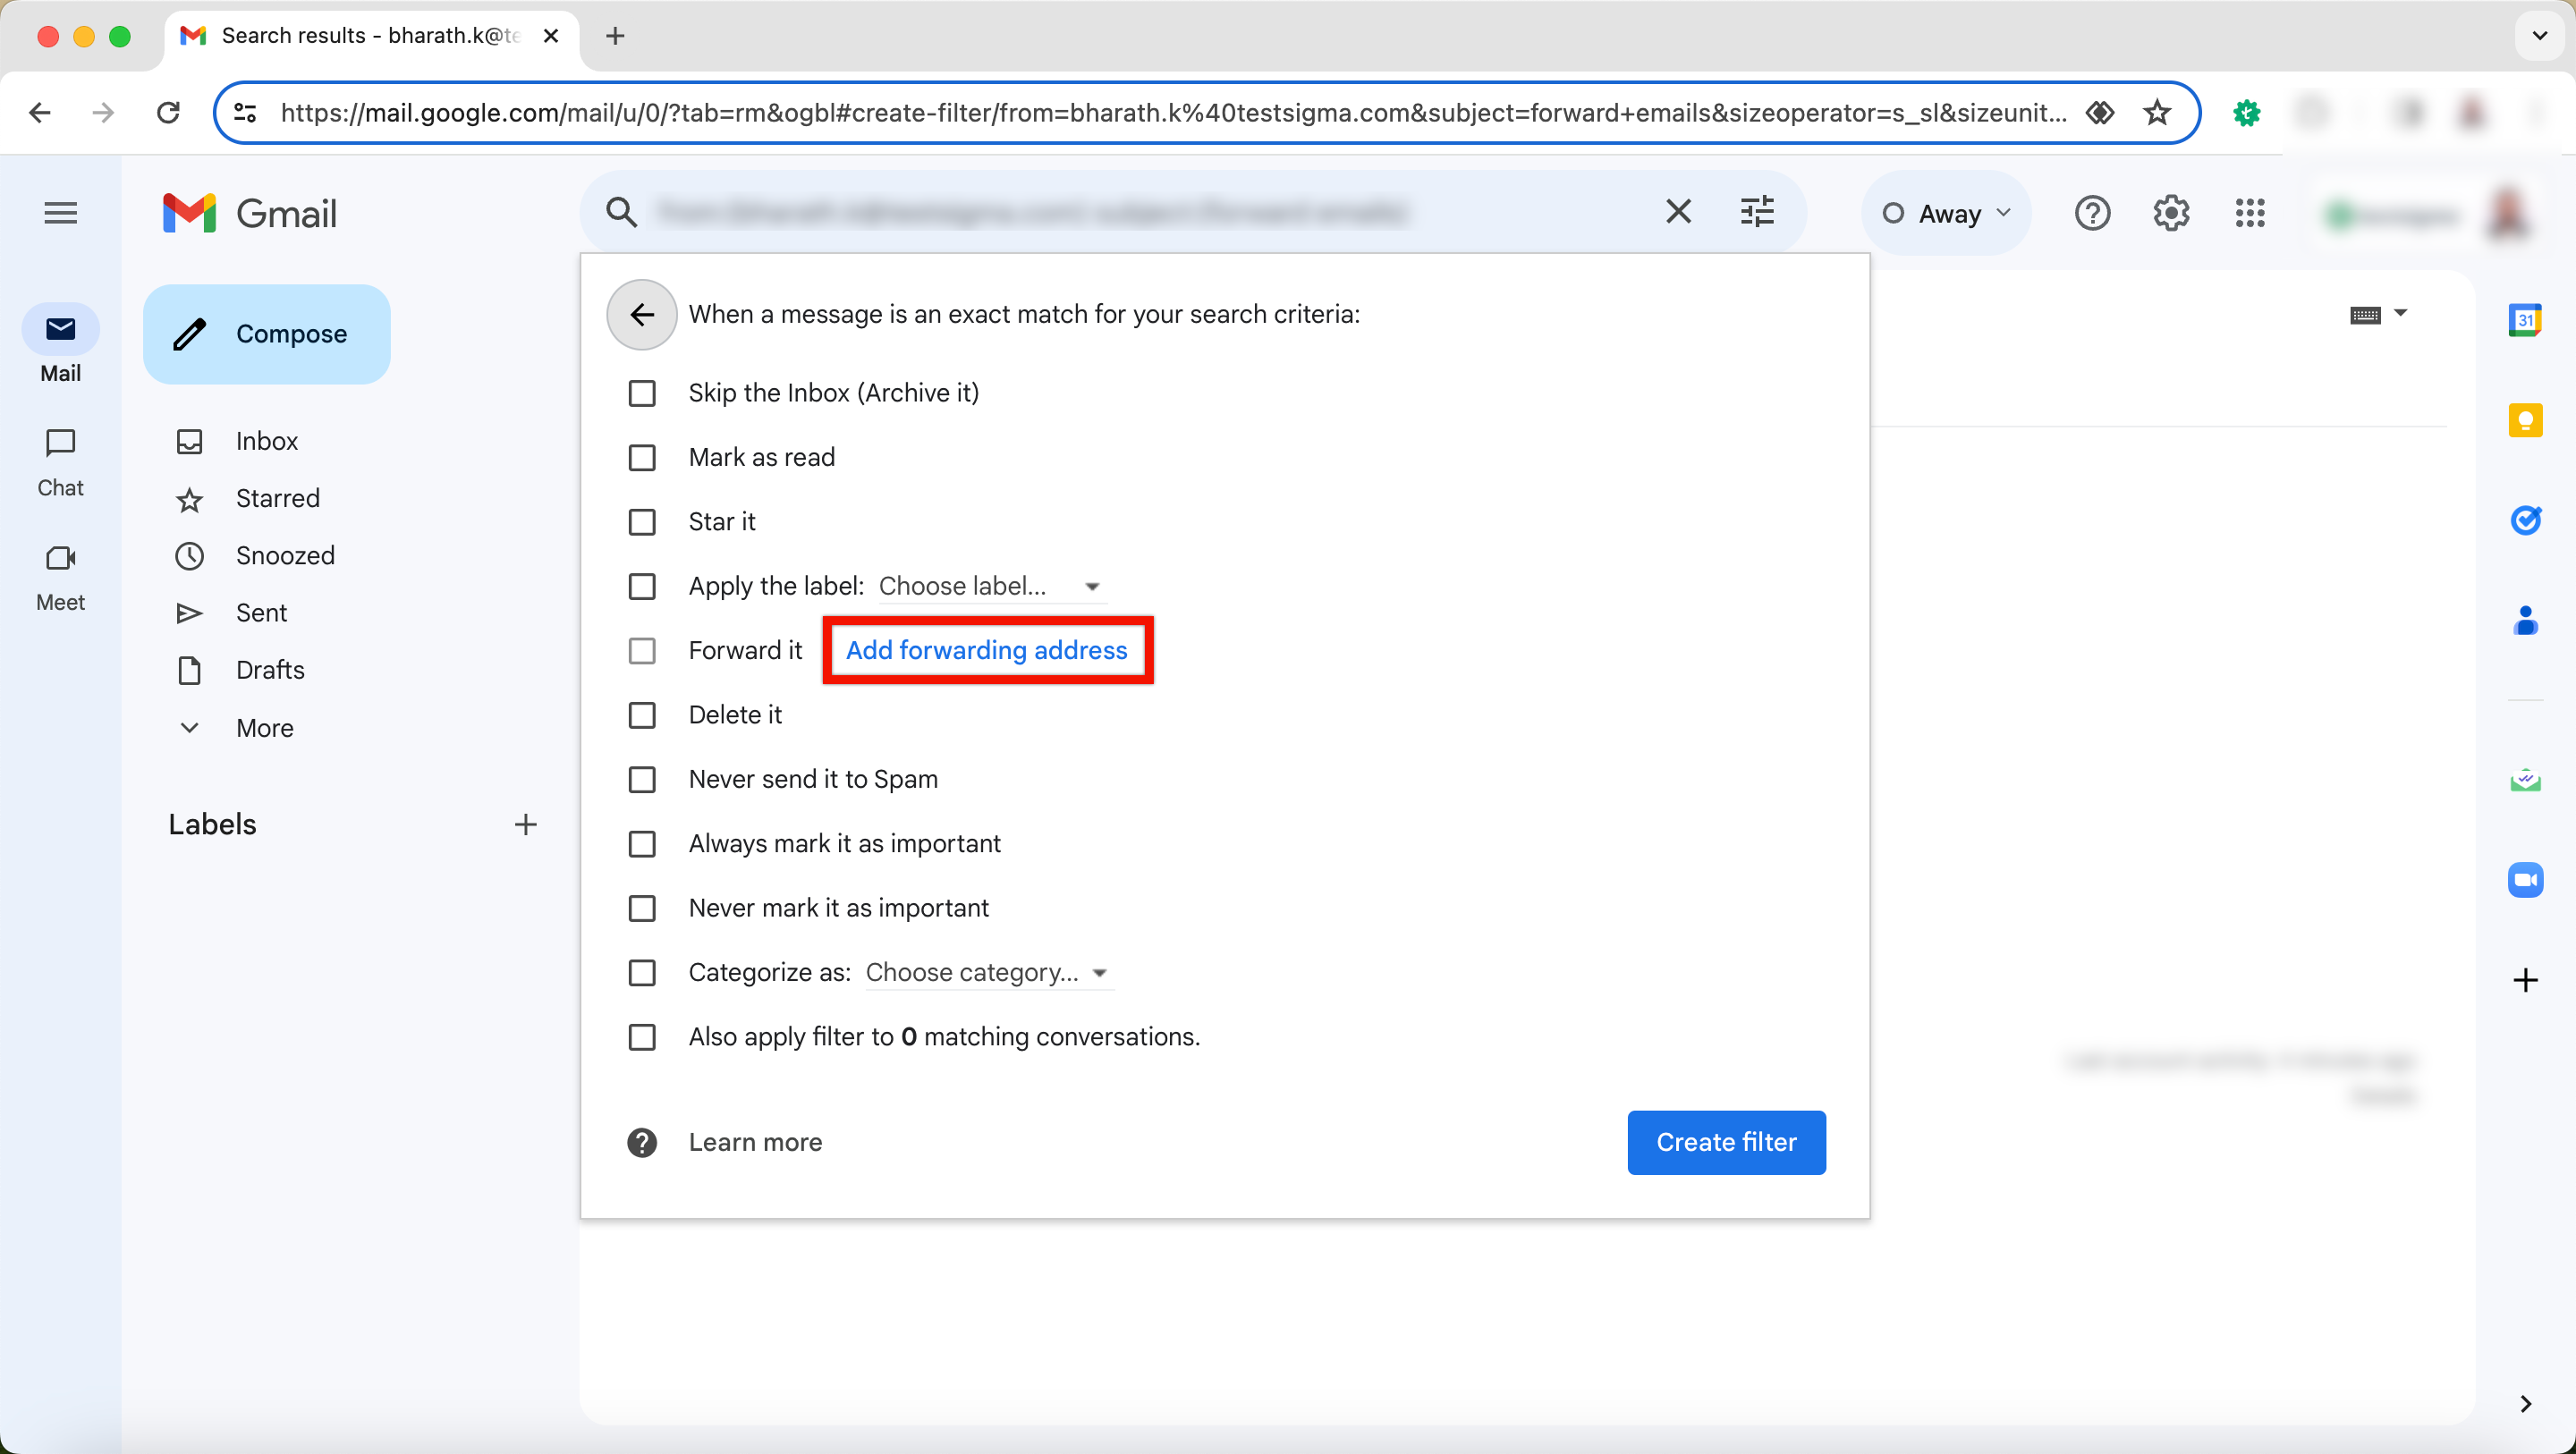
Configure Forwarding Address
- After creating the filter, click on Add forwarding address on When a message is an exact match for your search criteria overlay.
- Click on Add Forwarding address and add the designated automation email ID.
- Complete the setup by entering the OTP.
- You can contact the support team for OTP retrieval, which involves fetching data from the backend.
- For a sample test case associated with the Testsigma SMS Forwarder app, refer to the documentation on setup & use message forwarding.
Want to contribute or report missing content?