- continuous integration
 Test Plan Details
 - REST API (Generic)
- Jenkins
- Azure DevOps
- AWS DevOps
- AWS Lambda
- Circle CI
- Bamboo CI
- Travis CI
- CodeShip CI
- Shell Script(Generic)
- Bitrise CI
- GitHub CI/CD
- Bitbucket CI/CD
- GitLab CI/CD
- Copado CI/CD
- Gearset CI/CD
- Codemagic CI/CD
- Google Cloud Build CI/CD
Integrate Testsigma with Jenkins
Jenkins is an open-source automation server used for CI/CD and build automation. You can trigger Testsigma test plans directly from Jenkins to streamline testing in your pipelines.
Prerequisites
Before you begin, ensure that you have:
Reviewed the following documentation:
- A working Jenkins server with administrative access.
Trigger Testsigma Test Plans from Jenkins
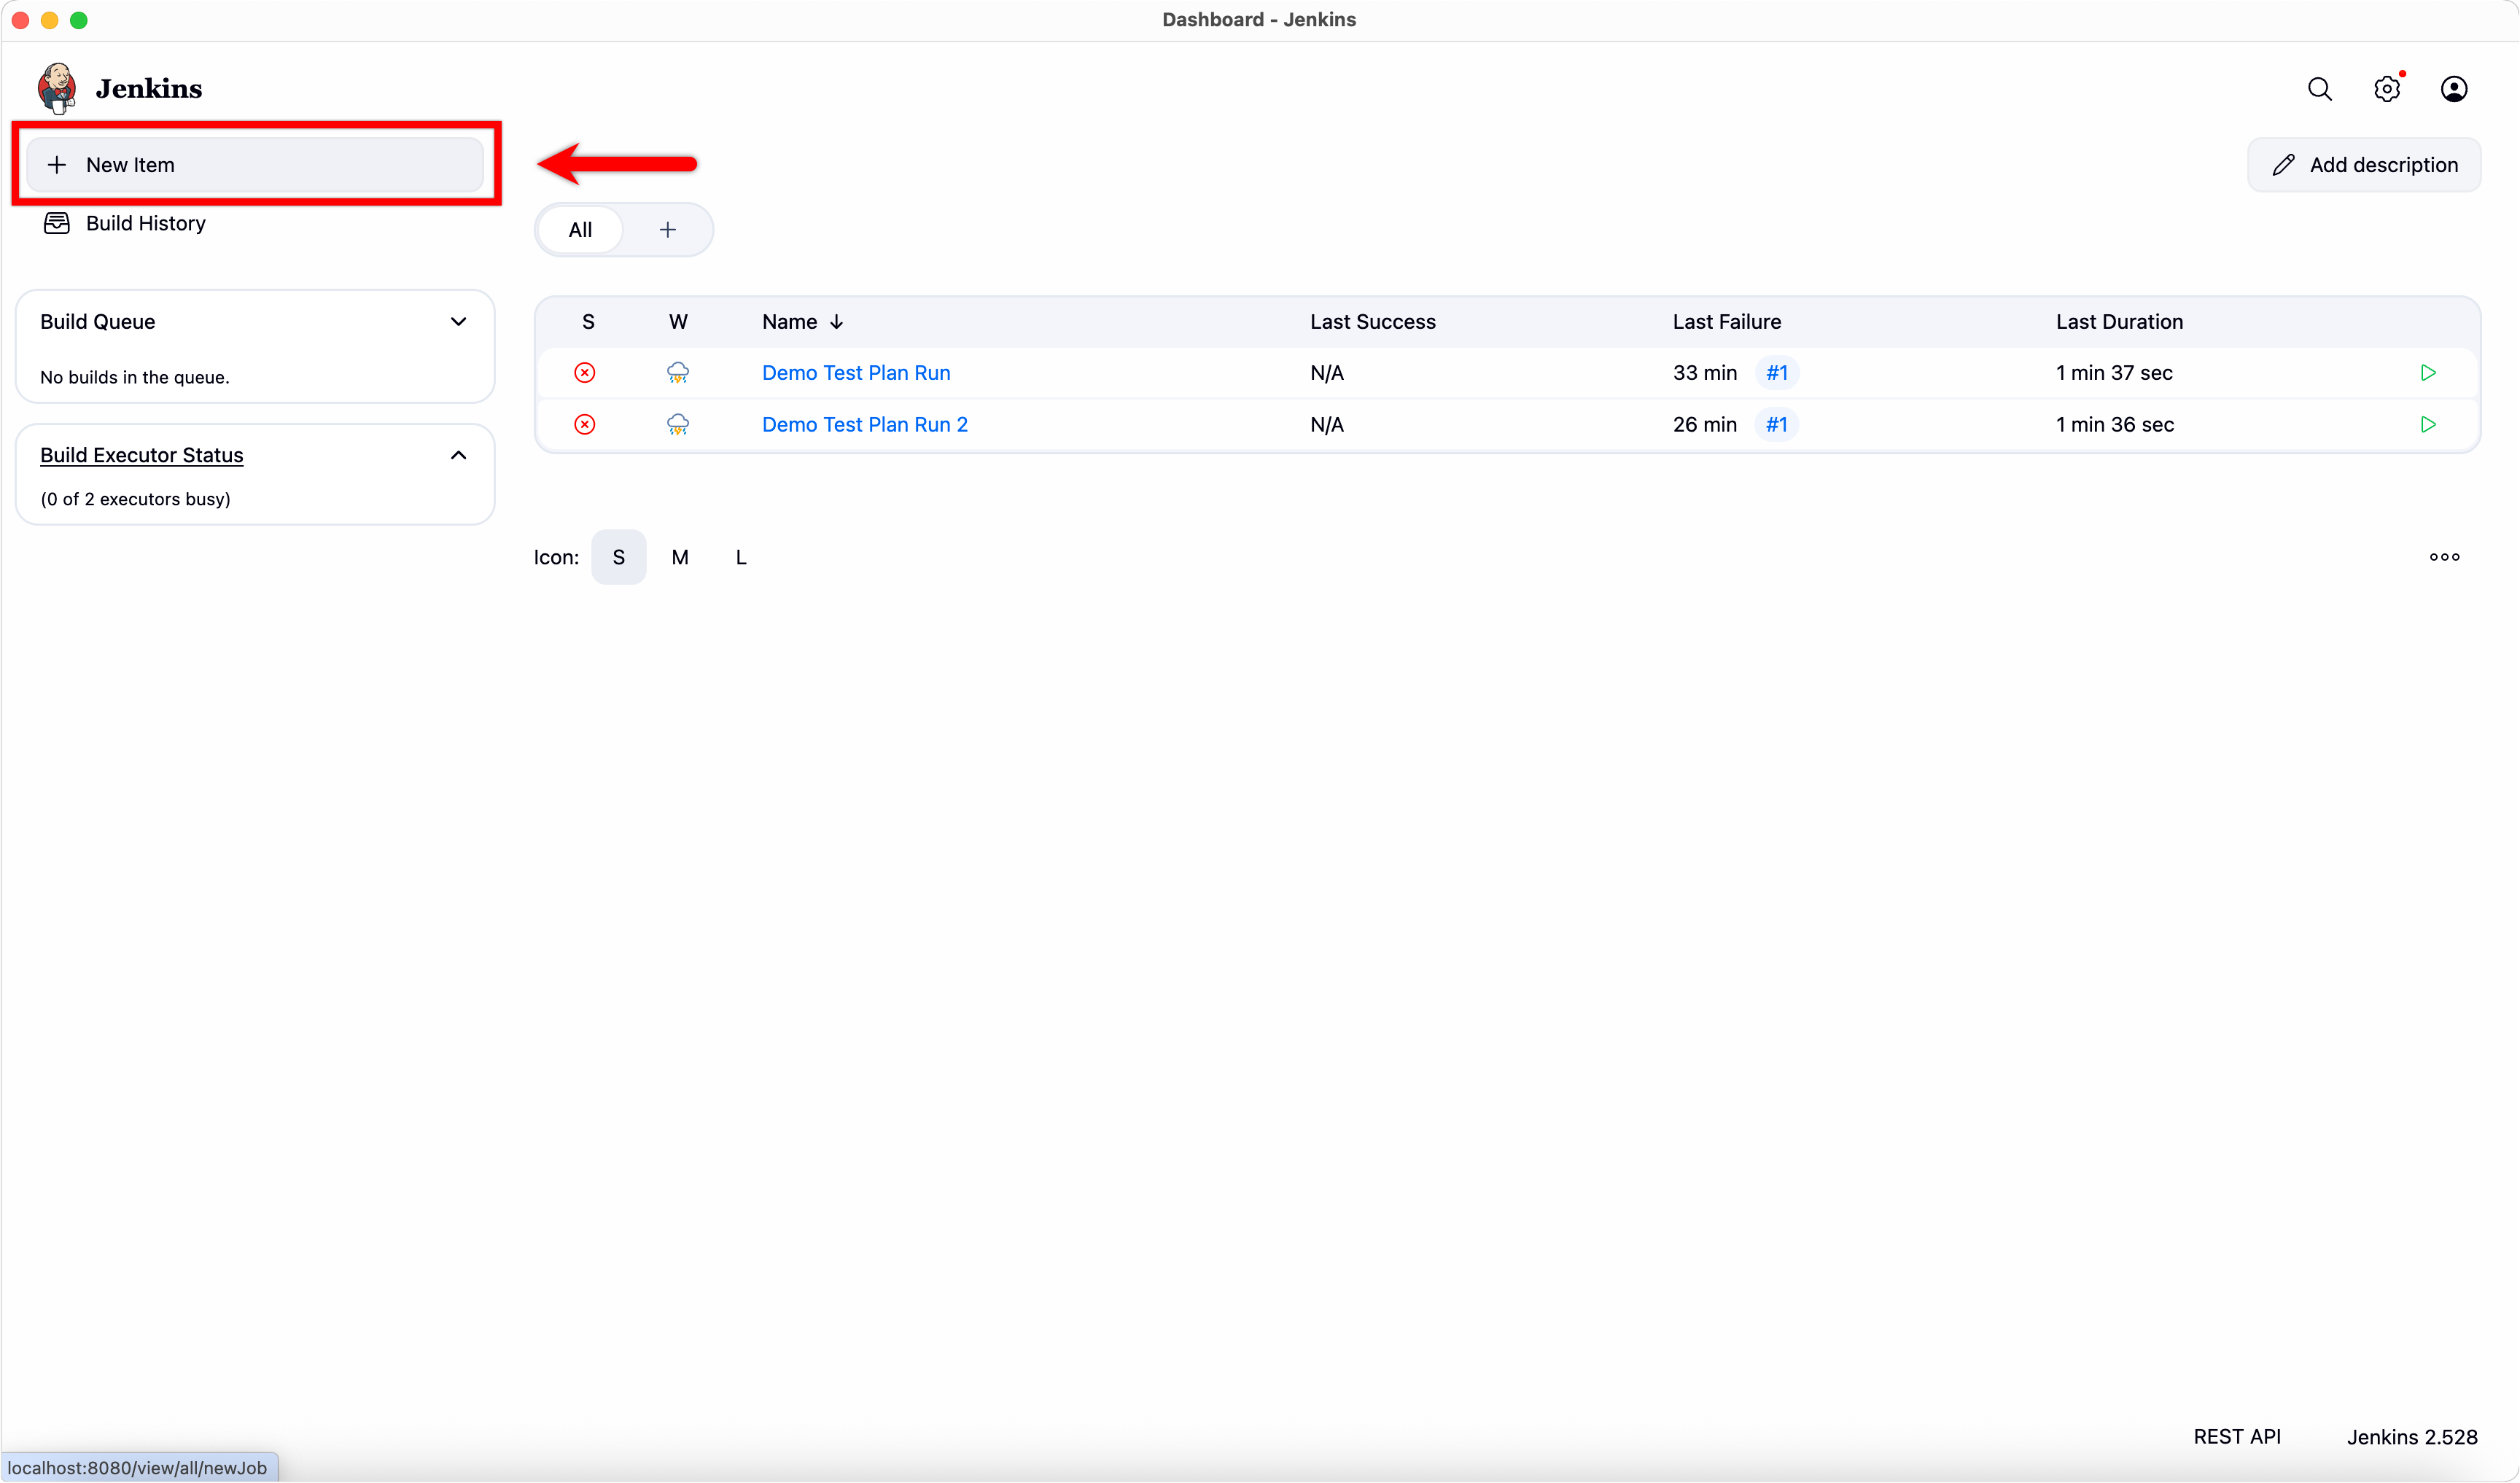
- Log in to your Jenkins instance.
- From the Jenkins Dashboard, click + New Item.
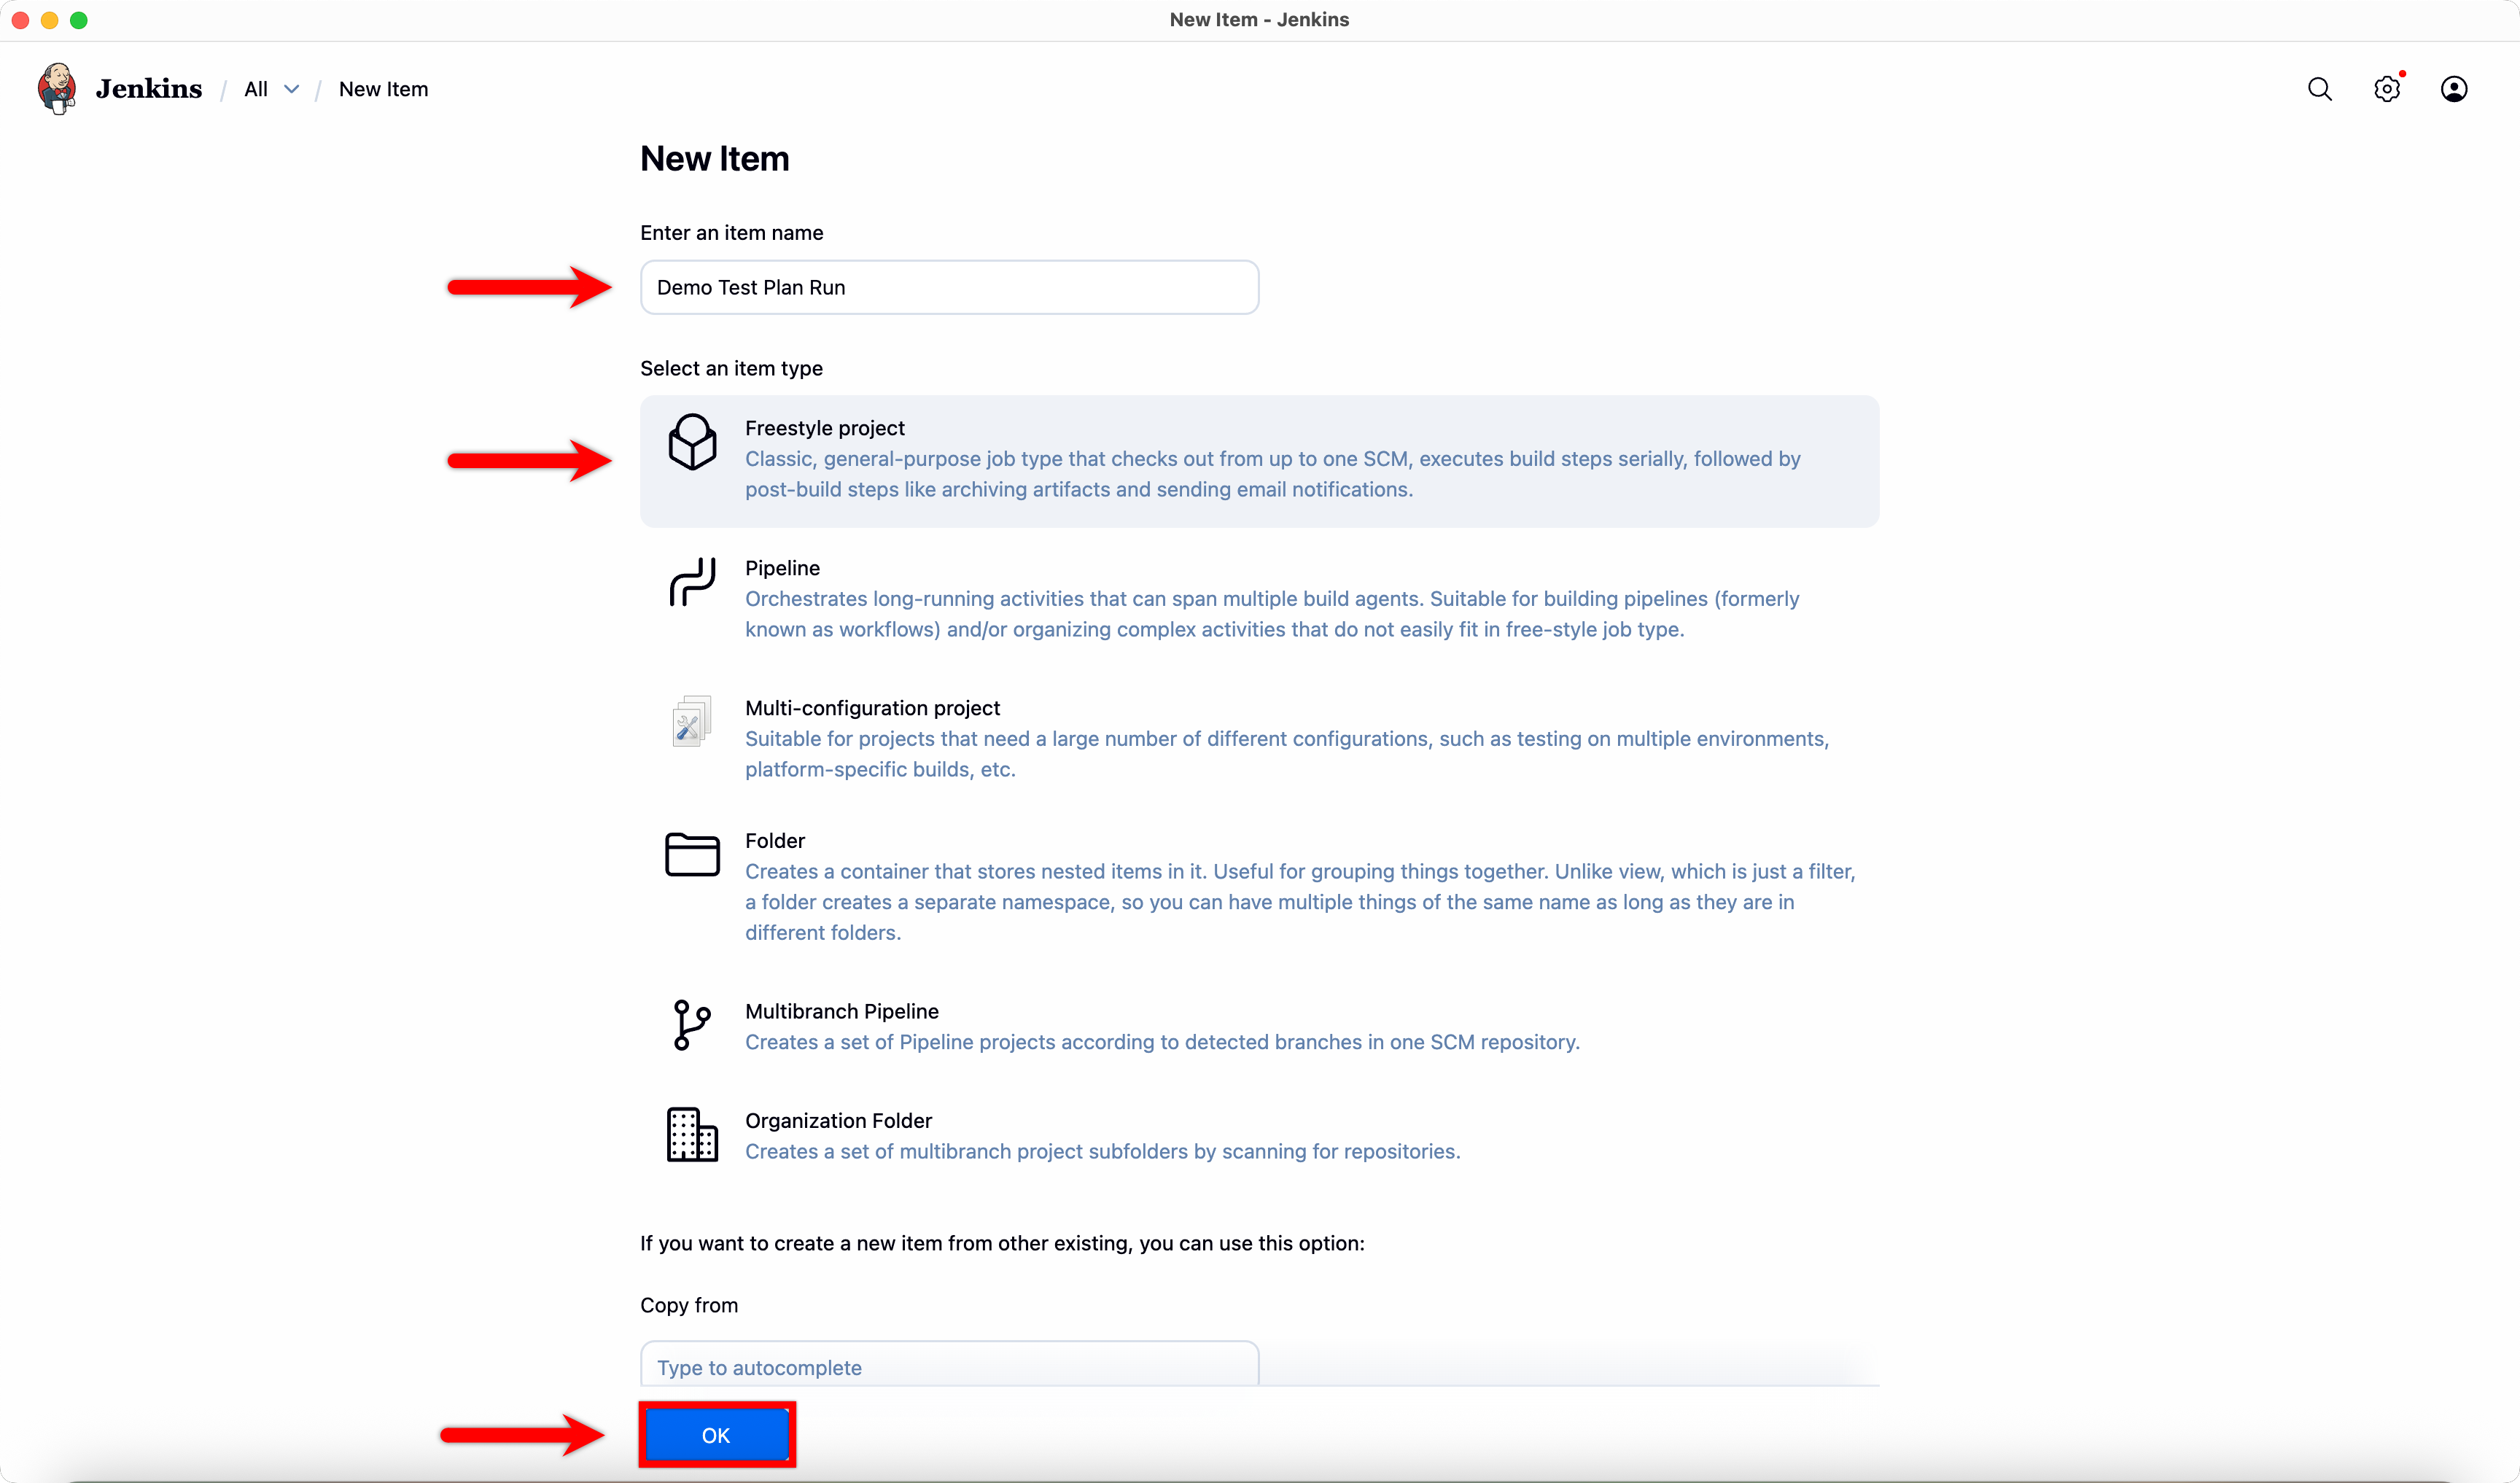
- Enter a Name, select Freestyle Project, and click Ok.
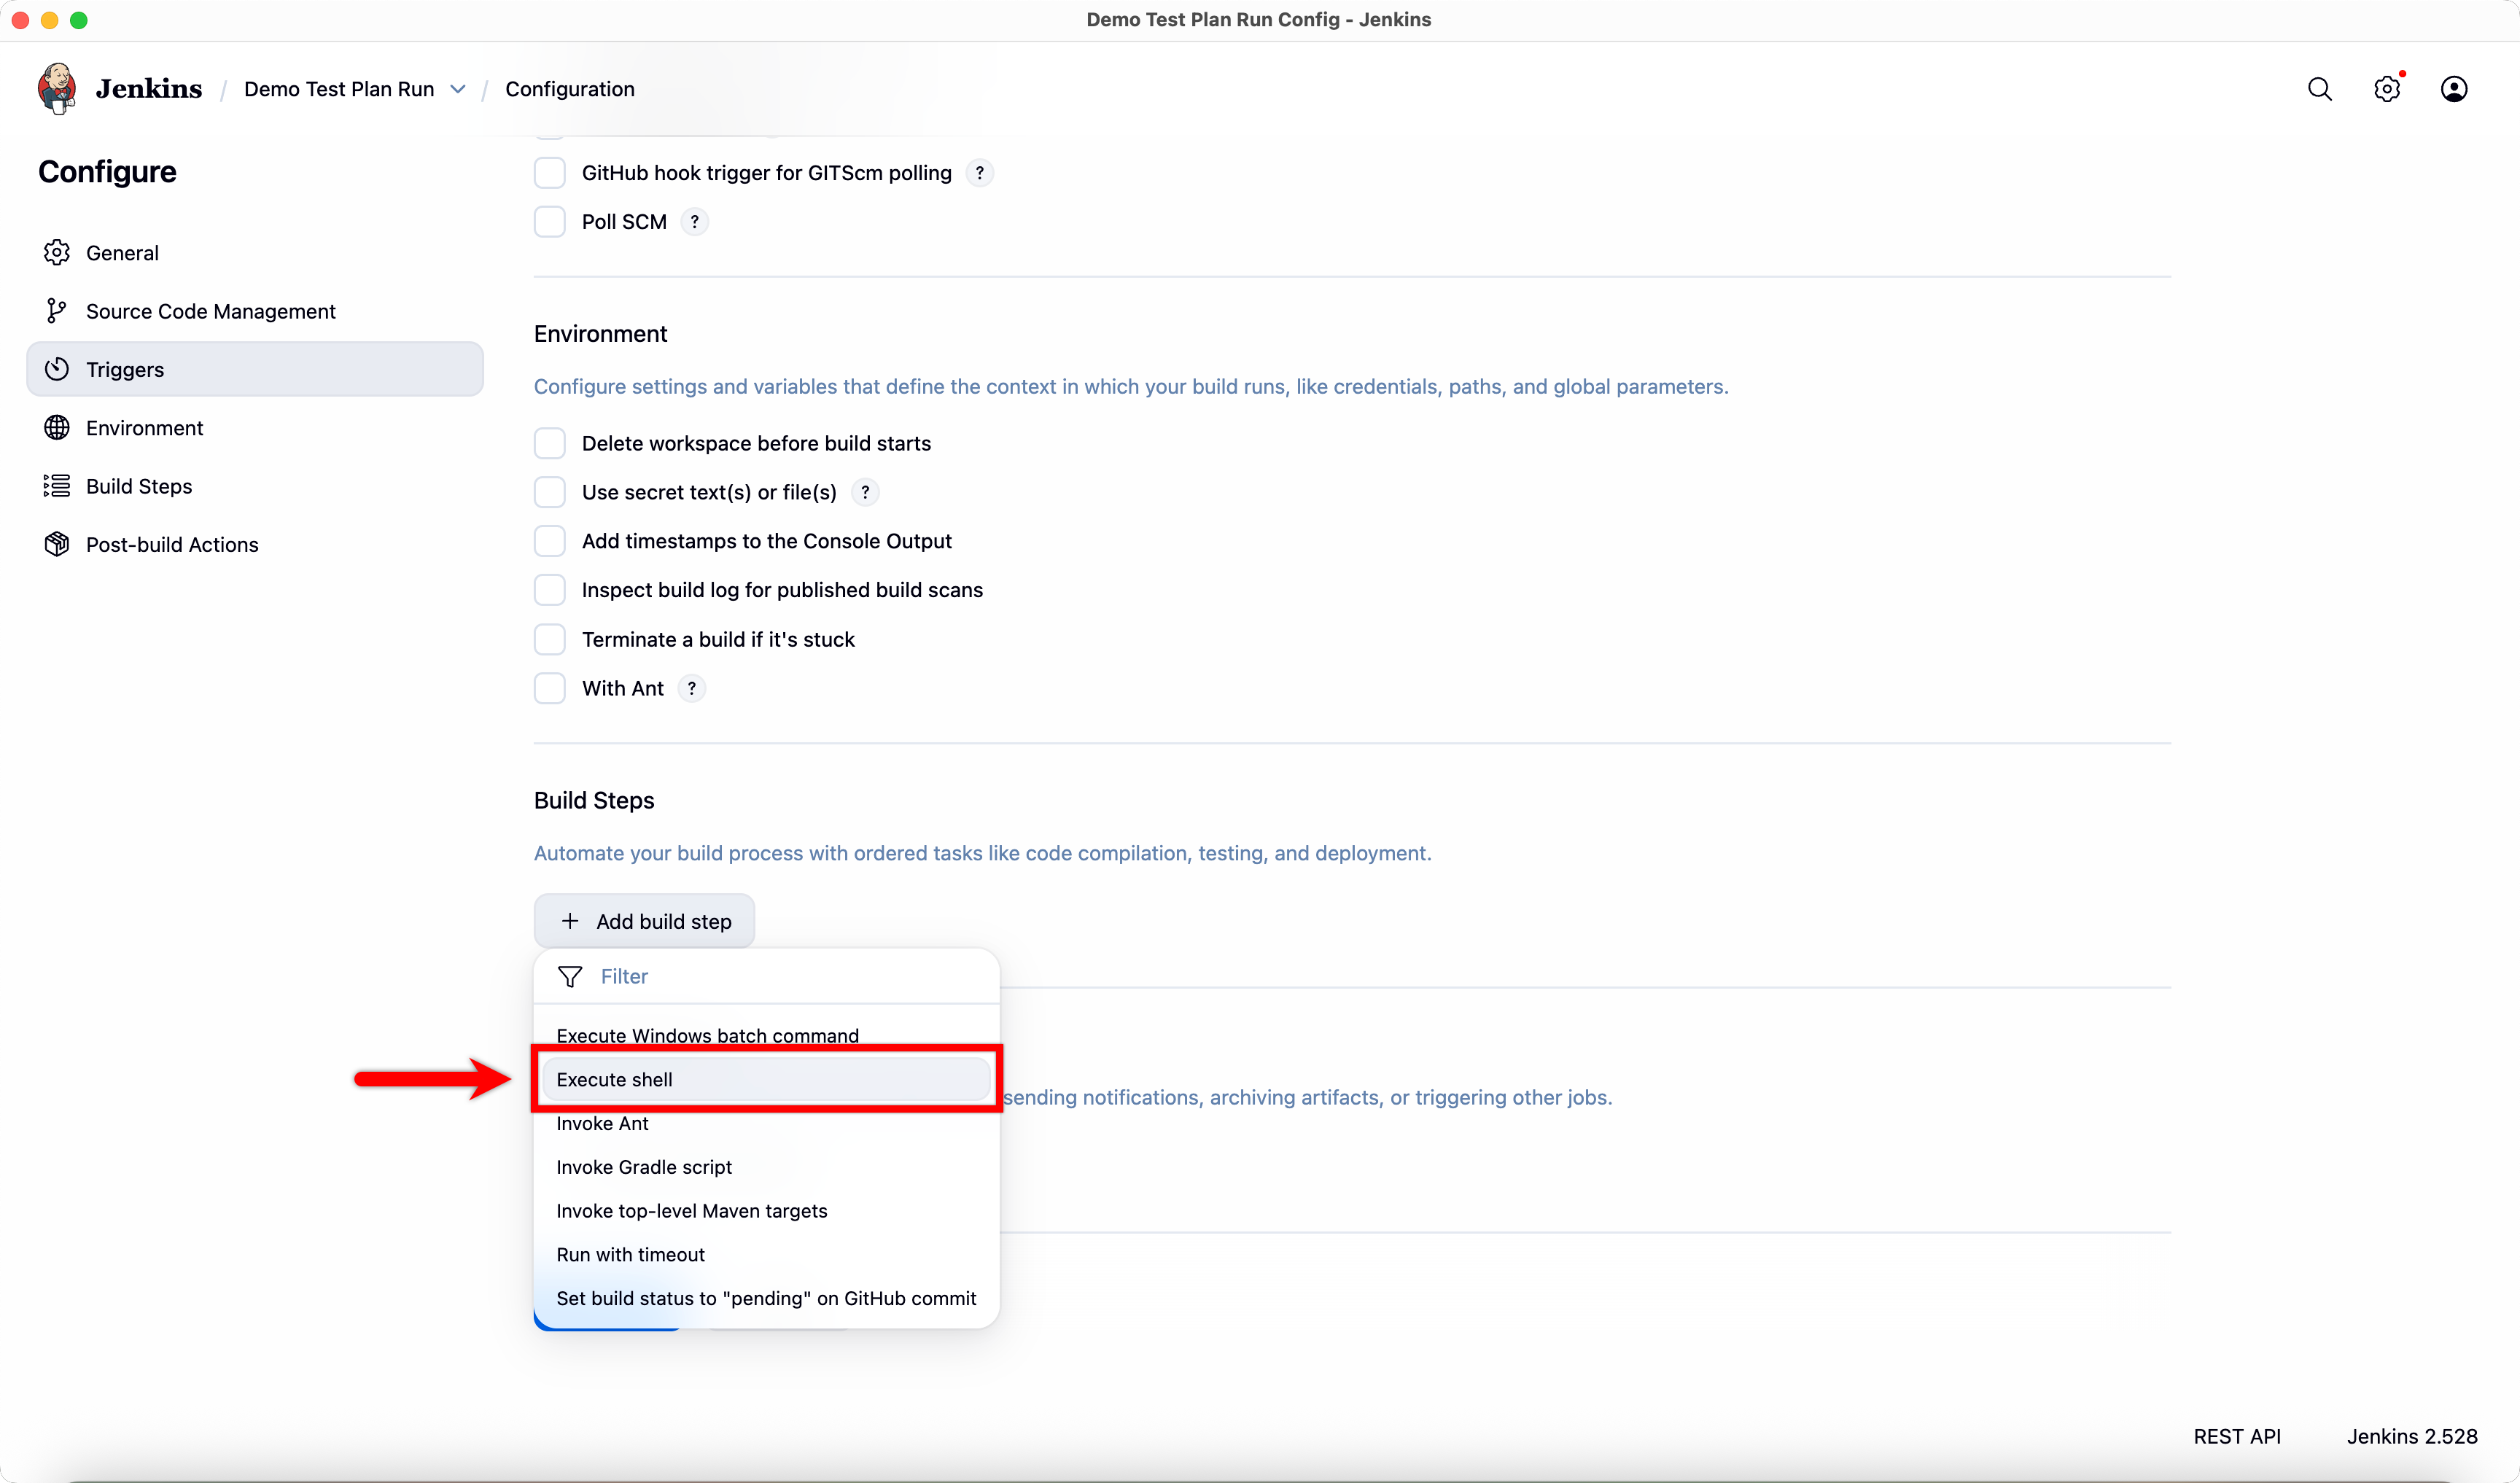
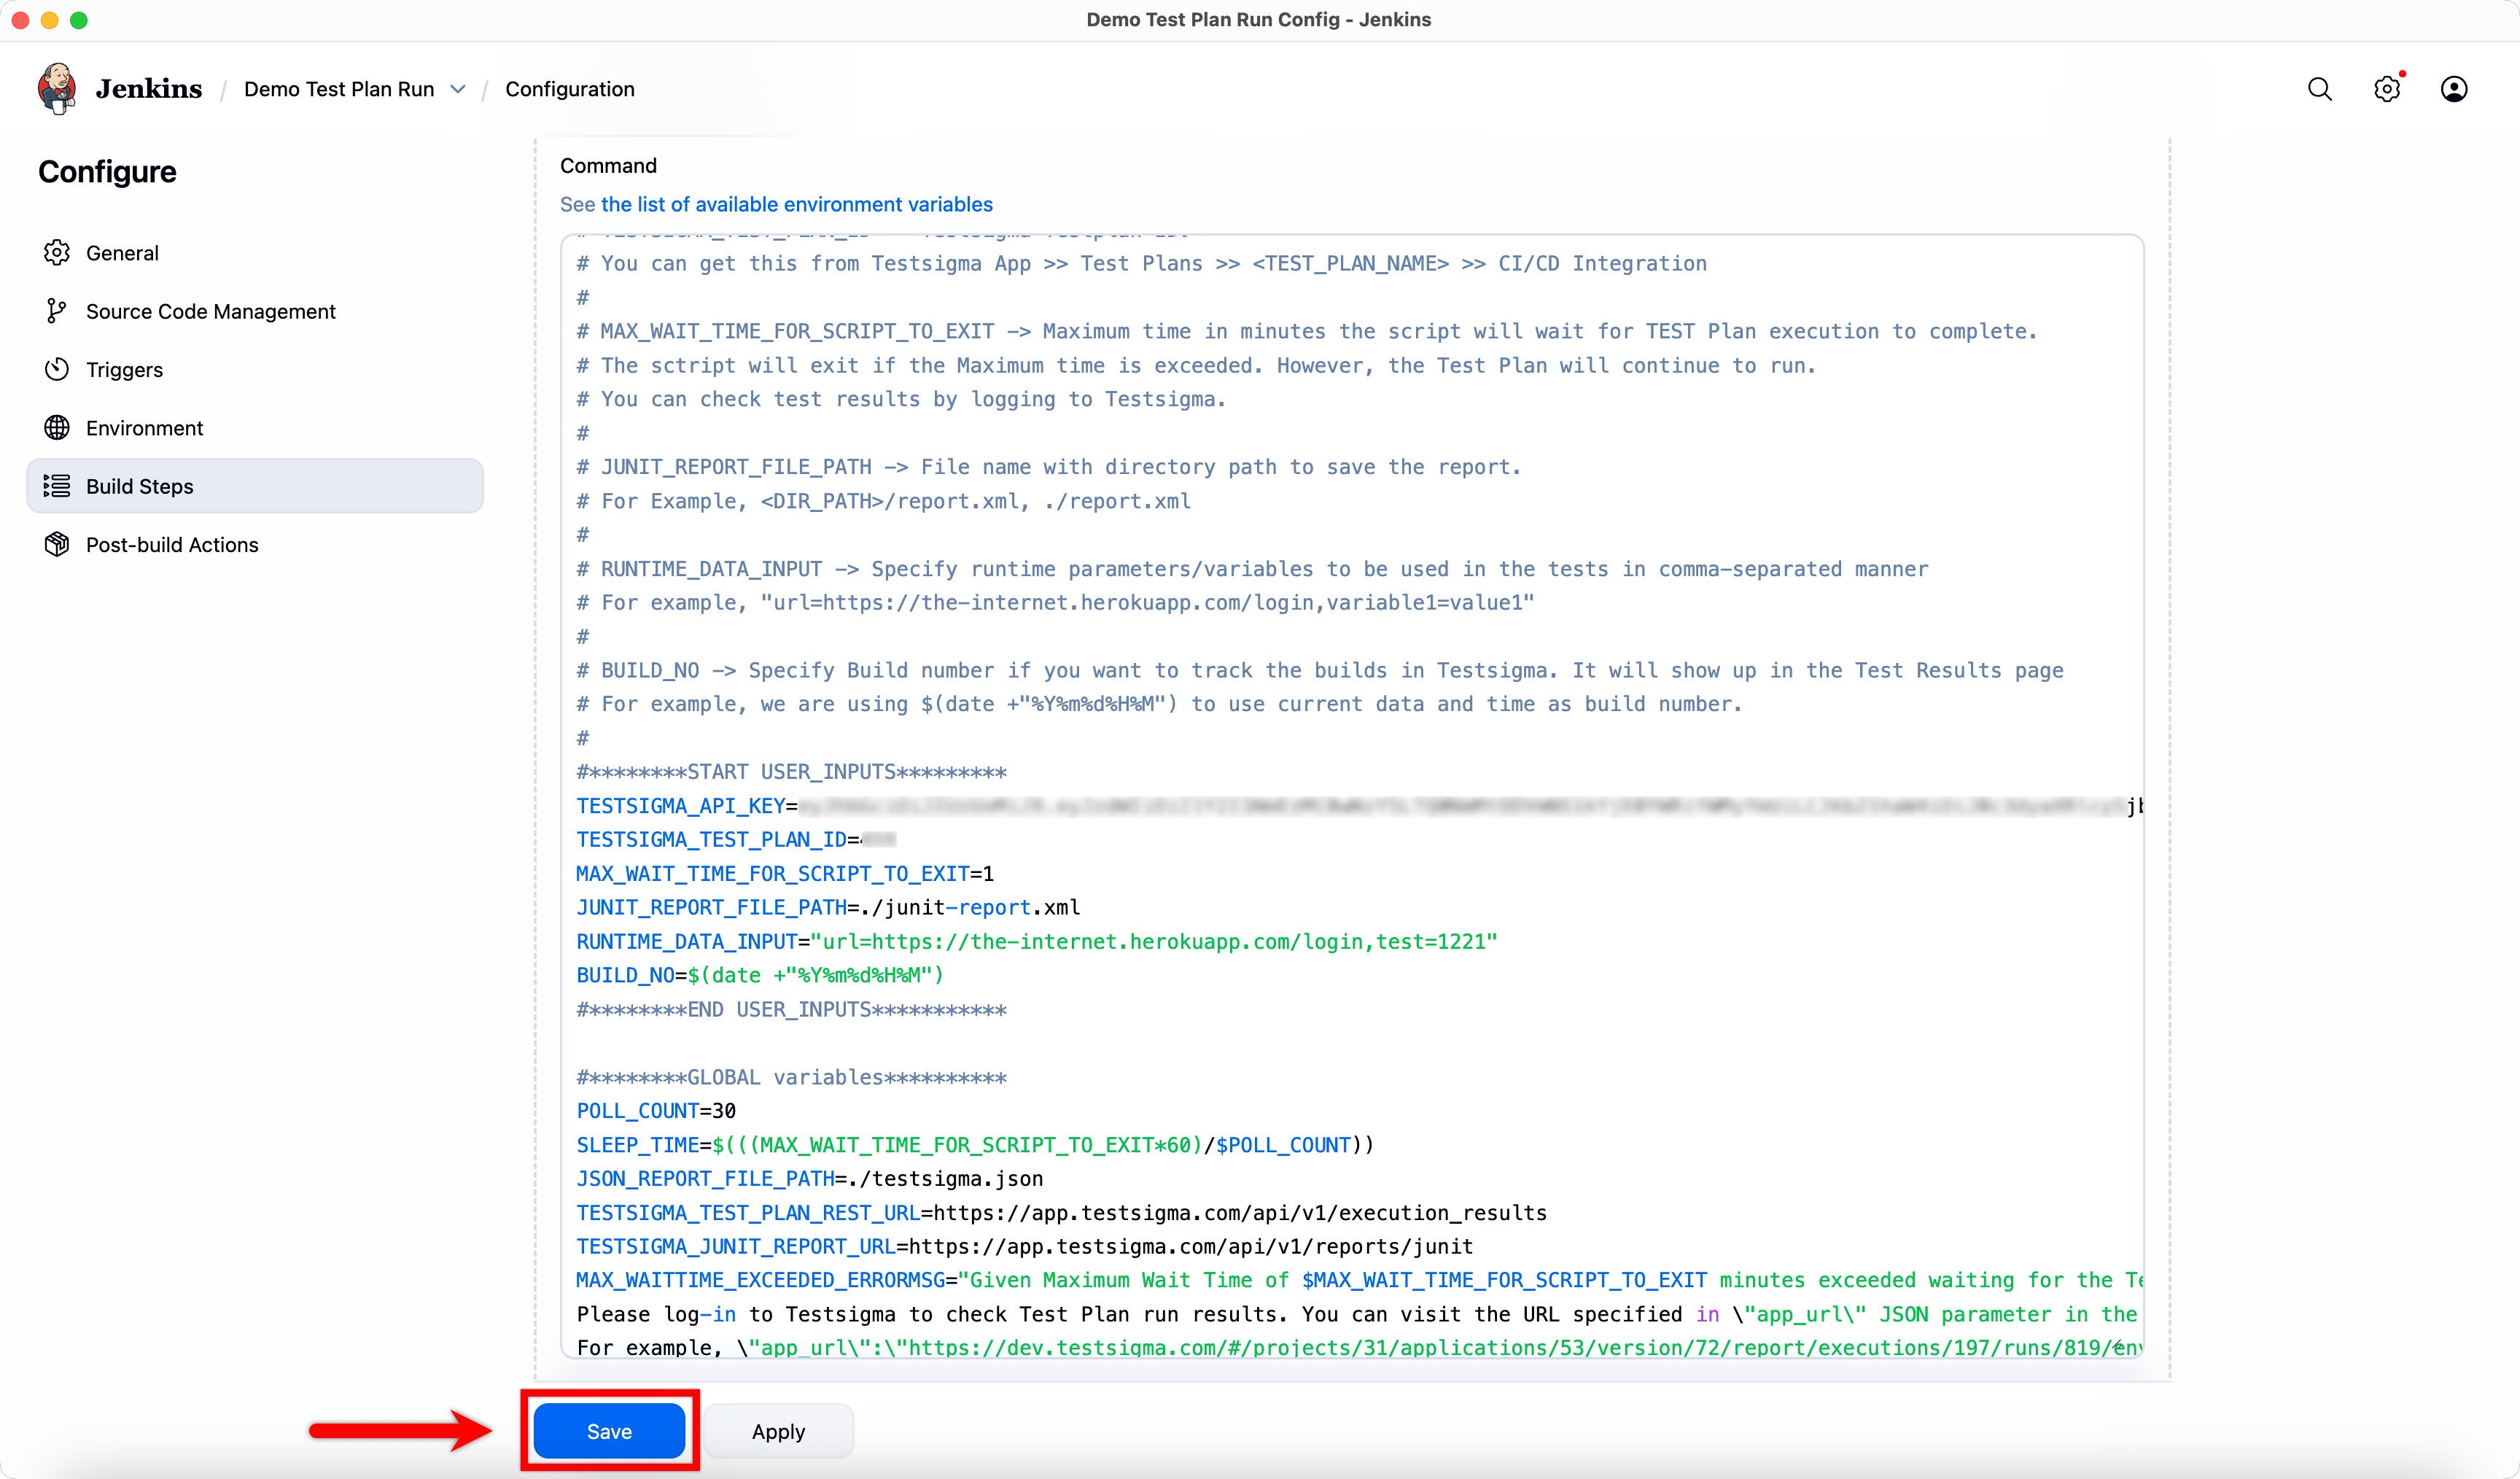
- In the Configuration page, scroll to Build Steps and click Add build steps.

- Select Execute Shell from the dropdown menu.
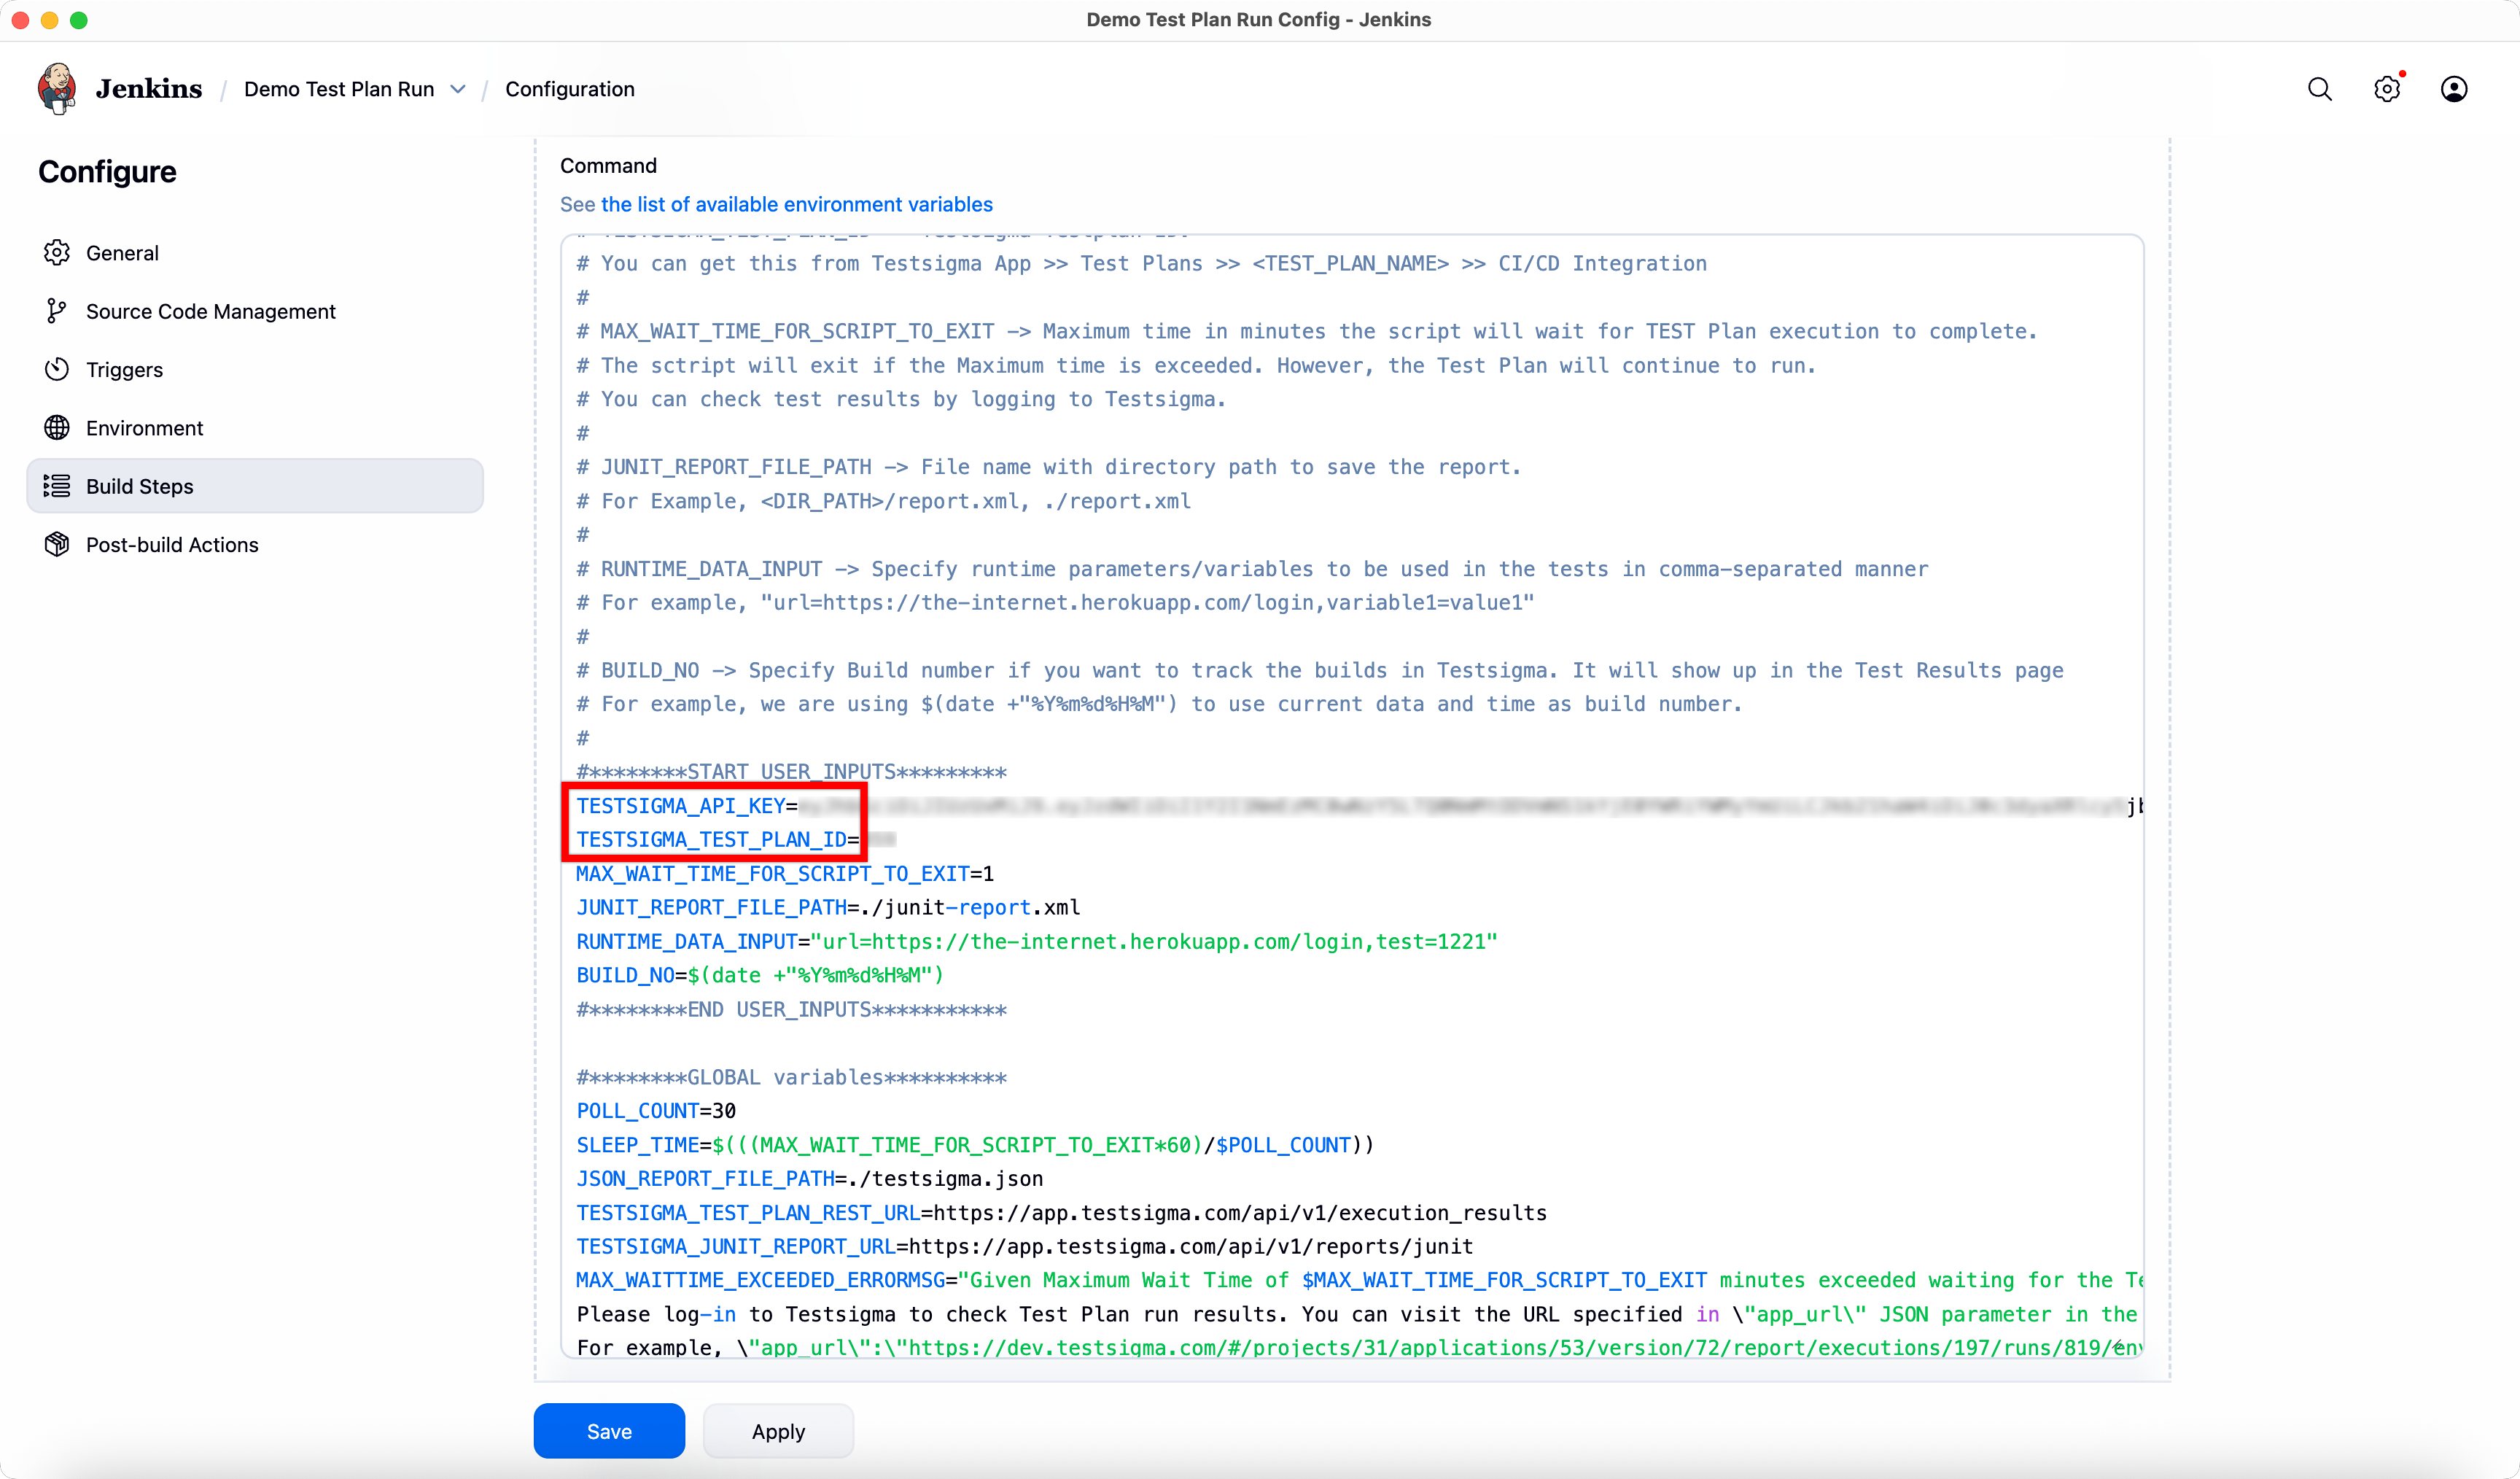
- Copy the Unix Shell Script from the Generic Shell Script page and paste it into the Execute Shell codebox.
NOTE:
Replace values of TESTSIGMAAPIKEY and TESTSIGMATESTPLAN_ID with your Testsigma API Key and Test Plan Execution ID.
- Click Save.
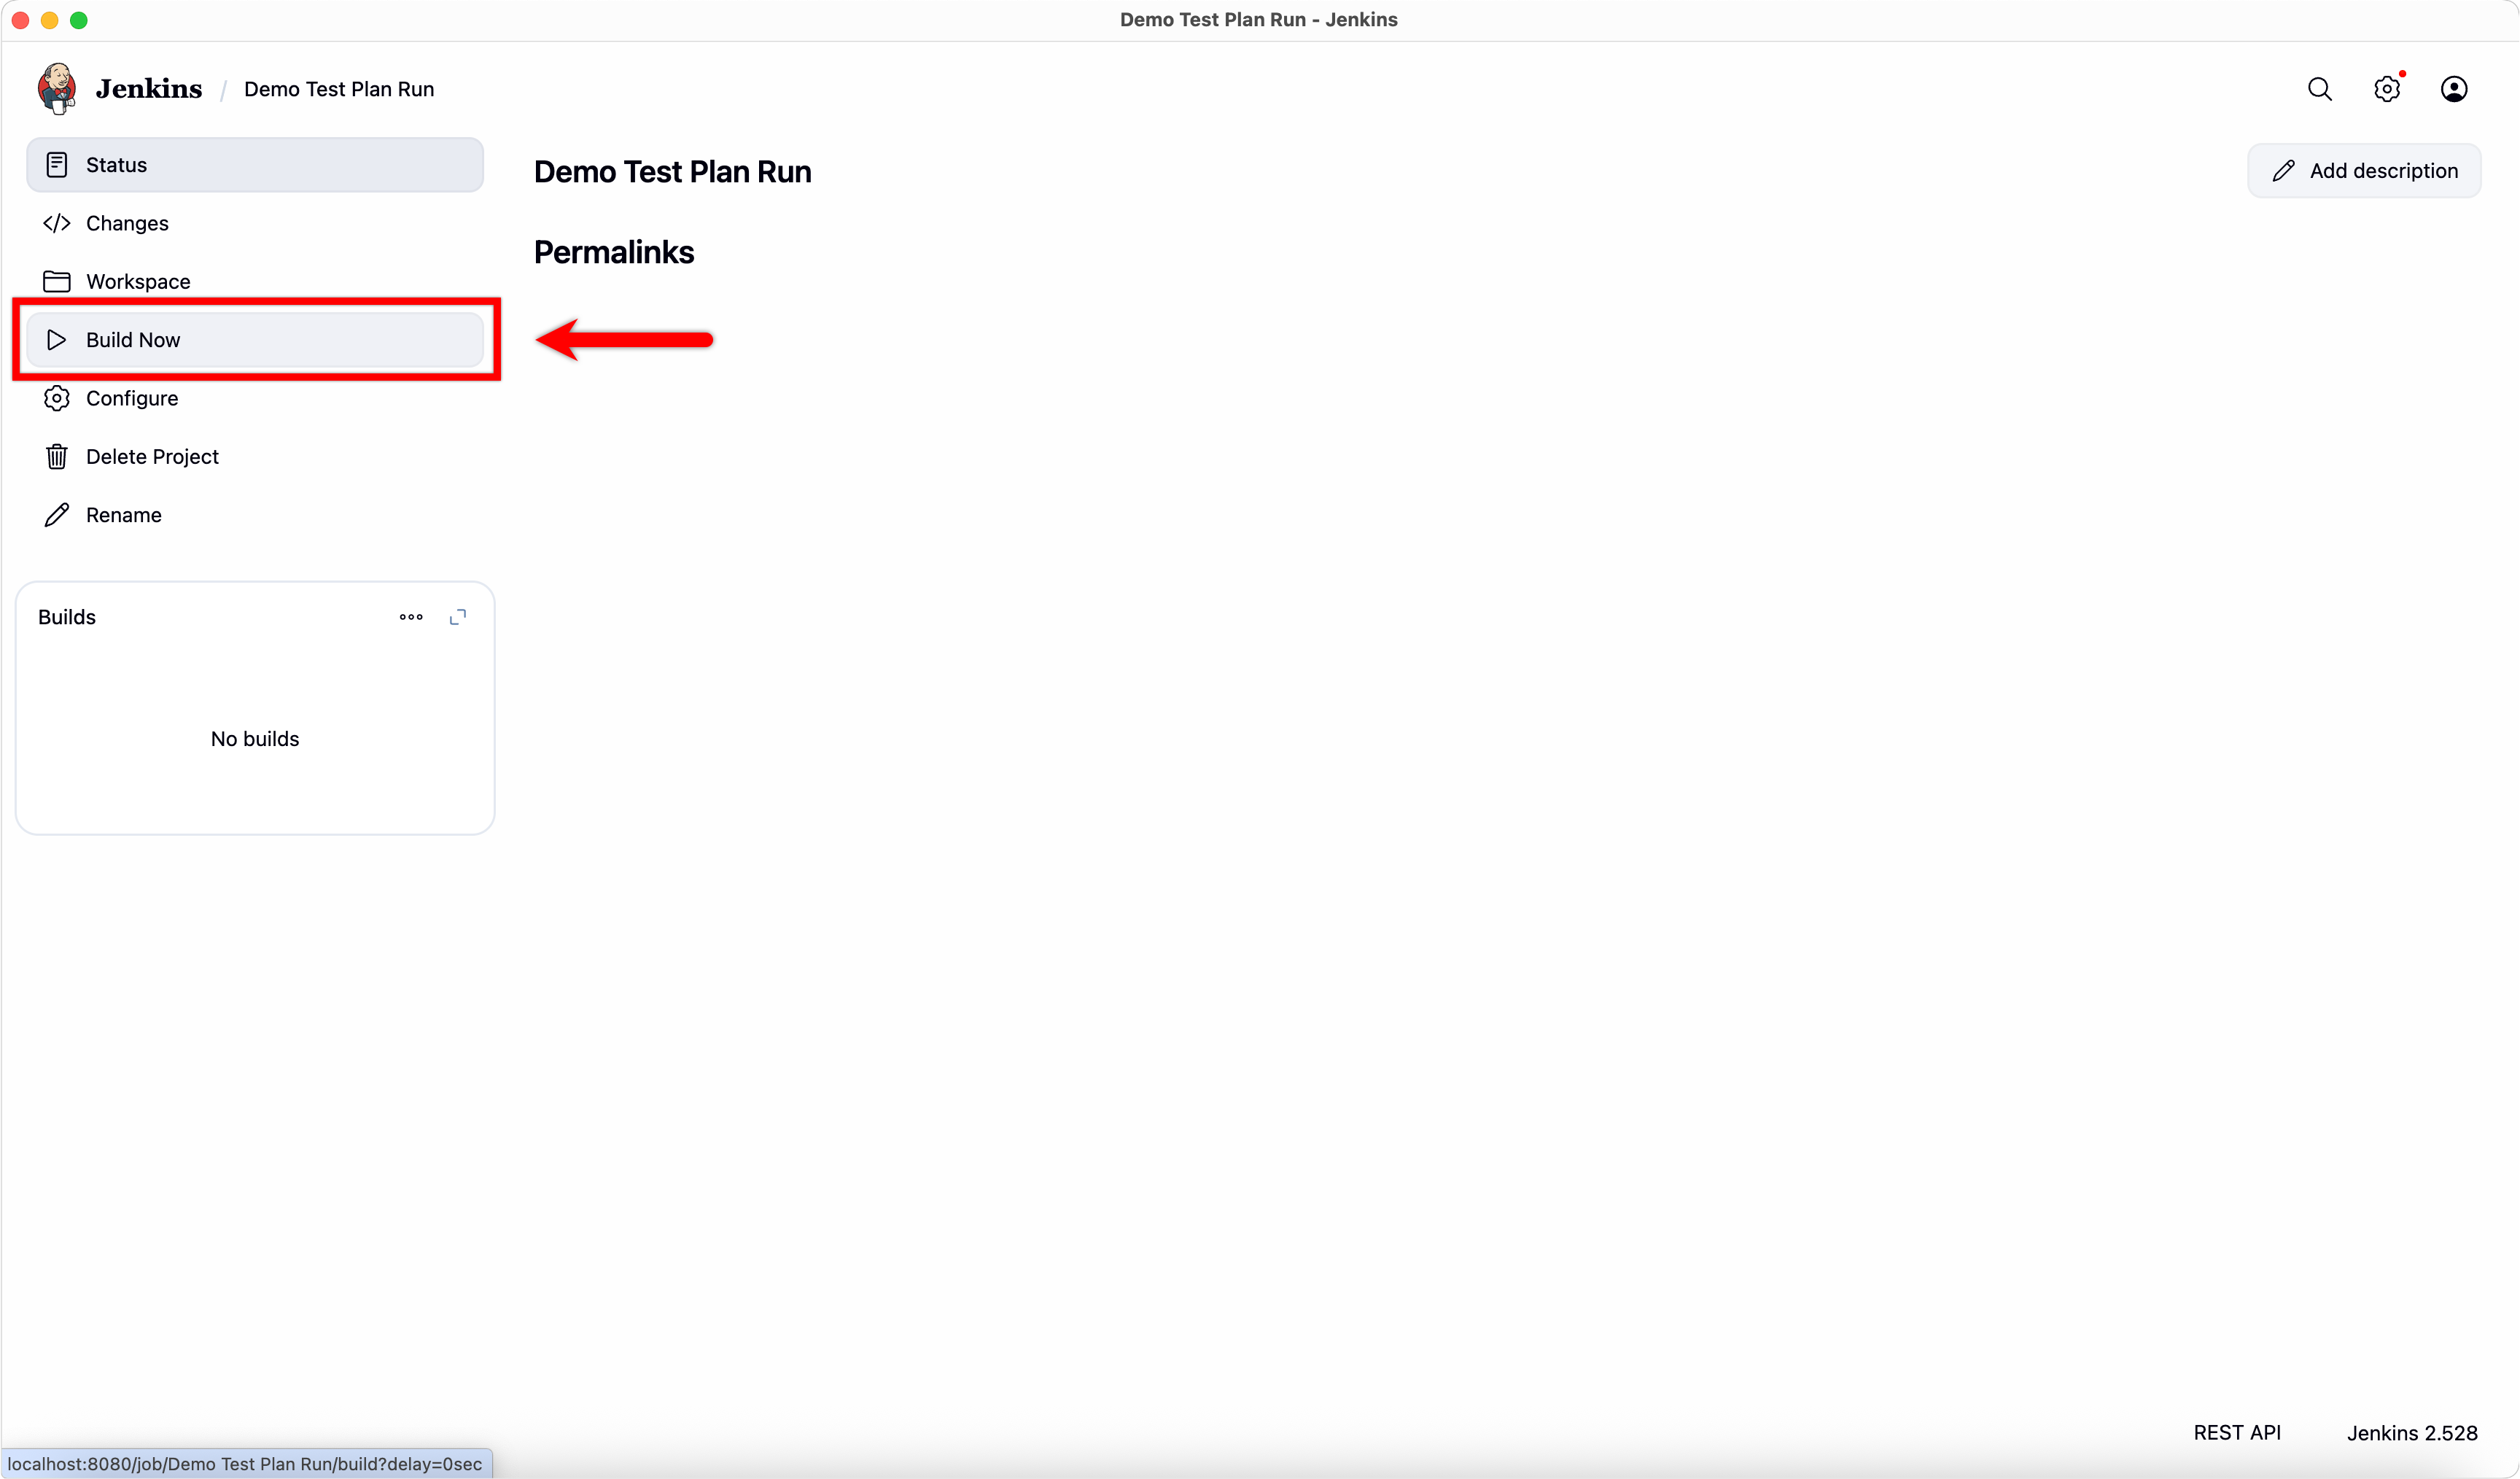
- In the project details page, click Build Now to trigger the Testsigma test plan.
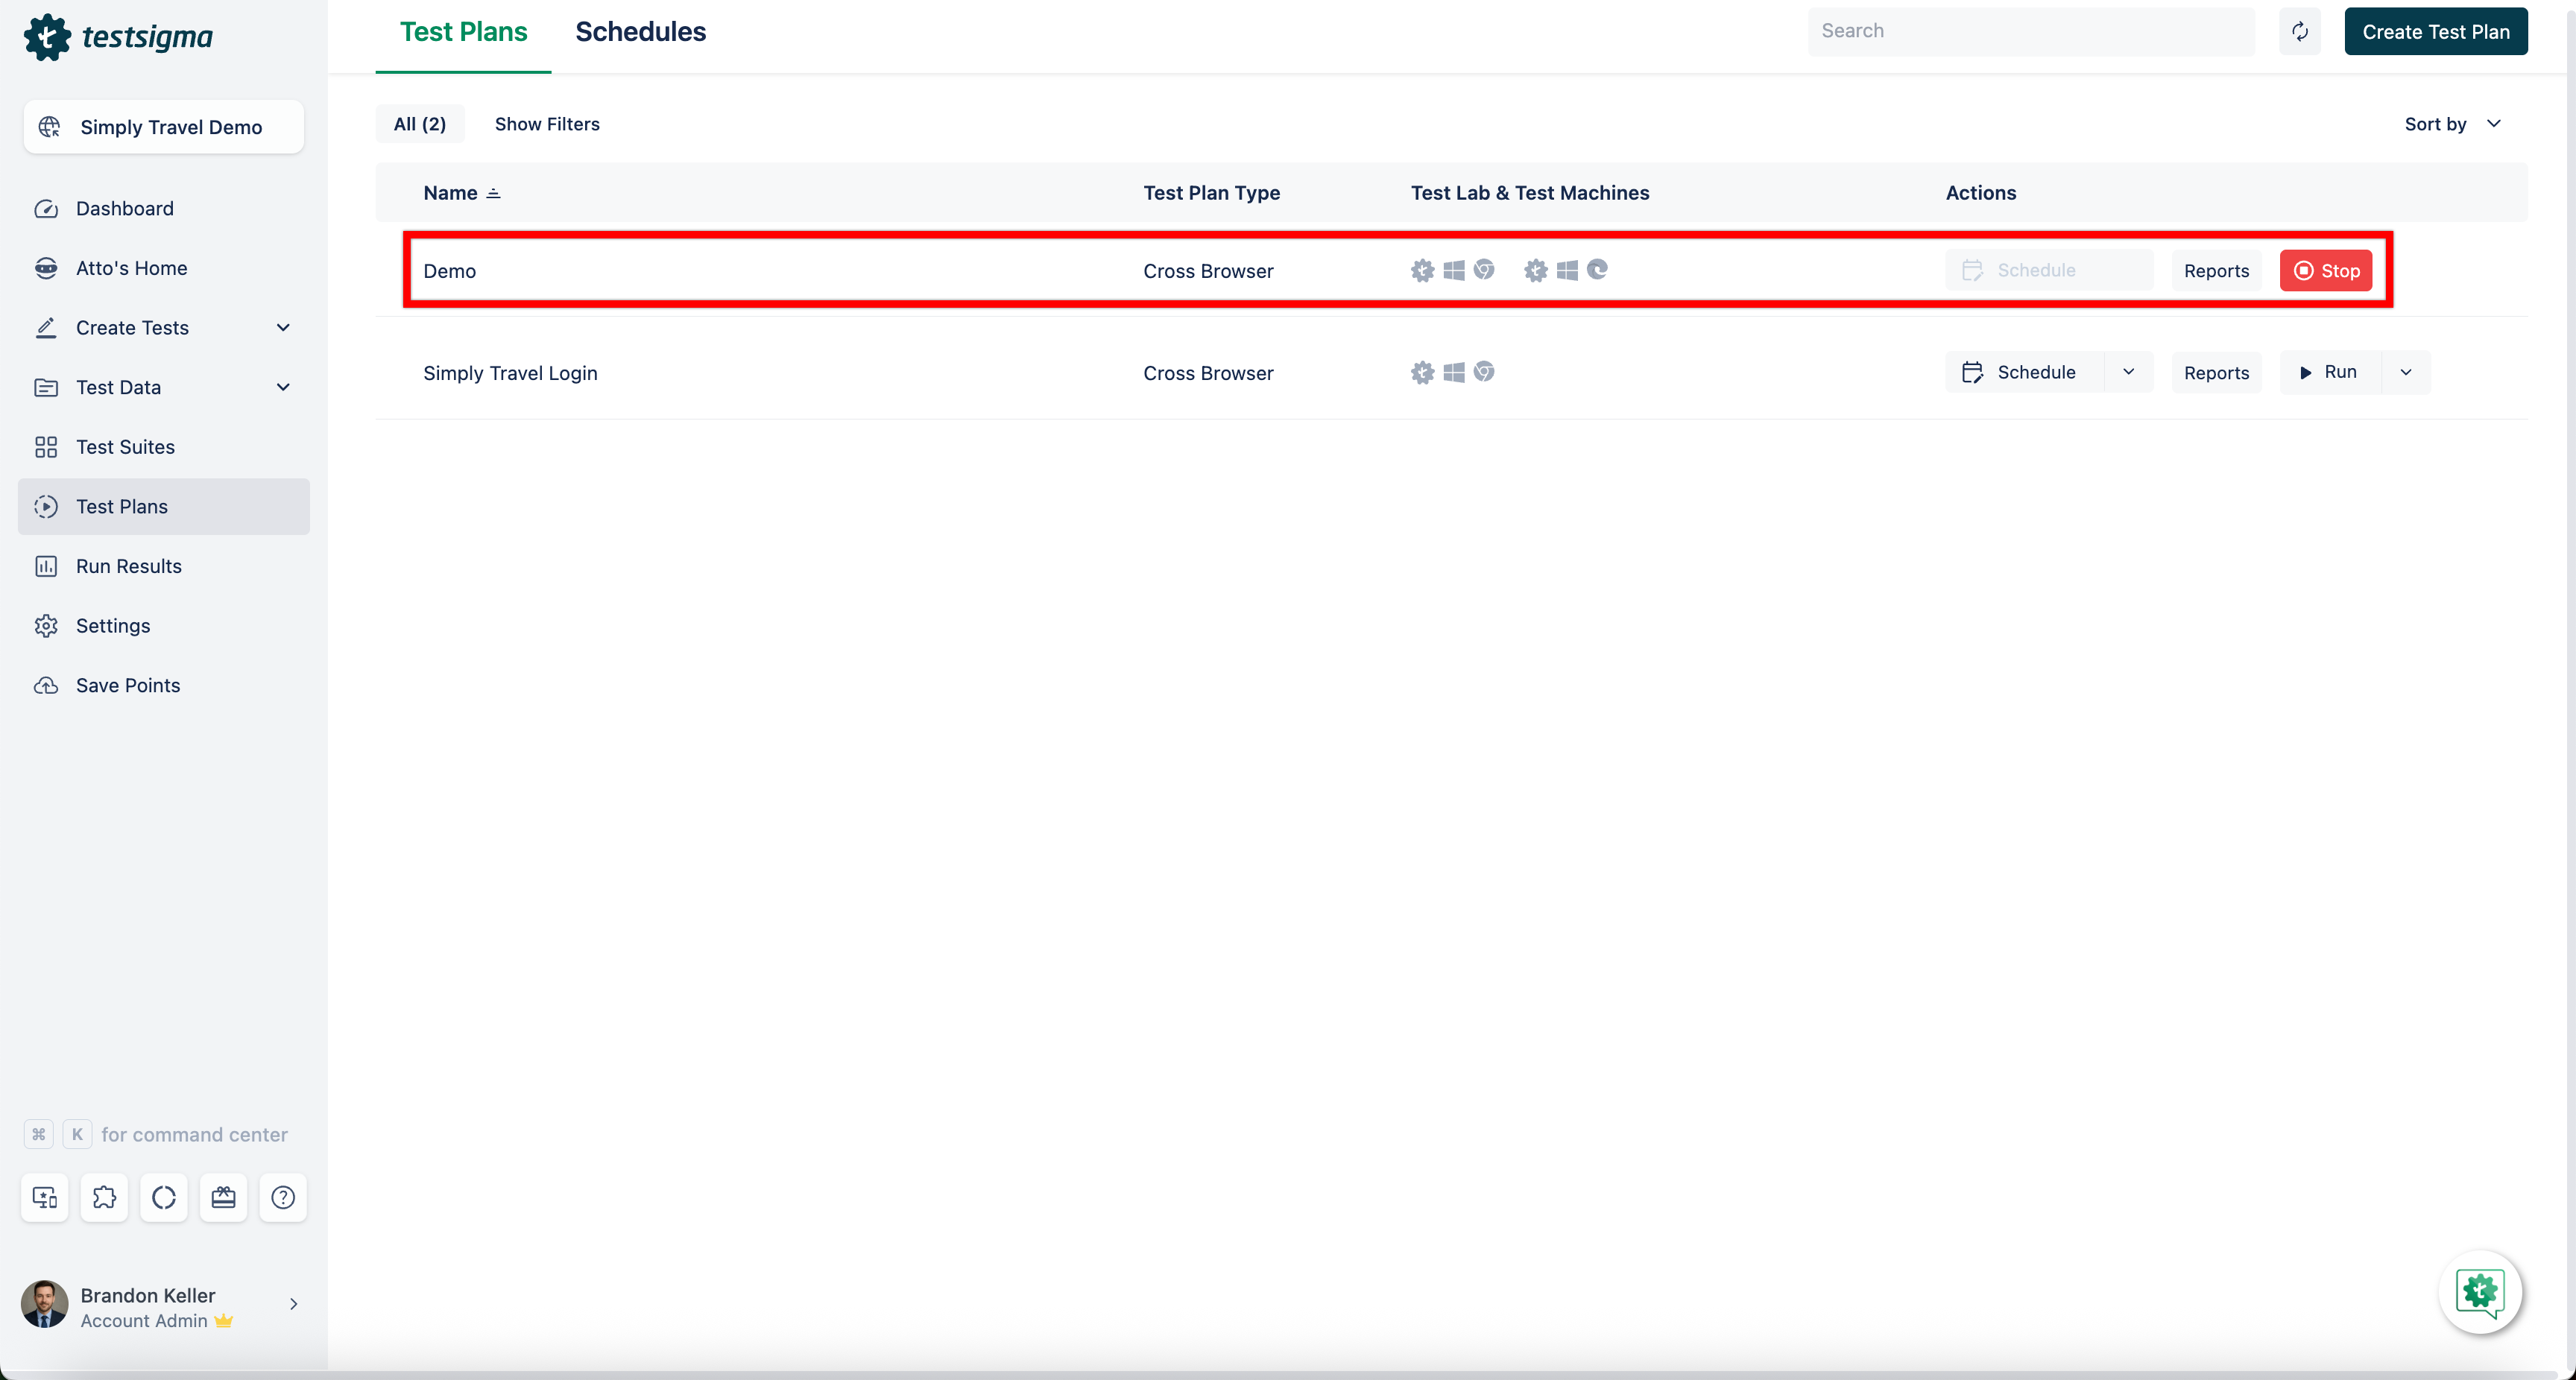
- In Testsigma Dashboard > Test Plans, verify the test plan execution has started.
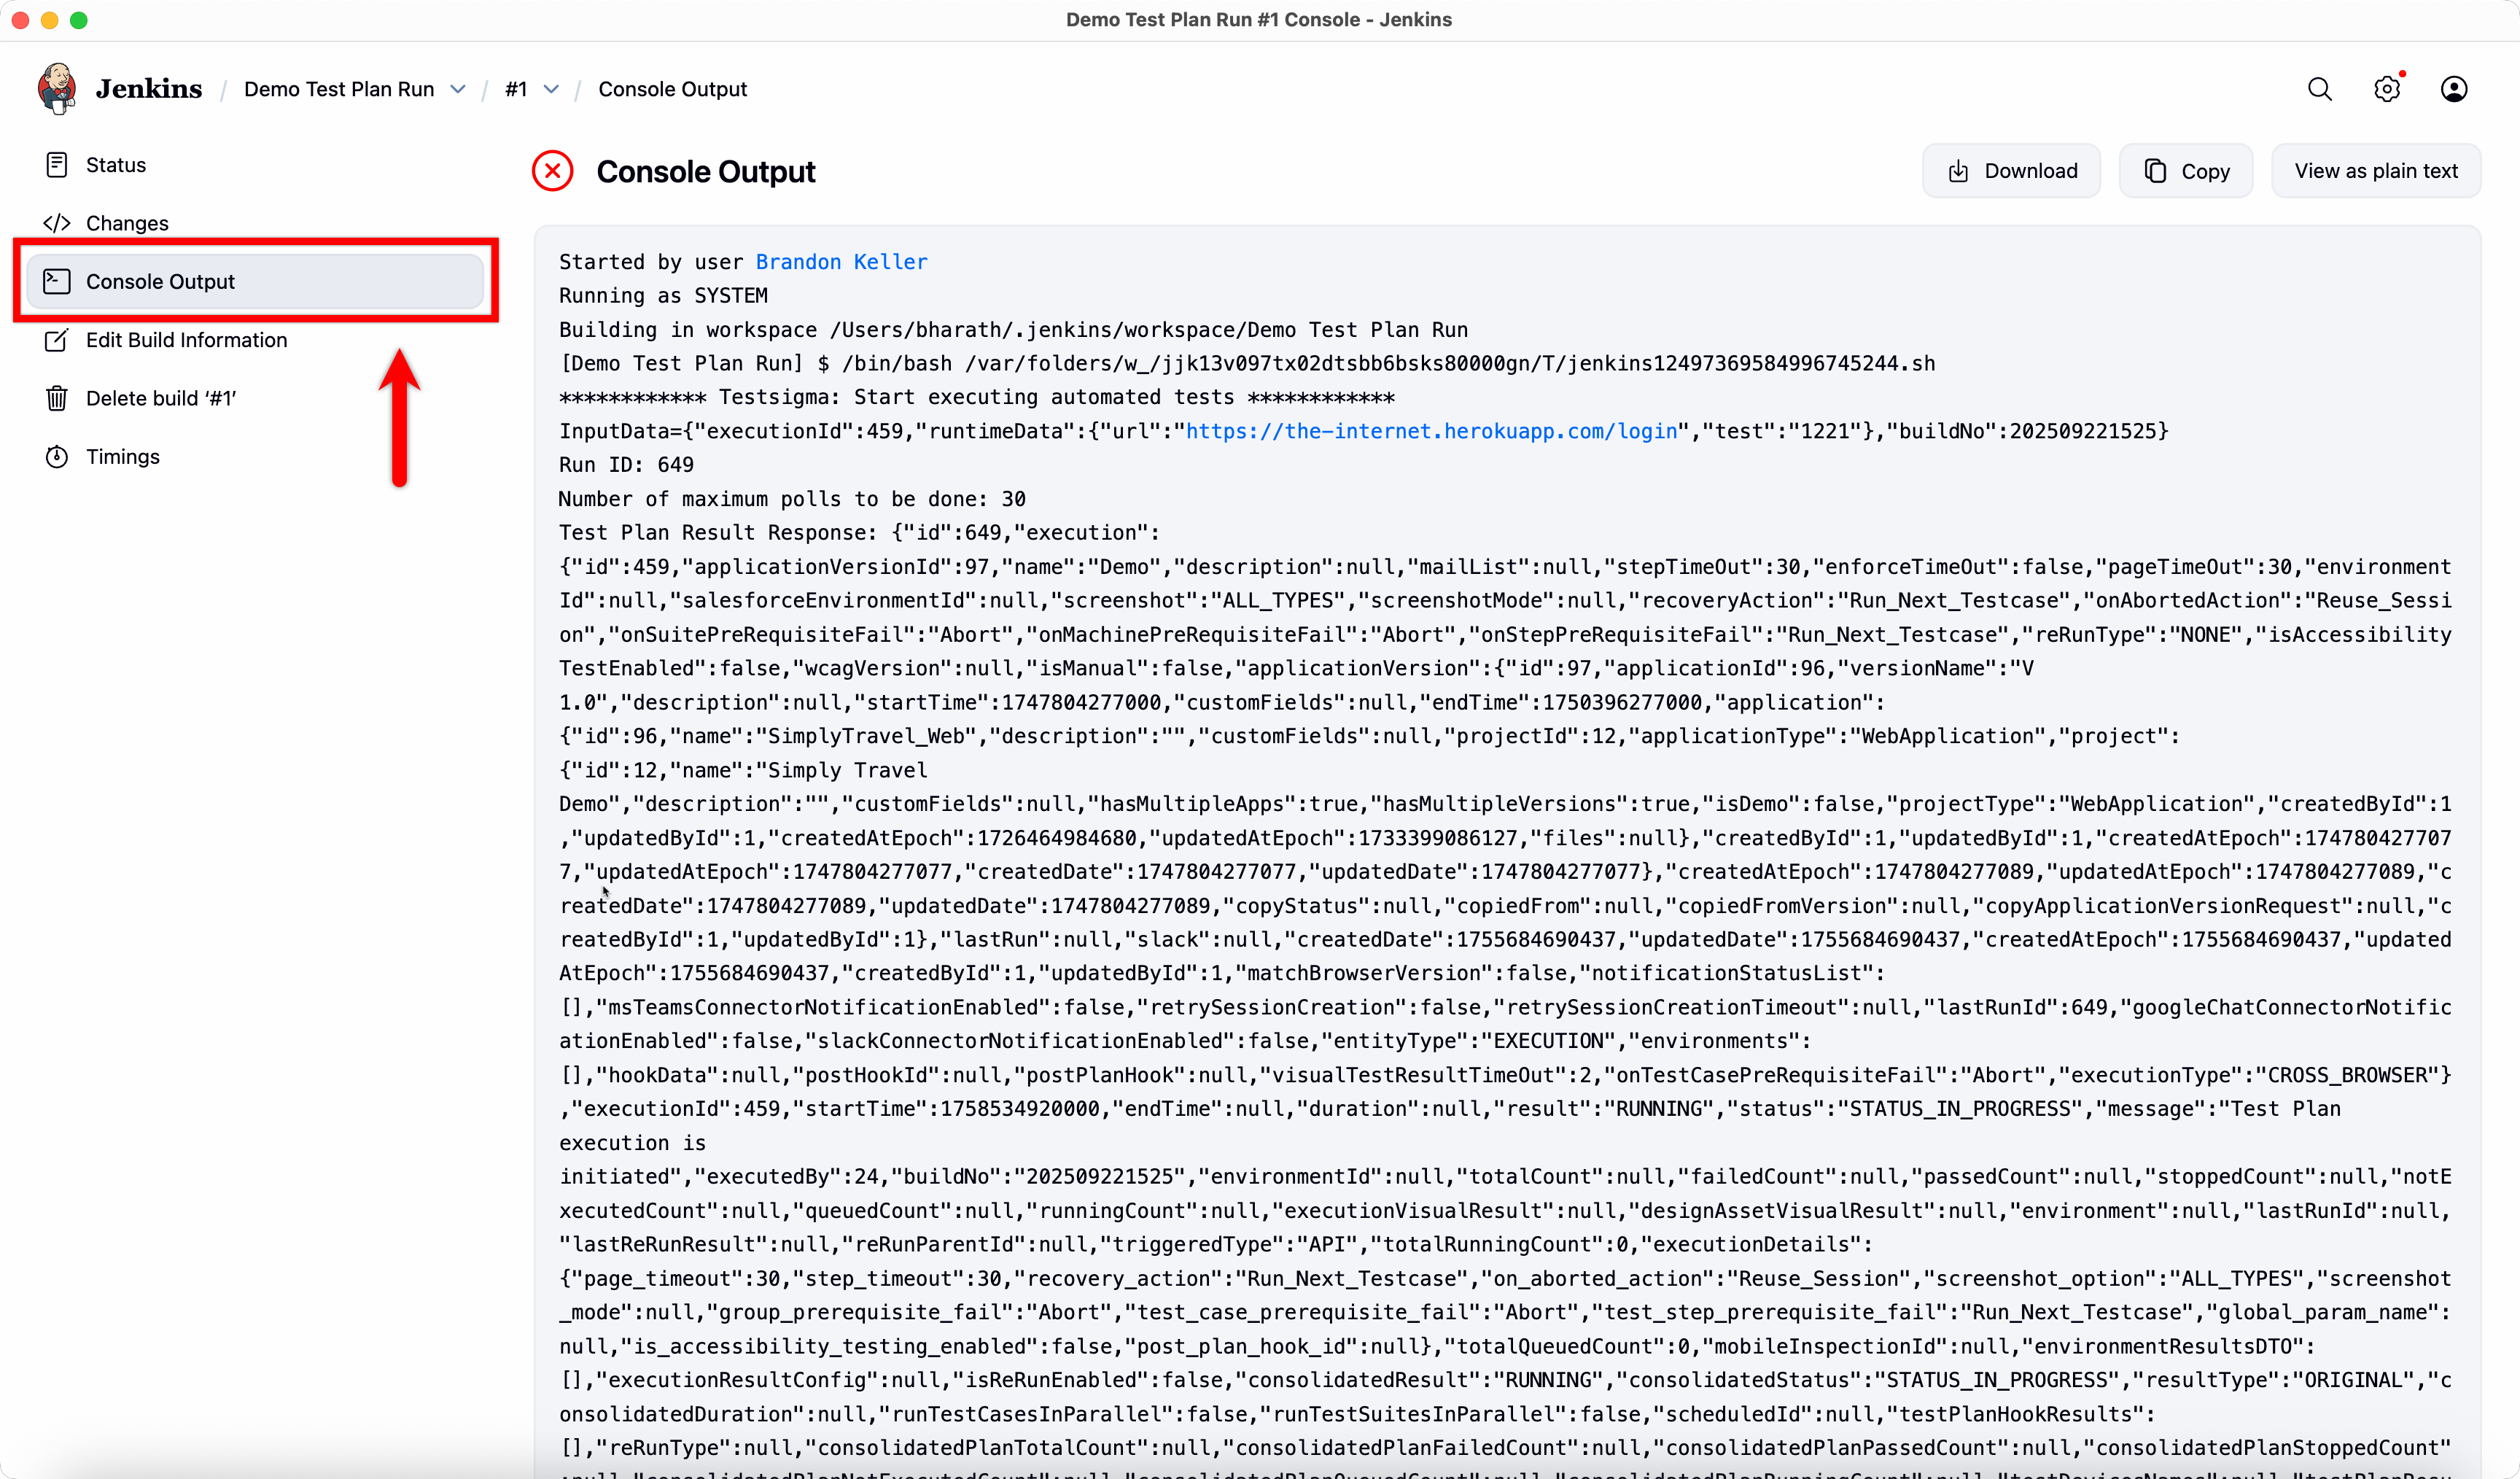
- Click Build, and select Console Log to view execution logs.
- Go to Testsigma Dashboard > Run Results to review detailed execution results.
Want to contribute or report missing content?