- configuration
 API Keys
- User Settings
- Security
- Configure Organization Settings
- Two-Factor Authentication (2FA)
- Configure Password Policy
- Setting Up Google SSO Login
- Setting Up Okta SSO Login (SAML)
- Setting Up Azure SSO Login (SAML)
- iOS Settings
- Create WDA File
- SMTP Configuration
- Manage Access
Setting up SAML-based SSO login for Testsigma in Azure
With Azure (by Microsoft) Active Directory, users can automatically sign into their cloud-hosted/on-premise applications for a hassle-free, secure sign-in experience.
You can use the Azure Active Directory Admin Center to enable single sign-on (SSO) for Testsigma. After you configure SSO, your users can sign in to our application by using their Azure AD credentials.
Prerequisites
Before you begin, ensure you have an Azure Account with Active Directory enabled and admin access to the Azure account.
I. Adding Testsigma Enterprise Application
- Login to Azure portal.
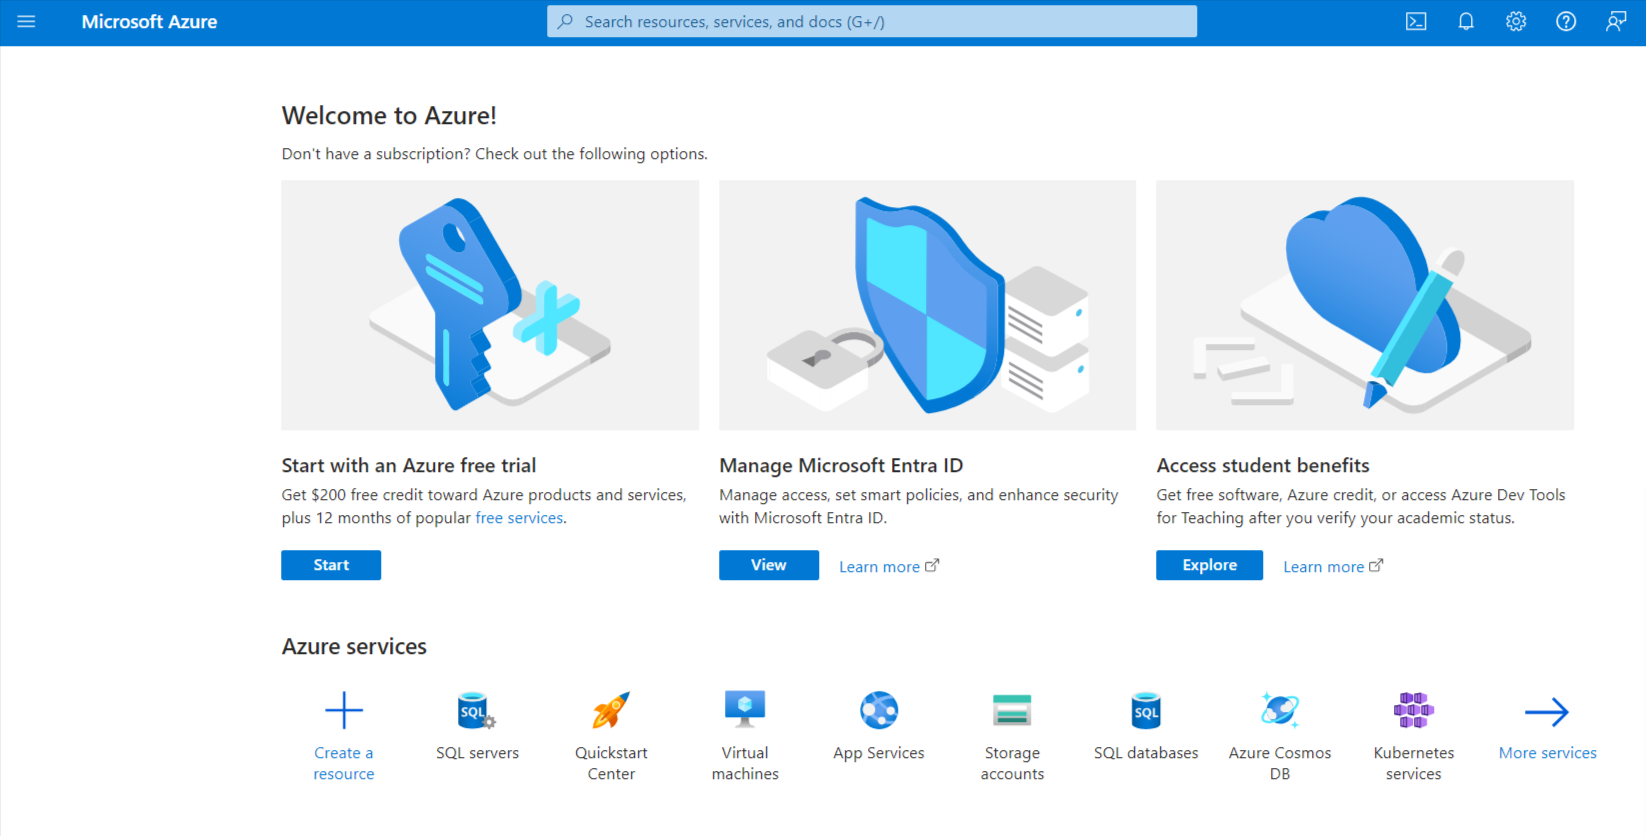
- Click the View button below “Manage Microsoft Entra ID”.
- In the Active Directory Overview page, click on + New application and choose Enterprise Application
- Click on + Create your own application In the overlay that opens up on the right, enter the name of the app you are integrating, and select option, ‘Integrate any other Application (Non-gallery)’ and click the Create button.
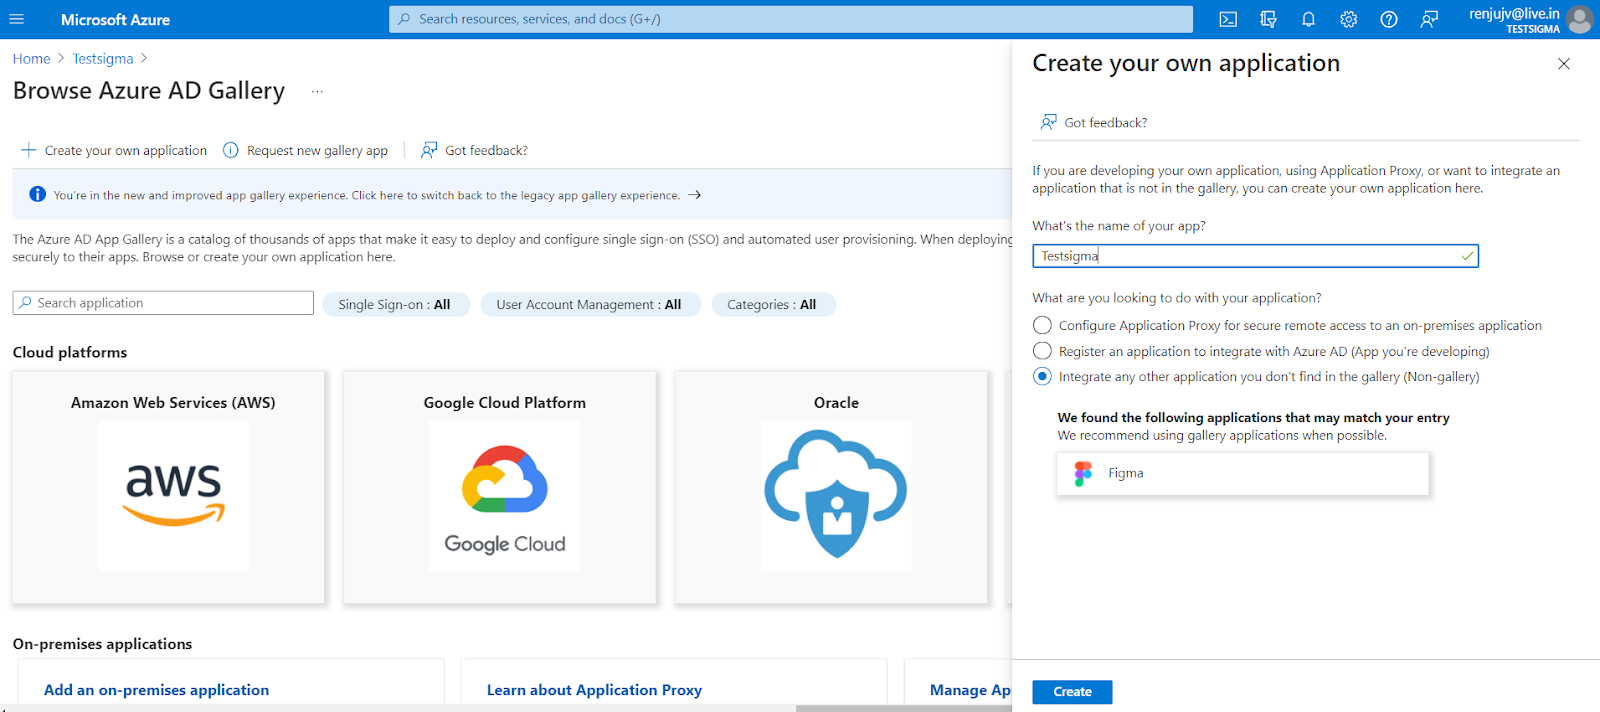
You’ll be redirected to the newly added Testsigma overview page.
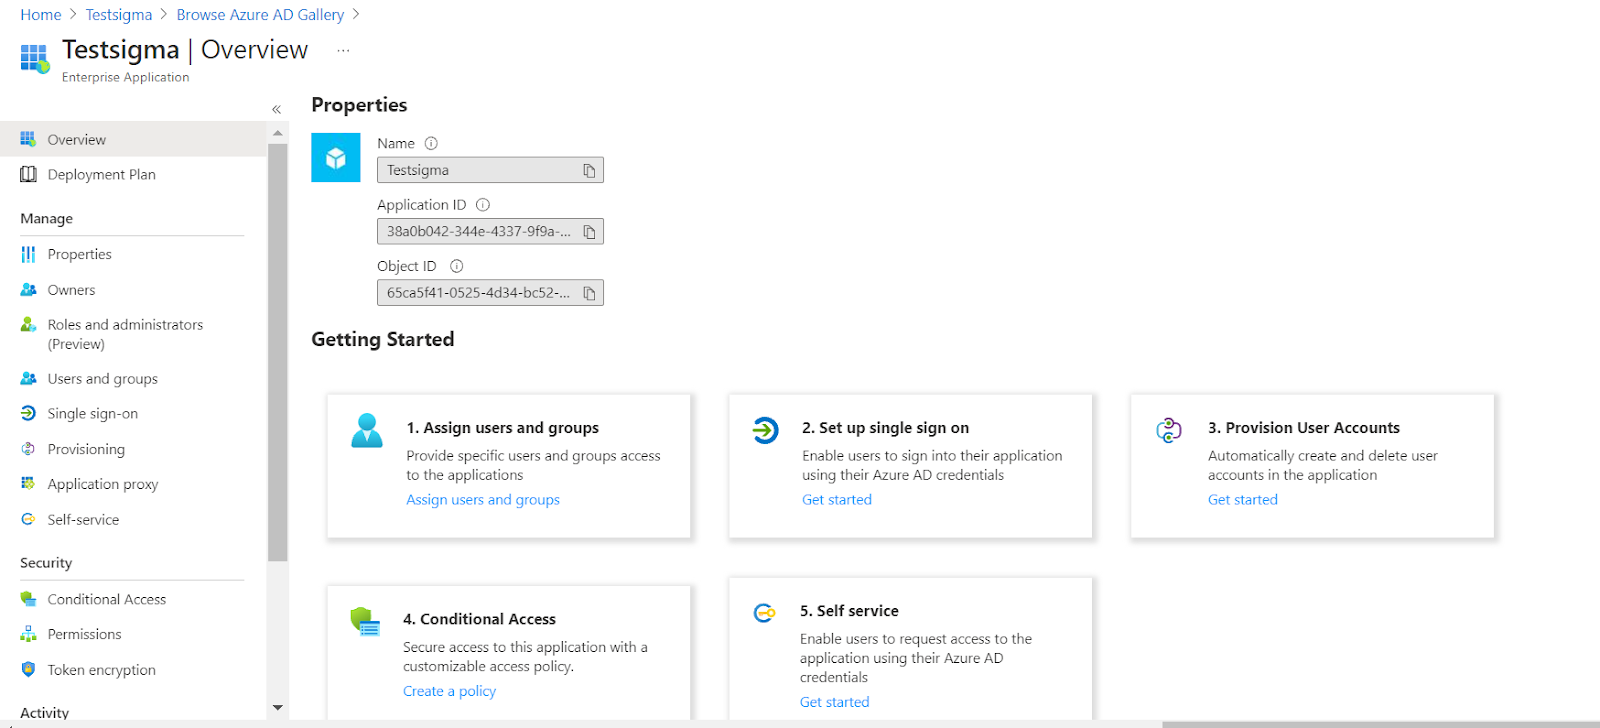
II. Adding Users to the Enterprise Application
- Click the Assign users and groups card to add the users in Azure AD to the recently added Testsigma app.
- Click on the + Add user/group on top.

- In the next page, Add Assignment, click on the None selected link to open up the Users overlay.
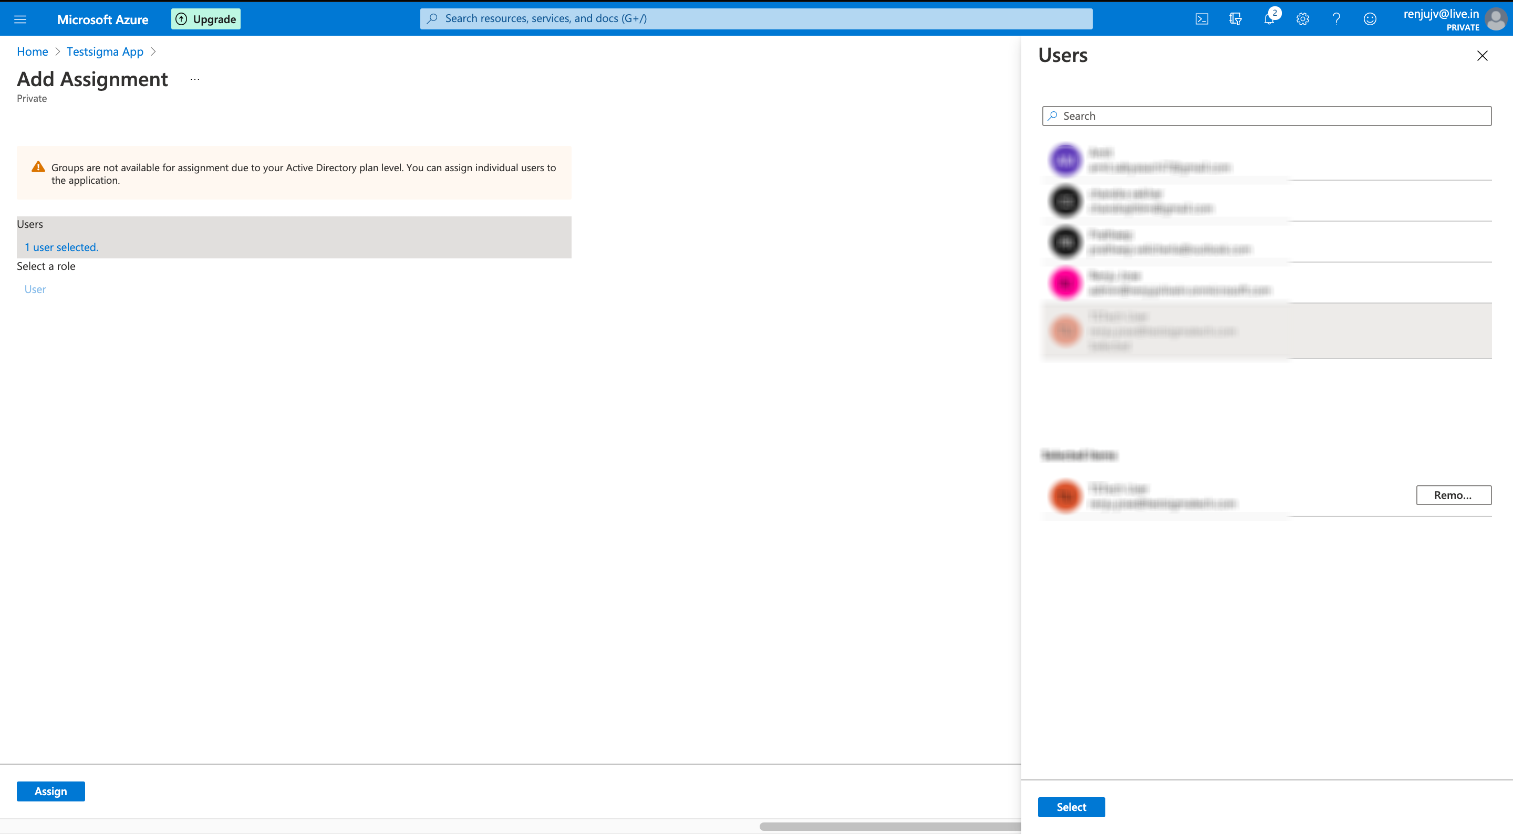 Select the required users from the Users overlay that opens up on the right.
 - Click on the Select button to pick and finalize the users list. You can find the list of added Users at the left pane under Users.
- To add assignments to these users, click Assign.
III. SAML Configuration on Azure in Testsigma
- Back in Testsigma Overview page on Azure, click option 2 i.e, Set up single sign on.
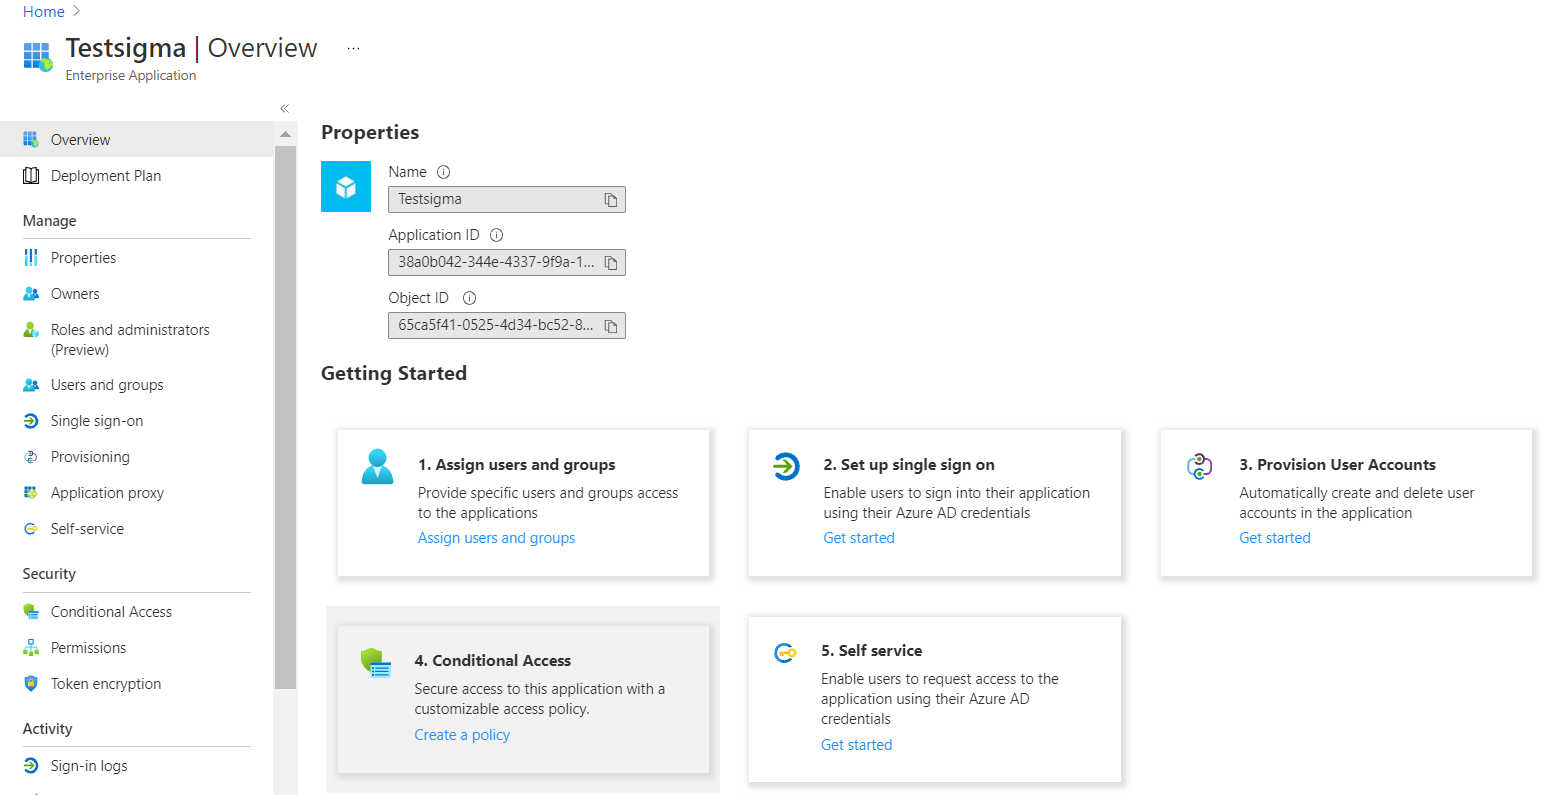
- Select the SAML authentication option.
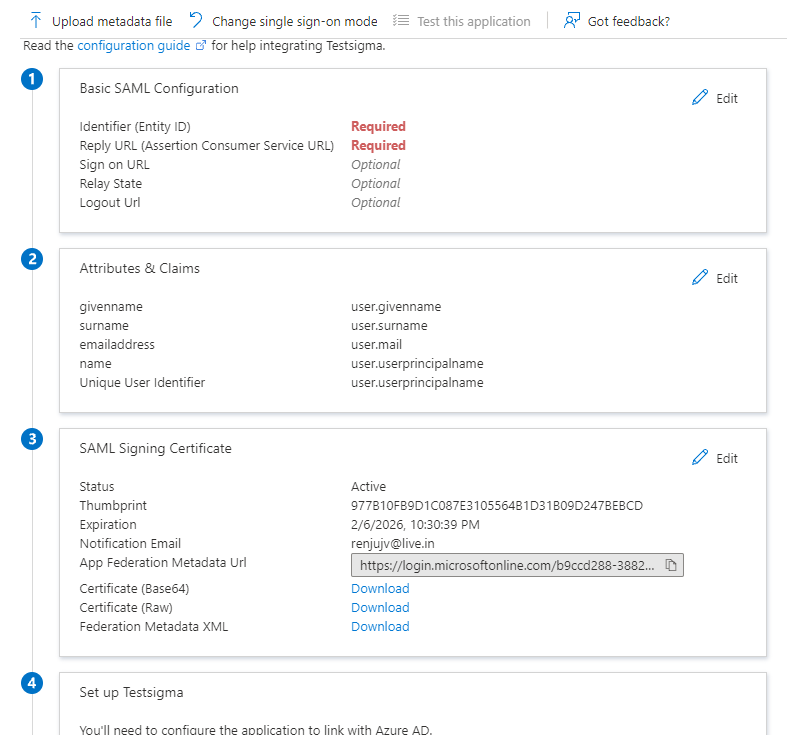
You will be taken to the Setup Single Sign-on with SAML screen as shown below:
-
Click on the Edit button on Section 1 - Basic SAML Configuration, enter the following details, and click Save:
- Entity ID : https://id.testsigma.com/saml/<id>/metadata.
- Sign on URL : https://id.testsigma.com/saml/<id>/callback.
- Relay State : https://id.testsigma.com/.
- Logout URL : (Leave it empty)
You need to replace the <id> with the SAML token identifier for your account. To get your id, you need to follow the steps below.
- Back in your Testsigma account, navigate to your profile and click Switch Account.
- Click Settings under the Others section on the home screen.
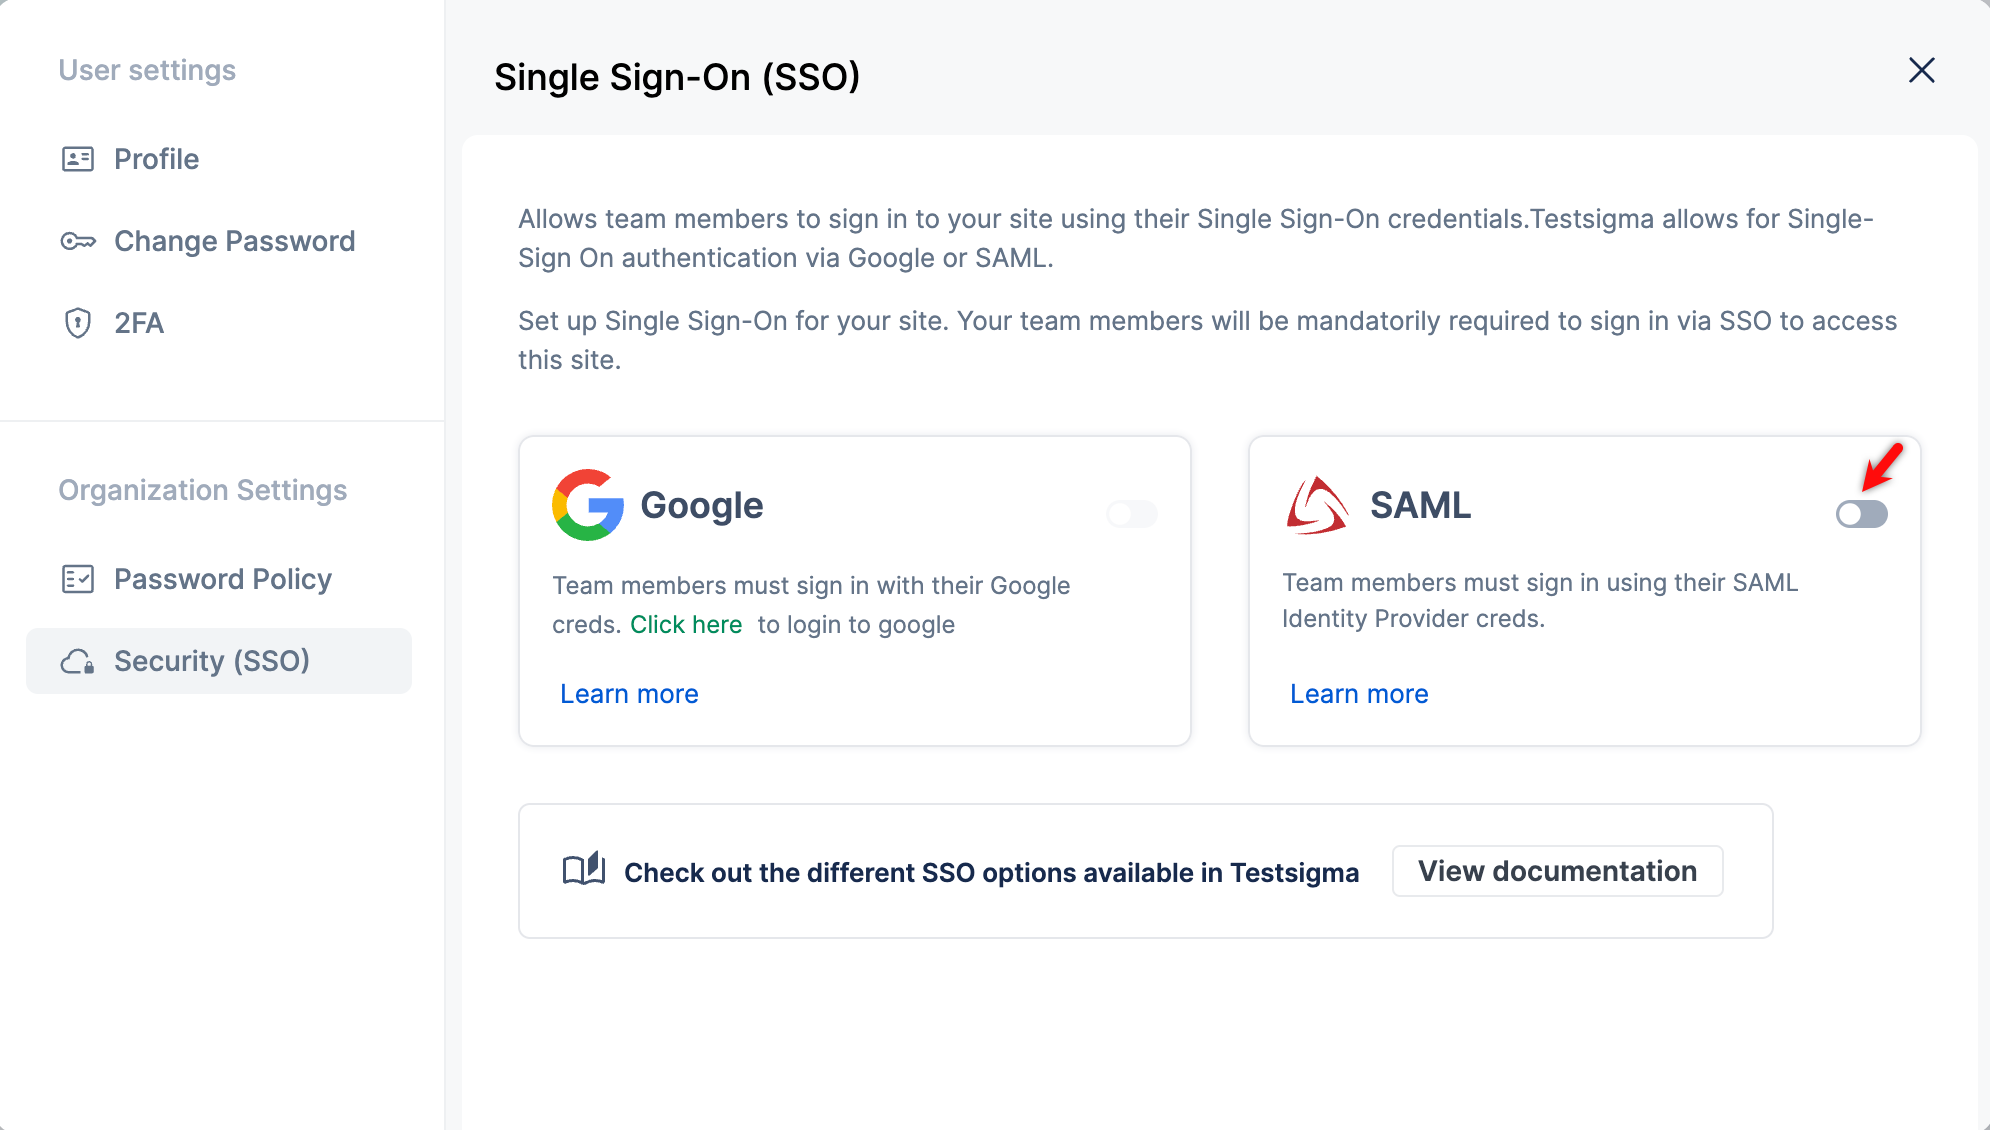
- In the Settings panel, scroll down to Organization Settings and click Security (SSO).
- In the Single Sign-On (SSO) settings, enable the SAML toggle.
- You will see an exclusive SAML token identifier for your account. When you hover over the Entity ID, Sign On URL, and Relay State, you will see an option to copy each value. You can click on it to copy the URLs directly.
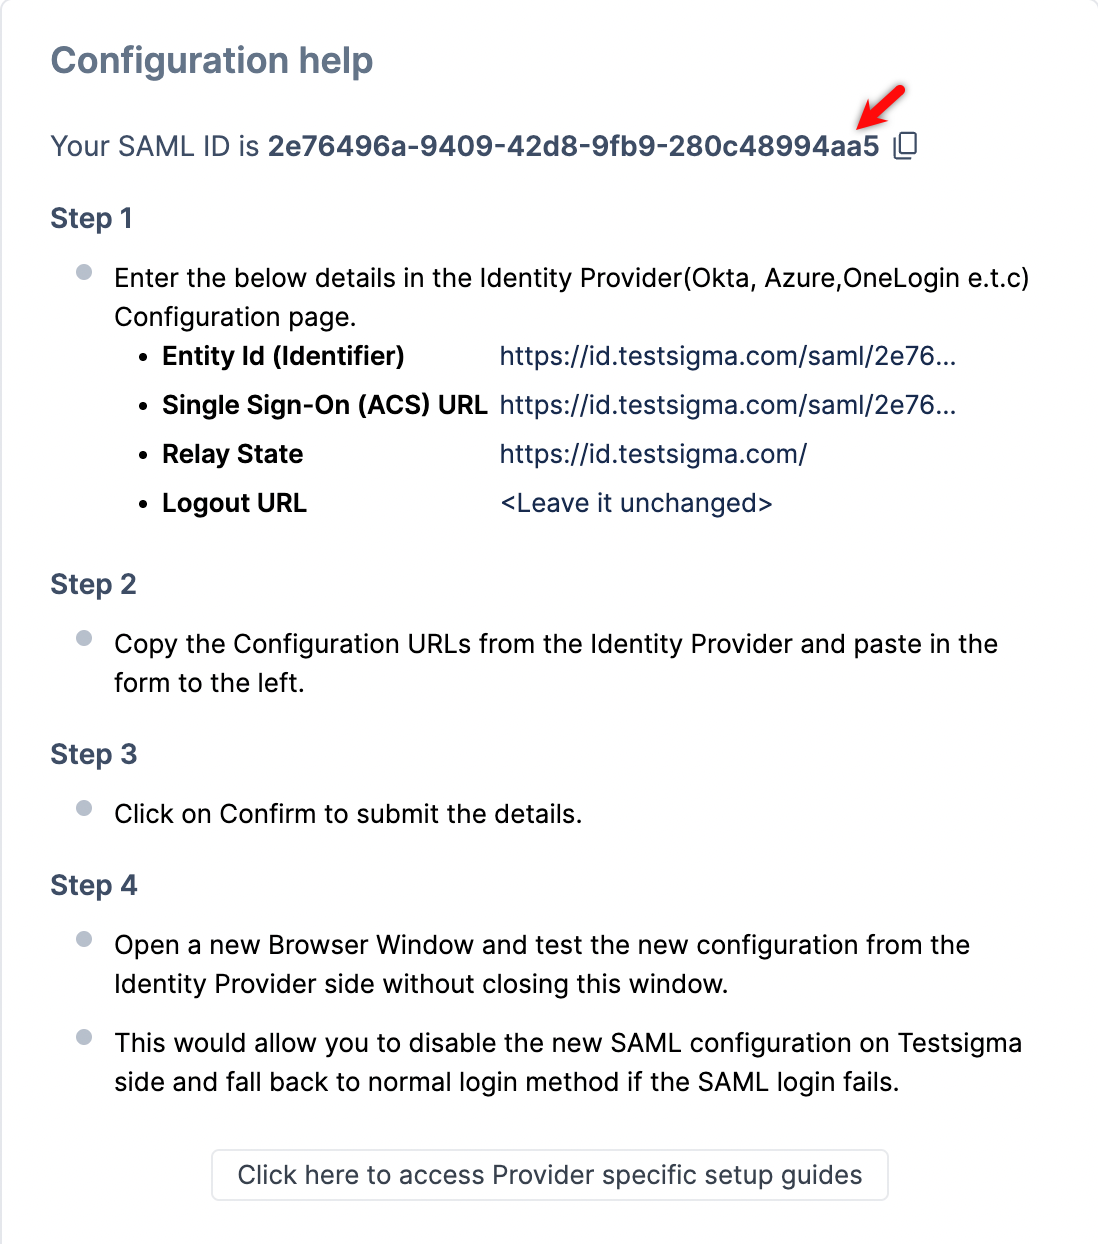
- You need to put this identifier in place of <id> in Step 3 and click Save.
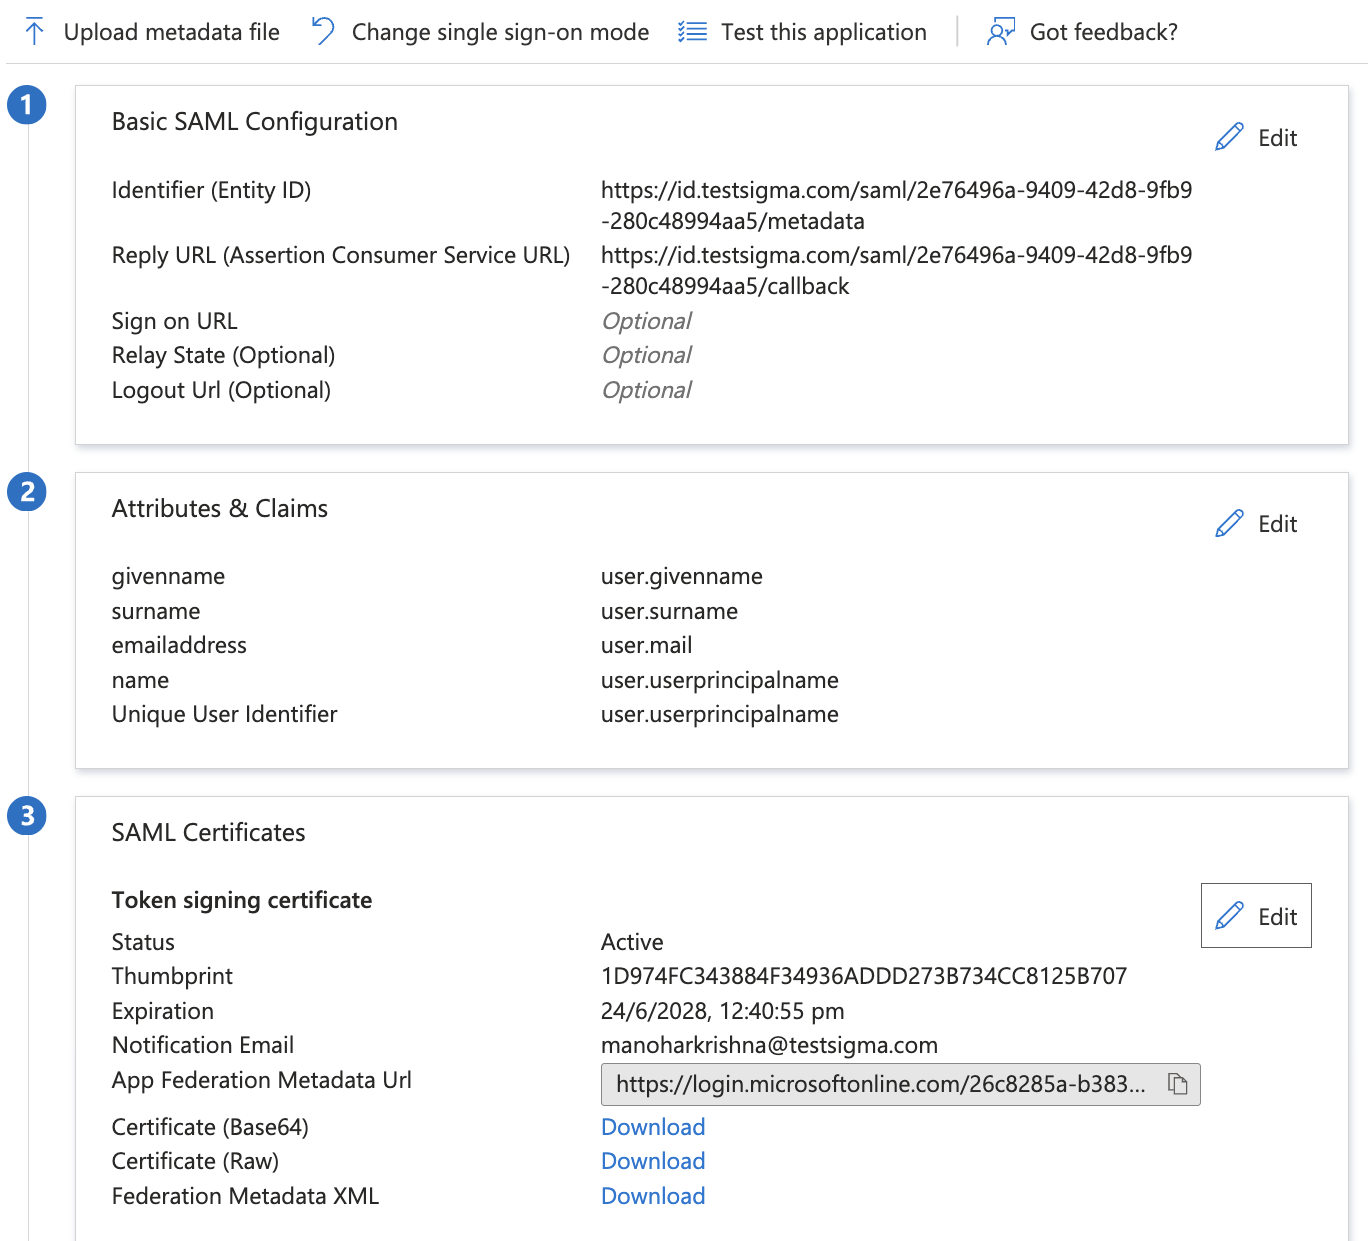
- Click on the Edit button of Section 2 - User Attributes & Claims. Under Required claim, click the Claim name/Claim value.
- In the Manage Claim page that now appears, select Source attribute as user.userprincipalname from the dropdown.
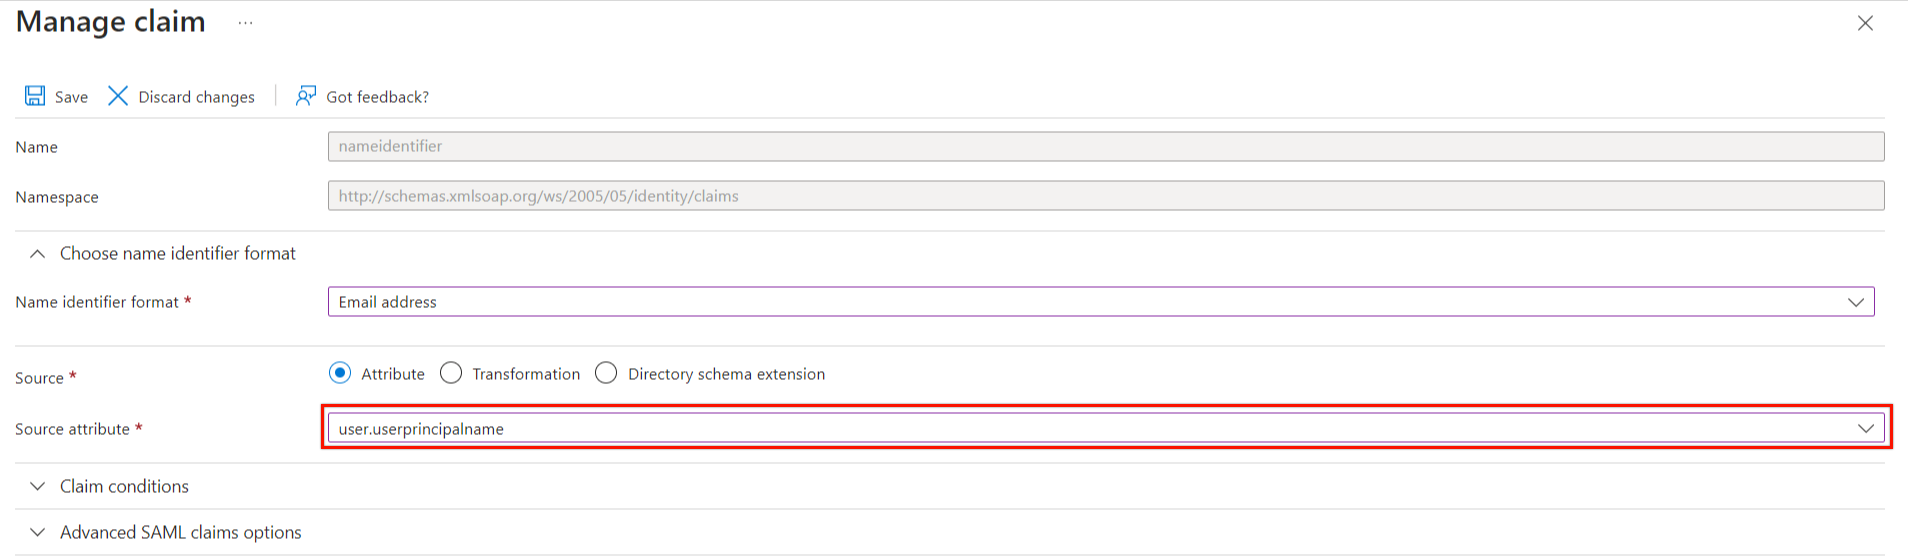
- Click Save and go back to the previous SAML-based Sign-on page.
-
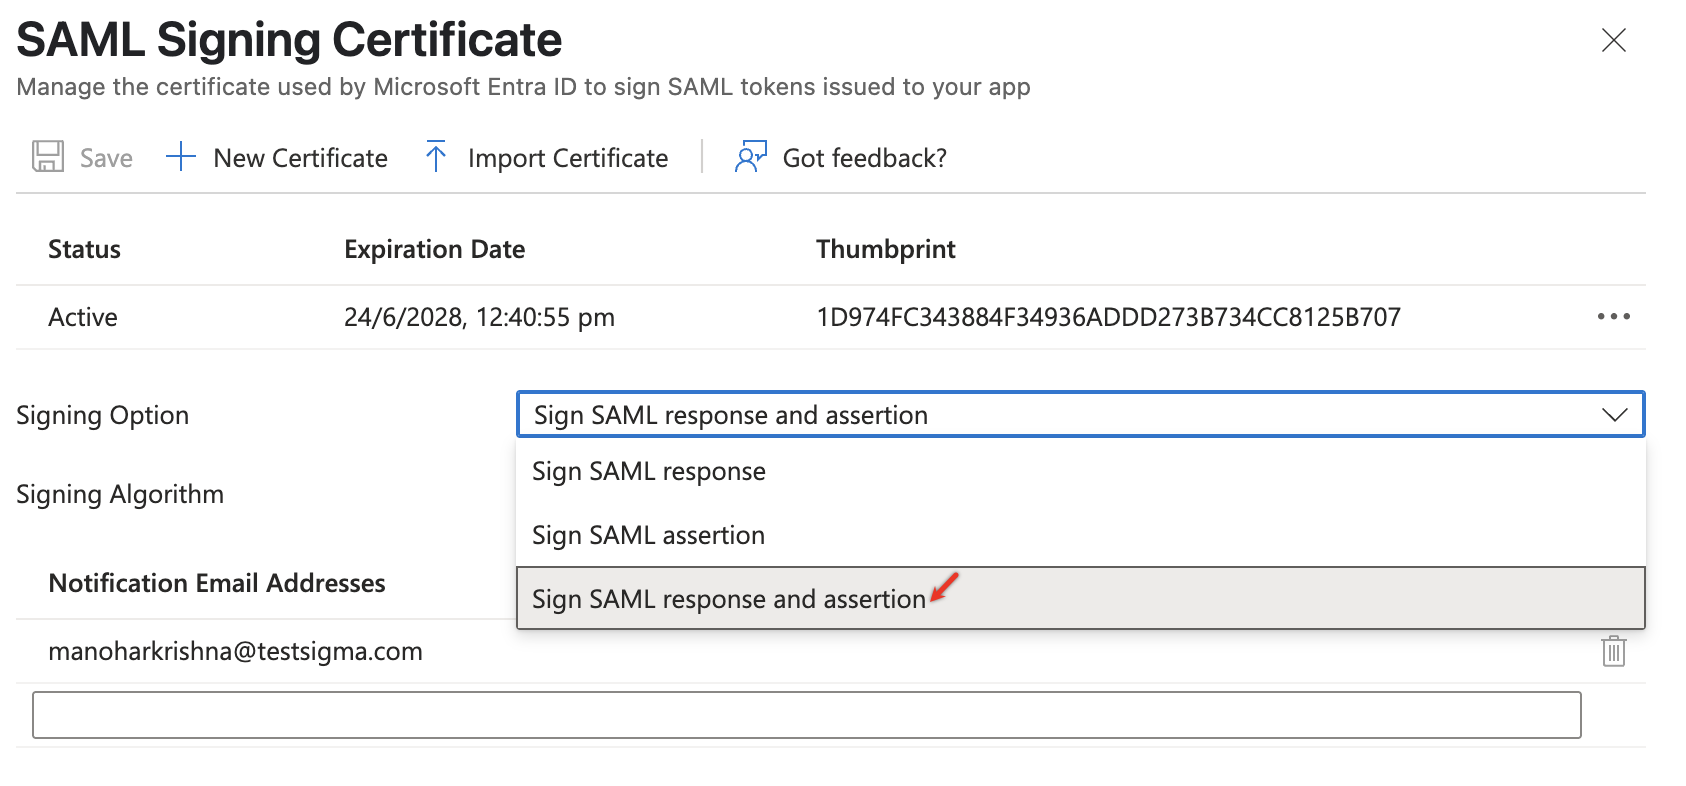
Click on the Edit button for section 3 - SAML Signing Certificate, enter the following details, and click Save:
- Signing Option: SAML response and assertion
- Signing Algorithm: SHA-256
That's all the configuration you need to perform on Azure App for SAML-based Sign-on.
- Now, navigate back to the SAML Sign-on page
Download the XML file, ‘Federation Metadata XML’ by clicking the Download link under Section 3 - SAML Signing Certificate.
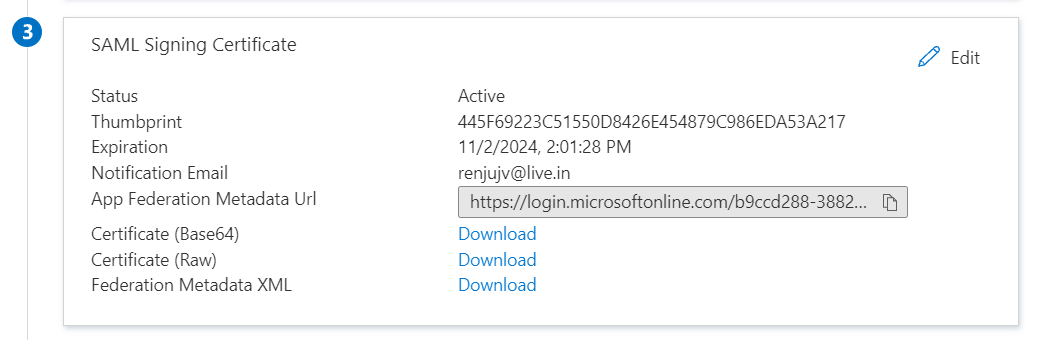
- Open the XML File and copy the value under the key EntityDescriptor > Signature > KeyInfo > X509Data > X509Certificate
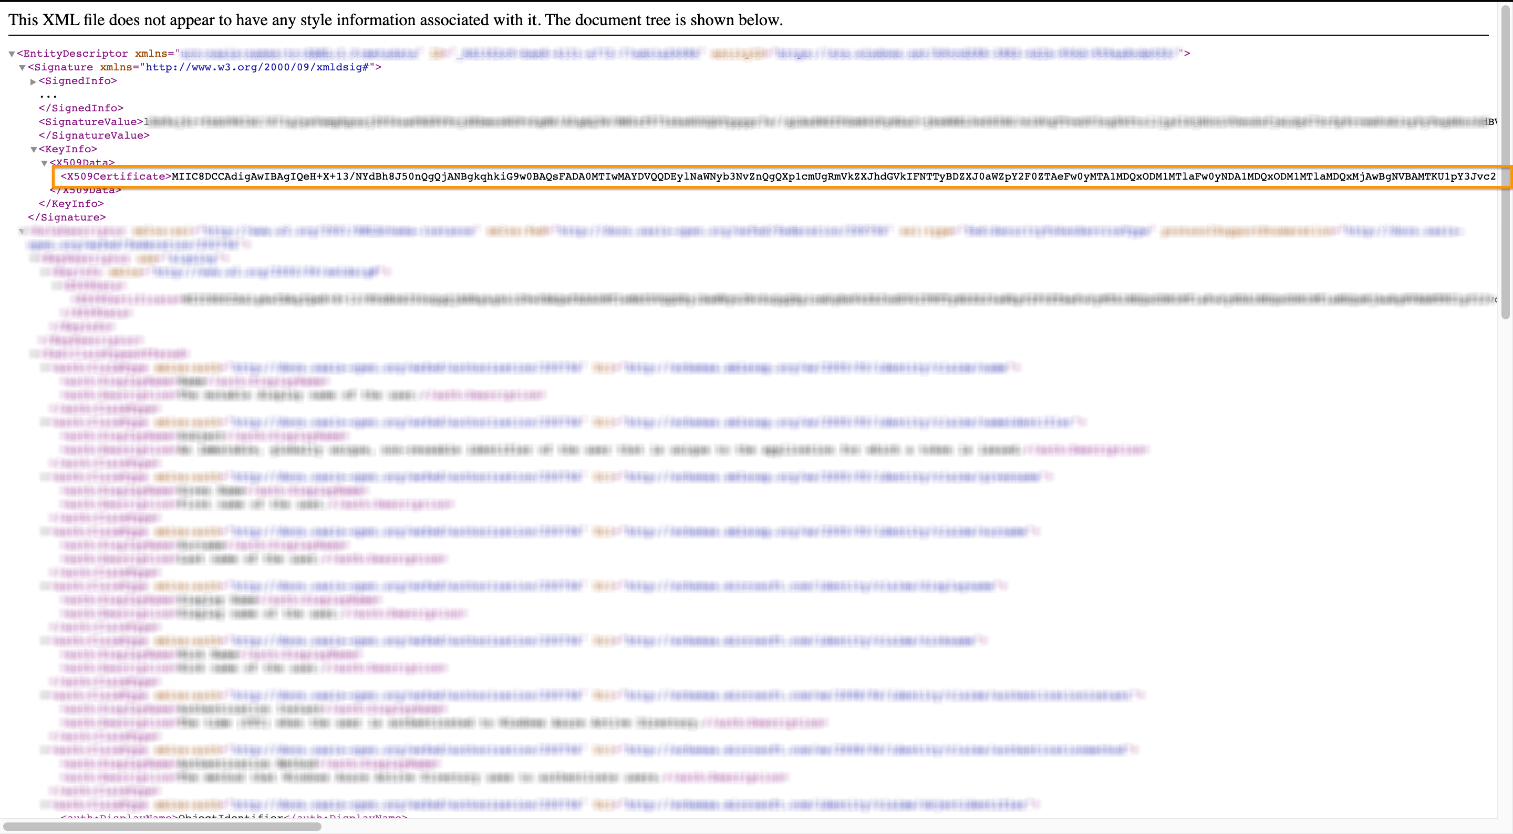
You can just search for <X509Certificate> and copy the value between first occurrence of <X509Certificate> and <X509Certificate>
-
Note down the following values from Section 4 - Set Up Testsigma App.
- Azure AD Identifier
- Login URL
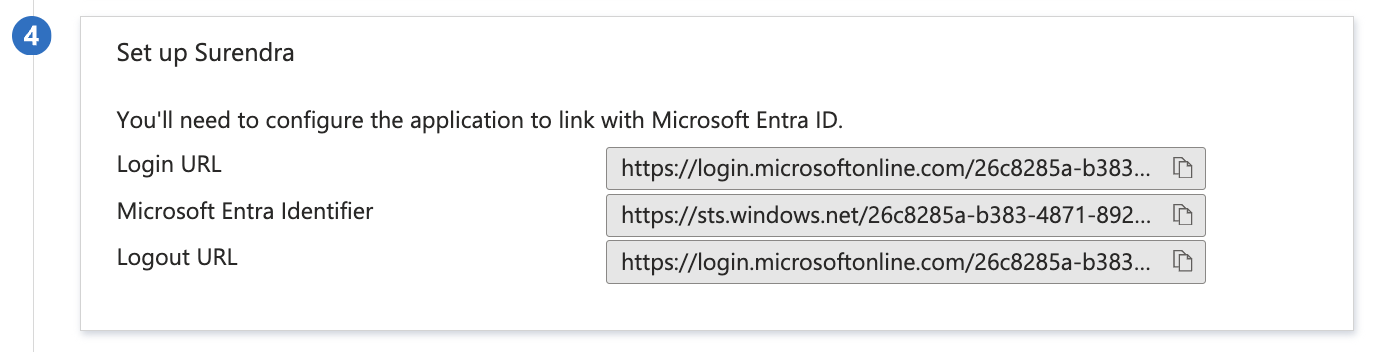
We will use the X509Certificate value, also the values above in Testsigma app in the next section.
IV. Azure Specific SAML Configuration in Testsigma
Inside your Testsigma account, navigate to Settings>Security
-
Click Proceed under SAML and enter the following details:
- Entity ID: Same as Microsoft Entra Identifier (obtained from Section 4 in Azure SAML Setup page)
- SSO URL: Same as Login URL (obtained from Section 4 in Azure SAML Setup page)
- SAML certificate: Downloaded <X509Certificate> value (obtained in previous section from downloaded XML file). This value resides within the tag: <X509Certificate><X509Certificate> Paste this value.

- Click the Confirm button to finalize the changes. SAML will now be enabled.
V. Test the SAML Config
- On Section 5 of the Single Sign-On option, you will find the option to test. Click Test.
- To test the sign-in, click on the ‘Sign in as current user’ option.
This will test the SAML-based login with the currently logged-in user.
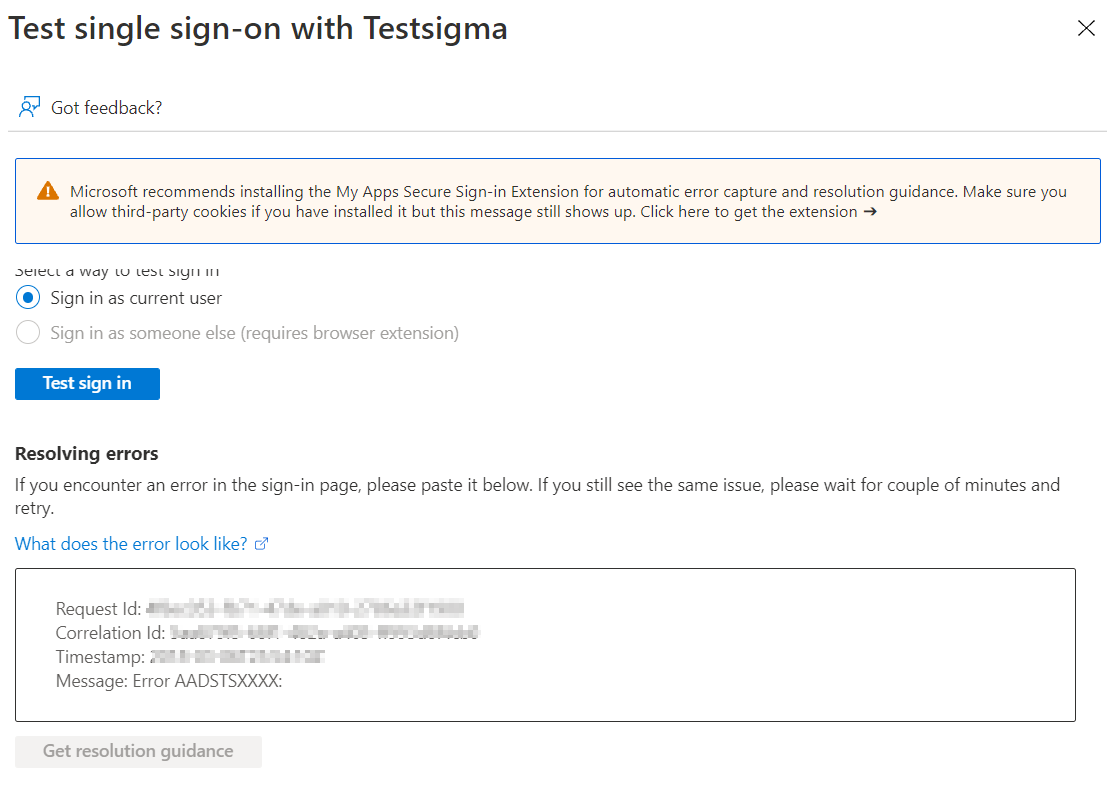
This will automatically log you into Testsigma.
Want to contribute or report missing content?