- collaboration
- Invite Team Members
- Assign Projects
- Users & Role Management
- Review Management [Test Cases]
- Review Management [Elements]
- Execution Controls
- test cases
- Test Cases
- Test Case List Actions
- Import and Export Test Cases
- Import Test Project Test Cases
- Importing Postman Collections and Environments
- Test cases for Desktop Windows
- Update Test Case result in a Test Plan
- Test cases for Mobile Web Application
- Test Step Types
- Type: Natural Language
- Type: REST API
- Type: Step Group
- Type: For Loop
- Type: While Loop
- Type: Block
- Type: If Condition
- Nested Step Groups
- Create Test Steps
- Create Test Steps Using Simple English
- Test Step Settings
- Test Step Options
- Reuse Elements
- Test Step Reordering
- Bulk Actions
- Add Steps Before & After
- Web Applications
- Test Step Actions
- Test Step Settings
- Test Data in Steps
- Add Steps Manually
- Reuse Elements
- Update Elements
- Create an Element
- Reorder Test Steps
- Bulk Actions
- Add Steps Before & After
- Record steps anywhere in a Test Case
- Image Injection
- Cross-application testing
- Test Data Types
- Raw
- Parameter
- Runtime
- Random
- Data Generator
- Phone Number
- Mail Box
- Environment
- Concat Test Data
- Create Test Data [Parameter]
- Update Test Data Profile
- Updating Value in TDP
- Import TDP
- Bulk Deletion of a Test Data Profile
- Create Test Data [Environment]
- Elements (Objects)
- Web Applications
- Record Multiple Elements
- Record Single Element
- Create Elements
- Supported Locator Types
- Formulating Elements
- Shadow DOM Elements
- Verifying elements in Chrome DevTools
- Handling iframe Elements?
- Dynamic Locators using Parameter
- Dynamic Locators using Runtime
- Using Environment Test Data for Dynamic locators
- Import/Export Elements
- AI Enabled Auto-Healing
- test step recorder
- Install Chrome Extension
- Install Firefox Extension
- Install Edge Extension
- Exclude Attributes/Classes
- test plans
- Add, Edit, Delete Test Machines
- Add, Edit, Delete Test Suites
- Schedule Test Plans
- Run Test Suites In Parallel
- Cross Browser Testing
- Distributed Testing
- Headless Testing
- Test Lab Types
- Disabling Test Cases in Test Plans
- AfterTest Case
- Post Plan Hook
- AfterTest Suite
- Email Configuration in Test Plan
- Execute Partial Test Plans via API
- Ad-hoc Run
- Test Plan Executions
- Dry Runs on Local Devices
- Run Tests on Vendor Platforms
- Run Test Plans on Local Devices
- Test Locally Hosted Applications
- Debug Test Case Failures
- Parallel and Allowed queues
- debugging
- Debug results on local devices (Web applications)
- Debug Results on Local Devices
- Launch Debugger in the Same Window
- Testsigma Agent
- Pre-requisites
- Setup: Windows, Mac, Linux
- Setup: Android Local Devices
- Setting up iOS Local Devices
- Update Agent Manually
- Update Drivers Manually
- Delete Corrupted Agent
- Triggering Tests on Local Devices
- troubleshooting
- Agent - Startup and Registration Errors
- Fetching Agent logs
- Upgrade Testsigma Agent Automatically
- Testsigma Agent - FAQs
- continuous integration
- Test Plan Details
- REST API(Generic)
- Jenkins
- Azure DevOps
- AWS DevOps
- AWS Lambda
- Circle CI
- Bamboo CI
- Travis CI
- CodeShip CI
- Shell Script(Generic)
- Bitrise CI
- GitHub CICD
- Bitbucket CICD
- GitLab CI/CD
- desired capabilities
- Most Common Desired Capabilities
- Browser Console Debug Logs
- Geolocation Emulation
- Bypass Unsafe Download Prompt
- Geolocation for Chrome & Firefox
- Custom User Profile in Chrome
- Emulate Mobile Devices (Chrome)
- Add Chrome Extension
- Network Throttling
- Network Logs
- Biometric Authentication
- Enable App Resigning in iOS
- Enable Capturing Screenshots (Android & iOS)
- Configure Android WebViews
- Incognito/Private mode
- Set Google Play Store Credentials
- addons
- What is an Addon?
- Addons Community Marketplace
- Install Community Addon
- Prerequisites(Create/Update Addon)
- Create an Addon
- Update Addon
- Addon Types
- Create a Post Plan Hook add-on in Testsigma
- Create OCR Text Extraction Addon
- configuration
- API Keys
- Security(SSO)
- Setting Up Google Single Sign-On(SSO) Login in Testsigma
- Setting Up Okta Single Sign-On Integration with SAML Login in Testsigma
- Setting up SAML-based SSO login for Testsigma in Azure
- iOS Settings
- Creating WDA File for iOS App Testing
- uploads
- Upload Files
- Upload Android and iOS Apps
- How to generate mobile builds for Android/iOS applications?
- Testsigma REST APIs
- Environments
- Elements
- Test Plans
- Upload Files
- Get Project wide information
- Upload and update test data profile
- Trigger Multiple Test Plans
- Trigger Test Plan remotely and wait until Completion
- Run the same Test Plan multiple times in Parallel
- Schedule, Update and Delete a test plan using API
- Update Test Case results using API
- Create and update values of Test Data Profile using REST API
- Rerun Test Cases from Run Results using API
- open source dev environment setup
- macOS and IntelliJ Community Edition
- macOS and IntelliJ Ultimate Edition
- Windows and IntelliJ Ultimate Edition
- Setup Dev Environment [Addons]
- NLPs
- Unable to retrieve value stored in text element
- Unable to capture dropdown element
- Unable to Select Radiobutton
- Unable to Click Checkbox
- setup
- Server Docker Deployment Errors
- Secured Business Application Support
- Troubleshooting Restricted Access to Testsigma
- Why mobile device not displayed in Testsigma Mobile Test Recorder?
- Unable to create new test session due to unexpected error
- web apps
- URL not accessible
- Test Queued for a Long Time
- Issues with UI Identifiers
- Missing Elements in the Recorder
- mobile apps
- Failed to Start Mobile Test Recorder
- Troubleshooting “Failed to perform action Mobile Test Recorder” error
- Test Execution State is Queued for a Long Time
- Mobile app keeps stopping after successful launch
- More pre-requisite settings
- Unable to start WDA Process on iPhone
- Most Common causes for Click/Tap NLP failure
- on premise setup
- On-Premise Setup Prerequisites
- On-Premise Setup with Docker-compose File
- Post-Installation Checklist for On-Premise Setup
- Install Docker on an Unix OS in Azure Infrastructure
- SMTP Configuration in Testsigma
- Configure Custom Domains
- salesforce testing
- Intro: Testsigma for Salesforce Testing
- Creating a Connected App
- Creating a Salesforce Project
- Creating Metadata Connections
- Adding User Connections
- Build Test Cases: Manual+Live
- Salesforce Element Repositories
- Intro: Testsigma Special NLPs
Create a Post Plan Hook add-on in Testsigma
Testsigma supports Post Plan Hooks, which are user-described actions via add-ons. These hooks run after a test plan execution is complete, irrespective of the success or failure of the test plan execution.
Users can customise the actions within these add-ons to fit their needs and link them through test plan settings.
To create addons, you should already know about Testsigma addons.
Refer to:
For information on how to create an add-on, refer to create an add-on.
Update the action code as required for the post plan hook
Unzip the downloaded zip file and open the extracted folder in your favourite IDE as a Java project (with Maven as the build tool). The downloaded folder is a Java Maven project folder consisting of a pom.xml file and an example template for a post plan hook in the com.testsigma.addons.hooks package.
Here's the sample code for a post-plan hook that sends an email containing the execution run result to three configured email addresses -
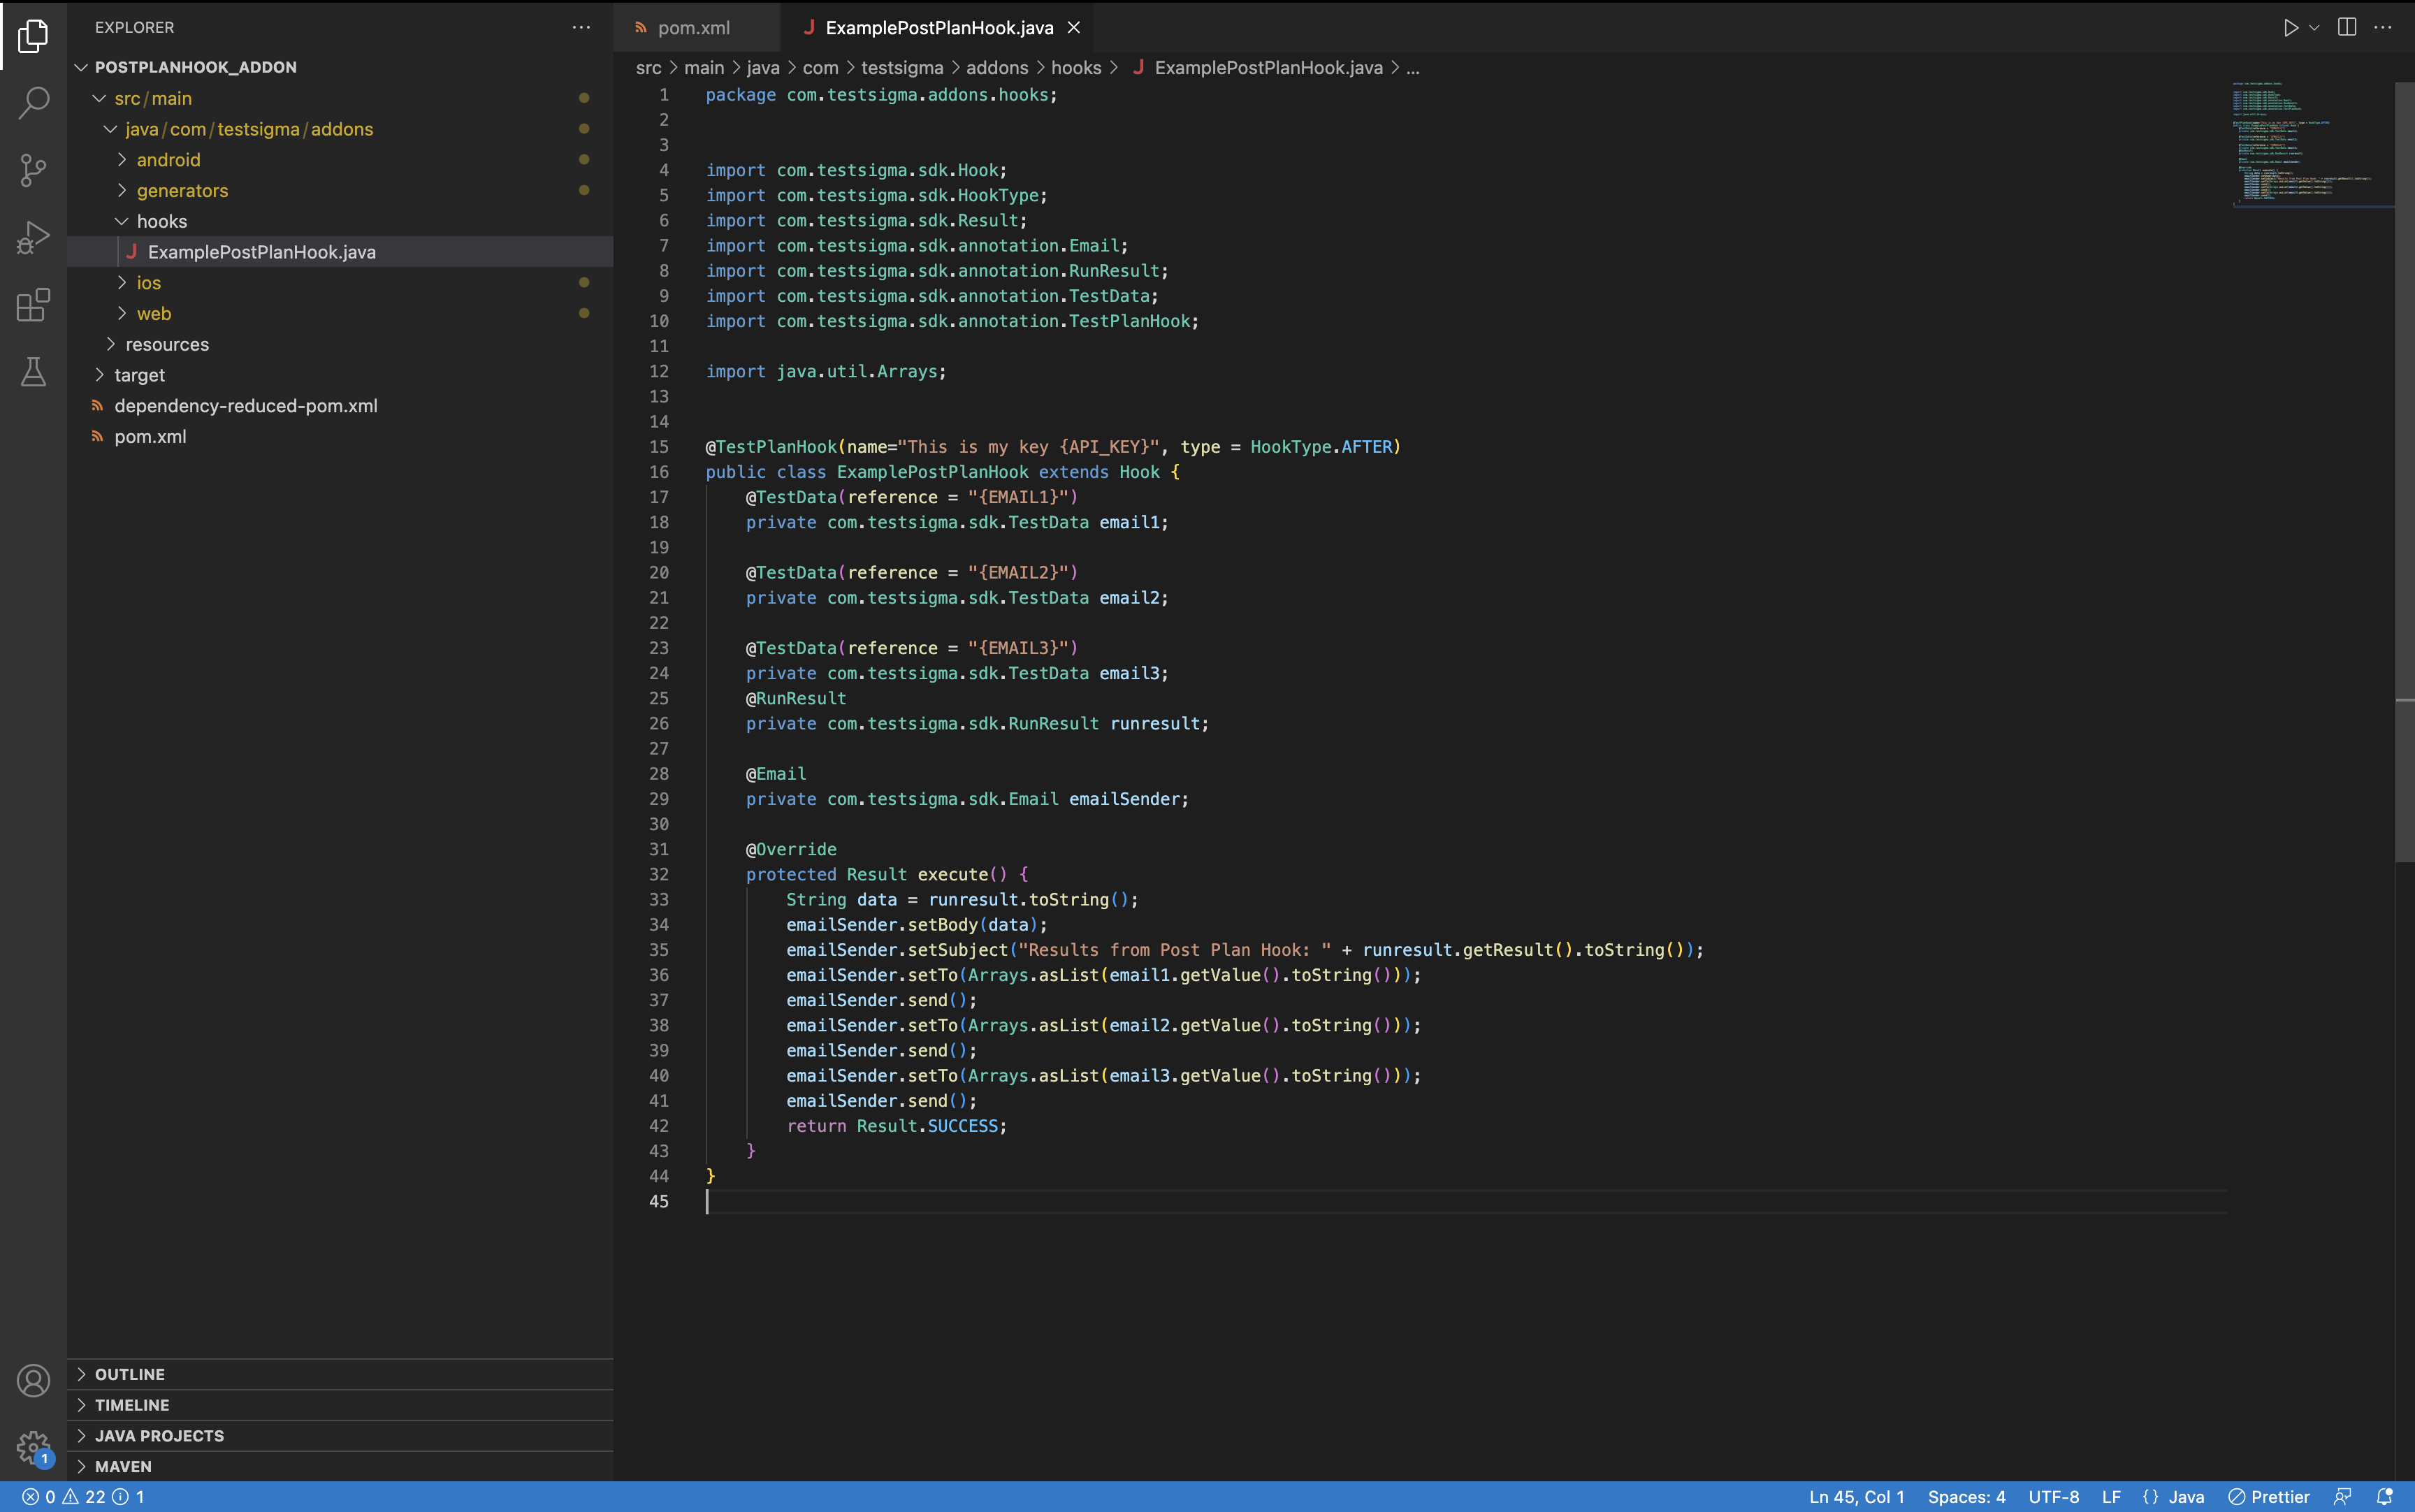
- The reference used for TestData must be surrounded by curly brackets to be recognised as a post-plan hook field.
- Currently, only one hook is allowed per add-on.
Test the code
Test the code to verify the add-on you have written. You can use either JUnit or TestNG as the test runner. Right-click on the Test class to run it as a TestNG or JUnit test and confirm if your code is performing as expected.
Upload the updated code to Testsigma
Once you have validated the code, save the changes you made and zip the project folder. You may use the below command on a bash shell:
zip -r addonName.zip . -x ".
Navigate to the add-ons page, select the dropdown for your add-on, and click Upload Code option to upload the zipped file.
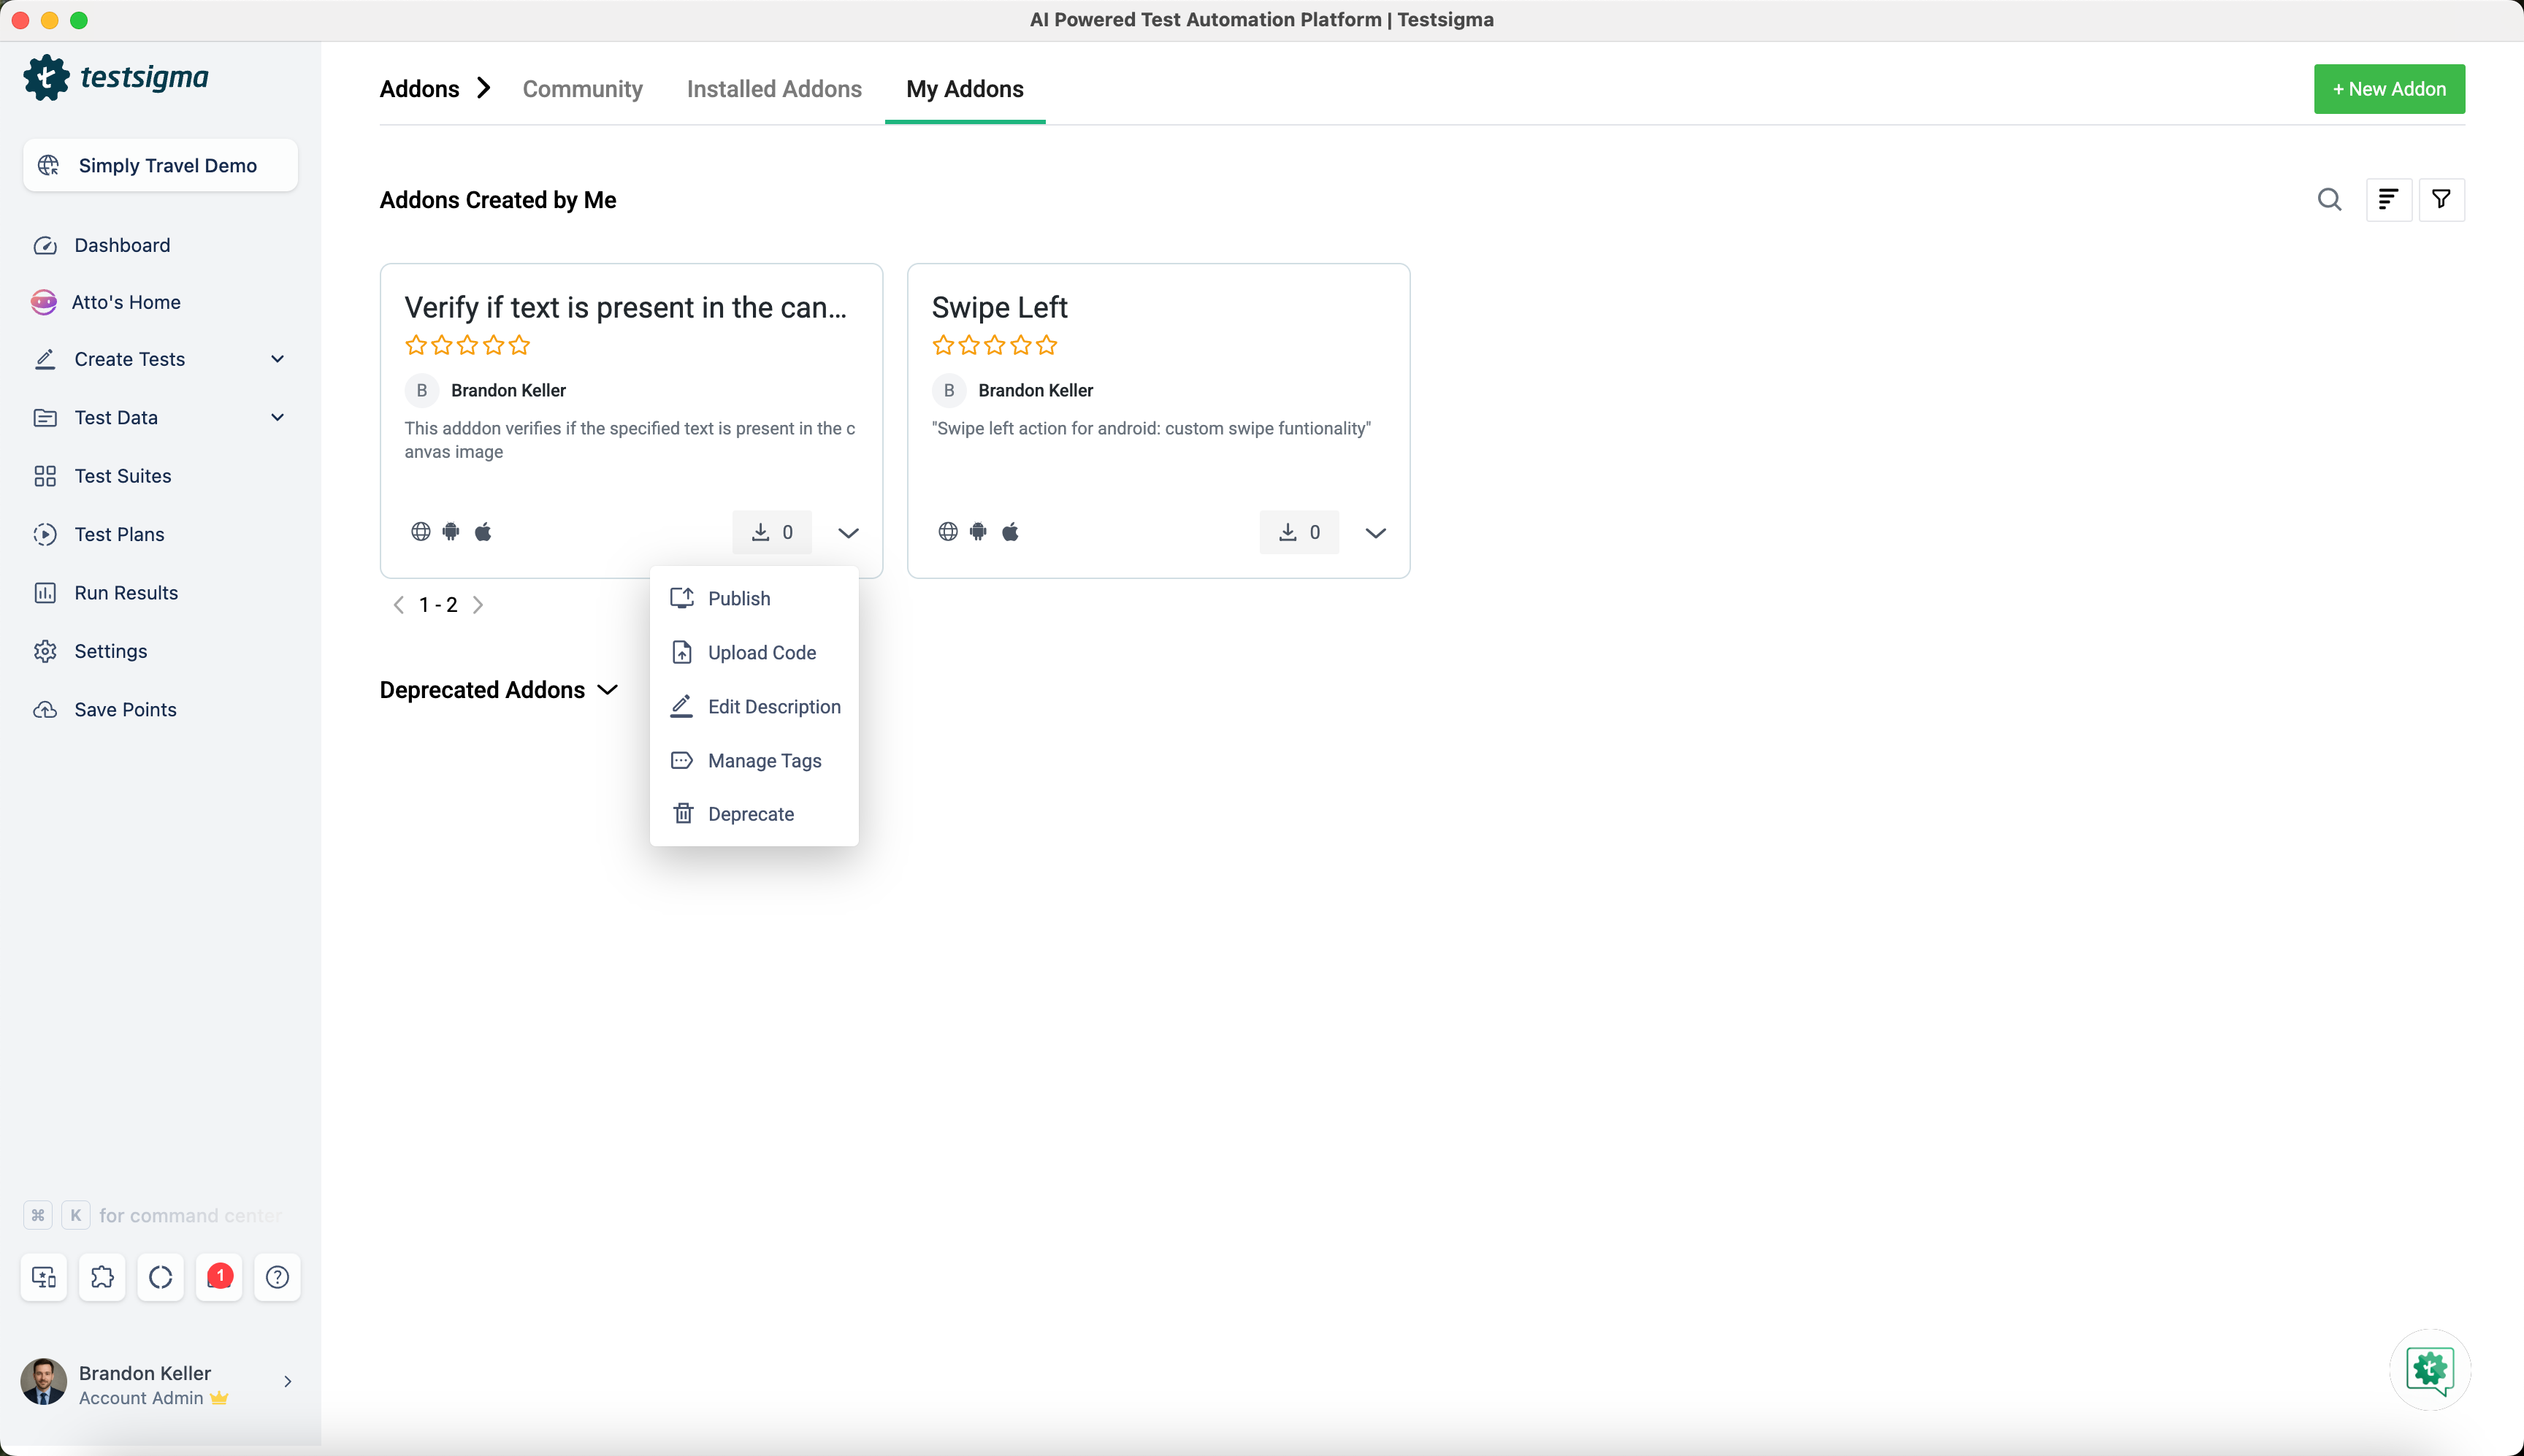
Other available options:
- Manage Tags: Add more tags and labels for categorising them. We can customise the action code.
- Delete: Delete the add-on.
- Edit Description: Edit the description in the add-on.
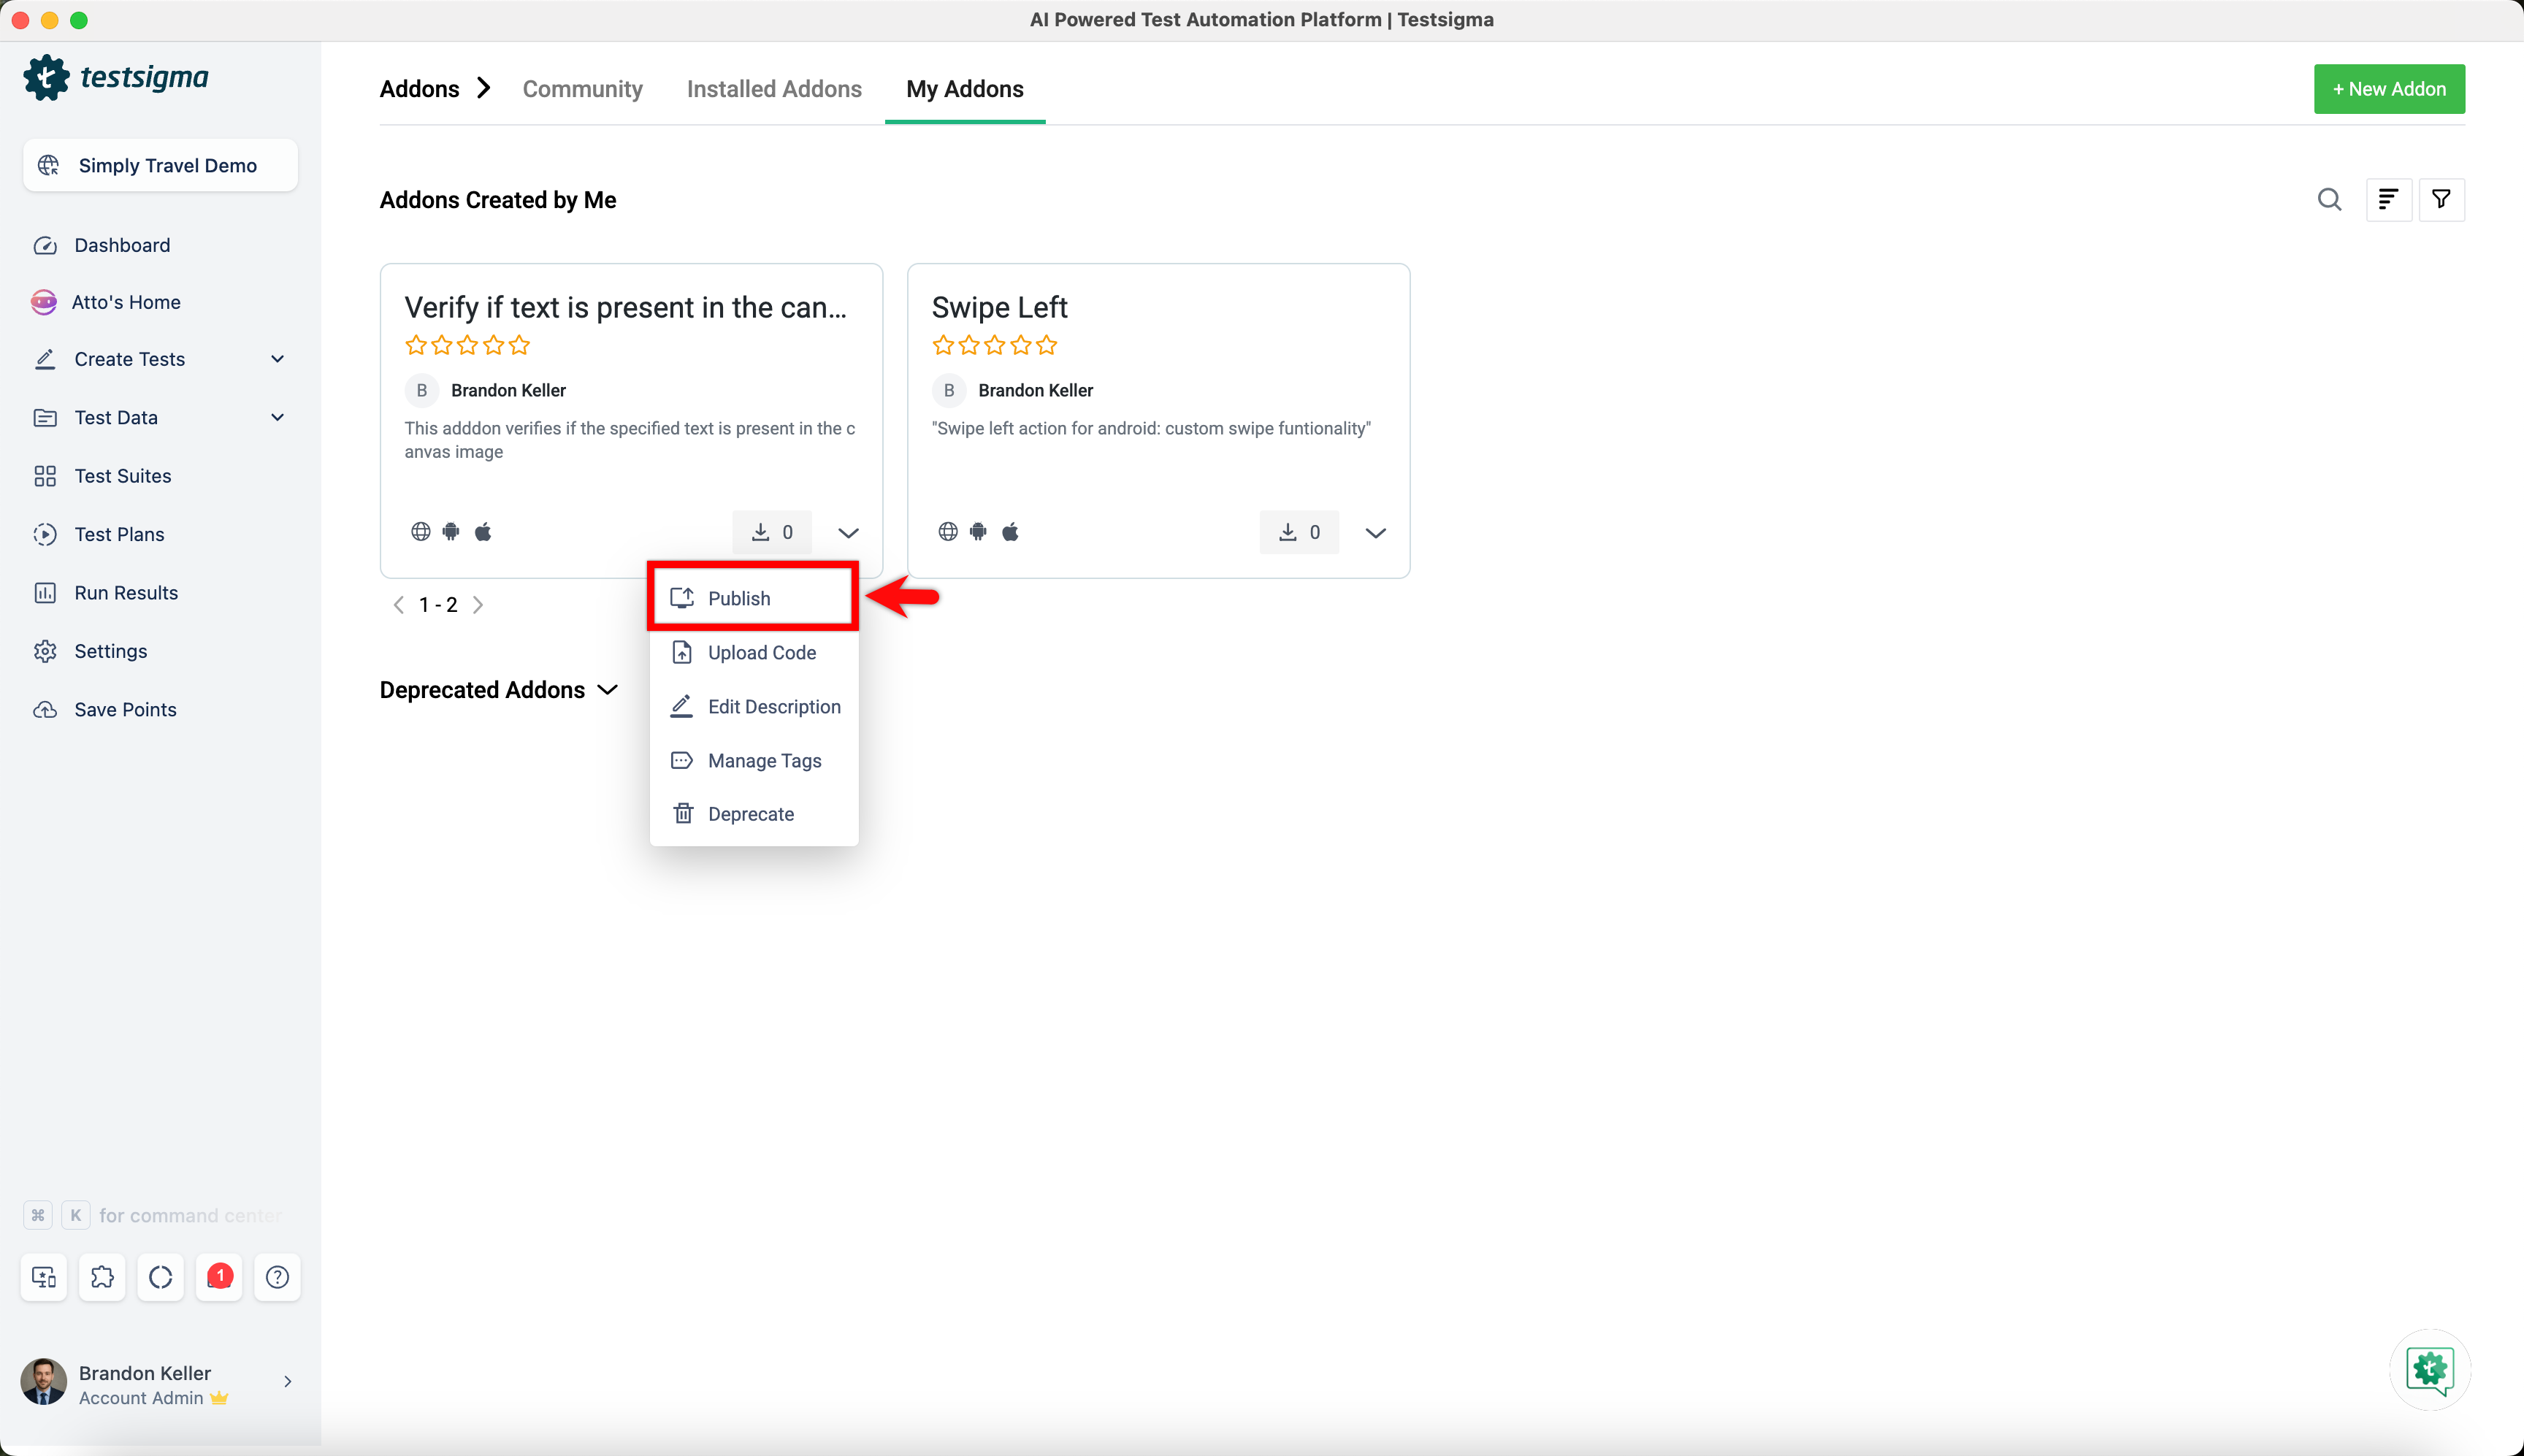
Publish the addon
Once the code is uploaded, the add-on options dropdown will show an additional option, Publish
If you select to publish your add-on, select one of the following on the Publish Add-on window: - Public: Choose this option if you want to make the add-on available to the testsigma community. - Private: Choose this option if you want to make the add-on available only to users in your organization.
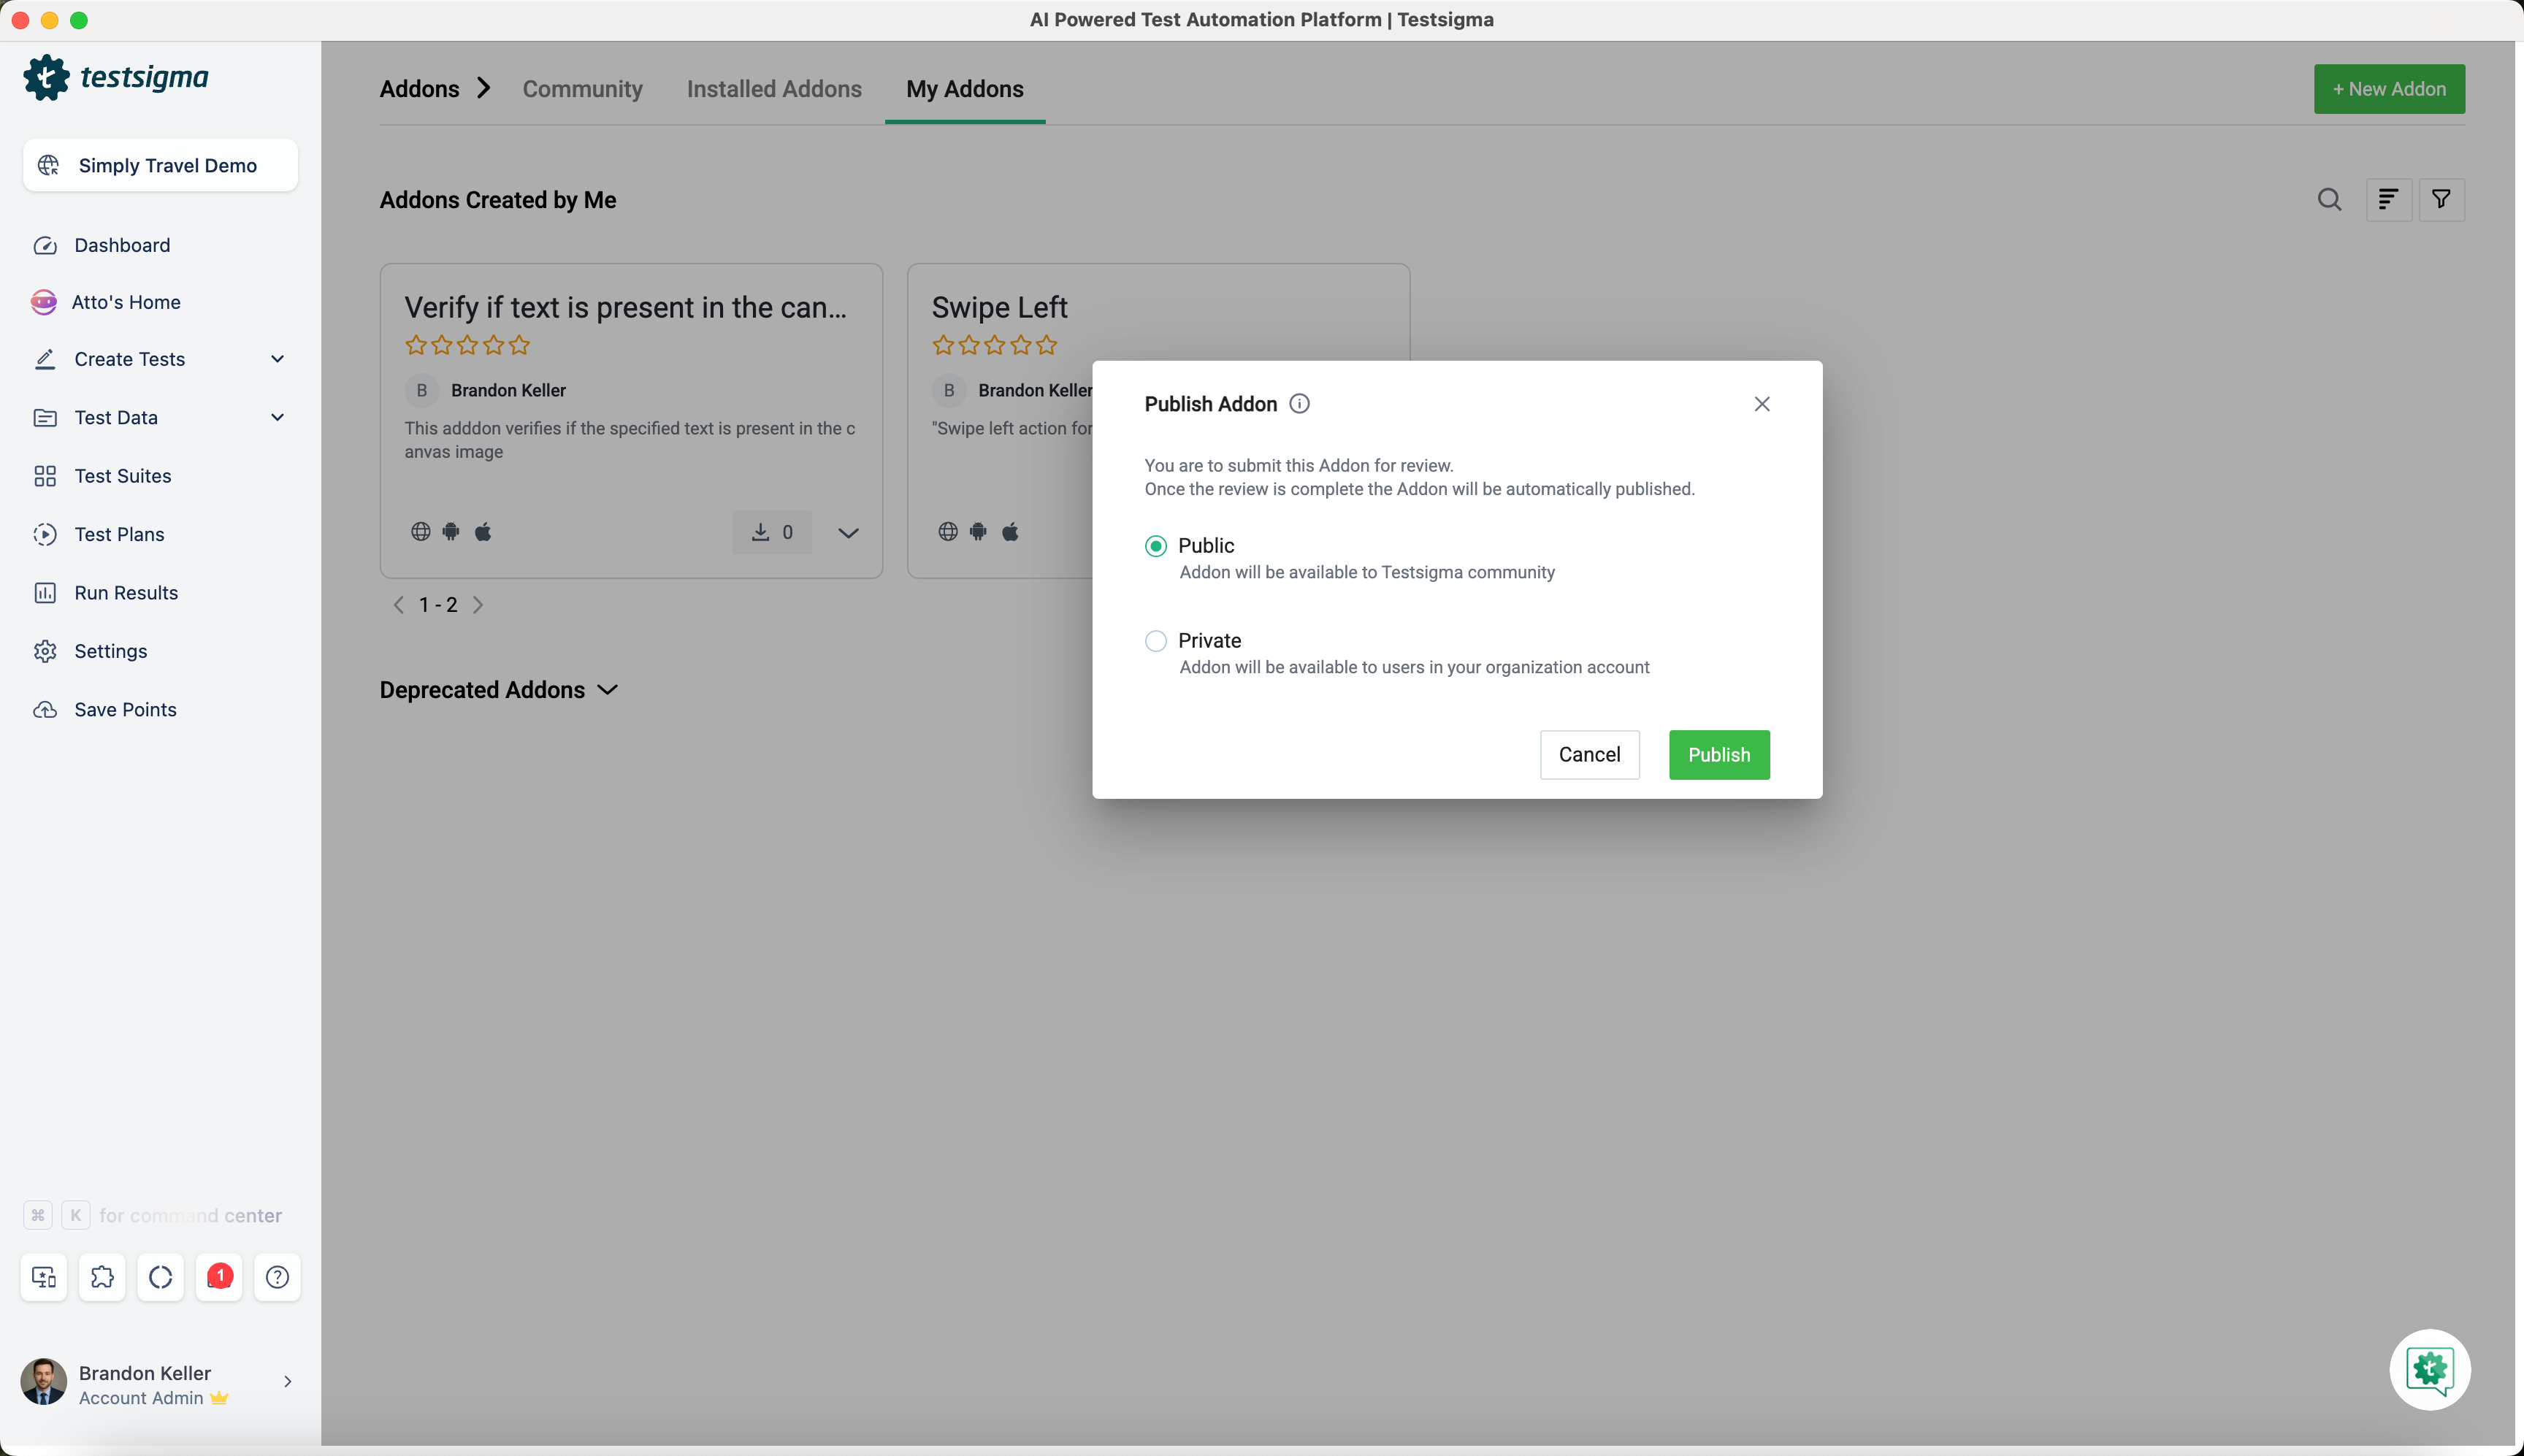
Once requested for publishing, an automatic security check is done internally. Upon the successful completion of the security check, the add-on is published. In case of a security check failure, an email notification would be sent to the user.
For trial users, once the request to publish is sent, an email will be sent to the Testsigma team for review, and you will be notified via email once it is approved.
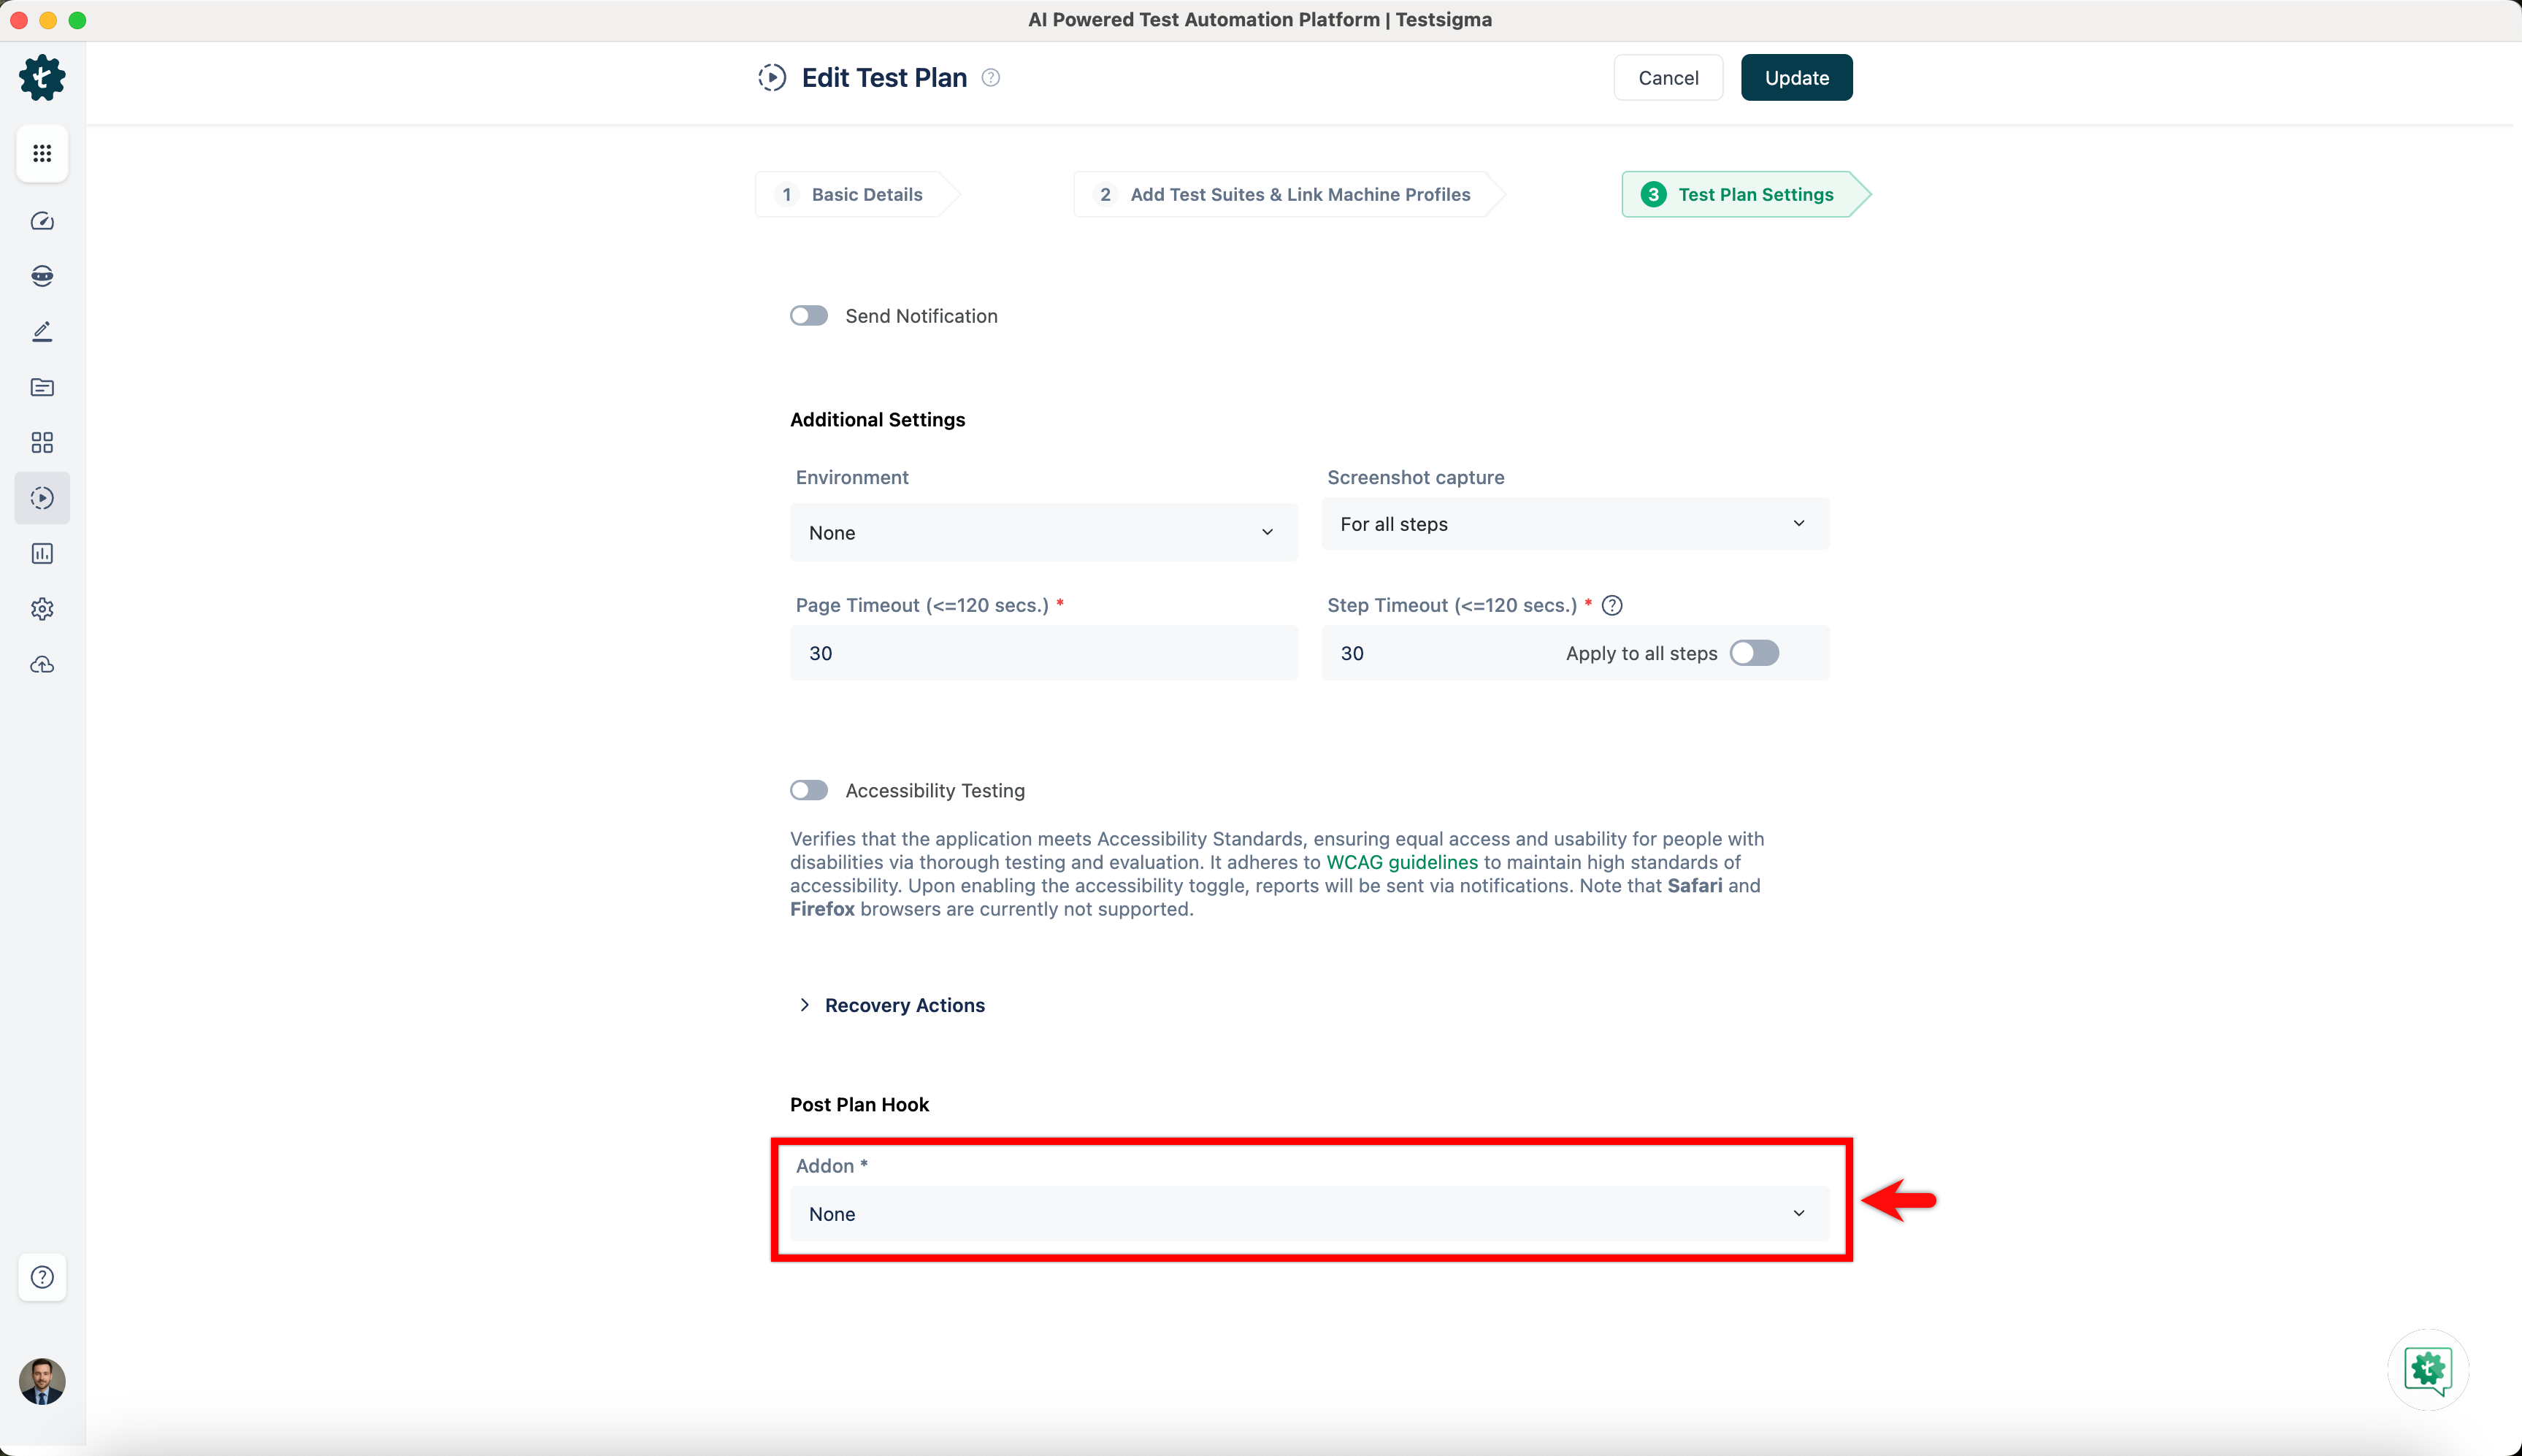
Try using the addon in a test plan settings
To try out the add-on you just created, create a new or open an existing test plan and add a test suite and test machine. Navigate to the Test Plan Settings tab and click the right arrow before Hooks to unhide the feature. Select the add-on and enter the inputs in the custom field.