- configuration
 API Keys
- User Settings
- Security
- Configure Organization Settings
- Two-Factor Authentication (2FA)
- Configure Password Policy
- Setting Up Google SSO Login
- Setting Up Okta SSO Login (SAML)
- Setting Up Azure SSO Login (SAML)
- iOS Settings
- Create WDA File
- SMTP Configuration
- Manage Access
Setting Up Okta Single Sign-On Integration with SAML Login in Testsigma
Single Sign-On (SSO) provides faster, easier, and more secure application access, enhancing user experience and security. SSO allows users to access multiple applications with a single login credentials, eliminating the need to remember multiple passwords. Instead of passwords, SSO uses secure tokens to grant access, making it a preferred solution for enterprises and SMBs to manage workforce identities efficiently. This guide will help you configure Okta and Testsigma to work together seamlessly, simplifying user access management and improving productivity.
Terminology
Familiarise yourself with these key terms before proceeding:
| Term | Definition |
|---|---|
| User | The person requesting access to the service. In this case, the Testsigma app user. |
| Service Provider (SP) | The application providing the service. Here, it's Testsigma. |
| Identity Provider (IdP) | The service managing user information, such as Okta, OneLogin, or Azure AD. |
| SAML Certificate/X.509 Certificate | A digital certificate used to verify the identity of the entities in SAML transactions. |
| Single Sign-On URL | The URL where authentication requests are sent for SSO. |
| Audience URI (SP Entity ID) | The unique identifier of the service provider, often a URL. |
| Default RelayState | The URL to redirect users to after authentication. |
| Name ID Format | The format of the user identifier sent in the SAML assertion, typically an email address. |
Prerequisites
Before you begin, ensure you have an active Okta account.
Getting the Testsigma Configuration for Okta
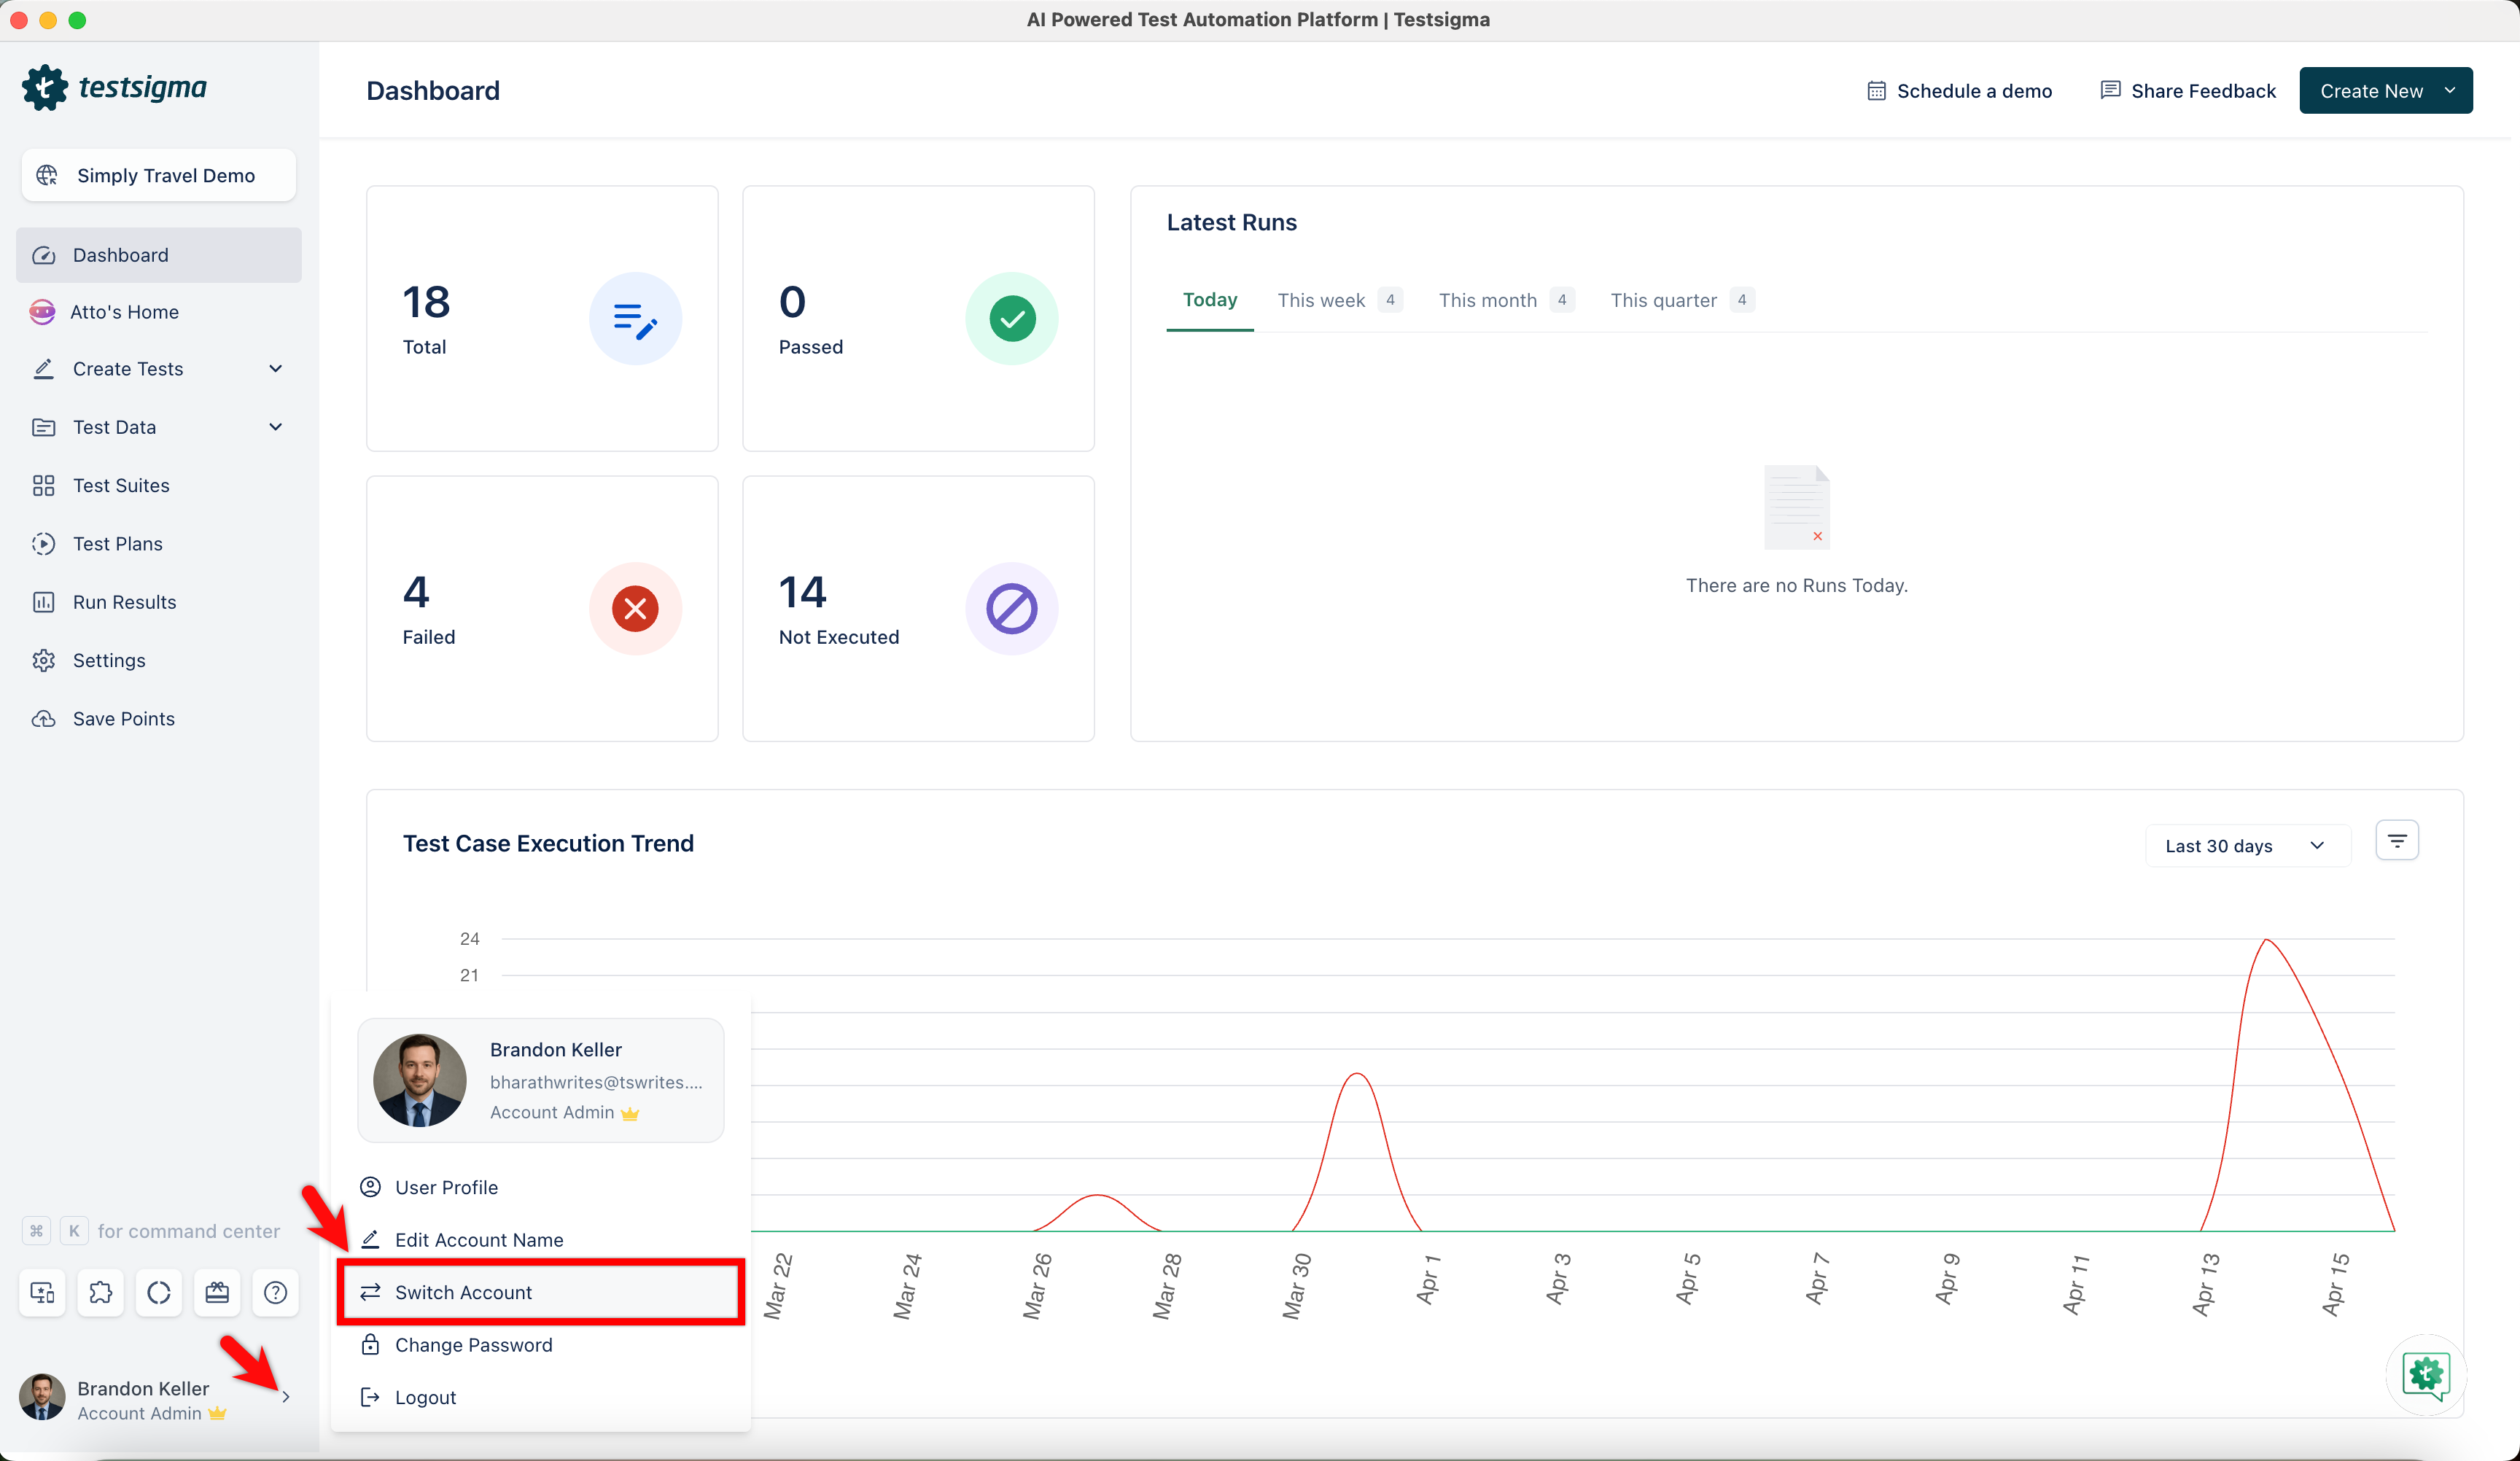
- Navigate to your profile and click Switch Account.
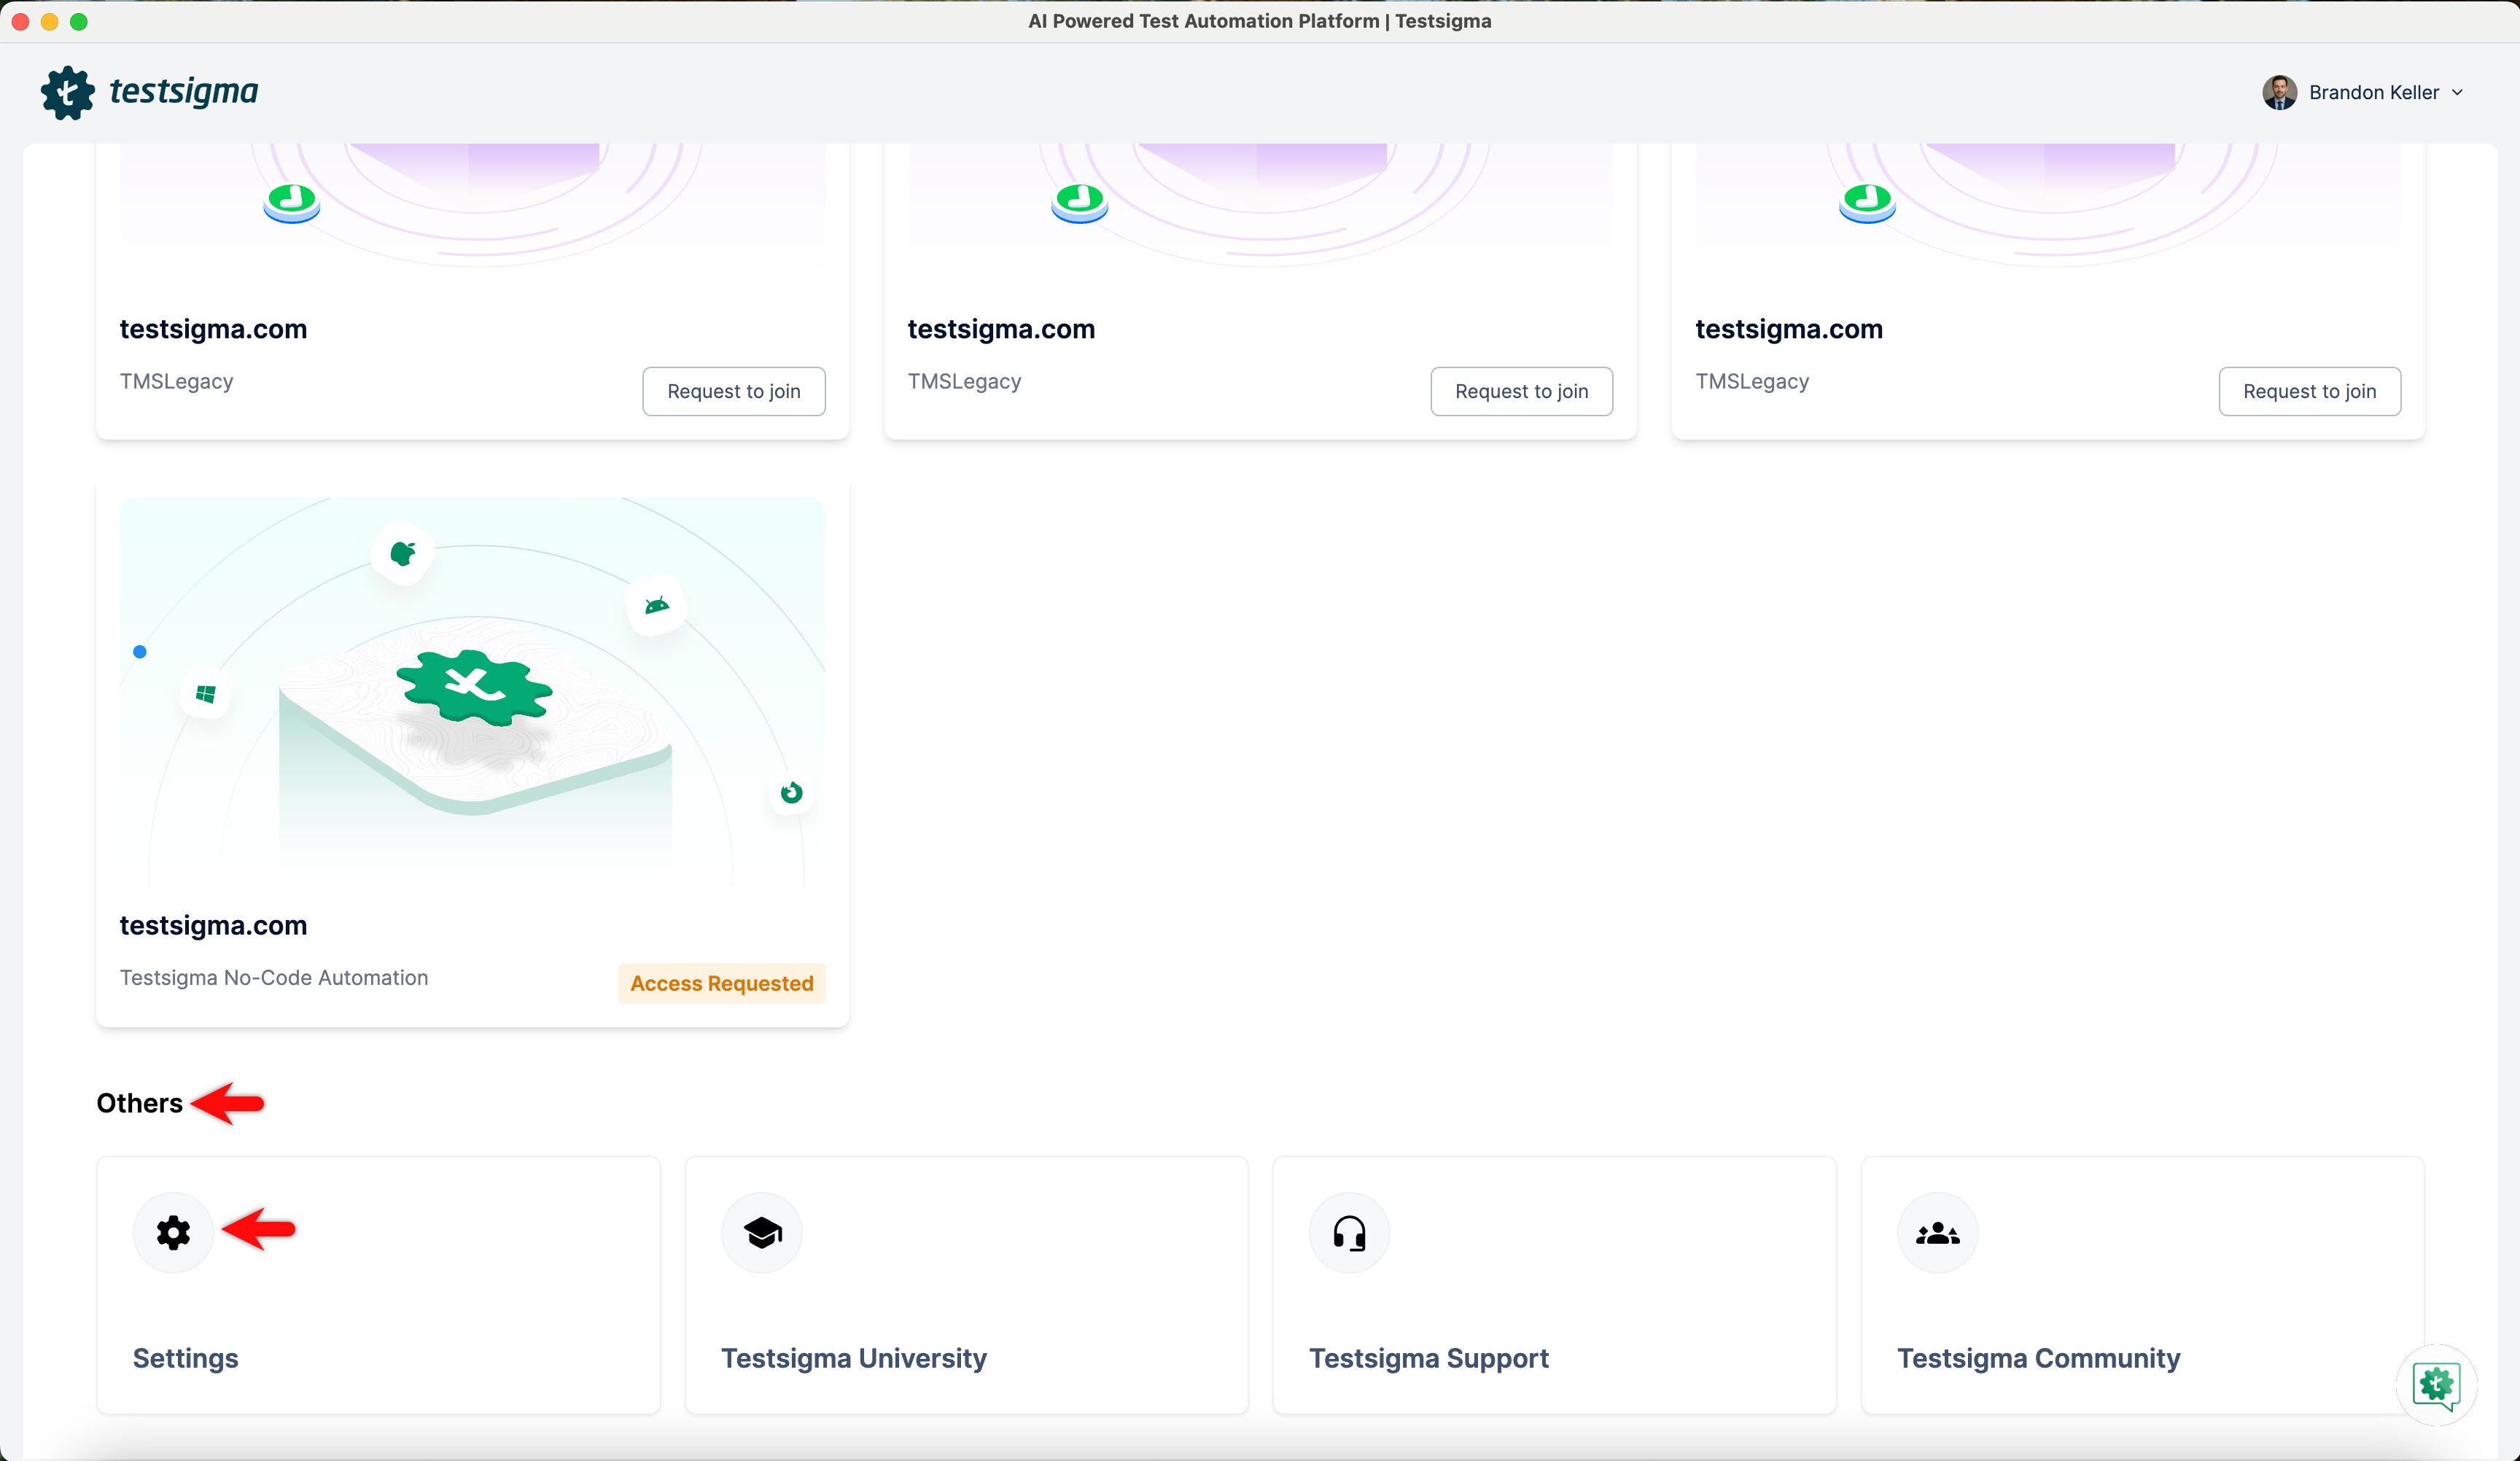
- Click Settings under the Others section on the home screen.
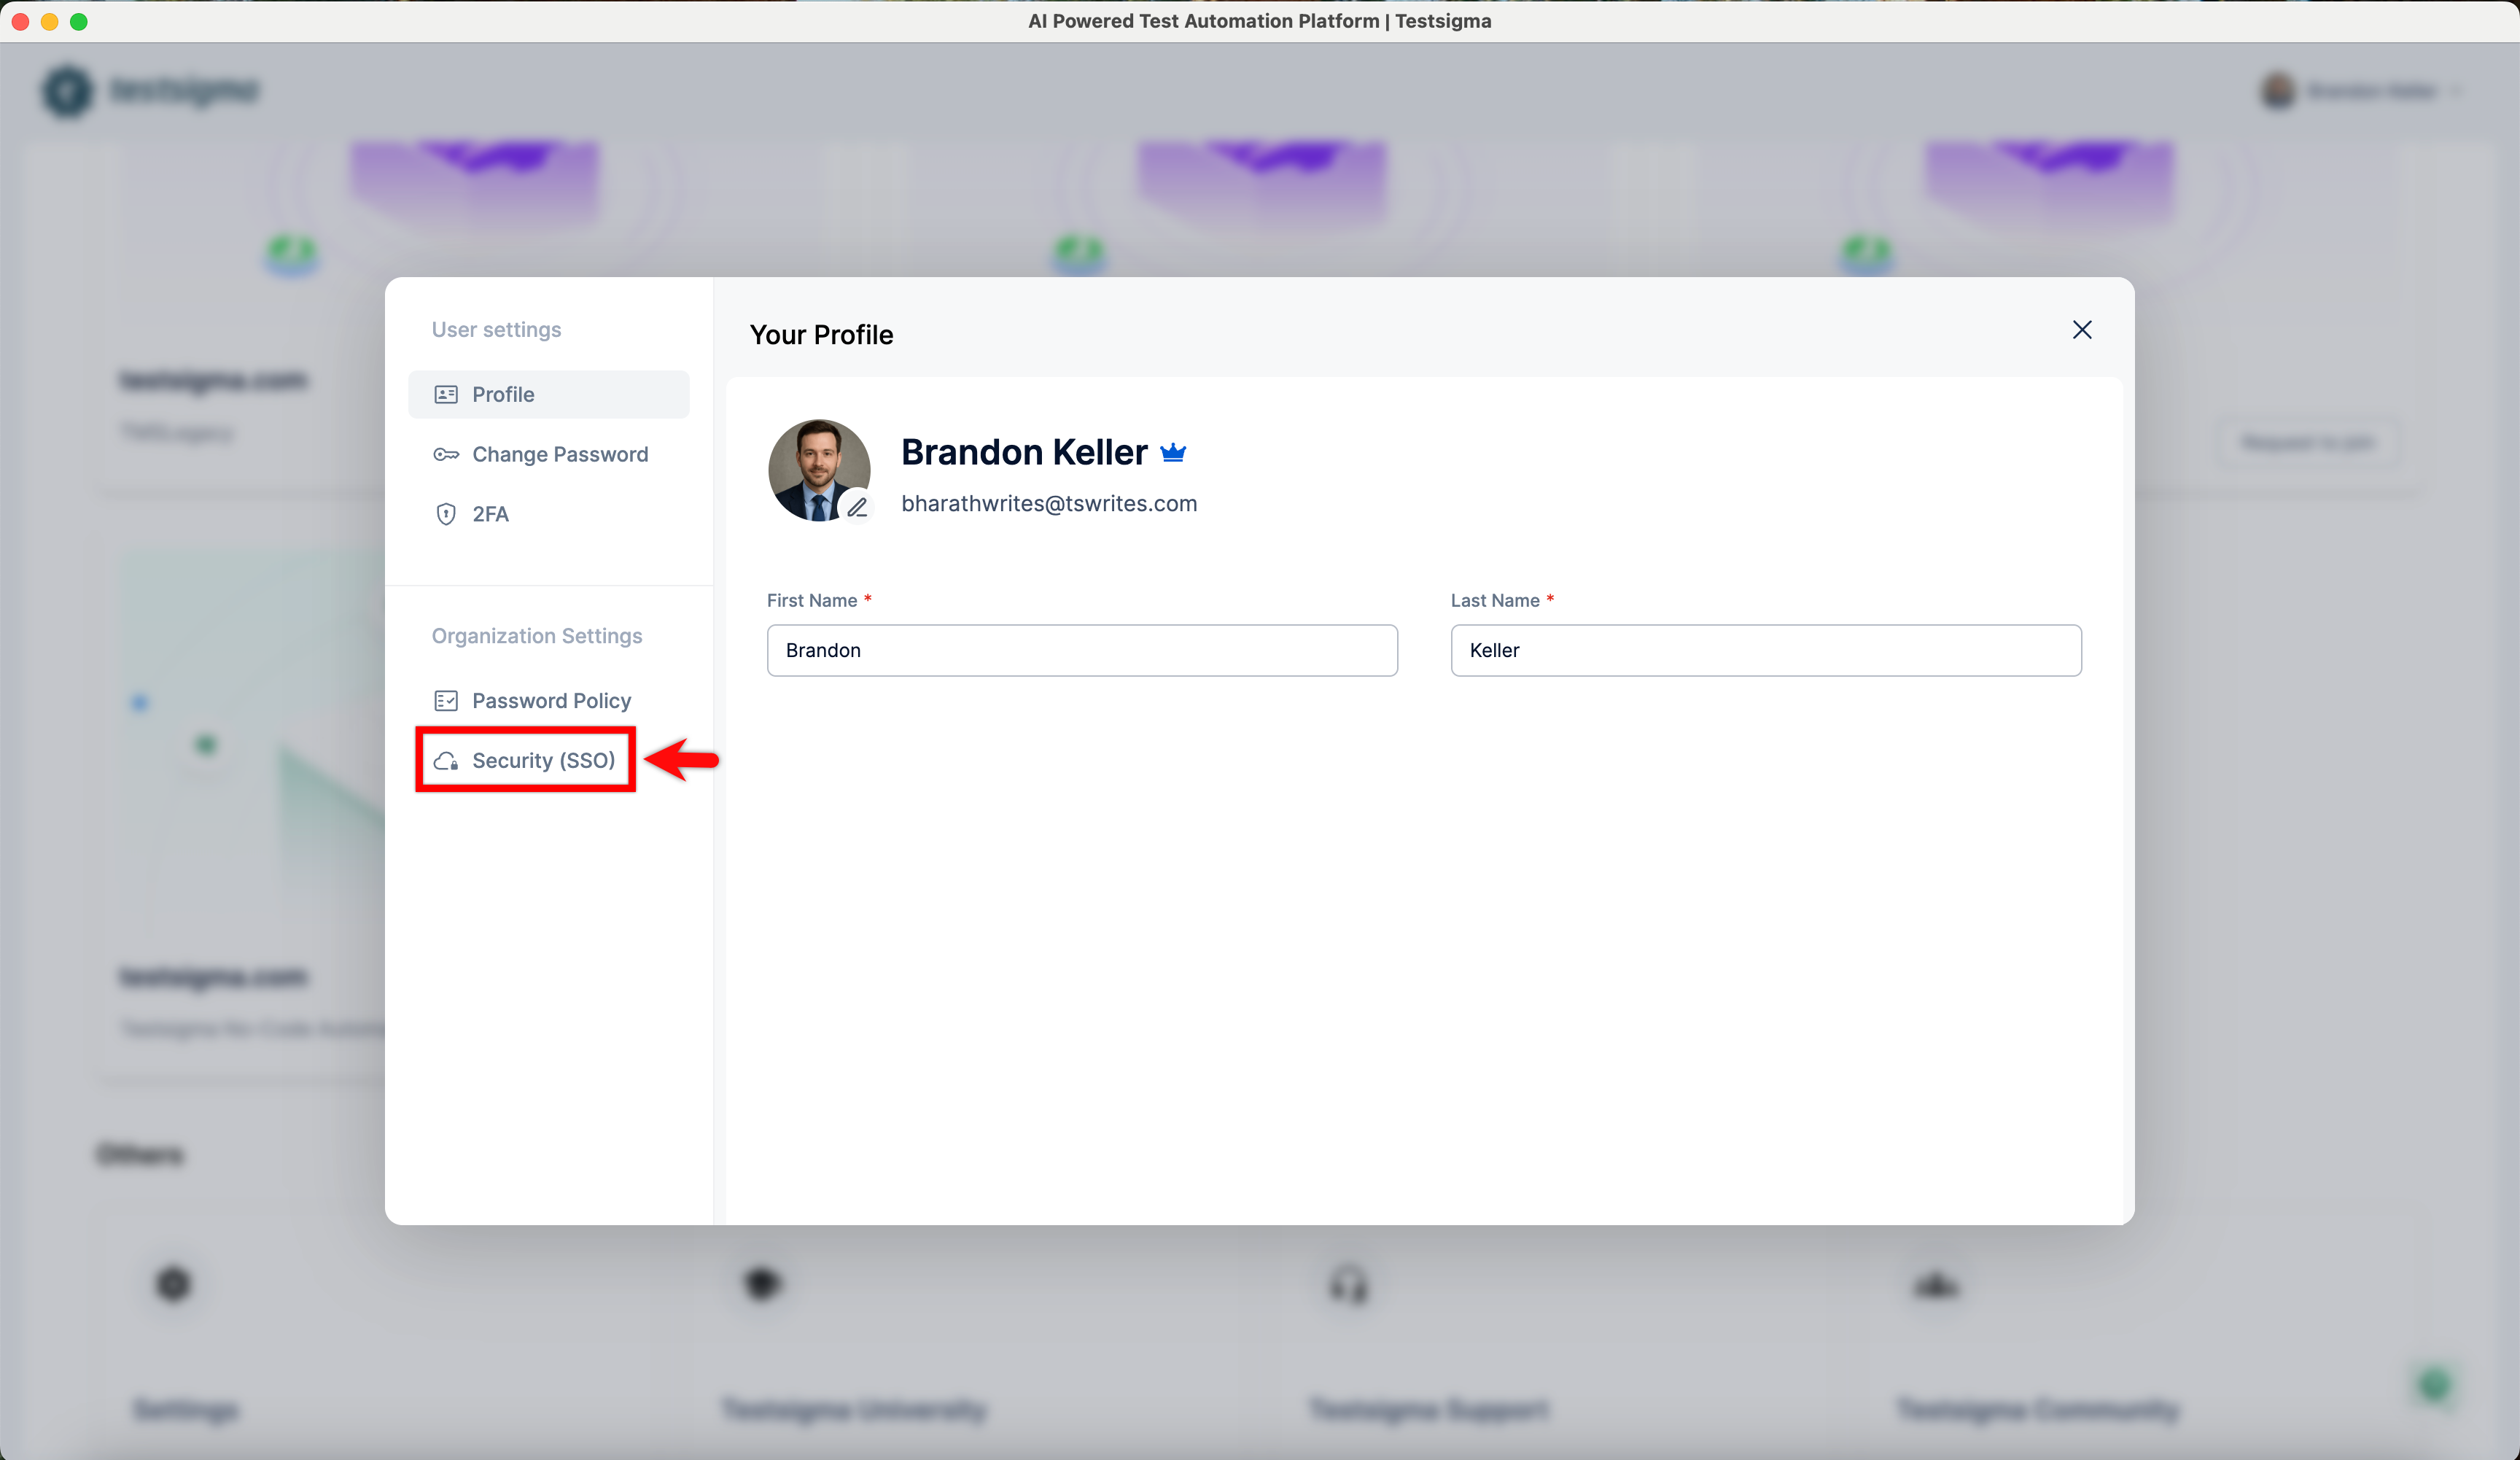
- In the Settings panel, scroll down to Organization Settings and click Security (SSO).
- In the Single Sign-On (SSO) settings, enable the toggle on SAML widget.
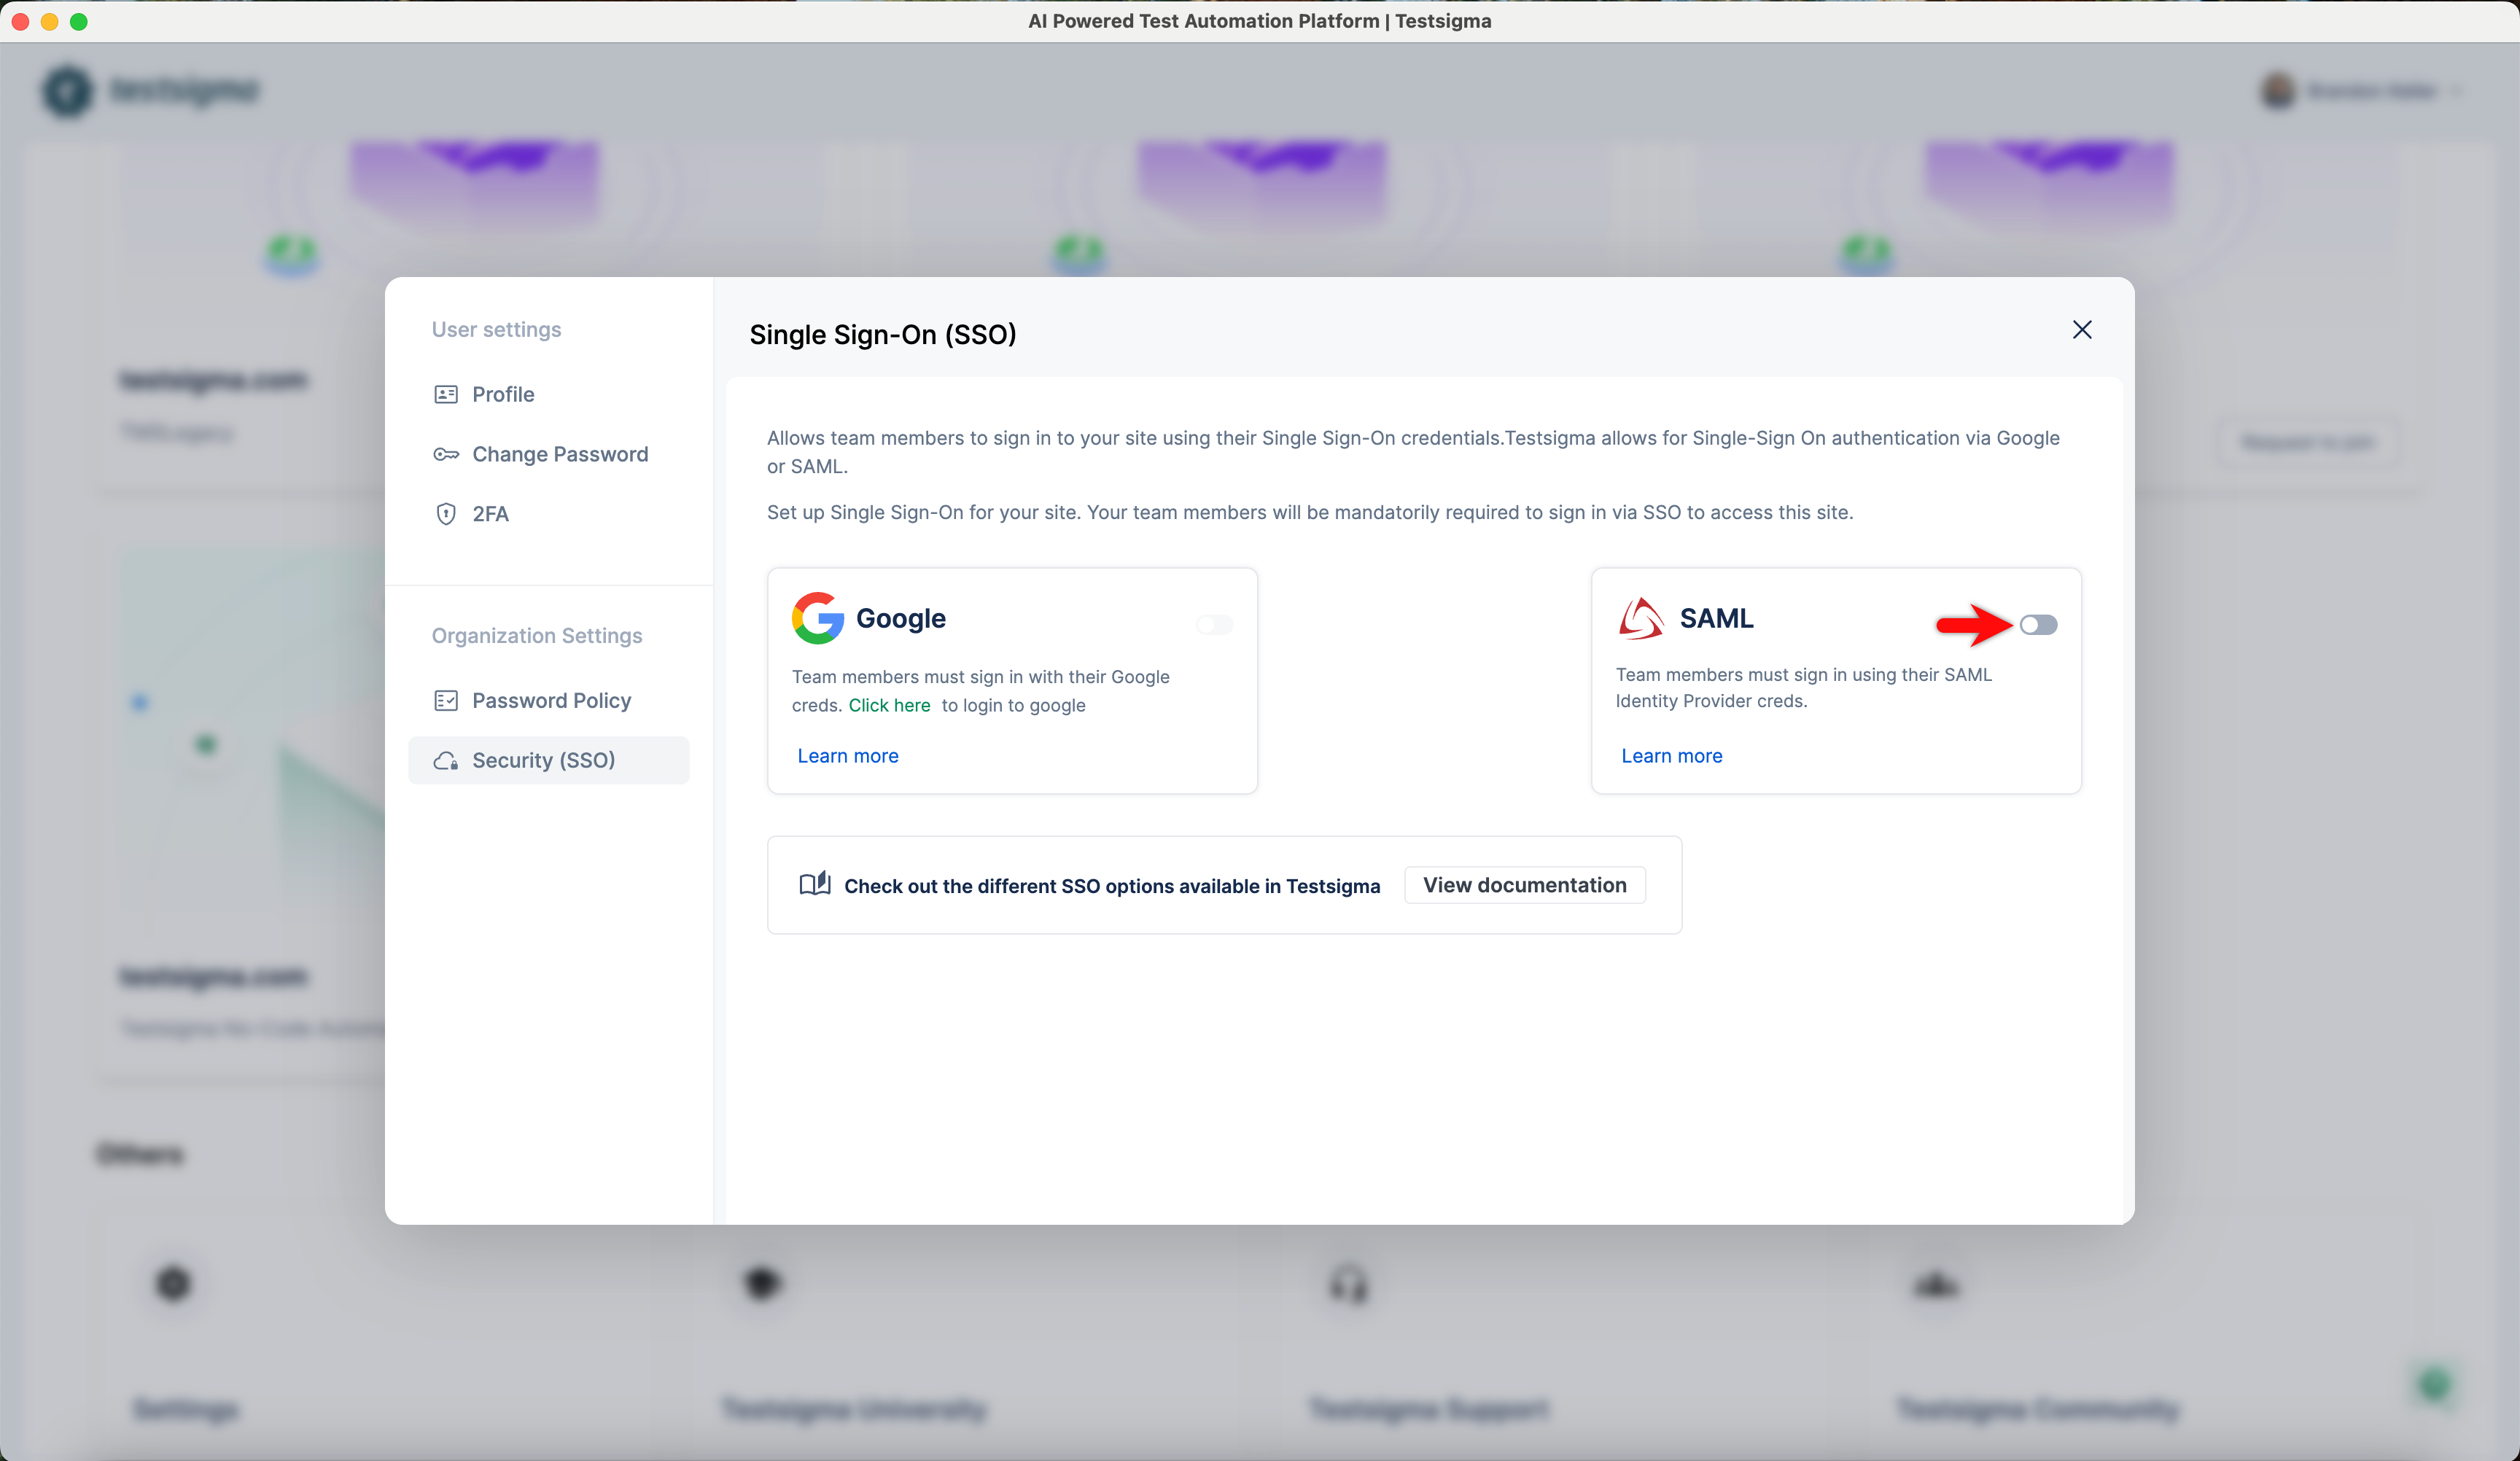
You can use only one SSO for your account. If you are using Google SSO, turn it off first.
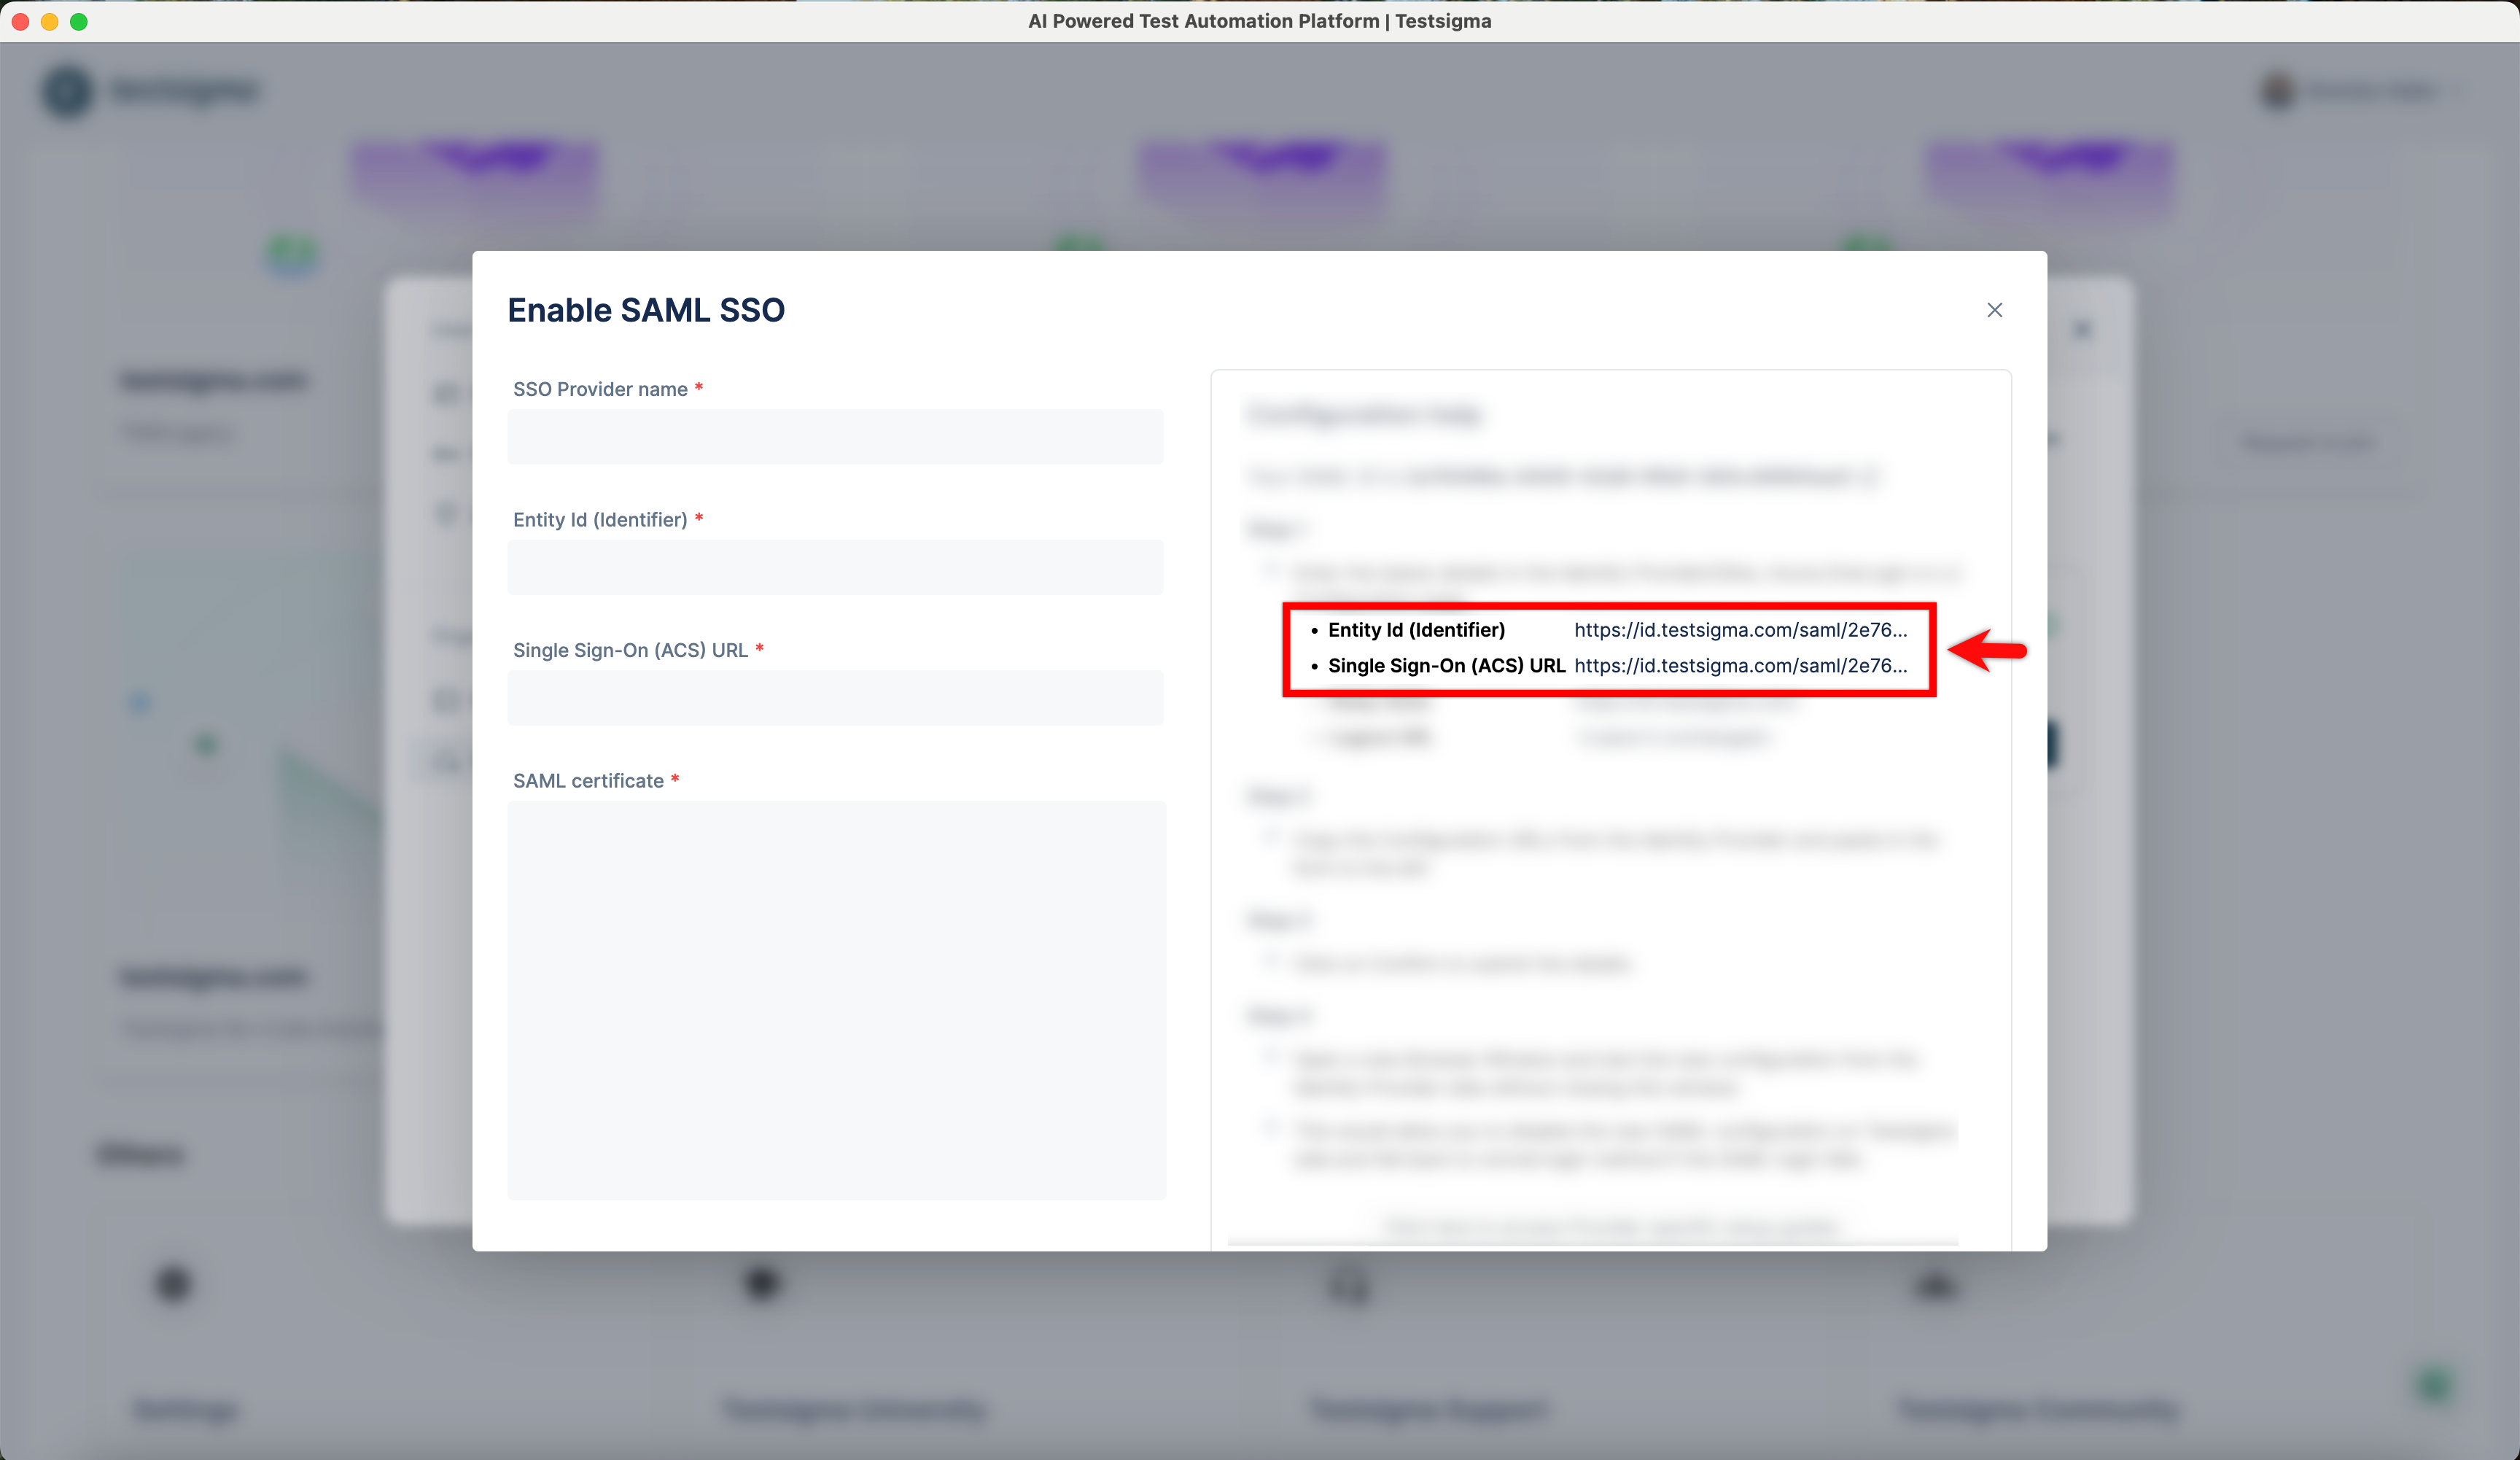
- In the Enable SSO pop-up, record the Entity ID (Identifier) and Single Sign-On (ACS) URL for use in Okta configuration.
Create and Configure Okta
-
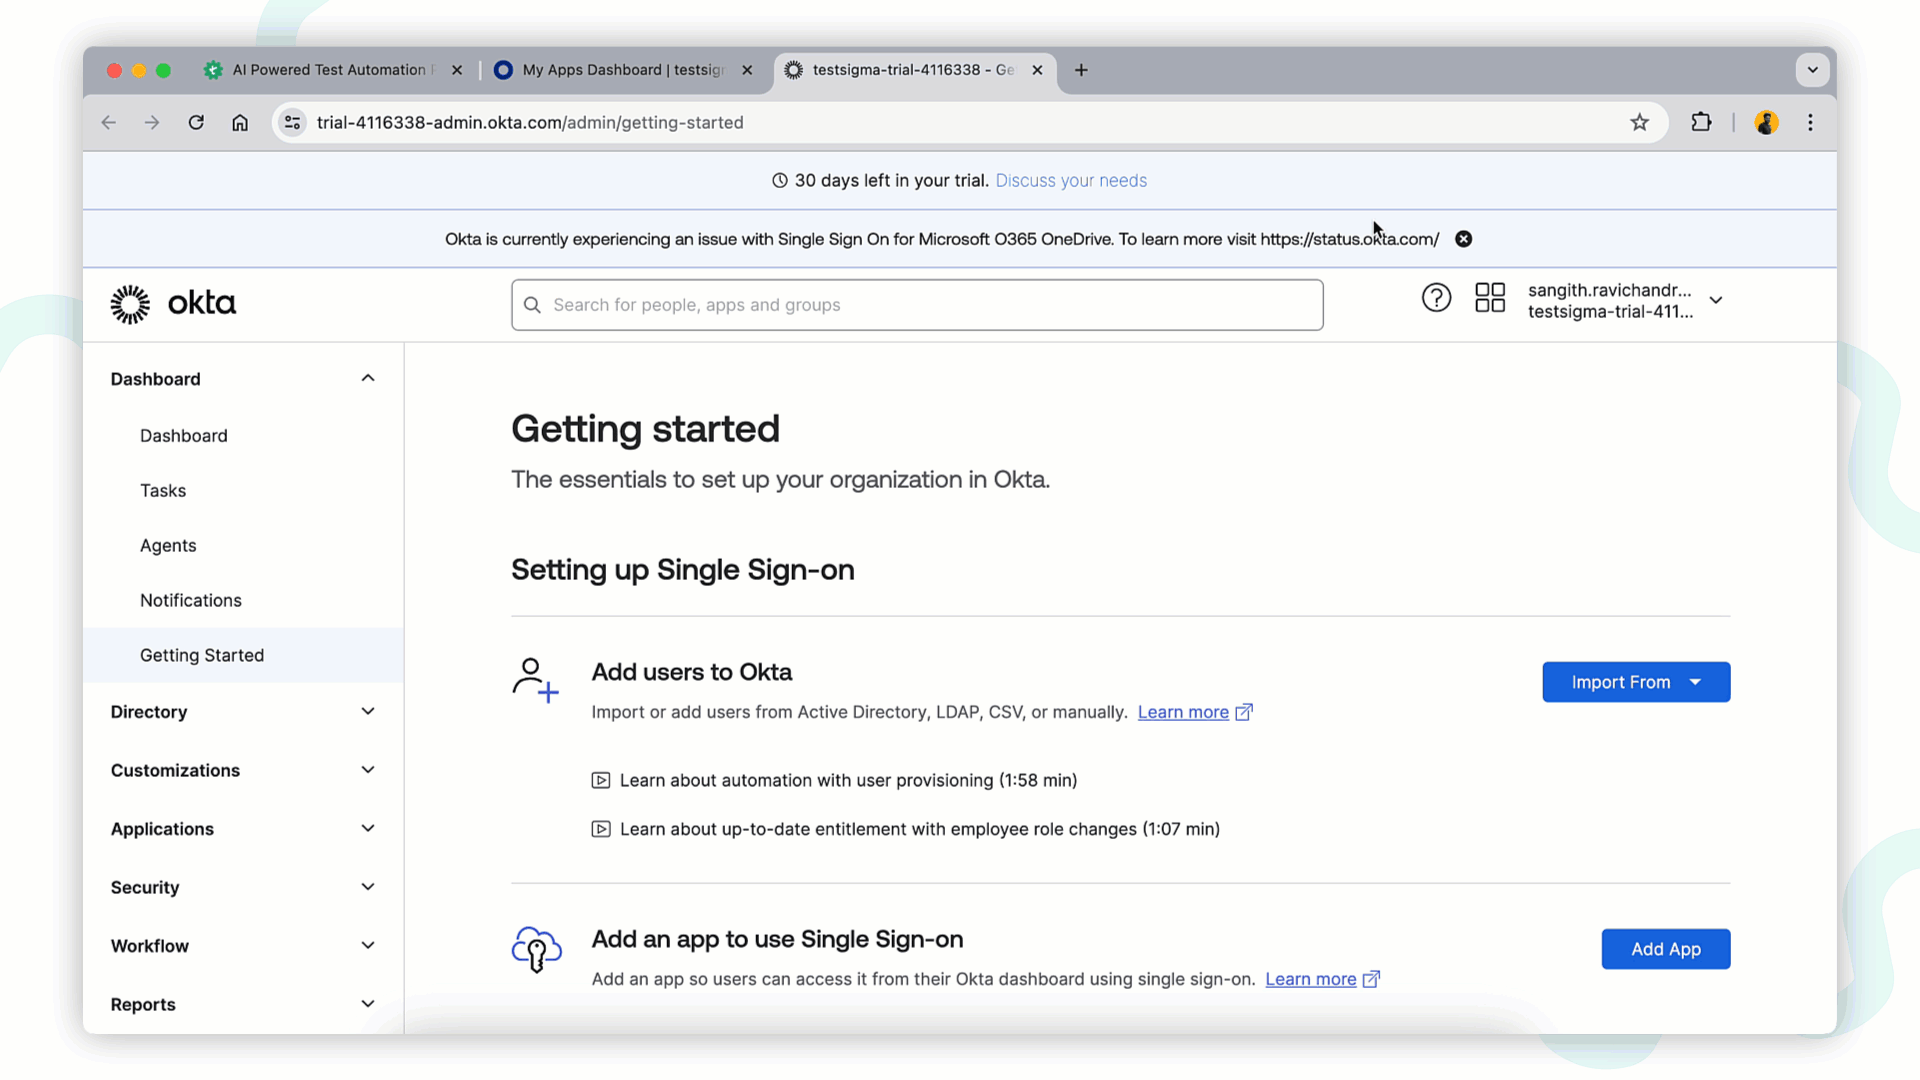
Log in to the Okta Admin Console.
NOTE:Check with your IT team before proceeding, as they may have exclusive admin access to the IdP configuration.
- In the Admin Console, under Applications, click Create App Integration. Choose SAML 2.0 and click Next.
-
In General Settings tab fill below details and click Next to proceed.
- App Name: Enter Application name, example Testsigma:
- App Logo and Visibility: Upload the app logo if preferred.
-
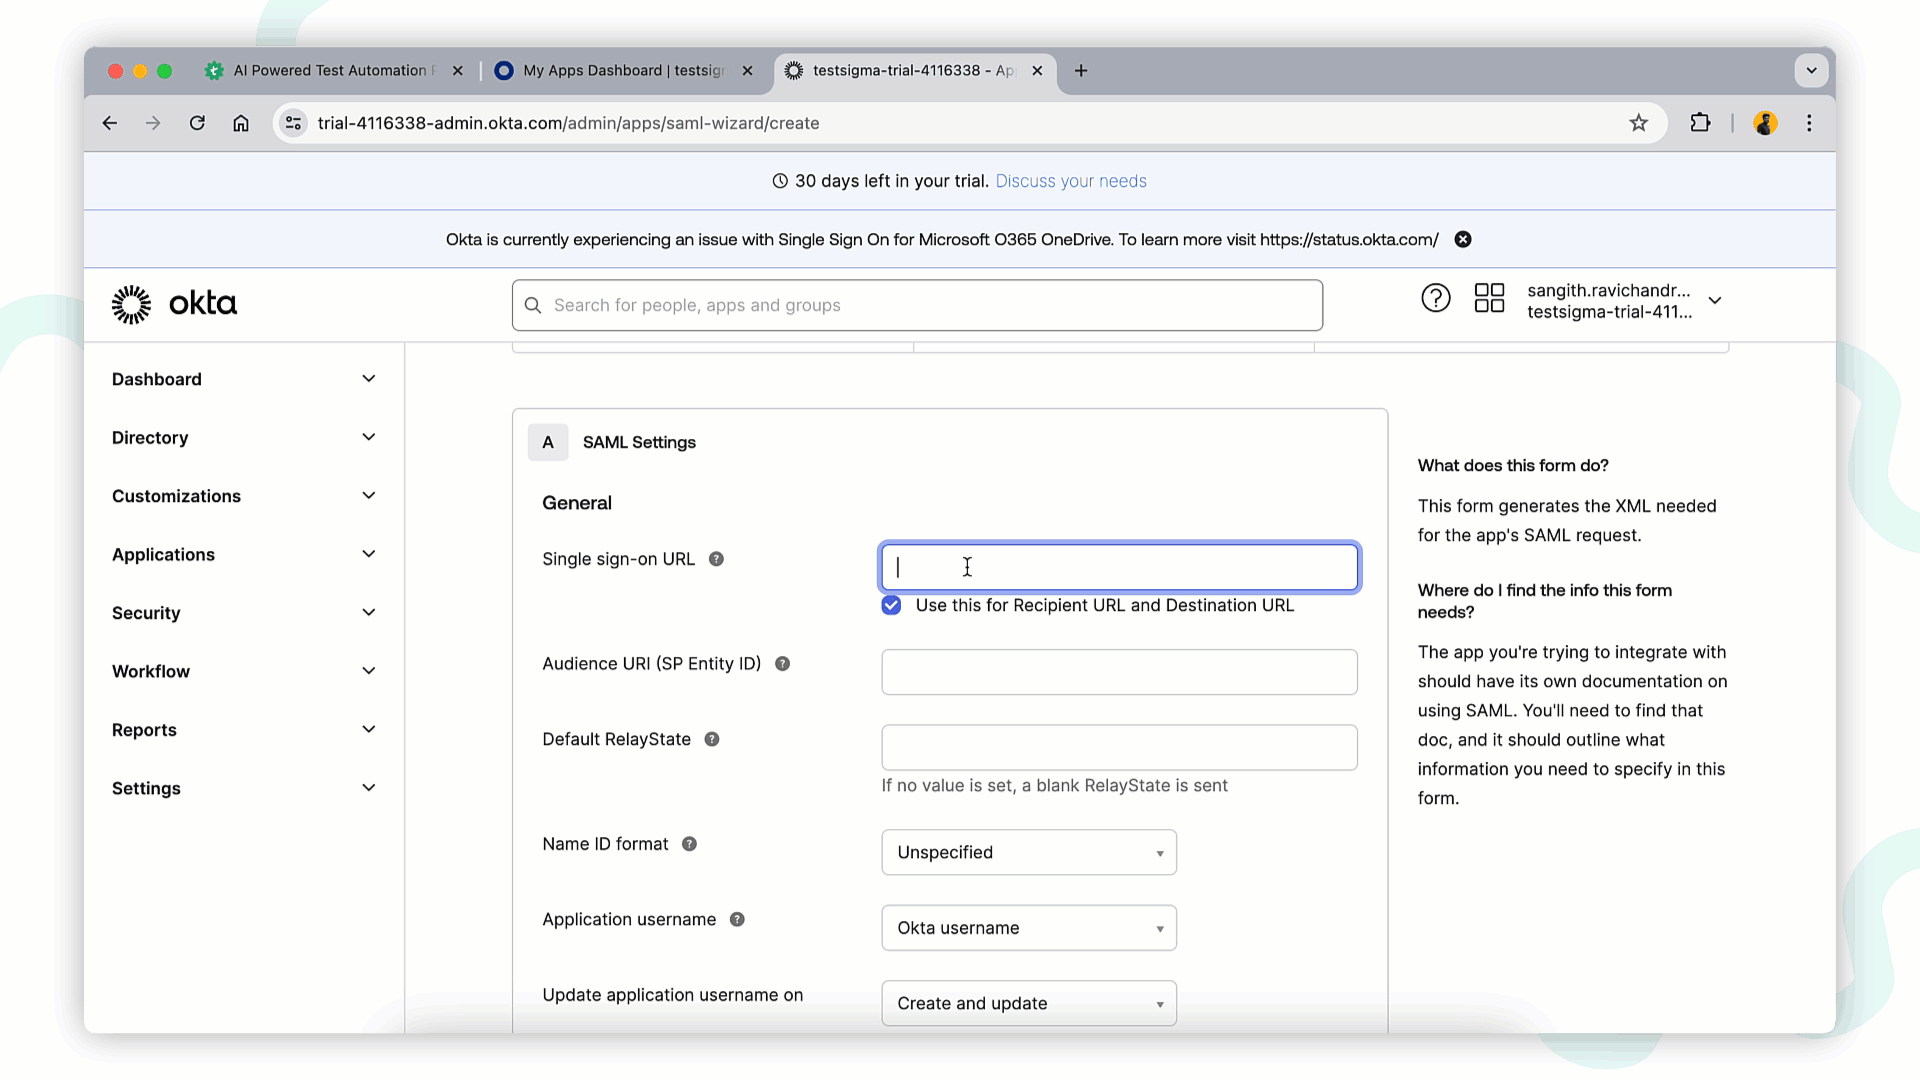
Configure SAML Settings and click Next to proceed:
- Single Sign-On URL: https://app.testsigma.com/saml/250/callback
- Audience URI (SP Entity ID): https://app.testsigma.com/saml/250/metadata
- Default RelayState: https://app.testsigma.com/ui/dashboard
- Name ID Format: Select EmailAddress from dropdown.
- Application Username: Okta username (default)
- Update Application Username On: Create and update (default)
- Finish Setup by selecting "I'm an OKTA User and add an Internal App" and "This is an internal app we have created". Click Finish.
- On the Sign-on methods page, click View Setup Instructions.
- Copy the Identity Provider Issuer, Identity Provider Single Sign-On URL, and X.509 Certificate for use in Testsigma.
Configure Testsigma for Okta SSO
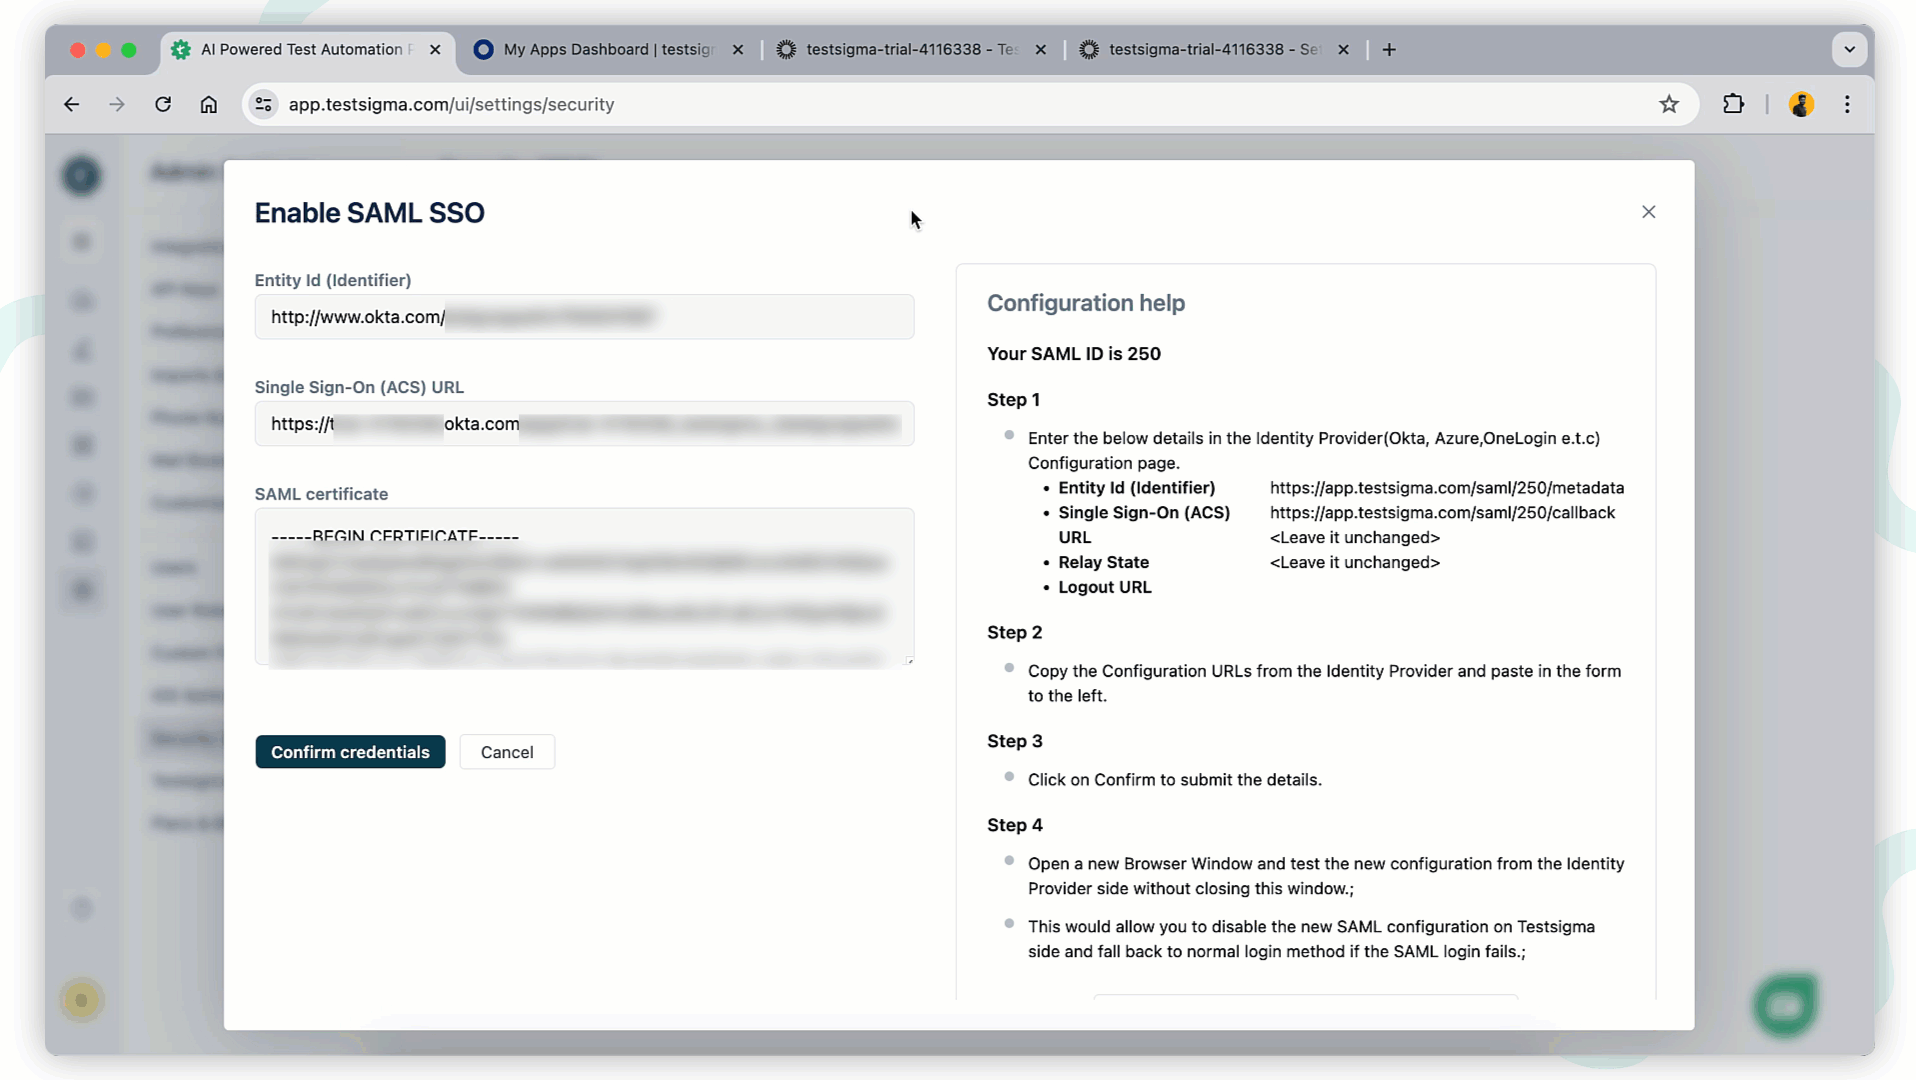
- In Testsigma, enter the Entity ID, SSO URL, and SAML Certificate recorded from Okta.
-
Terminology Mapping:
- Entity ID: Same Identity Provider Issuer.
- Identity Provider Single Sign-On URL: Paste Single Sign-On (ACS) URL.
- SAML Certificate: Paste X.509 Certificate.
- Click Confirm Credentials to confirm the Configuration.
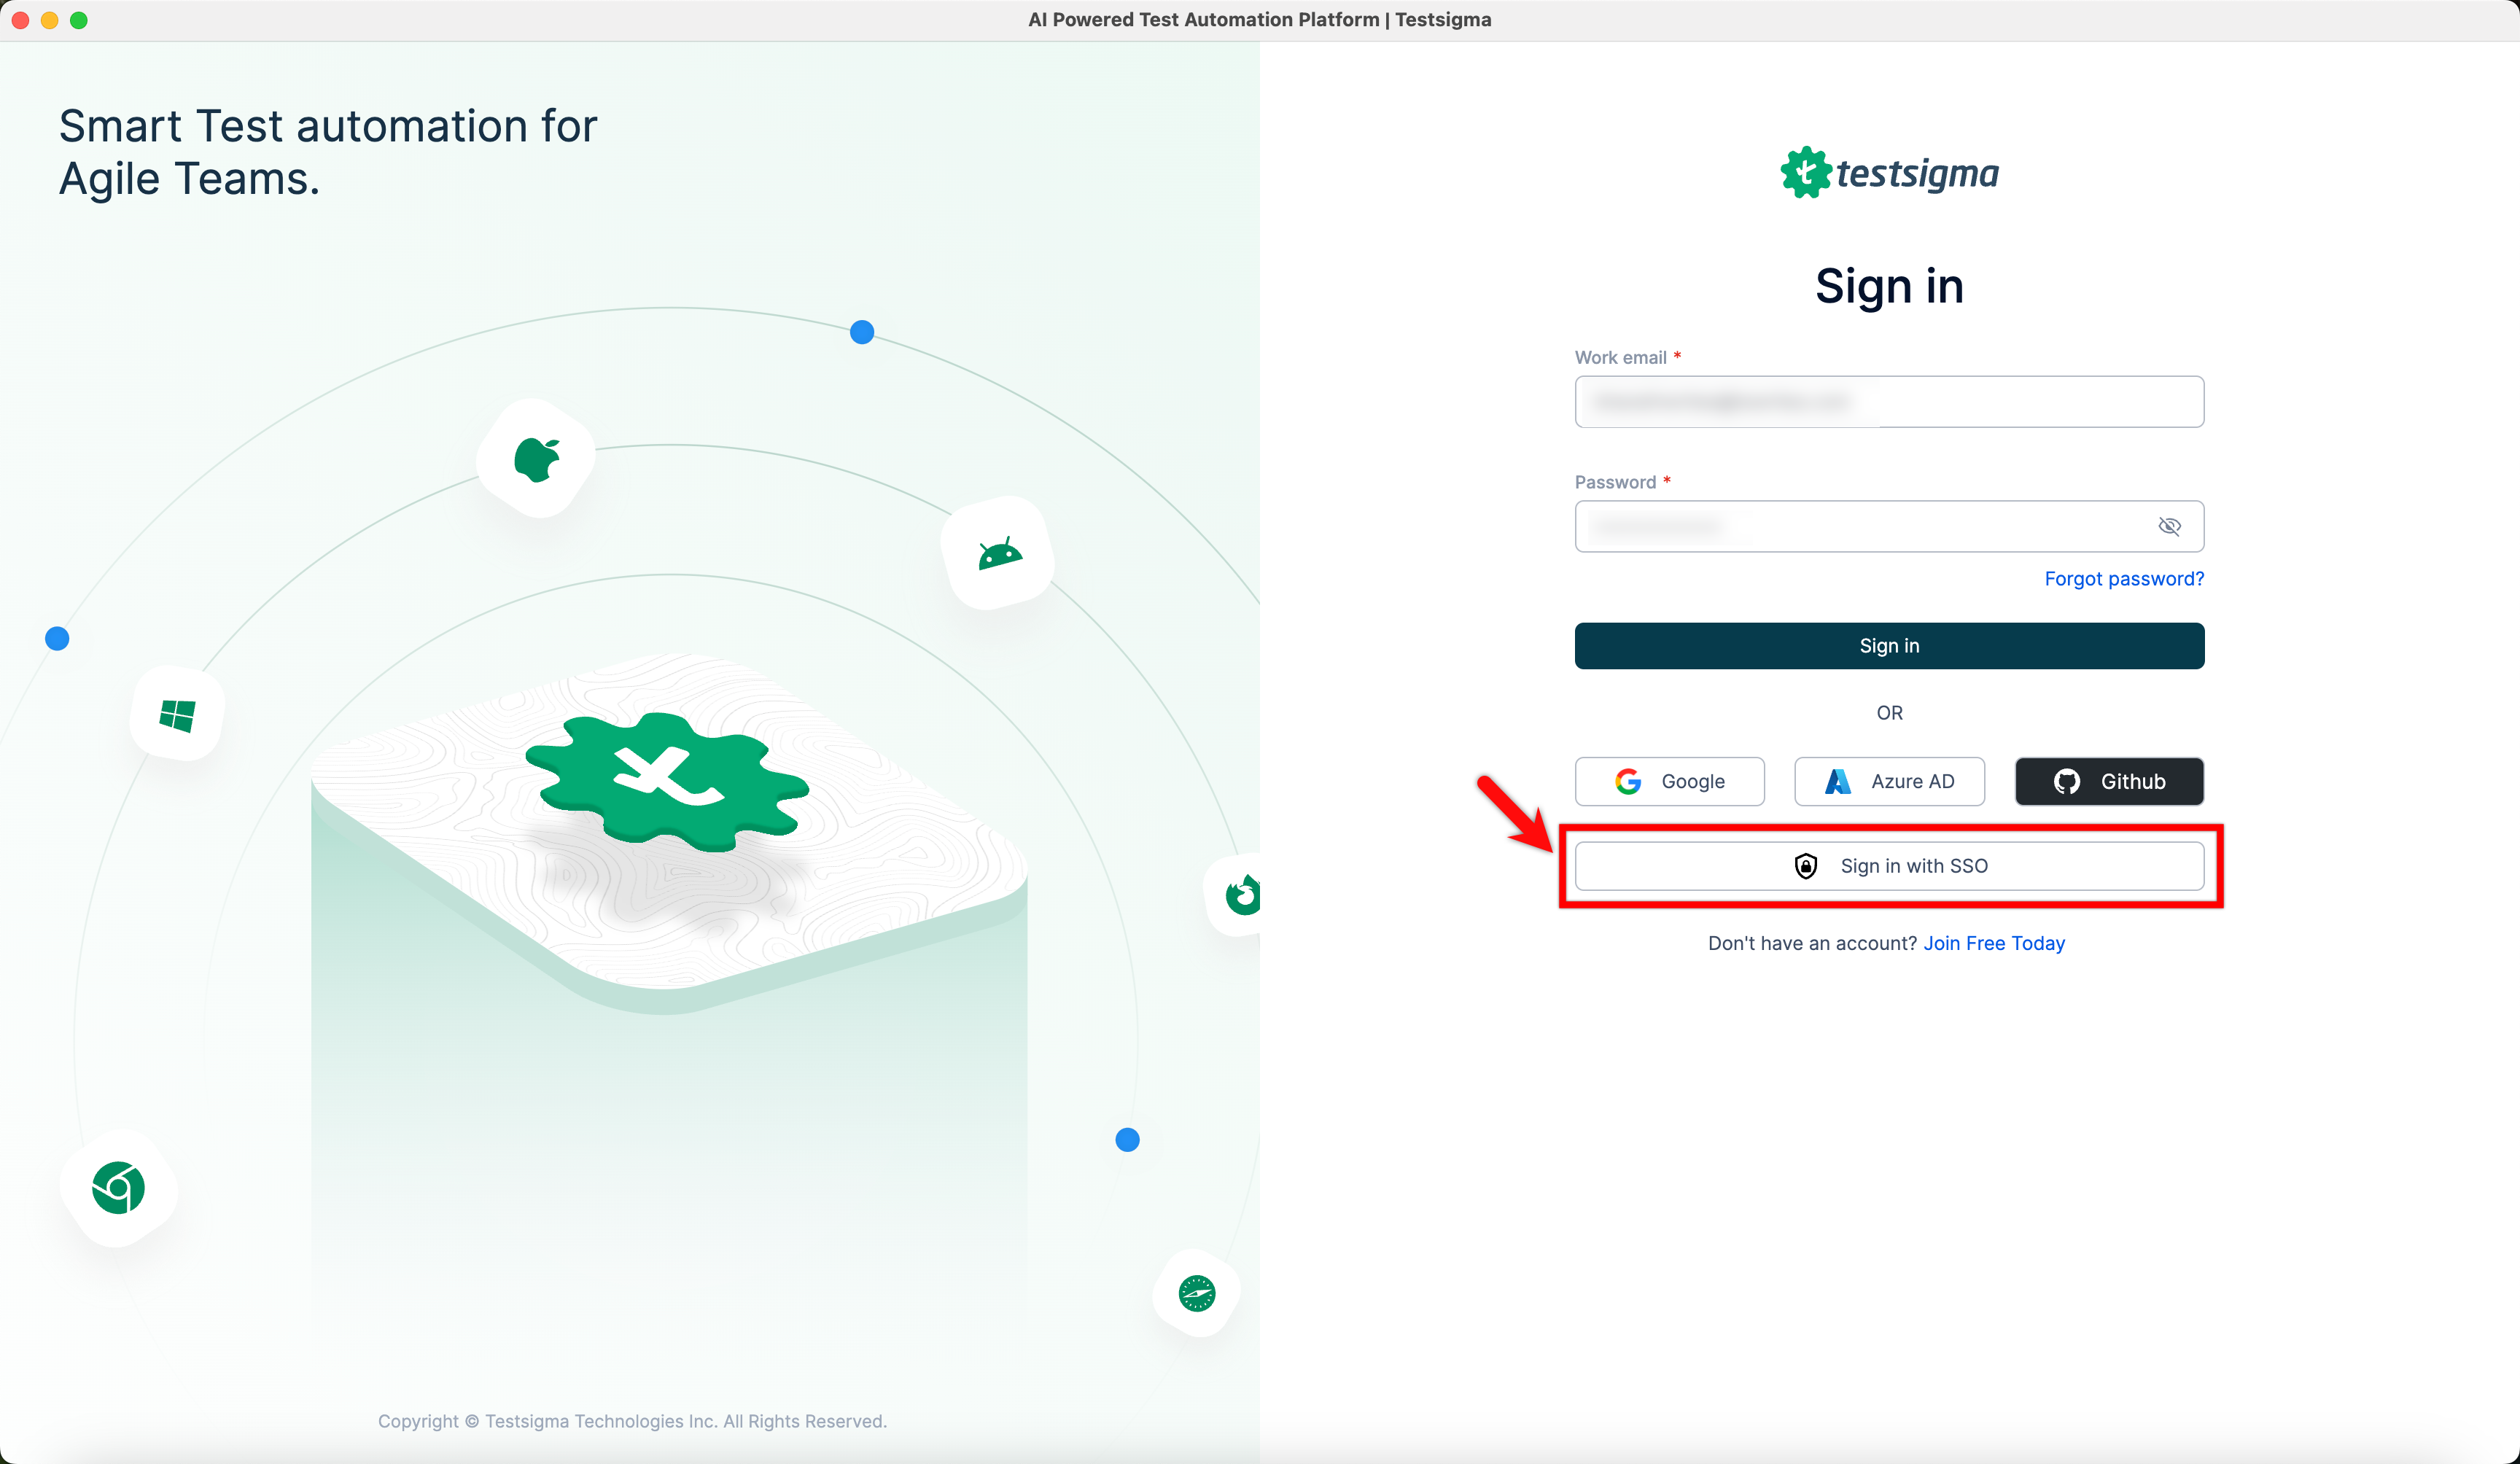
Sign in to Testsigma with SAML SSO
After configuring your Testsigma account with SAML, you can log in using SSO.
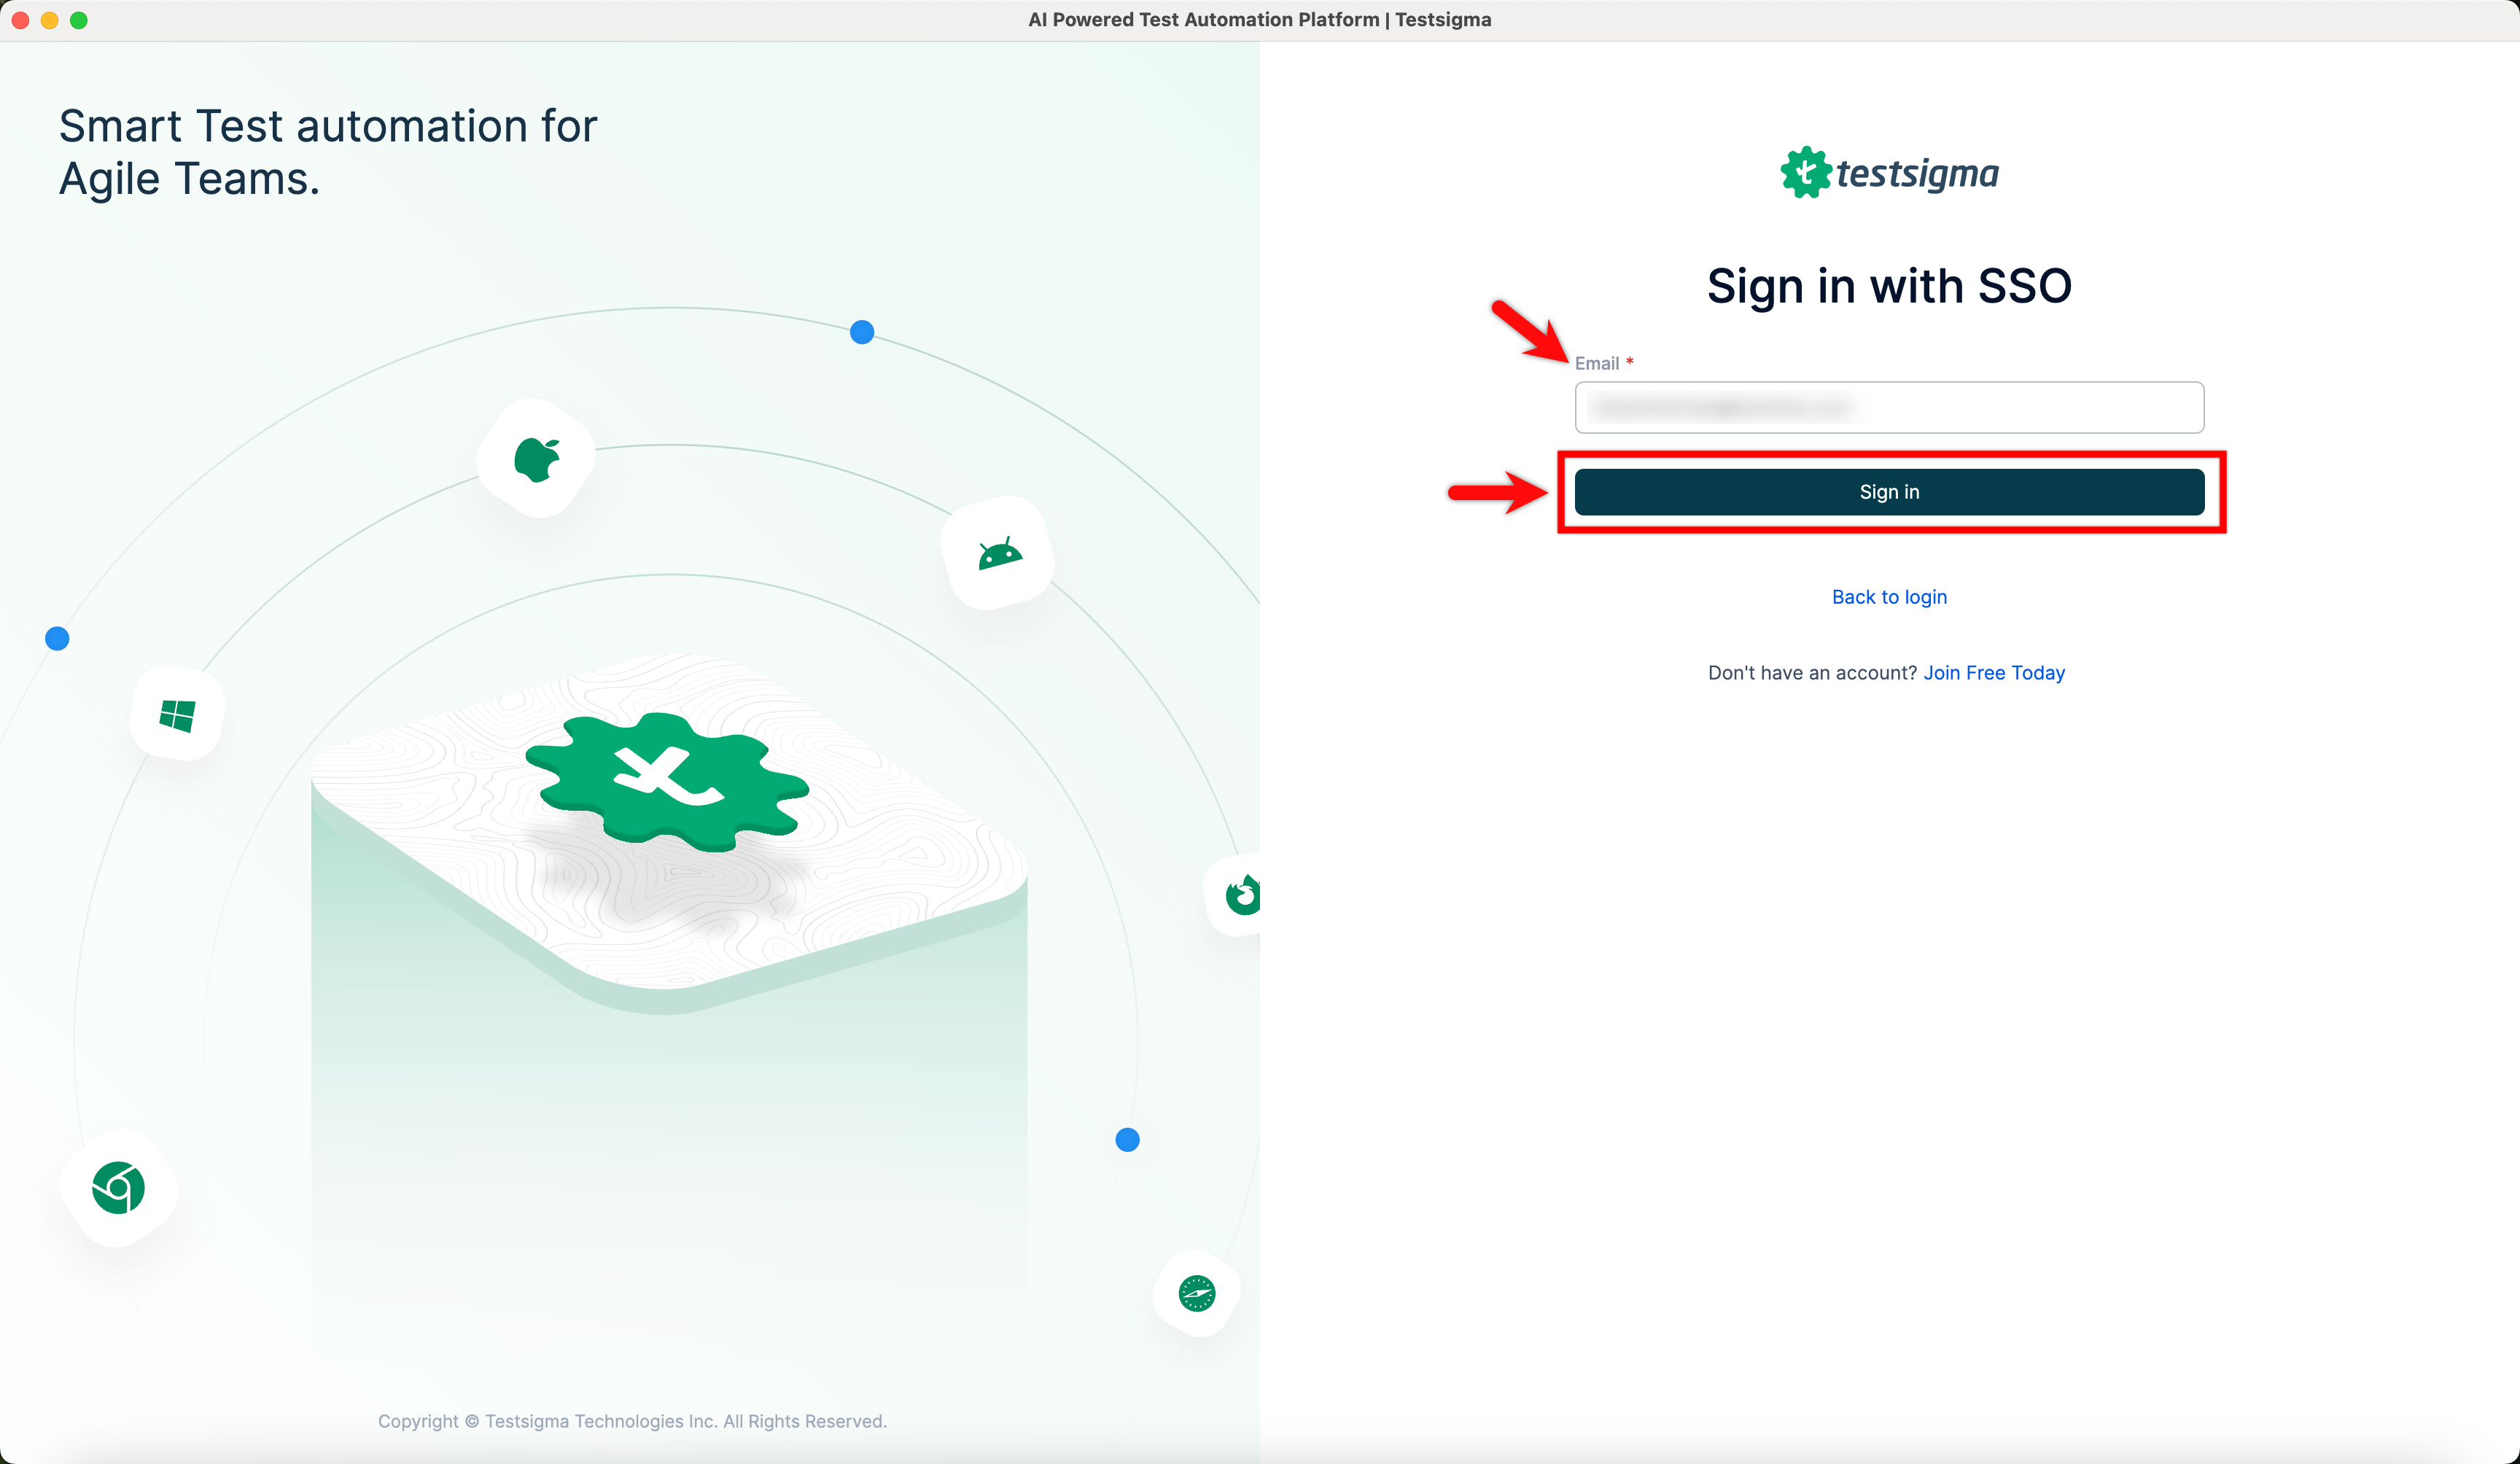
- Click Sign in with SSO on the Testsigma login page.
-
Enter the email ID configured with SSO with the account and click Sign in.
 NOTE:
NOTE:- Install the Okta mobile app for the first-time authentication.
- You cannot log in through SSO without configuring your email.
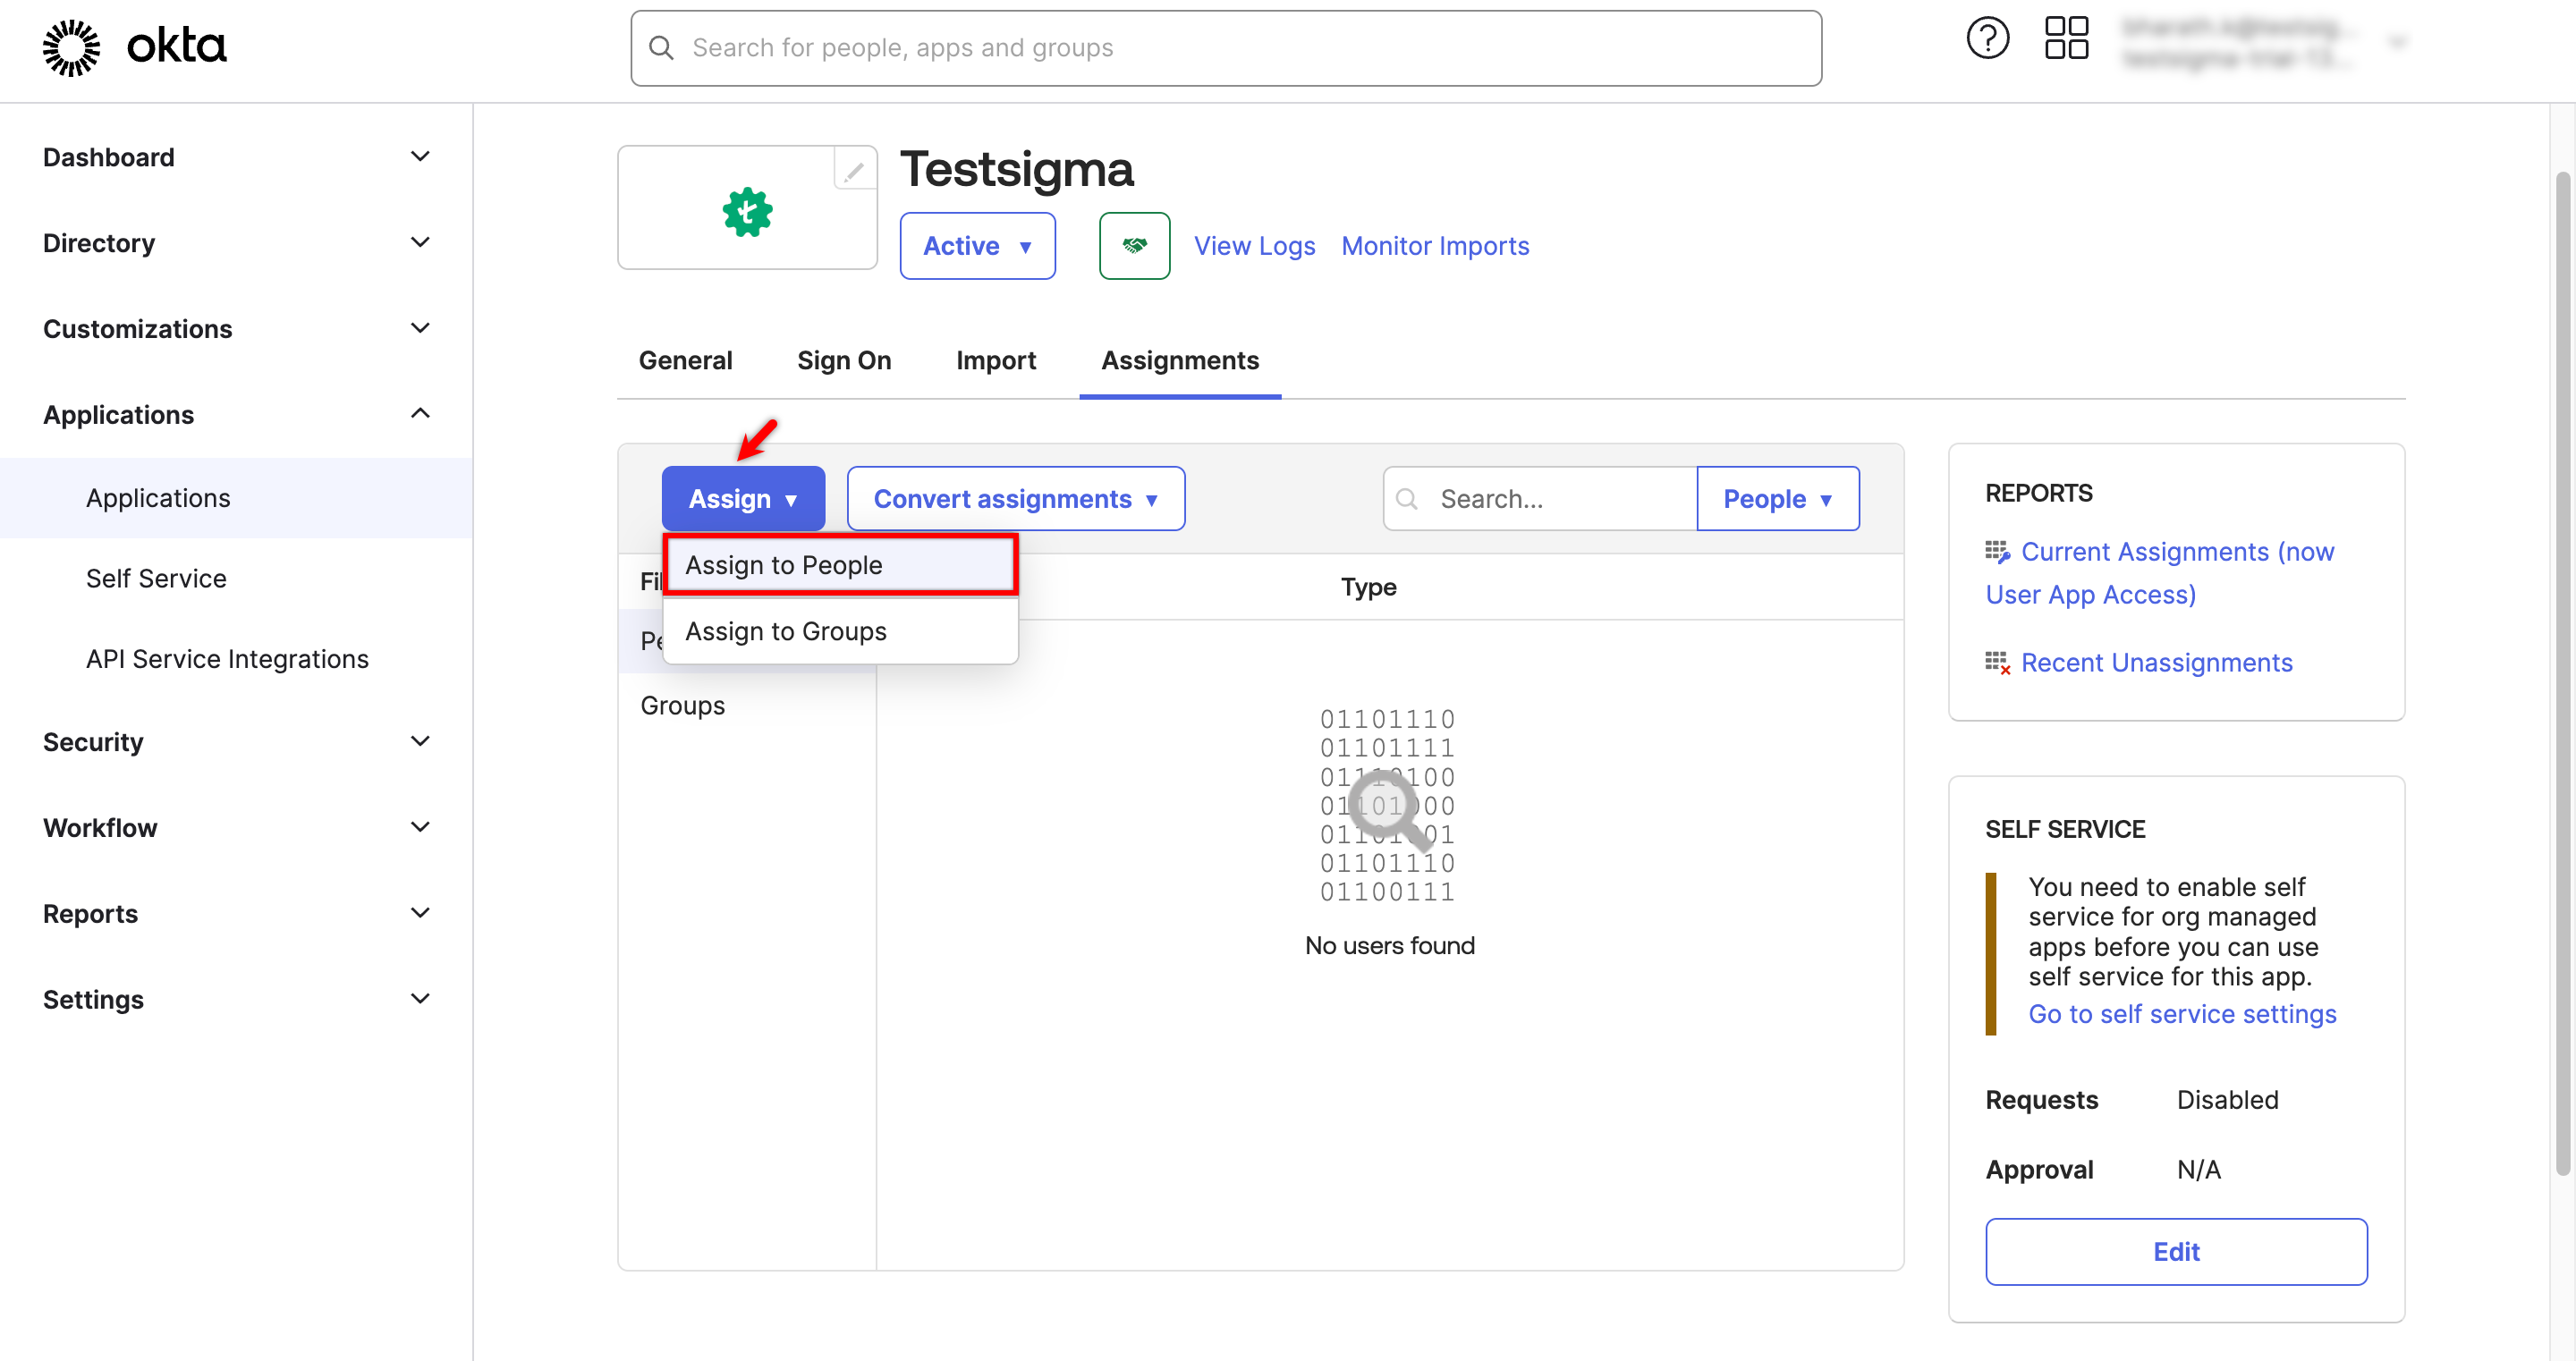
Assign App to Users in Okta
- From the Dashboard, go to Applications and select the application you want to assign to users.

- On the Application Details page, click Assign and select Assign to People from the dropdown menu.
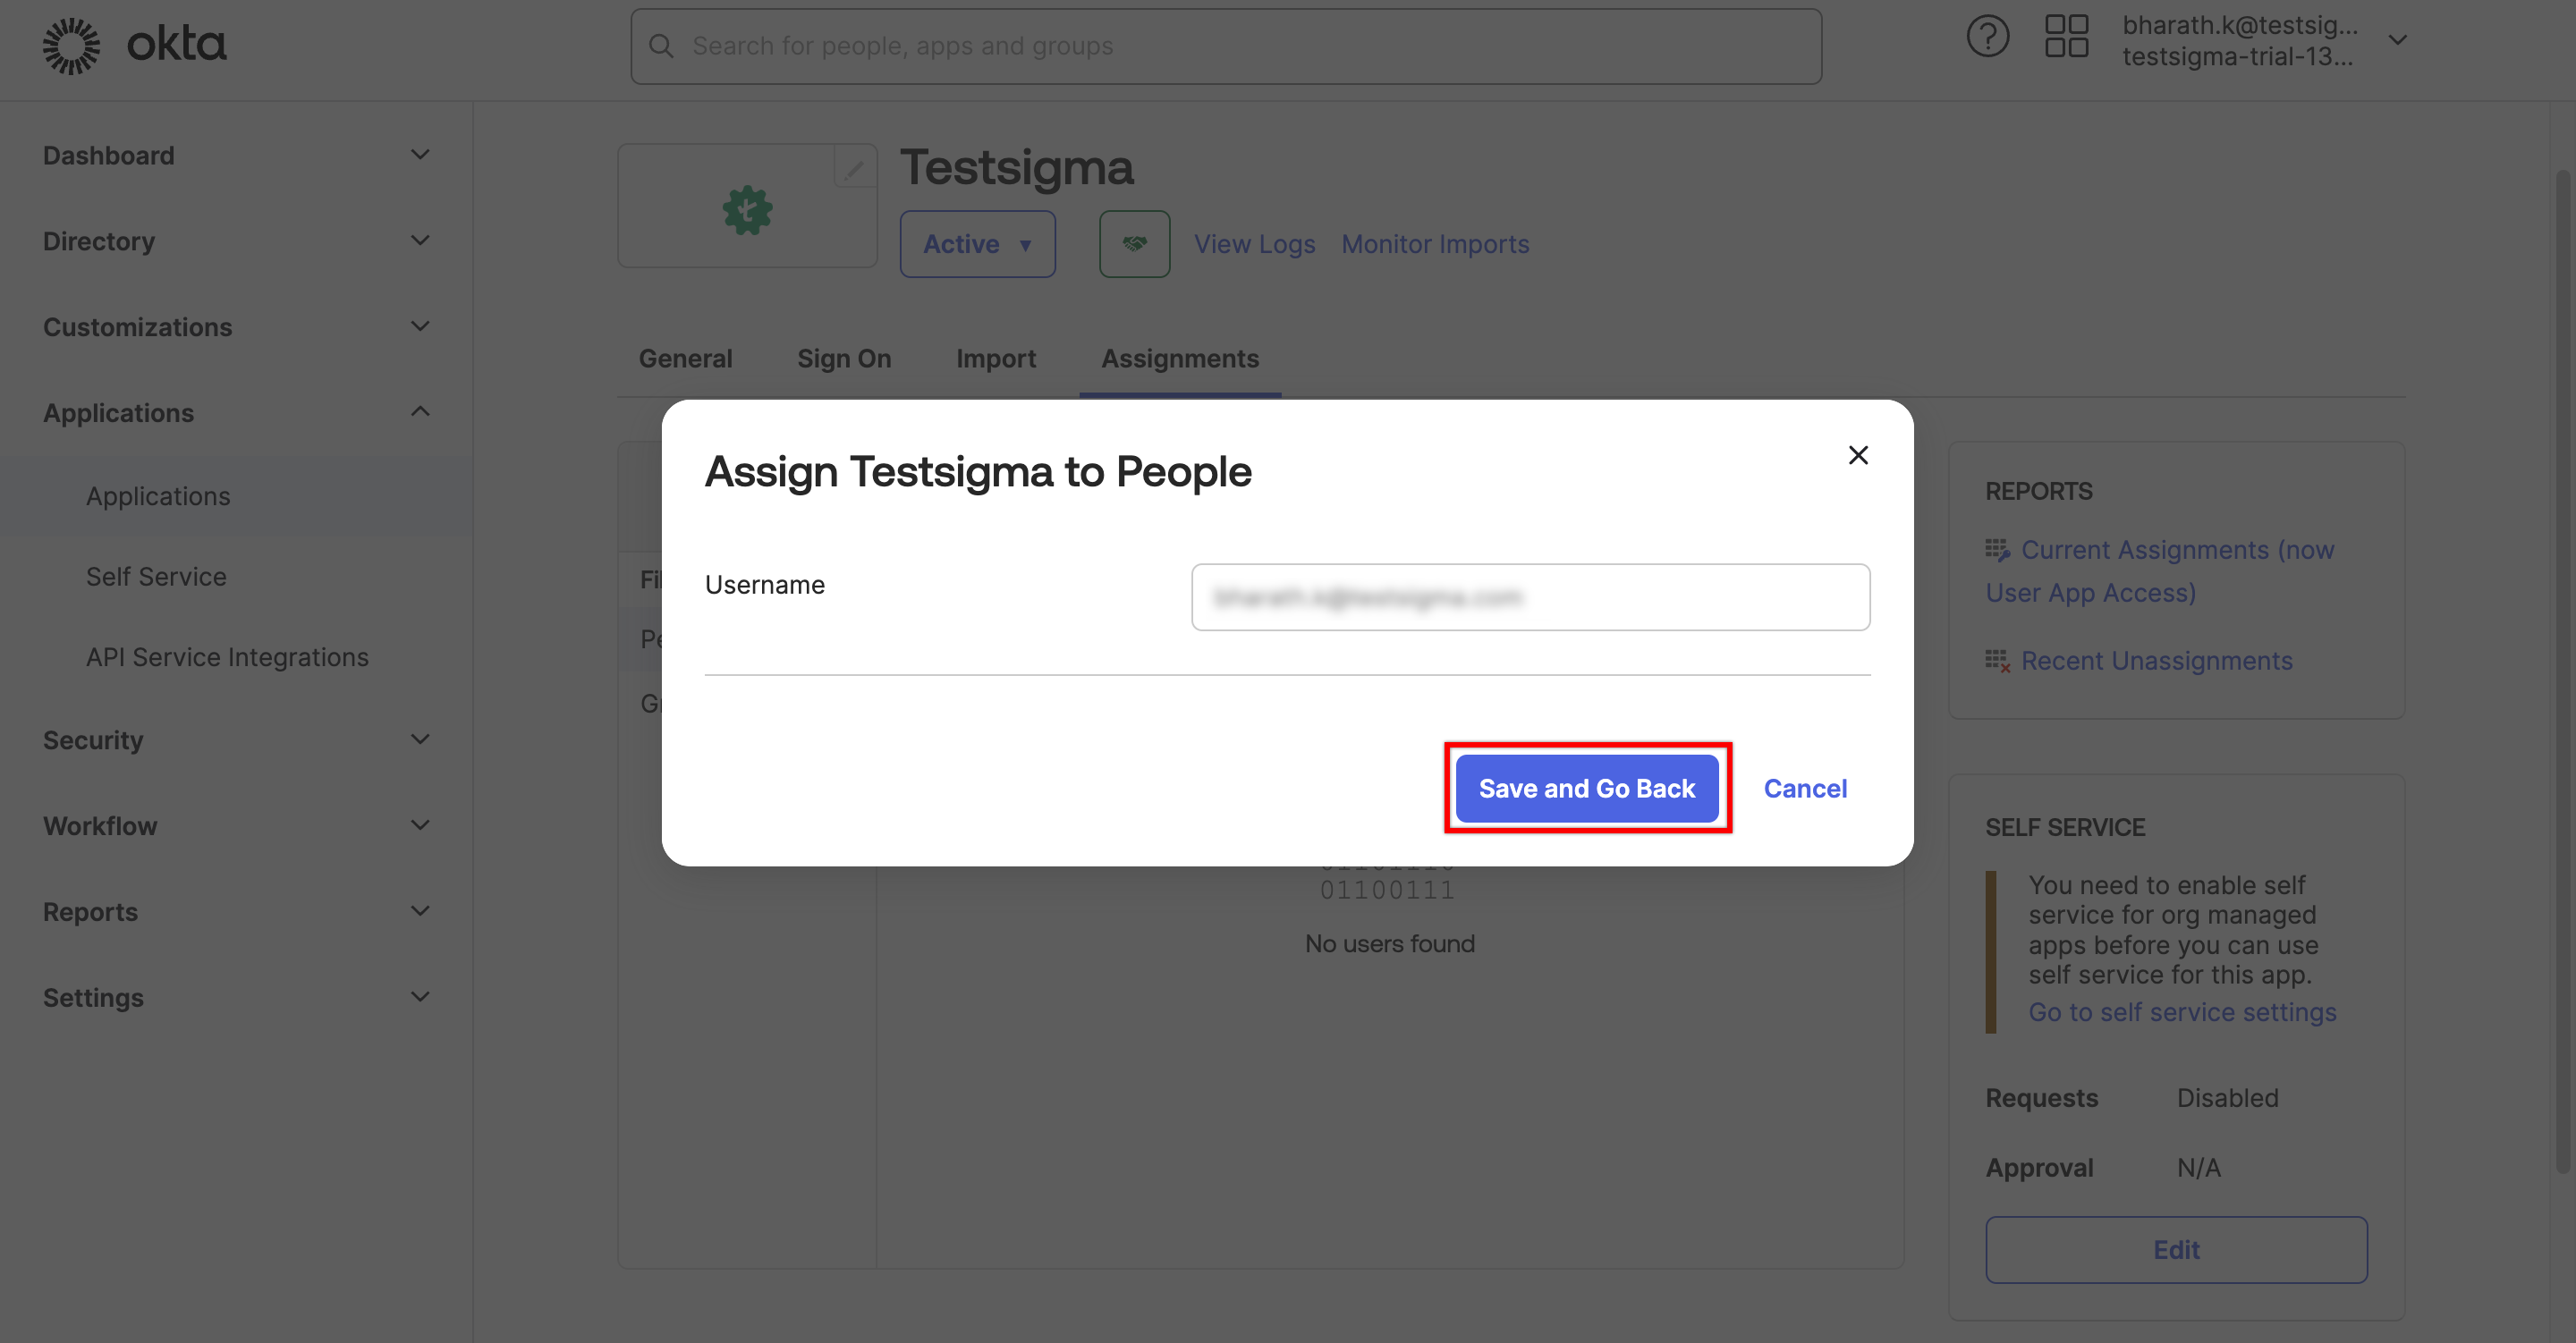
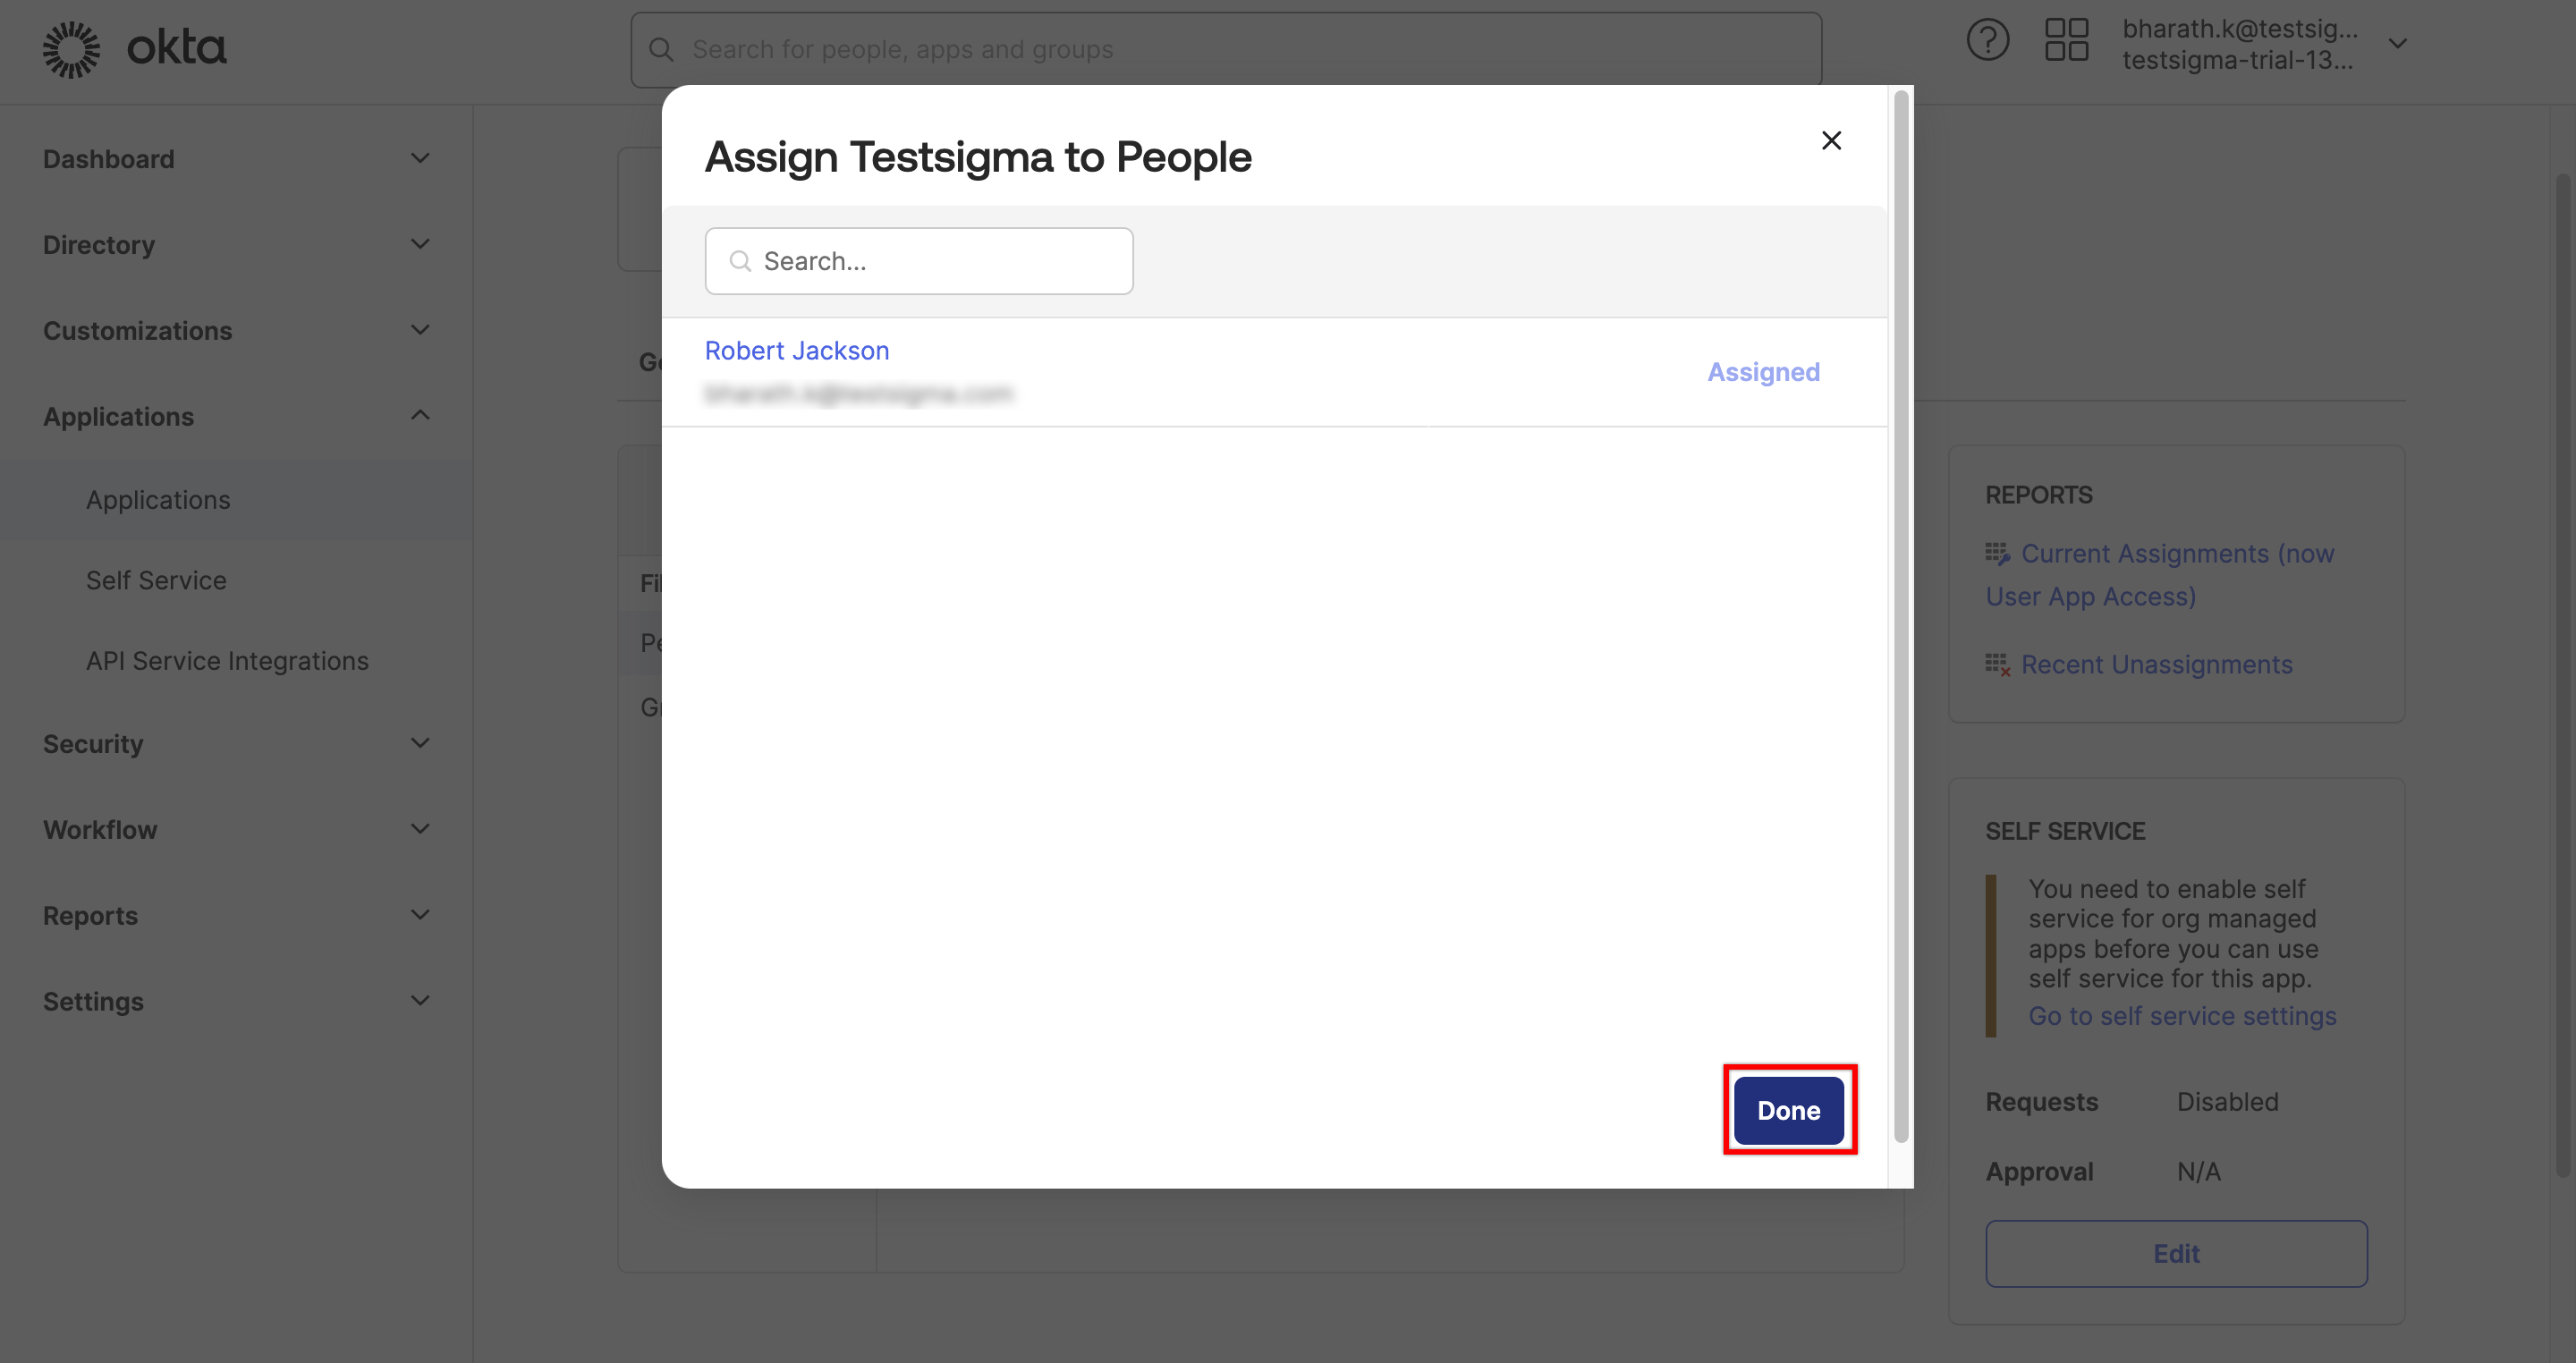
- In the Assign <App> to People dialog box, click the Assign button next to the user's ID.
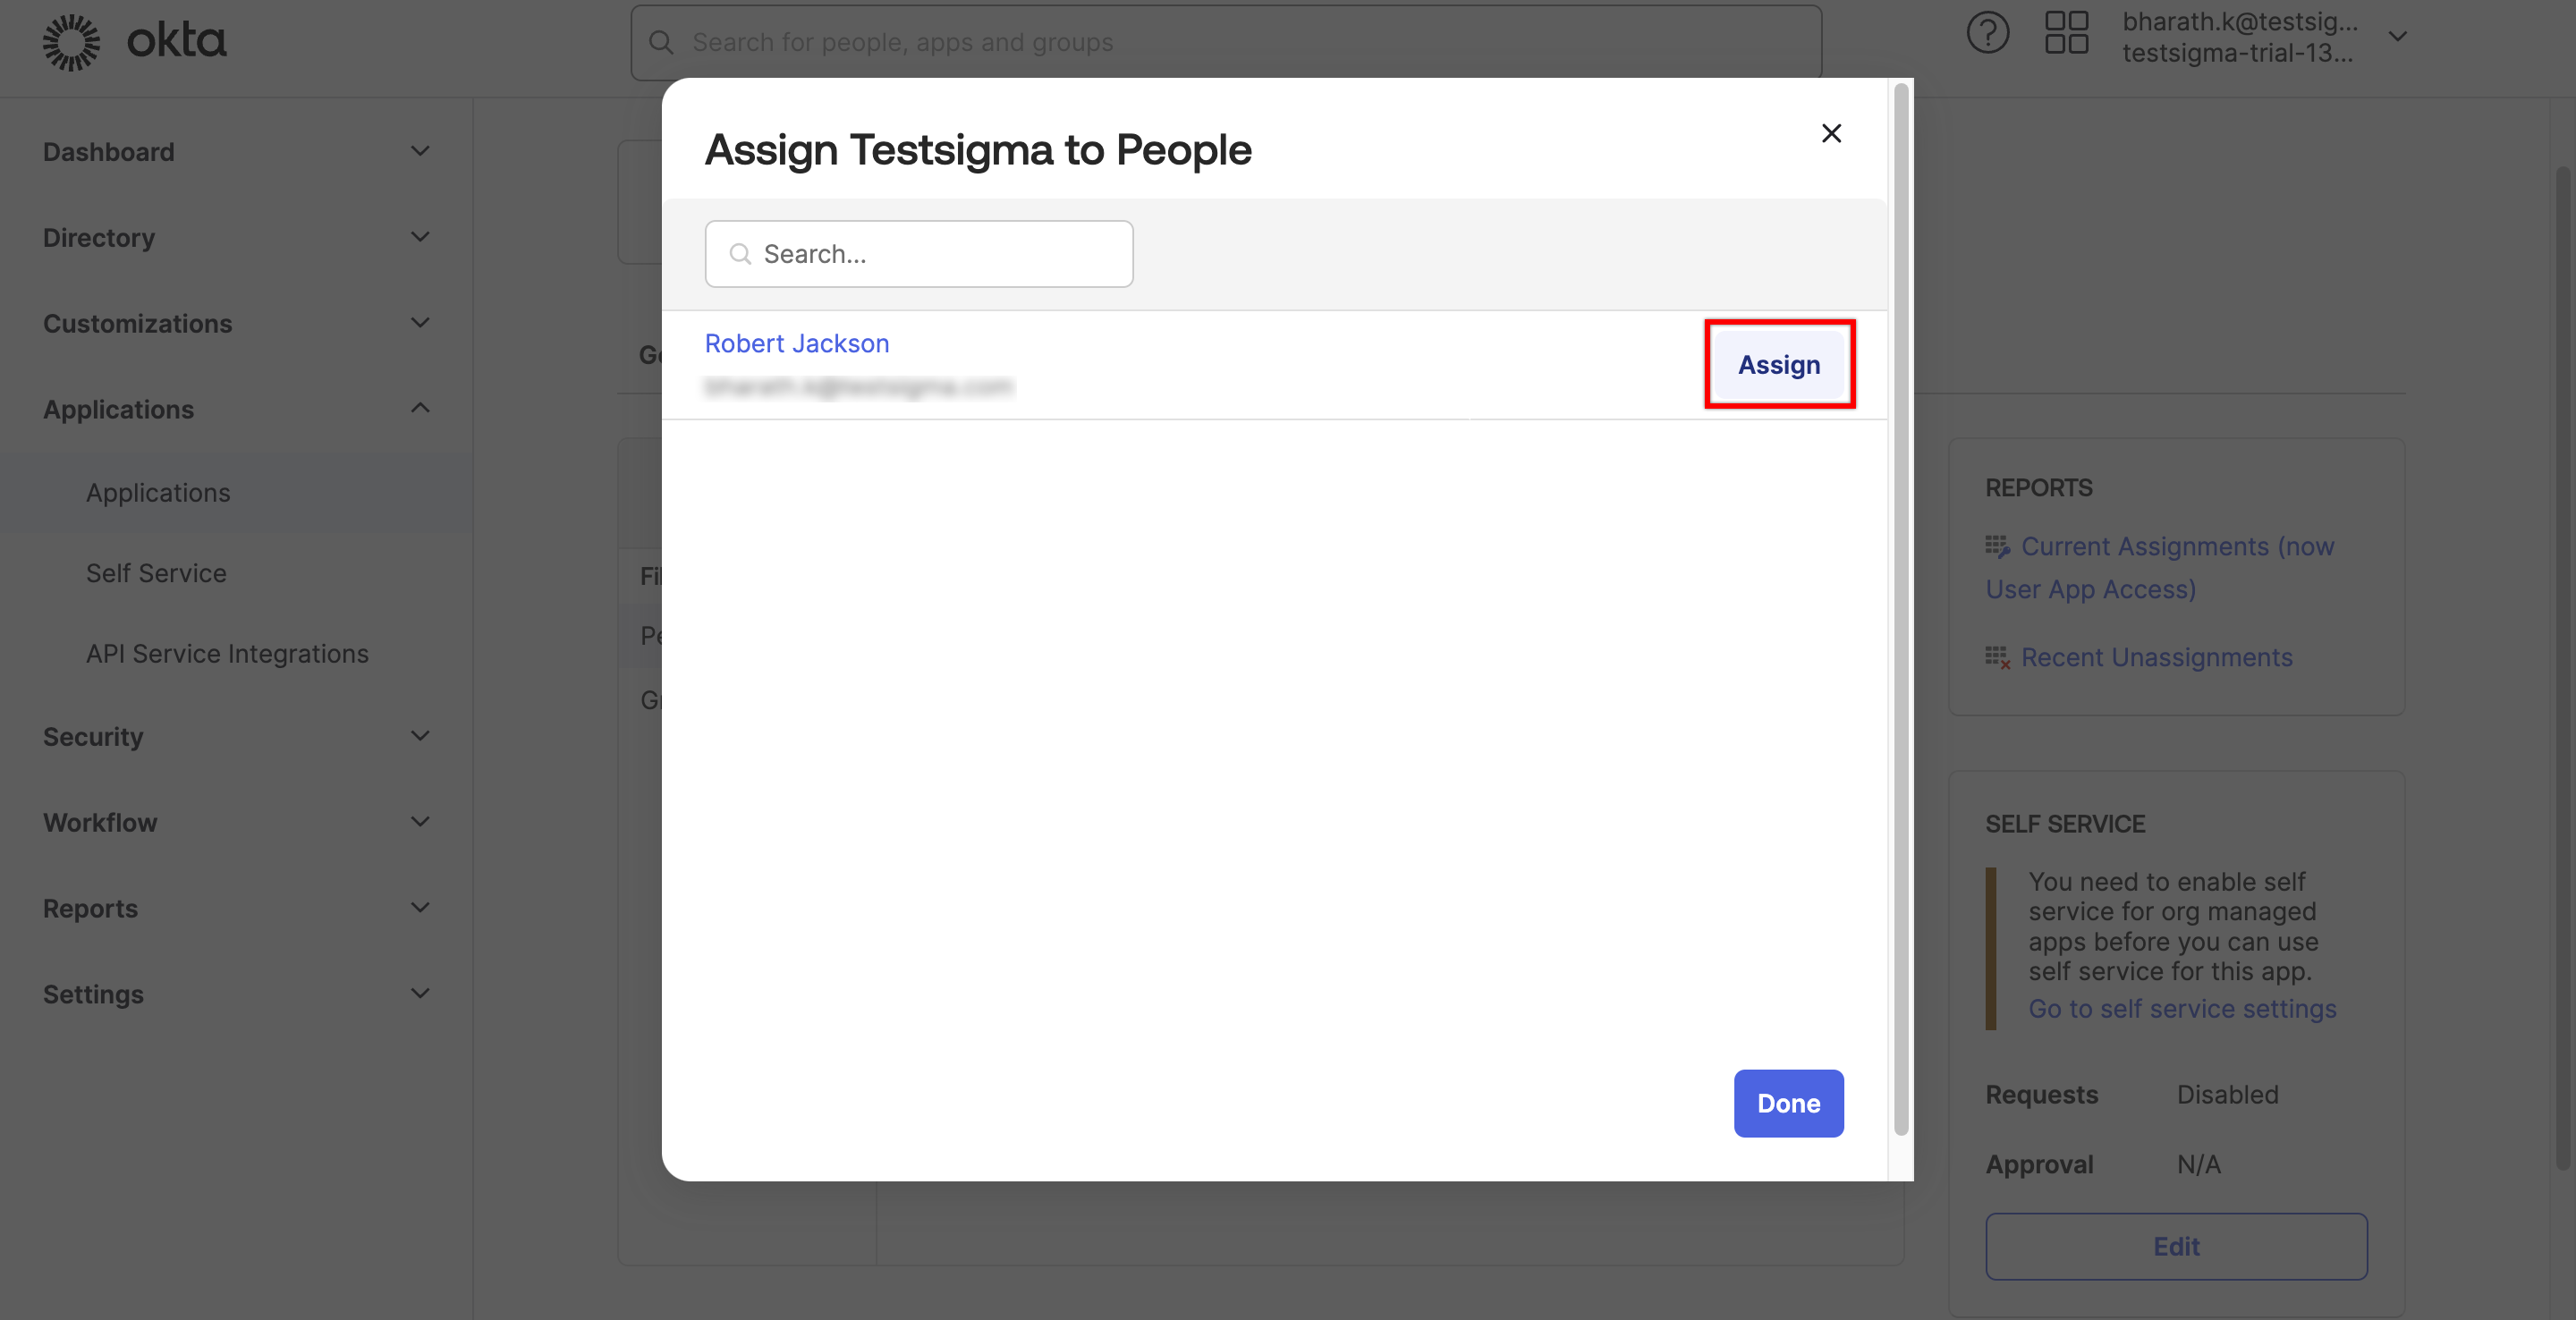
- Validate the email in the dialog box, then click Save and Go Back.
- Click Done. The assigned user can now access the application through Okta.
Disable Configured SSO
To disable SSO login using Okta, turn off the toggle to disable SAML SSO at any time. A disable SAML SSO warning prompt will appear. Click I Understand and Disable to remove the SSO configuration from your account. 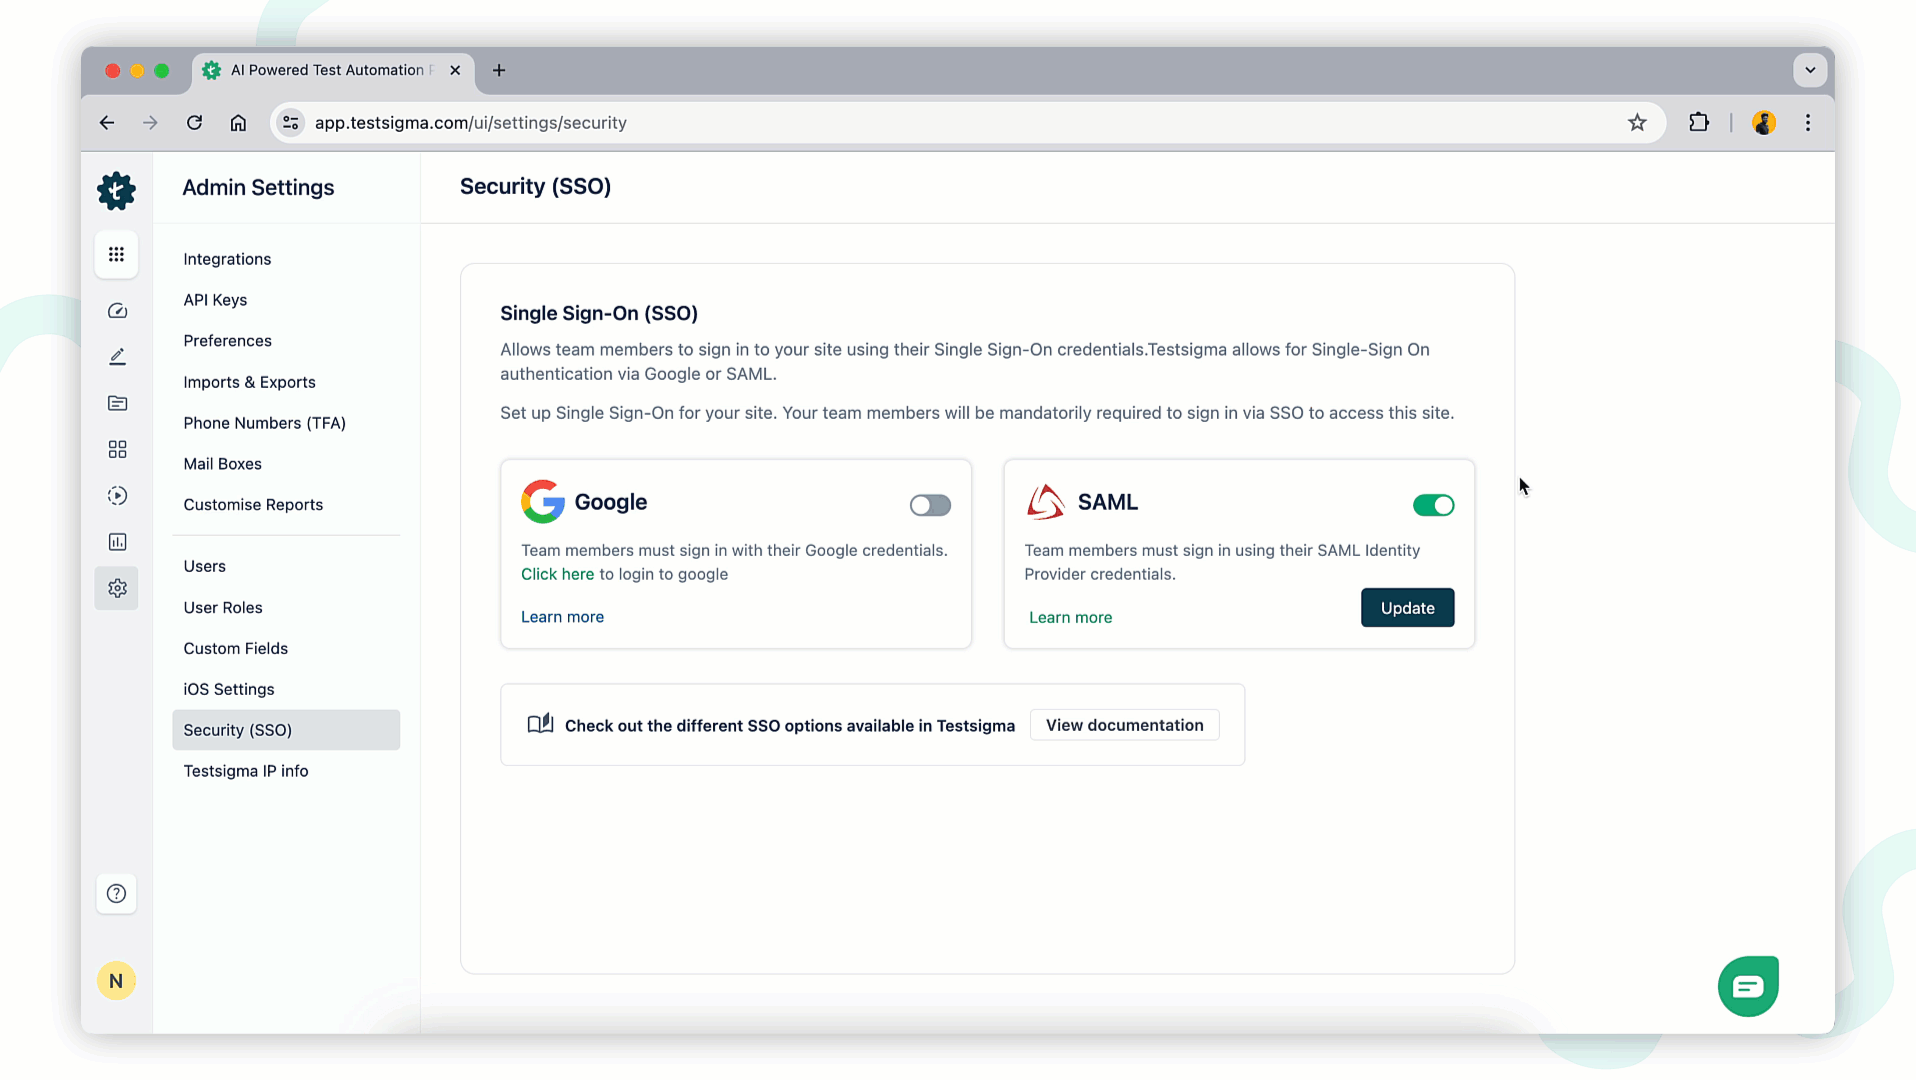
Want to contribute or report missing content?