- create test cases
 Organizing Test Cases in Folders
- Test Cases for Web Applications
- Test Cases for Mobile Applications
- Test Cases for Mobile Web Applications
- Manage Test Cases for Web Applications
- Manage Test Cases for Android & iOS Apps
- Manage Test Cases for Mobile Web Applications
- Test Case List Actions
- Importing Postman Collections and Environments
- Custom Fields for Test Cases
- Label Management
- Update Test Case Result in a Test Plan
- Test Case: Advanced Options Guide
- Test Step Types
- Type: Natural Language
- Type: REST API
- Type: Step Group
- Type: For Loop
- Type: While Loop
- Type: Block
- Type: If Condition
- Nested Step Groups
- Image Injection
- Cross-application testing
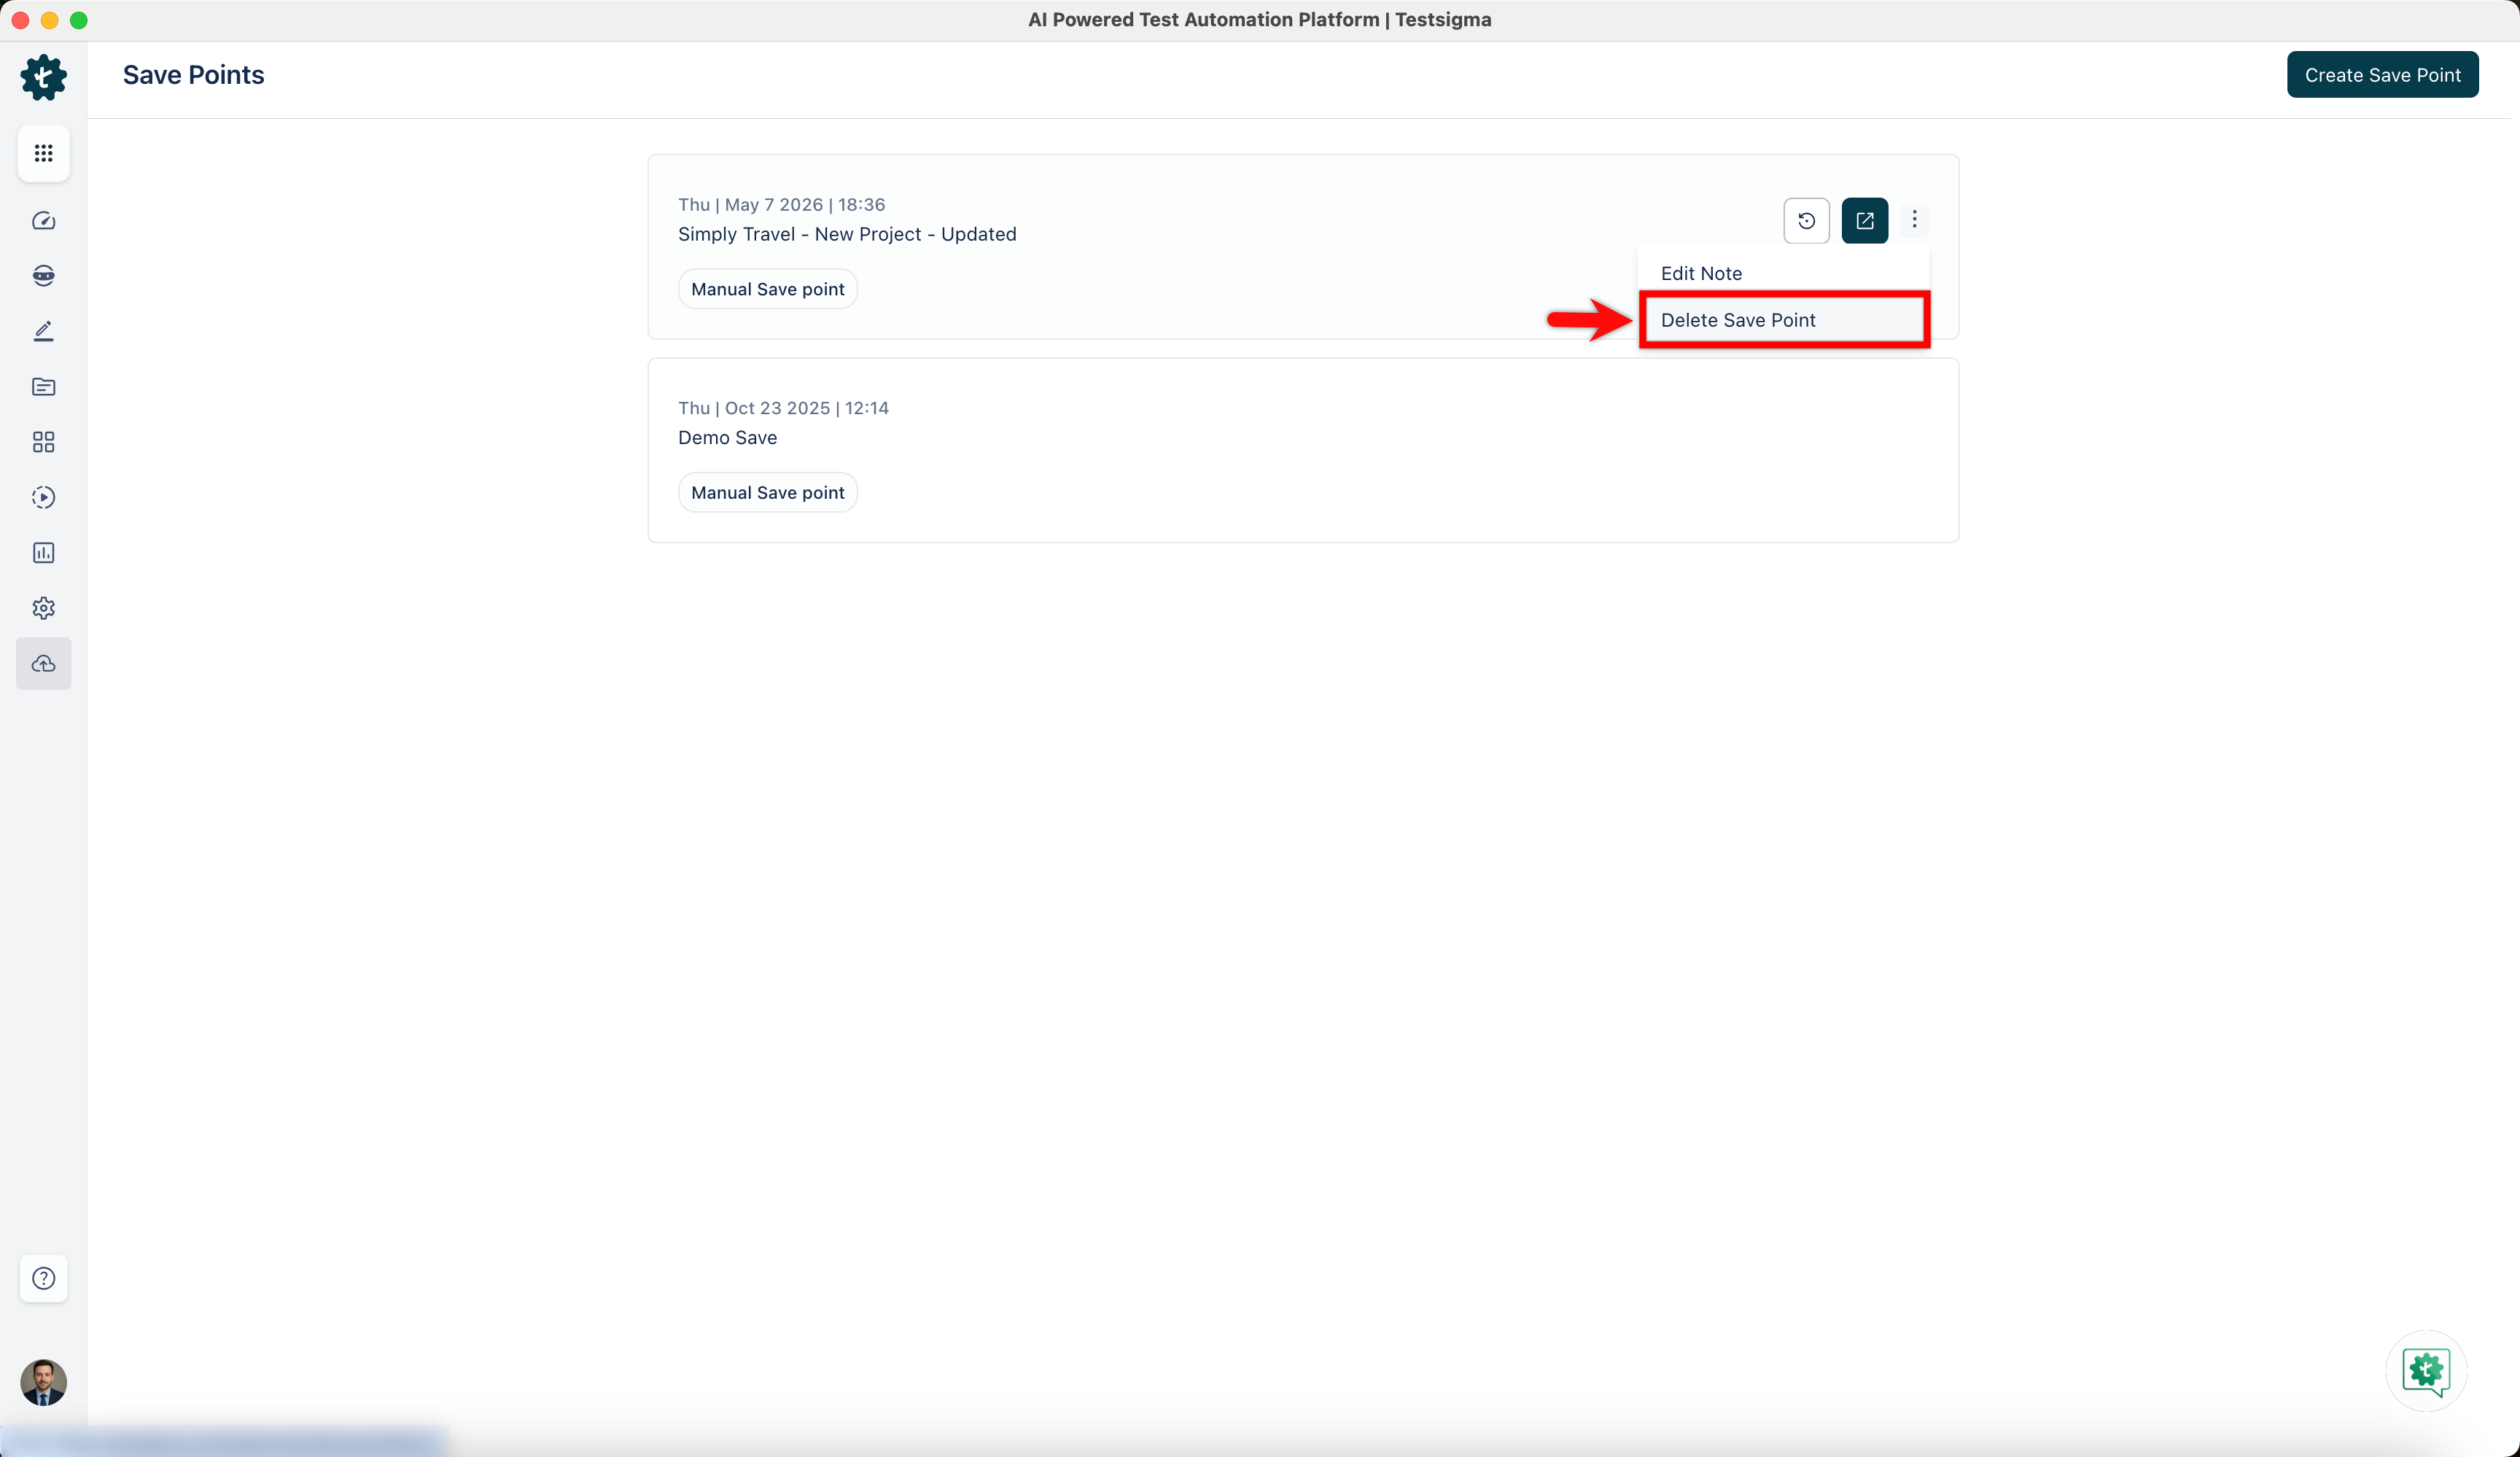
Manage Save Points
The Save Points feature lets you create checkpoints manually or during import to restore the project to the exact state it was in when the save point was created. You can also create, edit, delete, and restore save points as needed. This article explains how to manage save points in Testsigma.
Steps to Manage Save Points
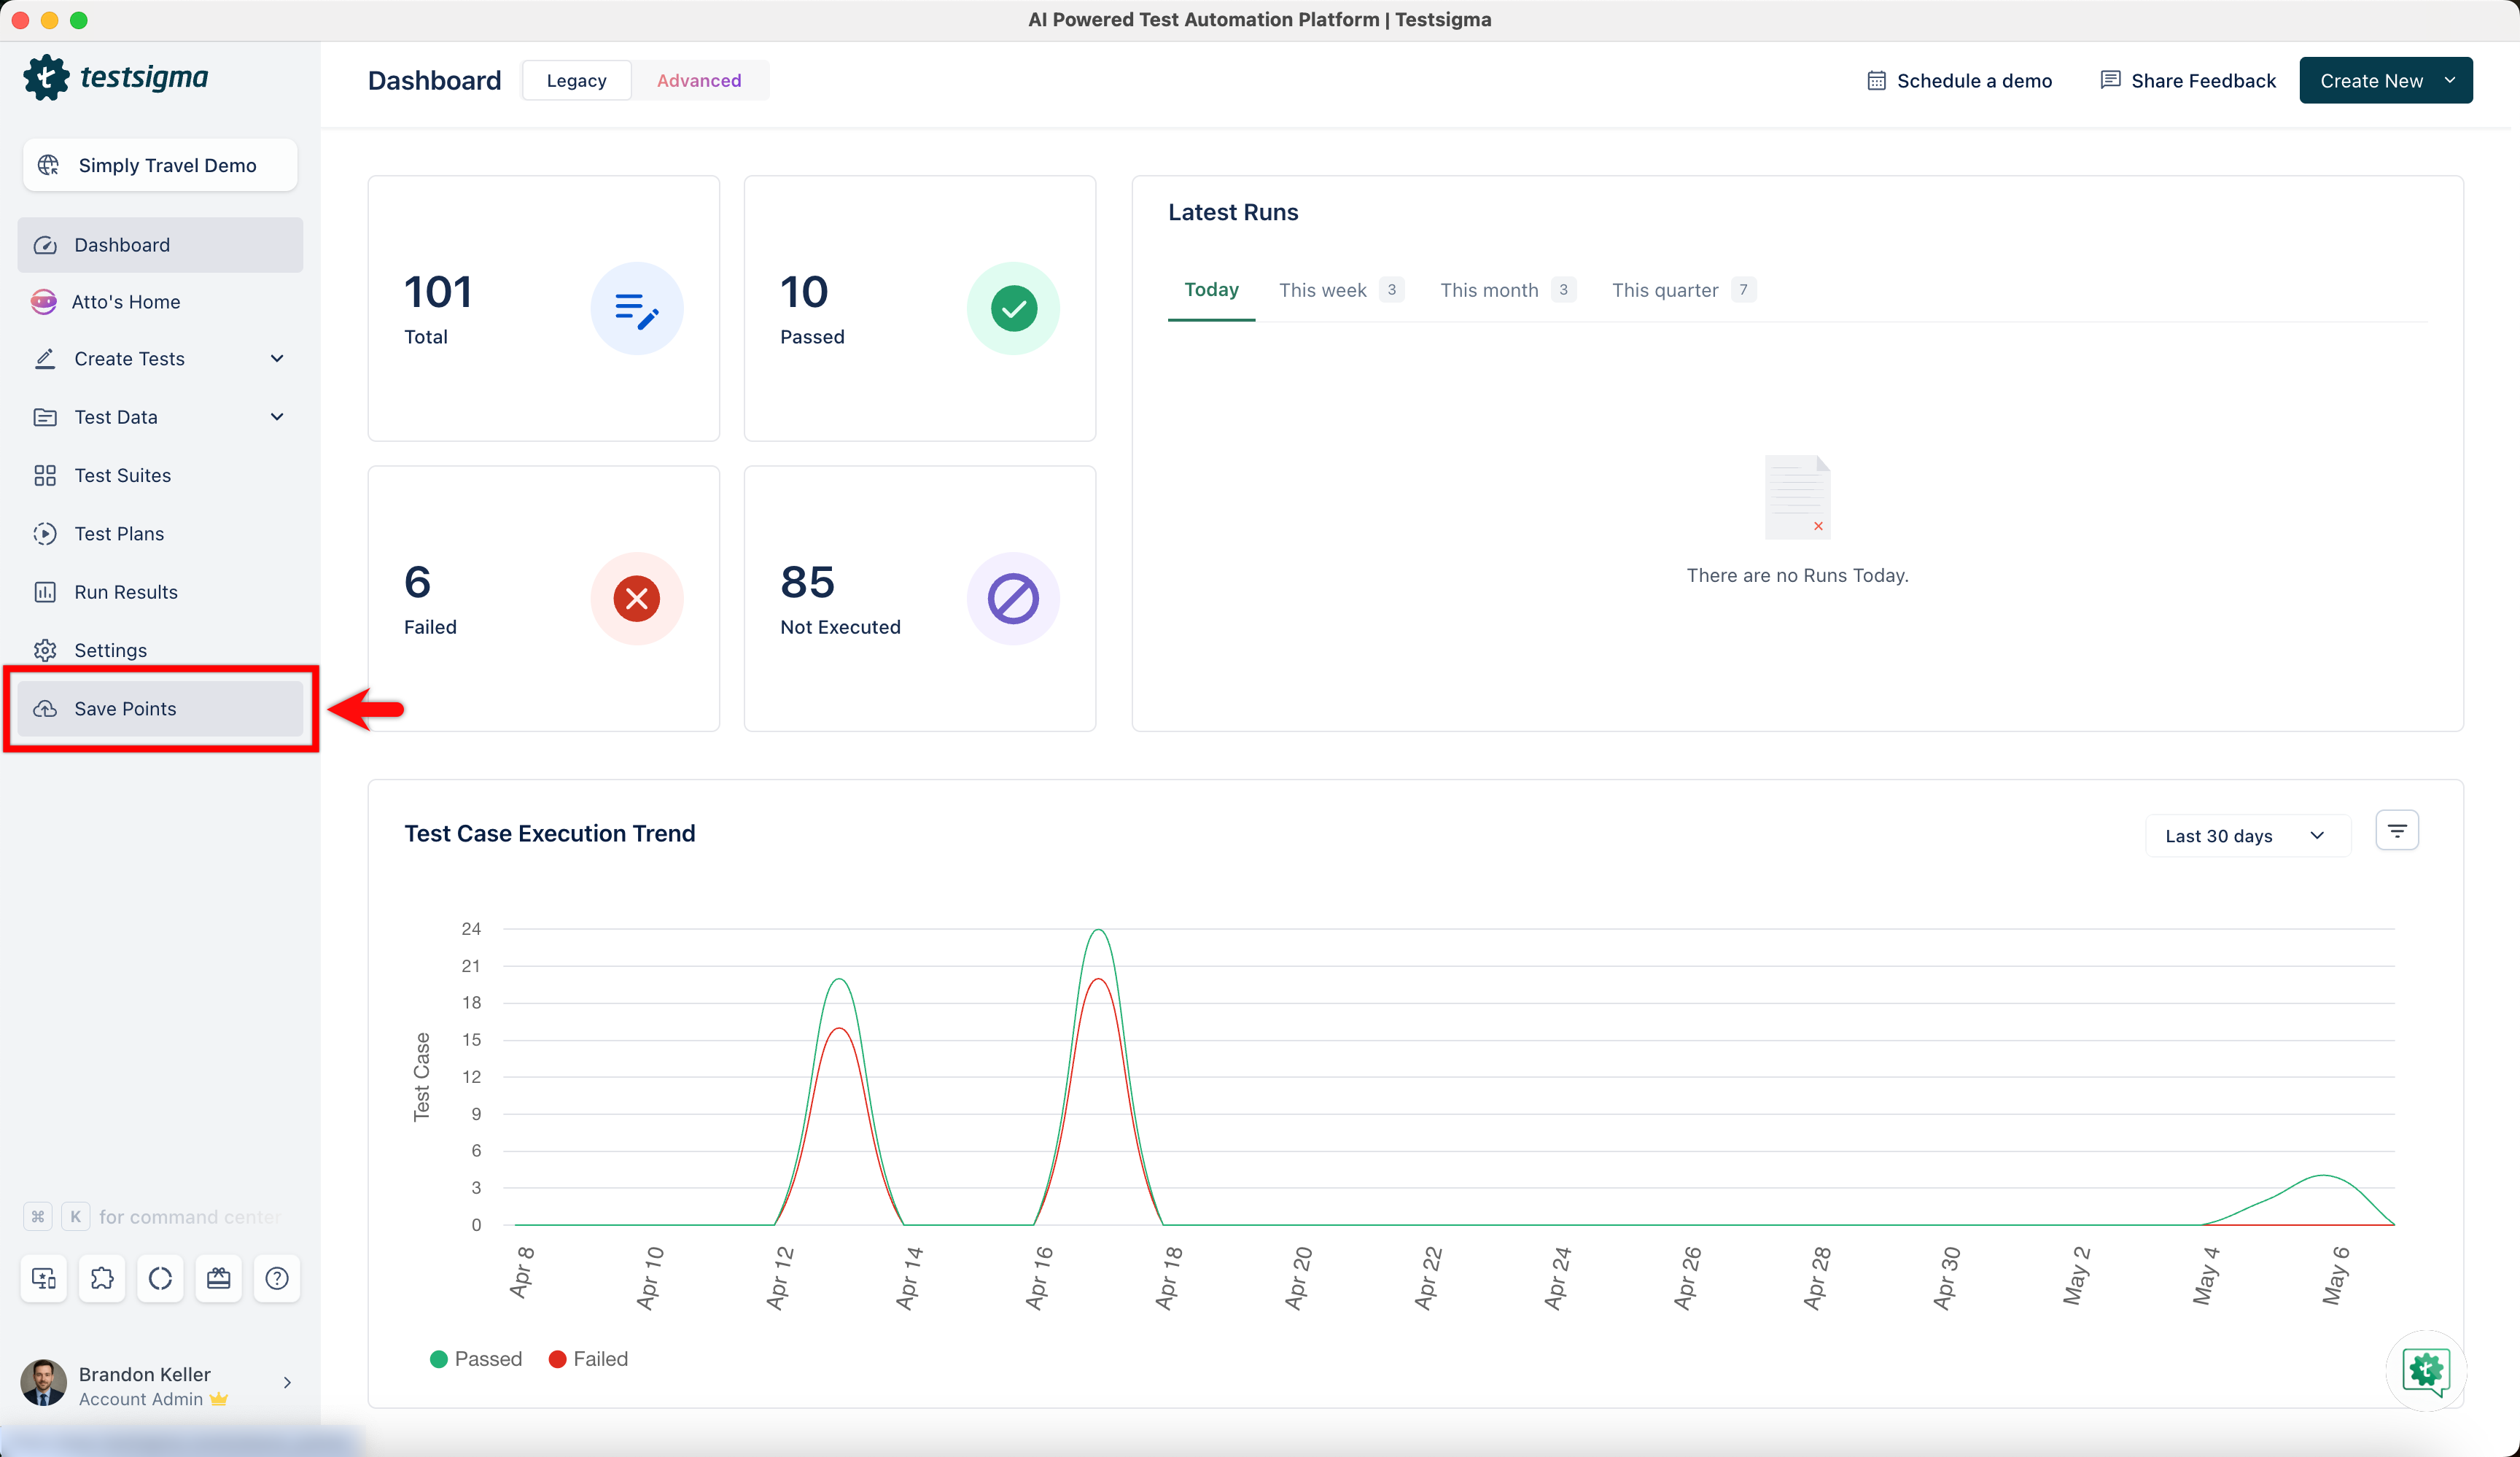
- From the left navigation bar, go to Save Points.
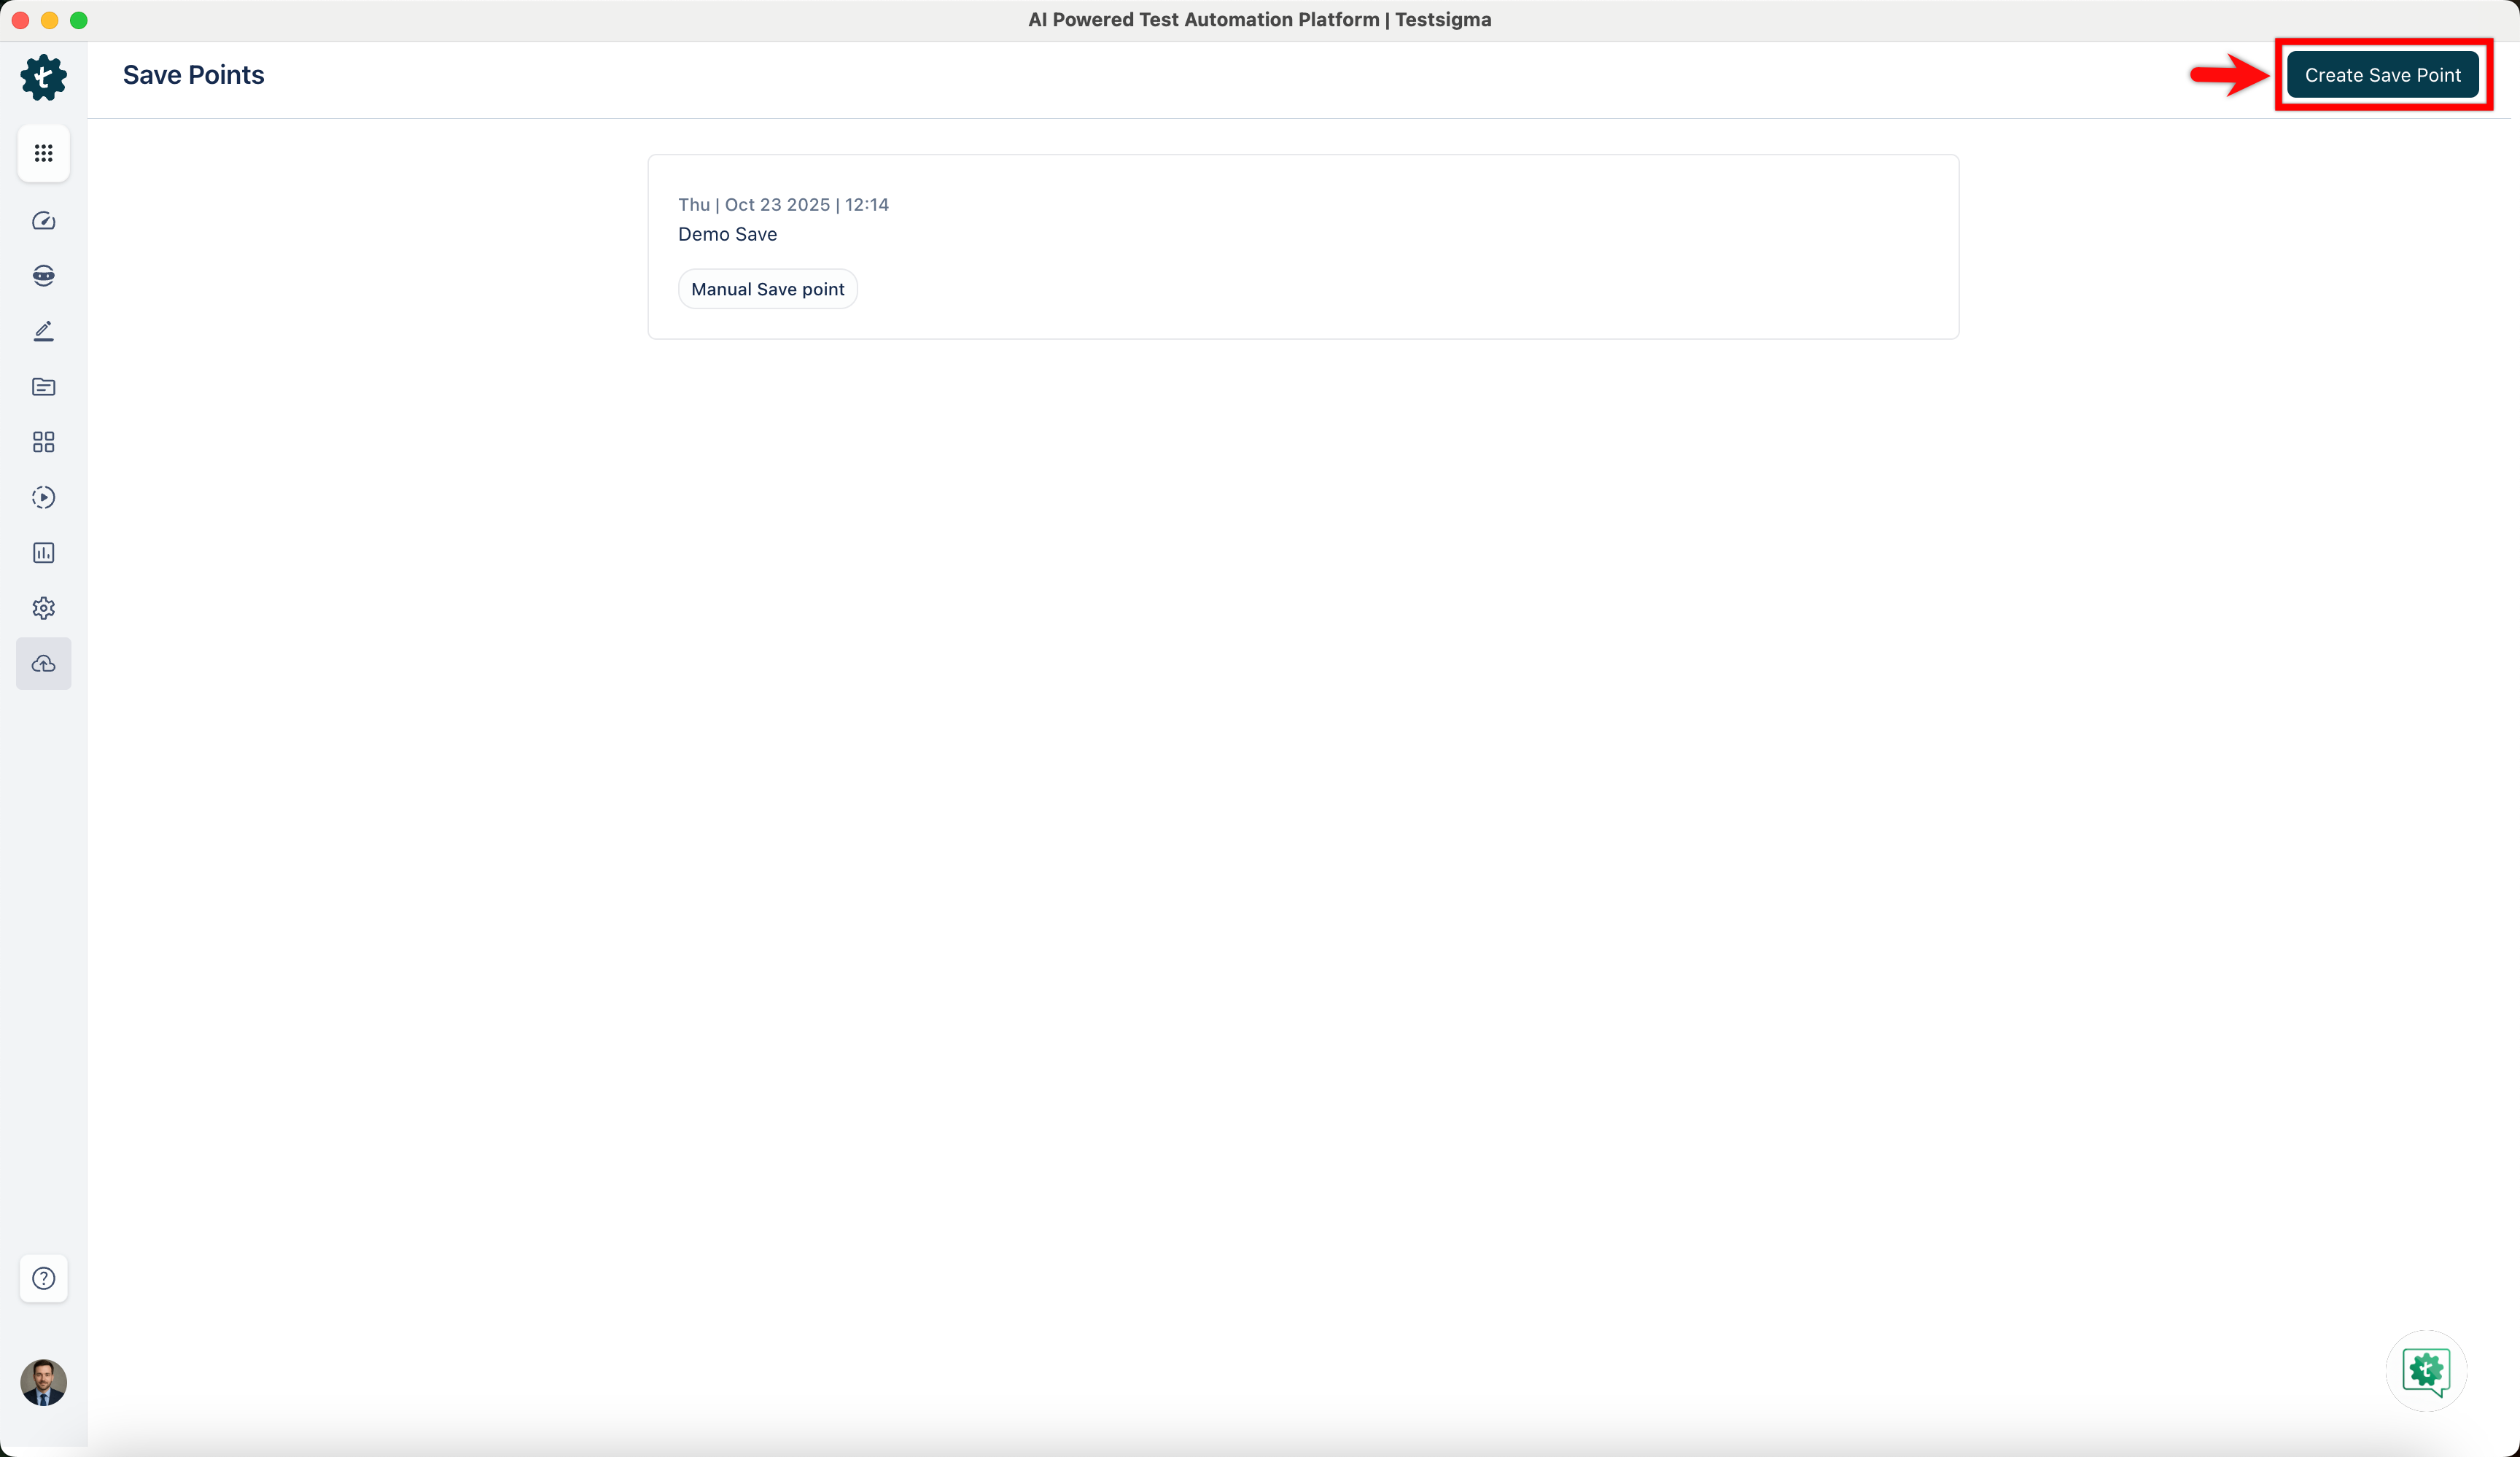
- Click Create Save Point to save all test cases, elements, test data profiles, and step groups.
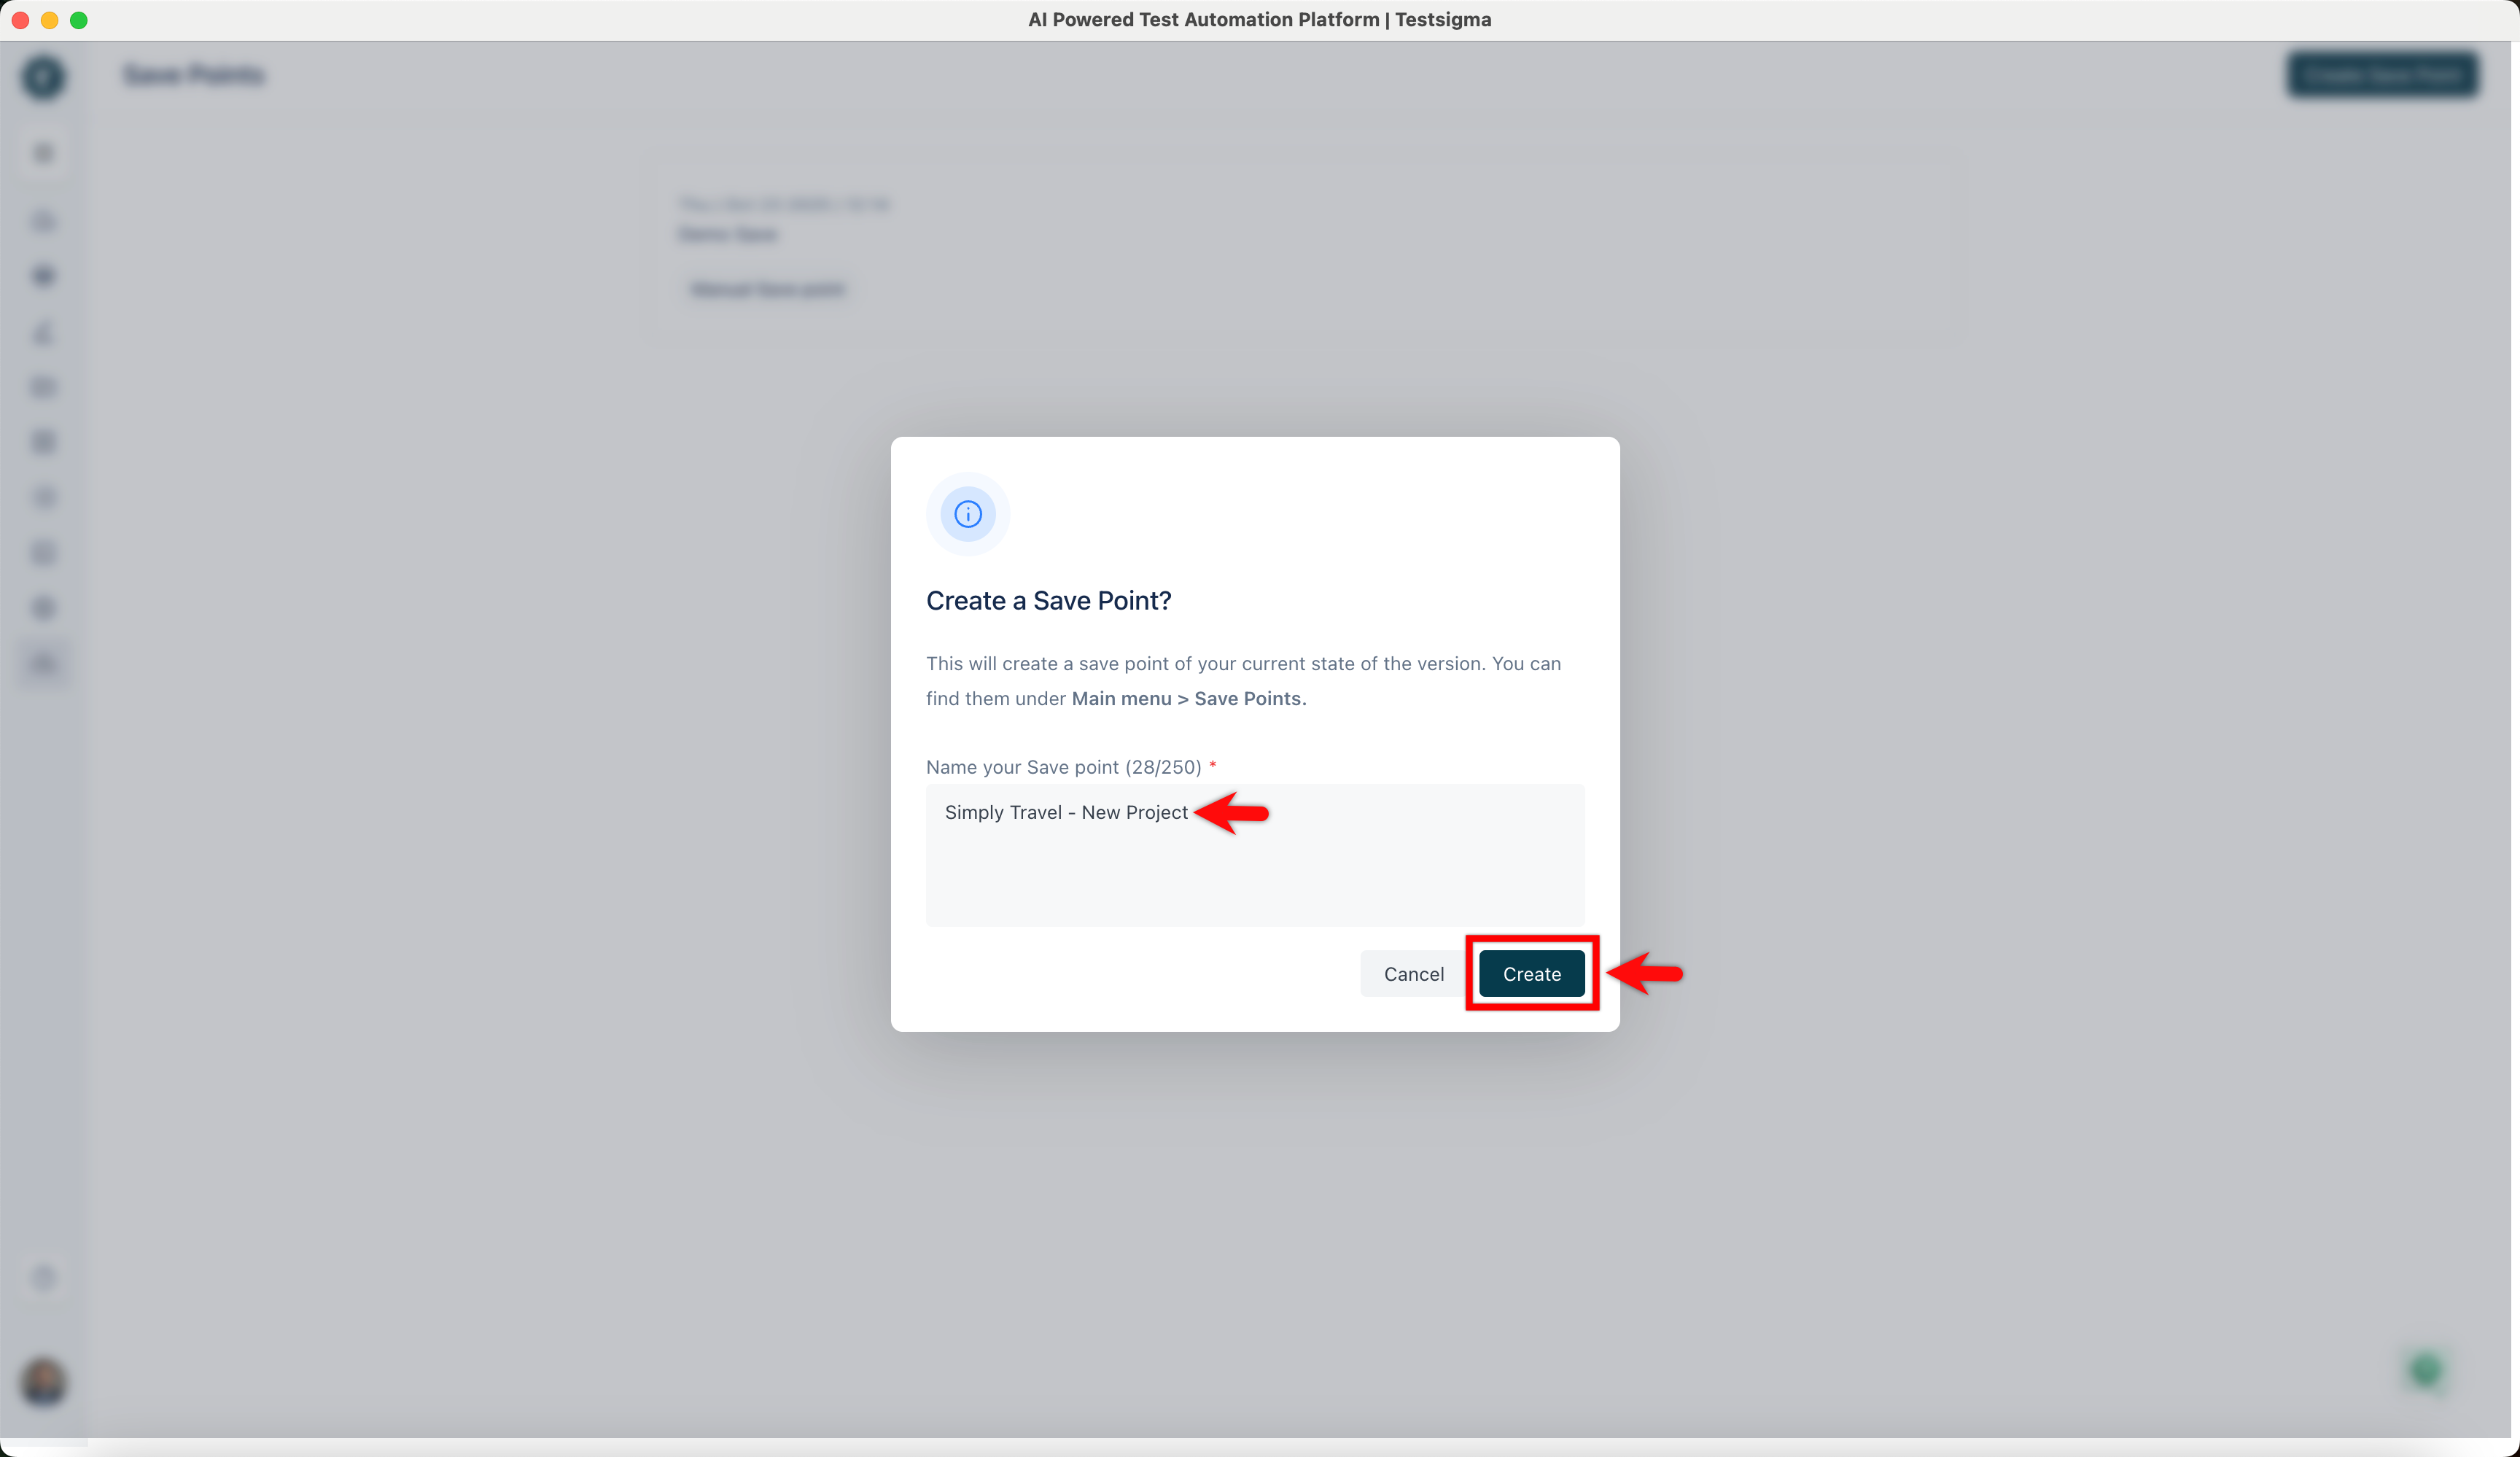
- In the Create a Save Point? dialog, enter a name, and click Create.
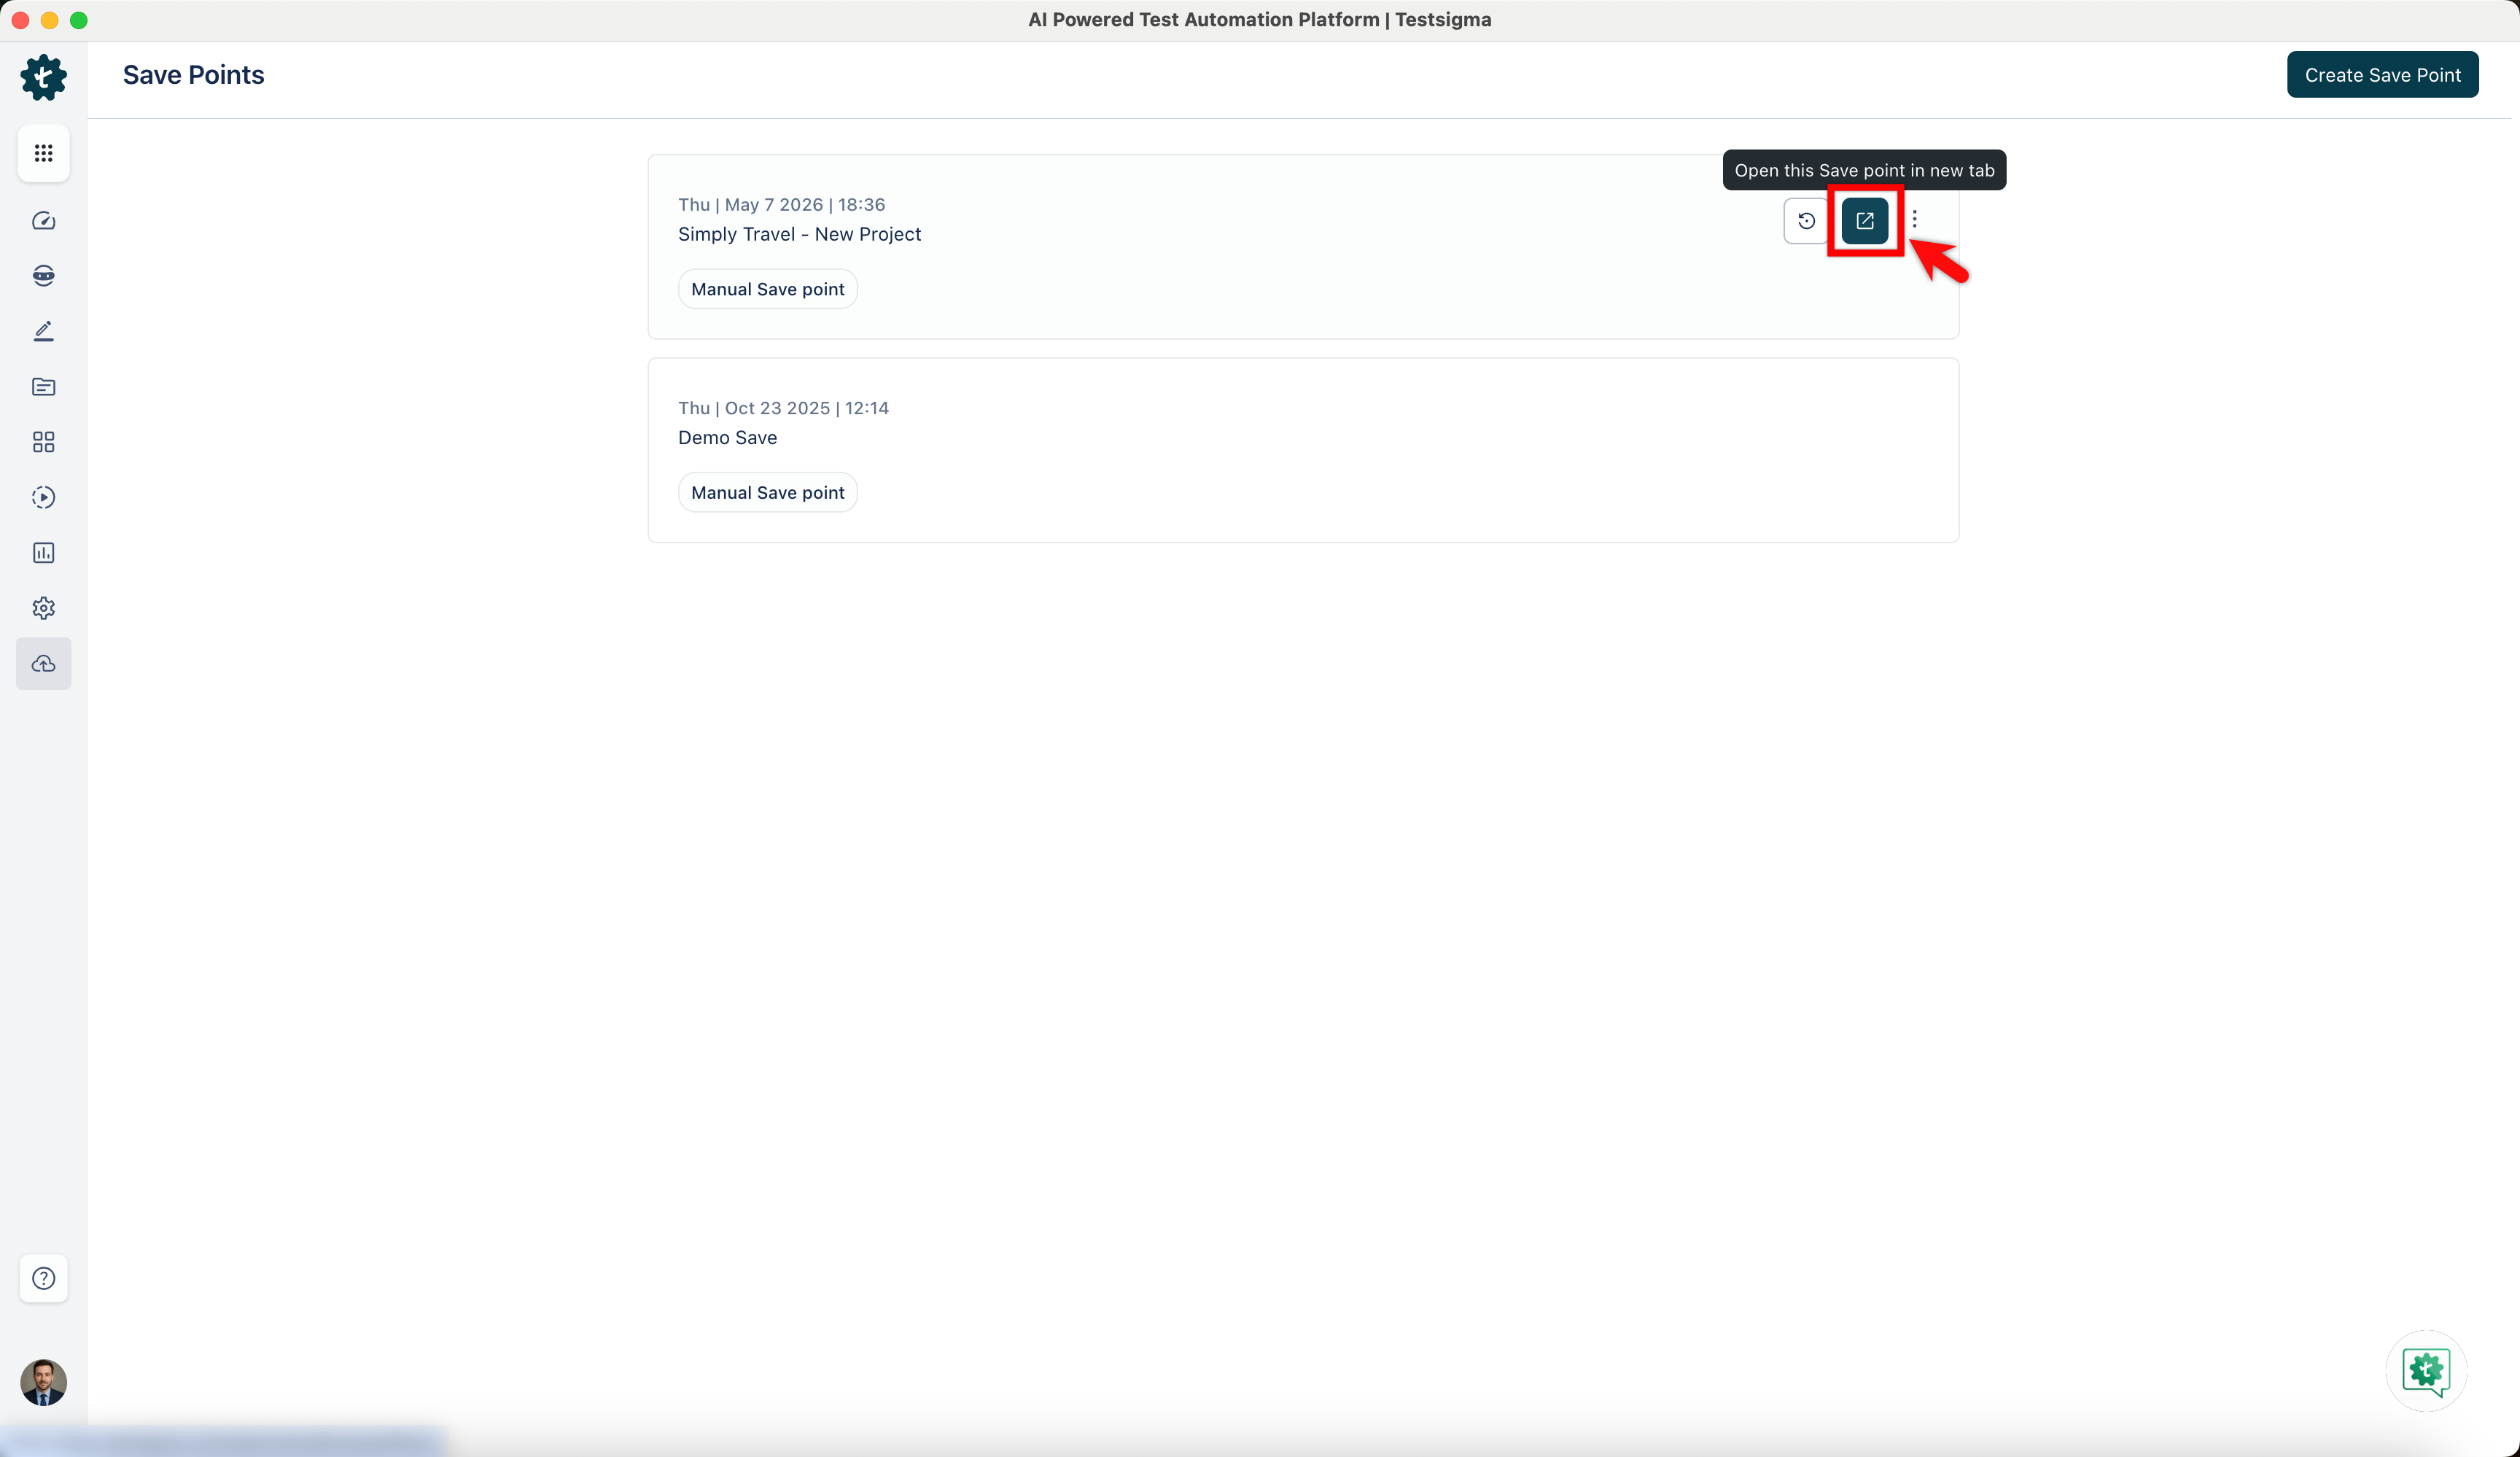
- Click the Open this Save Point in new tab icon to to view the save point in a new tab.
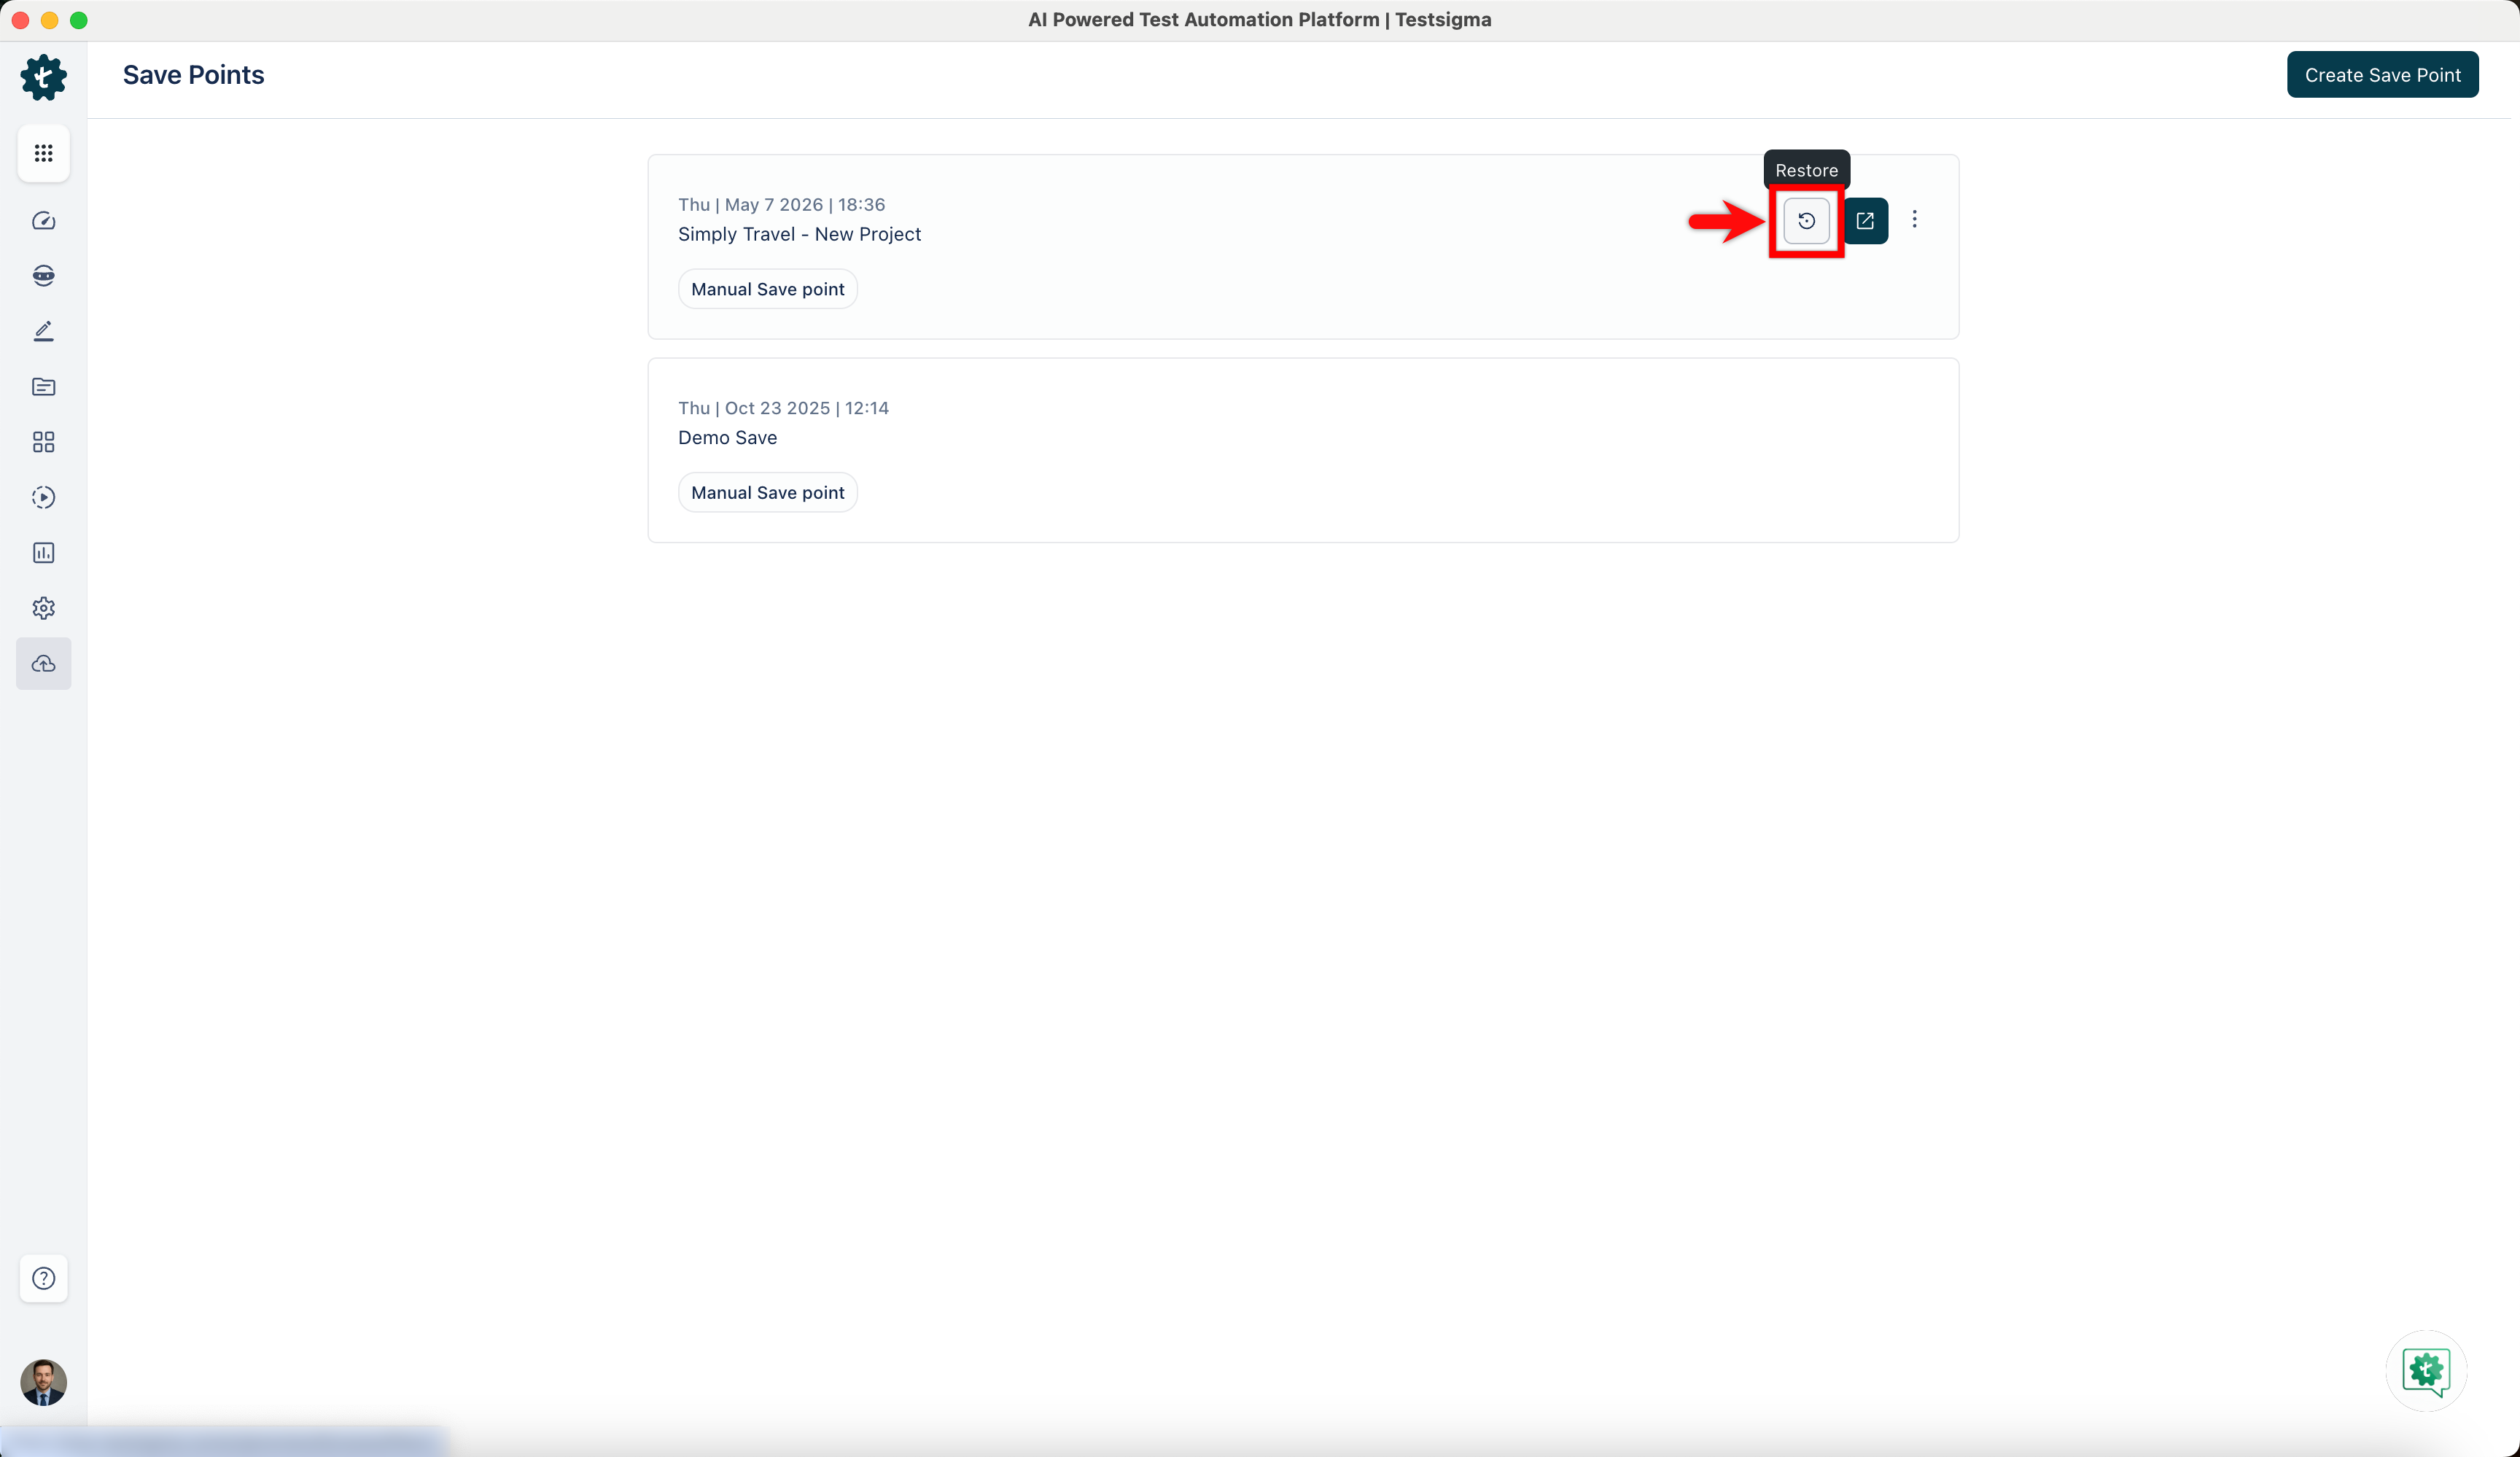
- Click the Restore icon to revert to the backup version.
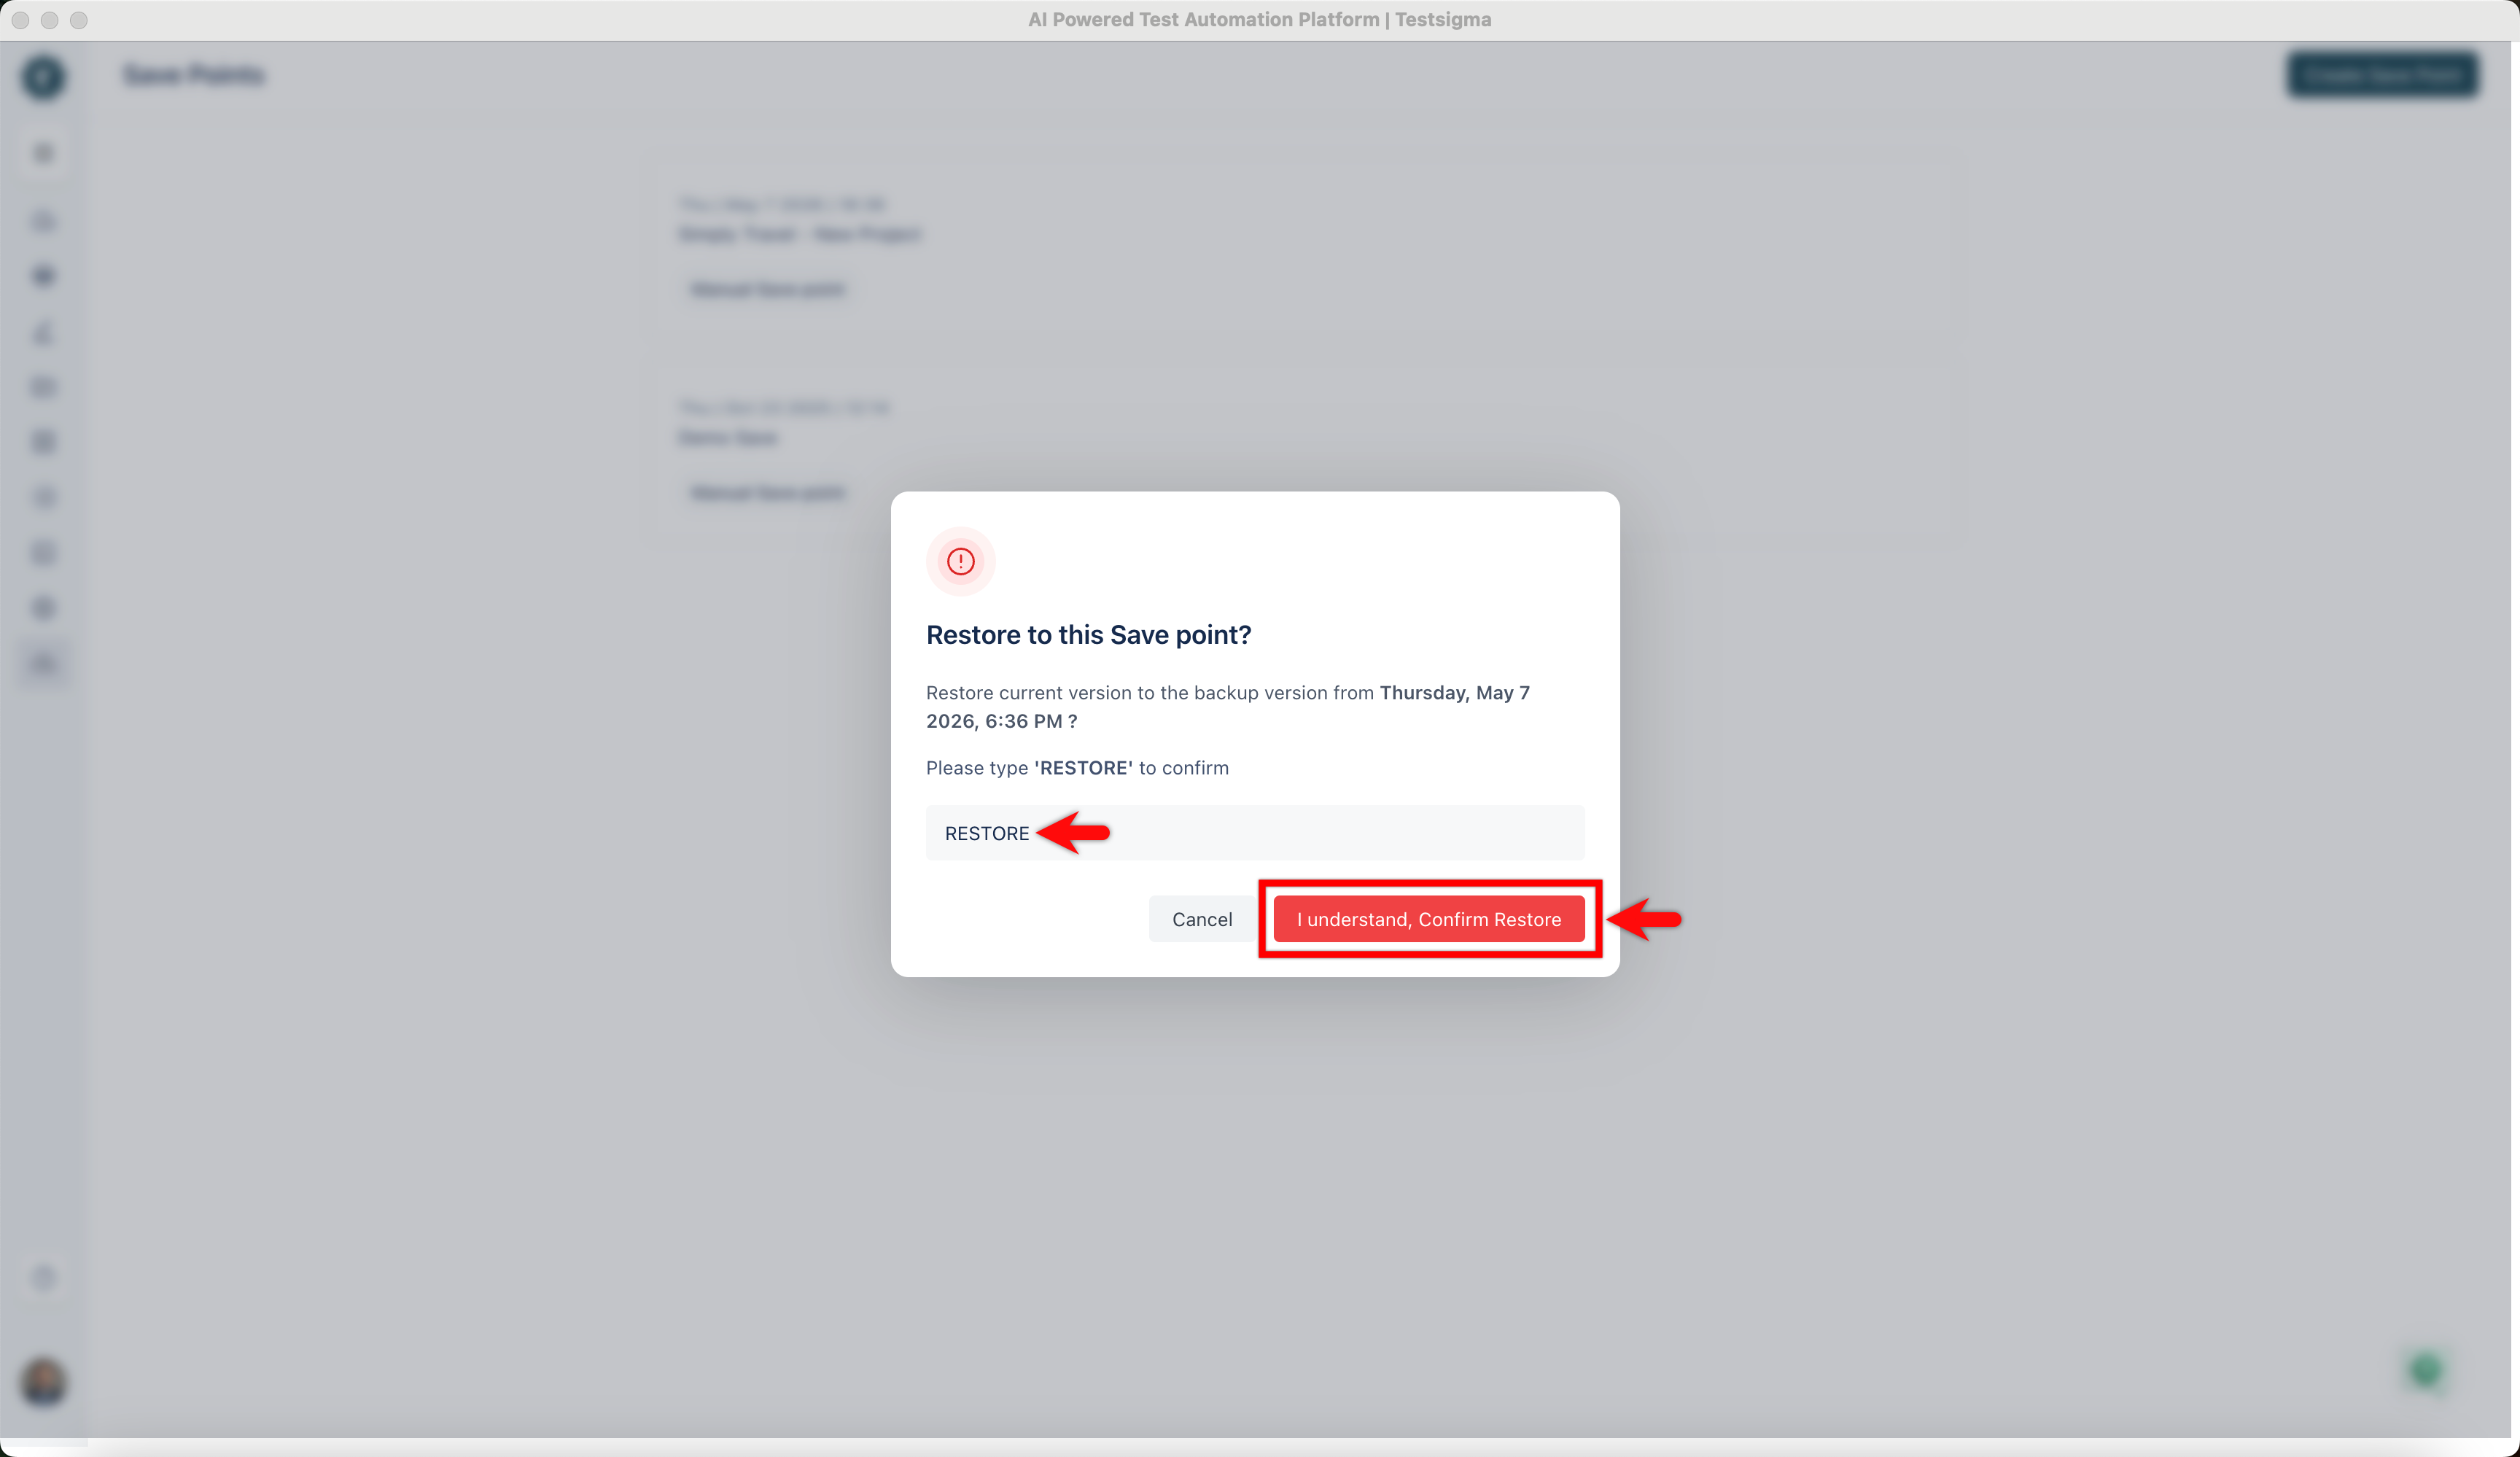
- In the Restore to this save point? dialog, enter RESTORE and click I understand, Confirm Restore.
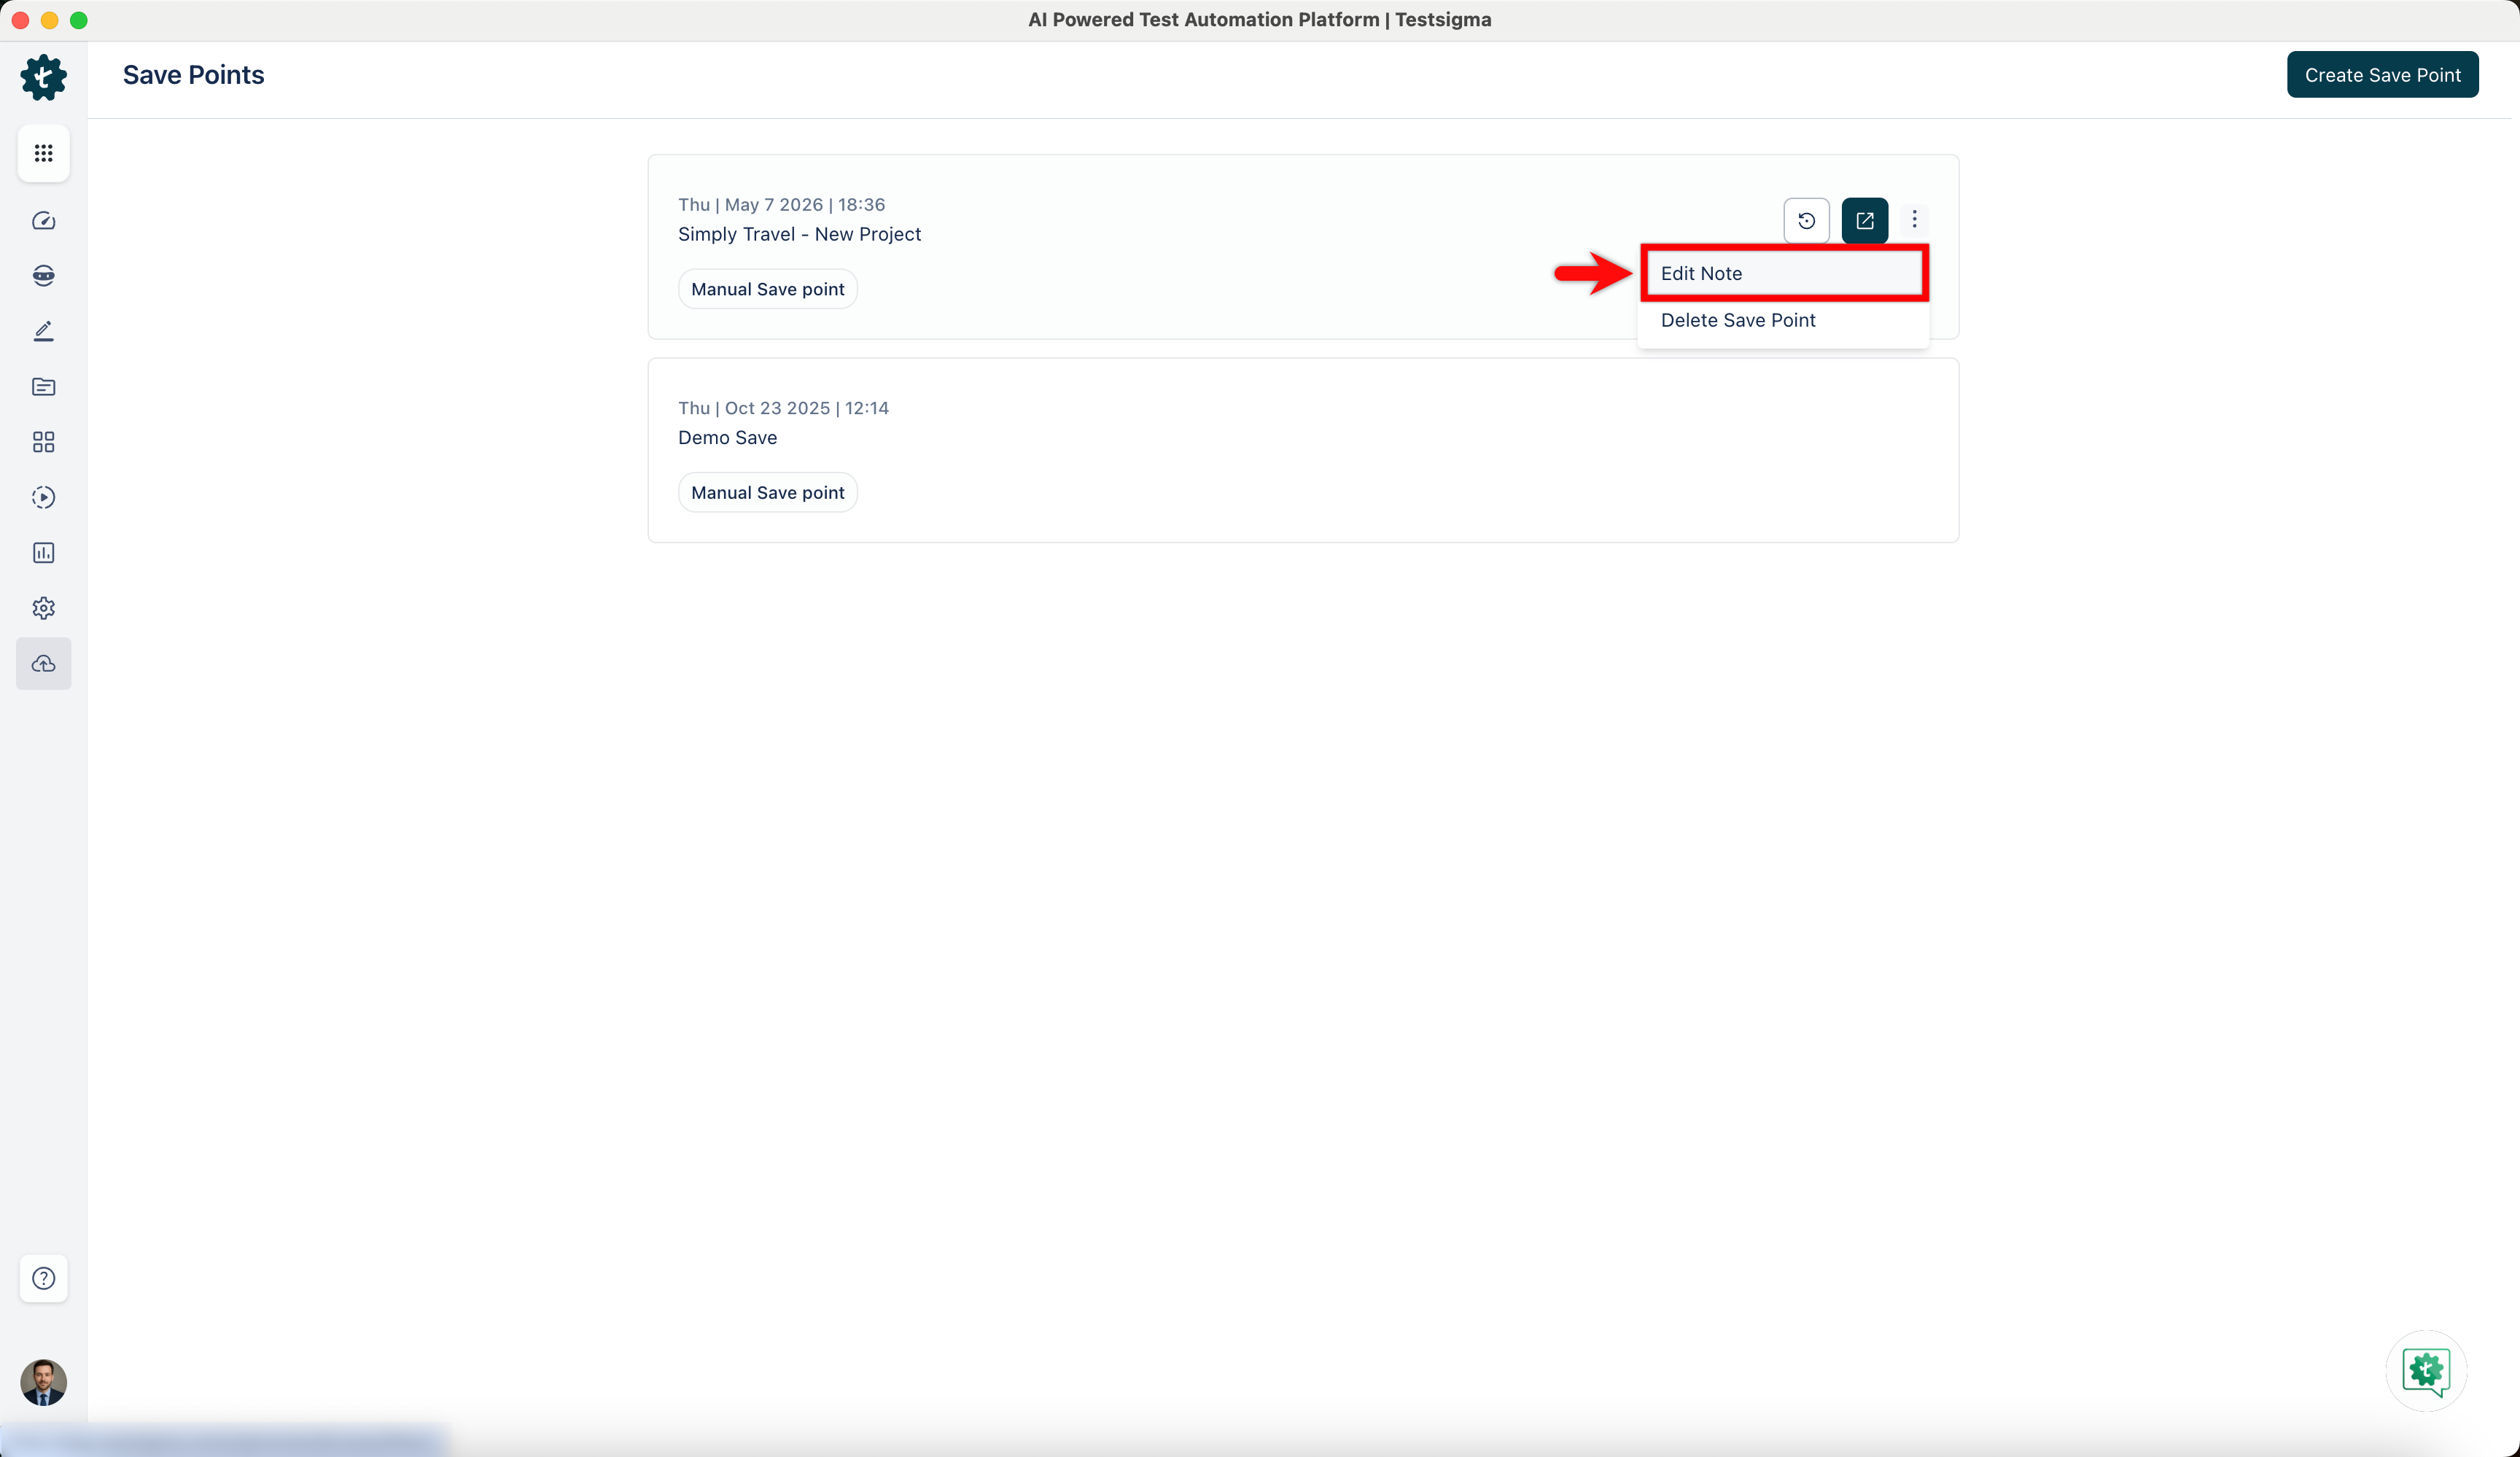
- To edit a note of a save point, click the ellipse icon next to it and click Edit Note.
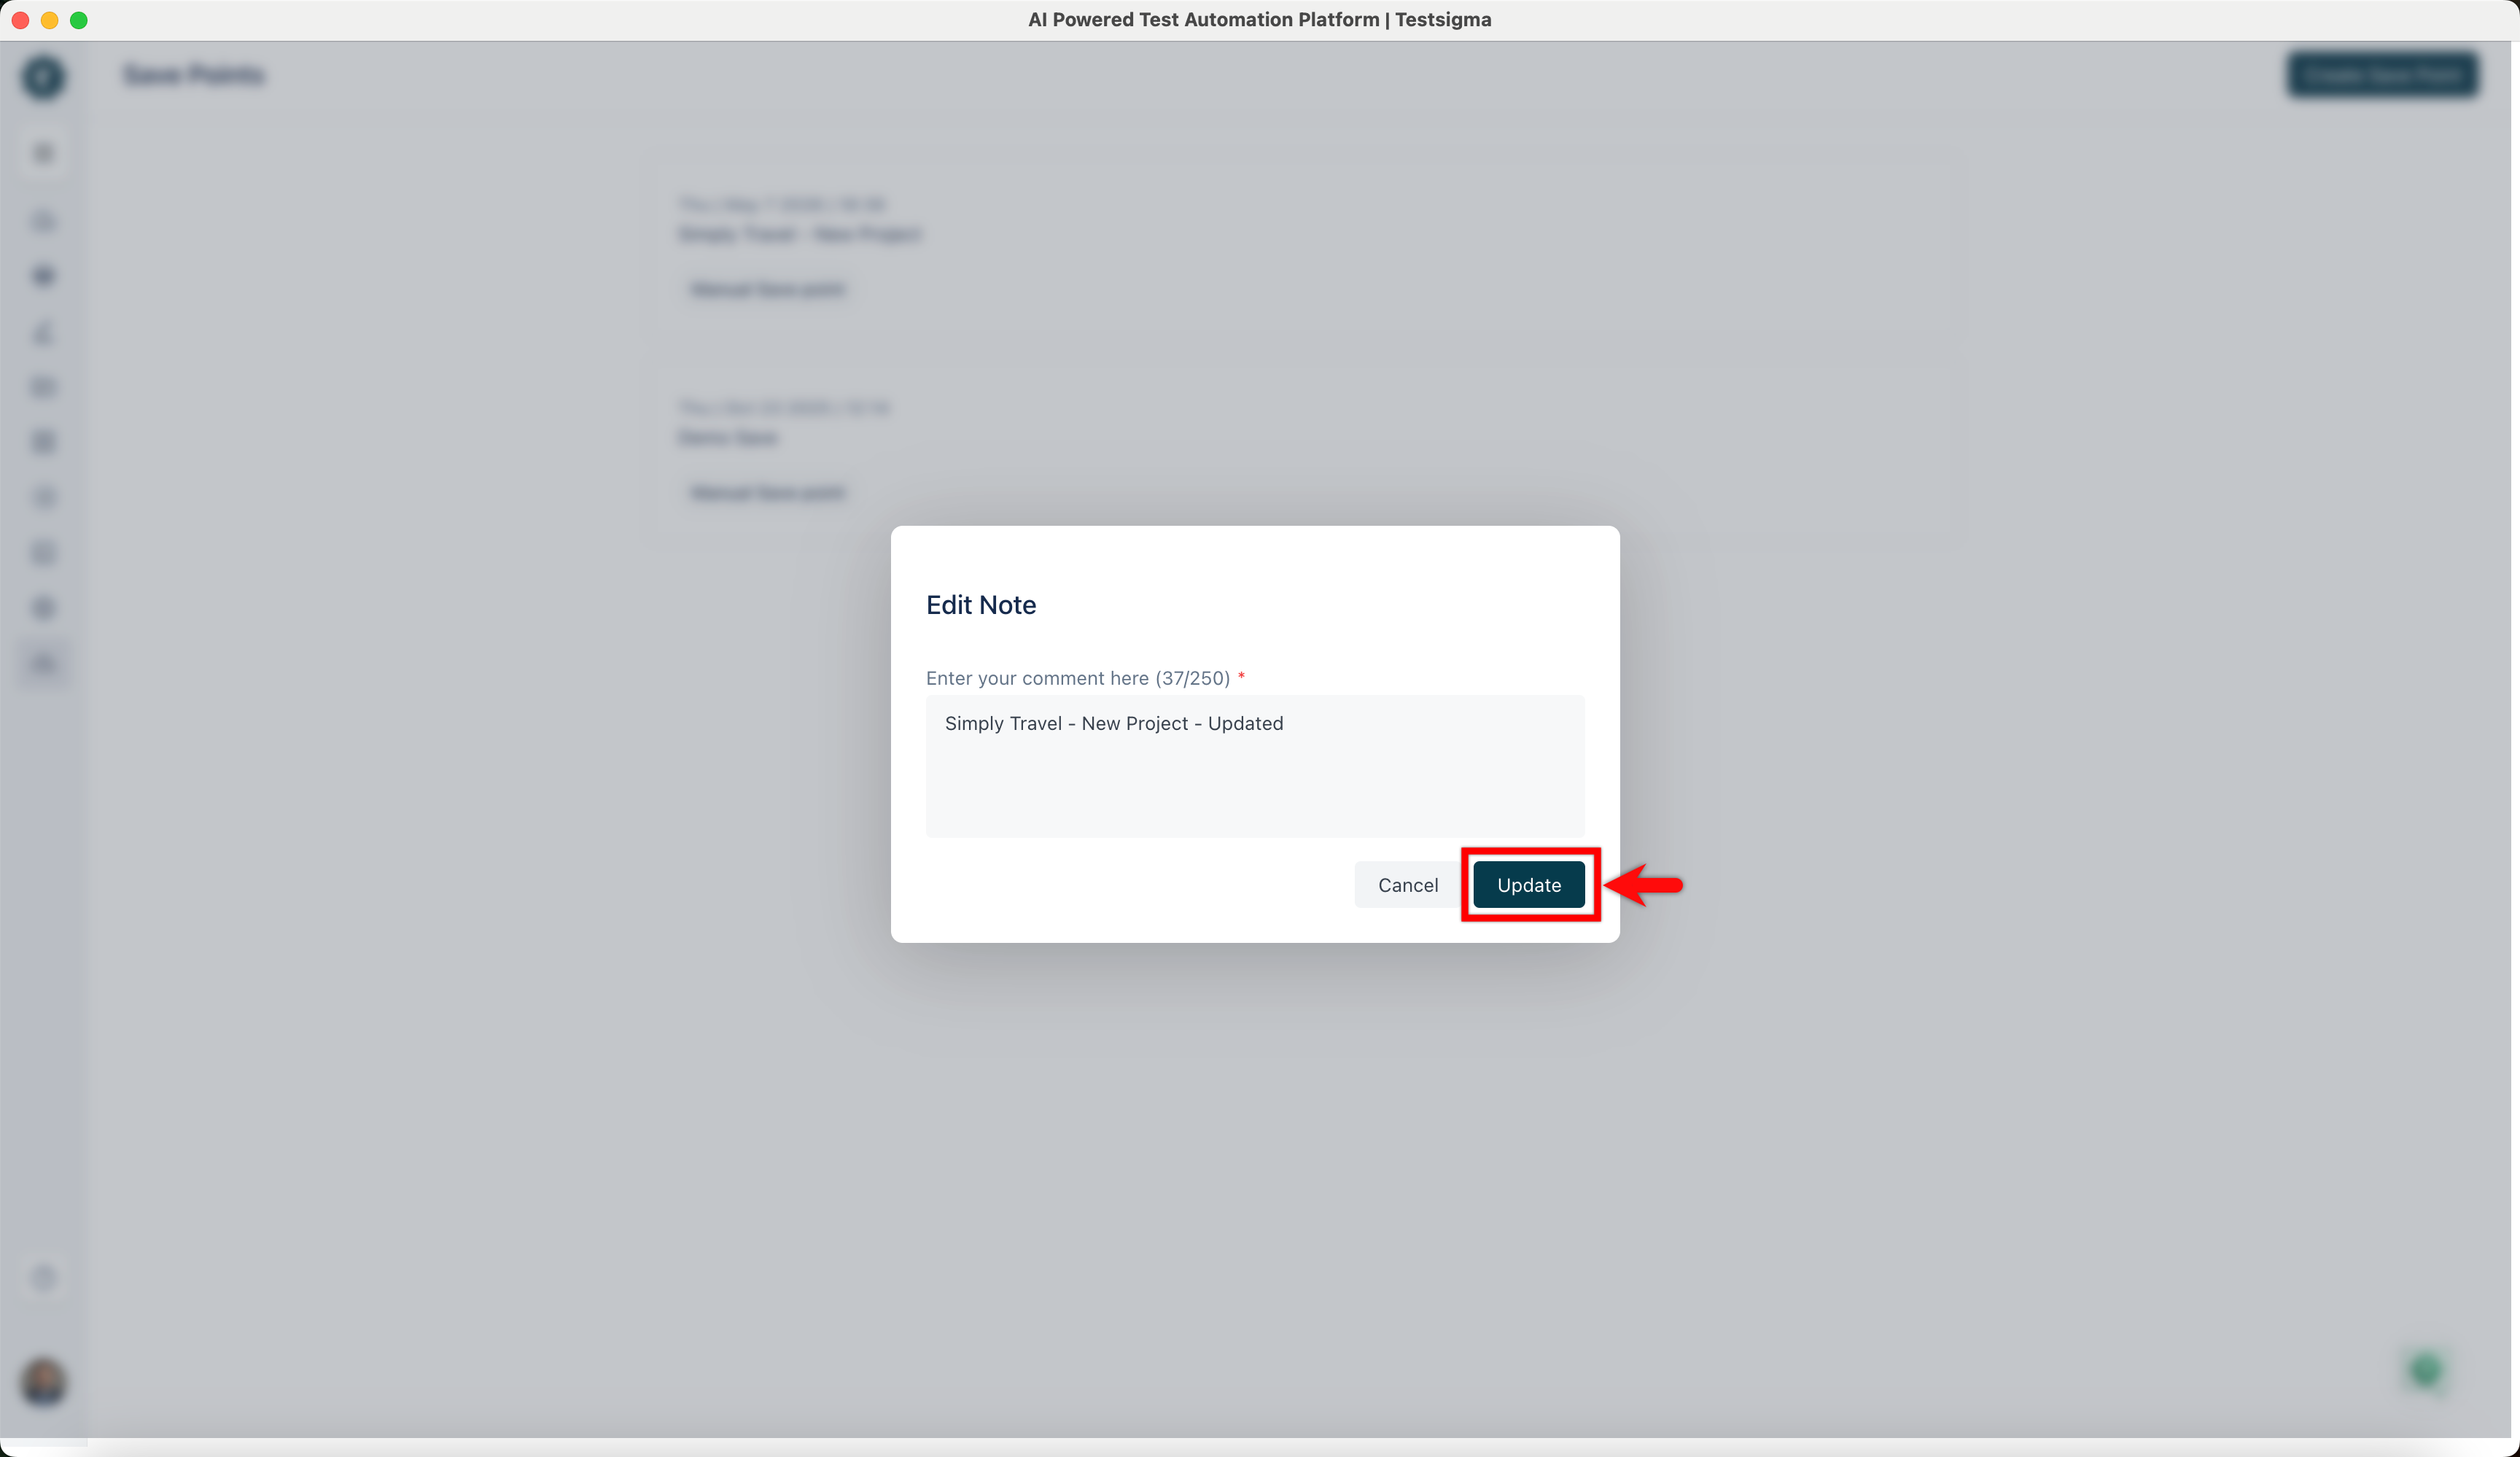
- In the Edit Note dialog, update the comment, and click Update.
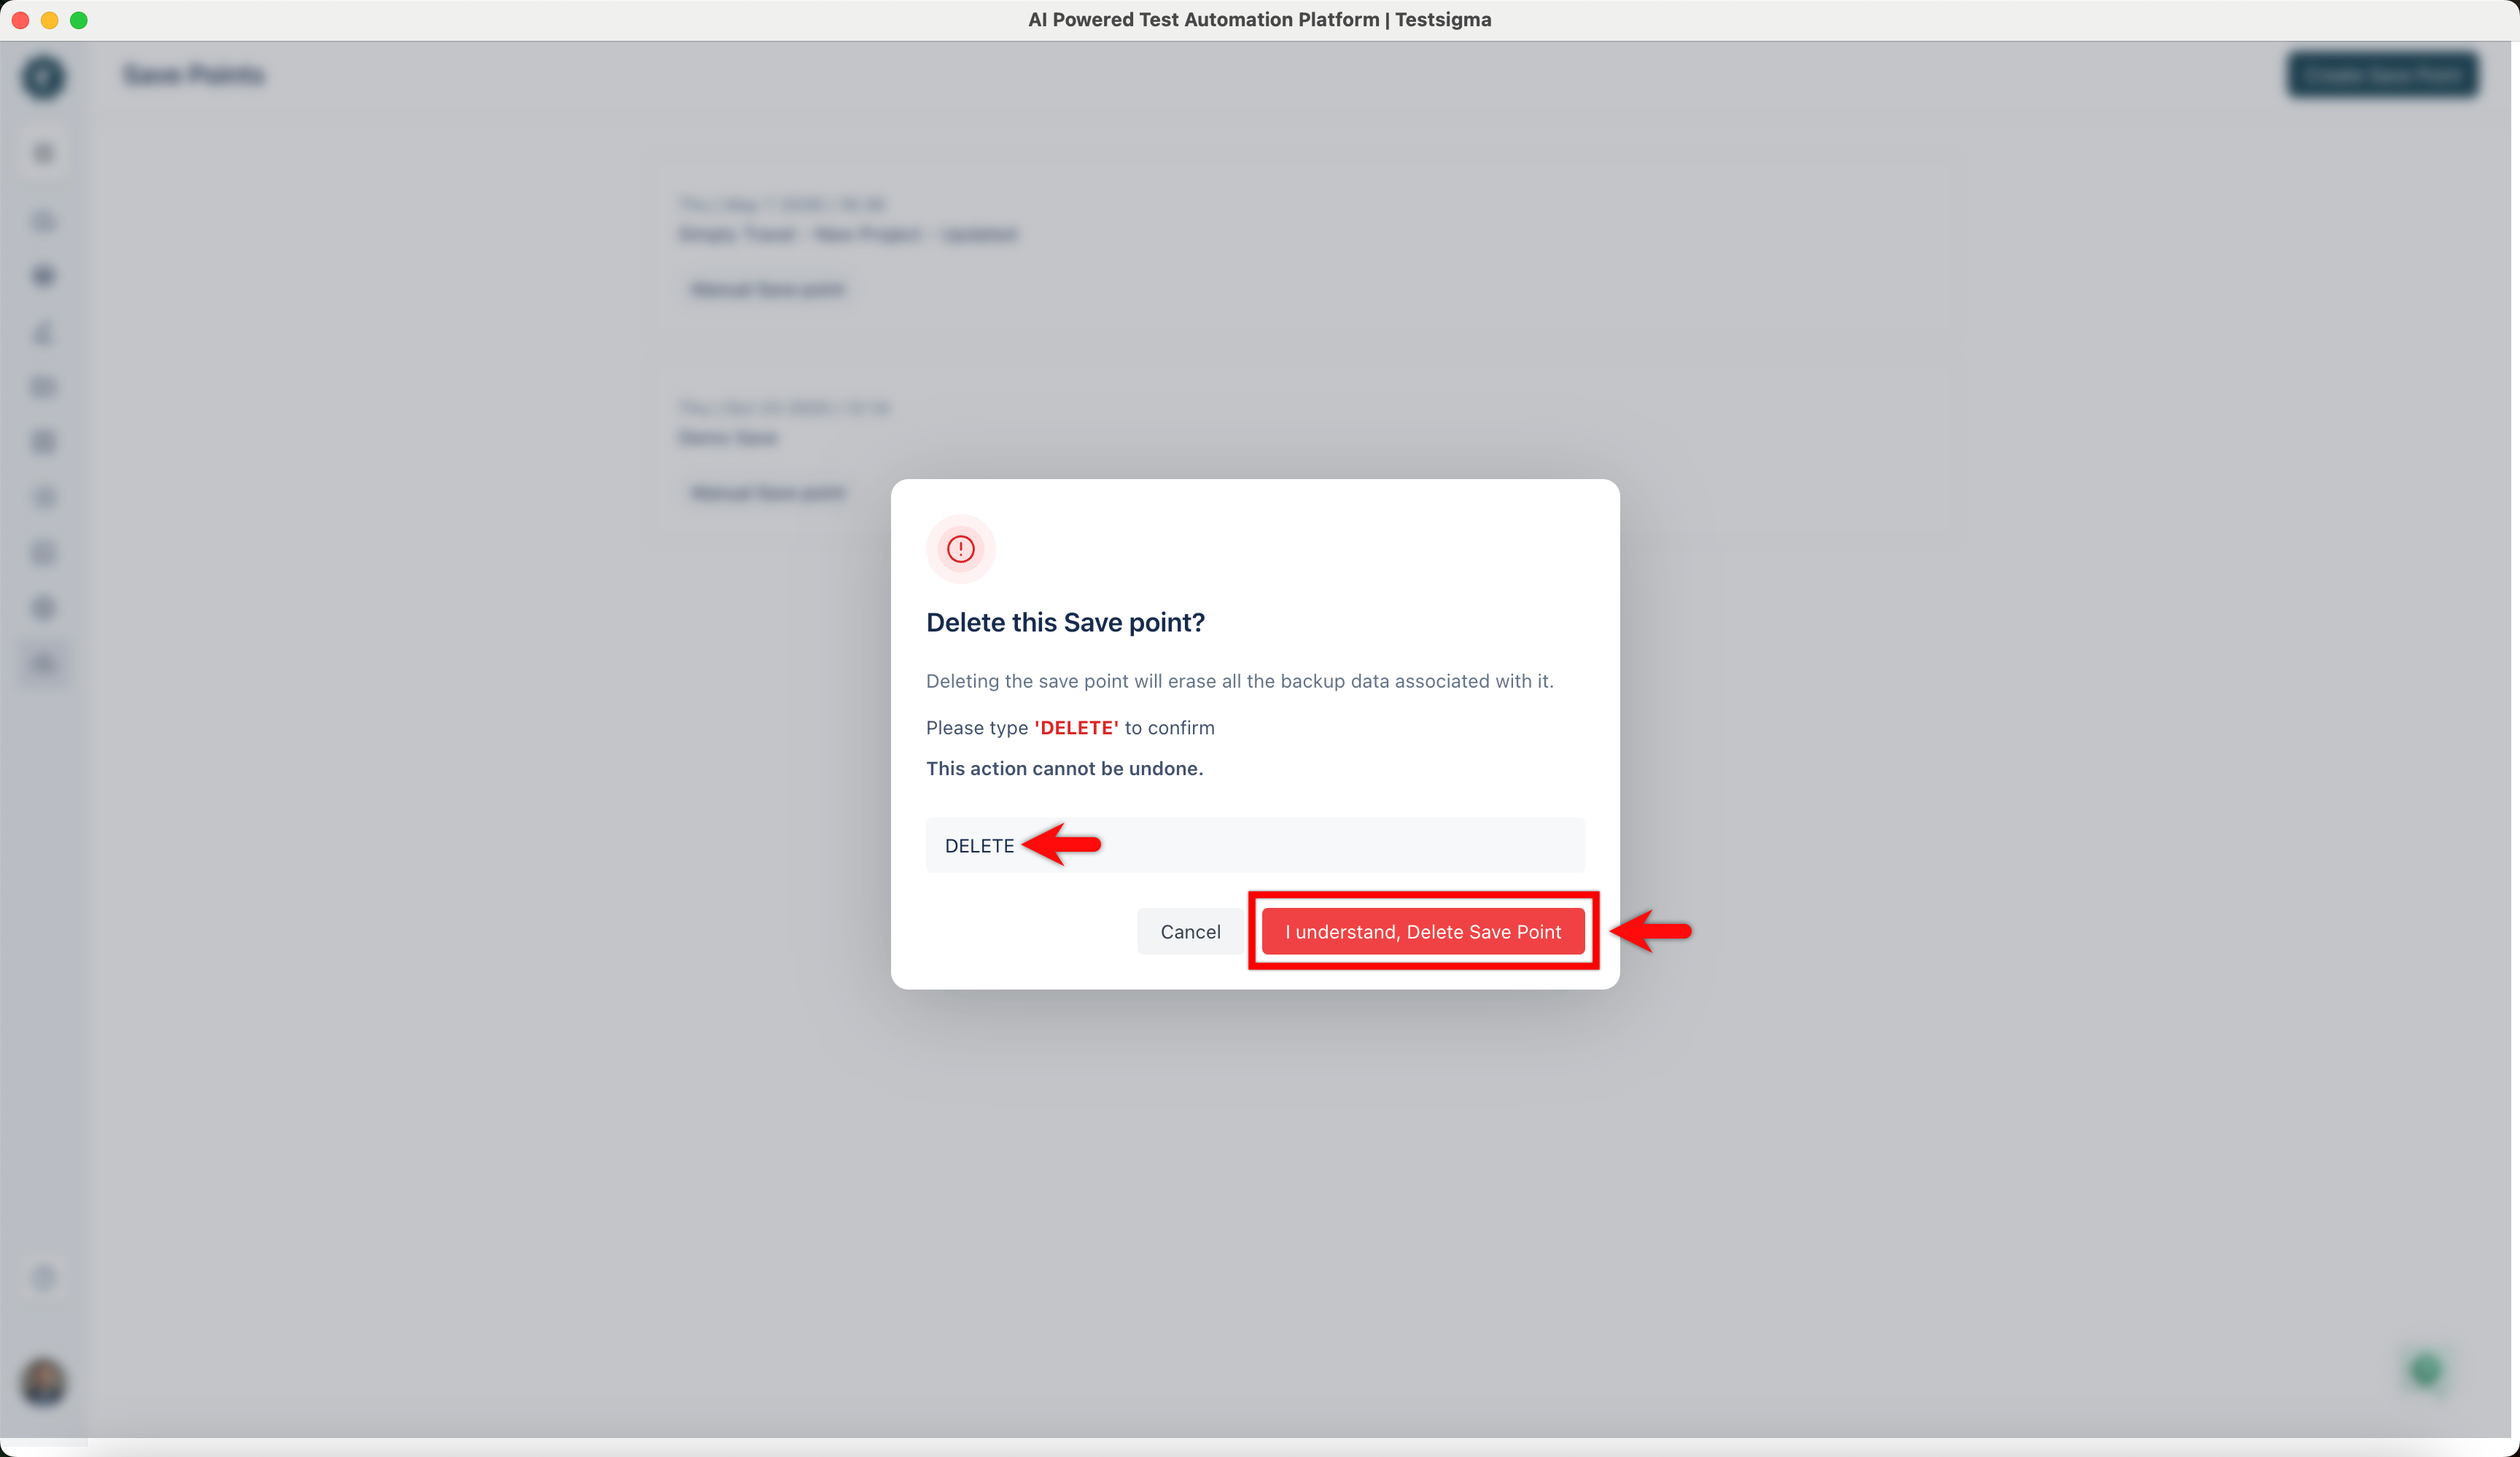
- To delete a save point, click the ellipse icon next to it and then click Delete Save Point.
- In the Delete this Save Point? dialog, enter DELETE and click I understand, Delete Save Point.
Want to contribute or report missing content?