
Integrating GitHub with Testsigma
You can integrate GitHub with Testsigma to automatically generate test cases using Atto when a pull request (PR) is raised. This integration uses GitHub Webhooks and a fine-grained Personal Access Token (PAT) to connect your GitHub repository with Testsigma securely. This article discusses the steps to configure the integration & attaching the PR template in GitHub.
Prerequisites
Before you begin, ensure you have admin access to your GitHub organization.
Configure GitHub Integration in Testsigma
- Navigate to Settings > Integrations.
- Enable toggle on Github widget.
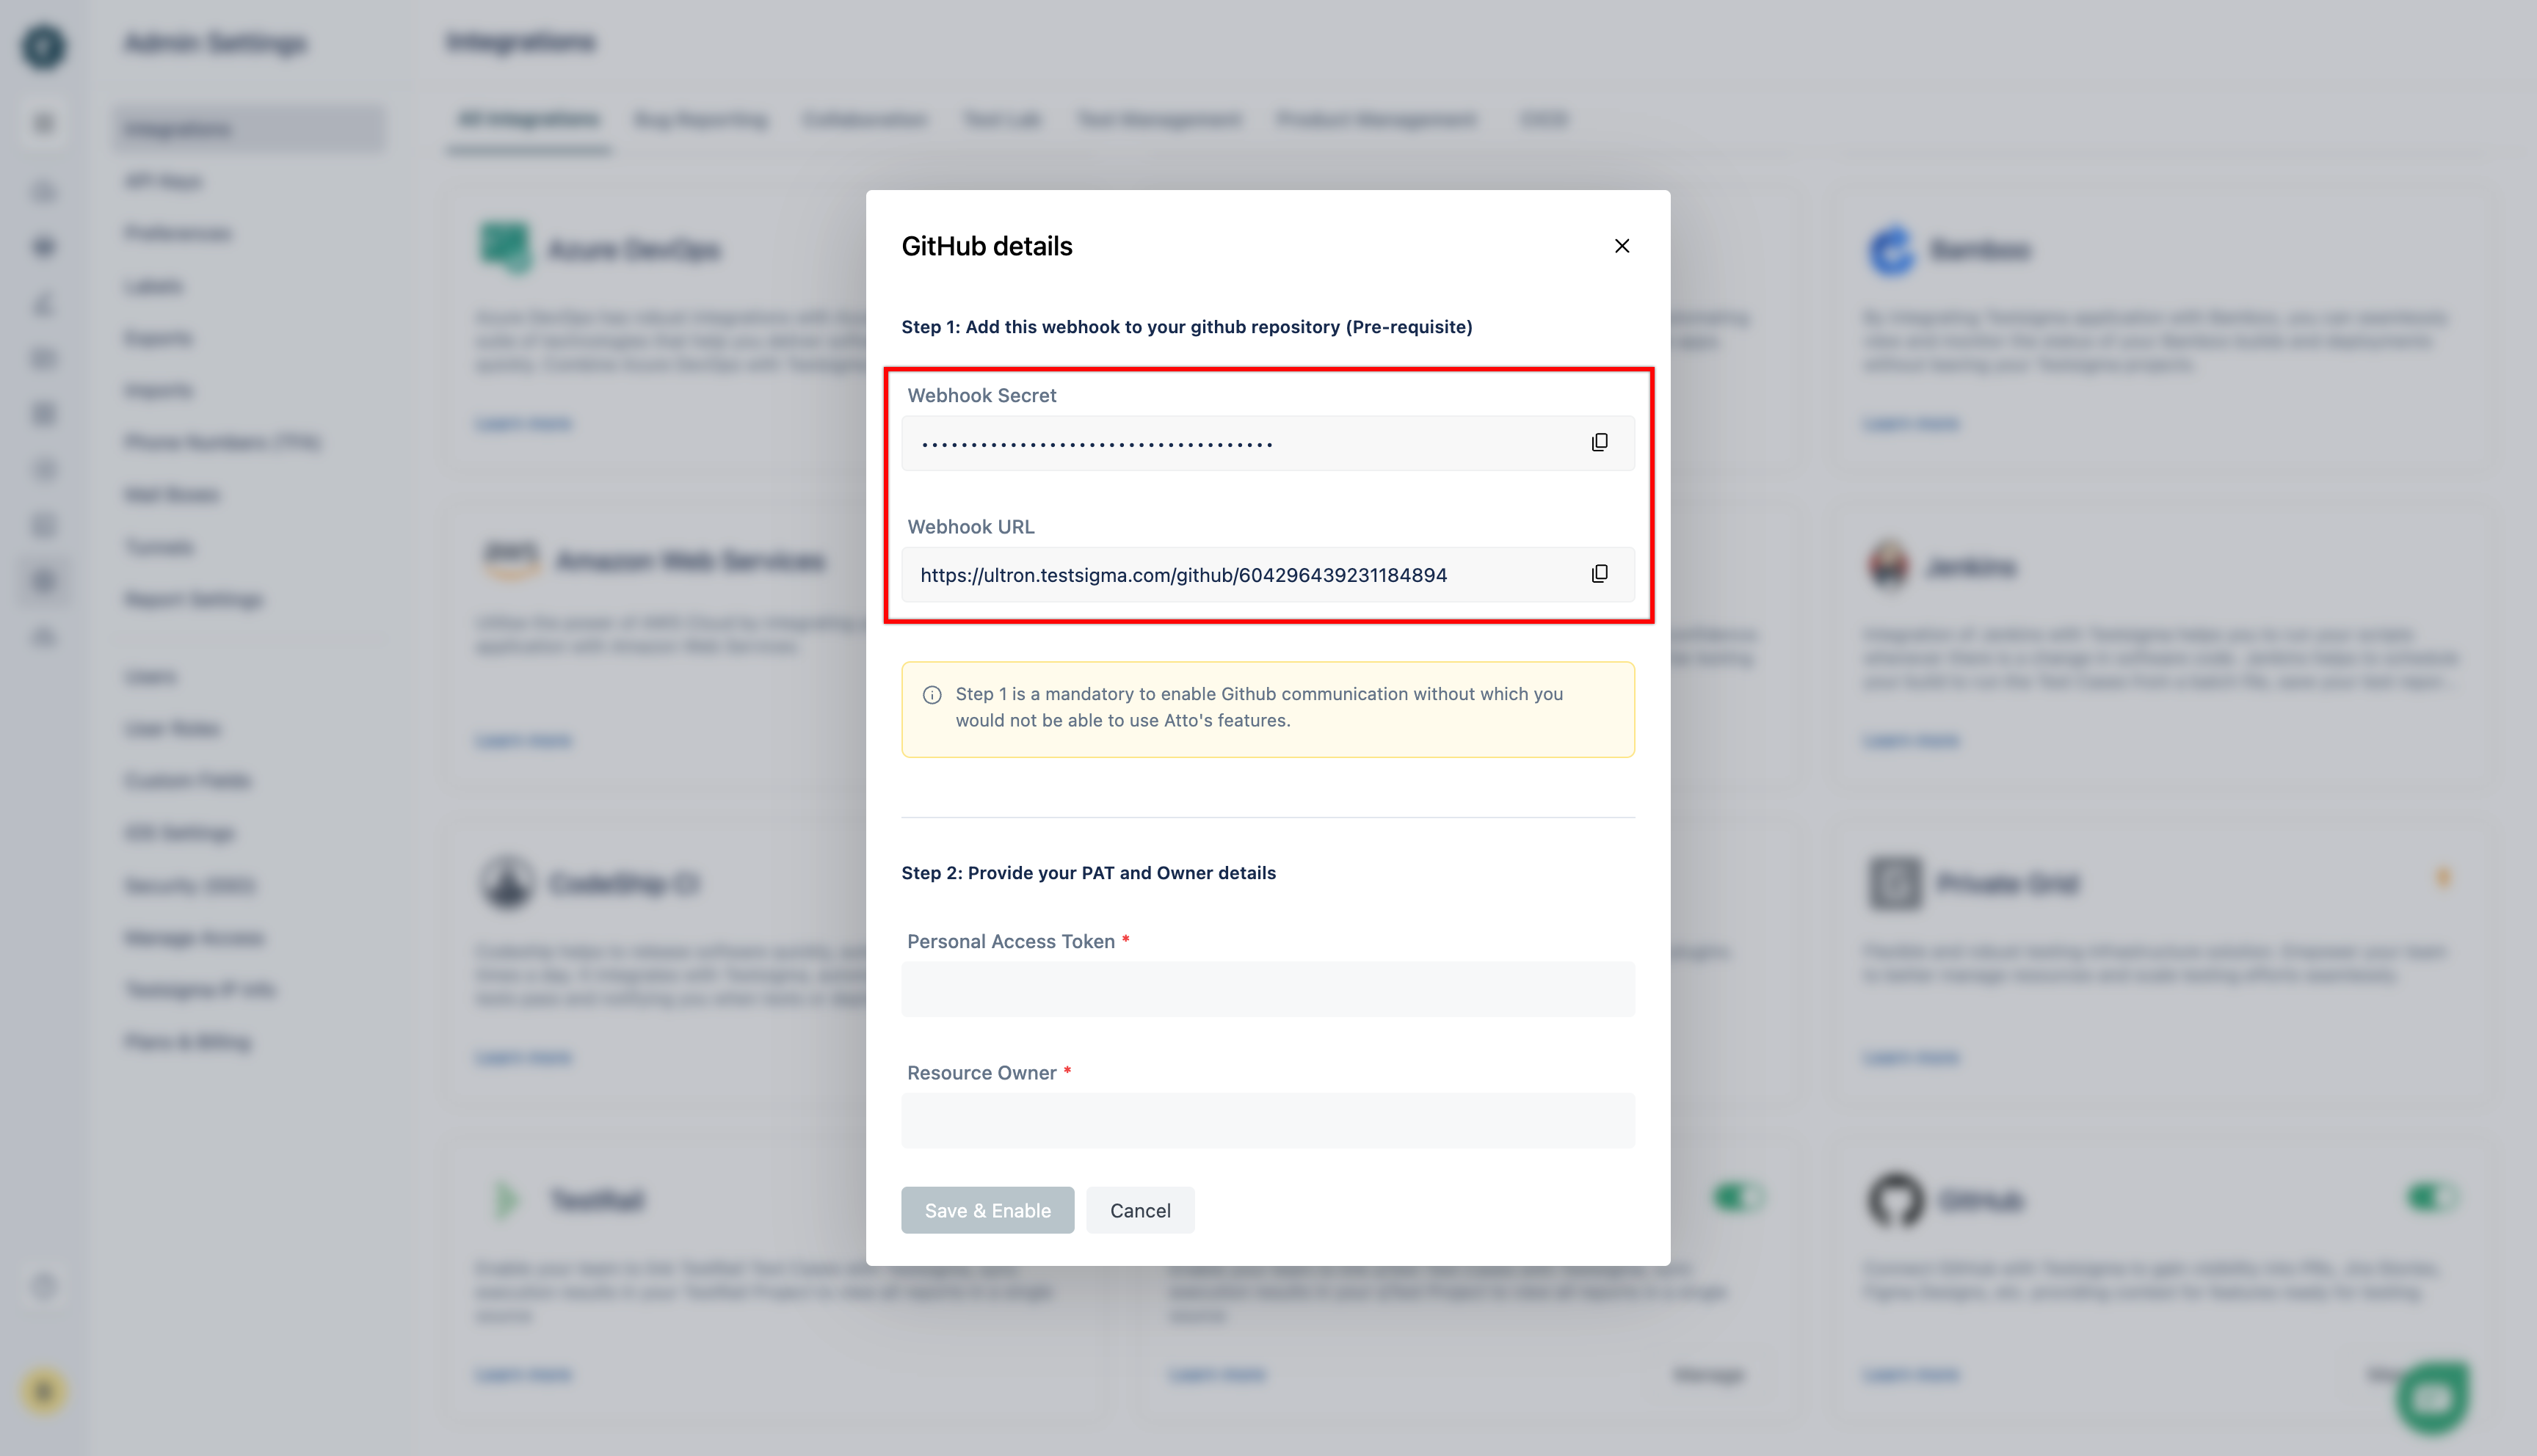
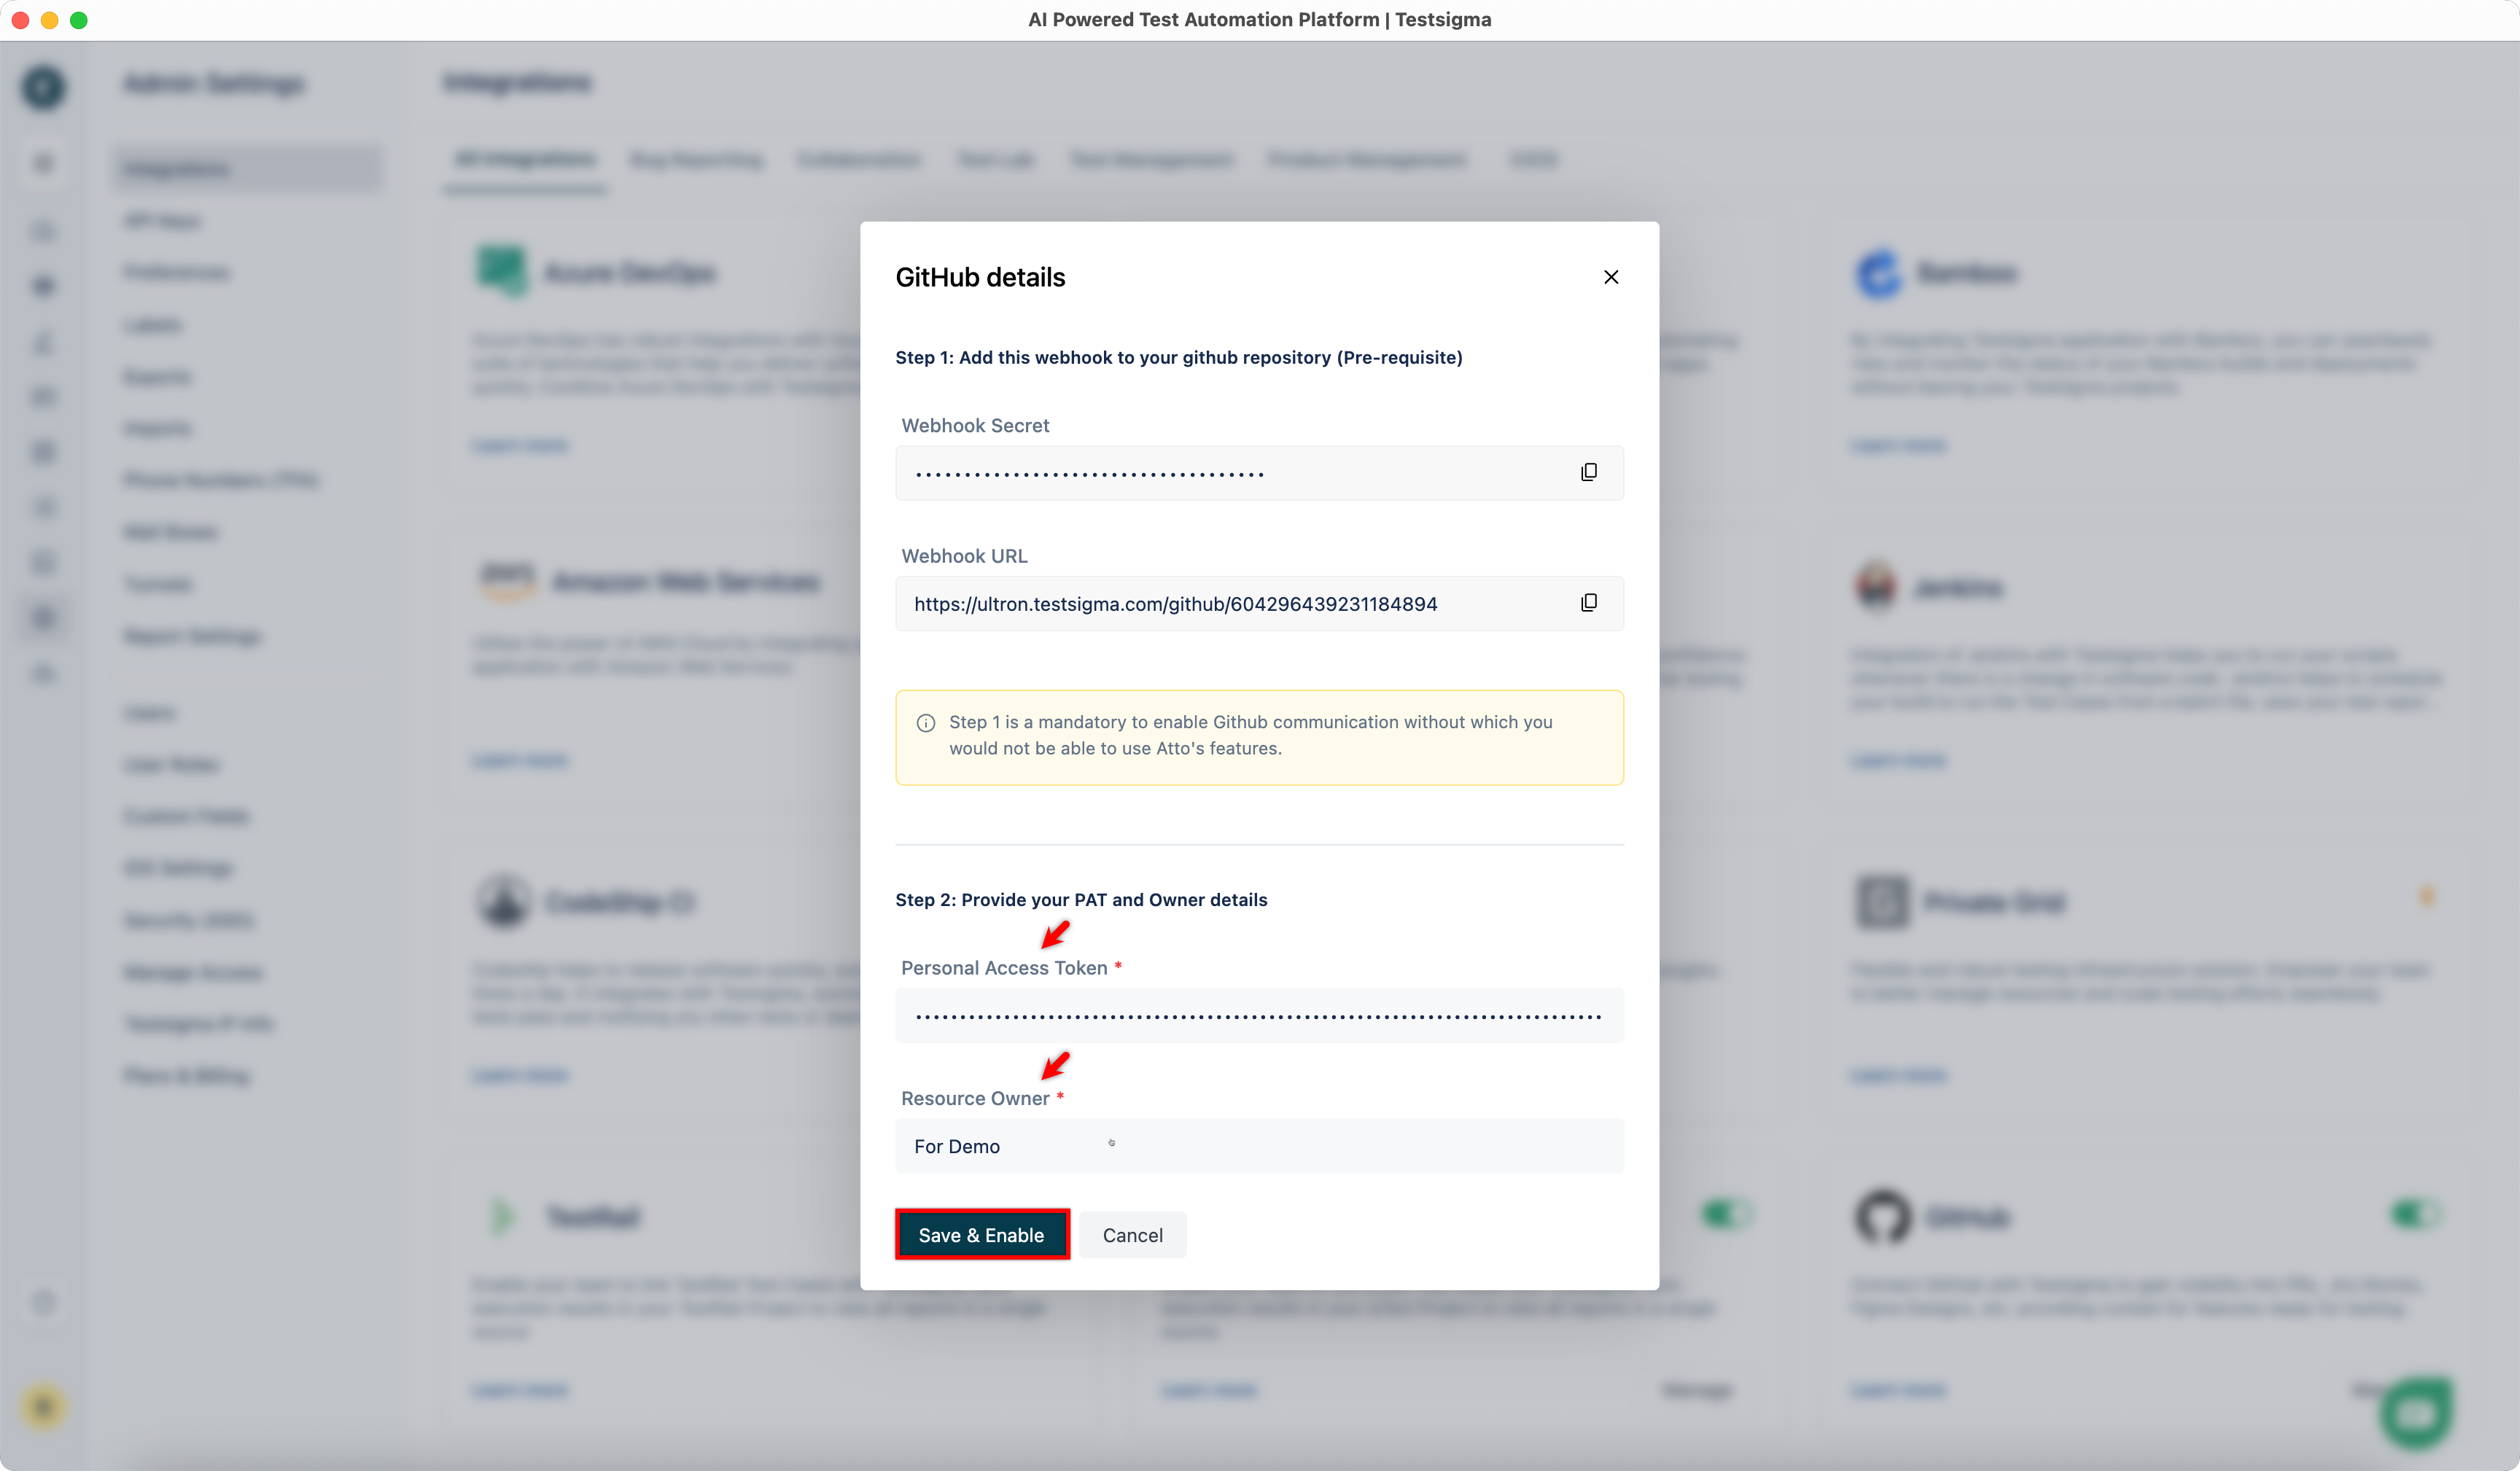
- Use these values of Webhook URL and Webhook Secret displayed in the dialog to create a Webhook in your GitHub repository.
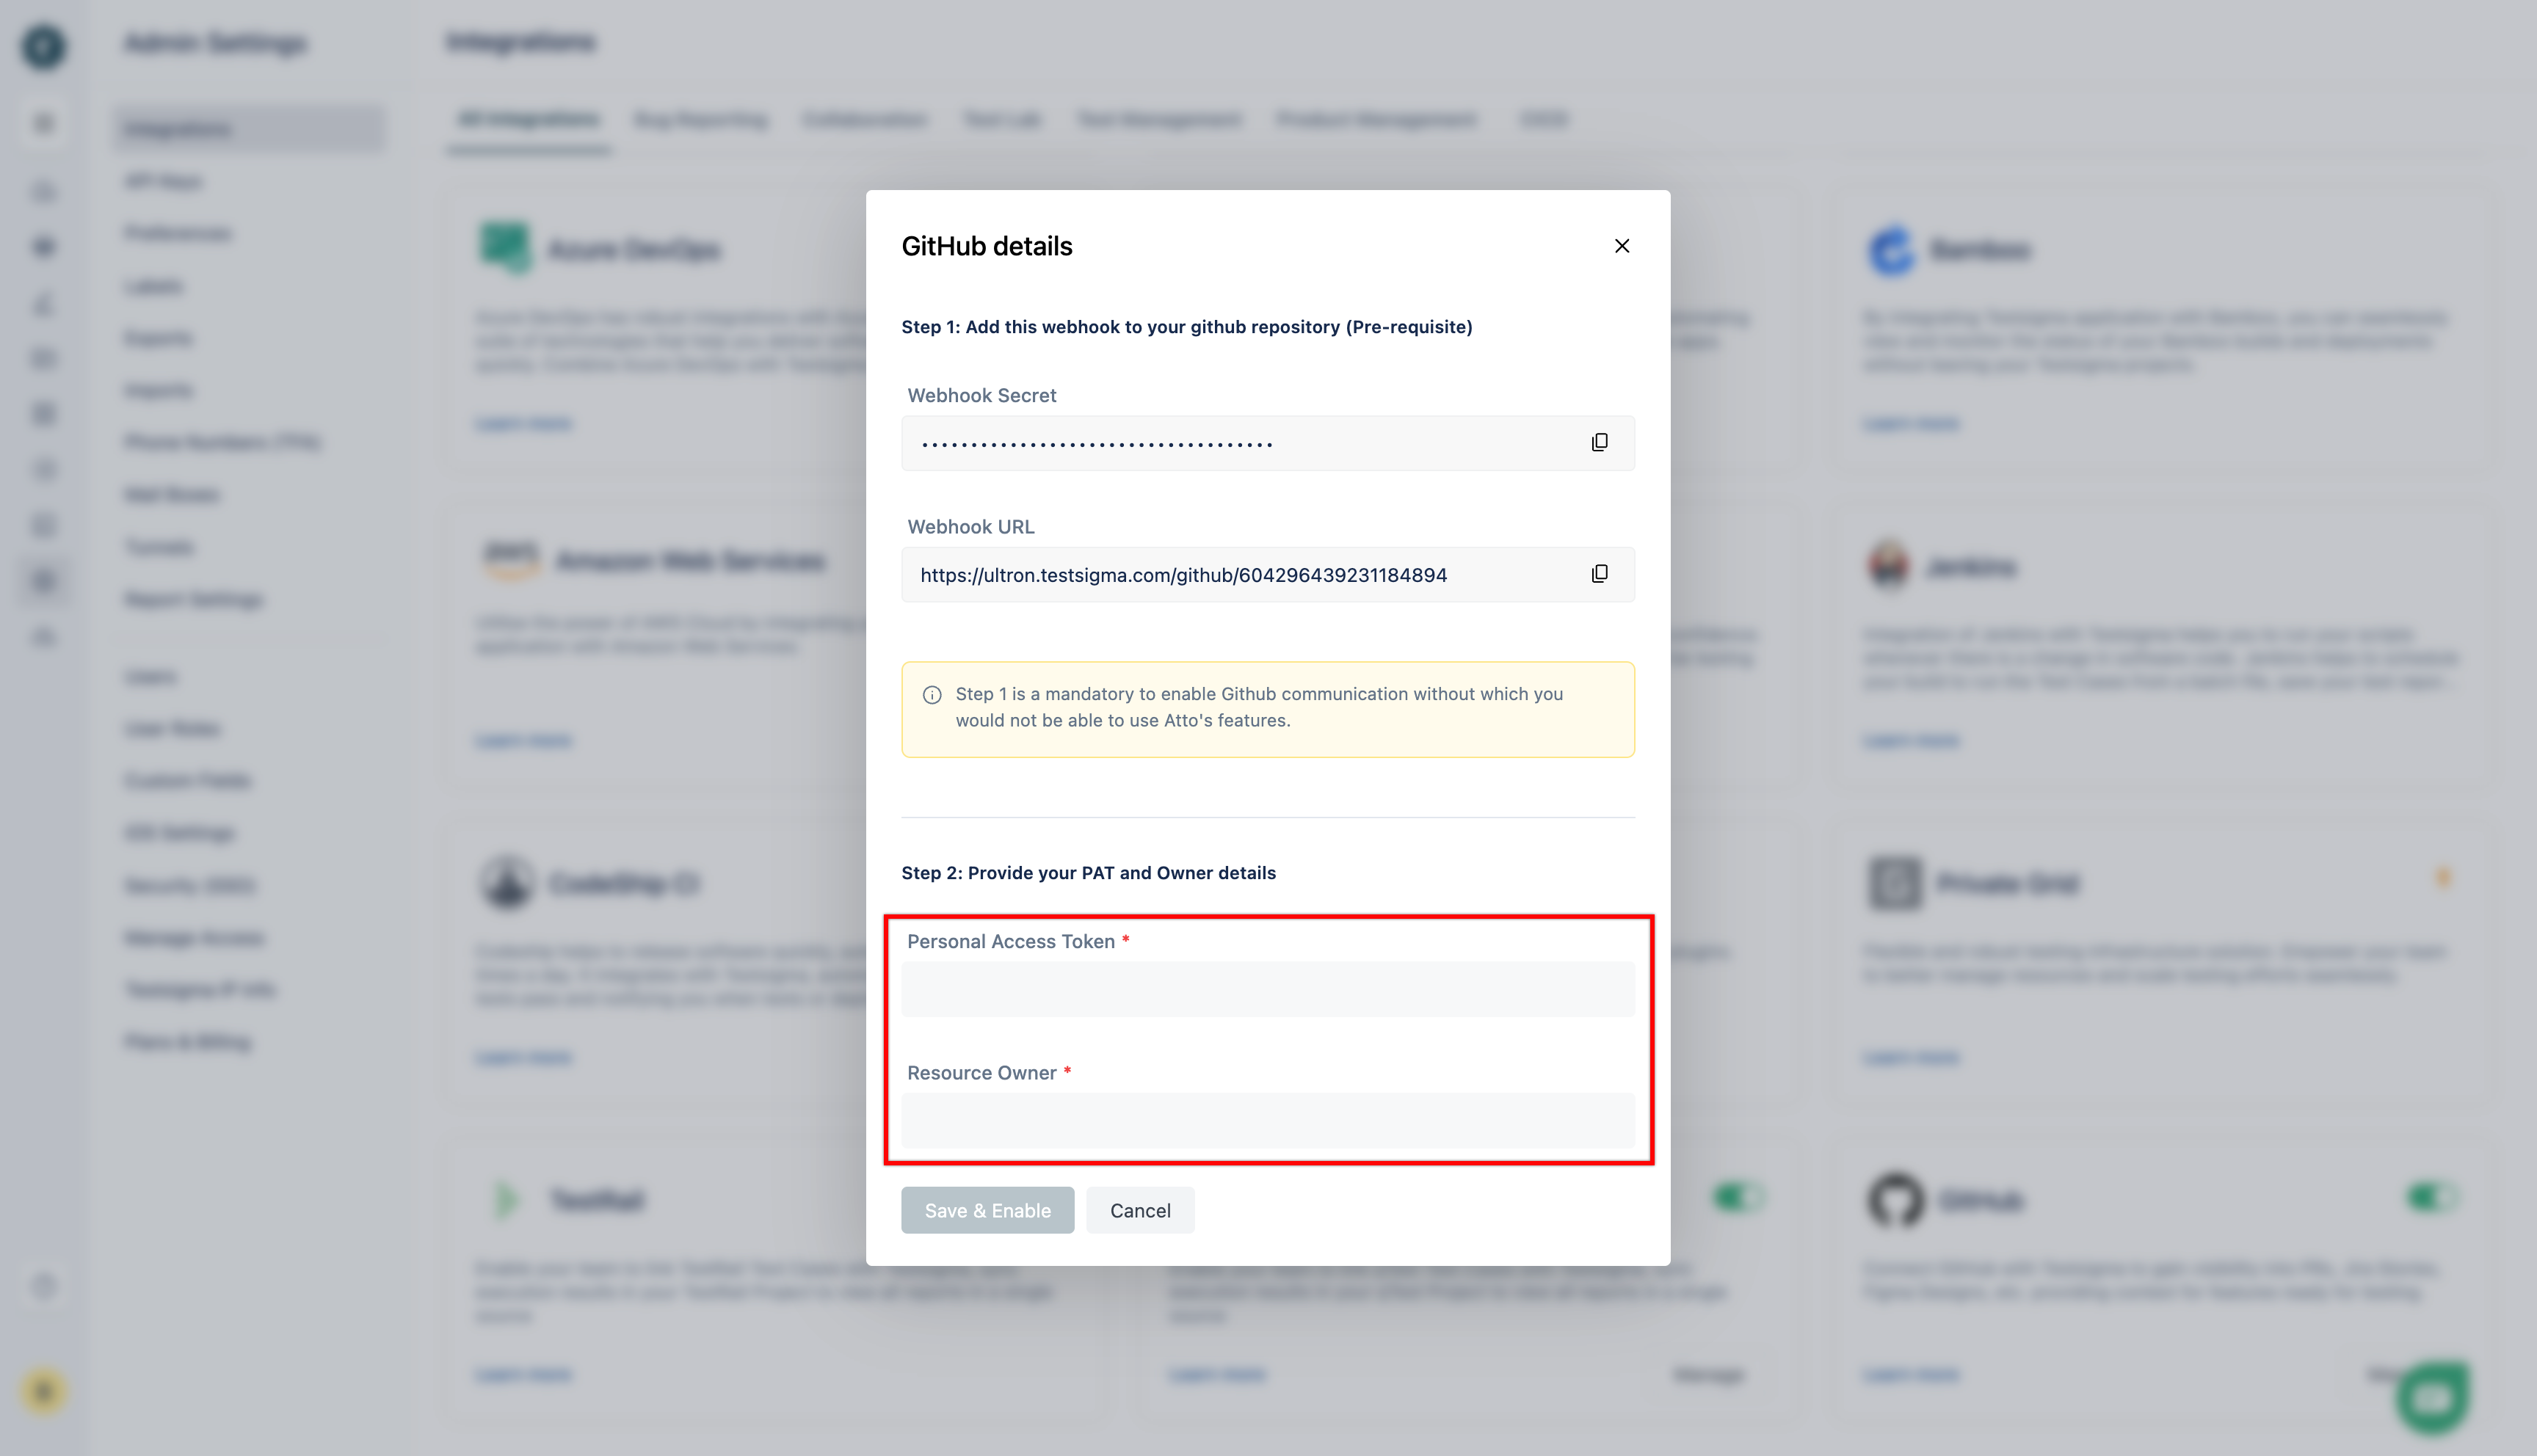
- Generate Personal Access Token, get Owner Details from GitHub and add the details in Step 2.
Step 1: Configure Webhooks in GitHub
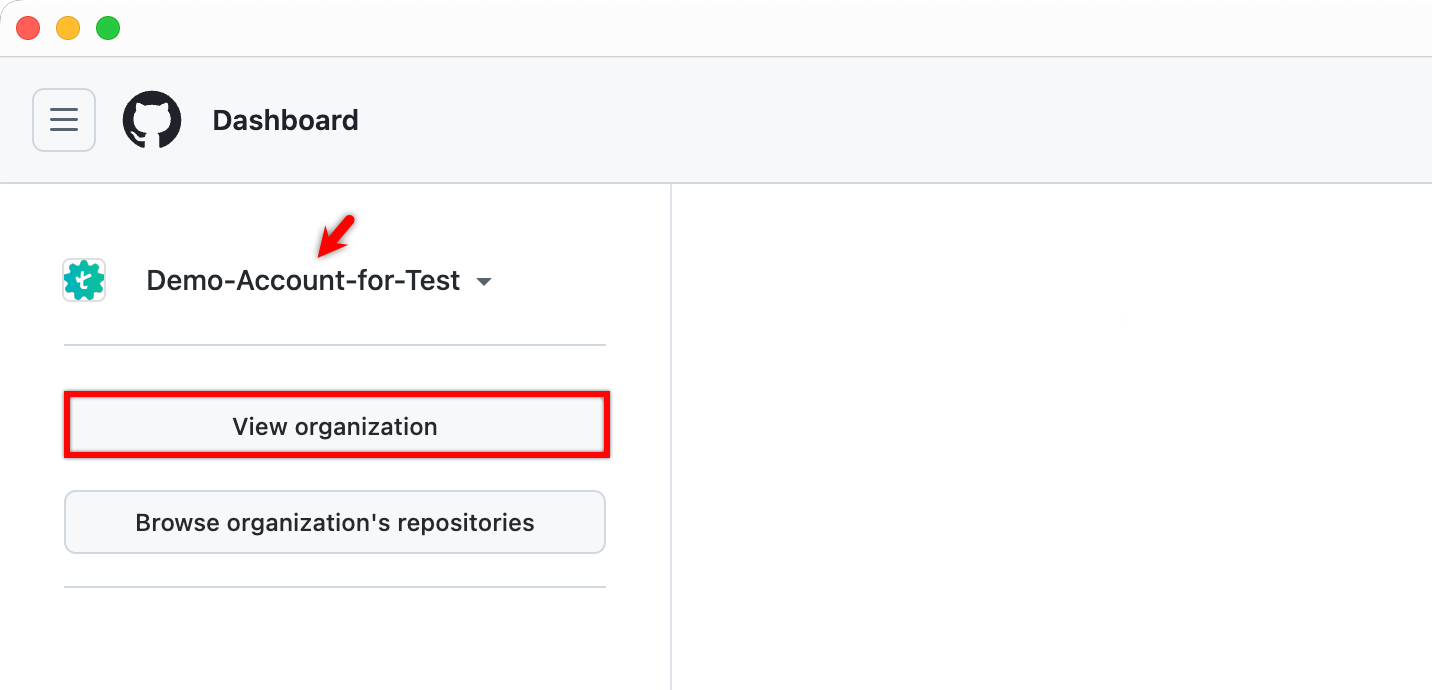
- Go to GitHub, select an organization, and click View organization.
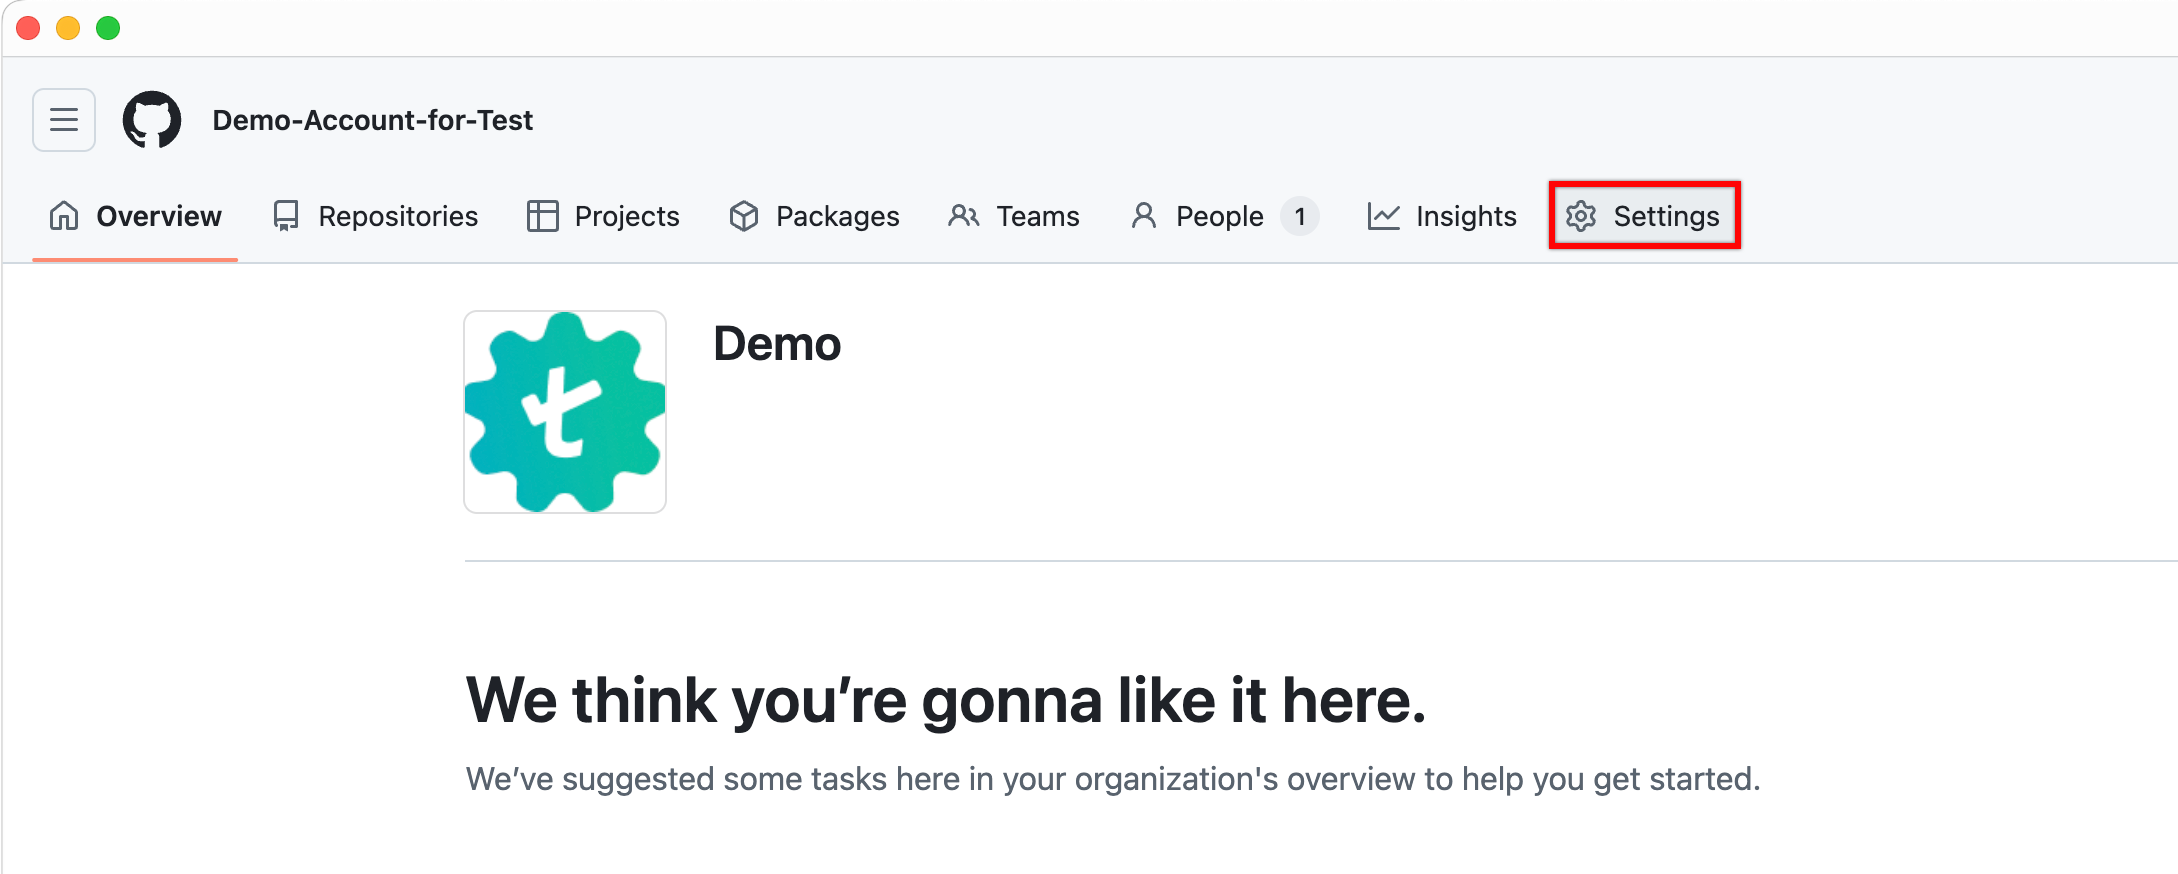
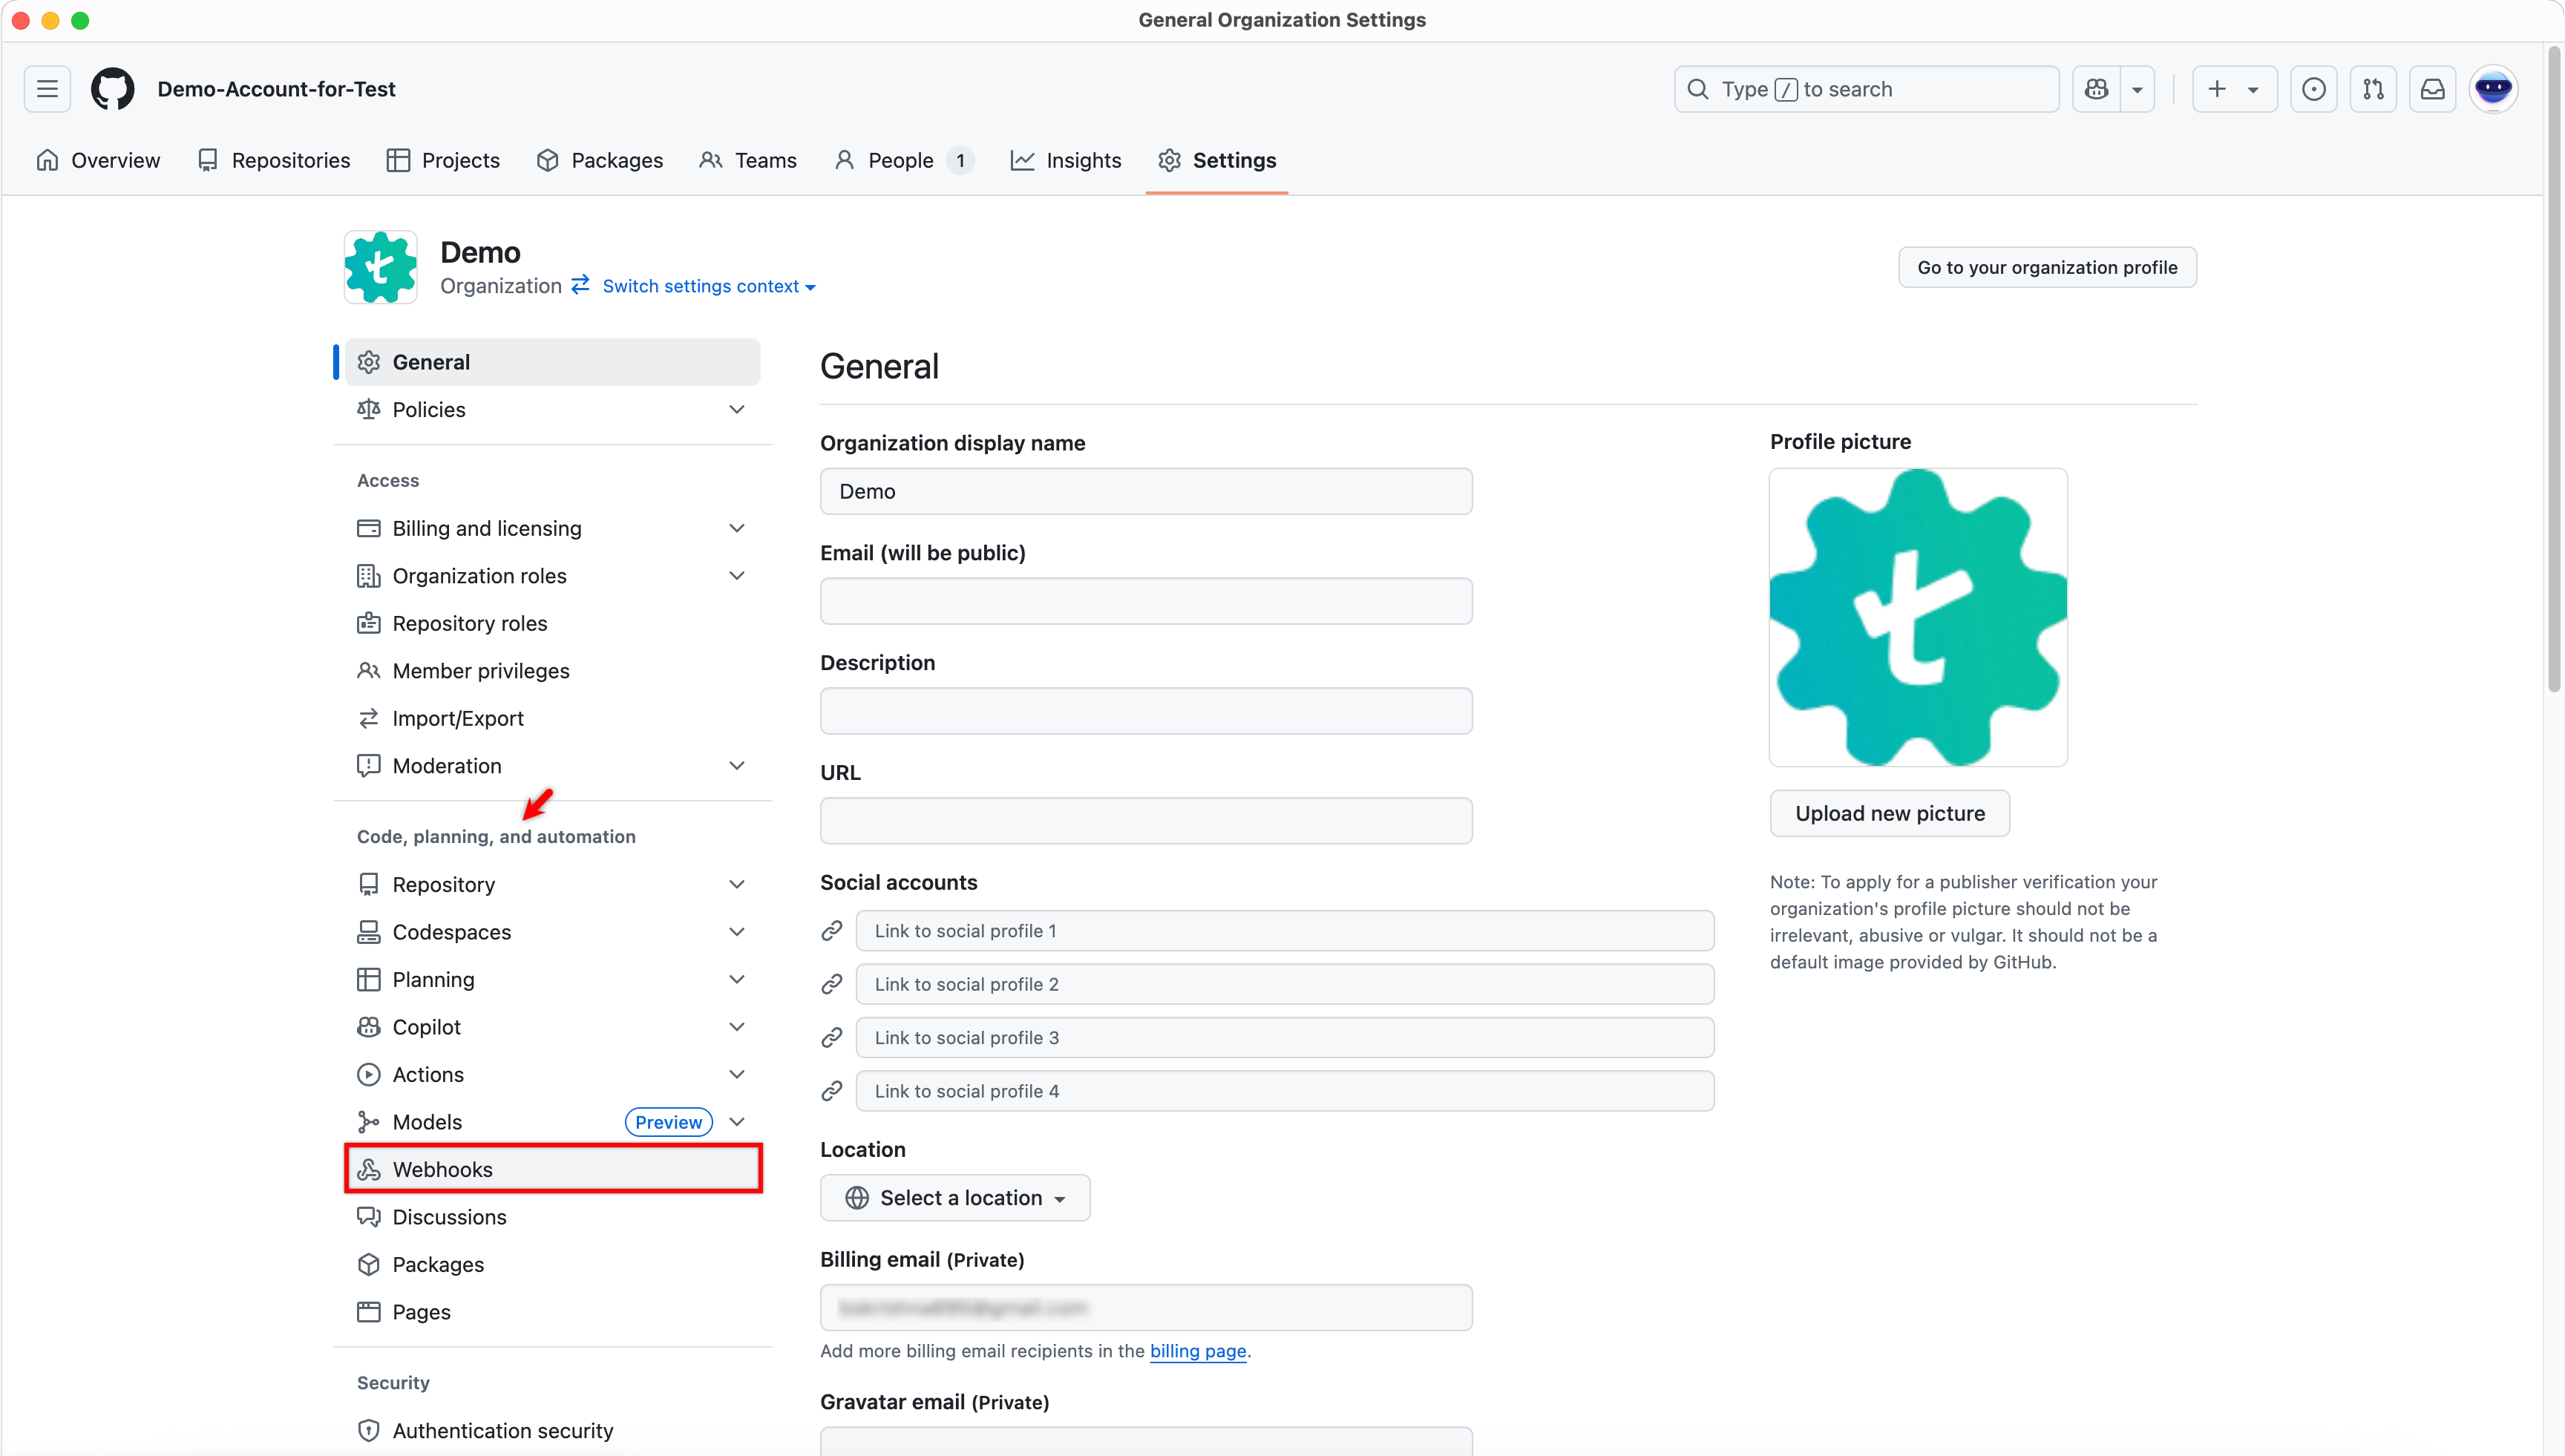
- In the top navigation bar, click Settings.
- In the left navigation pane, under Code, planning, and automation, click Webhooks.
- On the Webhooks page, click Add webhook.
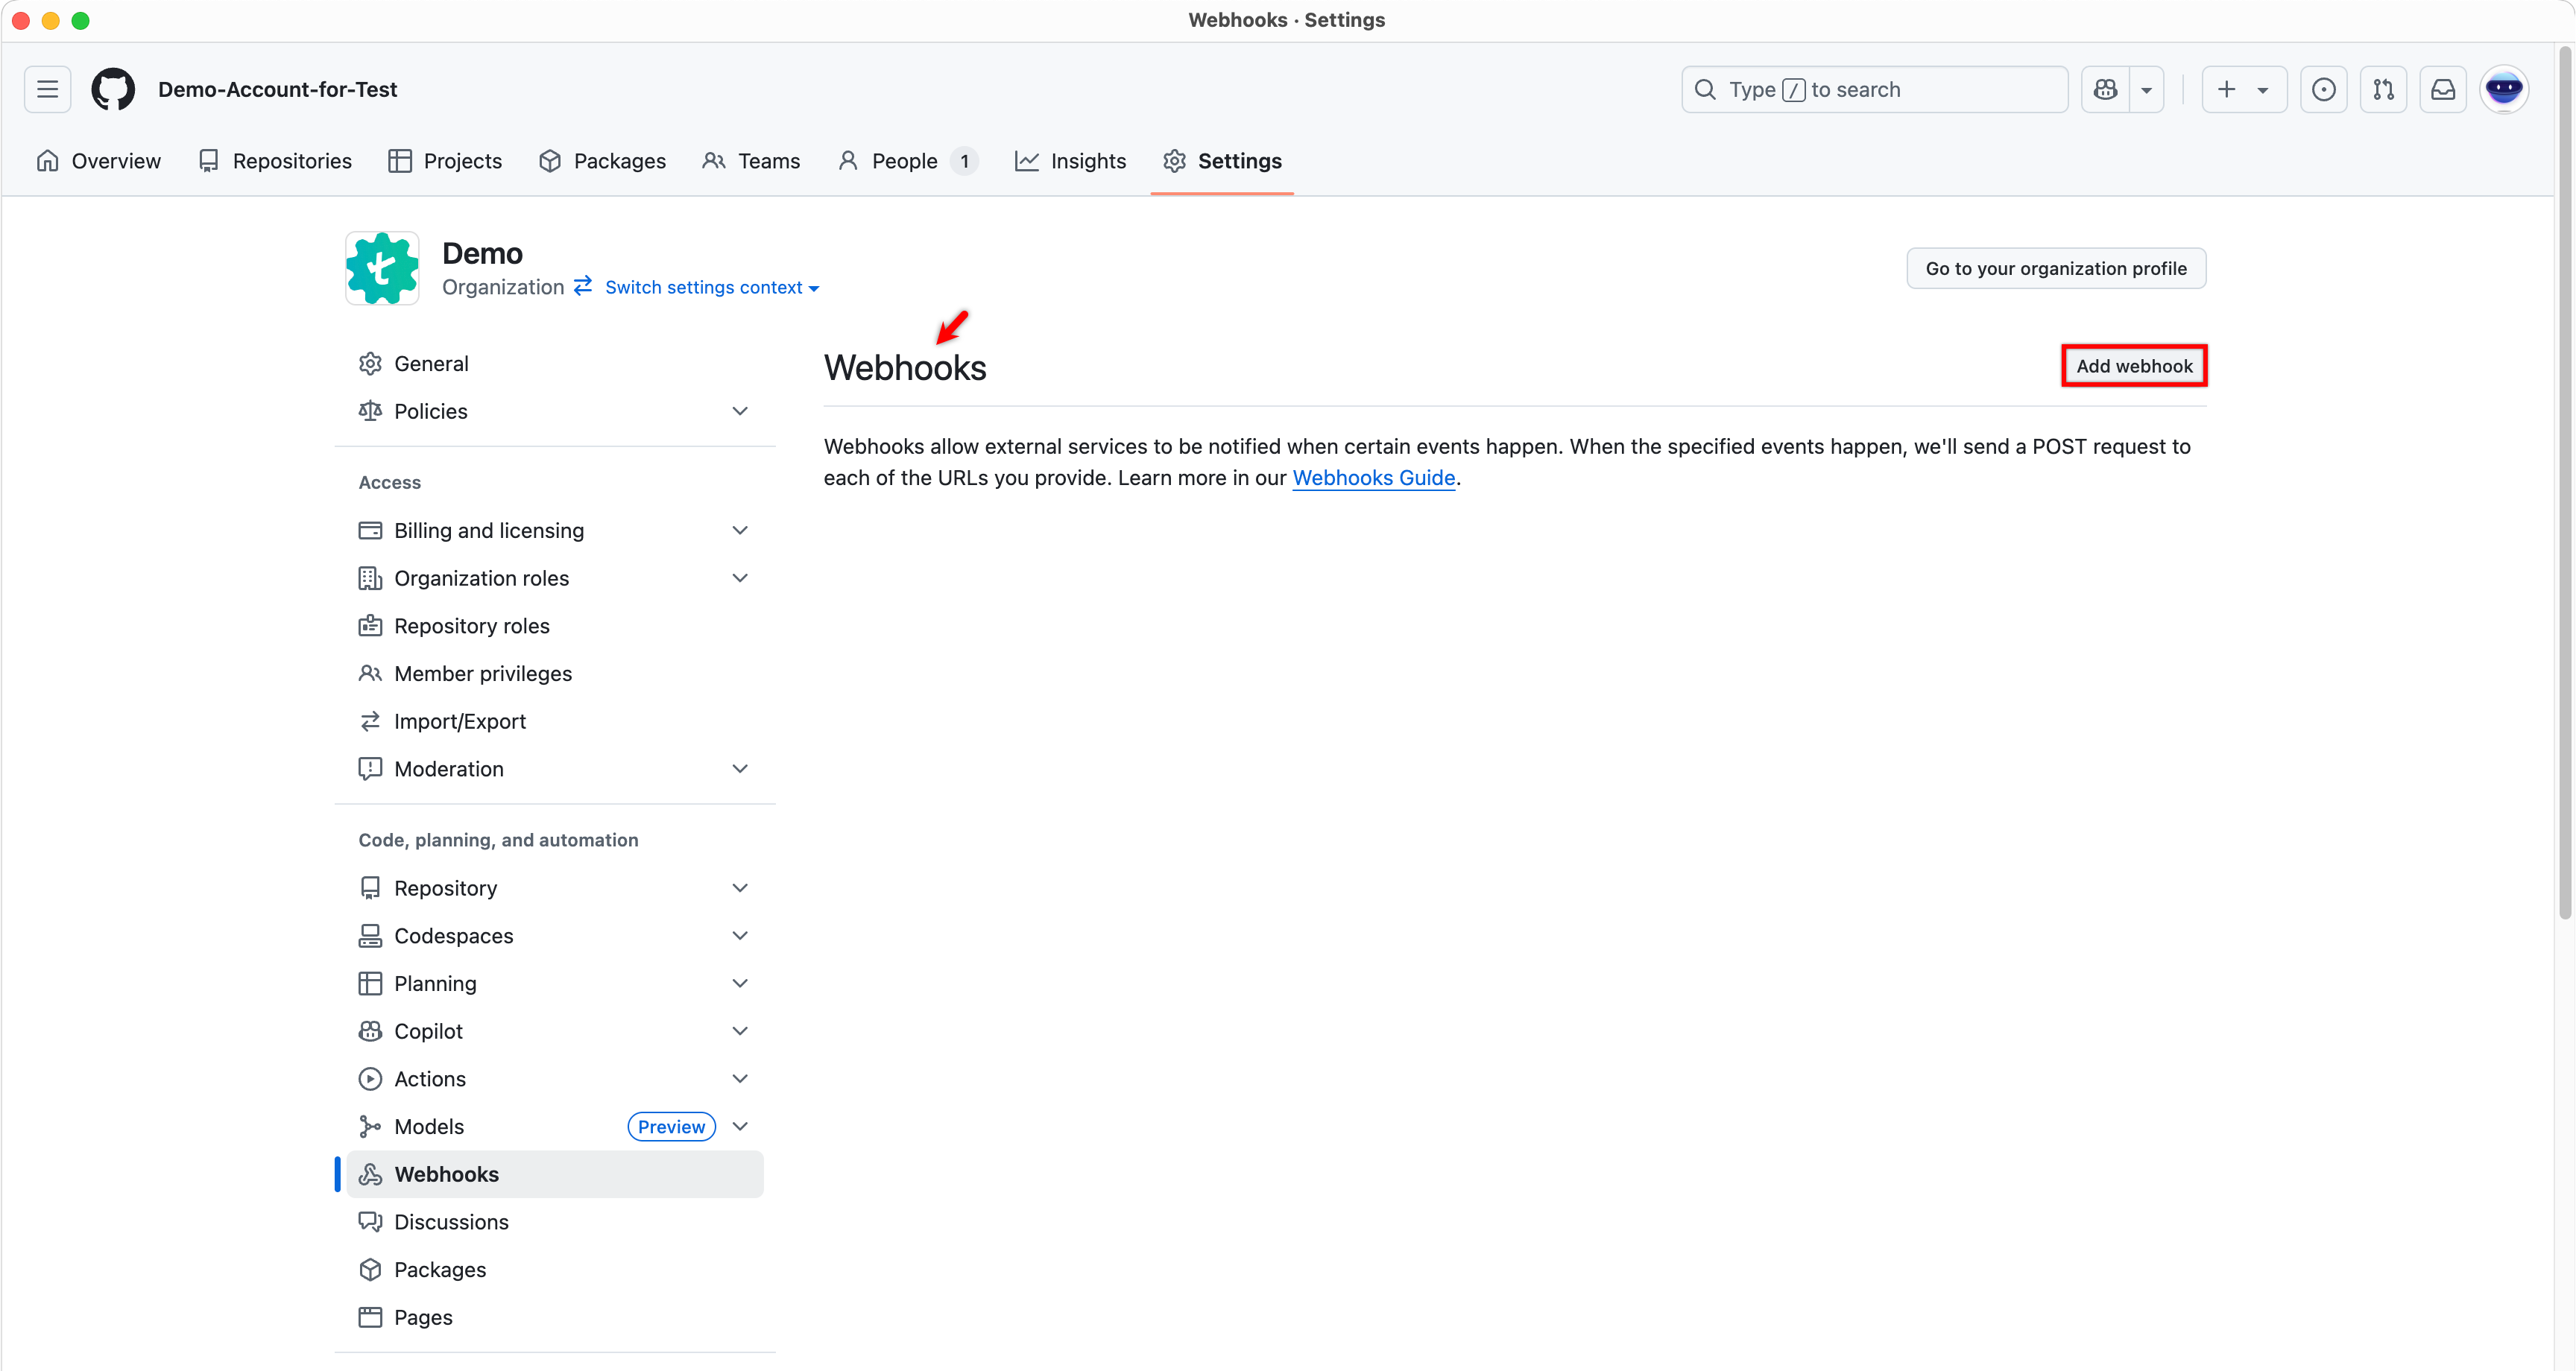
-
On the Add webhook page, do the following:
- In the Payload URL field, enter the Webhook URL.
- For Content type, select application/json.
- In the Secret field, enter the Webhook Secret.
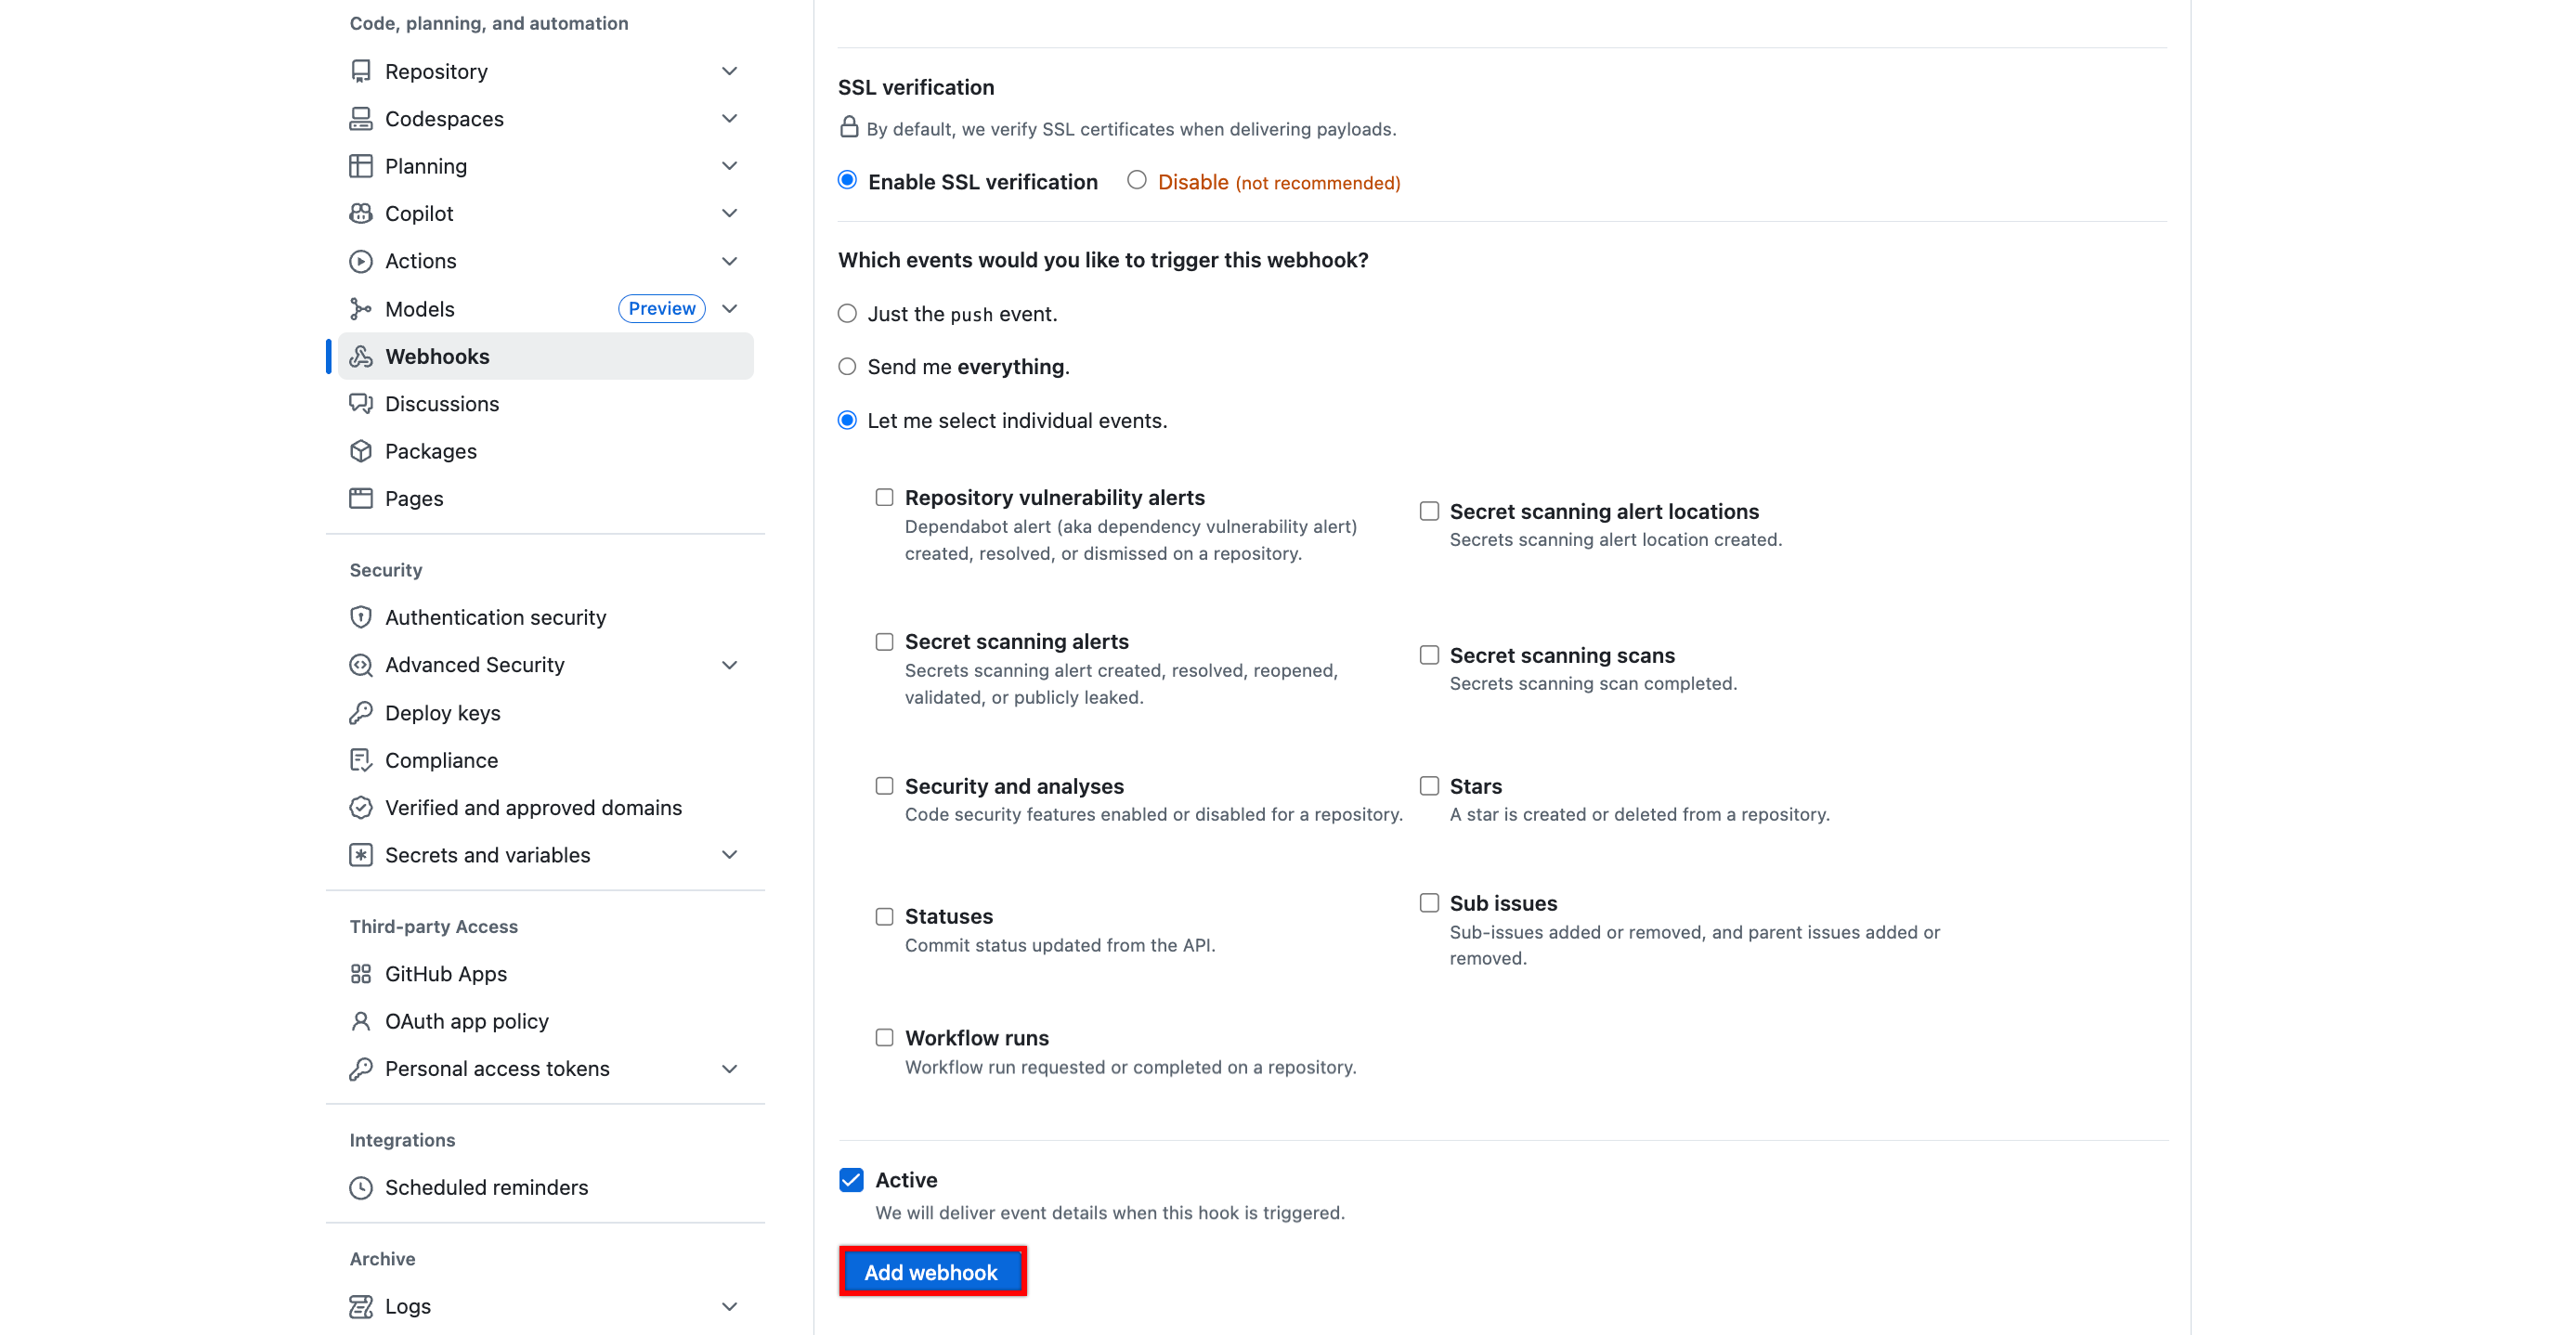
- Under Which events would you like to trigger this webhook?, select Let me select individual events.
- From the list of available events, select Pull requests.
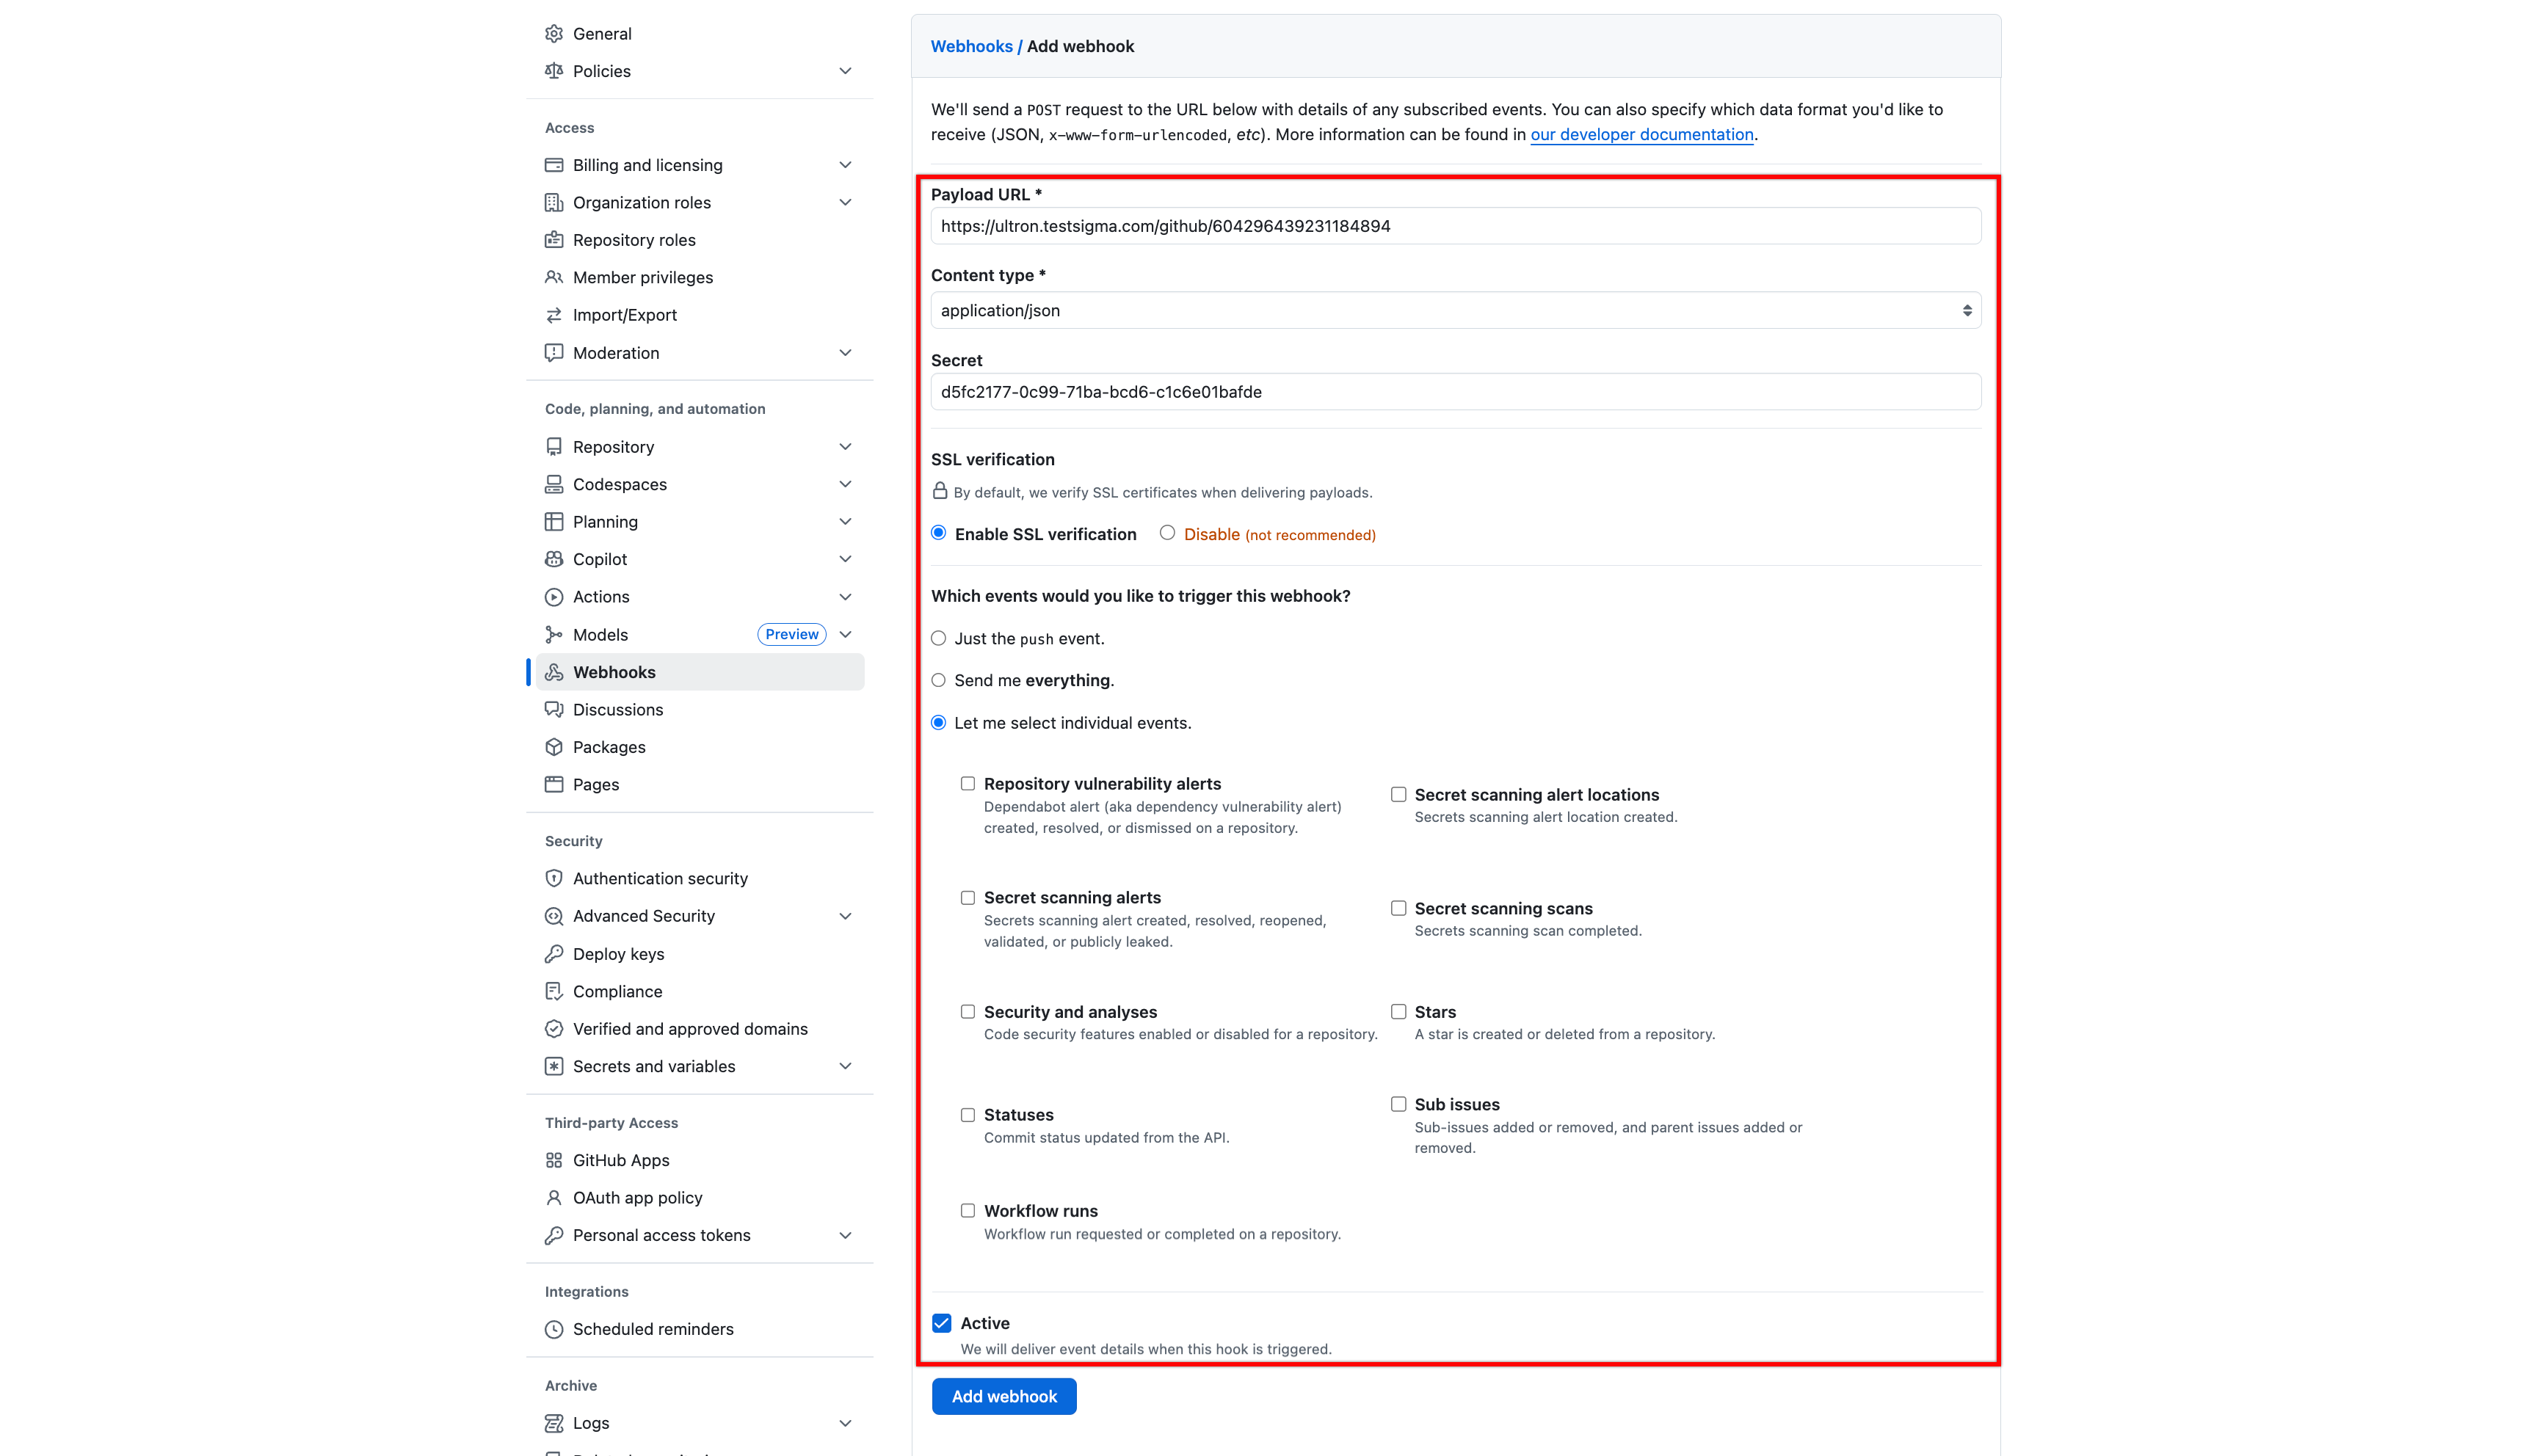
The Payload URL and Secret in GitHub must be copied from Webhook URL and Webhook Secret generated in Testsigma.
To obtain them, go to Settings > Integrations in Testsigma and enable the GitHub integration toggle.
- Select Add webhook to save the configuration.
Step 2: Generate PAT and Owner Details from GitHub
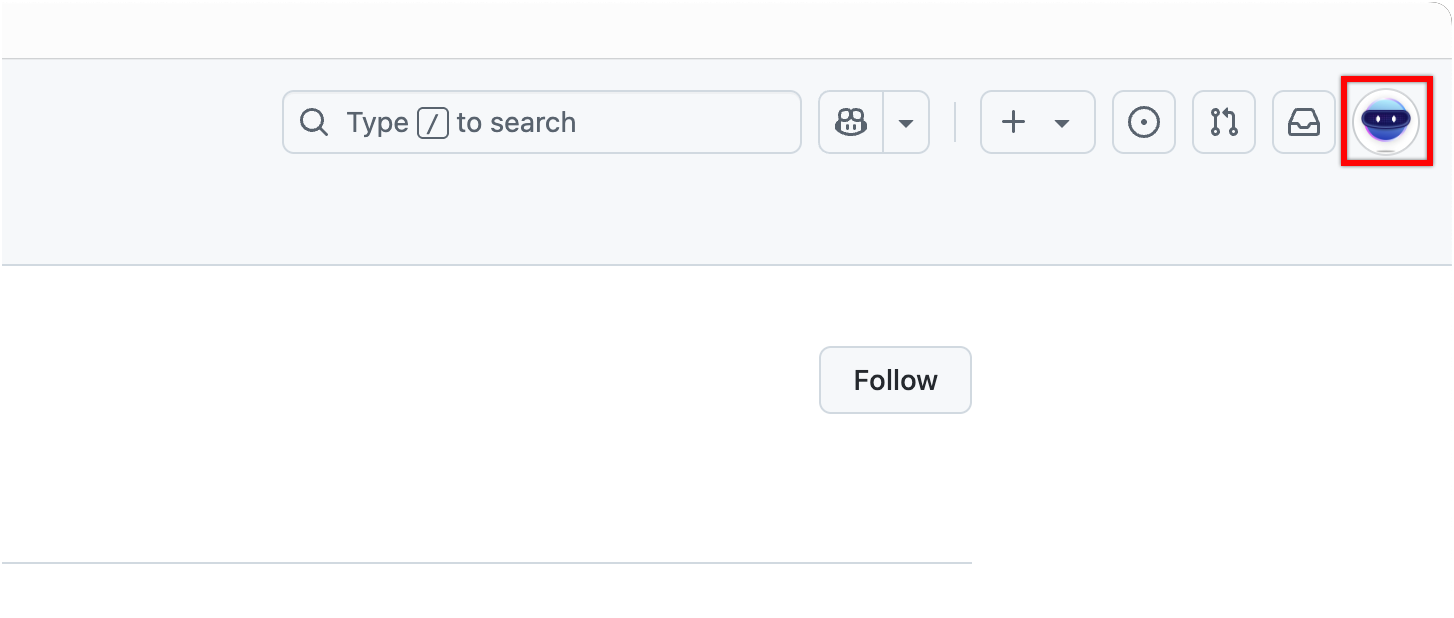
- Go to GitHub, and click your profile picture in the top-right corner.
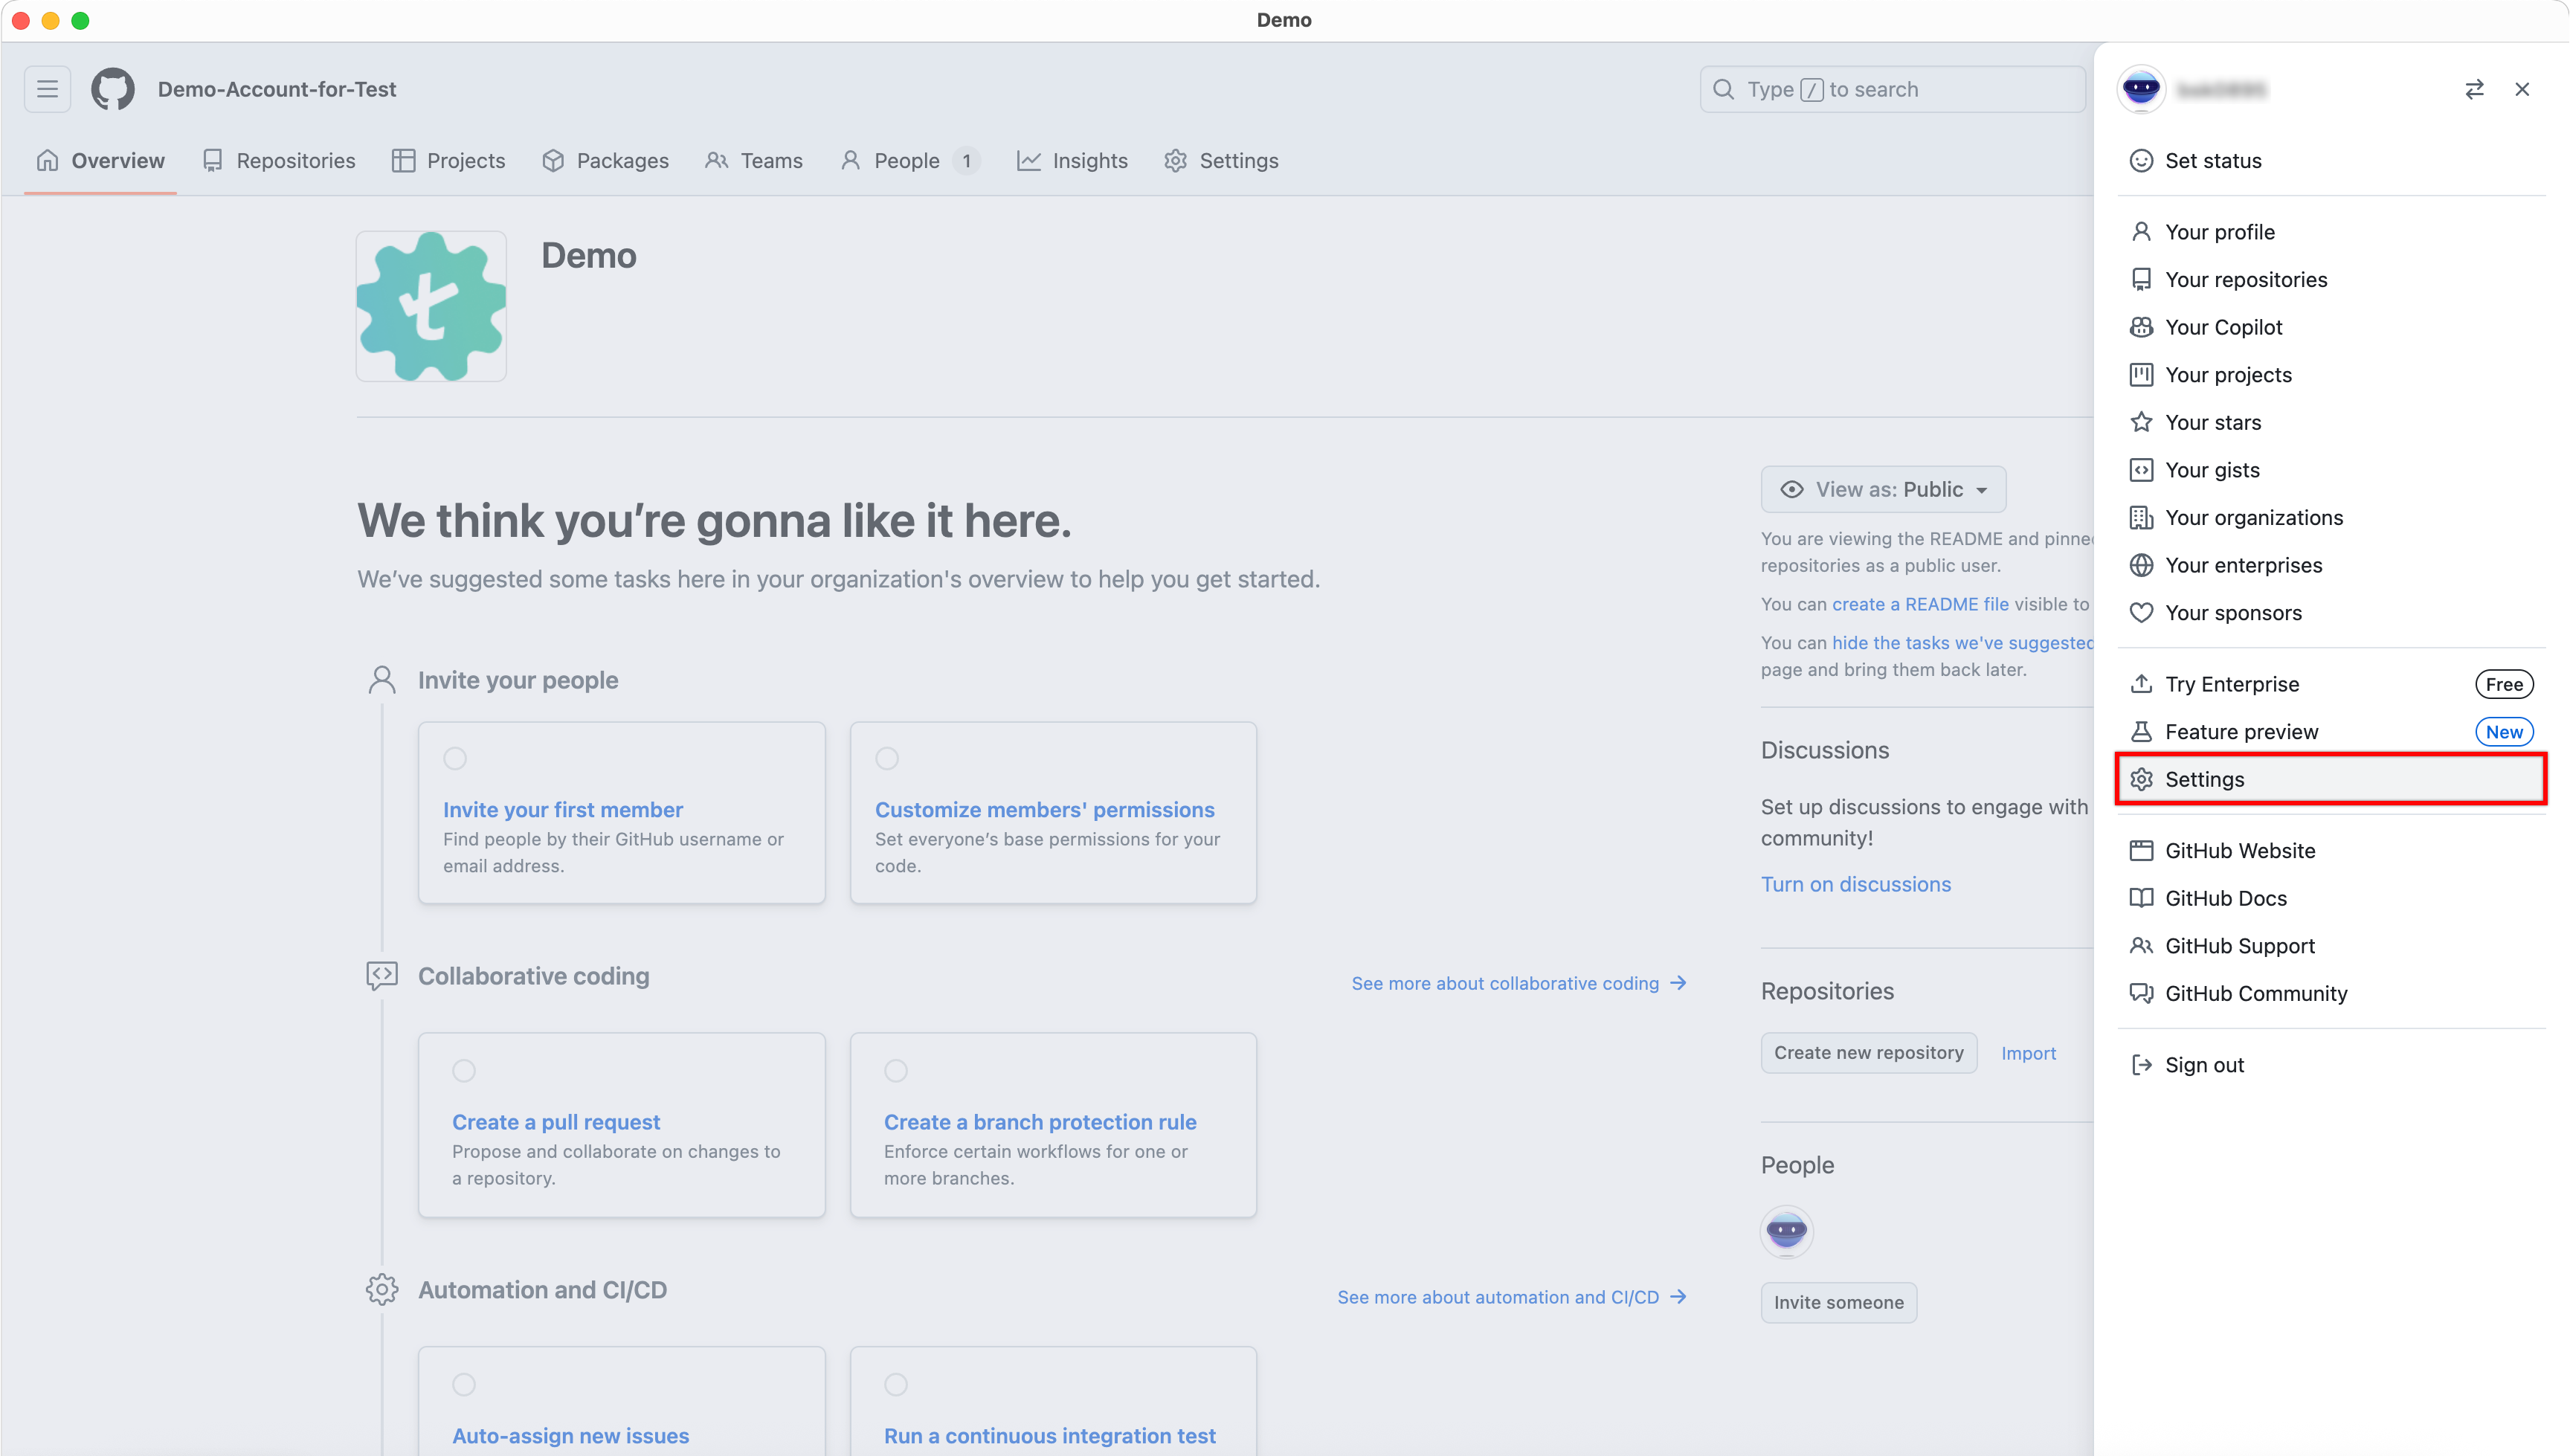
- In the profile menu, click Settings.
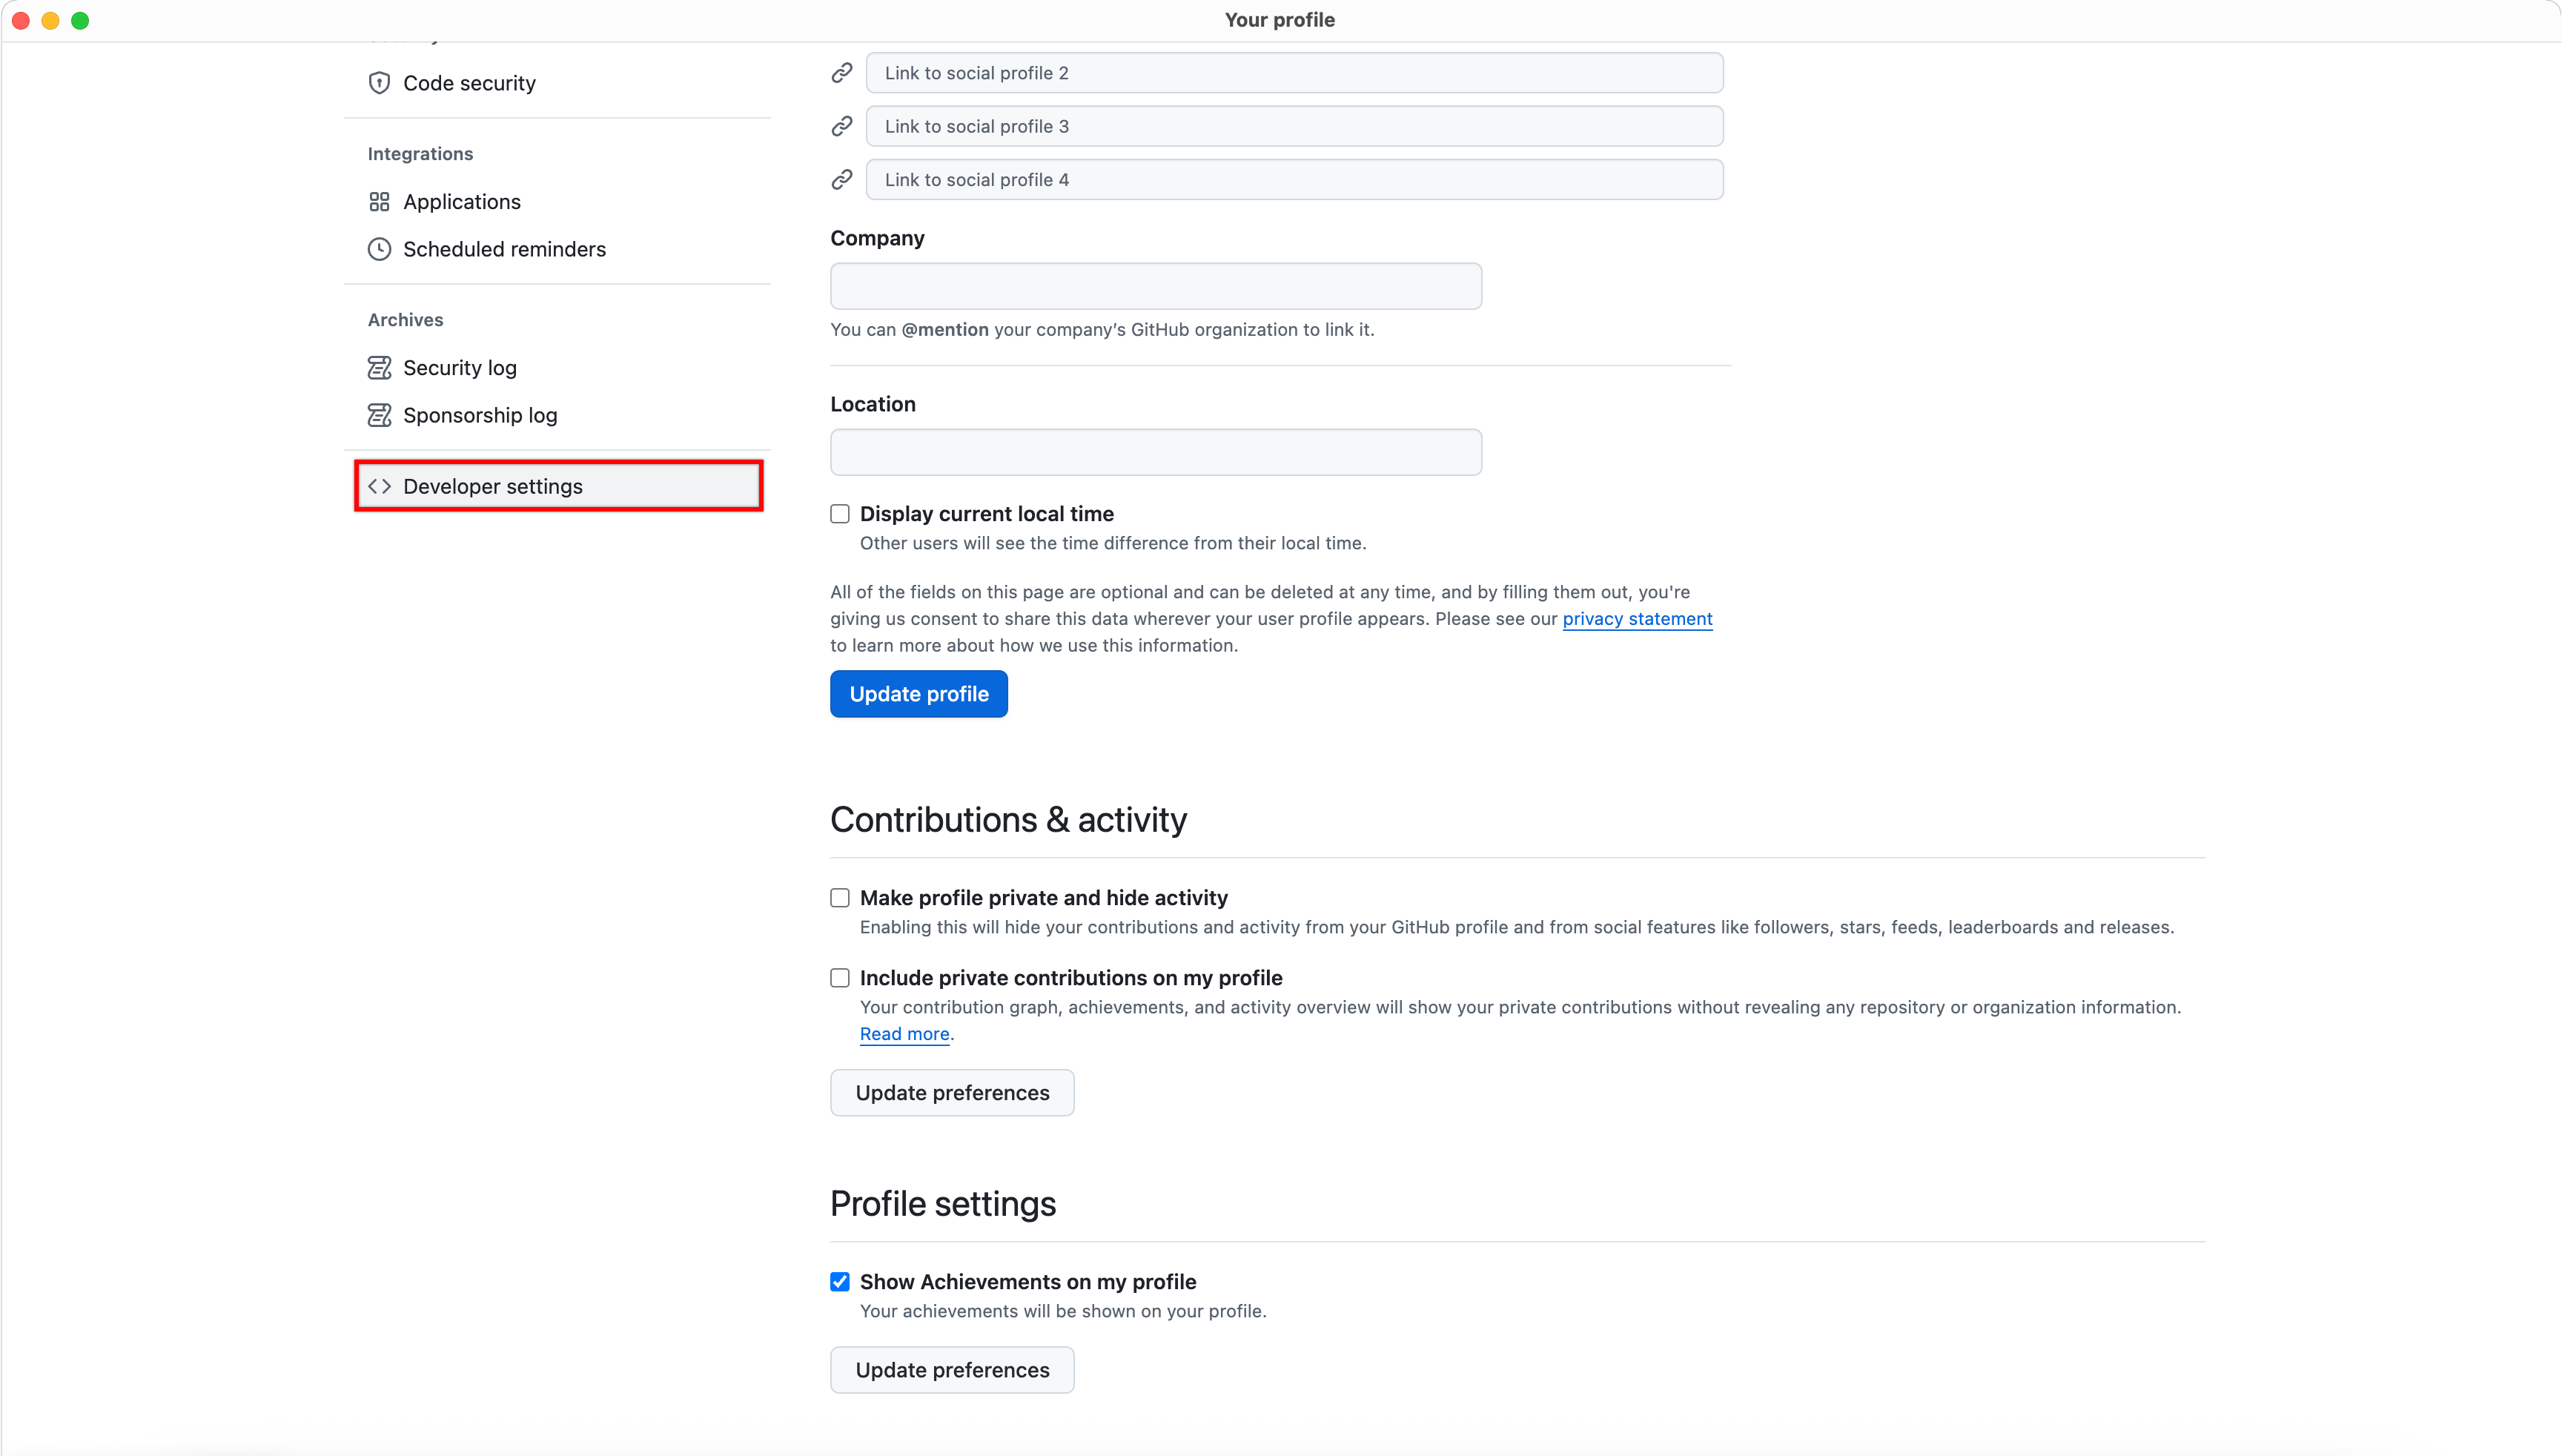
- In the left navigation pane, scroll down and click Developer settings.
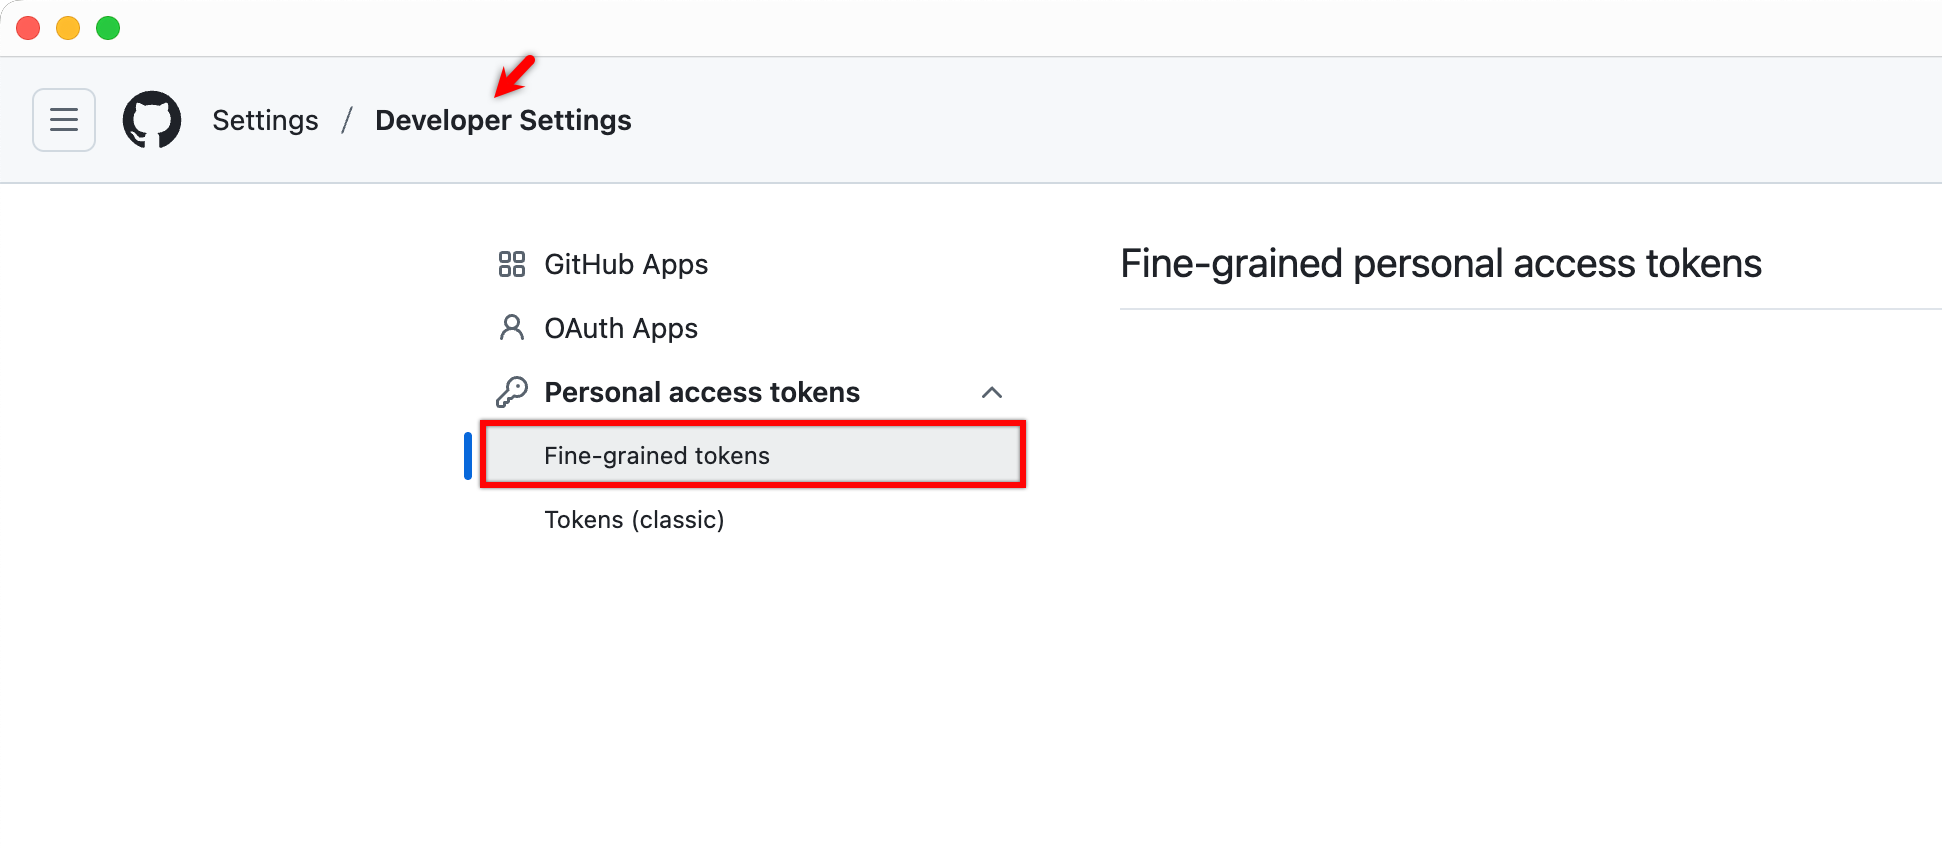
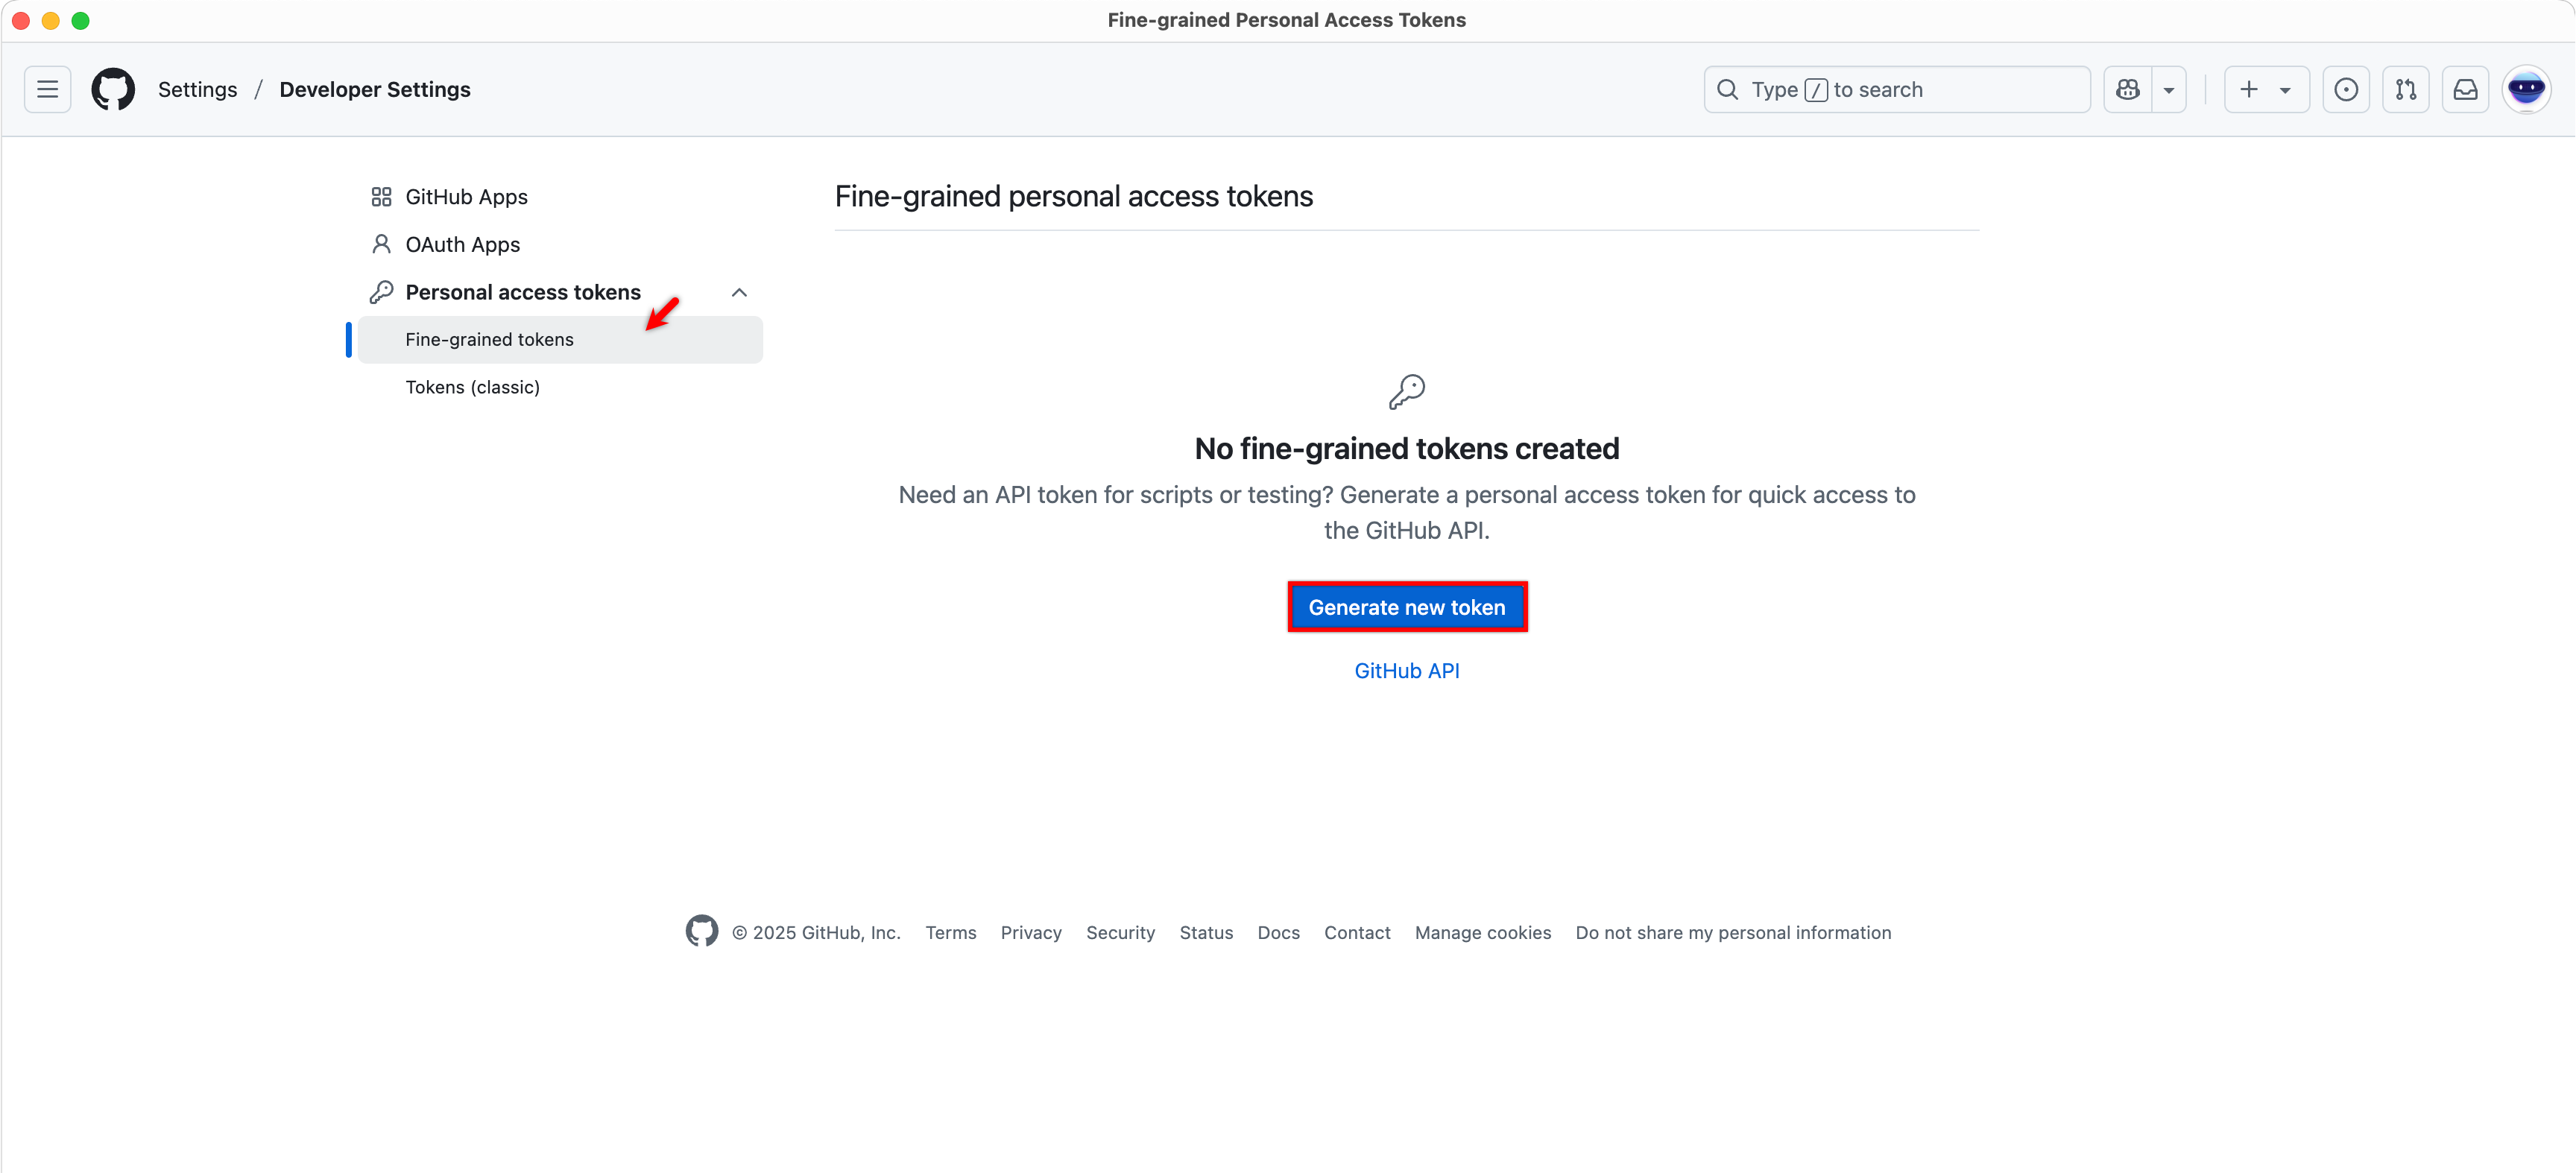
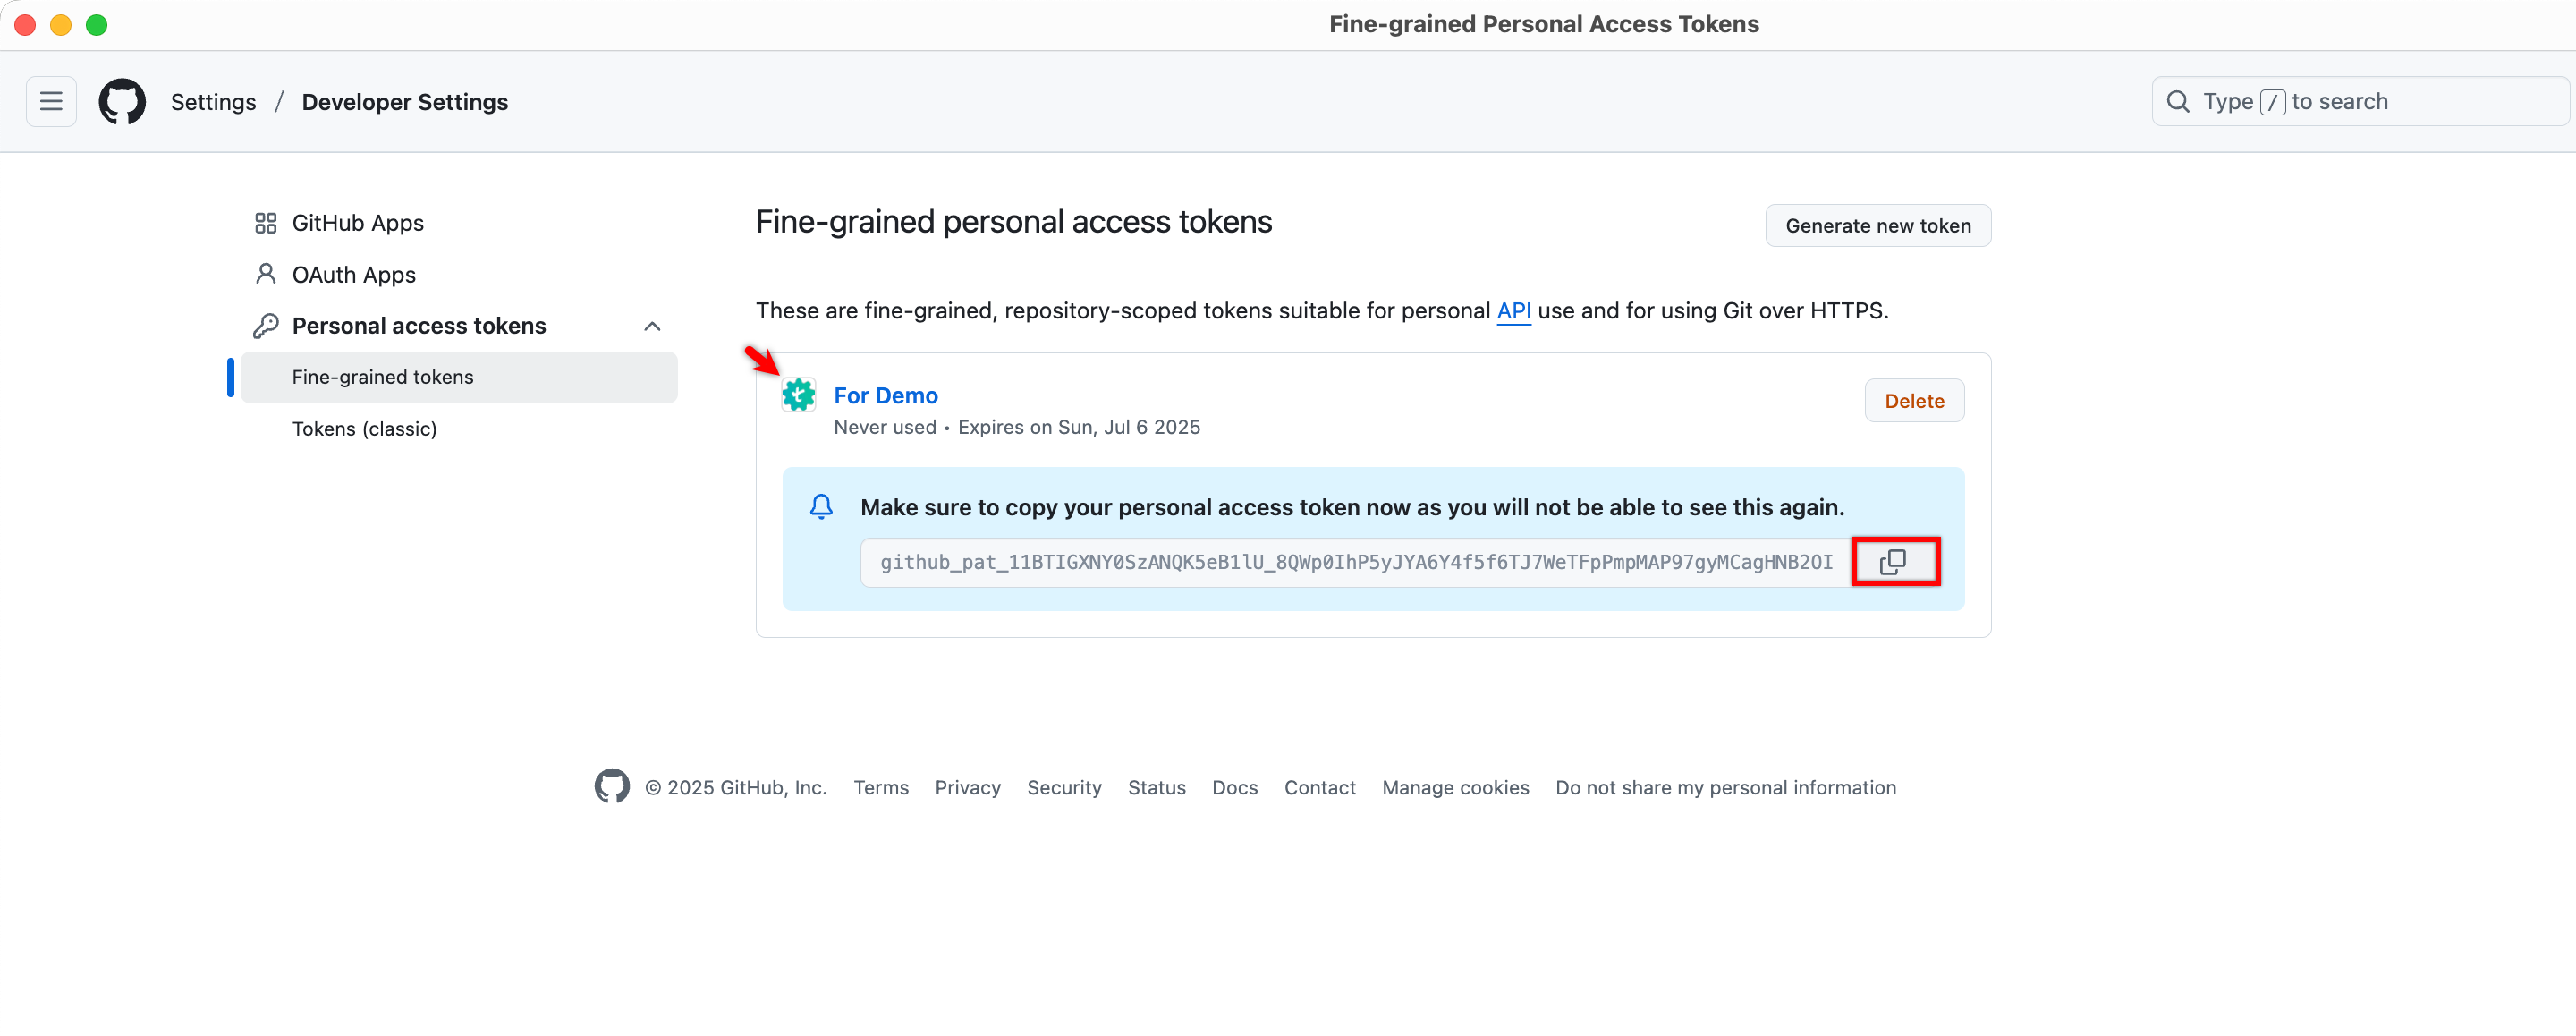
- Under Developer settings, click Personal access tokens, and then select Fine-grained tokens.
- Click Generate new token.
-
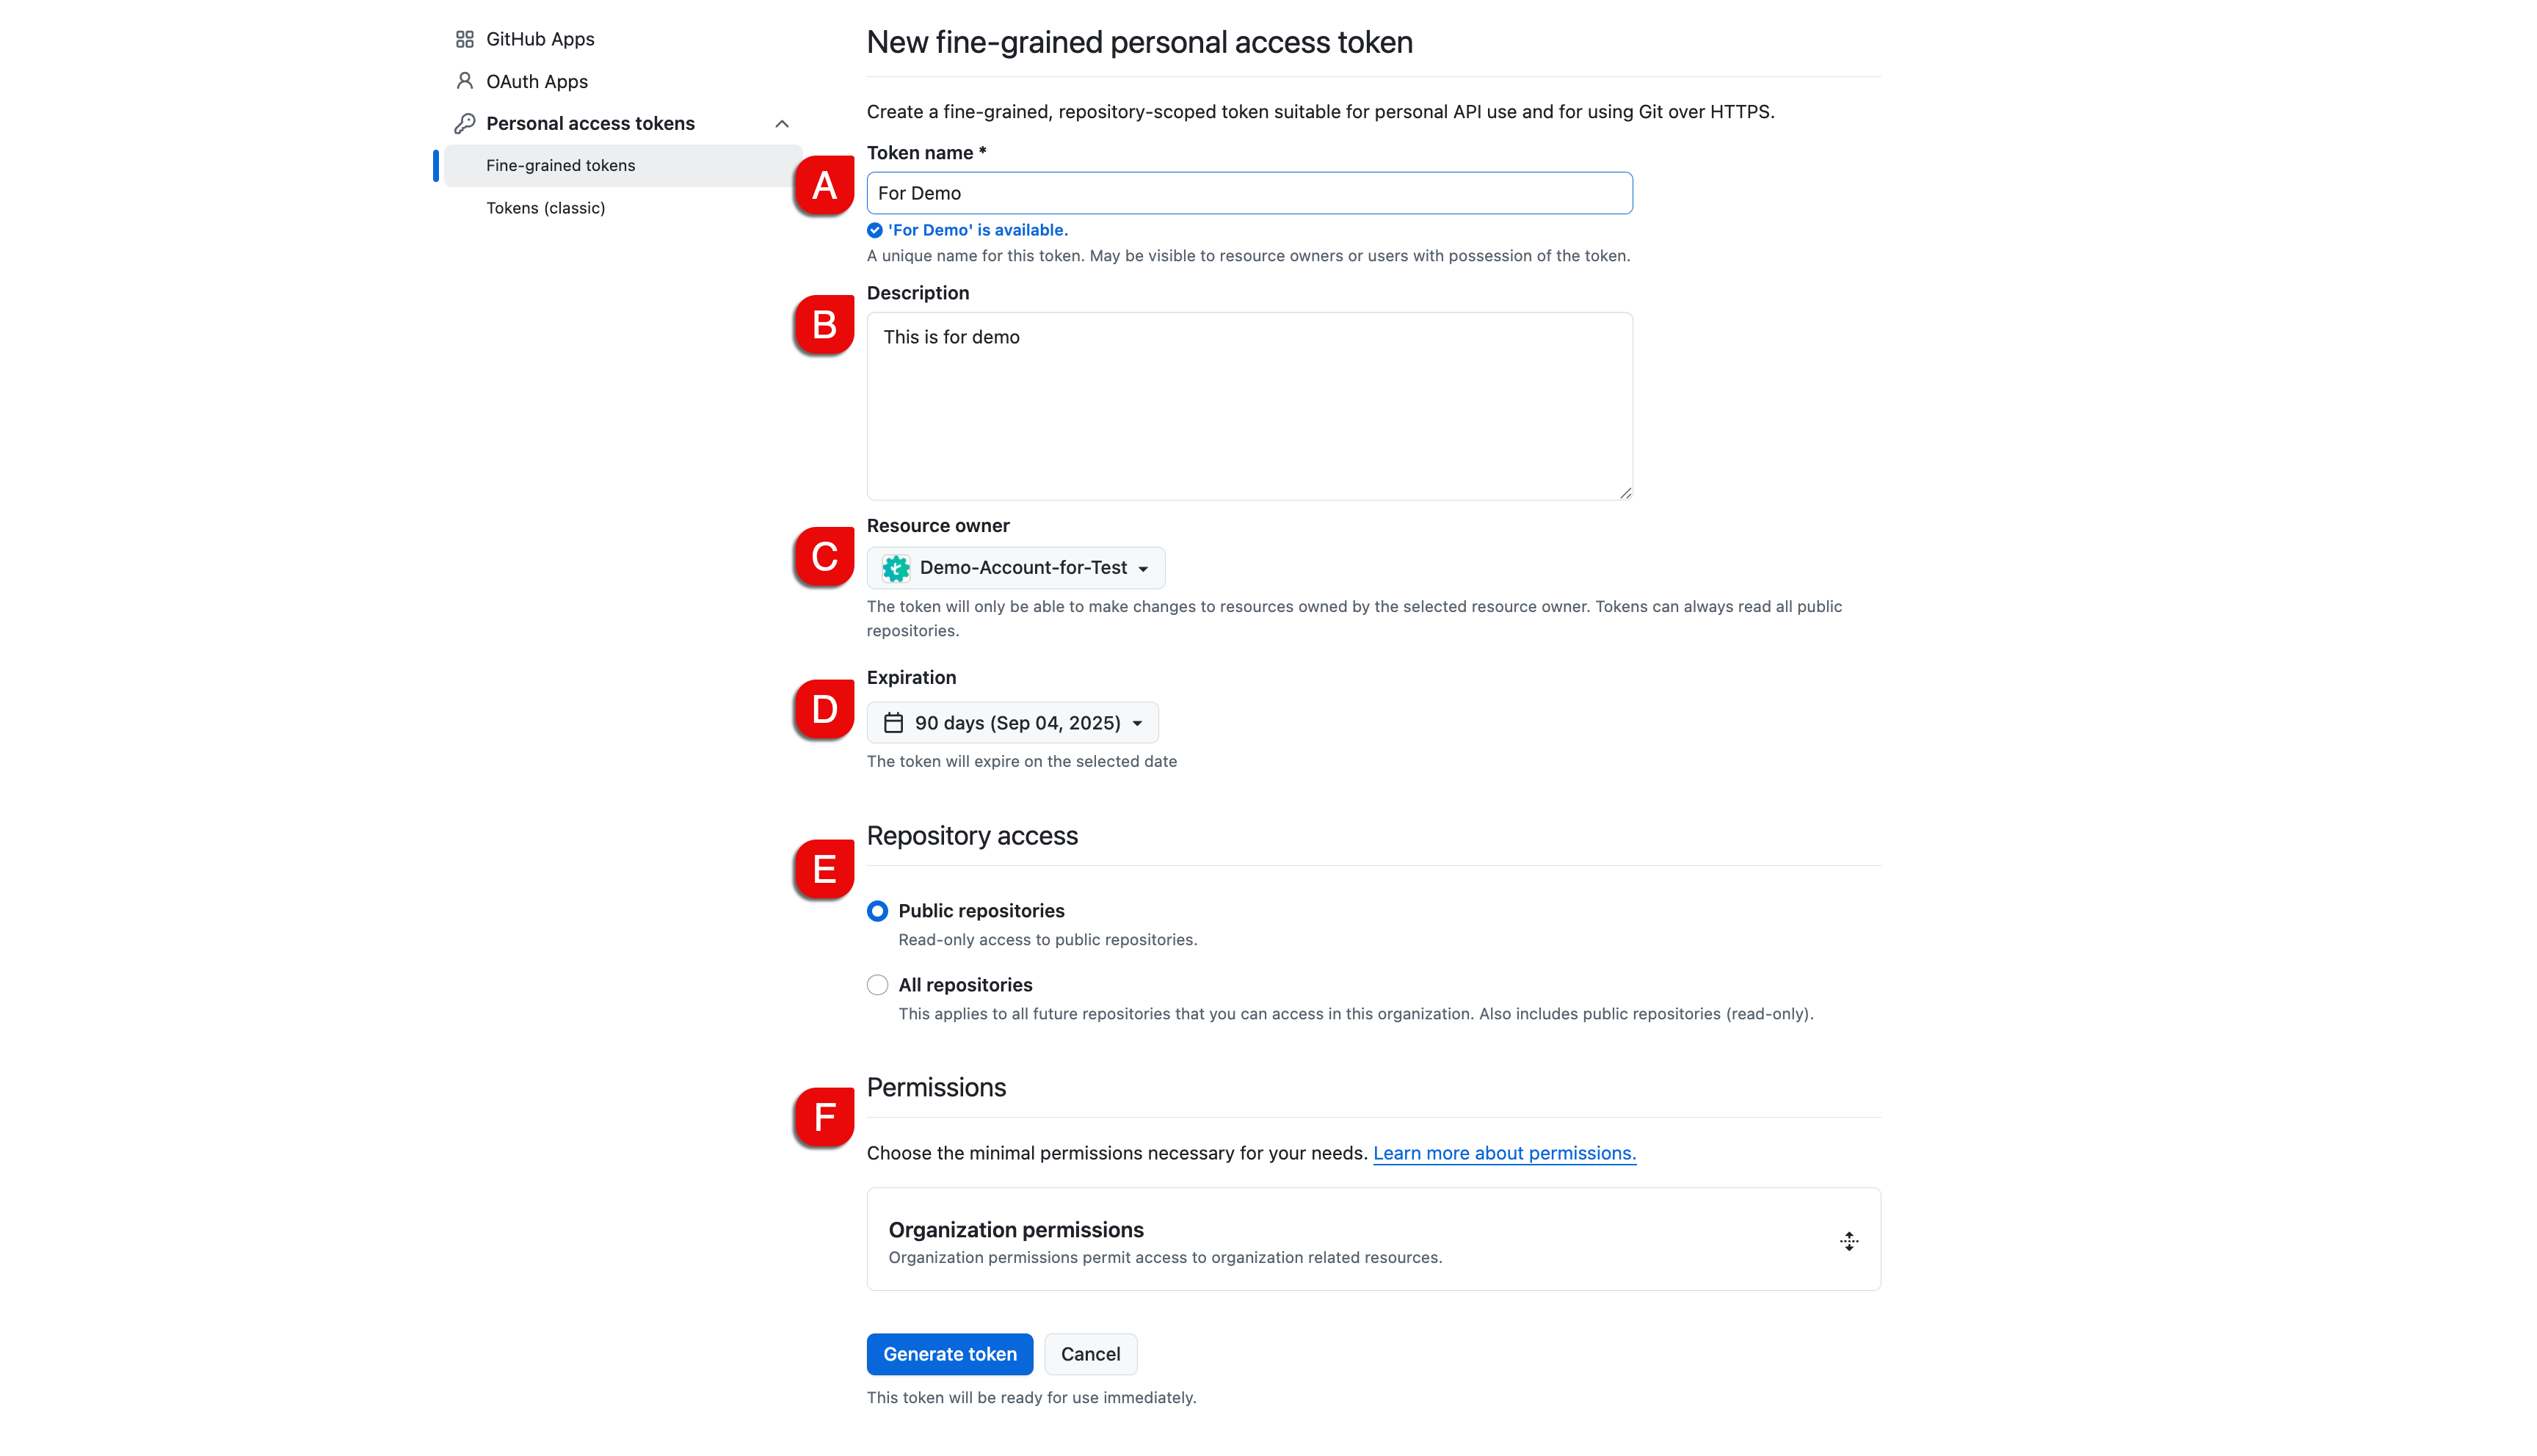
On the New fine-grained personal access token page, configure the following:
A. In the Token name field, enter a name for the token.
B. (Optional) In the Description field, enter the token's purpose.
C. Under Resource owner, select your organization.
D. Under Expiration, choose the desired validity period.
E. Under Repository access, select one of the following options:
- Public repositories: to grant access only to public repositories.
- All repositories: to grant access to all current and future repositories.
F. Under Permissions, configure the required repository & organization permissions.
- Public repositories: to grant access only to public repositories.
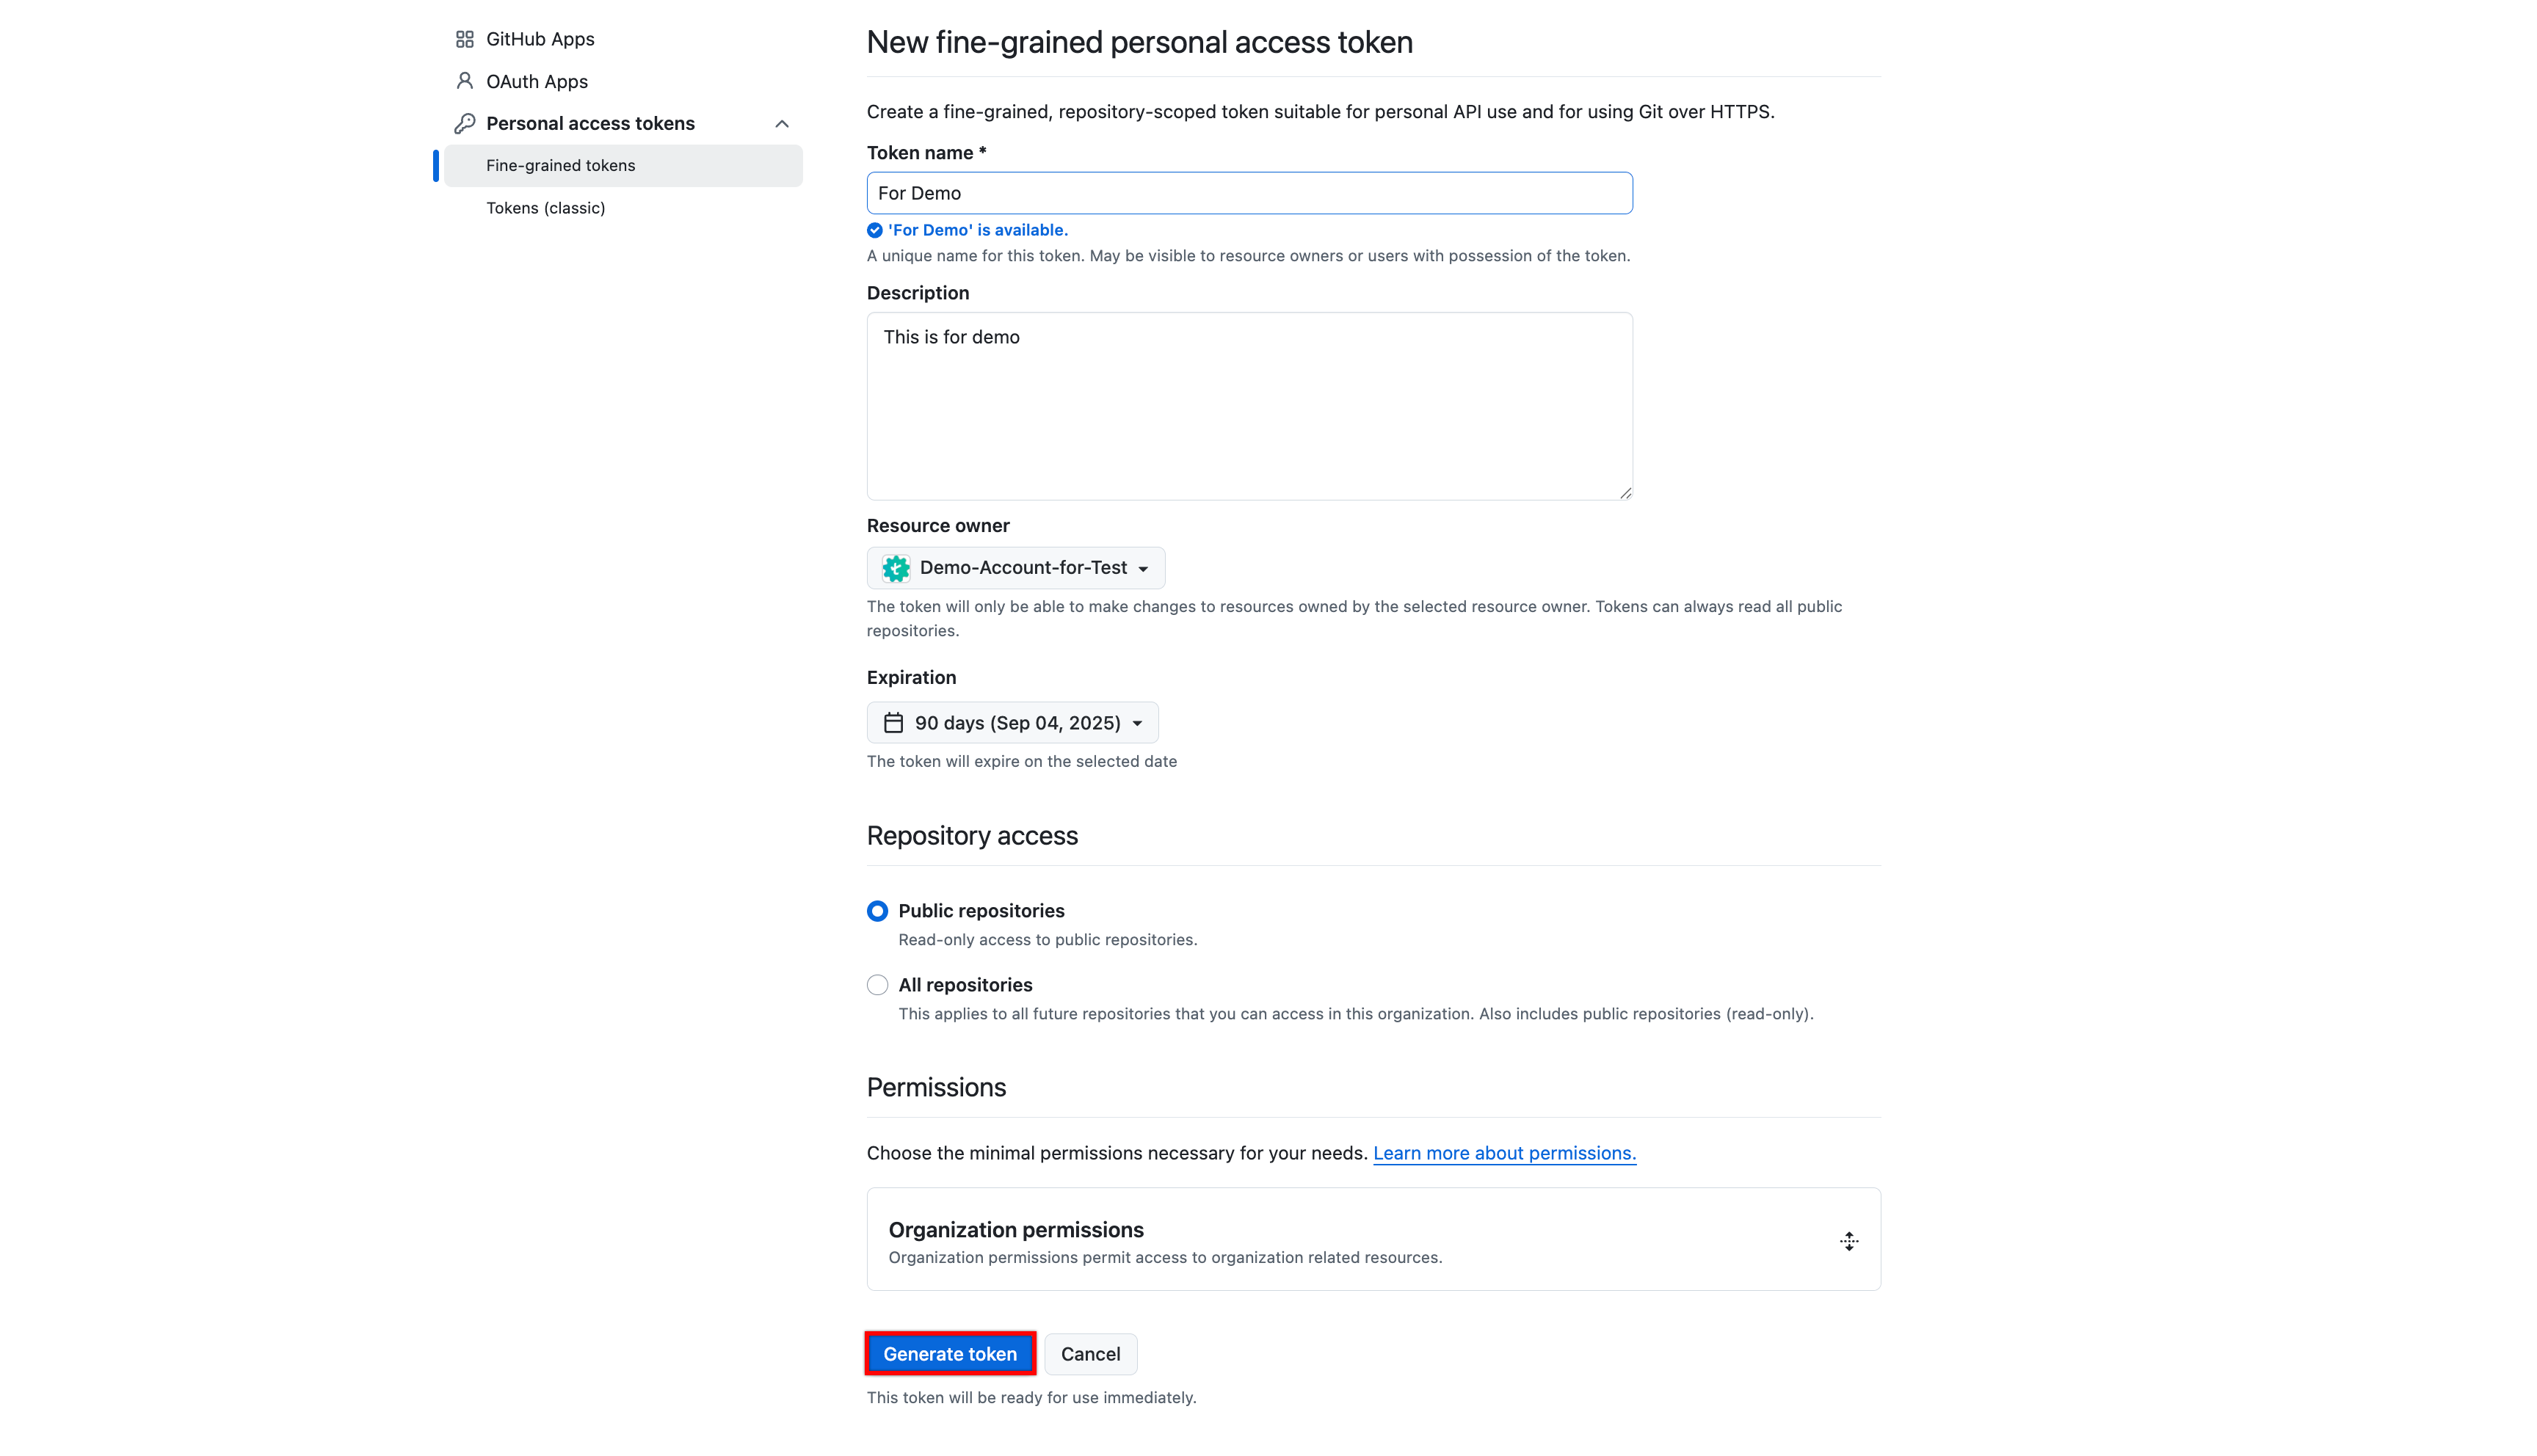
- Click Generate token.
- In the New personal access token dialog, click Generate token.
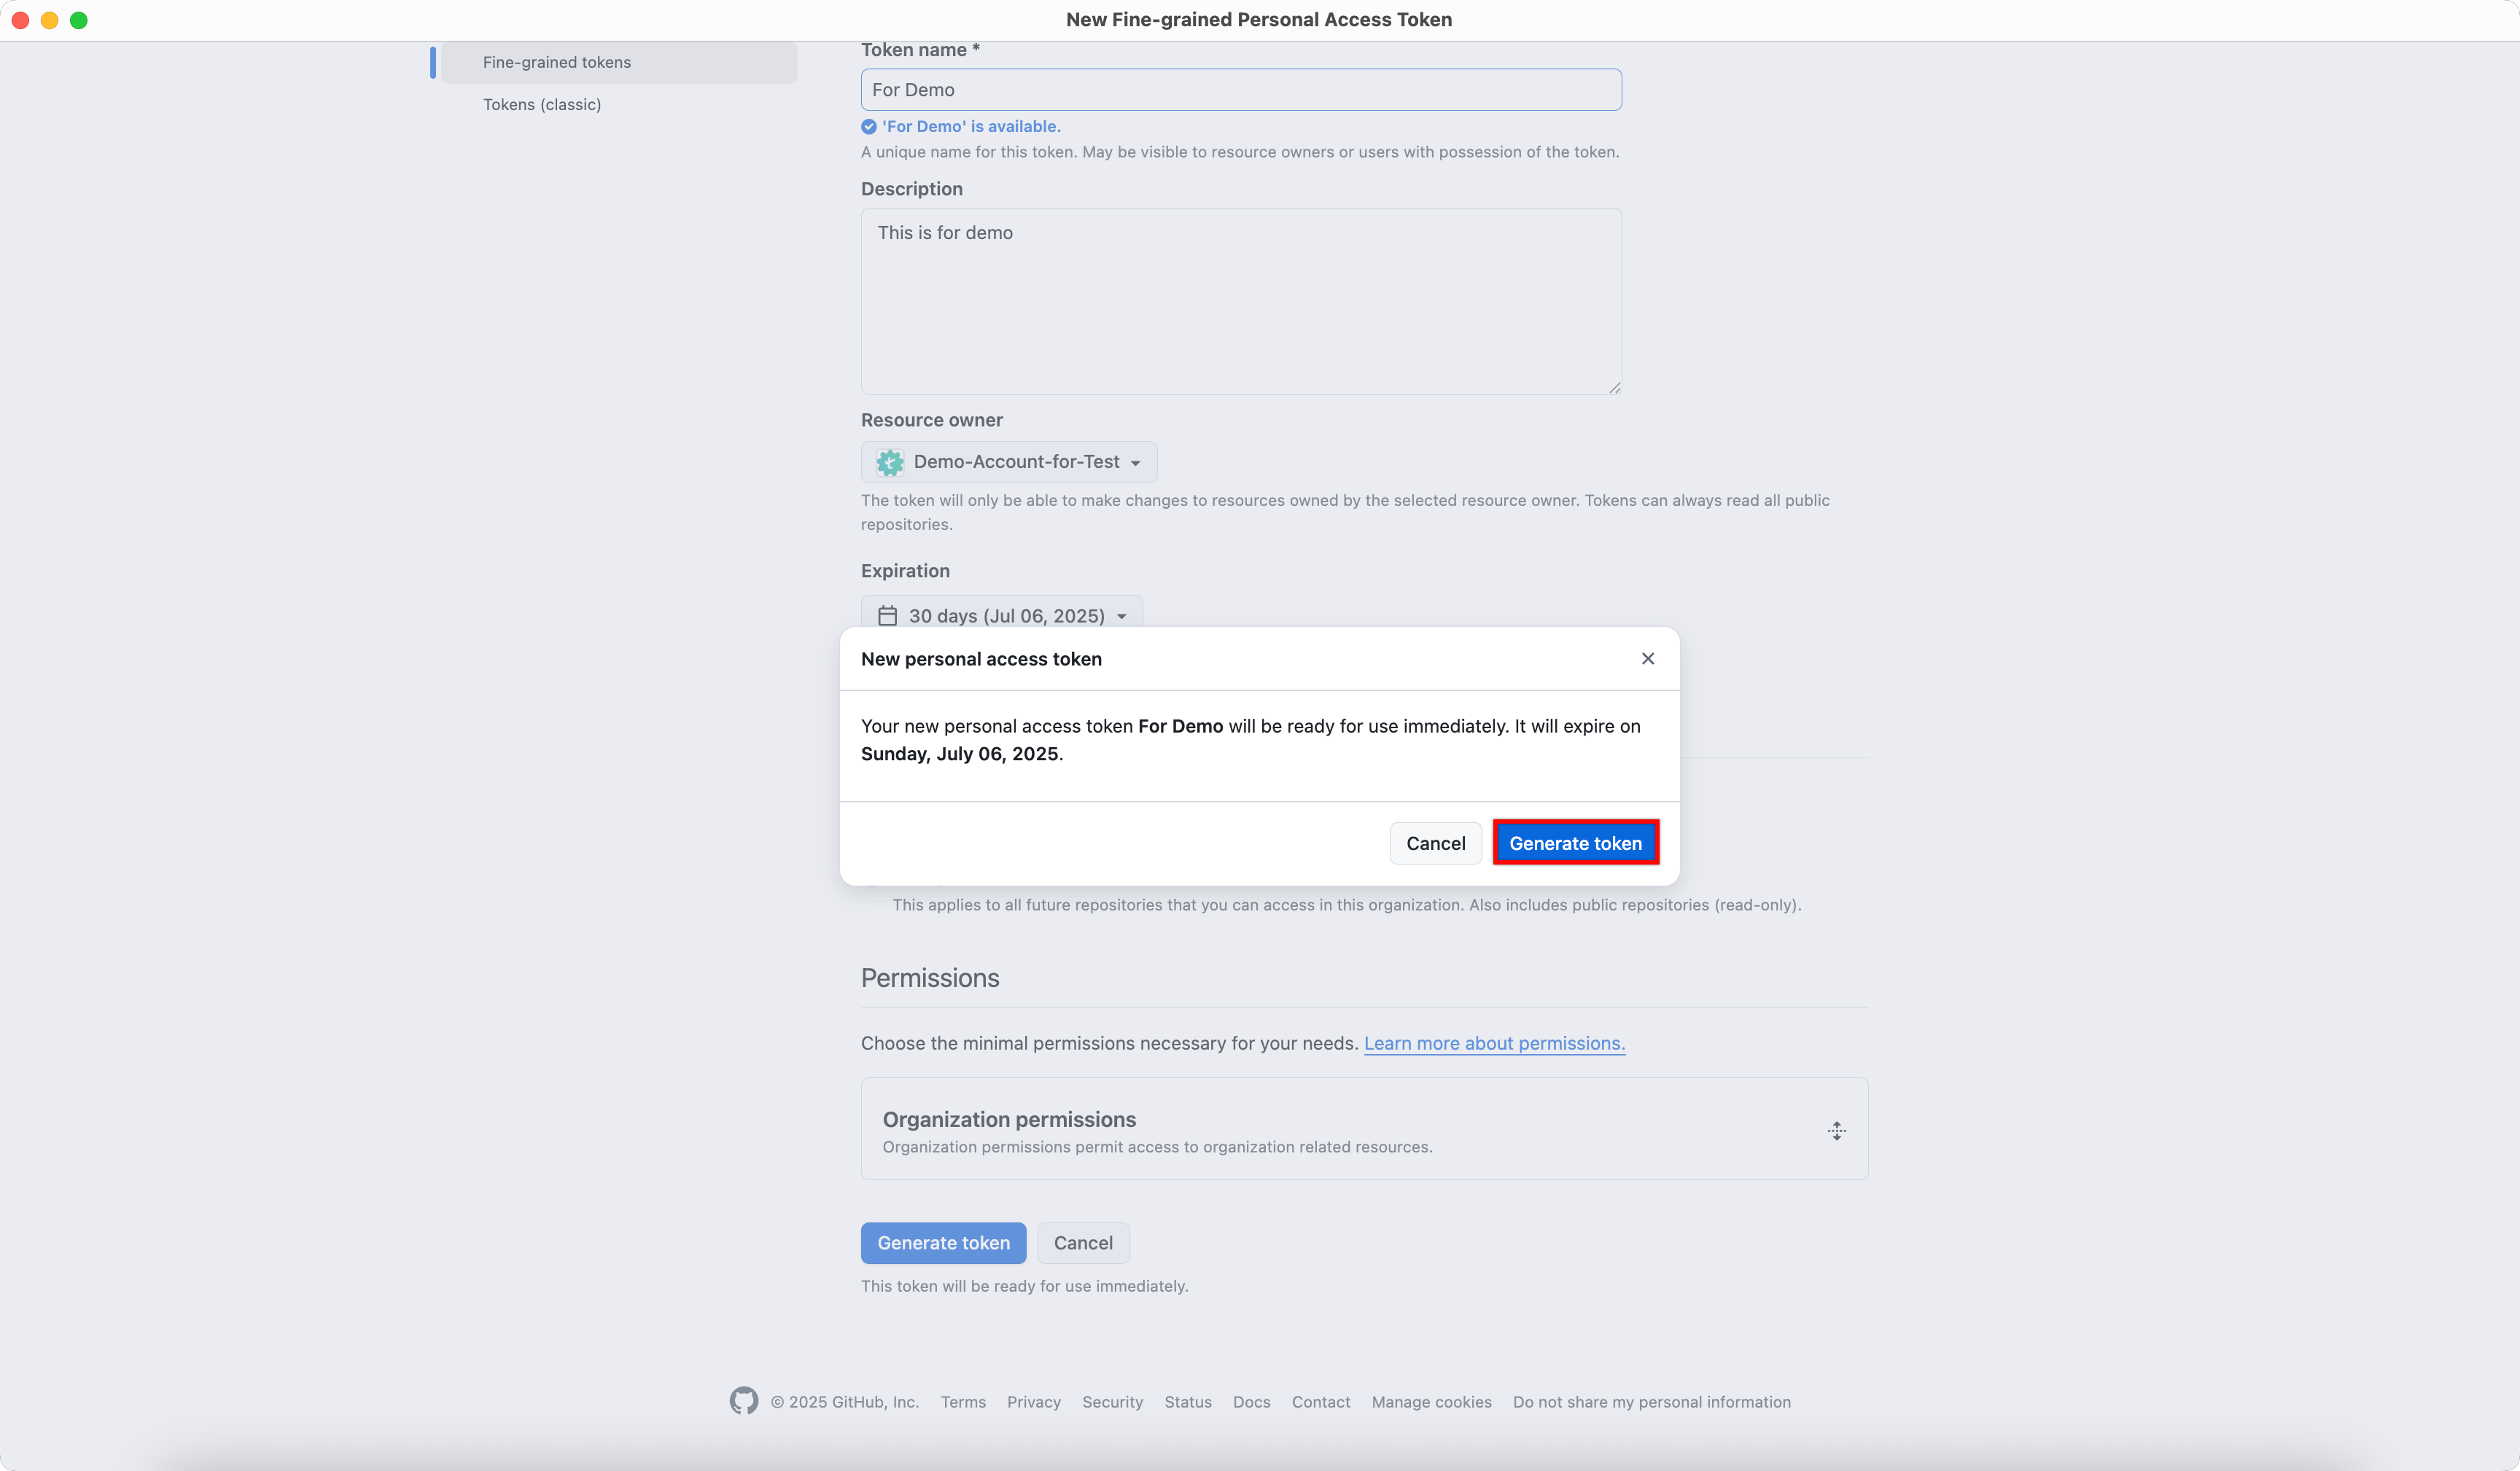
- Click Copy and securely store the generated token.
- Enter the generated Personal Access Token and Resource Owner, click Save & Enable.
Want to contribute or report missing content?