- salesforce testing
 Intro: Testsigma for Salesforce Testing
- Creating a Connected App
- Creating a Salesforce Project
- Test Salesforce Connection
- Creating Metadata Connections
- Adding User Connections
- Build Test Cases: Manual+Live
- Salesforce Element Repositories
- Intro: Testsigma Special NLPs
- SOQL as Test Step
- Query Builder for Salesforce Testing
- Automating Listview Table NLPs
- Error Handling On Metadata Refresh
Creating Metadata Connections
In Testsigma, you can create a Salesforce application and establish a Metadata connection, which enables you to perform various actions like retrieving metadata, updating configurations, creating custom objects, and managing other components that define how the application behaves. This article discusses creating a metadata connection in Testsigma.
Prerequisites
Before you begin, ensure that you have referred to:
Steps to Create Metadata Connection
- Click on Create metadata connection on Salesforce connections page.
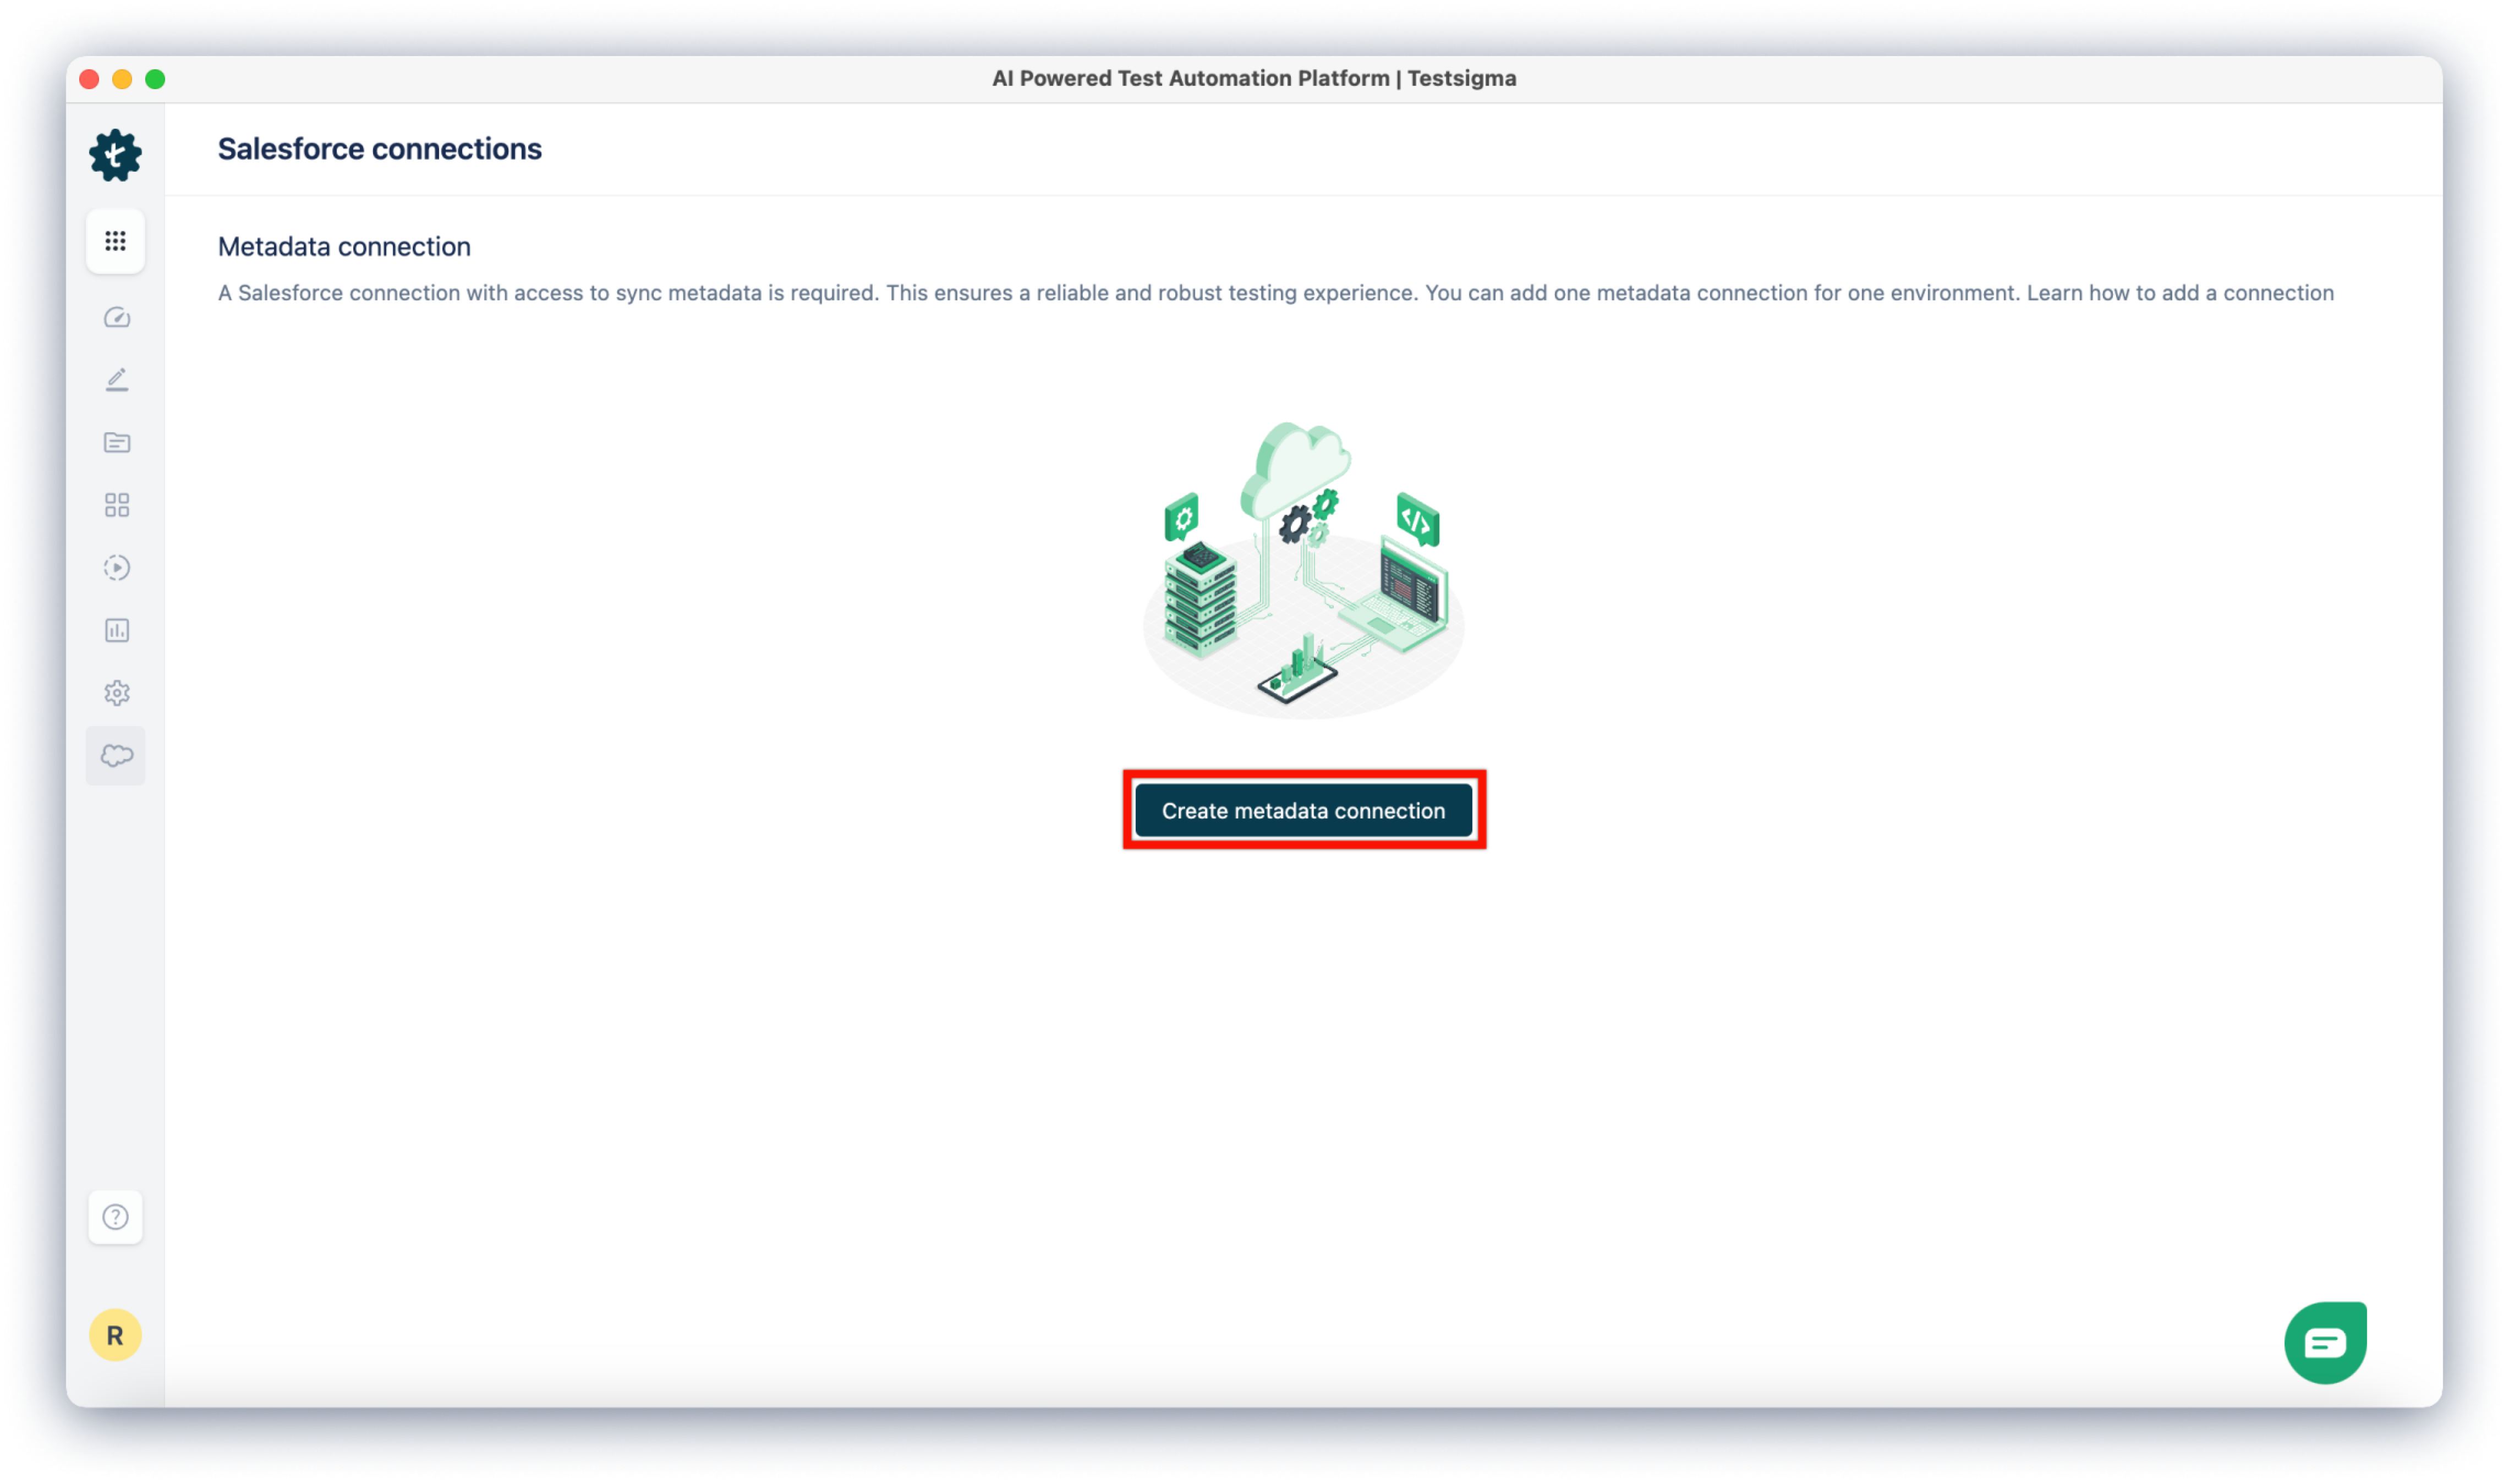
- This will open the Metadata connection prompt.
-
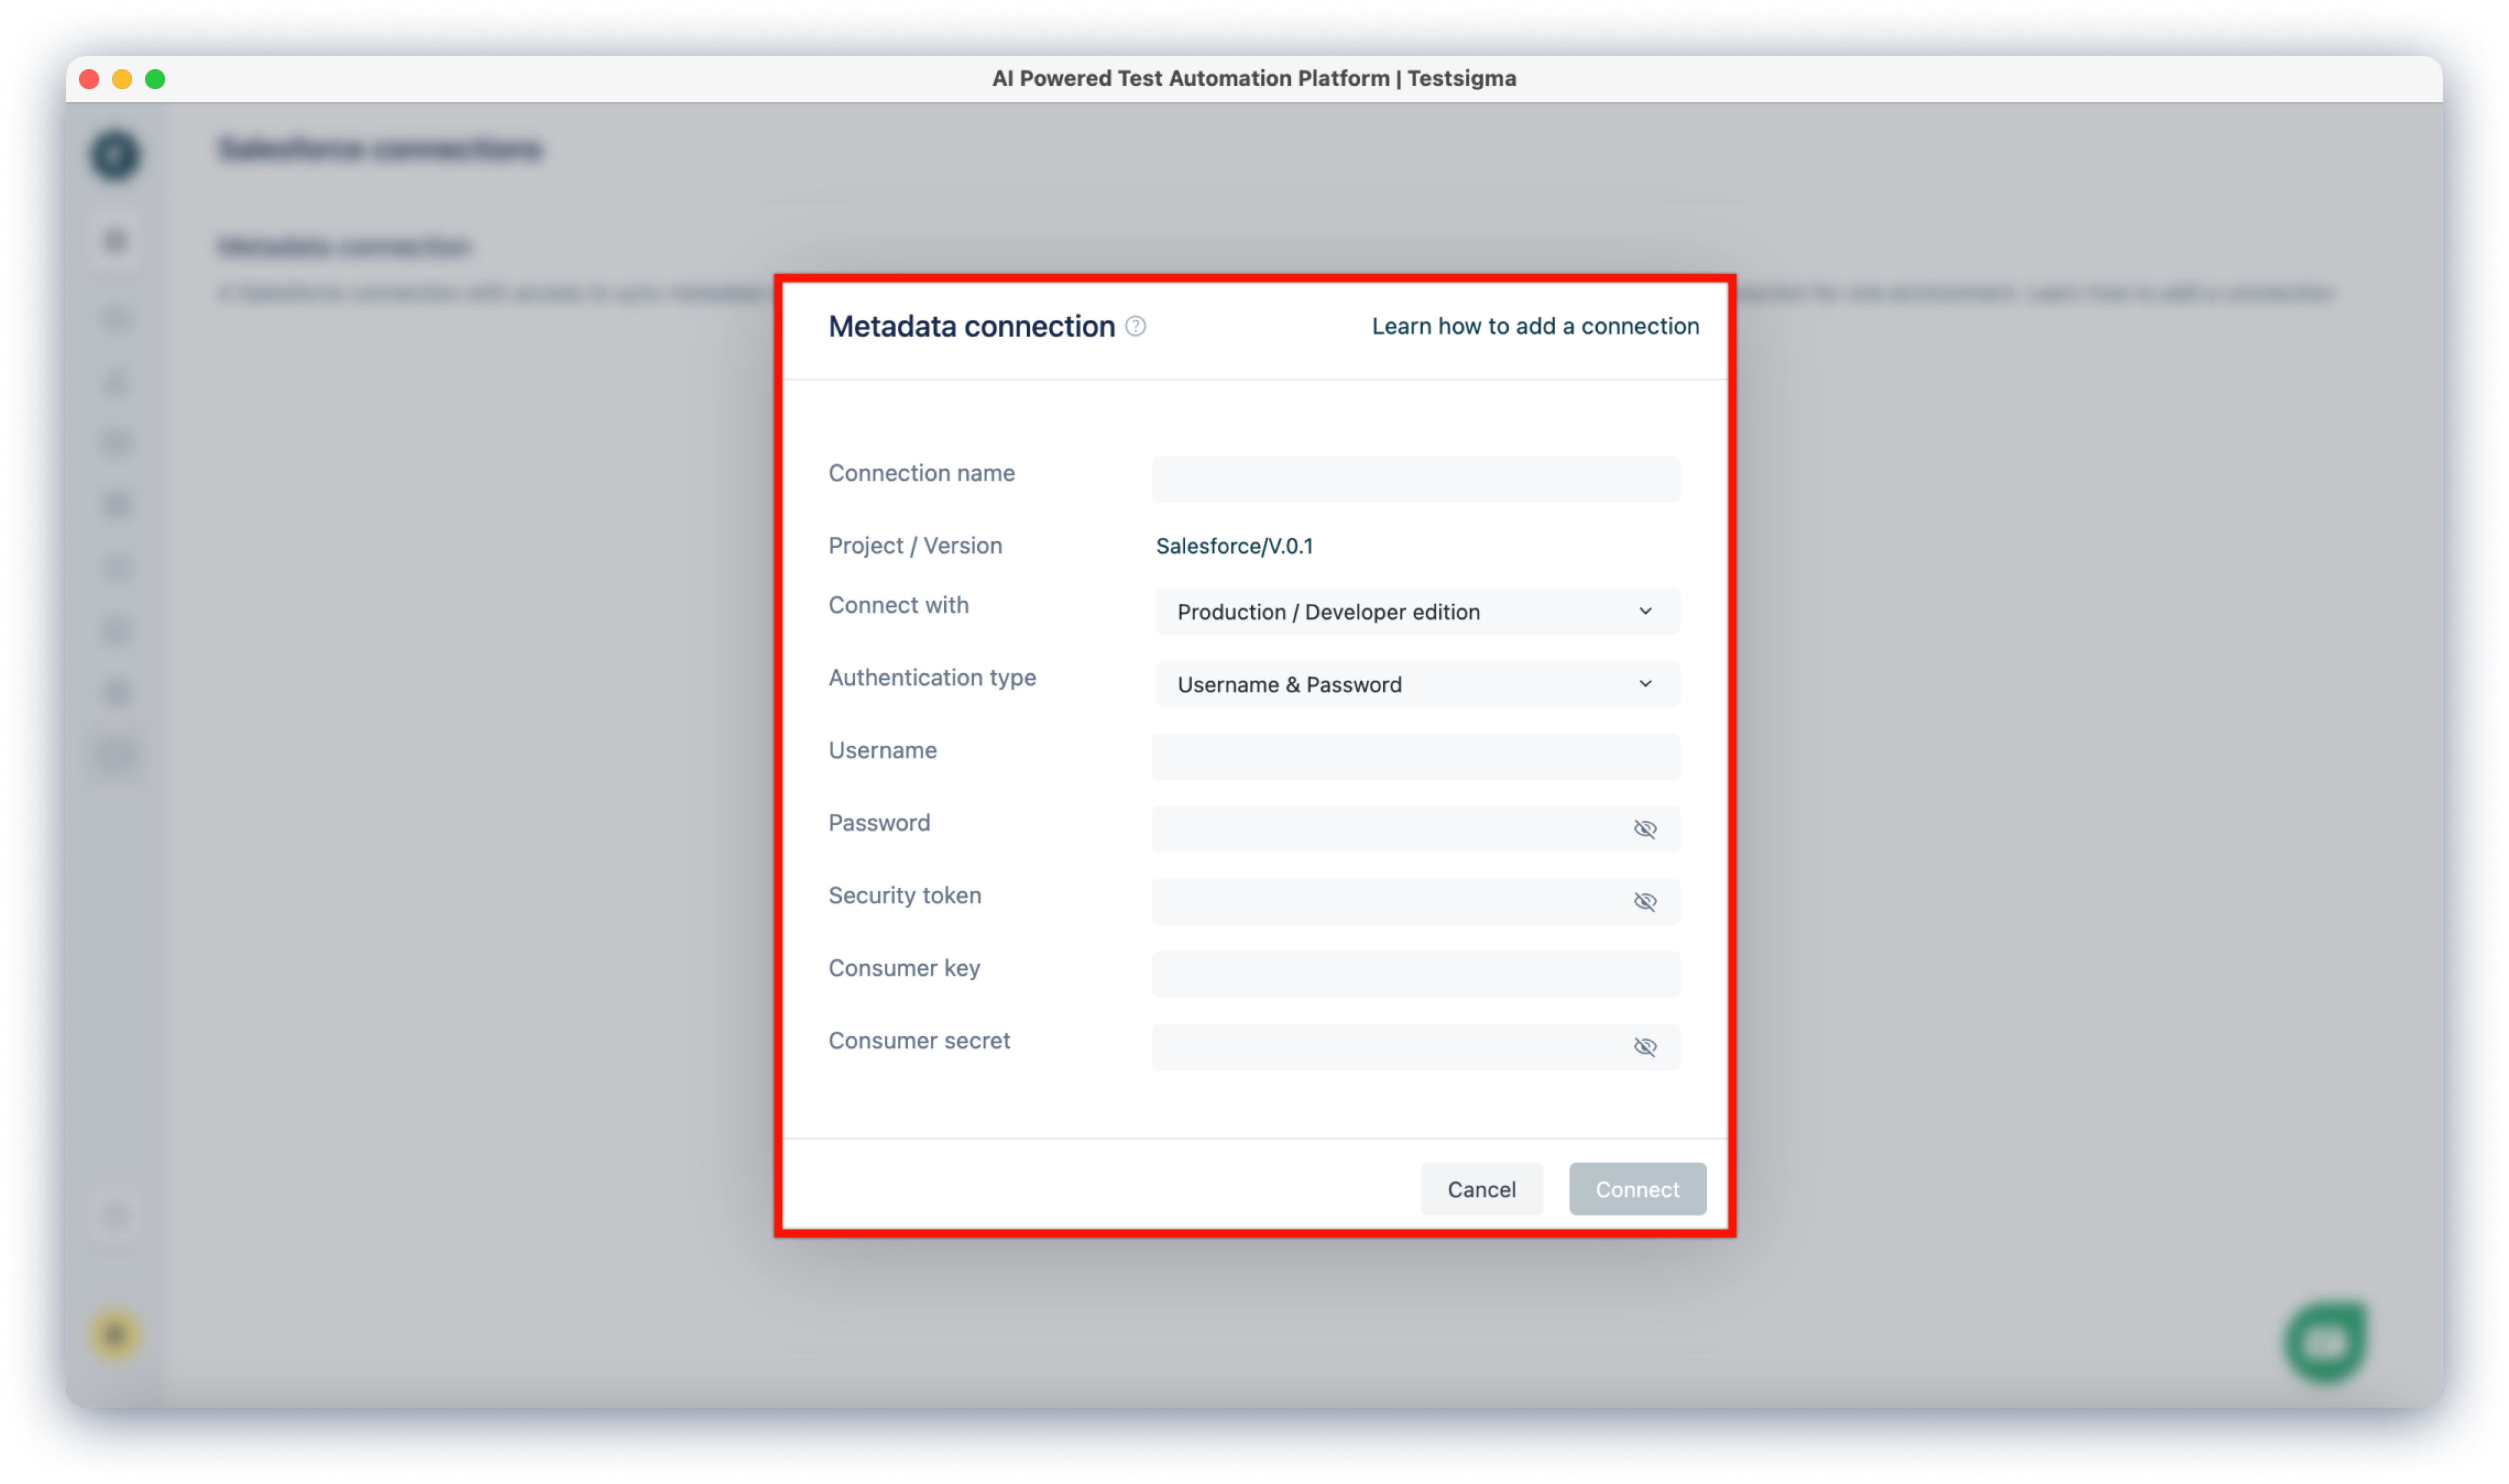
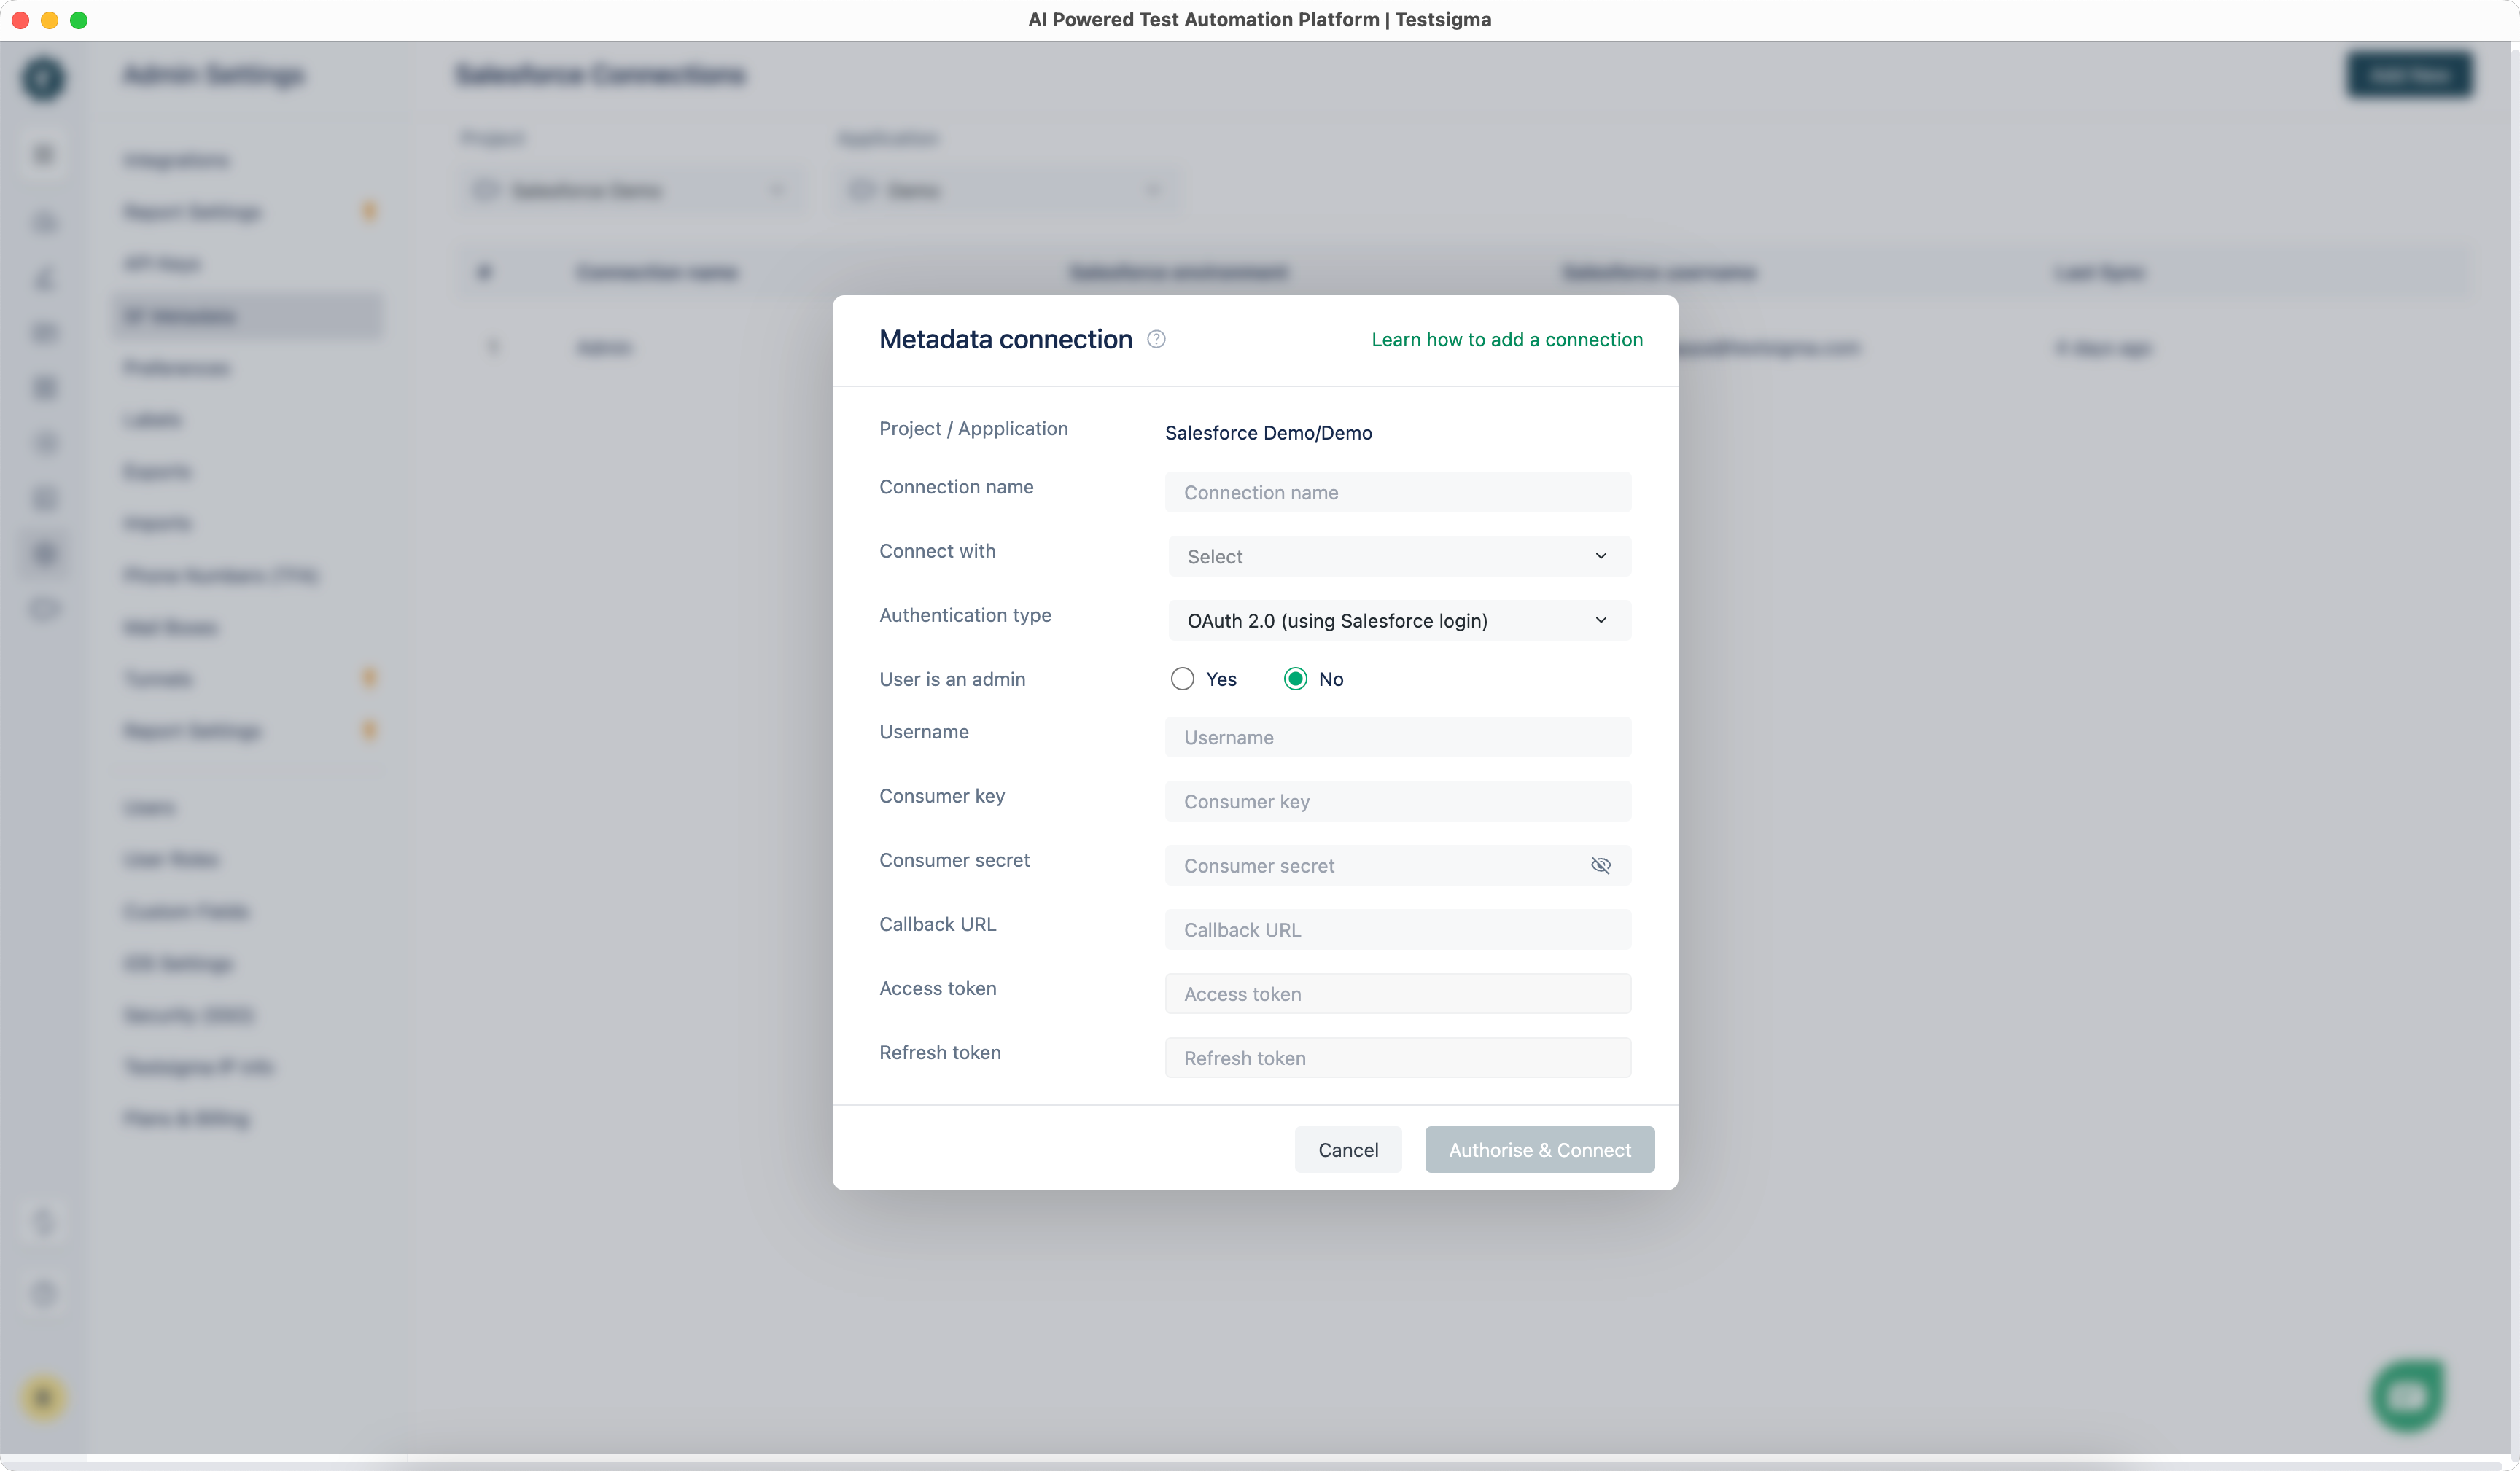
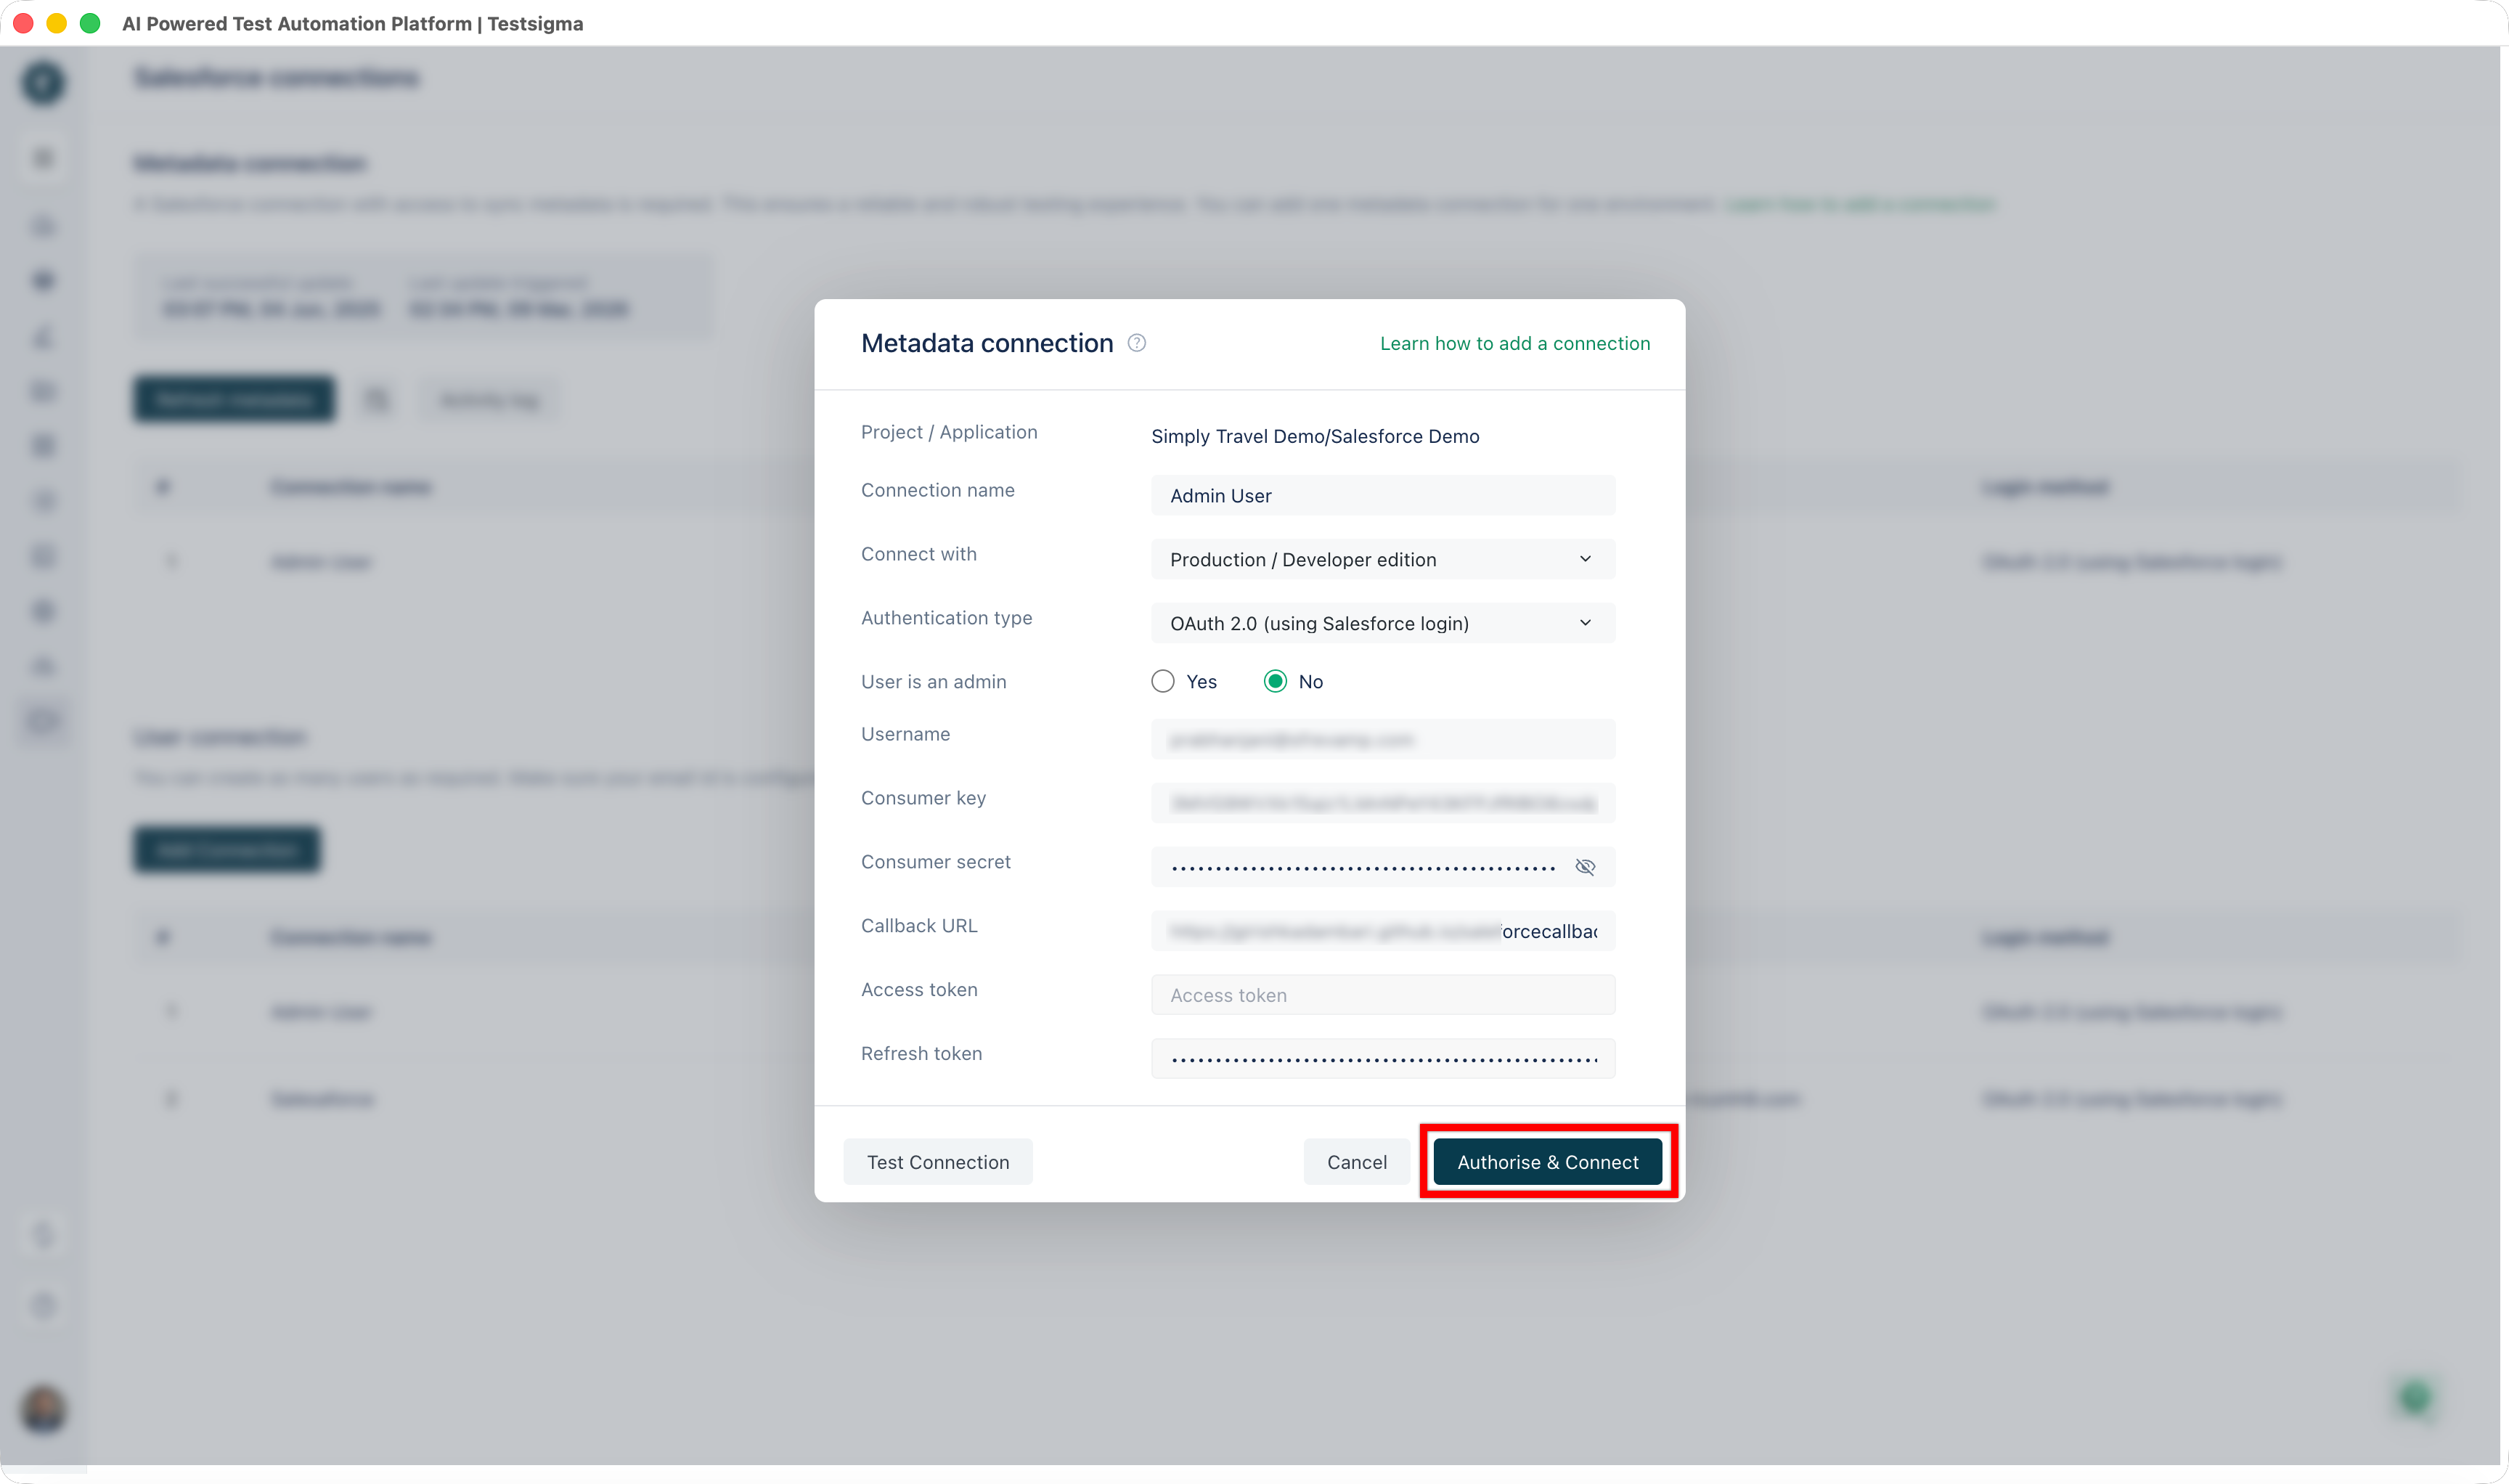
On Metadata connection prompt,
-
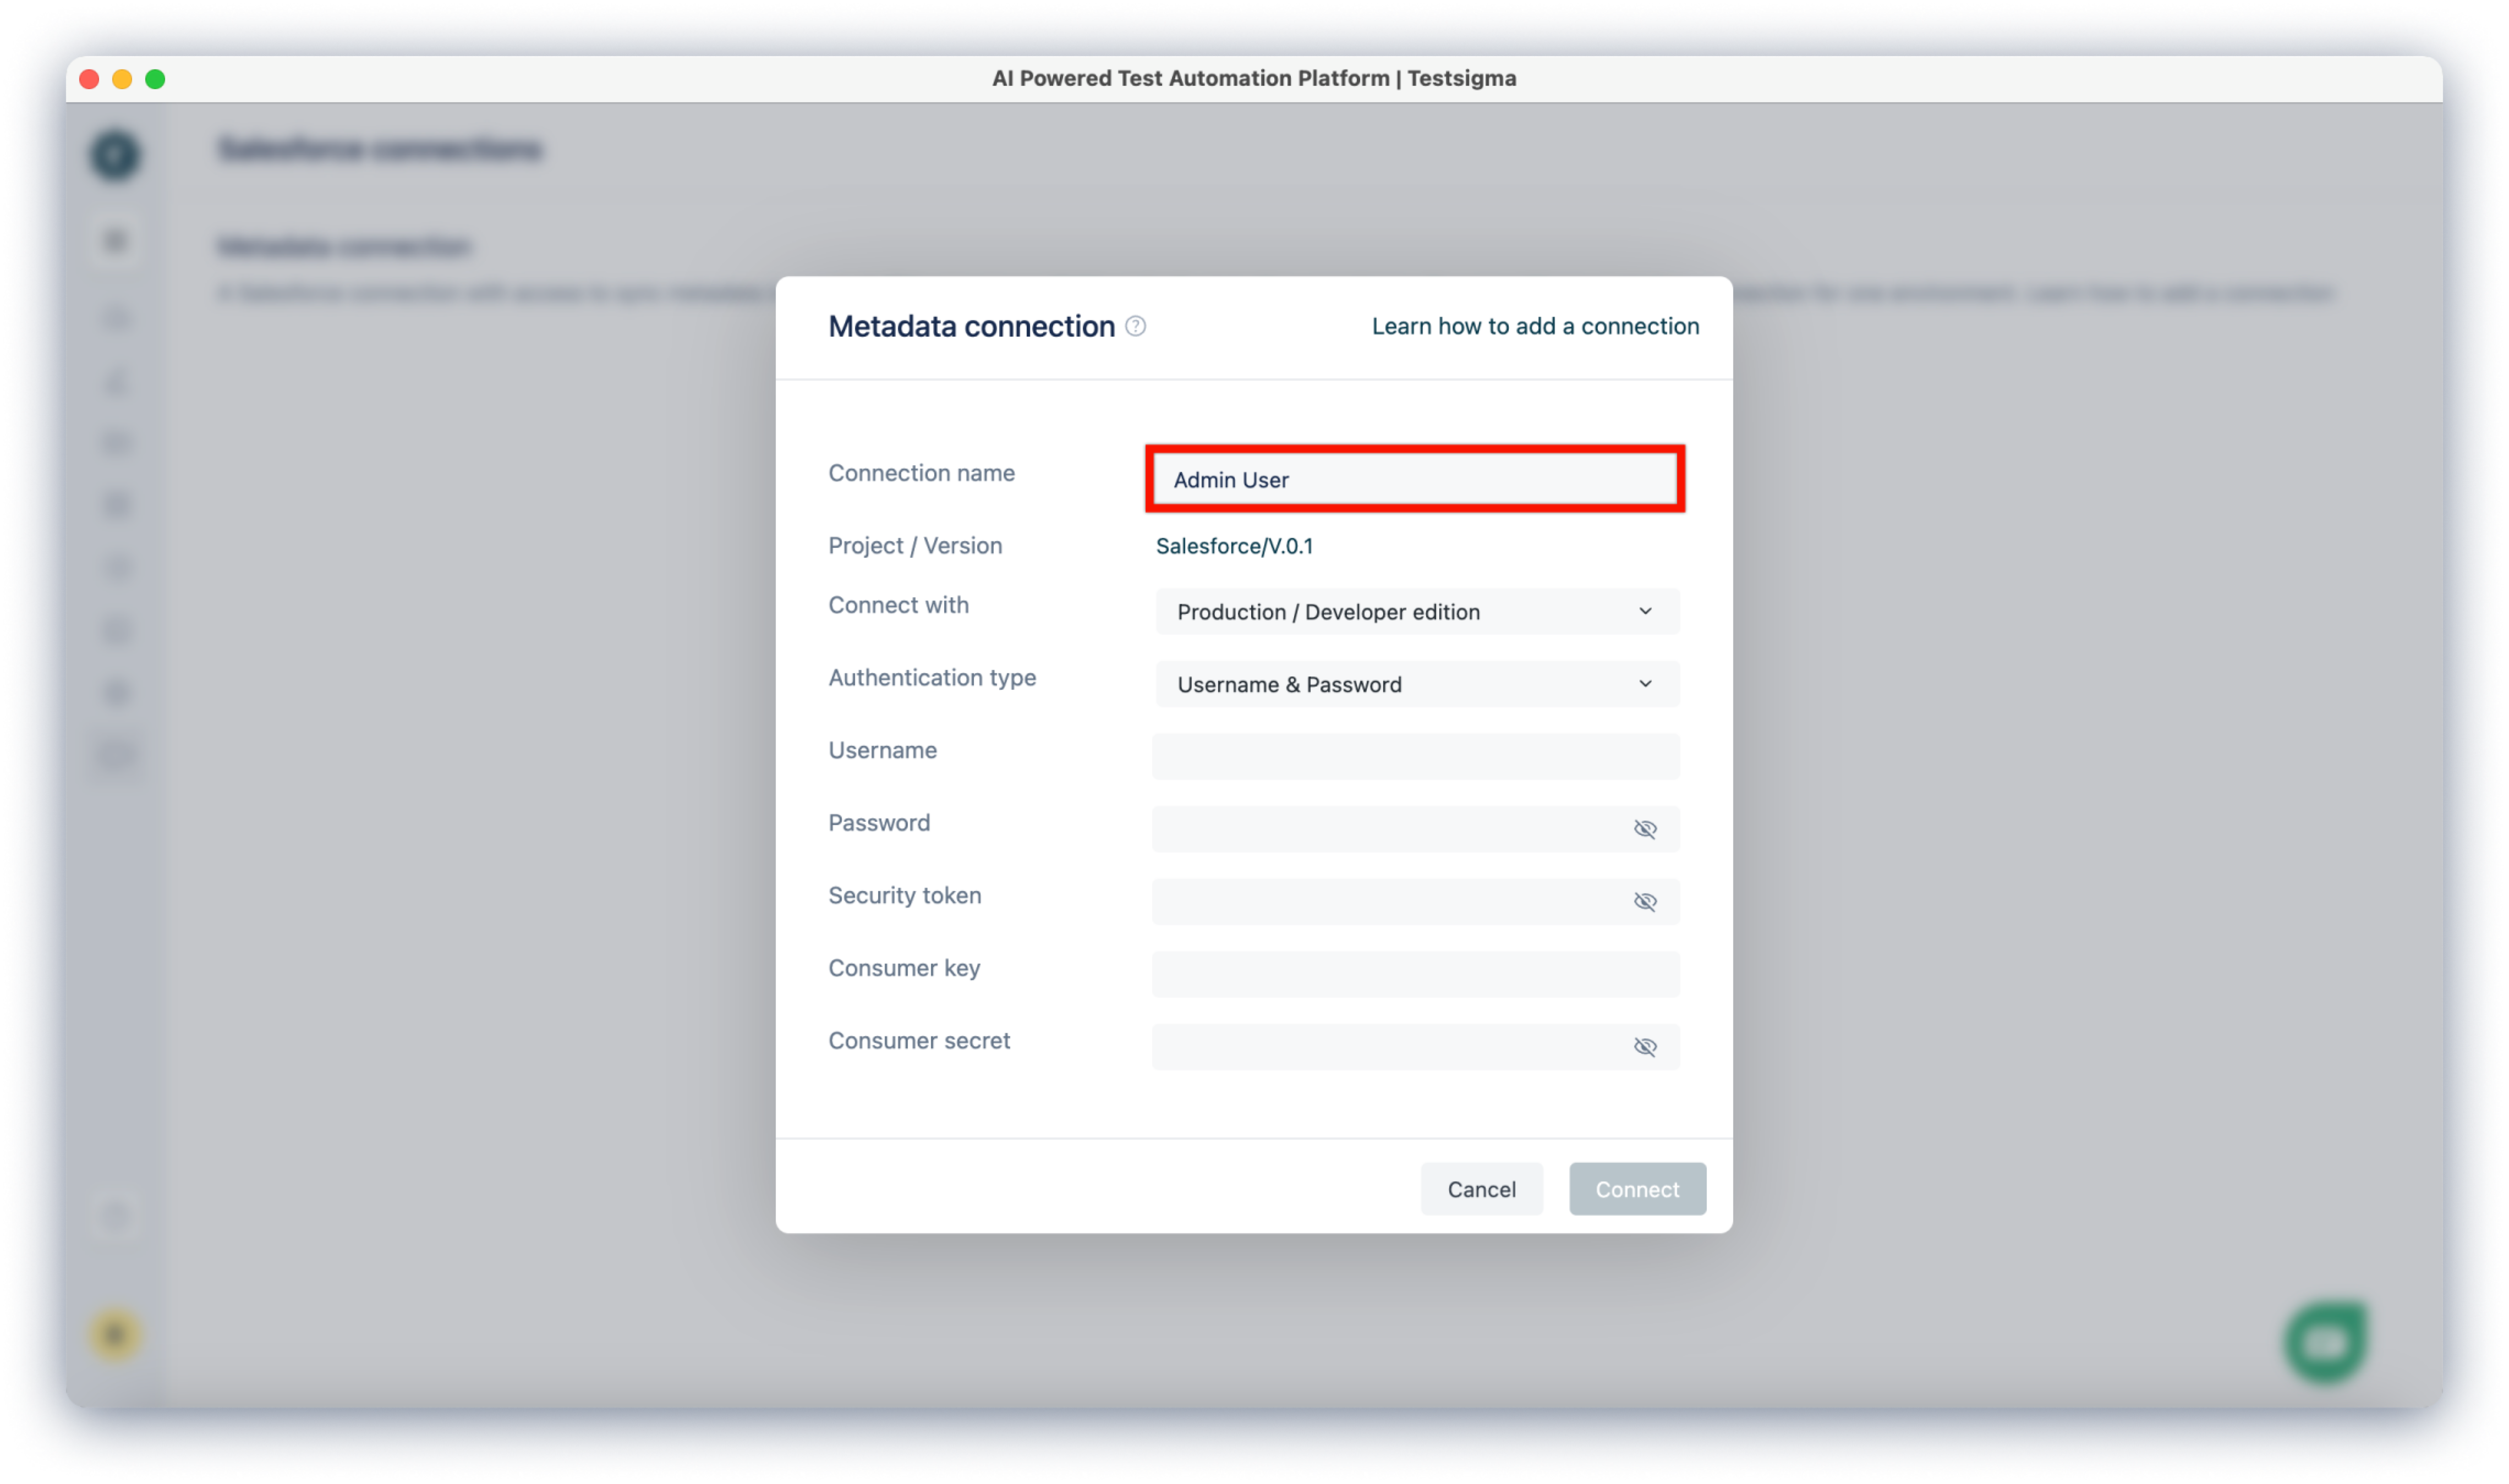
Enter Connection name, which is generally the user role you connect through, e.g., Admin.
 NOTE:
NOTE:You can also choose a custom name for the connection.
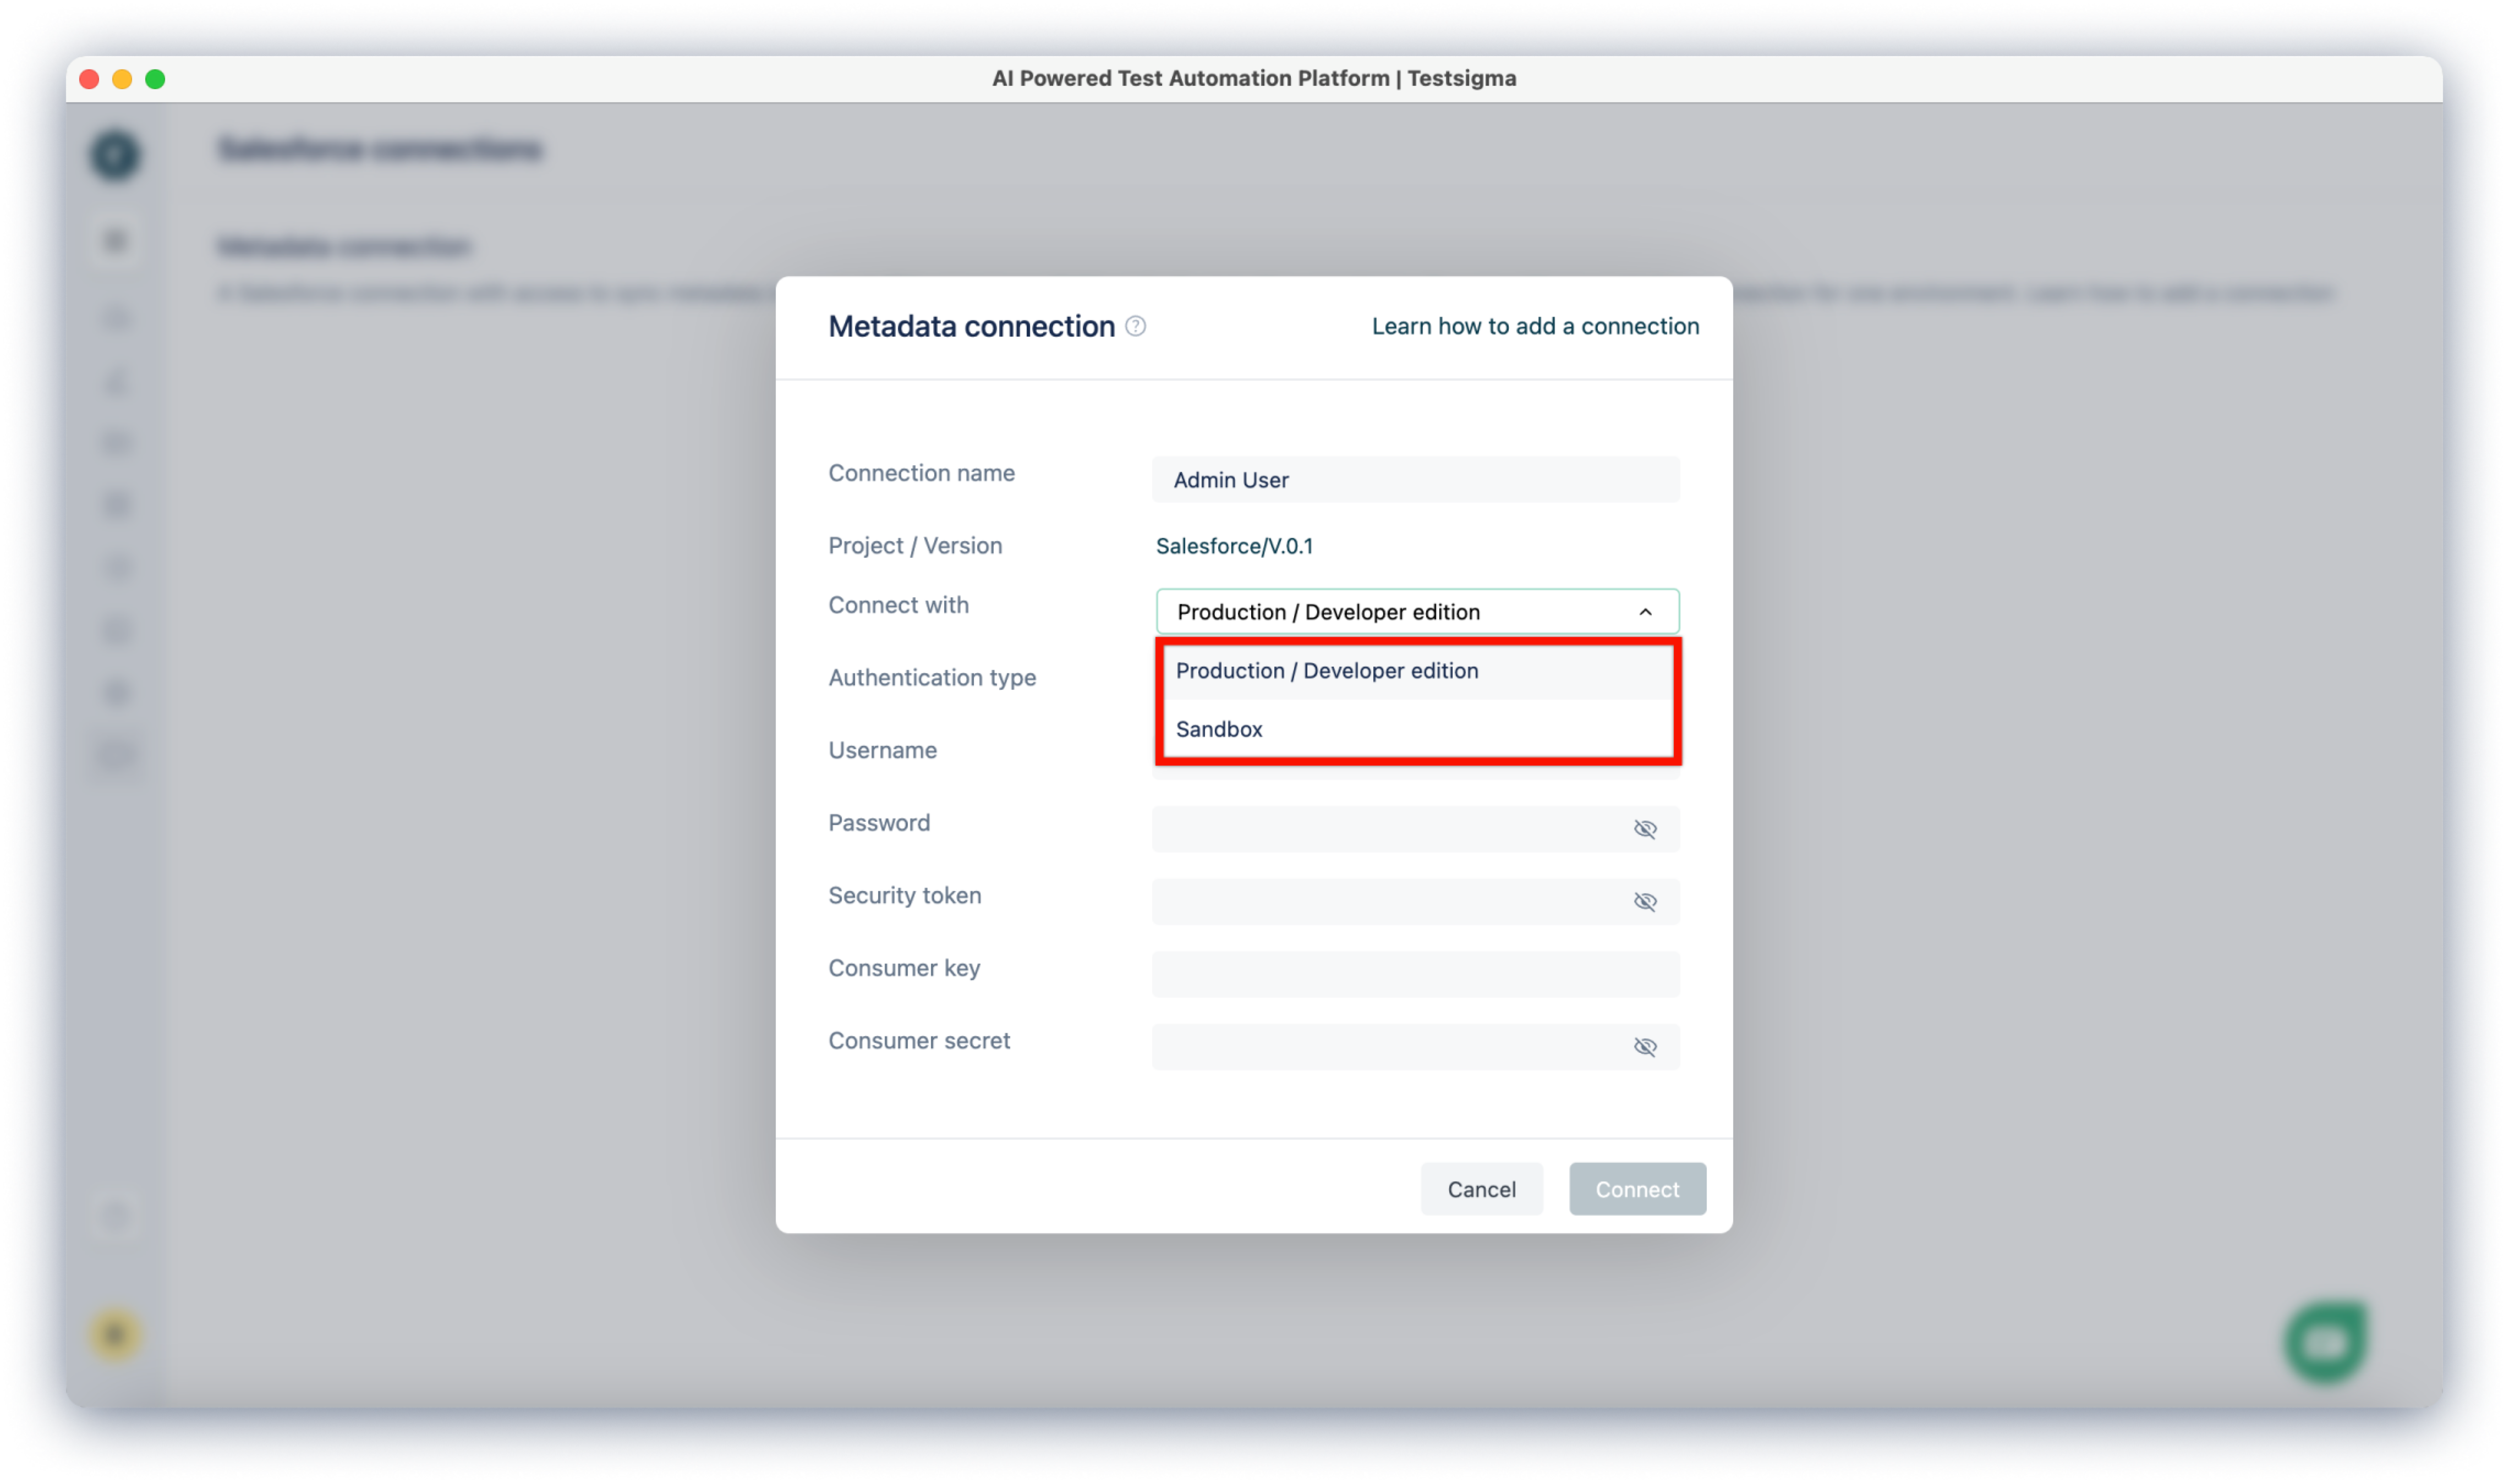
- Choose the Production / Developer edition, if you’re testing the product environment or Sandbox, if you’re testing the staging environment from Connect with dropdown.
-
Choose the Authentication type from the dropdown. In this example, we are choosing OAuth 2.0.
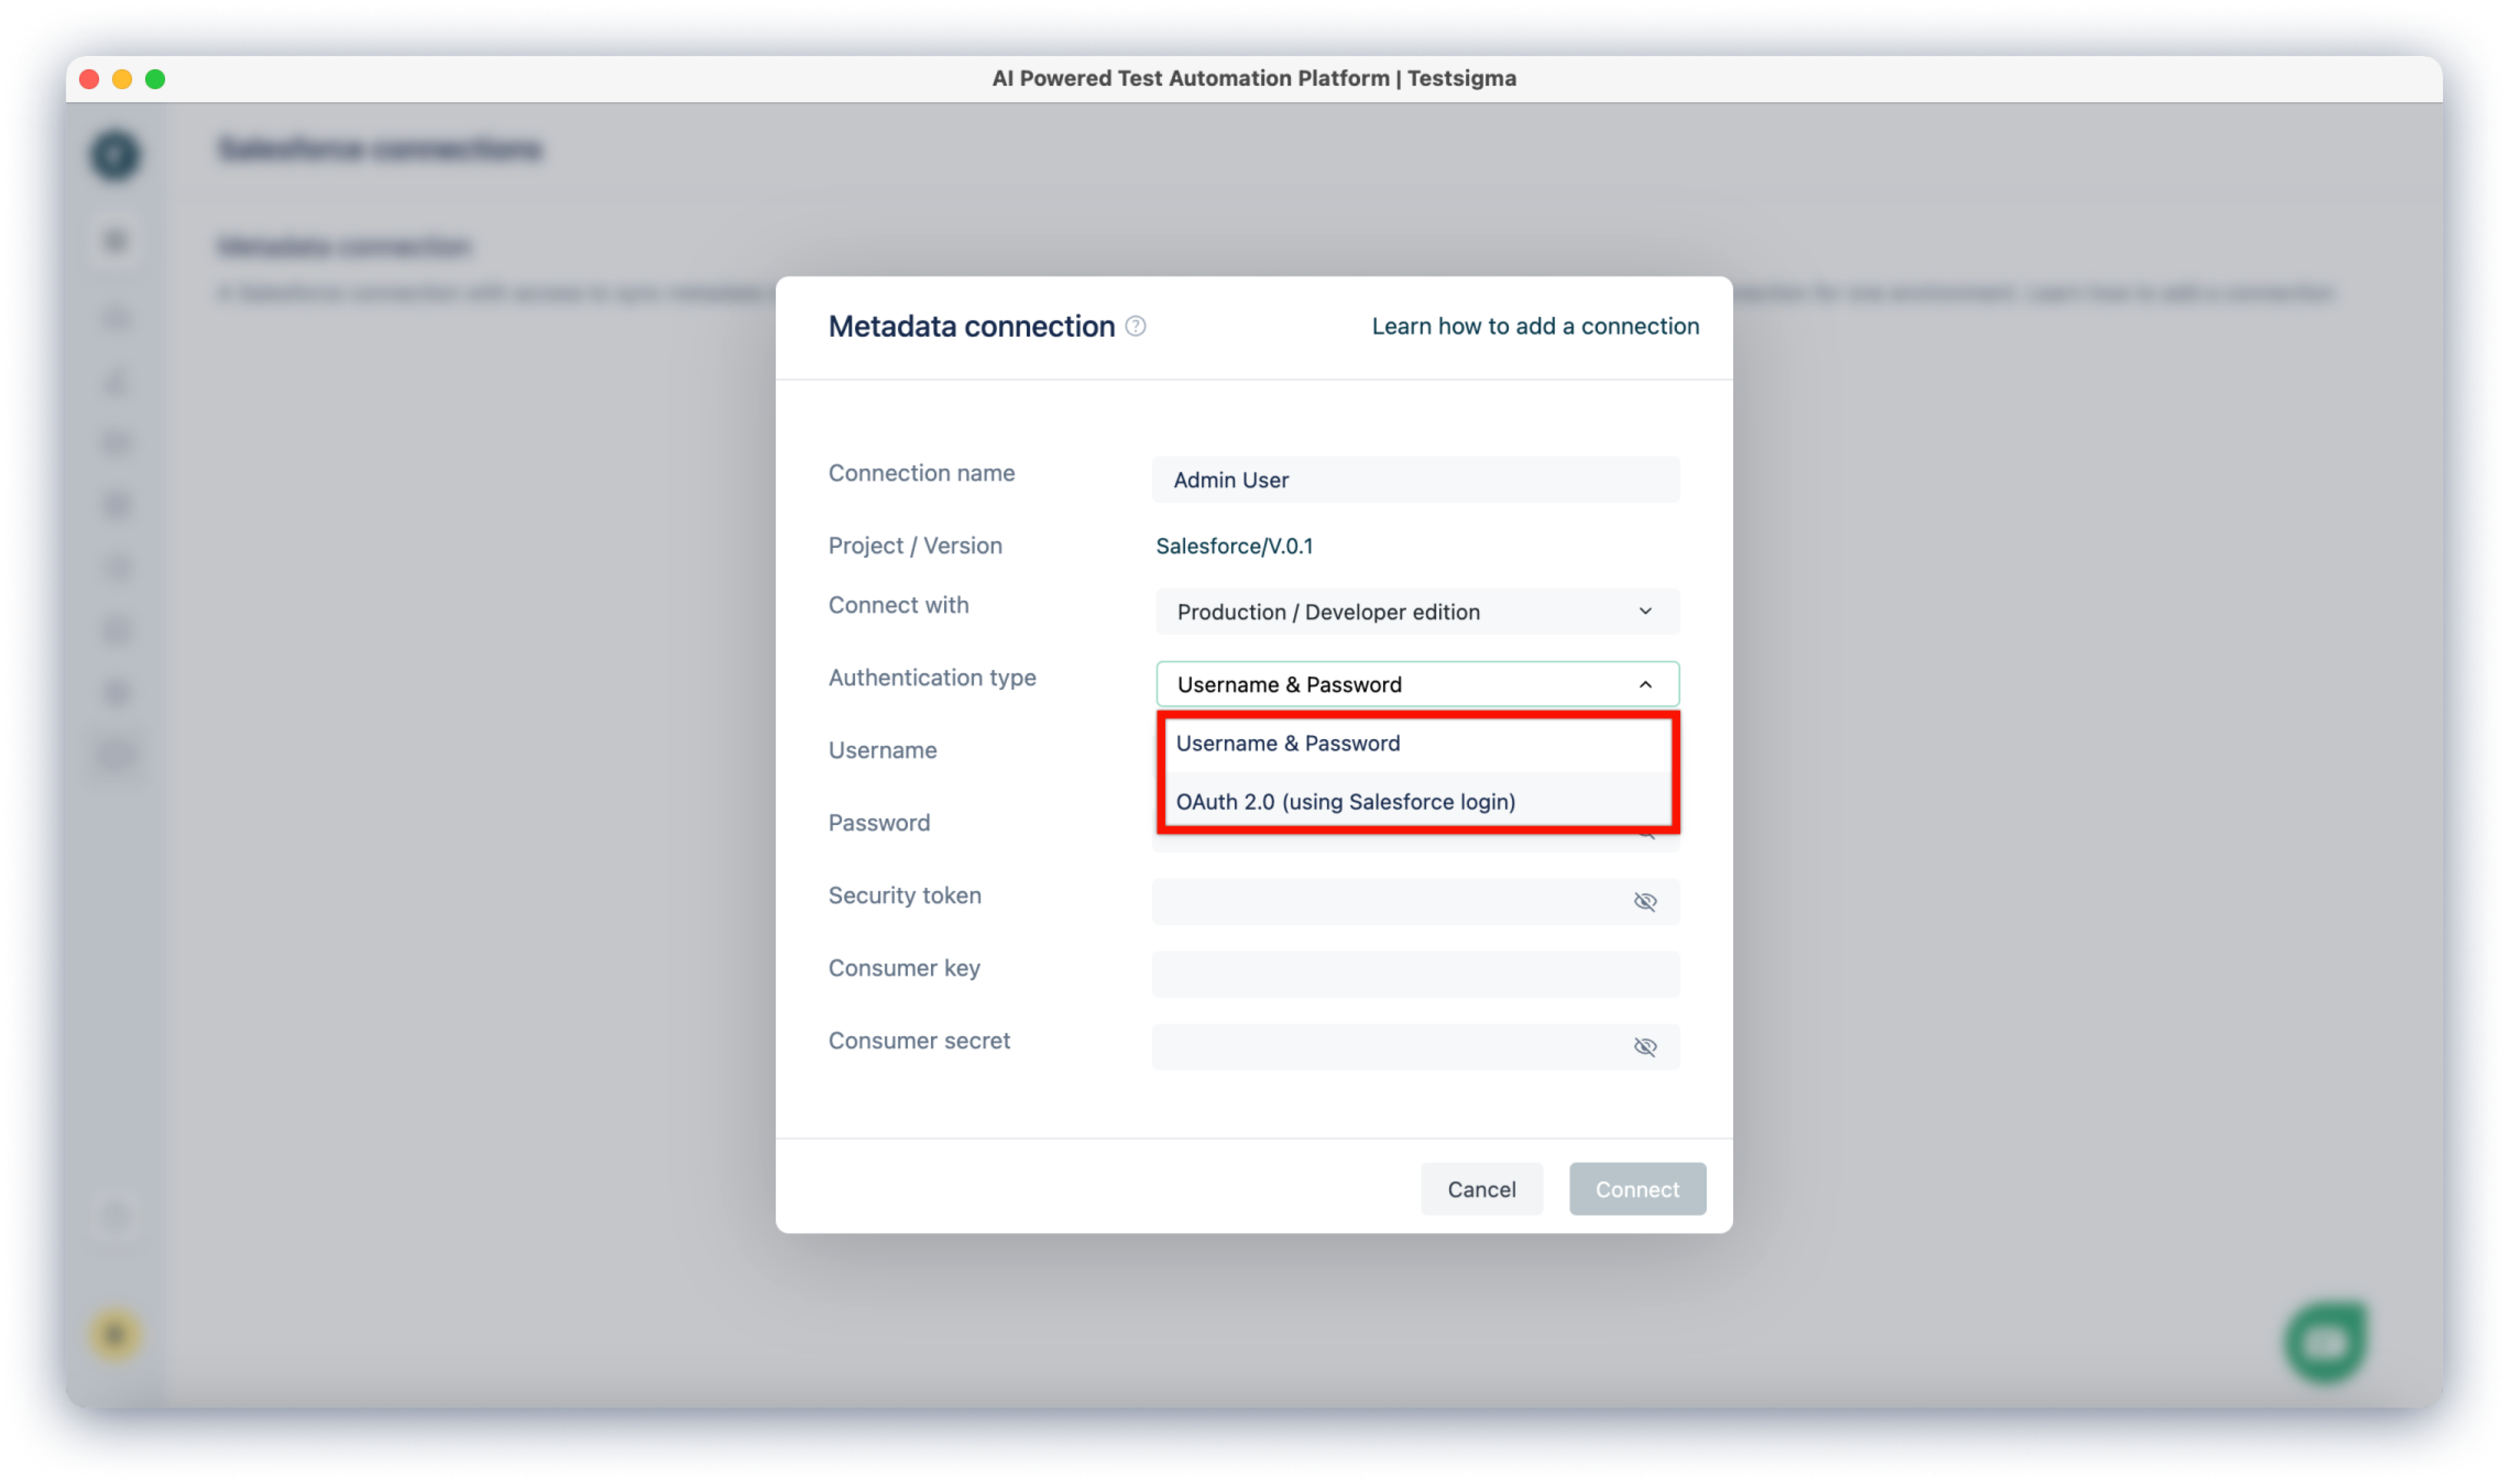
ℹ️Authentication Types:
There are two ways to Authenticate:- User name & Password: For User name & Password, enter Username, Password, Security token, Consumer key, and Consumer secret.
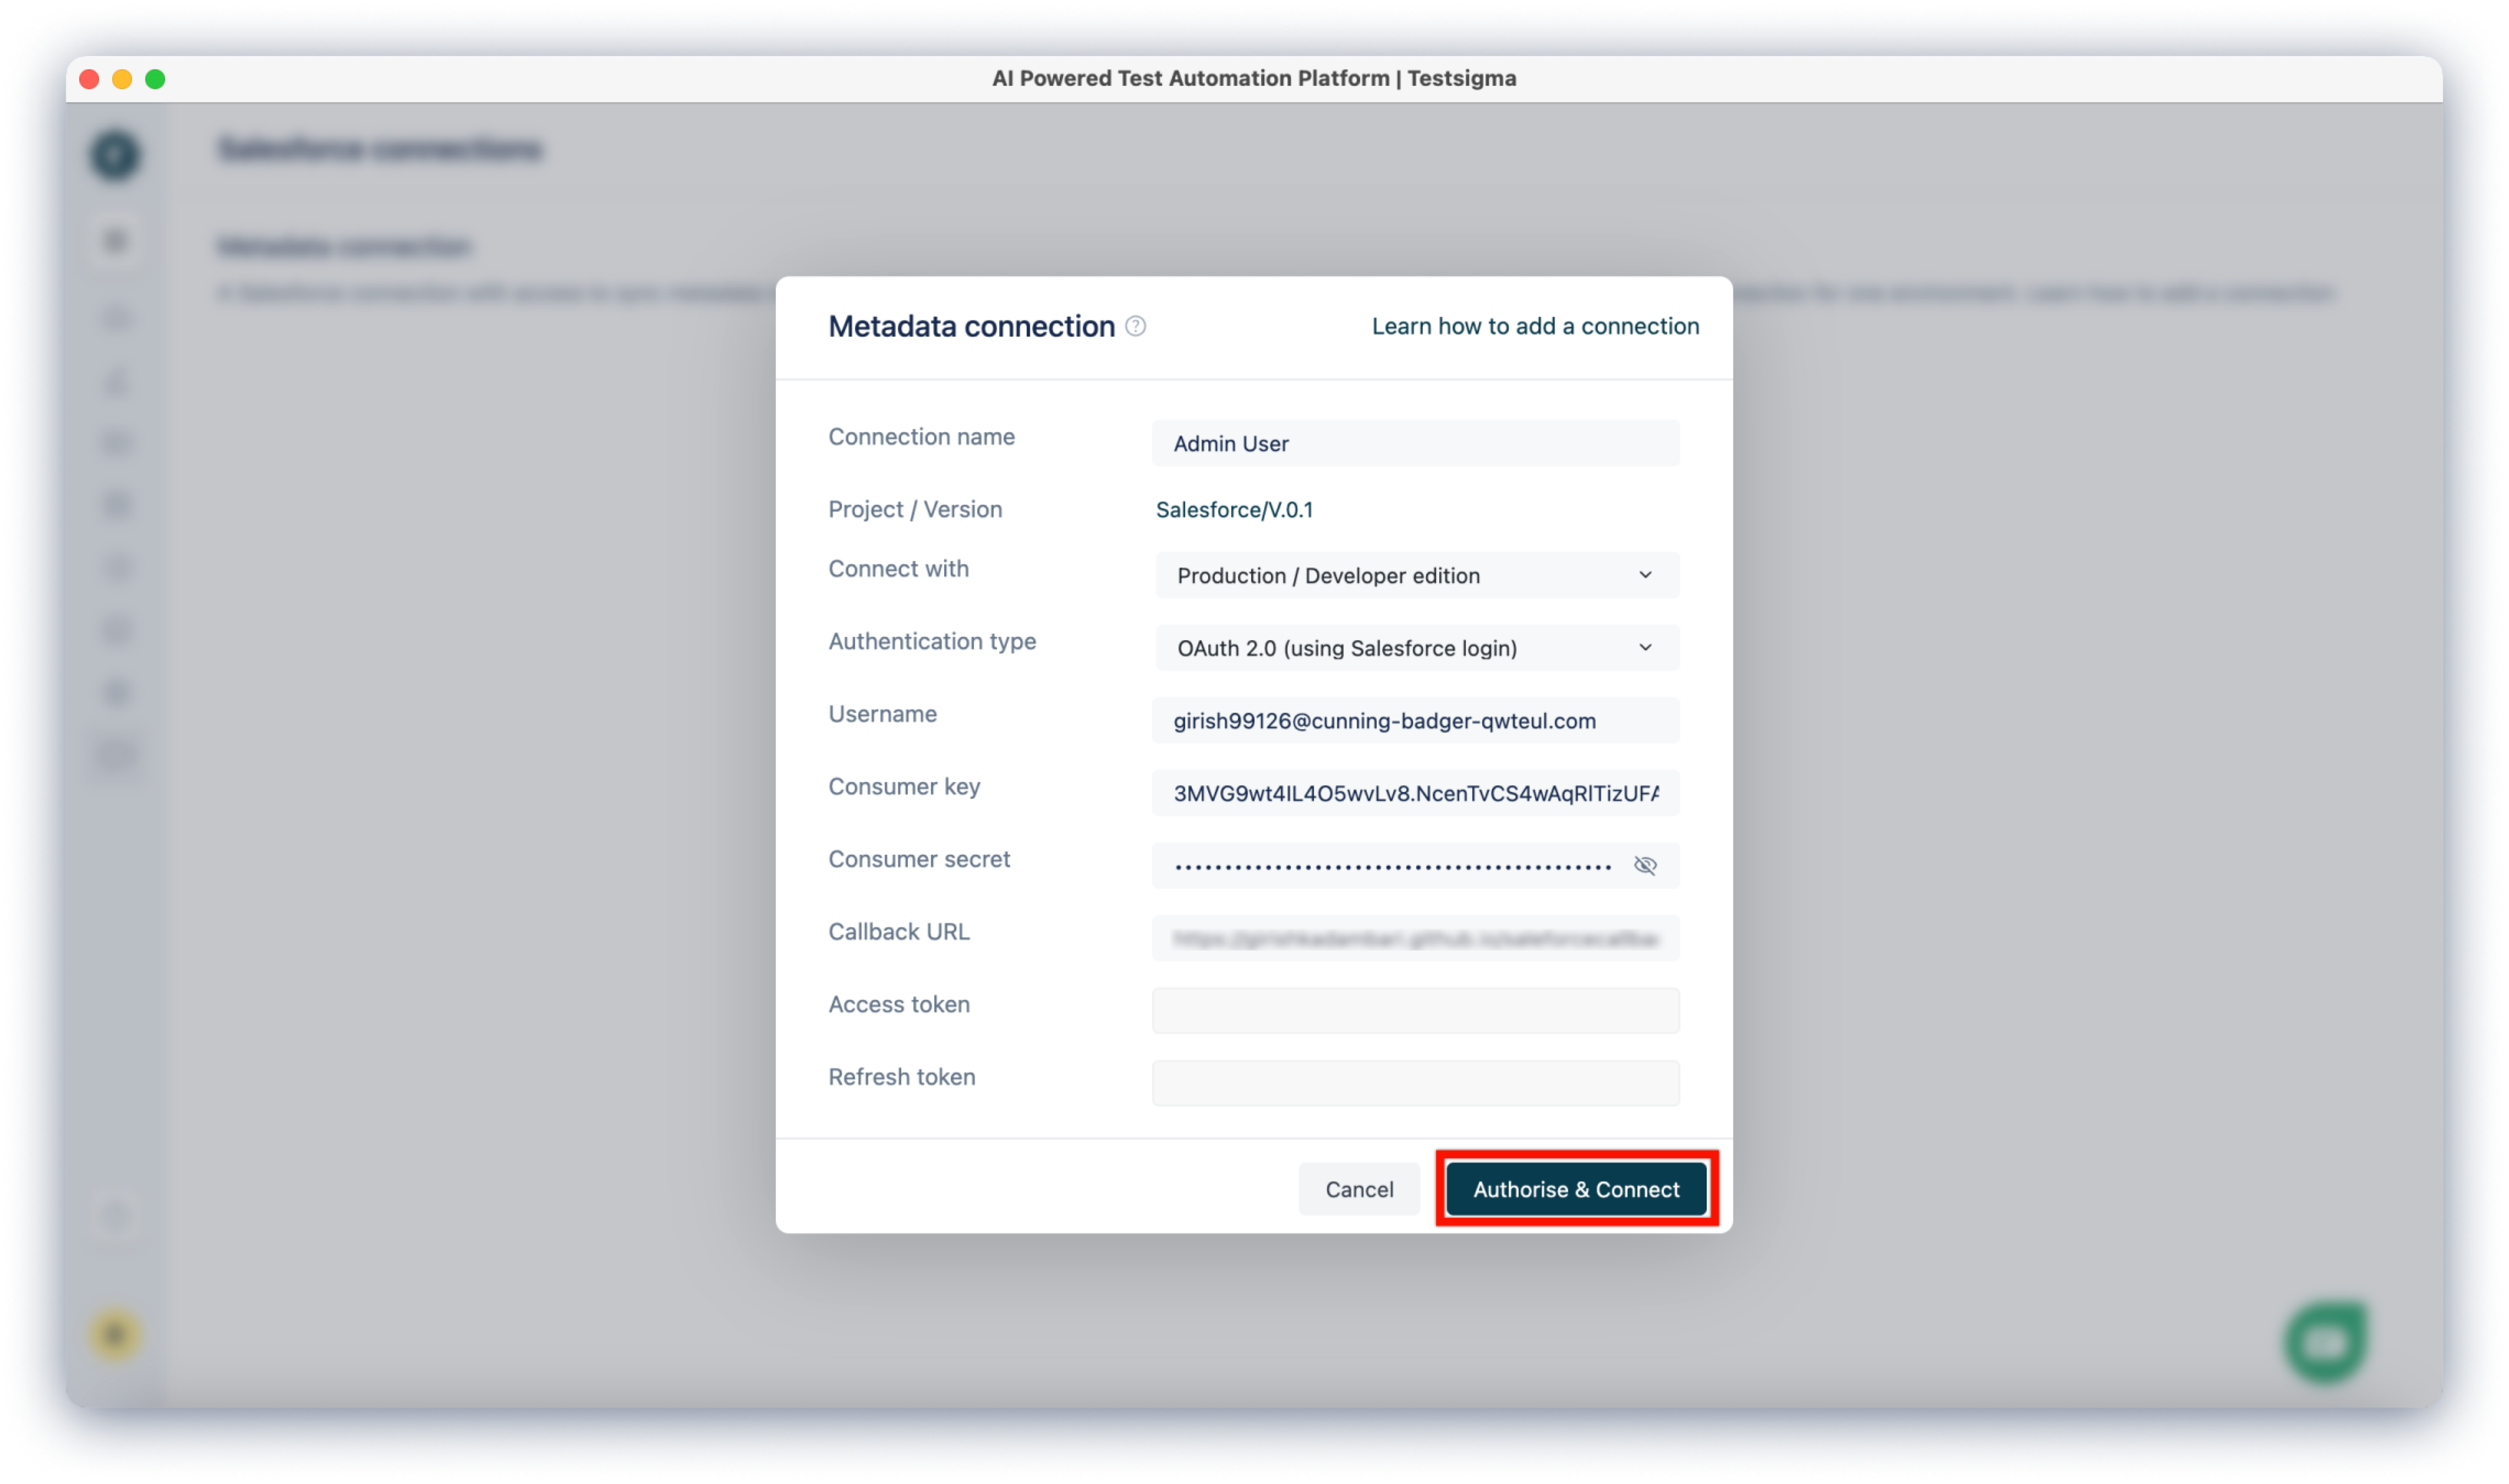
- OAuth: For OAuth, enter Username, Consumer key, and Consumer secret.
- Callback URL: Use the below mentioned Callback URL.
https://salesforce-callback.testsigma.com/authorize/
-
- Click on Authorise & Connect.
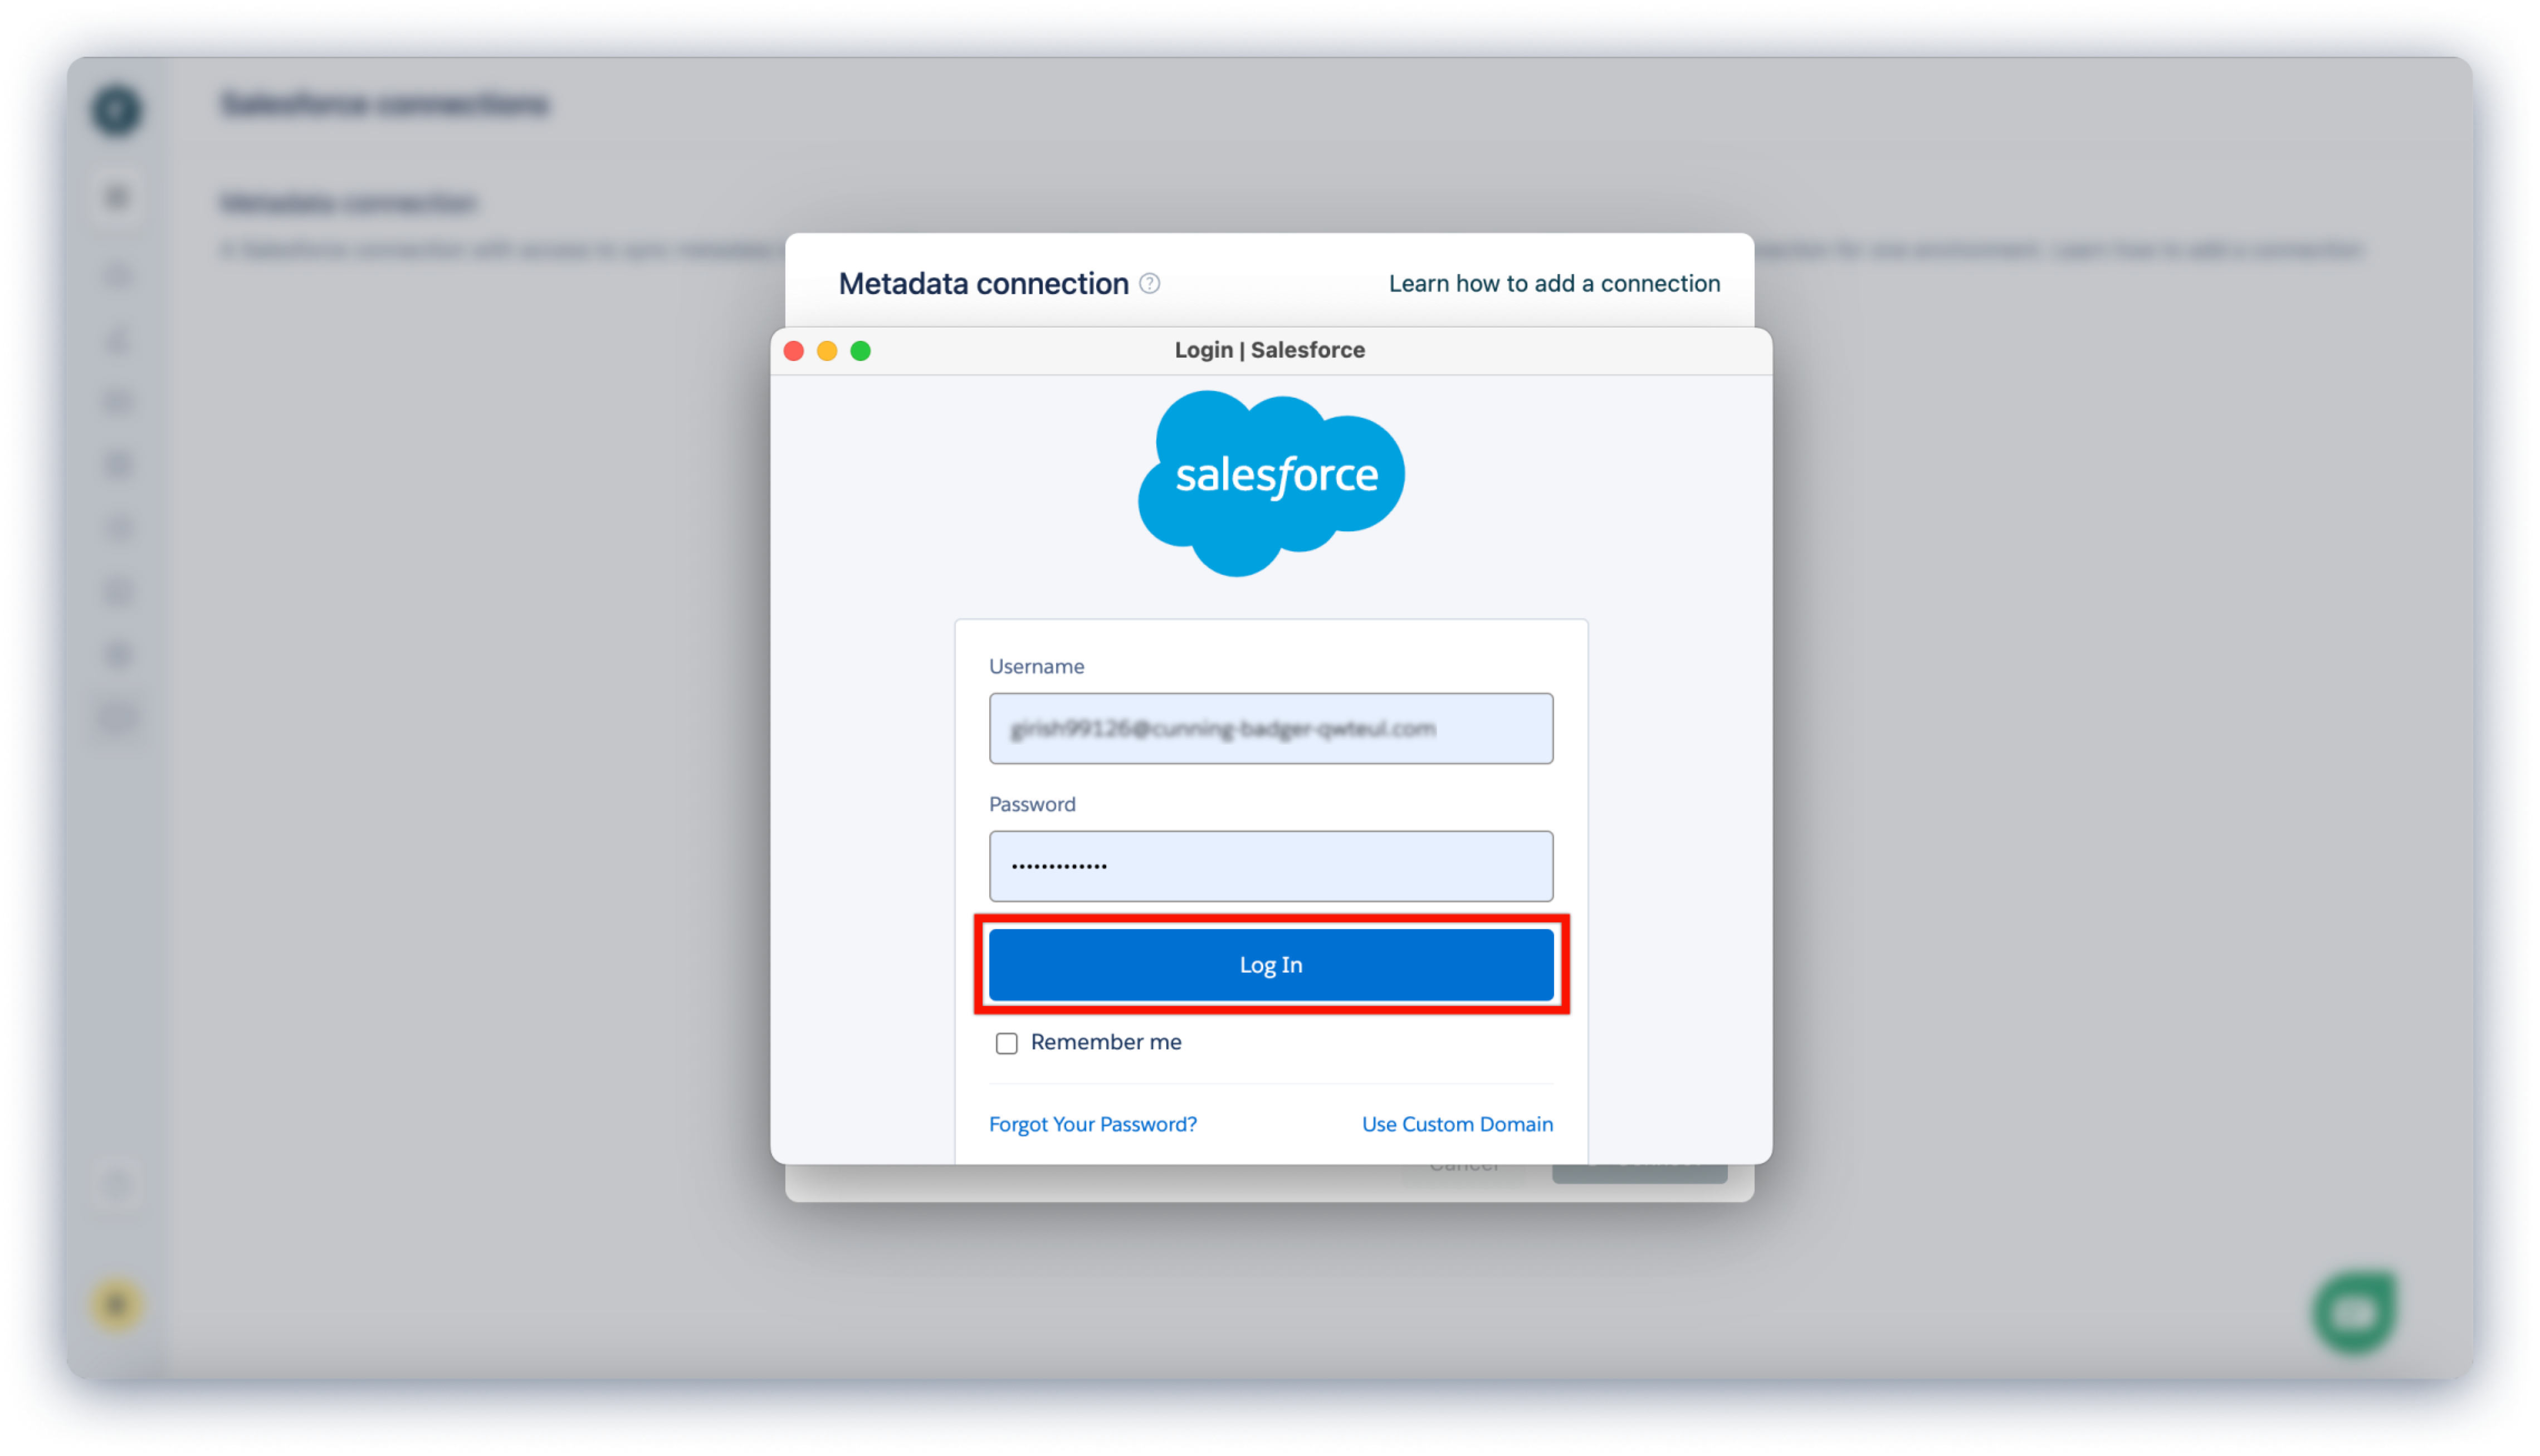
- A new window will open up requesting for Salesforce Login. Enter the credentials and click on Log In.
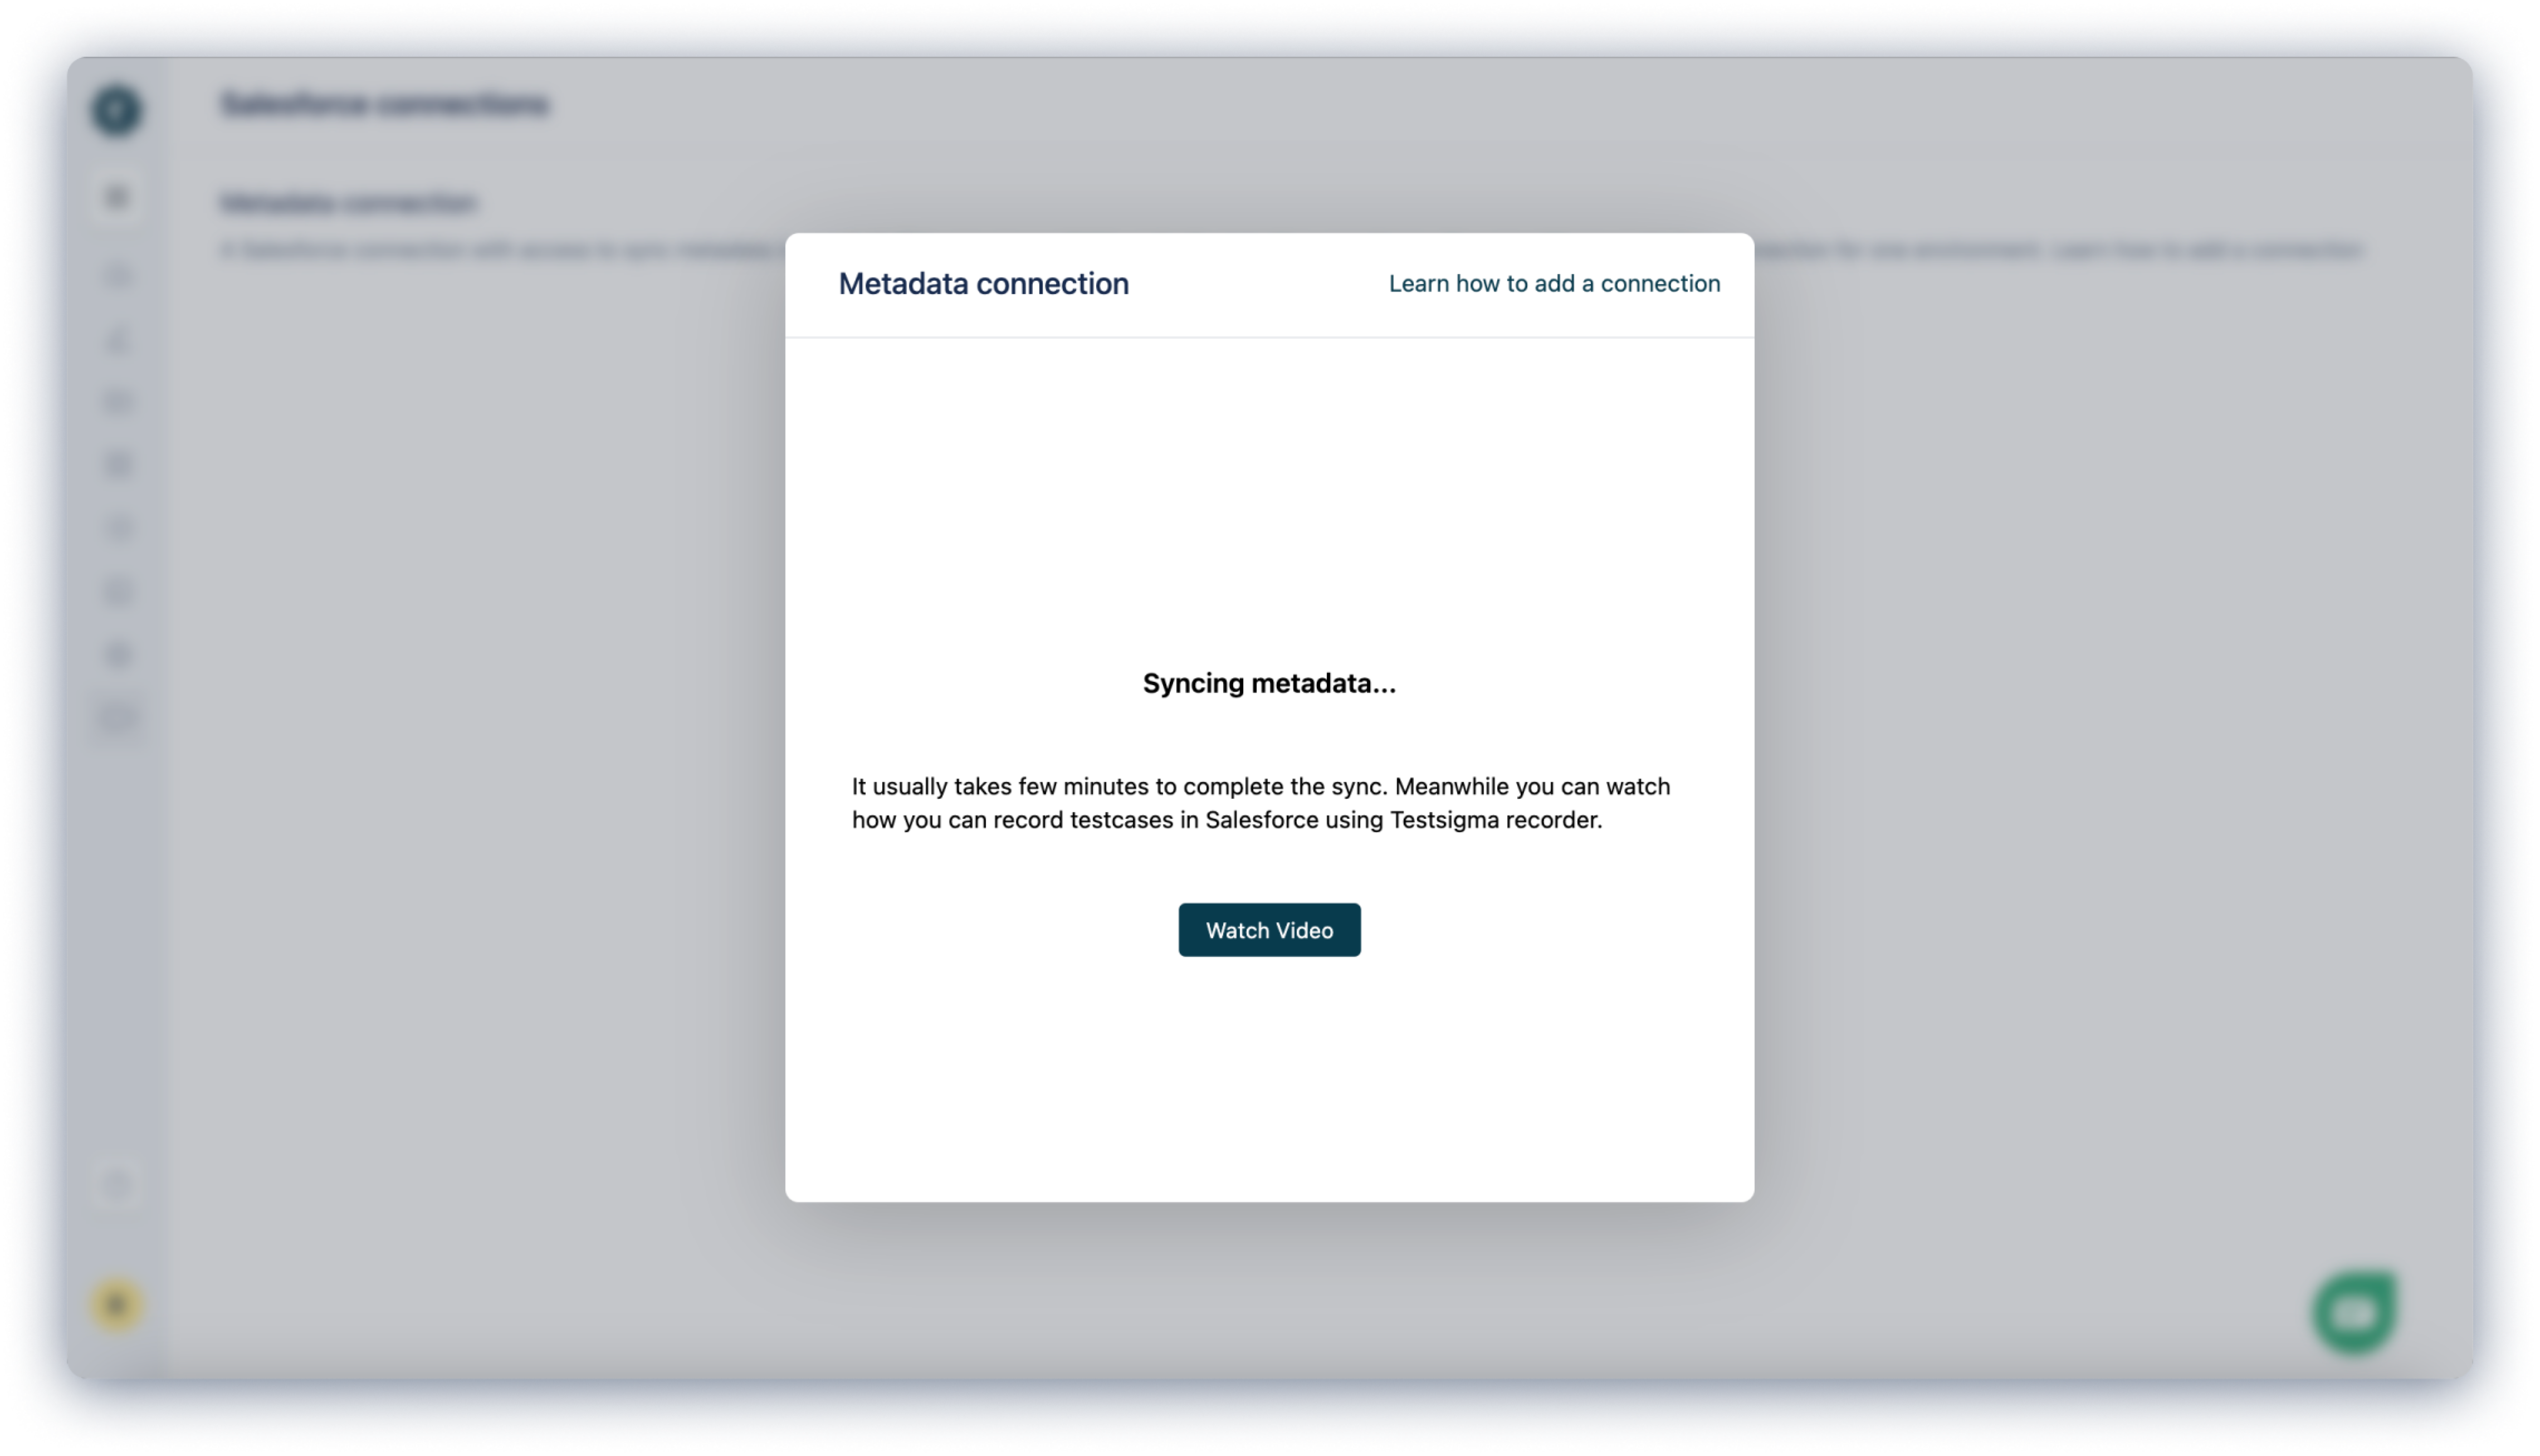
- This will display the Environment associated with the credentials. Click on Start metadata sync.
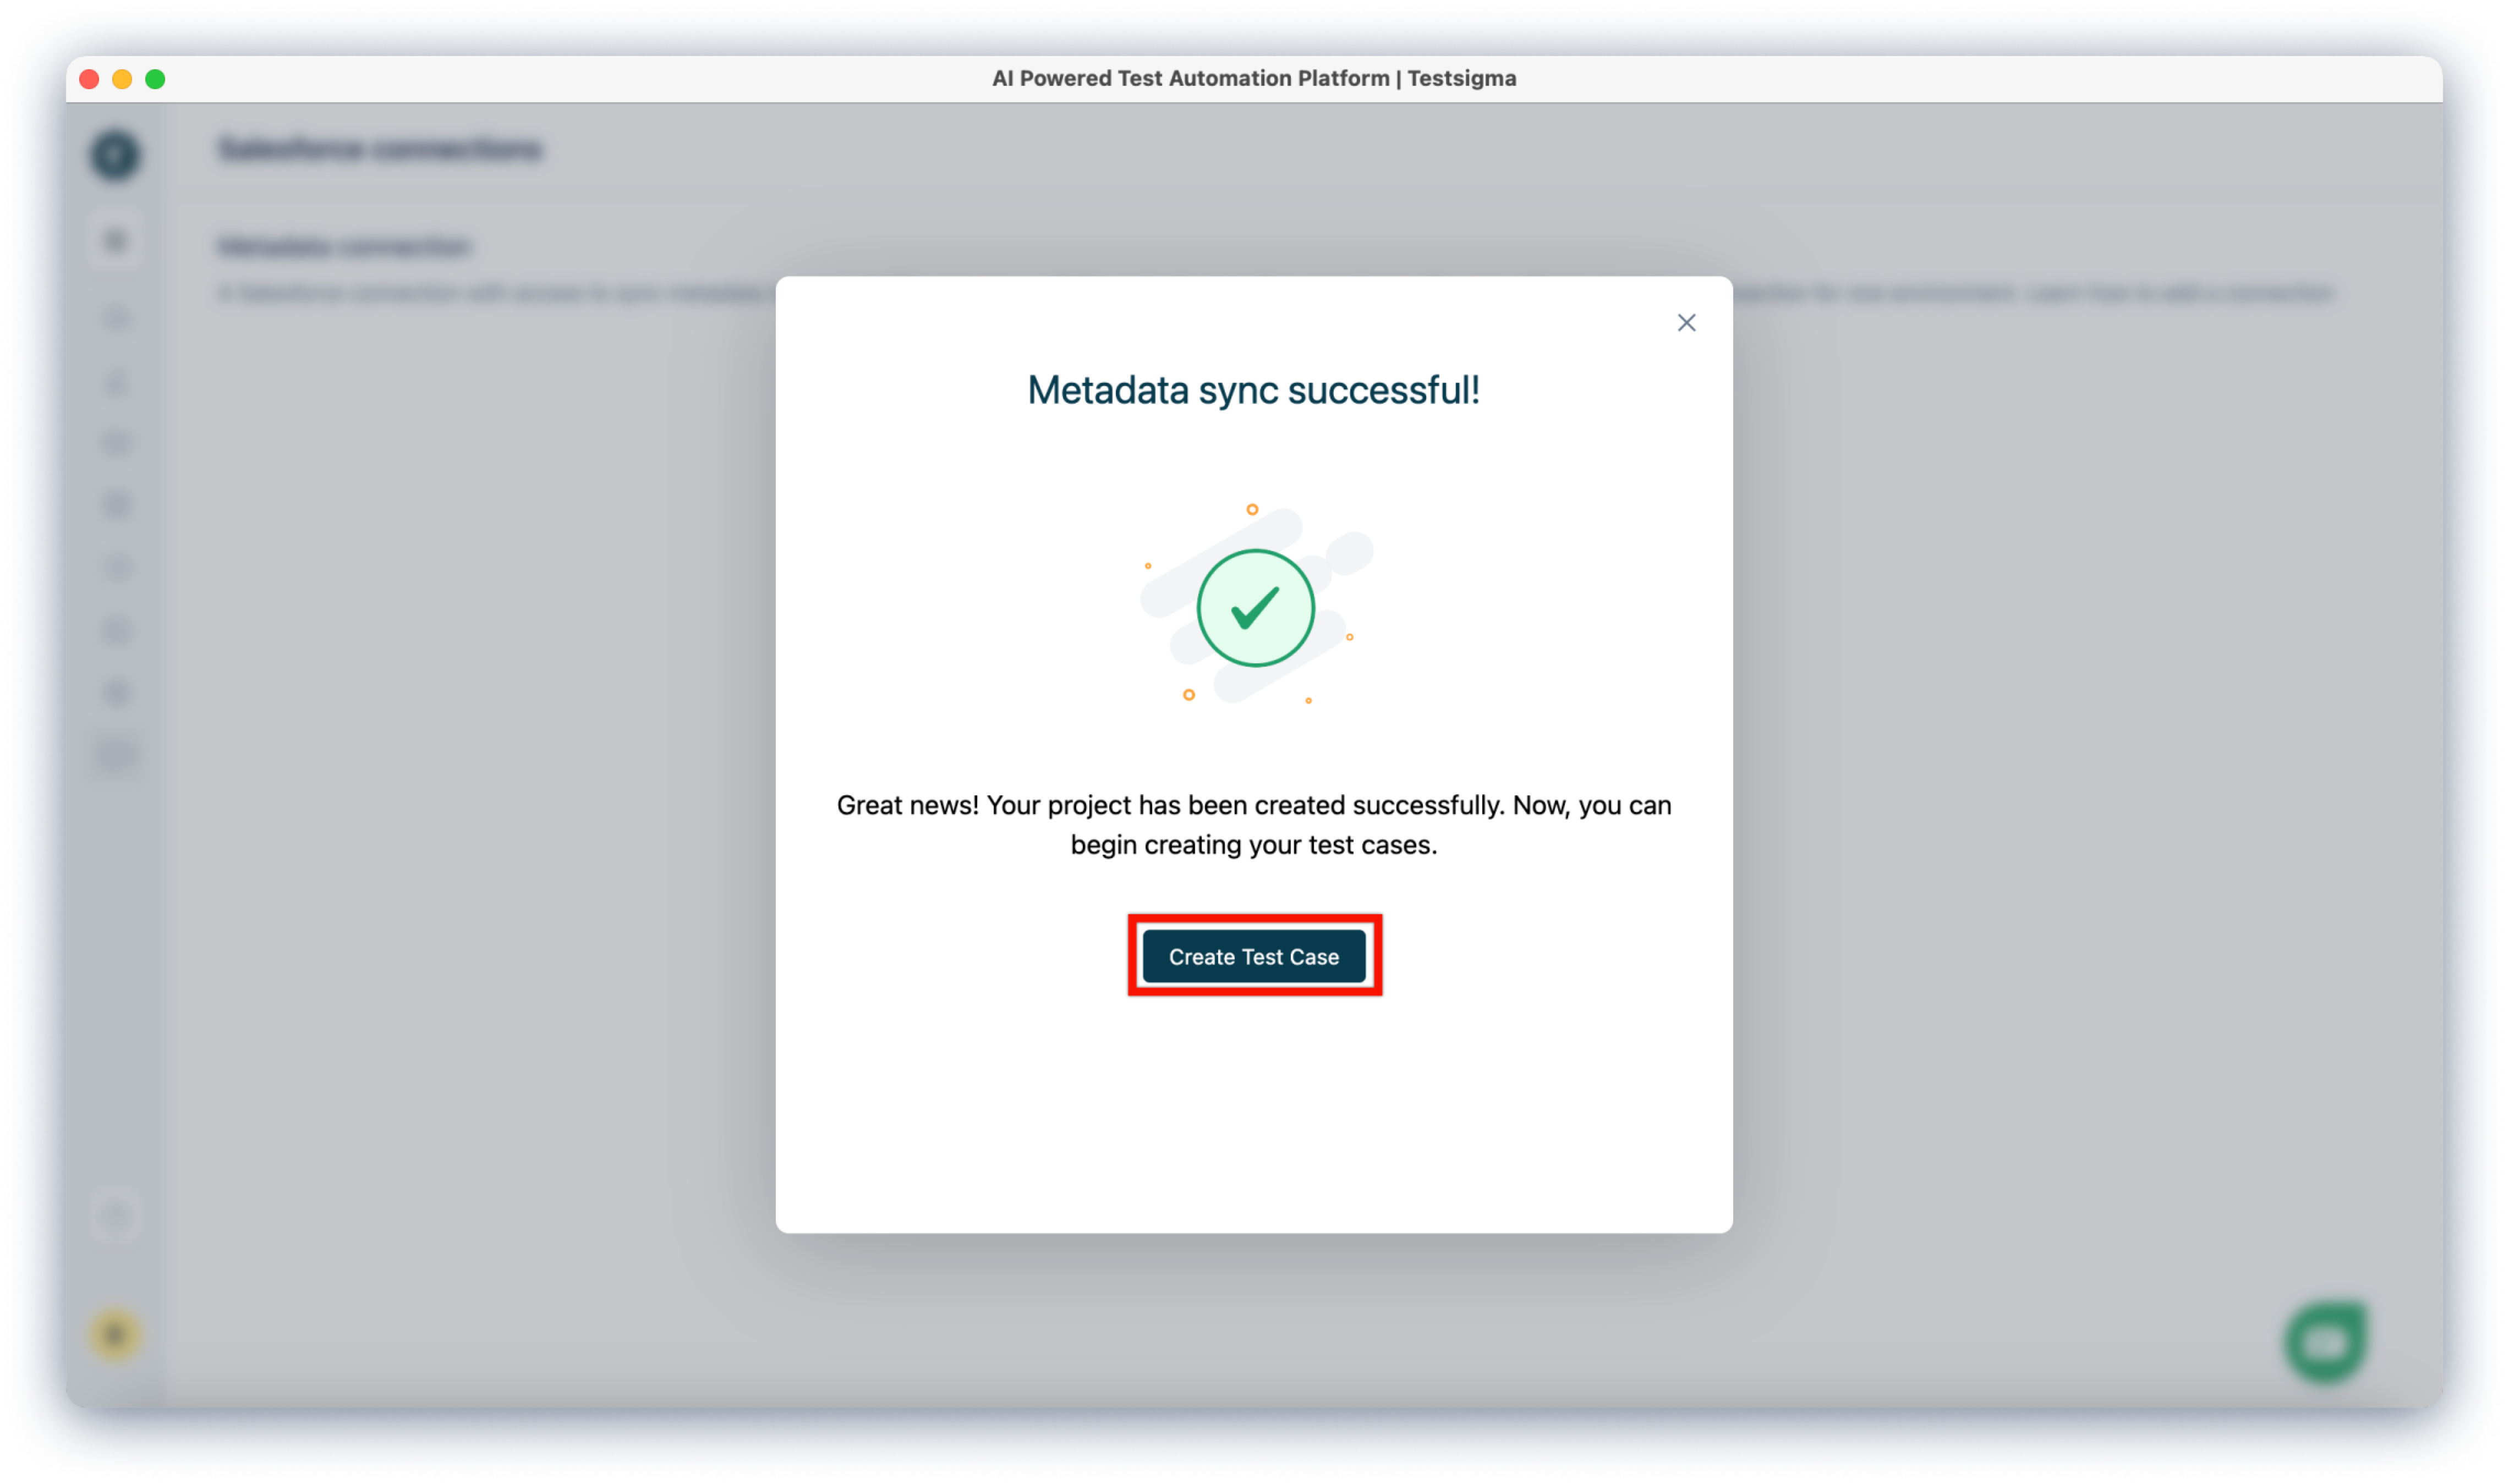
- Wait until the sync is complete. This will take some time.
- Once Metadata sync is successful, you can create test cases by clicking Create Test Case.
Steps to Add Multiple Metadata Connections
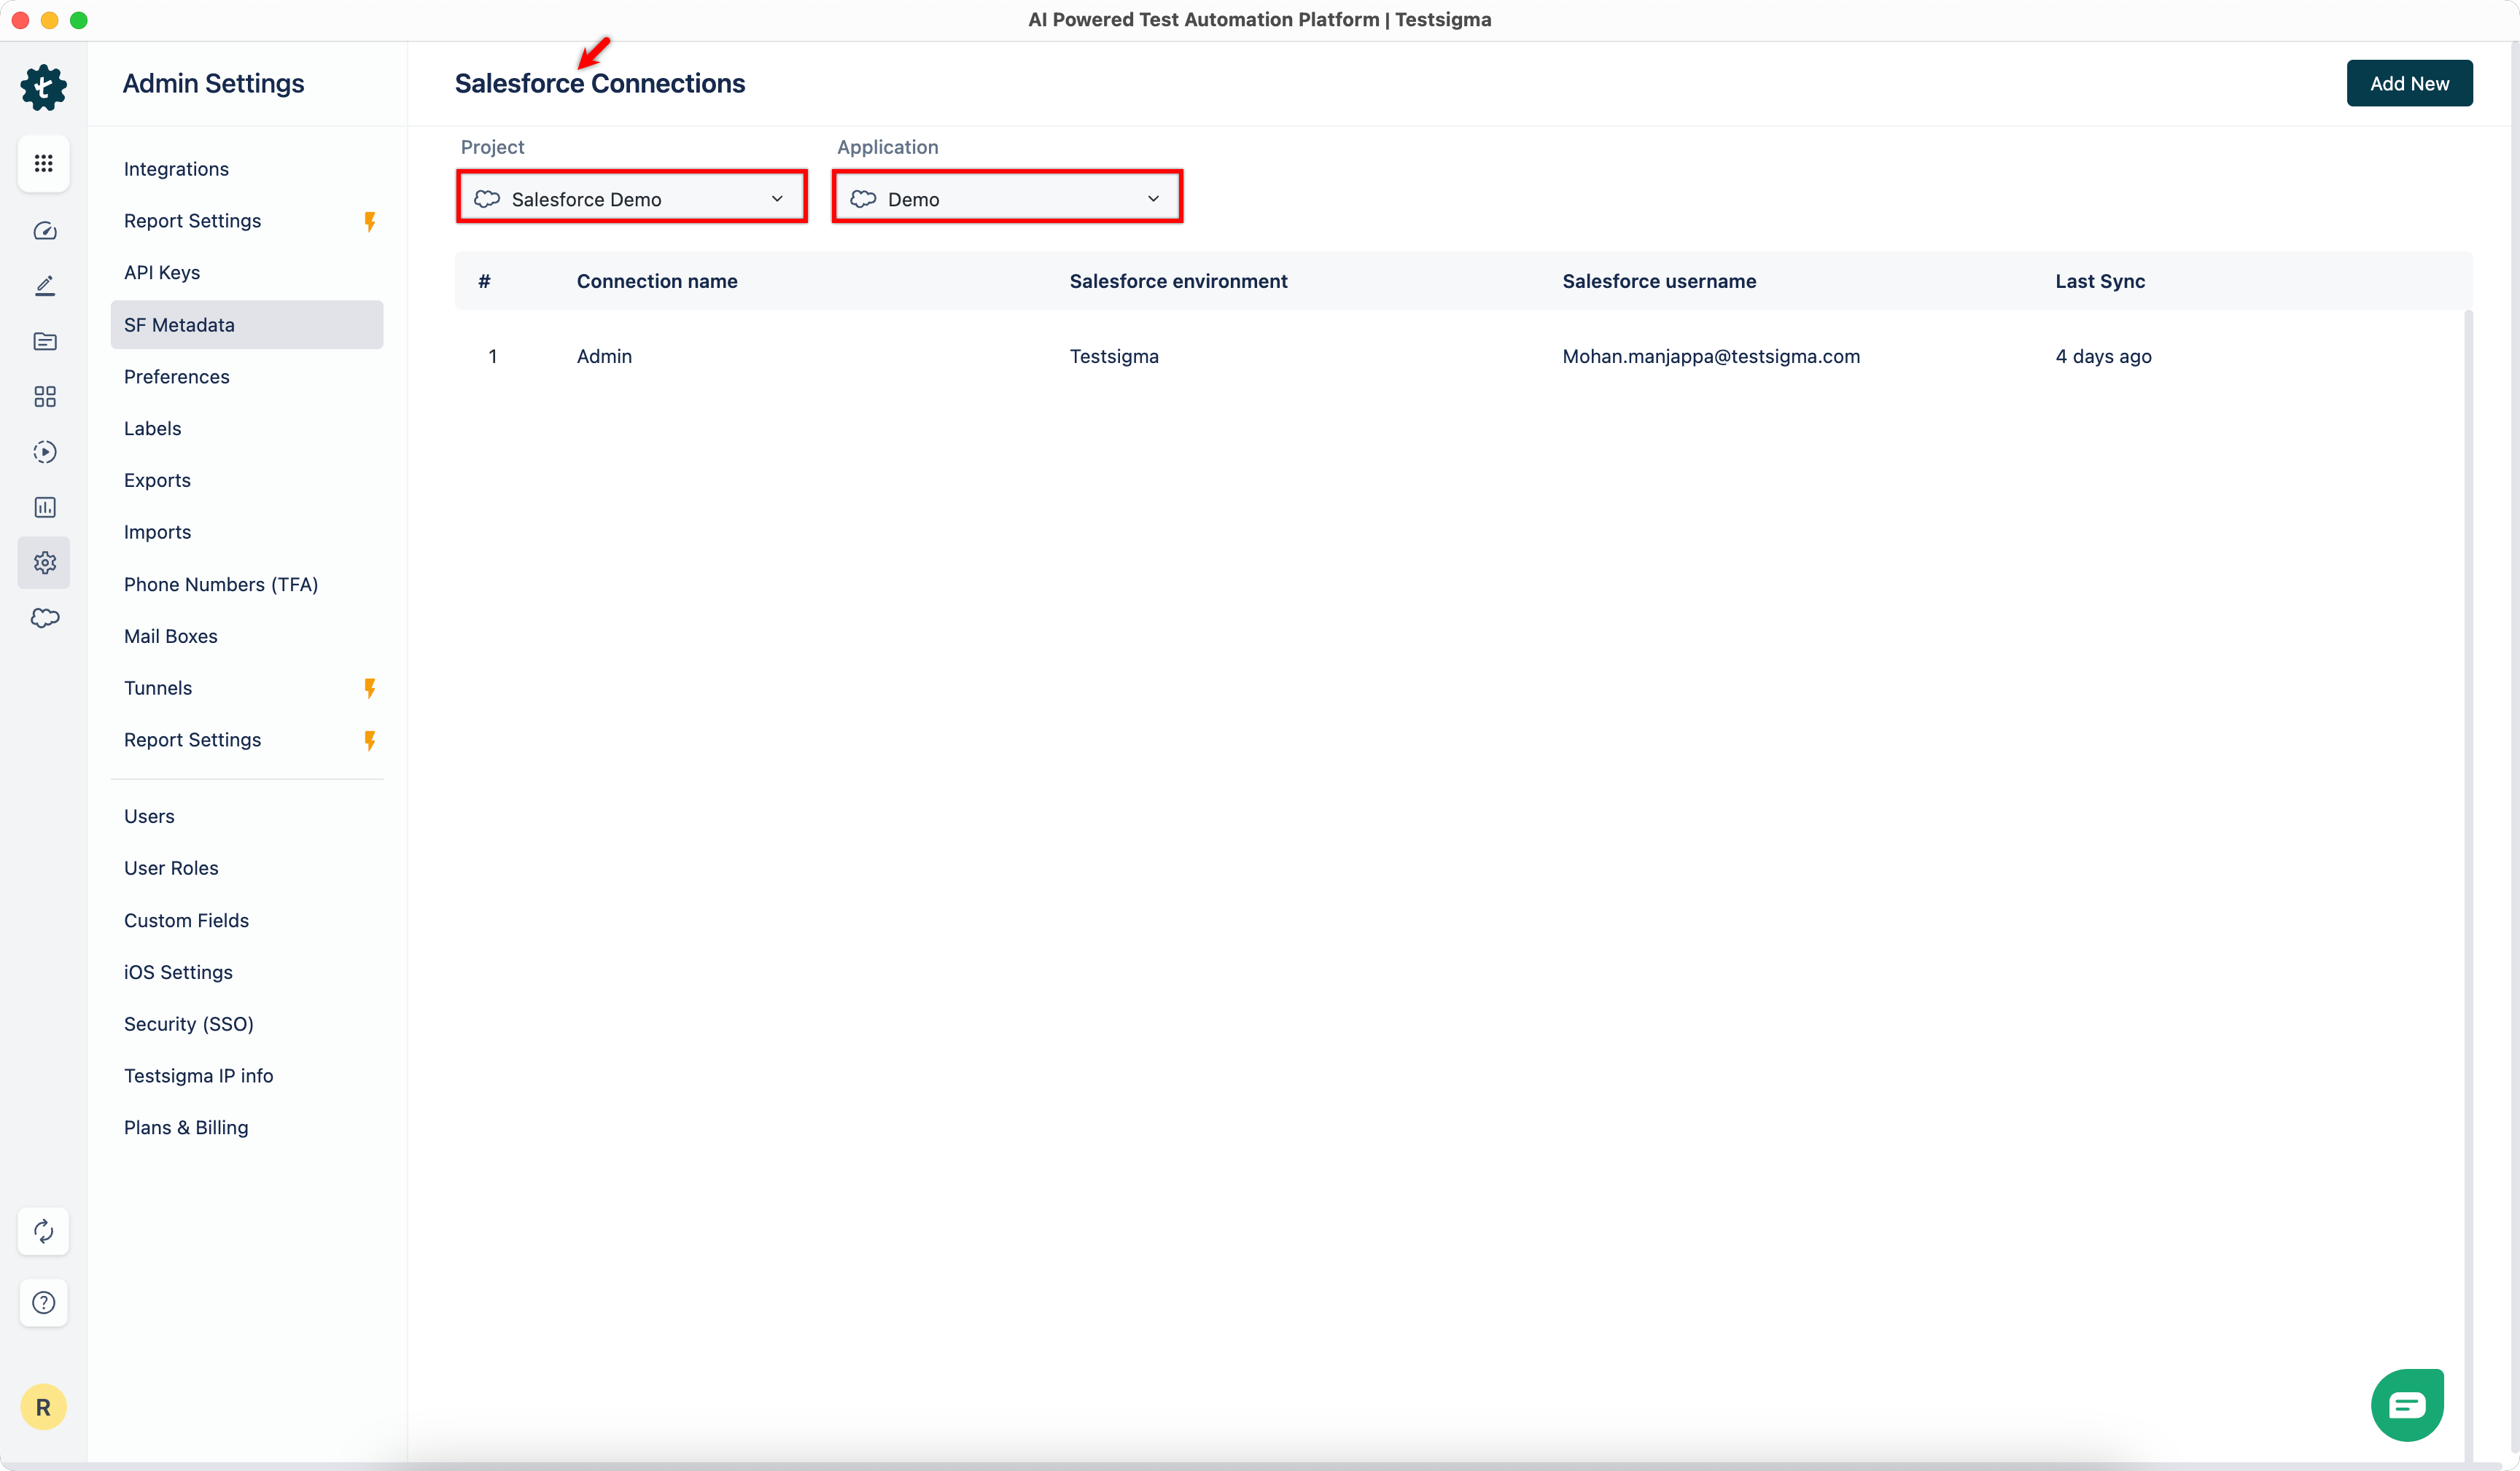
- Navigate to Settings > SF Metadata.
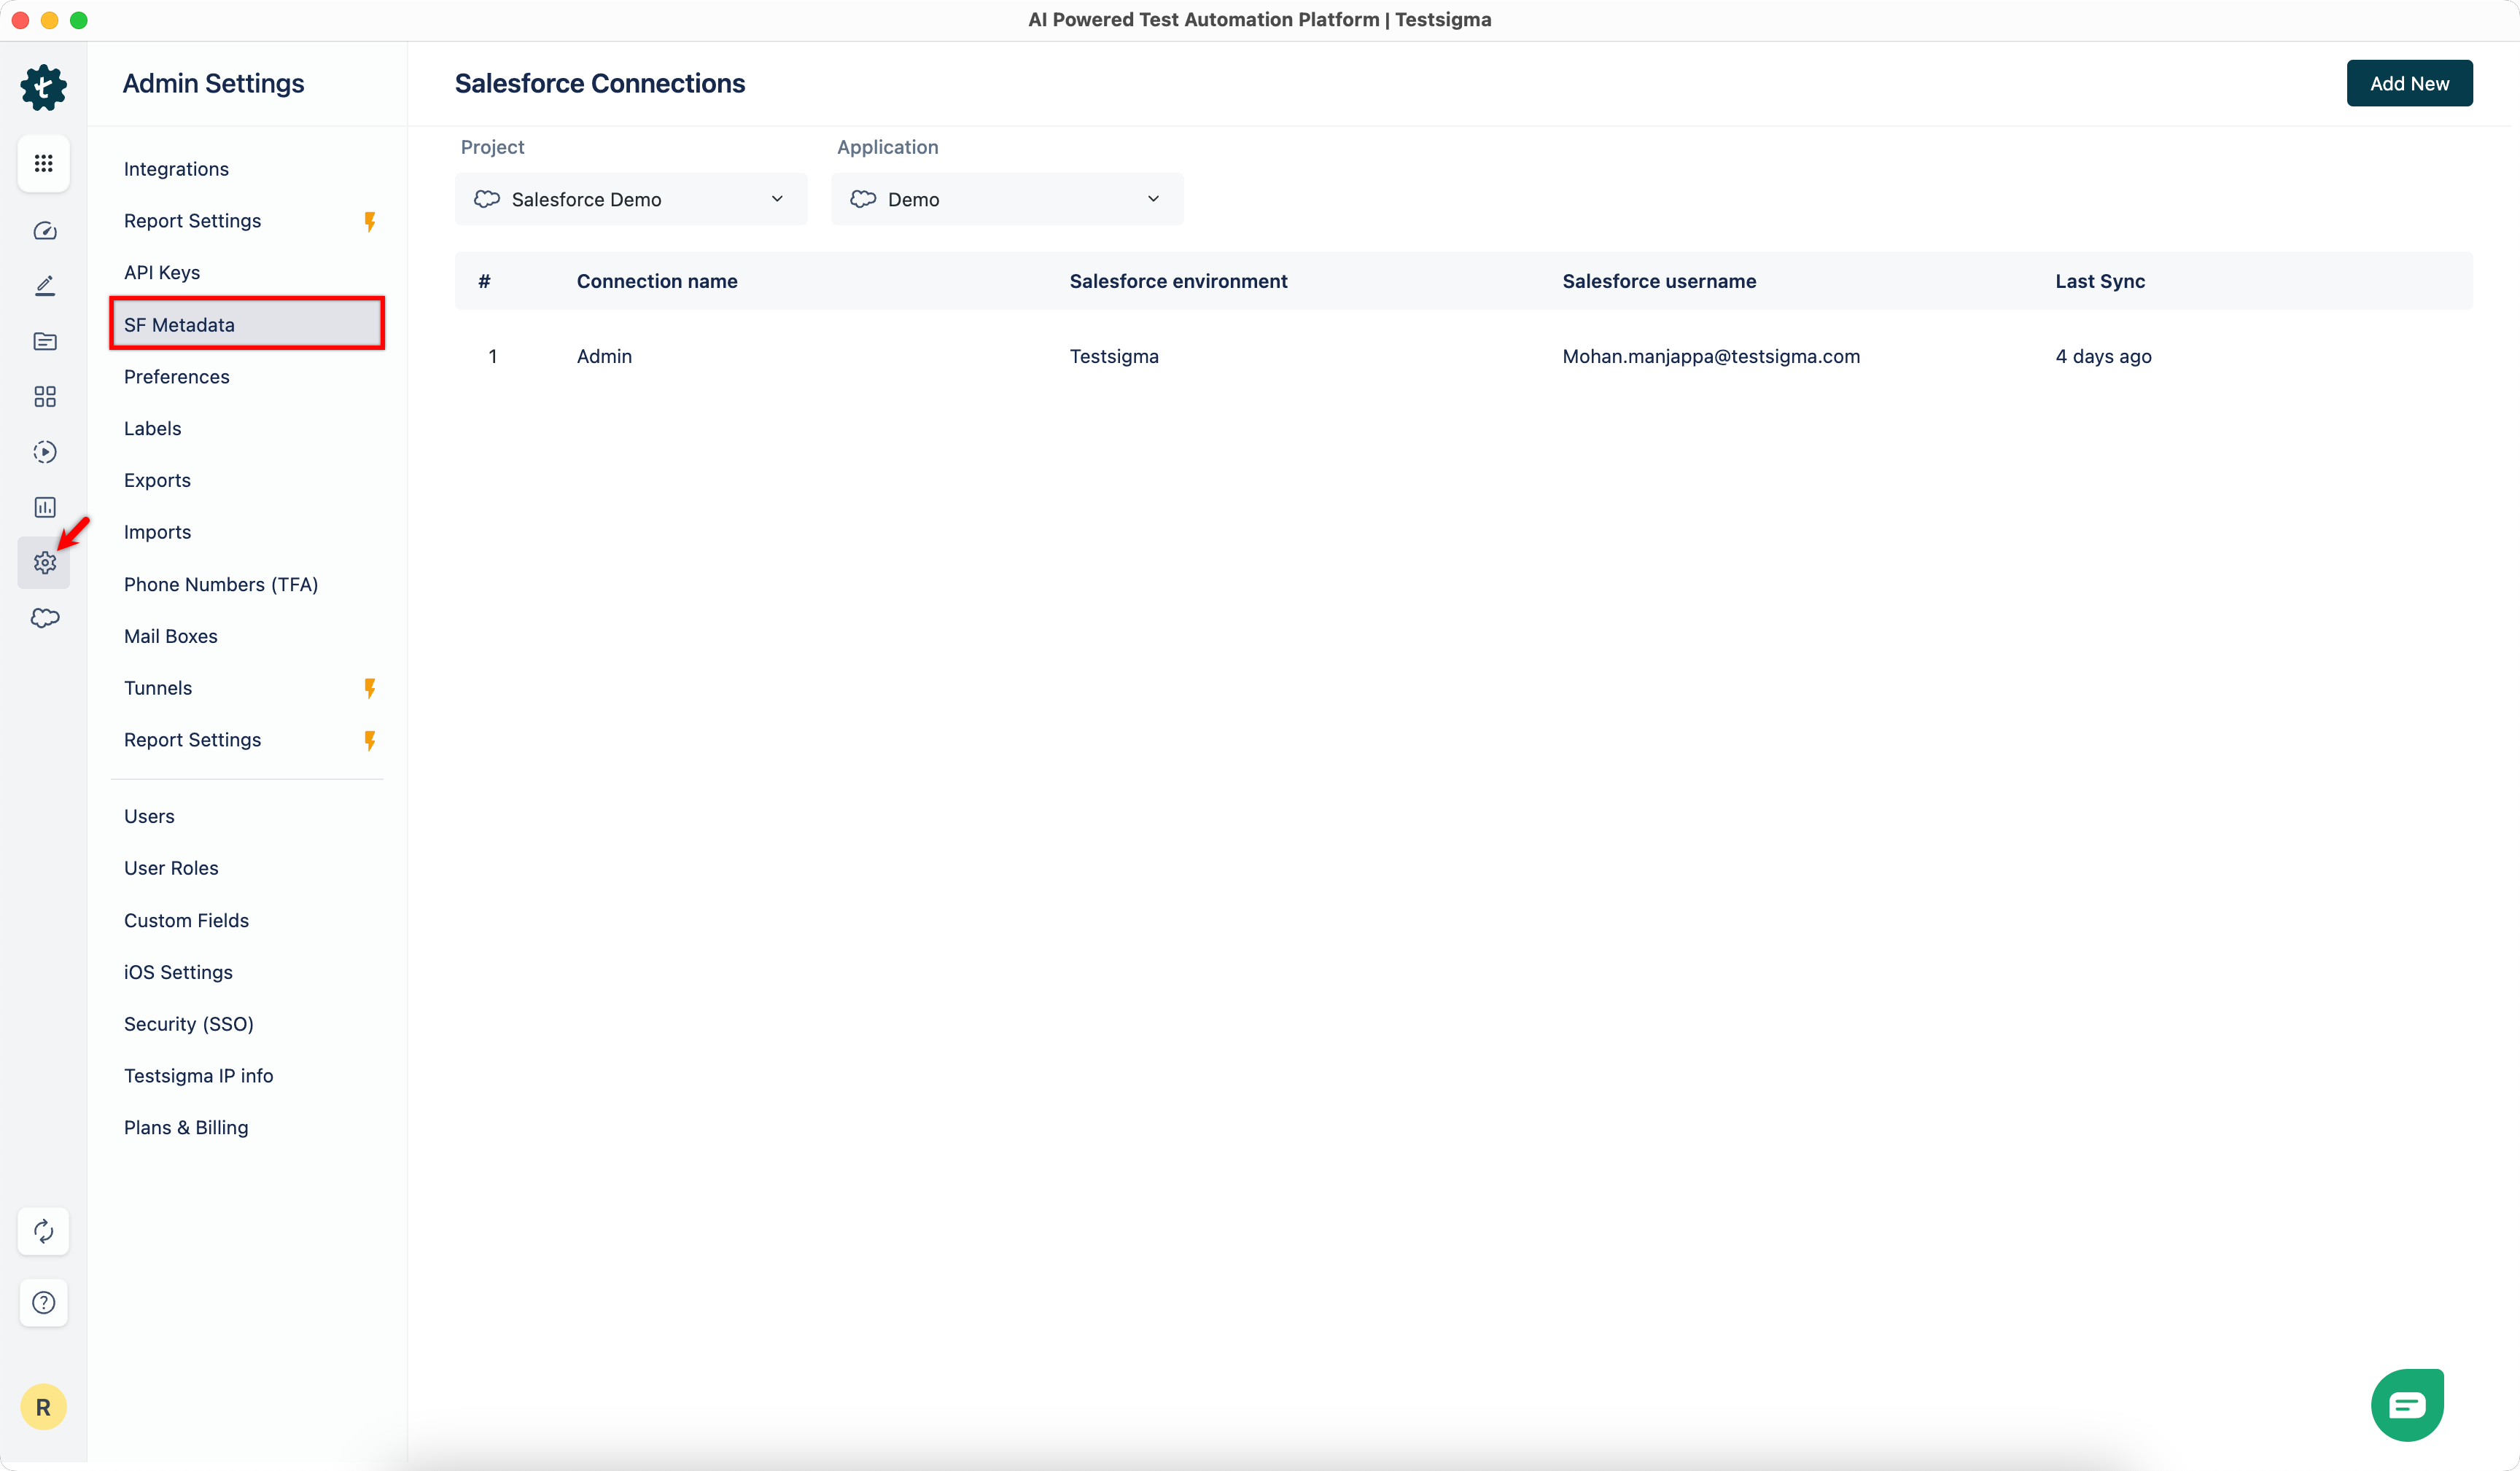
- Select a Project and Application from the dropdown menu where you want to add metadata connections.
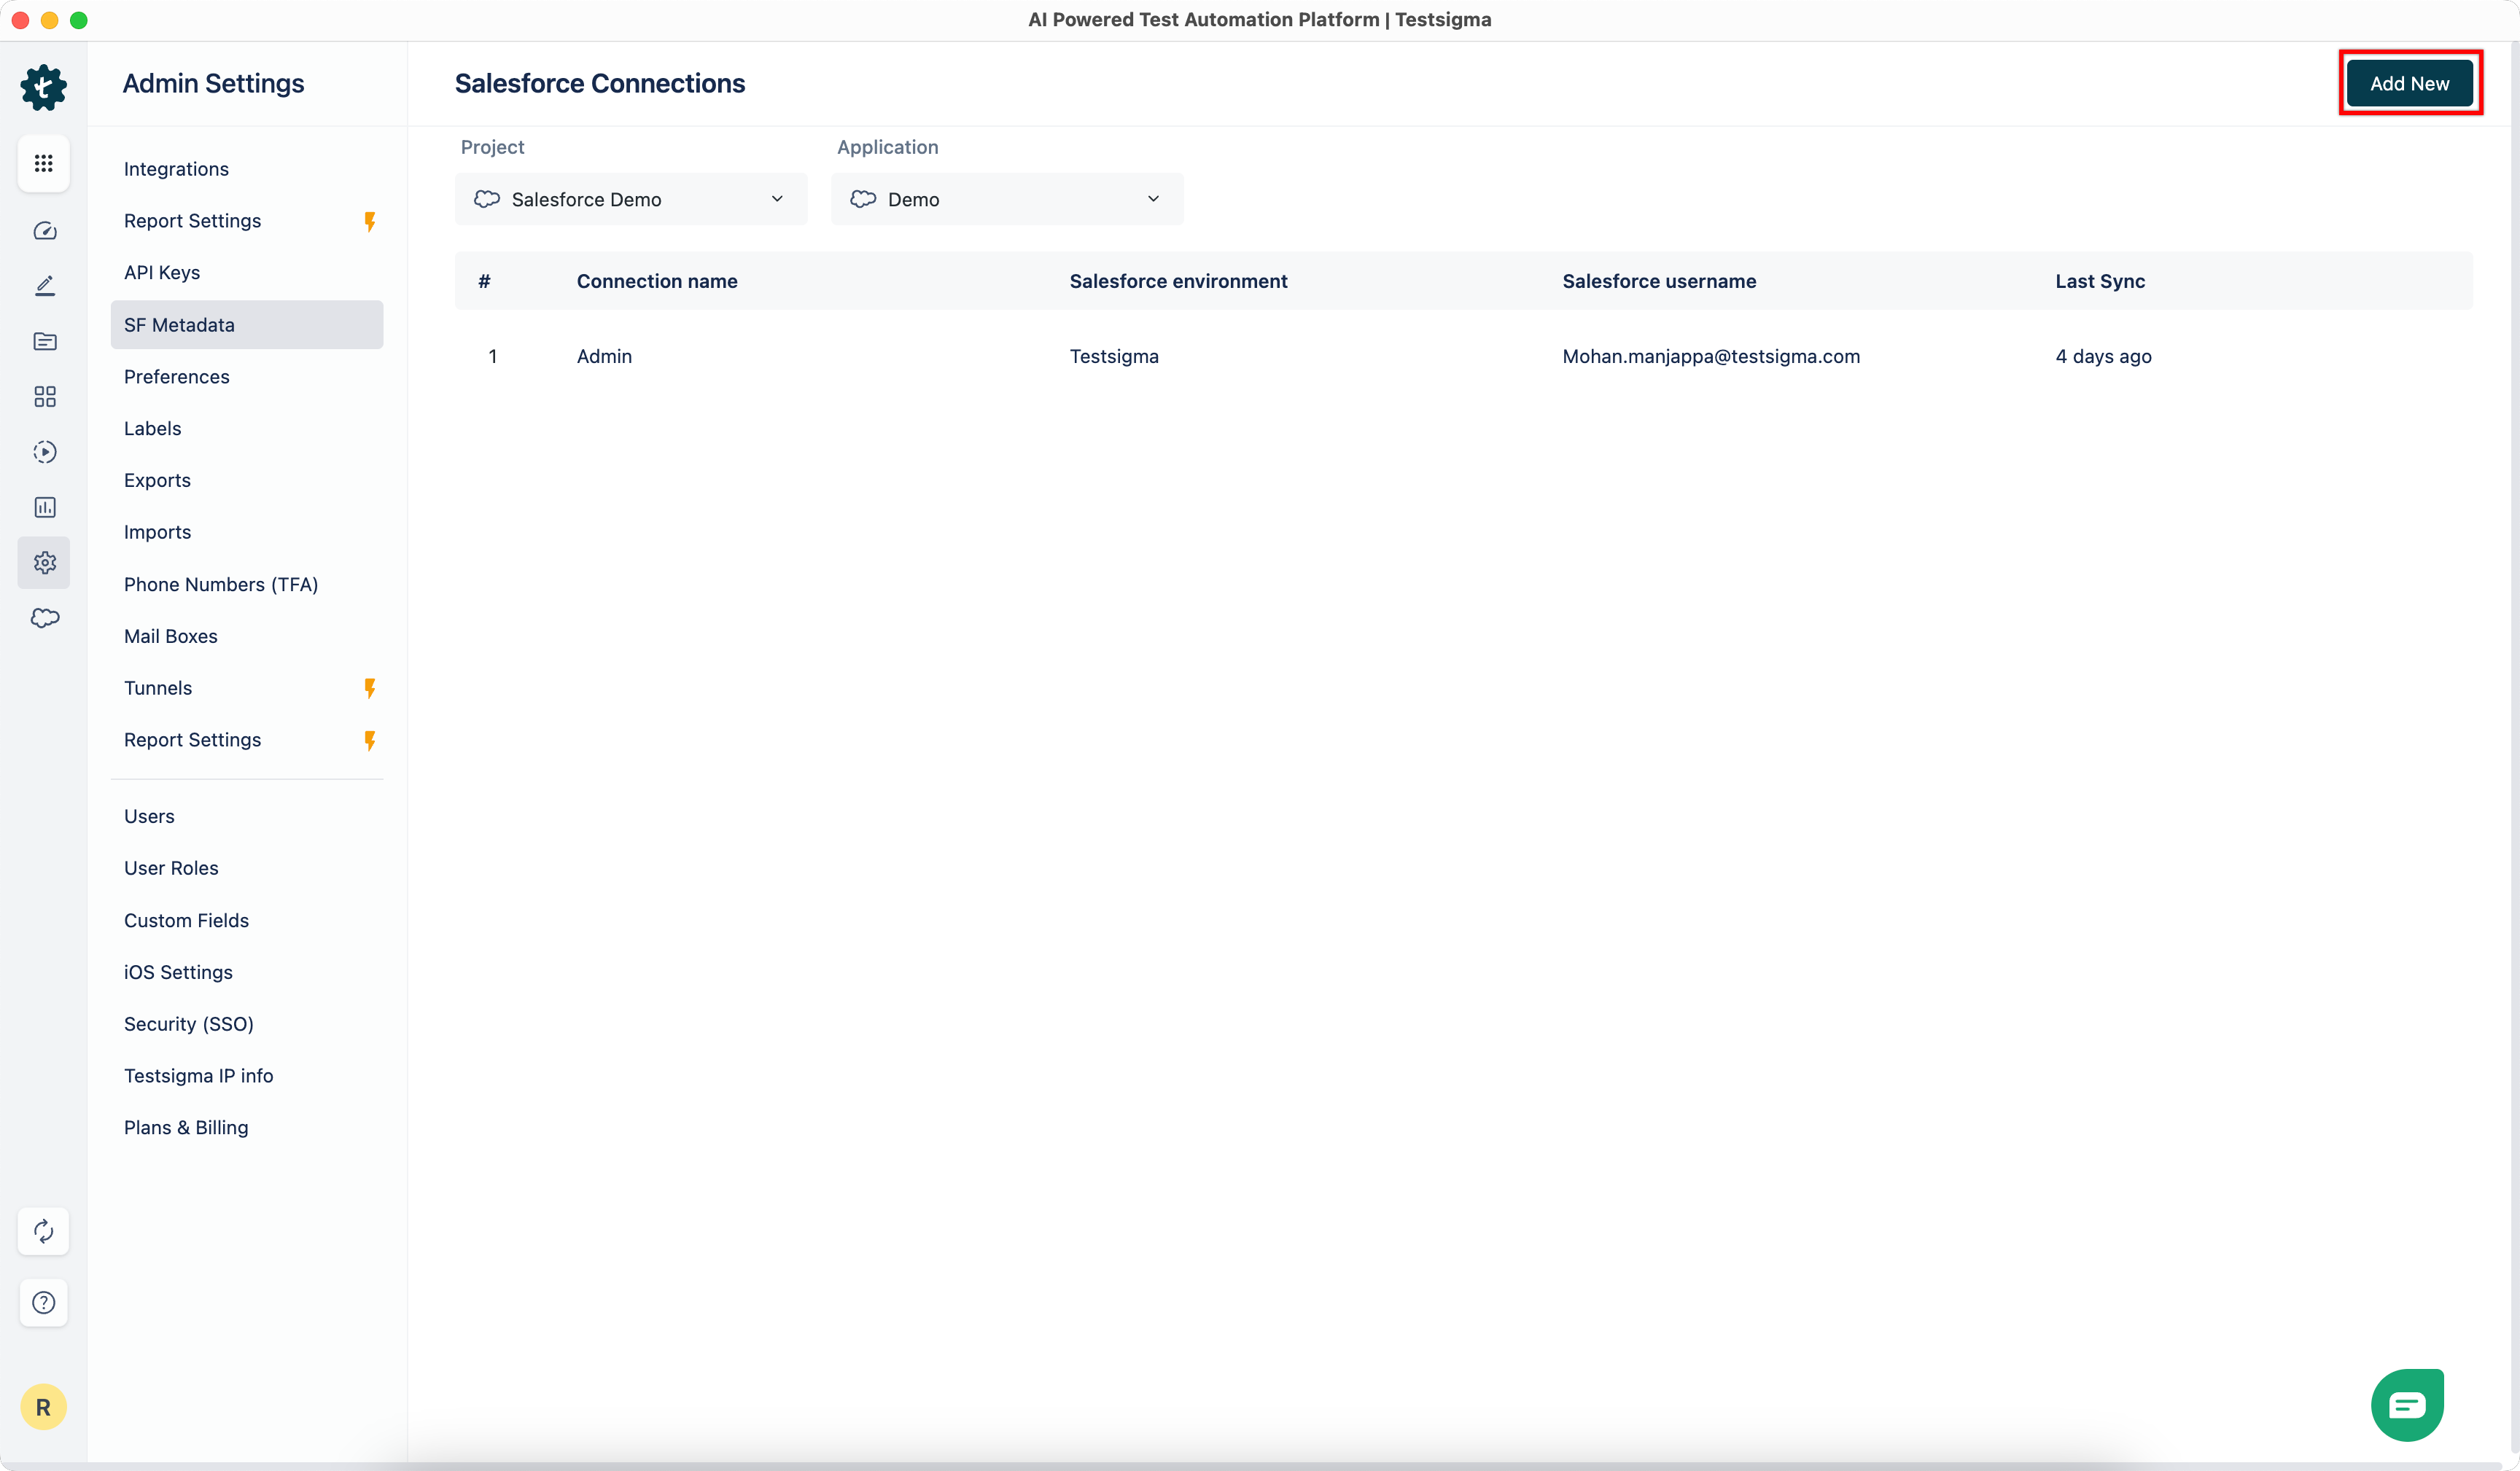
- Click Add New. This will open the Metadata Connection dialog.
- Follow the steps in the documentation on creating Salesforce Metadata Connections to add the Metadata Connections.
You can also copy existing metadata from multiple metadata connections added in older versions while creating a new version by following these steps.
- Go to Project > Project Settings > Versions, and click New Version.
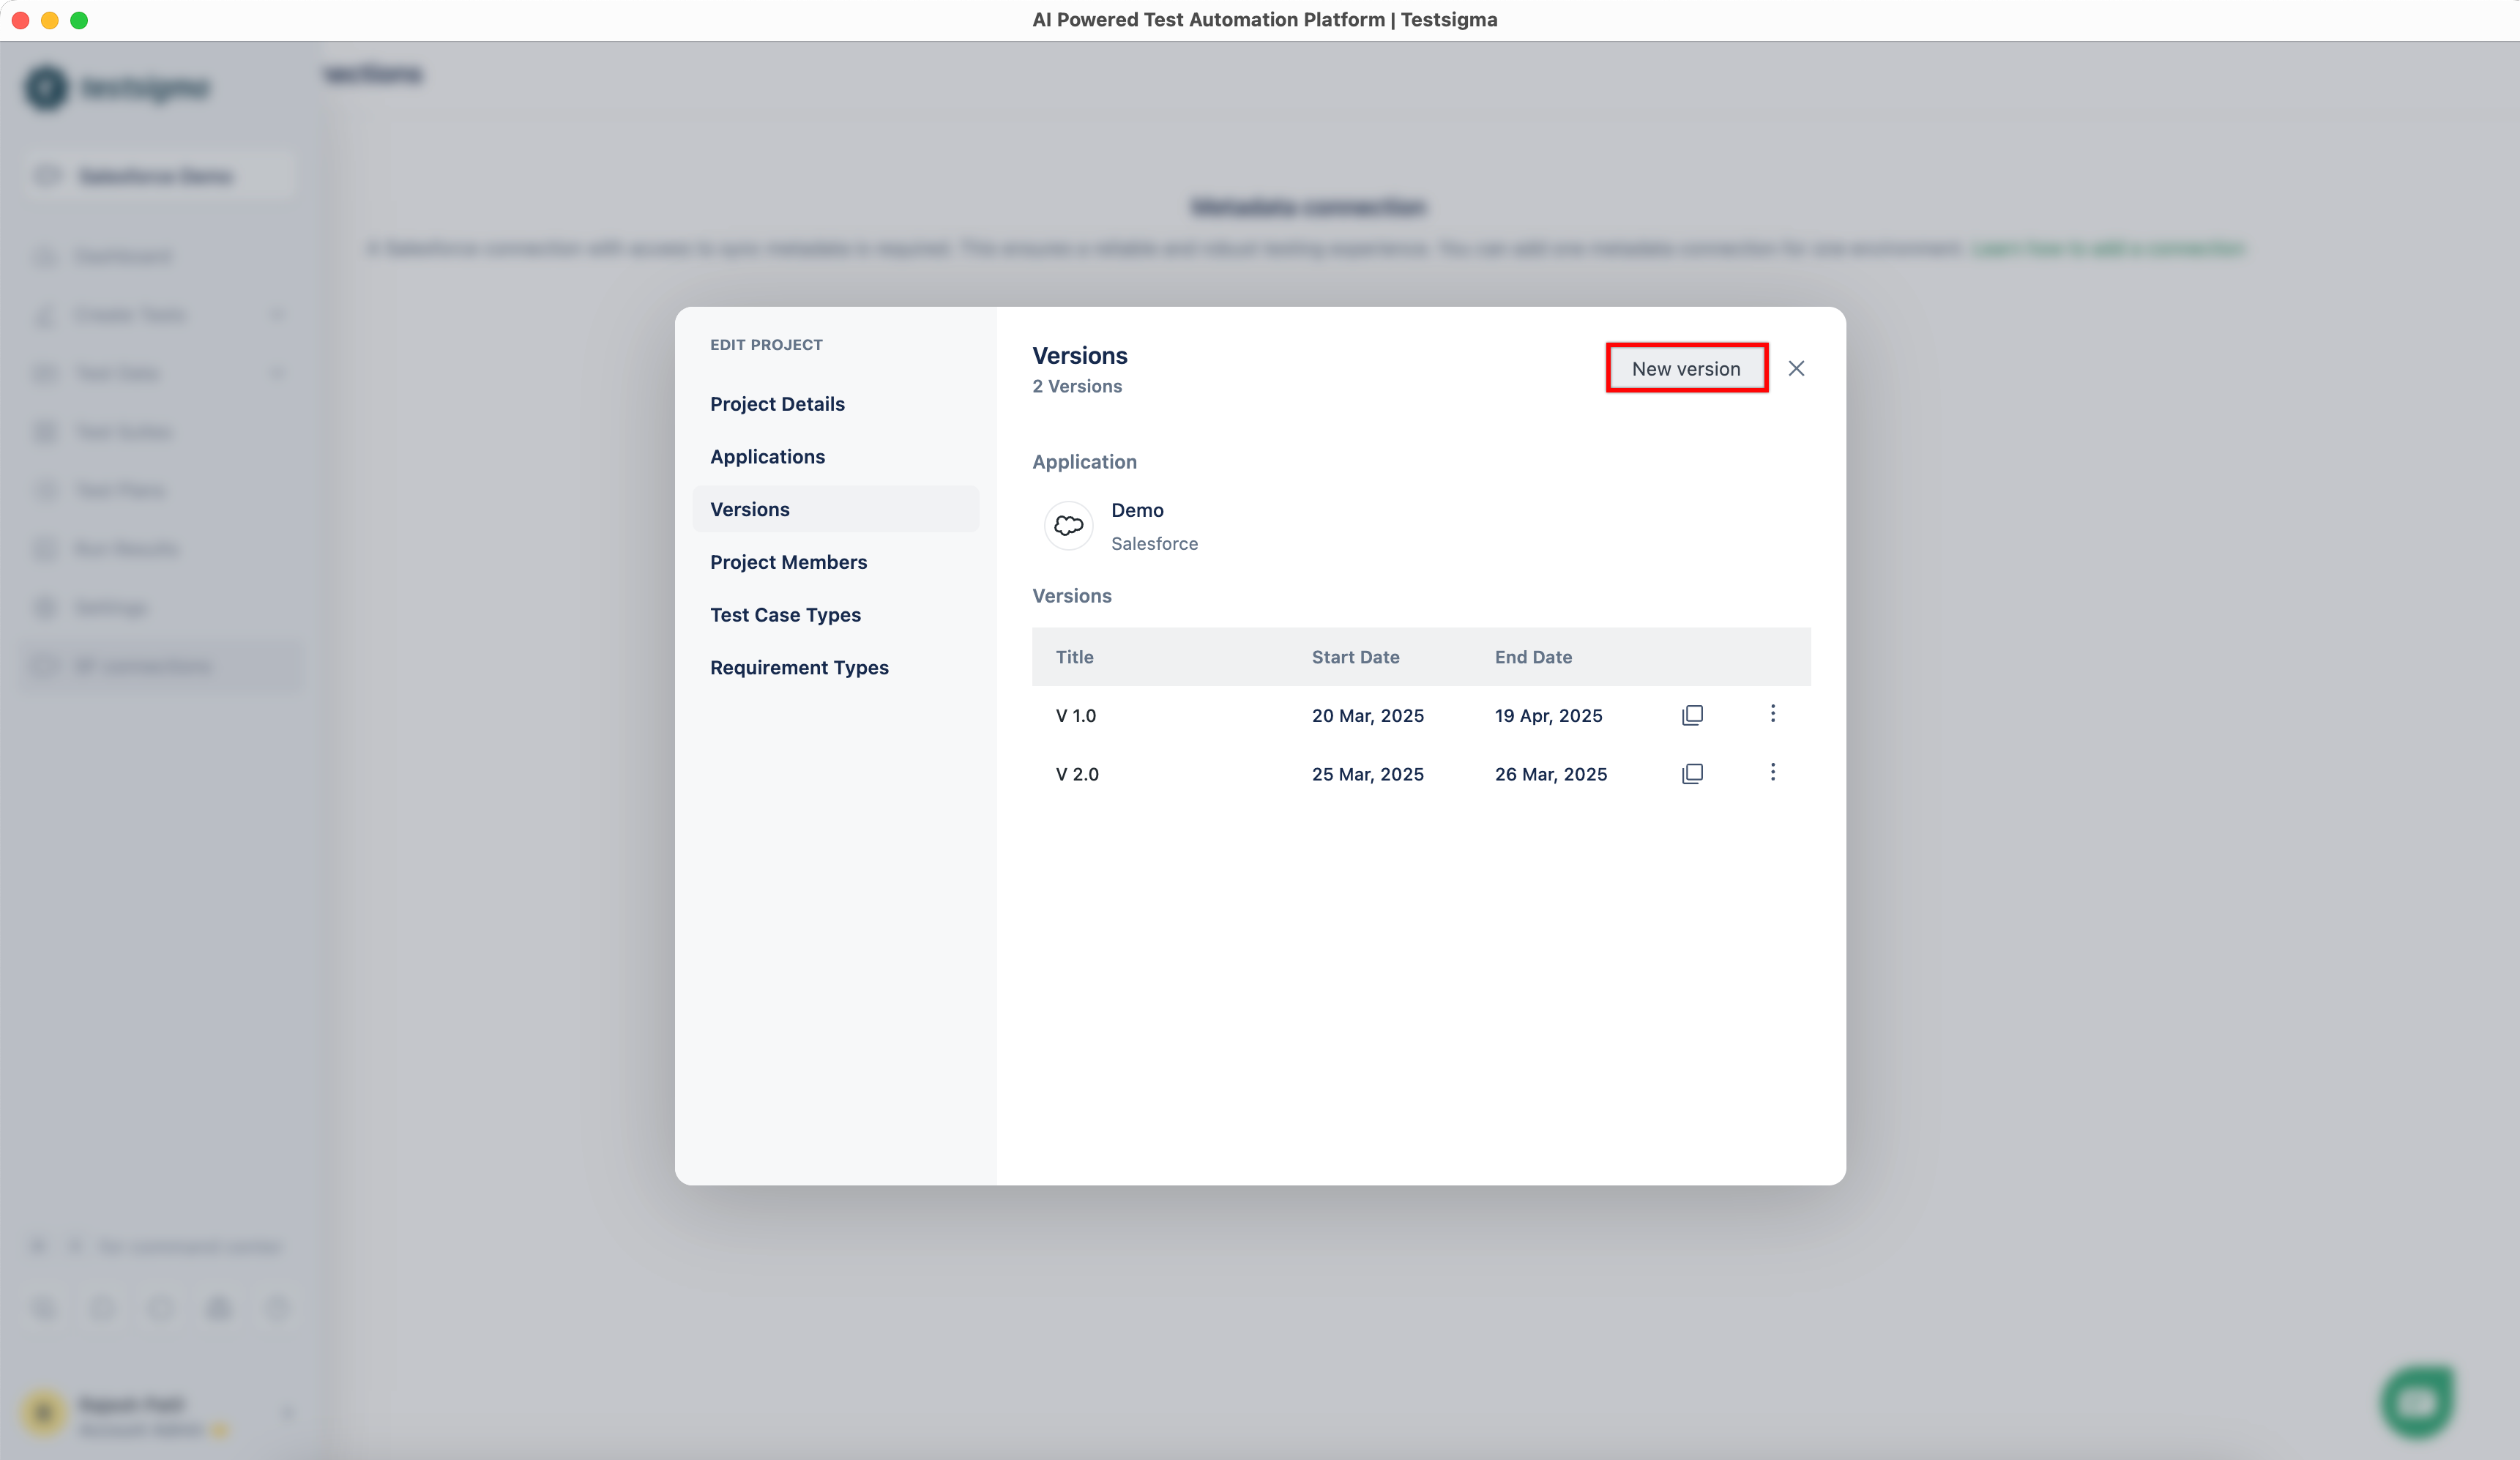
- Enter a Name and optional Description.
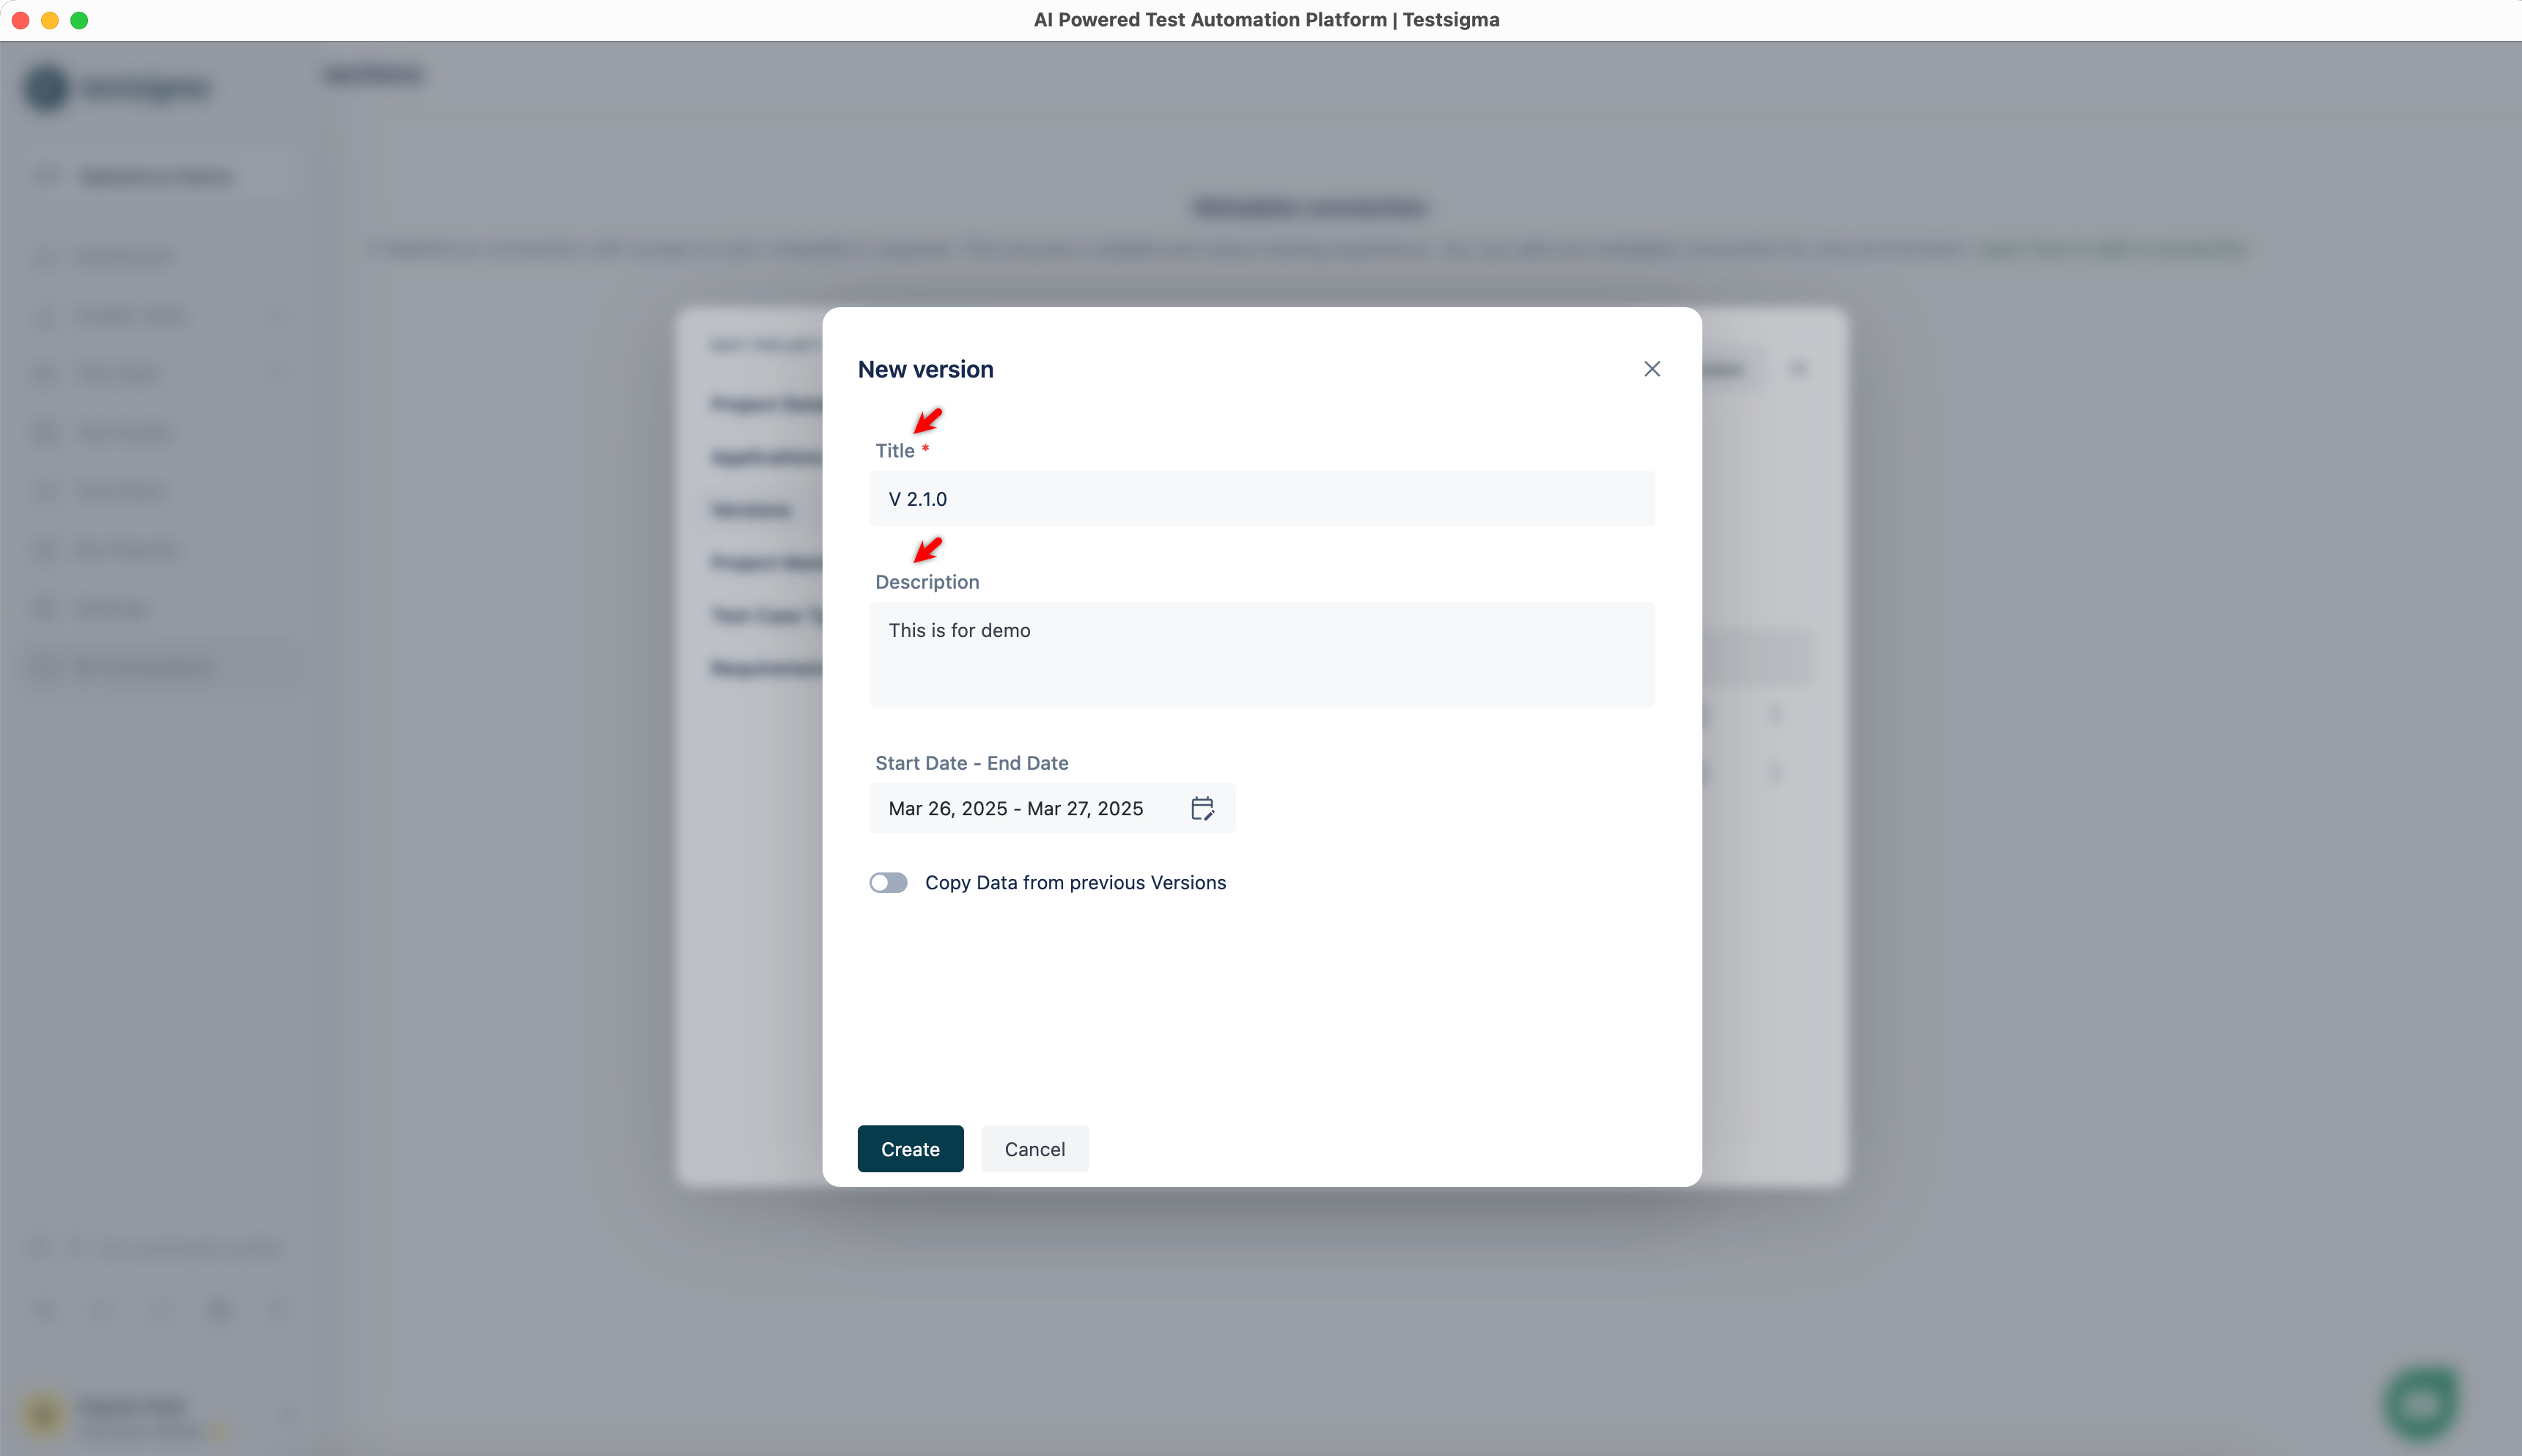
-
Go to Projects, and then navigate to the newly created Version. The system redirects you to the Salesforce Connections page.
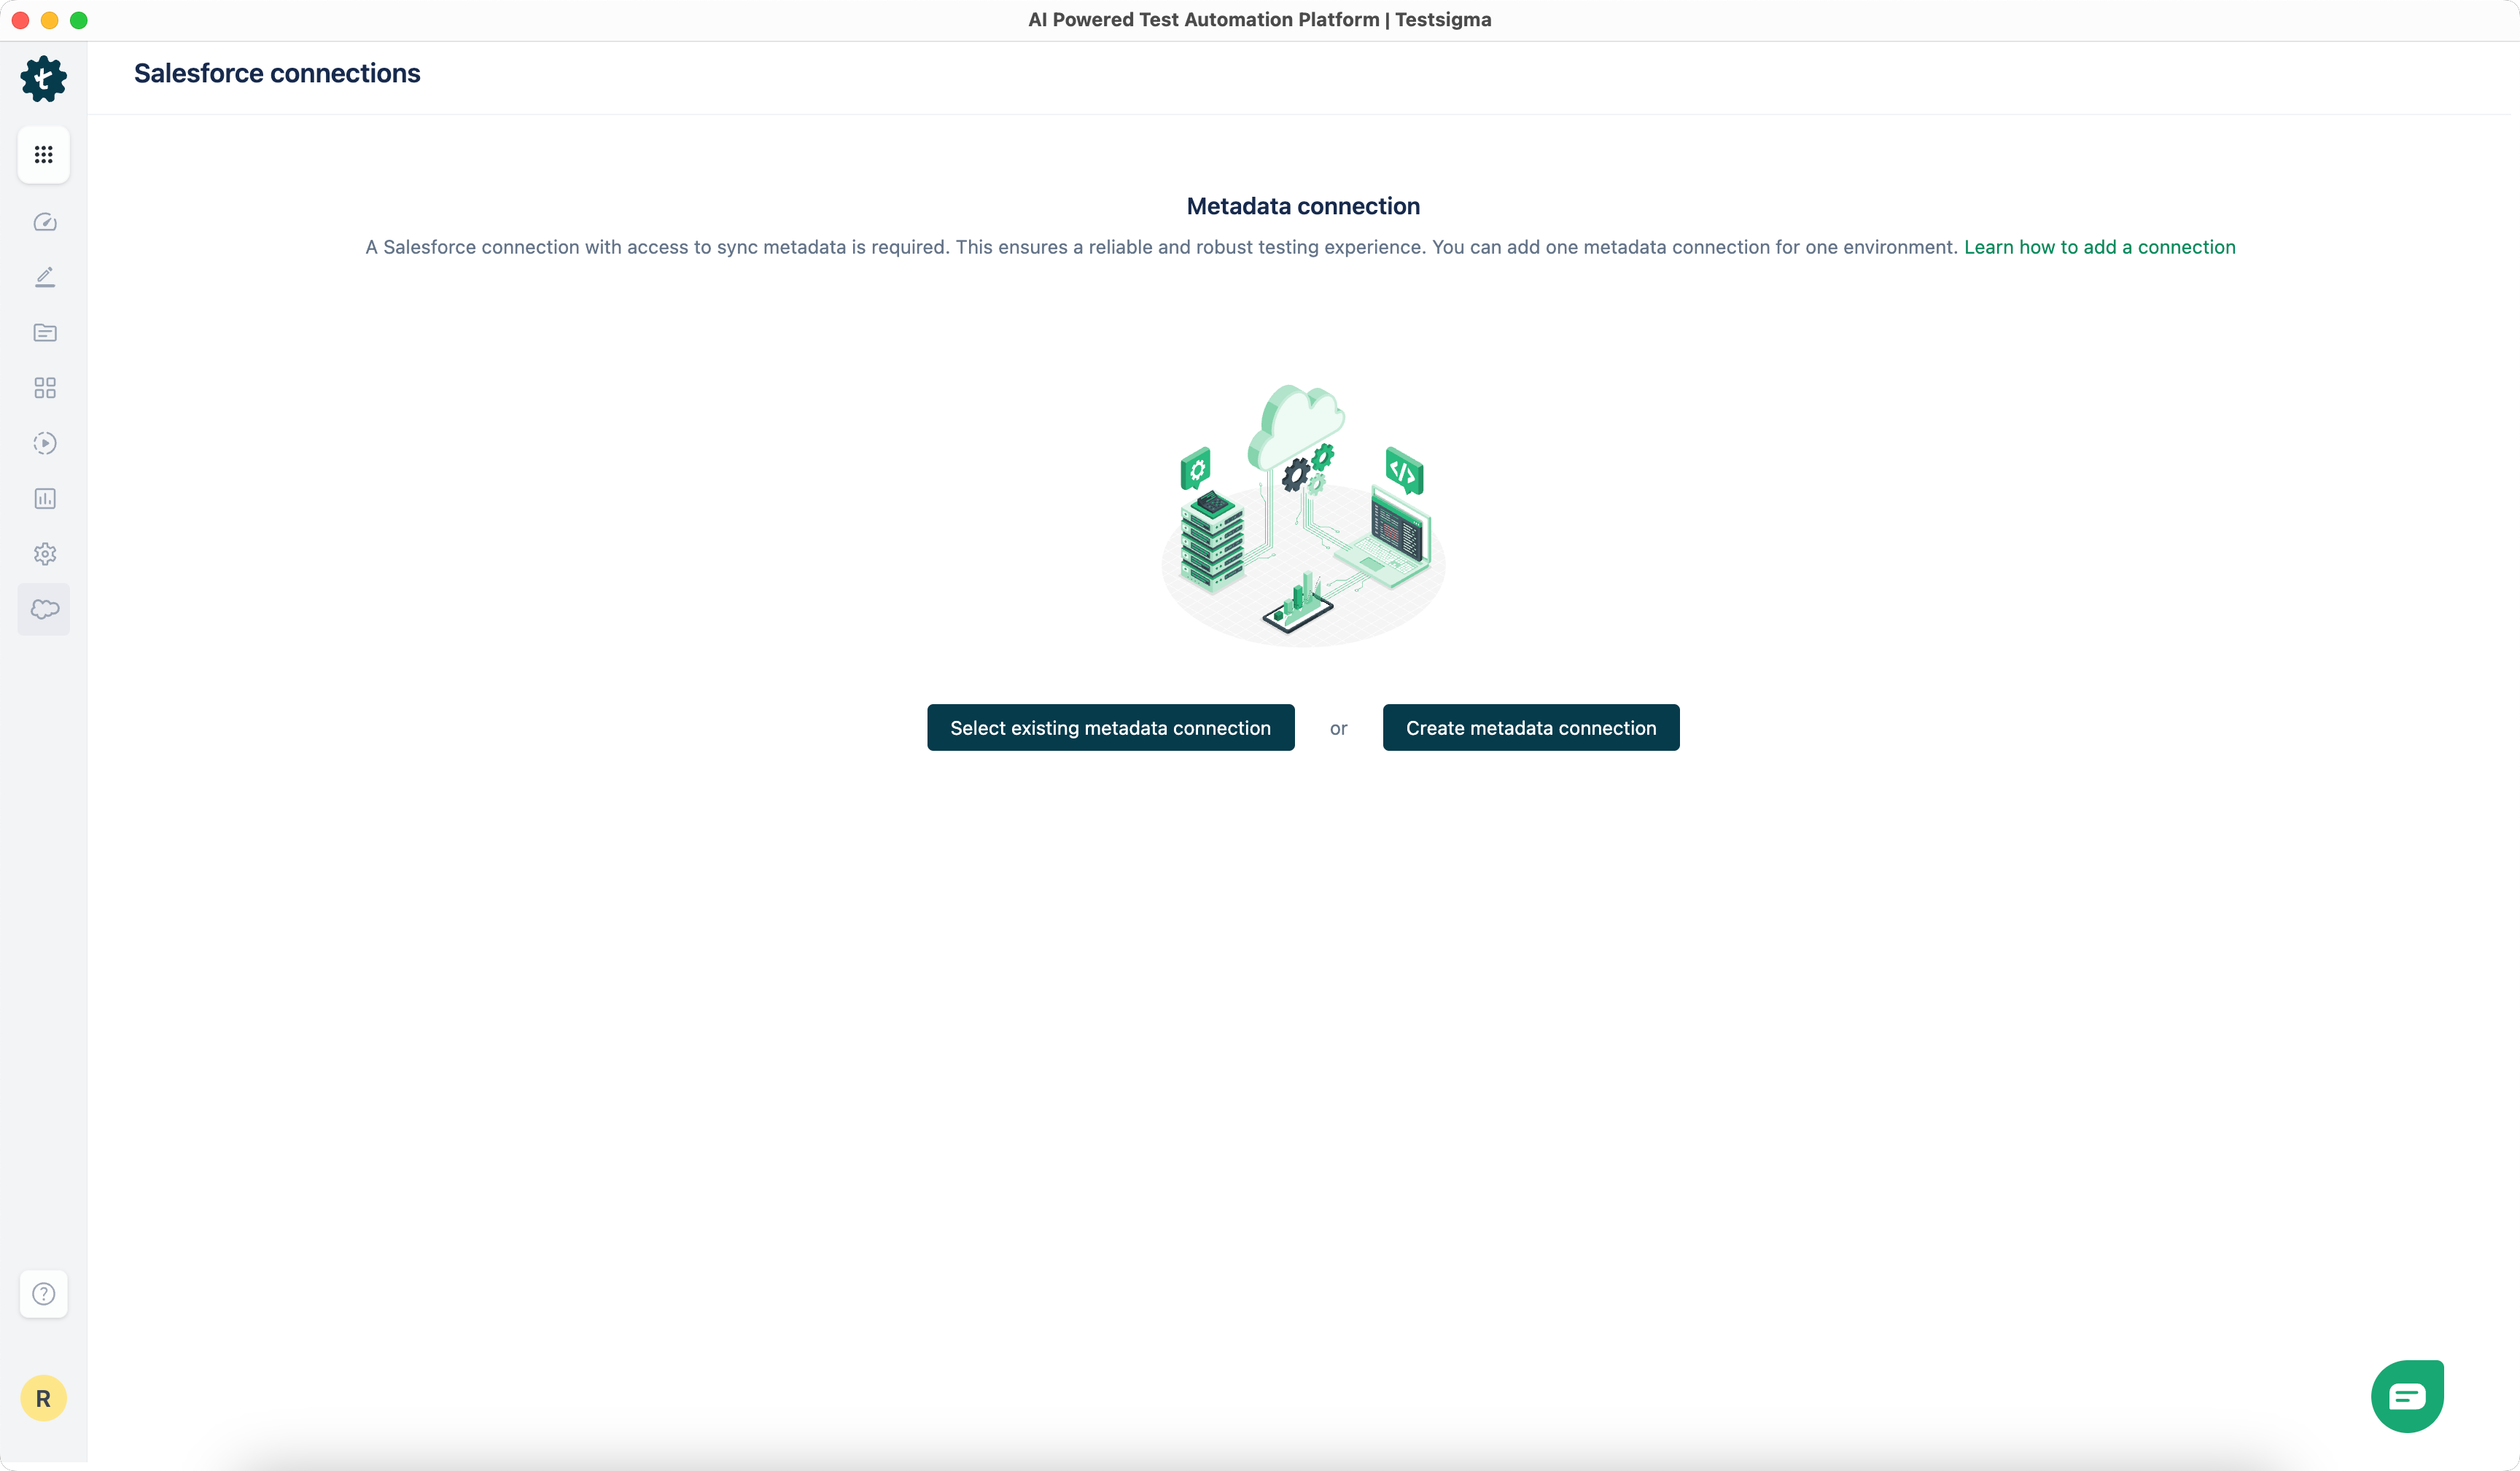
- Click Select Existing Metadata Connection to copy metadata from a previous version.
- Click Create Metadata Connection to create a new metadata connection.
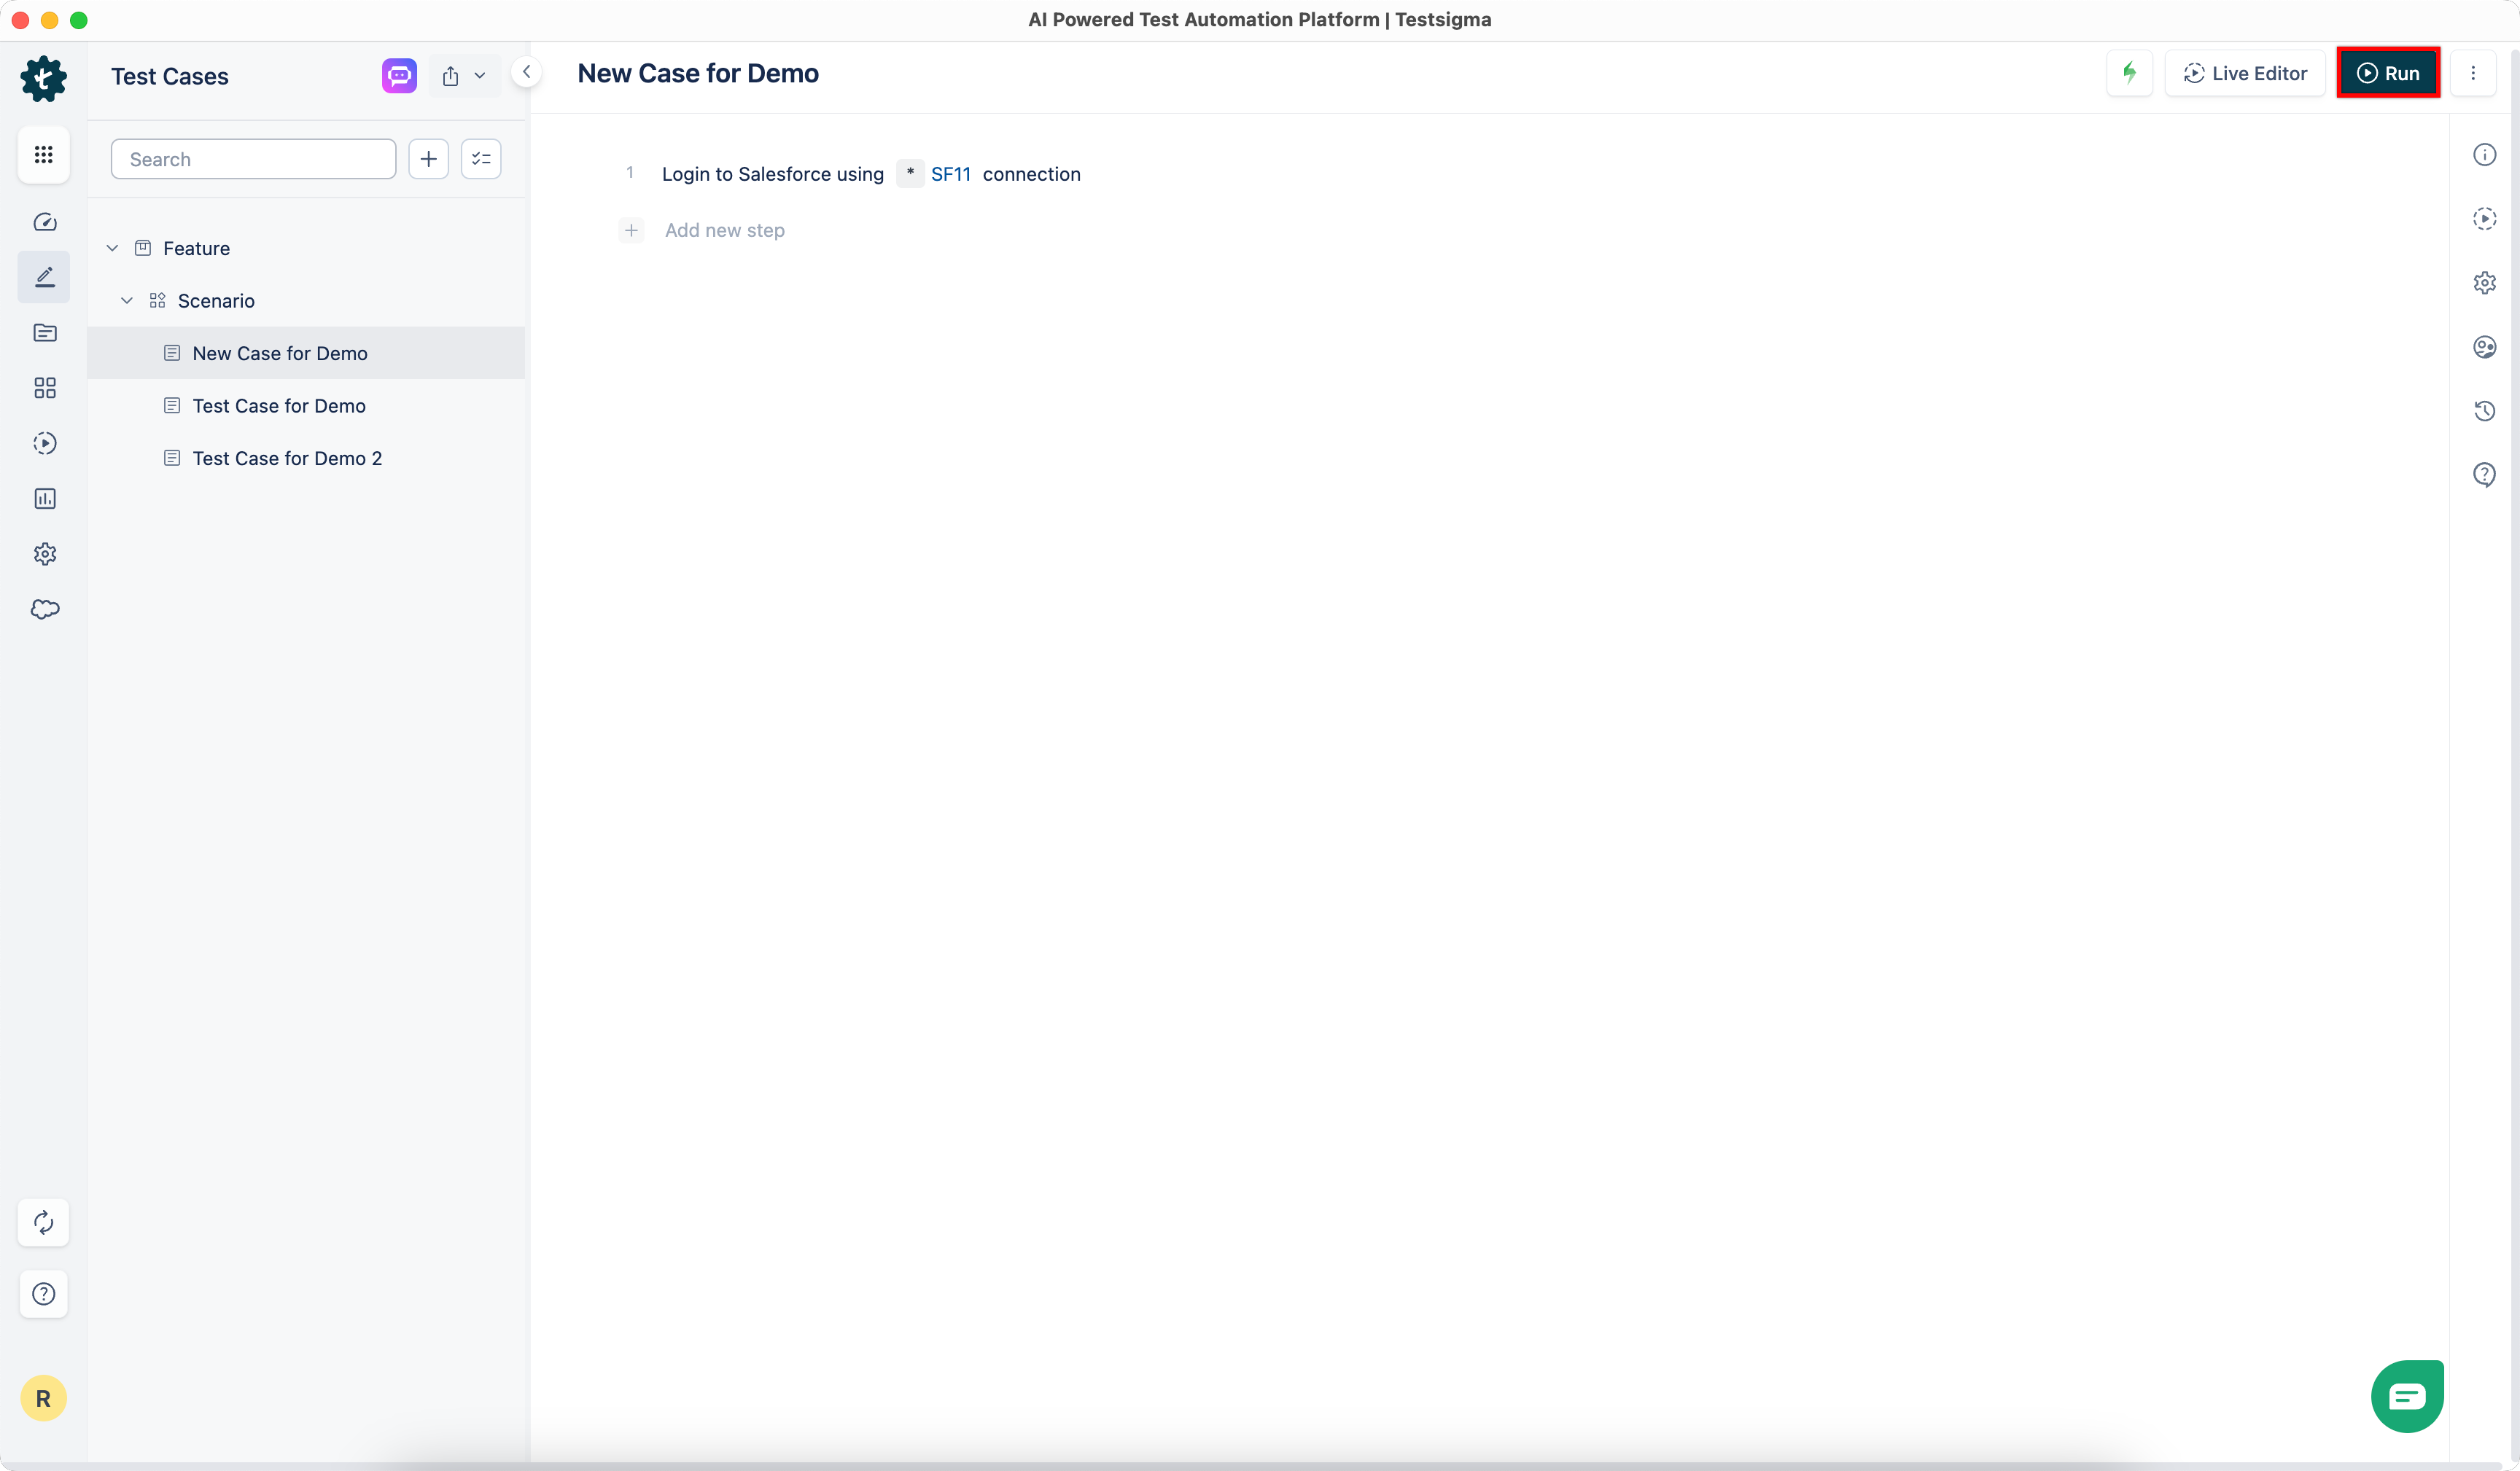
Executing Test Case against a Salesforce Metadata Connection
- Create a Test Case and click Run on the Action Panel.
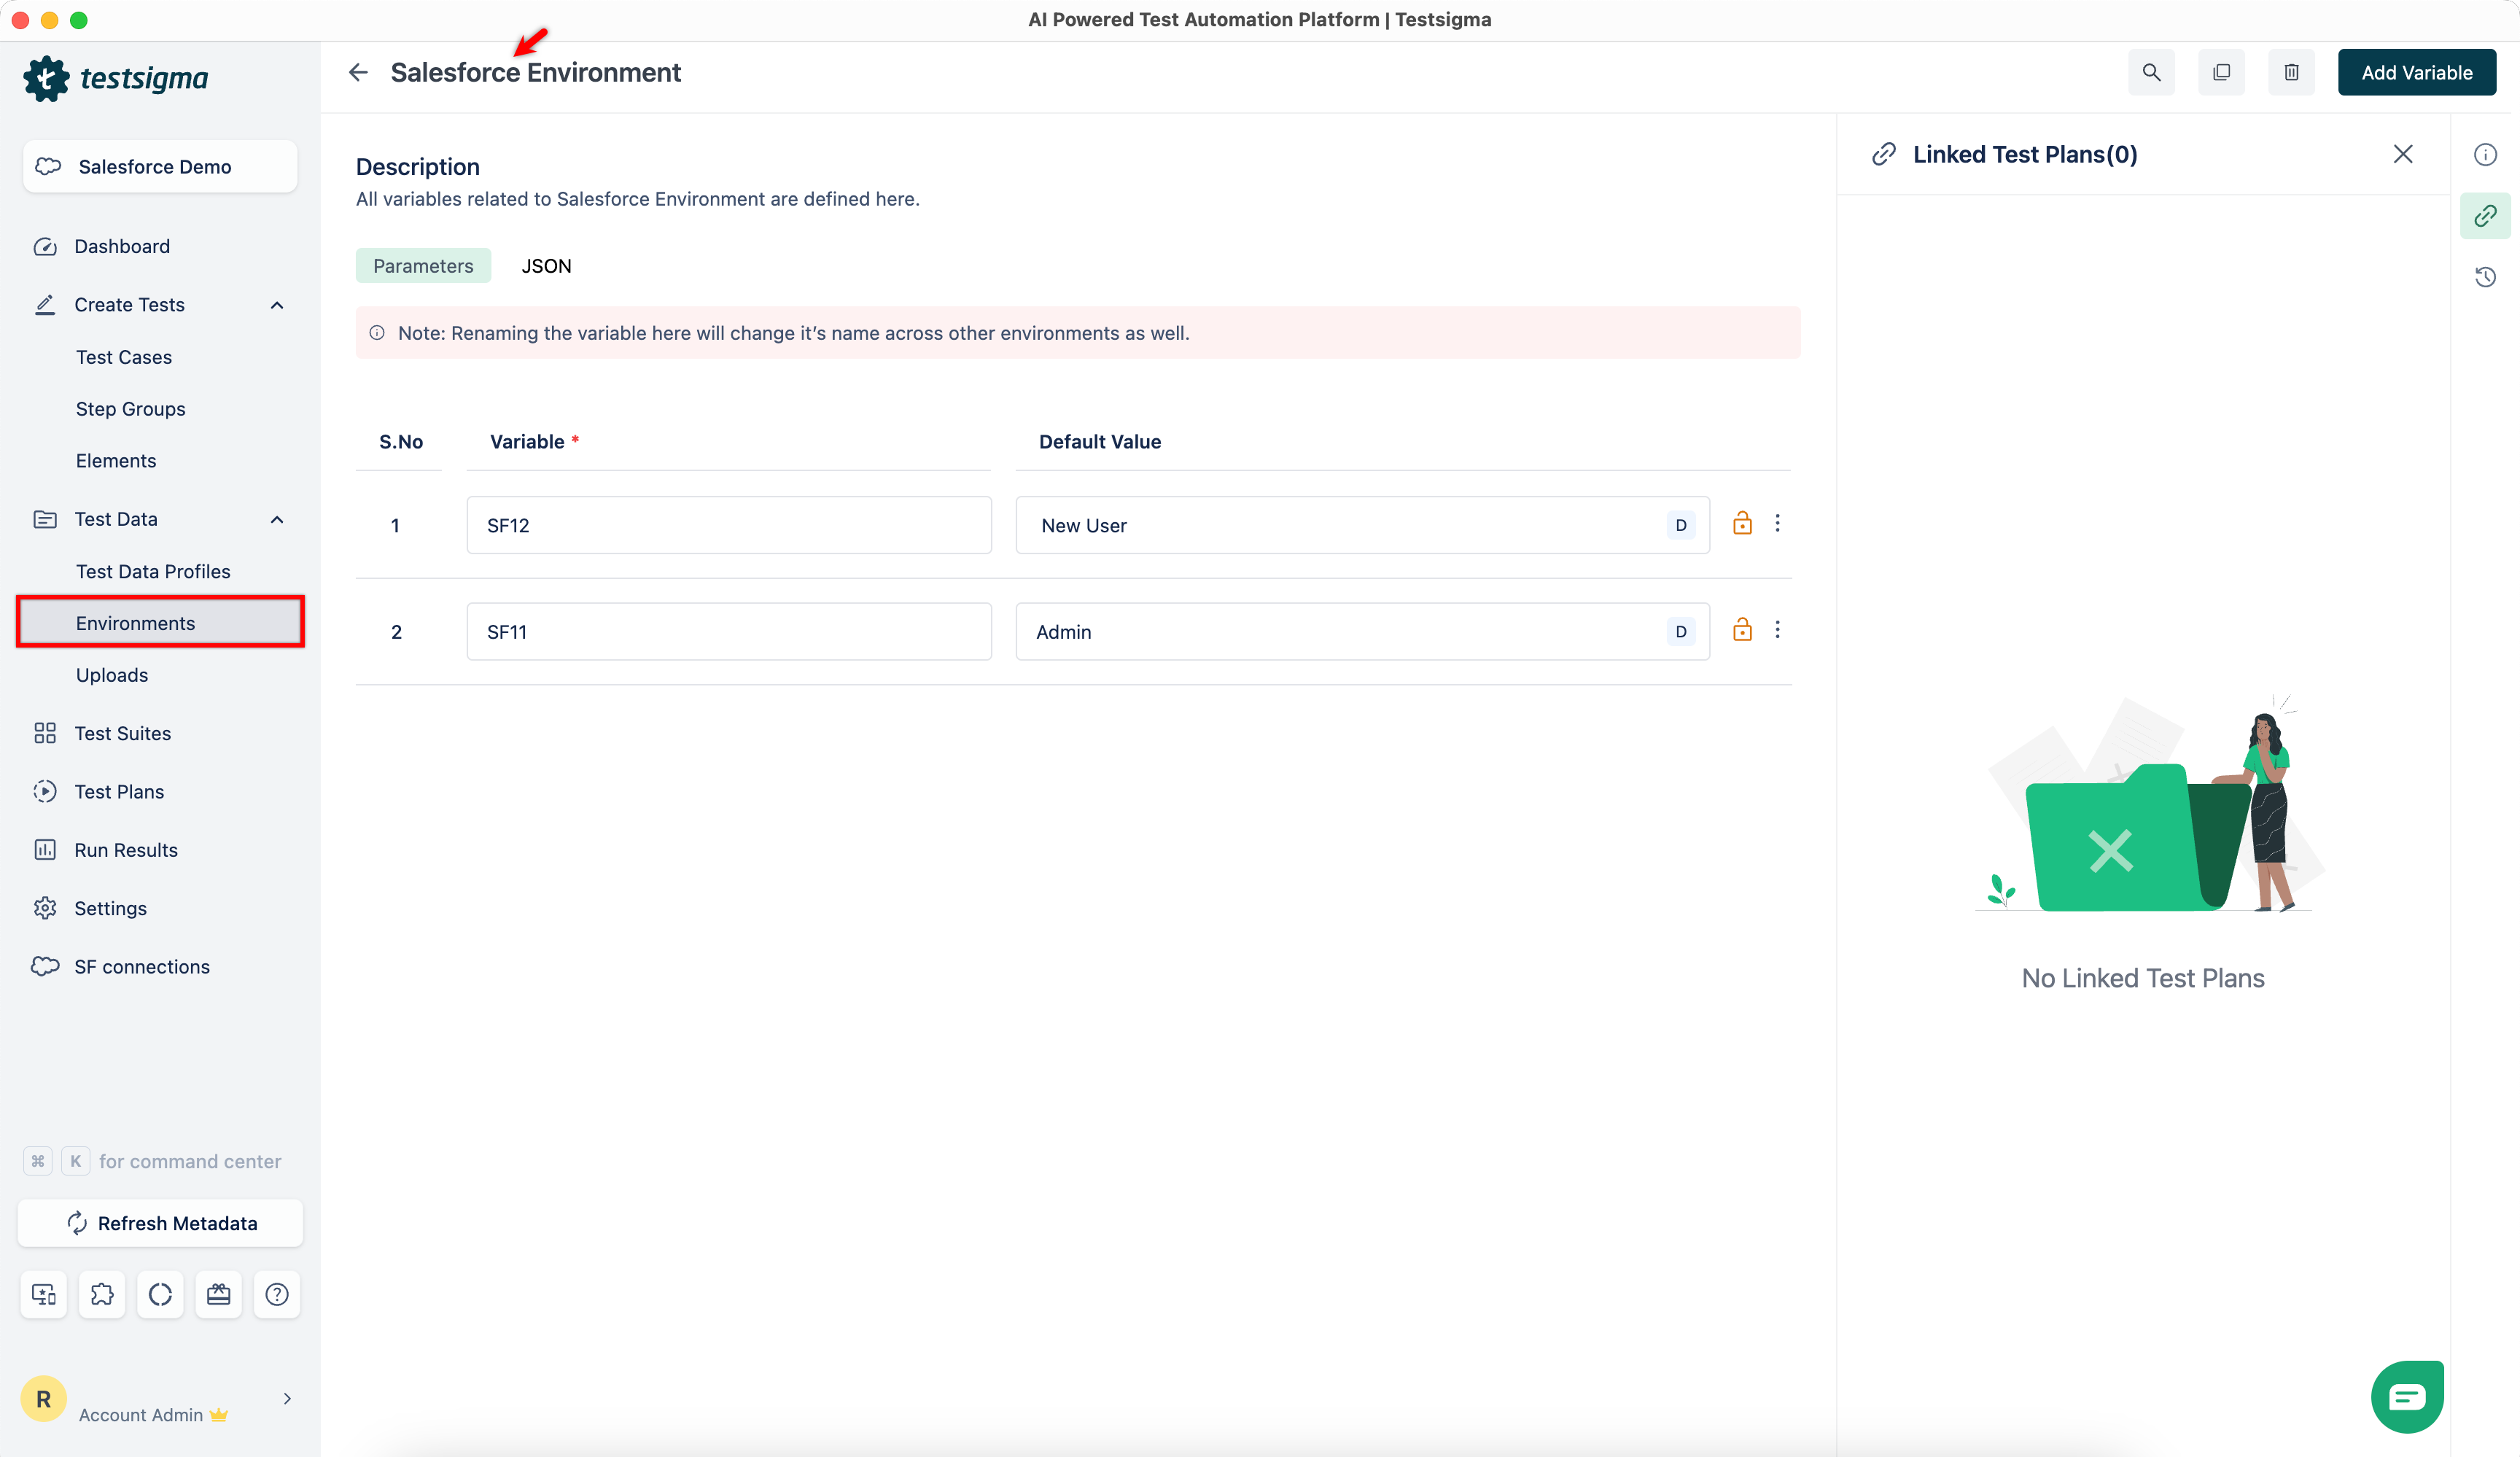
Before you configure Ad-Hoc Run, you need to add user connections as Environments in Testsigma. For information on creating Environments, see Environments.
-
On the Ad-Hoc Run overlay,
- Select an Environment with which the user connection is linked in the test steps.
- Select a Salesforce Metadata Connection against which you want to execute the test case.
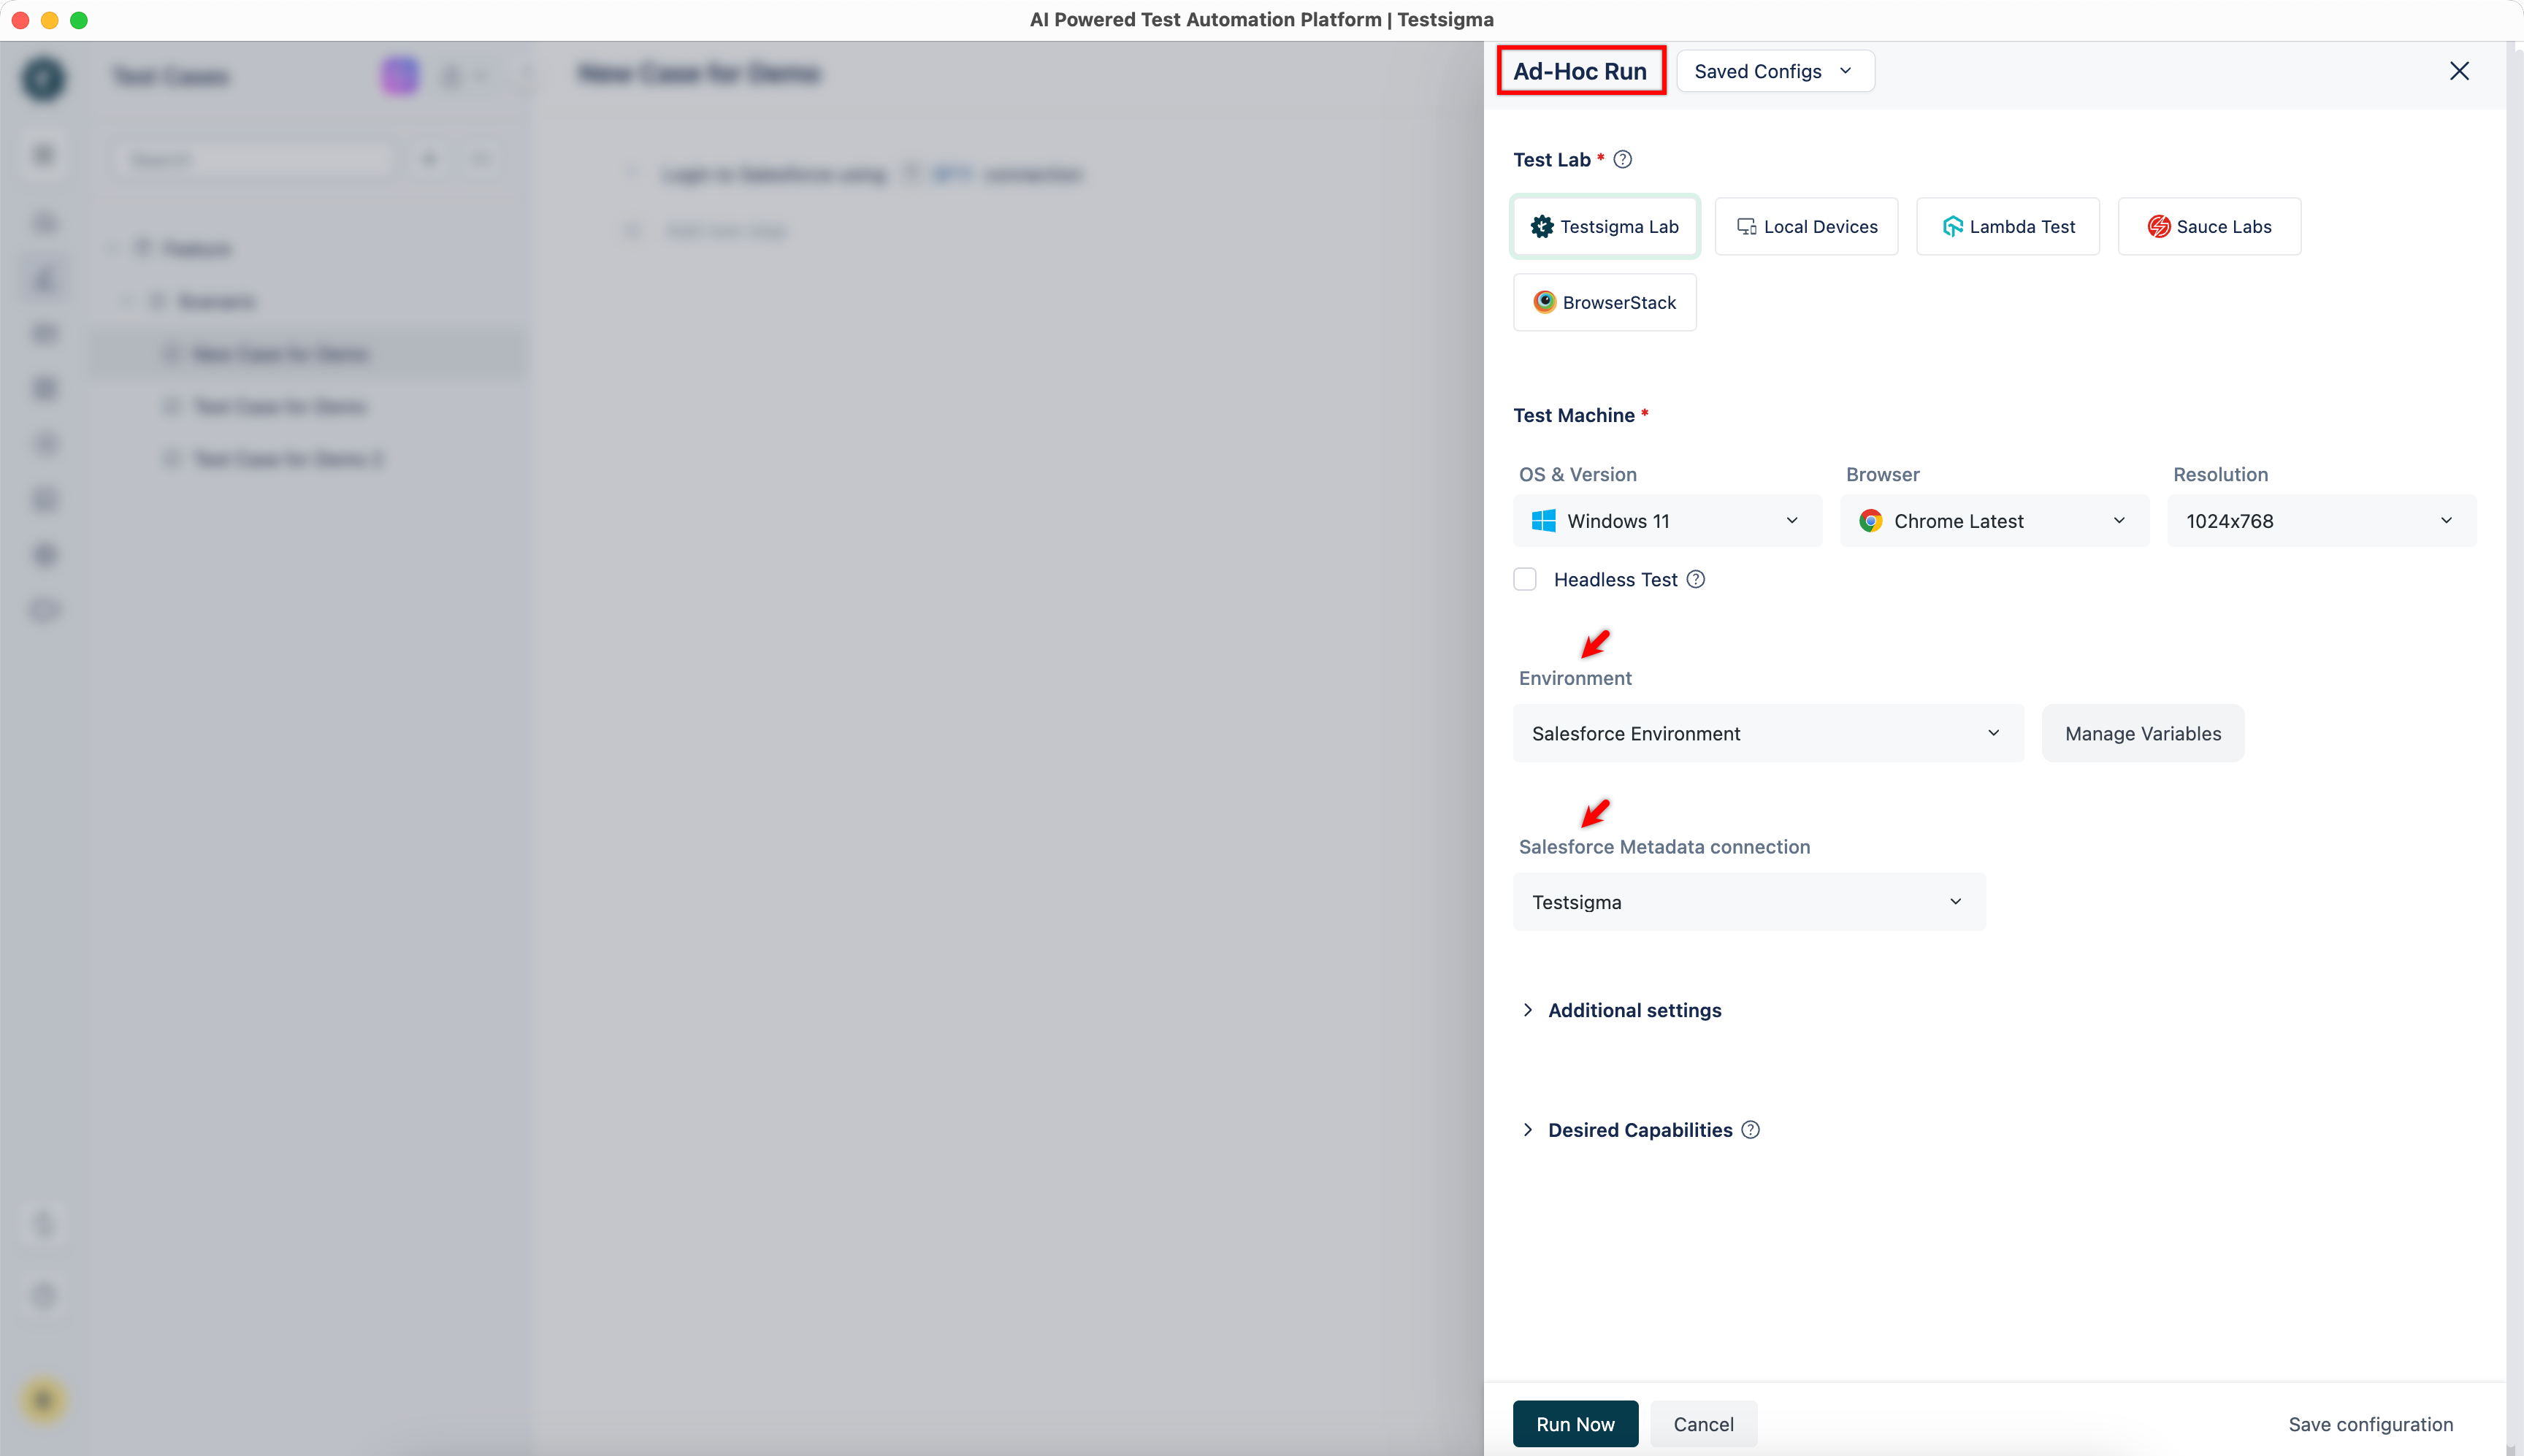
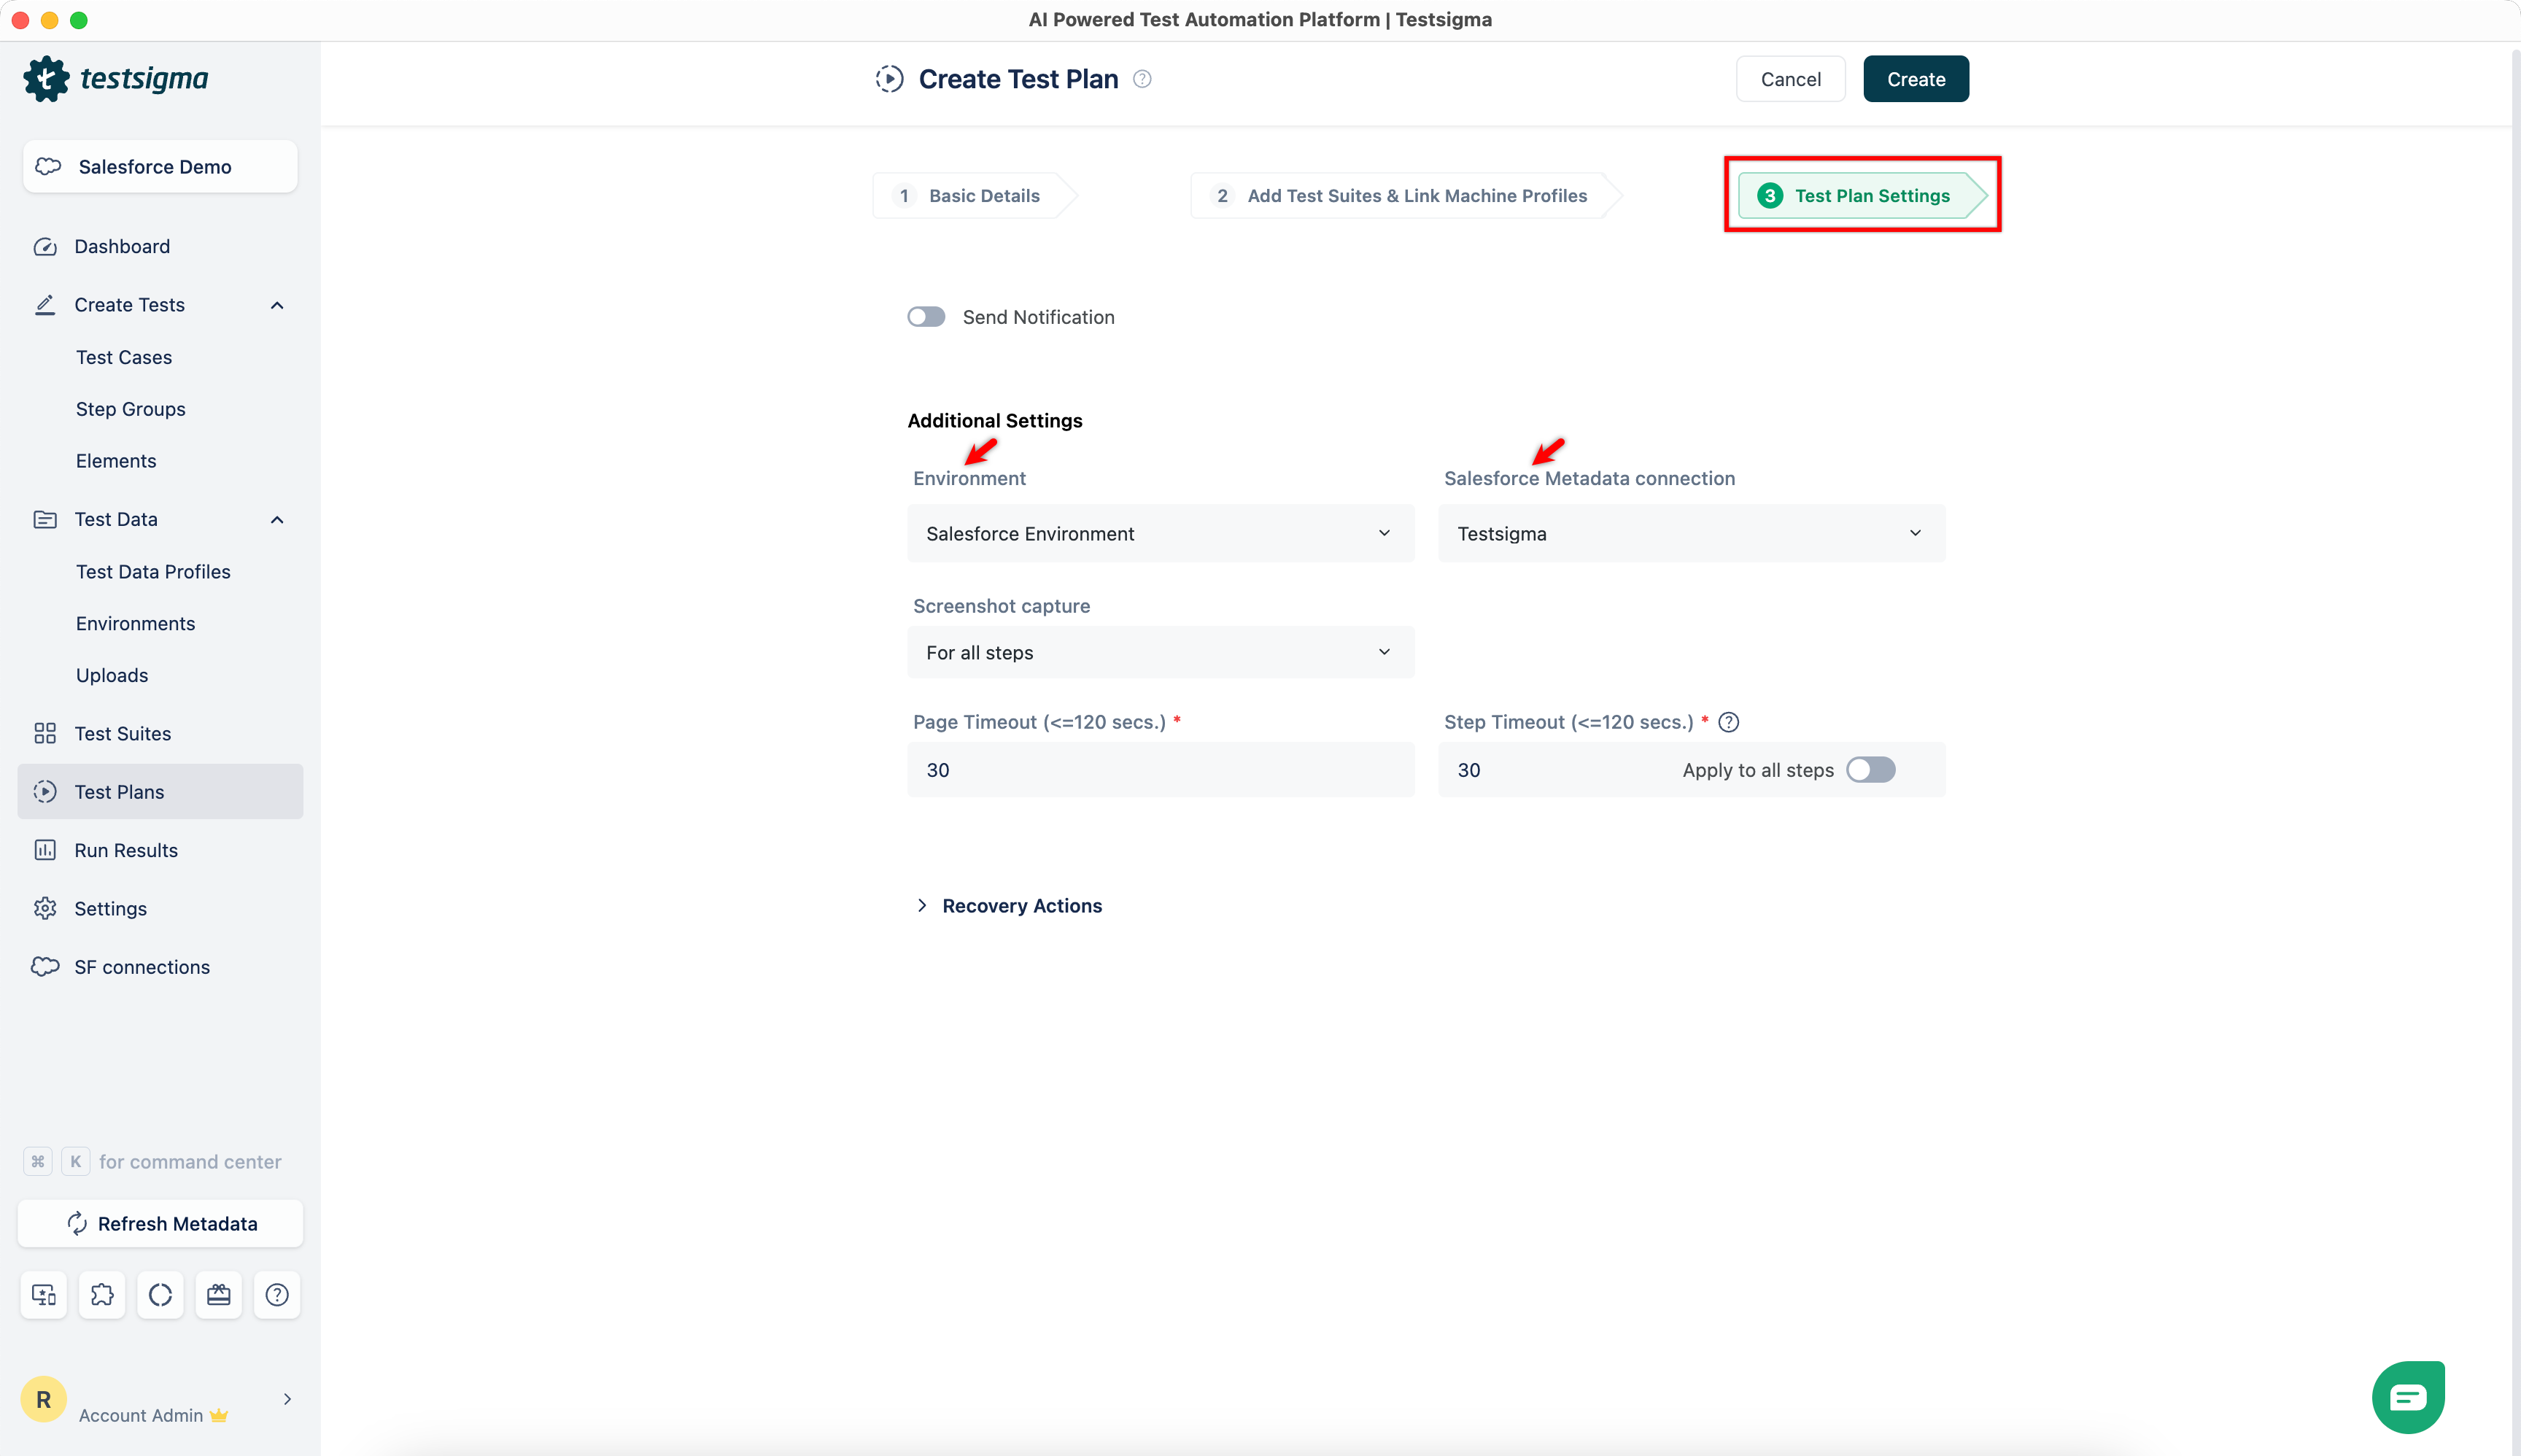
You can also configure the same for Test Plans in Test Plan Settings > Additional Settings by selecting Environment and a Salesforce Metadata Connection.
Steps to Edit Metadata Connection
- From the Dashboard, click on SF Connections.

- In the Metadata connection section, hover over the connection, click on the kebab menu, and choose Edit connection from the dropdown menu.
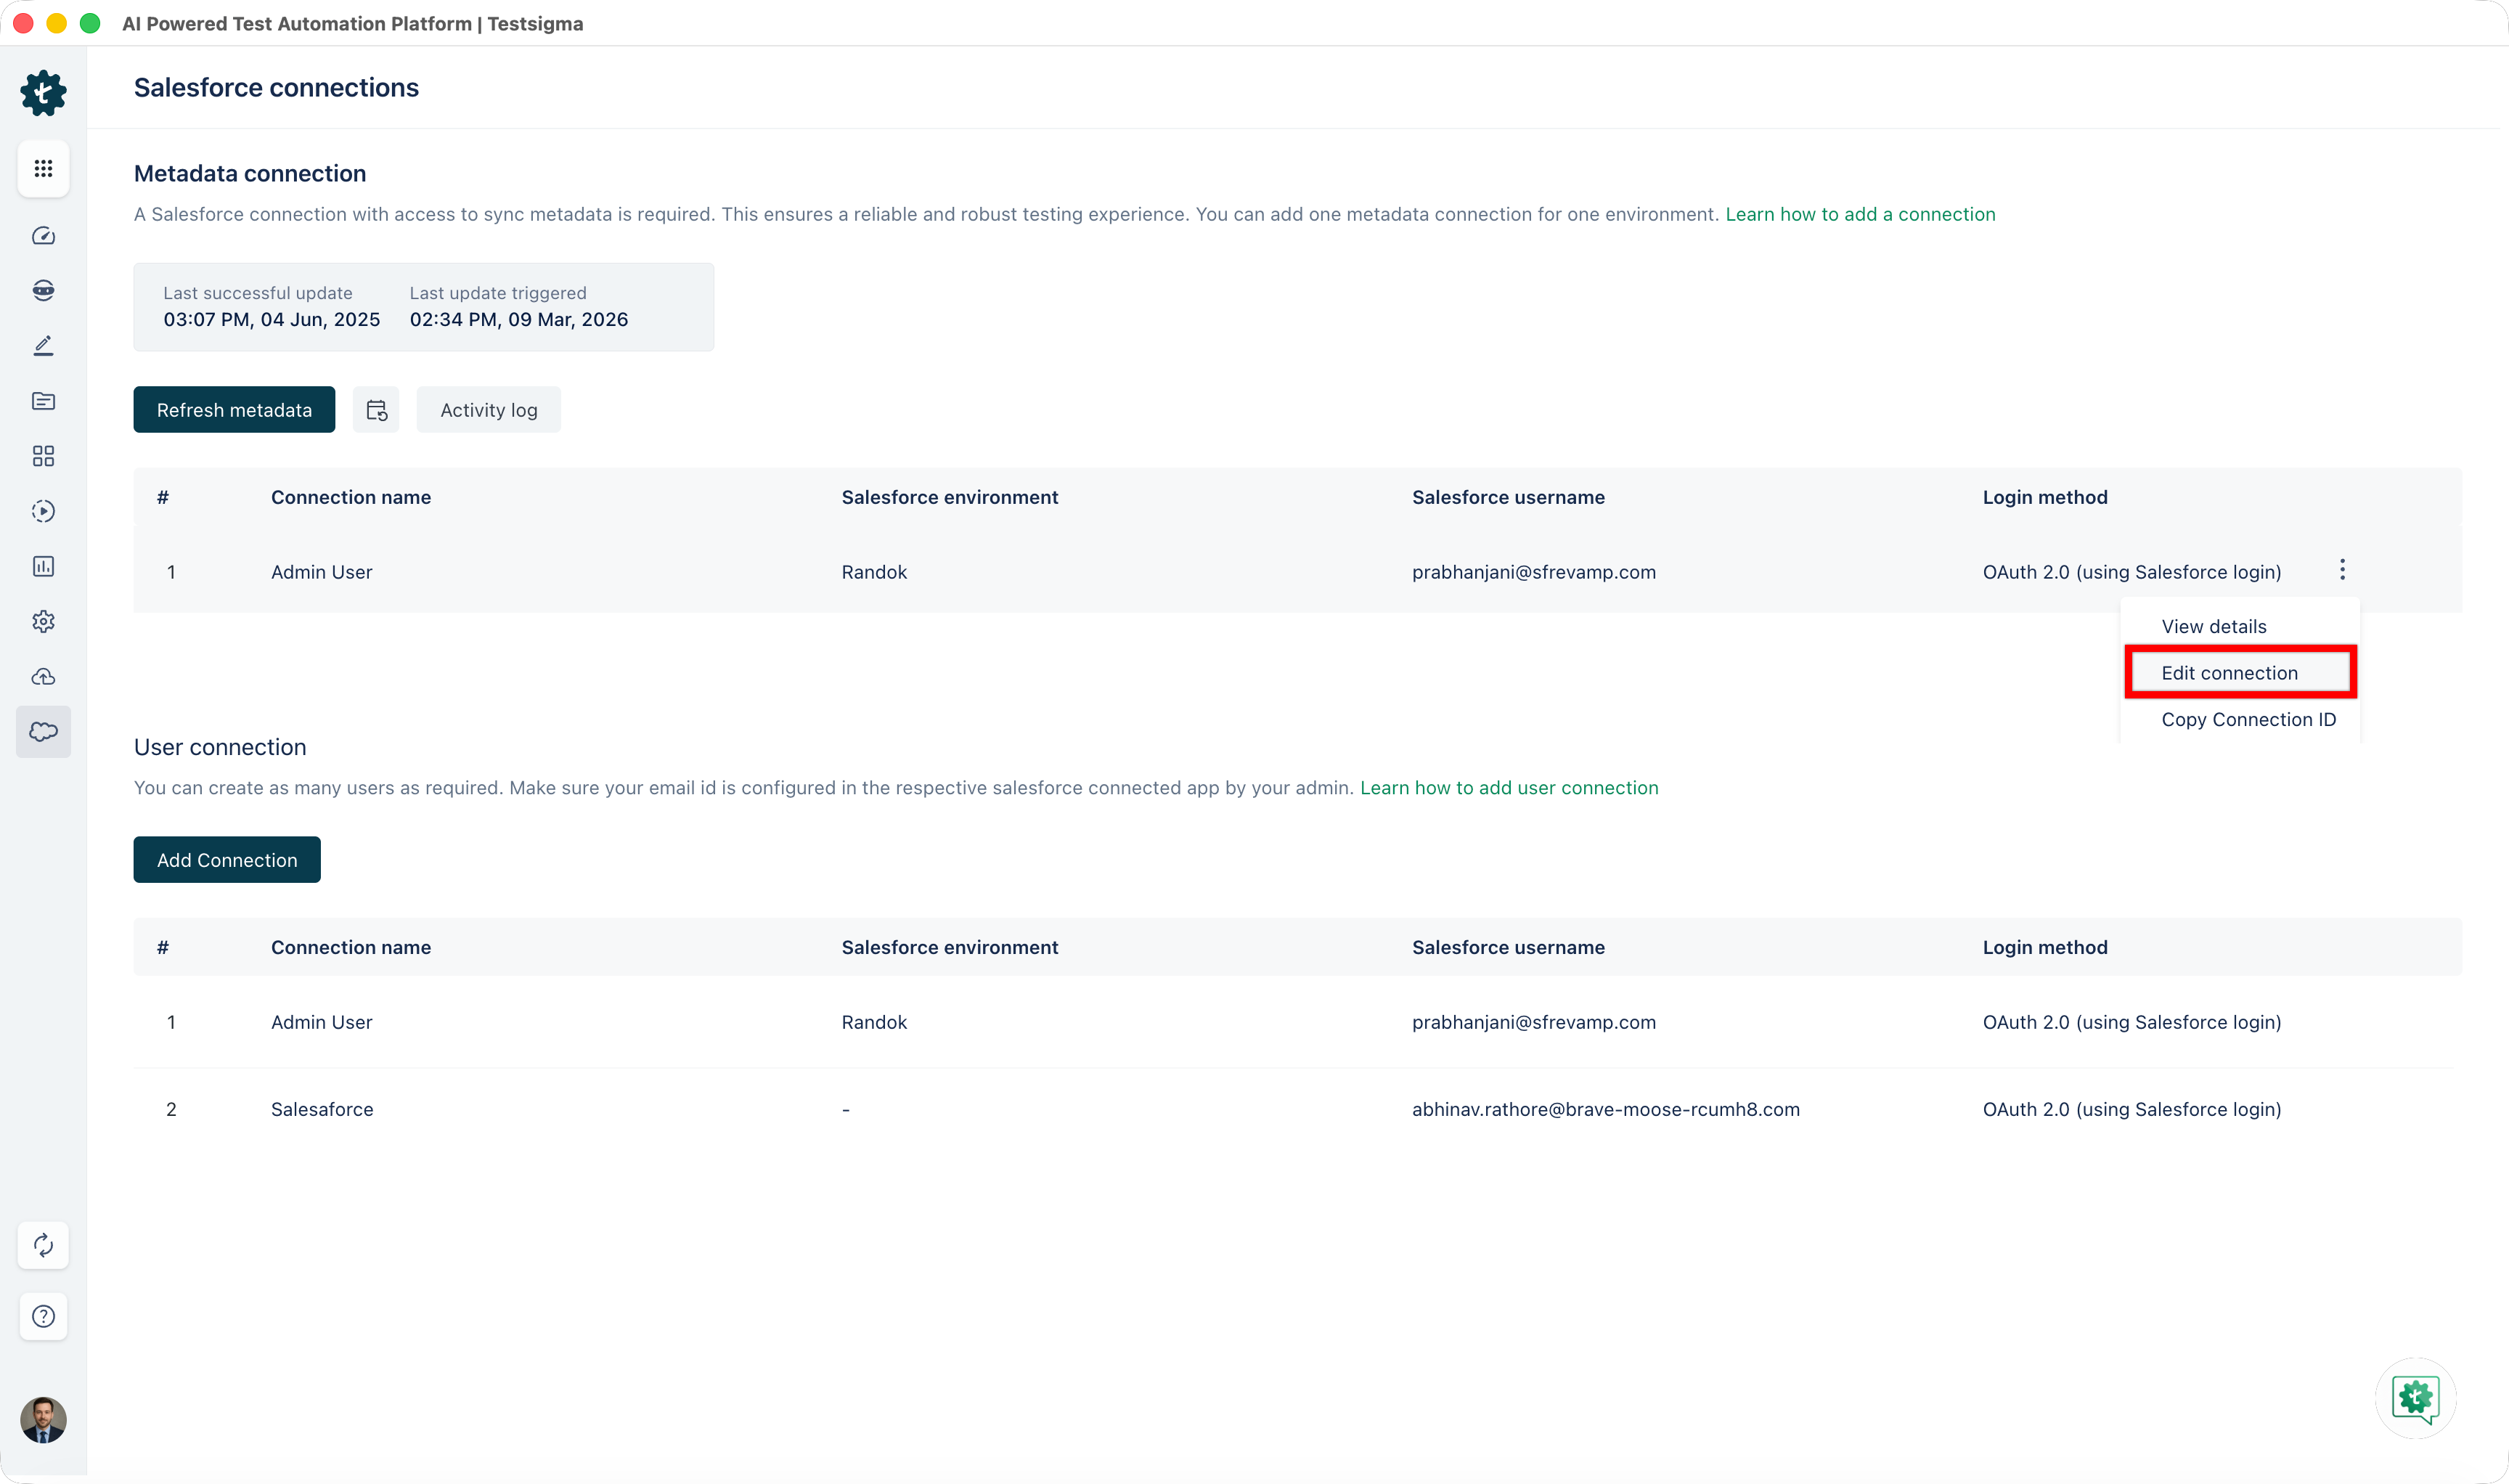
- On the Metadata connection prompt, make the necessary changes and click on Authorise & Connect.
You can not update the Metadata connection with a different environment.
Steps to Refresh Metadata Connection
To refresh metadata, you have two options:
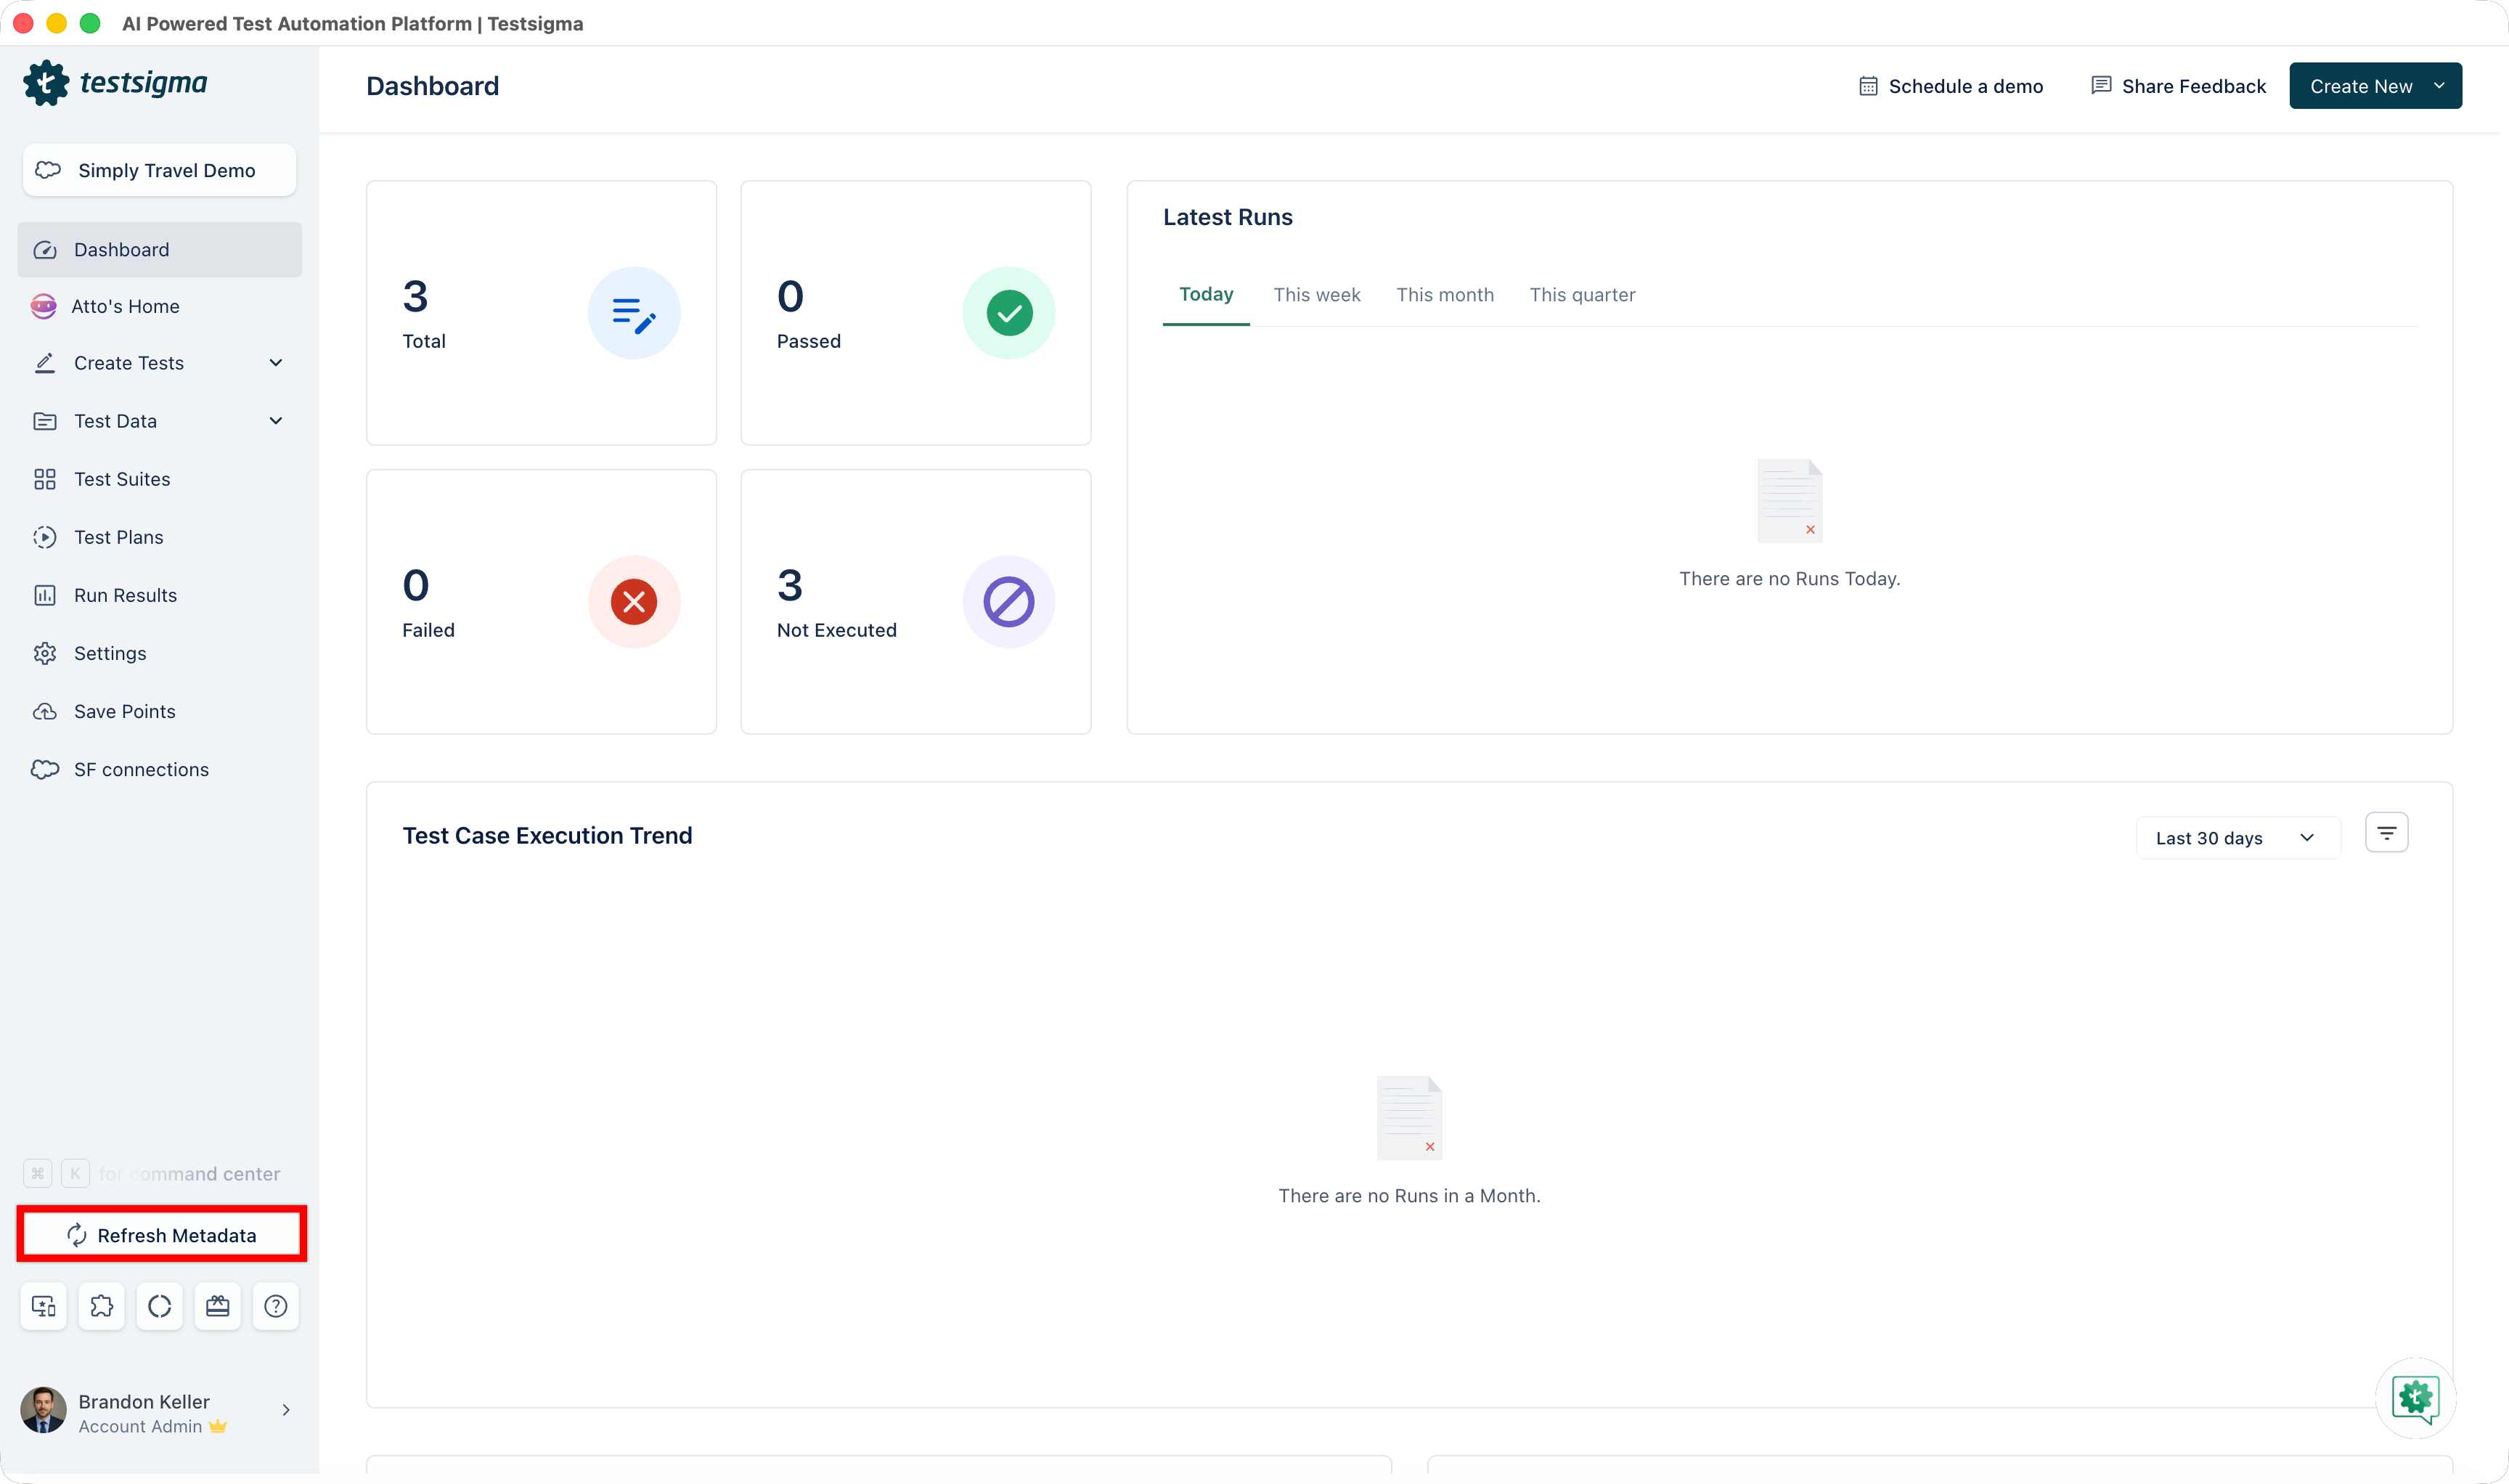
- From the Dashboard, go to SF Connections and click on Refresh Metadata.
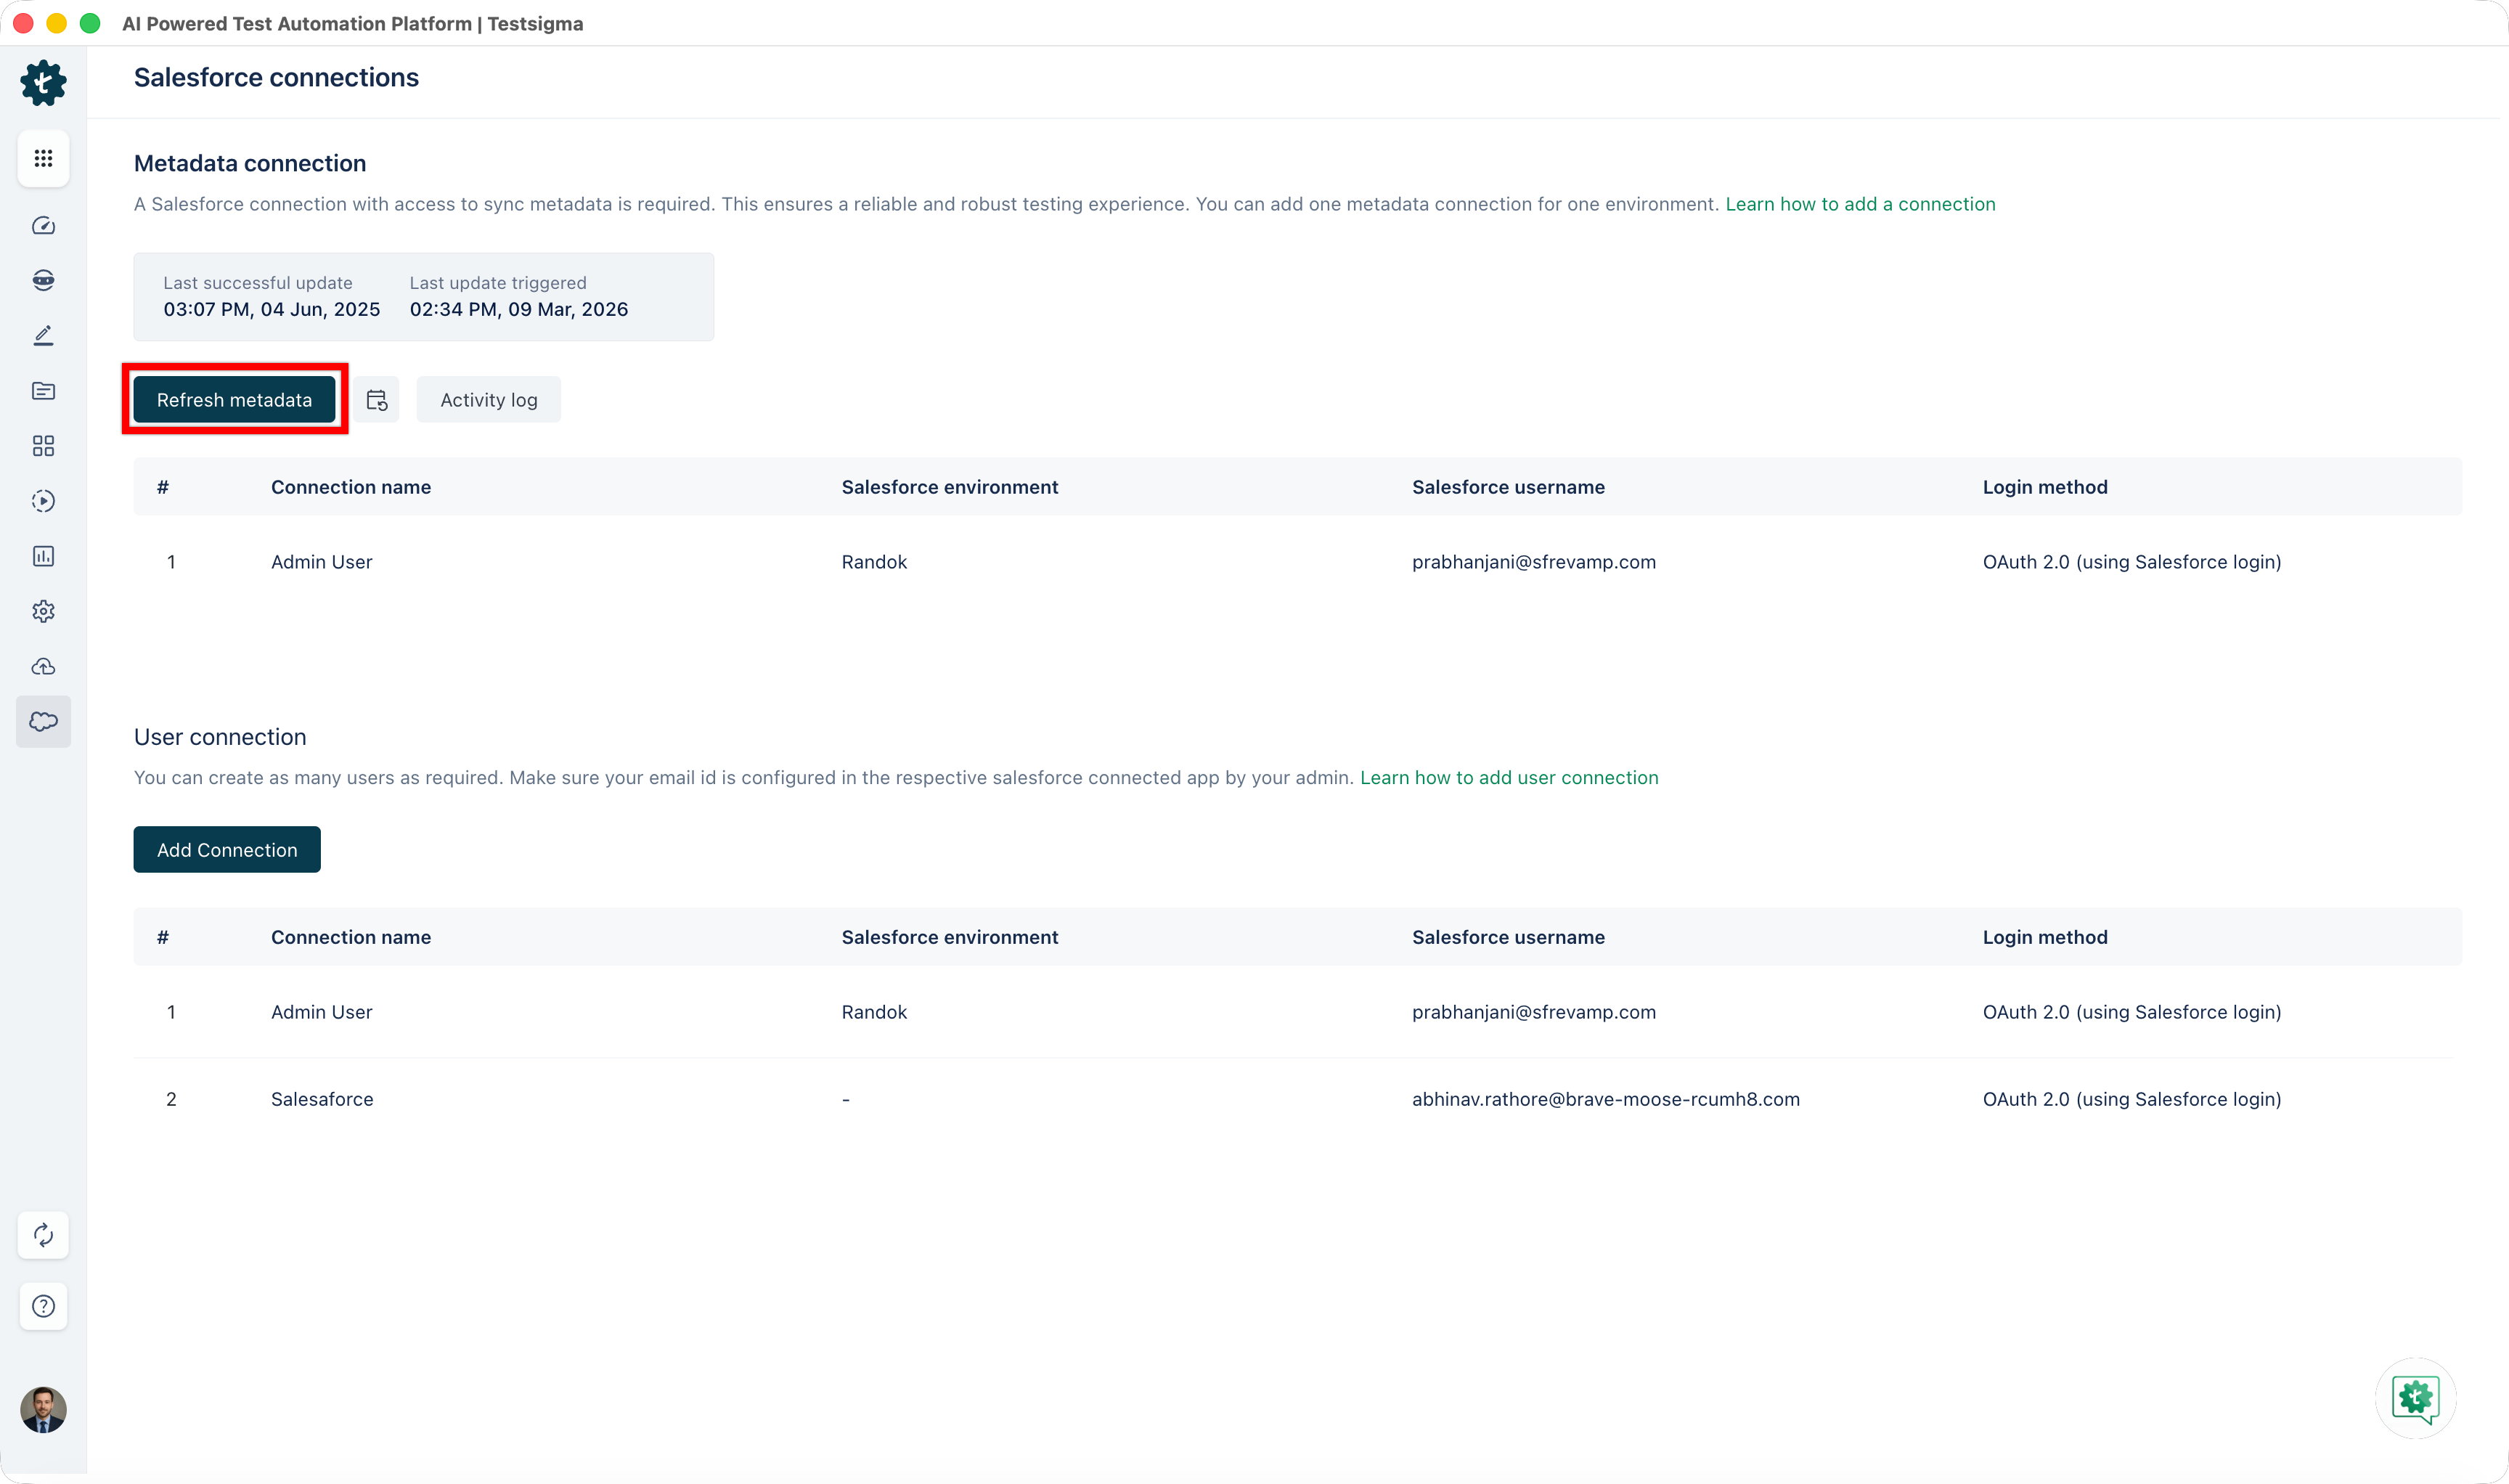
- Click on Refresh Metadata directly from the dashboard.
You can also refresh metadata using API. For more details, refer to the documentation on Salesforce Metadata refresh using API.
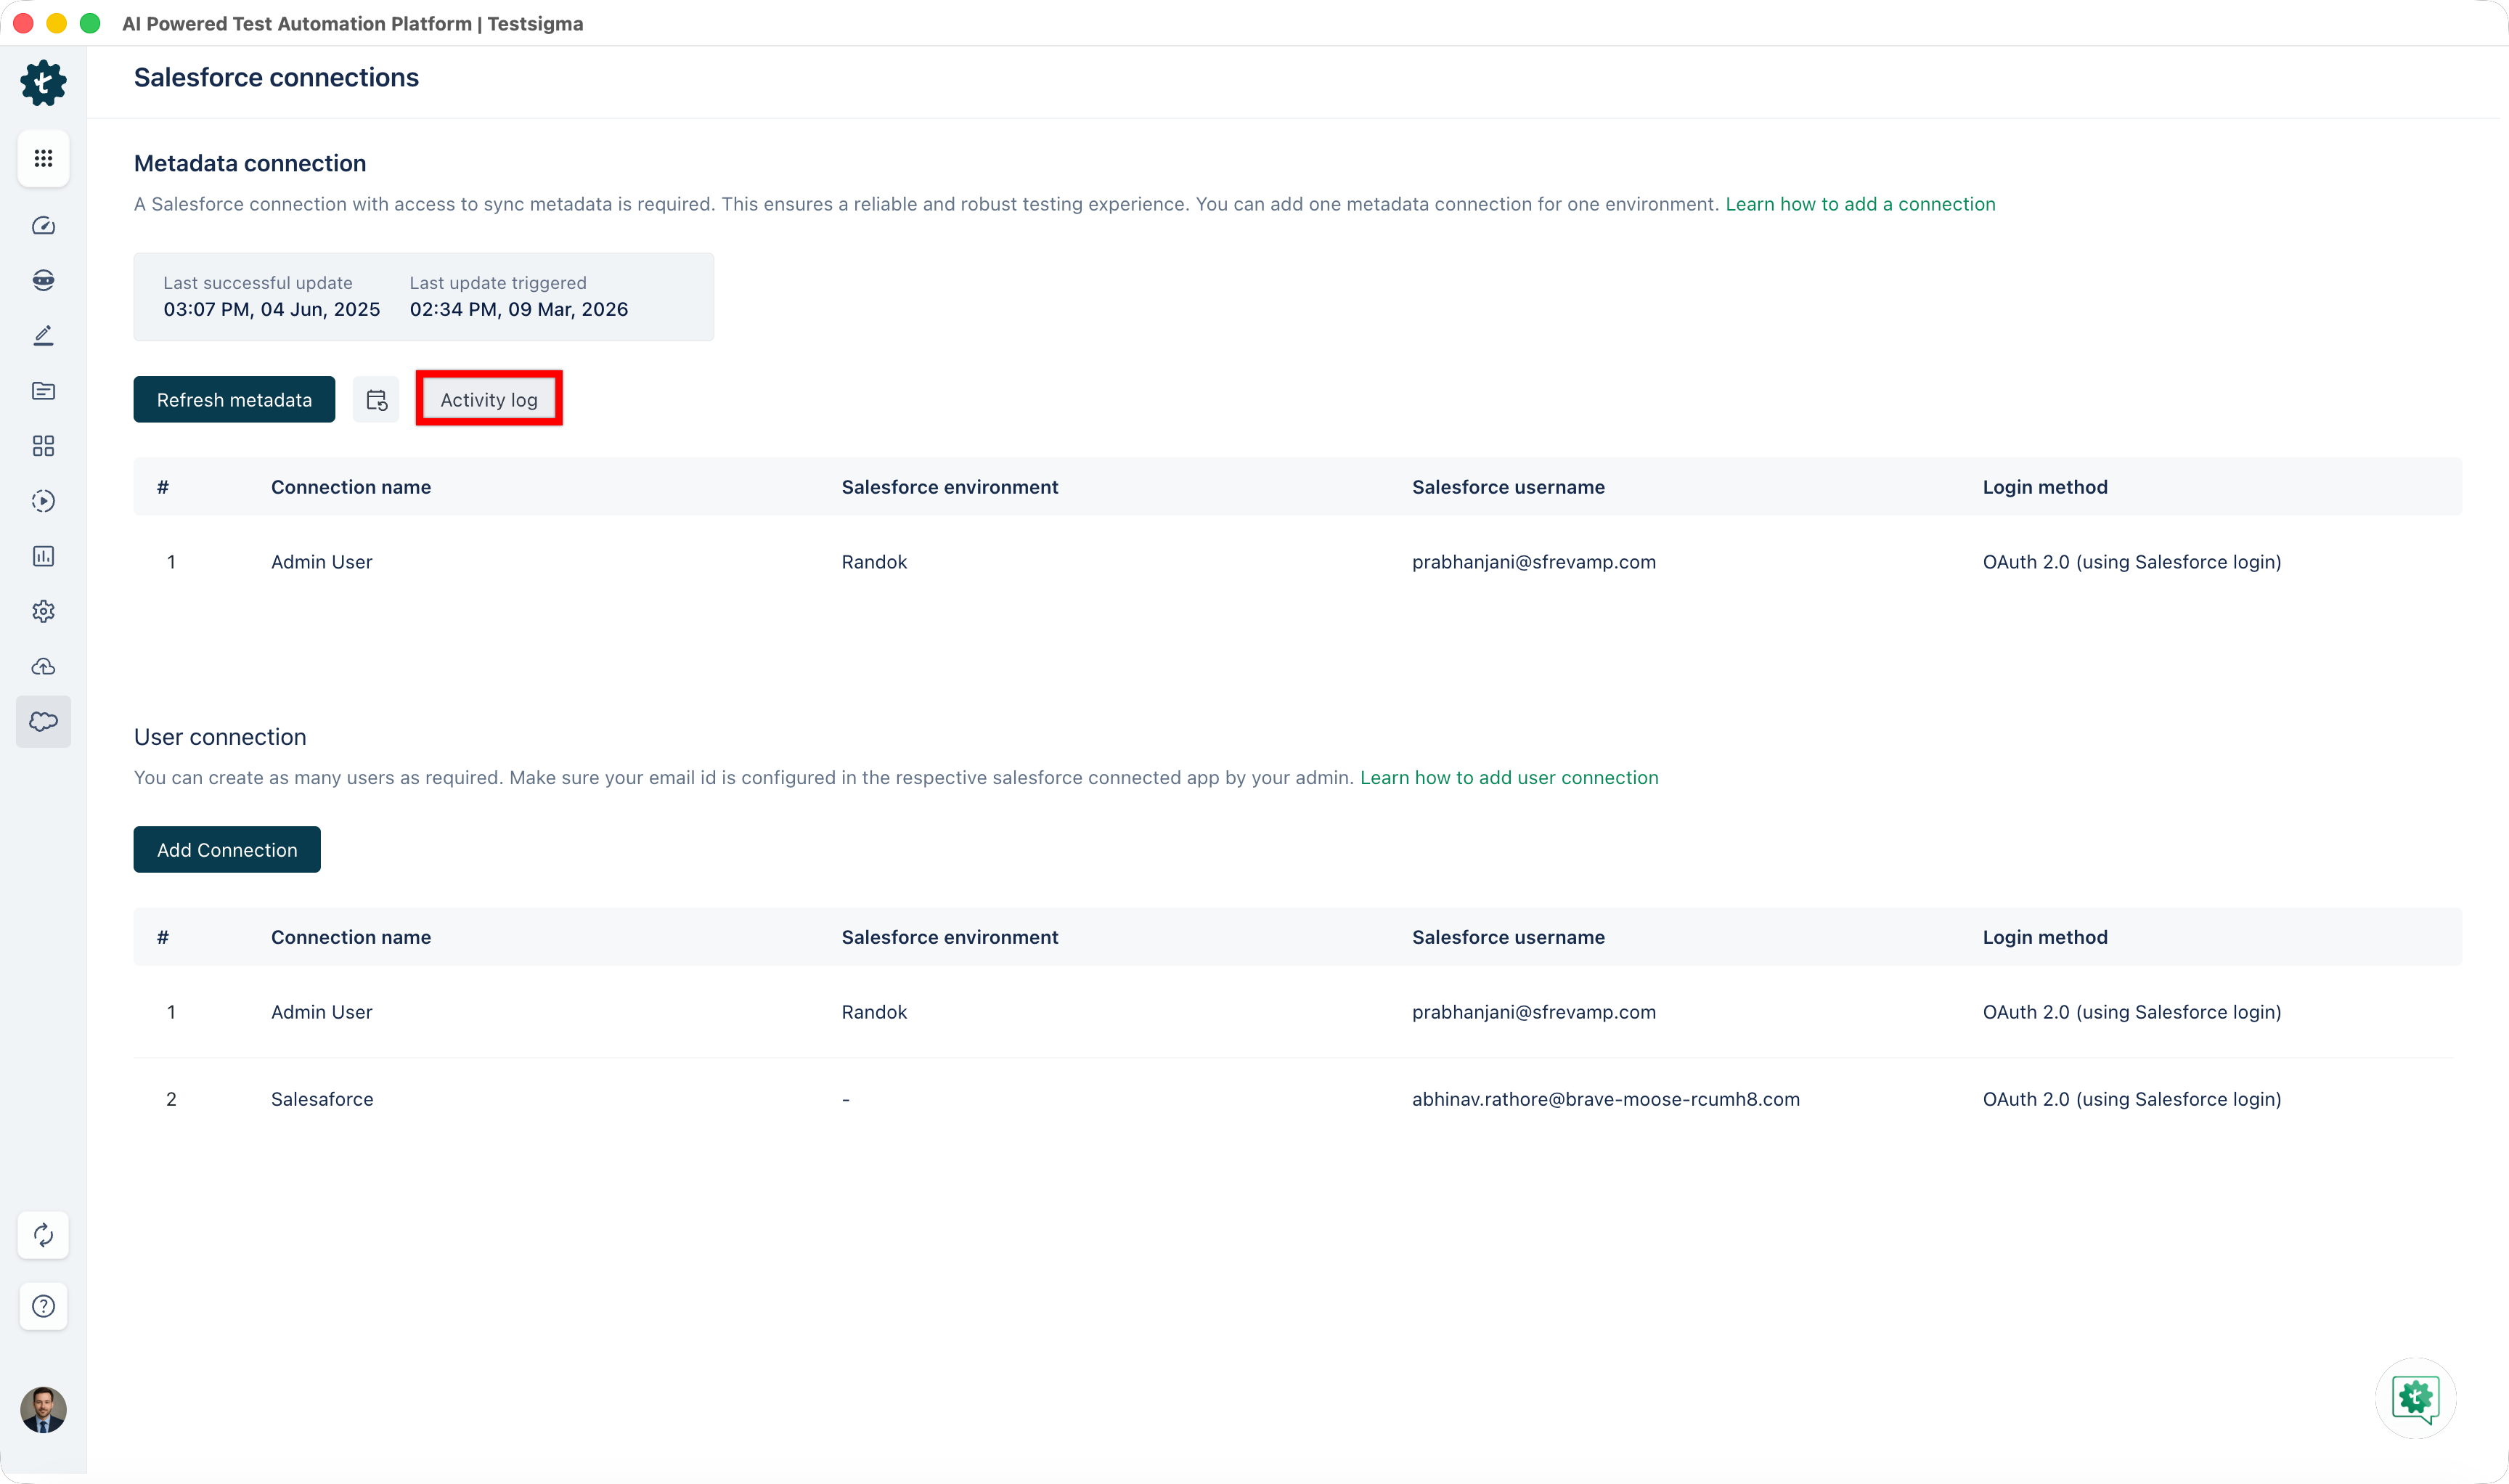
Activity Logs
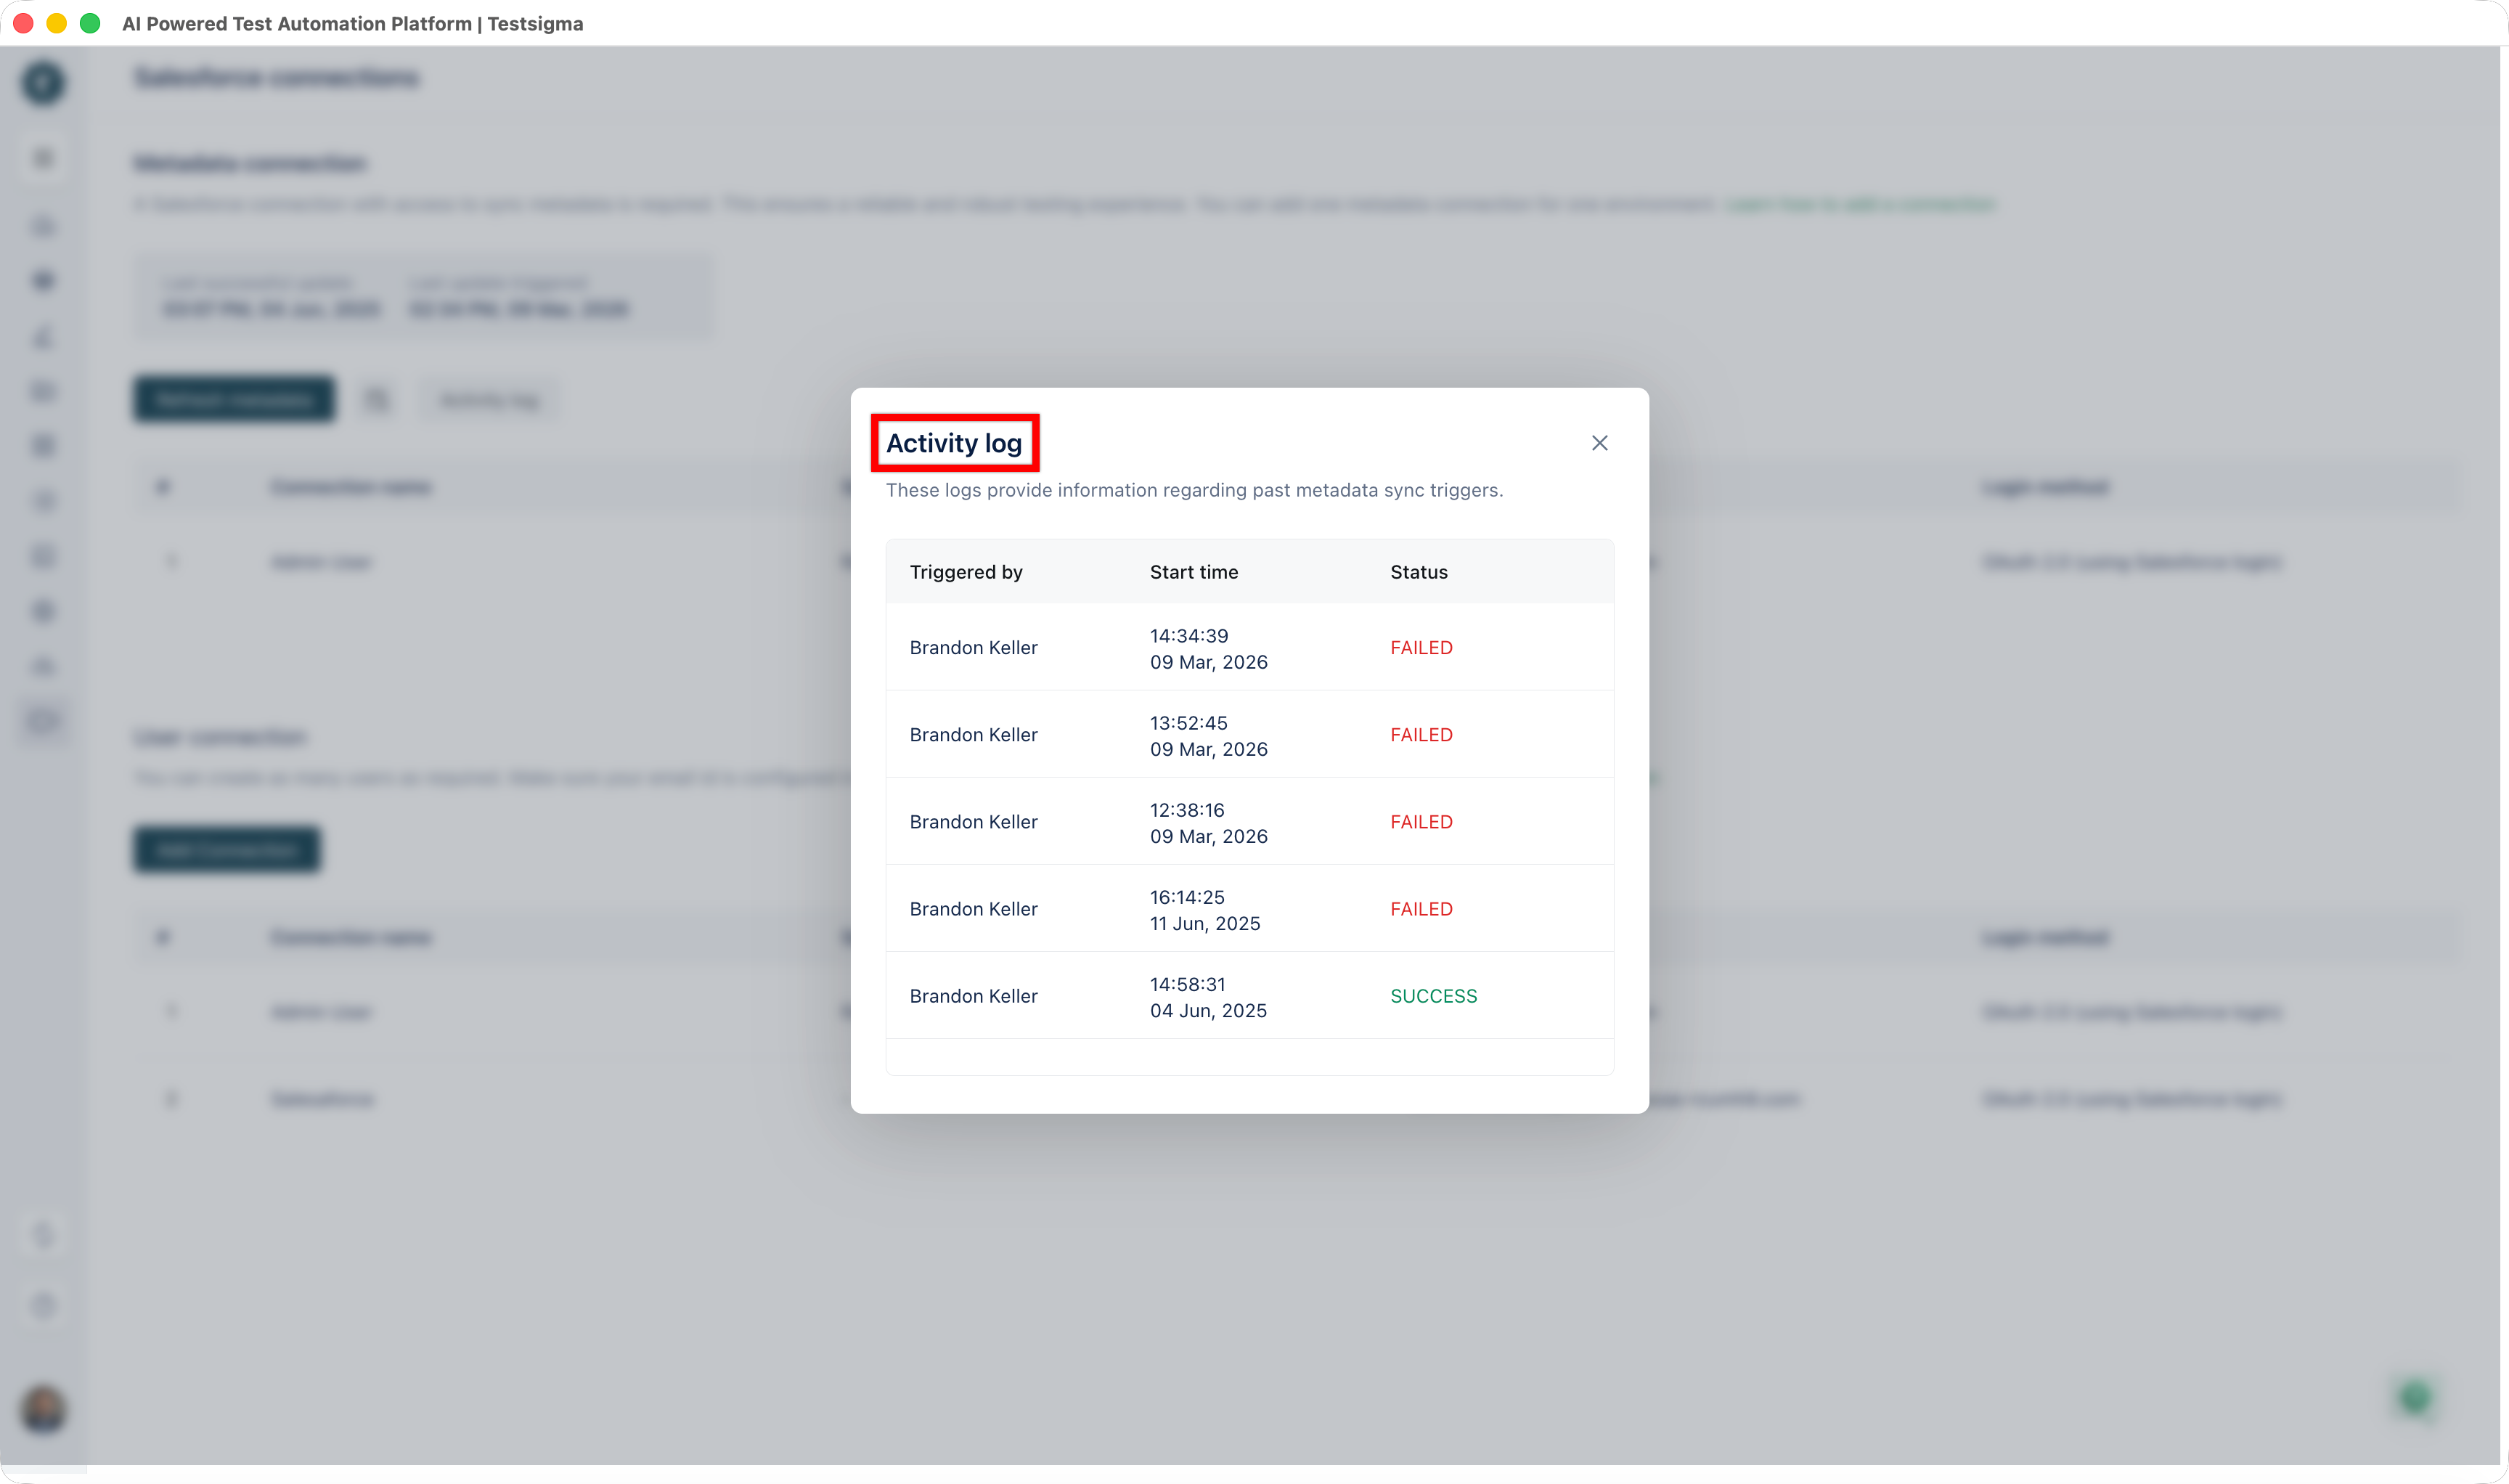
The activity log tab on the connection details page displays the information about all metadata sync triggers status, and the start time of metadata edit/refresh triggers. This article discusses the activity logs in the Salesforce metadata connection.
Steps to View Metadata Activity Logs
- Navigate to SF connections and click on Activity log. This will open the Activity log dialog.
- The Activity log dialog displays information regarding past metadata sync triggers.
Refer to the documentation on Salesforce troubleshooting guide for the most common issues while creating the metadata connection.
Want to contribute or report missing content?