- create test cases
 Organizing Test Cases in Folders
- Test Cases for Web Applications
- Test Cases for Mobile Applications
- Test Cases for Mobile Web Applications
- Manage Test Cases for Web Applications
- Manage Test Cases for Android & iOS Apps
- Manage Test Cases for Mobile Web Applications
- Test Case List Actions
- Importing Postman Collections and Environments
- Custom Fields for Test Cases
- Label Management
- Update Test Case Result in a Test Plan
- Test Case: Advanced Options Guide
- Test Step Types
- Type: Natural Language
- Type: REST API
- Type: Step Group
- Type: For Loop
- Type: While Loop
- Type: Block
- Type: If Condition
- Nested Step Groups
- Image Injection
- Cross-application testing
Test Step Options
In Testsigma, you can customize test steps within a test case using test step options. These options allow you to control and customize various aspects of test execution, such as data inputs, assertions, and behavior, enhancing the test scenario's flexibility and accuracy. This article discusses all test step options available in Testsigma.
Prerequisites
Before you begin, ensure that you have referred to:
Clear Step
Click on the test step, then click the Eraser icon to clear the step in a single click. Clearing the test step will remove any existing actions or data within the step. 
Step Settings
Click on the test step, then click the ellipsis icon to open a dropdown list of Test Step Settings. Select the Step Settings option from this list to configure particular settings for the test step, such as timeouts, retries, prerequisites, or other settings. For more information on configuring test step settings, refer to the documentation on configuring test step settings. 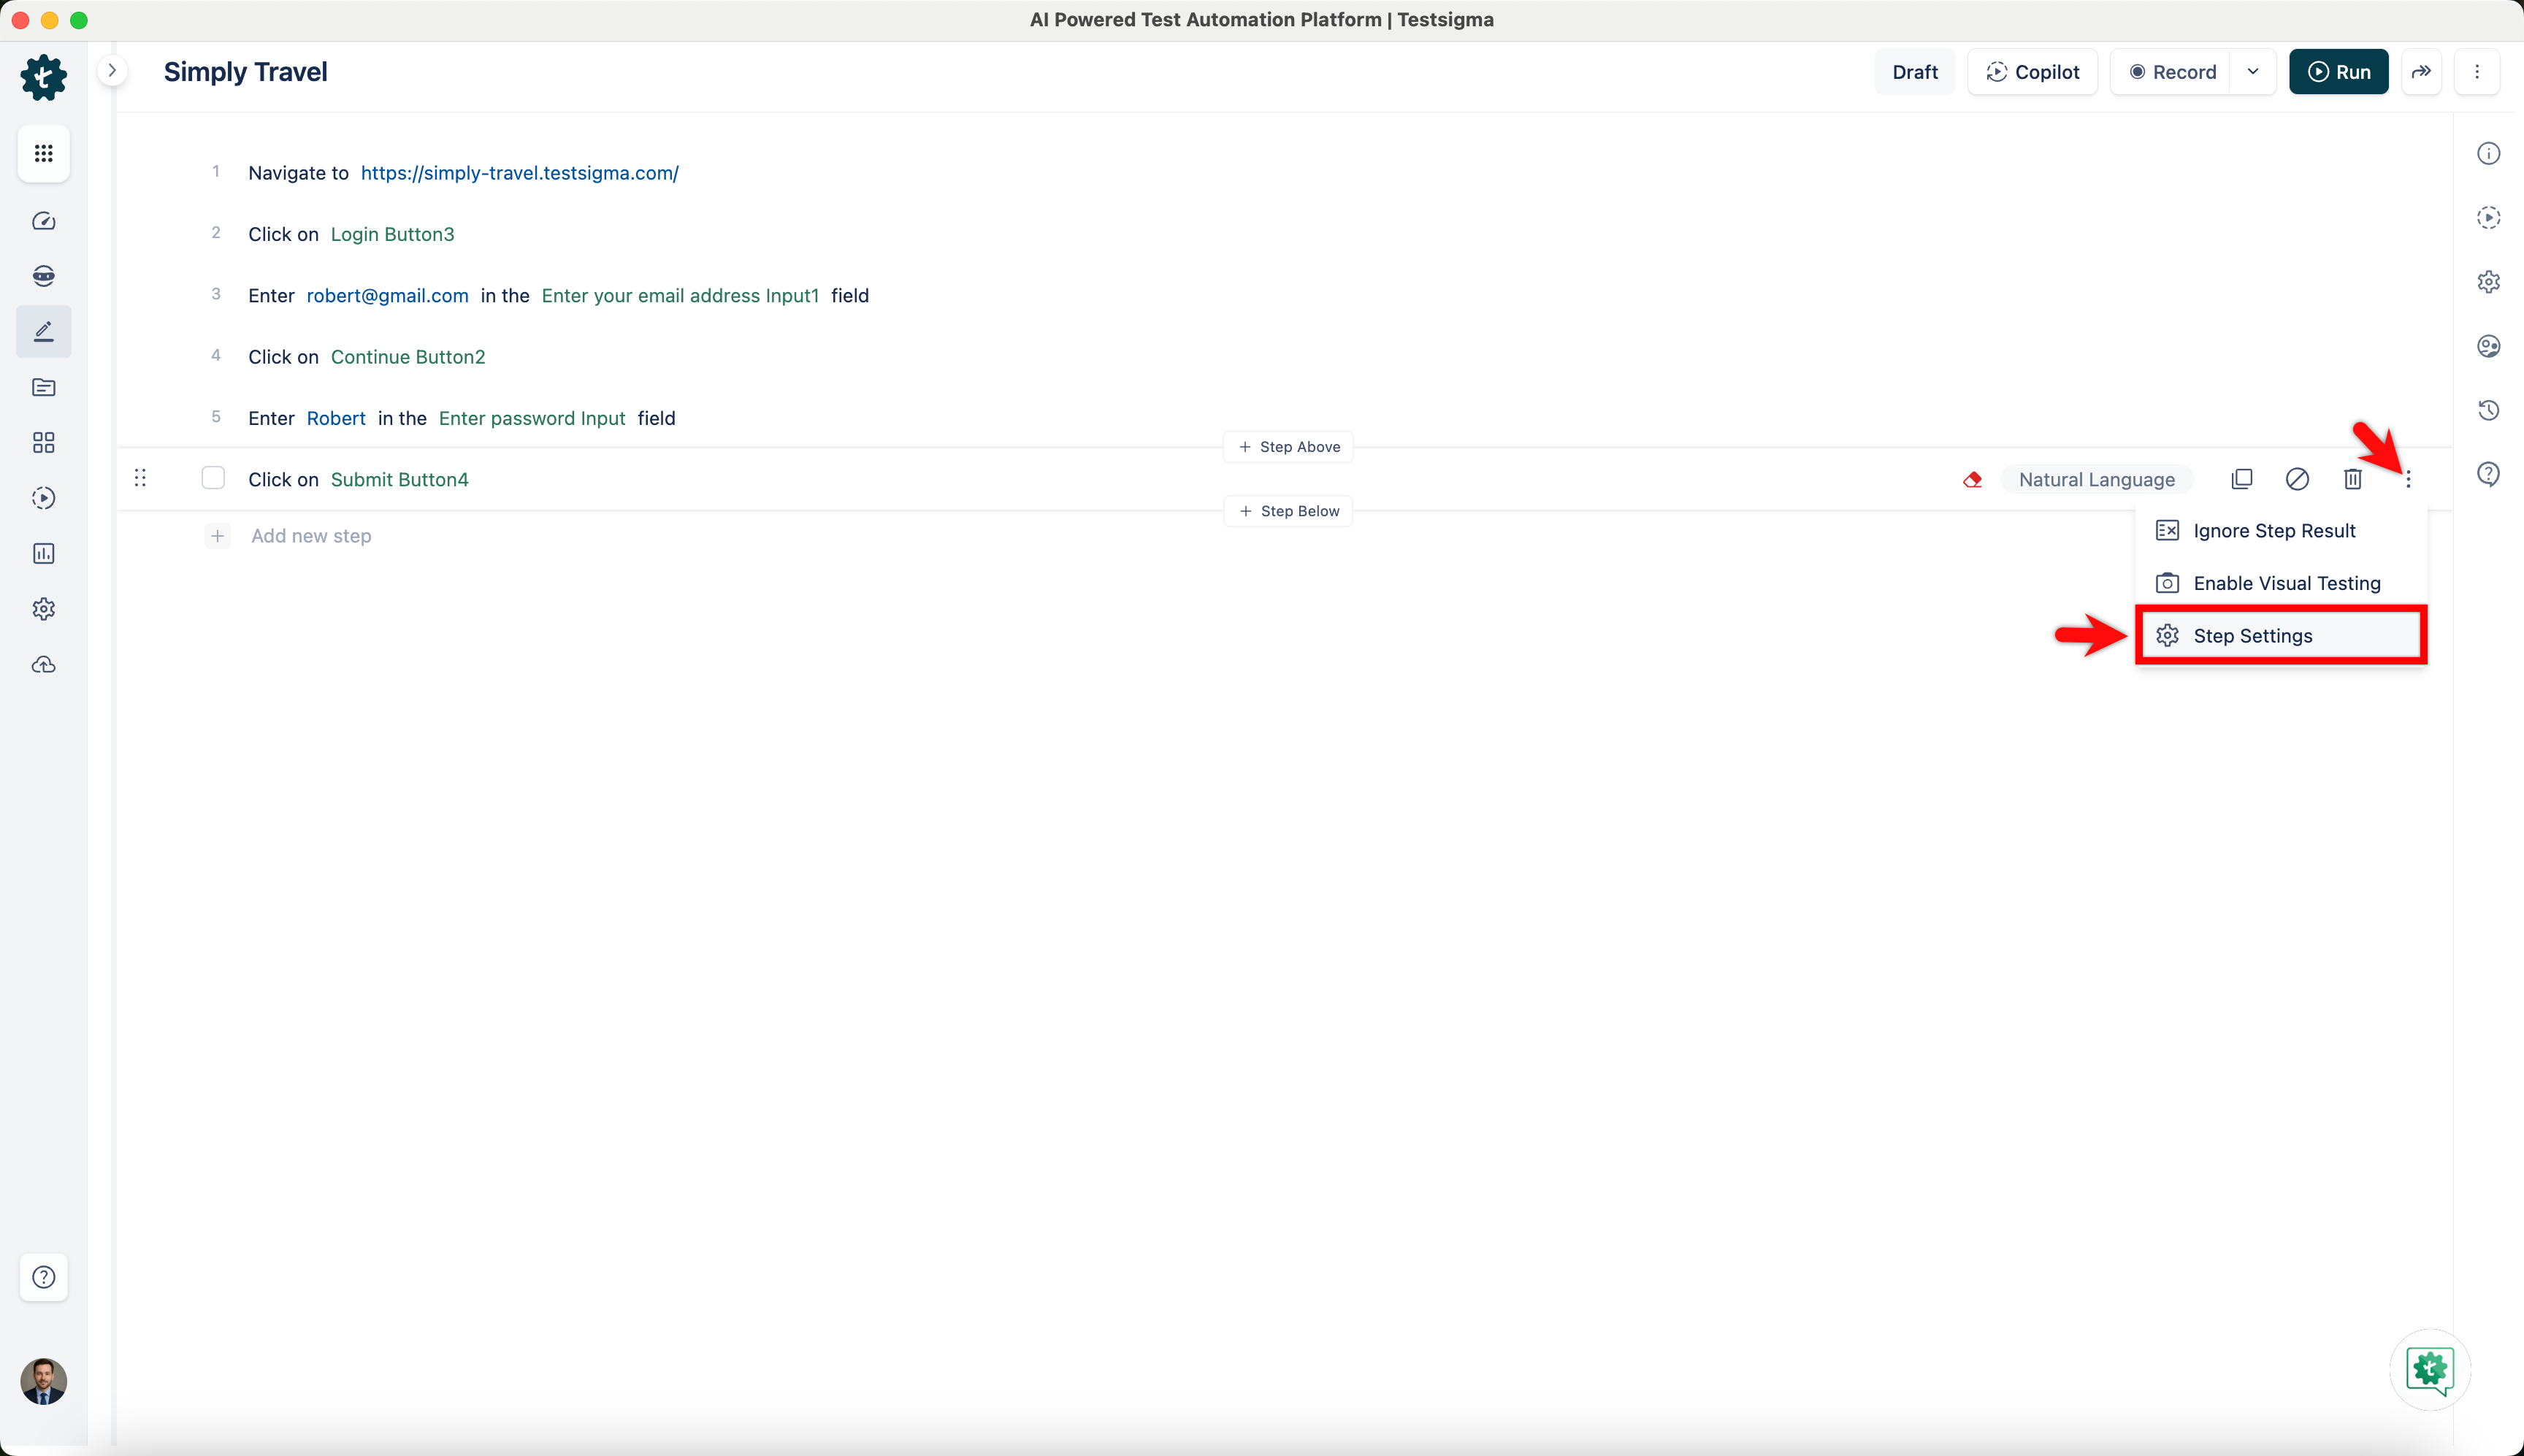
Disable Step
Click on the test step, then click the Disable step icon to temporarily deactivate the selected step in the test case. This will prevent the test step from running during execution. 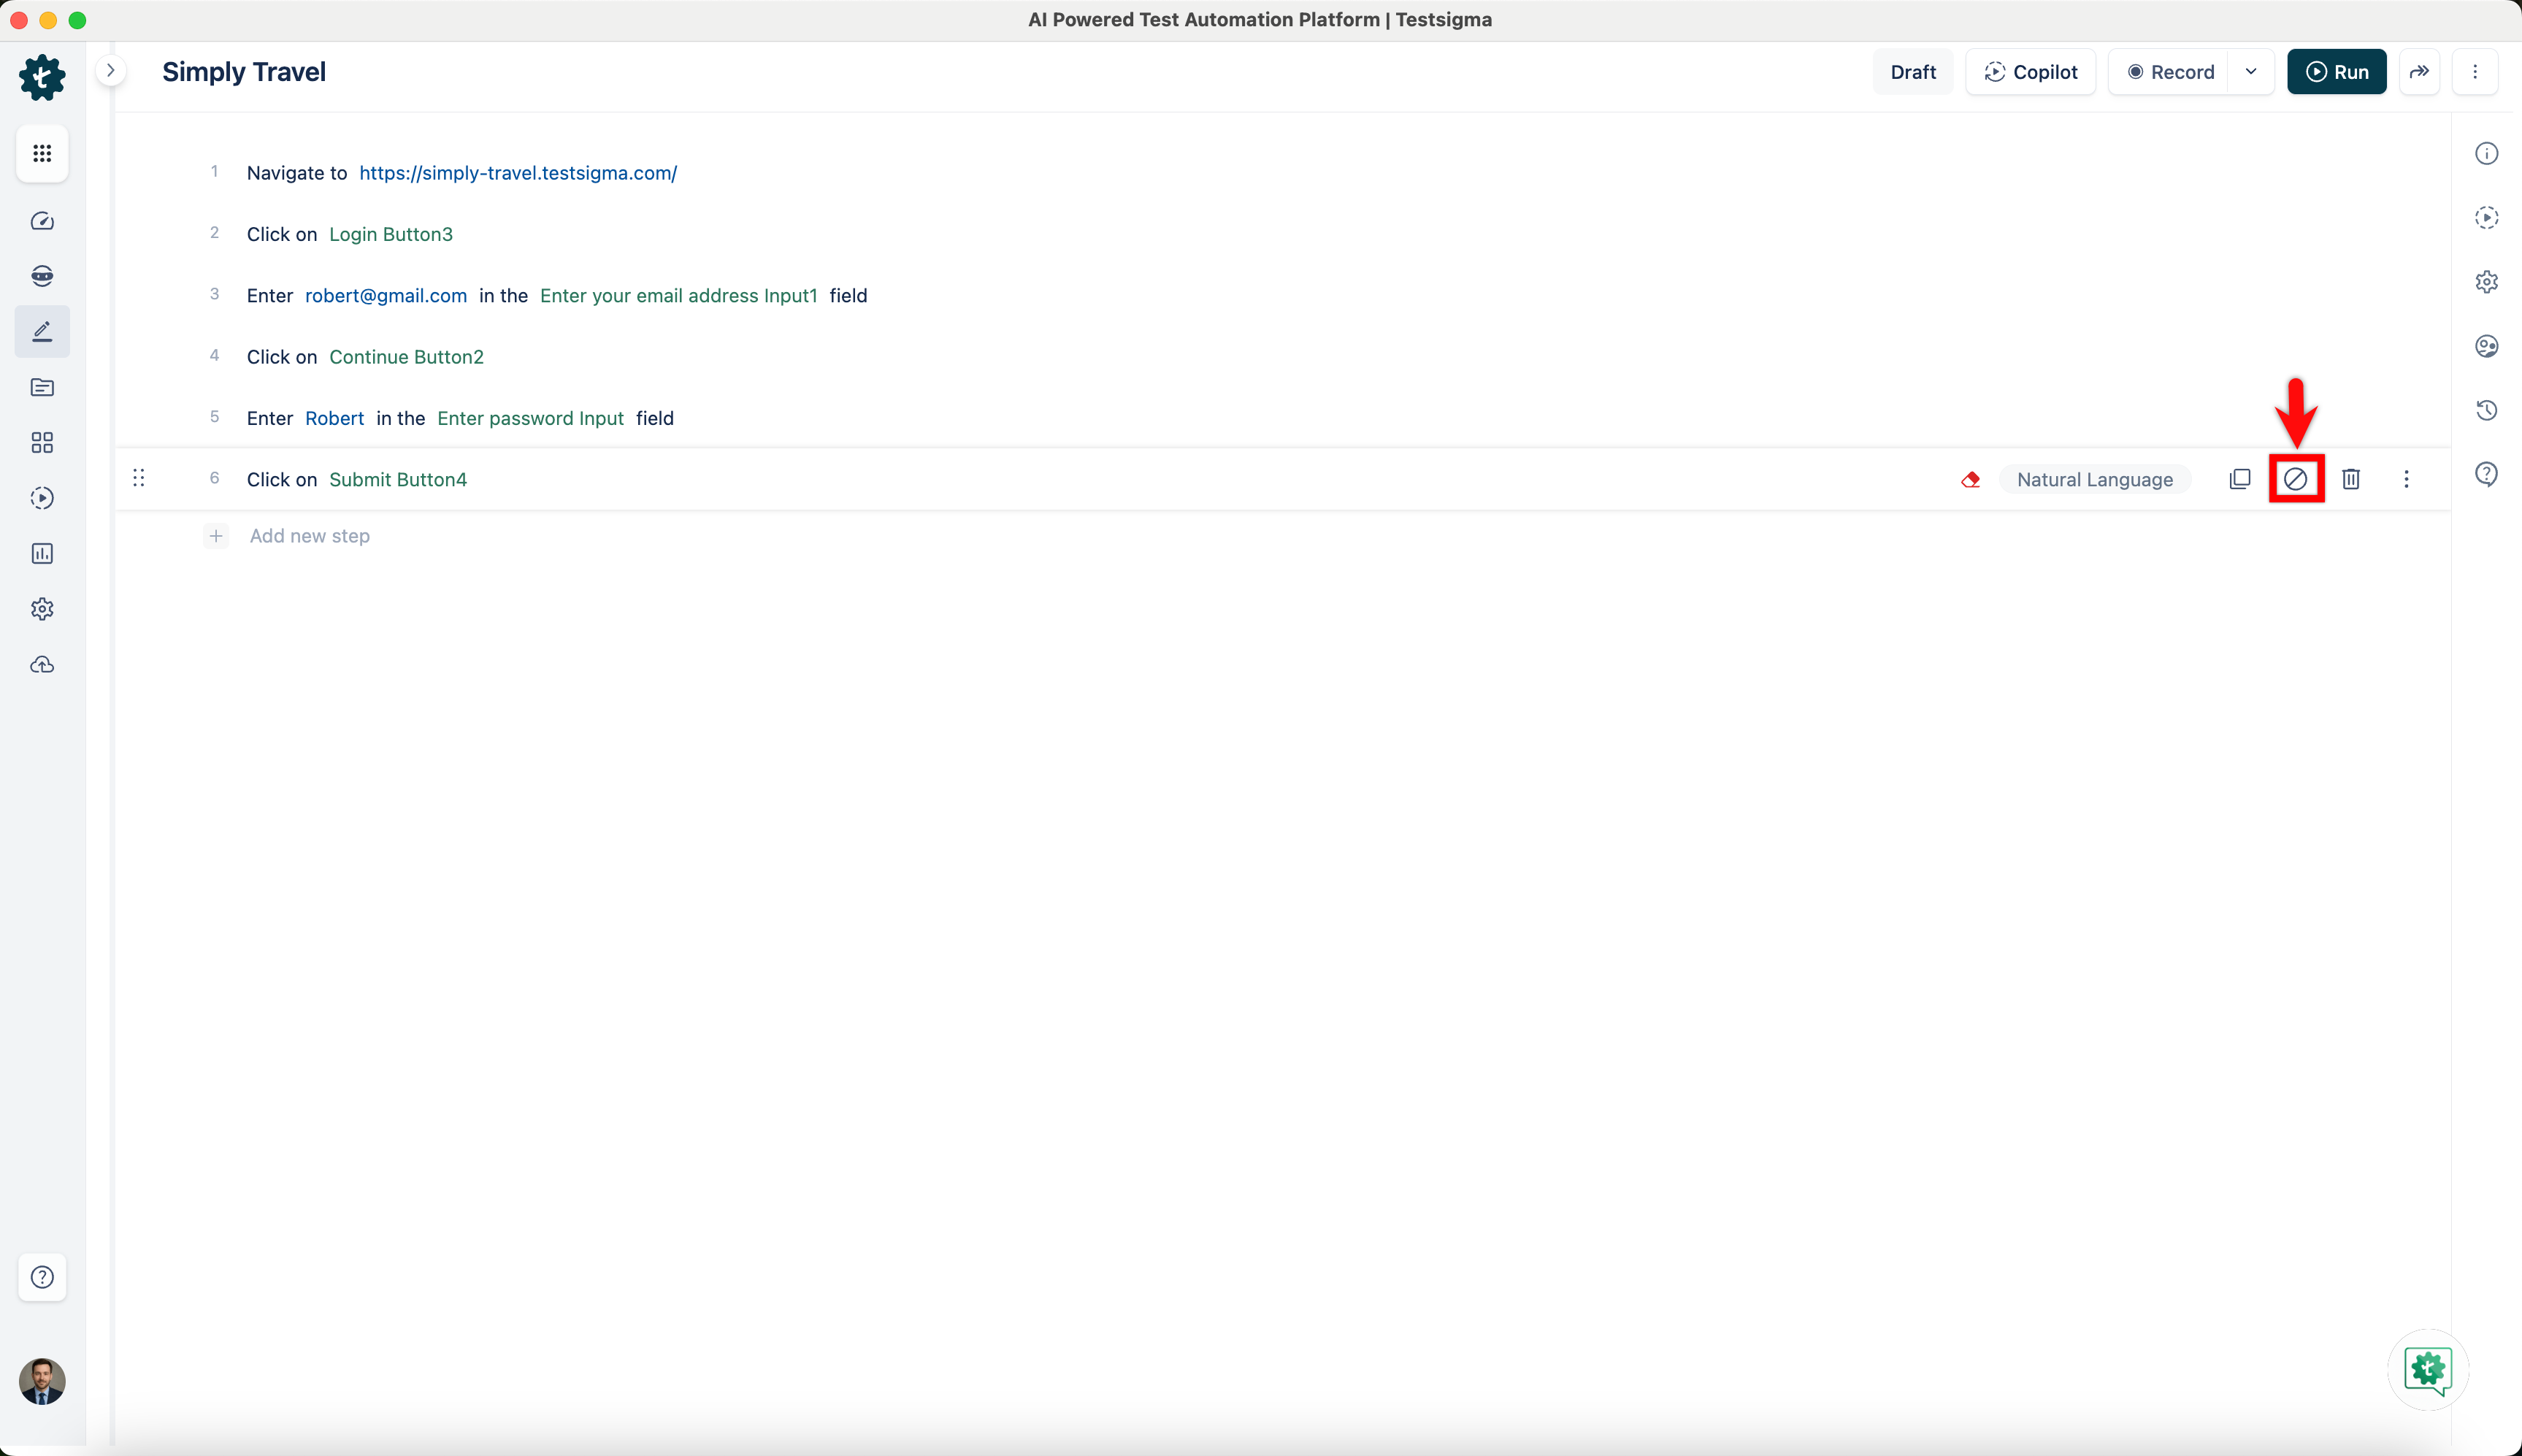
Ignore Step Result
Click on the test step, and then click the ellipsis icon to open a dropdown list of Test Step Settings, then select the Ignore Step Result option from this list to exclude the outcome of a specific step from the overall test result. 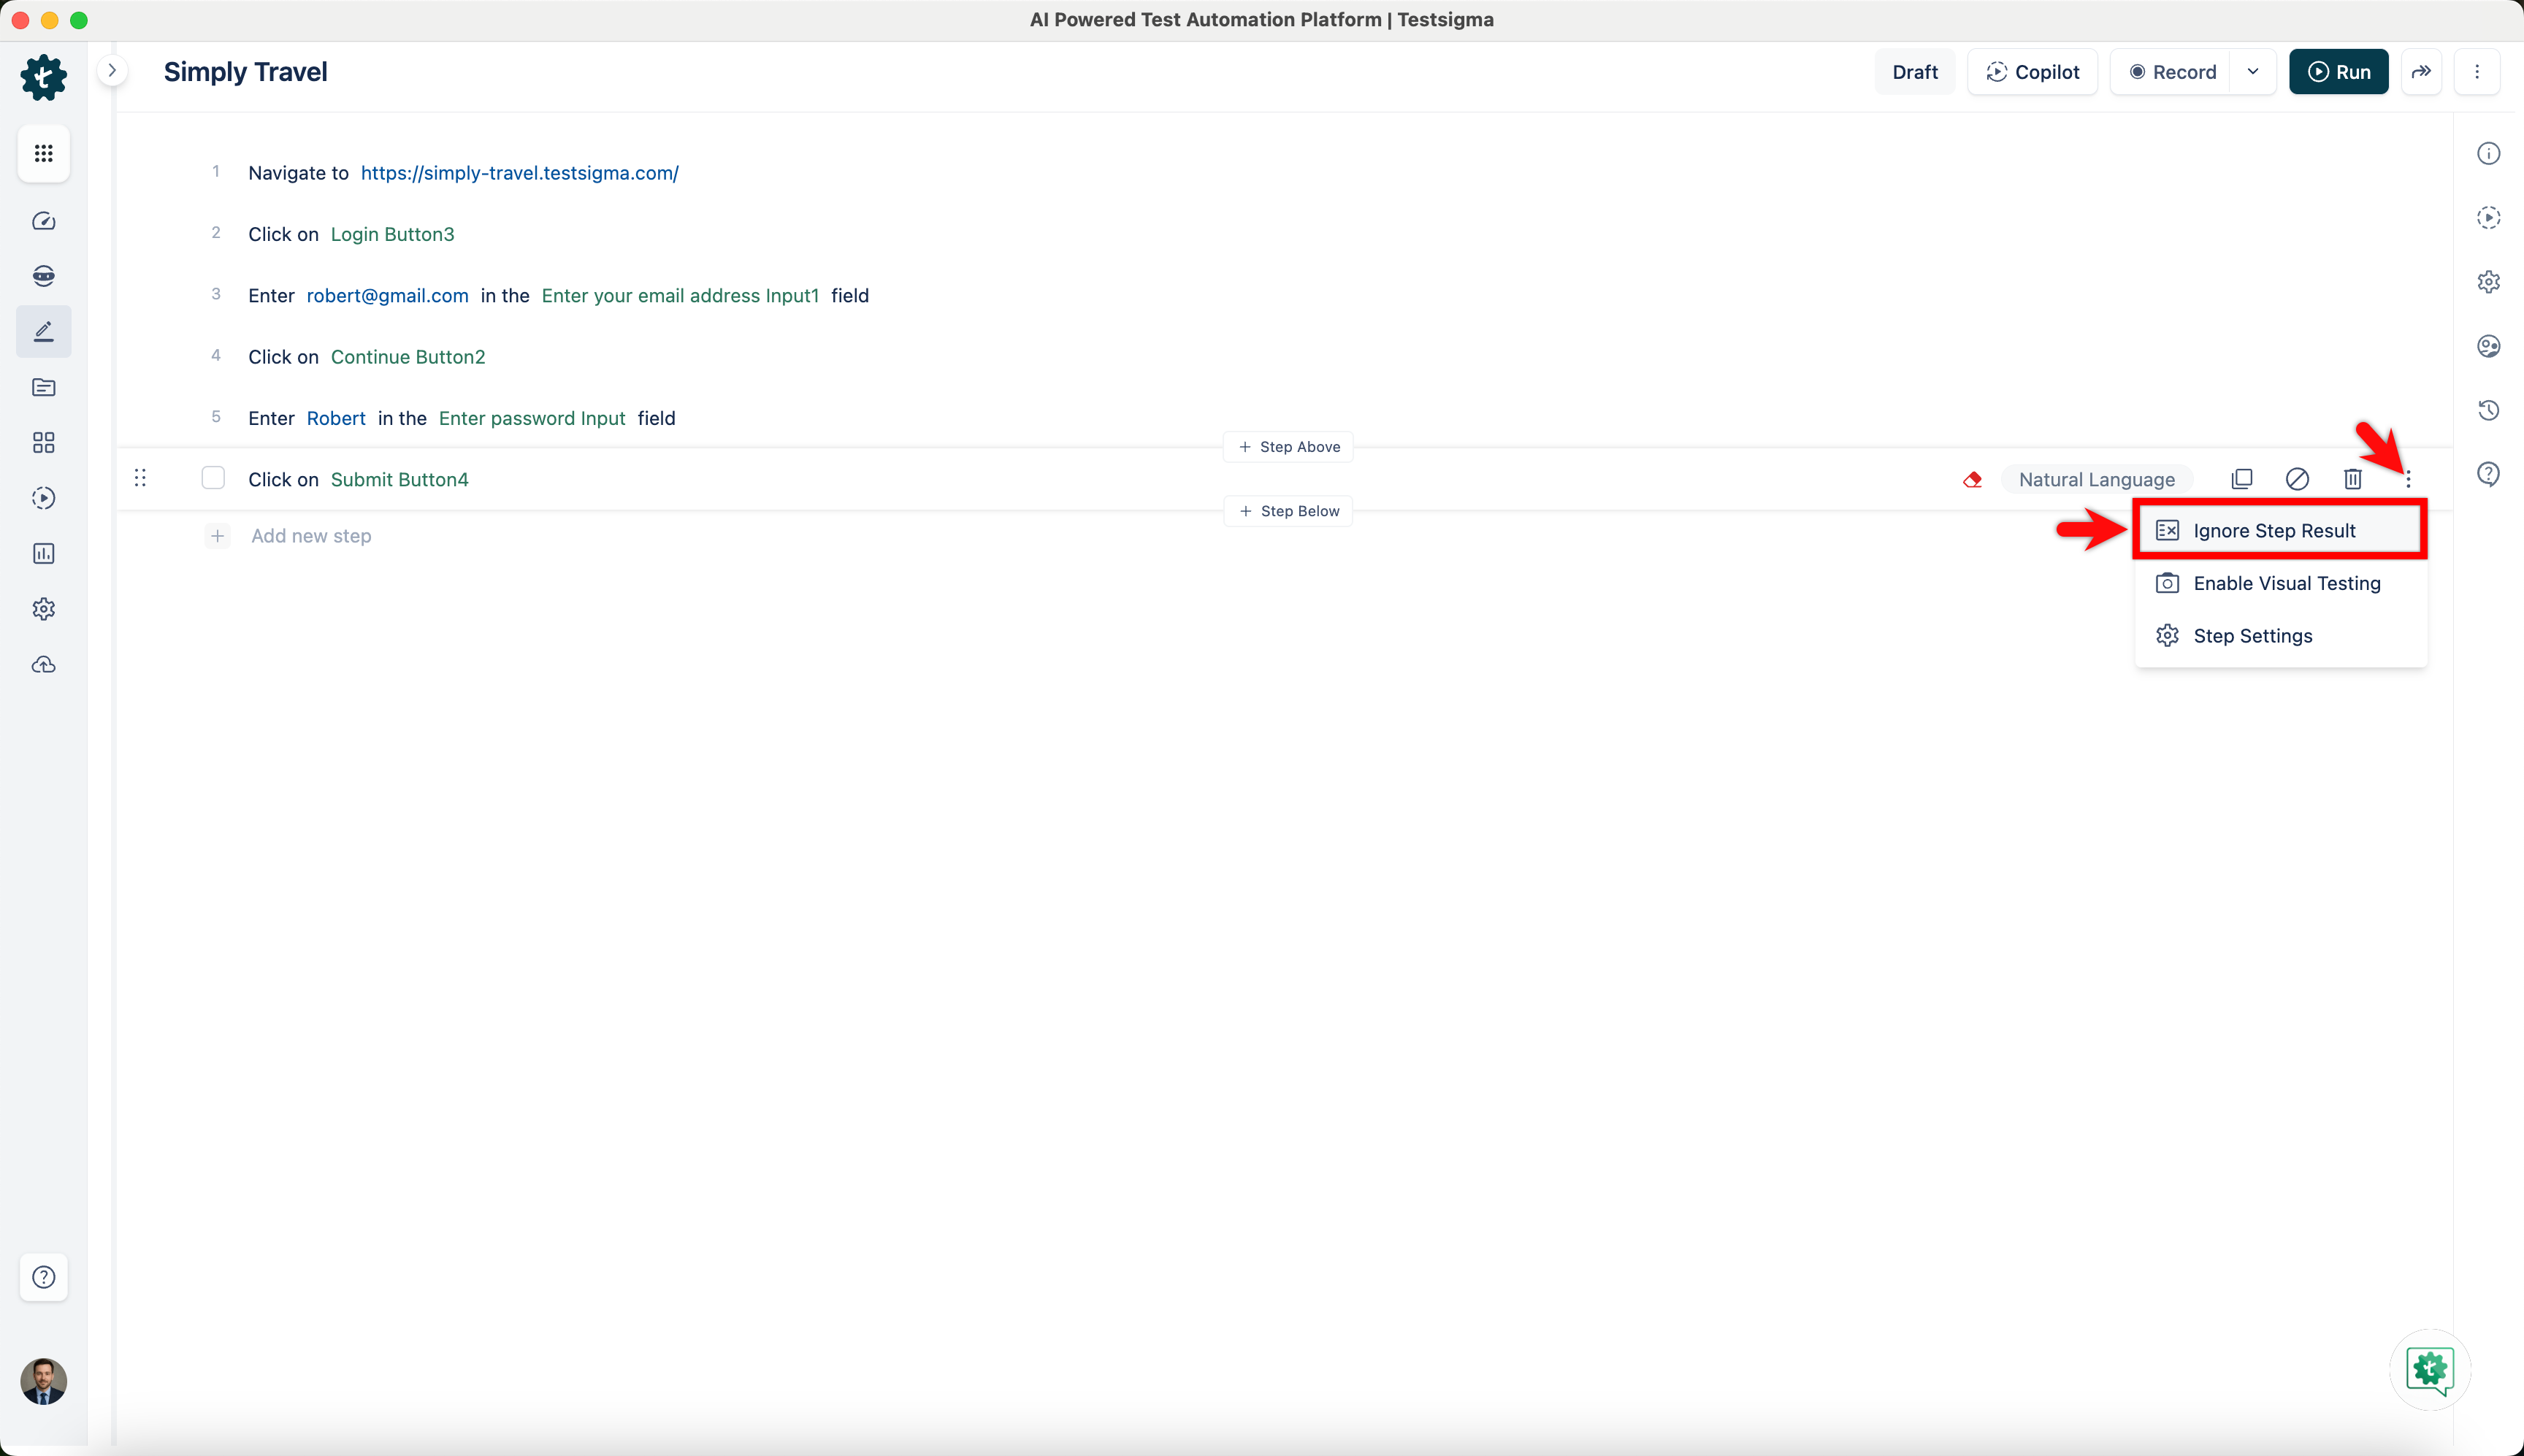
Enable Visual Testing
Click on the test step, and then click the ellipsis icon to open a dropdown list of Test Step Settings. Select the Enable Visual Testing option from this list to capture and compare how the user interface of an application looks between different builds or versions. For more information on visula testing, refer to the documentation on visual testing. 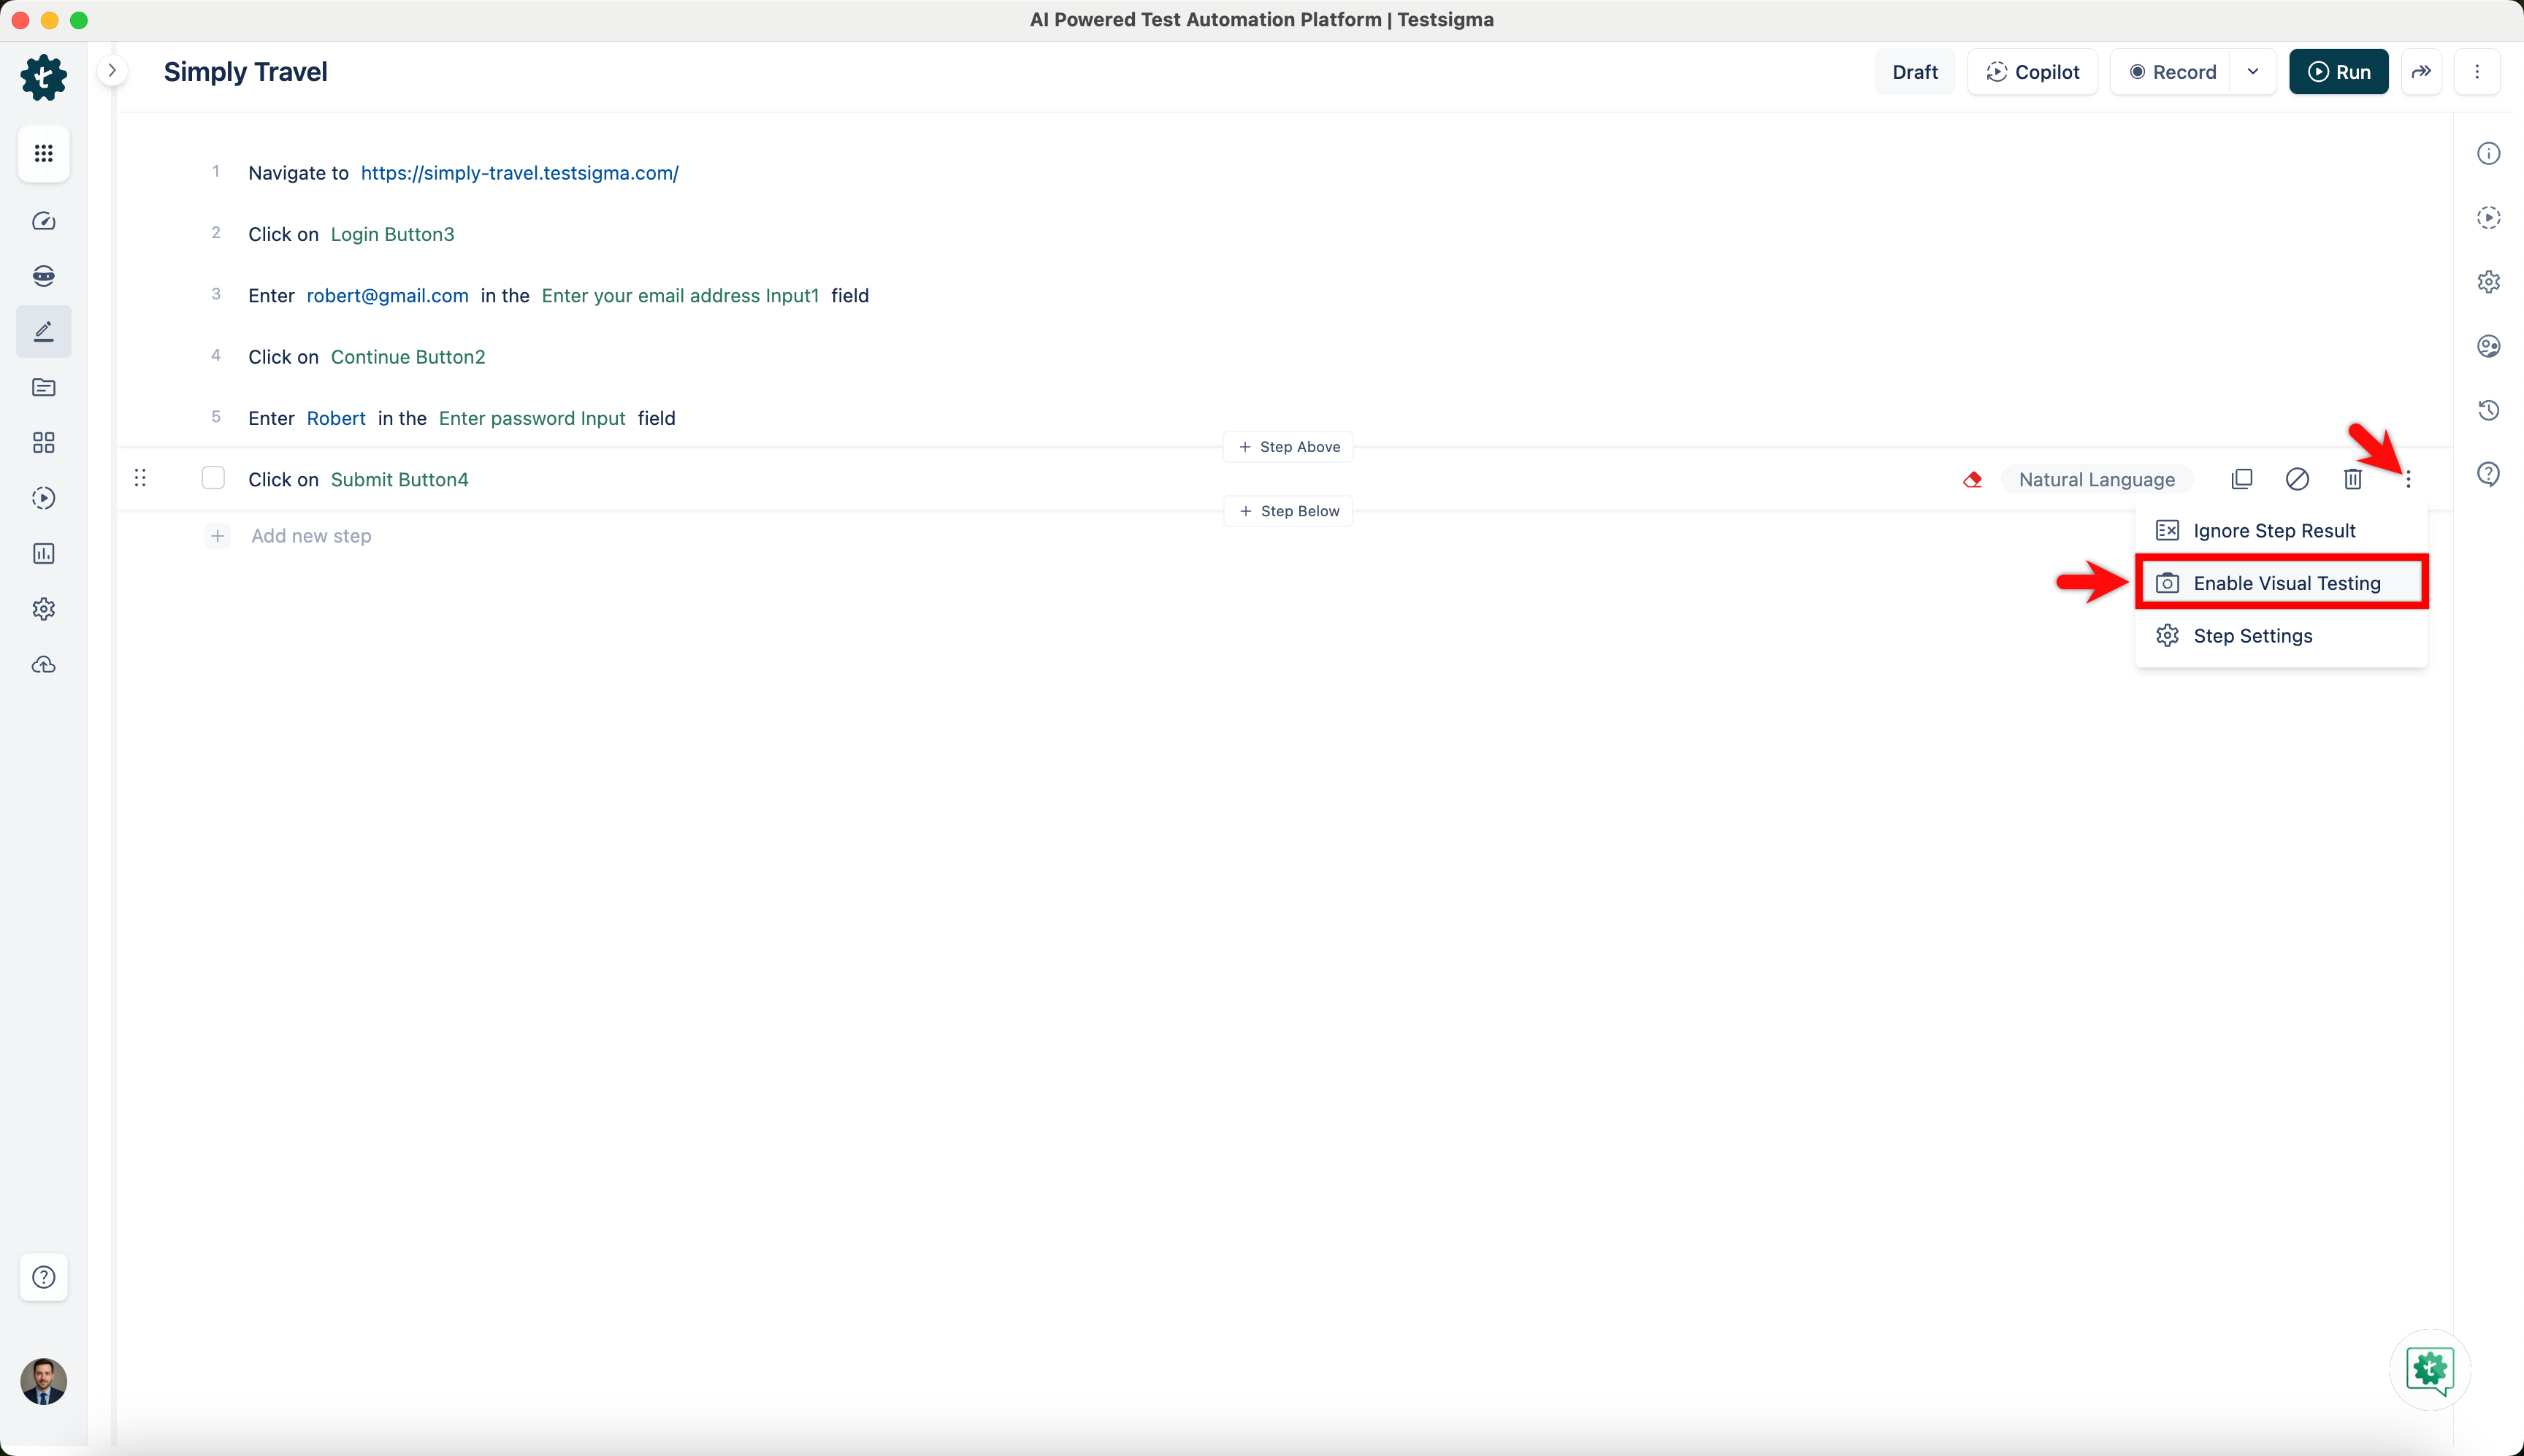
Clone Step
Click on the test step, then click the Clone Step icon to create an identical copy of the selected step, which saves time when you need multiple similar steps within the same test case. 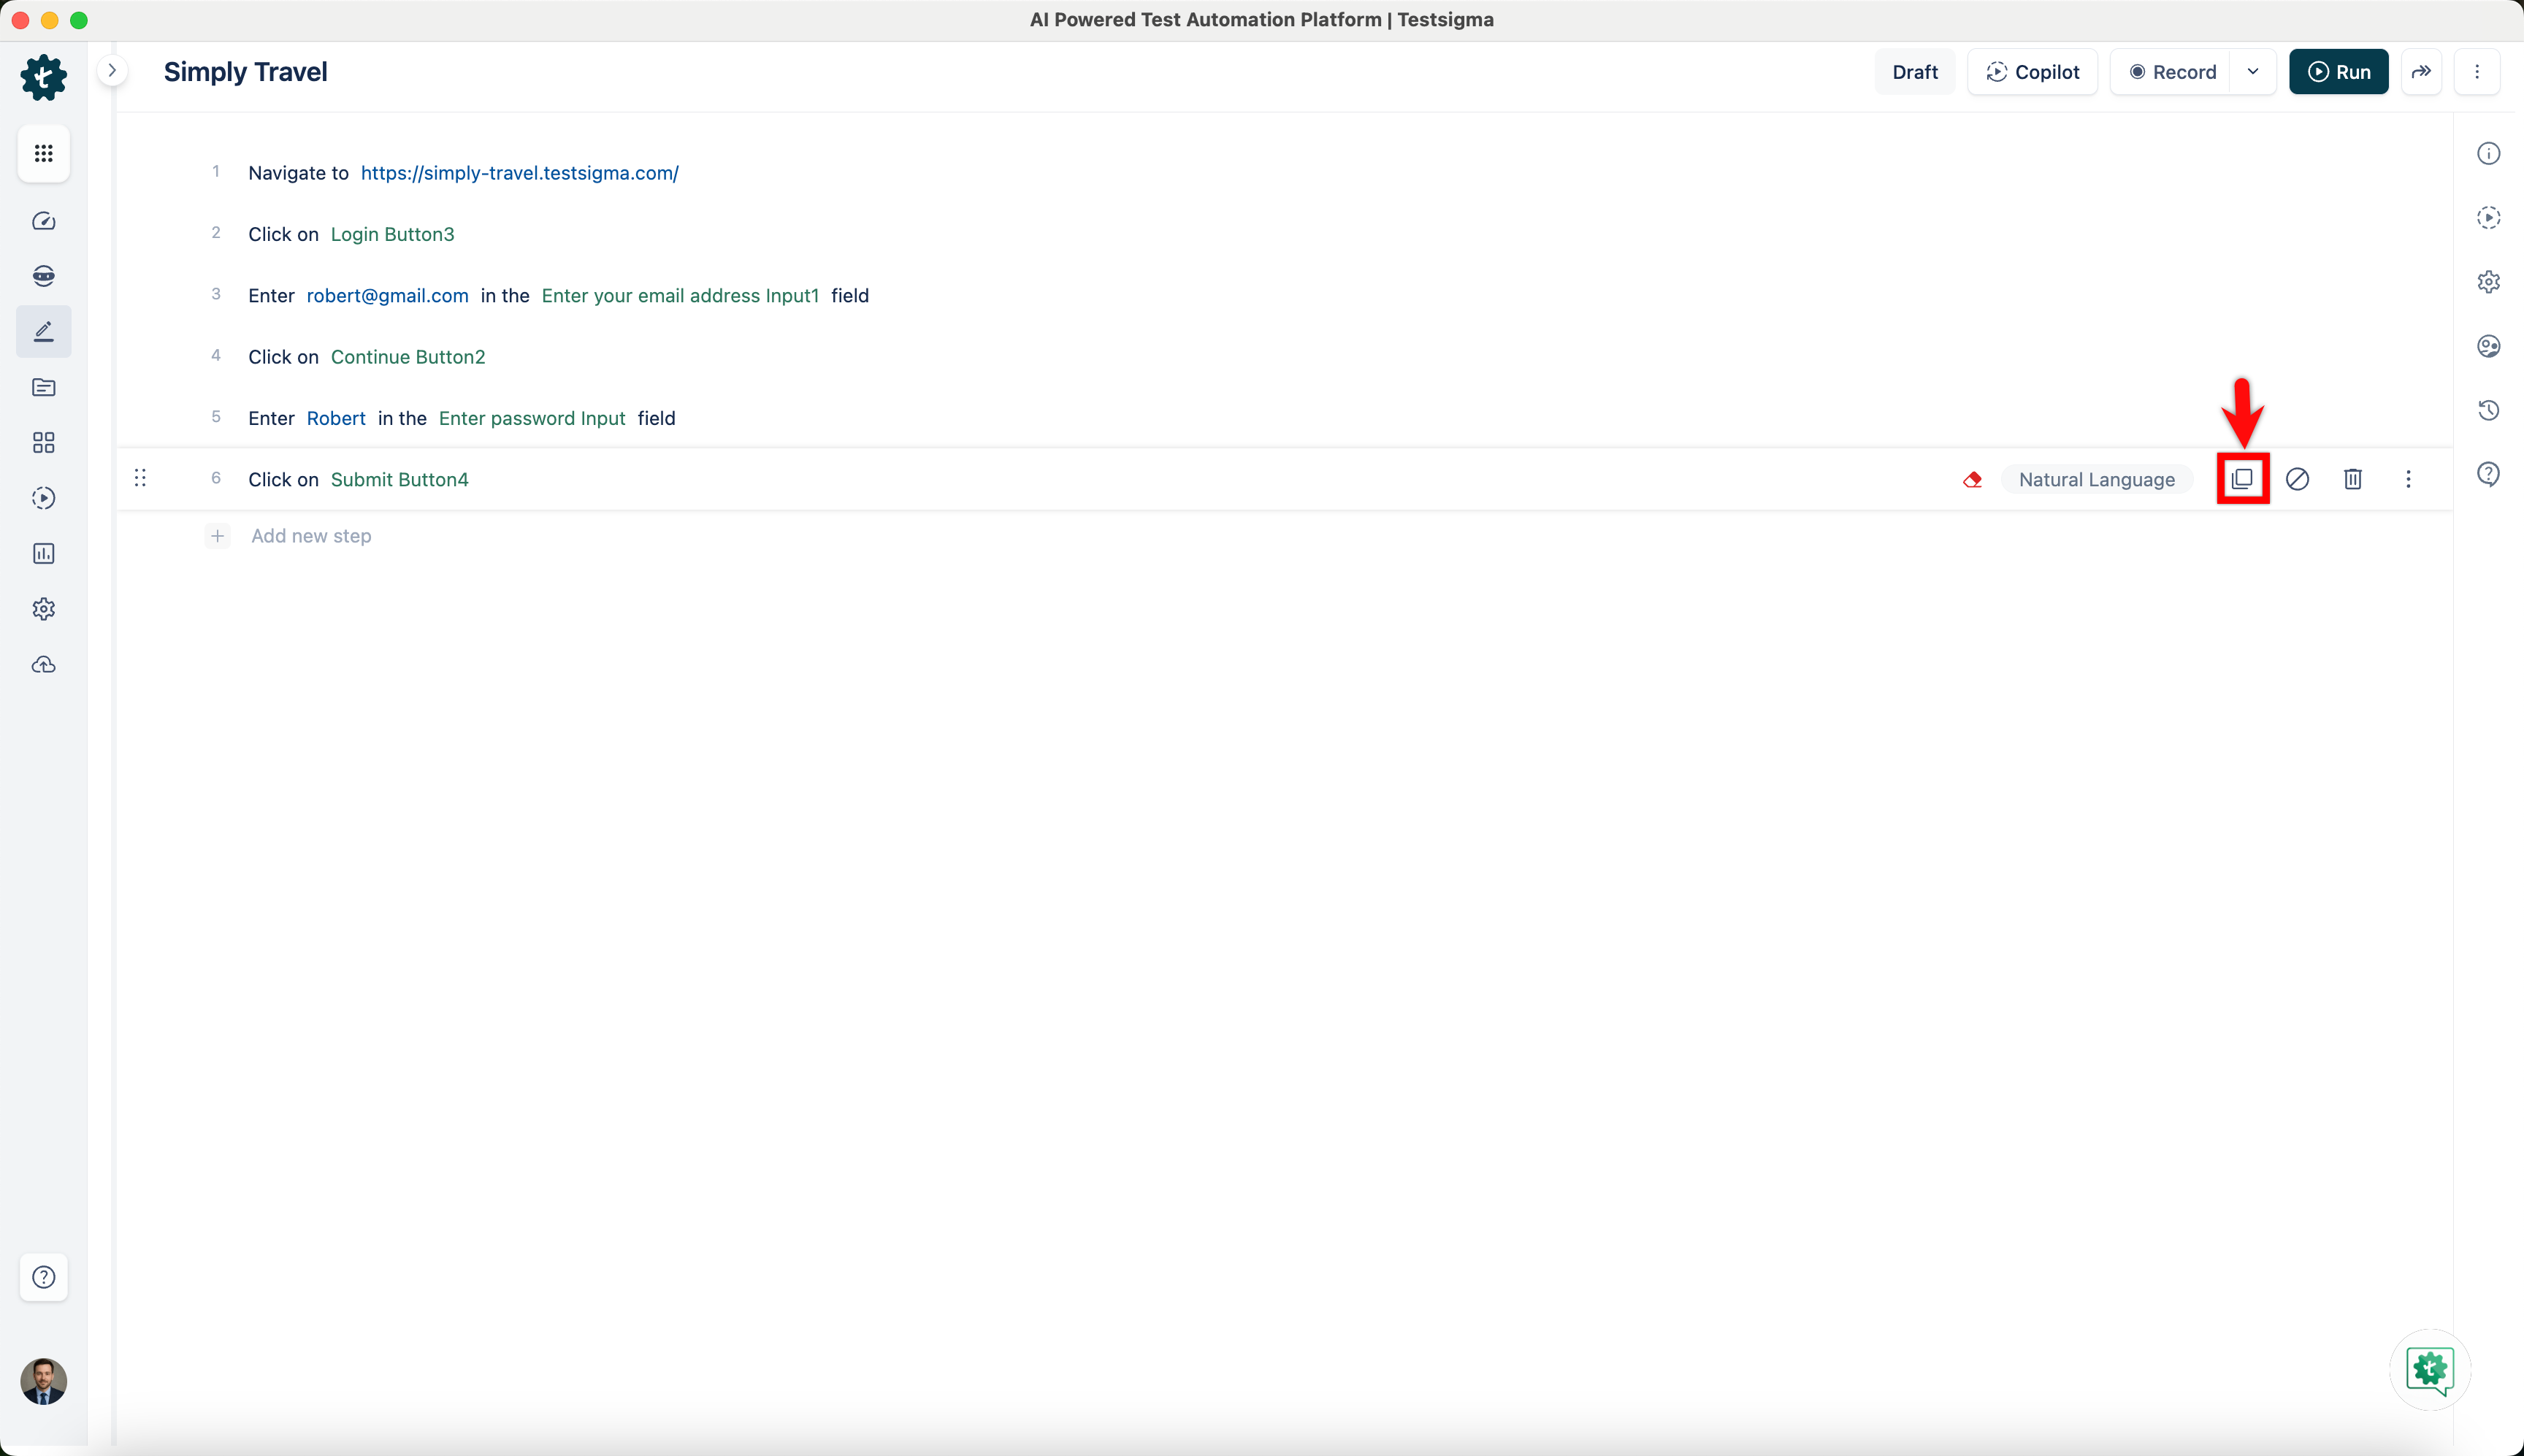
Delete Step
Click on the test step, then click the Delete Step icon to permanently remove the selected step from the test case, helping streamline test maintenance and organisation. 
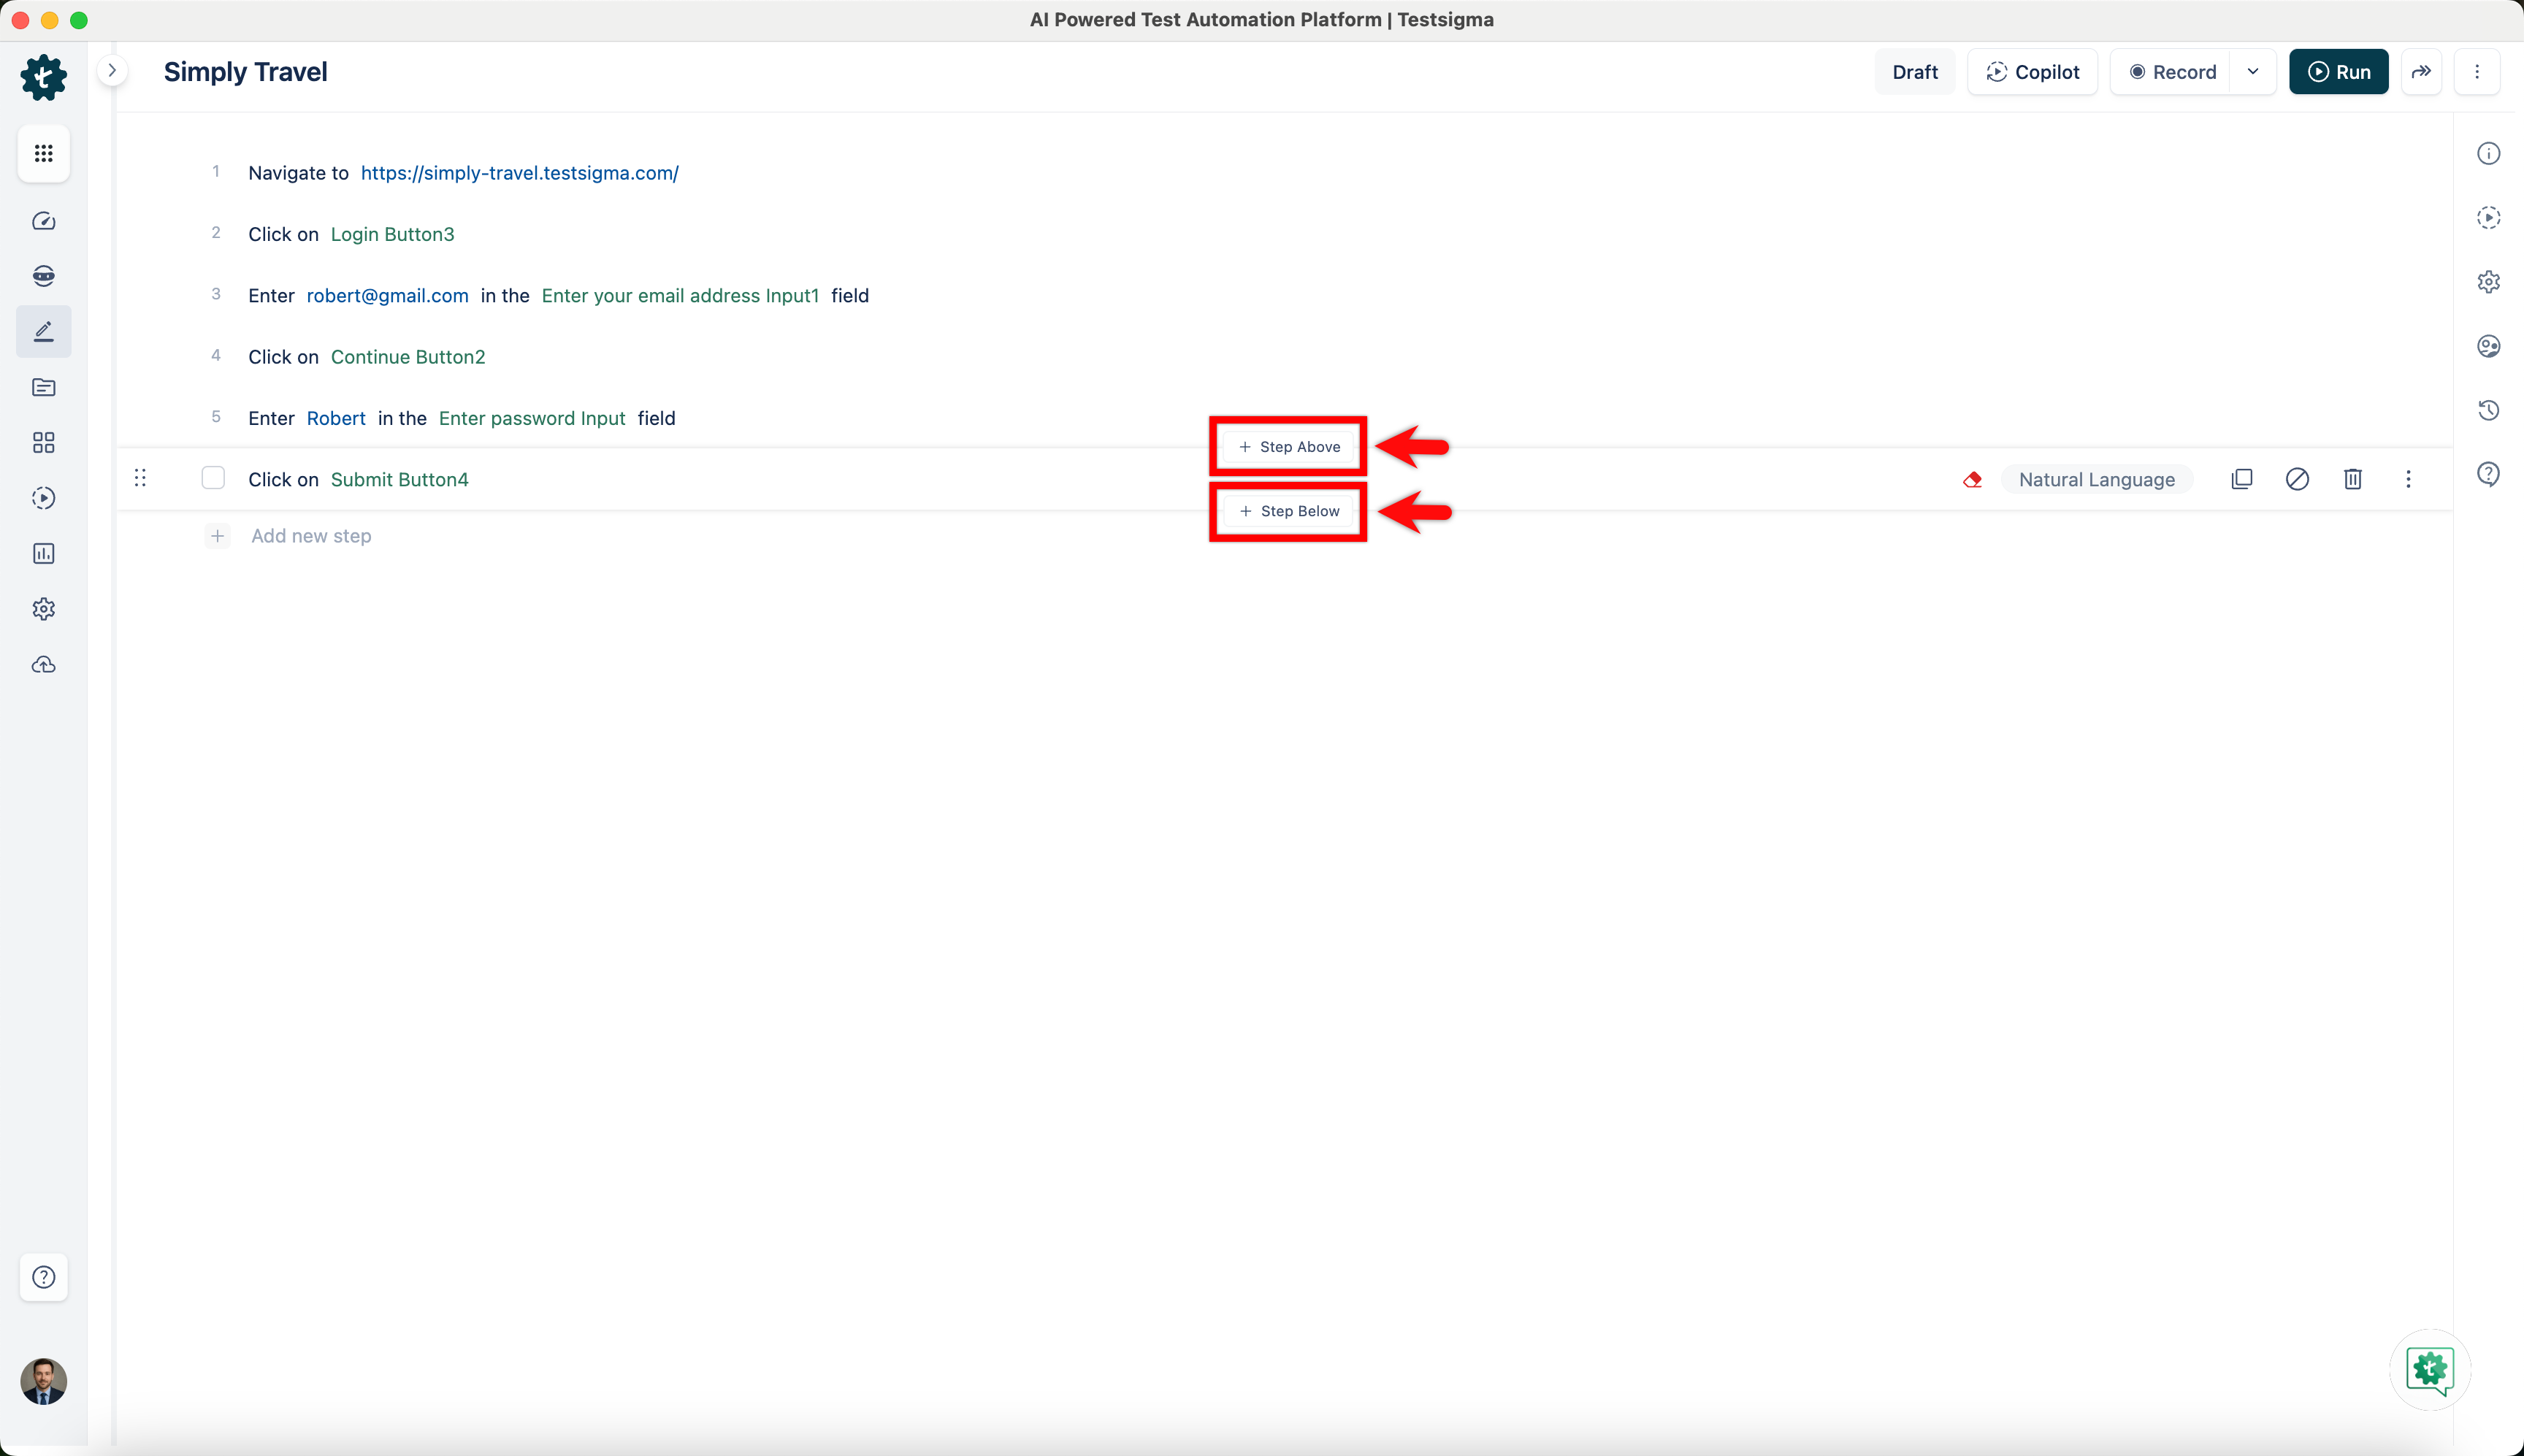
Steps Above and Below
You can add steps above and below a test step by clicking on Step Above & Step Below.
If you click on Step Above, you can add another step above the test step, while if you click on Step Below, you can add another step below the test step.
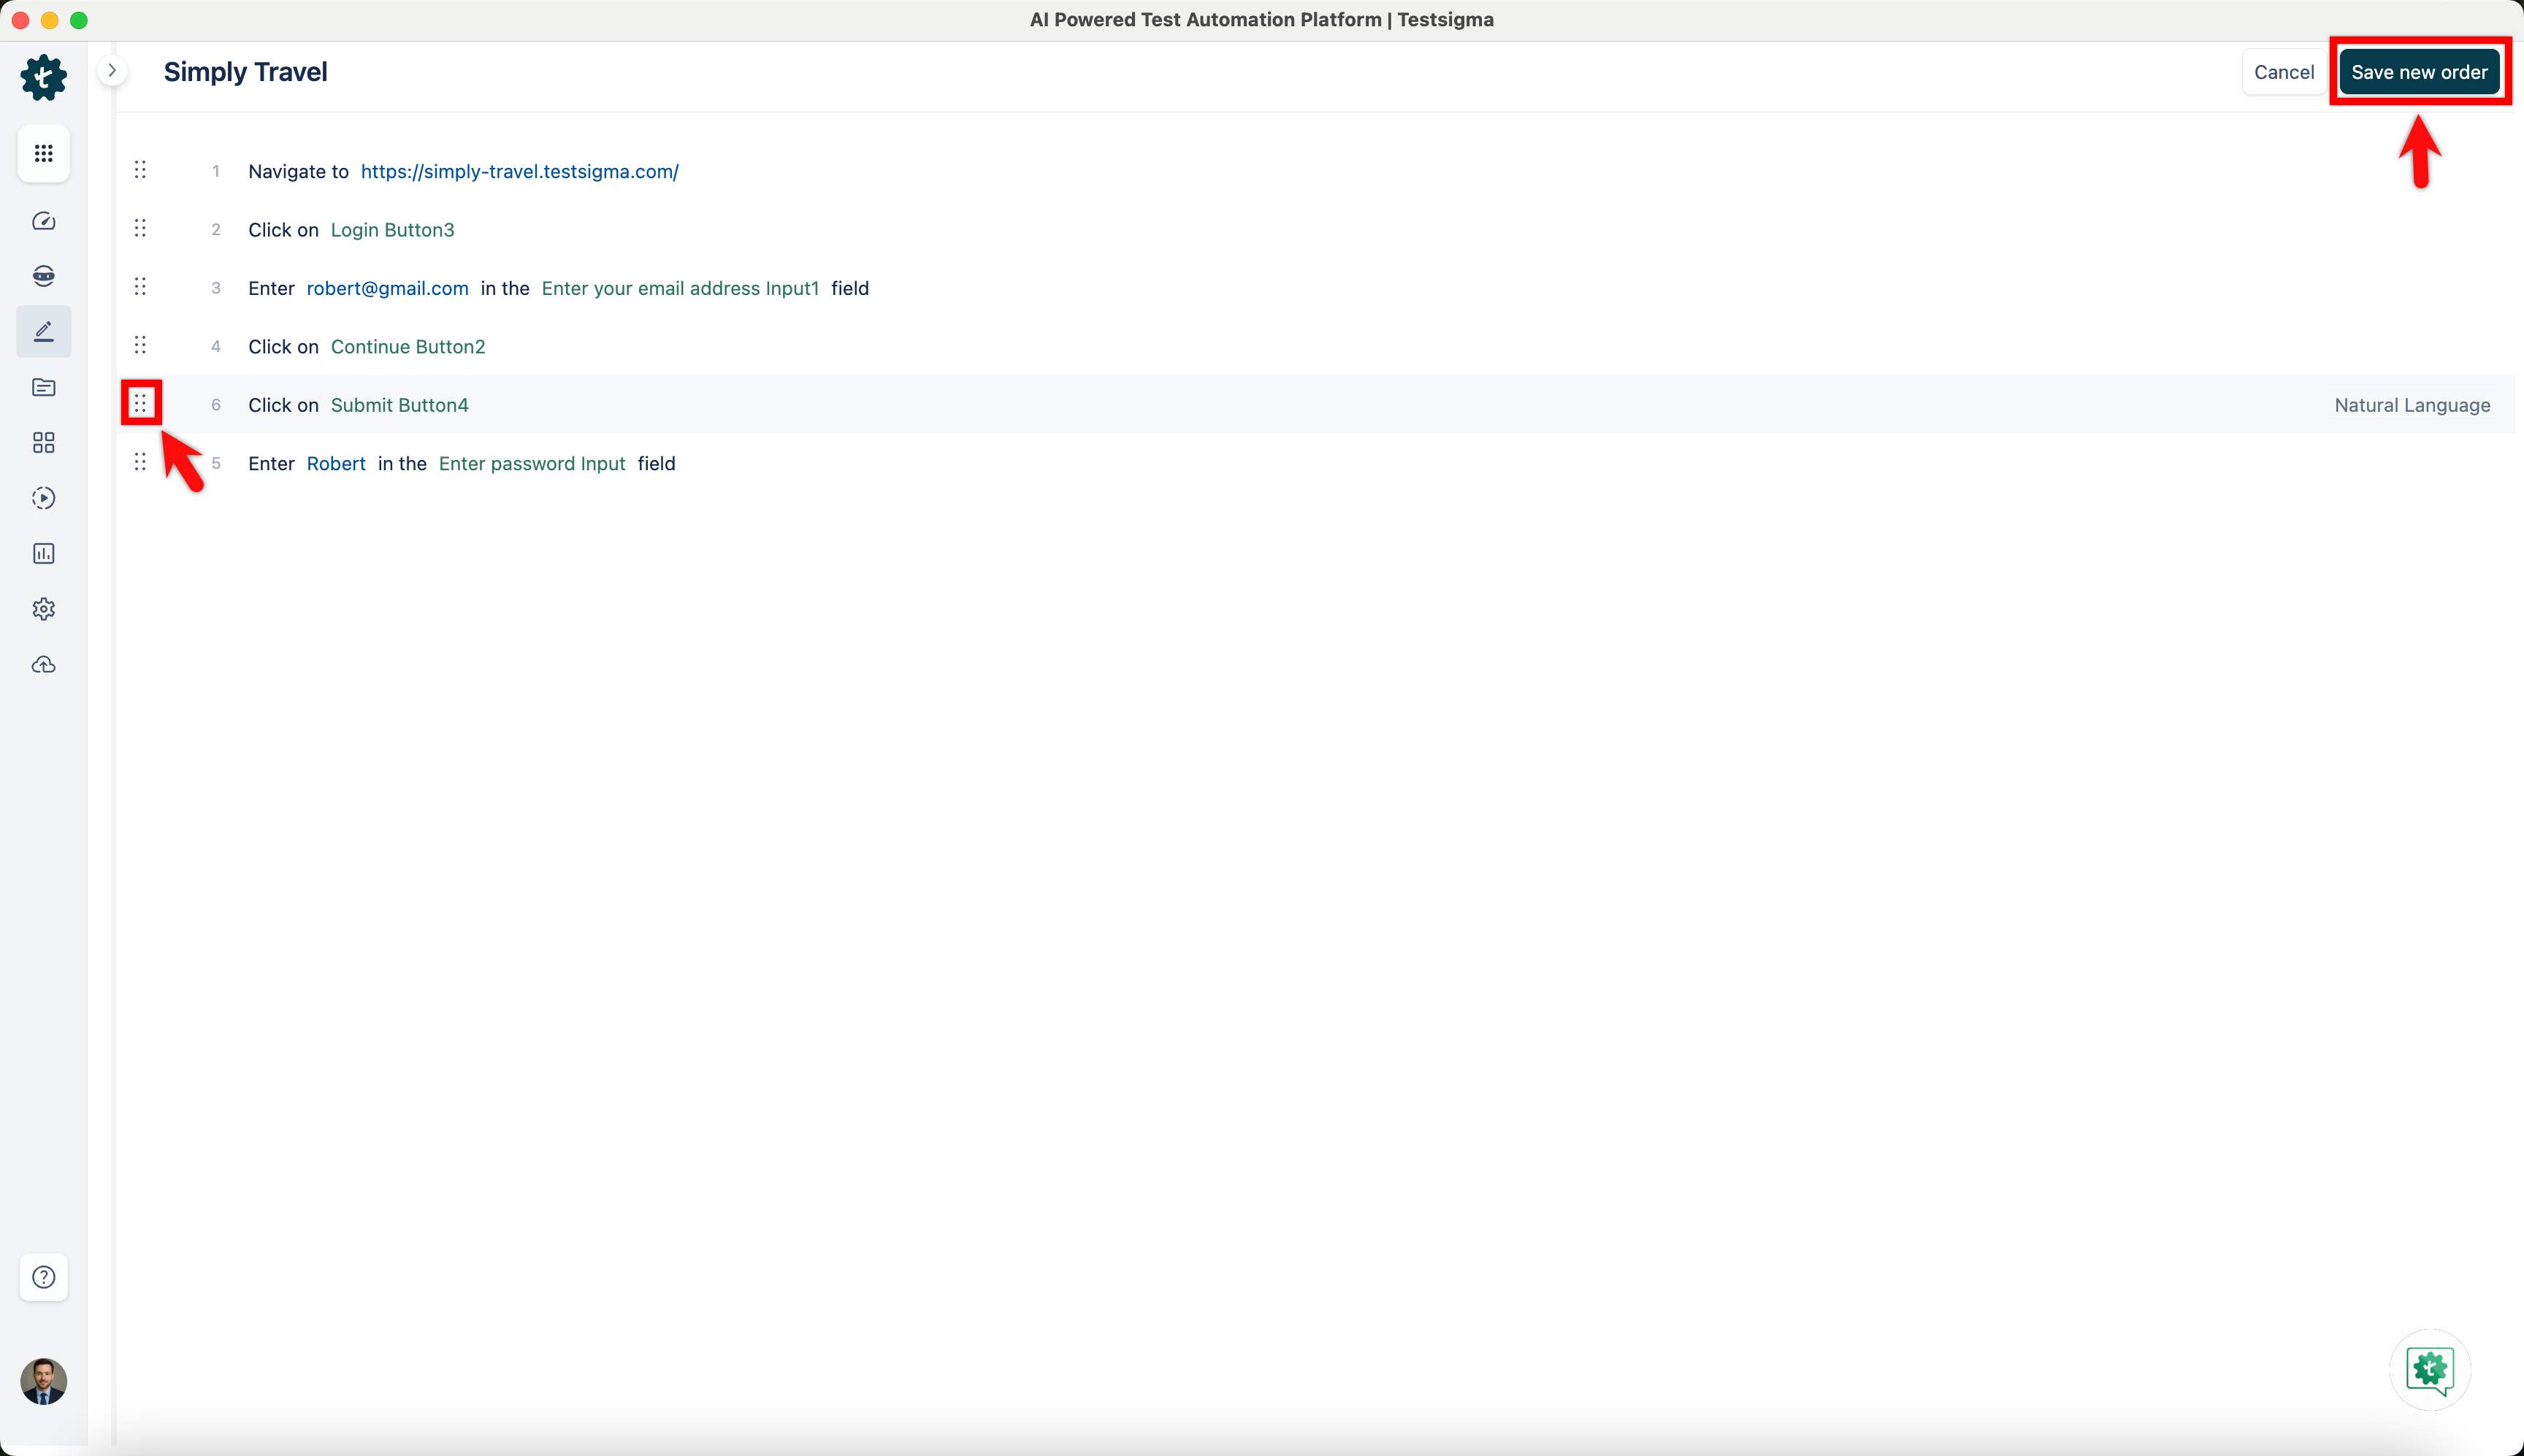
Reorder Test Step
Follow these steps to reorder test steps within a test case:
- Create a test case with a list of the test steps.
- You will find an ⋮⋮ (vertical ellipsis) icon before each test step. This icon represents the drag-and-drop handle for reordering.
- Hover your cursor over the ⋮⋮ icon for the test step you wish to move, then click and hold the icon to grab the test step and reorder it.
- Drag the test step to the desired position within the test case's list of test steps while holding it. As you move the test step, you will see a visual indicator of where the test step will be placed once you release it.
- Drop the test step into its new position by releasing the mouse button. Testsigma will automatically update the test step order in the test case after you release the test step.
- After reordering your test steps, click the Save New Order option in the screen's top right corner to save the new order.
Want to contribute or report missing content?