- runs
 Ad-hoc Run
- Test Plan Executions
- Dry Runs on Local Devices
- Run Tests on Private Grid
- Run Tests on Vendor Platforms
- Run Test Plans on Local Devices
- Test Locally Hosted Applications
- Flutter Integration Driver Testing on Testsigma
- Debug Test Case Failures
- Parallel and Allowed queues
Ad-hoc Run
Testsigma's Ad-hoc Run feature allows you to run your test cases without impacting the real test outcomes. You can use this functionality to verify if your test cases are set up accurately and performing as intended before proceeding with full-scale testing.
This documentation will guide you through setting up Test Labs and Test Machines, selecting the App Source, adjusting Additional Settings, and configuring Desired Capabilities.
Prerequisites
Before you begin, ensure that you have referred to:
- Documentation on creating projects.
- Documentation on creating test cases.
- Documentation on creating test labs.
- Documentation on setting up local devices with Testsigma Agent.
- Documentation on creating environments.
- Documentation on creating headless tests.
- Documentation on managing desired capabilities for all applications.
- Documentation on uploads.
- Documentation on creating camera image injection.
- Documentation on creating network logs for Android and iOS applications.
Ad-hoc Run in Test Case
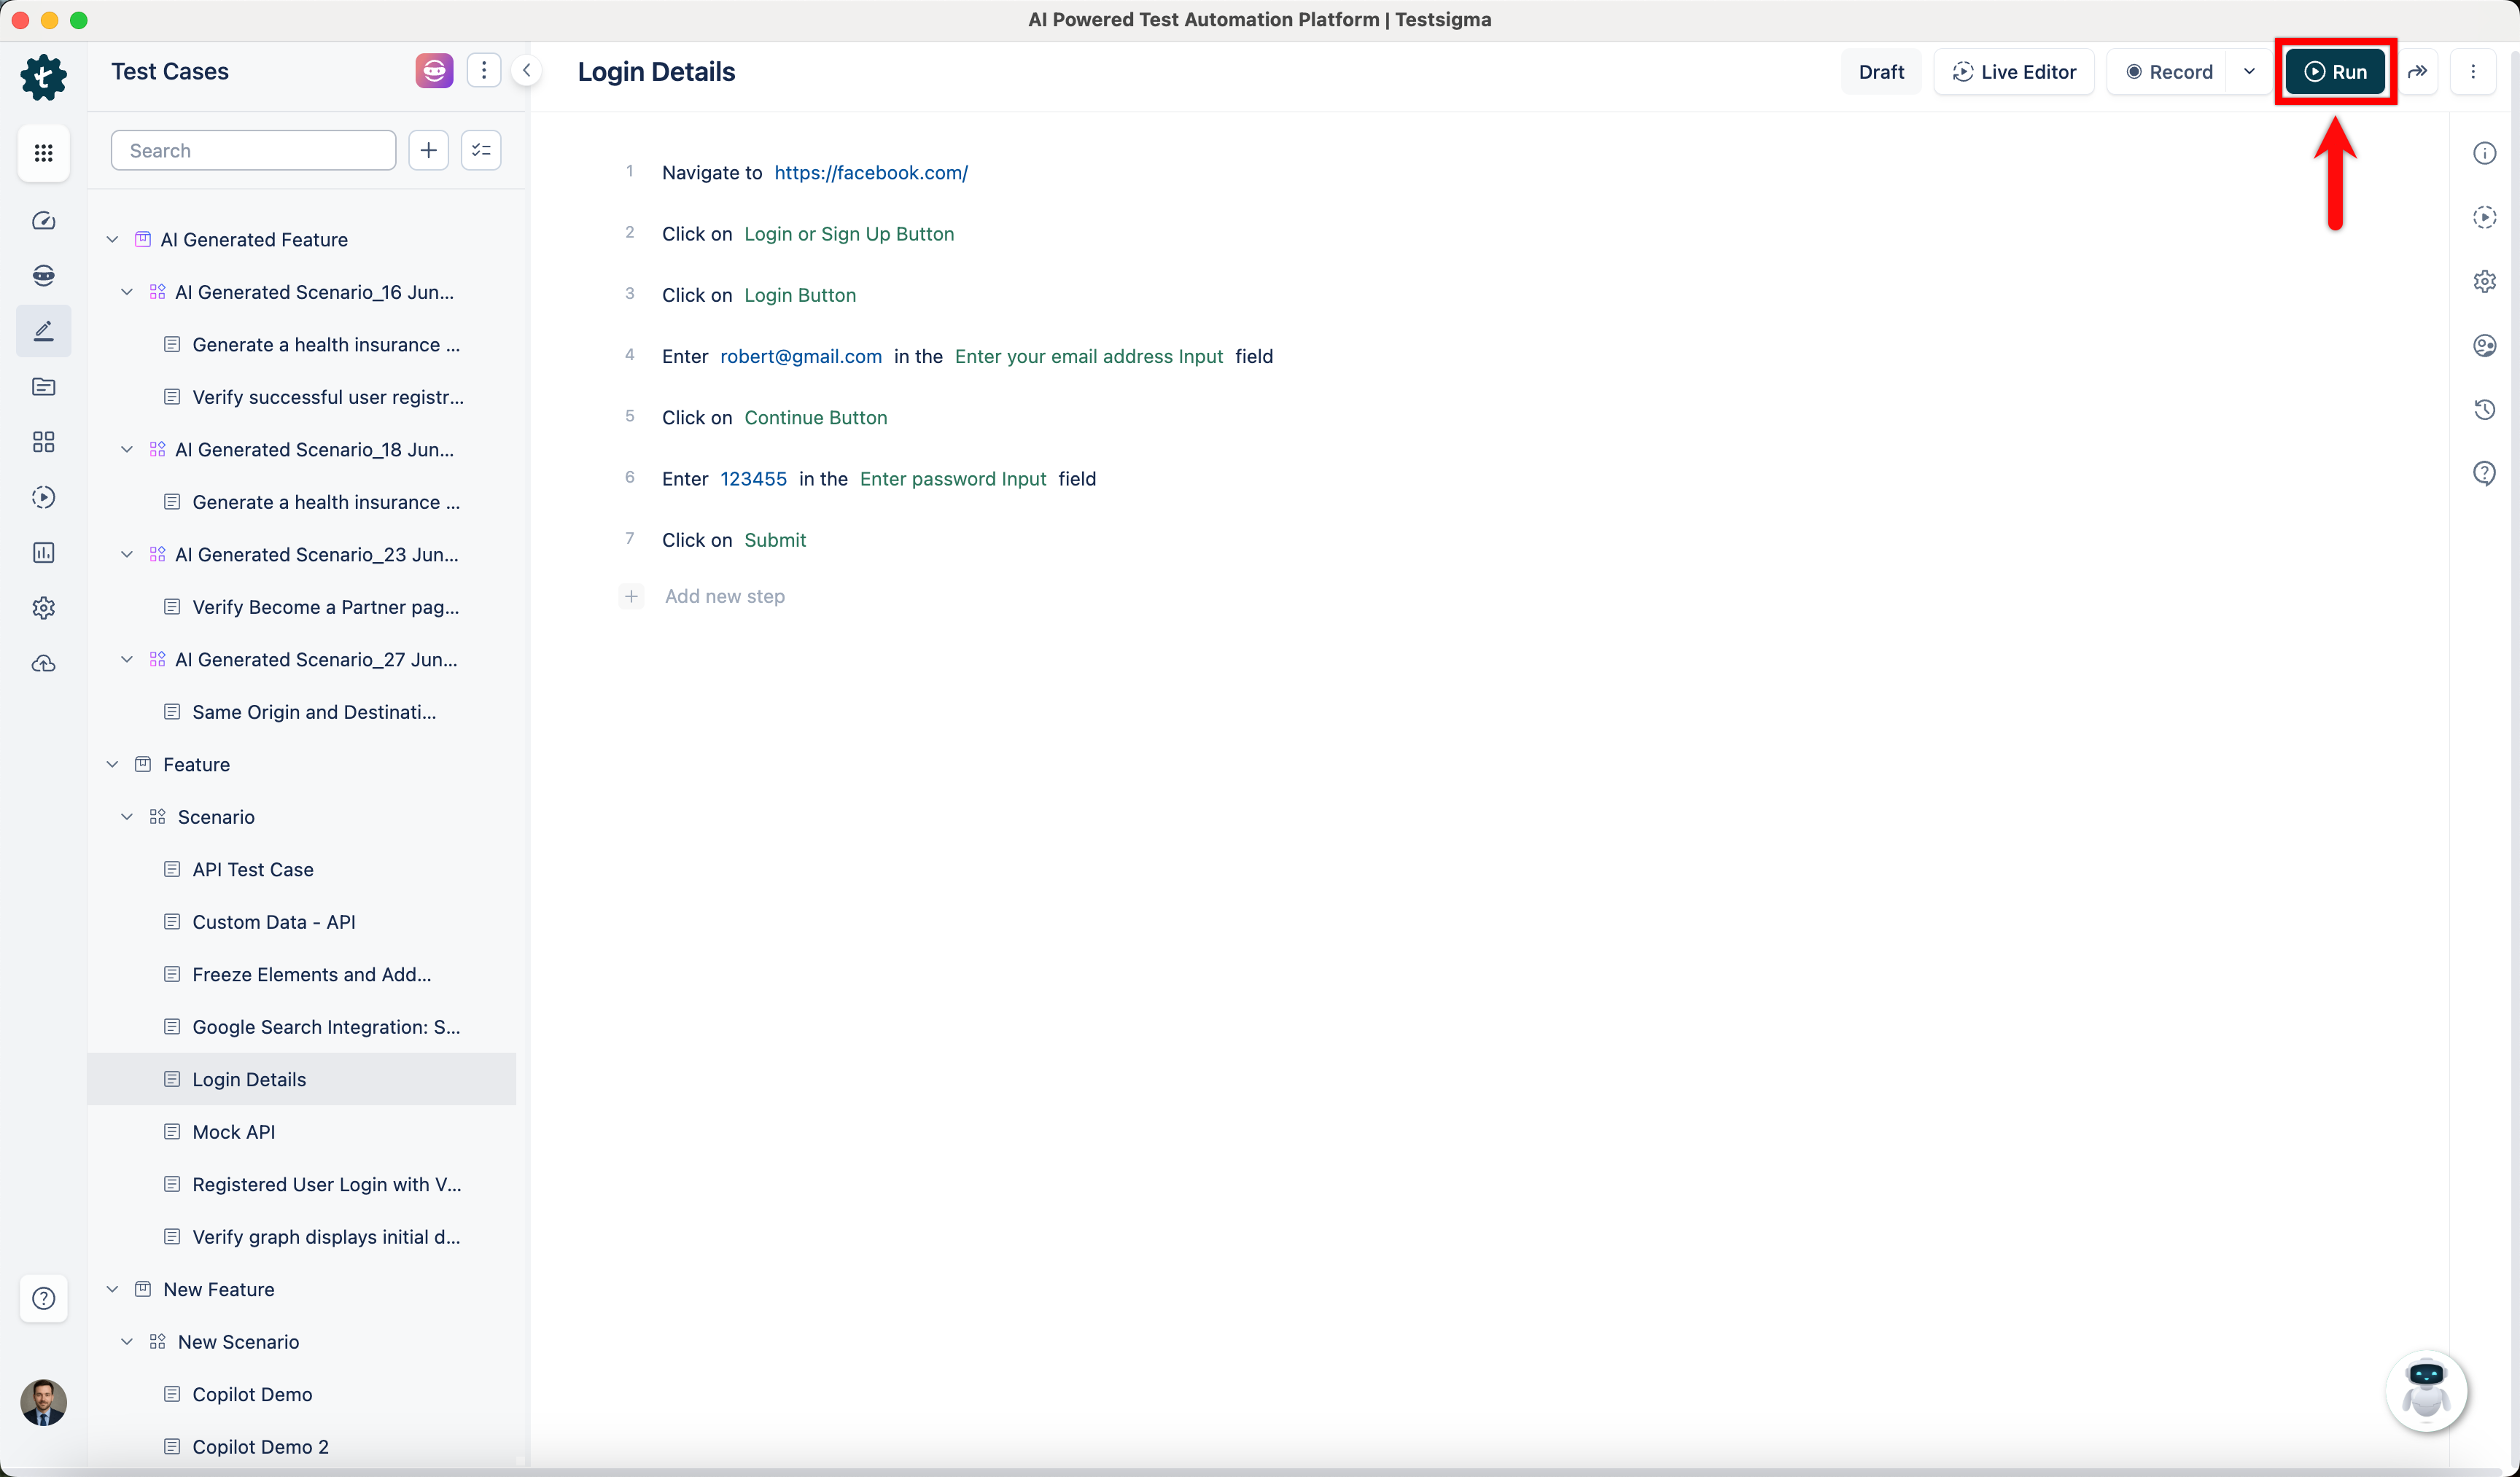
- Create a Test Case with a list of the test steps and then click Run in the top right of the Test Case Details page to initiate an Ad-hoc Run overlay.
- Configure the ad-hoc run in the Ad-hoc Run overlay based on the application type in the below section.
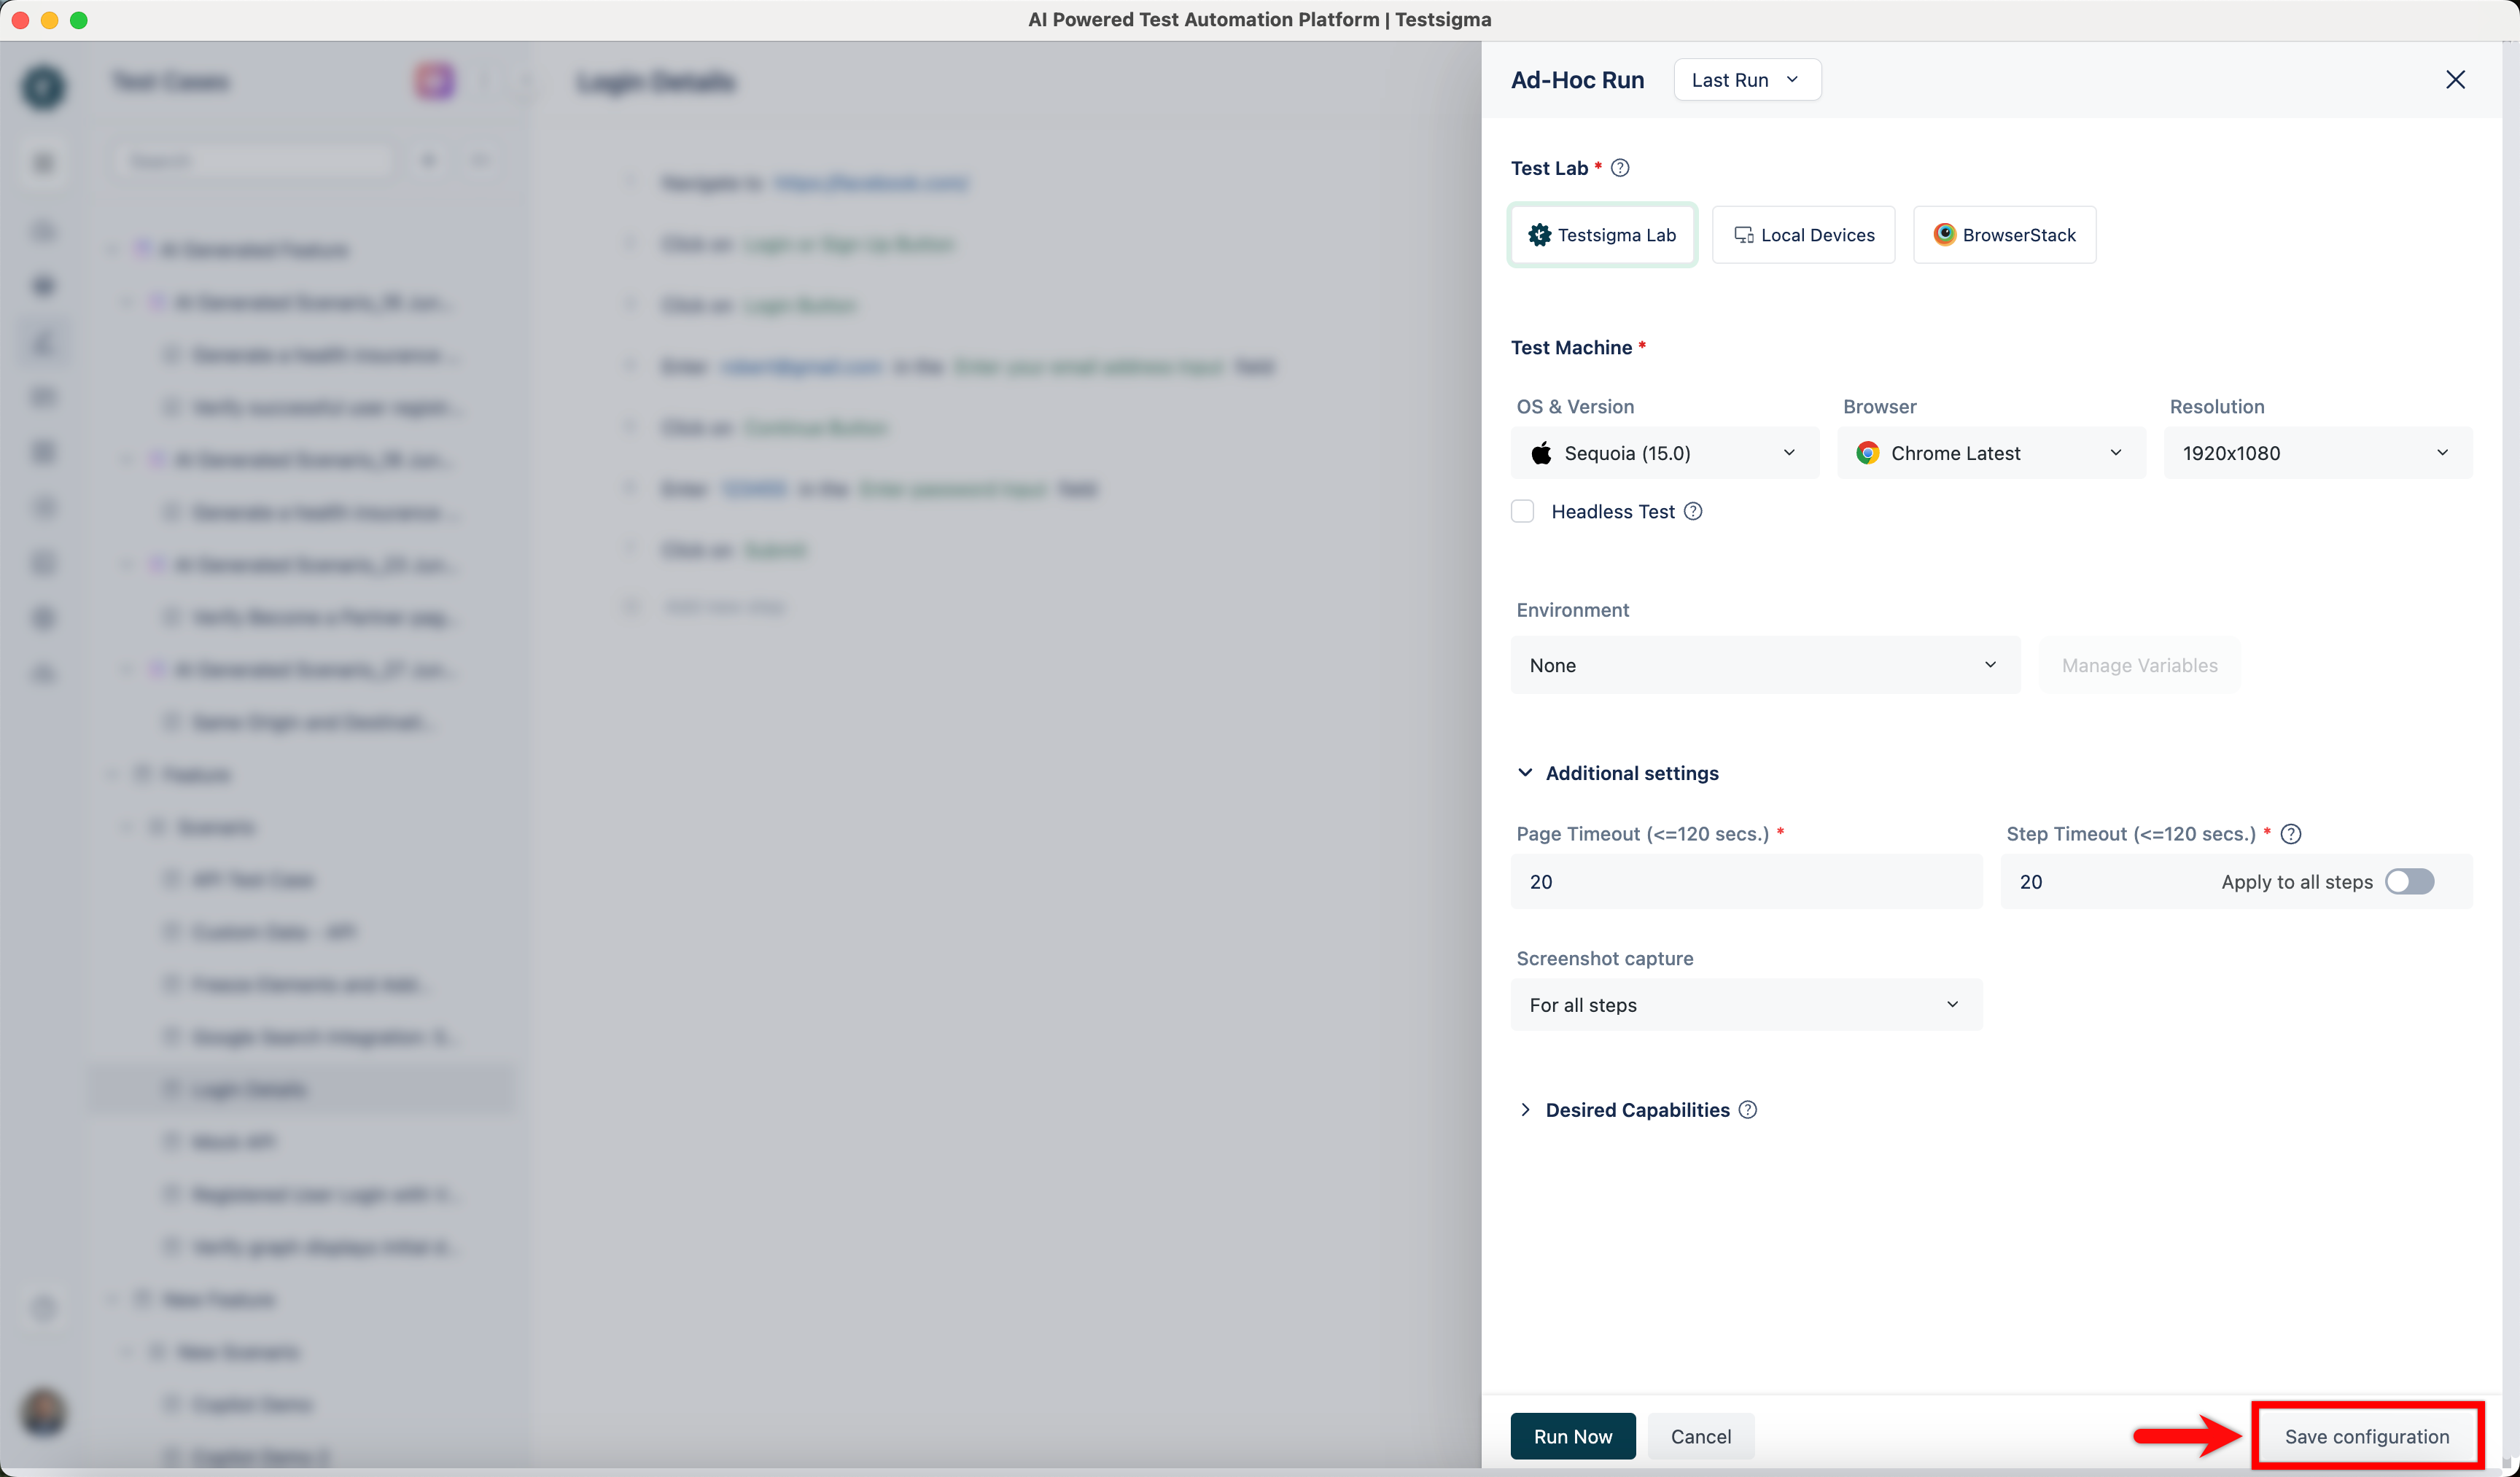
- Click Save Configuration in the screen's bottom right corner to save the Ad-hoc Run setups configuration.
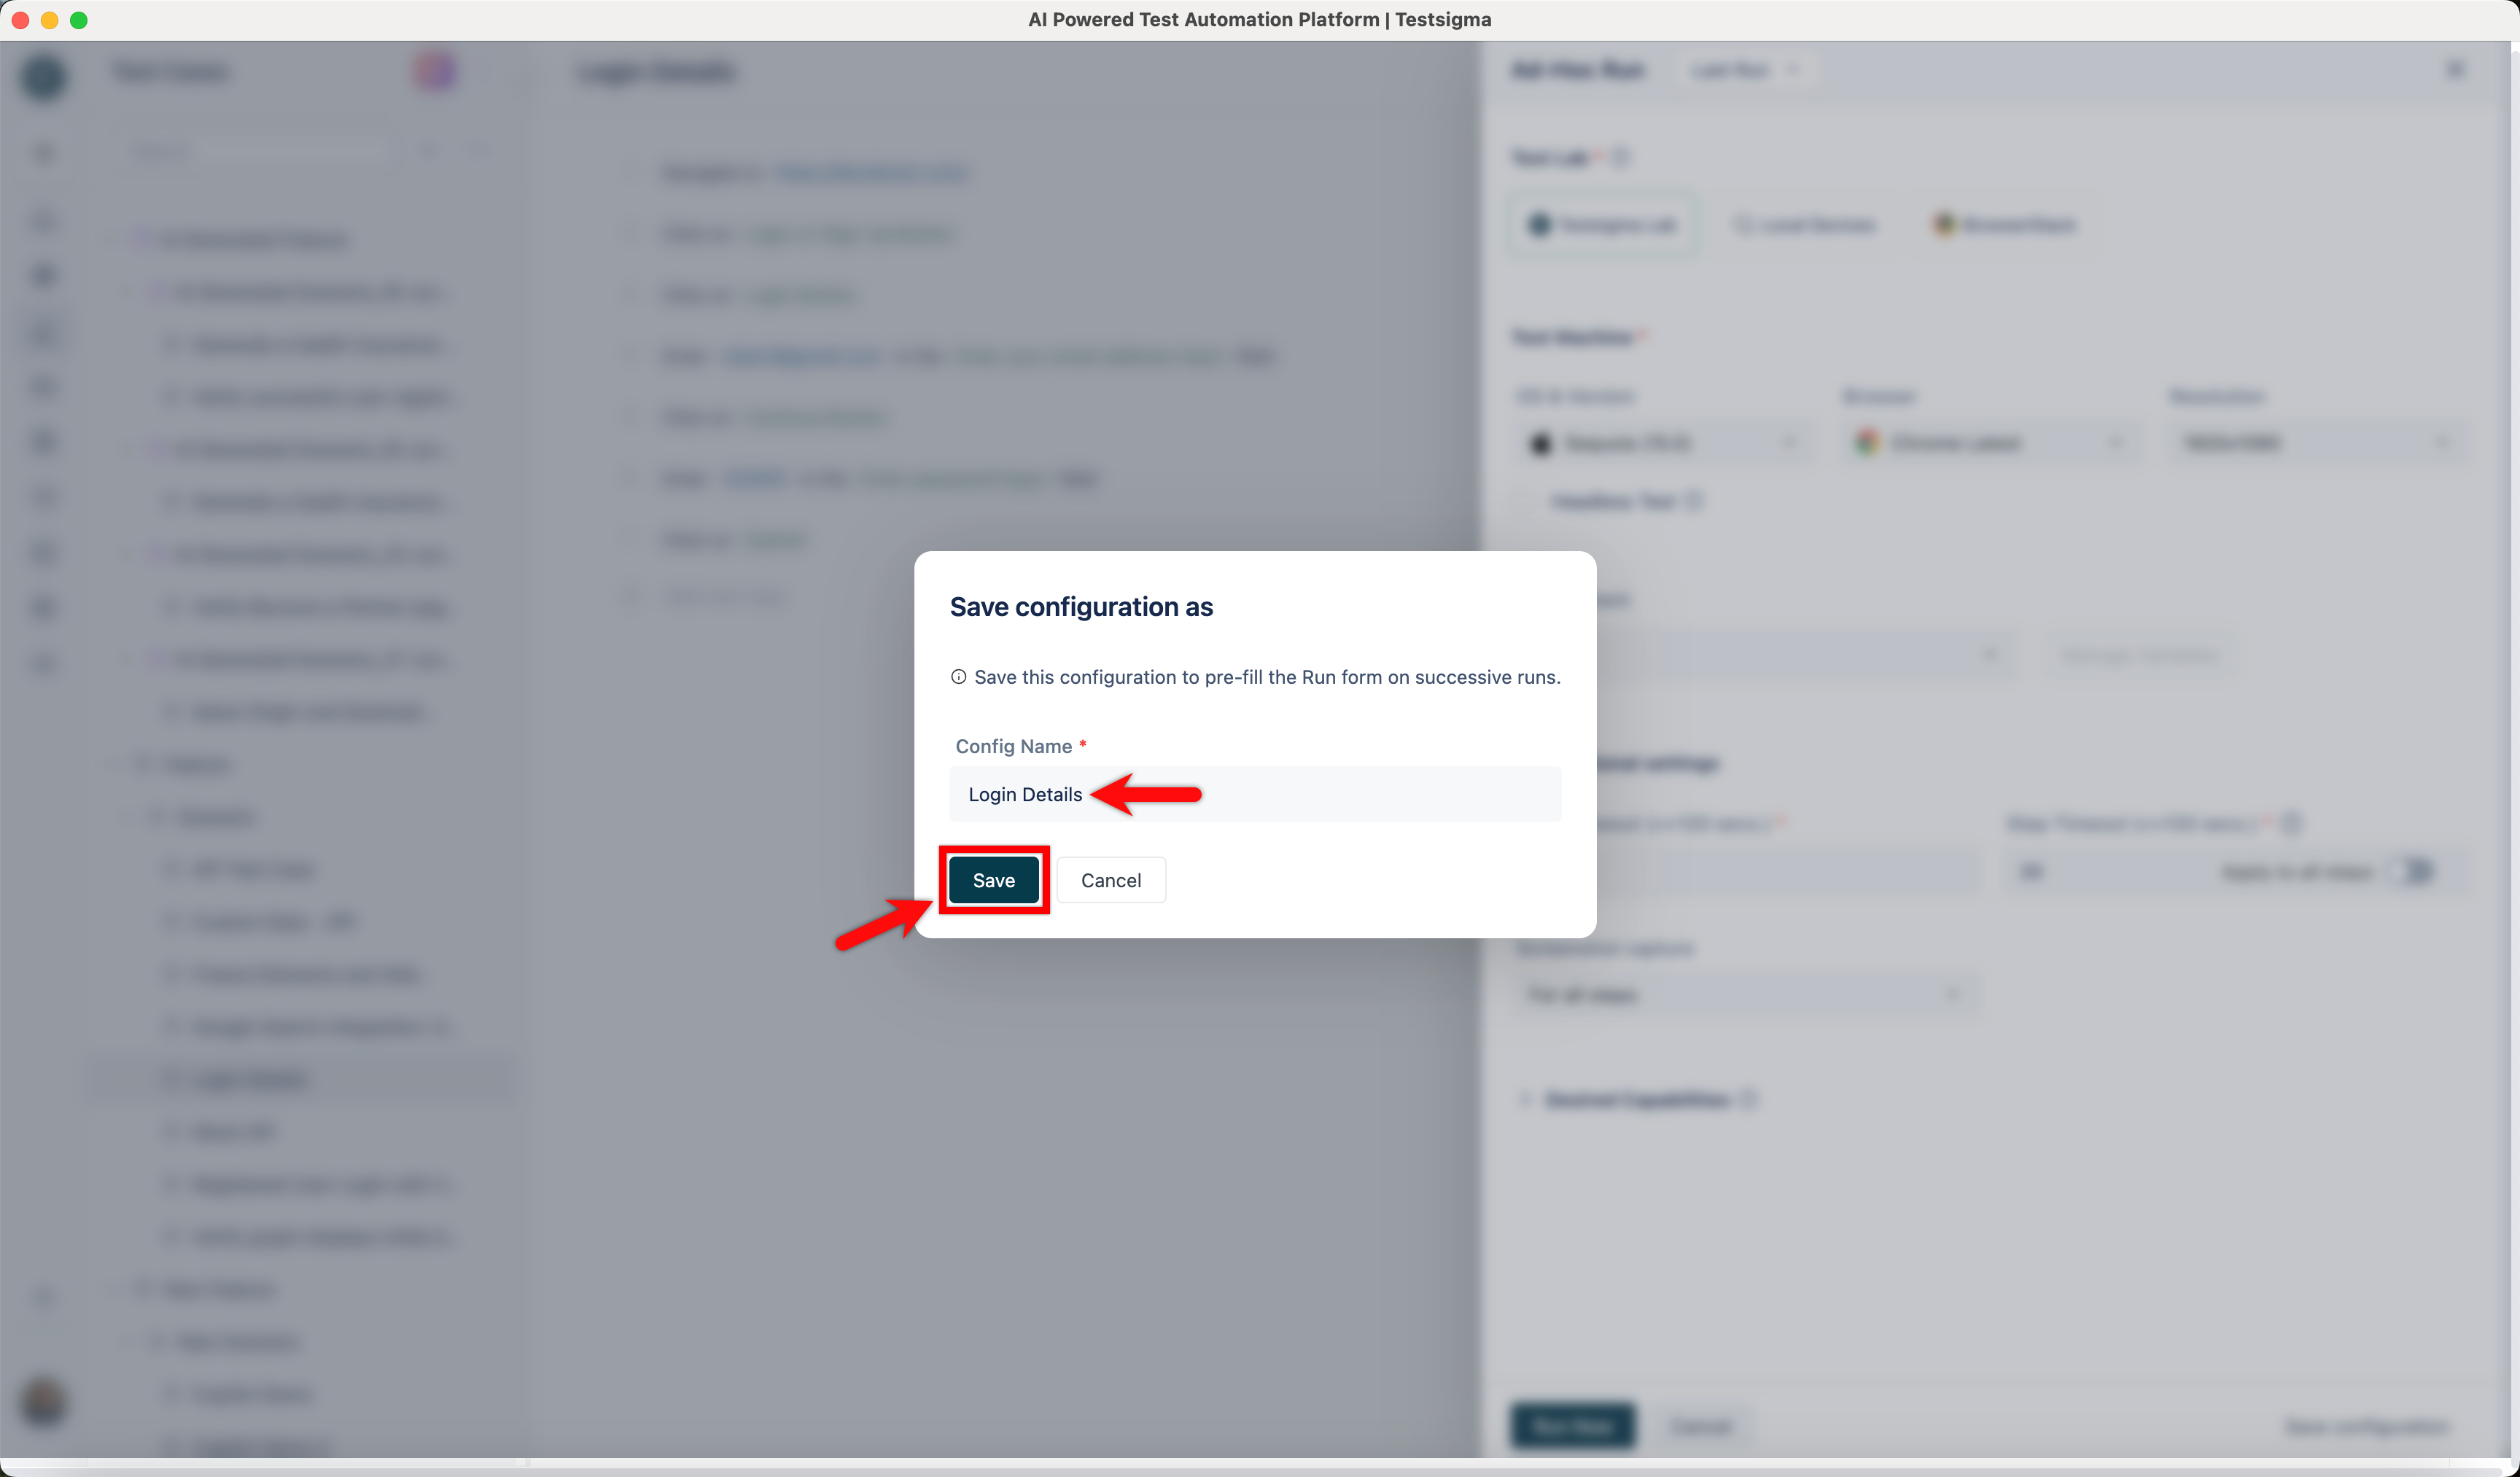
- Enter a Name for the configuration in the pop-up window that appears and click Save.
- Click on Saved Configs at the top of the screen to reuse the saved configuration, and a drop-down list will appear. Select the Saved Config from this list.
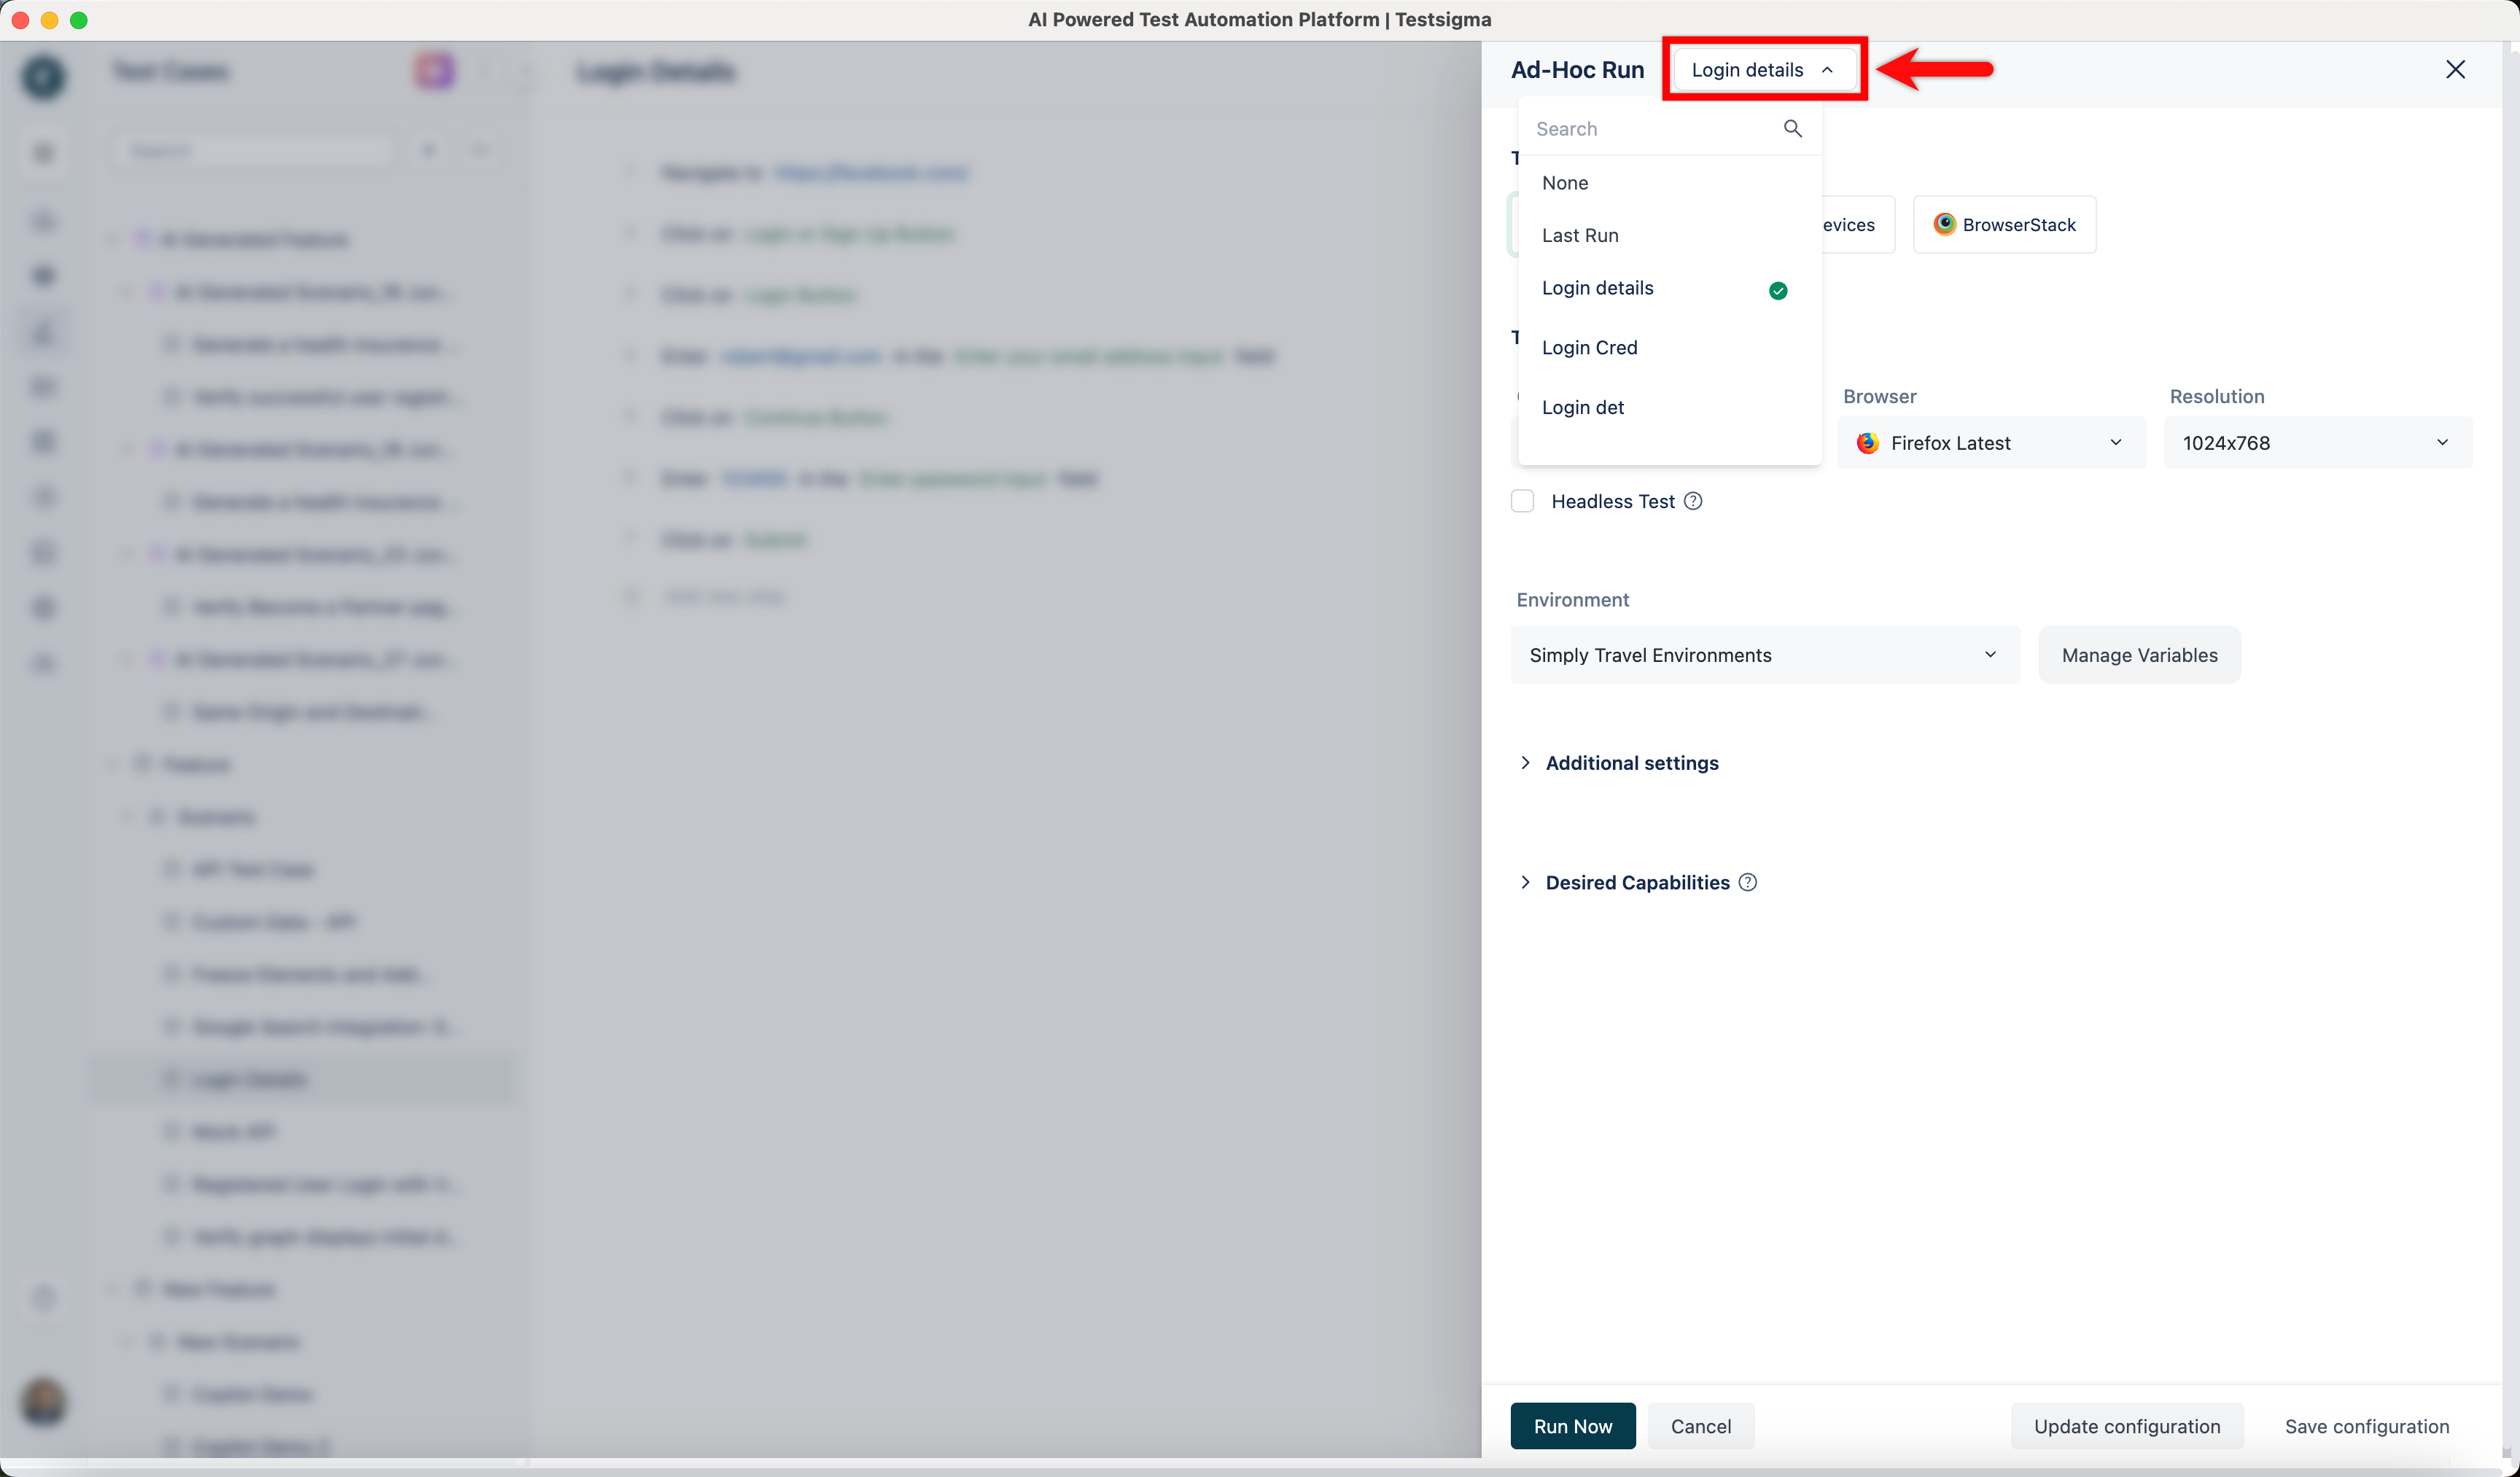
- The Ad-hoc Run overlay will be automatically pre-filled with the saved configuration for your next runs when selected.
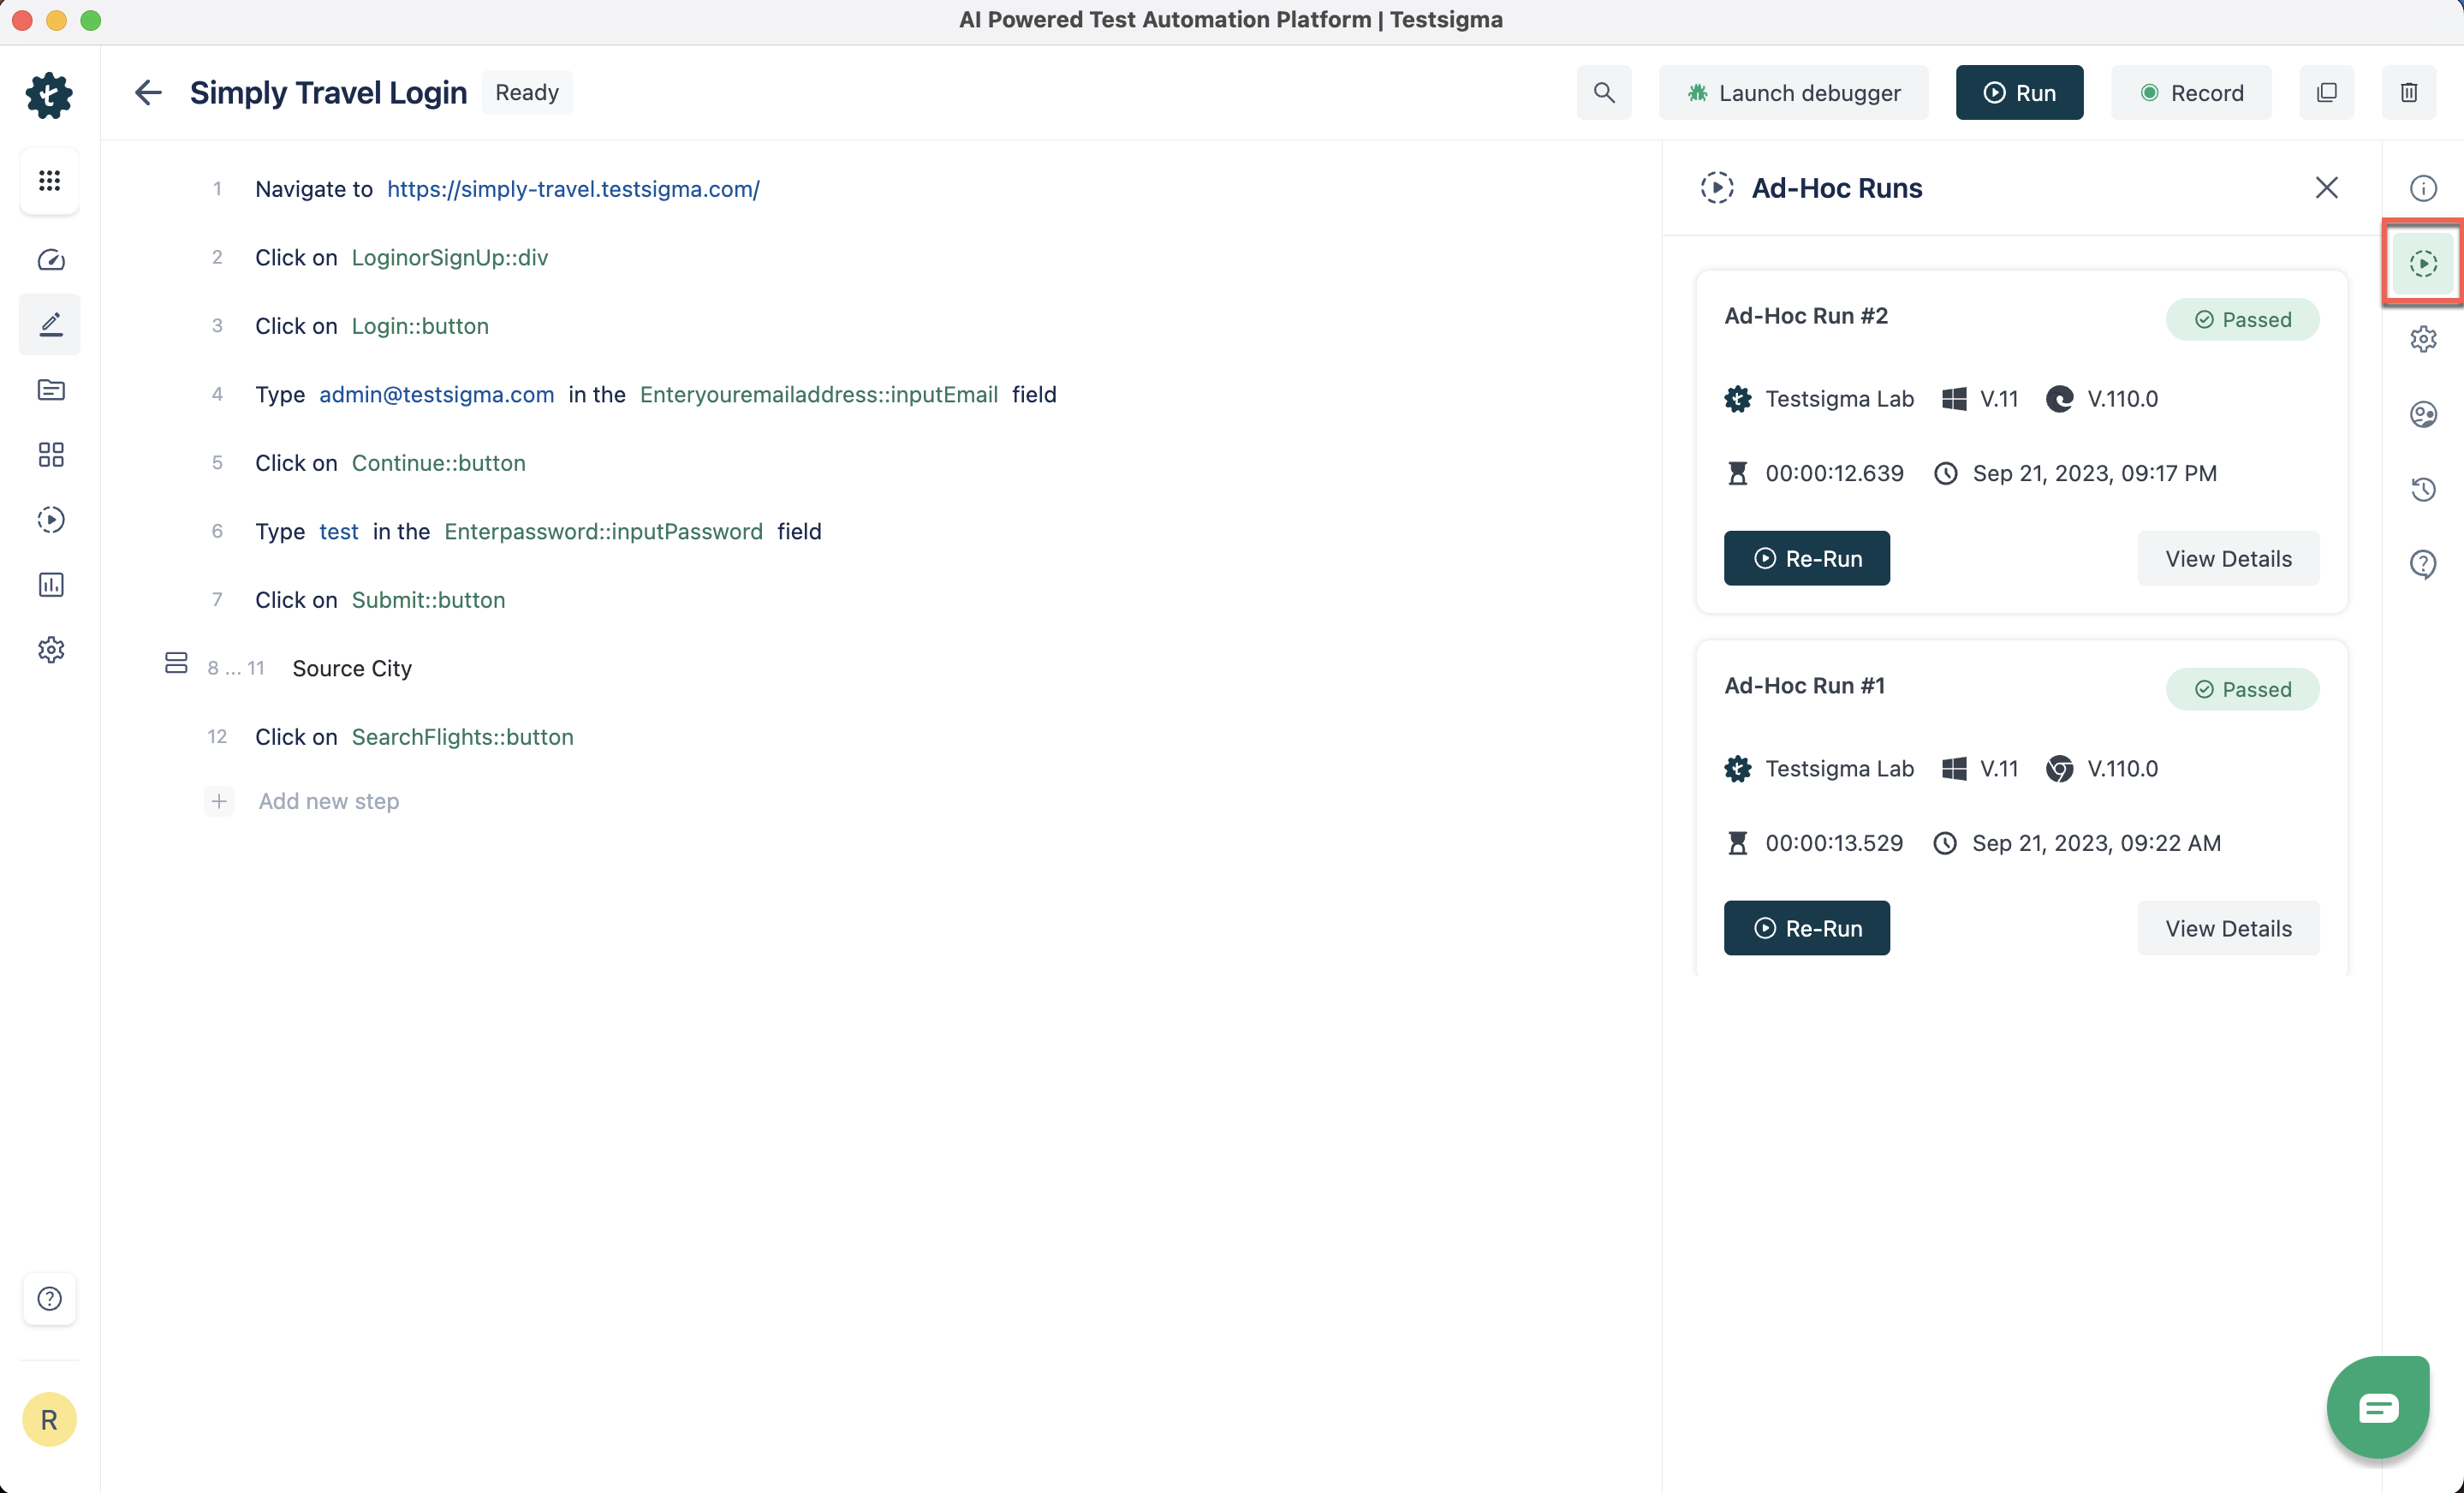
- In the Test Case Details page, click Ad-Hoc Runs in the right Navigation Bar to open the right sidebar. This will enable you to view the history and details of Ad-Hoc Run results for the Test Case.
Whitelisting of Testsigma IP addresses is necessary to ensure that the Testsigma servers and lab environments can securely interact with your applications and systems for testing activities. For more information, refer to whitelisting Testsigma IP addresses
Web Application
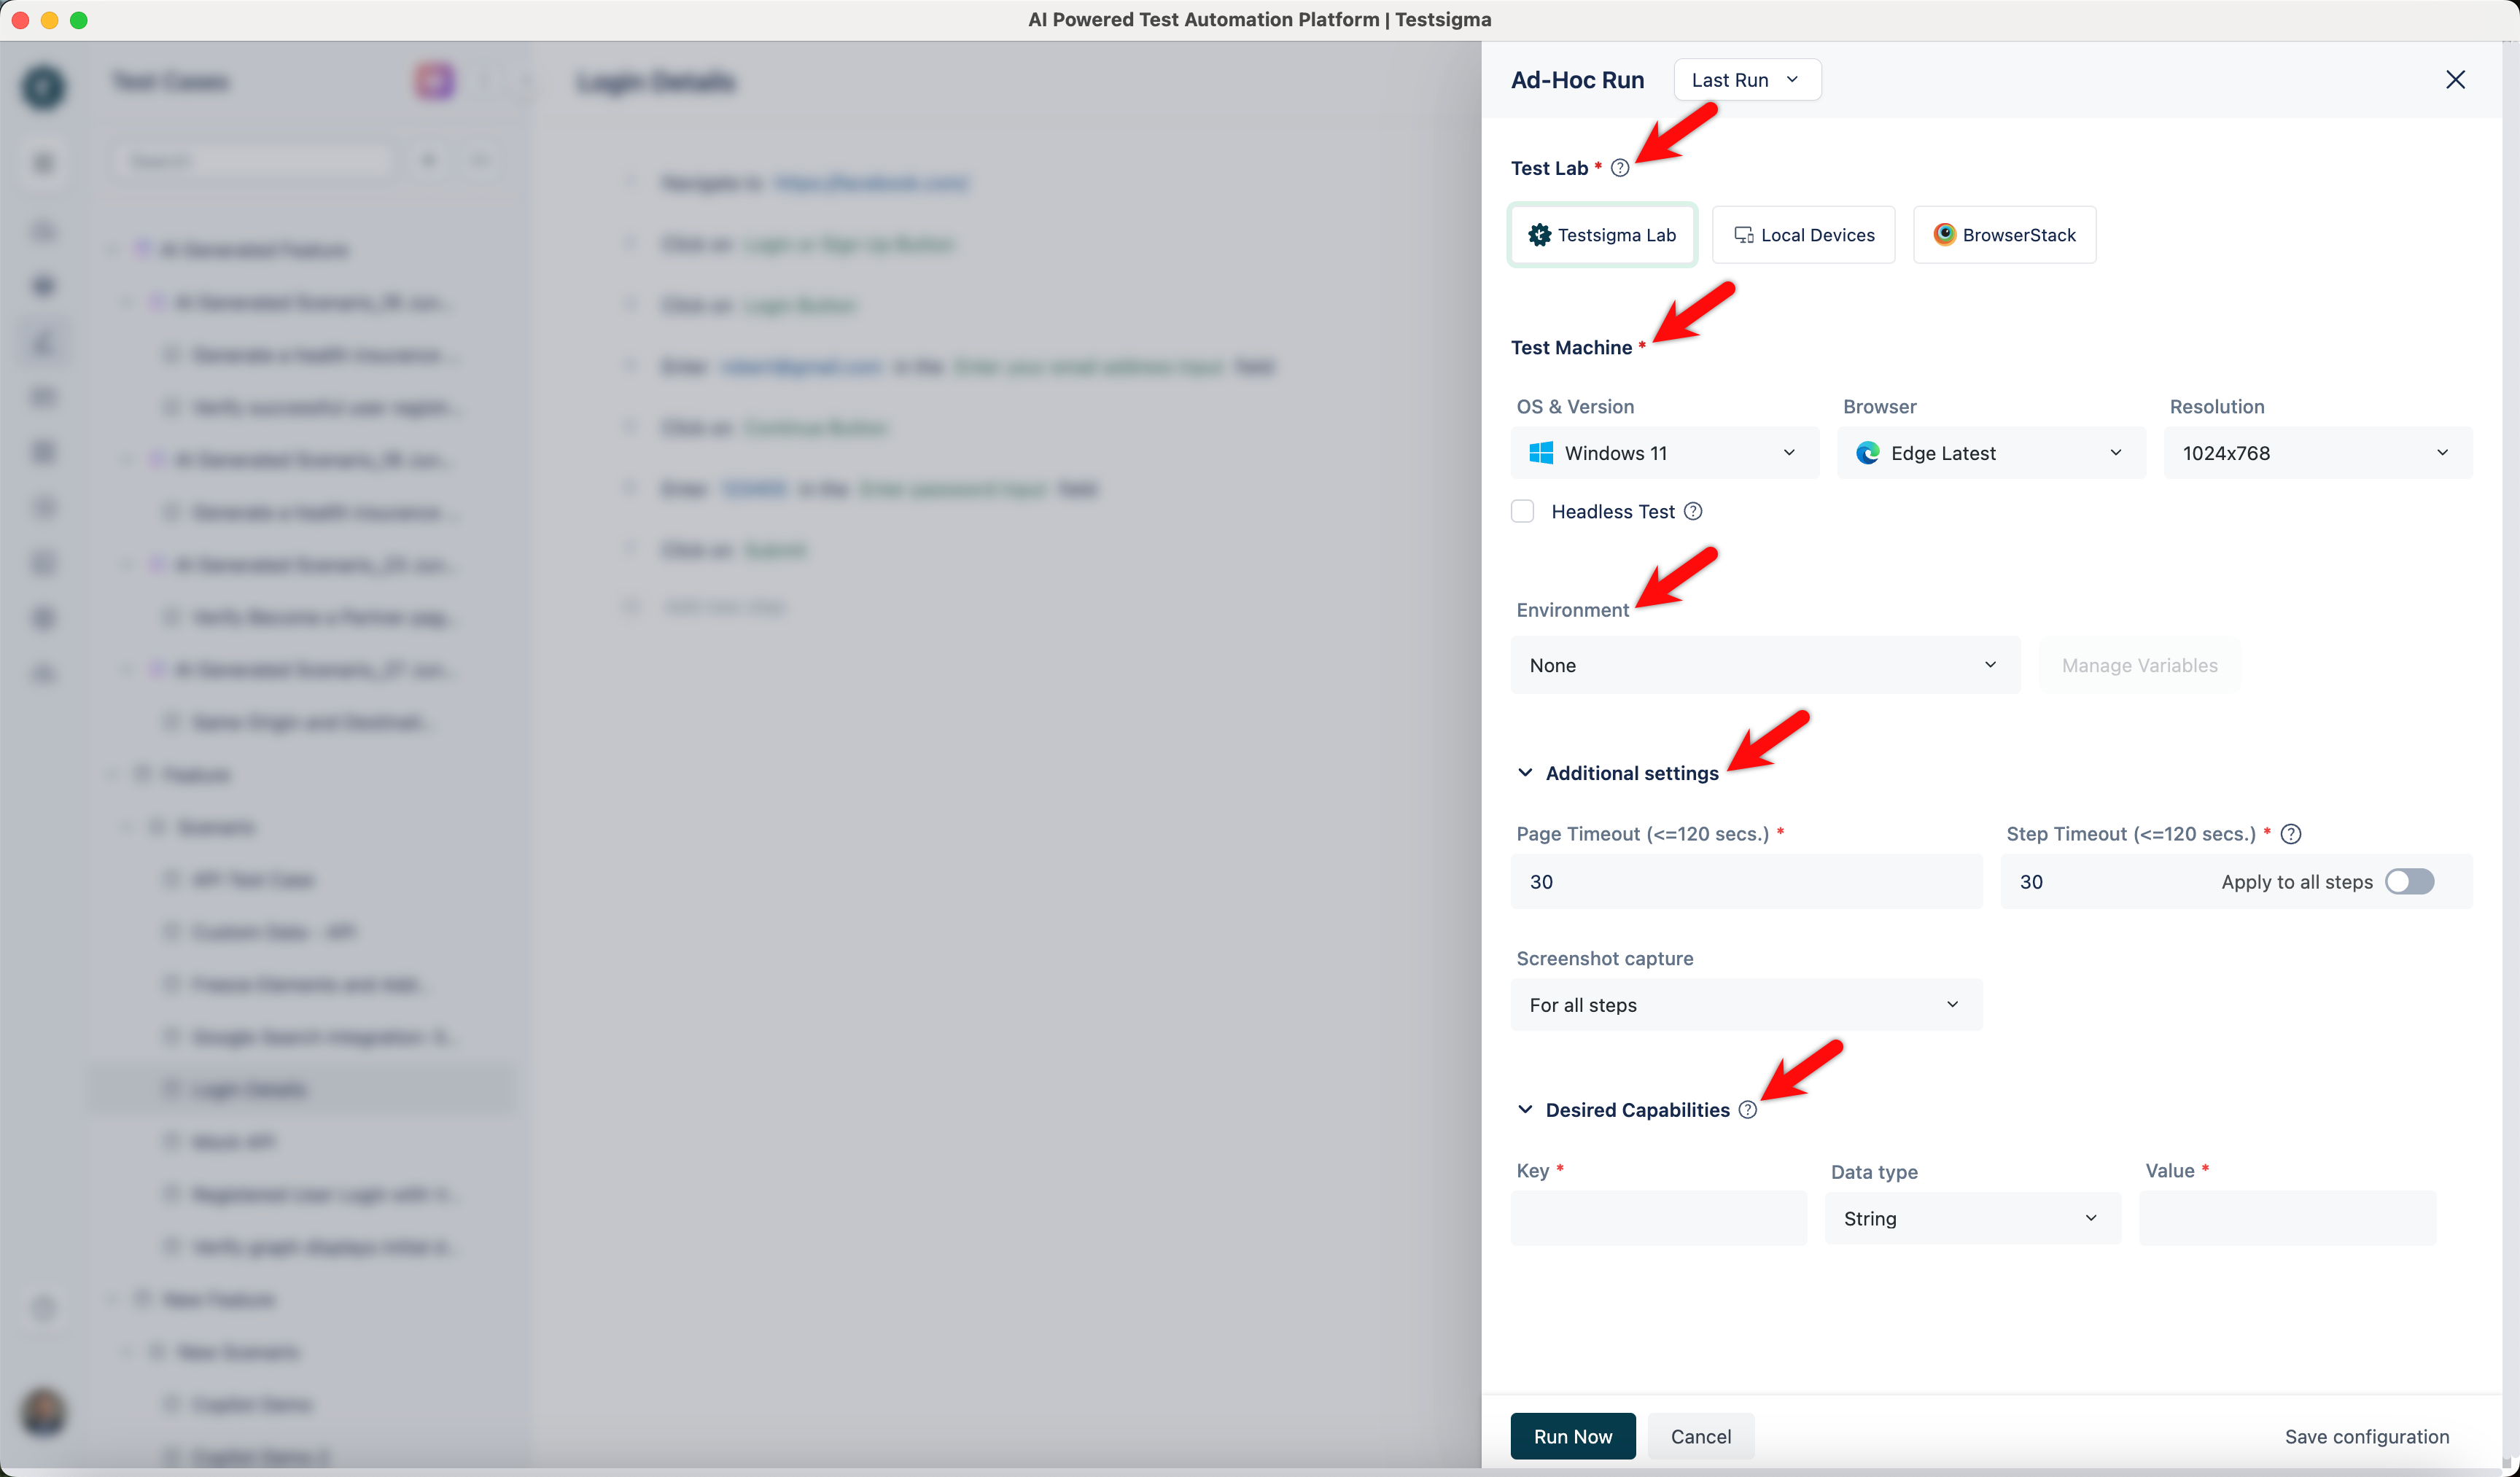
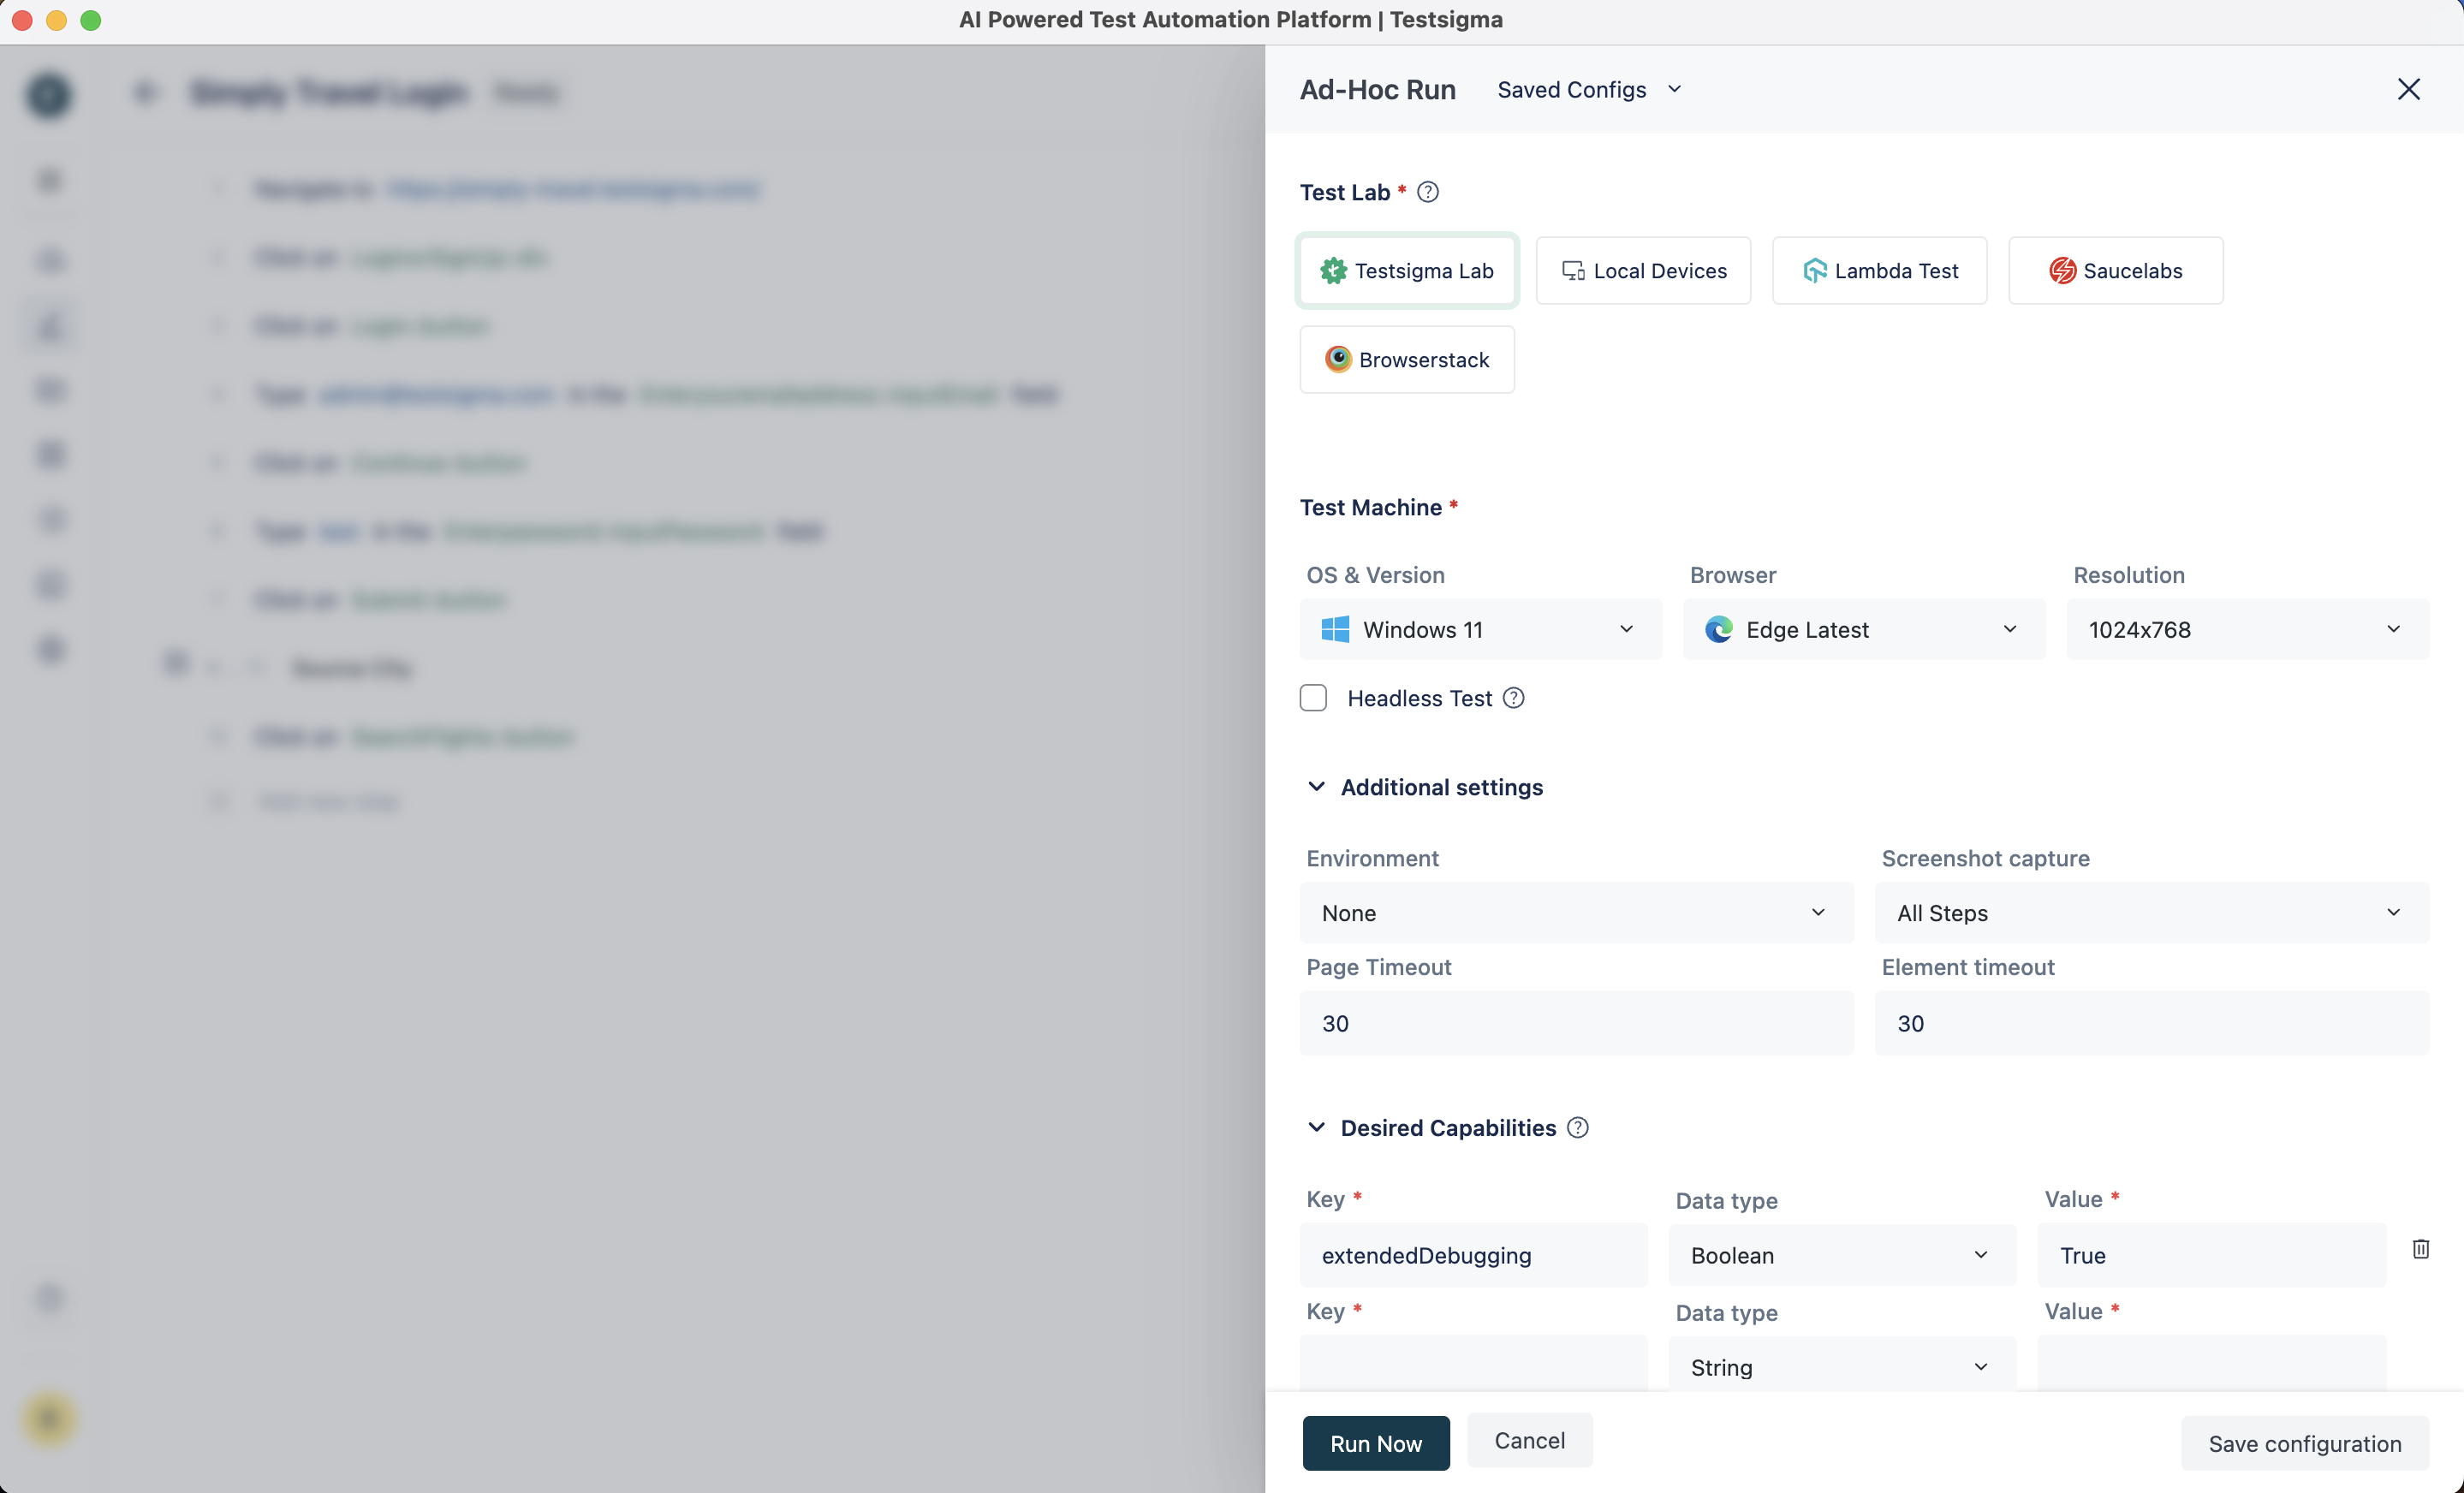
In the Ad-hoc run layover, provide the following configuration settings for a web application:
- Test Lab: Select the test lab to run the test case. You can run the tests on Testsigma Cloud Lab, your Local Devices or other vendor platforms, including SauceLabs, BrowserStack, Lamba Test, etc.
-
Test Machine: Select the appropriate test machines and provide the following configuration details:
- OS & Version
- Browser & Version
- Resolution
- Headless Test: Click the toggle button for Headless Test to enable headless testing for a test case.
-
Additional Settings: Provide the following details under additional settings:
- Environment: Select the test environment.
- Screenshot Capture: Select when the screenshots need to be taken, for All Steps or Failed Steps alone.
- Page Timeout: Duration for which the test should wait for the page to load.
- Element Timeout: Duration for which the test should wait for the element to load.
- Desired Capabilities: Provide Key, Data Type and Value under Desired Capabilities.
- Click on Run Now.
Mobile Web Application
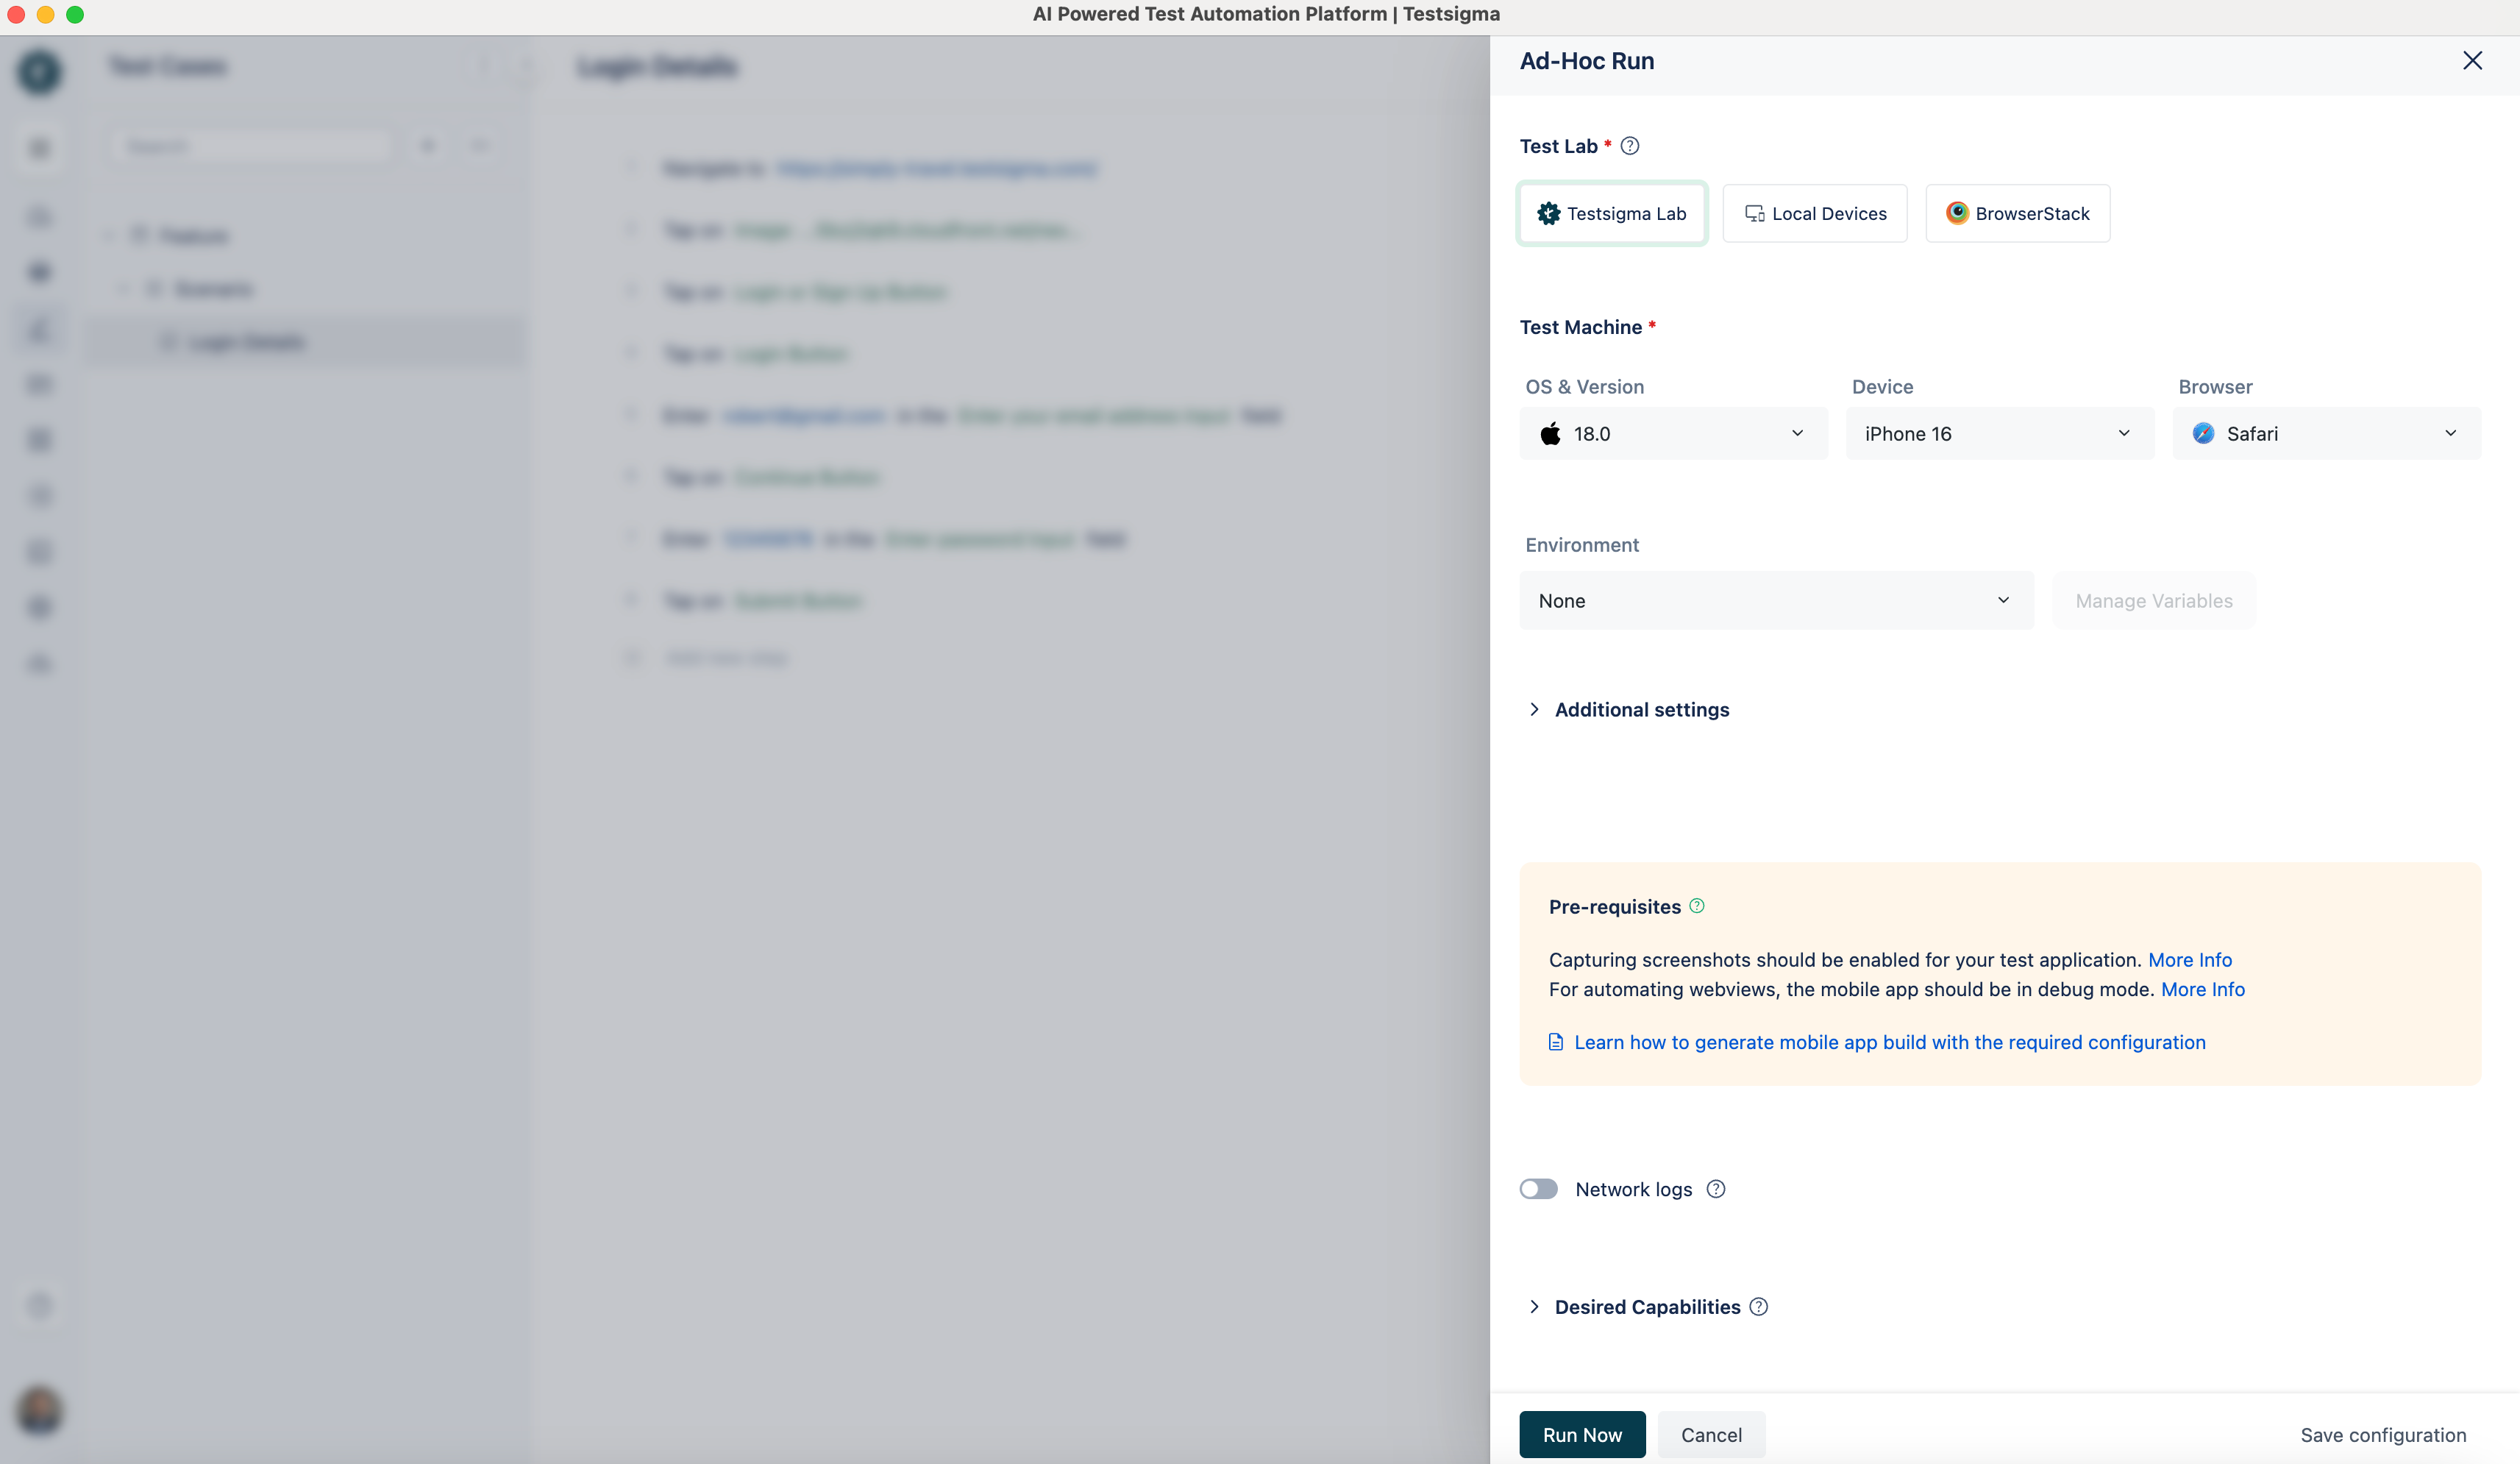
In the Ad-hoc run layover, provide the following configuration settings for a mobile web application:
- Test Lab: Select the test lab to run the test case. You can run the tests on Testsigma Cloud Lab, your Local Devices or other vendor platforms, including SauceLabs, BrowserStack, Lamba Test, etc.
-
Test Machine: Select the appropriate test machines and provide the following configuration details:
- OS & Version
- Device
- Browser
-
Additional Settings: Provide the following details under additional settings:
- Environment: Select the test environment.
- Screenshot Capture: Select when the screenshots need to be taken, for All Steps or Failed Steps alone.
- Page Timeout: Duration for which the test should wait for the page to load.
- Element Timeout: Duration for which the test should wait for the element to load.
- Camera Image Injection: Click the toggle button for Camera Image Injection to enable camera image injection for a test case.
- Network Logs: Click the toggle button for Network Logs to enable network logs for a test case.
- Desired Capabilities: Provide Key, Data Type and Value under Desired Capabilities.
- Click on Run Now.
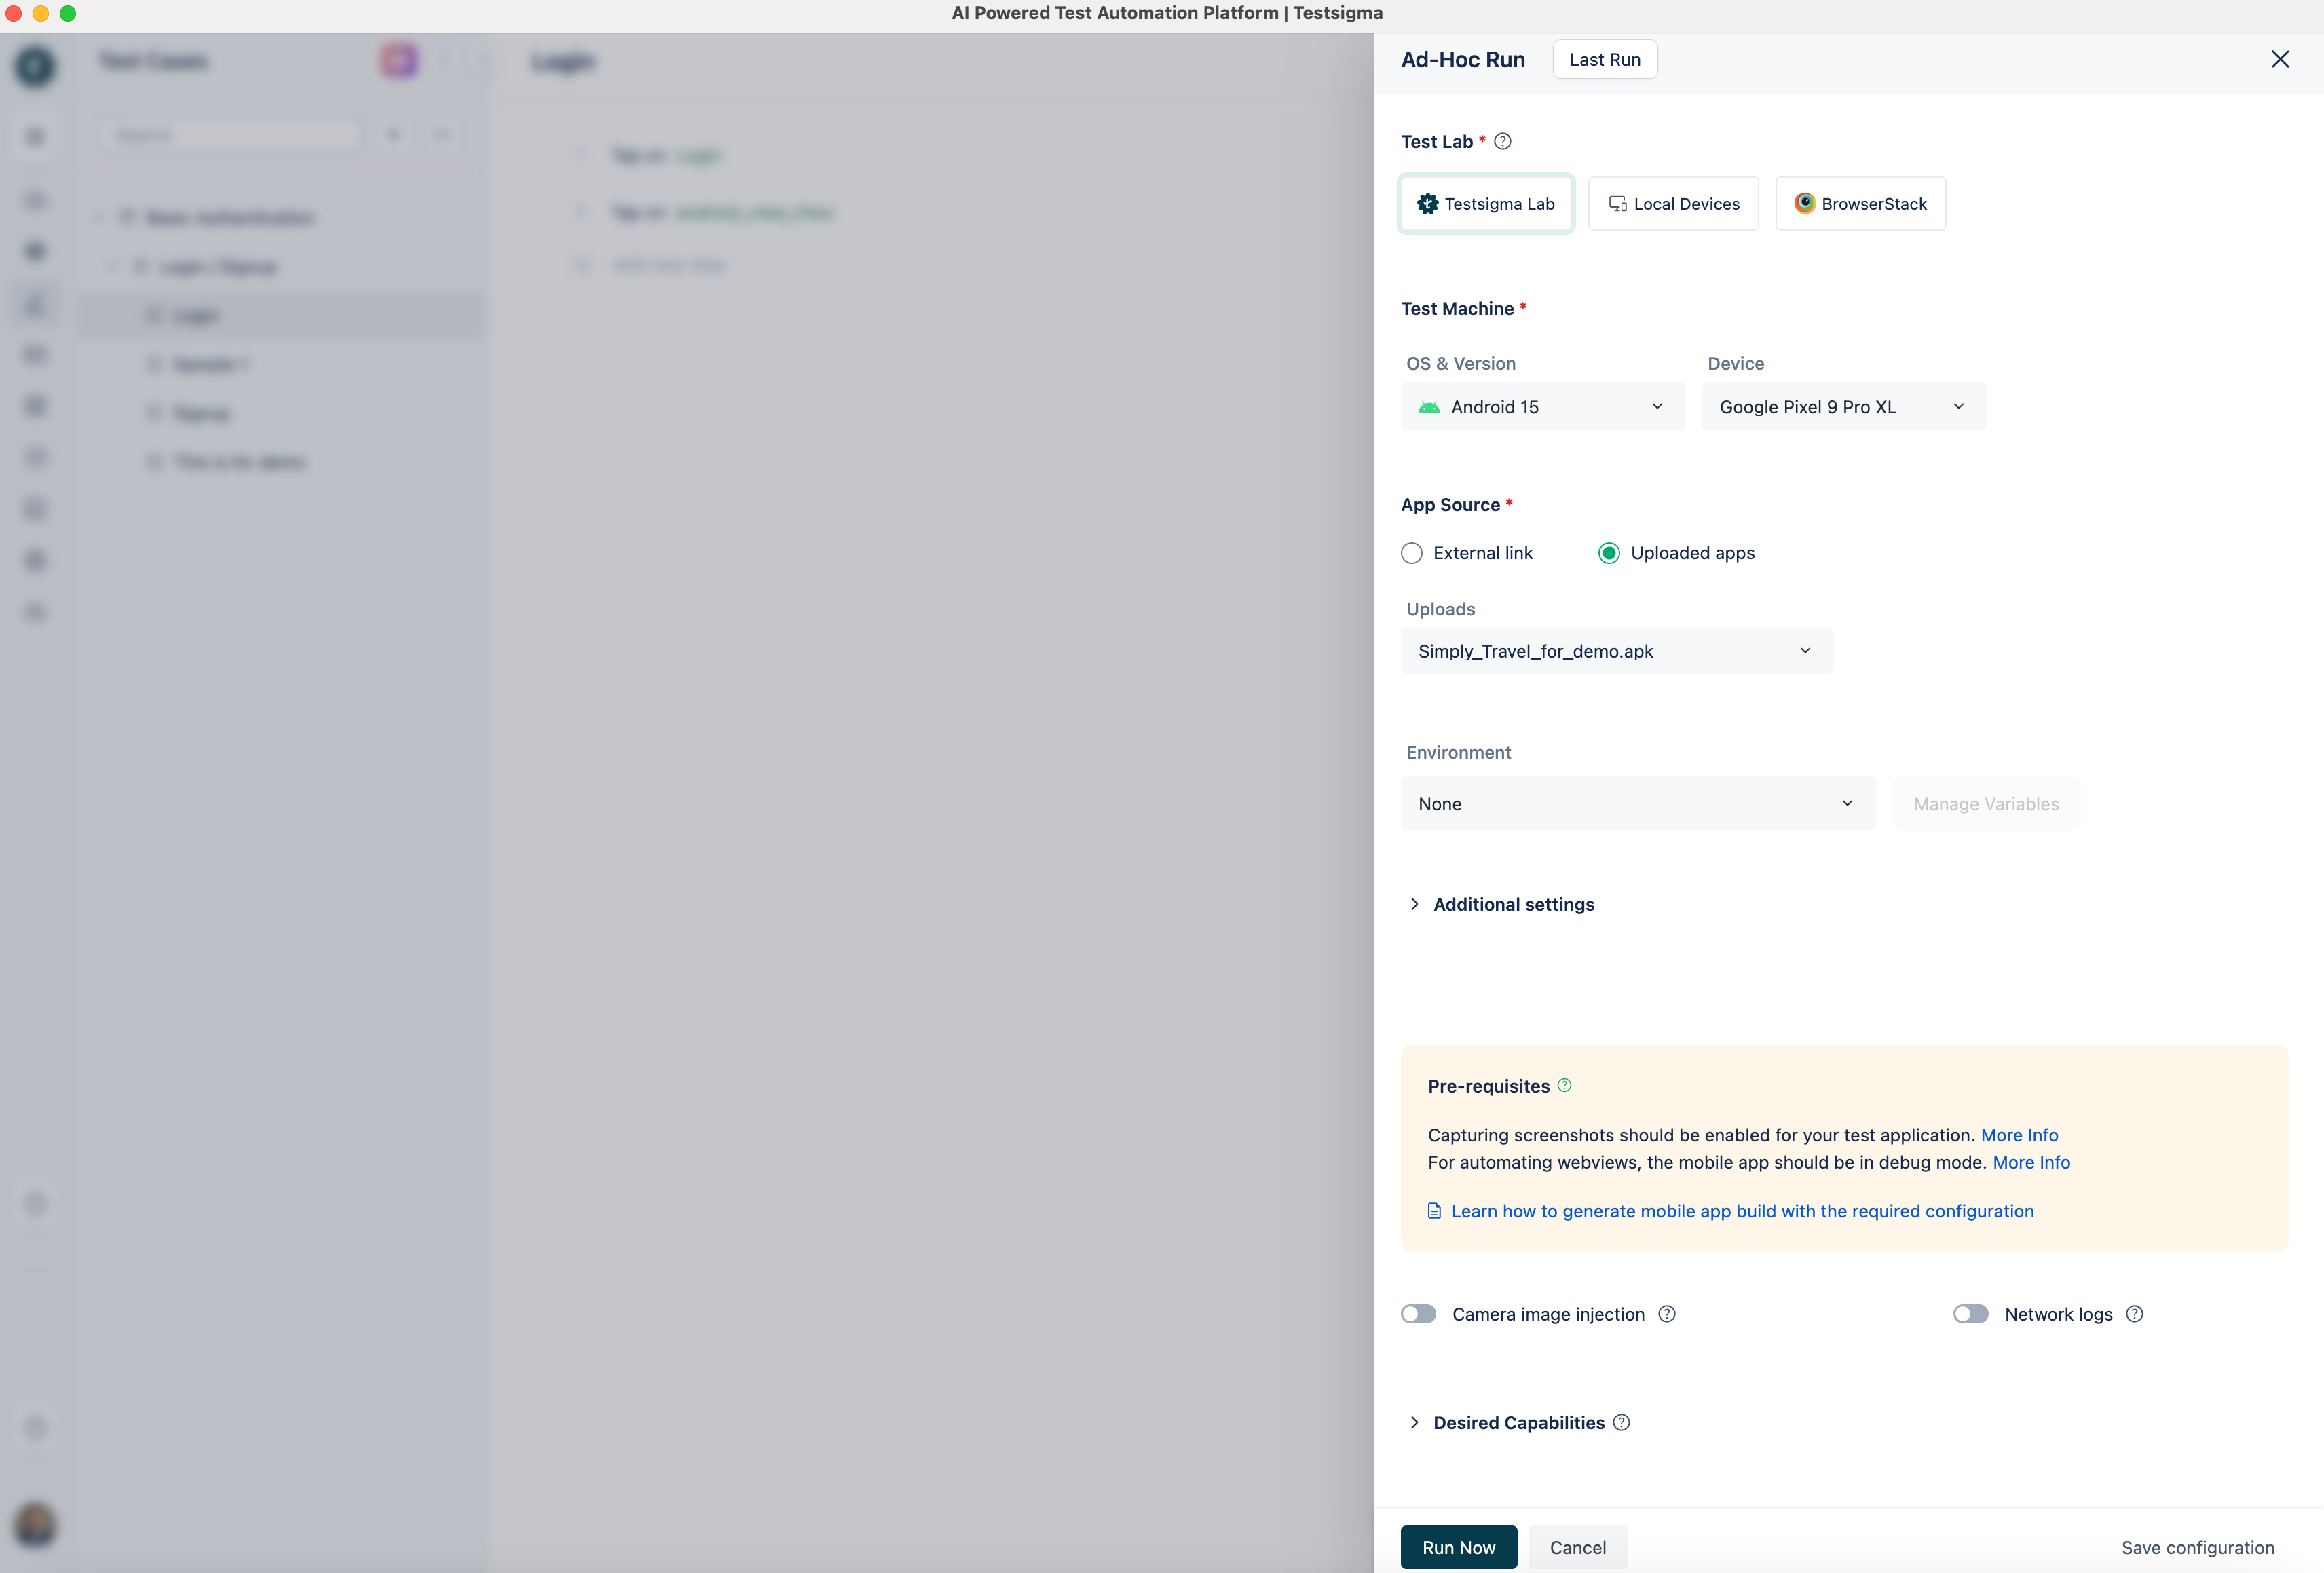
Android Application
In the Ad-hoc run layover, provide the following configuration settings for an Android application:
- Test Lab: Select the test lab to run the test case. You can run the tests on Testsigma Cloud Lab, your Local Devices or other vendor platforms, including SauceLabs, BrowserStack, Lamba Test, etc.
-
Test Machine: Select the appropriate test machines and provide the following configuration details:
- OS & Version
- Browser & Version
-
App Source: Select either one of the following options for an app source:
- External Path: Provide the publicly accessible URL of the application.
- Uploaded Apps: Select the application from uploaded apps in Testsigma.
-
Additional Settings: Provide the following details under additional settings:
- Environment: Select the test environment.
- Screenshot Capture: Select when the screenshots need to be taken, for All Steps or Failed Steps alone.
- Page Timeout: Duration for which the test should wait for the page to load.
- Element Timeout: Duration for which the test should wait for the element to load.
- Camera Image Injection: Click the toggle button for Camera Image Injection to enable camera image injection for a test case.
- Network Logs: Click the toggle button for Network Logs to enable network logs for a test case.
- Desired Capabilities: Provide Key, Data Type and Value under Desired Capabilities.
- Click on Run Now.
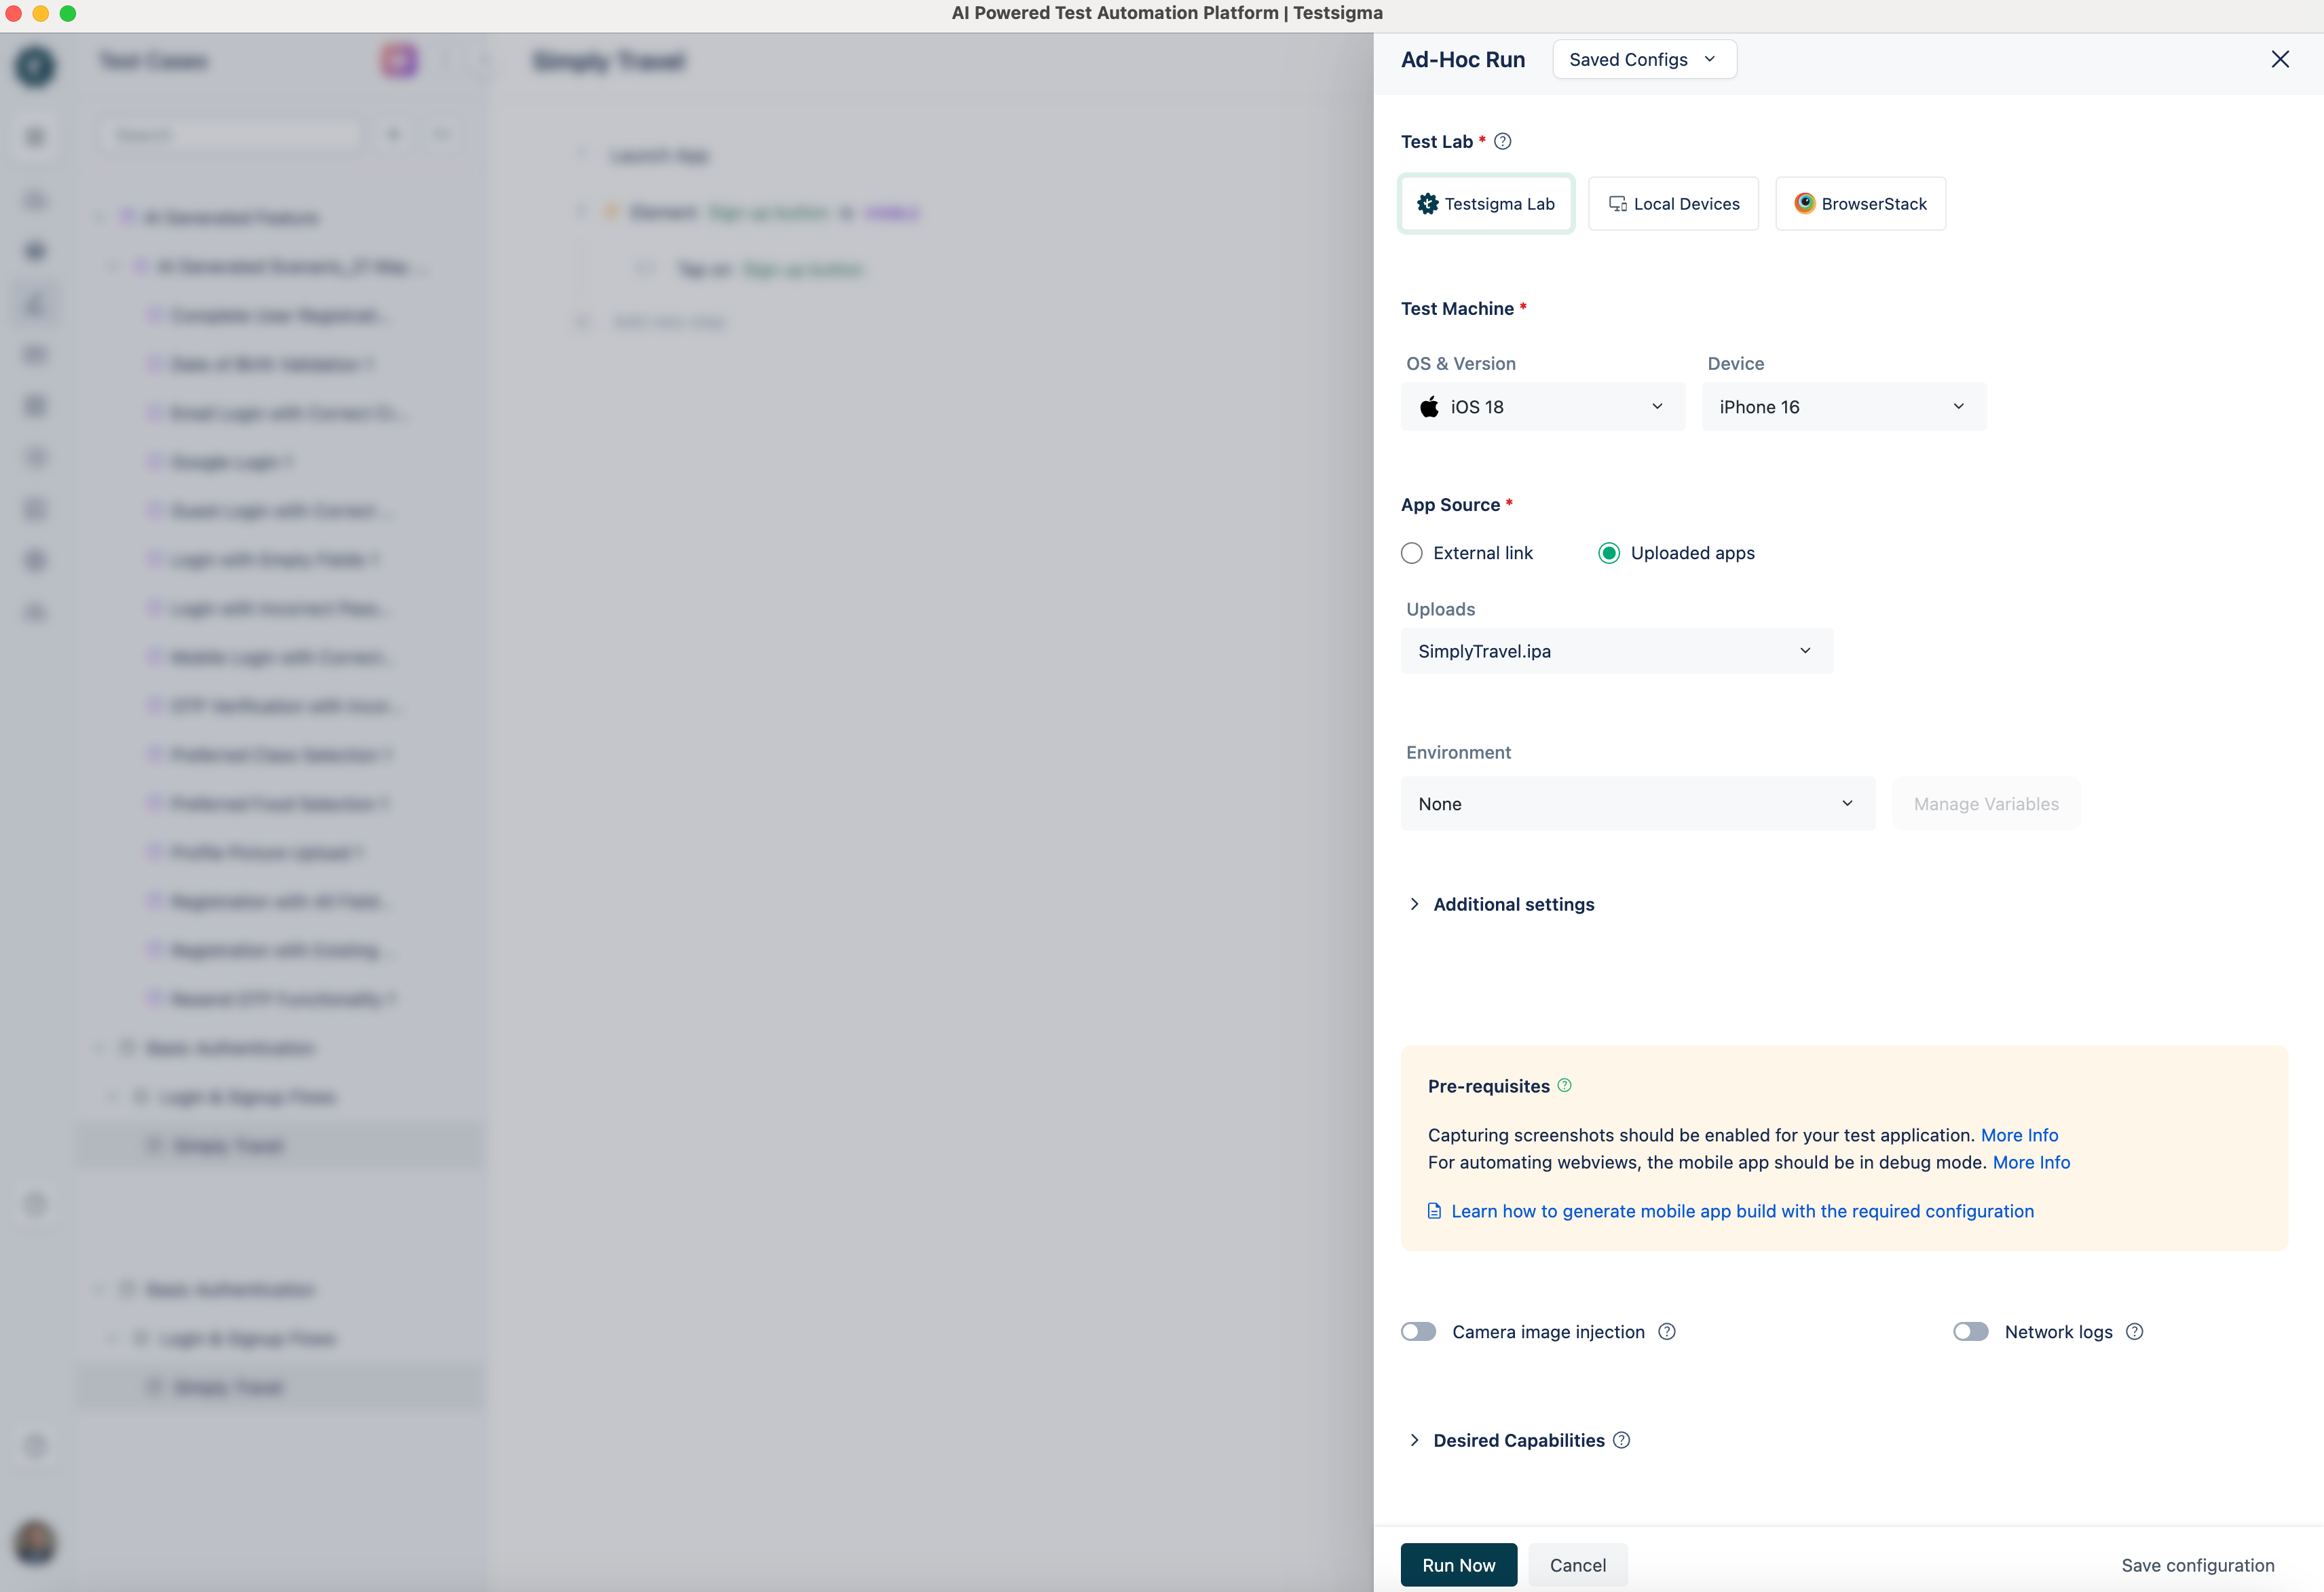
iOS Application
In the Ad-hoc run layover, provide the following configuration settings for an iOS application:
- Test Lab: Select the test lab to run the test case. You can run the tests on Testsigma Cloud Lab, your Local Devices or other vendor platforms, including SauceLabs, BrowserStack, Lamba Test, etc.
-
Test Machine: Select the appropriate test machines and provide the following configuration details:
- OS & Version
- Browser & Version
-
App Source: Select either one of the following options for an app source:
- External Path: Provide the publicly accessible URL of the application.
- Uploaded Apps: Select the application from uploaded apps in Testsigma.
-
Additional Settings: Provide the following details under additional settings:
- Environment: Select the test environment.
- Screenshot Capture: Select when the screenshots need to be taken, for All Steps or Failed Steps alone.
- Page Timeout: Duration for which the test should wait for the page to load.
- Element Timeout: Duration for which the test should wait for the element to load.
- Camera Image Injection: Click the toggle button for Camera Image Injection to enable camera image injection for a test case.
- Network Logs: Click the toggle button for Network Logs to enable network logs for a test case.
- Desired Capabilities: Provide Key, Data Type and Value under Desired Capabilities.
- Click on Run Now.
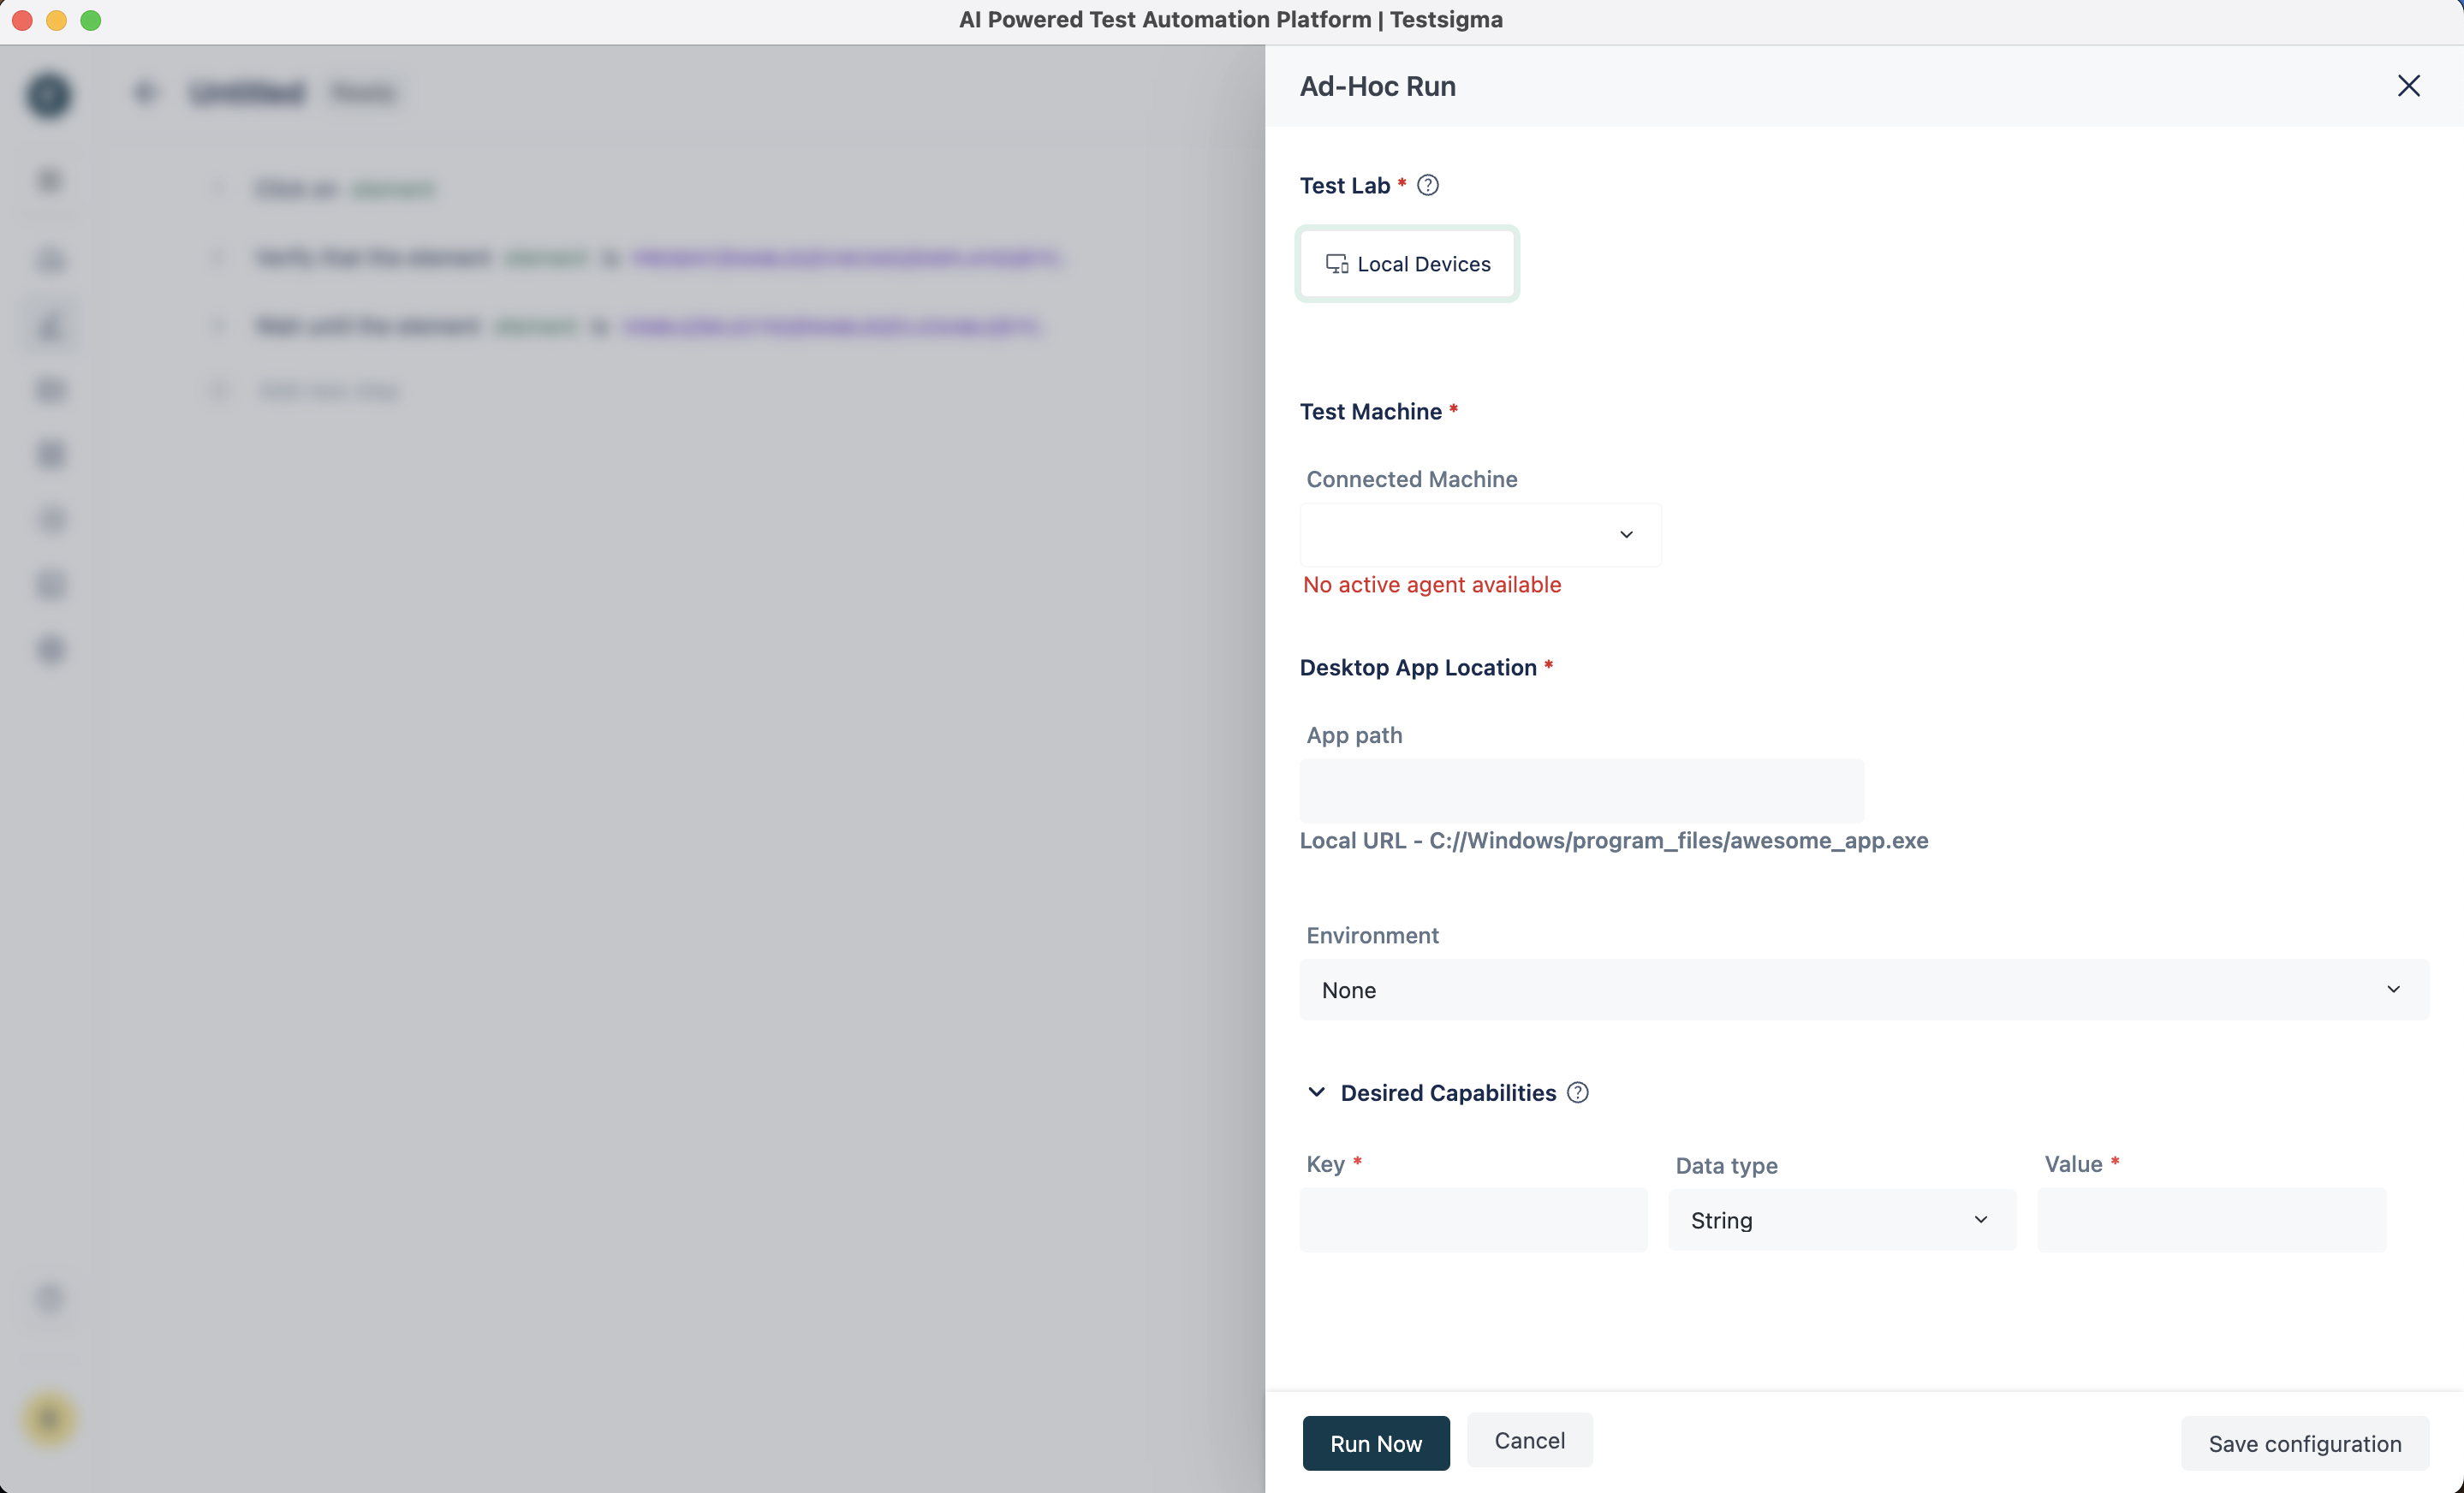
Desktop Windows
In the Ad-hoc run layover, provide the following configuration settings for a Desktop application:
- Test Lab: Select the test lab as Local Devices to run the test case.
- Test Machine: Select the registered active agent as Test Machine to run the test case.
- Desktop App Location: Provide the Local URL for the application path.
- Environment: Select the test environment.
- Desired Capabilities: Provide Key, Data Type and Value under Desired Capabilities.
- Click on Run Now.
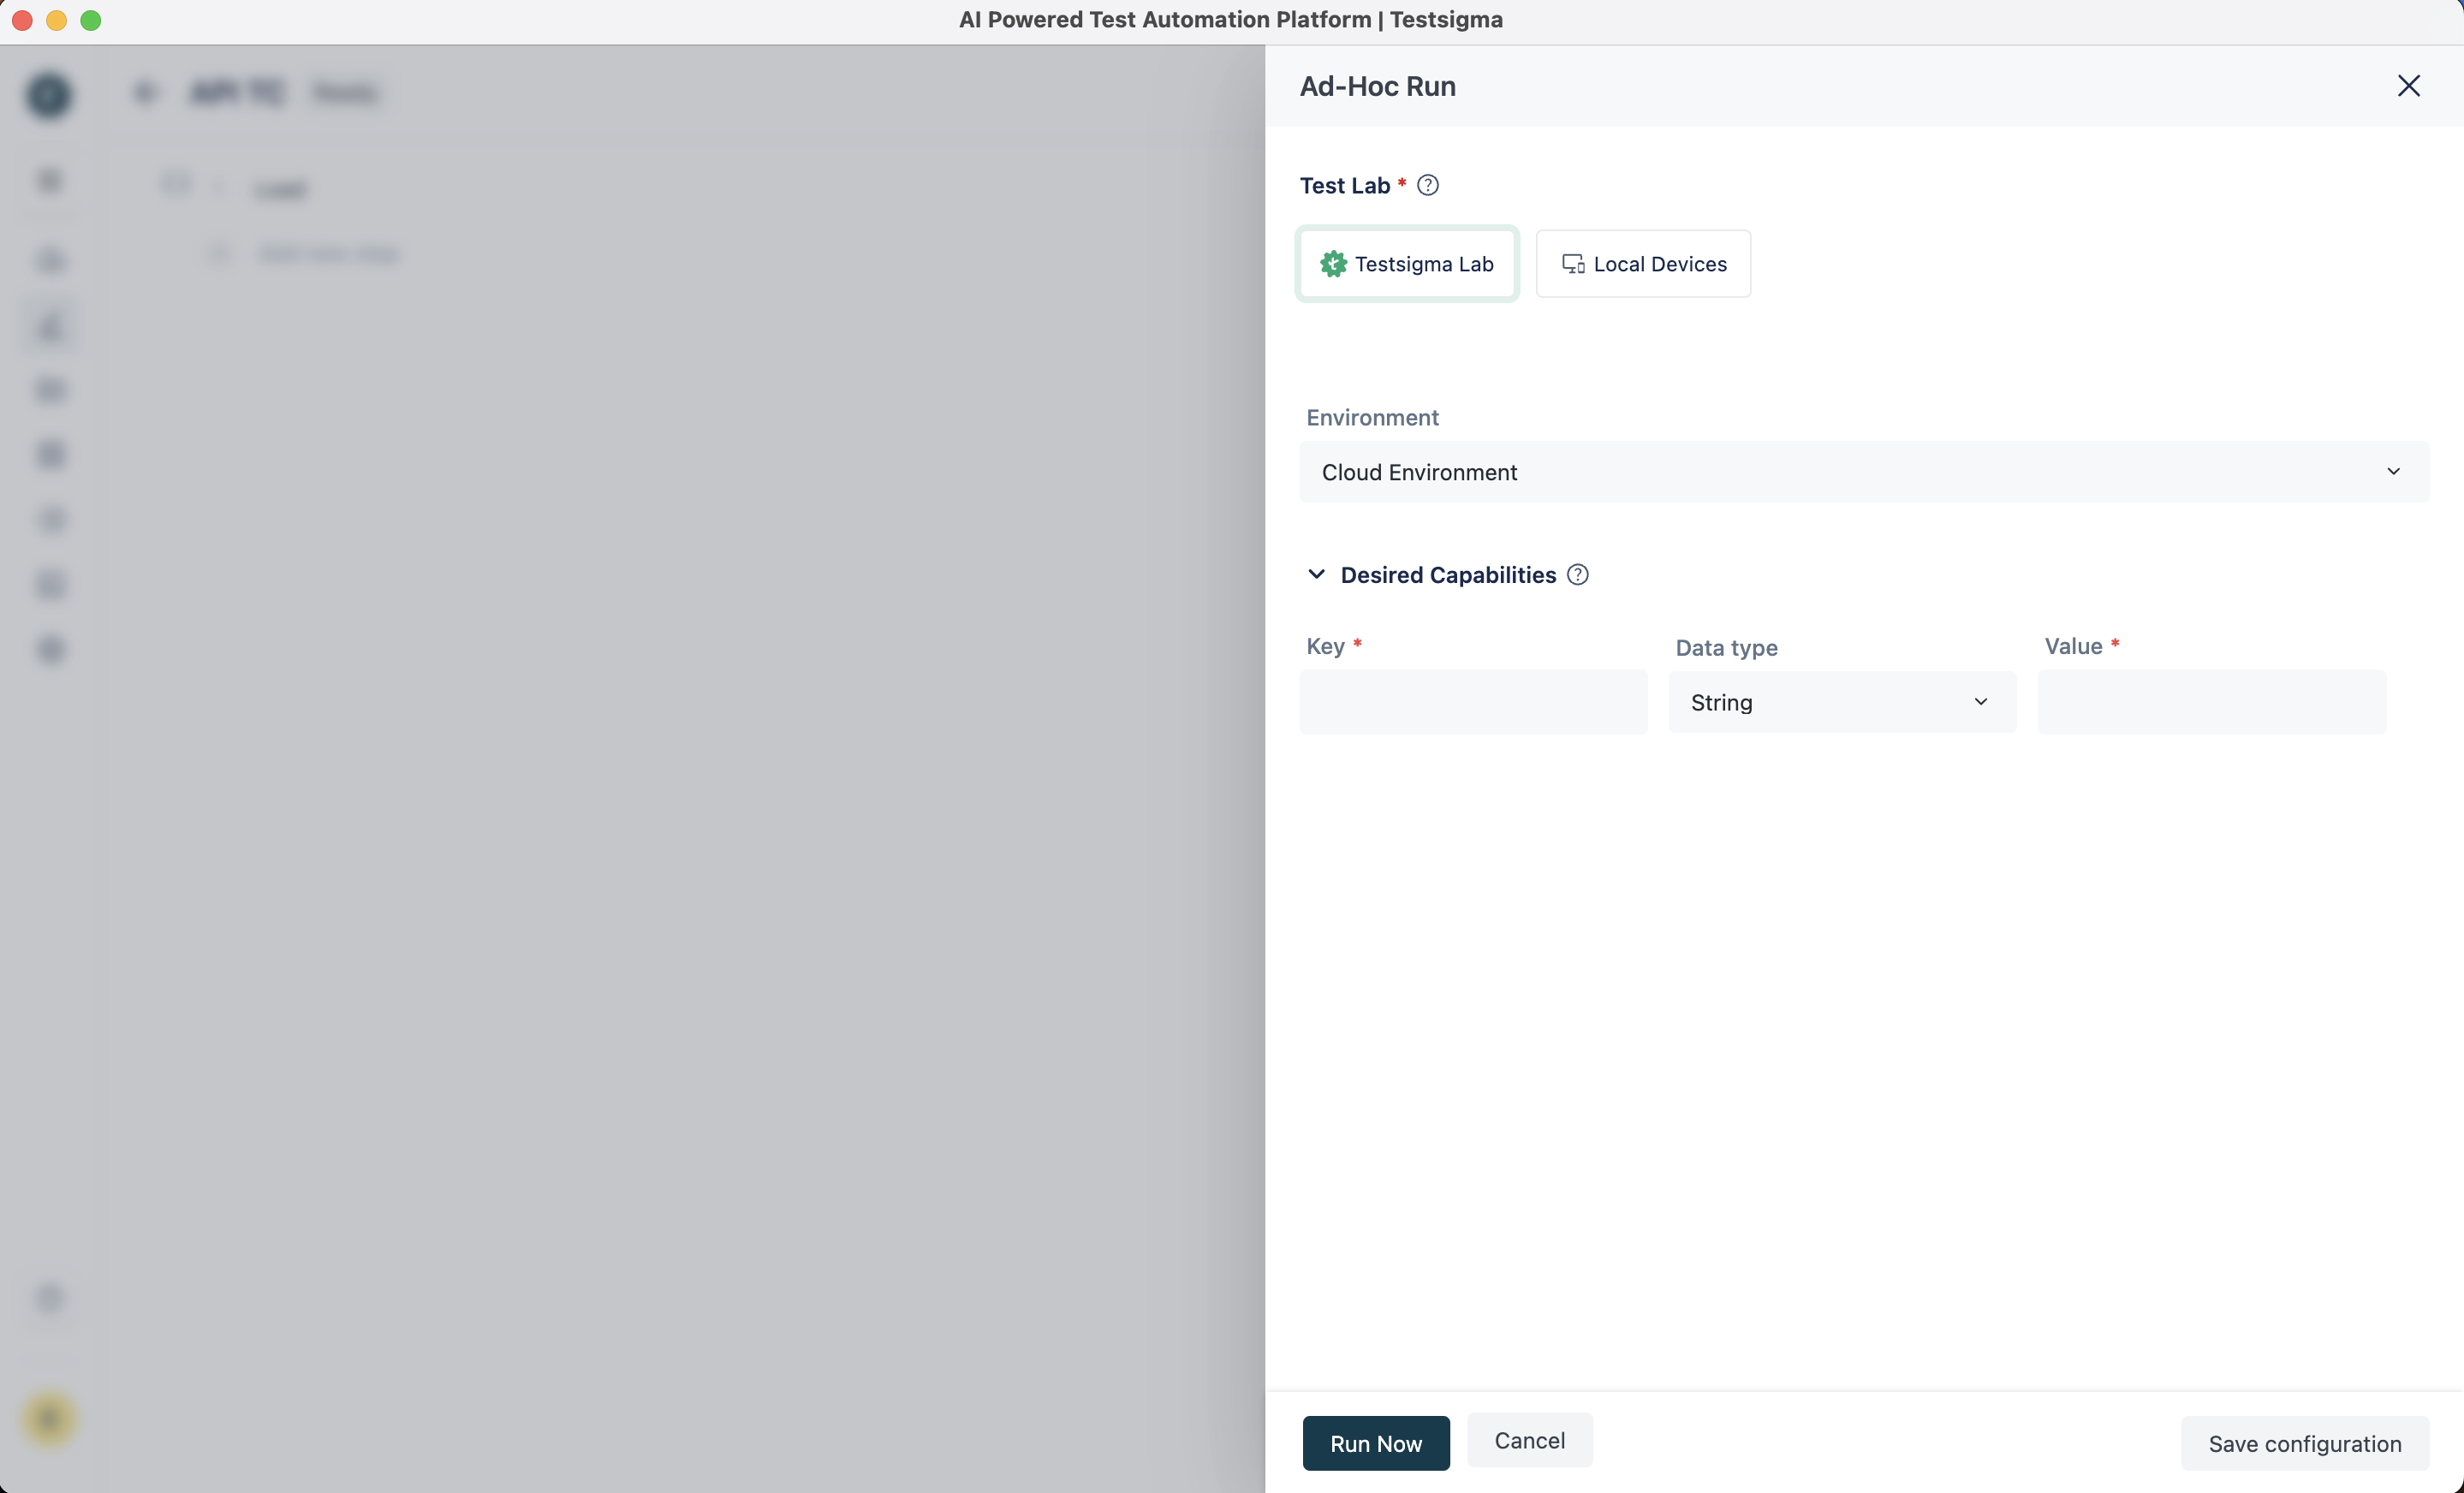
Rest API Application
In the Ad-hoc run layover, provide the following configuration settings for a Rest API:
- Test Lab: Select the test lab, either Testsigma Cloud Lab or Local Devices, to run the test case.
- Environment: Select the test environment.
- Desired Capabilities: Provide Key, Data Type and Value under Desired Capabilities.
- Click on Run Now.
Adding Prerequisite Test Case
You can add a prerequisite test case for any test case while executing the test case as dry runs. Follow the steps below to add a prerequisite test case for dry runs.
- Navigate to Create Tests > Test Cases, select a test case for which you want to add prerequisites and click on Test Case Settings.
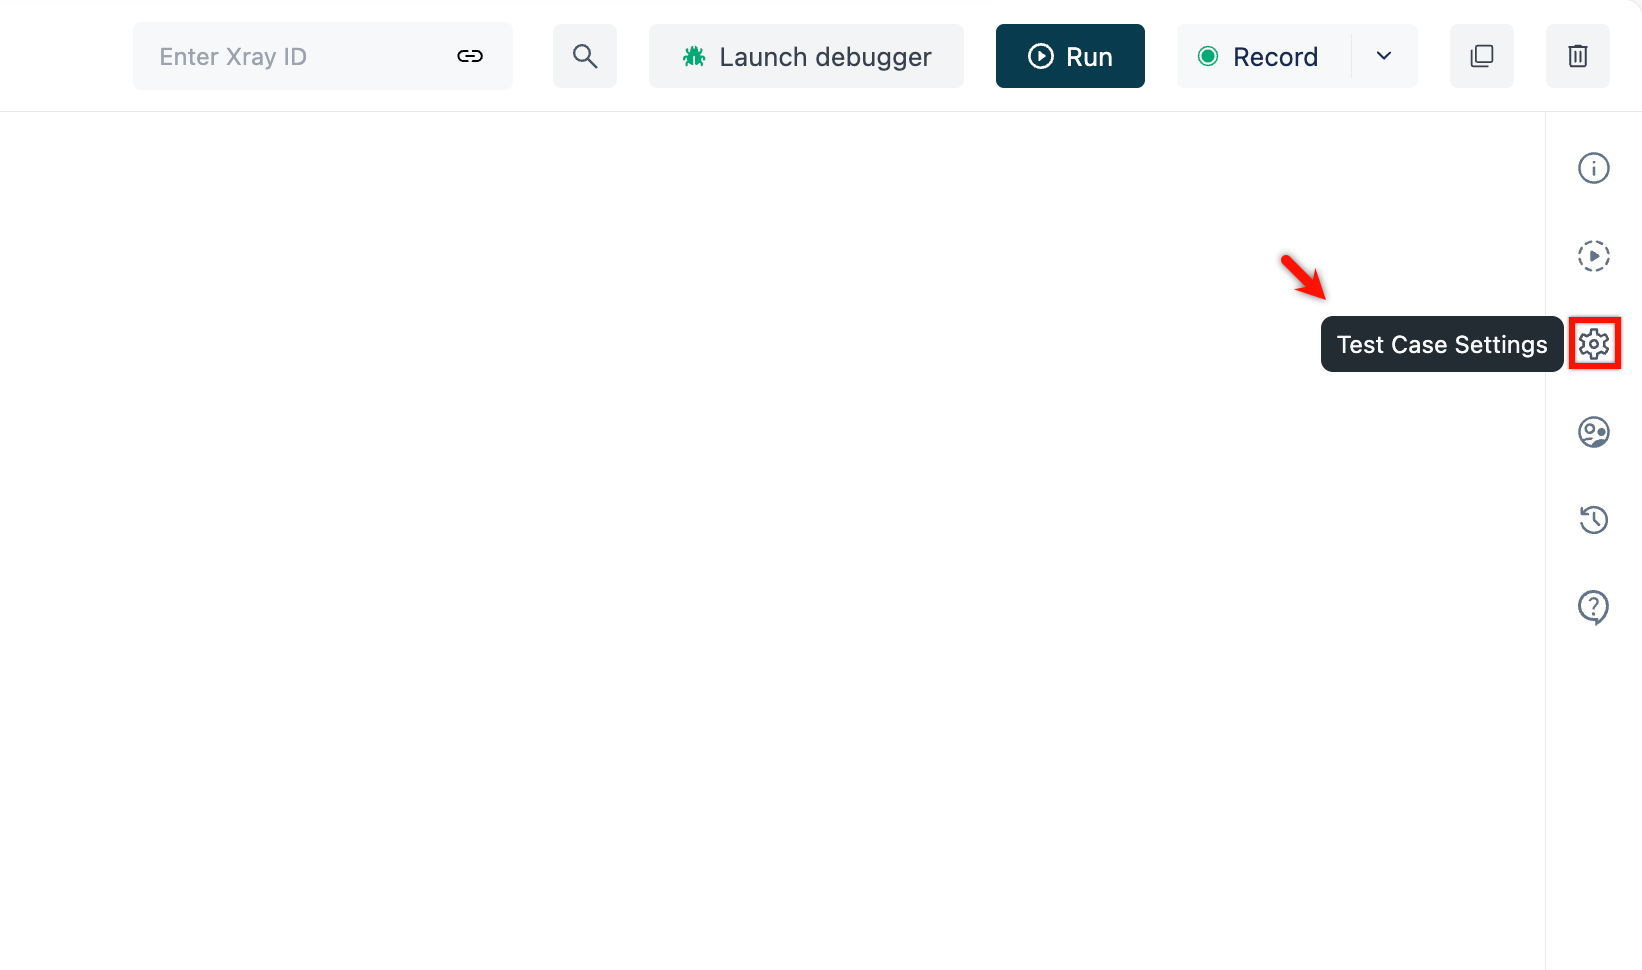
- Select the prerequisite test case from the dropdown.
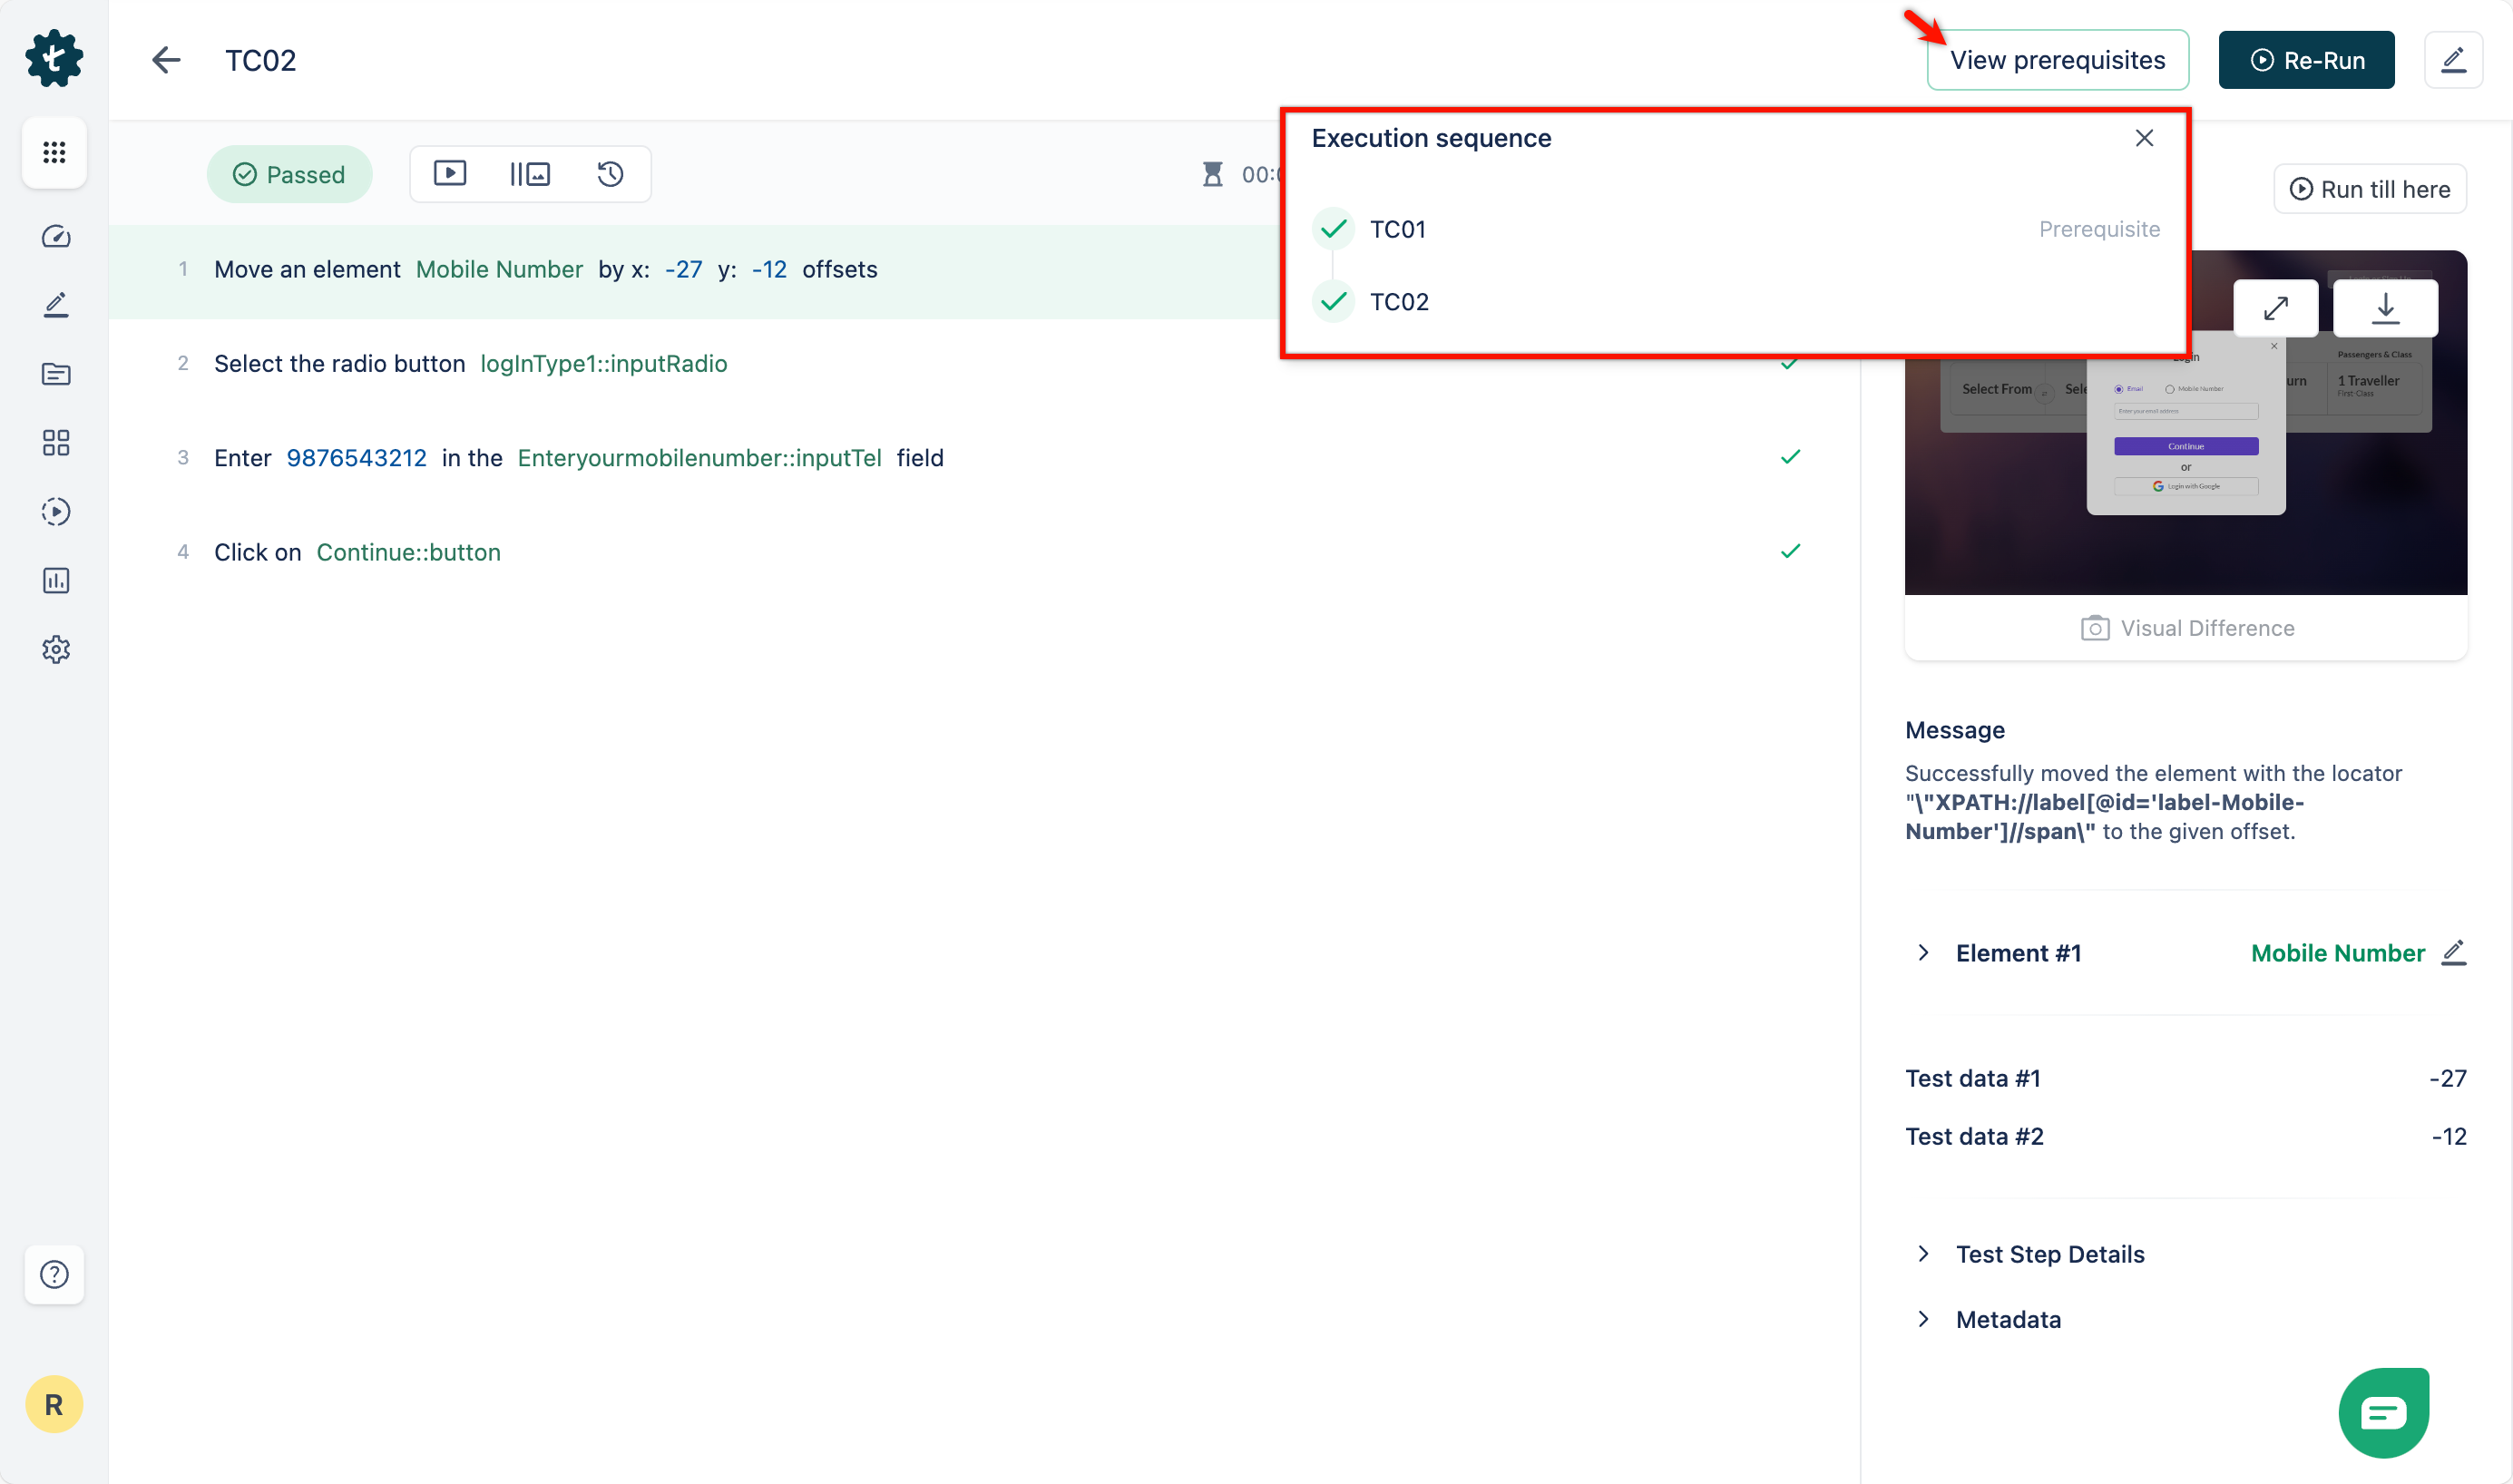
- For Dry Runs, the test case will be executed after the prerequisite test case. You can check the Execution sequence on the test case results page.
Want to contribute or report missing content?