- Test Data Types
 Raw
Raw- Parameter
- Runtime
- Random
- Data Generator
- Phone Number
- Mail Box
- Environment
- Concat Test Data
- Folder Structure for Test Data Profiles
- Create Test Data Profile
- Update Test Data Profile
- Update Value in Test Data Profile
- Import Test Data Profile
- Bulk Deletion of a Test Data Profile
- Create Test Data [Environment]
- data generators
- Default Test Data Generators
- Address Function Type
- ChangeDataType Function Type
- Company Function Type
- DateFunctions Function Type
- DomainFunctions Function Type
- EmailFunctions Function Type
- File Function Type
- Friends Function Type
- IdNumber Function Type
- Internet Function Type
- MailboxAliasFunctions Function Type
- MailboxFunctions Function Type
- Name Function Type
- NameFunctions Function Type
- Number Function Type
- NumberFunctions Function Type
- Phone Number Function Type
- PhoneNumberFunctions Function Type
- Random String Function Type
- RandomText Function Type
- StringFunctions Function Type
- TestDataFromProfile Function Type
Create & Use Test Data Profiles
Use Test Data Profiles to manage large sets of test data in a structured, reusable format. For example, when testing a login feature, you can store thousands of credential sets in a single profile and run all test cases against that data. Testsigma organizes Test Data Profiles within a Feature > Scenario folder hierarchy, keeping your test data aligned with your project structure.
Prerequisites
Before you begin, ensure that you have:
- An active Testsigma project with the required permissions to manage test data.
- A Feature and Scenario set up in Test Data Profiles. For more information, see Folder Structure for Test Data Profiles.
- Reviewed the documentation on creating test cases.
Create a Test Data Profile
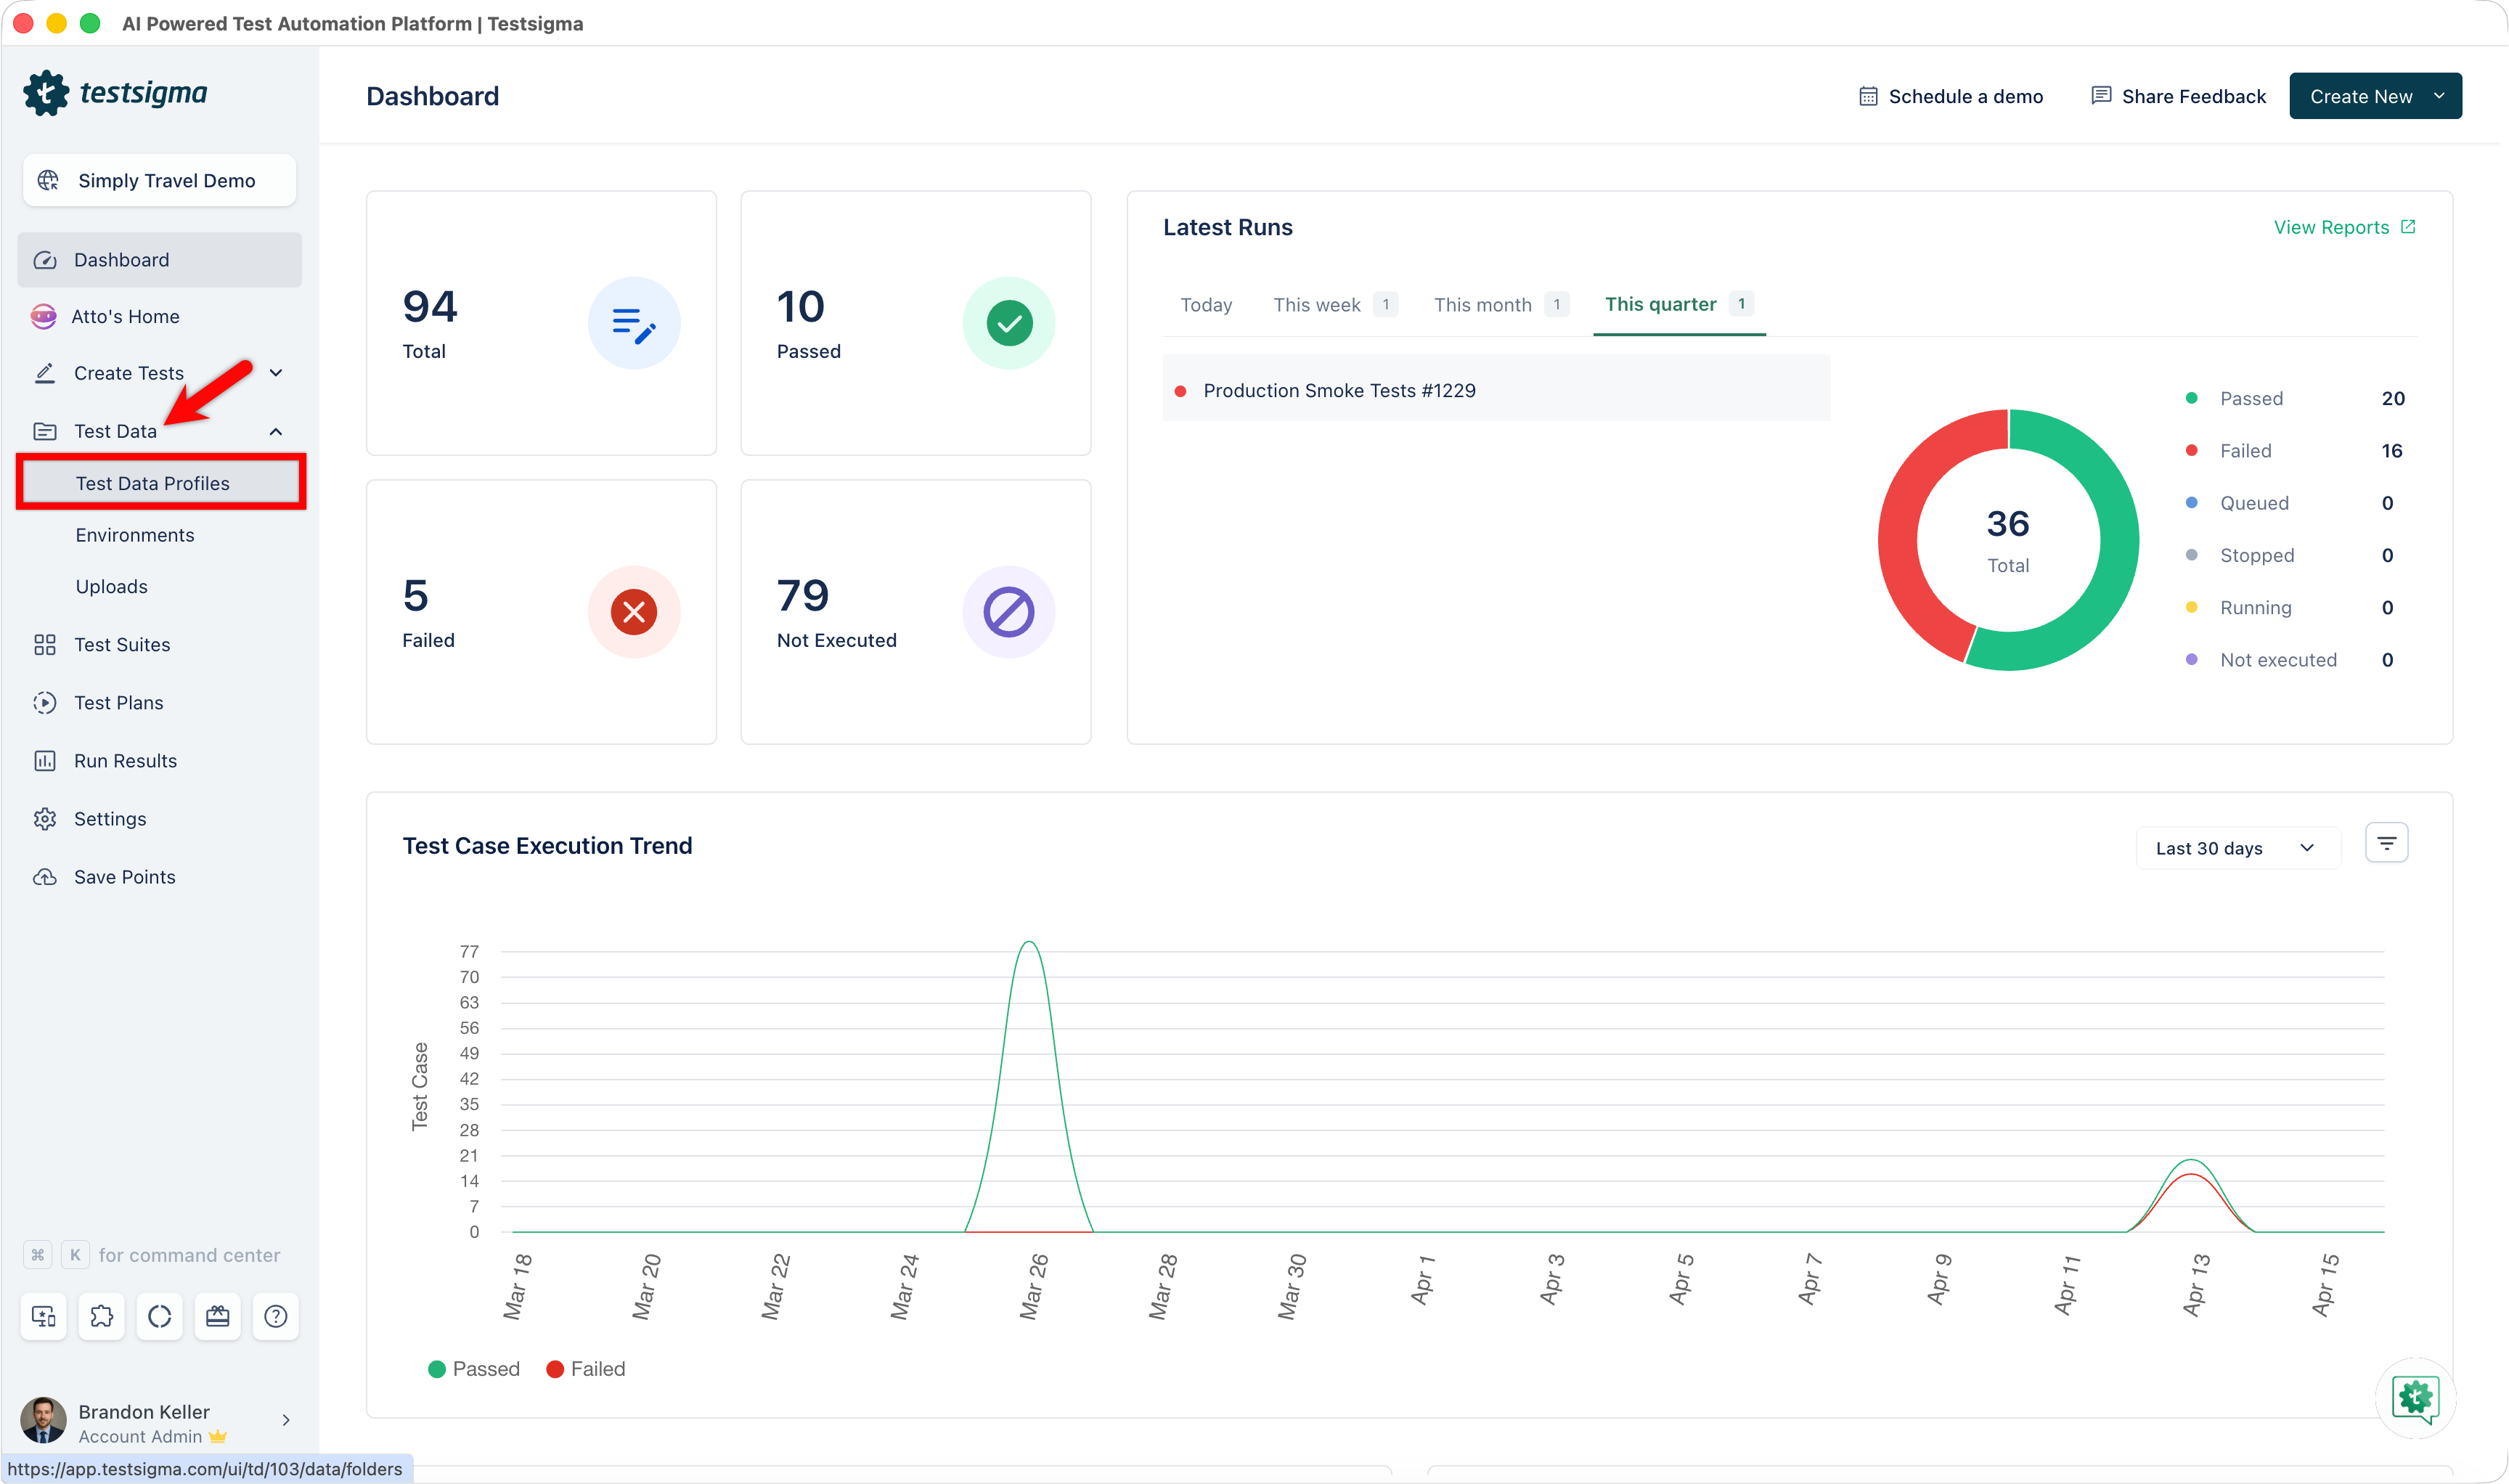
- From the left navigation bar, go to Test Data > Test Data Profiles.
- In the left panel, expand the Feature and Scenario where you want to create the profile.
-
Create the profile using one of the following methods:
From the + menu
- At the top of the left panel, click '+'.
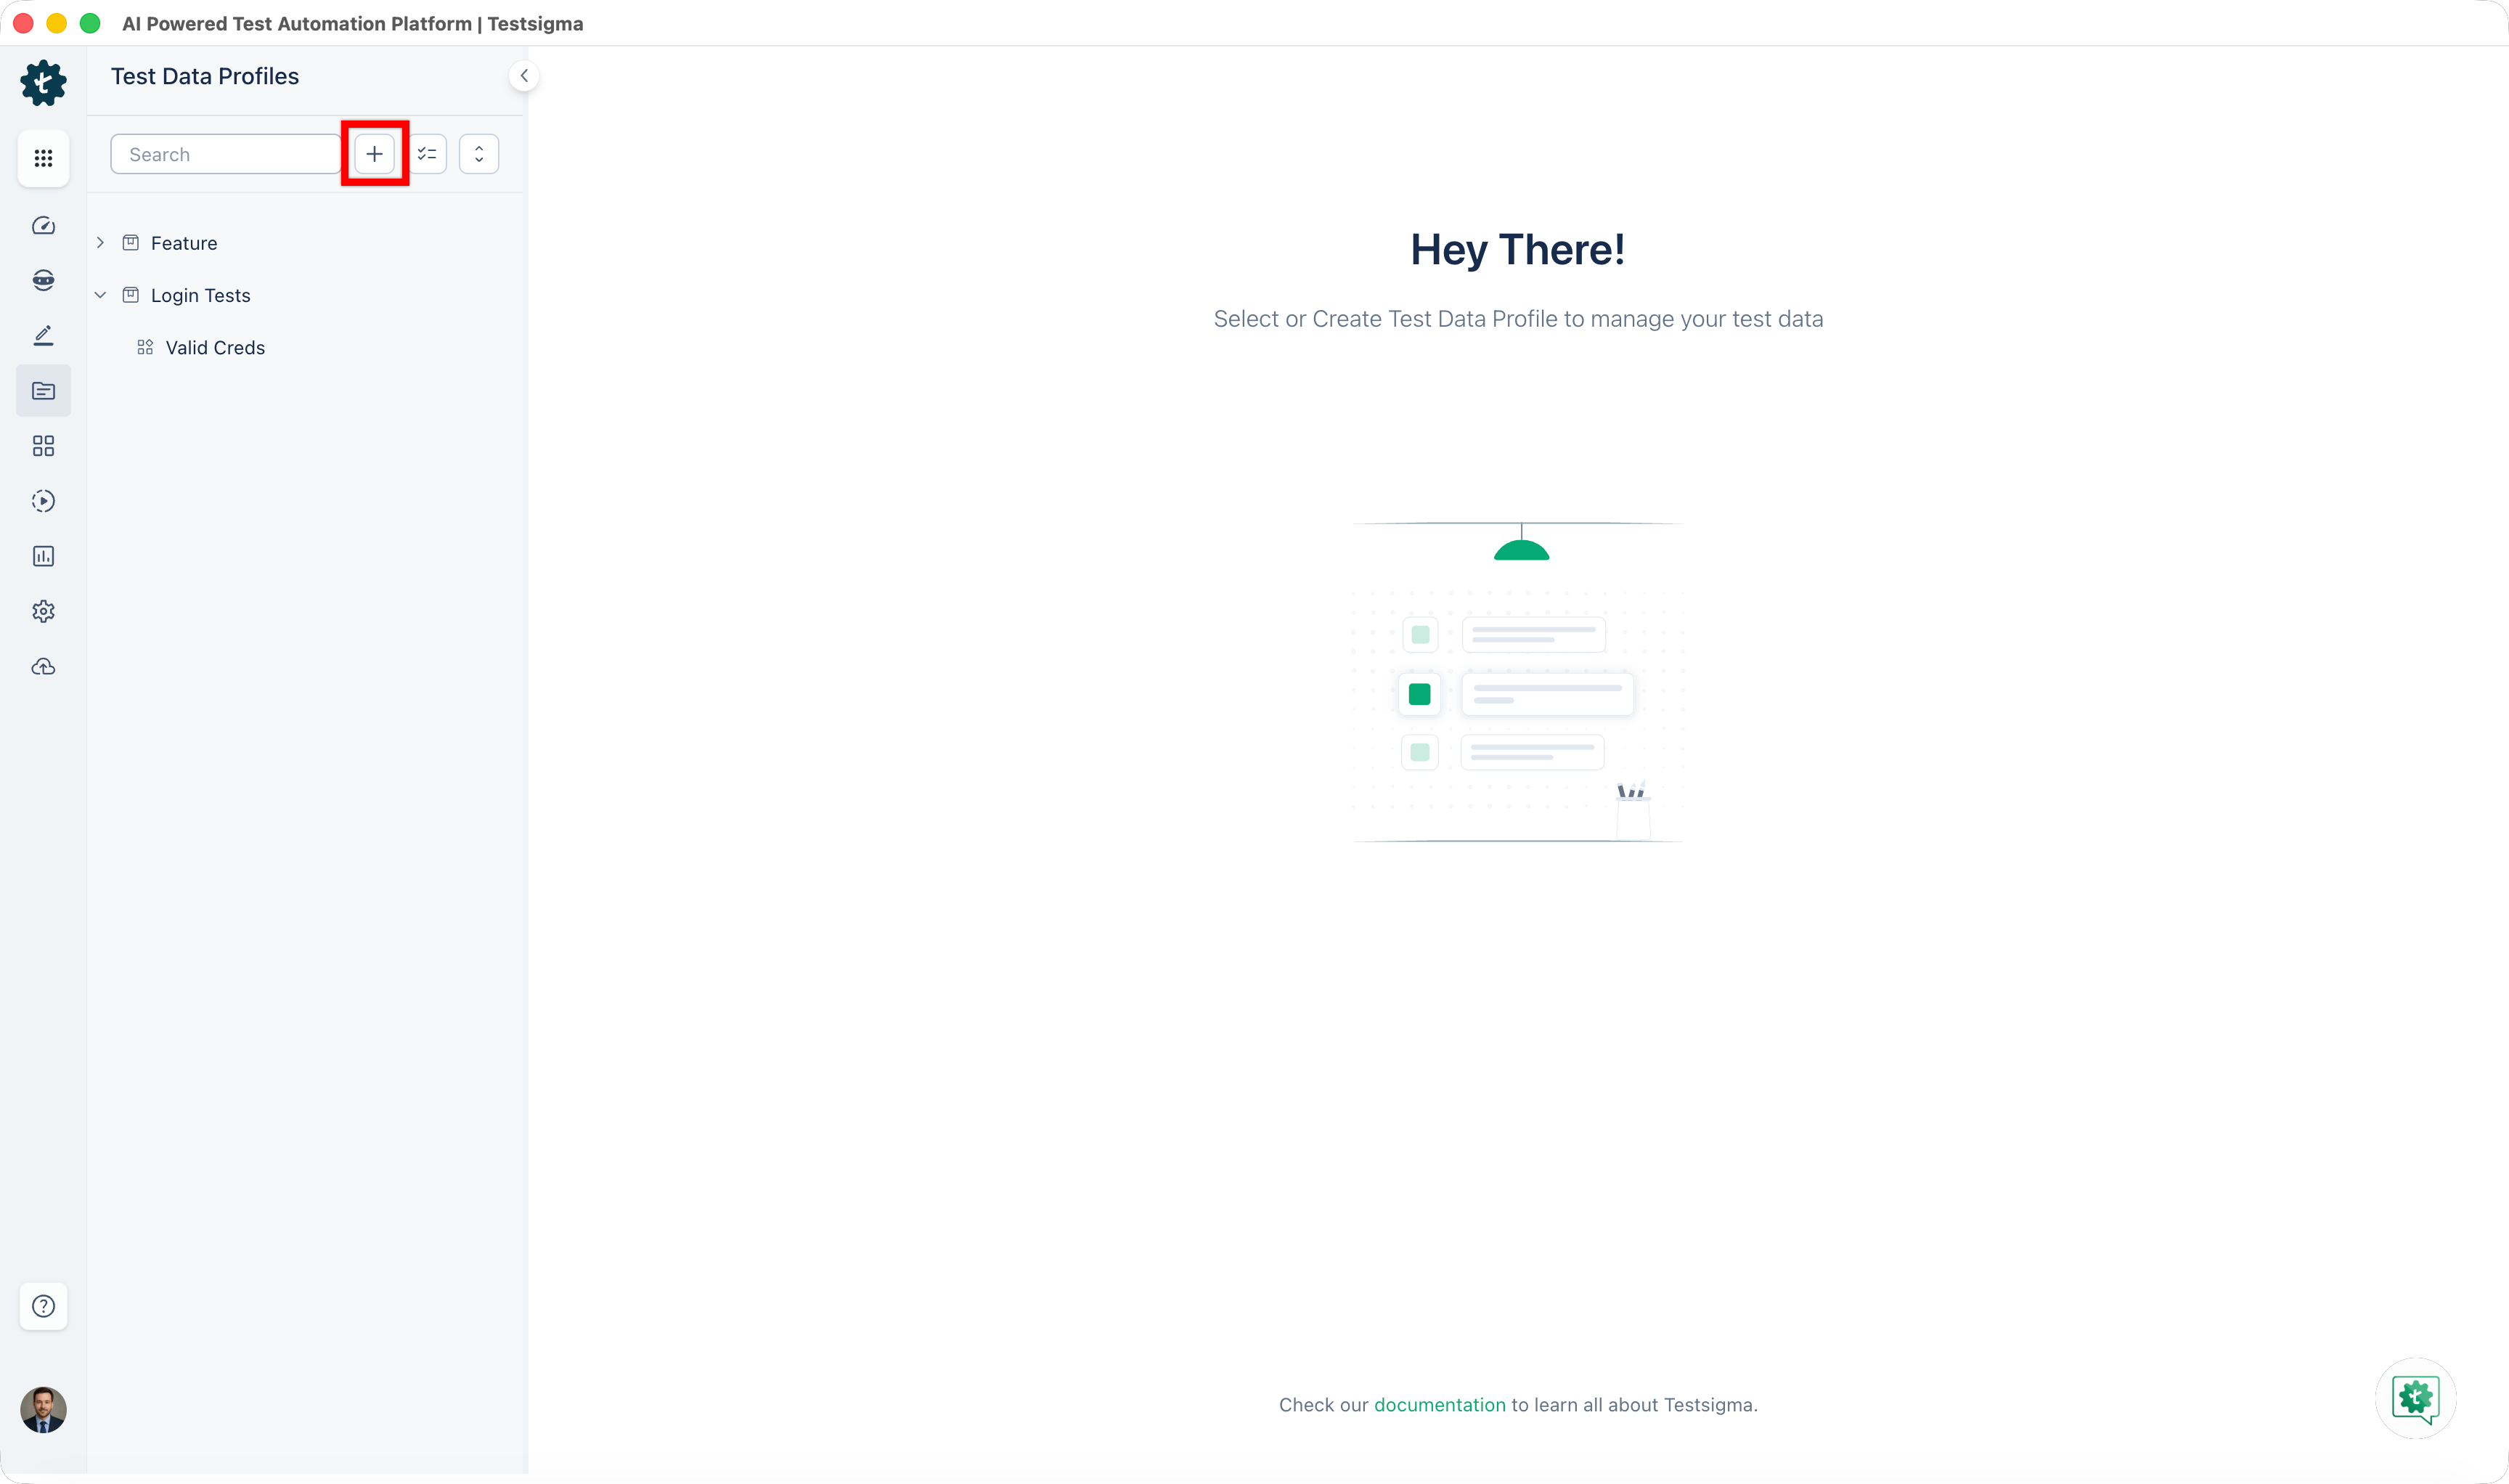
- From the dropdown, select New Test Data Profile.

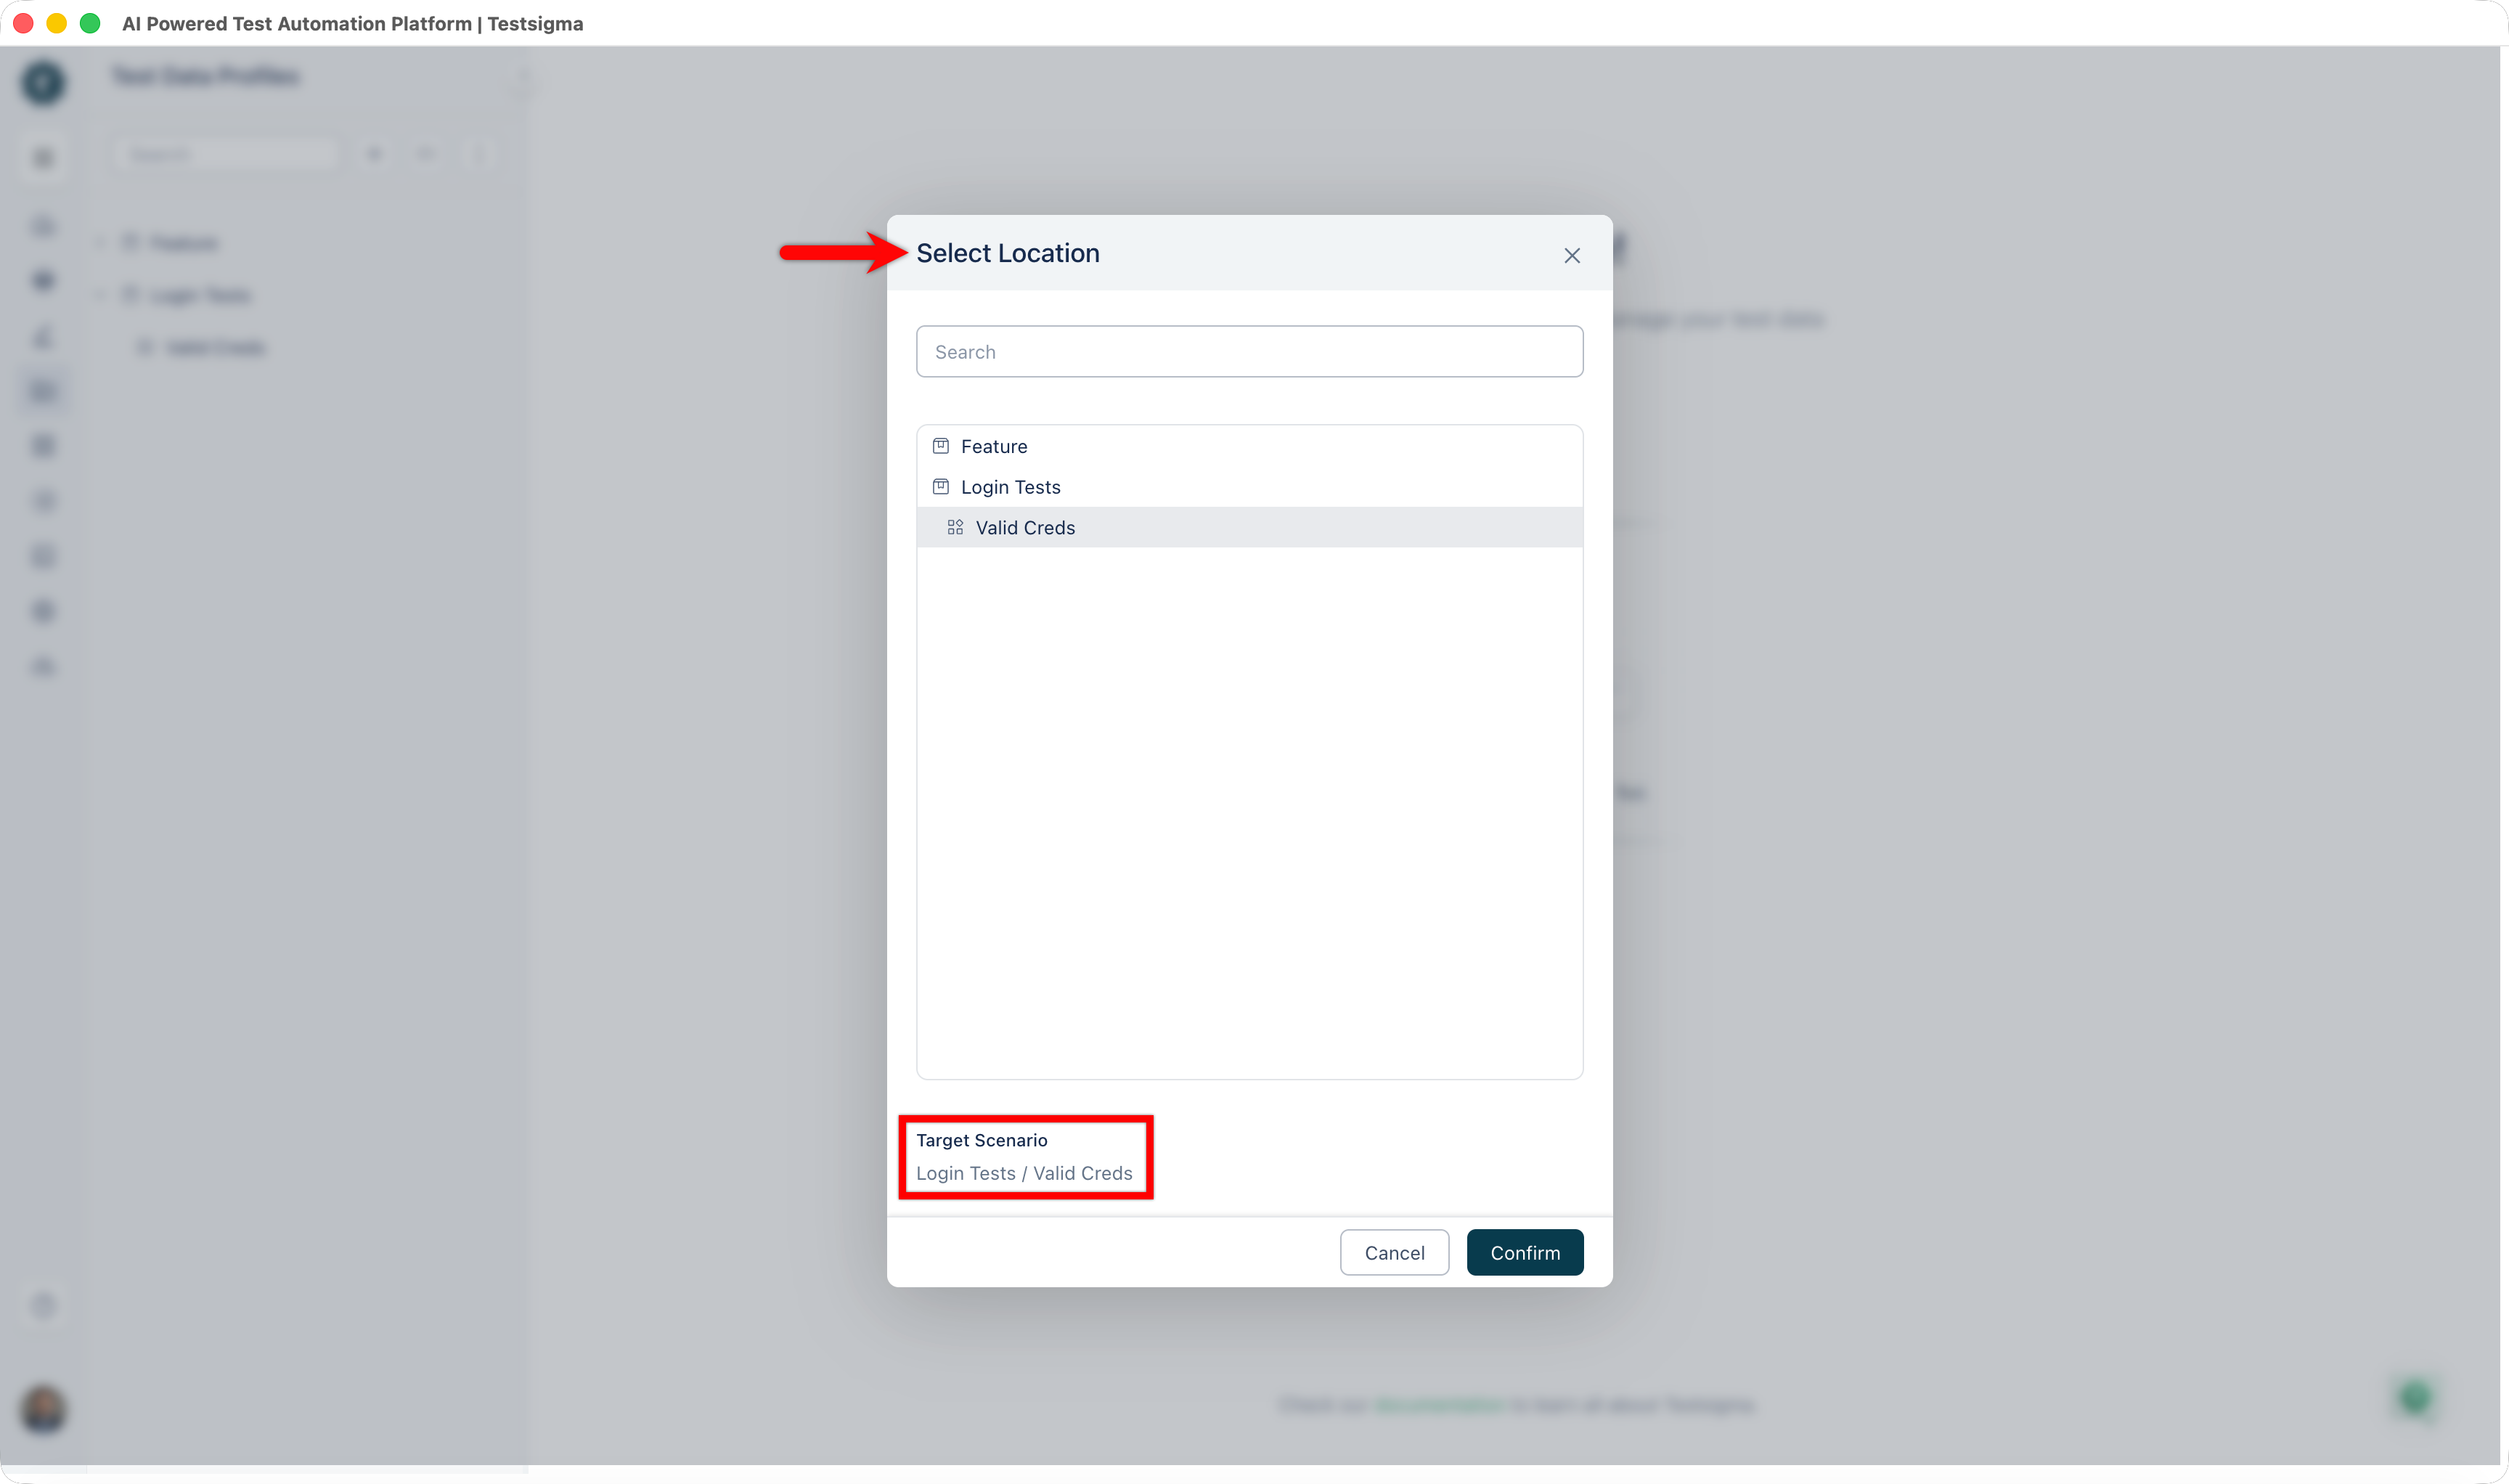
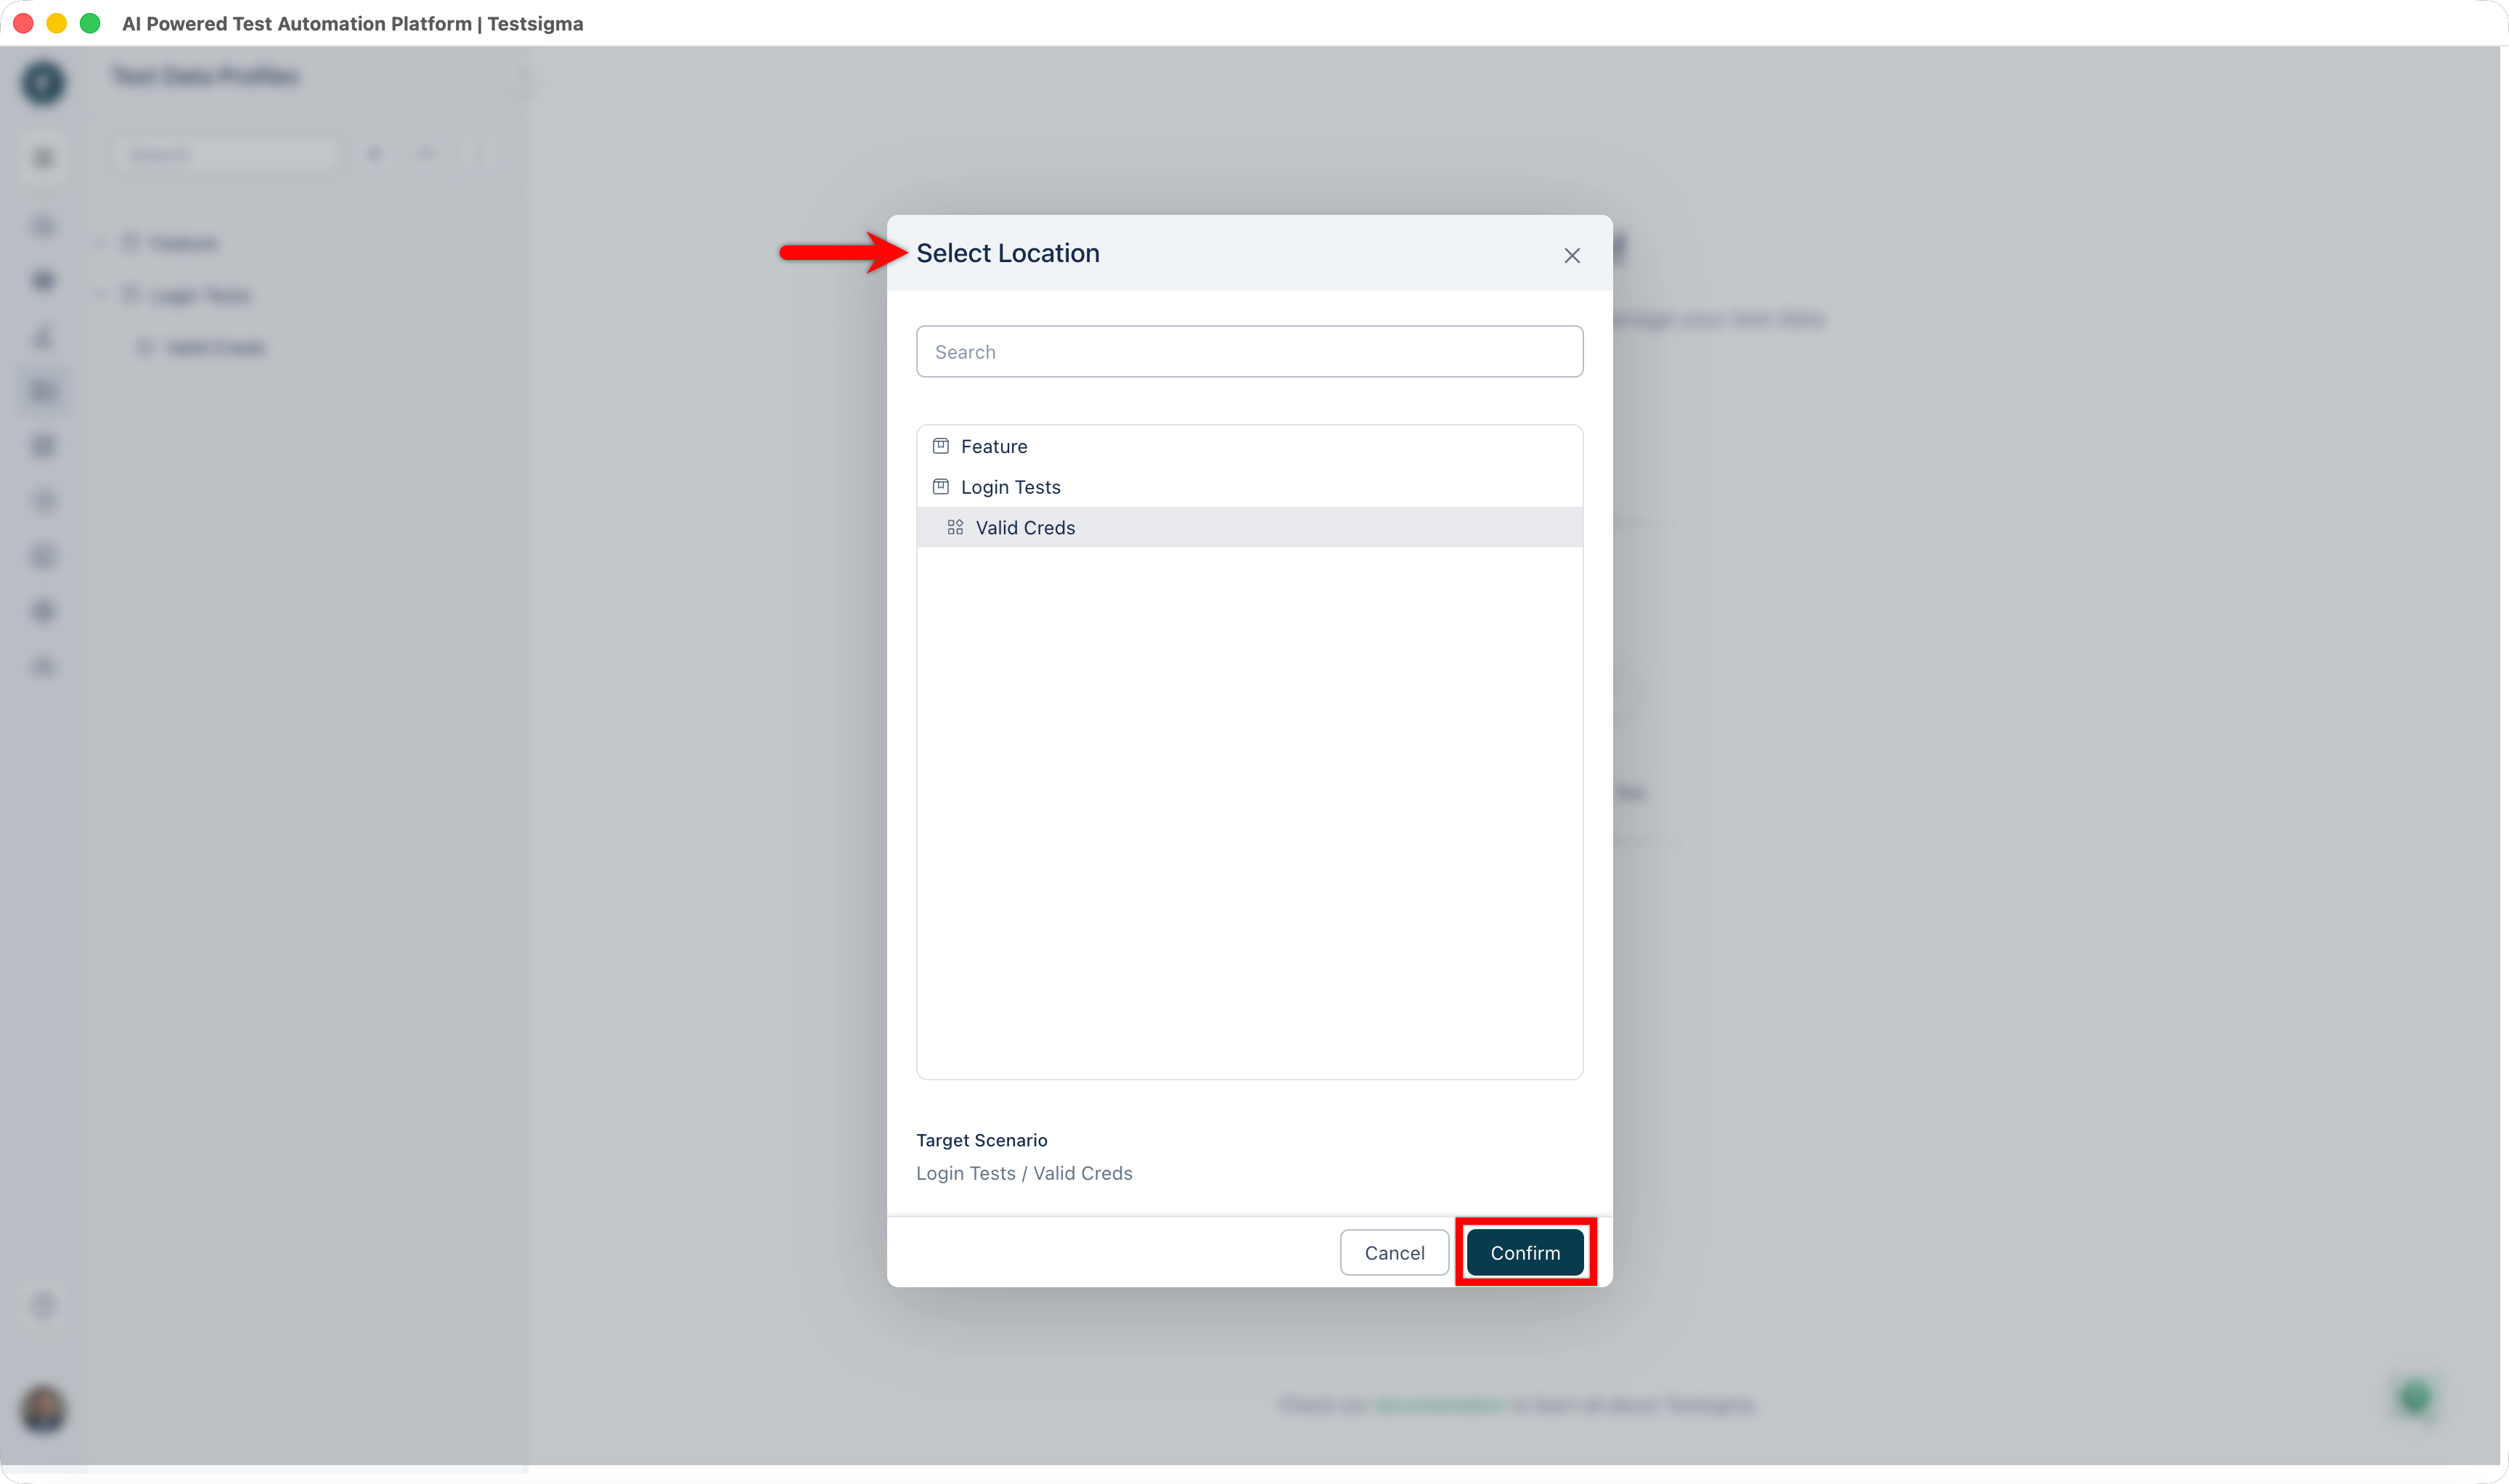
- In the Select Location dialog, select the Feature and then the Scenario where you want to store the profile. The selected Scenario appears under Target Scenario at the bottom of the dialog.
- Select Confirm, then complete the profile creation. For more information, see Create a Test Data Profile.
From the folder tree
- In the left panel, expand a Feature to reveal its Scenarios.
- Hover over a Scenario. A '+' icon appears next to the Scenario name.
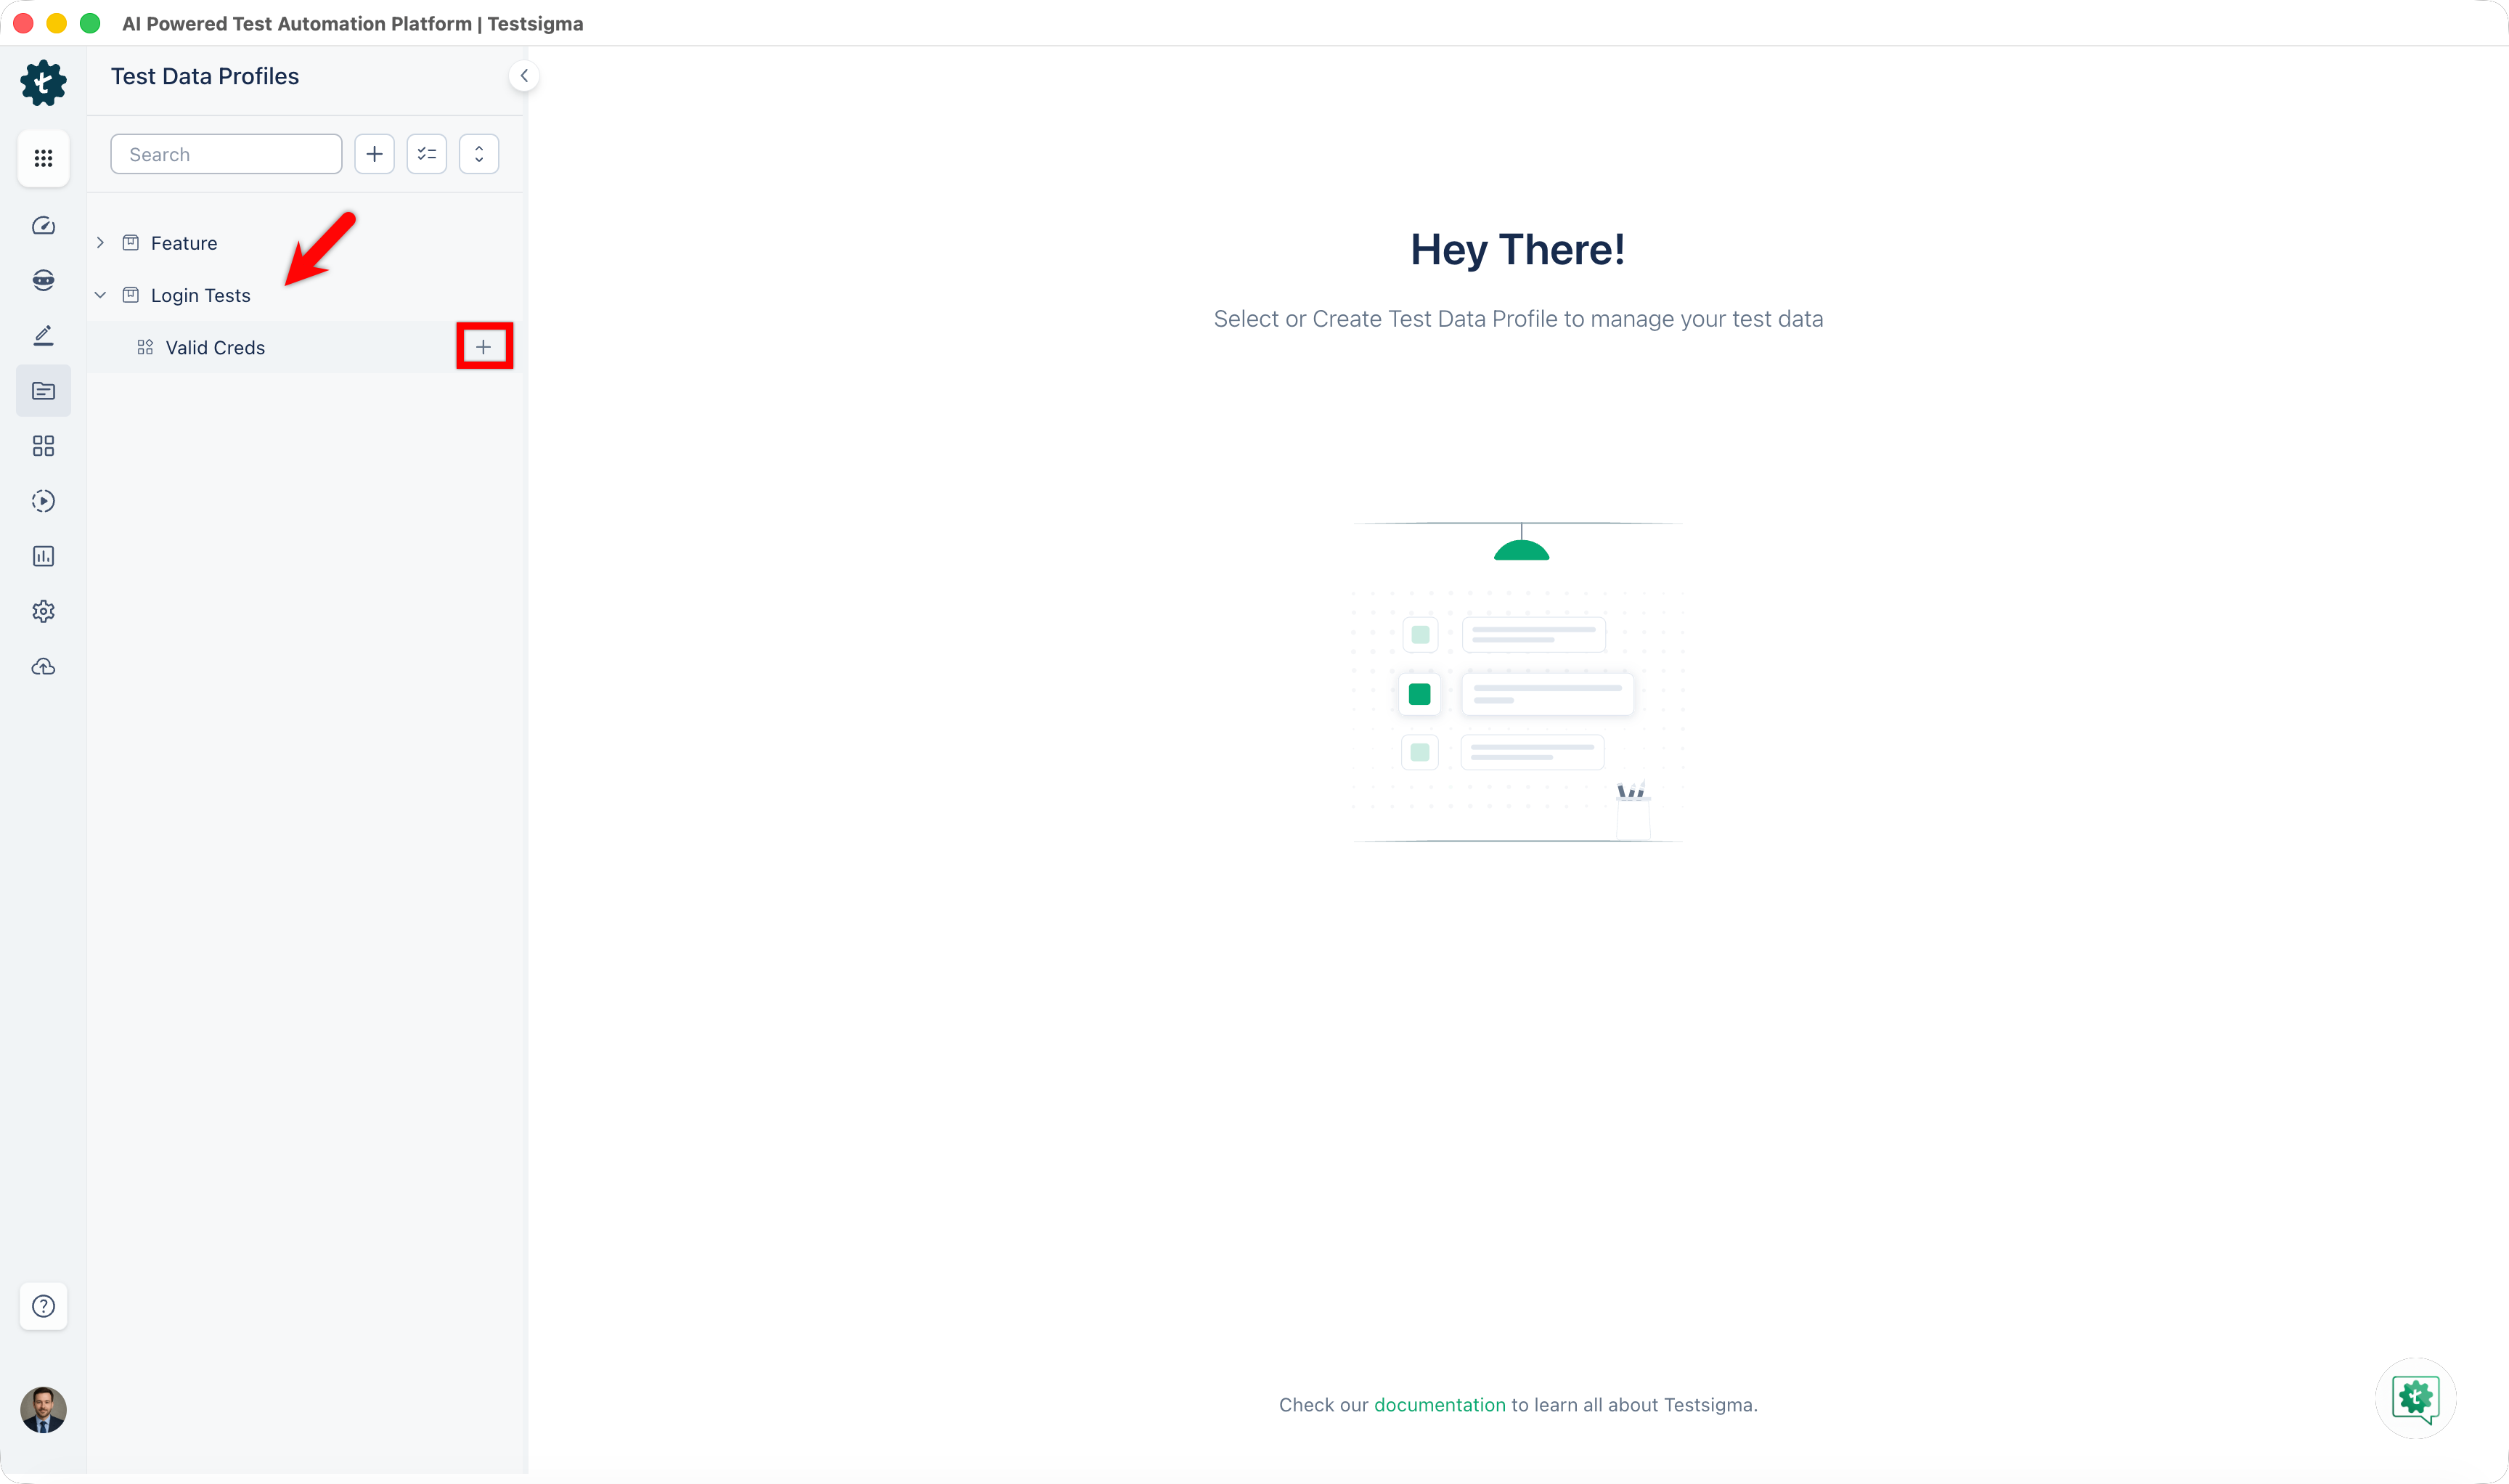
- Click +.
A new Untitled Test Data Profile opens in the editing view, already associated with that Scenario.
- At the top of the left panel, click '+'.
- In the Test Data Profile Info panel on the right, enter a name in the Name field.
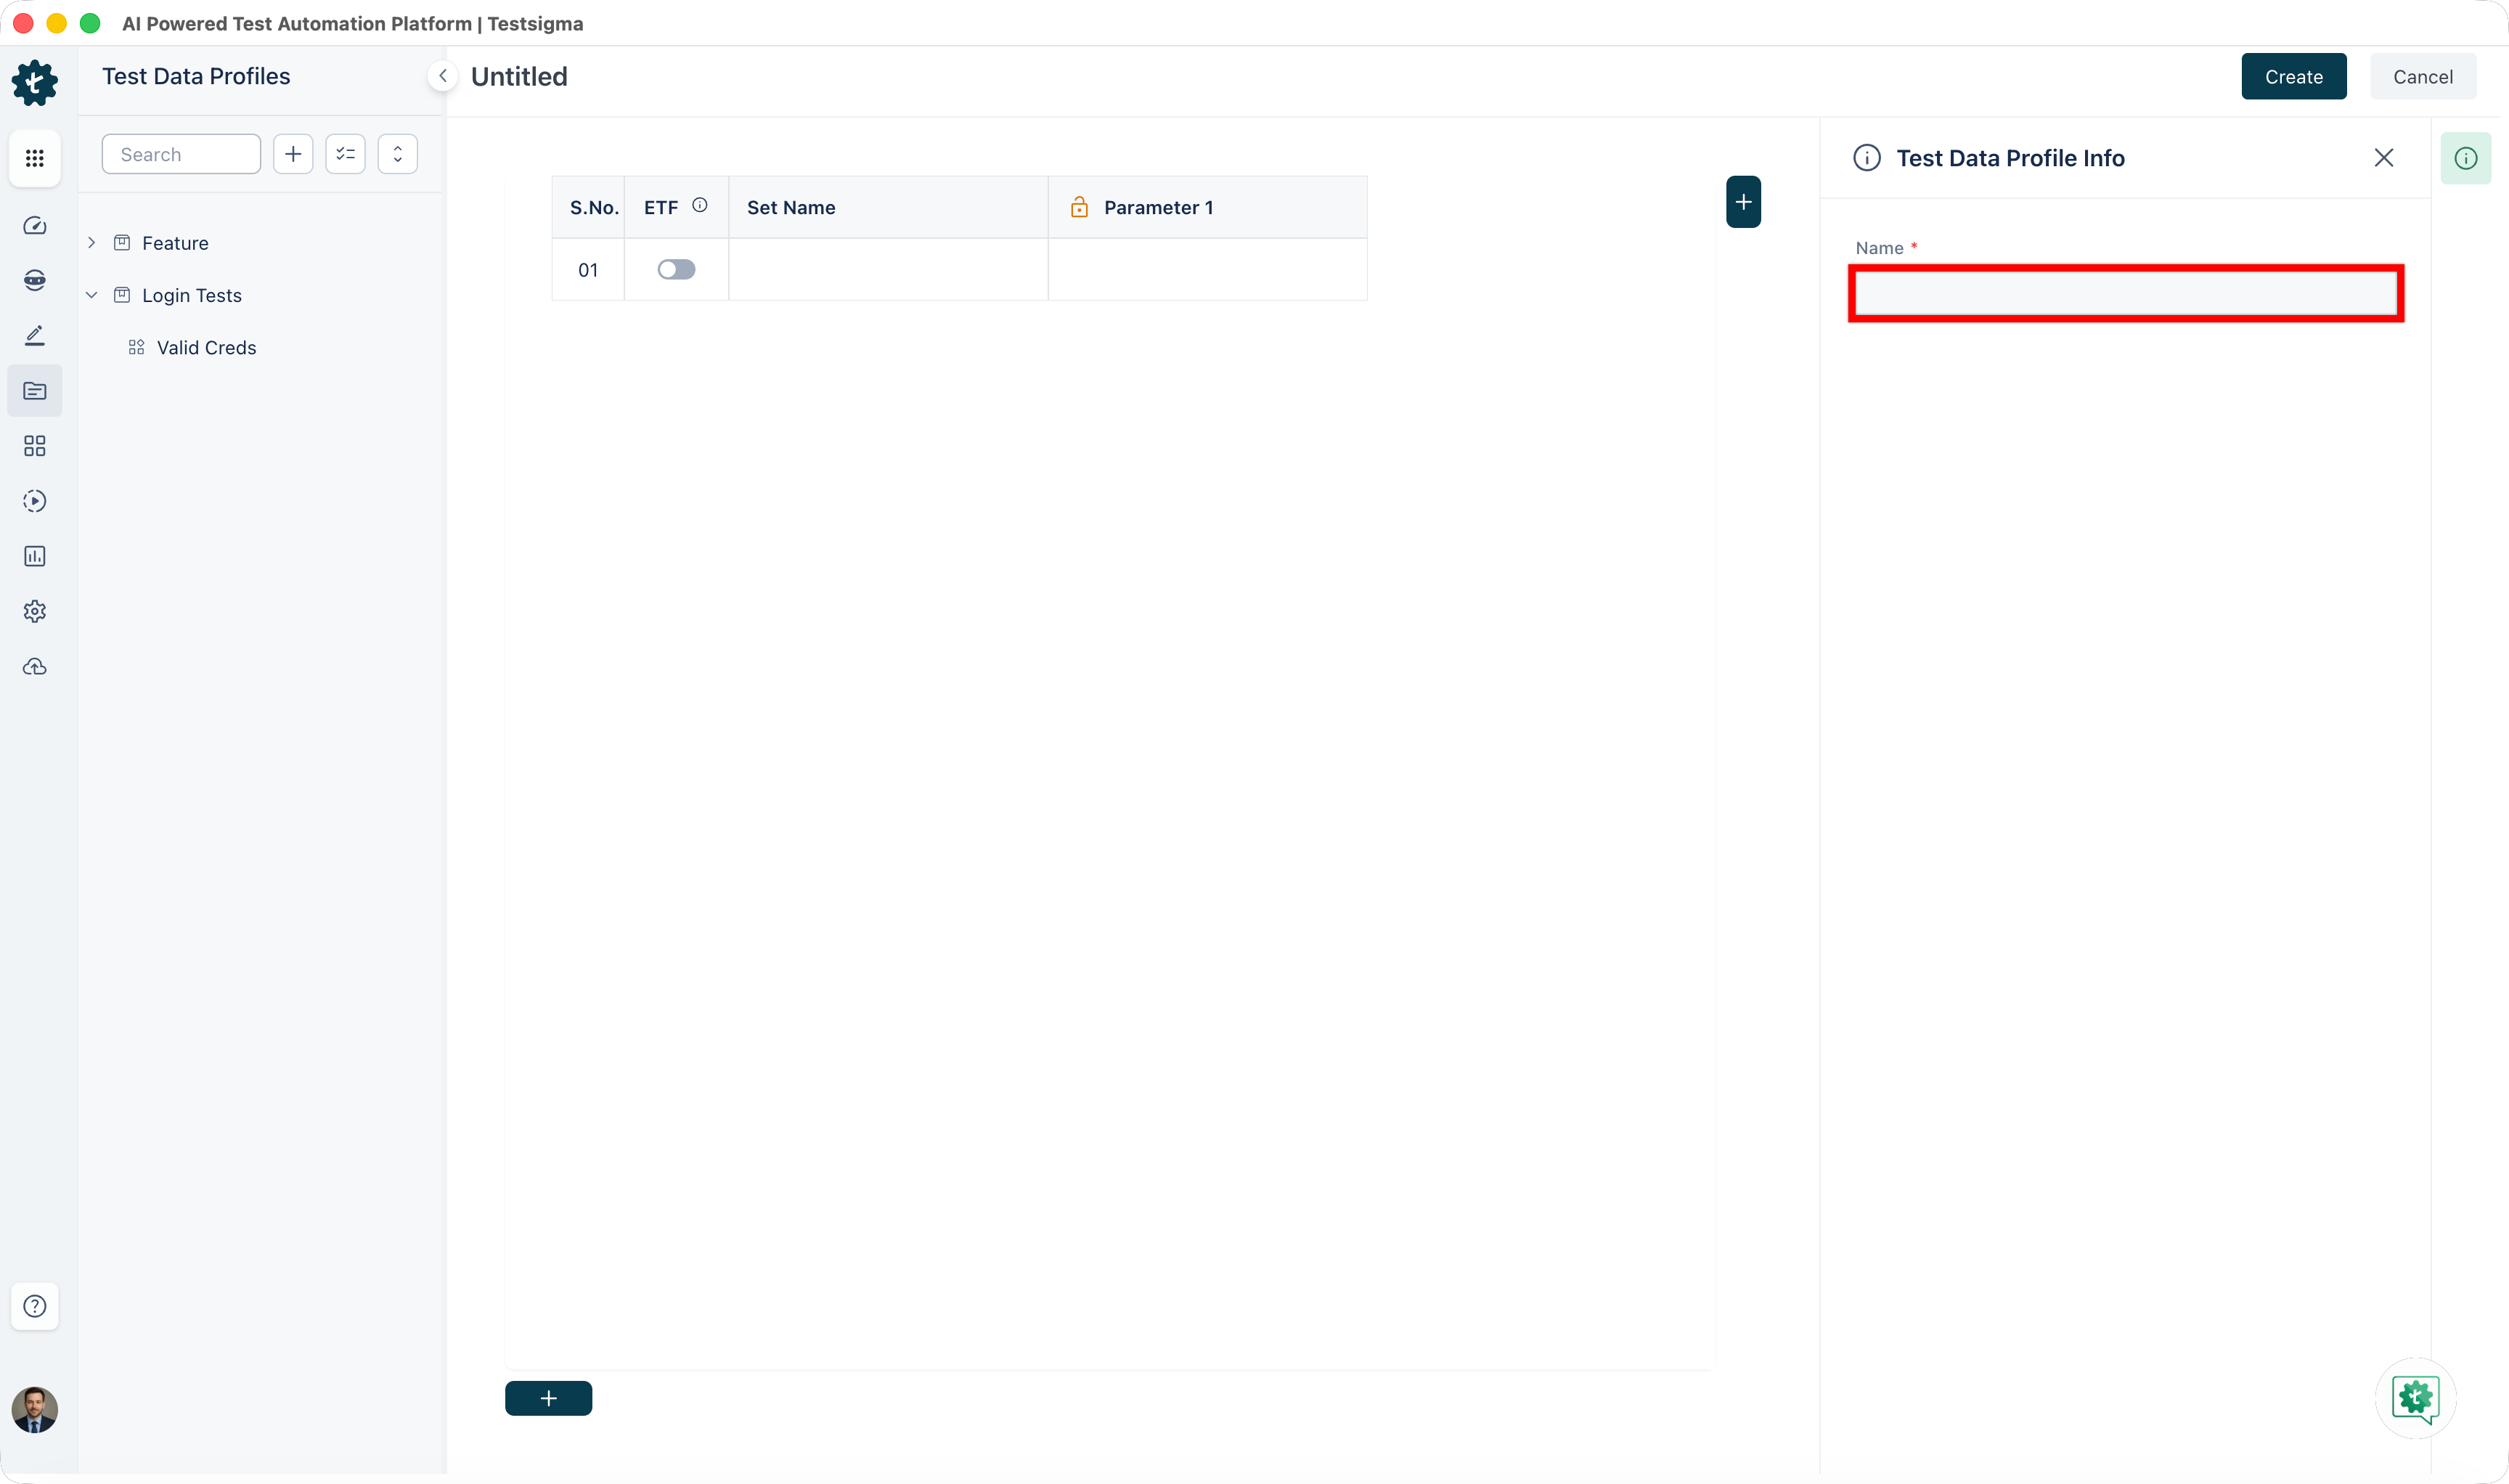
- Select + at the top of the data grid to add a column (parameter), and select + at the bottom to add a row (data set). Repeat as needed.
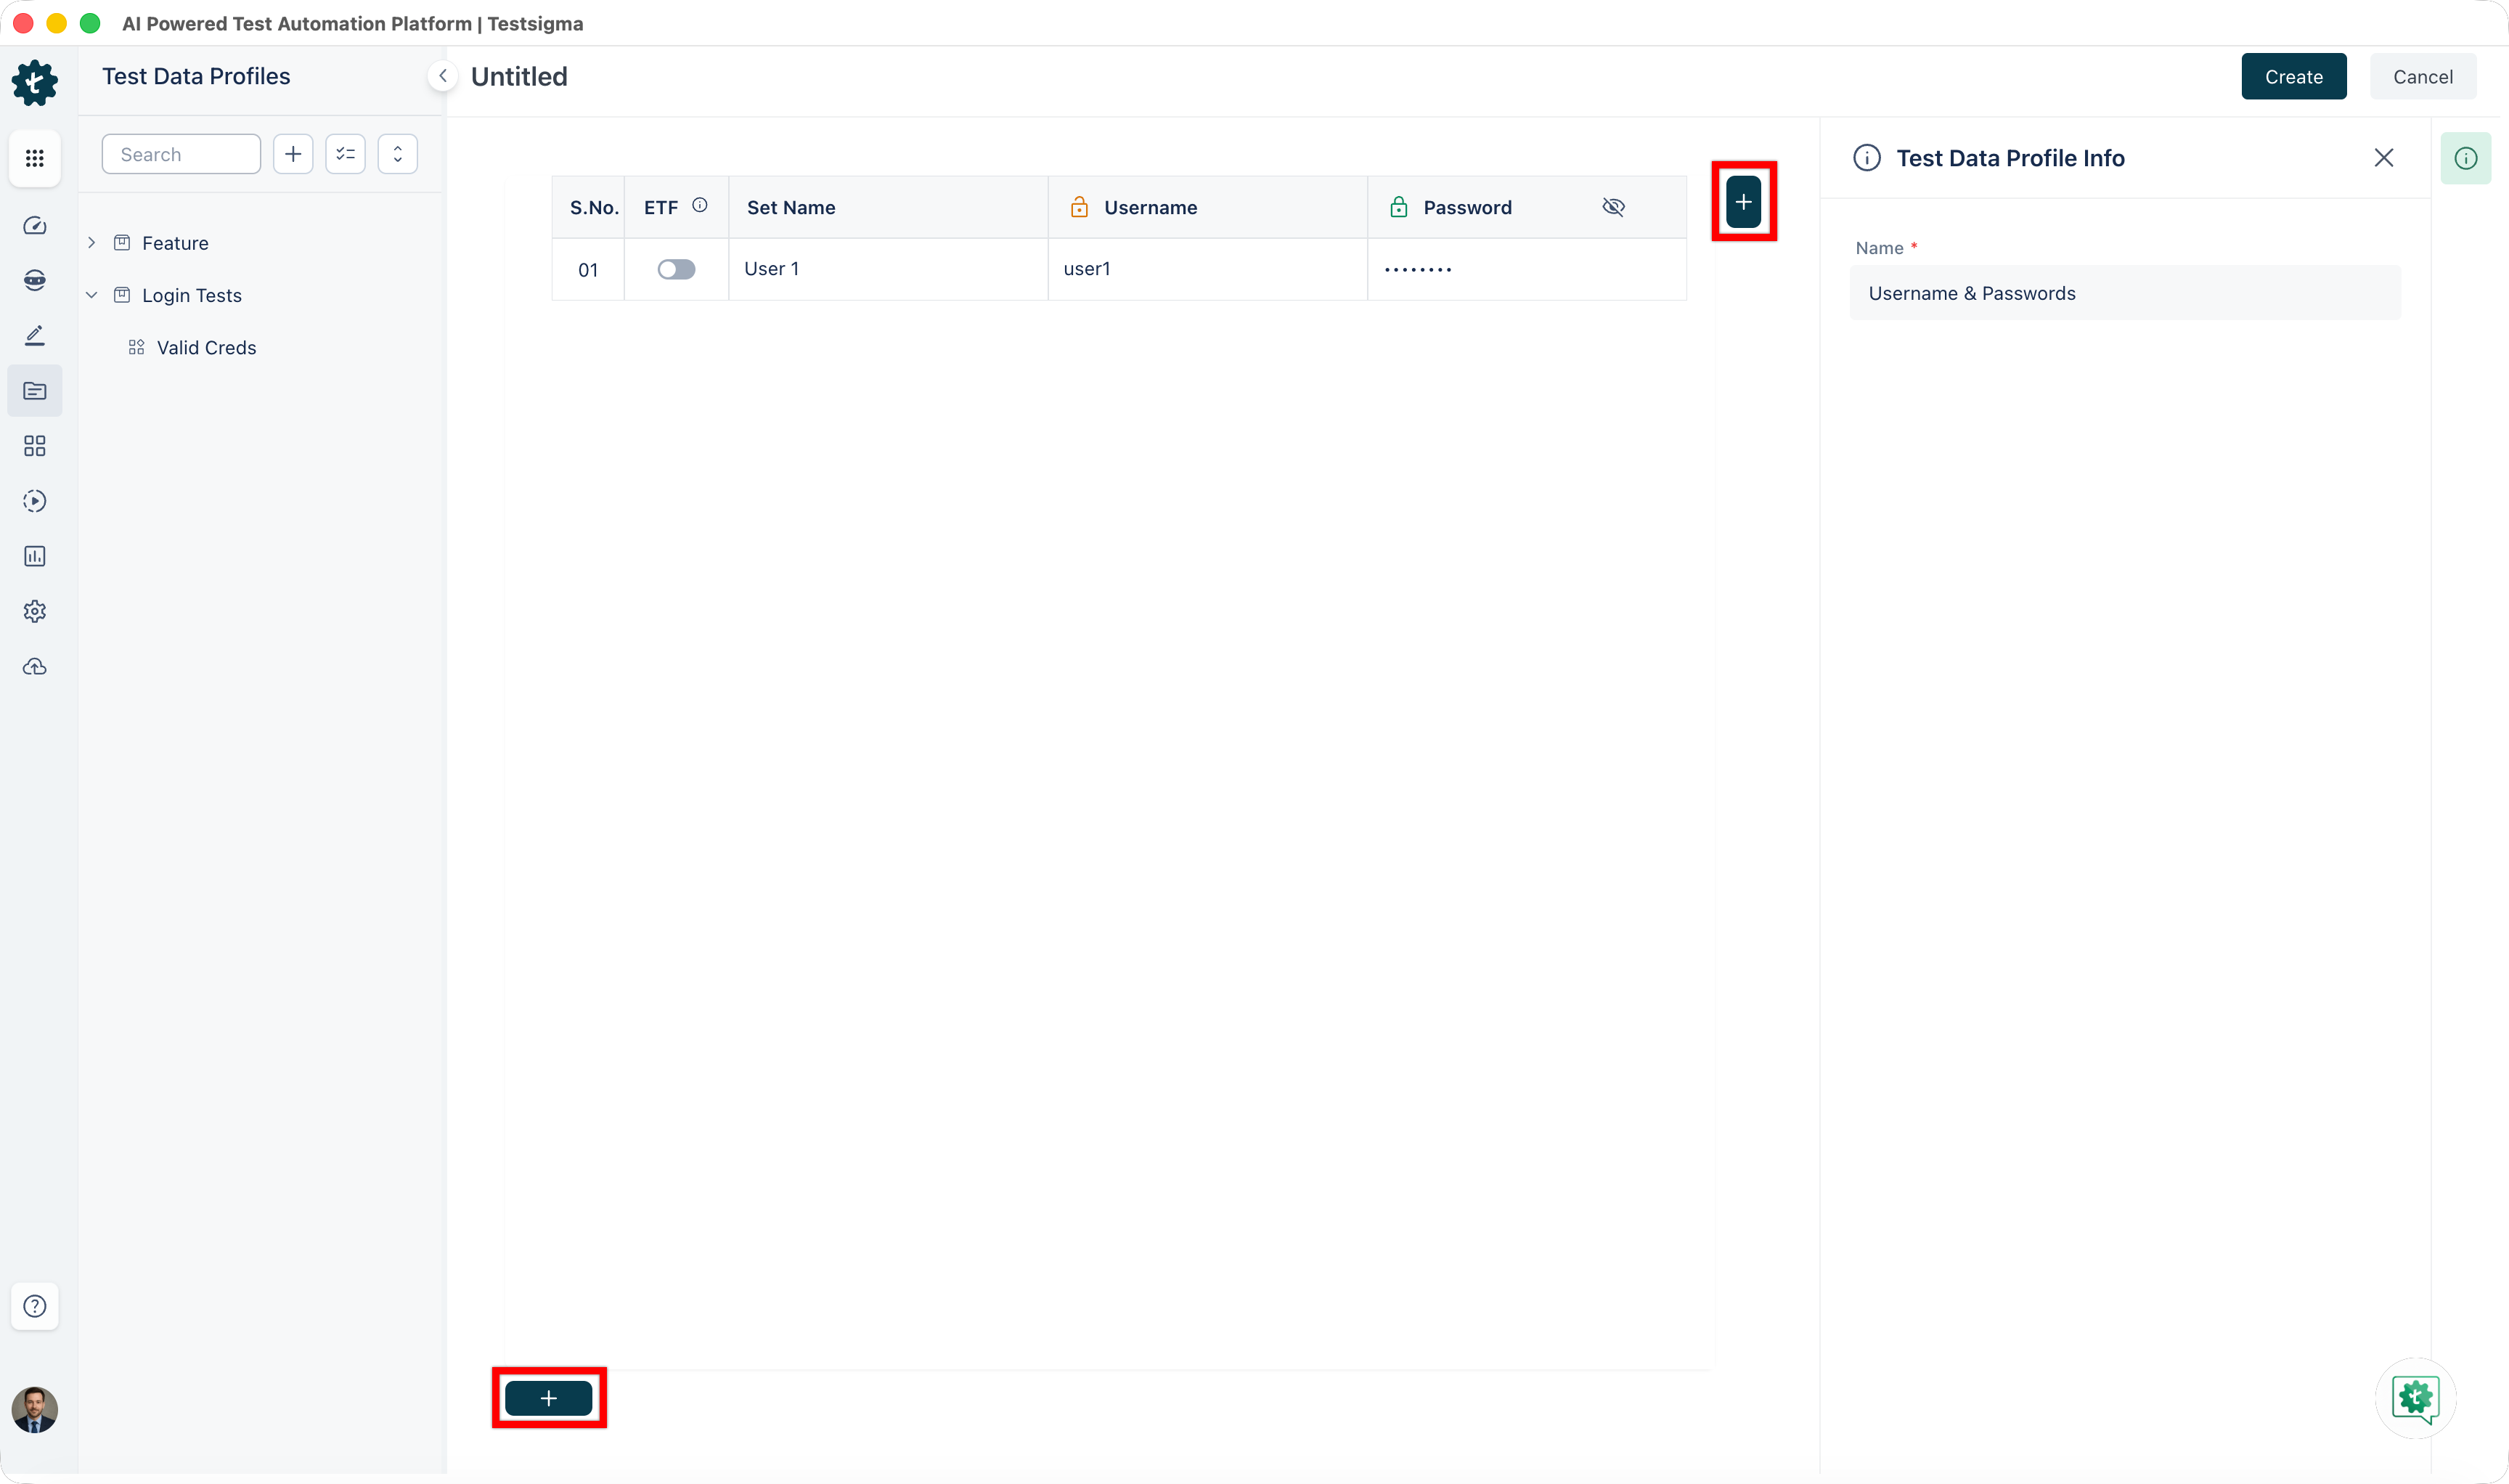
- Enter values in the data grid cells.
To mark a data set as expected to fail during execution, enable the toggle in the ETF (Expected to Fail) column for that row.
- Click Create.
The profile appears in the left panel under the selected Feature and Scenario.
Protect Sensitive Parameter Values
If a parameter column contains sensitive data such as passwords or tokens, you can mask the values so they are hidden in the UI.
- Open the Test Data Profile.
- Enter values in the parameter column.
- Select the lock icon in the column header. The values display as dots (••••••••) to all users.
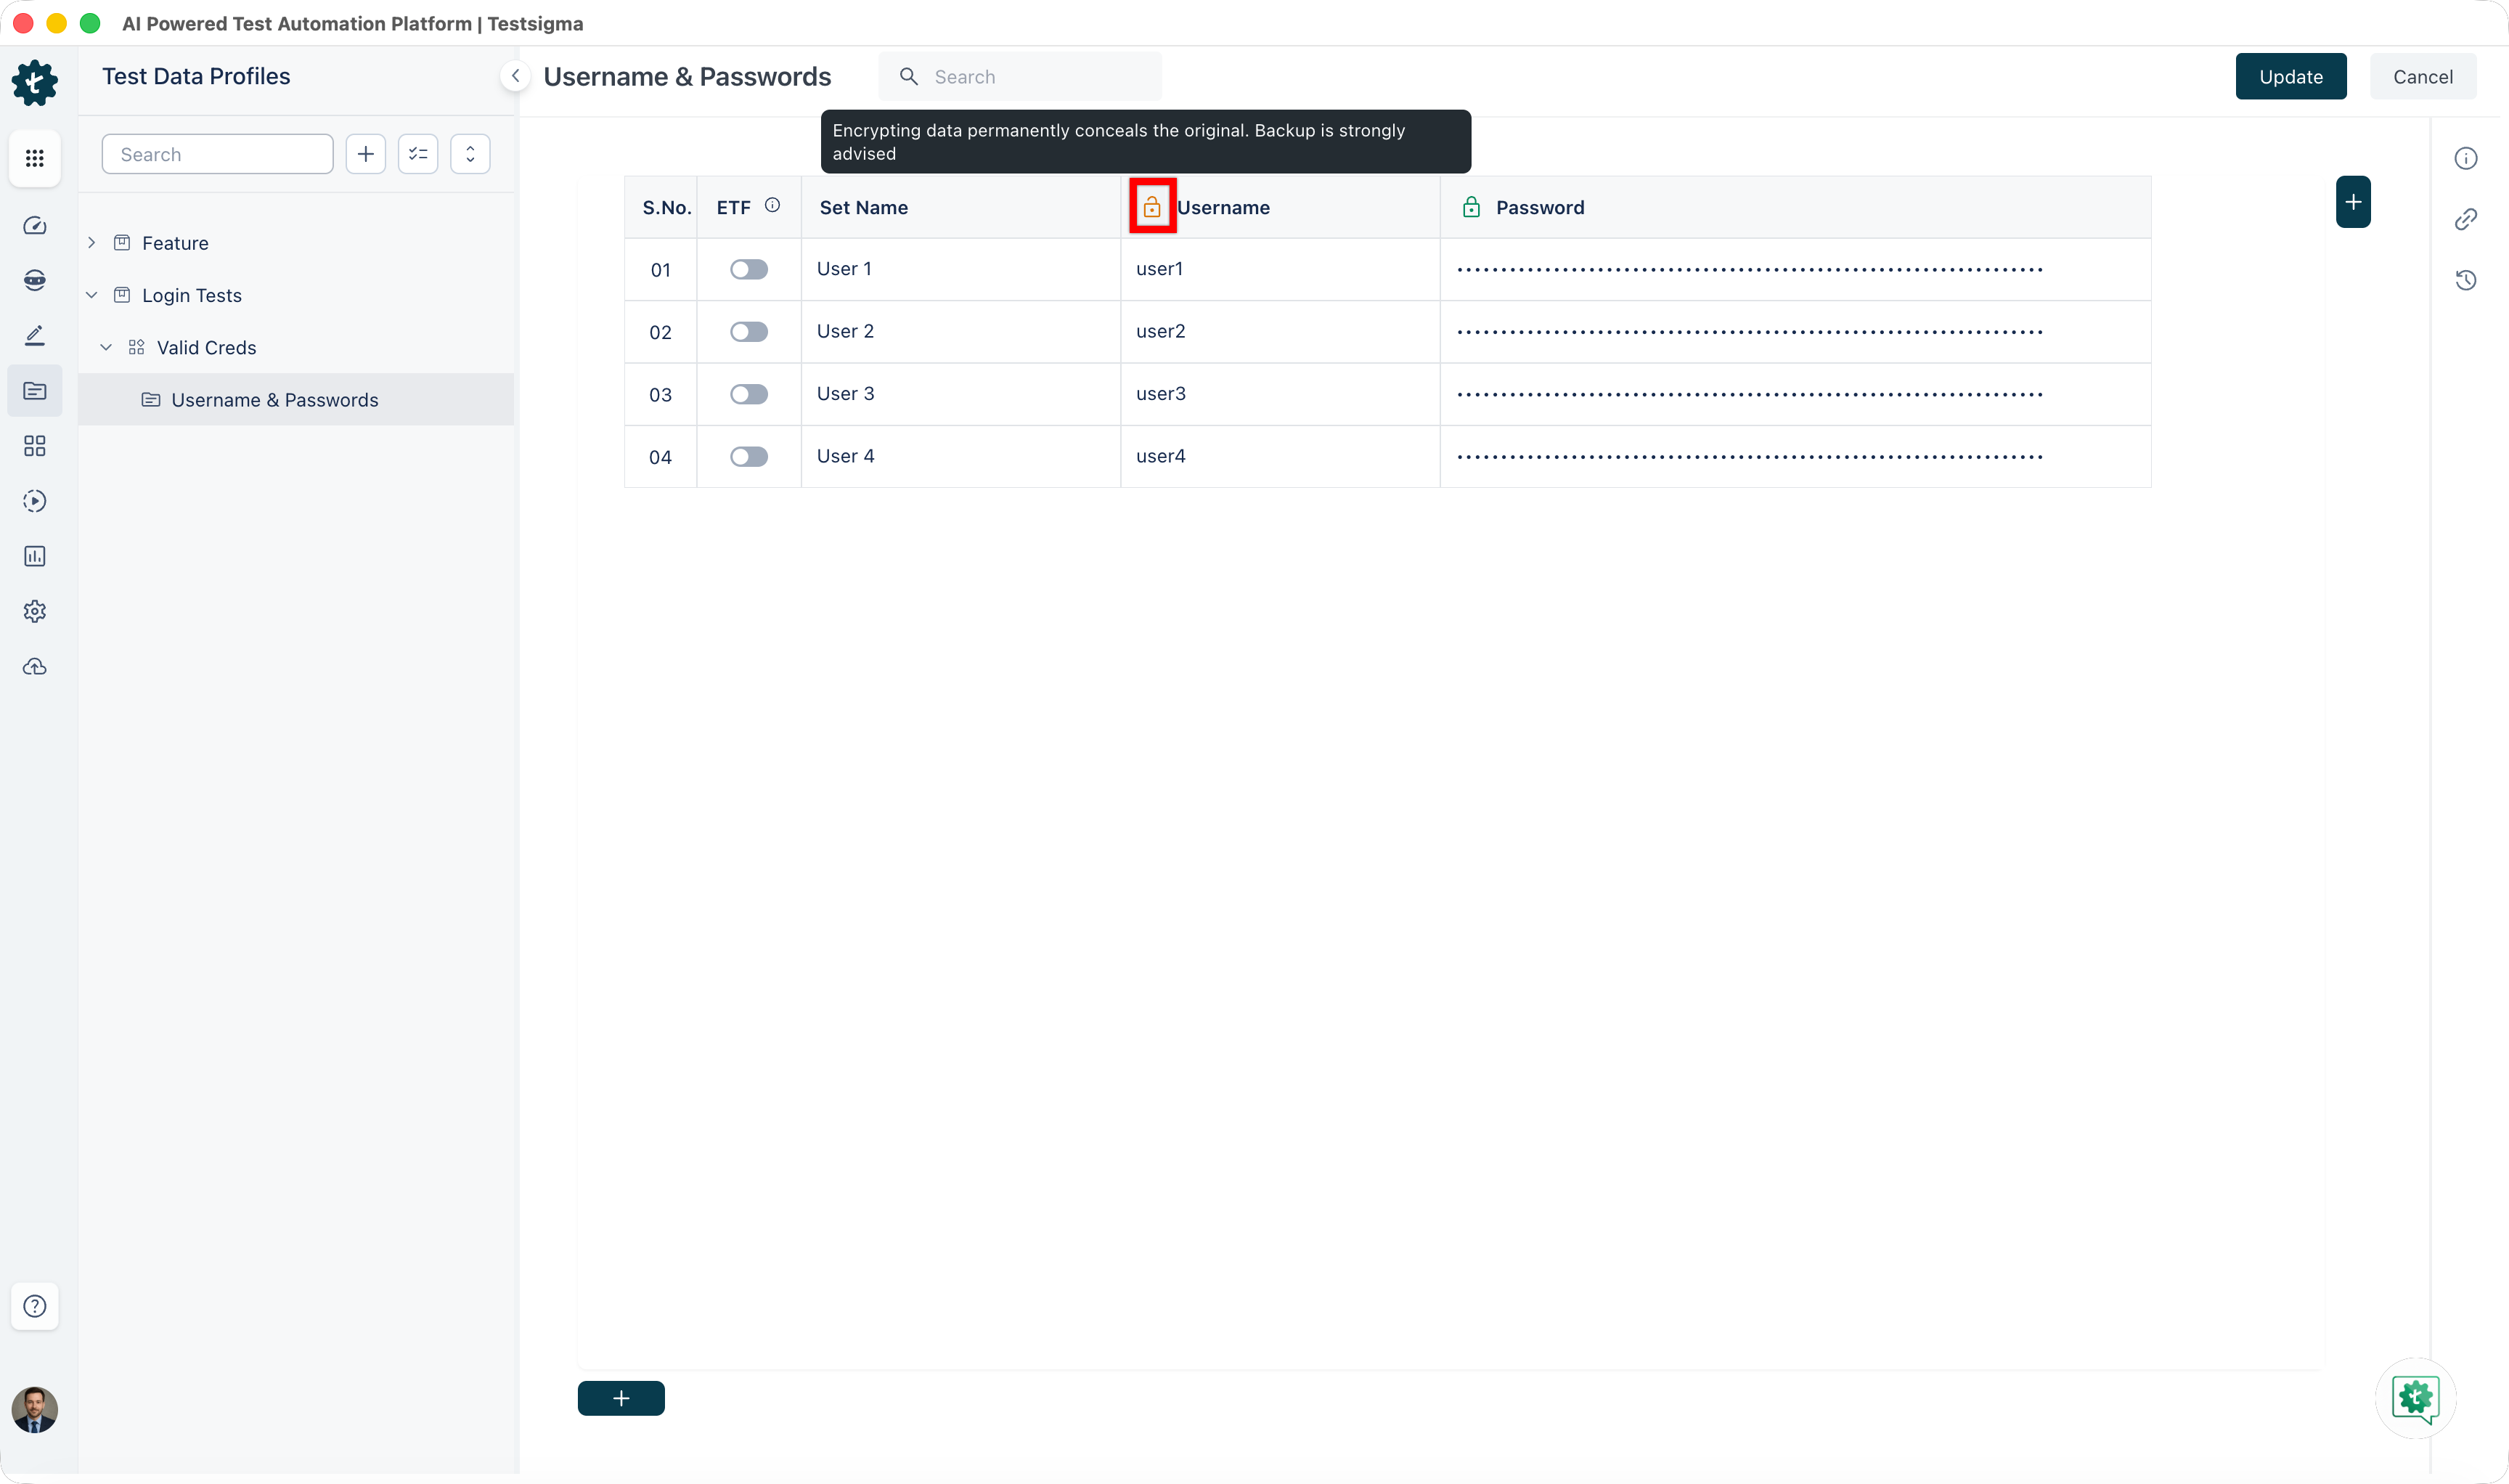
- Select Update to save your changes.
Locking a column masks values in the UI but does not affect how they are used during test execution.
Associate a Test Data Profile with a Test Case
- From the left navigation bar, go to Create Tests > Test Cases and create or open an existing test case.
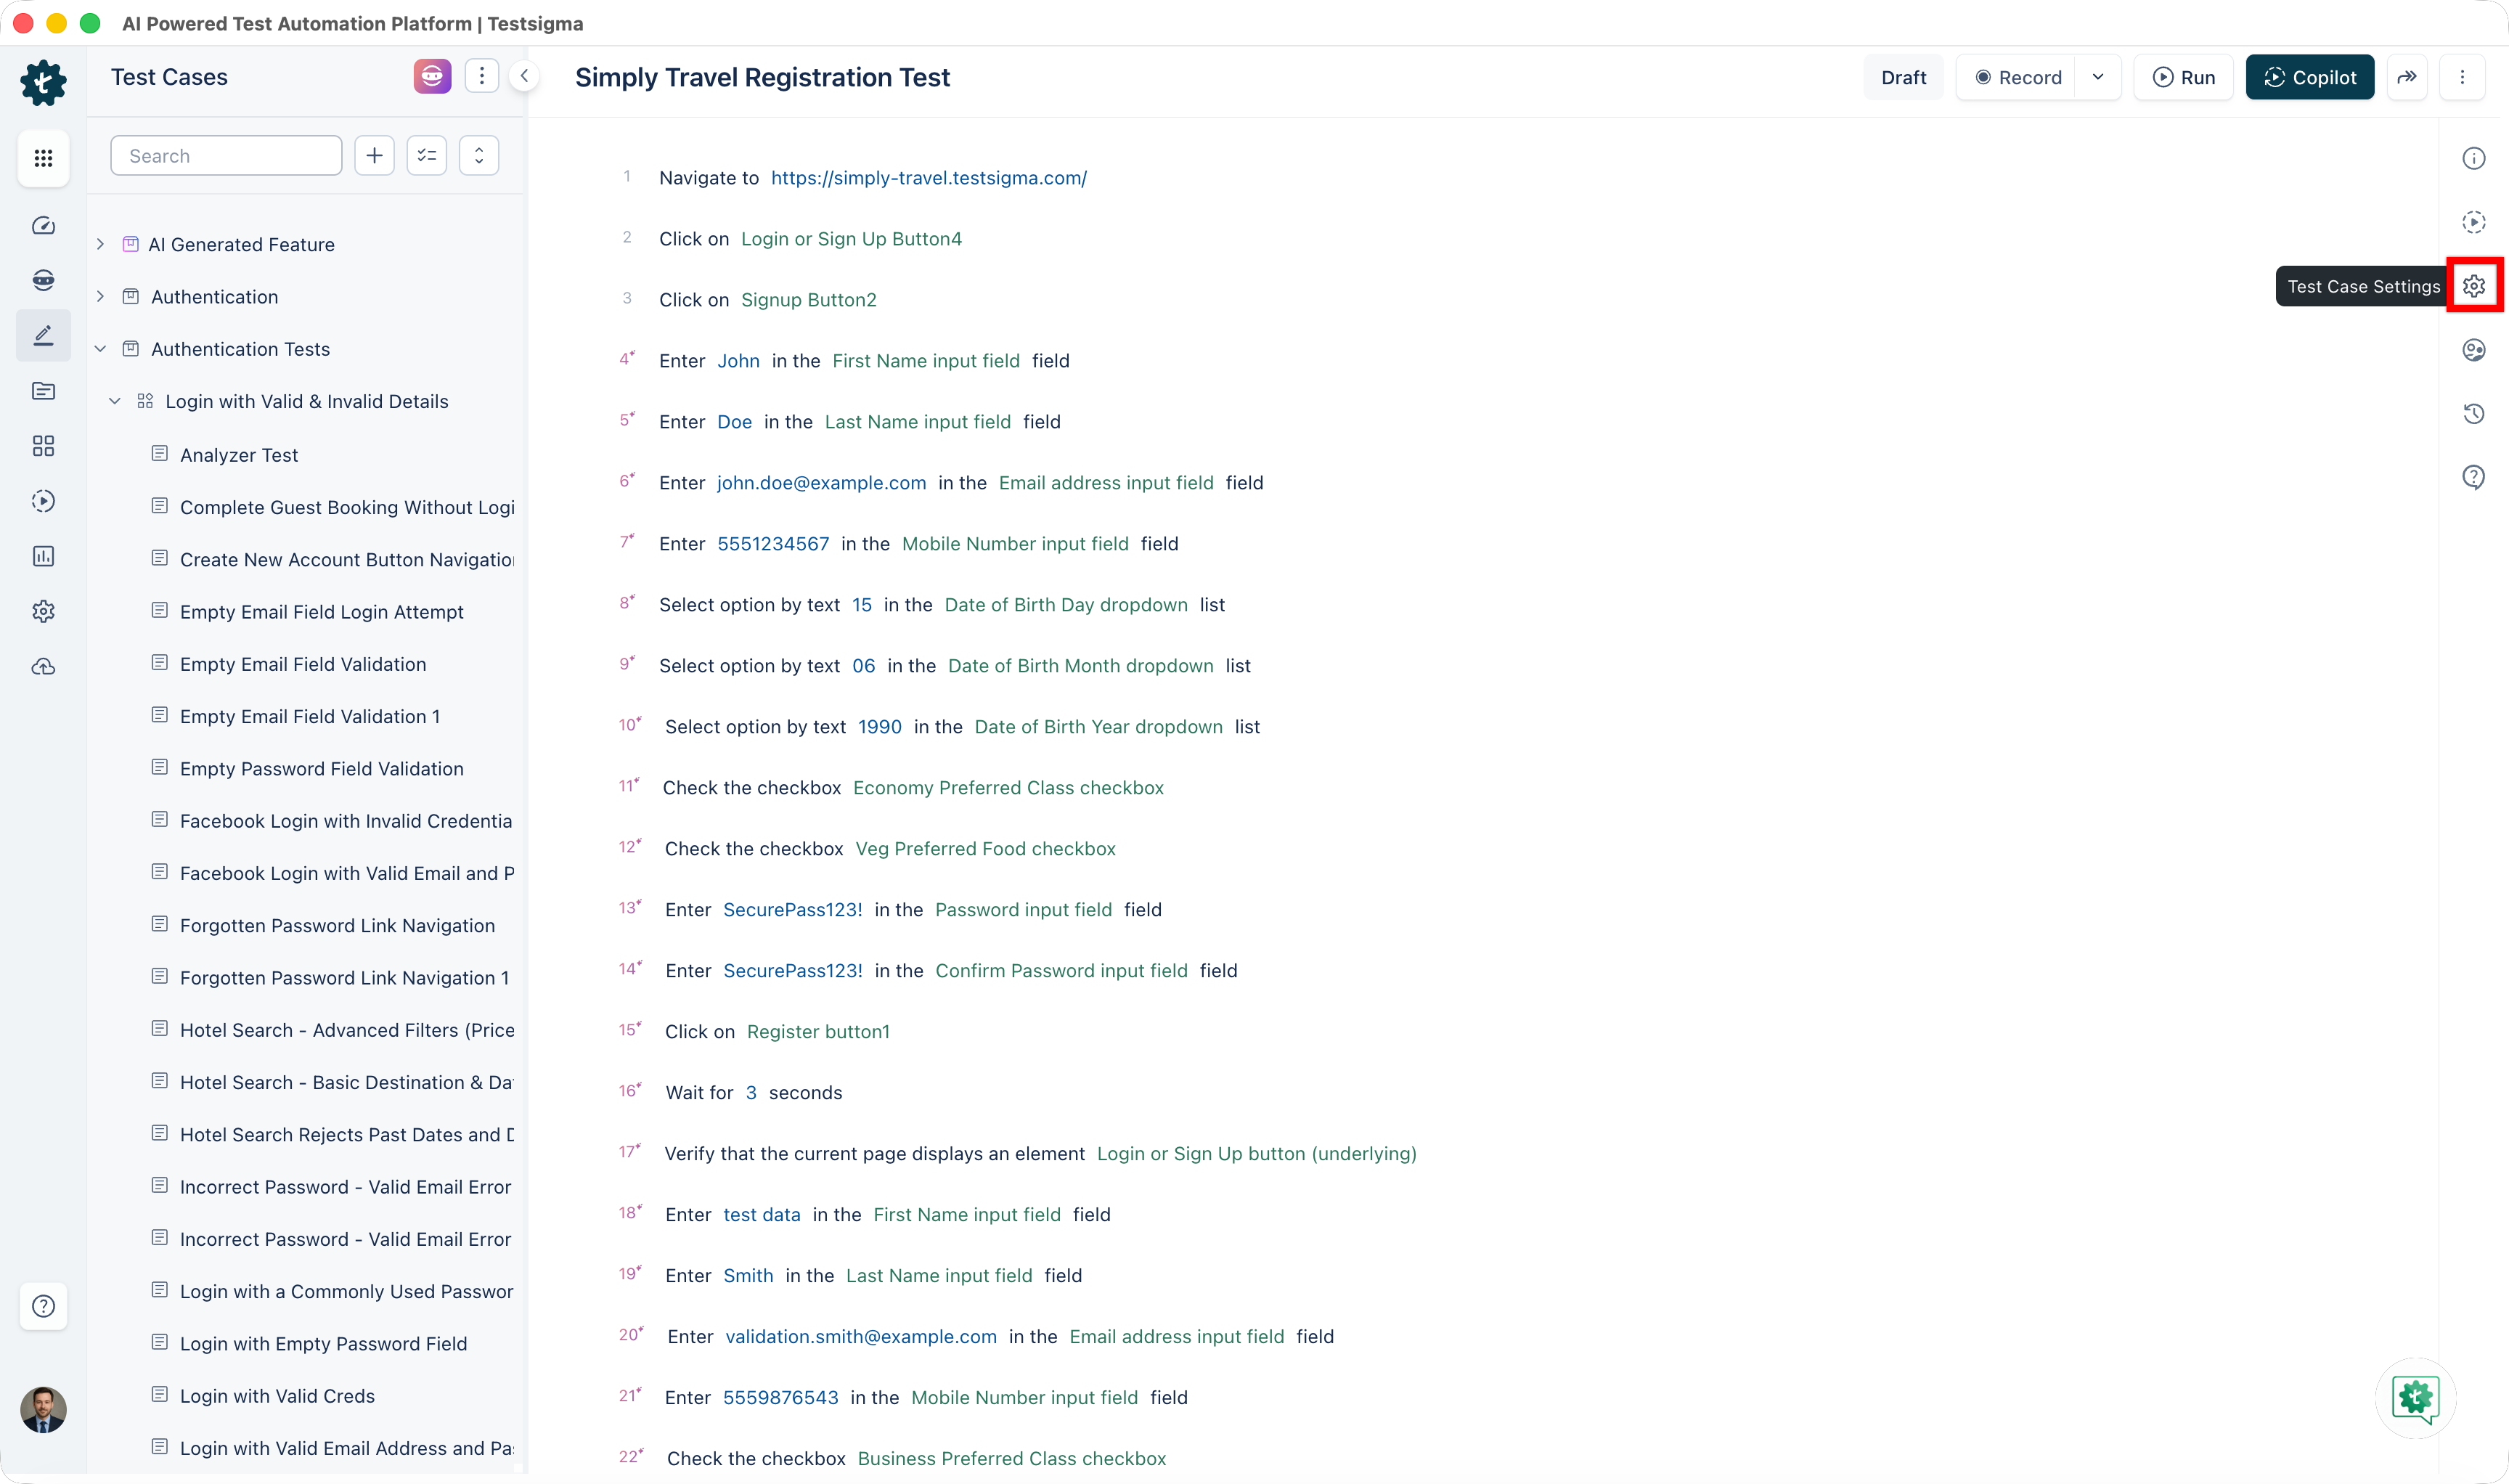
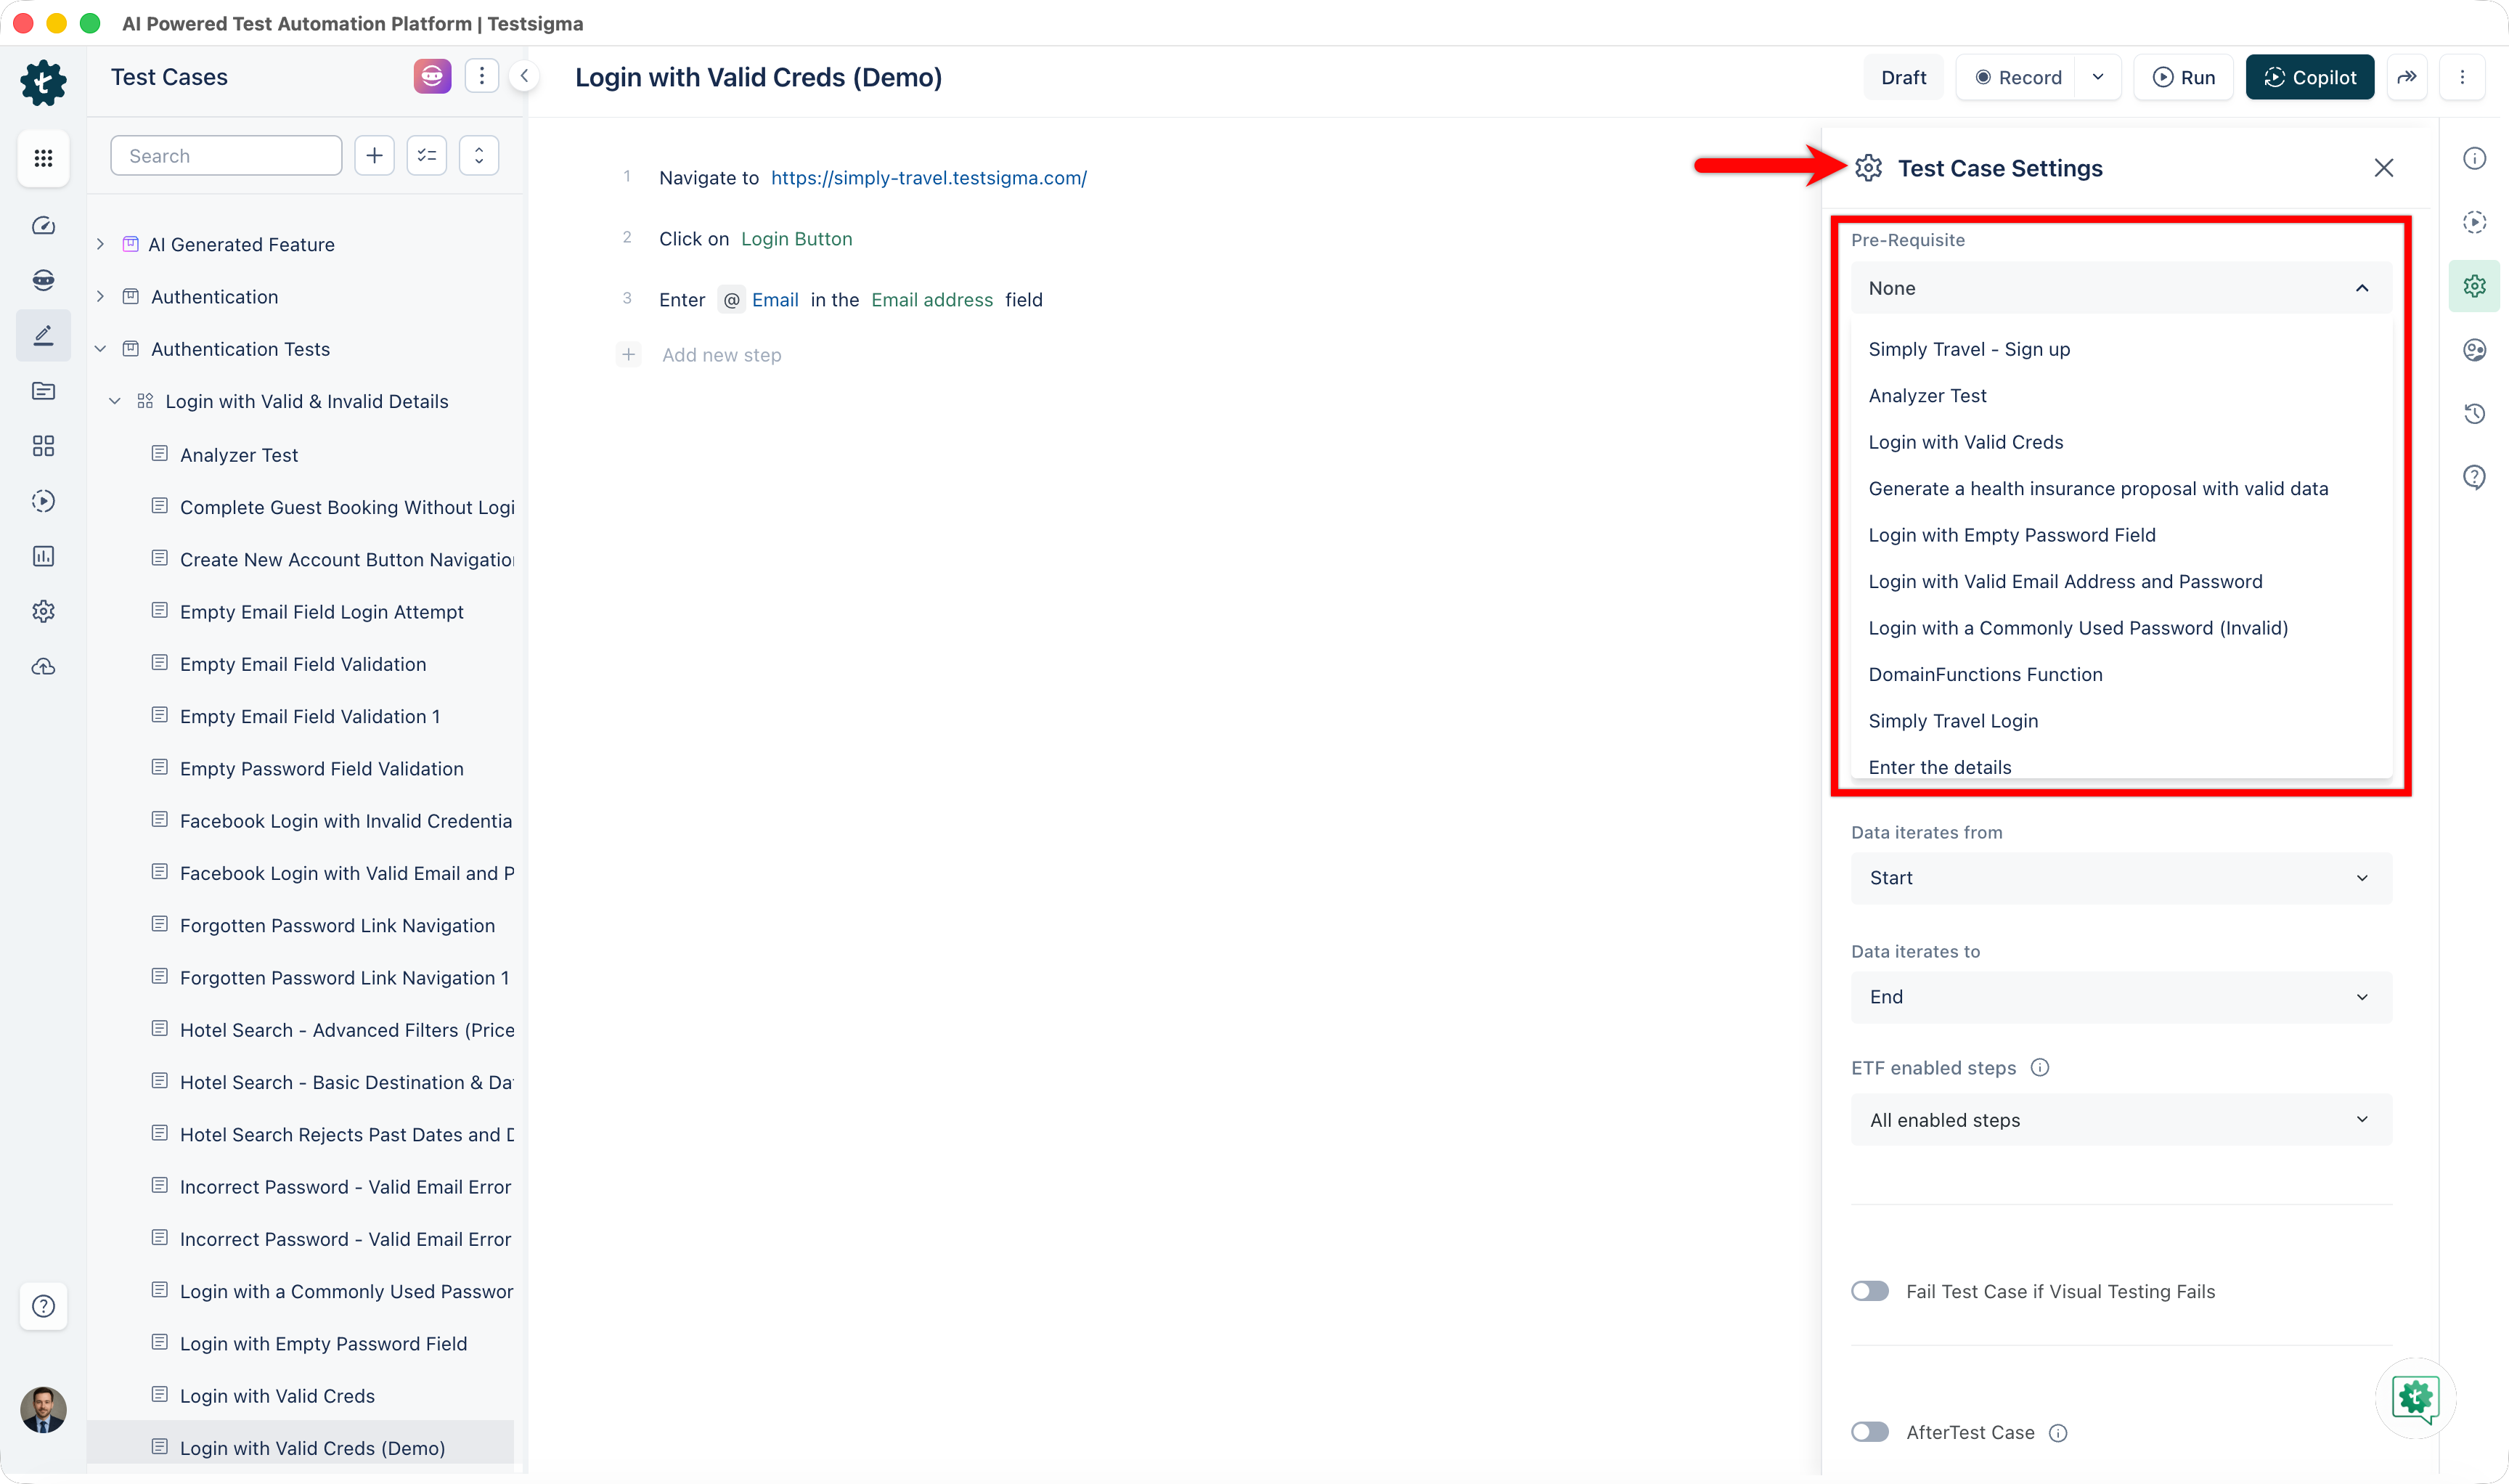
- On the Test Case details page, click on Test Case Settings from the right navigation bar.
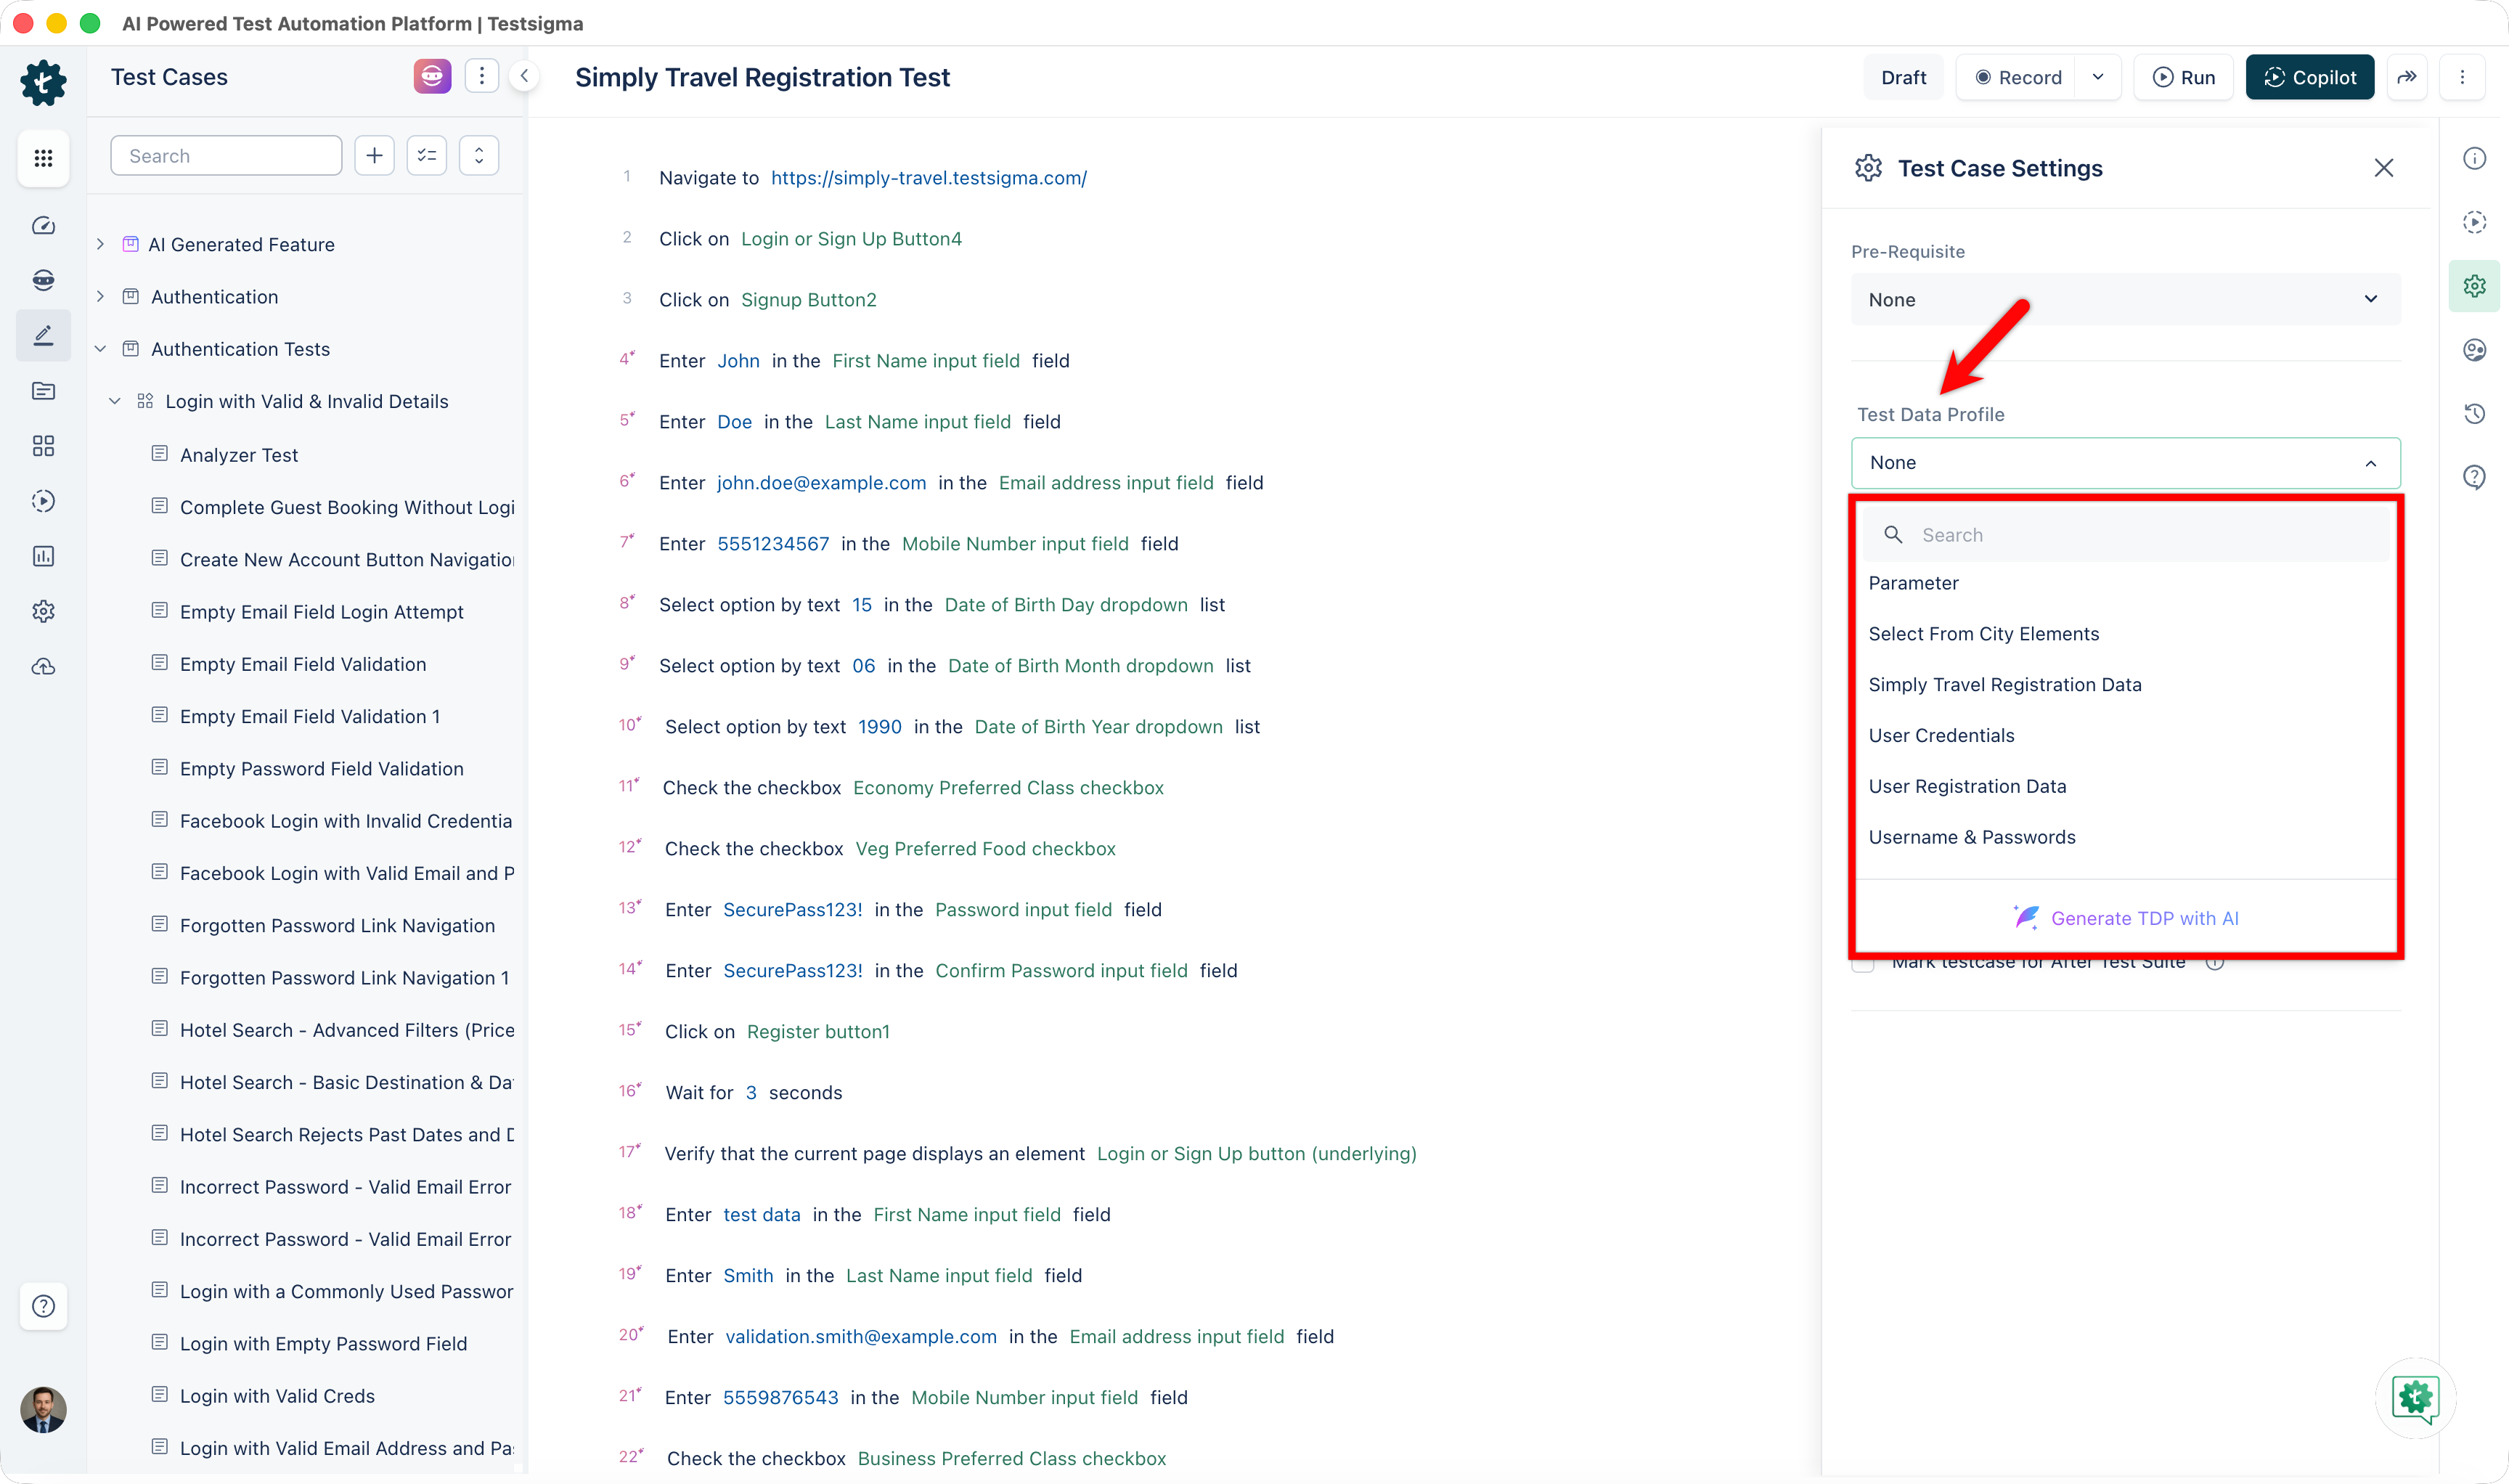
- In the Test Case Settings page, choose a Test Data Profile from the dropdown menu.
-
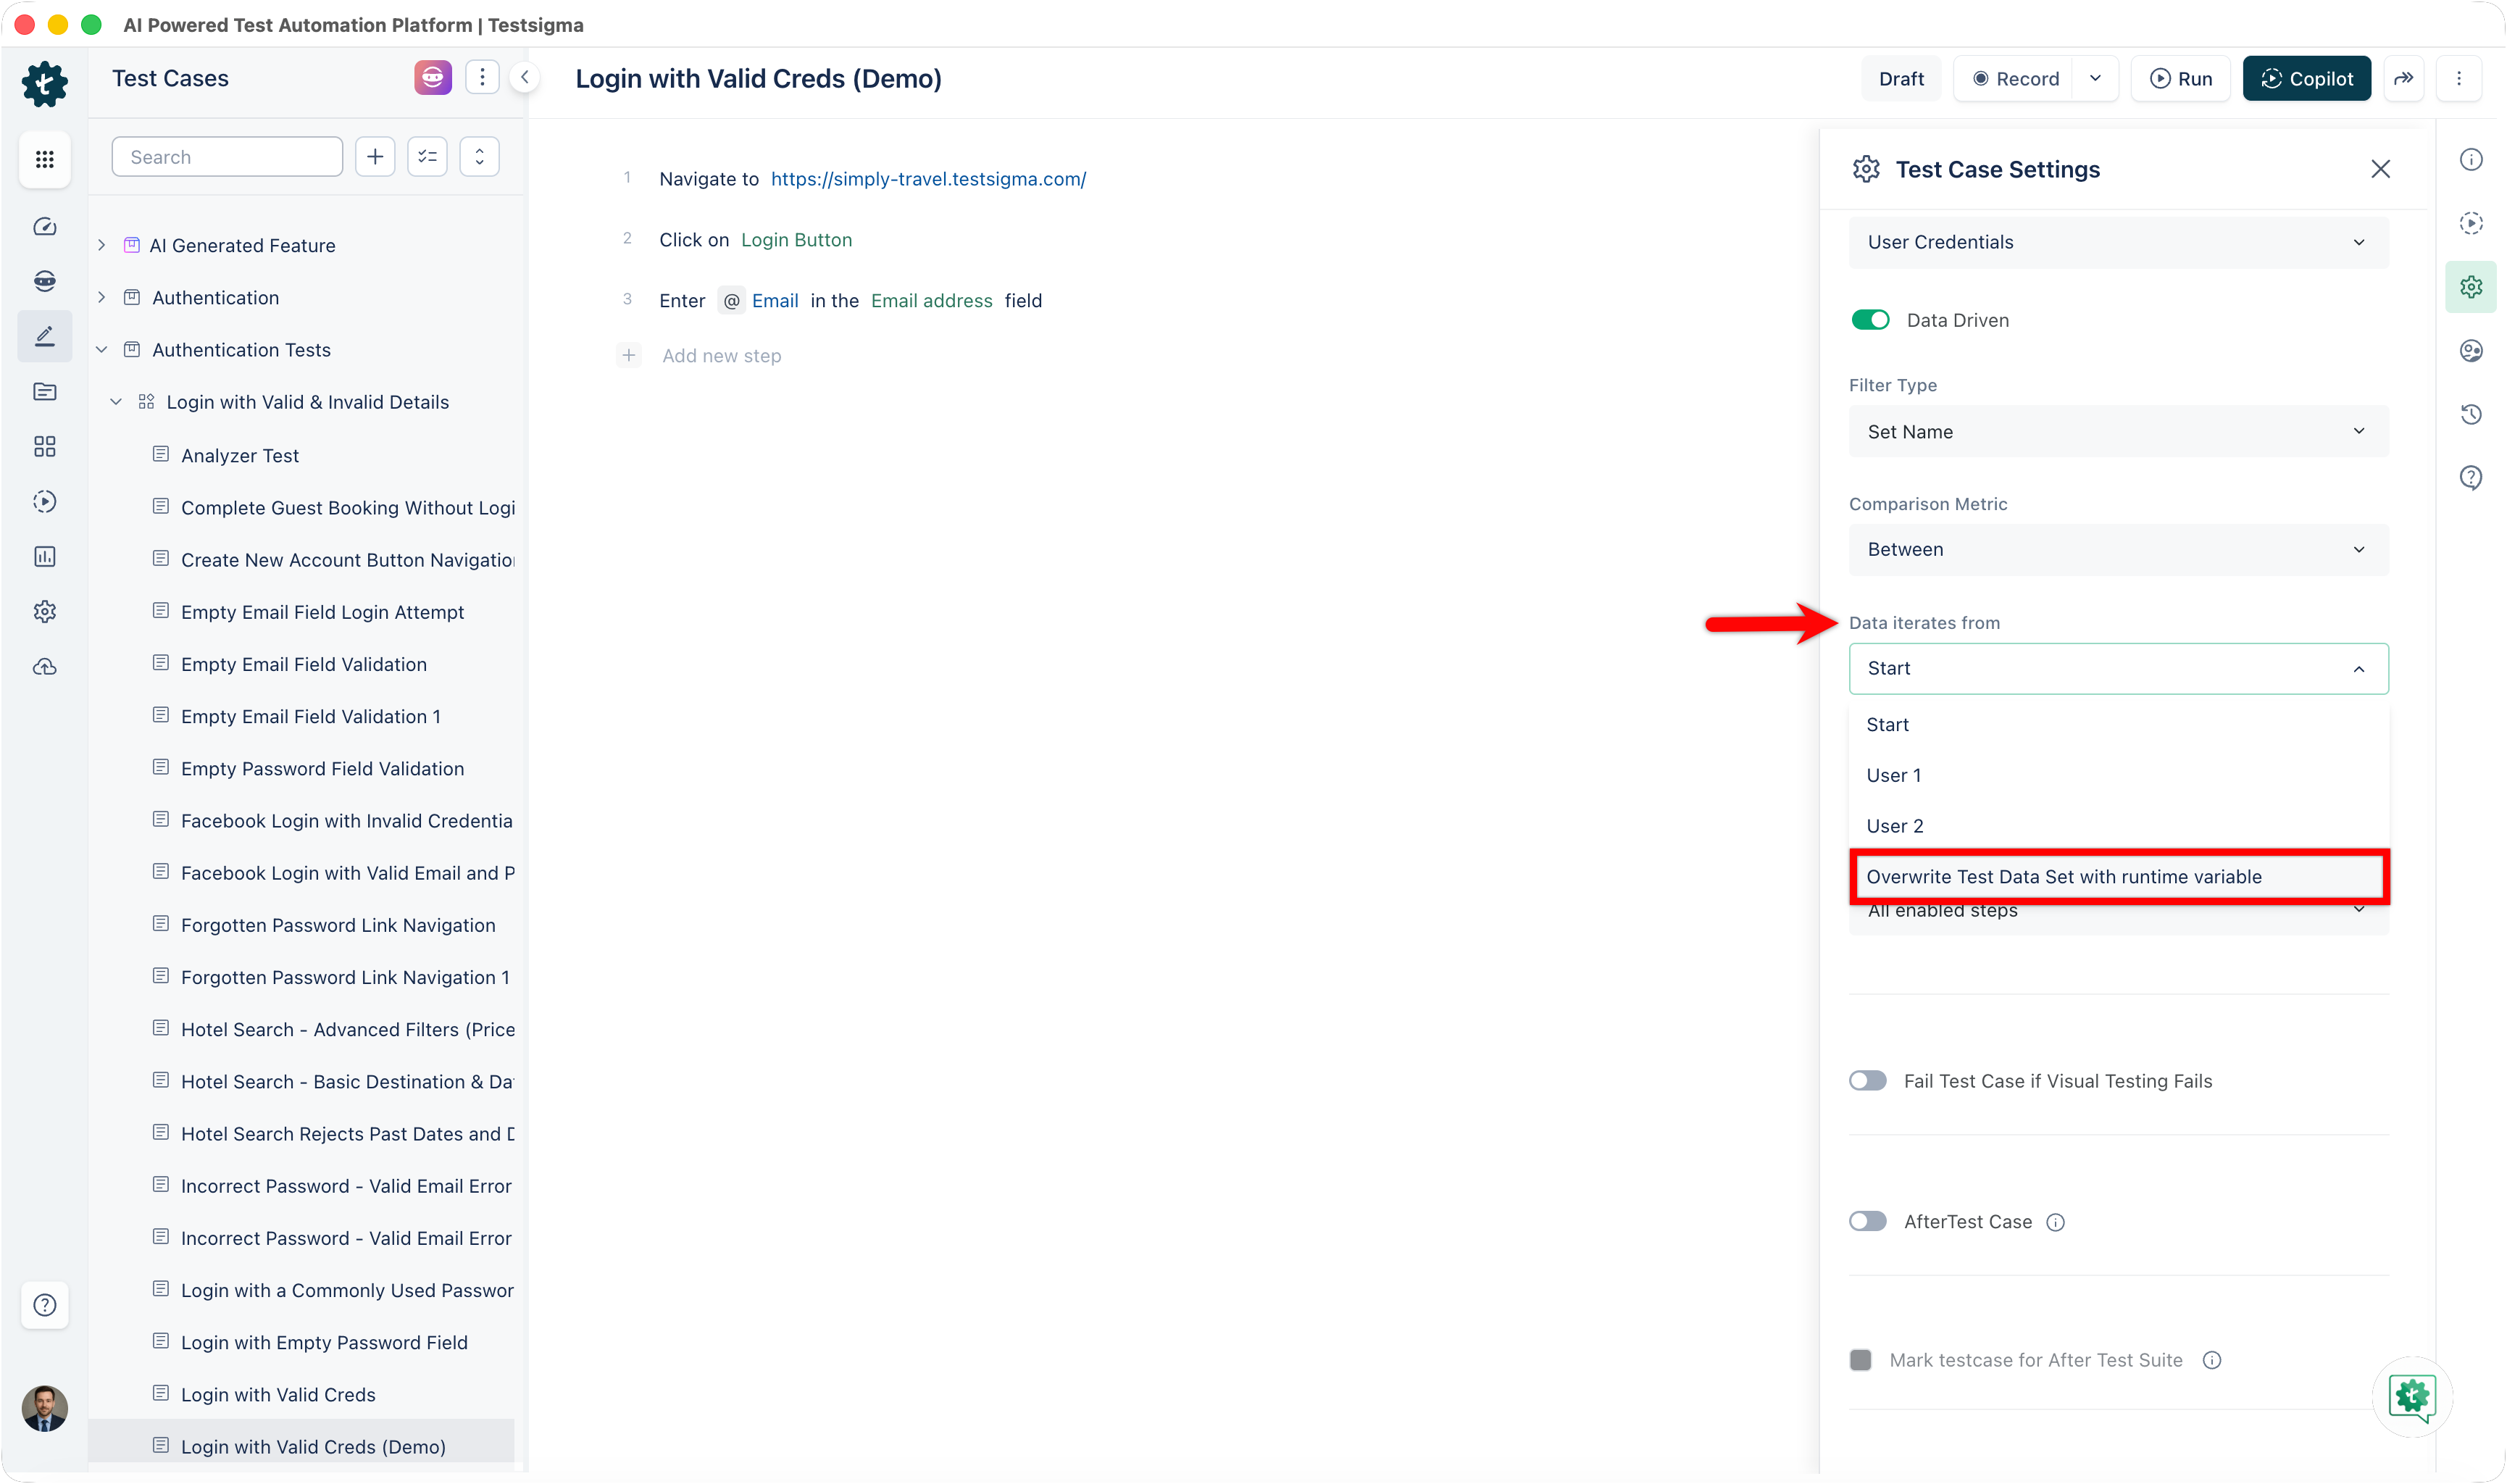
Enable the Data-Driven toggle.
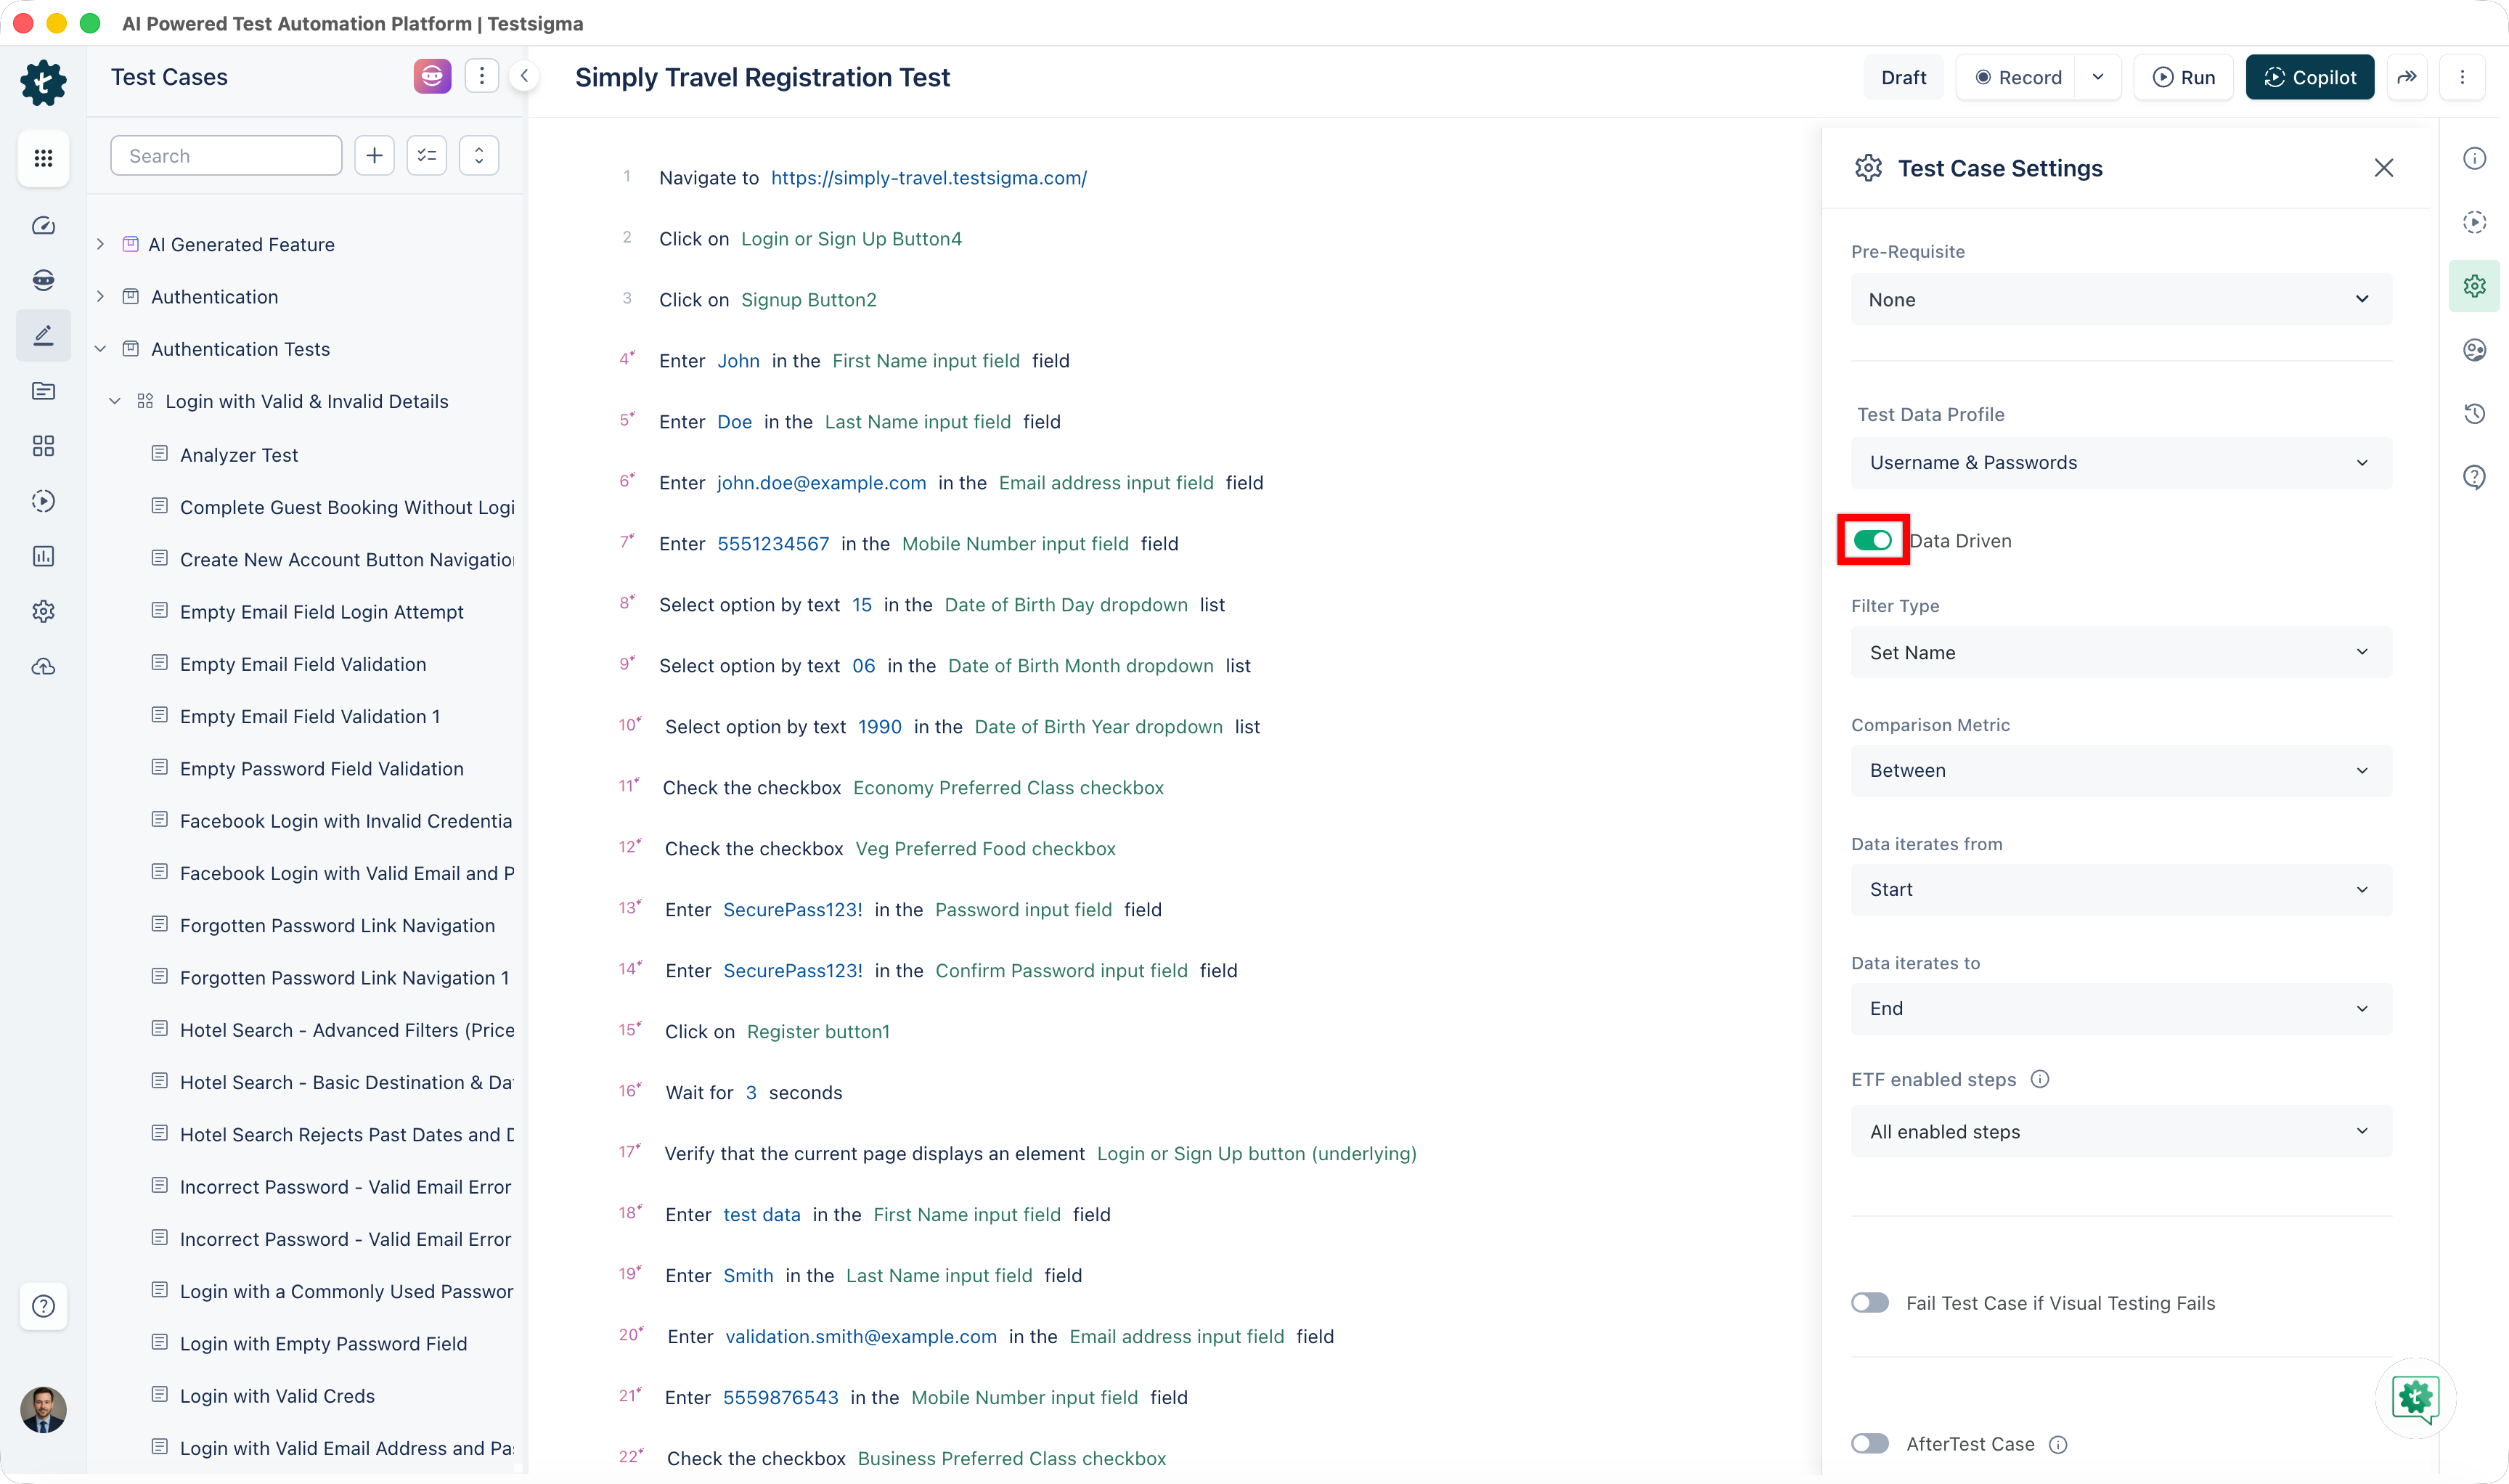 After enabling the toggle, use the following filters to control which data sets are used in the test case:
Filter Description Iteration Filters sequential data sets using greater than, less than, or between operations. Set Name Filters non-sequential data sets by name using equals, contains, starts with, or ends with. Parameter Filters non-sequential data sets by the parameters used in the data sets. 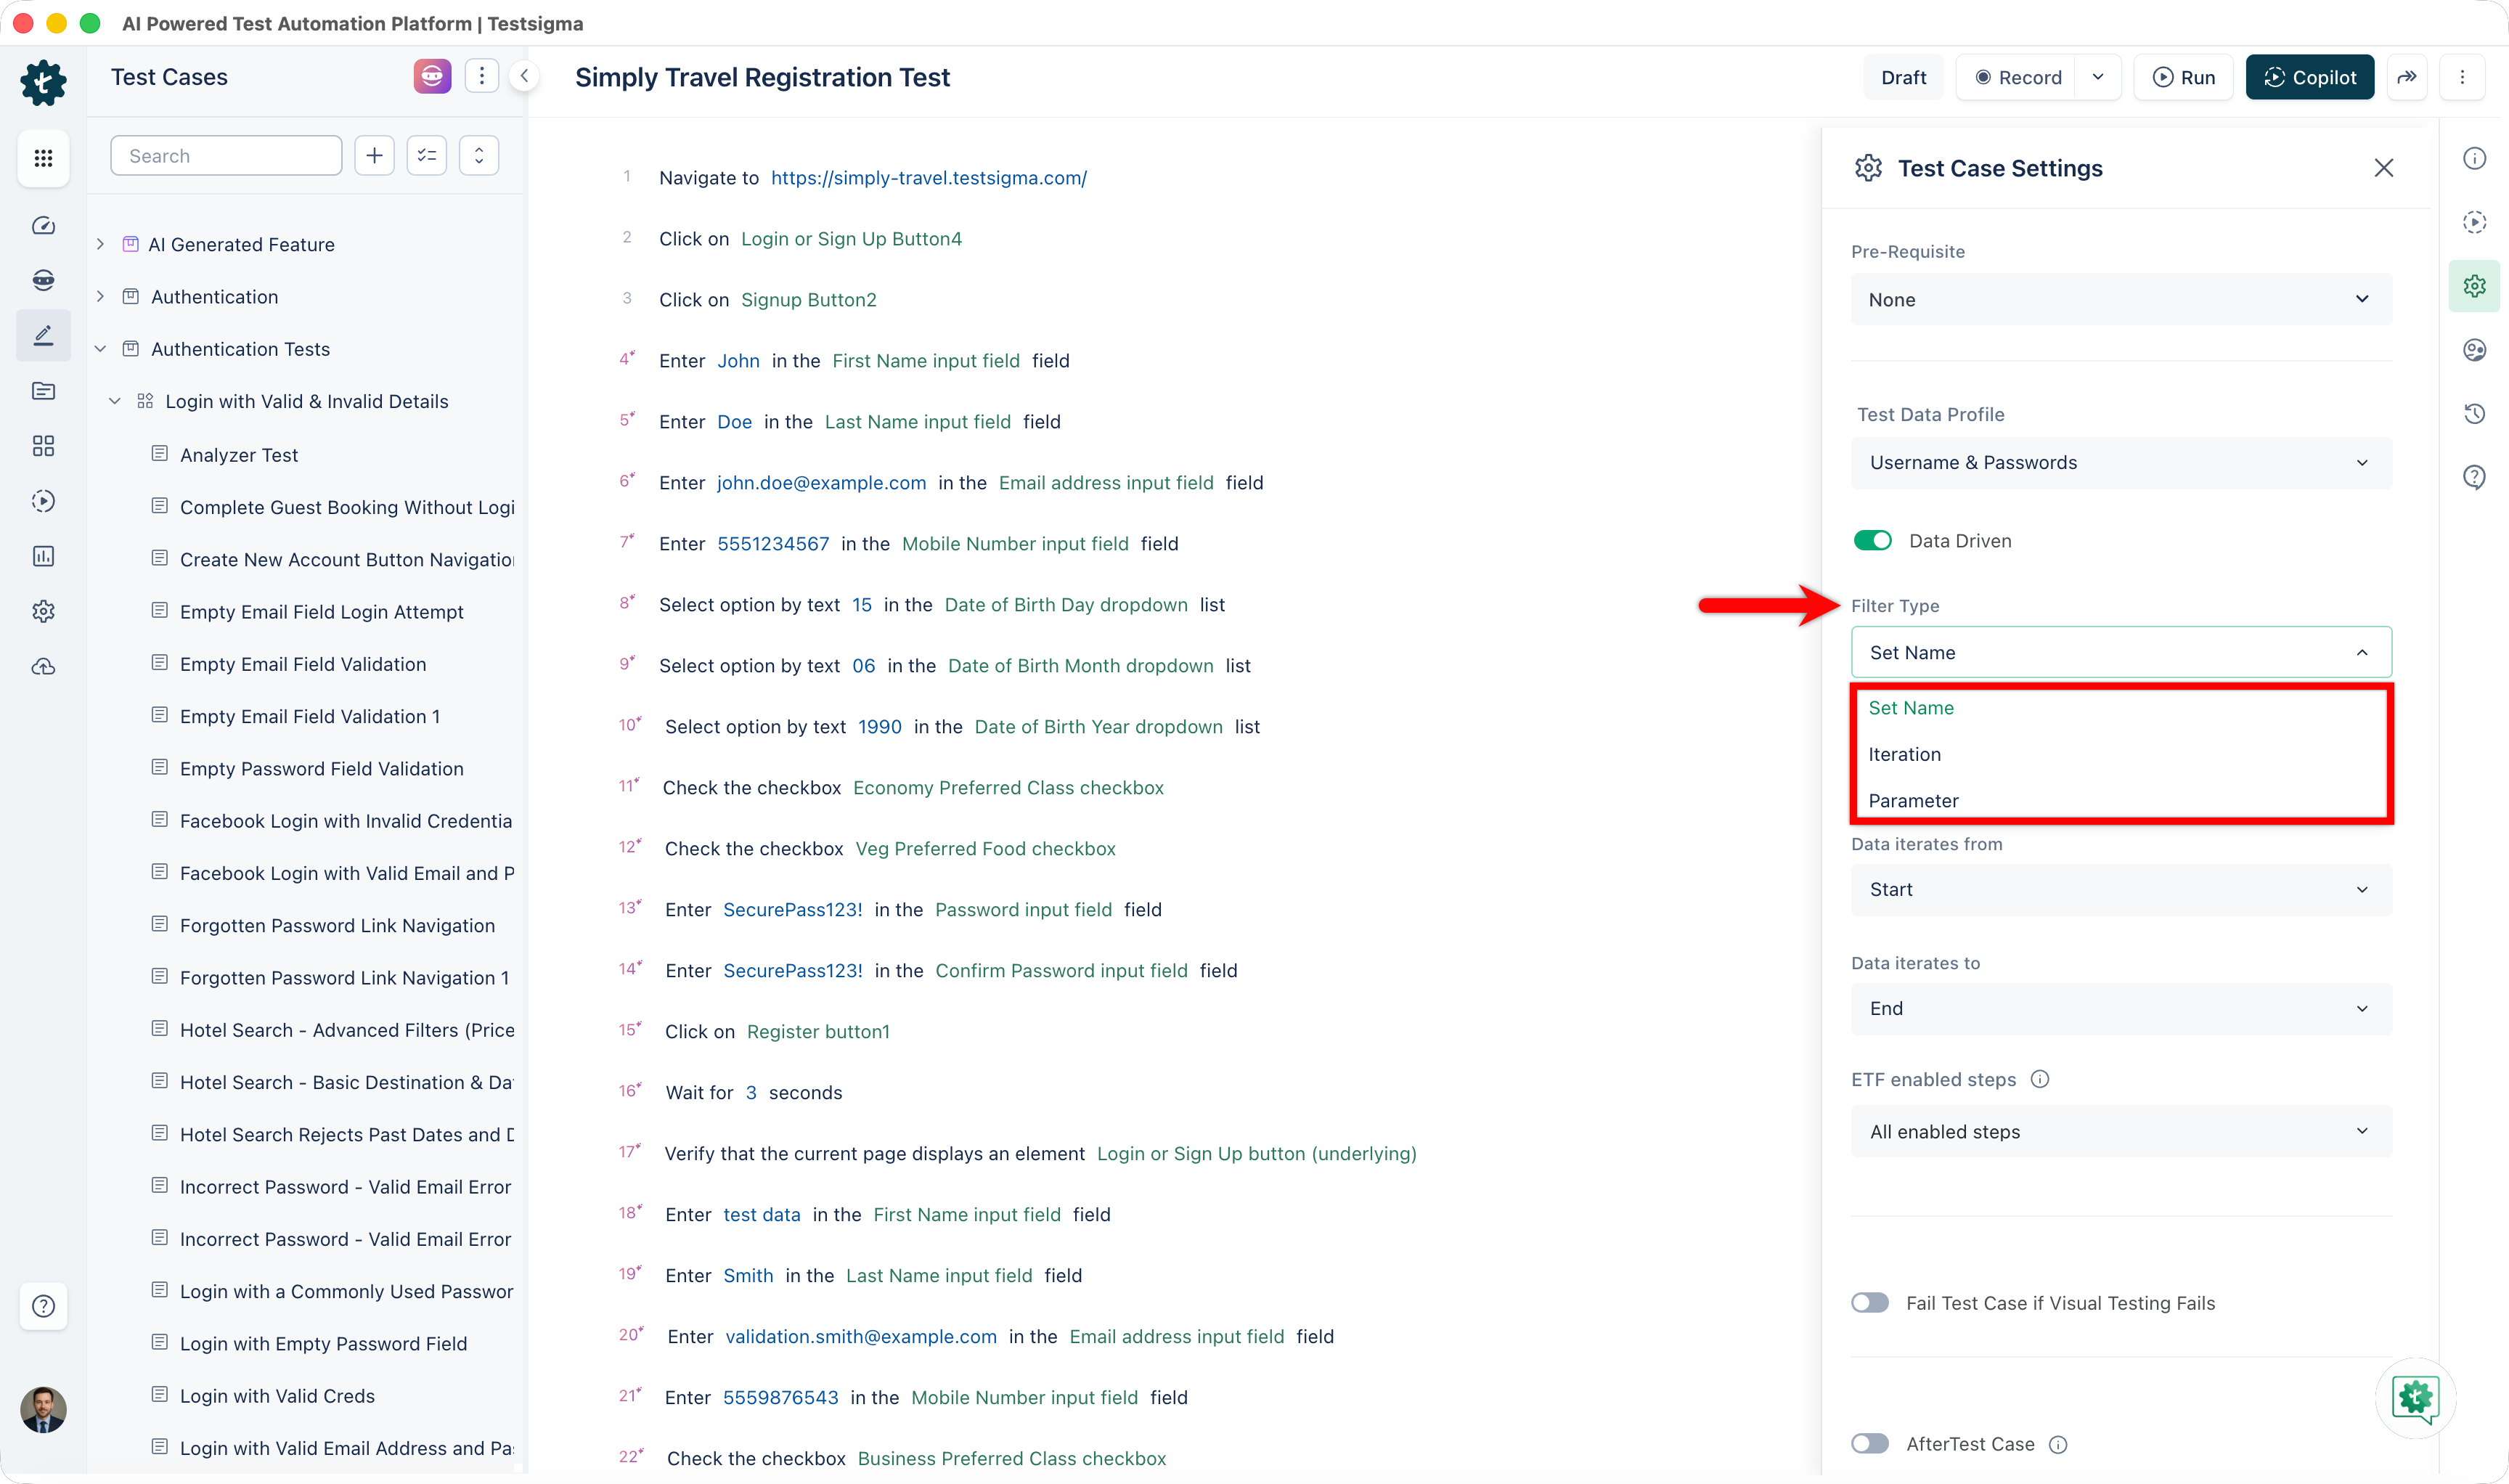
Use a Test Data Profile in a Test Case
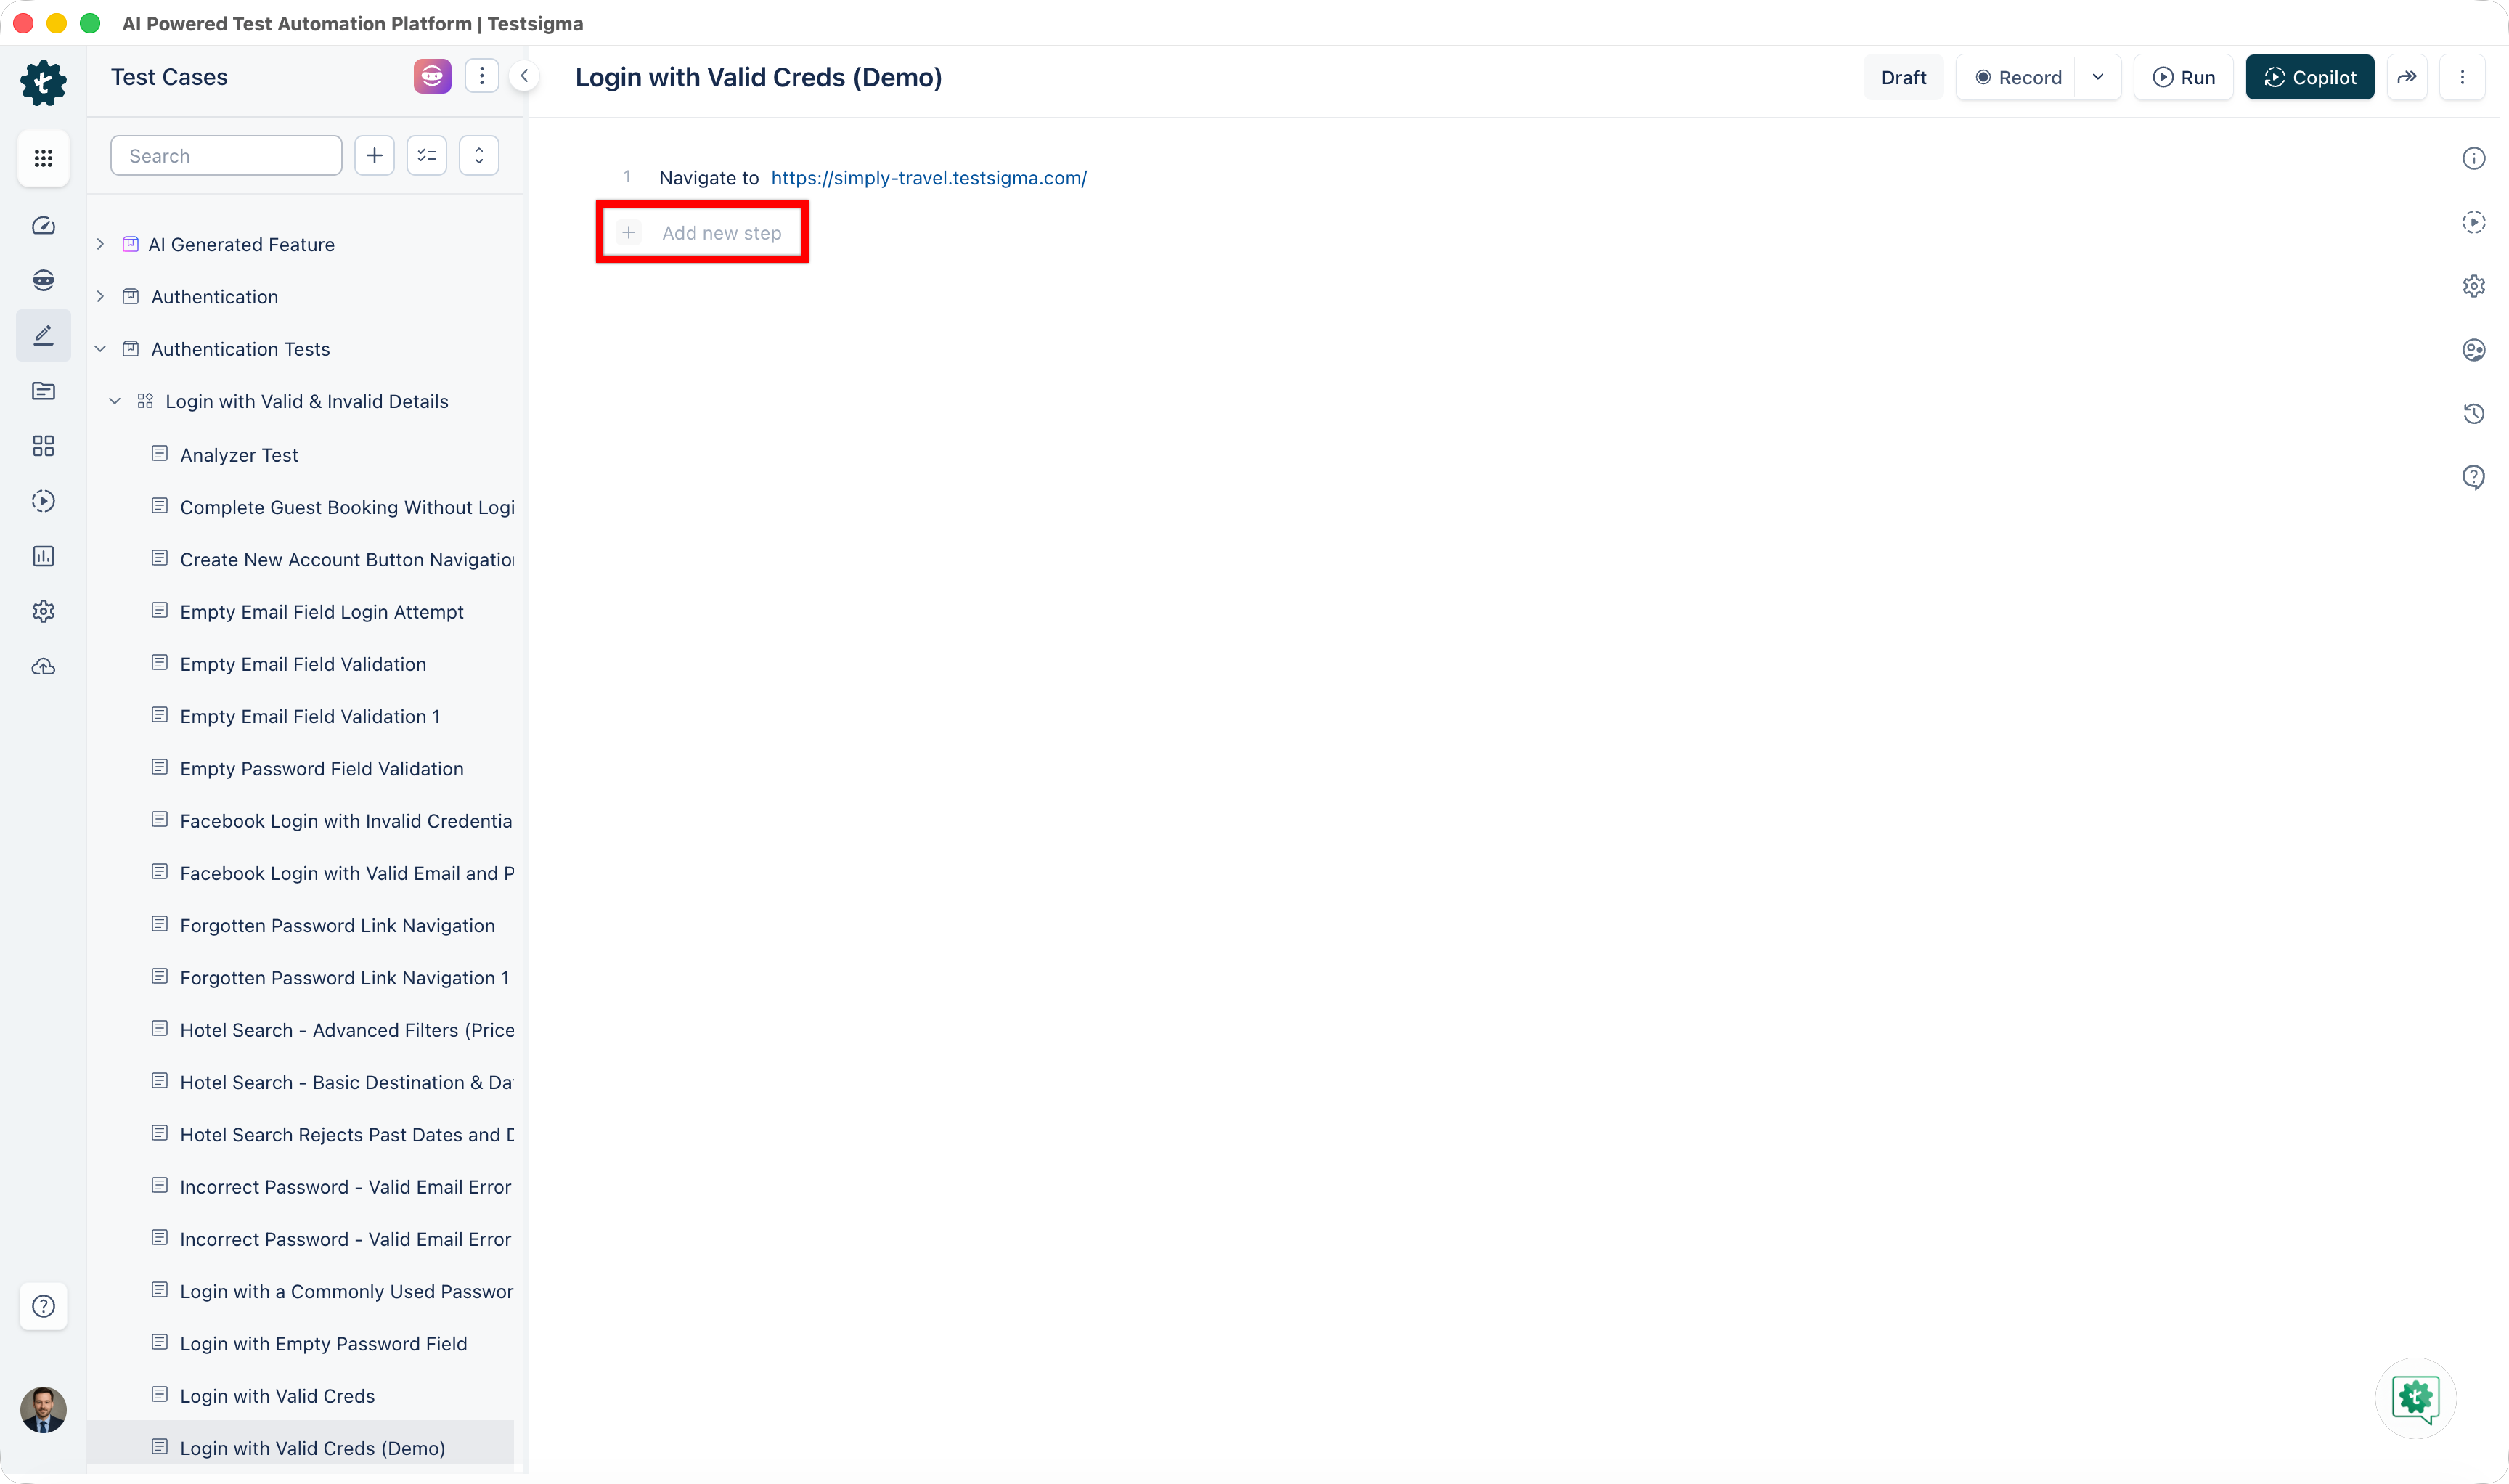
- On the Test Case Details page, click Add new step.
- Use NLP to create a new test step that includes a placeholder for the test data.
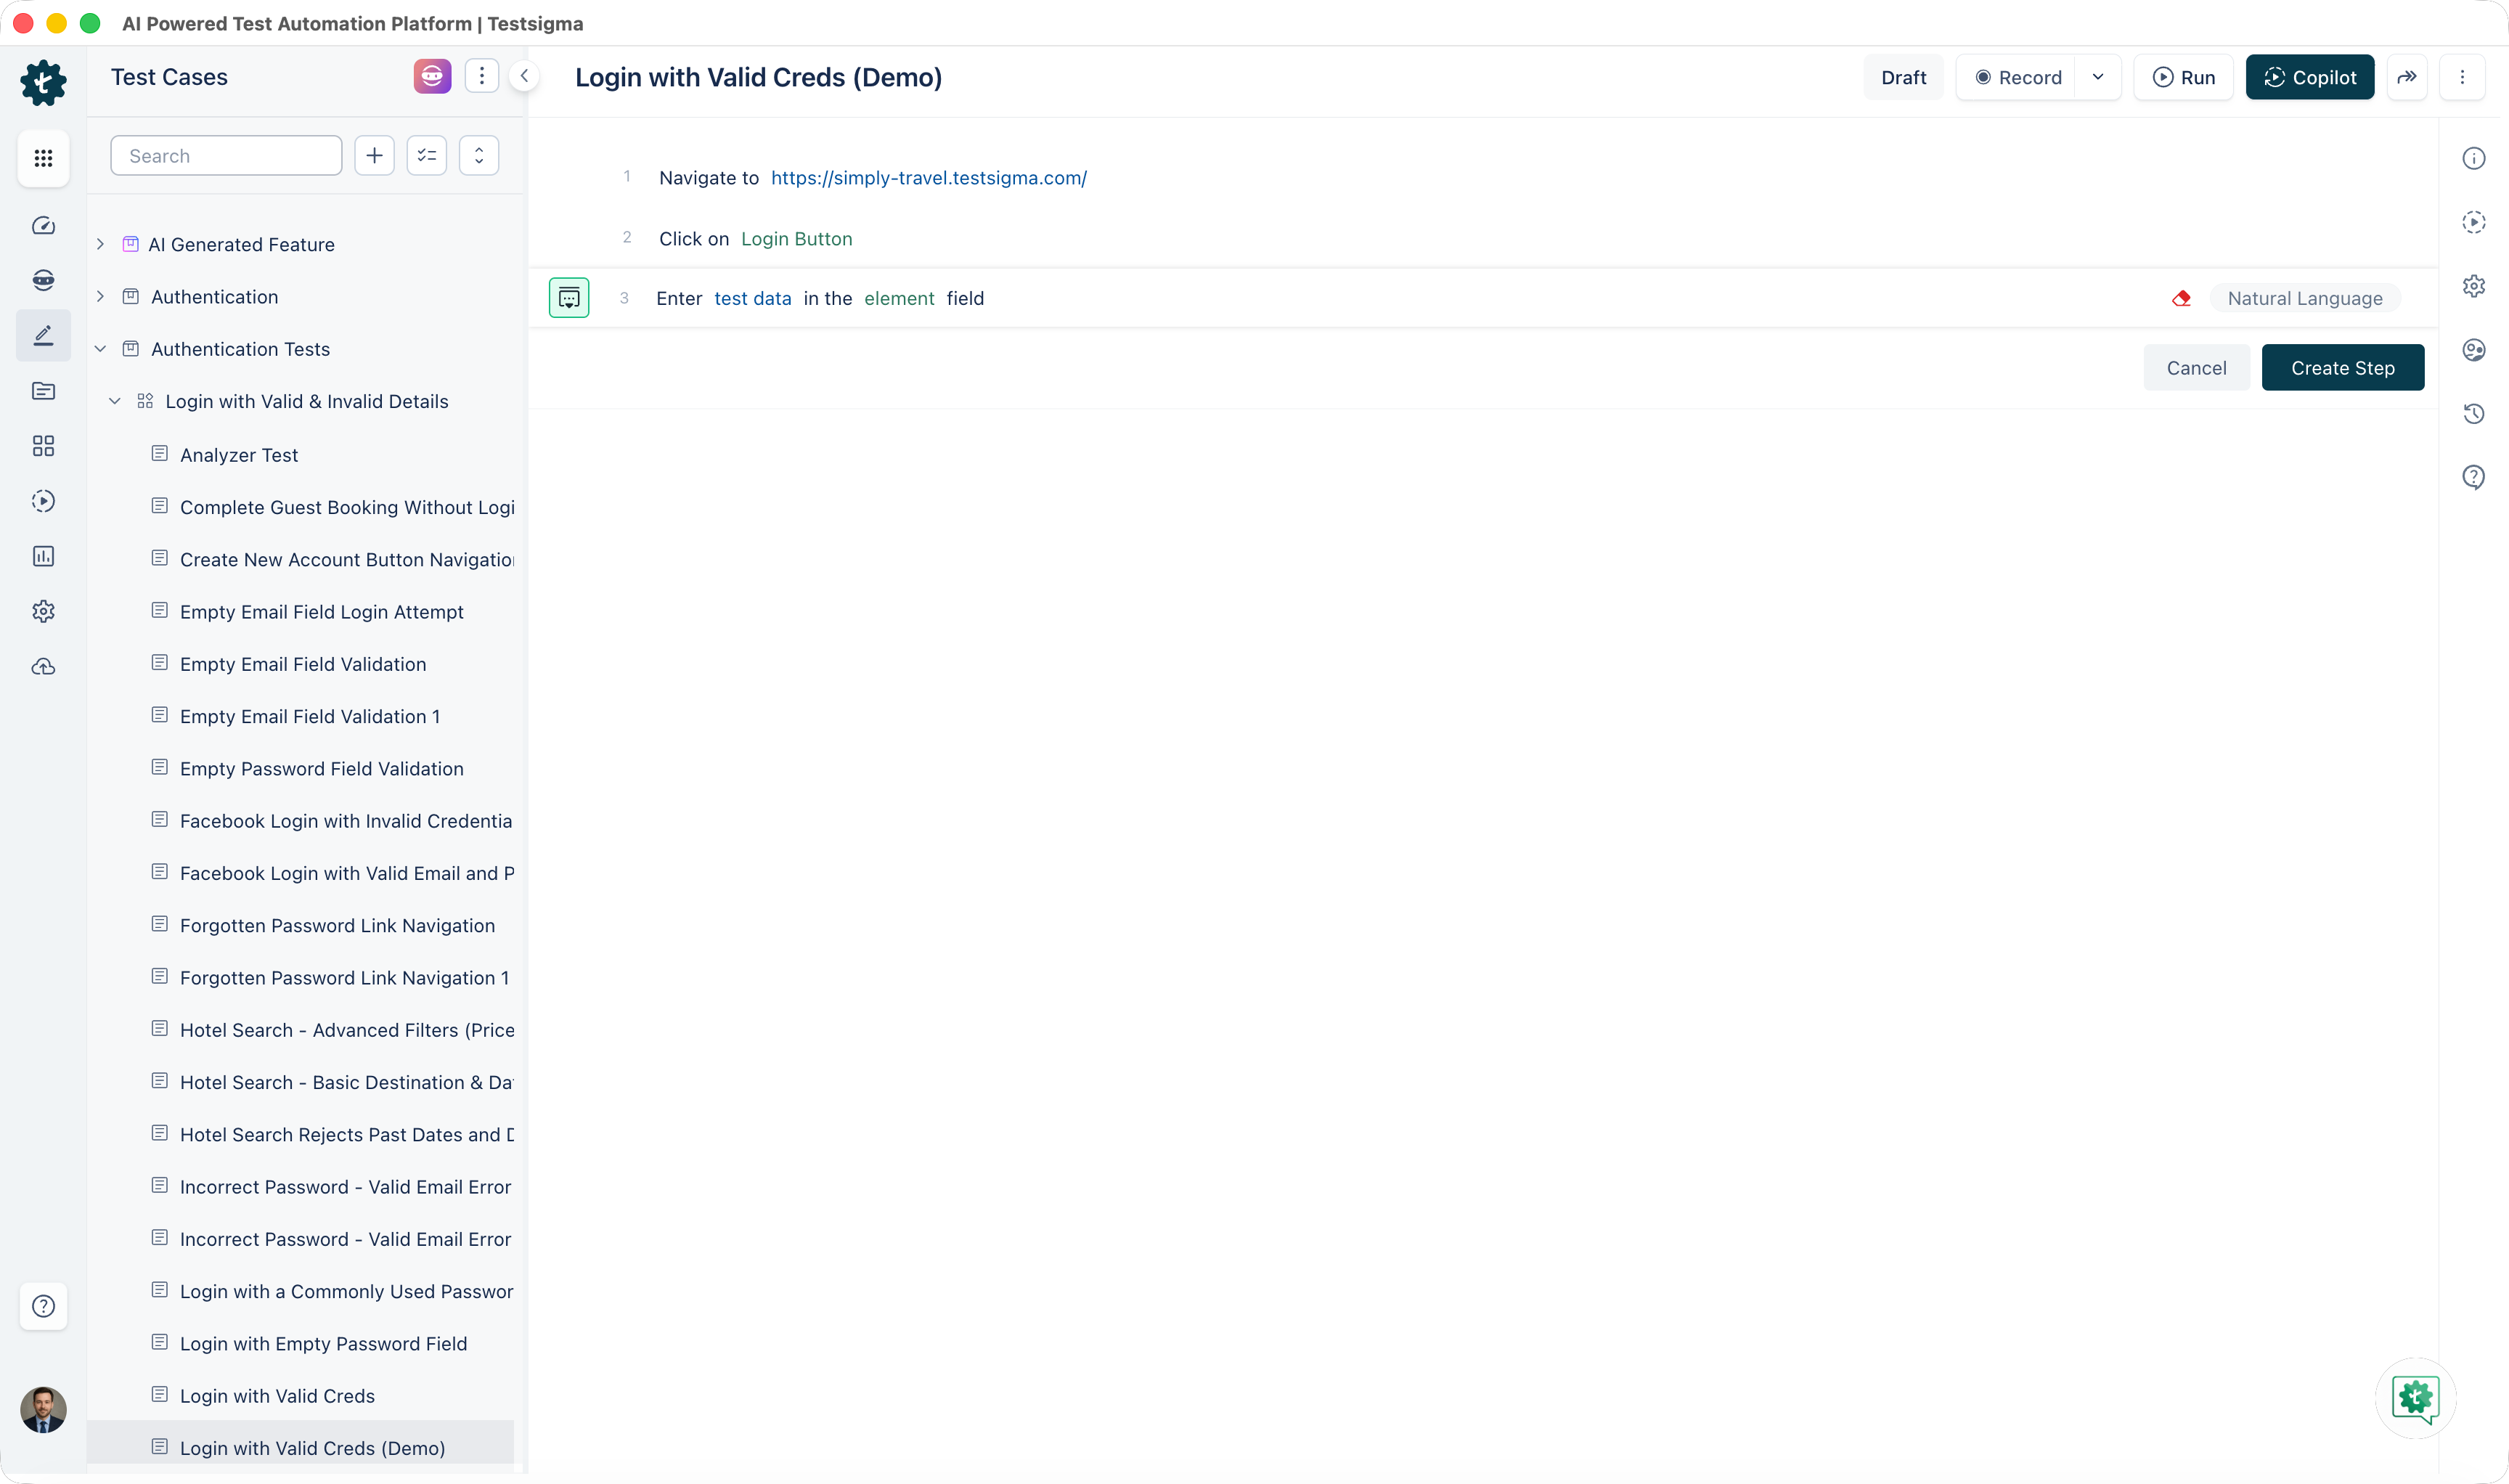
- Click the test data placeholder.
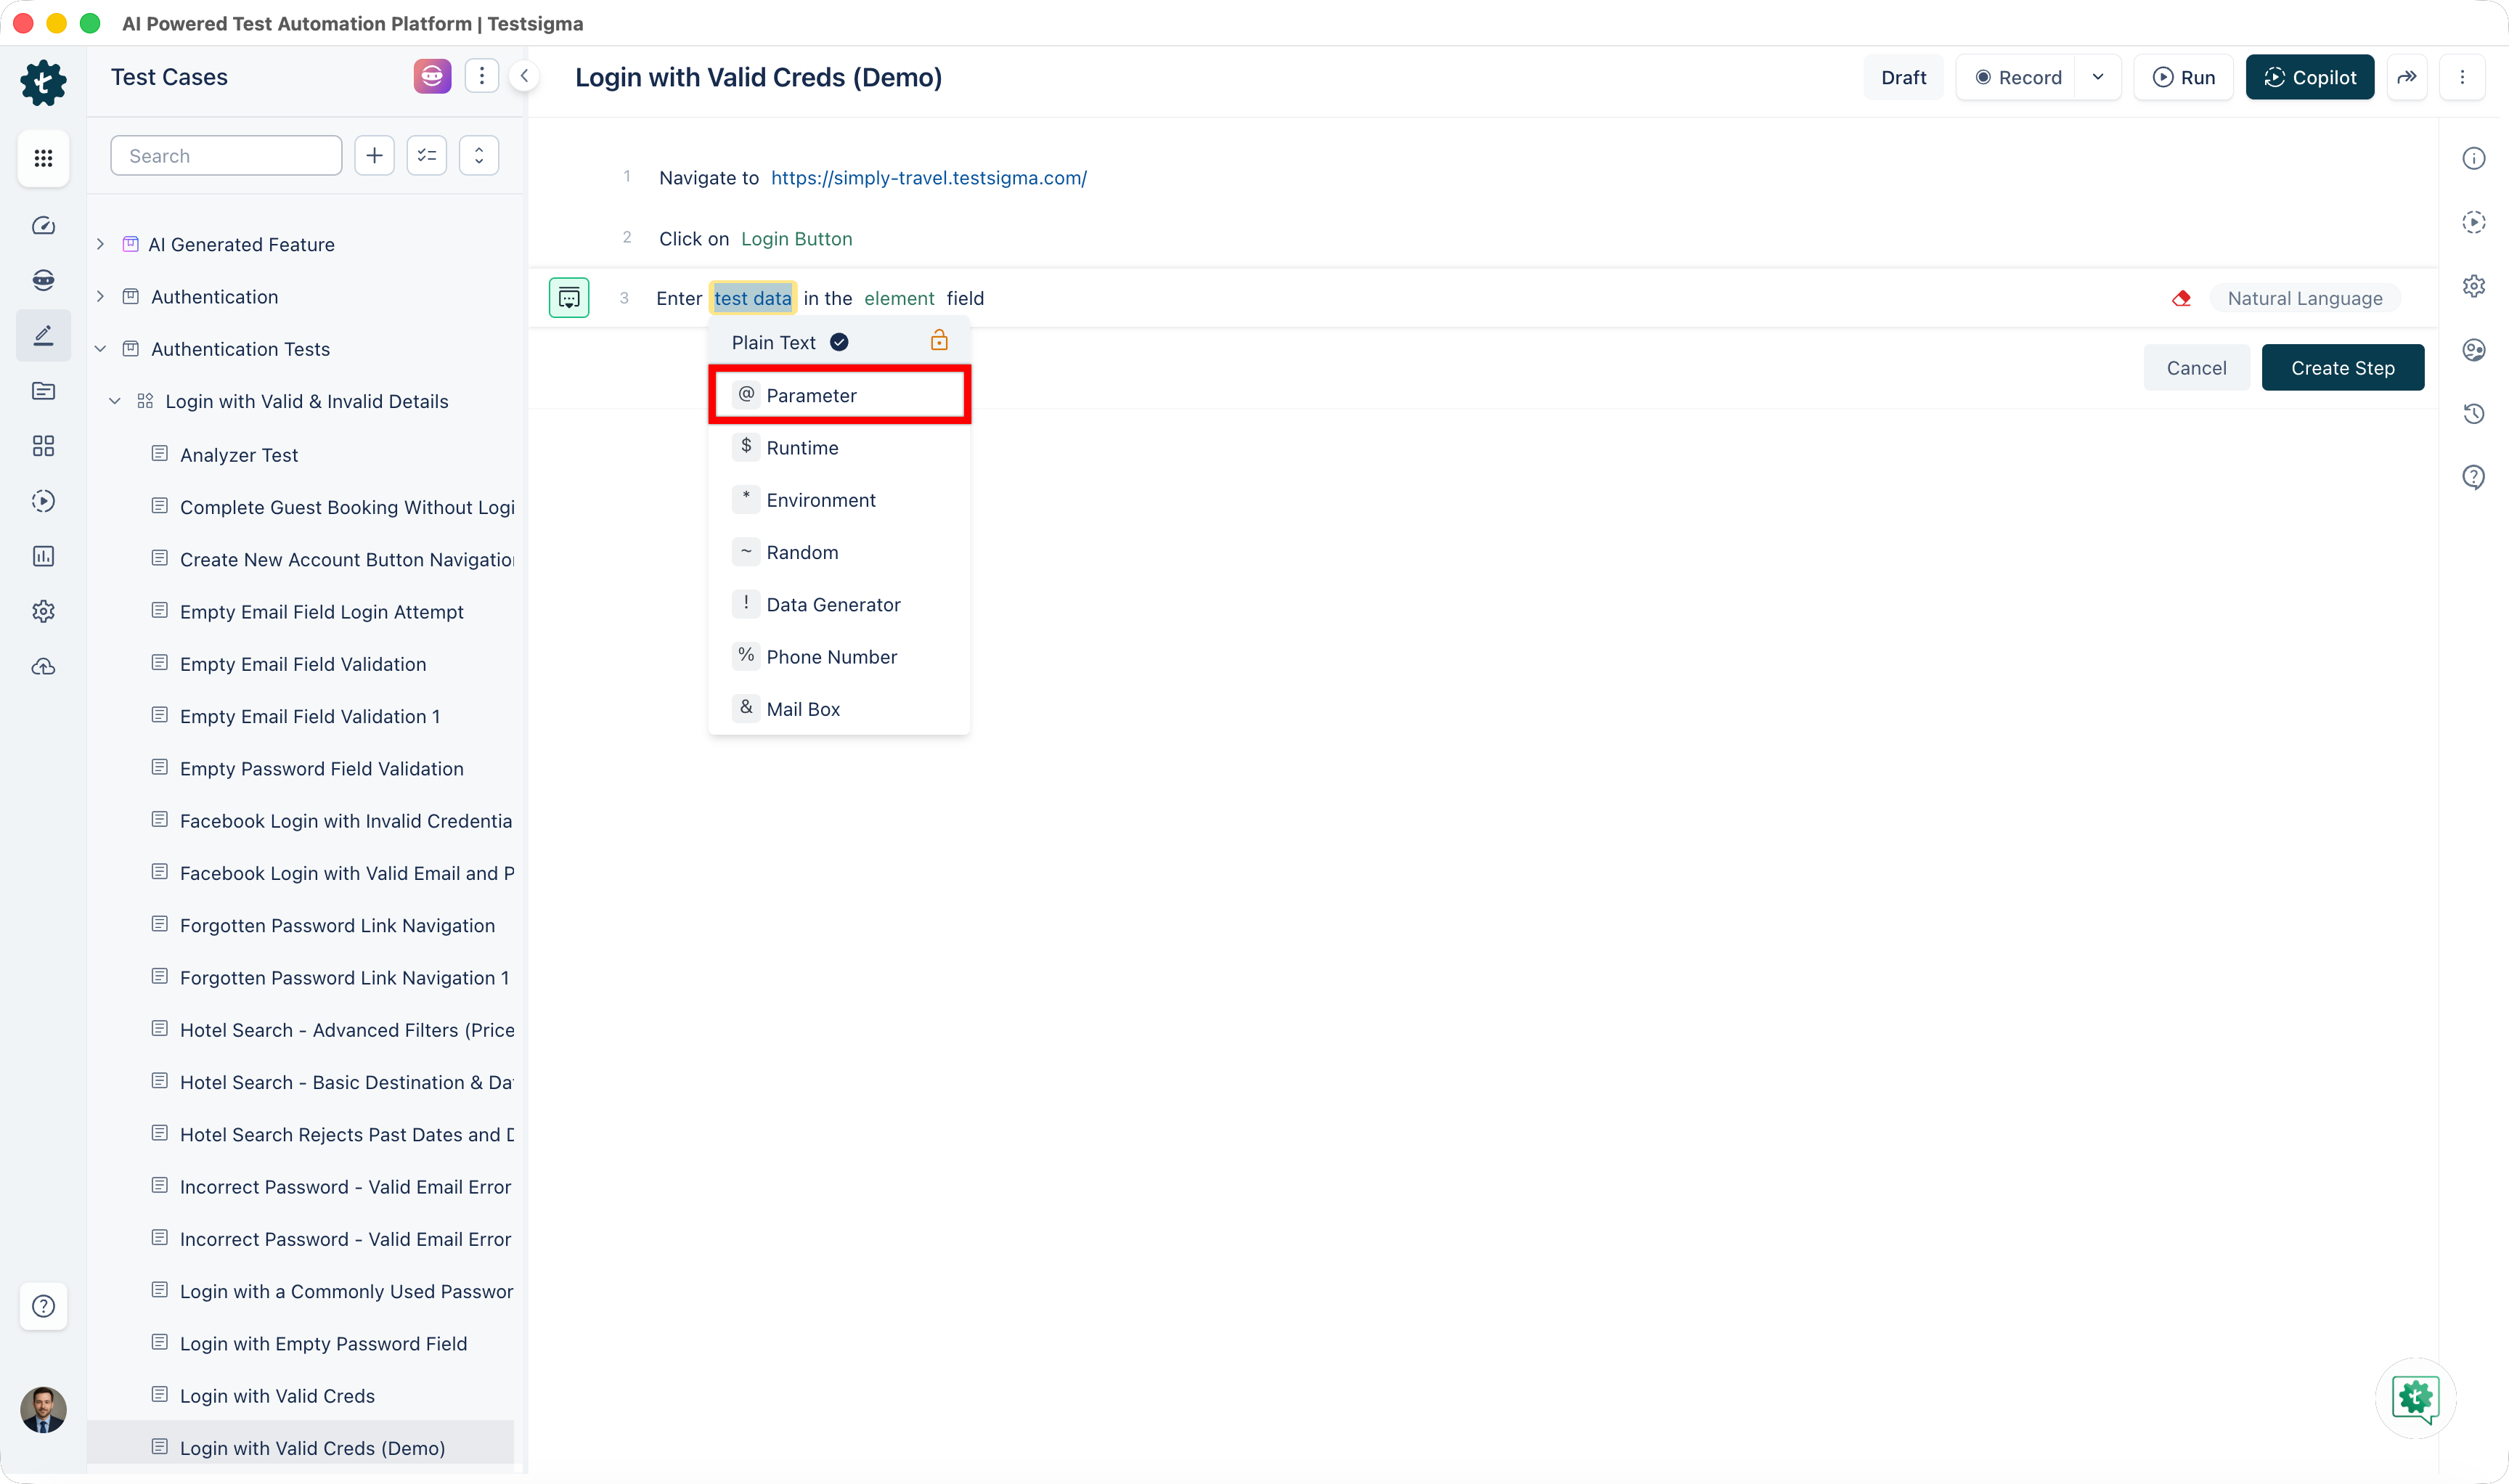
- From the test data types dropdown, select @ Parameter .
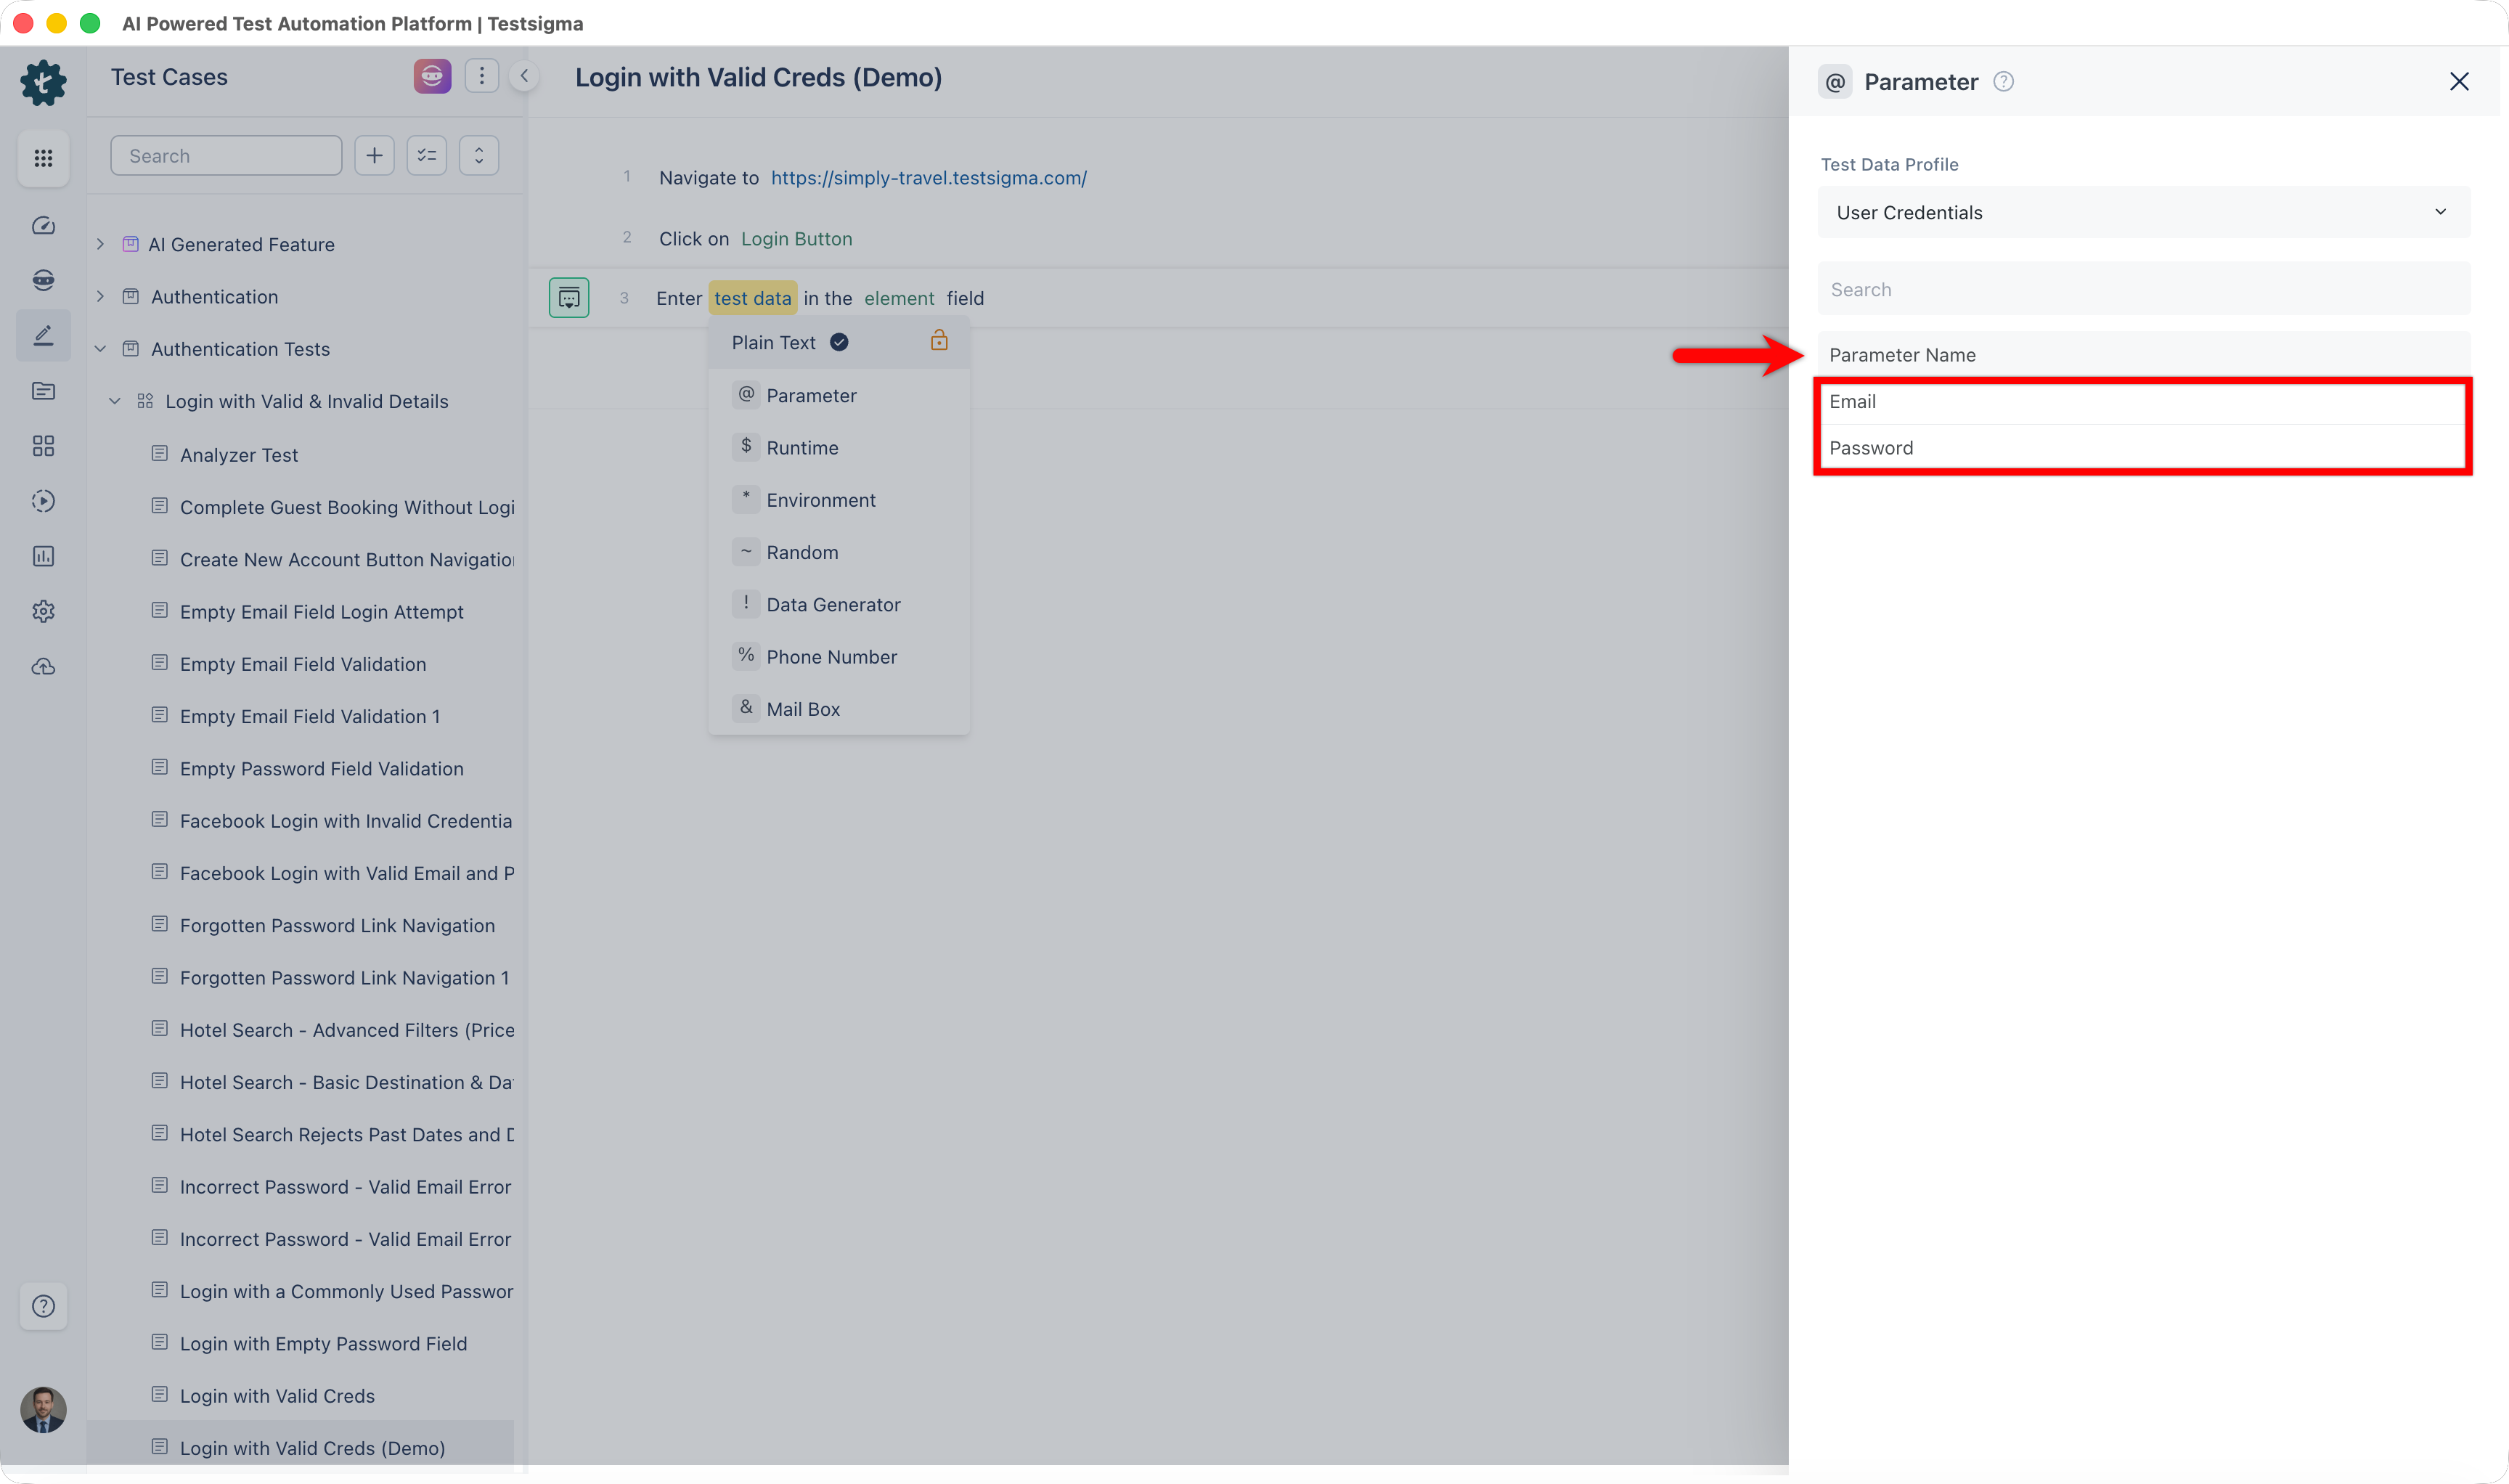
- In the right panel, select the parameter.
Run Data-Driven Tests with Dynamic Data Sets
By default, data-driven tests iterate values from start to end. To start iteration from a specific point, store start and end values as runtime variables in a prerequisite test case.
Set Variables in a Prerequisite Test Case
- From the left navigation bar, go to Create Tests > Test Cases and create or open an existing test case.
- In your test steps, store the start and end data values using the variables RunTime_TestData_Set_Start and RunTime_TestData_Set_End.

-
RunTime_TestData_Set_Start = "delhi";
RunTime_TestData_Set_End = "bangalore";
For example, assign
Create Data-Driven Test Cases with Dynamic Data Sets
- On the Test Case Details page, select Test Case Settings.
- From the Prerequisite dropdown, select the prerequisite test case.
- Enable the Data-Driven toggle.
- For the Data Iterates From dropdown, select Overwrite Test Data Set with a runtime variable.
- For the Data Iterates To dropdown, select Overwrite Test Data Set with a runtime variable.
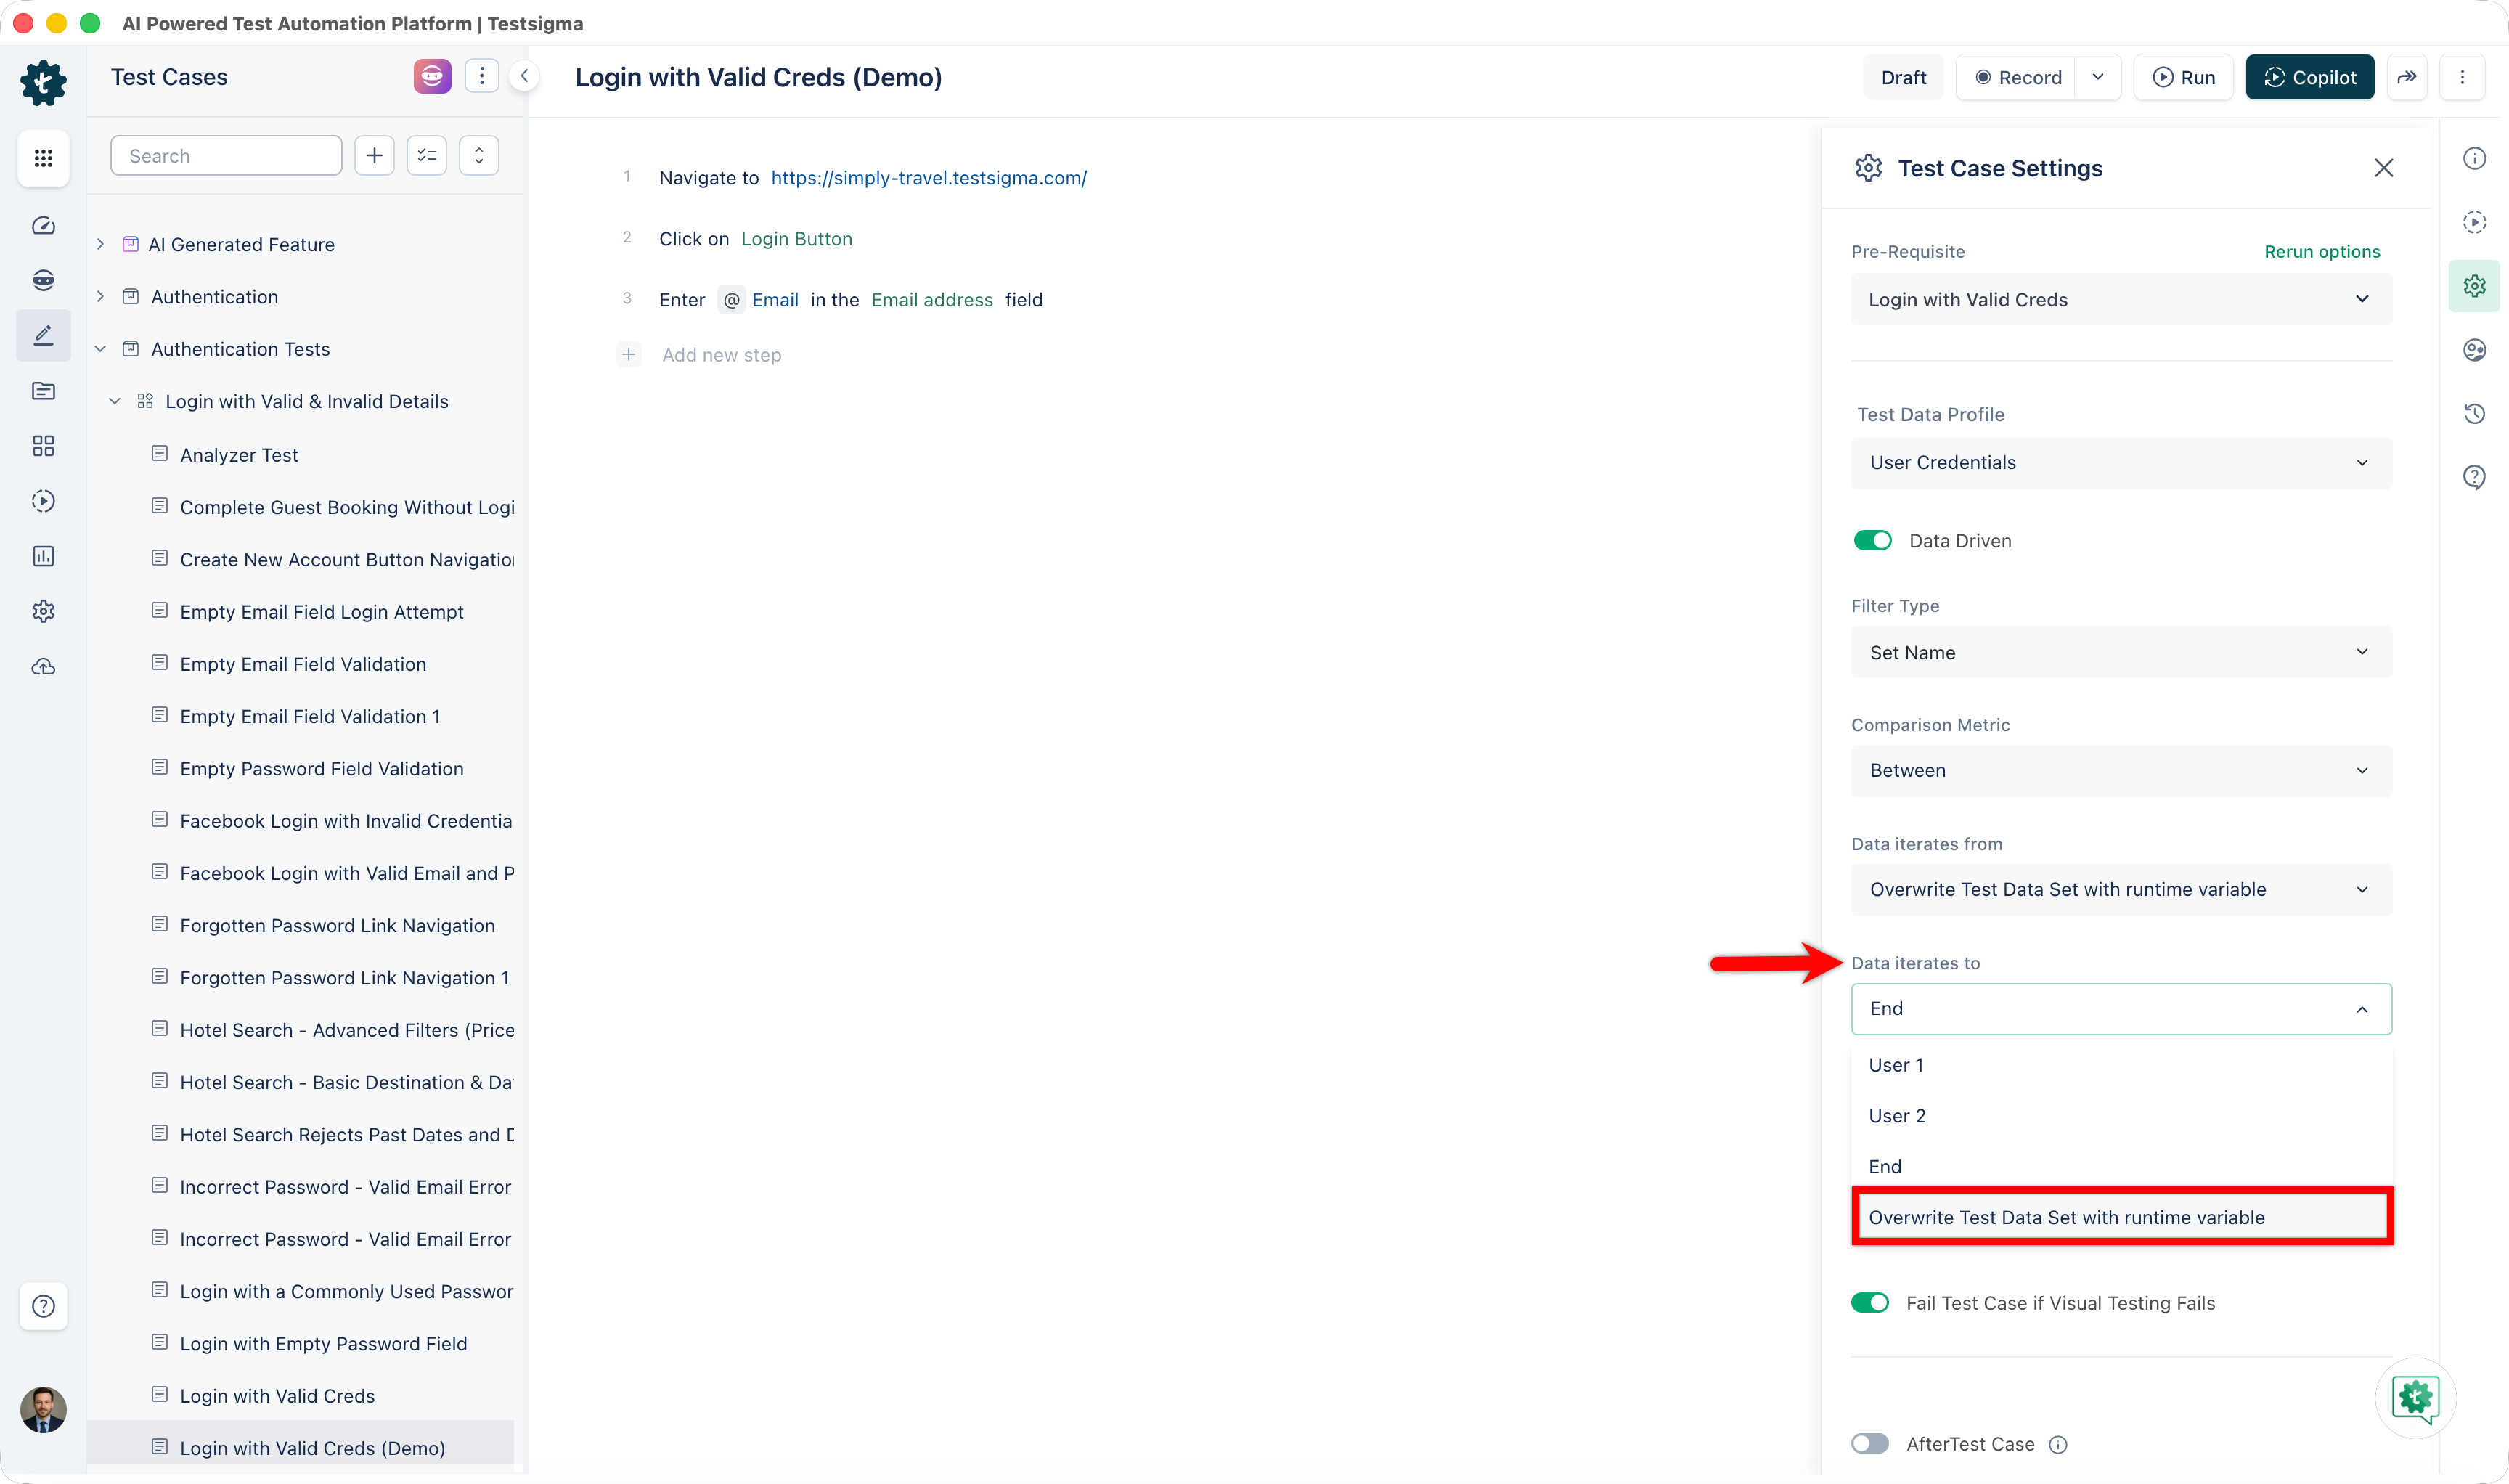
- Create the test steps, then click Run to execute the test case.
Additional Actions on Test Data Set Name
-
Store: Store the test data set name in a variable for later use. Use the following NLP syntax:
store-iteration-count-test-data-set-name - If Condition: Use test data set values from a Test Data Profile in an if condition. For more information, see Add-ons.
Generate a Test Data Profile Using AI
- On the Test Case Details page, go to Test Case Settings > Test Data Profile.
- Click the Test Data Profile dropdown menu.
- Click Generate TDP with AI. This will open the Test Data Generation dialog.
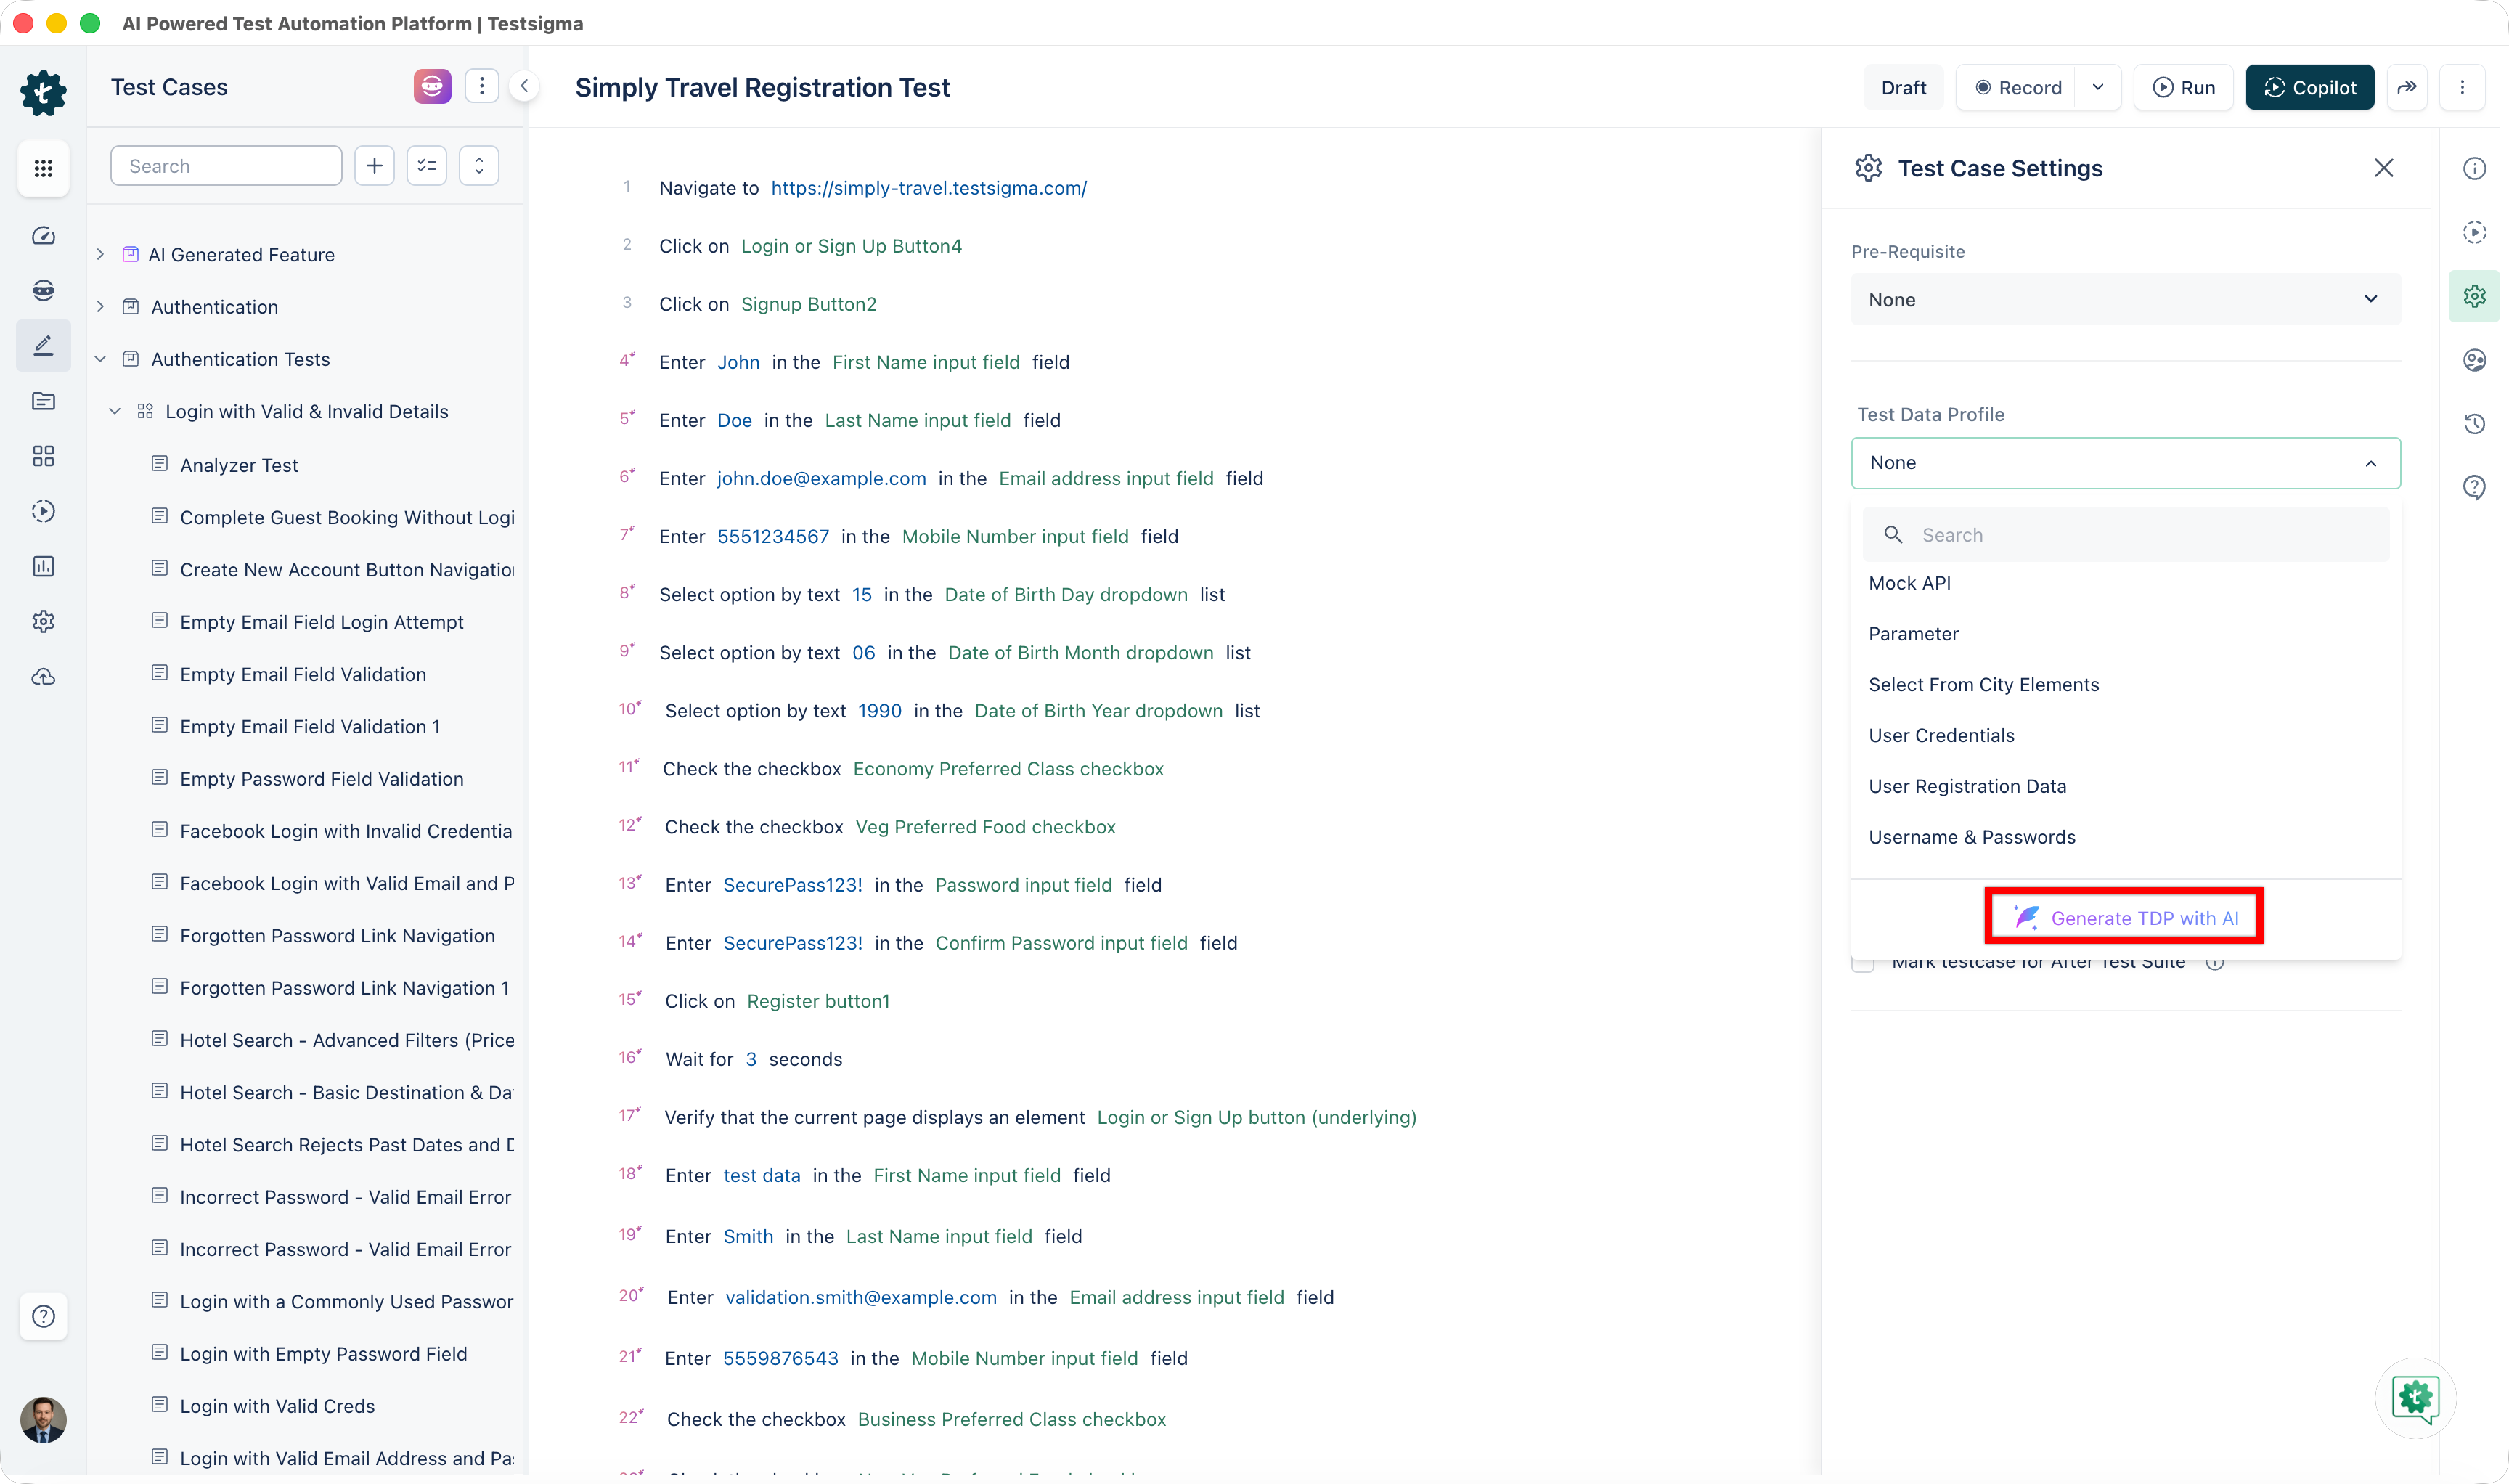
- In the Test Data Generation dialog, validate the Field Names, then click Generate.
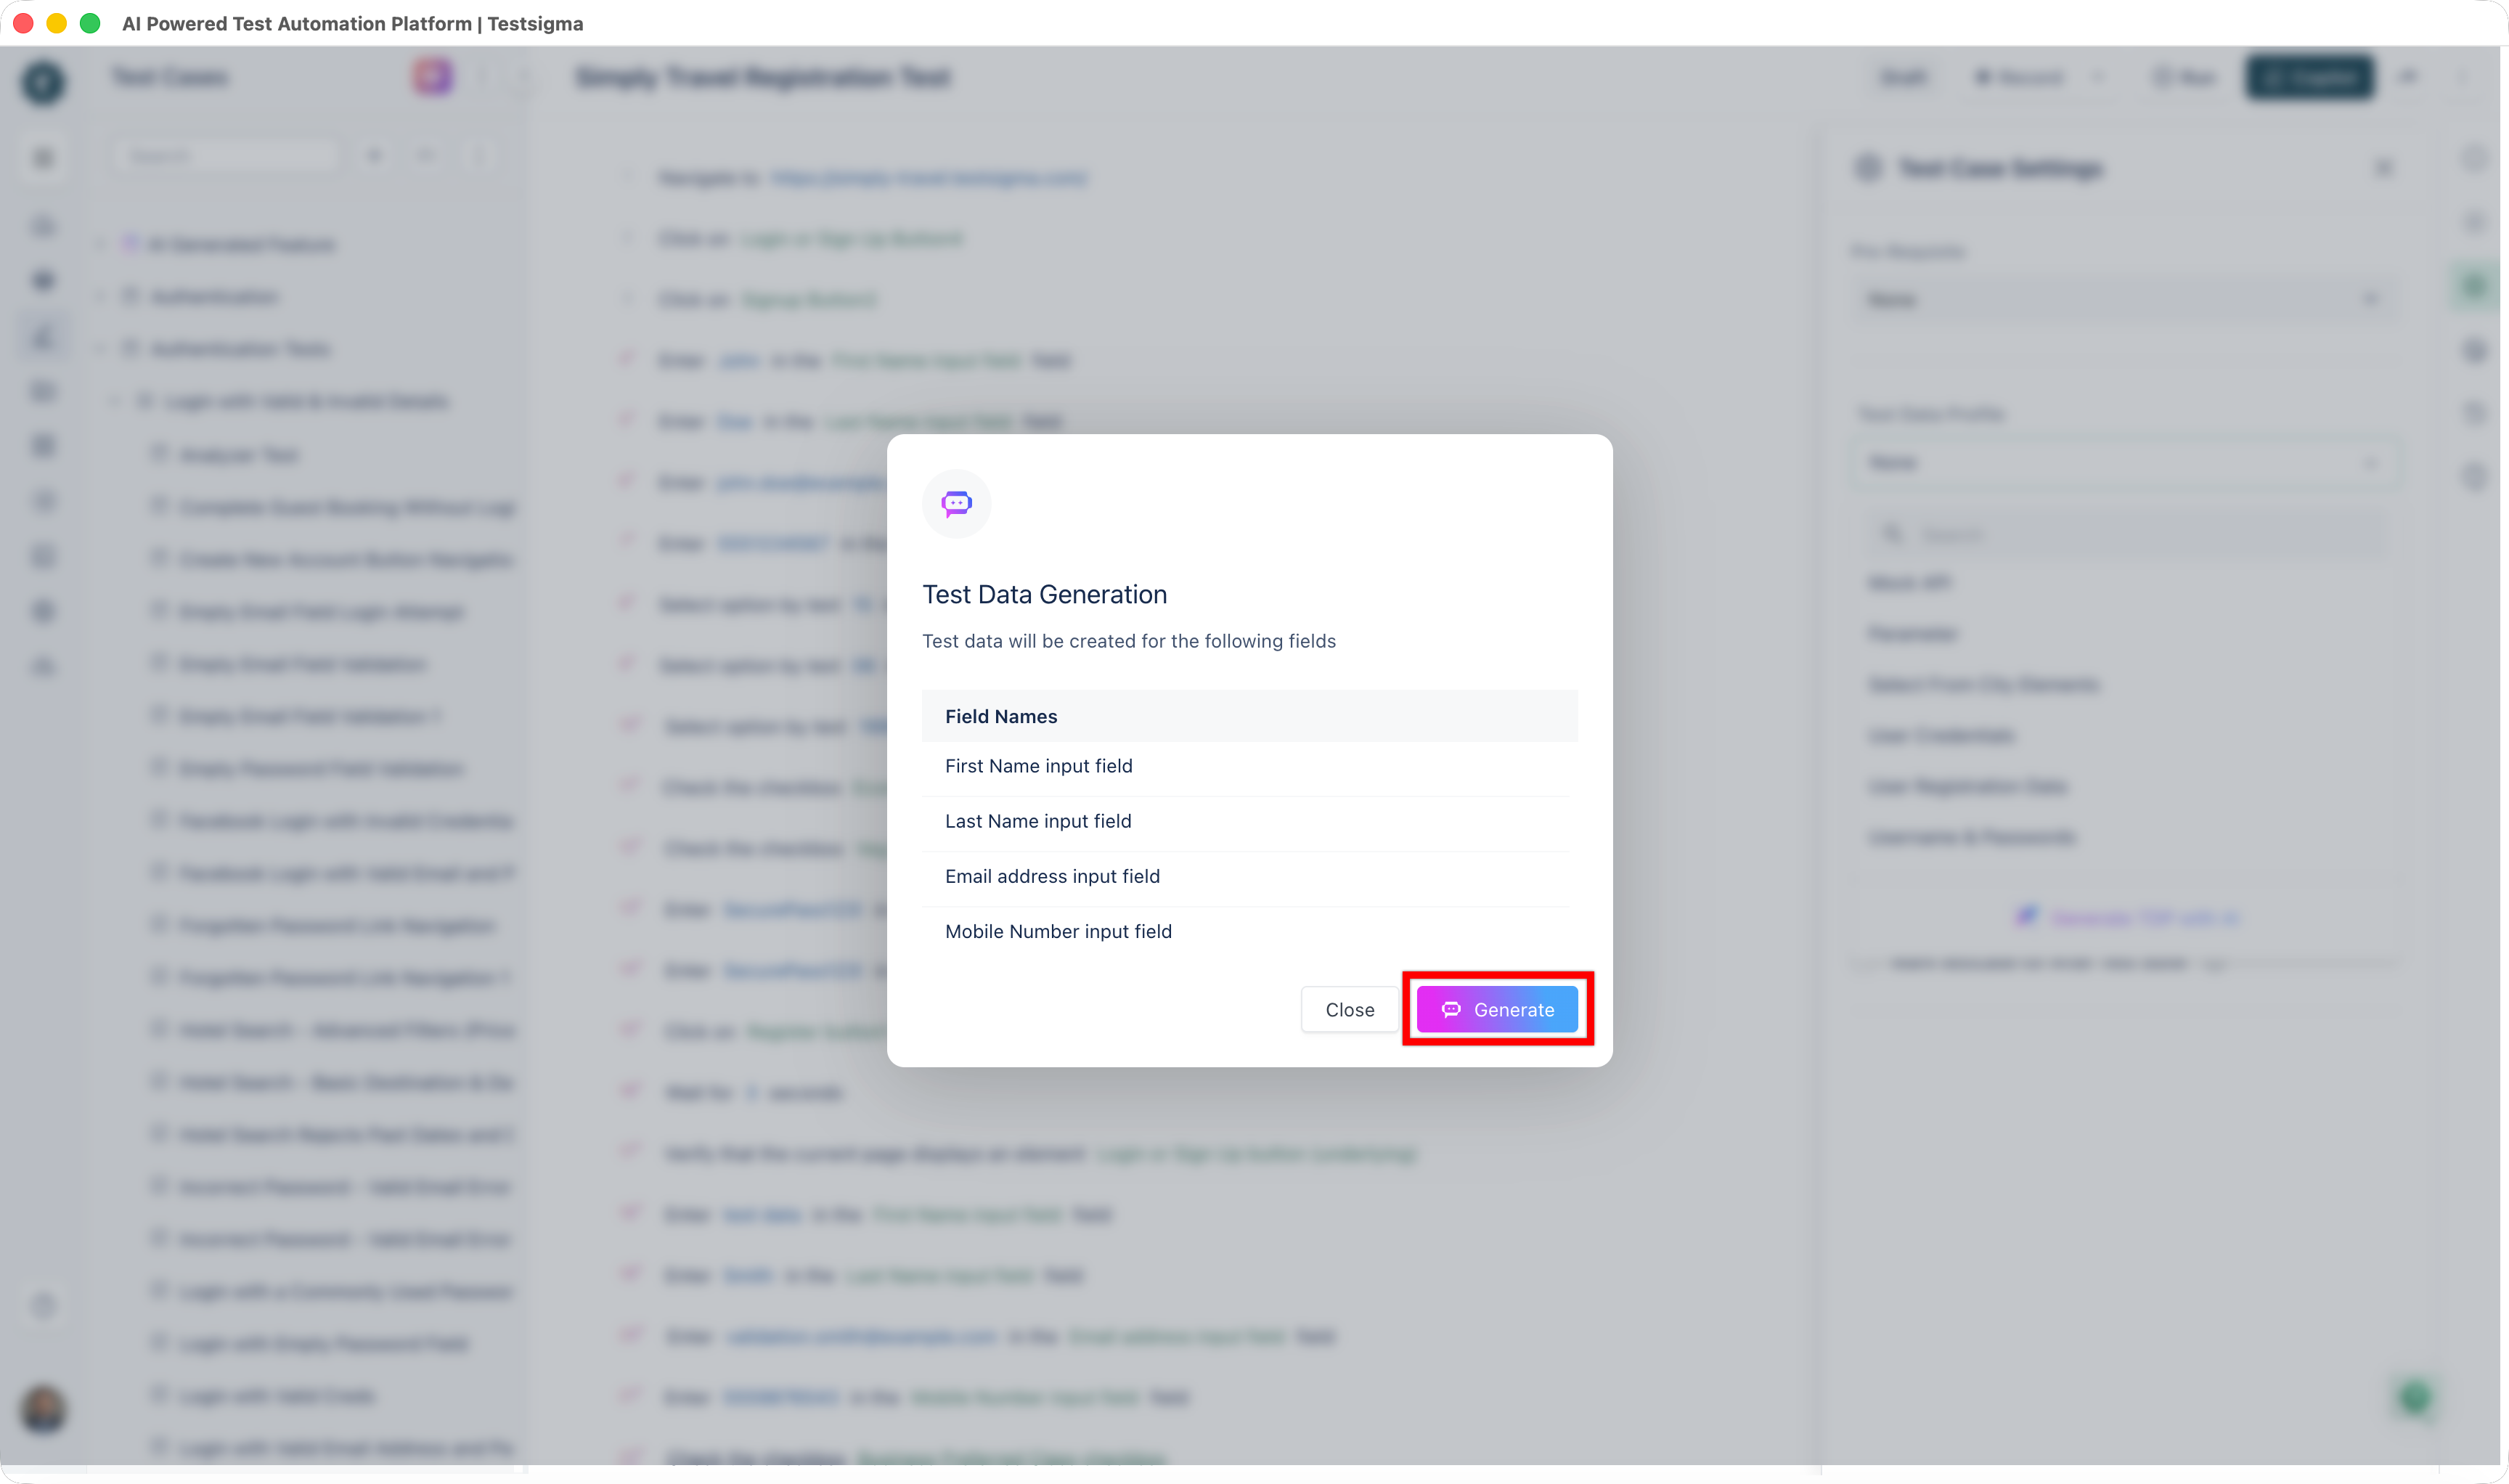
- Wait for the data to be generated. Once you are satisfied with the data, click Create and Replace.
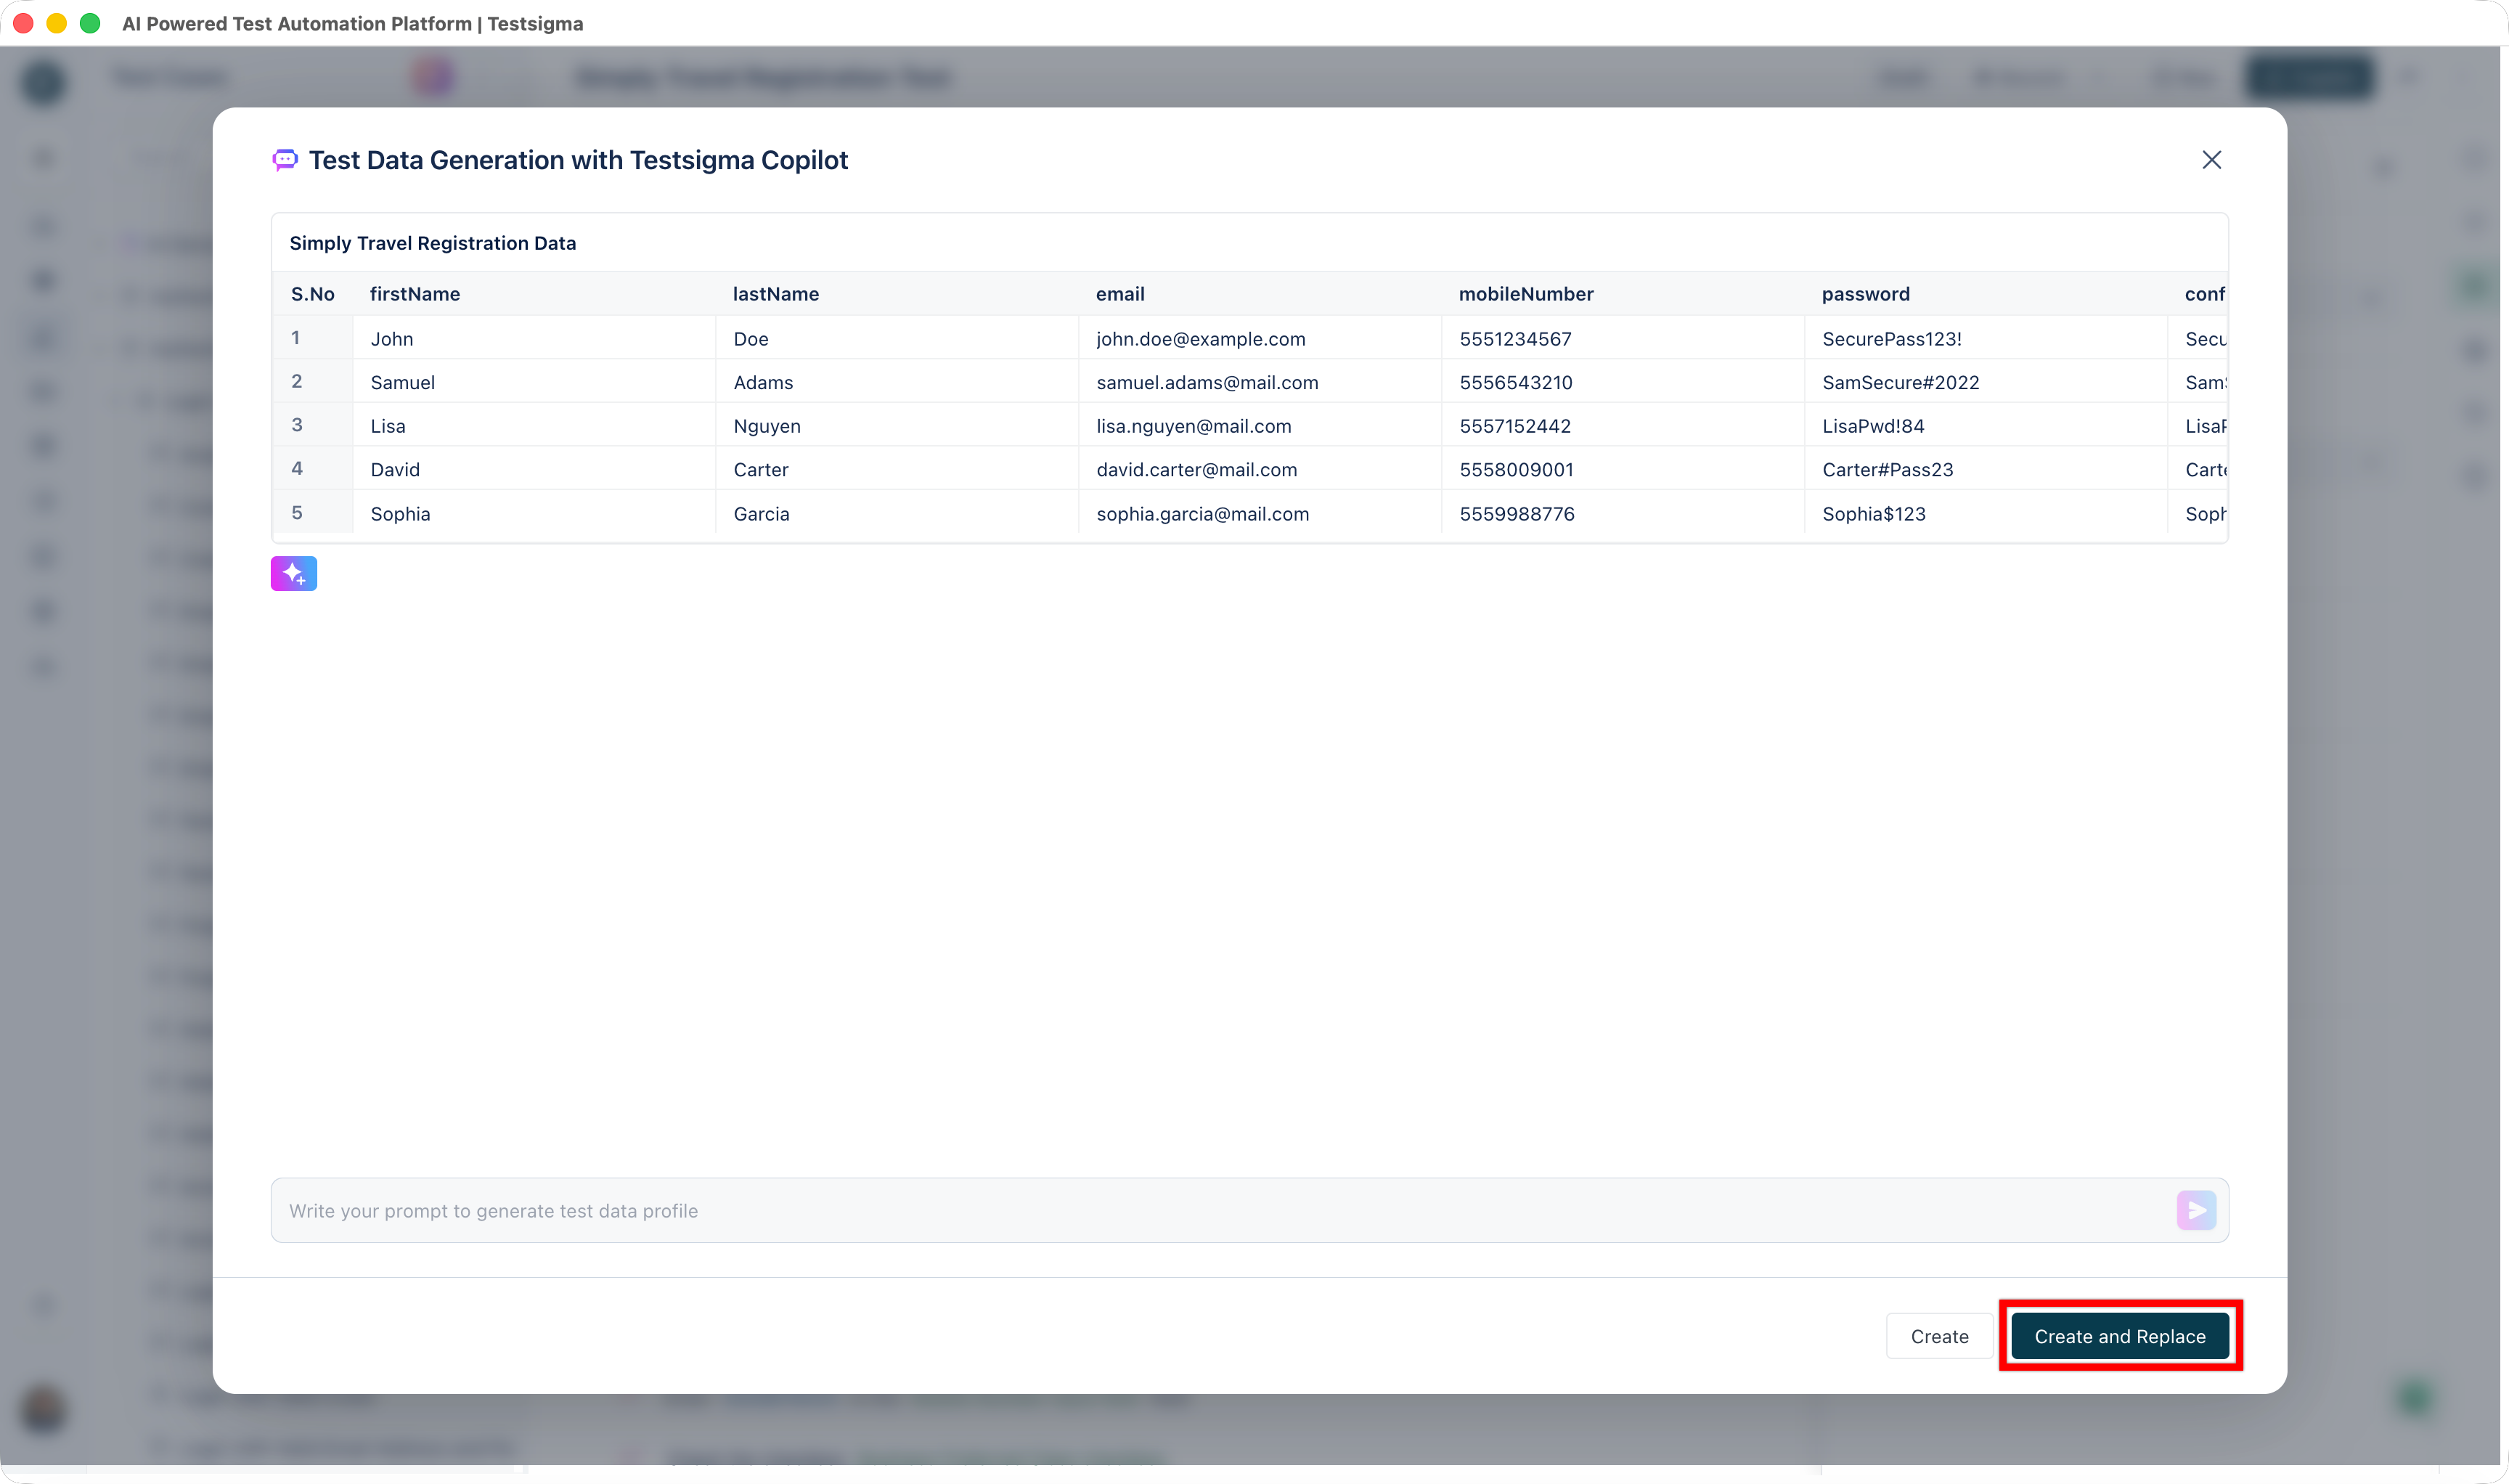
- Your test data in the test steps will be replaced with the generated data.
Want to contribute or report missing content?