- continuous integration
 Test Plan Details
 - REST API (Generic)
- Jenkins
- Azure DevOps
- AWS DevOps
- AWS Lambda
- Circle CI
- Bamboo CI
- Travis CI
- CodeShip CI
- Shell Script(Generic)
- Bitrise CI
- GitHub CI/CD
- Bitbucket CI/CD
- GitLab CI/CD
- Copado CI/CD
- Gearset CI/CD
- Codemagic CI/CD
- Google Cloud Build CI/CD
Integrate Testsigma with Google Cloud Build
You can integrate Google Cloud Build with your version control system to automate test execution using a shell script that triggers Testsigma tests via CI/CD. This article discusses configuring Google Cloud Build with a repository and executing test automation workflows using a cloudbuild.yaml file.
Prerequisites
Before you begin, ensure you have:
- A GitHub repository with your project code.
- A Google Cloud project with billing enabled.
- Admin permissions in both GitHub and Google Cloud.
Create or Select a Google Cloud Project
- Navigate to Google Cloud Console.
- On the Google Cloud home page, click Select a Project.
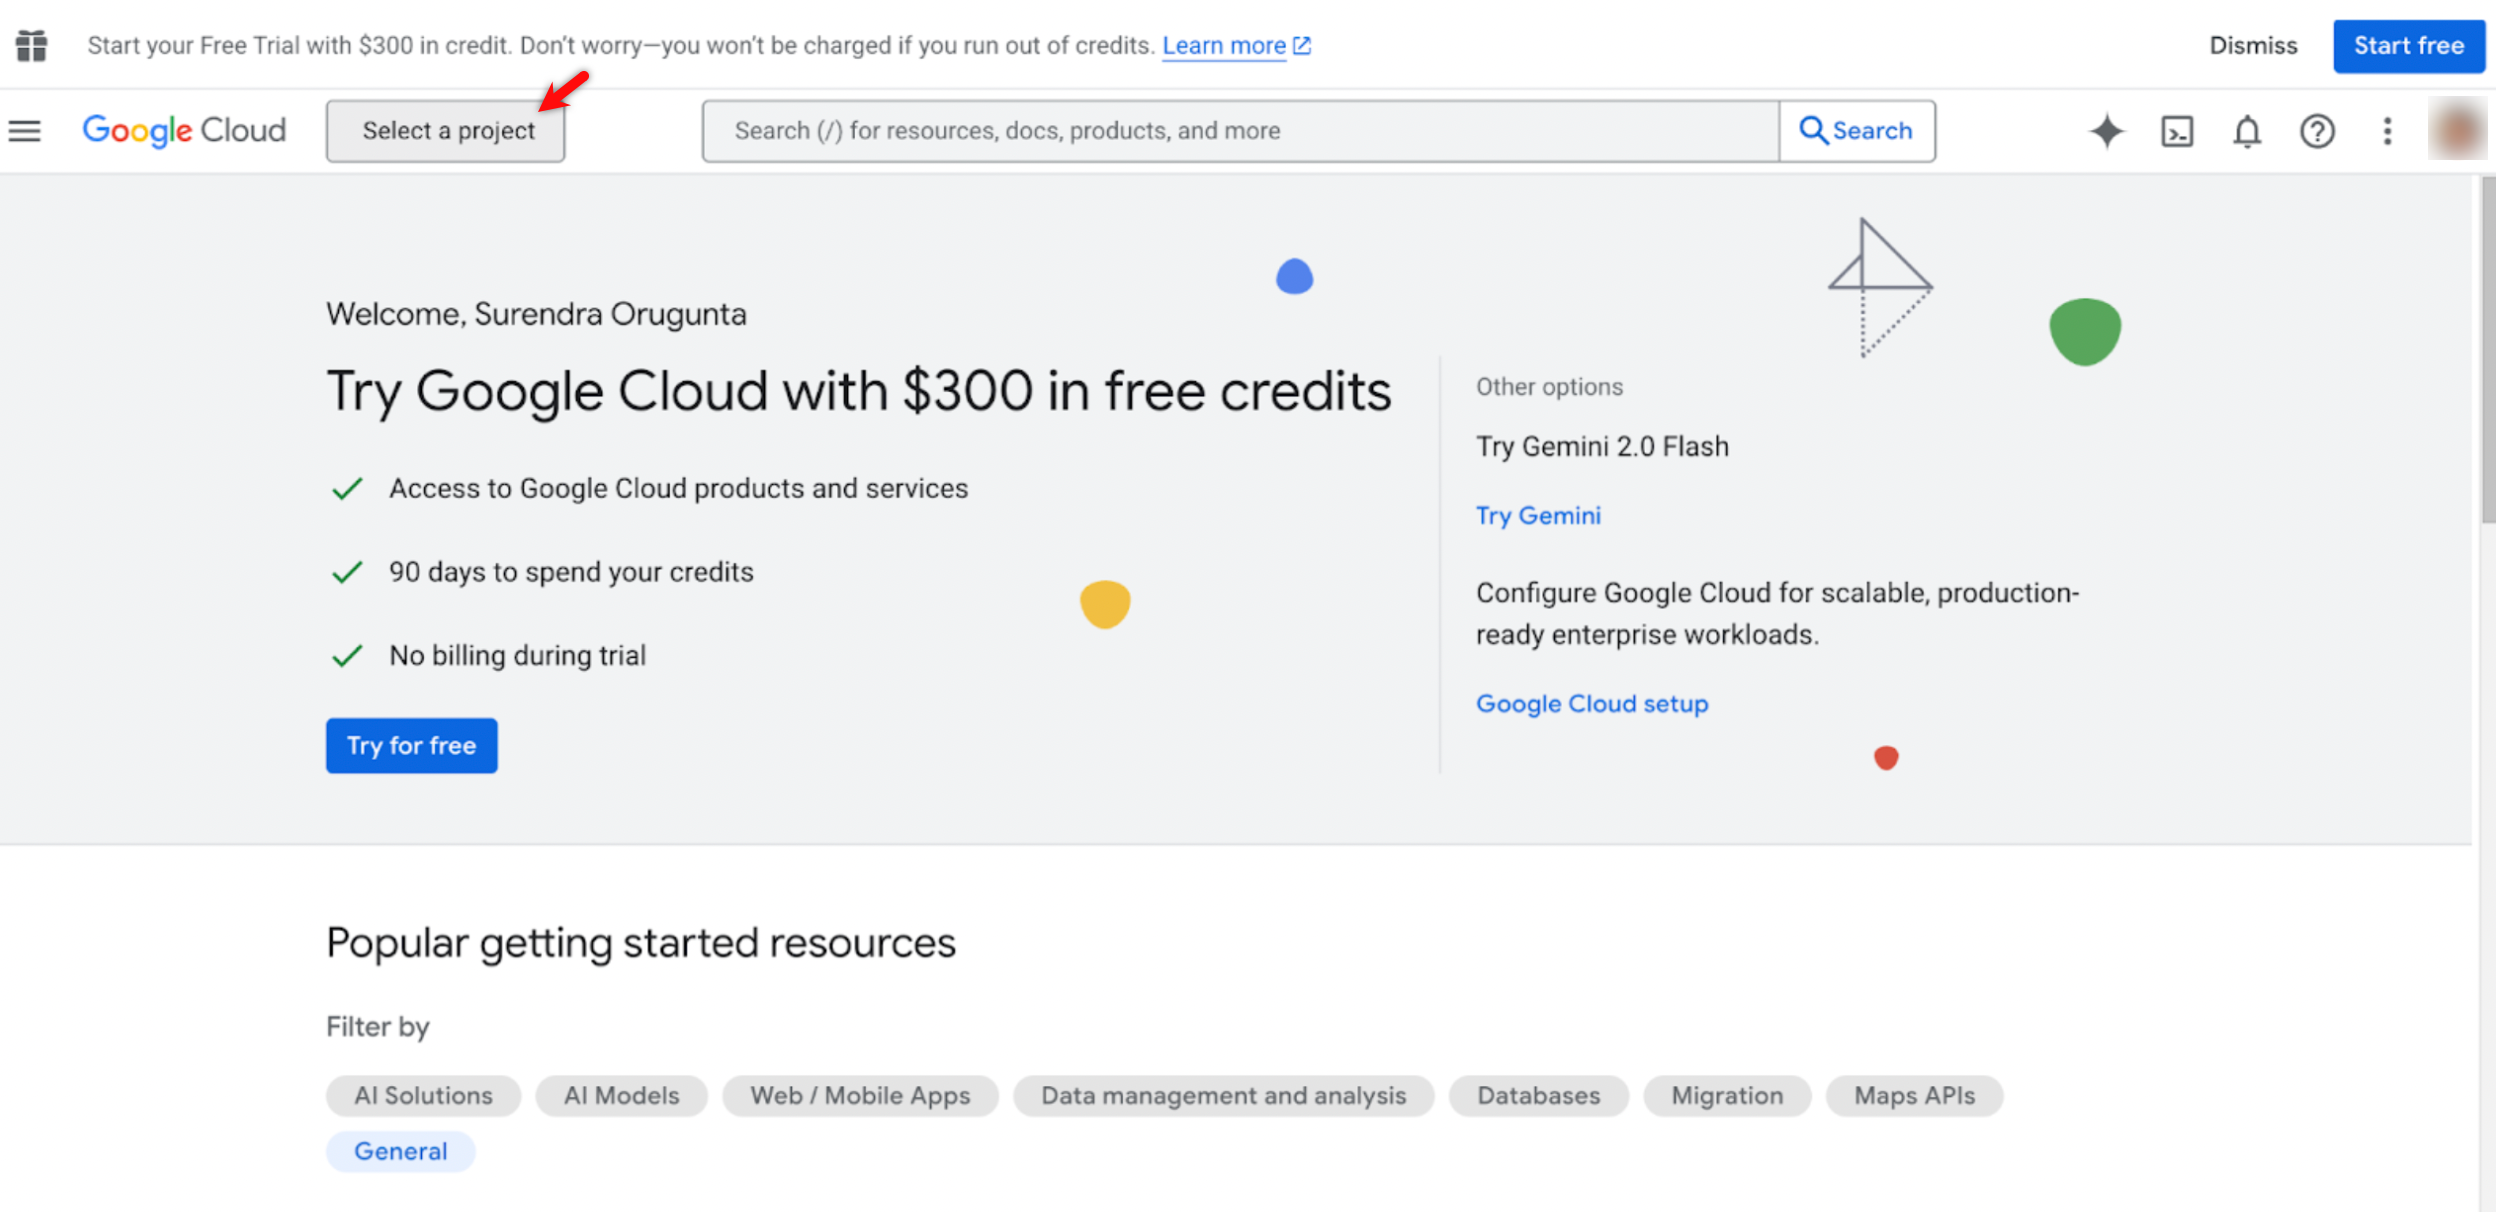
- In the Select a project dialog, click New Project if you don’t already have one.
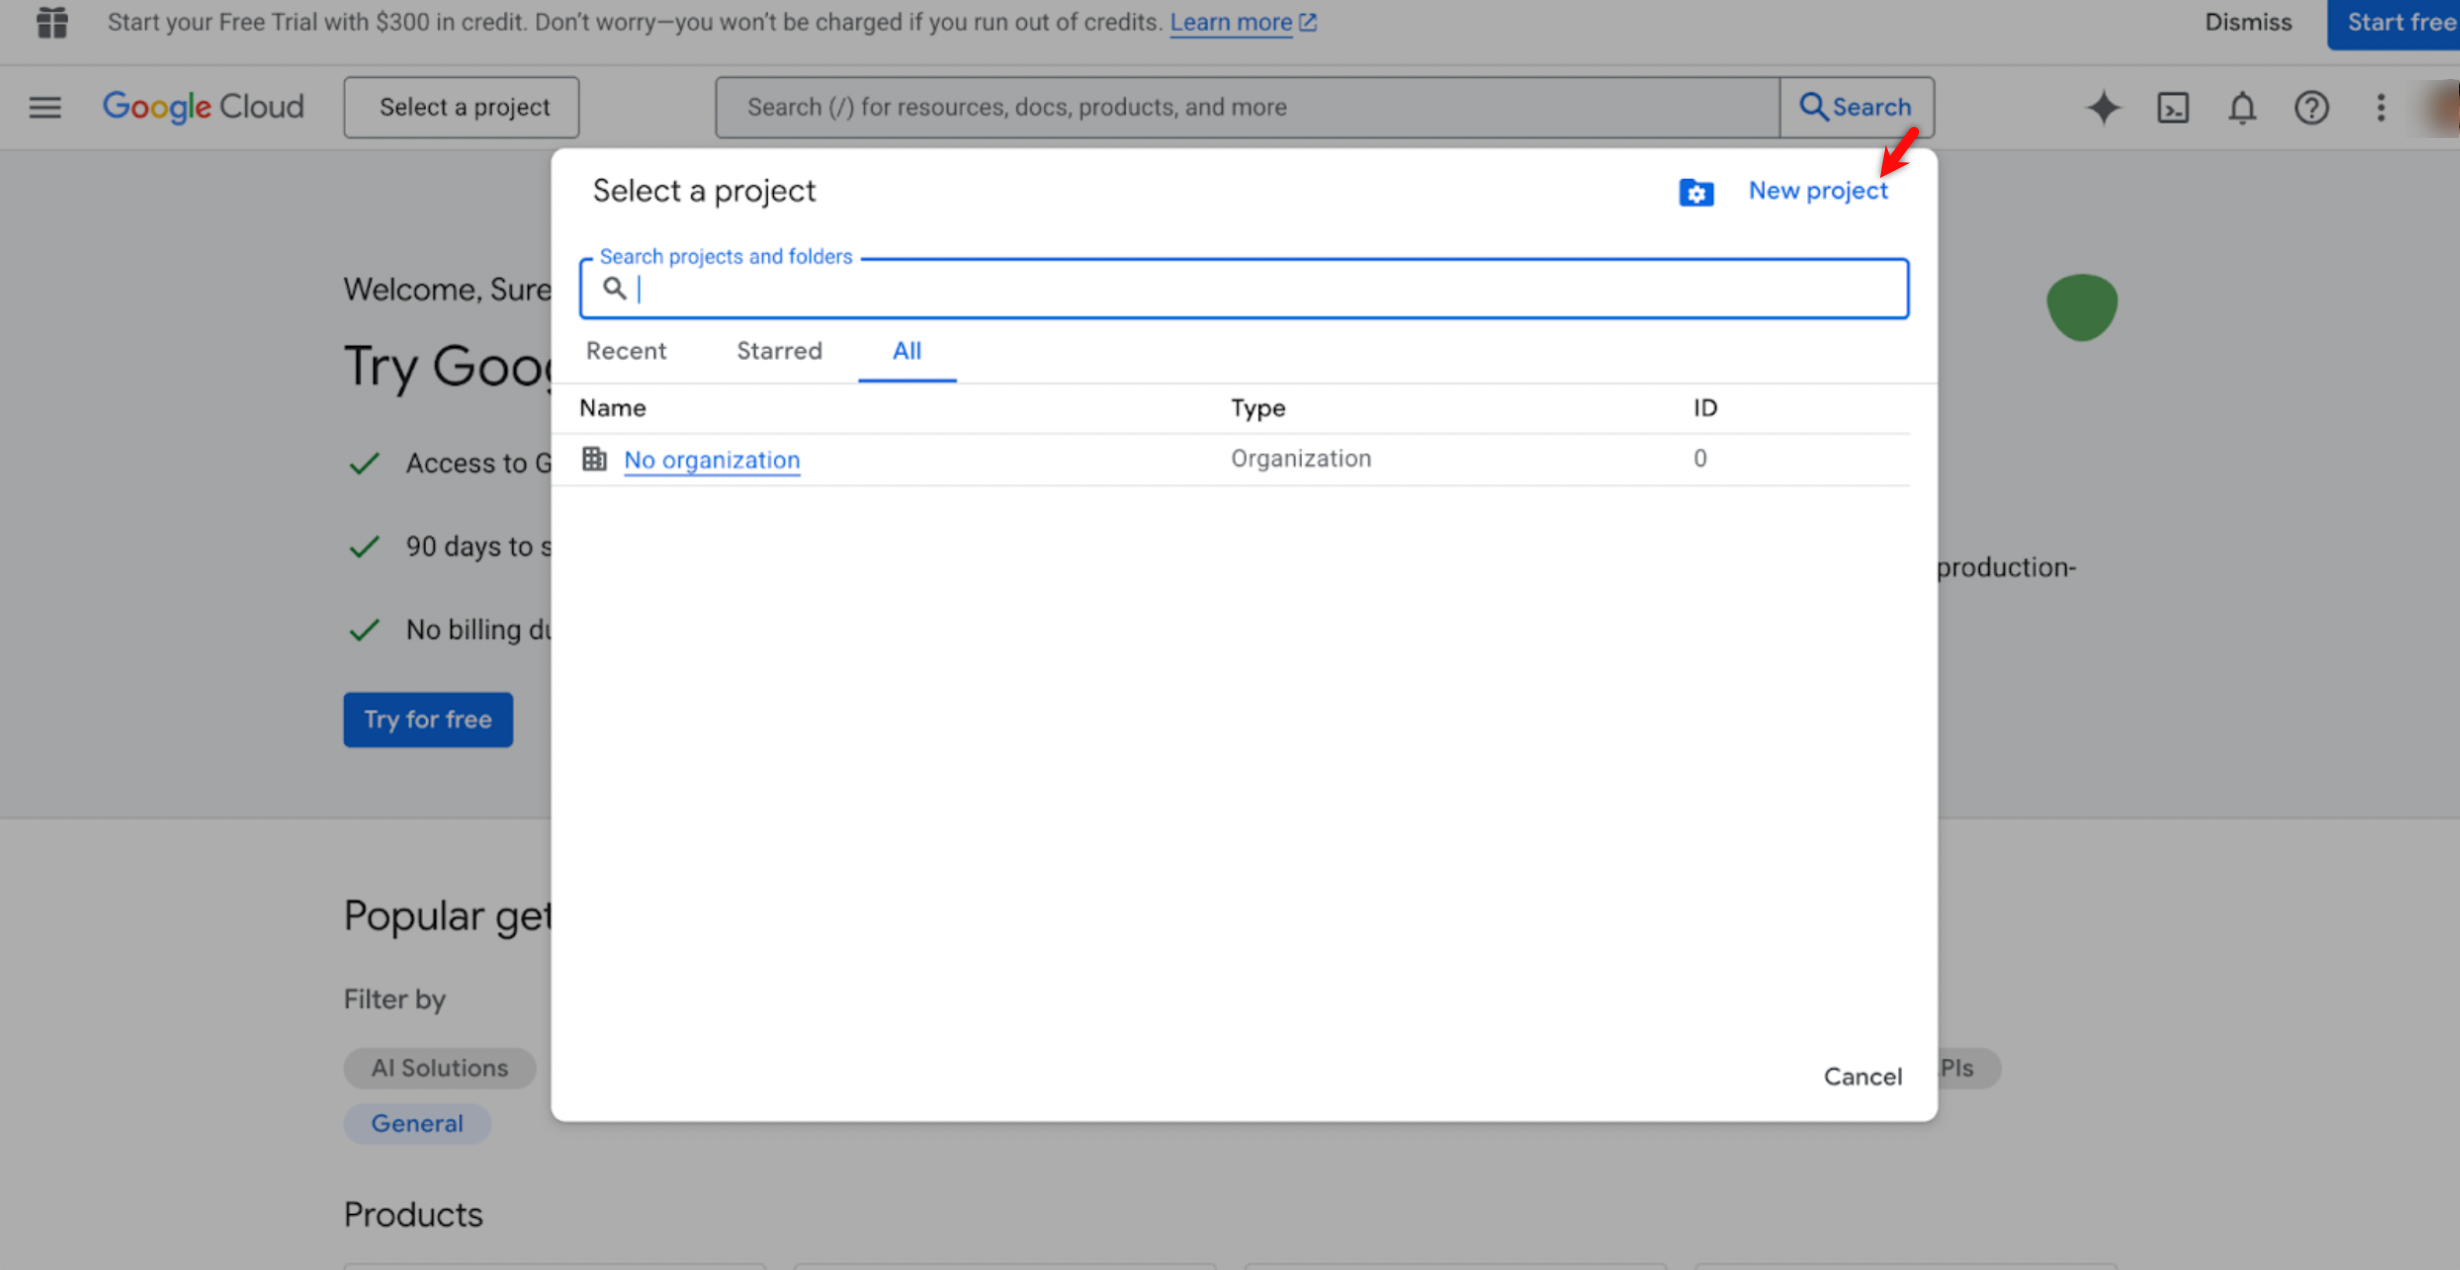
- If you already have a project, select it from the list.
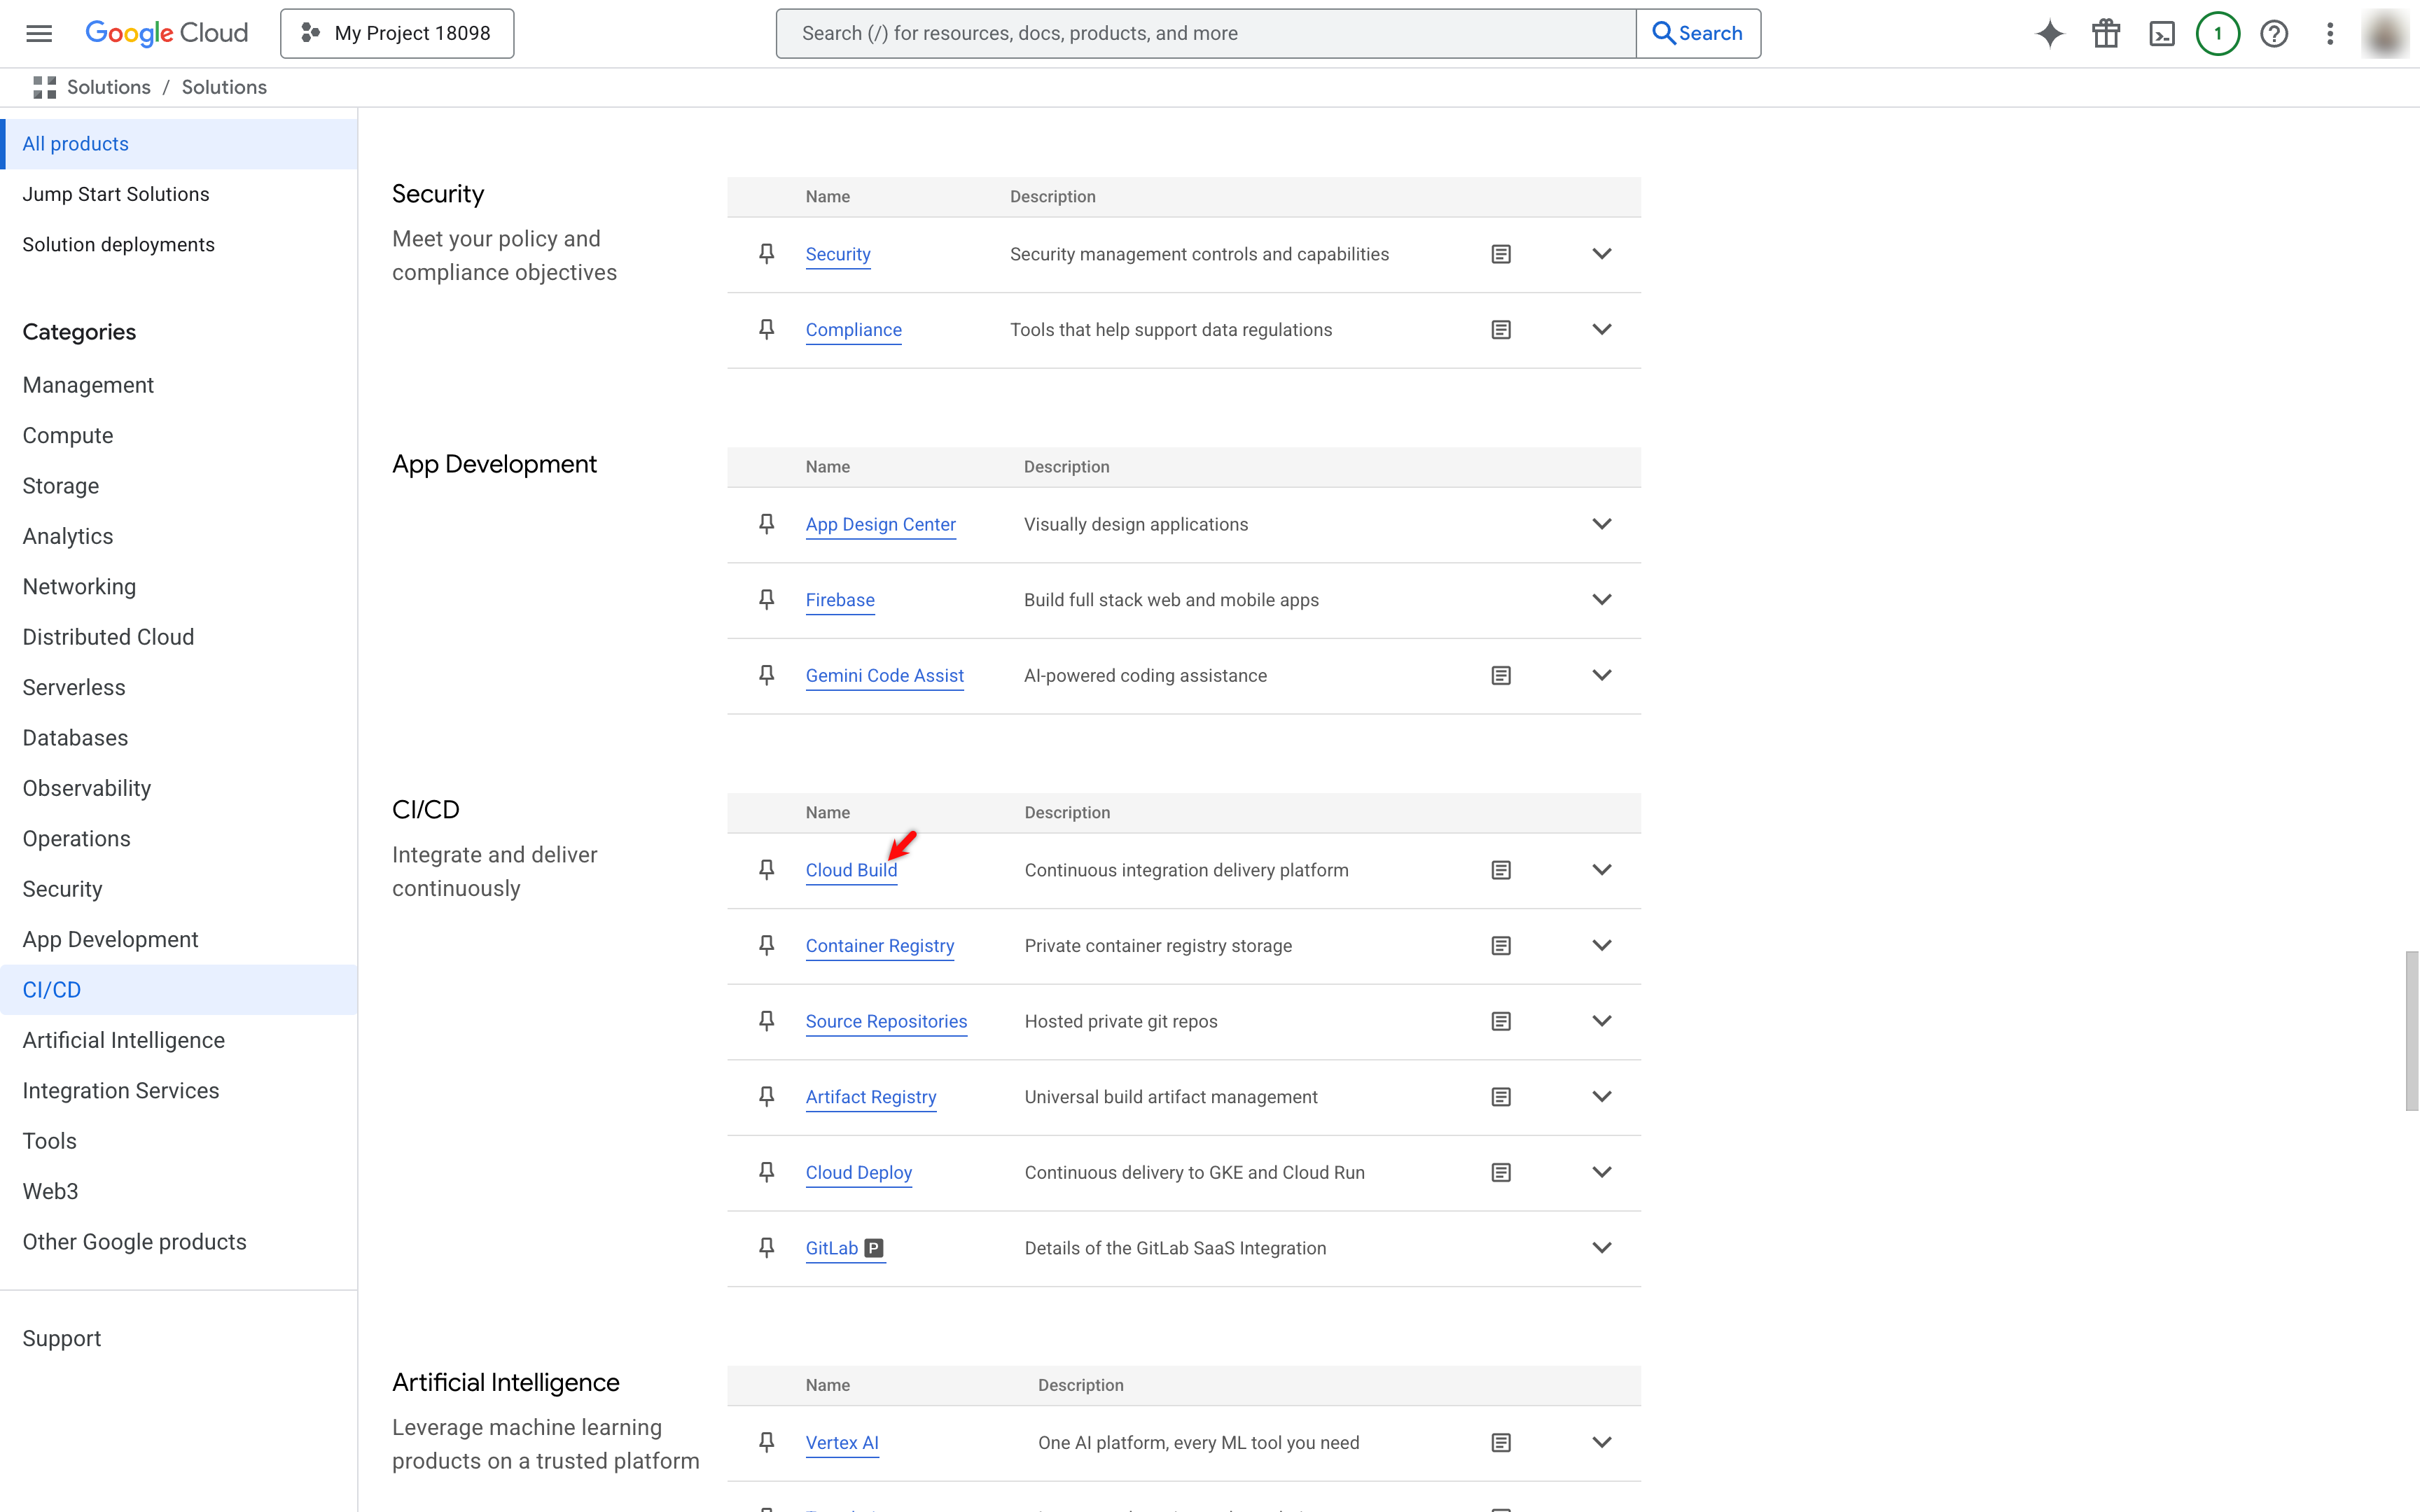
Navigate to Cloud Build
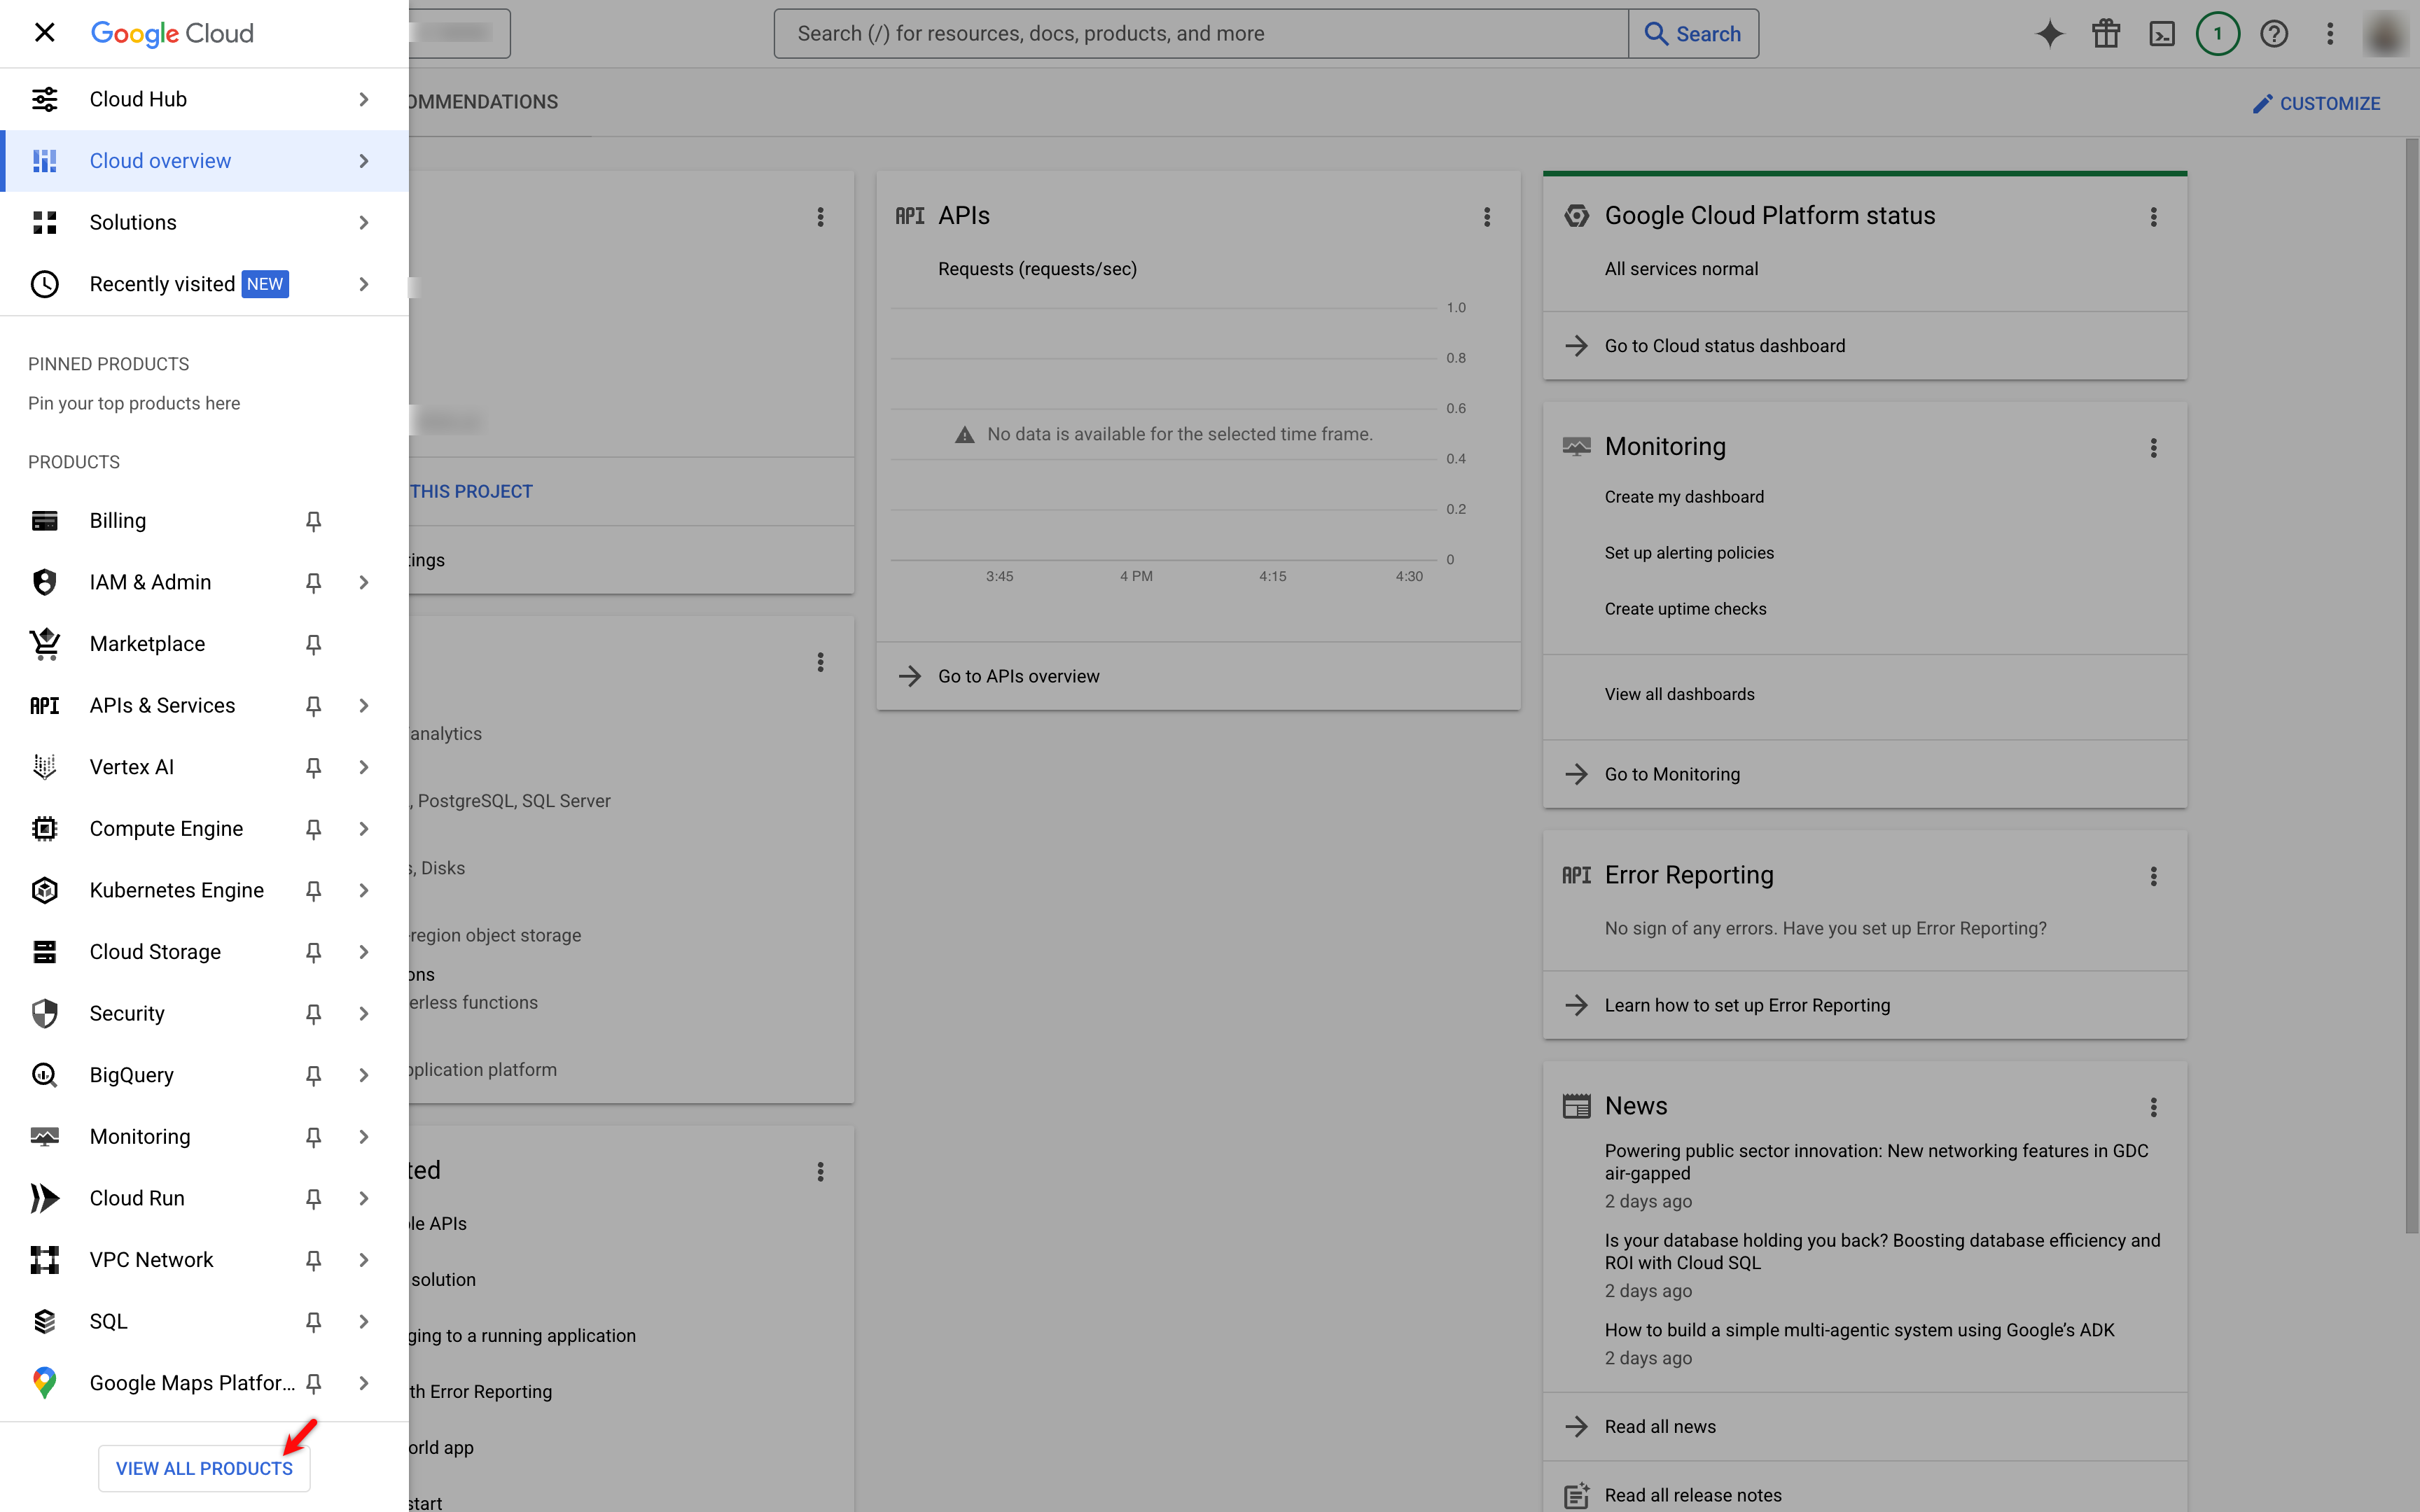
- Click the navigation menu.

- In the navigation menu, click View all products.
- In the left panel, under Categories, click CI/CD.
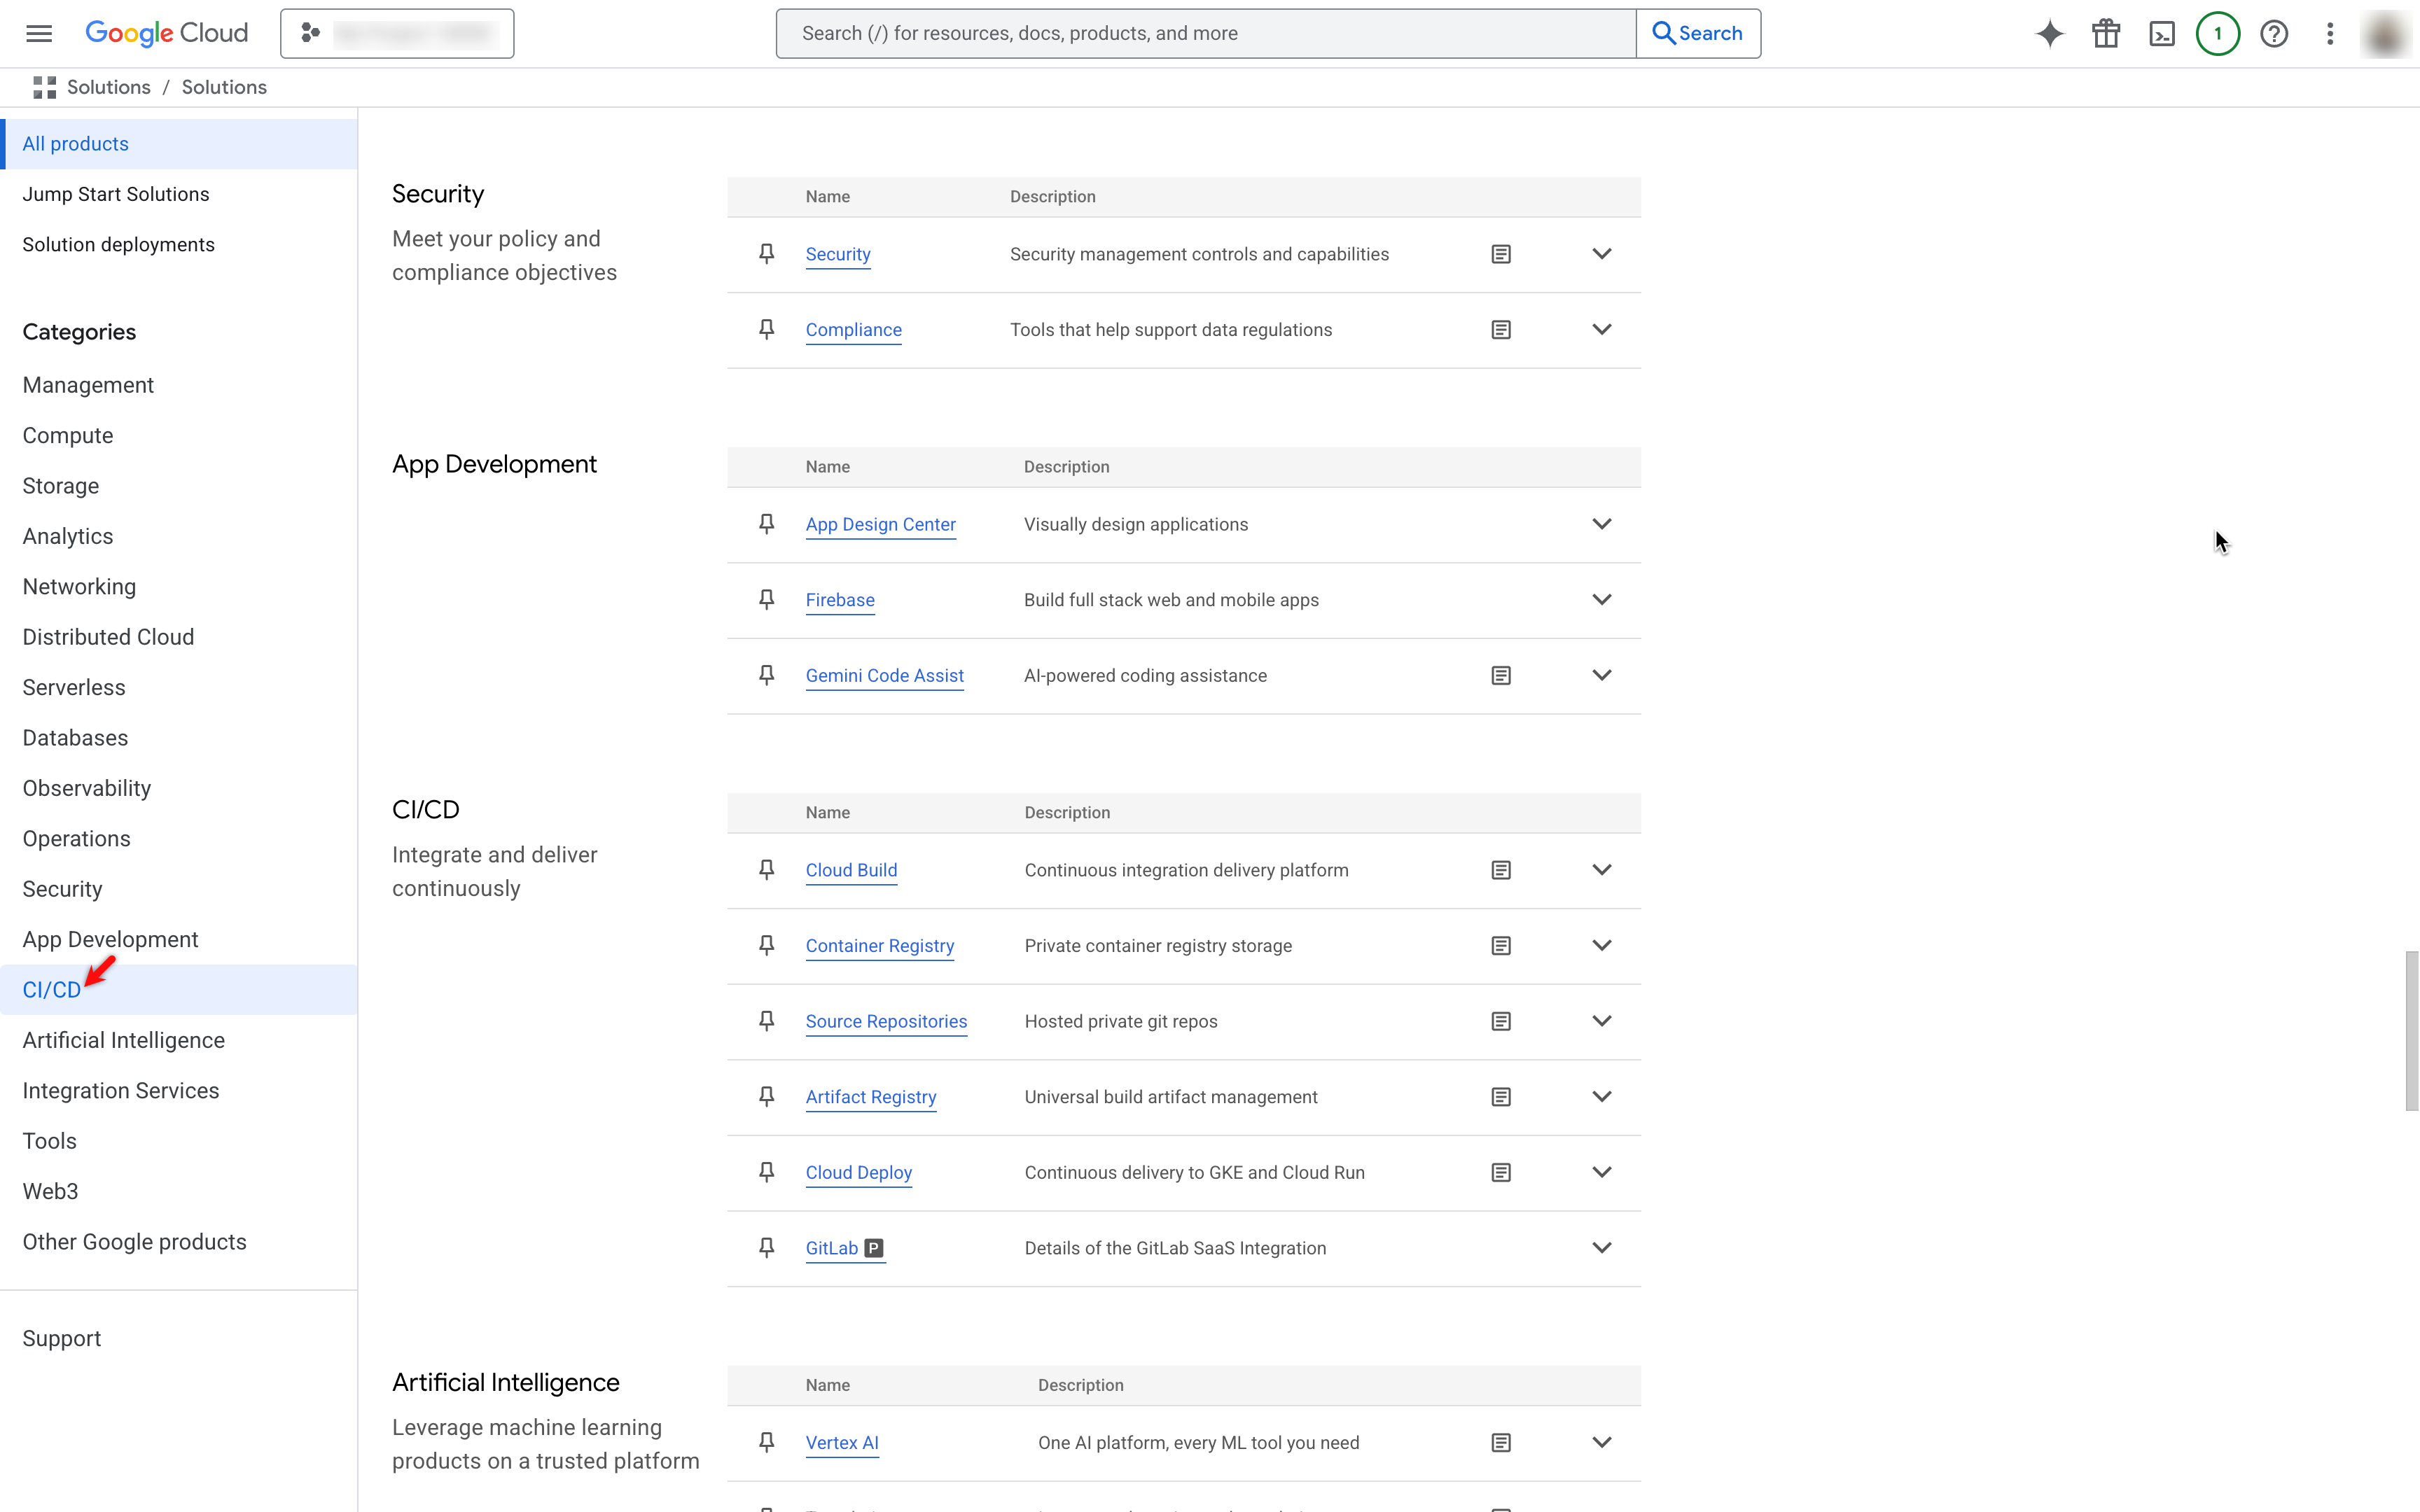
- Click Cloud Build under the CI/CD section.
Create a Repository Connection
- In the Cloud Build navigation pane, click Repositories and then click Connect repository to connect your source code.

NOTE:
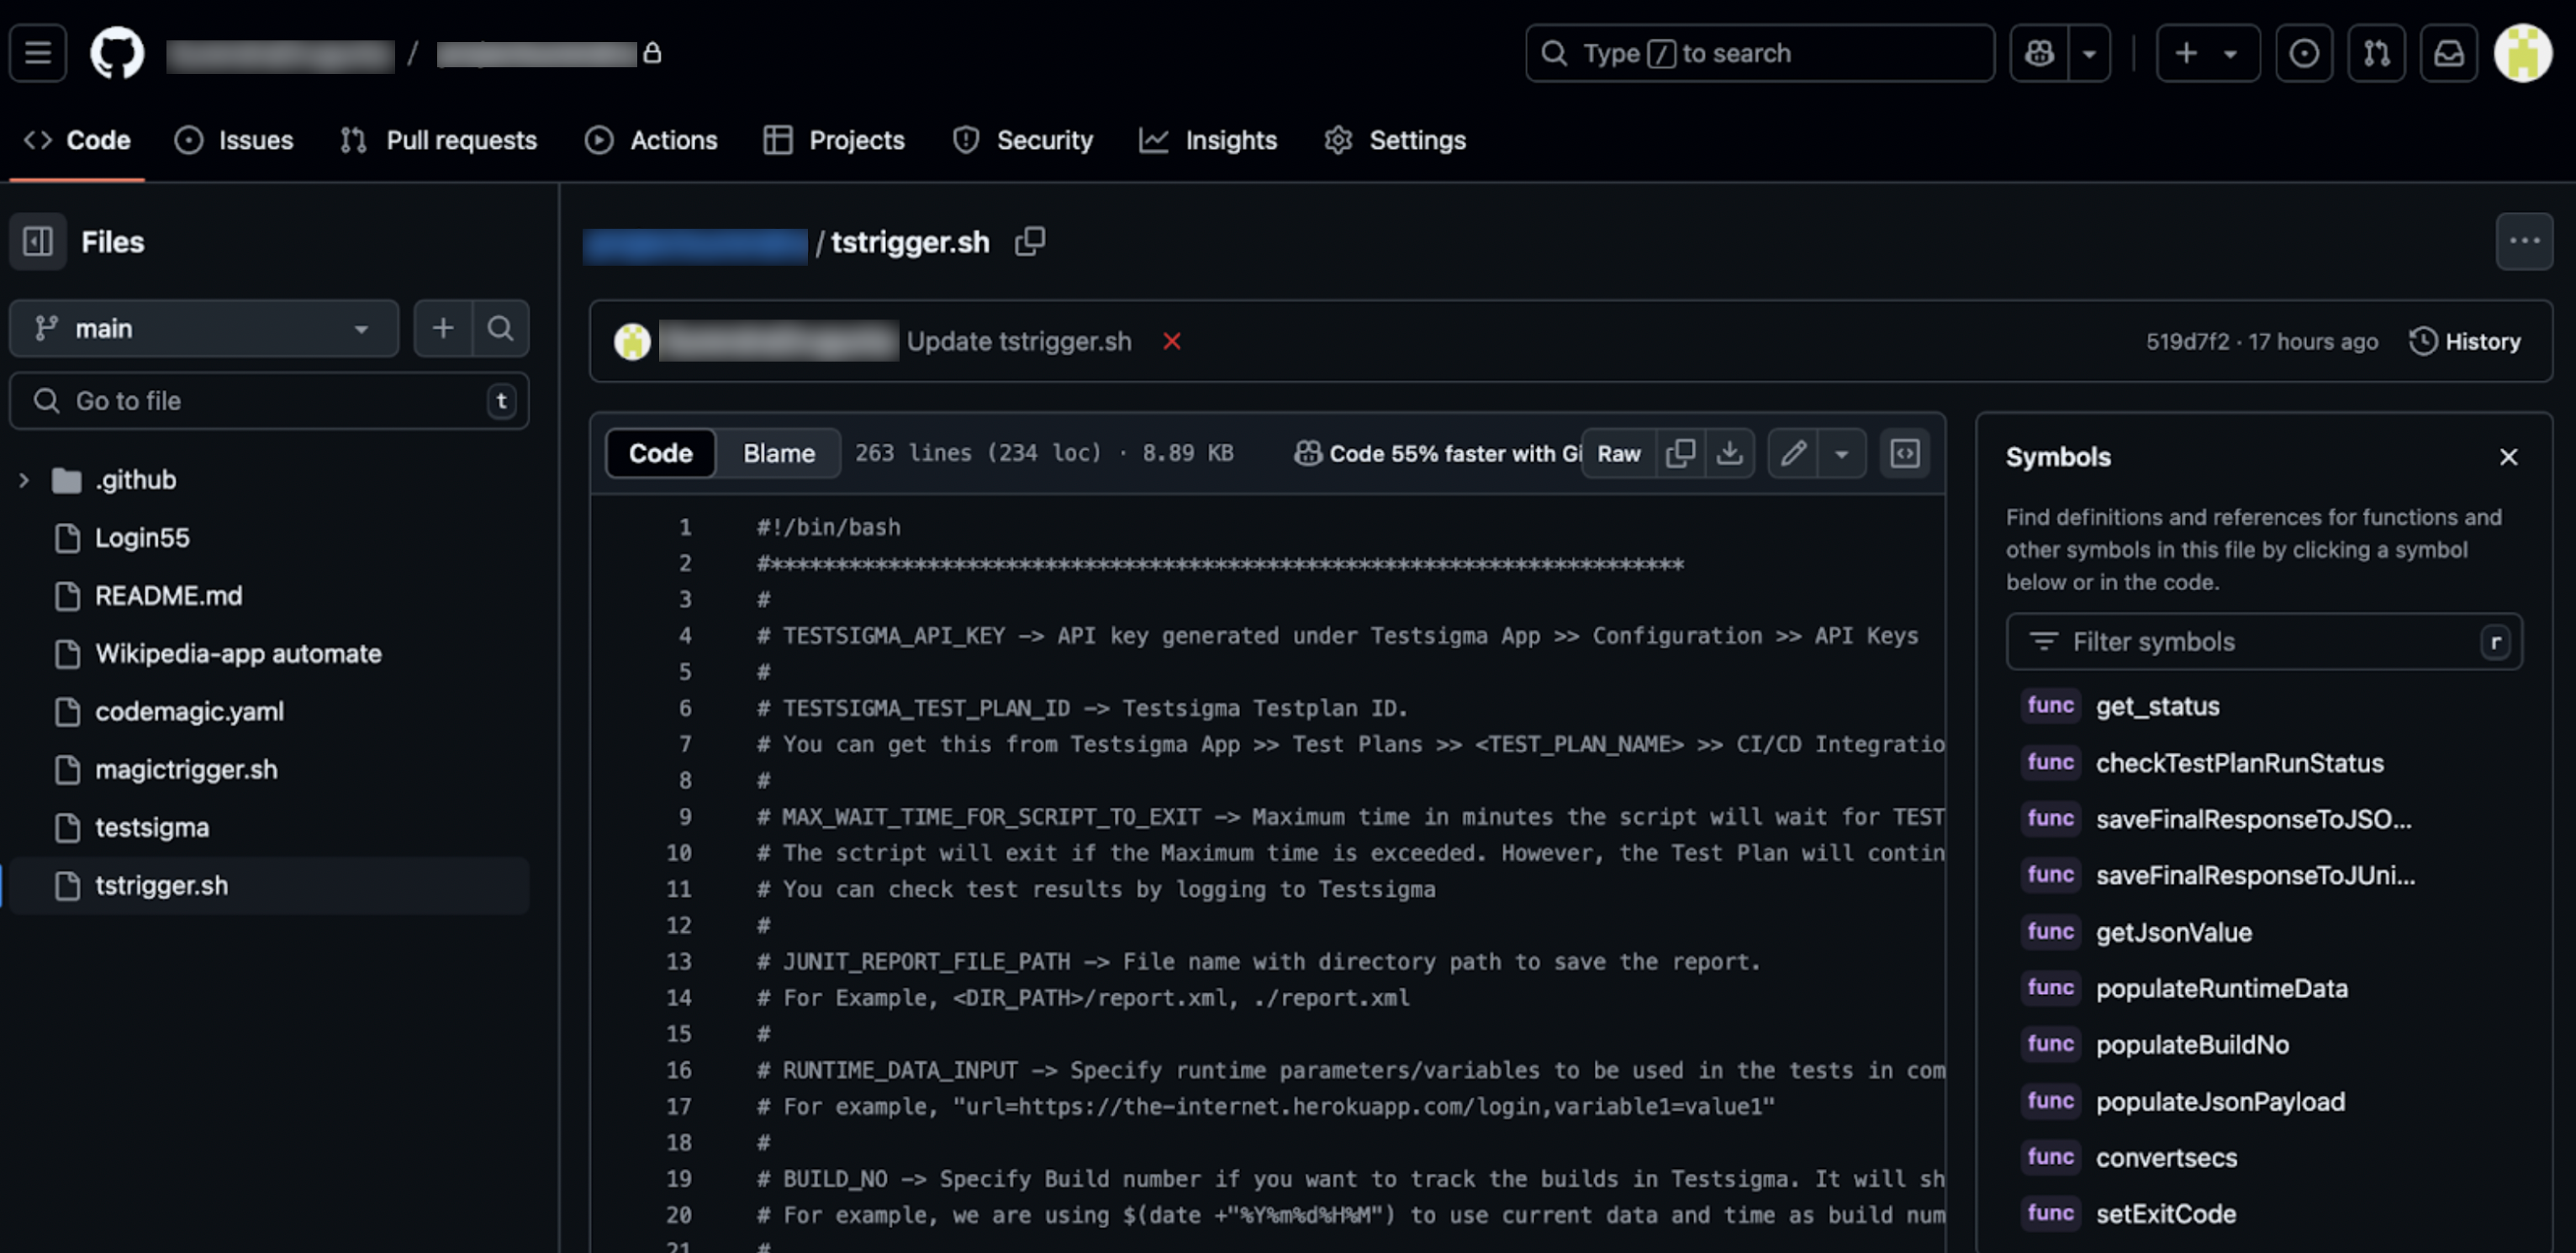
- Ensure the tstrigger.sh file is present in the same repository and marked as executable. For information on the generic shell script, refer to the documentation on generic Shell script.
- Ensure you have an API key and a Test Plan ID. For more information, refer to the documentation on generating API keys and documentation on getting test plan ID.
-
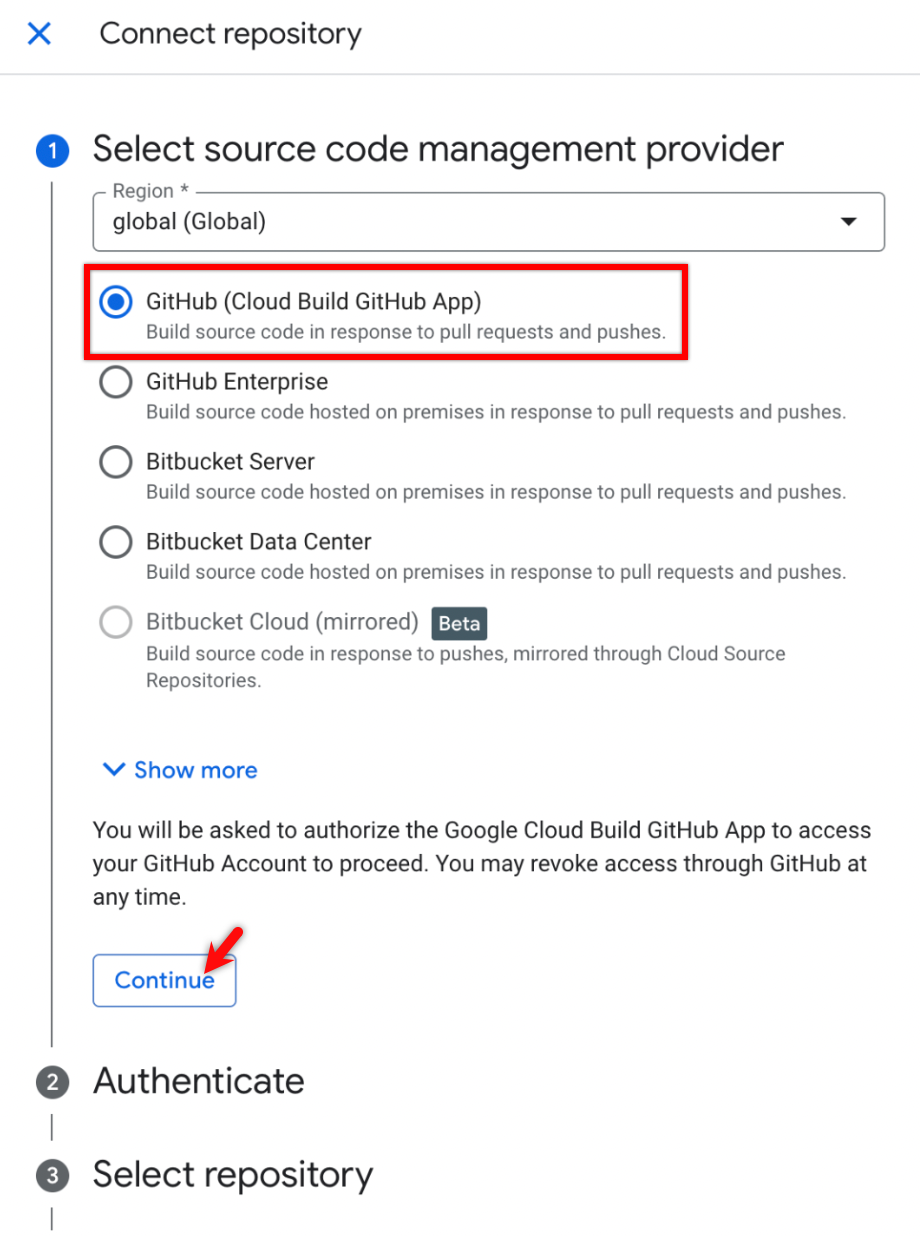
- On the Connect repository overlay, select your source code management provider from the list (we’re selecting GitHub), then click Continue.
NOTE:
- Google Cloud Build will redirect you to GitHub.
- Return to Google Cloud Build, and it authenticates automatically.
- Once authentication is done, expand the drop-down in the Select repository step and select the required one.
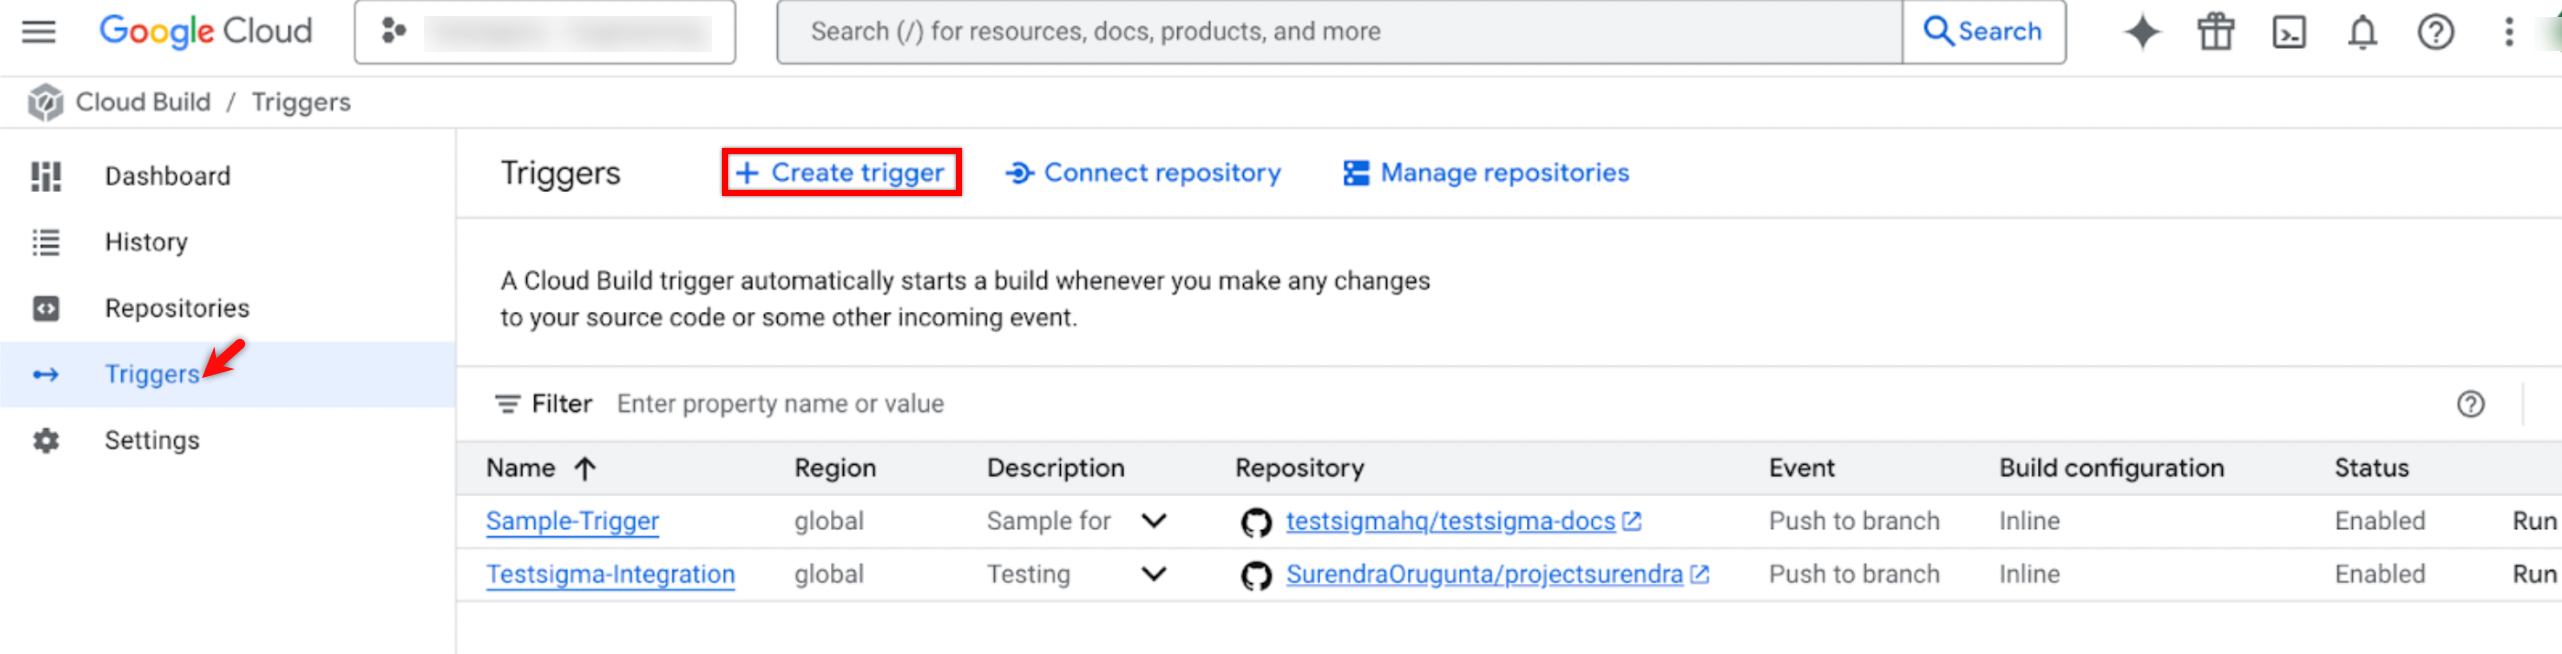
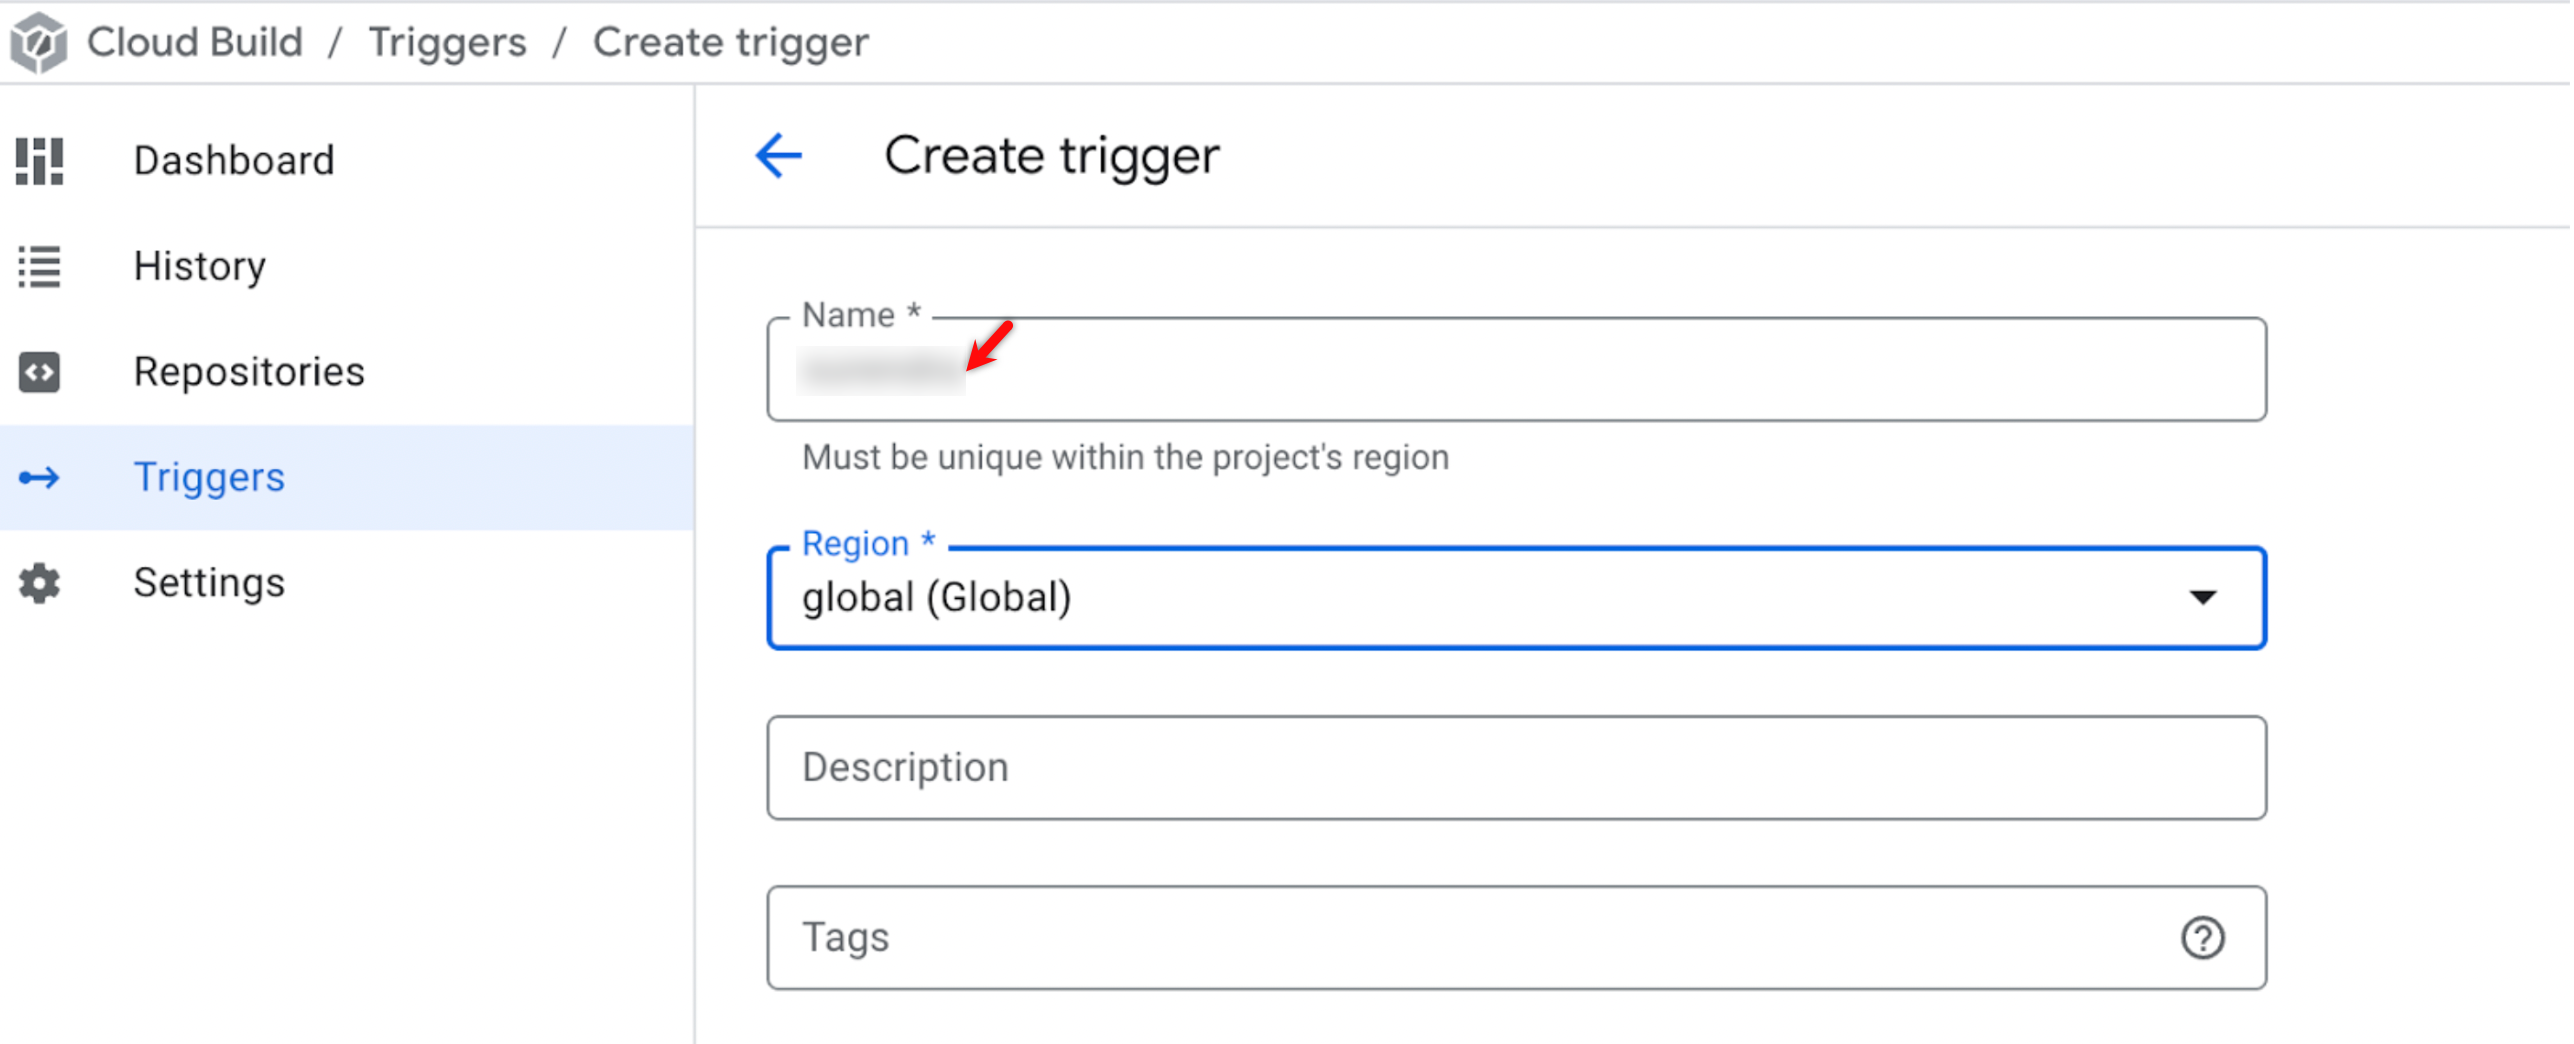
Create a Trigger
- Go to Triggers in the Cloud Build menu and click on + Create trigger.
- Enter a name for your trigger in the Name field.
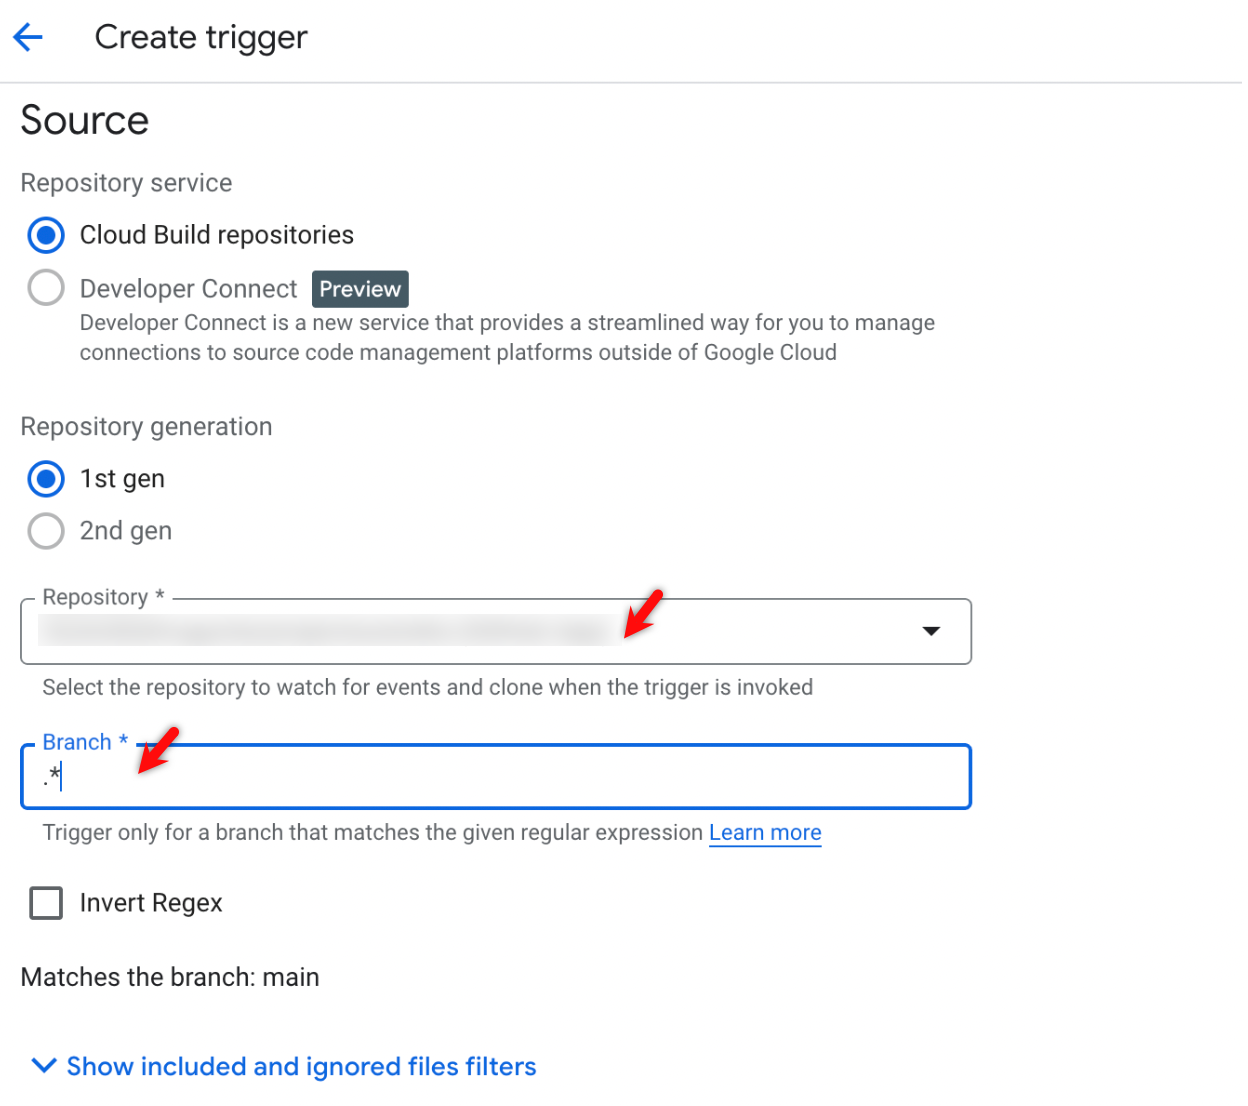
- In the Create trigger page, under the Source section, expand the drop-down in the Repository and Branch fields and select the required ones.
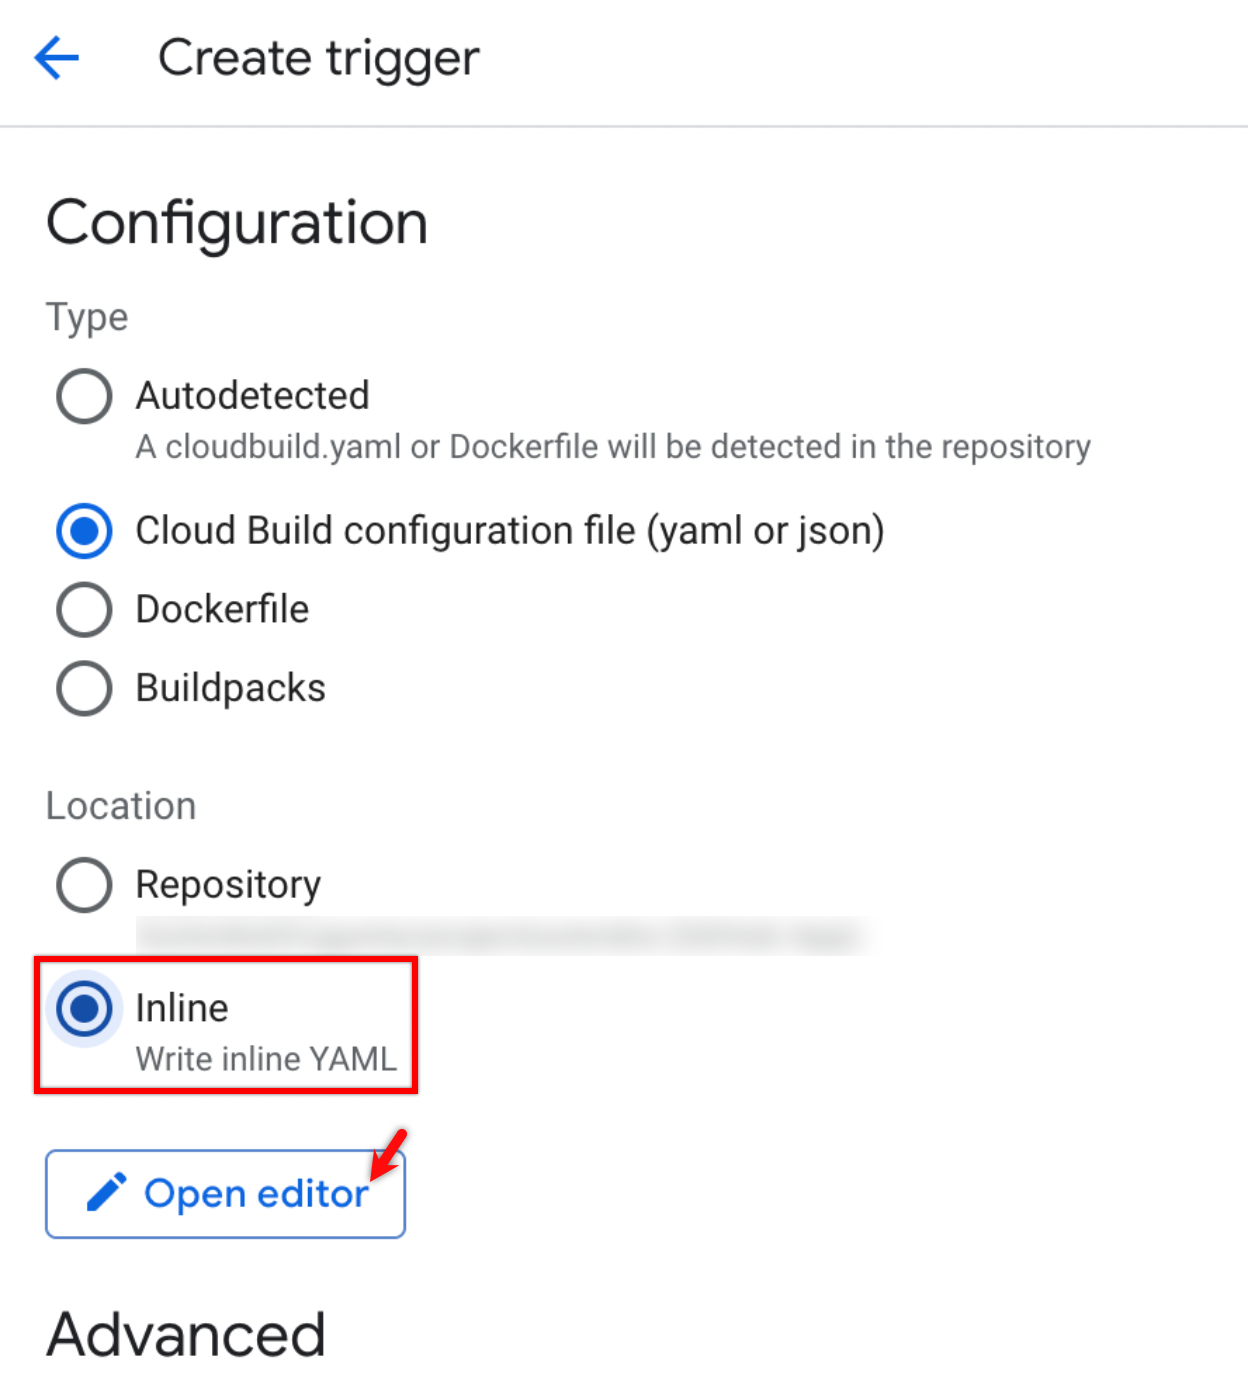
- Under the Configuration section, select the Cloud Build configuration file (yaml or json) radio button.

- Under the Location section, select the Repository radio button to automatically fetch the pipeline file details from your GitHub repository.
- If you select the Inline radio button and click Open editor to manually add your YAML configuration.
- Add the following in the Edit Inline Configuration overlay and click Done:
steps:
  - name: 'ubuntu:20.04'
    args:
      - '-c'
      - |
        apt-get update && apt-get install -y curl bash coreutils
        chmod +x tstrigger.sh
        ./tstrigger.sh
    entrypoint: bash
options:
  logging: CLOUD_LOGGING_ONLY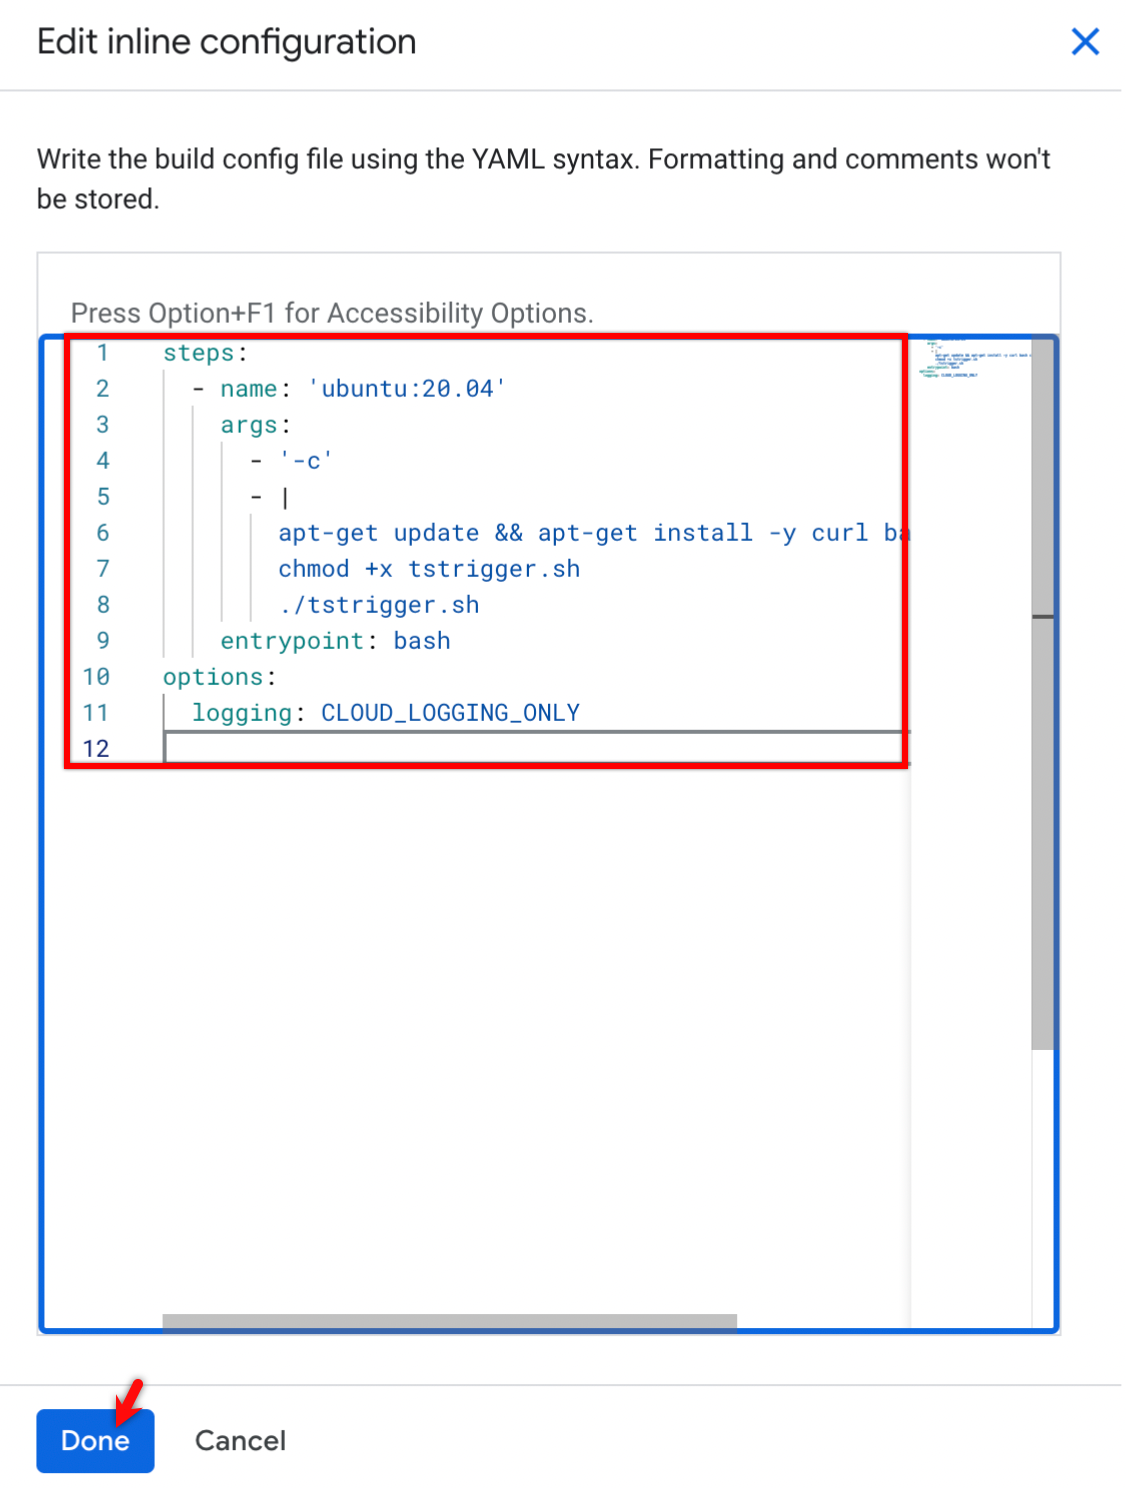
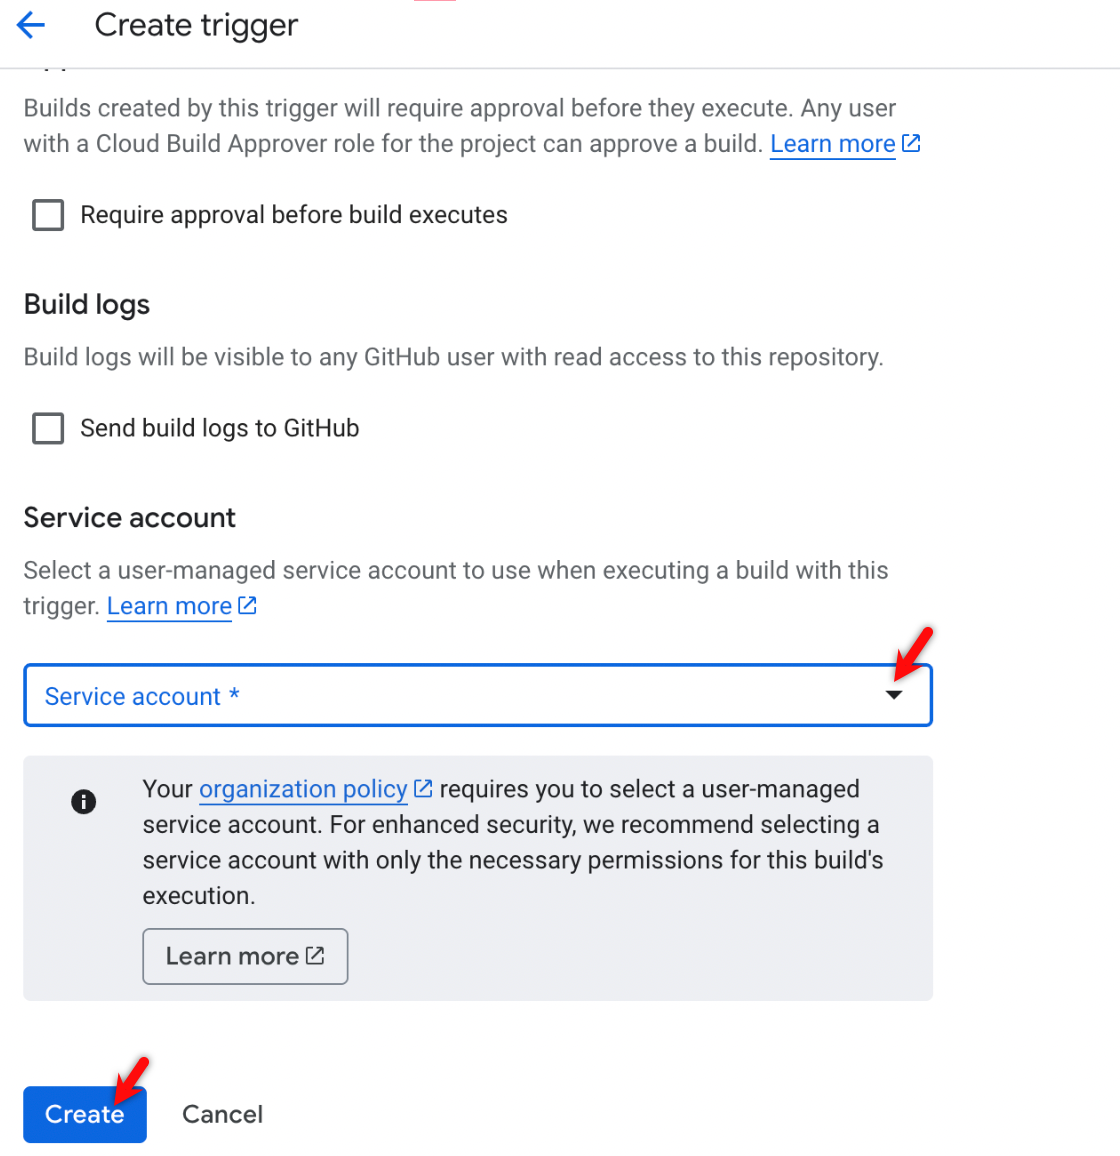
- Under the Advanced section, expand the drop-down in the Service account field, select the required account, and click Create.
Run the Configuration
- Click Run on the newly created trigger.
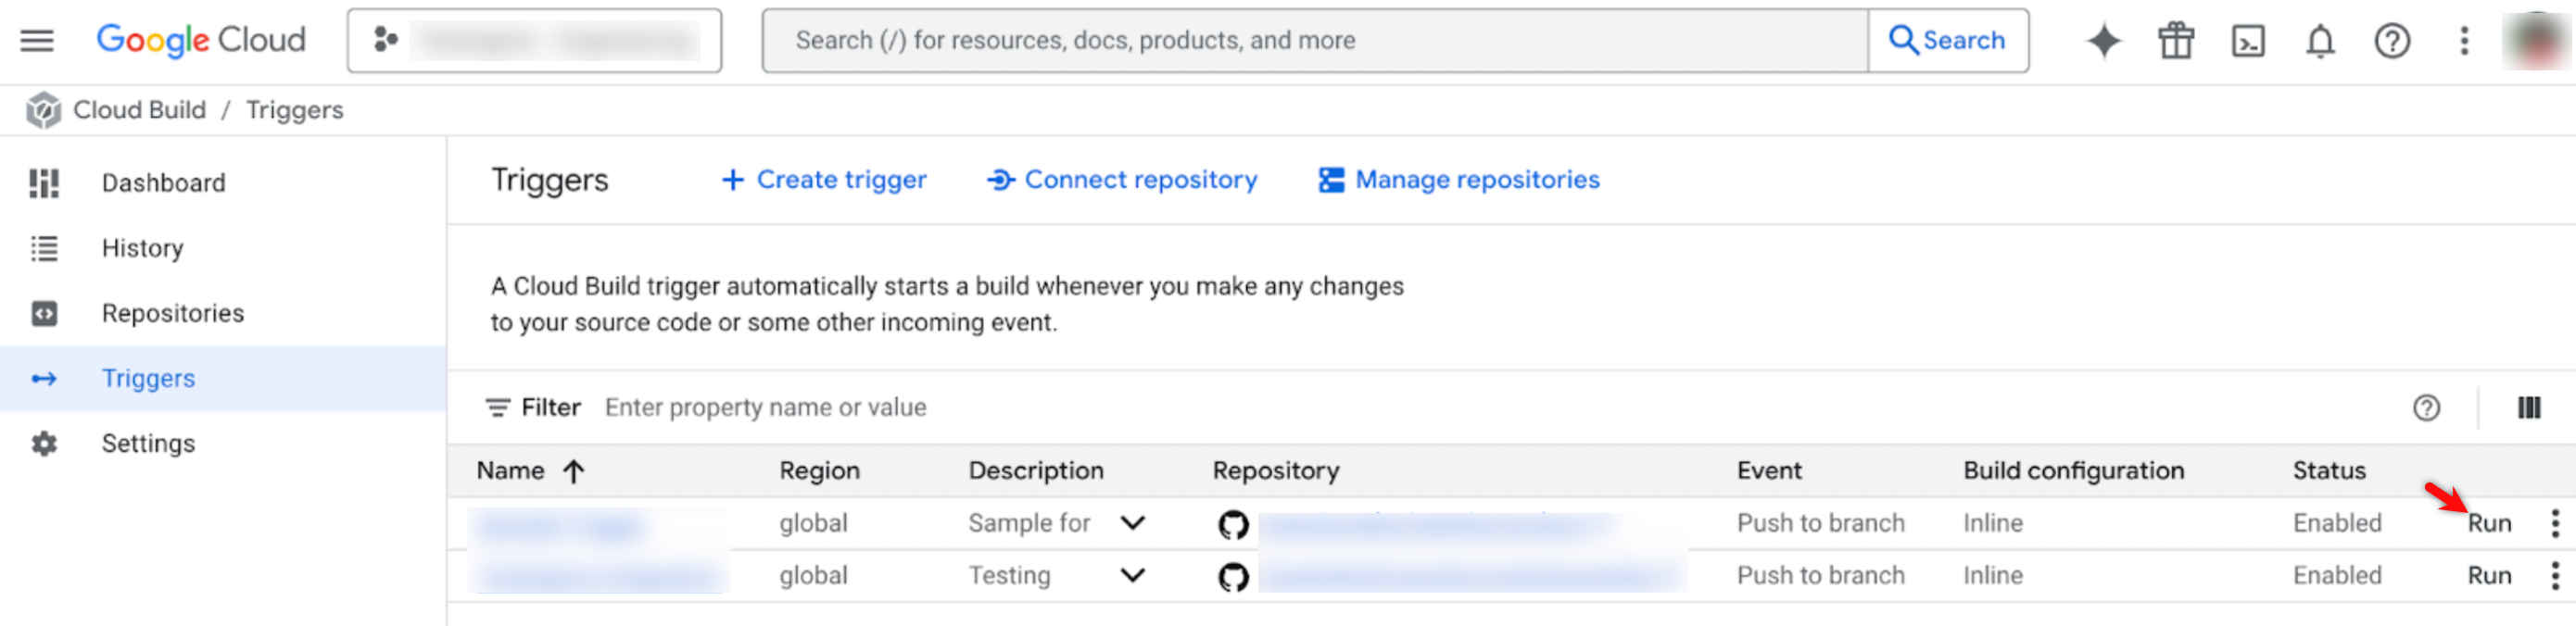
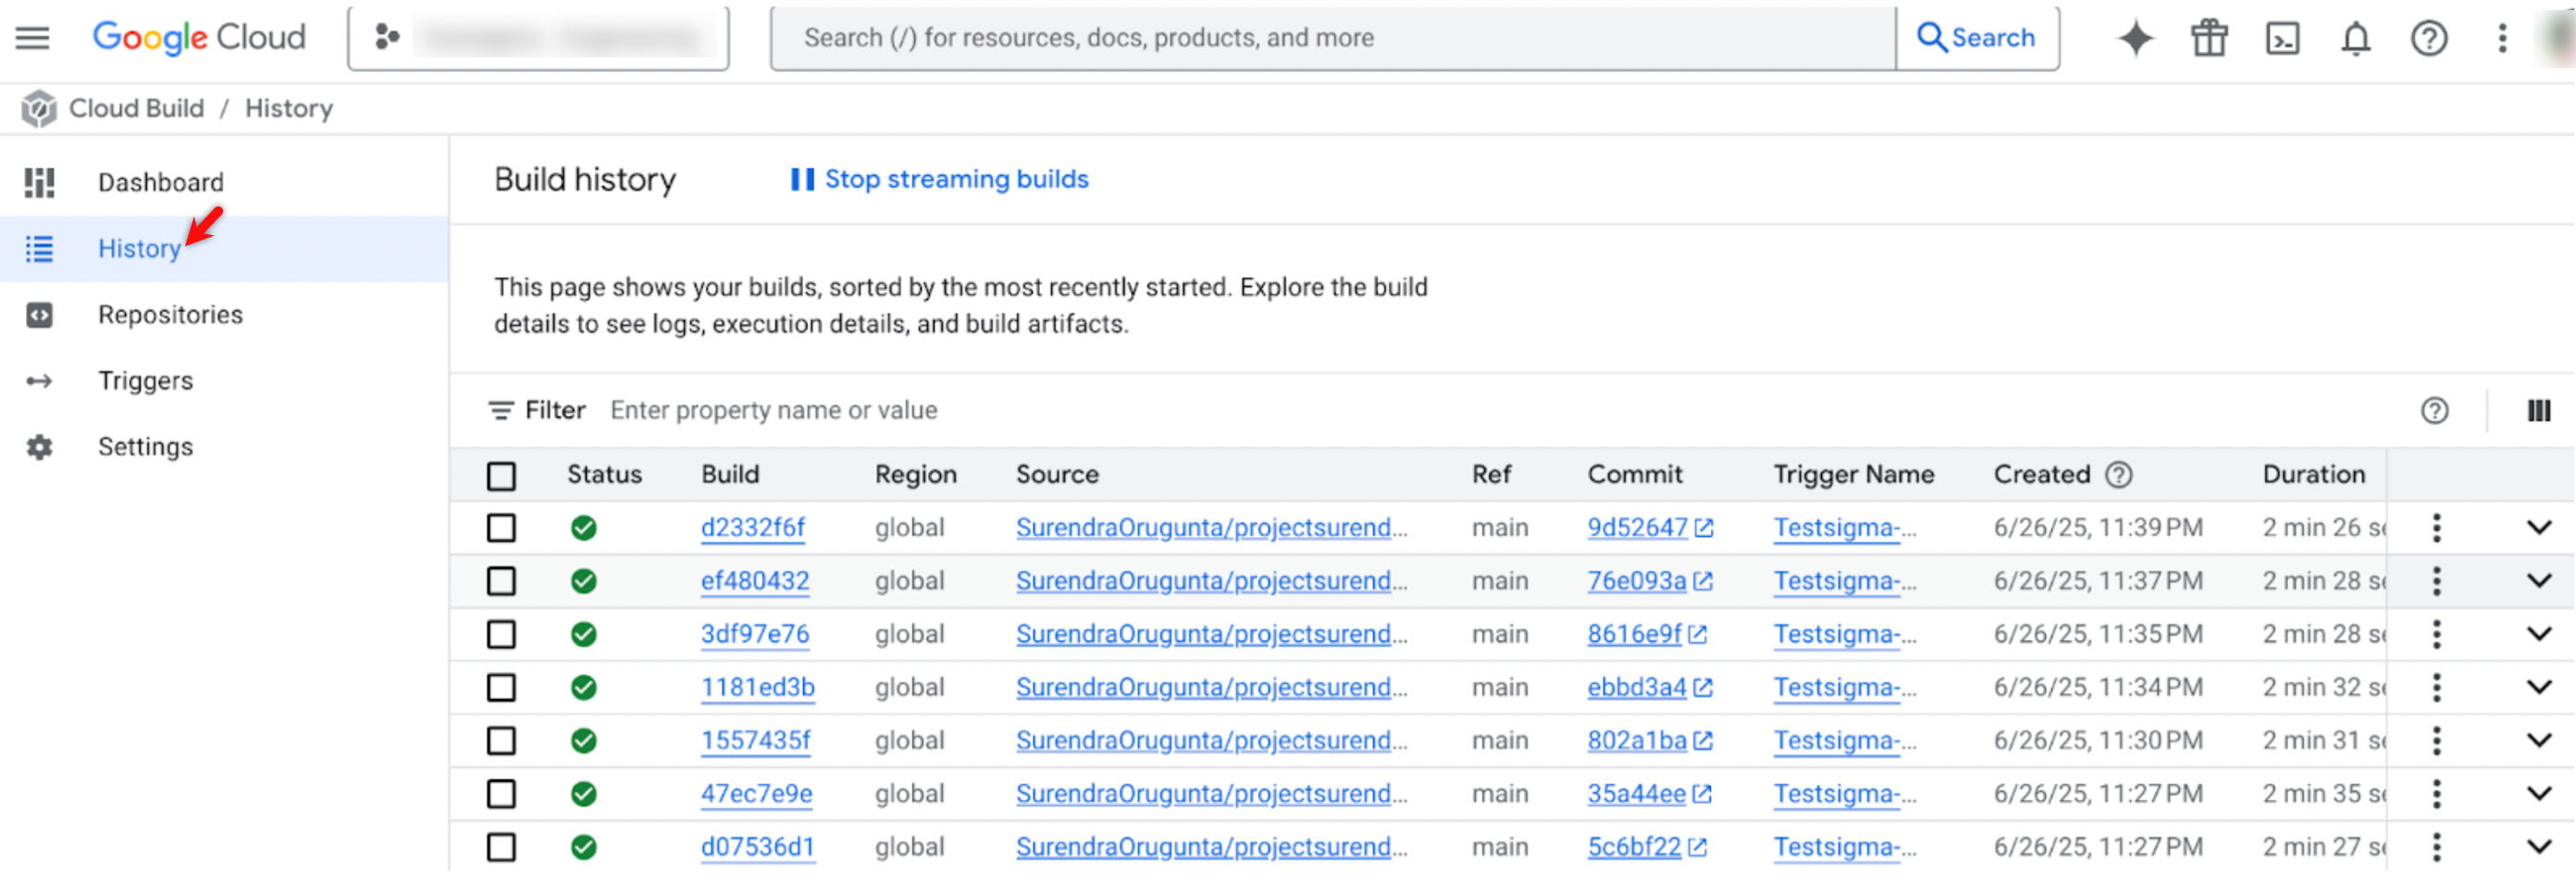
- You can view the build results under History in the Cloud Build menu.
Want to contribute or report missing content?