 Intro: Windows Automation (Lite)
- Windows (Lite) Project & Application
- Element Learning with Test Recorder
- Test Cases for Windows (Lite)
Creating a Windows Project & Application
Creating a Windows (Lite) application in Testsigma is simple!
Go to one of your existing projects and create a new Windows (Lite) application, or create a new project and add a Windows (Lite) application to it. This article discusses creating a project and adding a Windows (Lite) application to the project in Testsigma.
For more information, refer to the documentation on creating projects and documentation on creating applications.
Steps to Create a Windows (Lite) Project and Application
-
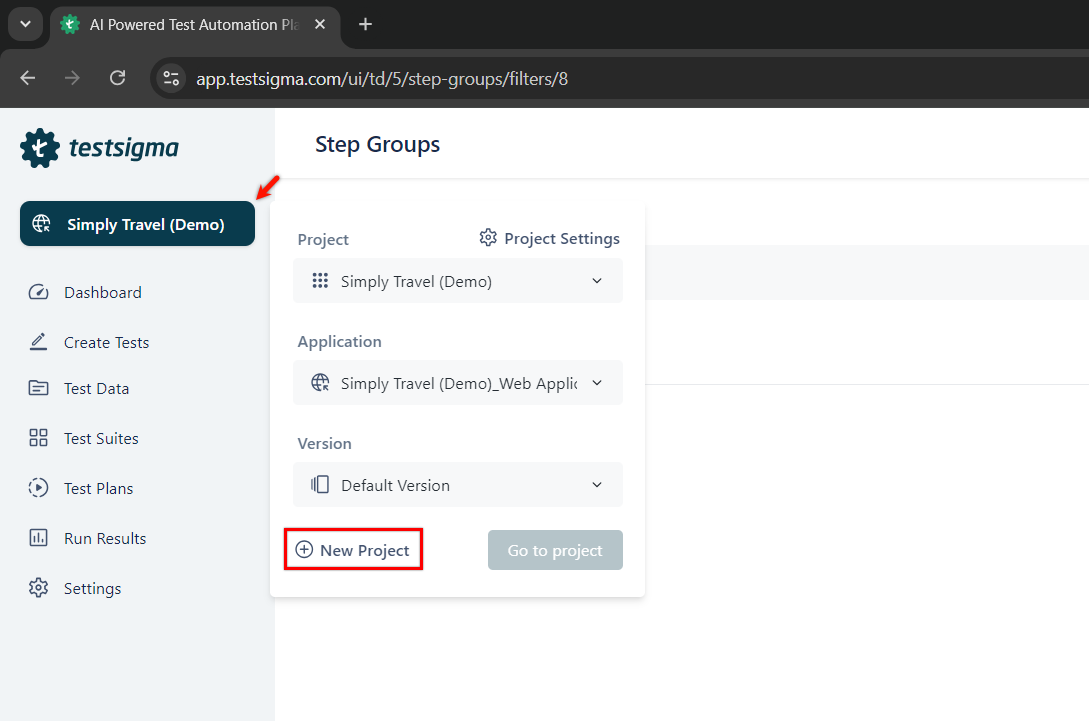
Navigate to Project on the left-nav bar, and click New Project.
-
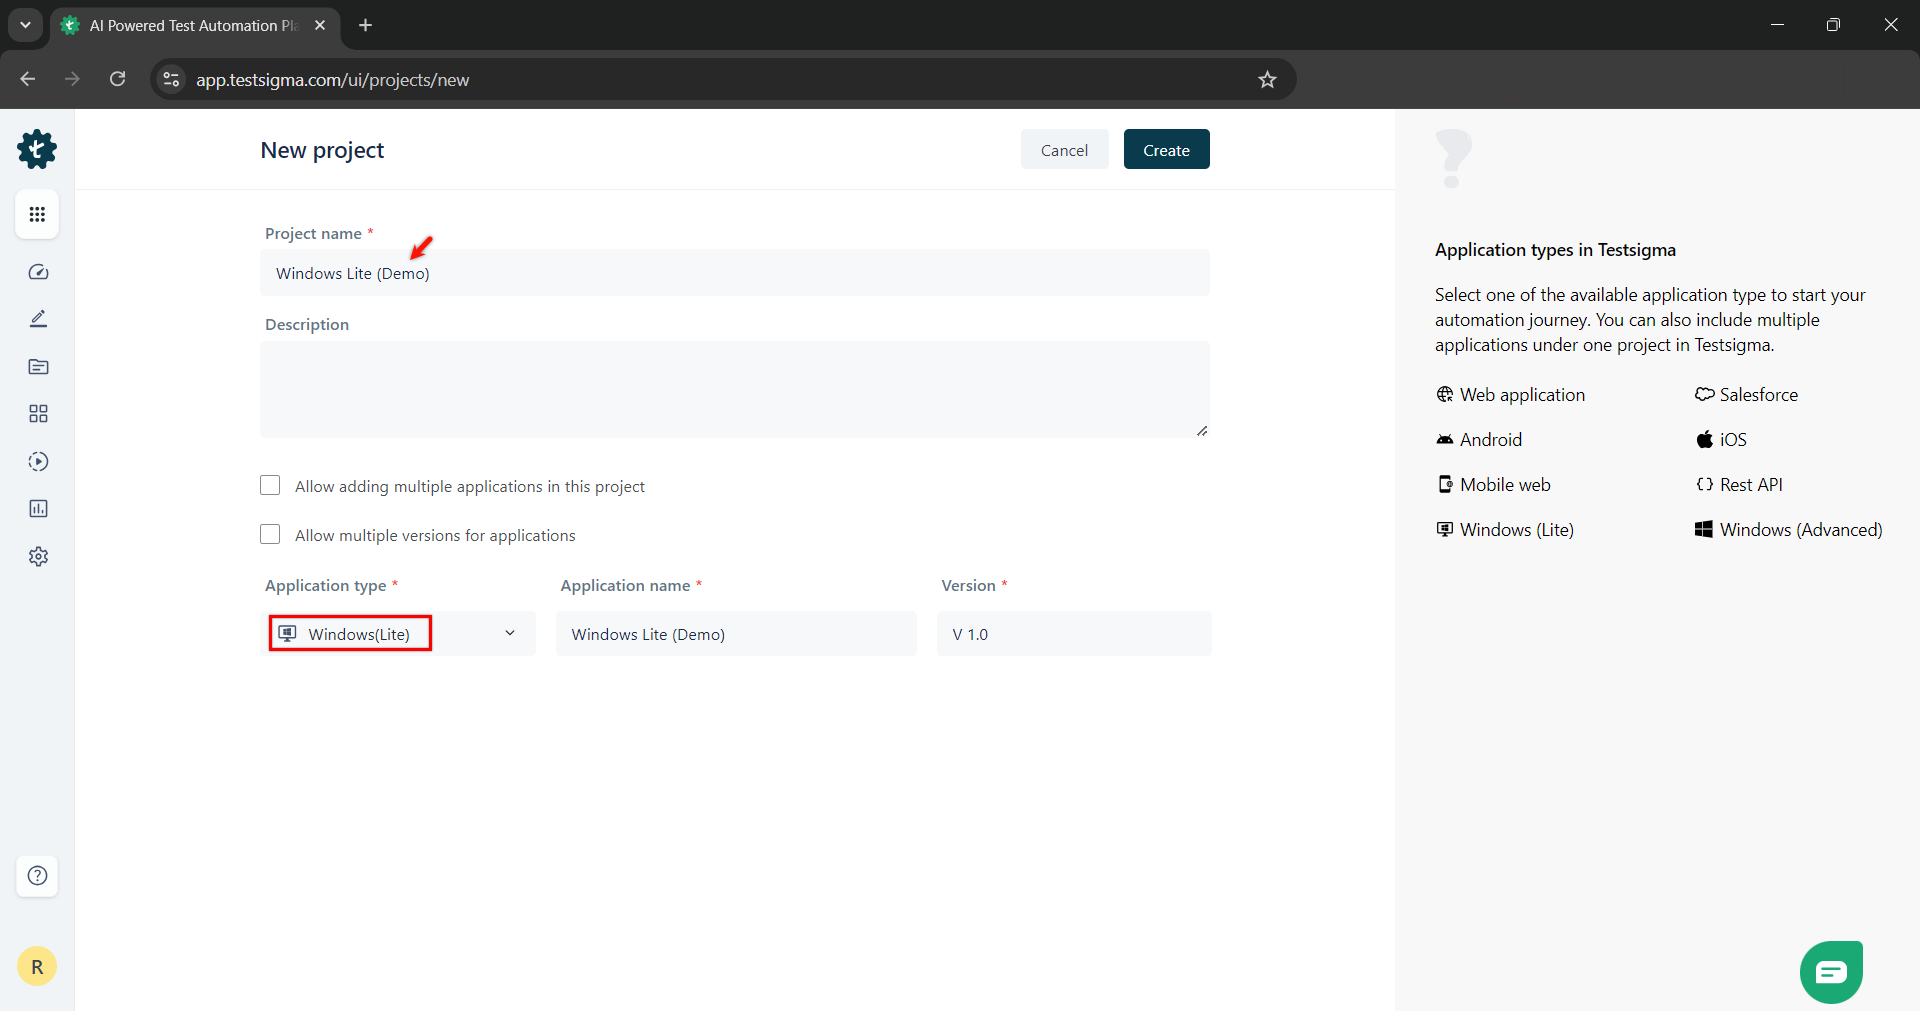
On the New project page,
-
Enter Project name and choose Windows (Lite) from the Application type dropdown.
-
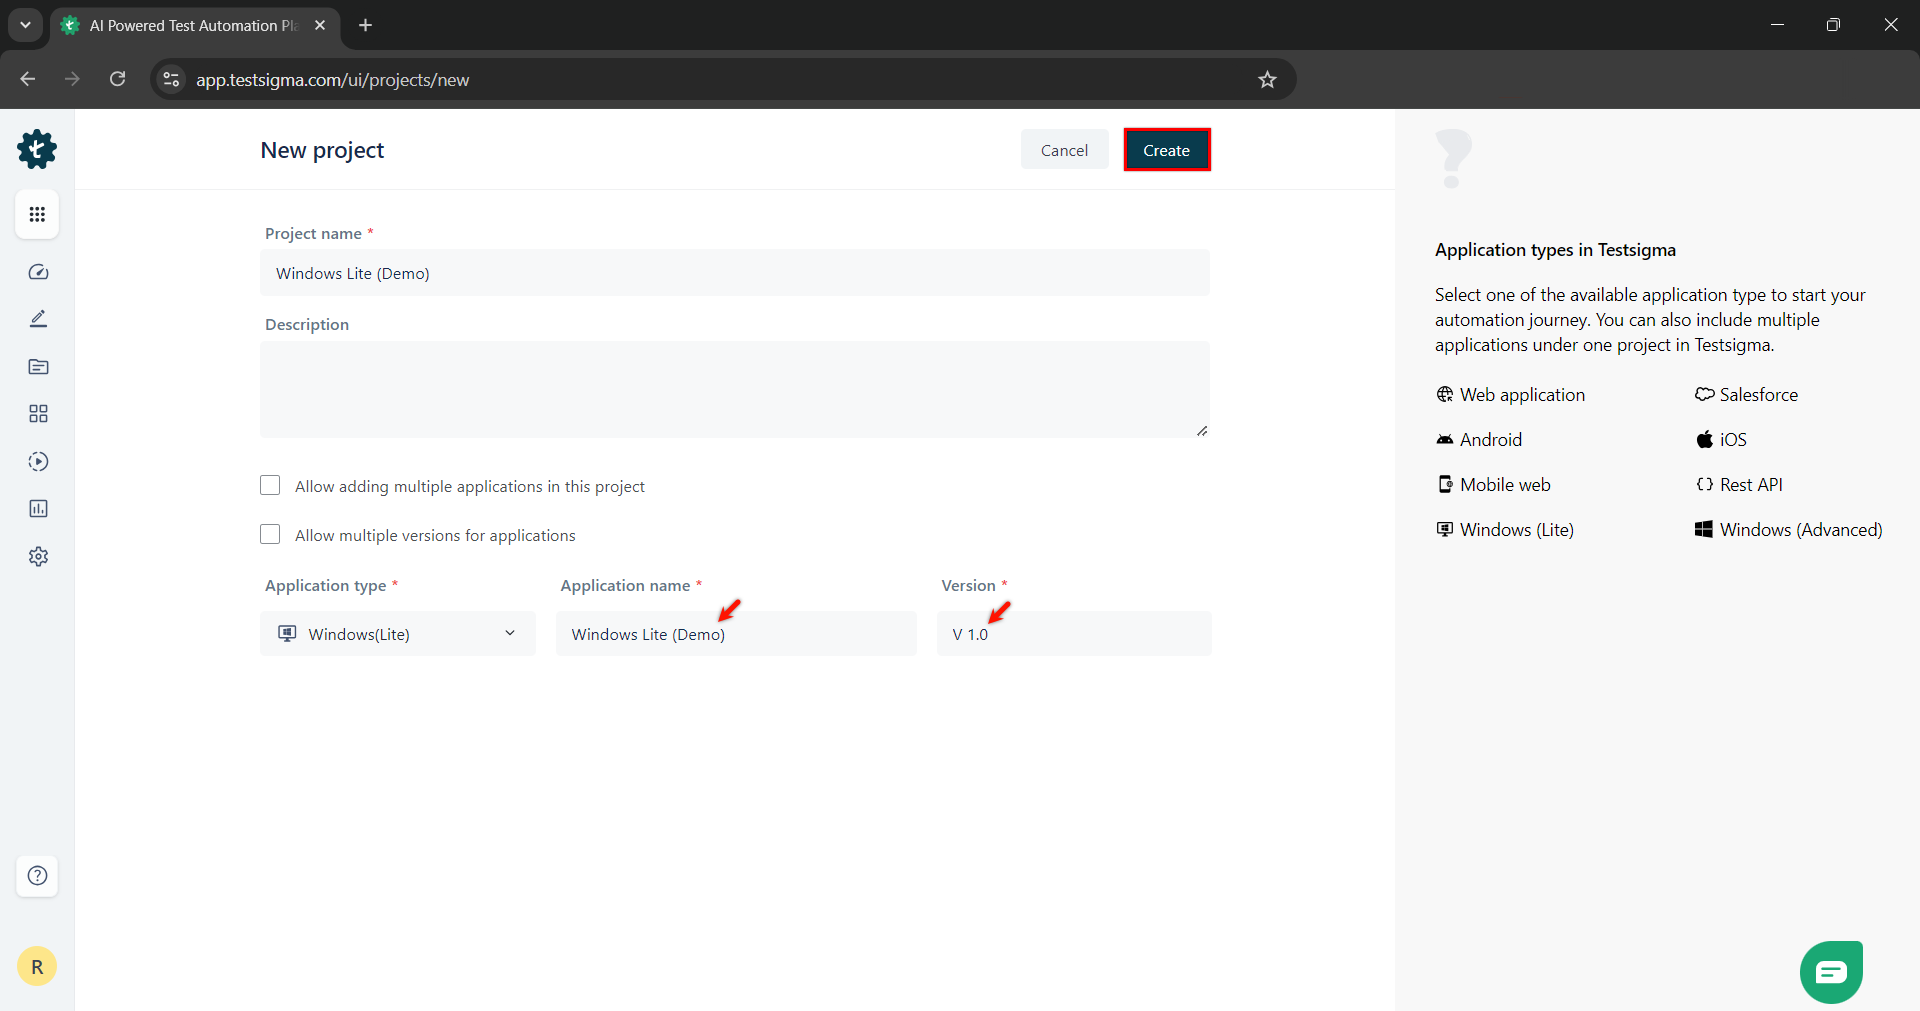
Enter Application name, Version and click Create.
-
NOTE:
- You can also add a Windows (Lite) application to an existing project by navigating to Project > Project Settings > Applications > New Application.
- Ensure the Allow Multiple Applications option is enabled before proceeding with creating a new application.
Want to contribute or report missing content?