
Add Requirements
Testsigma allows you to generate test cases from requirements using Generative AI. It takes inputs from tools such as Jira, Xray, qTest, and Figma, along with supporting files like videos and images. Based on these inputs, Testsigma automatically generates executable test cases, helping you accelerate test development and improve coverage. This article discusses generating test cases from requirements using Testsigma's Generative AI capabilities.
Prerequisites
Before you begin, enable AI Features from Settings > Preferences > Generative AI features and ensure have necessary integrations with Testsigma.
Add the Data from Jira
- From the left navigation bar, go to Atto’s Home.
- Click Generate with AI.
- On the Generate Test Cases page, click Jira Requirements.
-
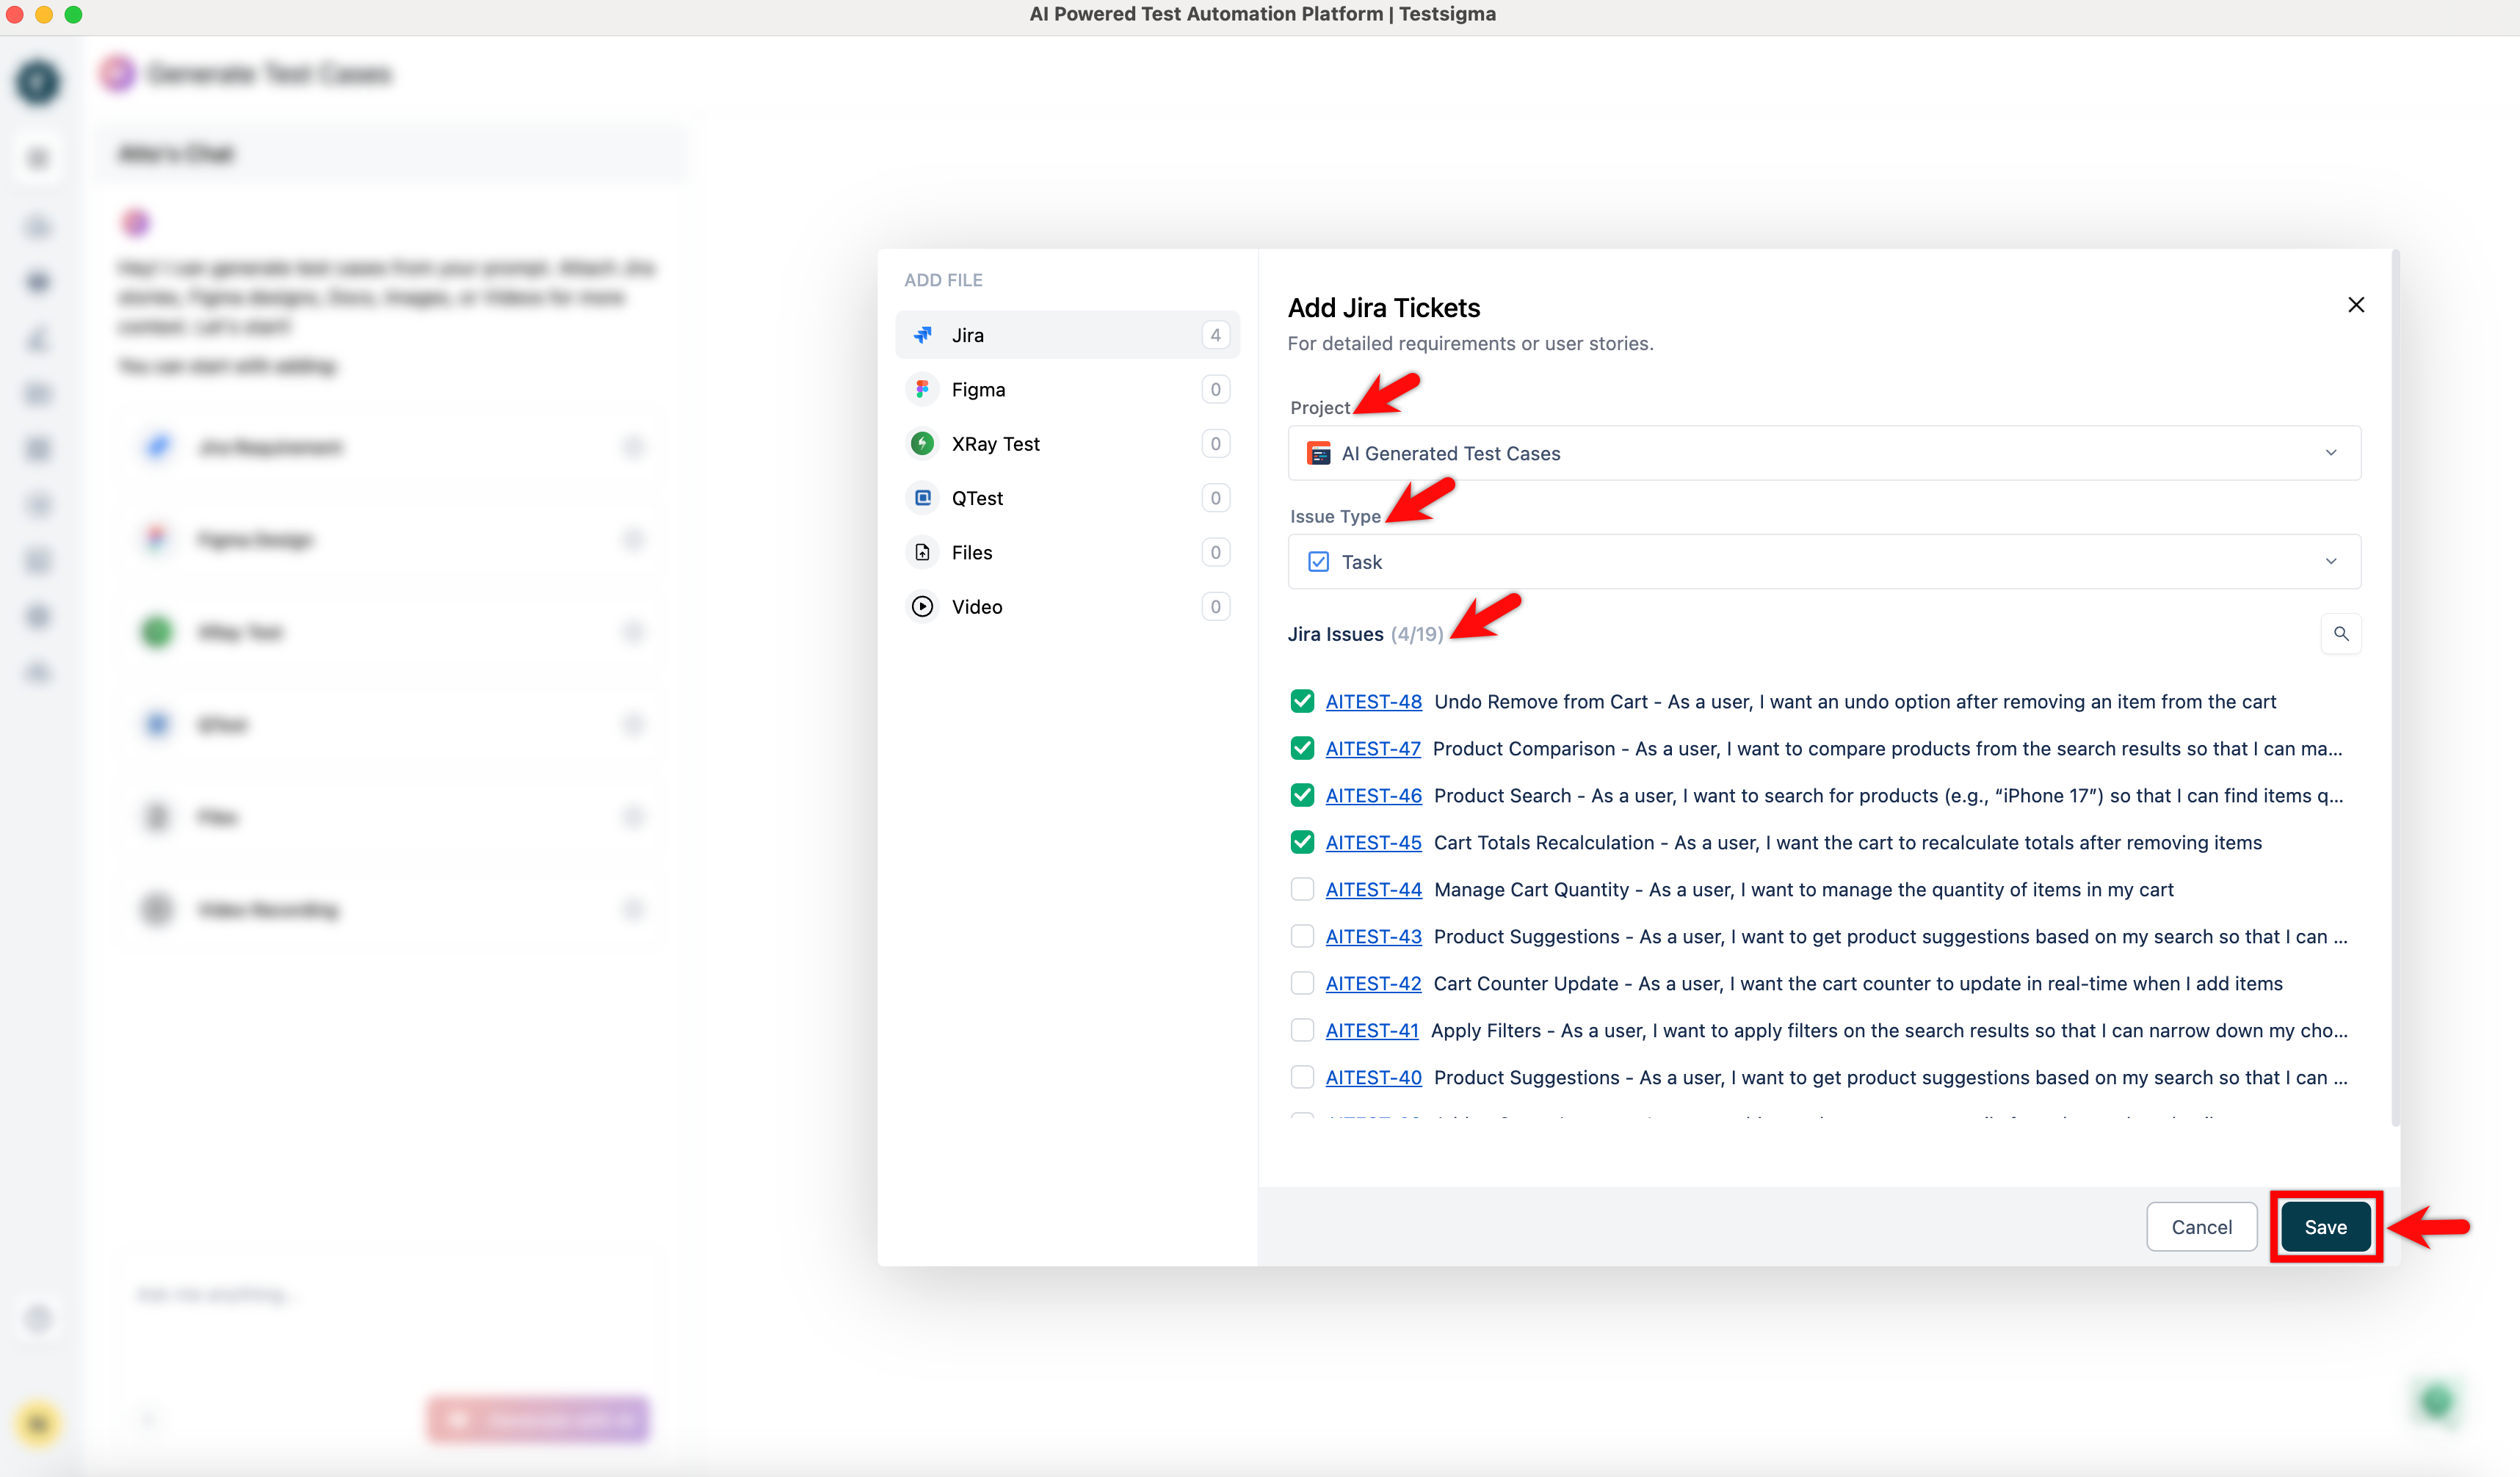
In the Add Jira Tickets dialog,
- From the Jira Project dropdown, select a project.
-
Under Issue Type, select either Epic or Story:
- If you select Epic, choose the stories under that epic.
- If you select Story, choose the stories you want to generate test cases for.
- Click Save.
To generate Salesforce test cases from requirements, click Settings in the prompt text box. By default, the Prefer API steps is selected. To generate UI-based test steps, clear the Prefer API steps option.
Add the Data from Figma
- From the left navigation bar, go to Atto’s Home.
- Click Generate with AI.
- In the Generate Test Cases section, select Figma Designs.
-
In the Figma Designs dialog,
- Select a Team, Project, Figma design file, Section and Page from the respective dropdown menus.
- Click + Select Frames, select the required frames in the Select Frames screen, and click Save.
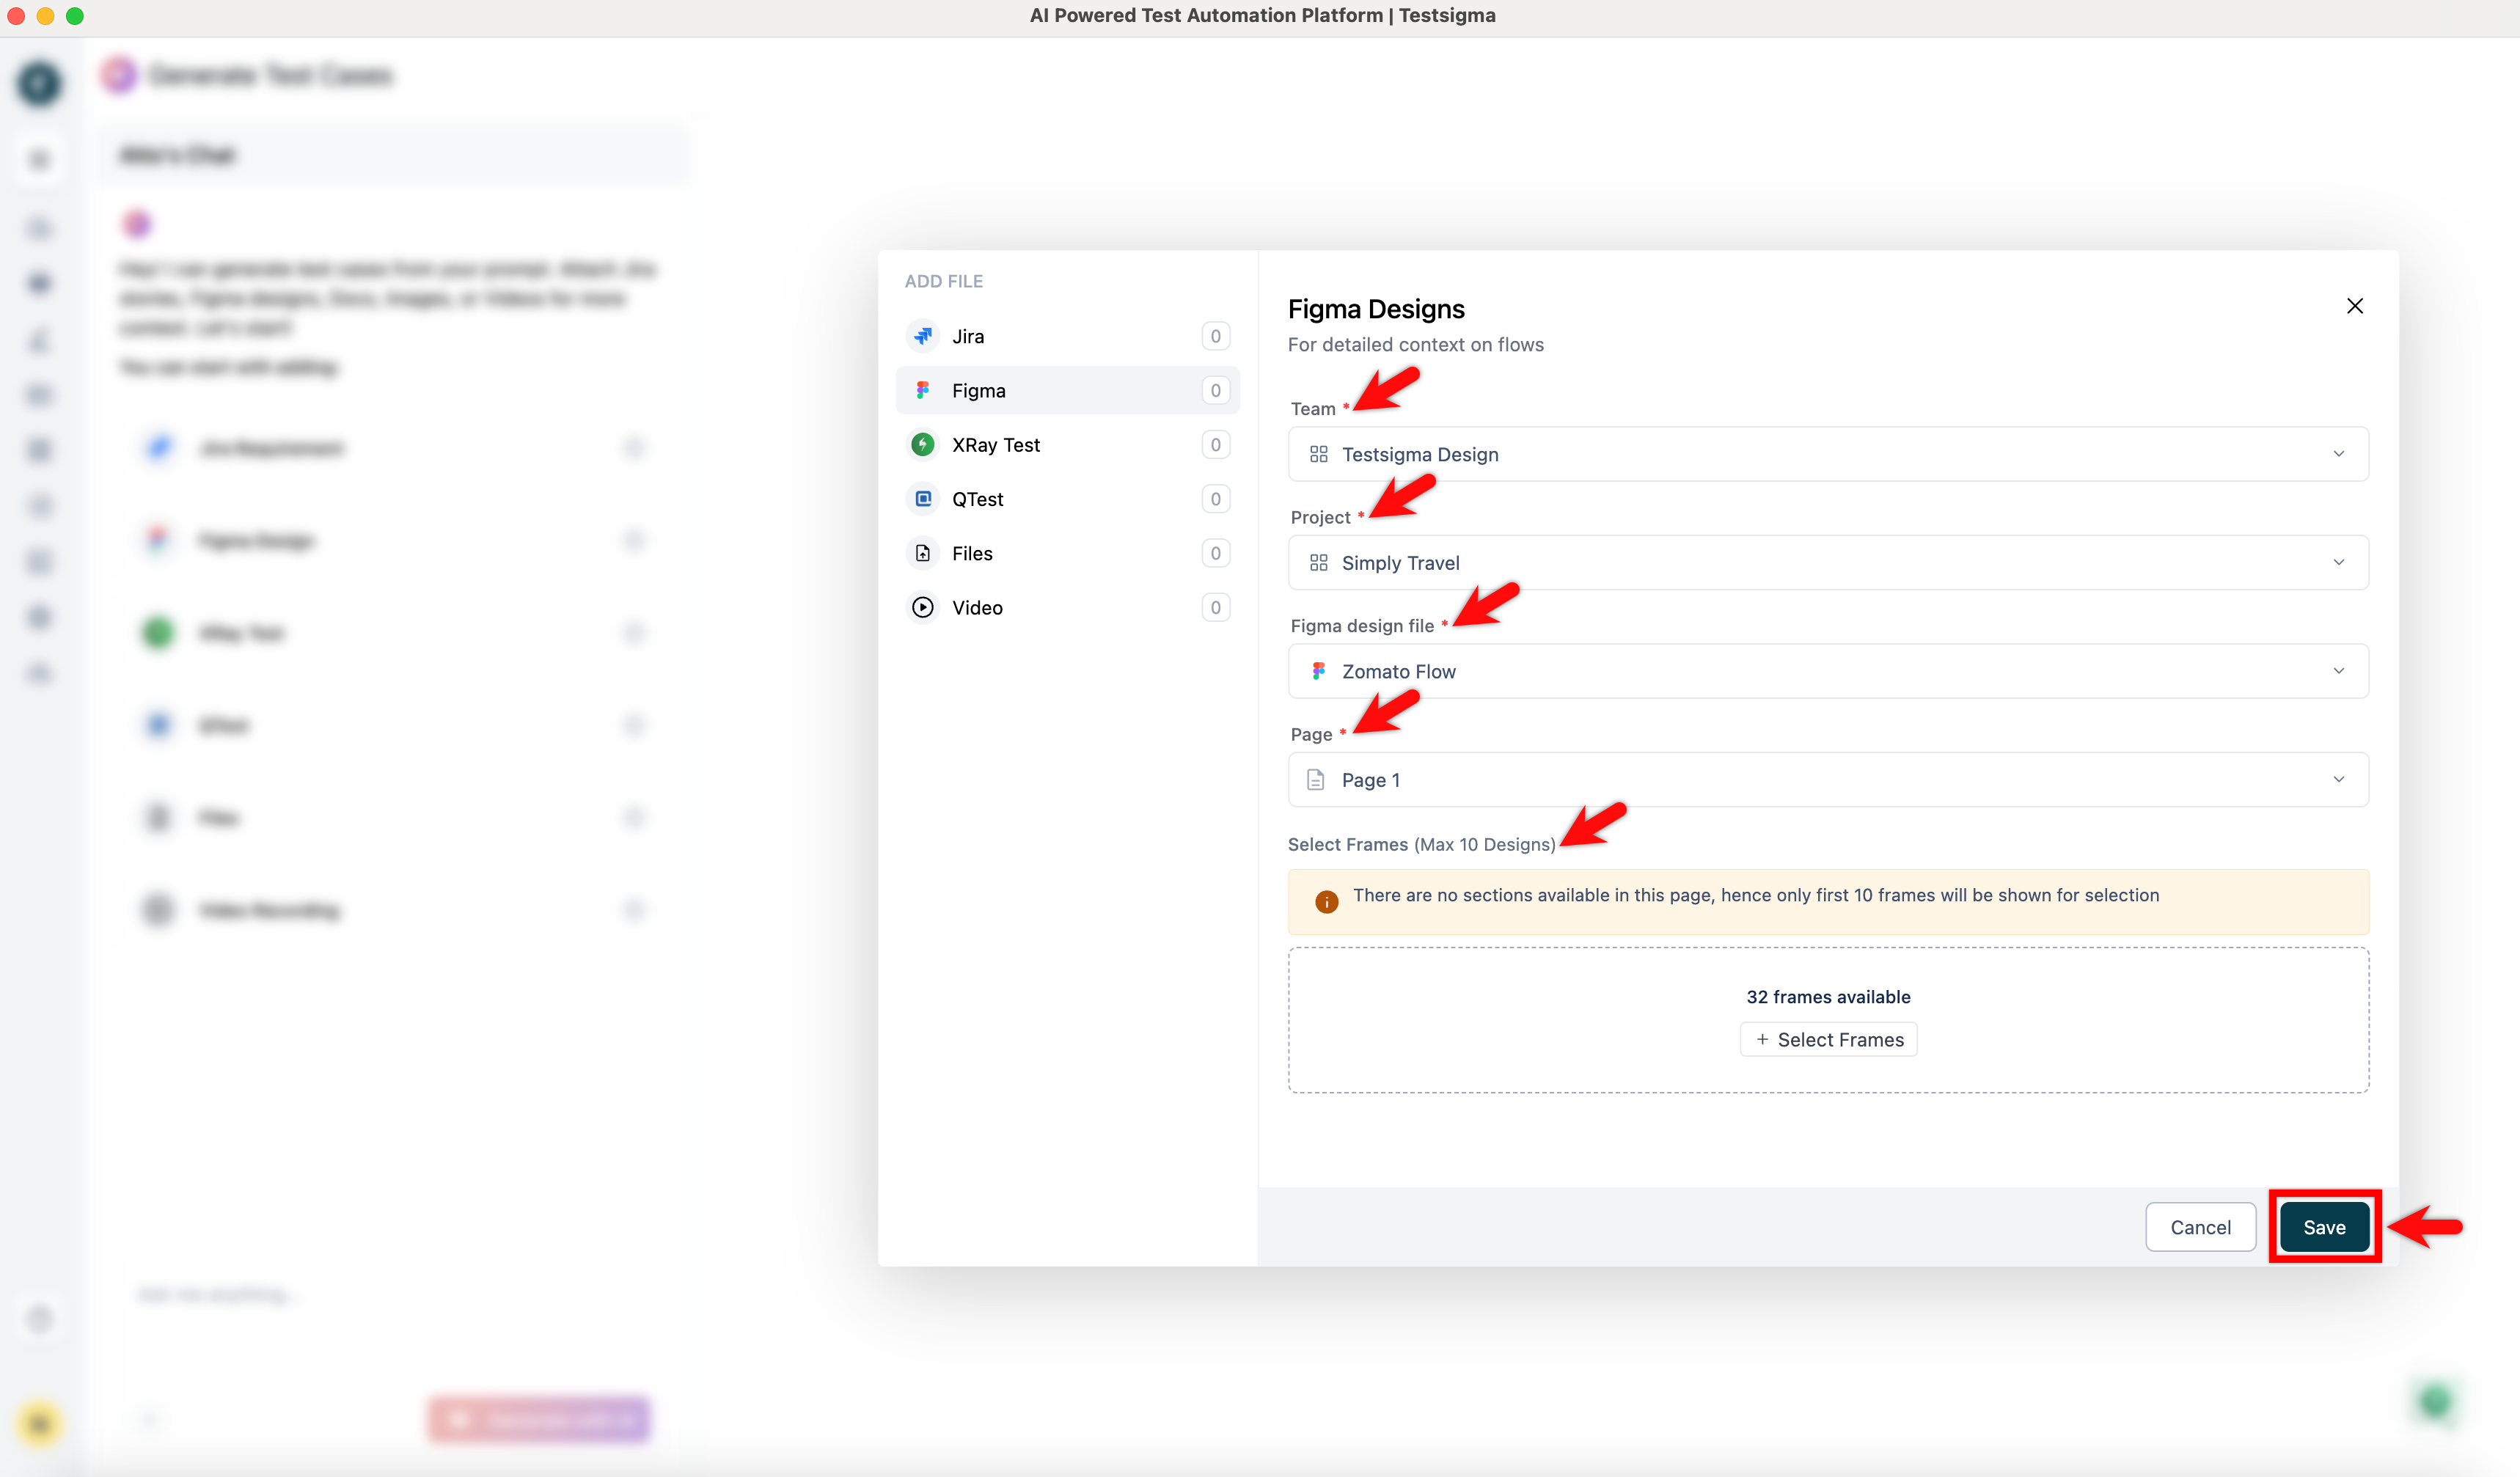
- If you want to remove all the selections that you have made, click Clear Selection.
- If the selected page has no Sections, you can directly select the frames.
- The maximum limit for selecting frames is 10.
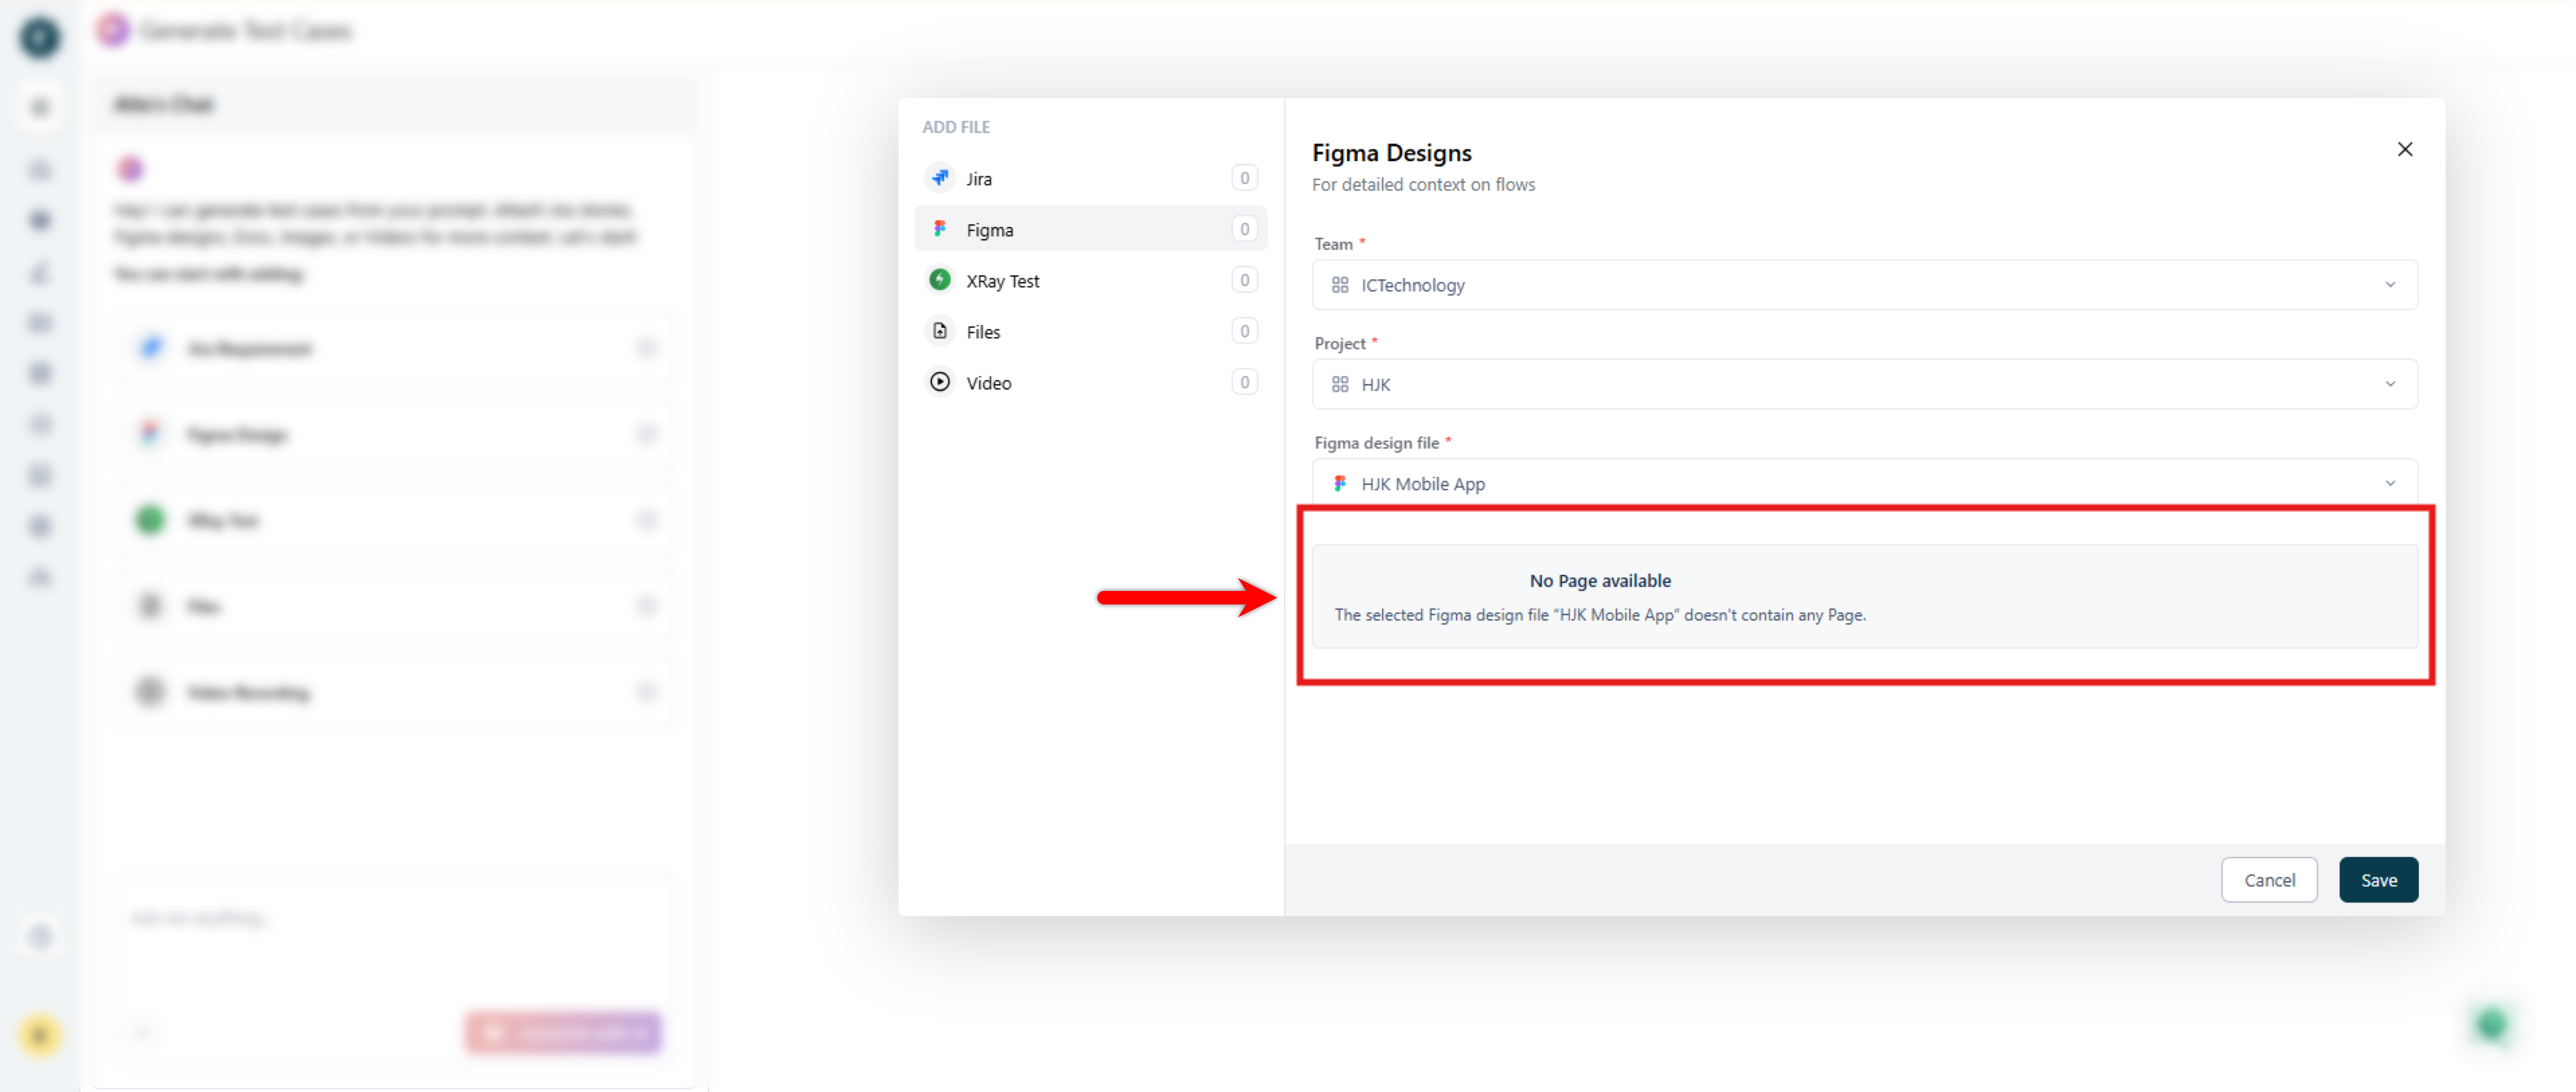
Troubleshooting: Figma Pages Not Loading in Testsigma
In some cases, the Figma pages may fail to load and display No pages even if the same file worked previously. This issue typically occurs when Figma’s API rate limits are exceeded, preventing Testsigma from fetching the required page data.
Cause
Figma applies rate limits to REST API requests based on the user’s seat type and access level. When these limits are reached, Figma temporarily stops returning page/file information to external tools. As a result, Testsigma cannot load the pages and displays No pages. Users with lower access seats are more likely to reach these limits, which may cause the page list to stop loading intermittently.
Steps to Resolve the Issue
1. Verify the Figma API Key Permissions
Ensure the API key used in Testsigma belongs to a Figma account with a Dev/Full seat. These roles provide higher API rate limits and help prevent intermittent failures.2. Re-generate the API Key (If Needed)
If the current key was created under a seat with restricted API access, generate a new key from an account with a higher access tier.3. Wait for Rate Limits to Reset
If rate limits were exceeded, Figma may temporarily block further requests. Wait a few minutes and then try loading the pages again.4. Review Figma Rate Limits
For detailed info on rate limits, see Figma’s Rate Limits.
Add the Data from QTest
- From the left navigation bar, go to Atto’s Home.
- Click Generate with AI.
- On the Generate Test Cases page, click QTest.
-
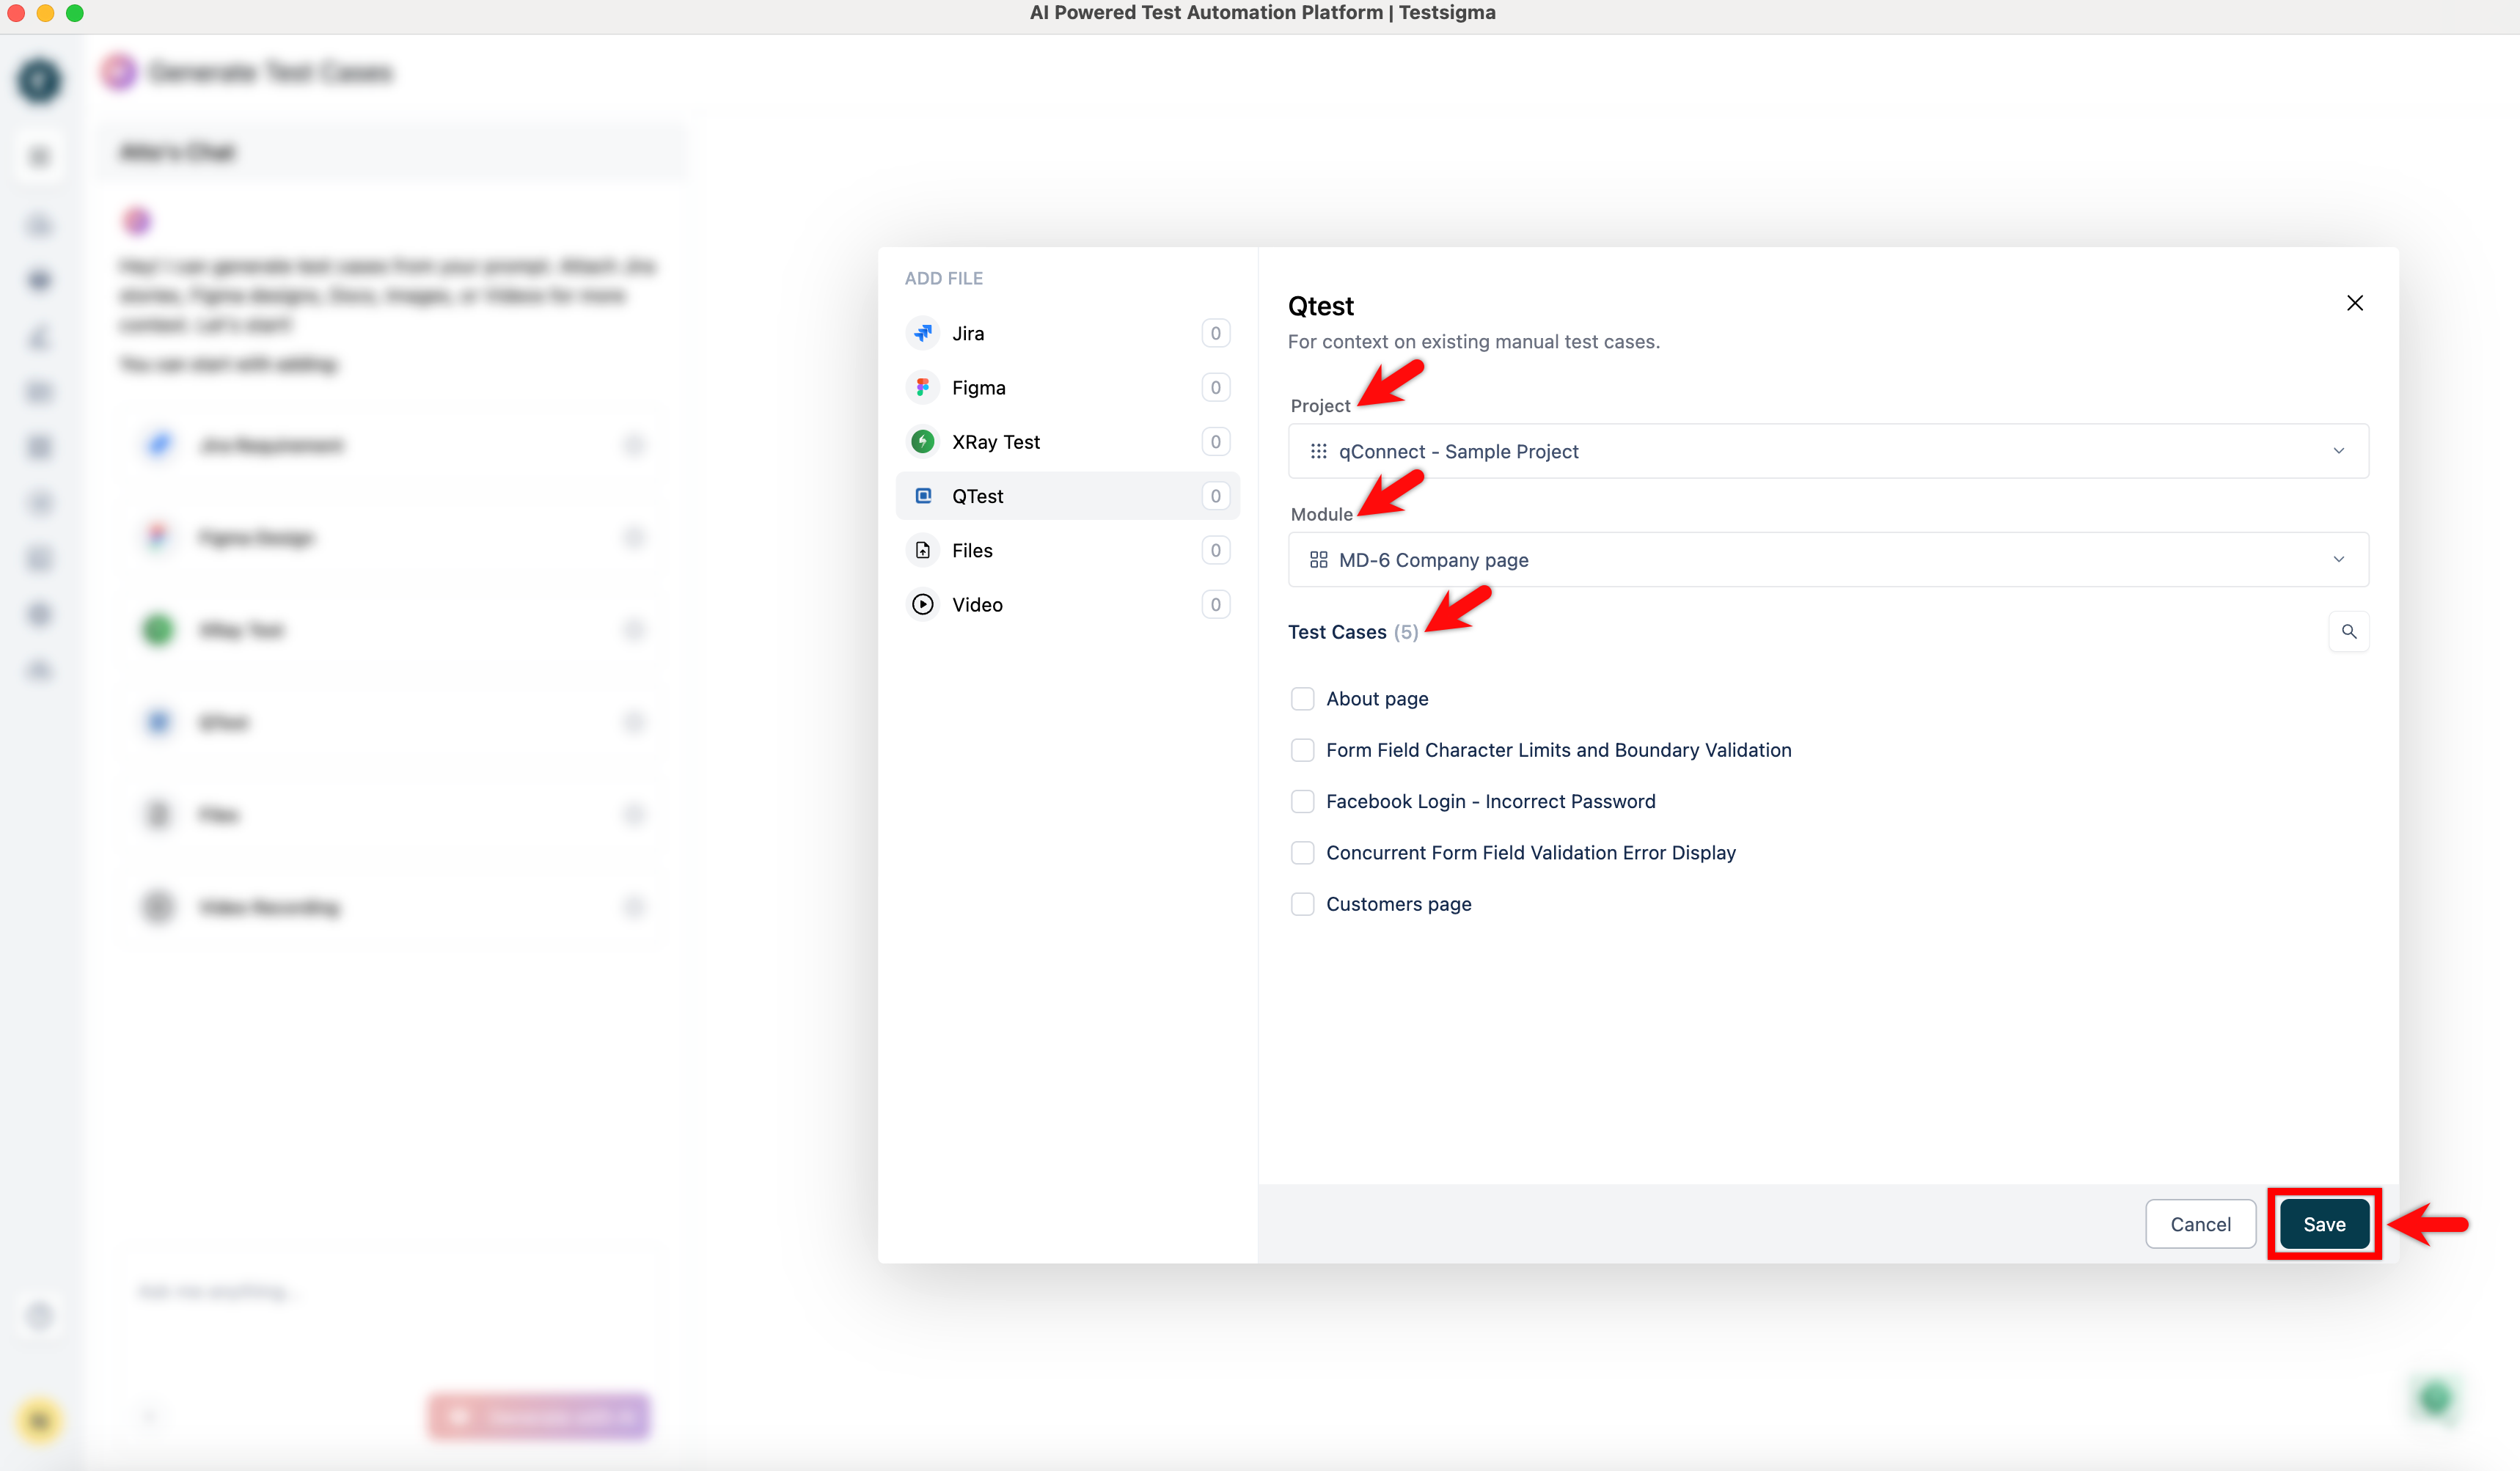
In the Qtest dialog,
- From the Project dropdown, select a project.
- From the Module dropdown, select a module.
- Select the test cases you want to use as input.
- Click Save.
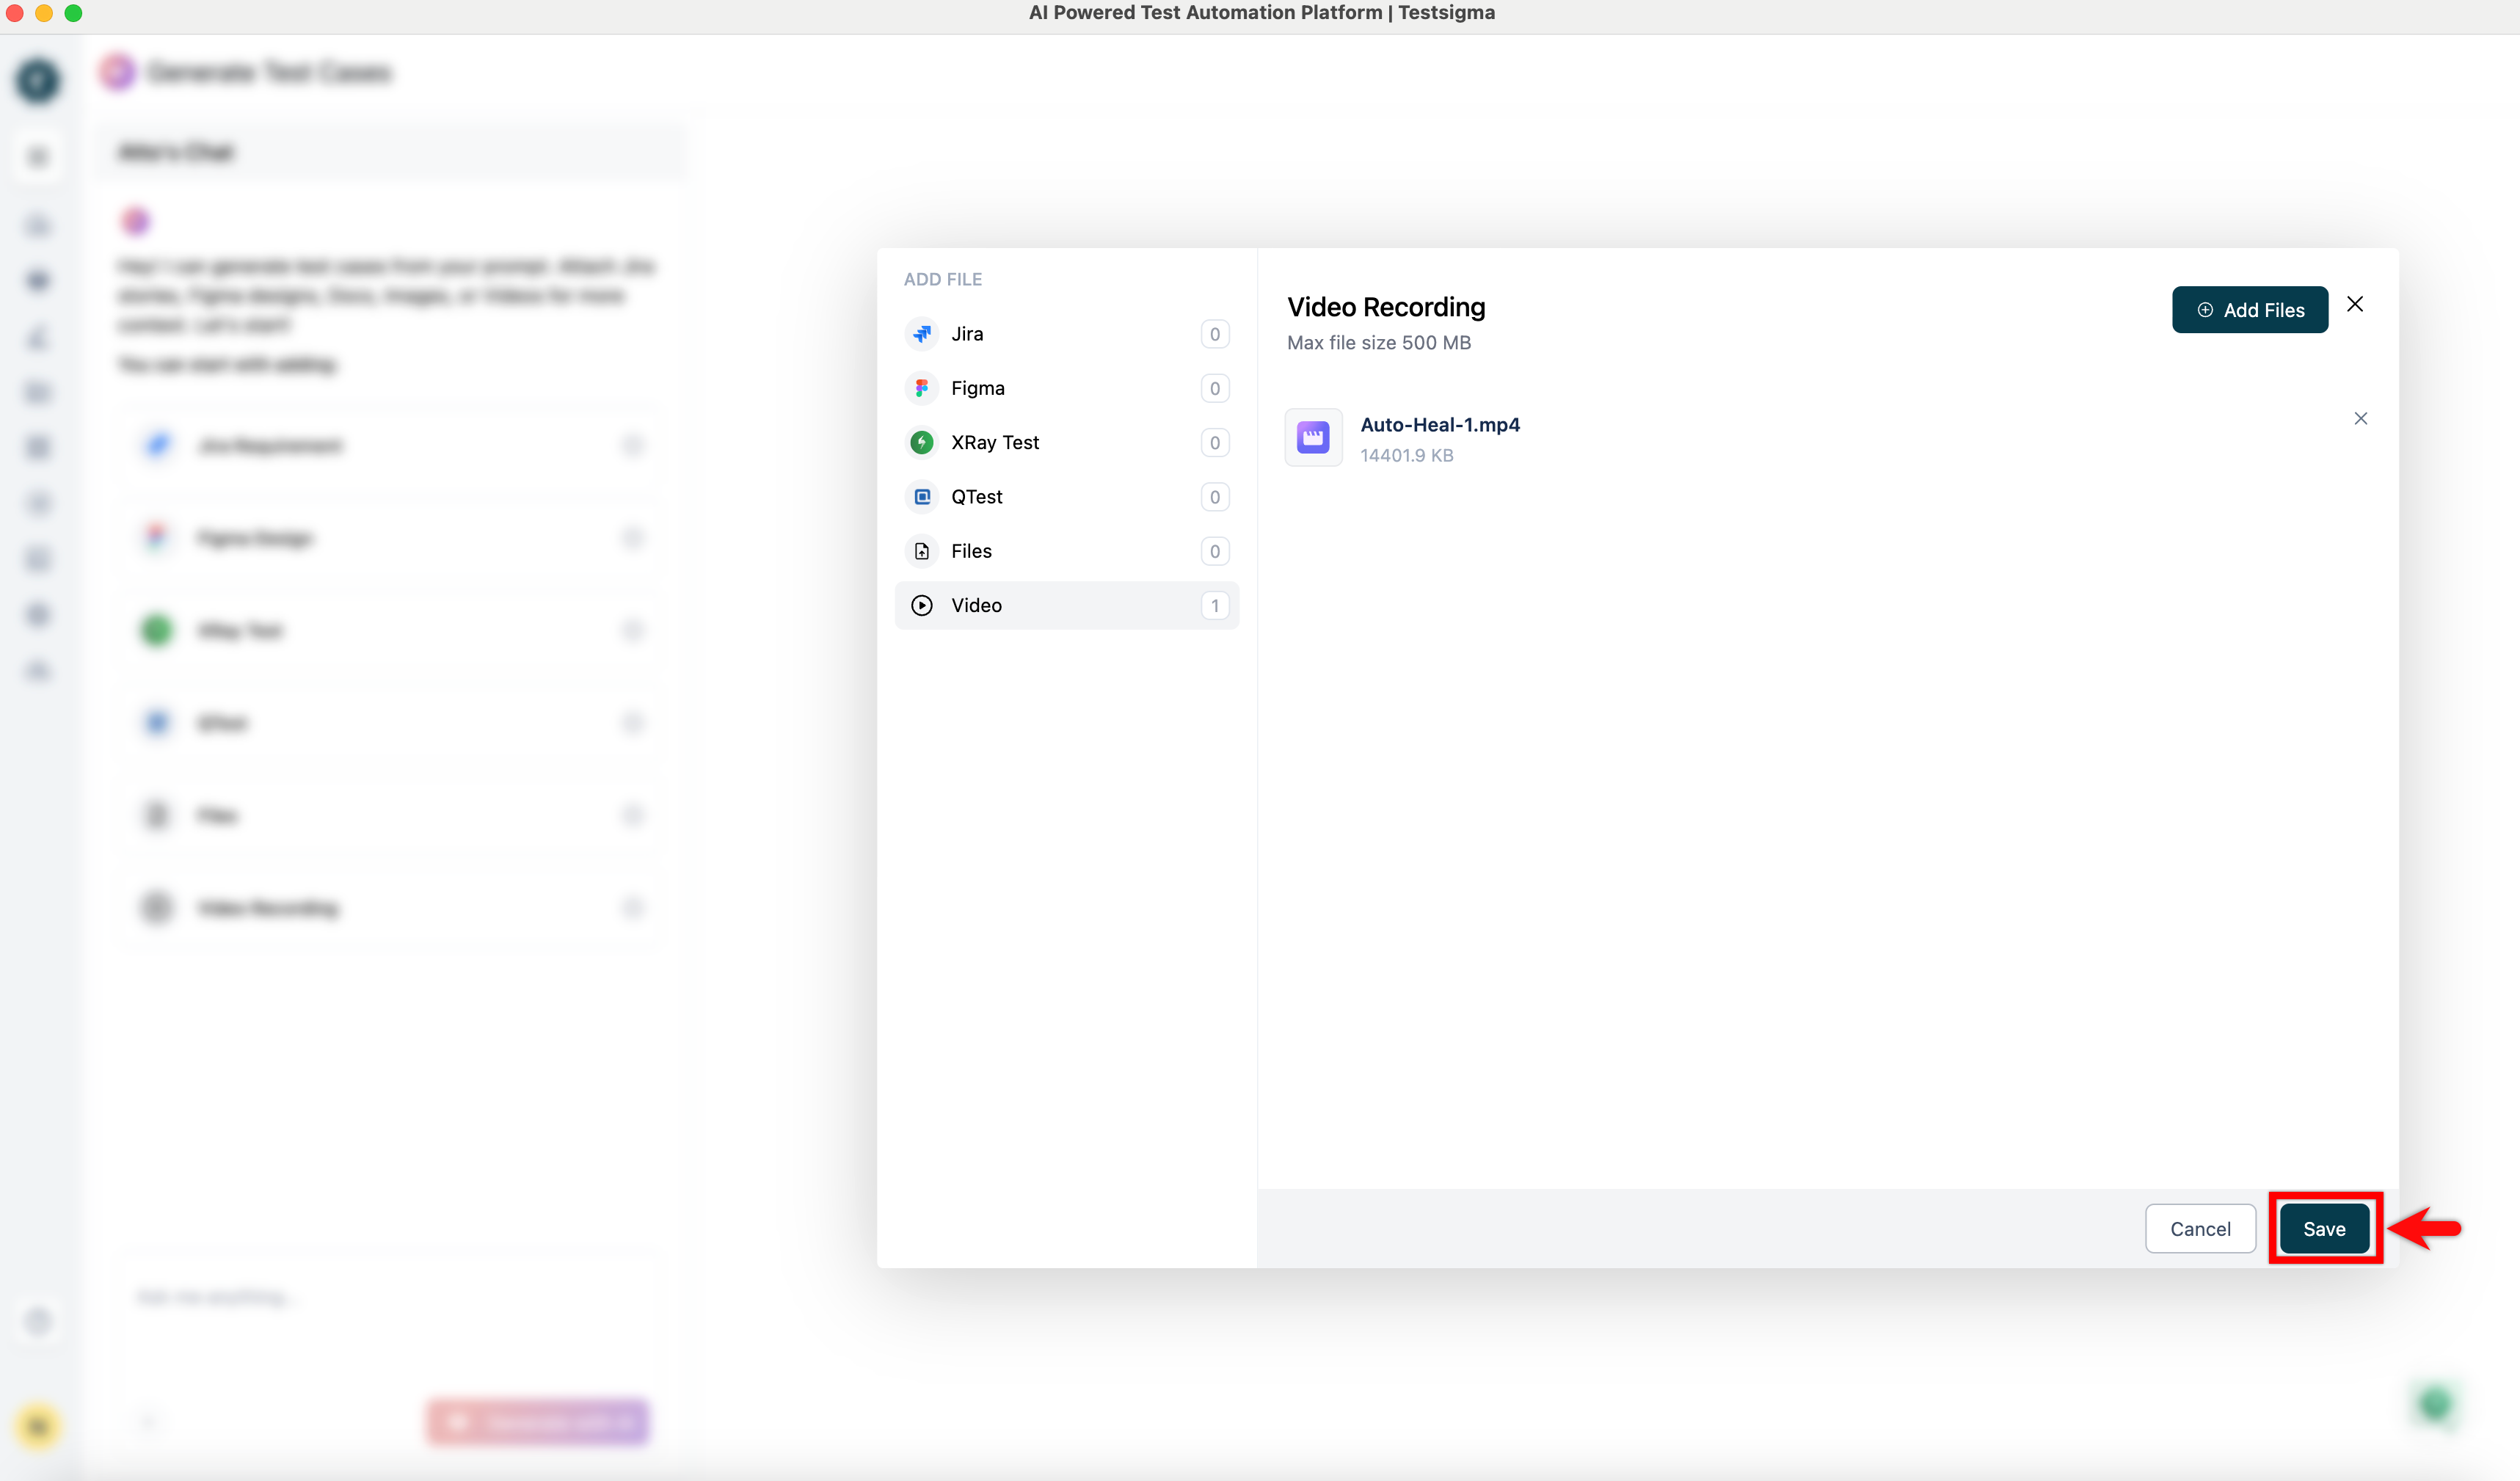
Add the Data from Video Recording
- From the left navigation bar, go to Atto’s Home.
- Click Generate with AI.
- In the Generate Test Cases section, click Video Recording as an input source.
- In the Video Recording dialog, click Add Files.
- Click Browse, select a video file, and wait for the upload to complete.
- Once the video is loaded, click Save.
- Click Save again.
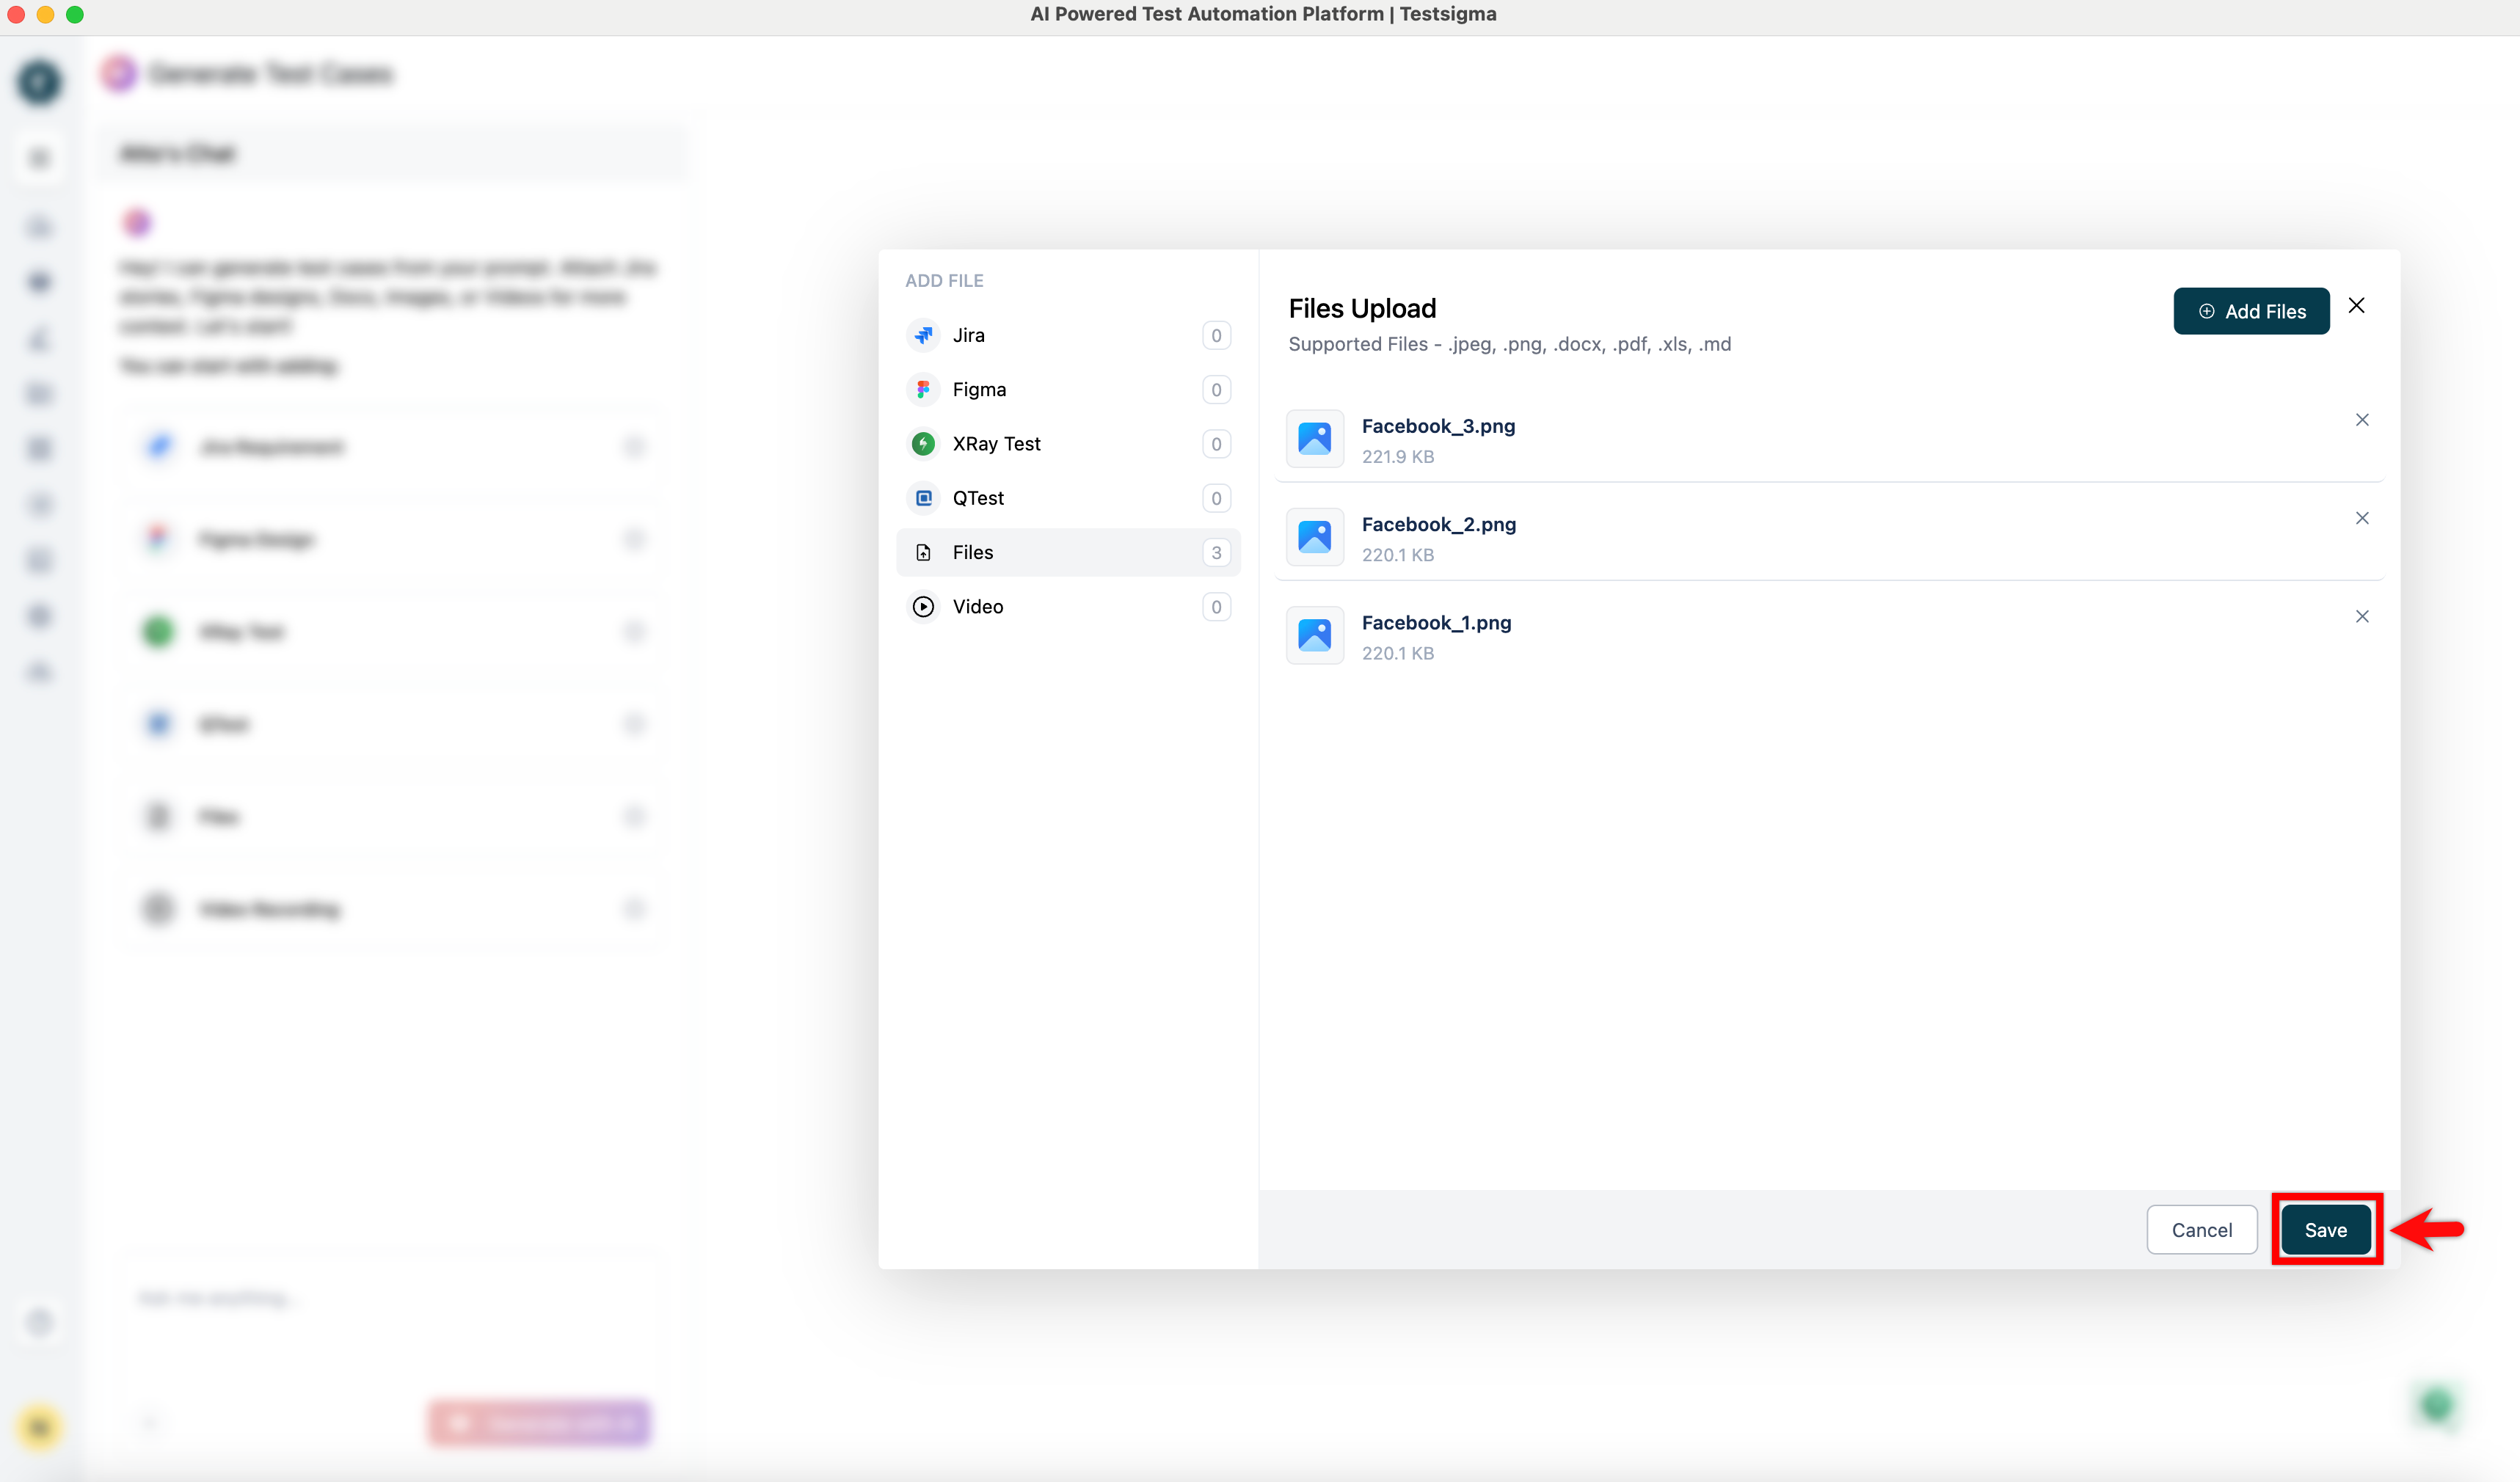
Add the Data from Files
- From the left navigation bar, go to Atto’s Home.
- Click Generate with AI.
- In the Generate Test Cases section, click Files as an input source.
- In the Files Upload dialog, click Add Files.
- Click Browse and select the files that contain relevant test information.
- Once the files are loaded, click Add Files.
- Click Save.
Add Data from Confluence Pages
- From the left navigation bar, go to Atto’s Home.
- Click Generate with AI.
- In the Generate Test Cases section, click Confluence as an input source.
-
In the Confluence dialog,
- Select the Confluence Space containing your requirements.
- Select one or more Pages you want to use as input.
- Click Save.
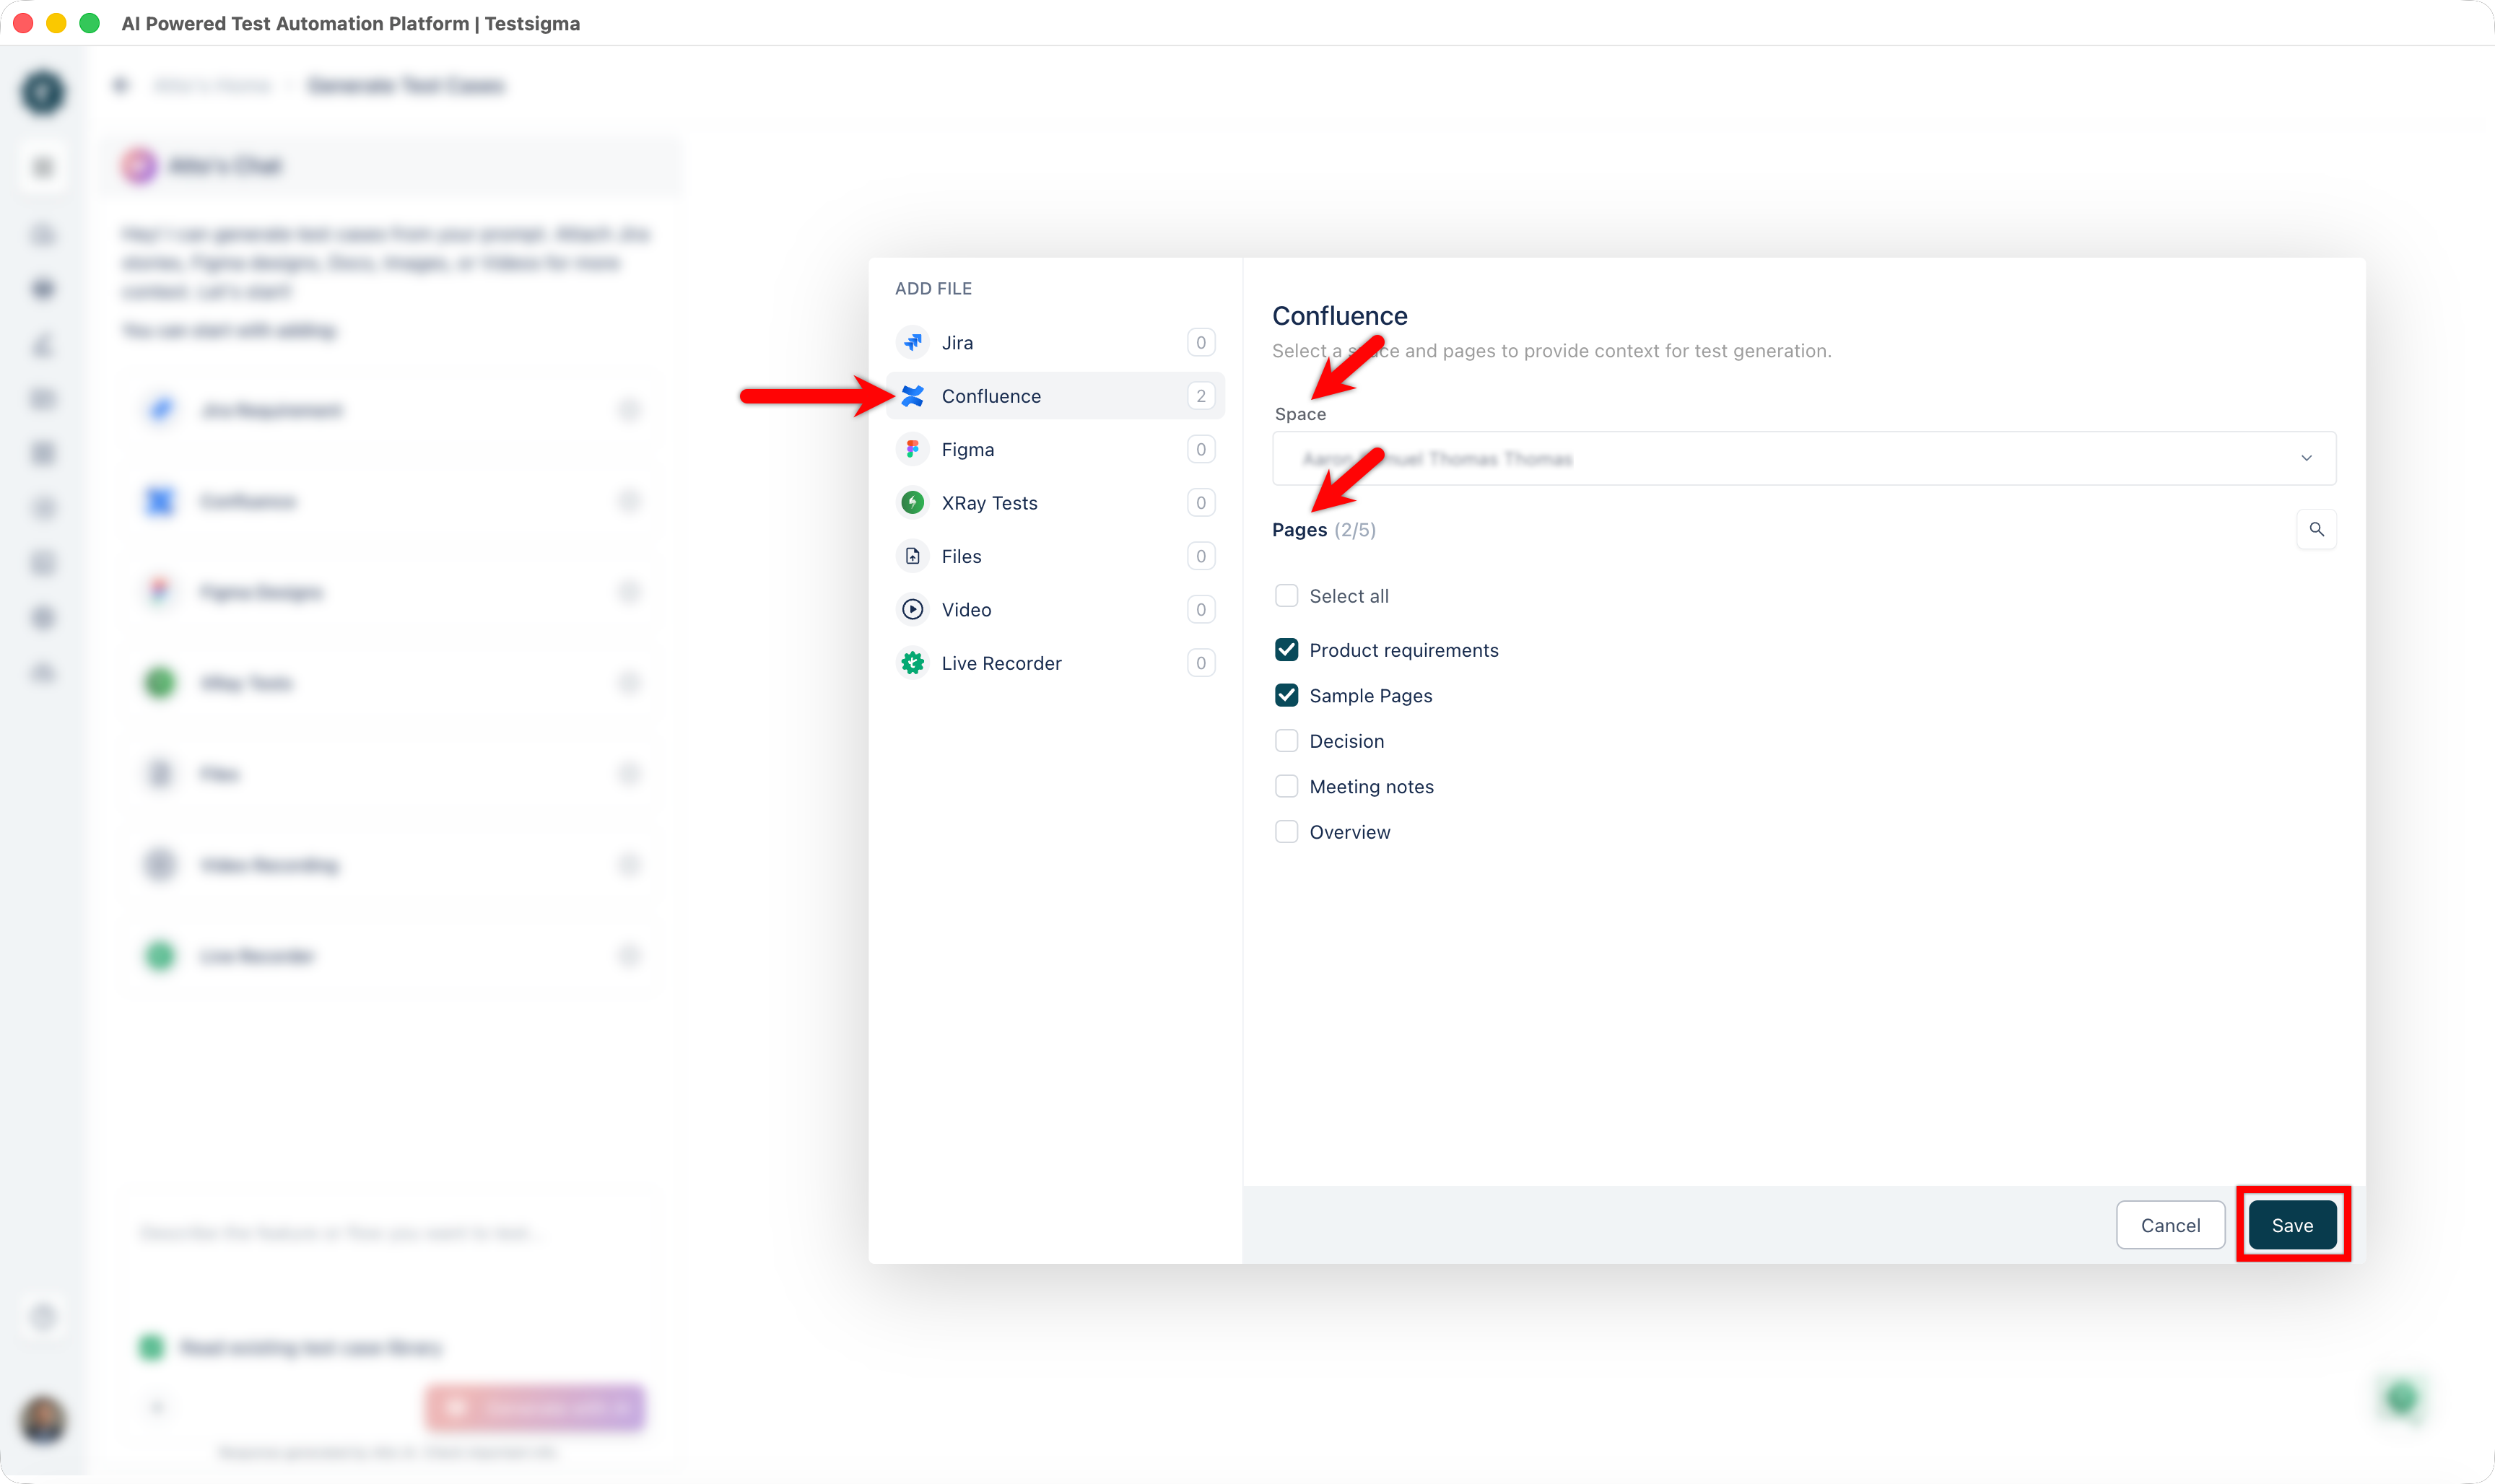
Atto will now use the selected Confluence pages as context for generating test cases.
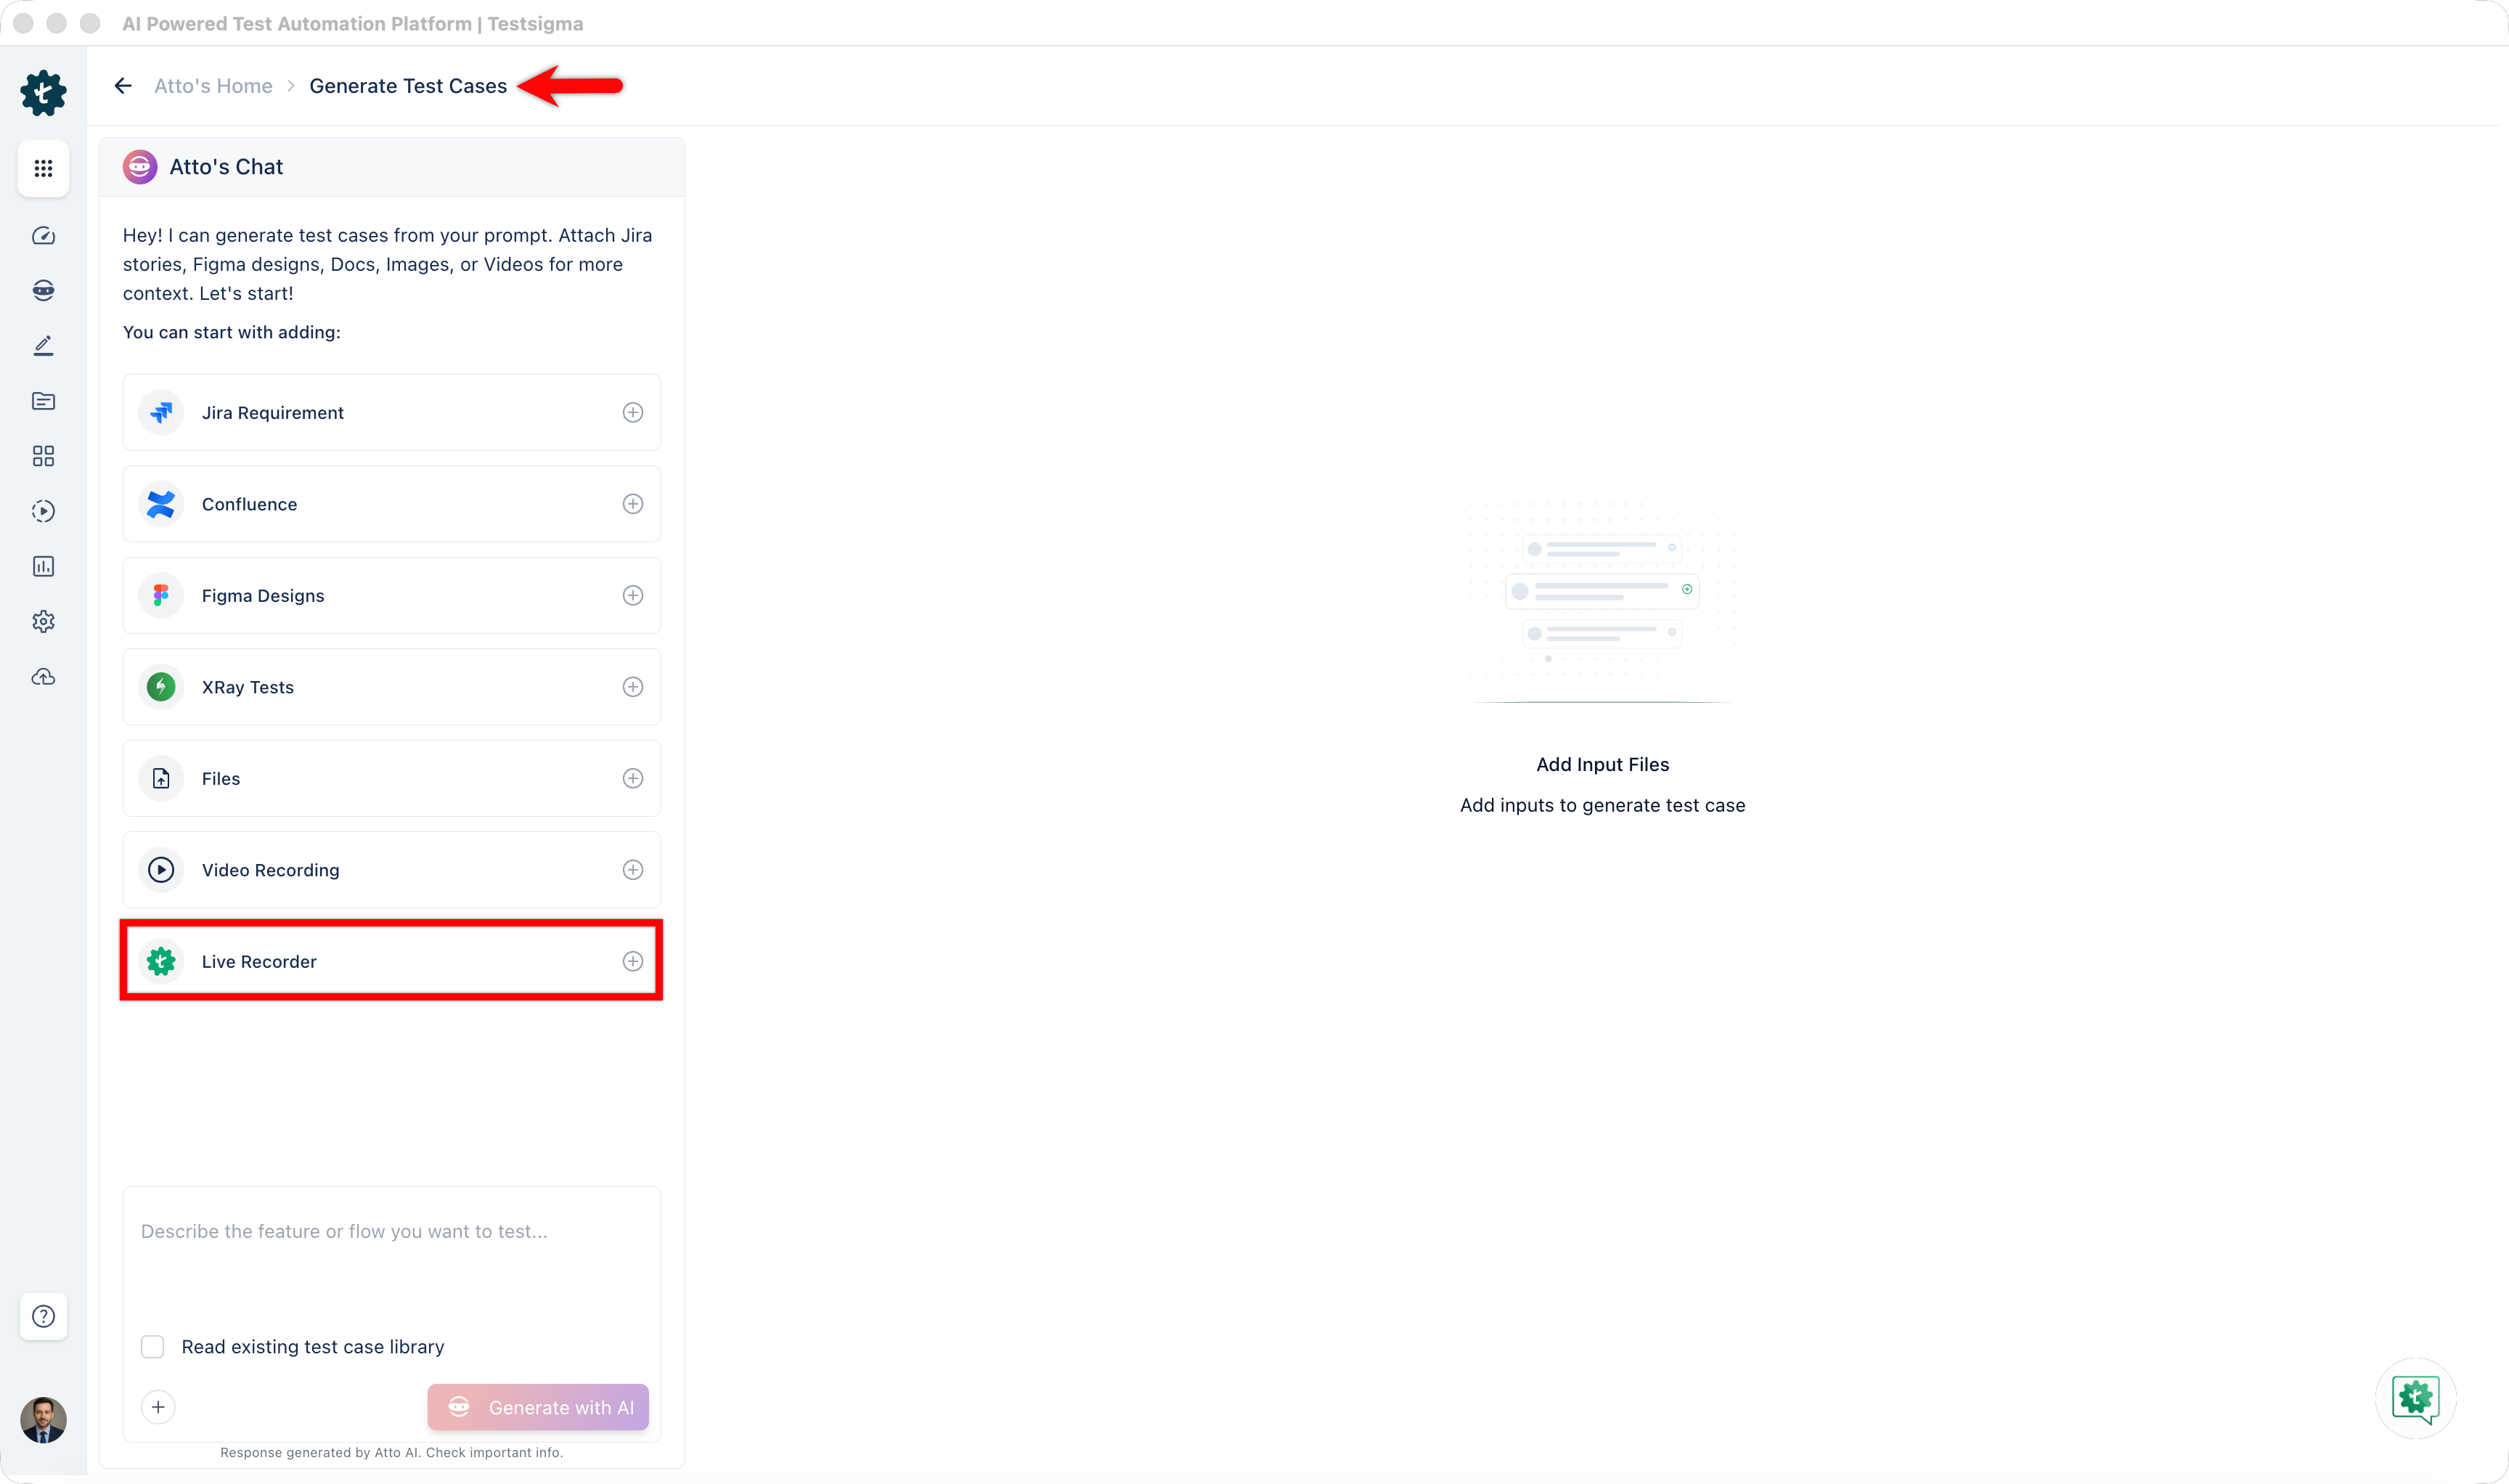
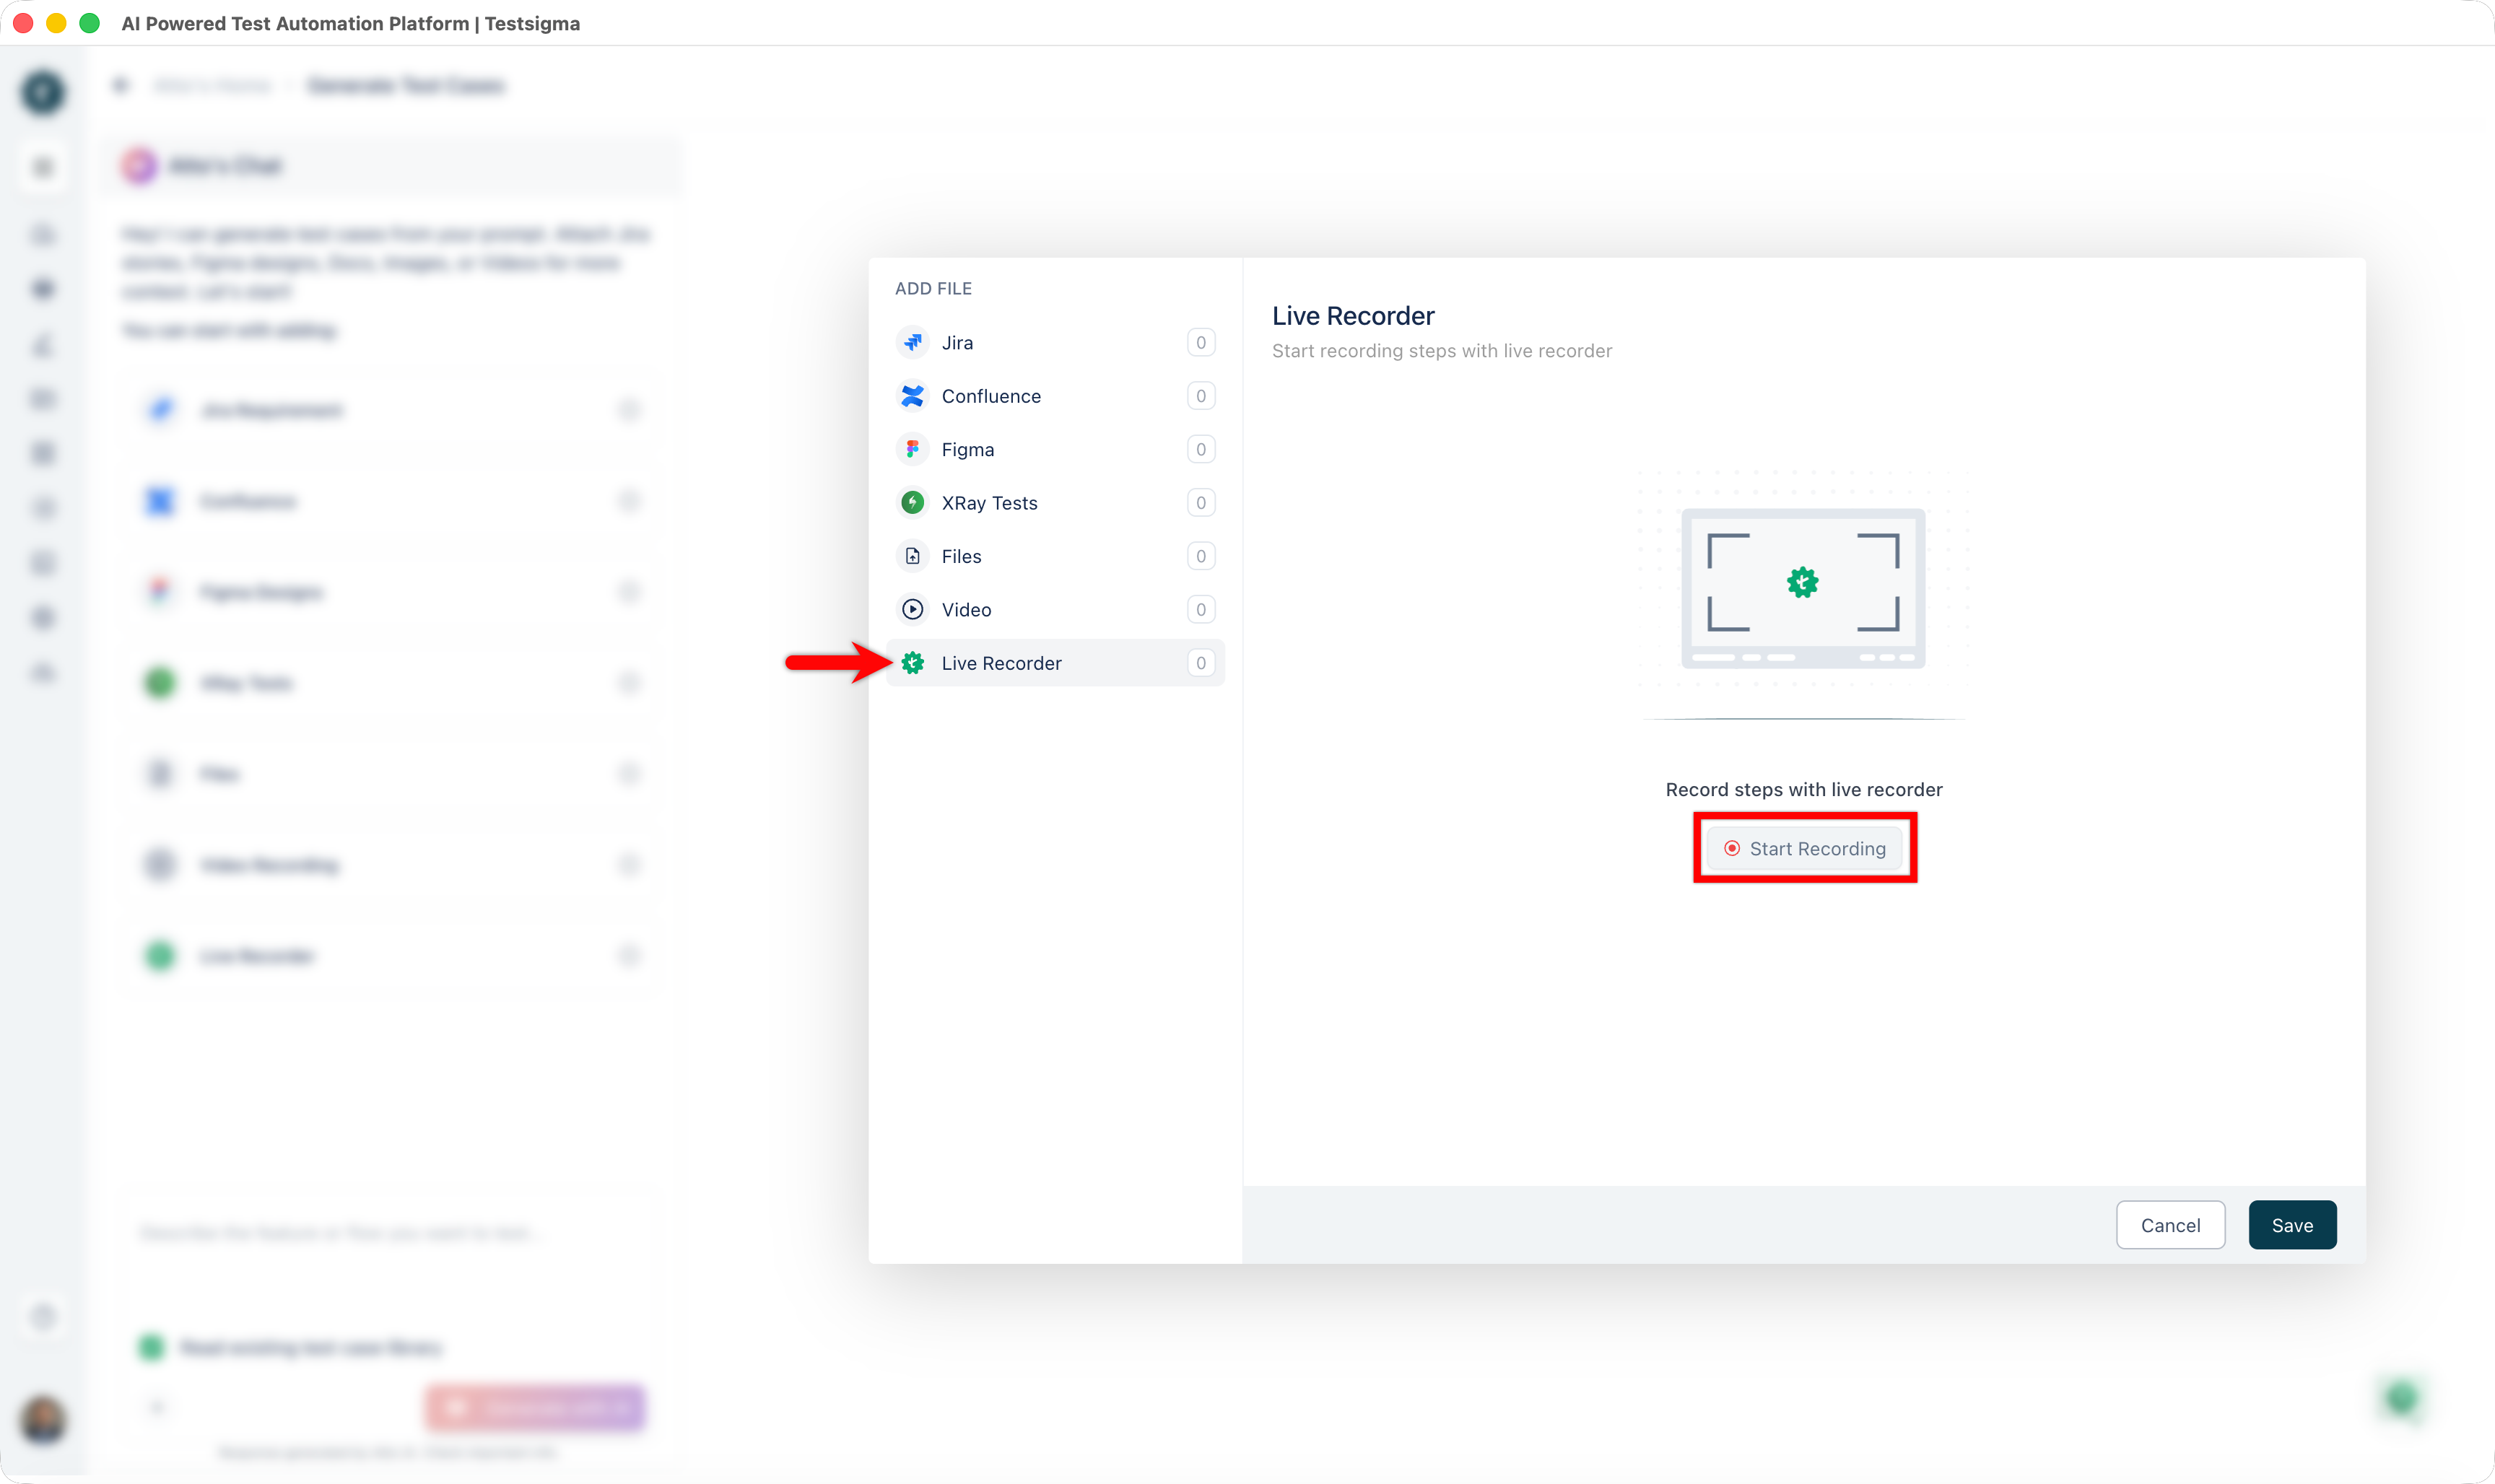
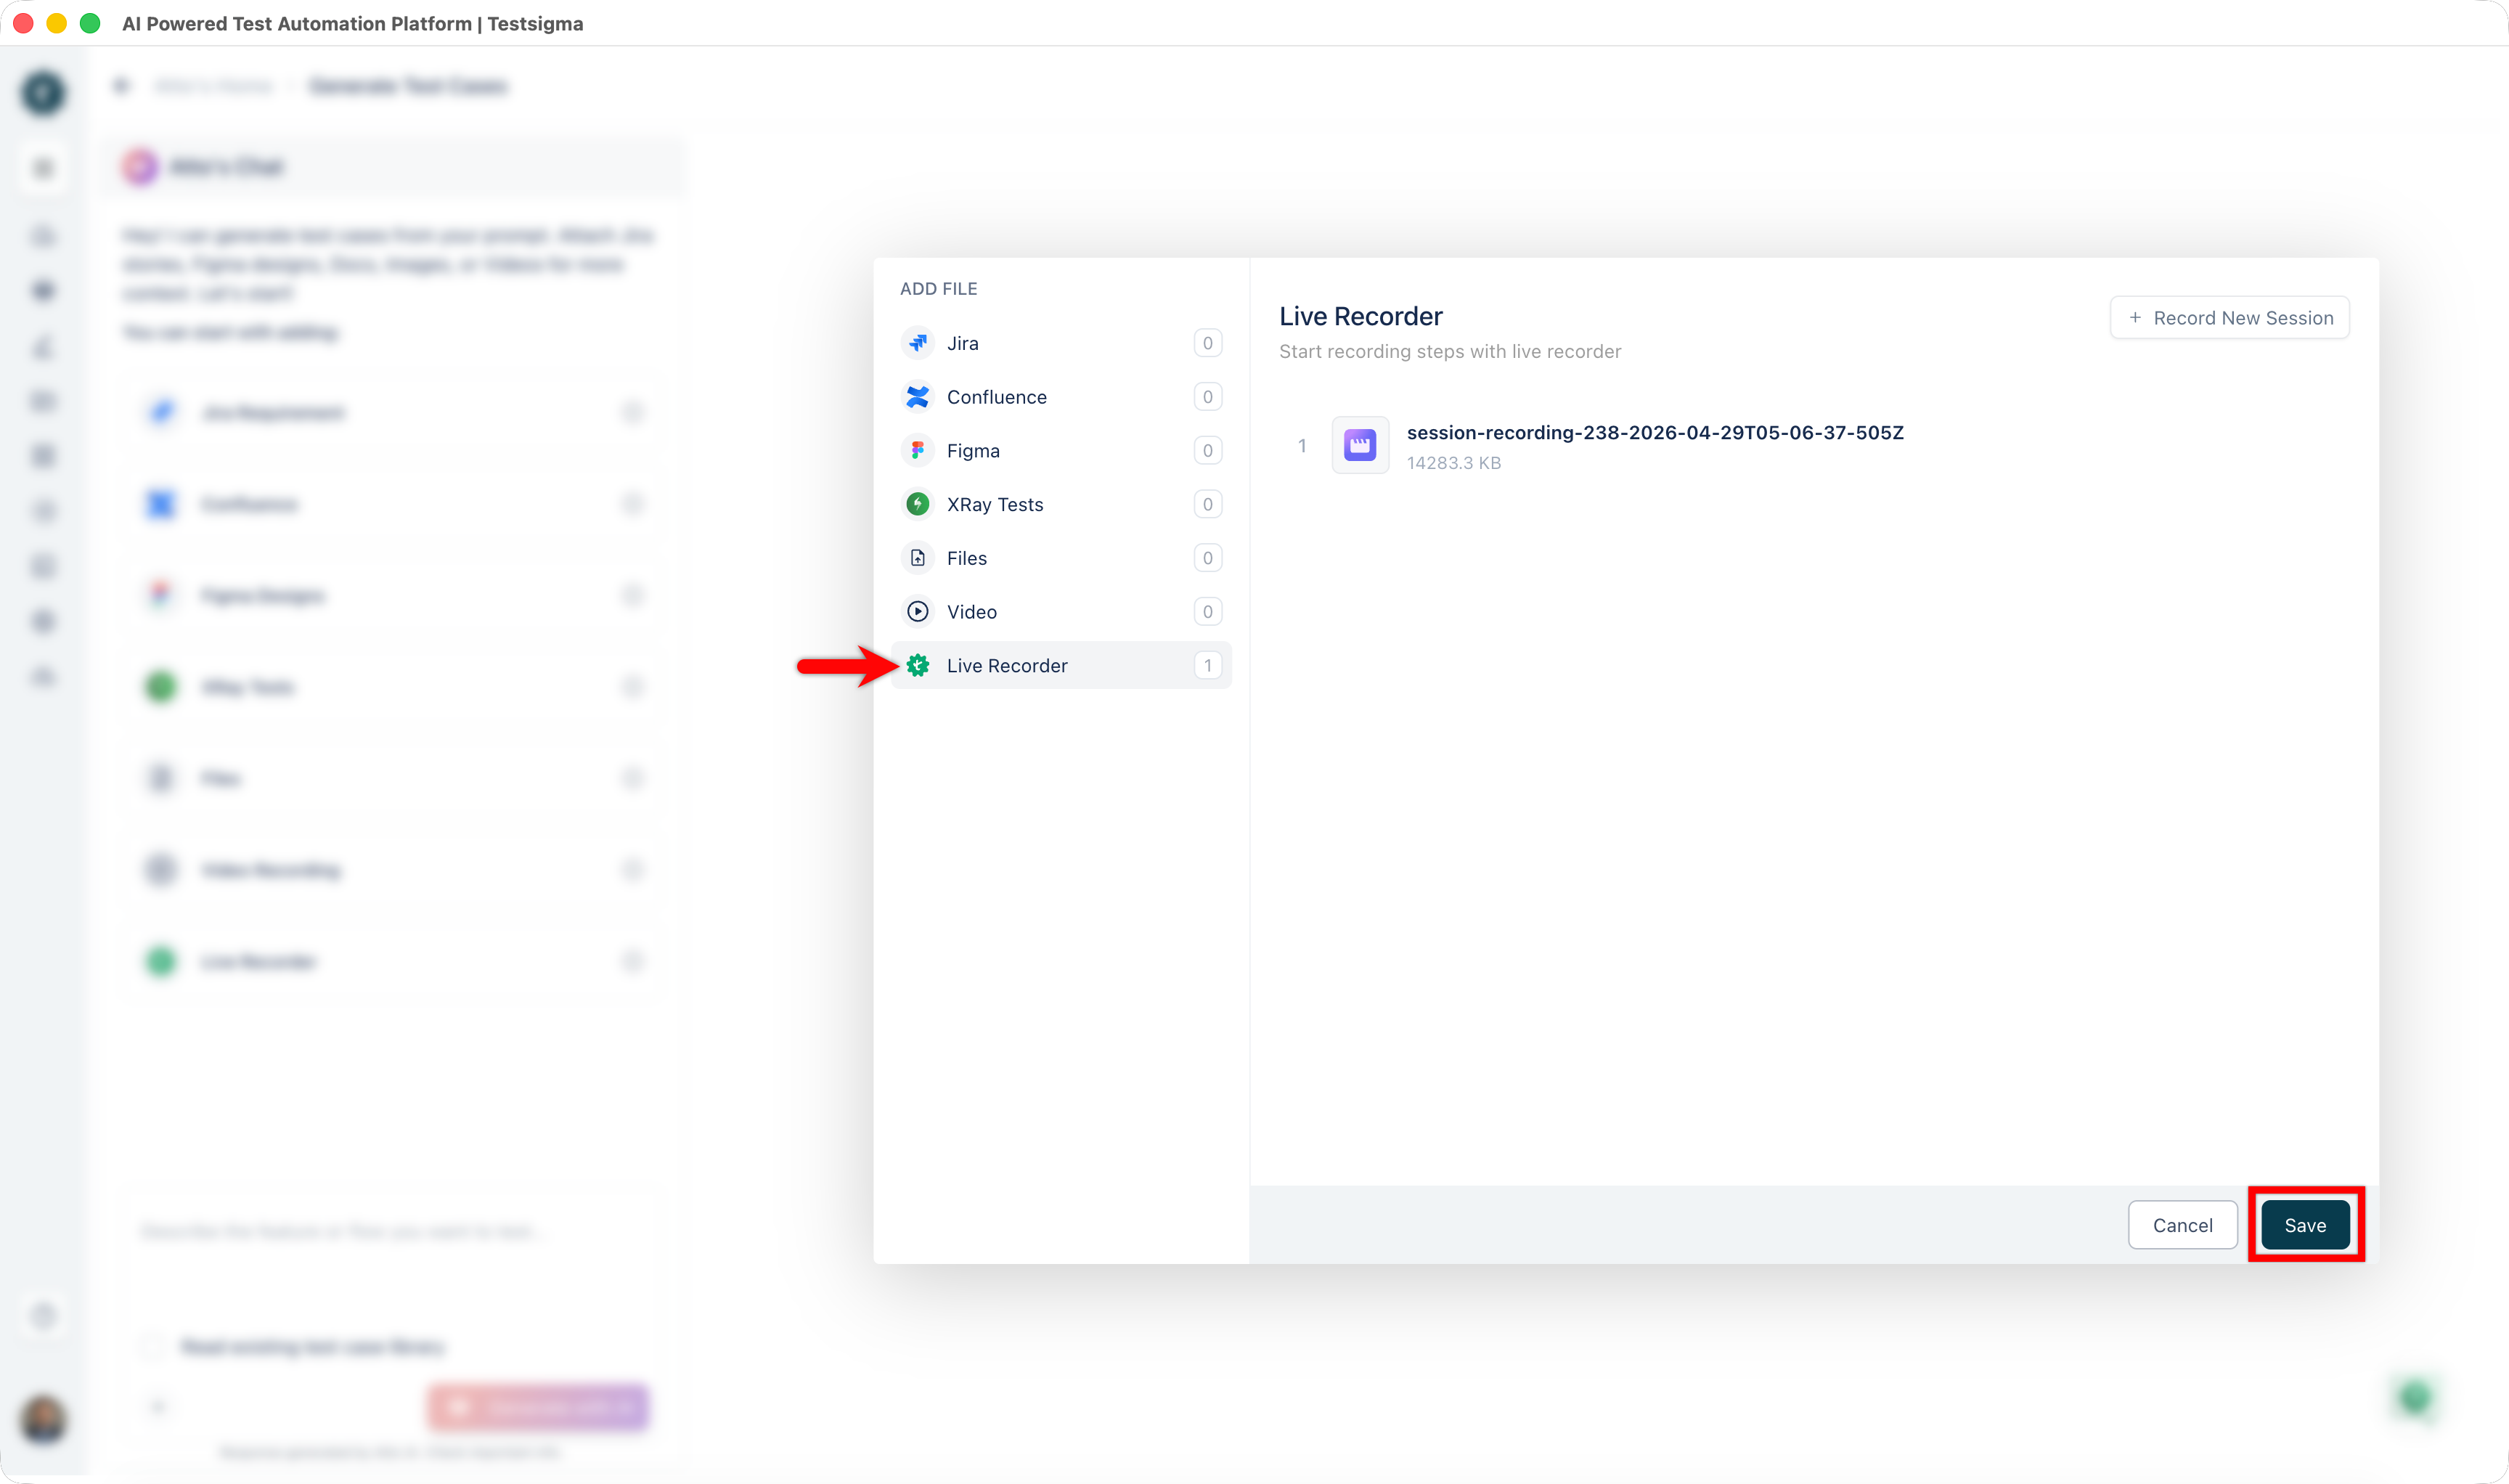
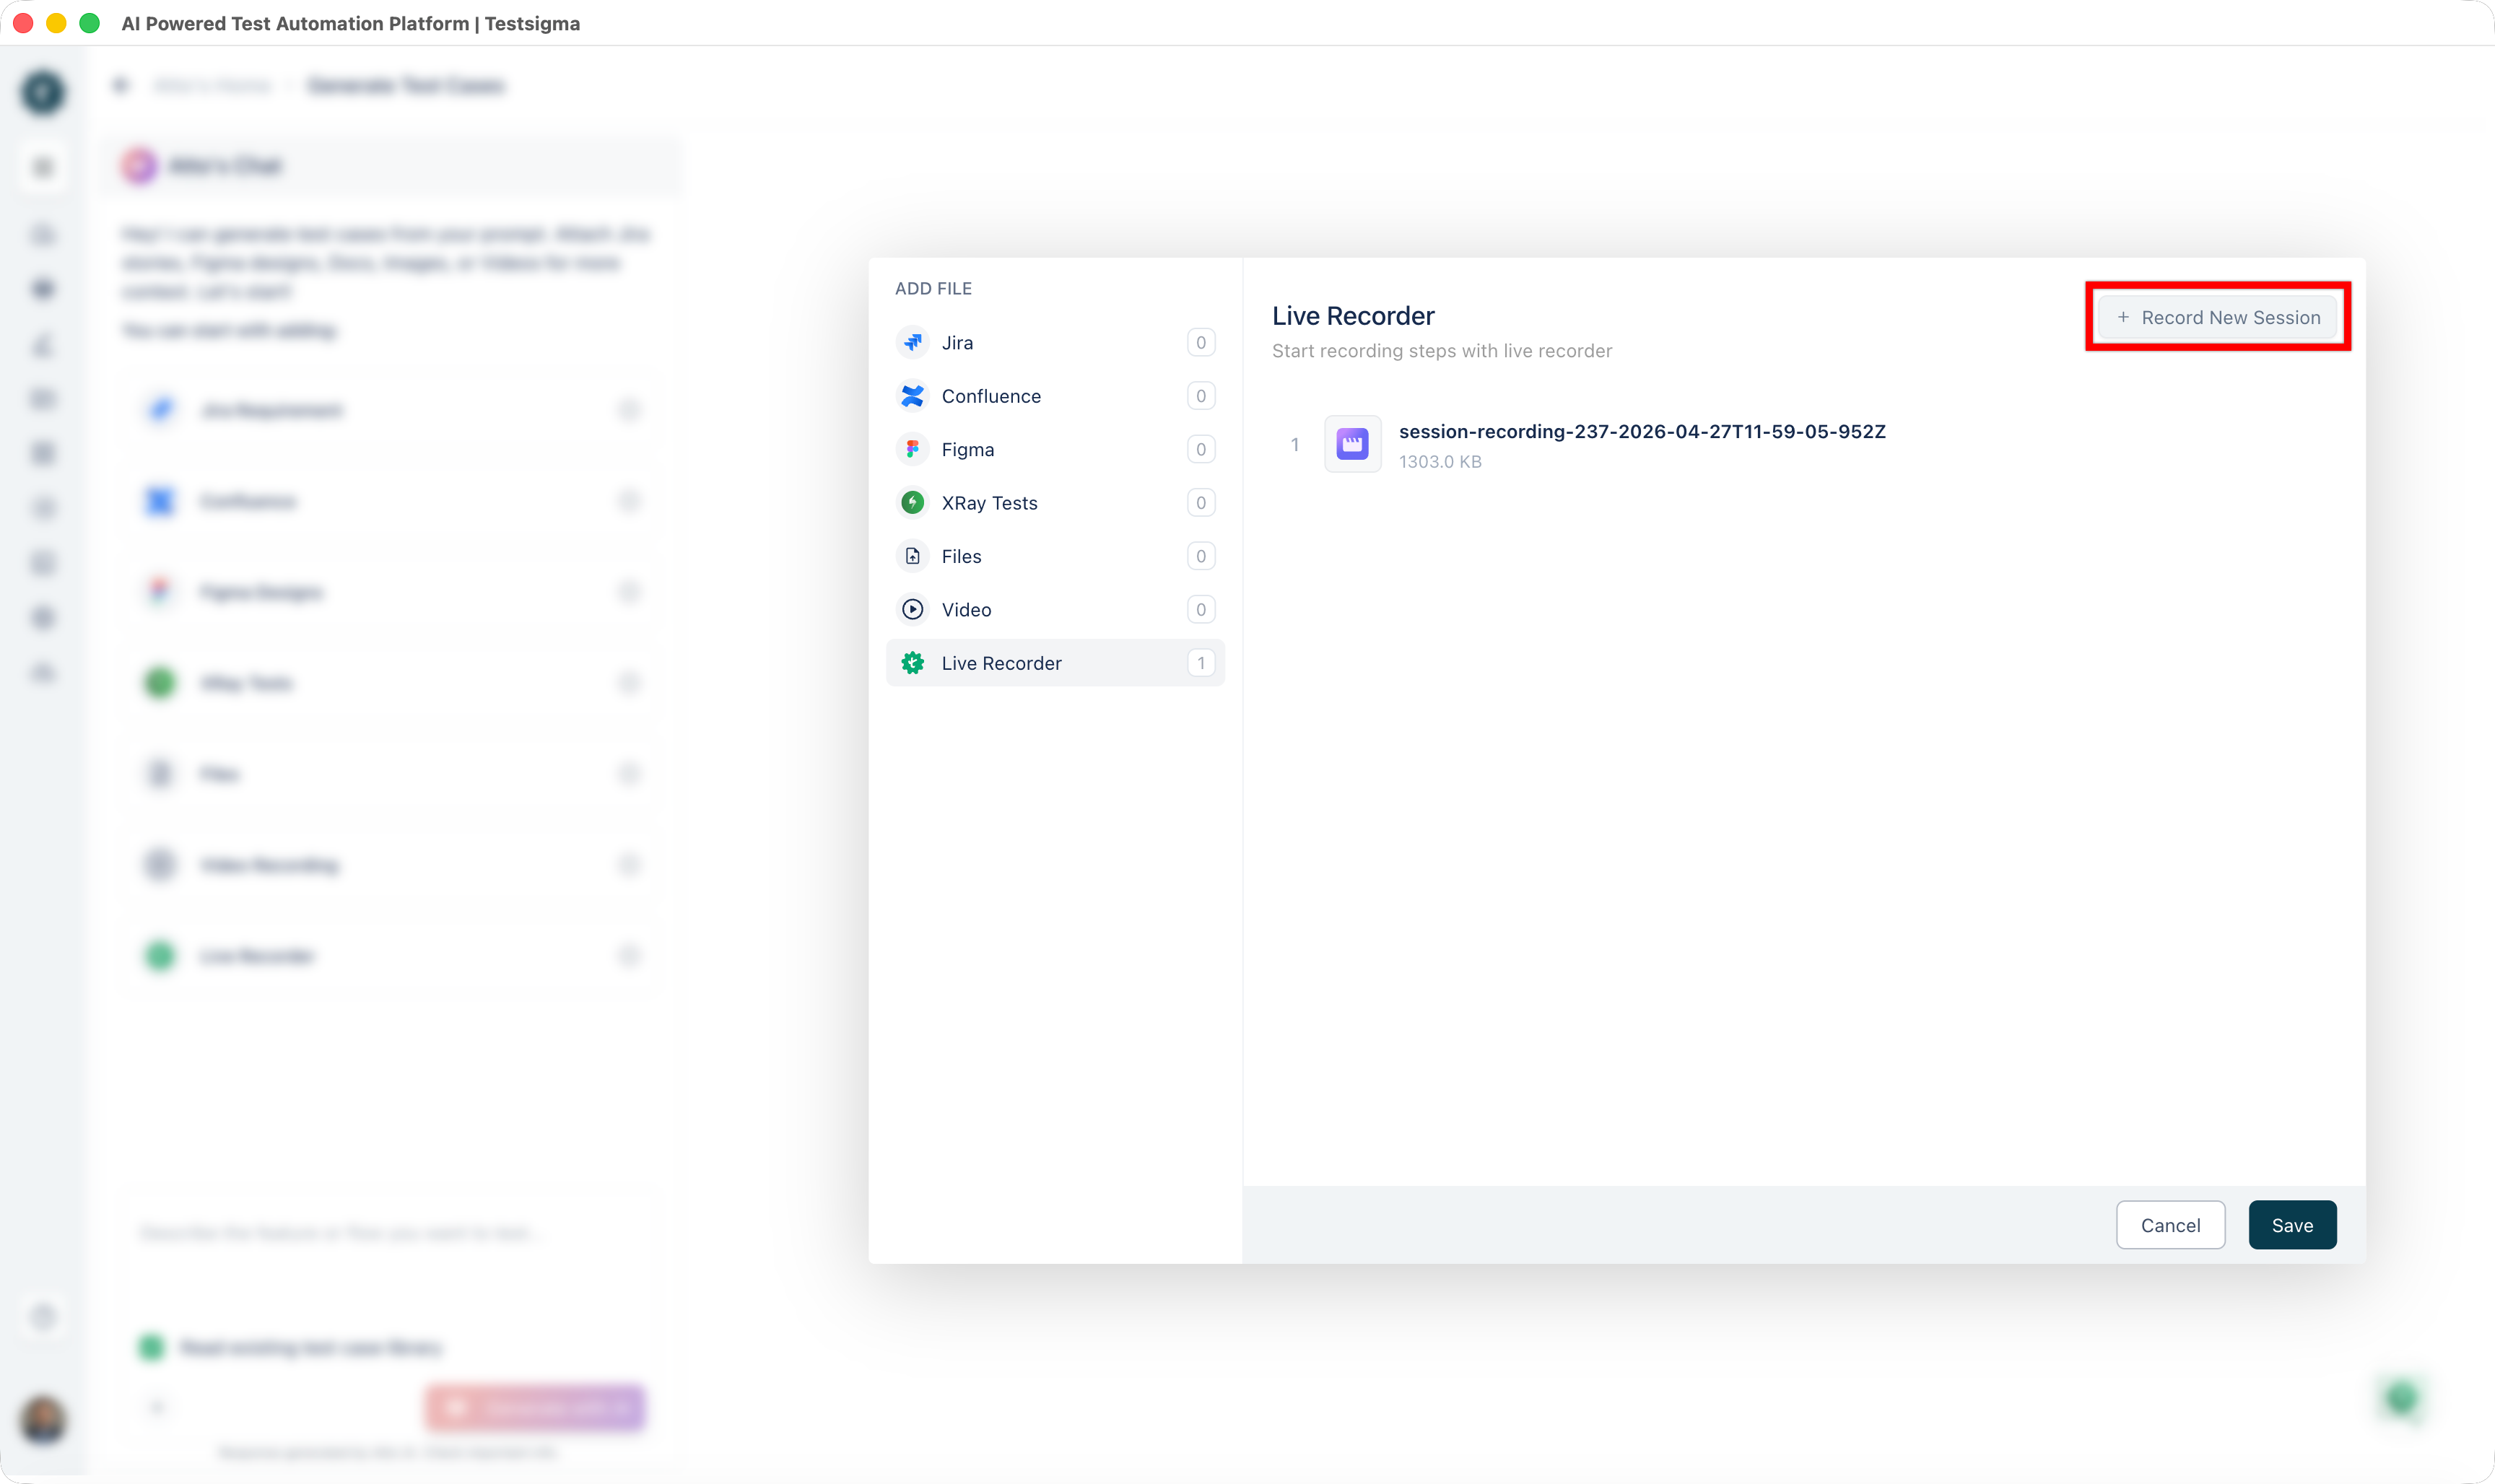
Add Data from Live Recorder
- From the left navigation bar, go to Atto’s Home.
- Click Generate with AI.
- In the Generate Test Cases section, select Live Recorder as an input source.
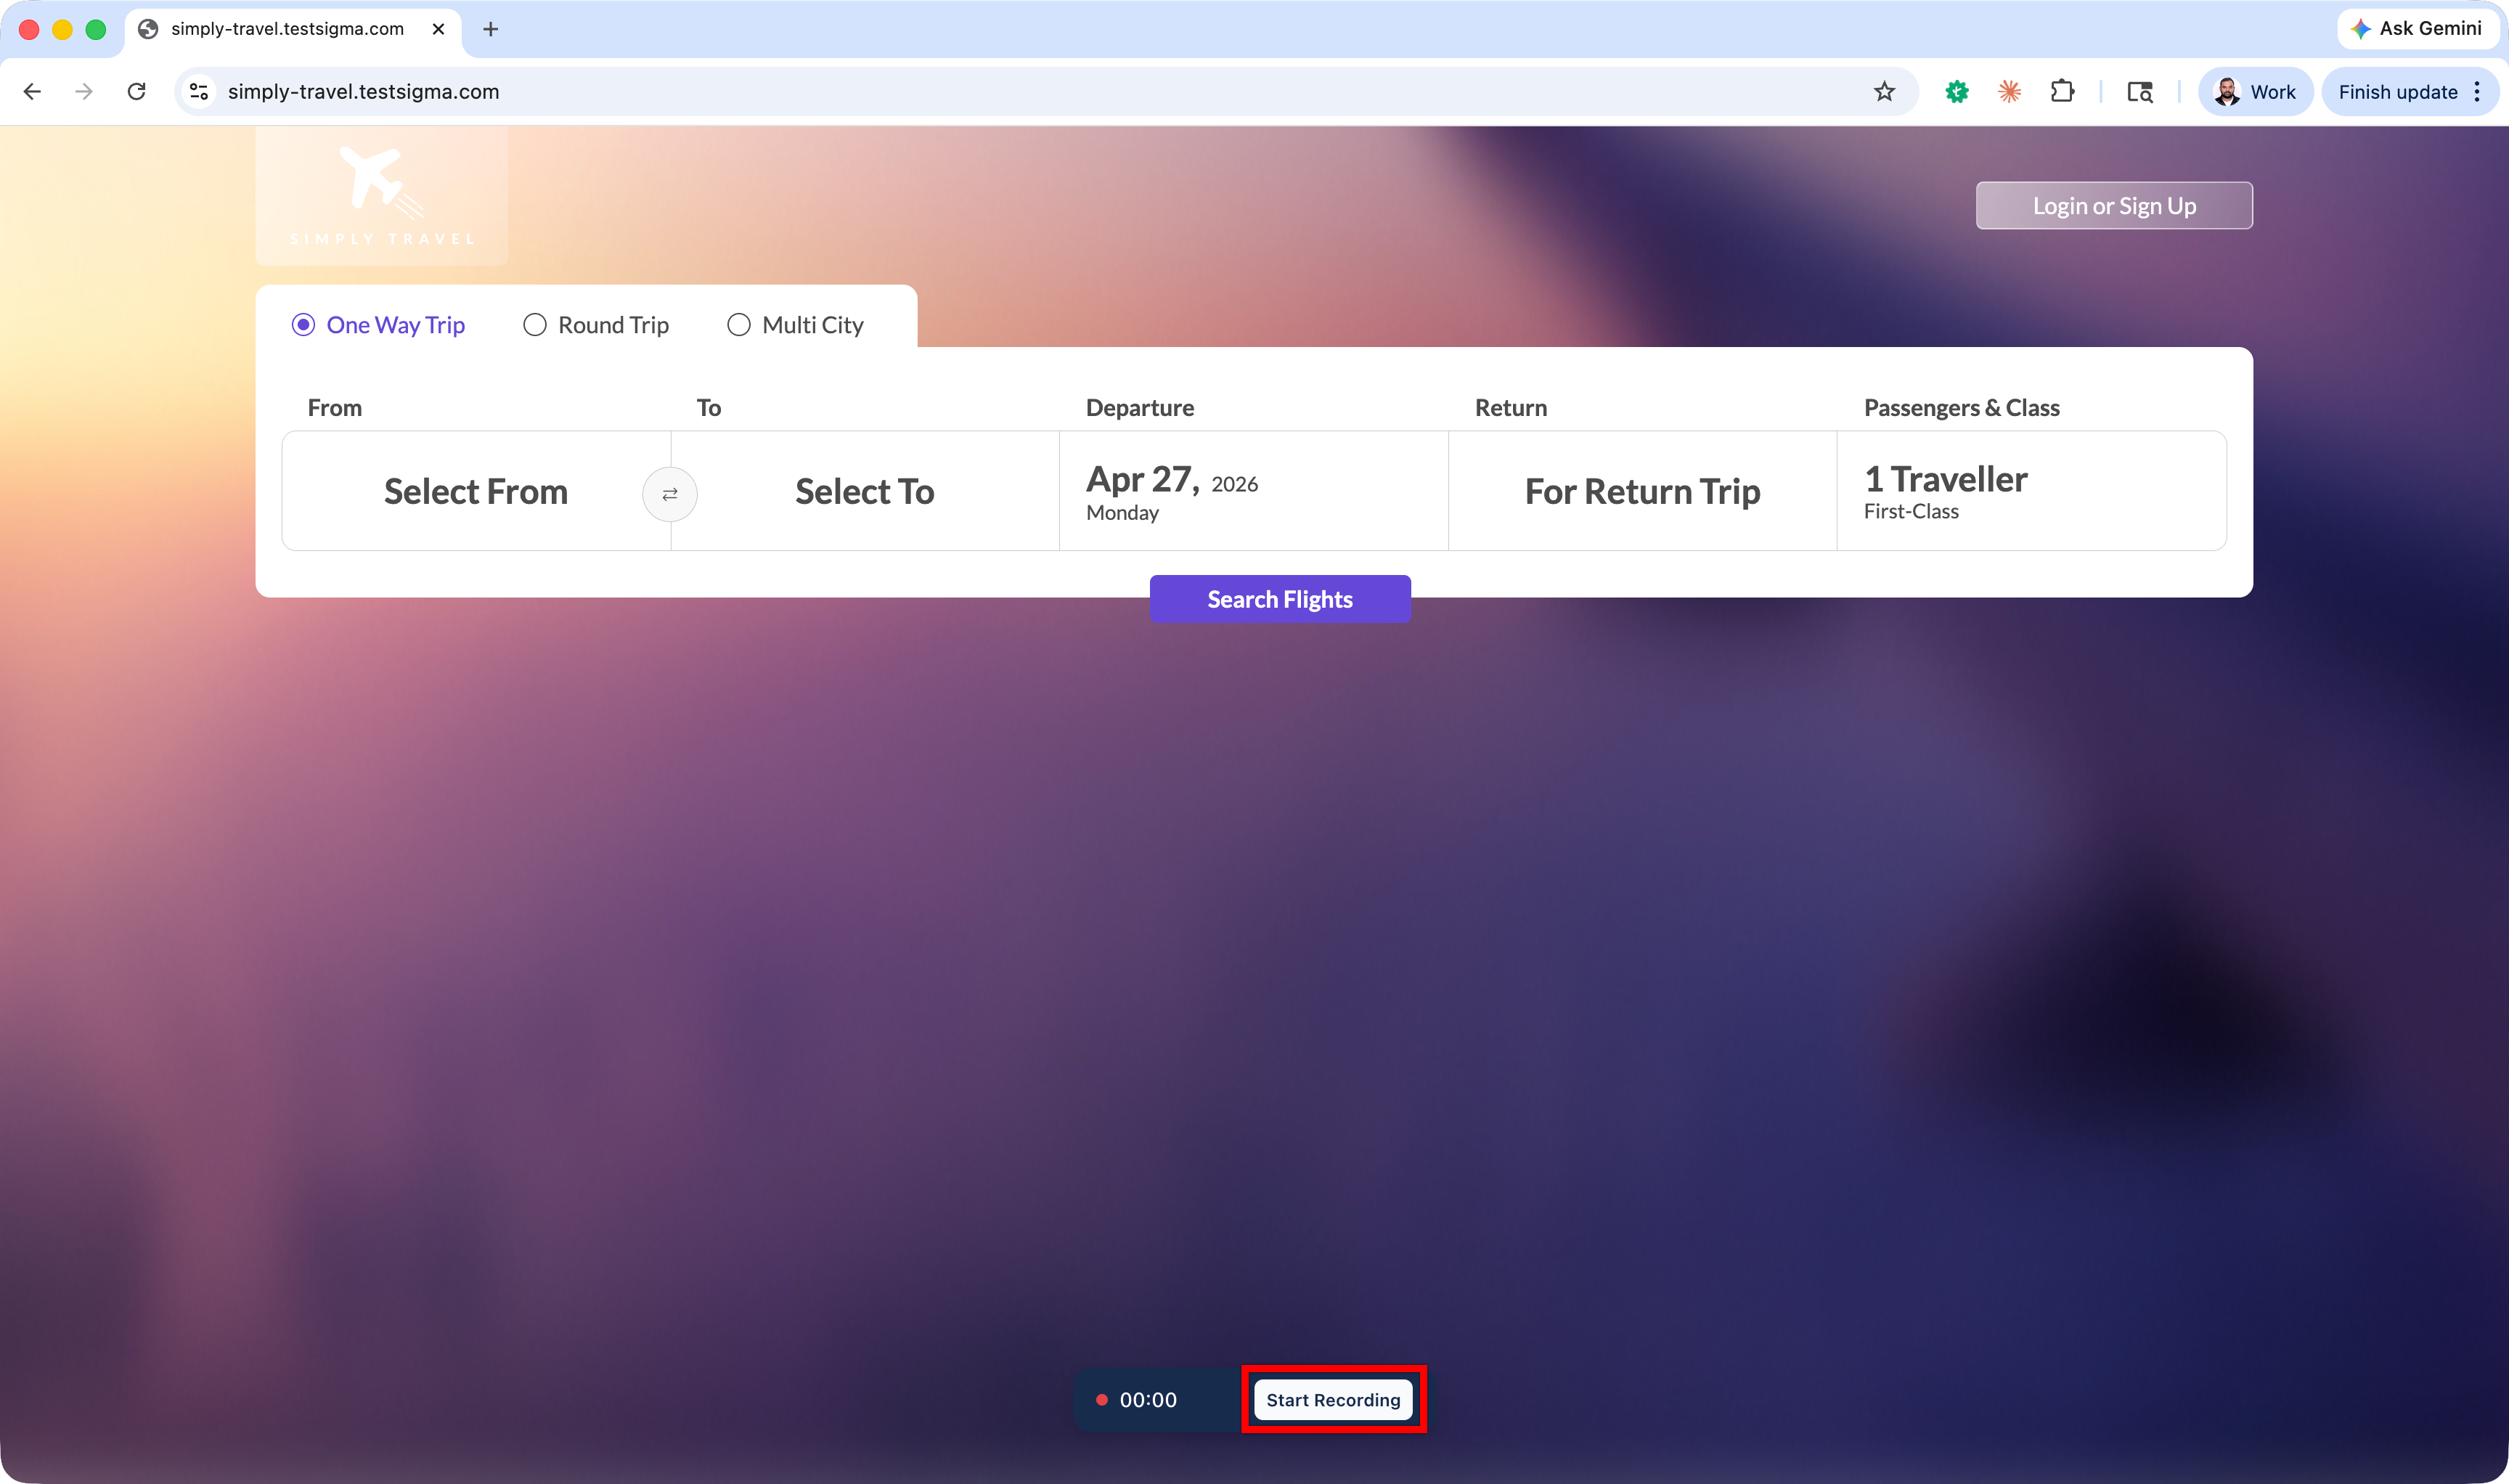
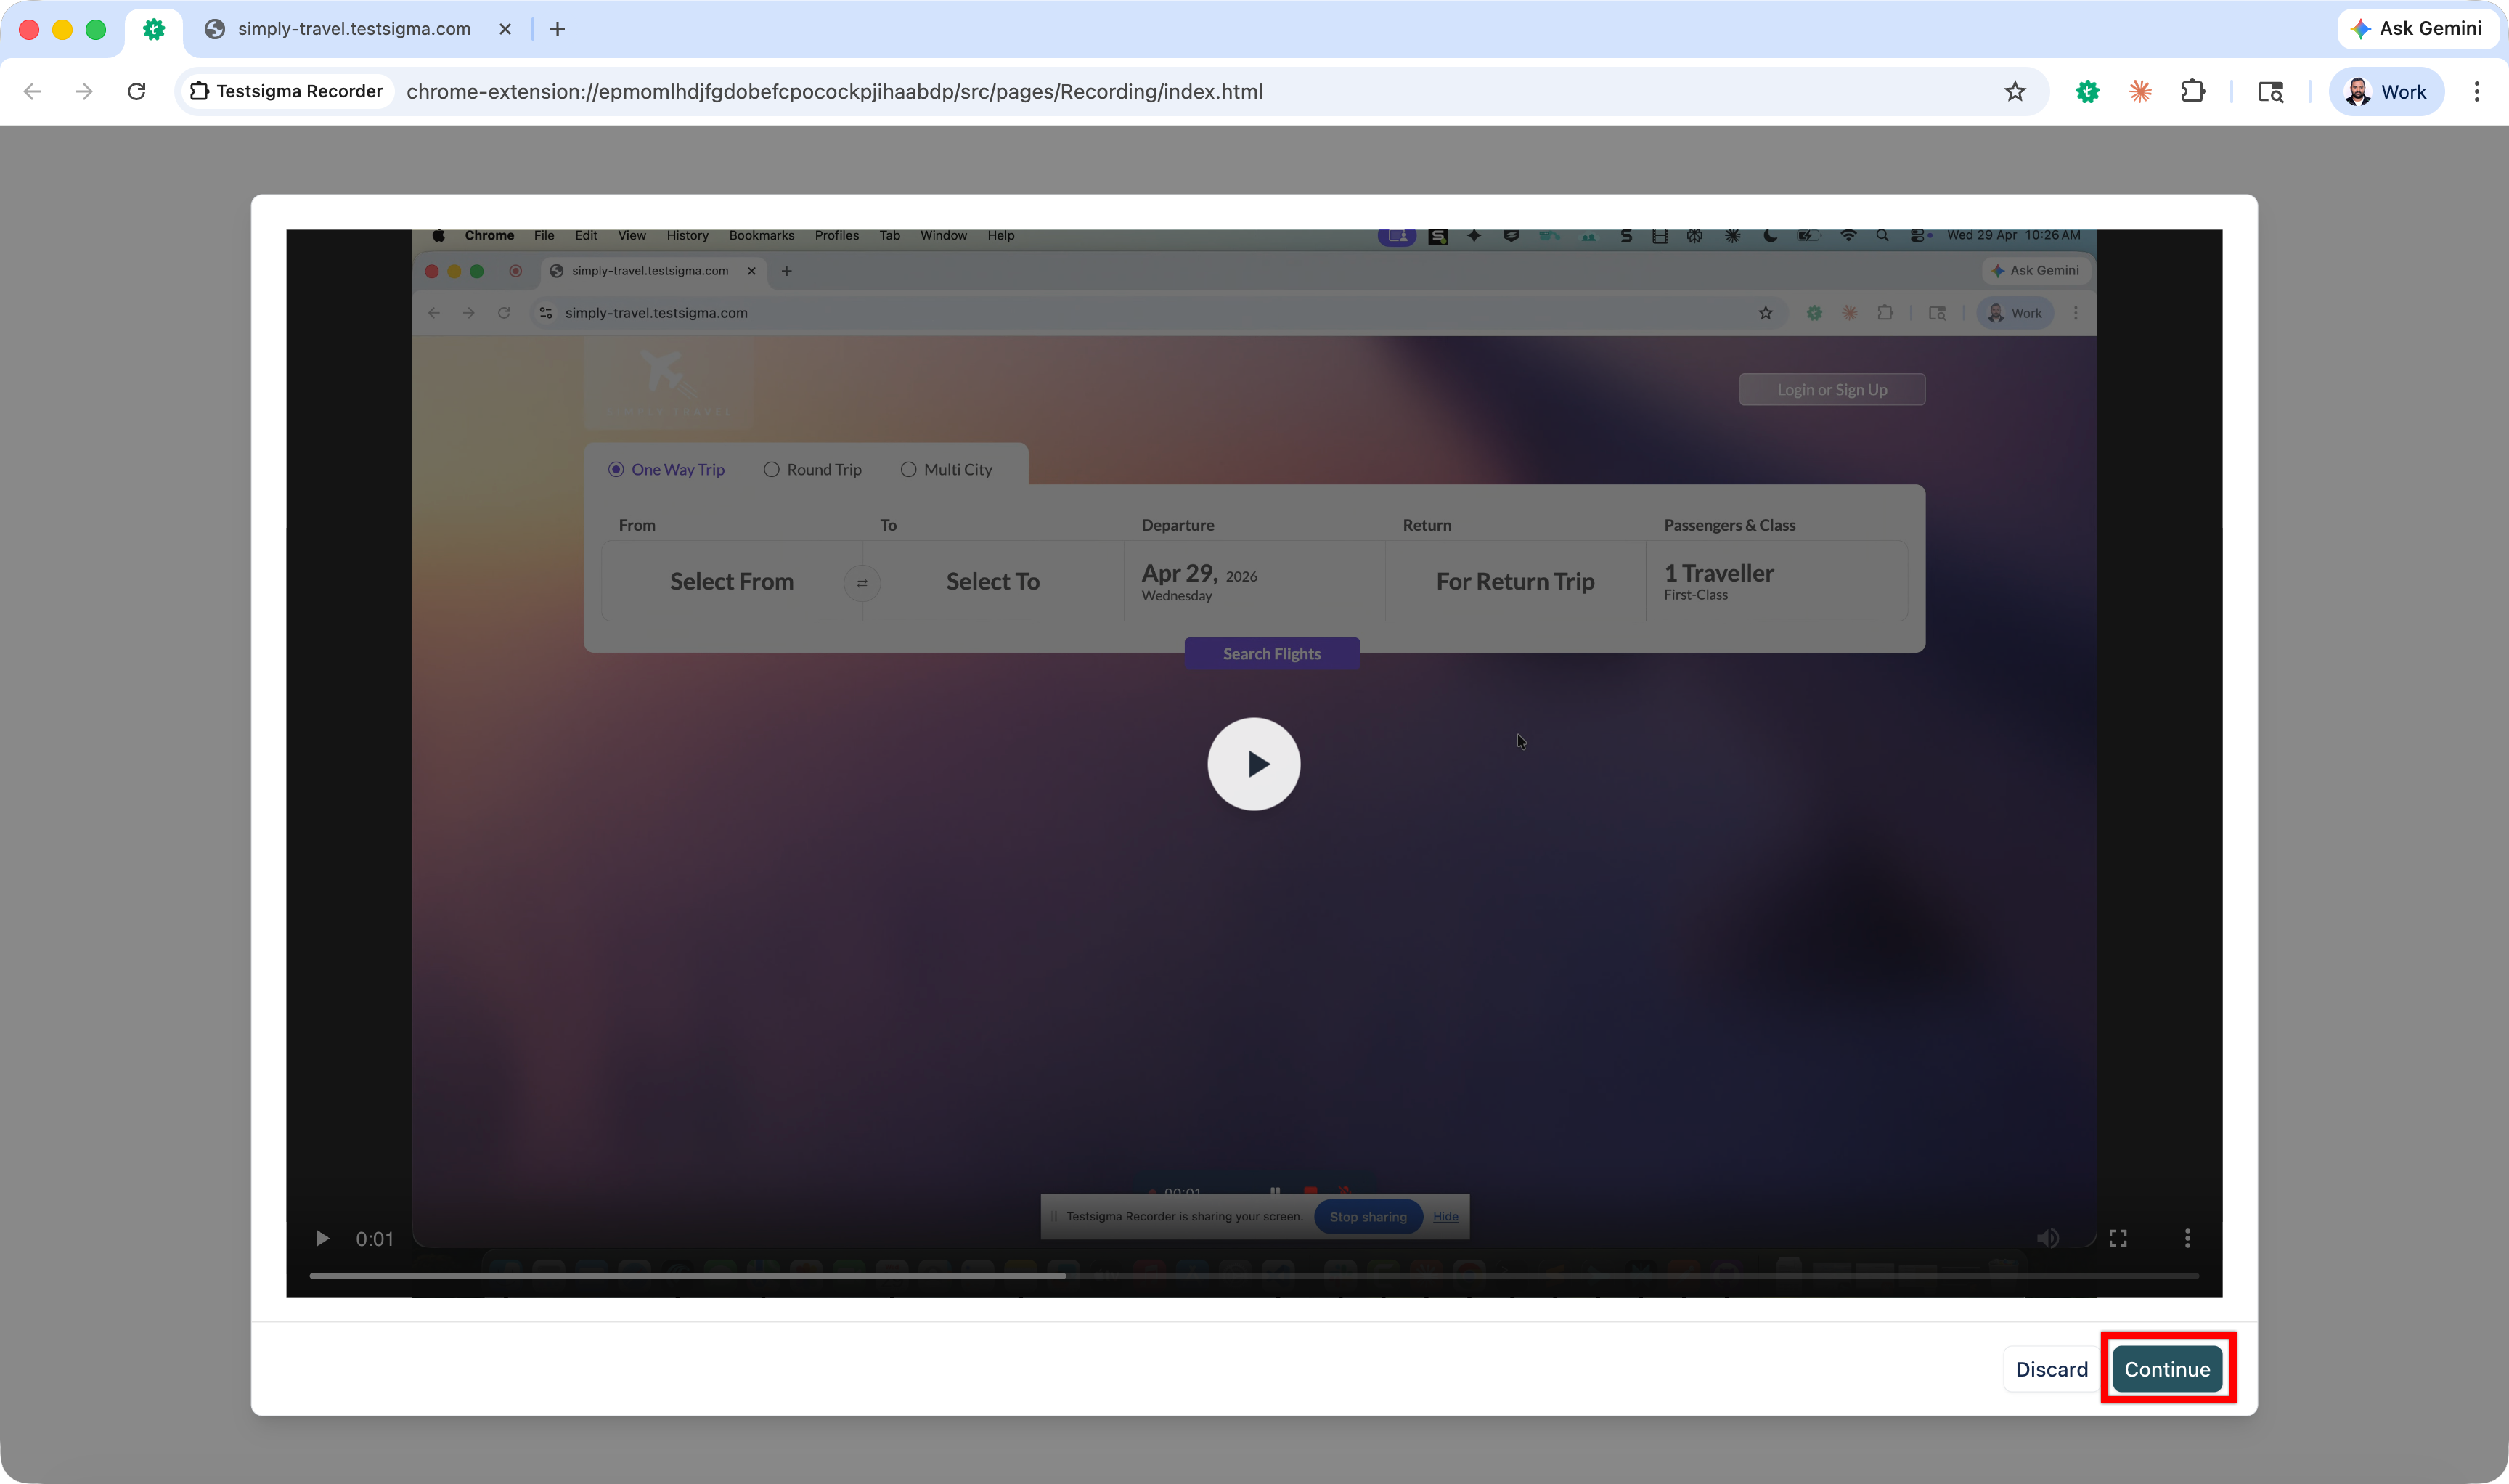
- In the Live Recorder dialog, click Start Recording. A new Chrome session opens automatically.
- Enter the URL to test and click Start Recording.
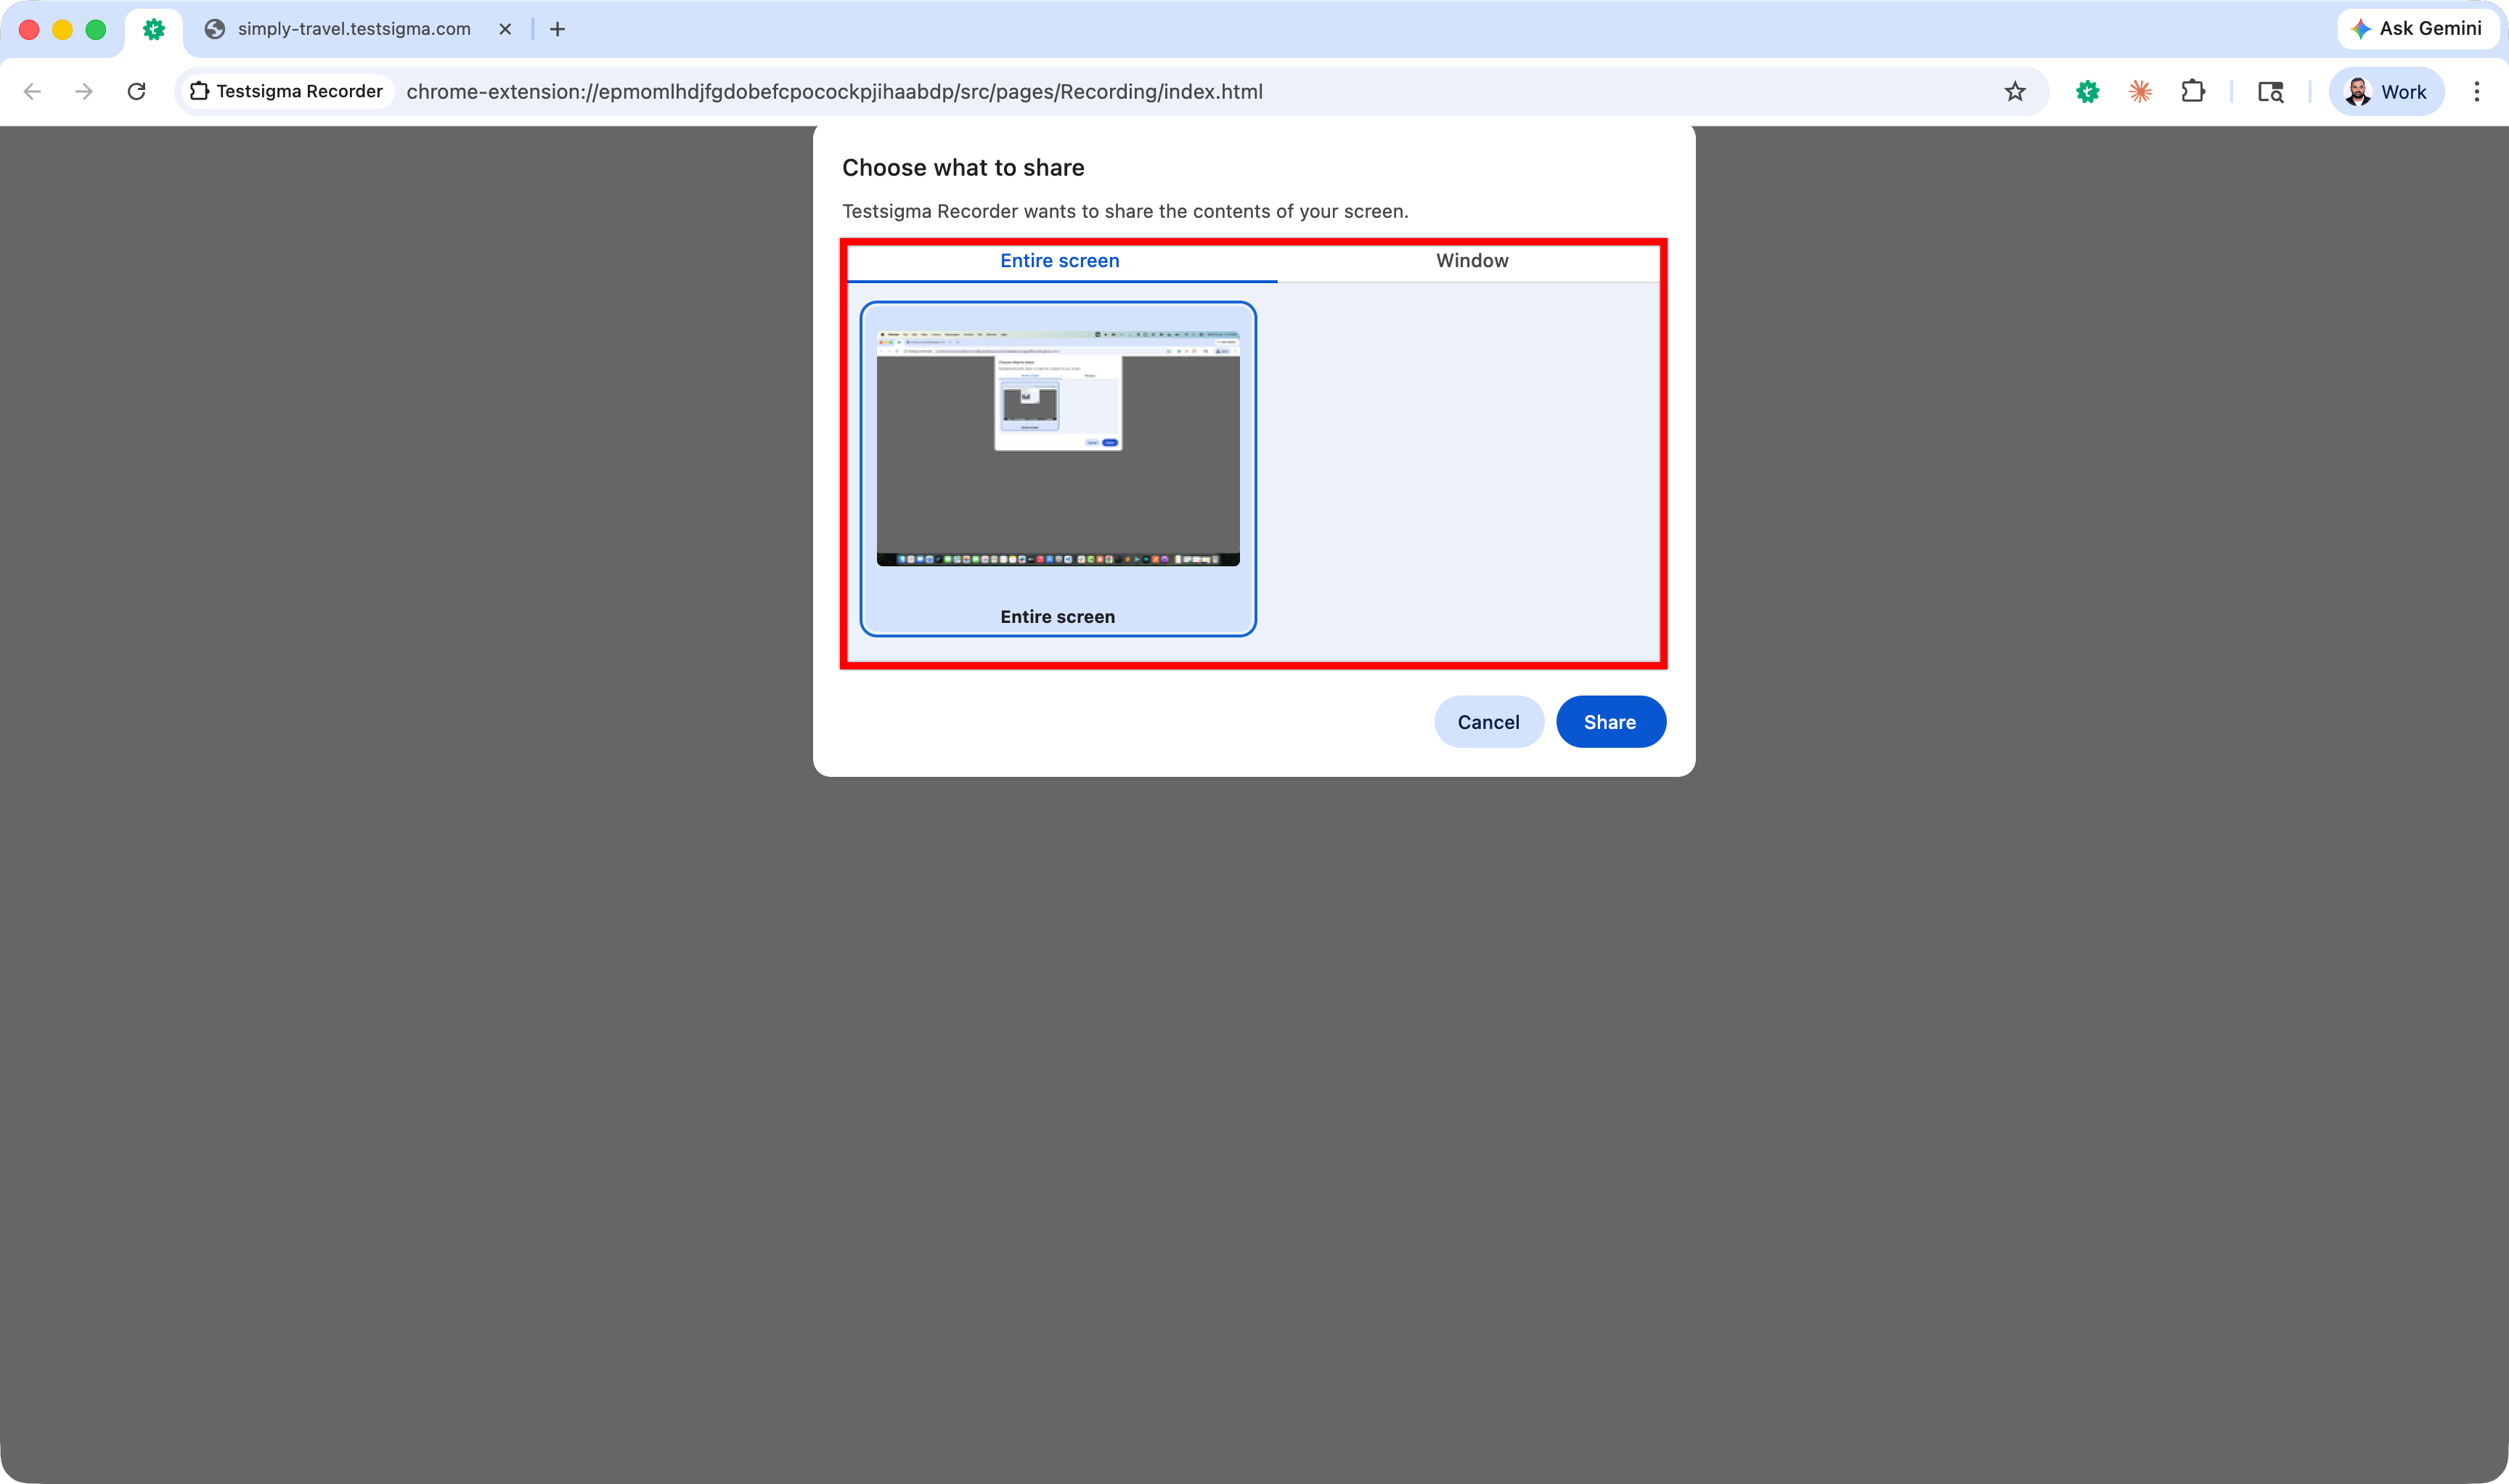
- When prompted to choose what to share, select Entire screen or Window as needed.
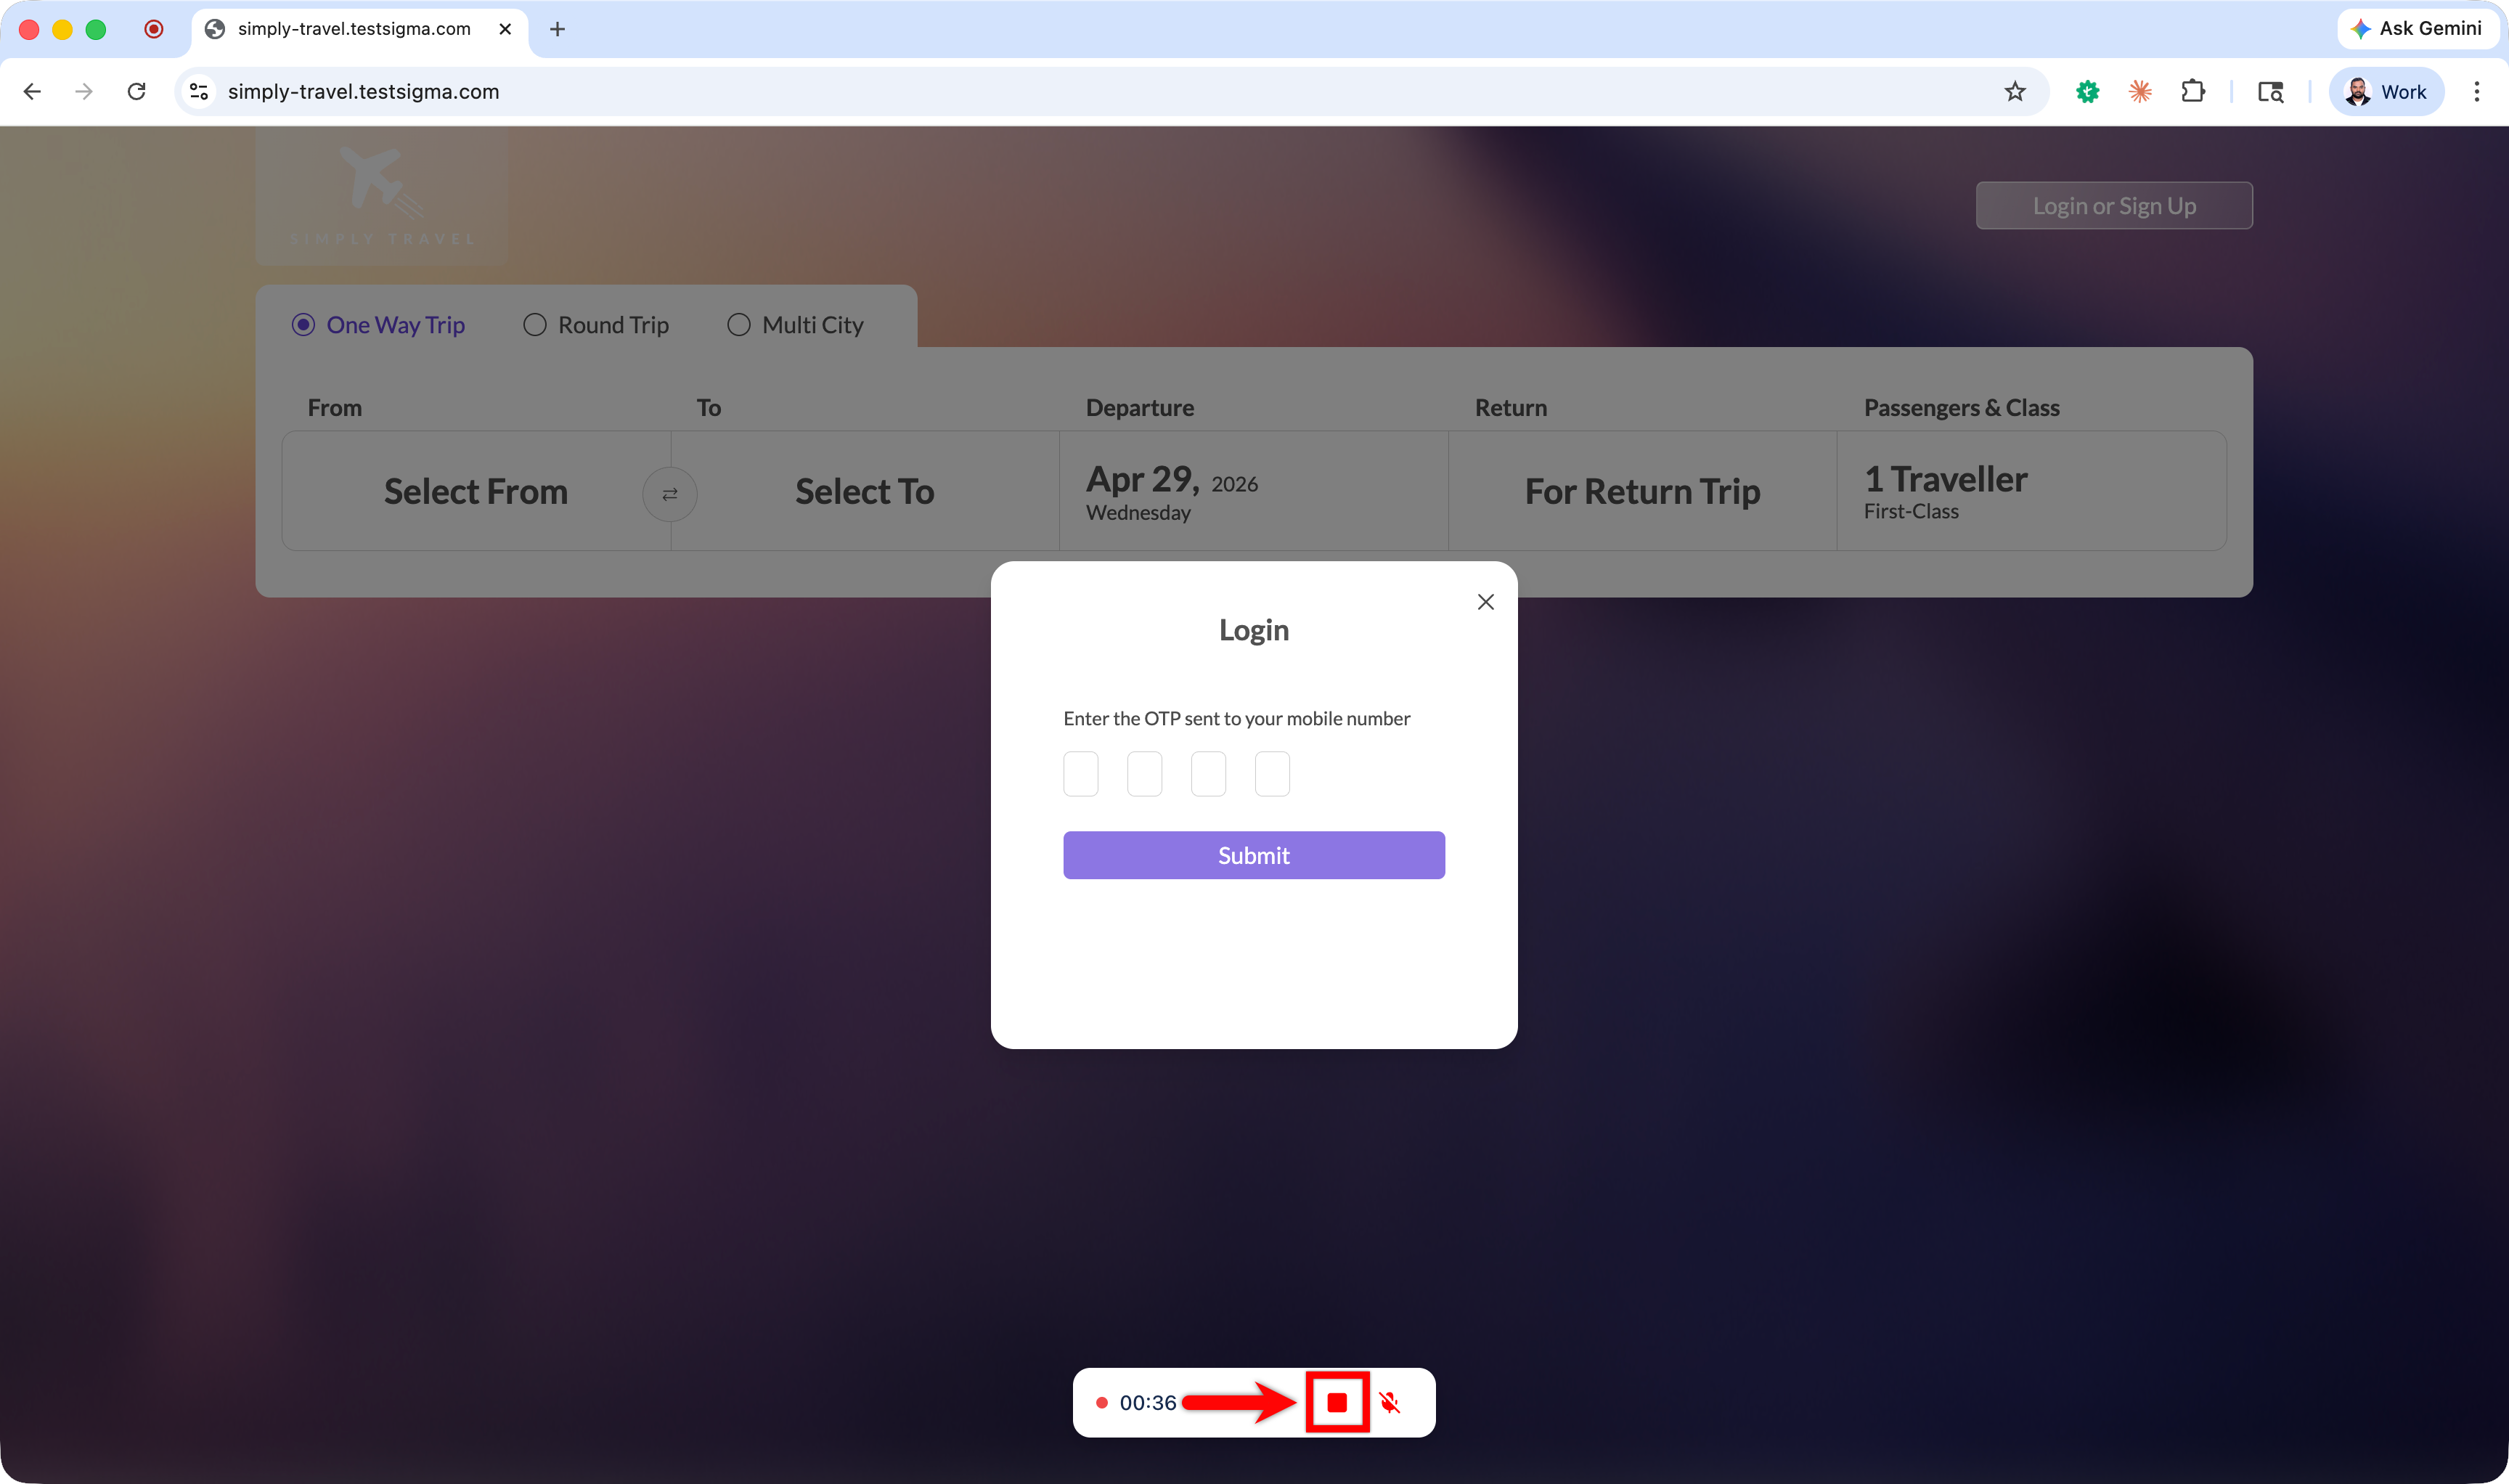
- Perform the actions and user interactions you want to provide as context to Atto.
- Click Stop, review the recorded video, and click Continue.
- Review the recording again and click Continue.
- You’ll be redirected to Testsigma with the Live Recorder dialog displaying your recording.
- Click Save to add the recording as context for test case generation.
You can add additional context by clicking Record New Session and repeating steps 5-10. This allows you to capture multiple user workflows or interactions for comprehensive test case generation.
Want to contribute or report missing content?