- create test cases
 Organizing Test Cases in Folders
- Test Cases for Web Applications
- Test Cases for Mobile Applications
- Test Cases for Mobile Web Applications
- Manage Test Cases for Web Applications
- Manage Test Cases for Android & iOS Apps
- Manage Test Cases for Mobile Web Applications
- Test Case List Actions
- Importing Postman Collections and Environments
- Custom Fields for Test Cases
- Label Management
- Update Test Case Result in a Test Plan
- Test Case: Advanced Options Guide
- Test Step Types
- Type: Natural Language
- Type: REST API
- Type: Step Group
- Type: For Loop
- Type: While Loop
- Type: Block
- Type: If Condition
- Nested Step Groups
- Image Injection
- Cross-application testing
Create Test Steps in Testsigma
In Testsigma terminology, each automated action executed by the test script is a test step. For example, in a login form, Enter <username> in the <username> field is a test step. This article discusses creating test steps for web, mobile web, Android, and iOS applications using Testsigma recorder & simple English (NLPs).
Prerequisites
Before you begin, ensure you're familiar with concepts of Features and Scenarios, Test Step Types, have installed the Test Recorder, and have a Web/Android/iOS app to test.
Creating Test Steps Manually
Web & Mobile Web
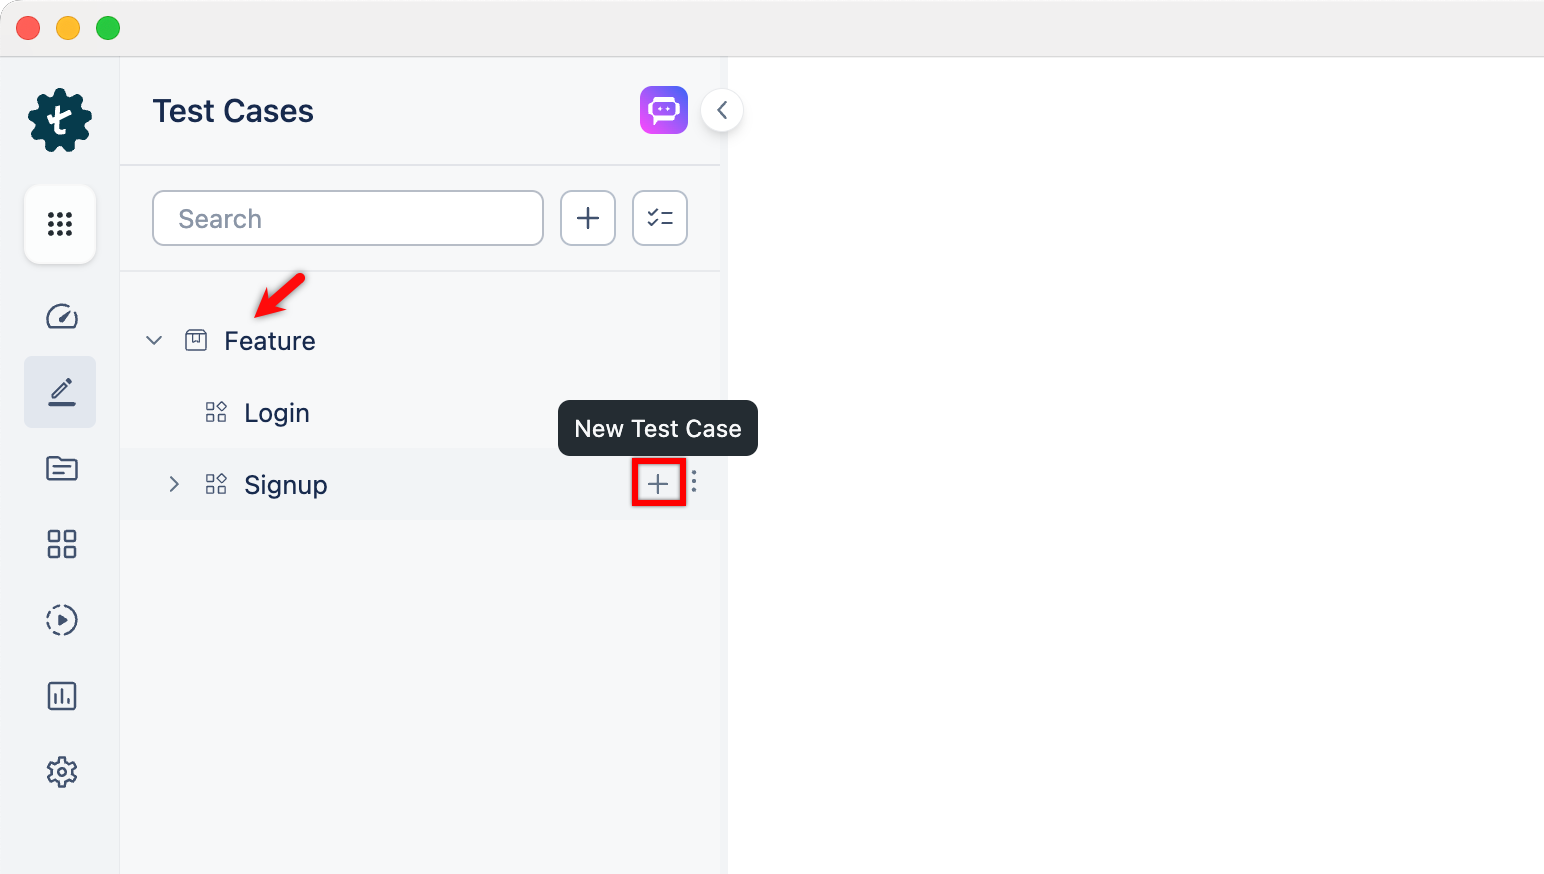
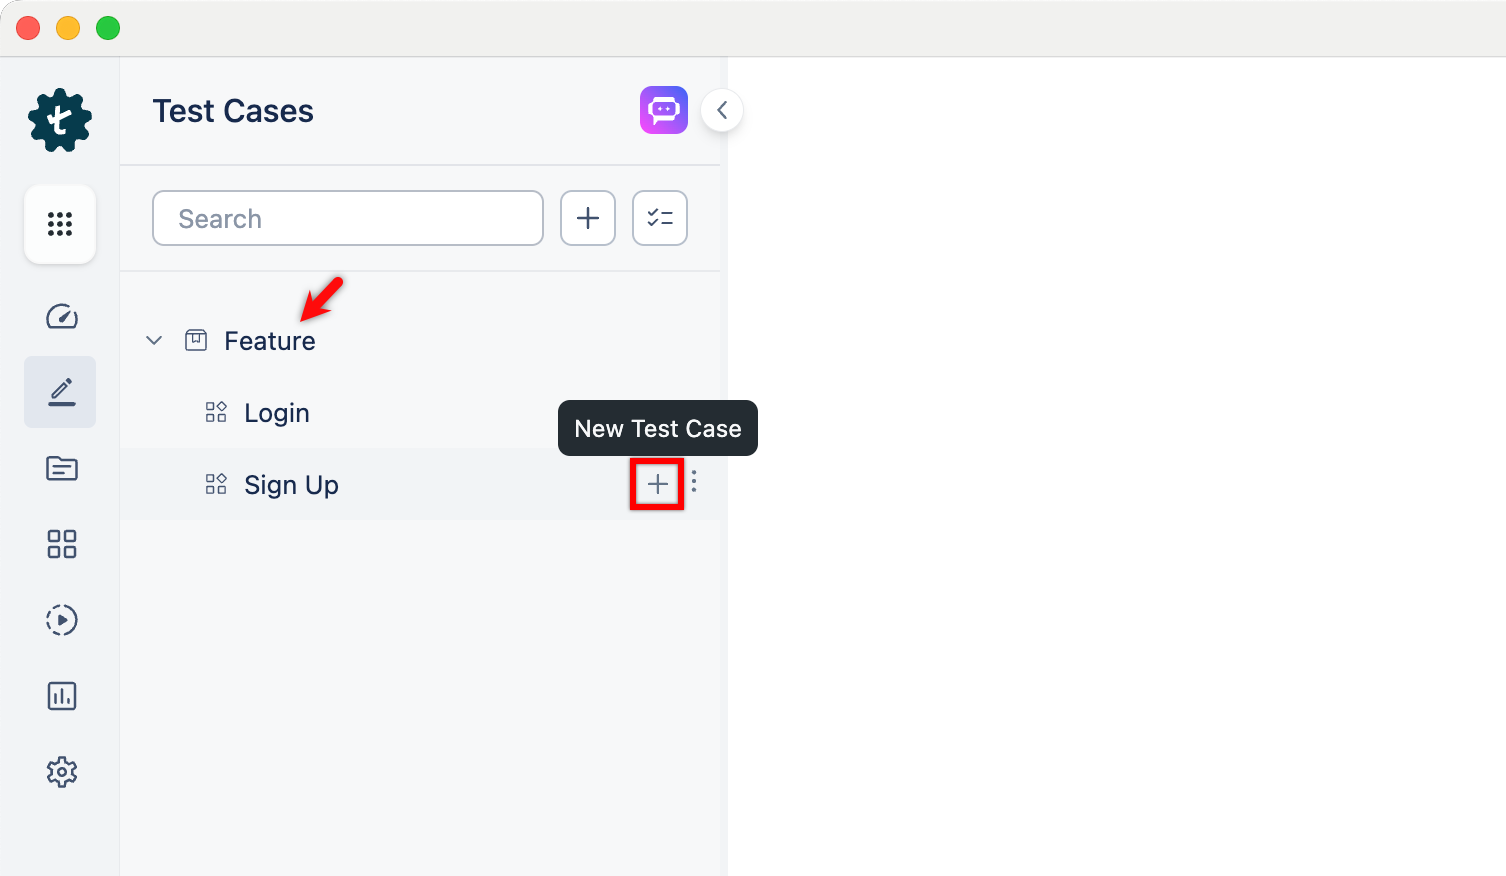
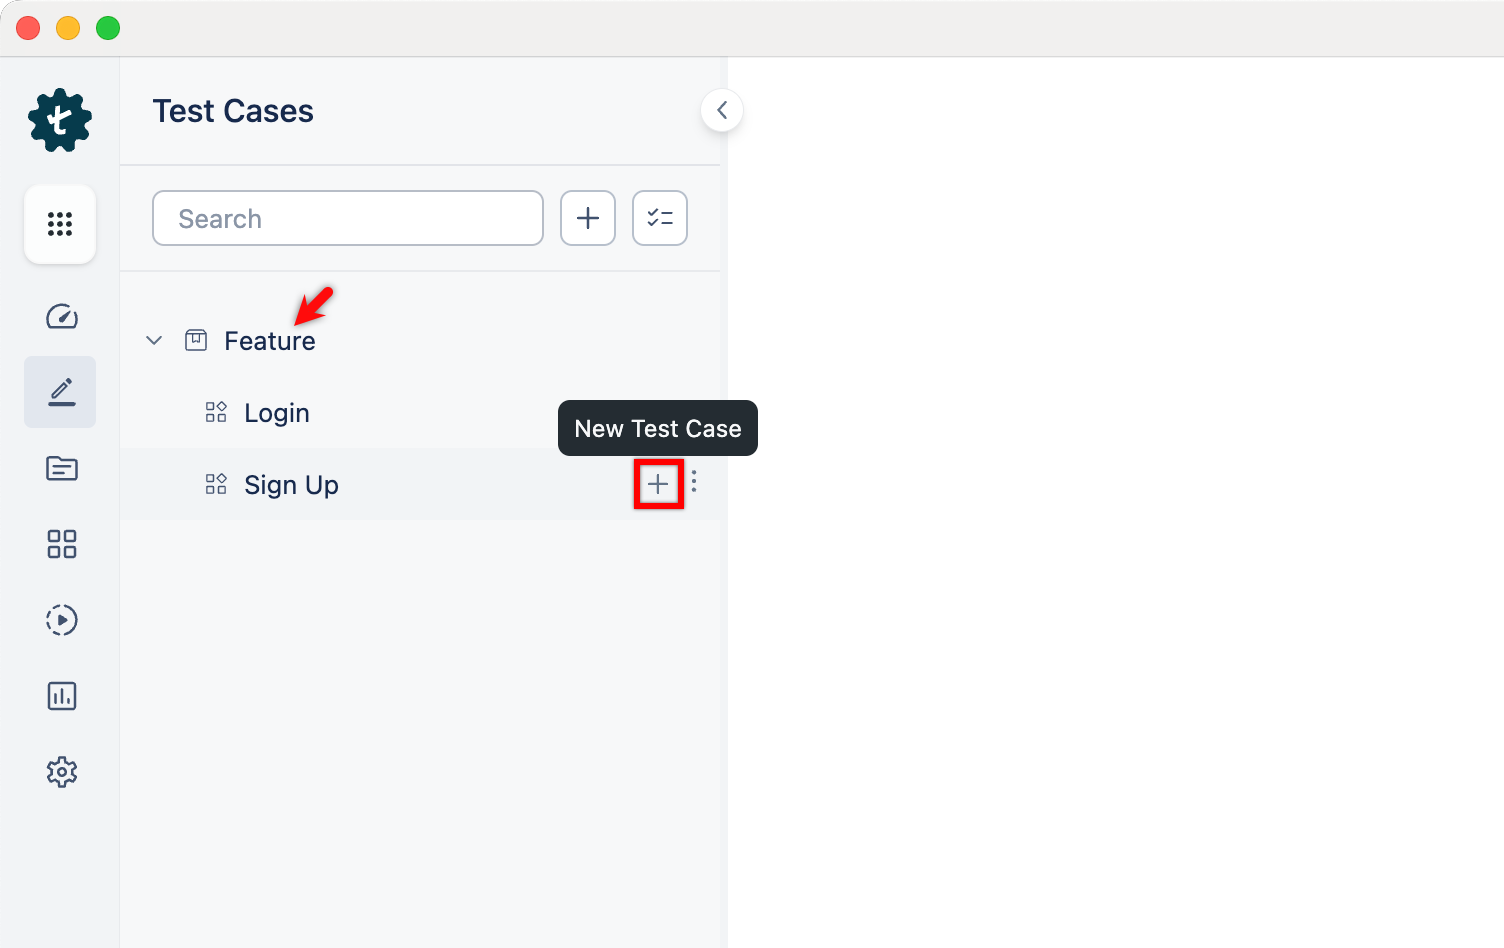
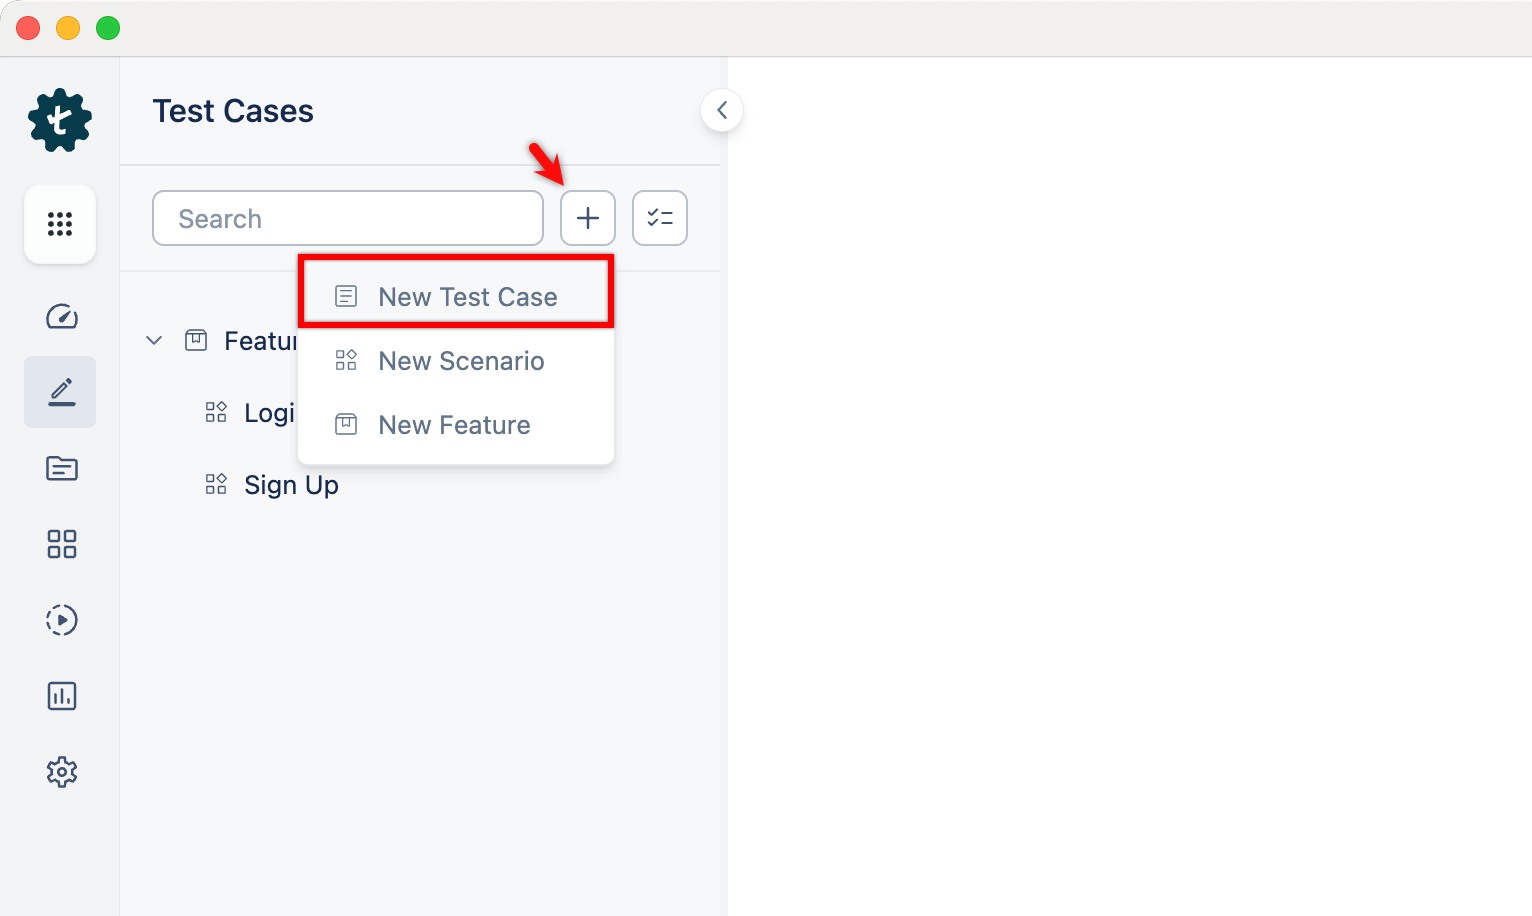
- From the left navigation bar, go to Create Tests > Test Cases.

- In the Test Case Explorer section, expand the required feature and click the + icon next to the target scenario. This will open a dialog box.
-
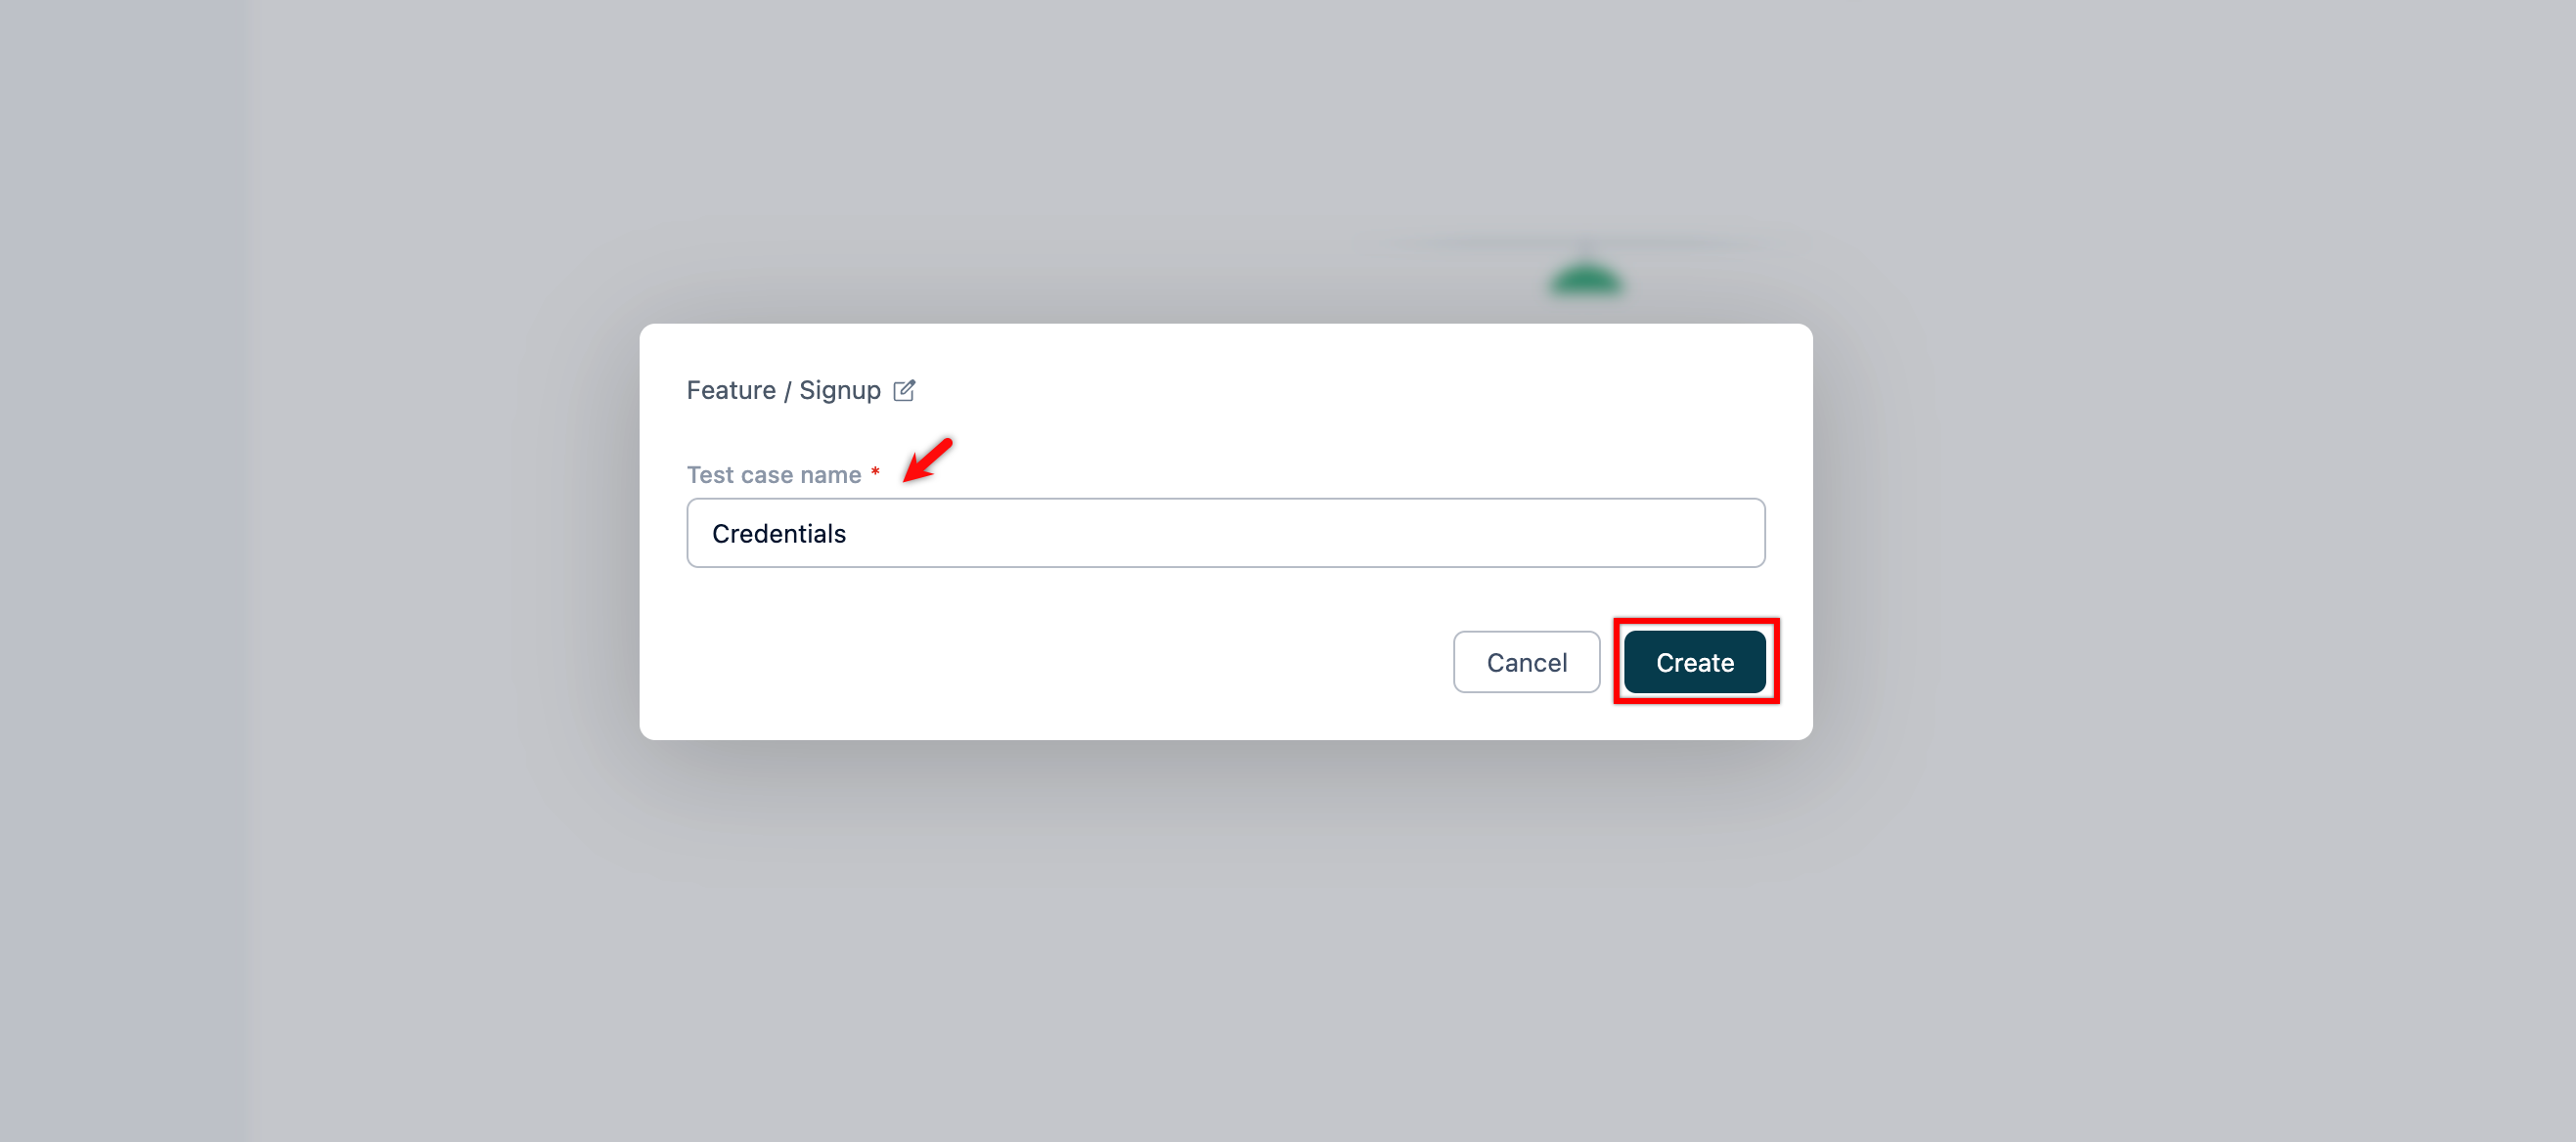
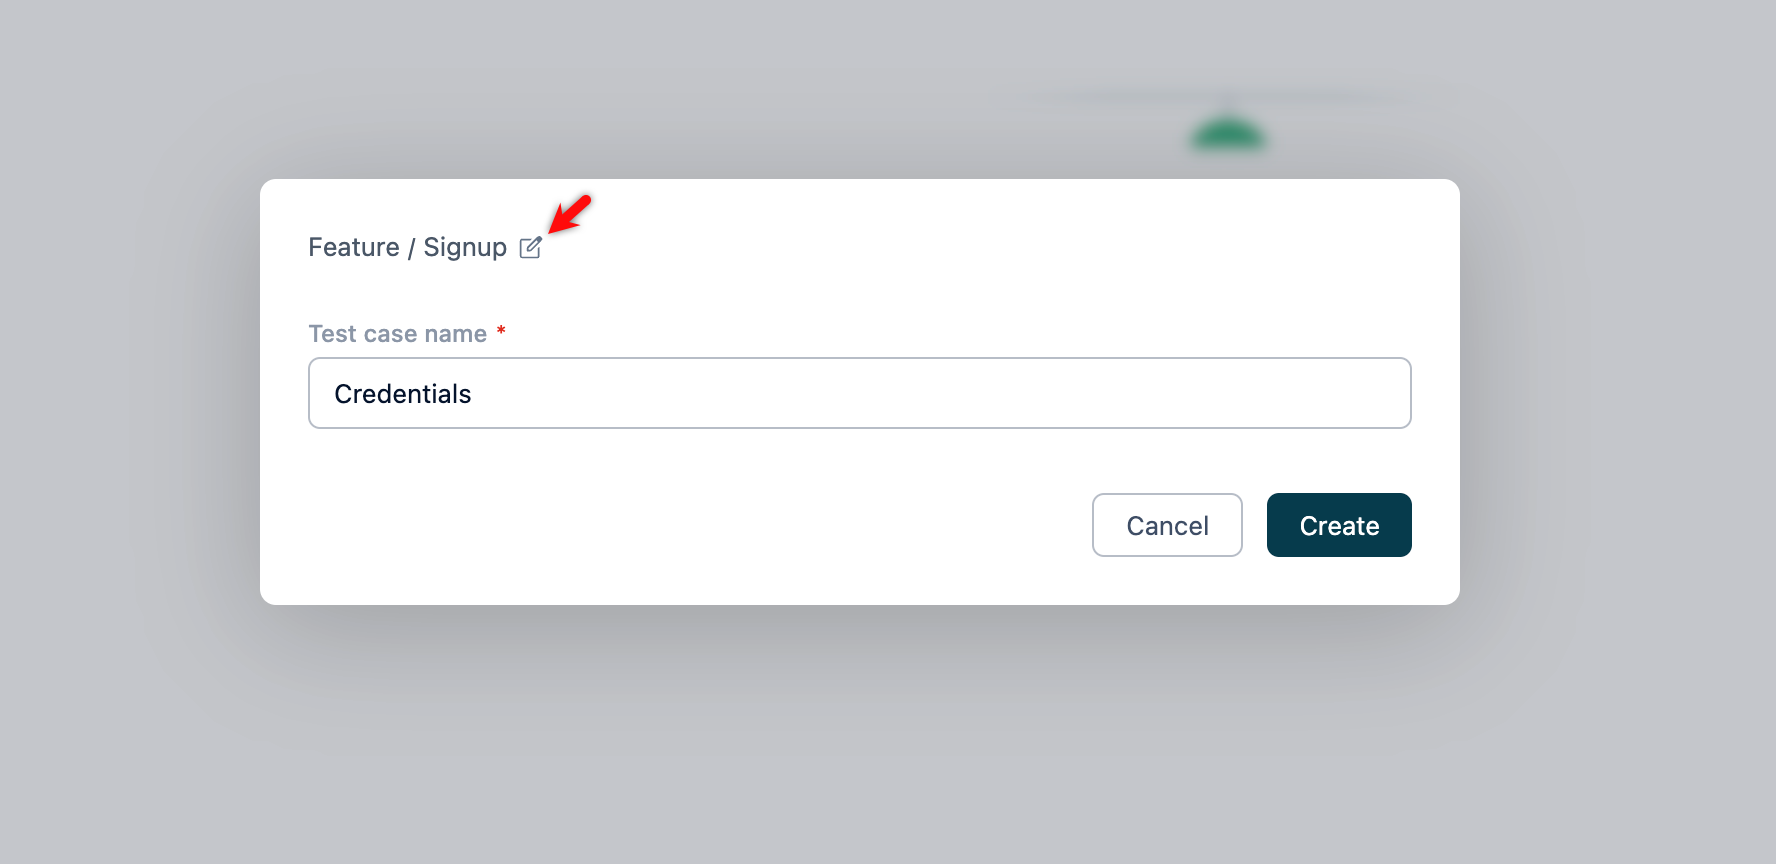
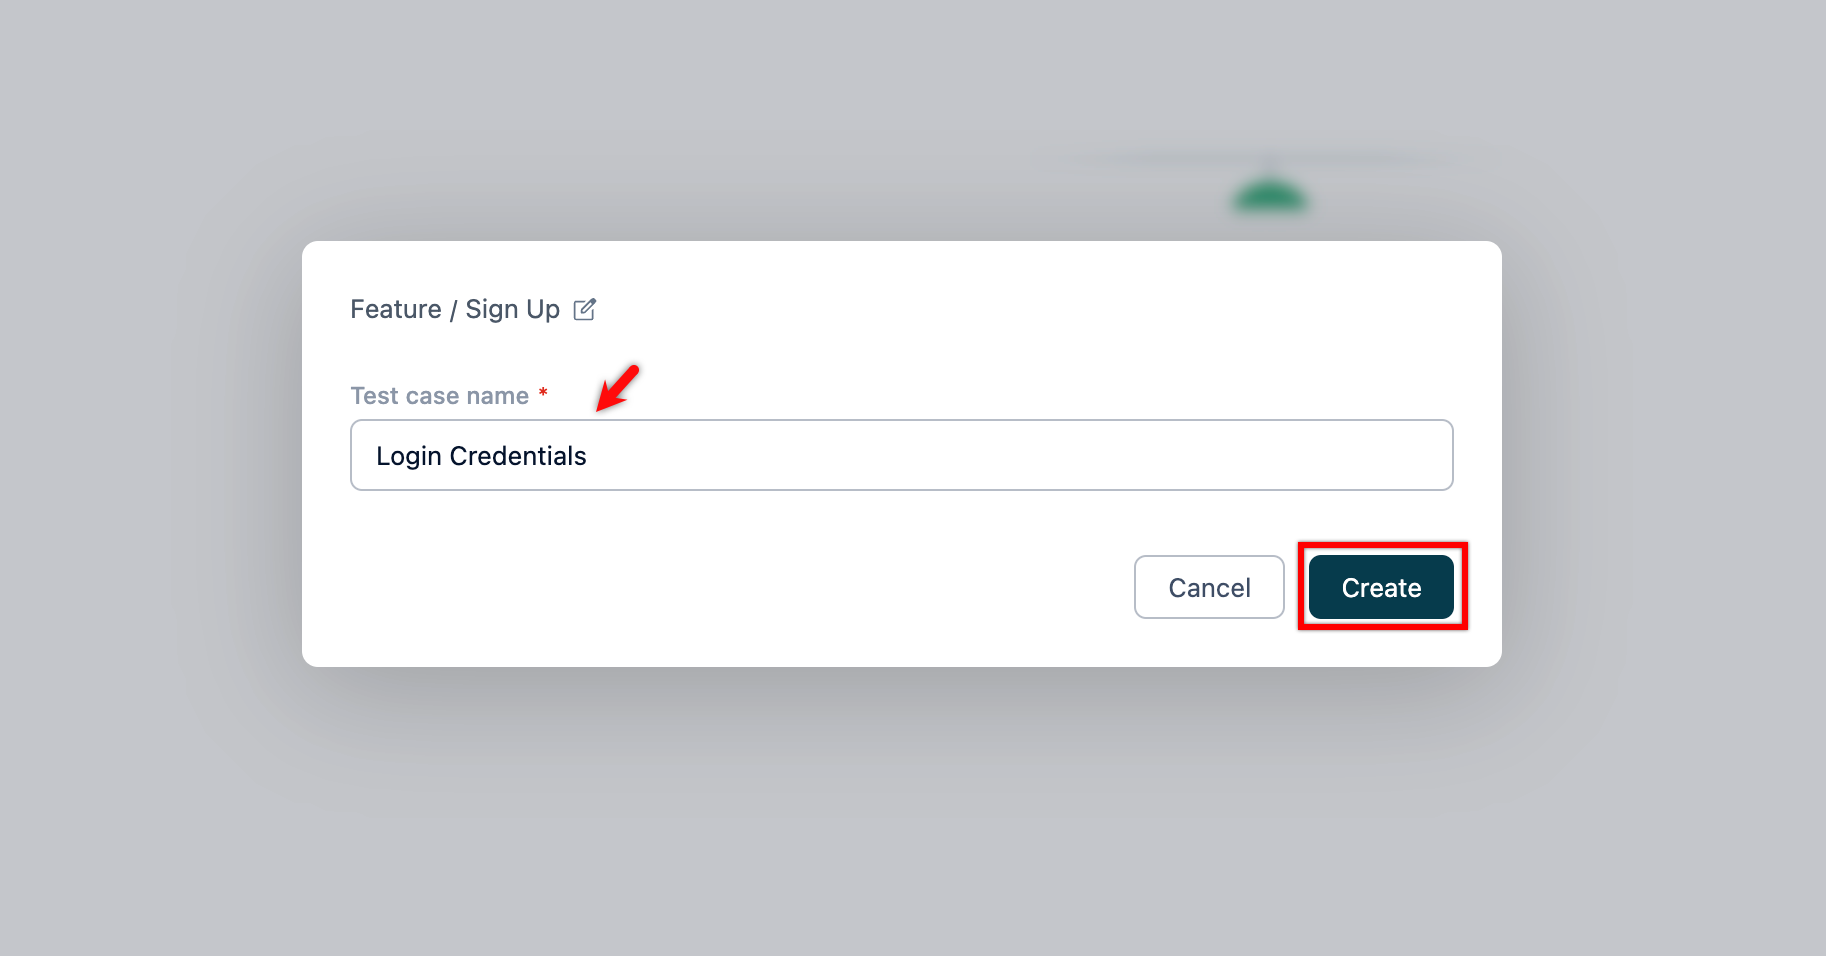
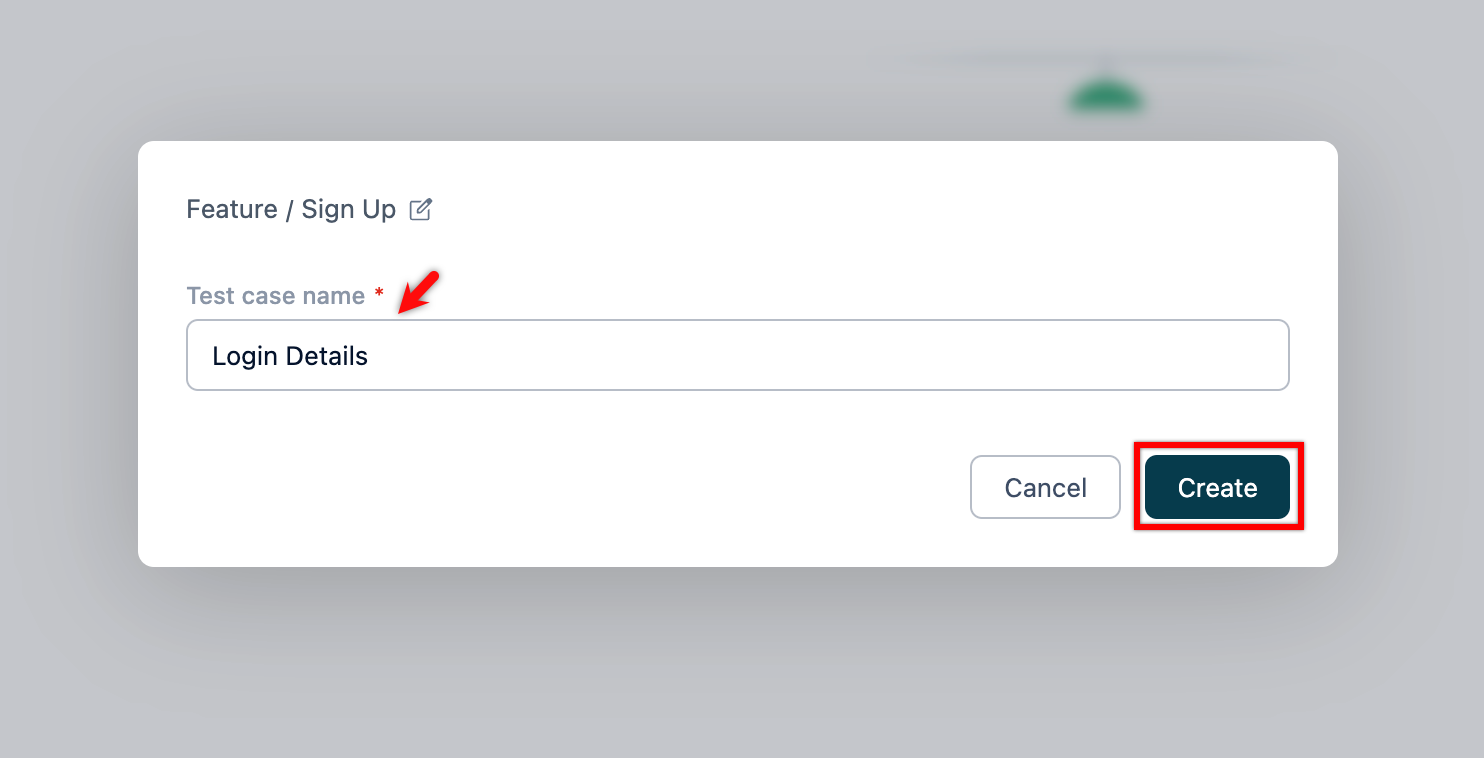
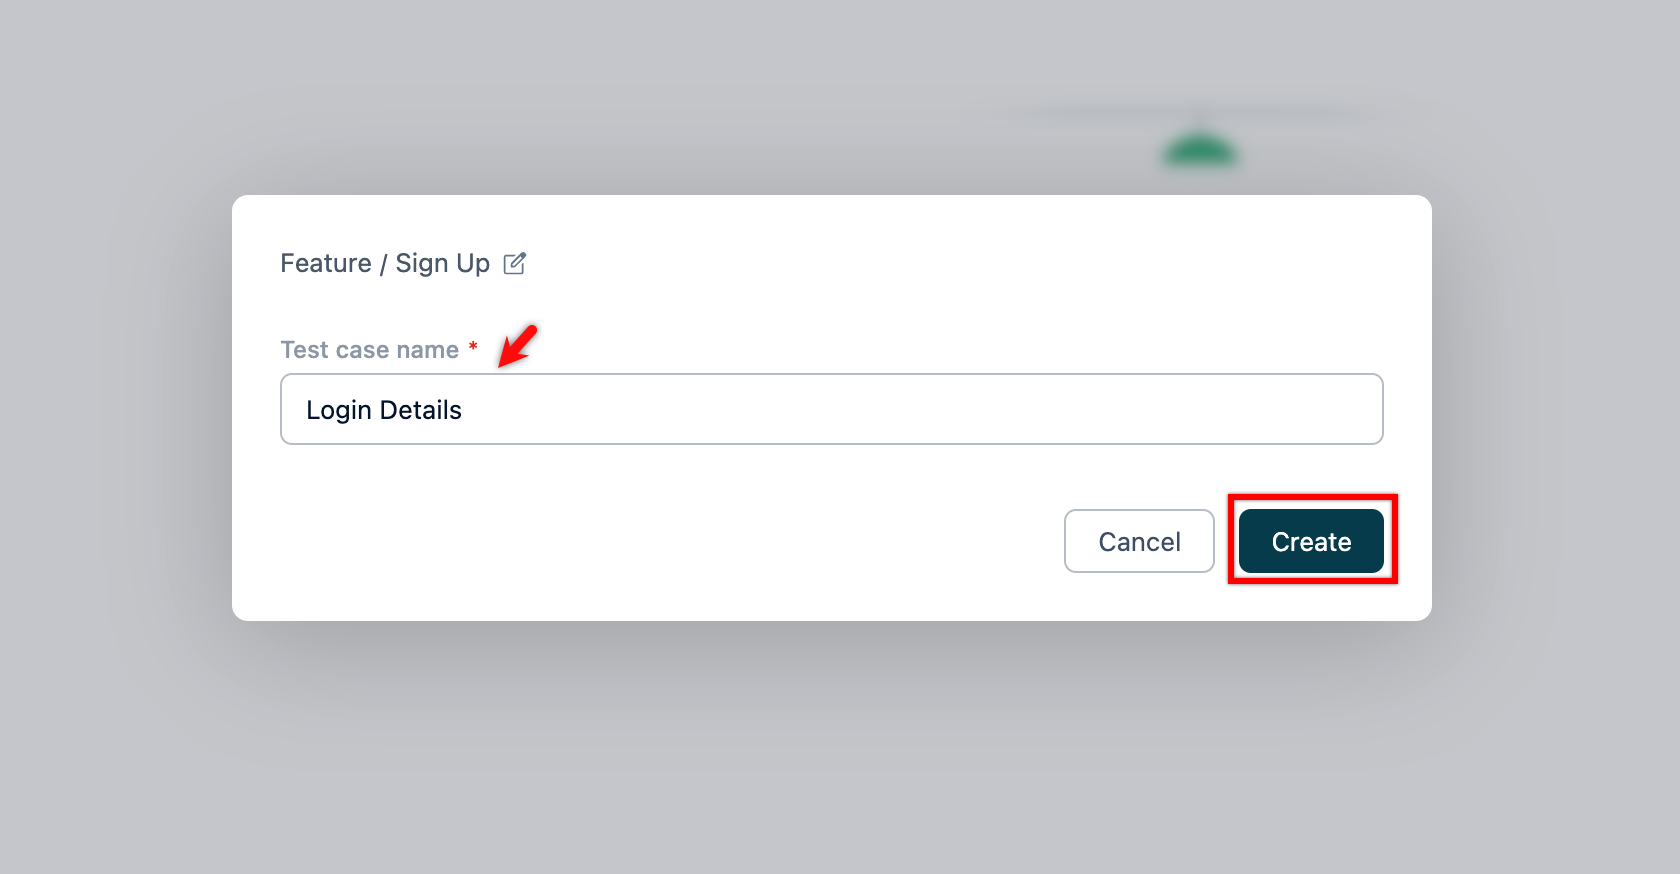
On the dialog box, validate the target feature and scenario, enter the name, and click Create.
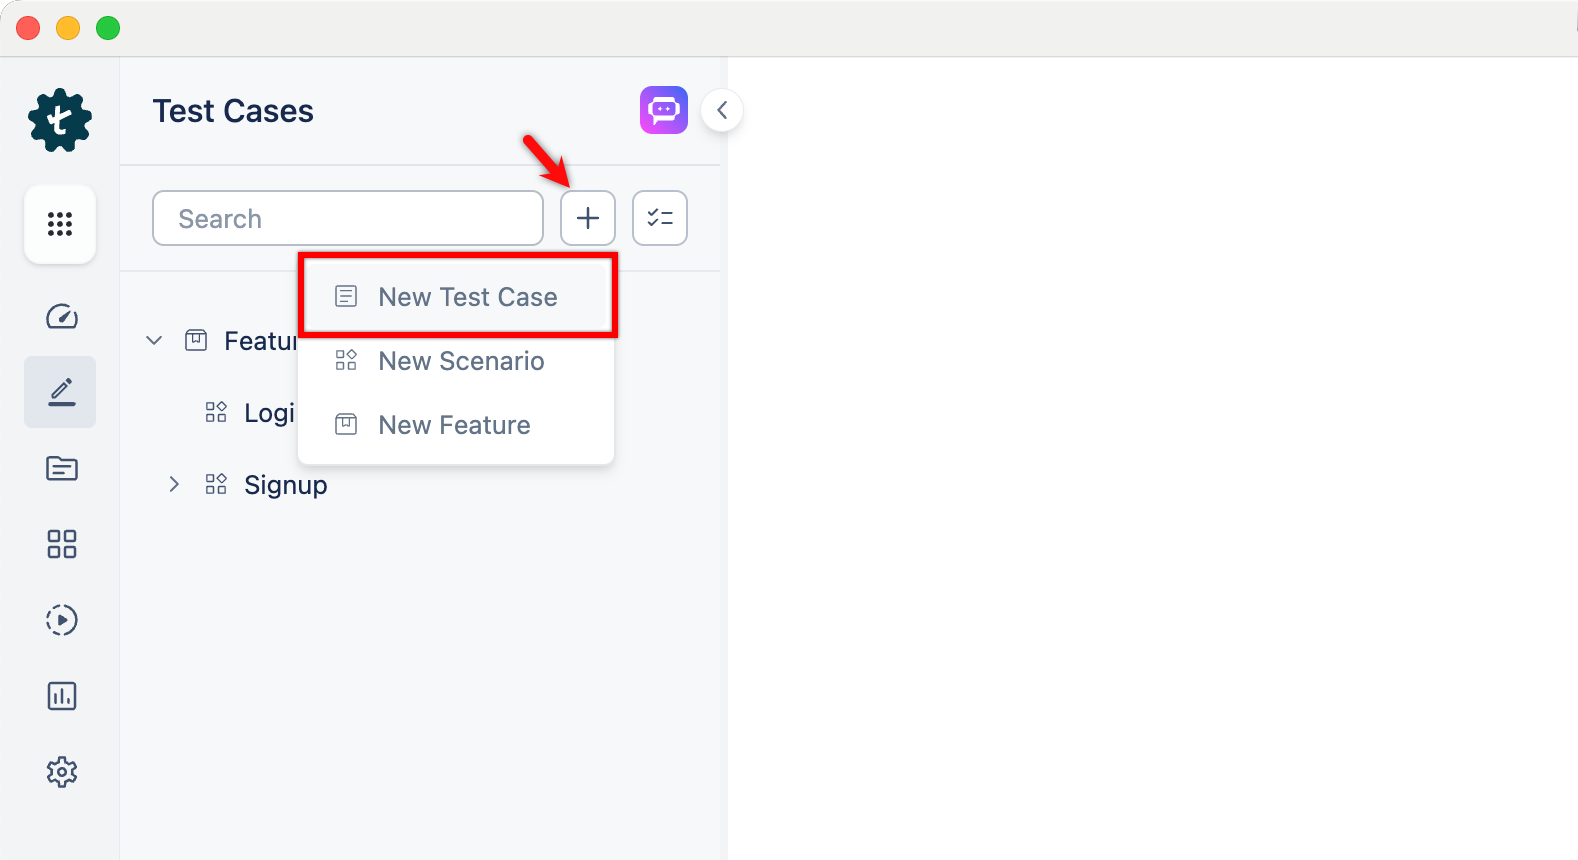
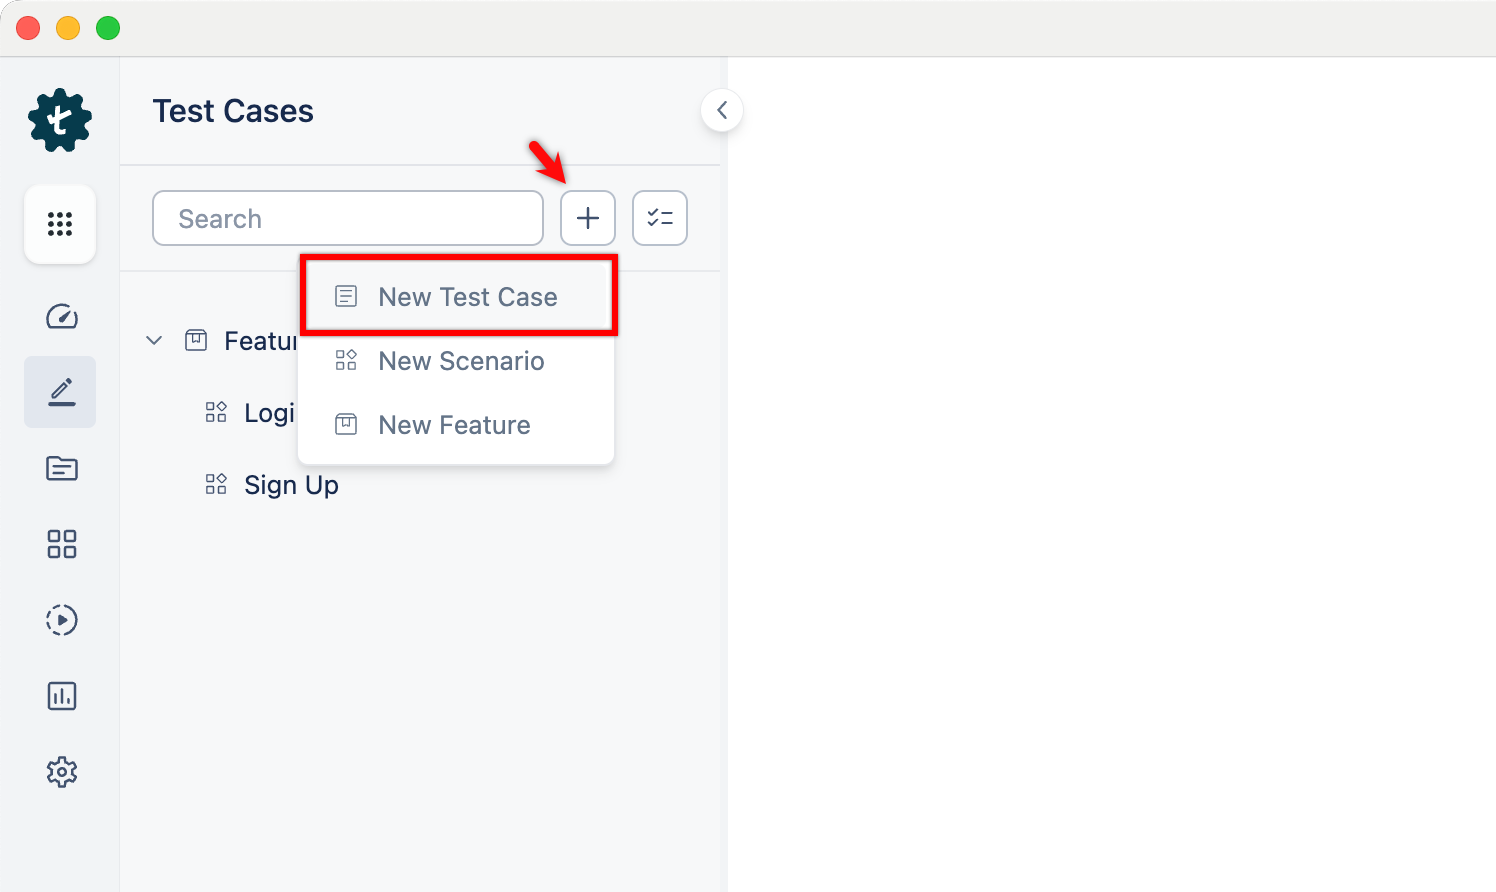
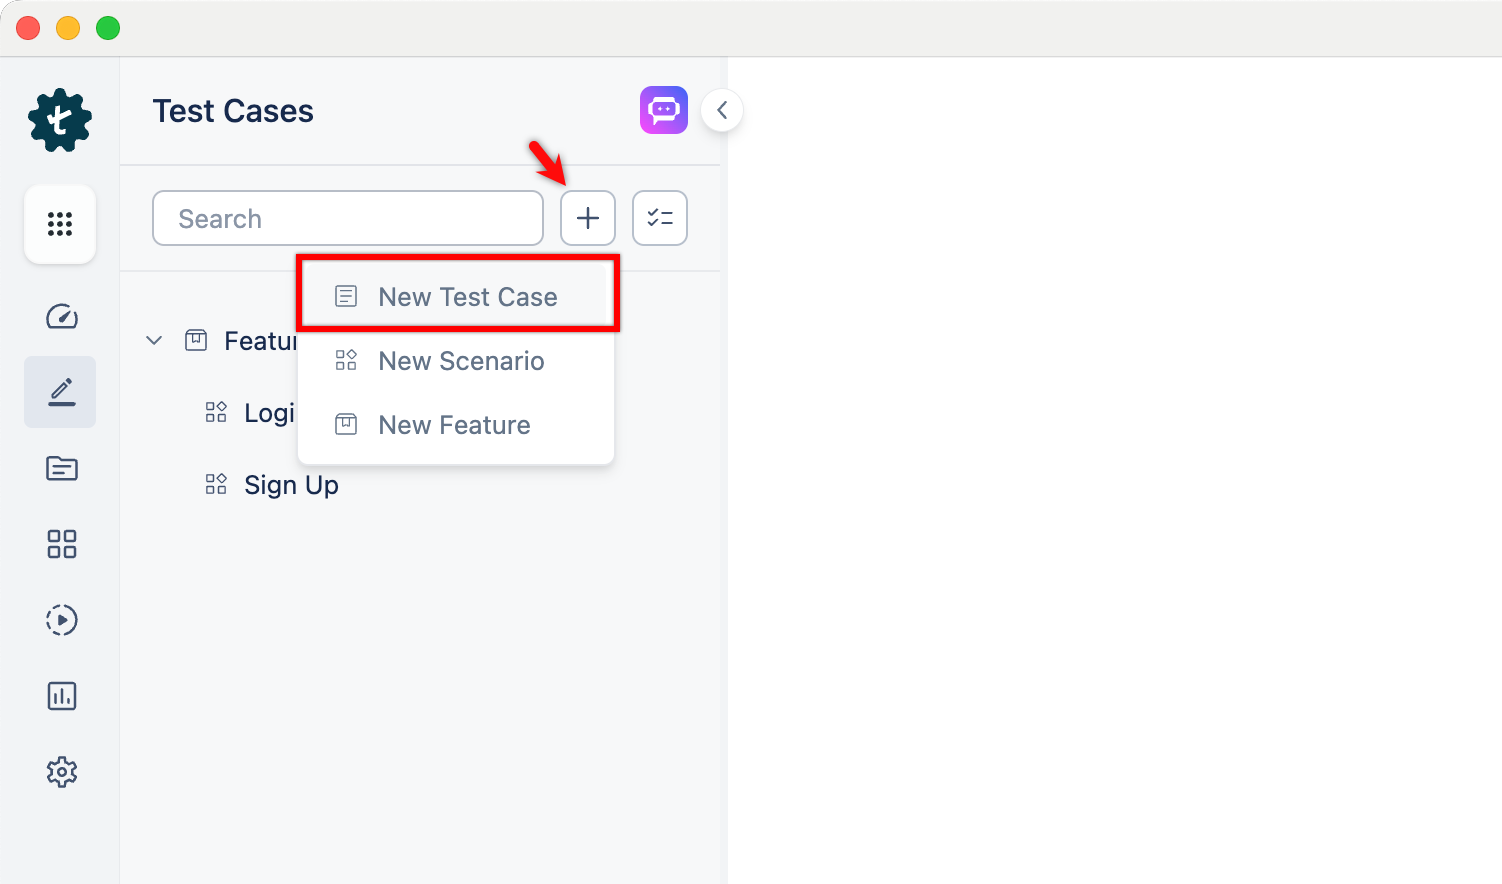
Alternatively, click the + icon next to the search bar and select New Test Case from the drop-down menu. Follow the same steps as above.
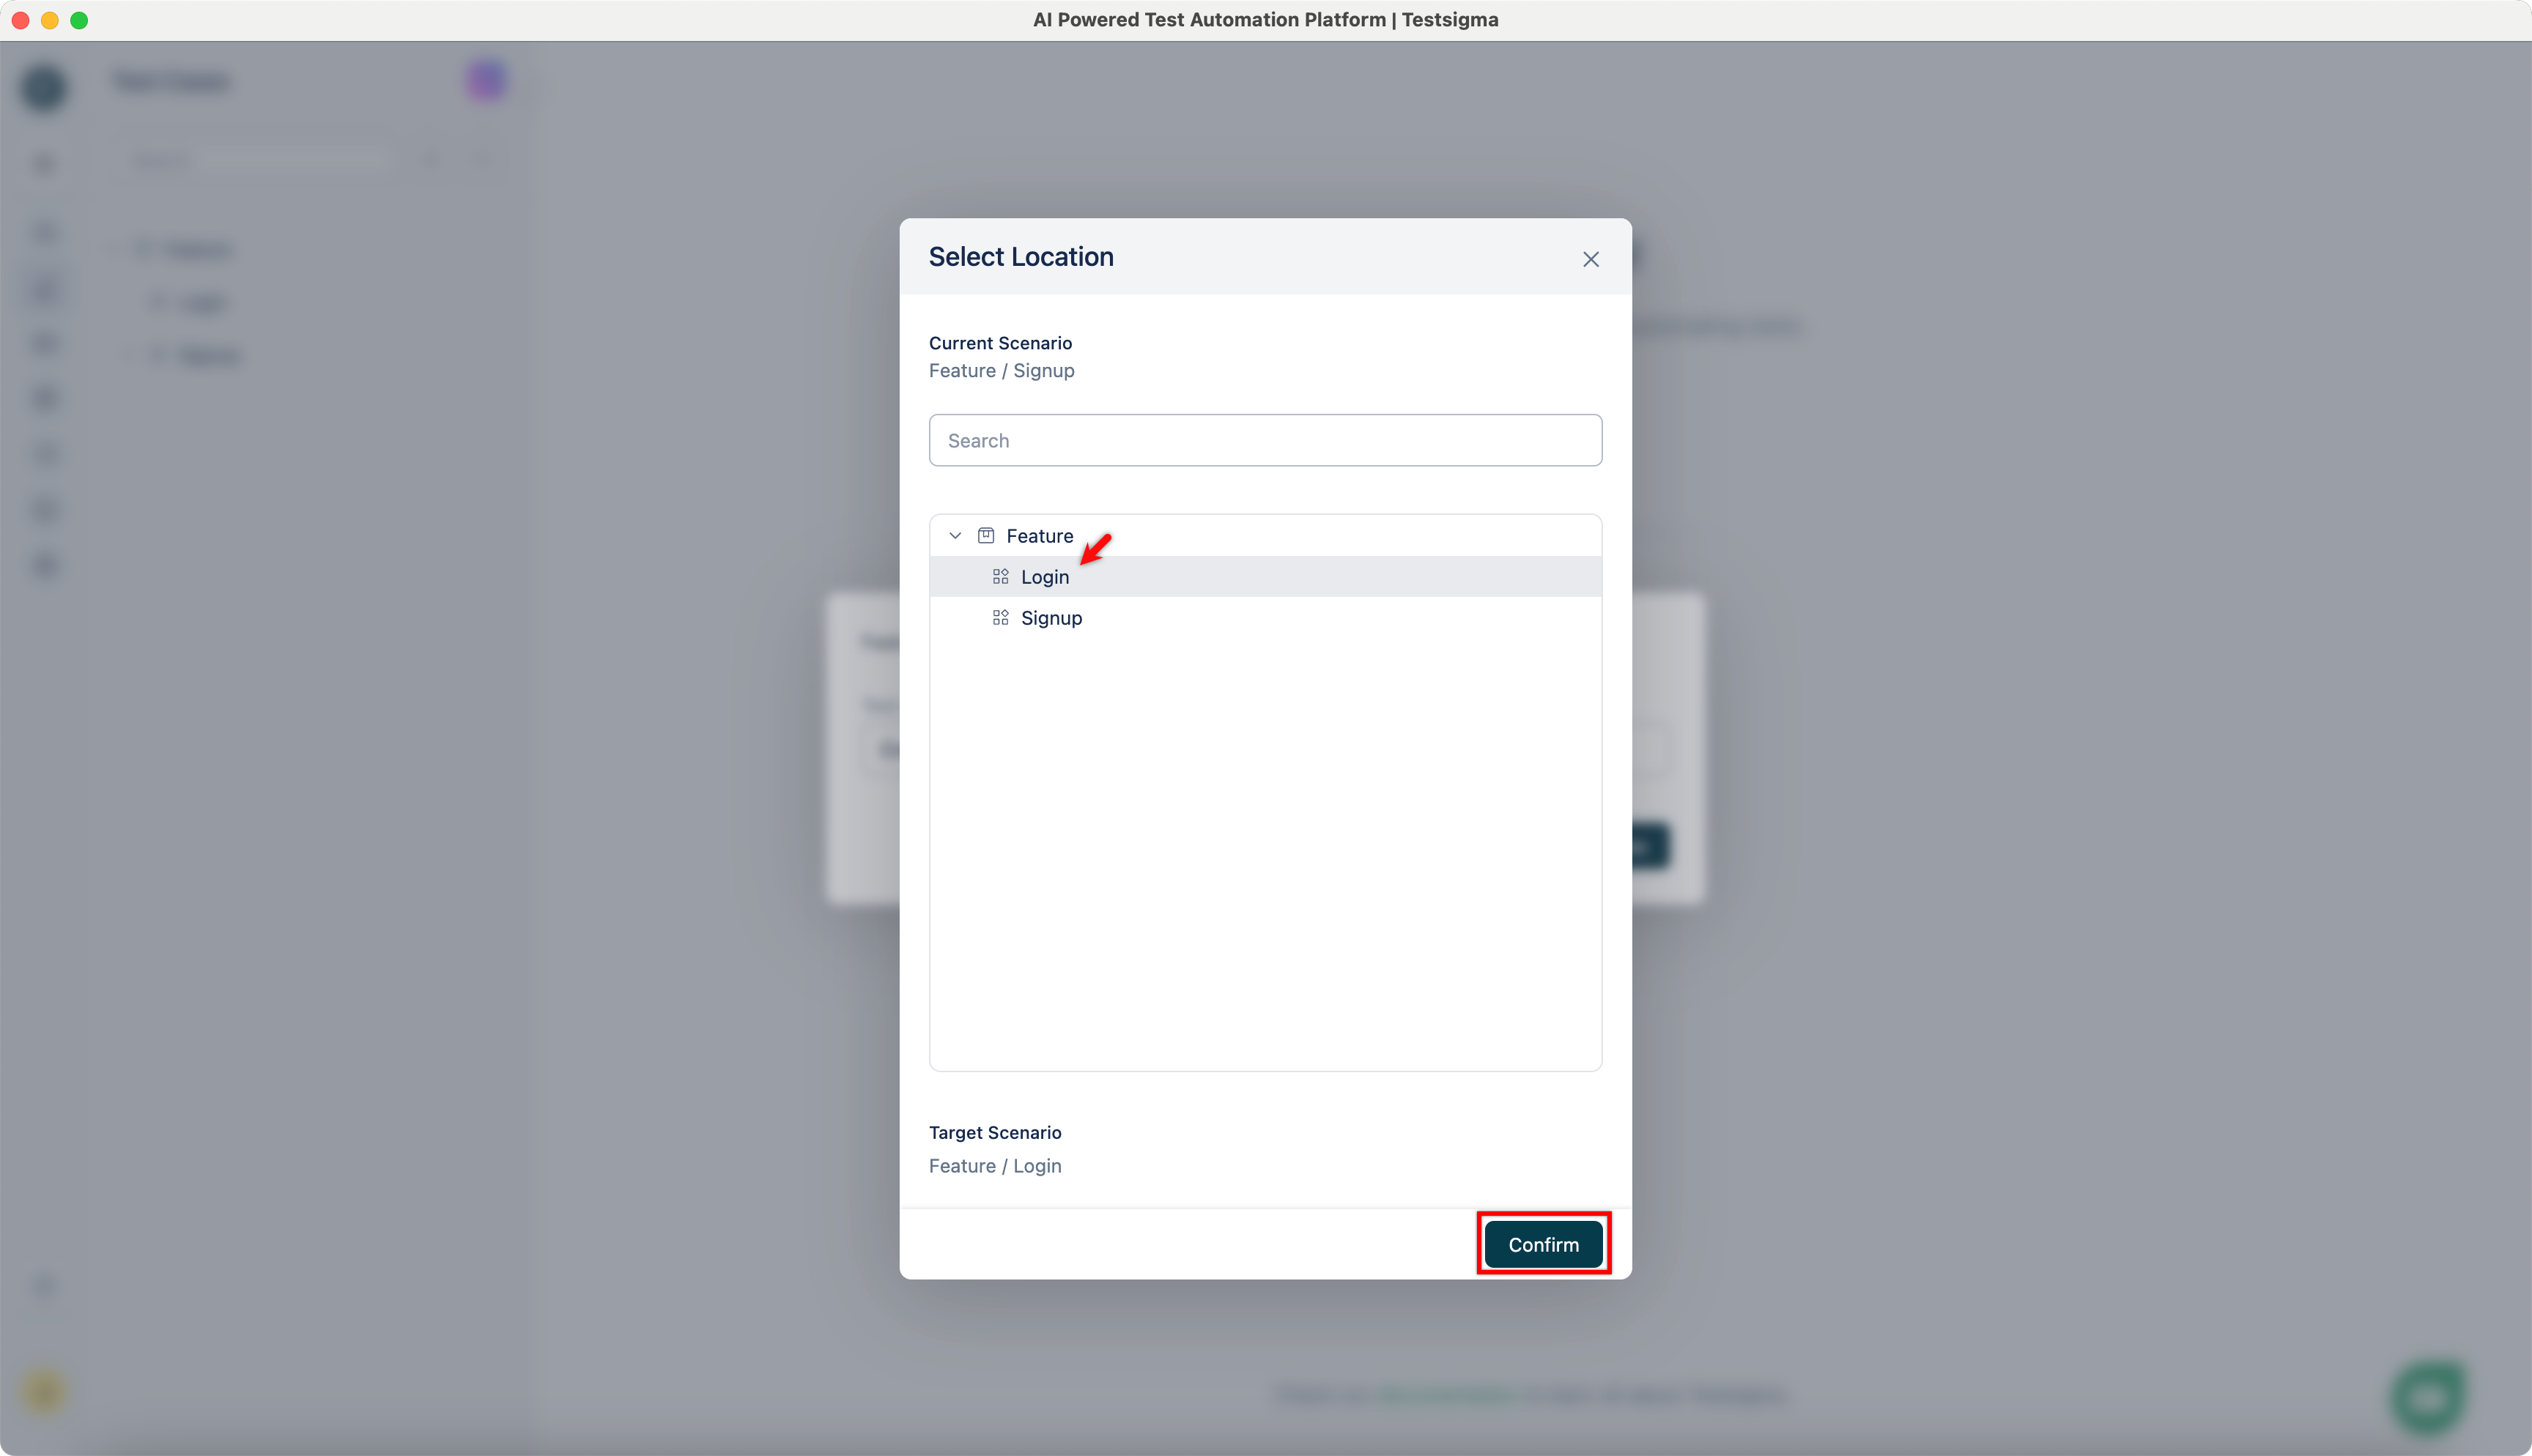
- You can edit the target feature and scenario by clicking on the Edit icon. This will open the Select Location dialog.
- In the Select Location dialog, select the target feature and scenario and click Confirm.
- This feature functions consistently across all applications.
-
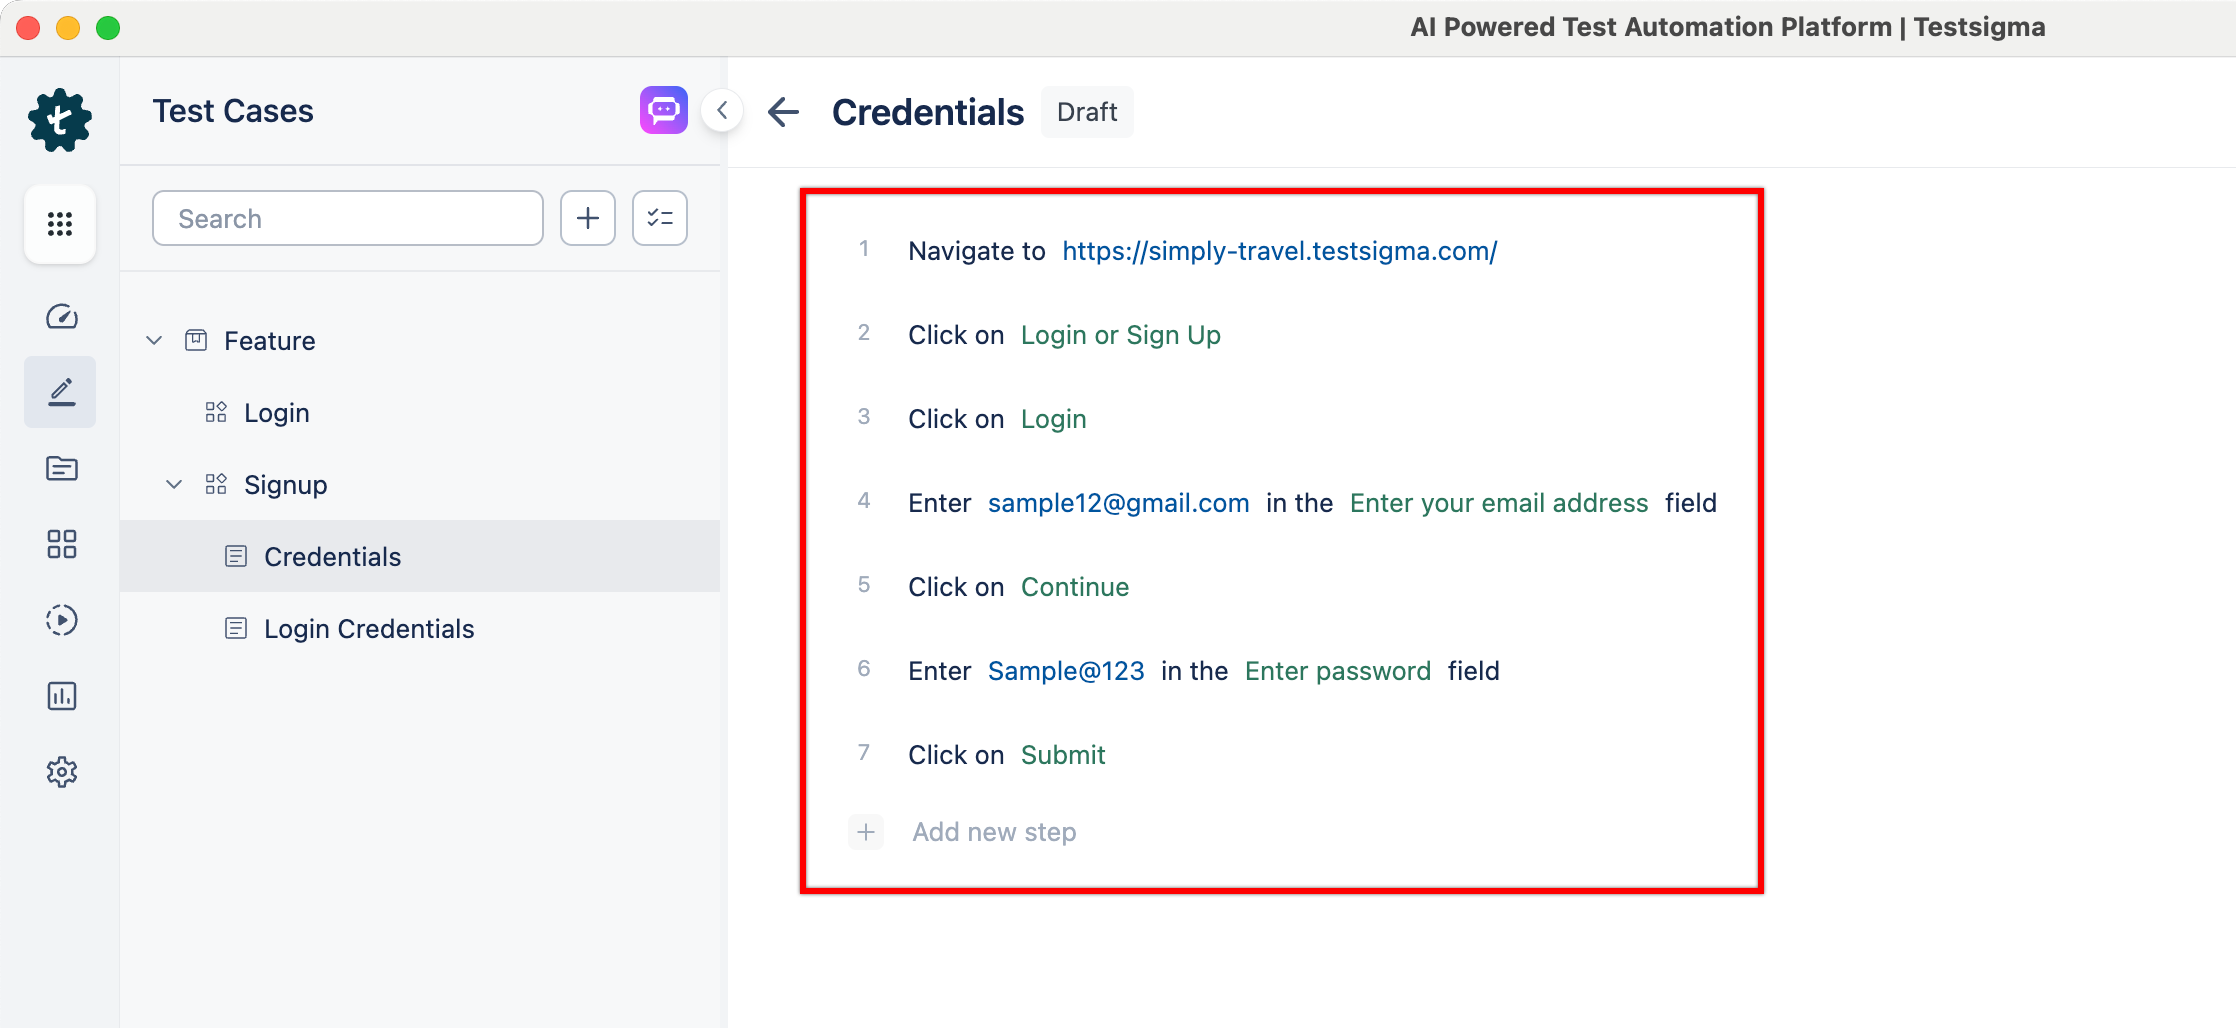
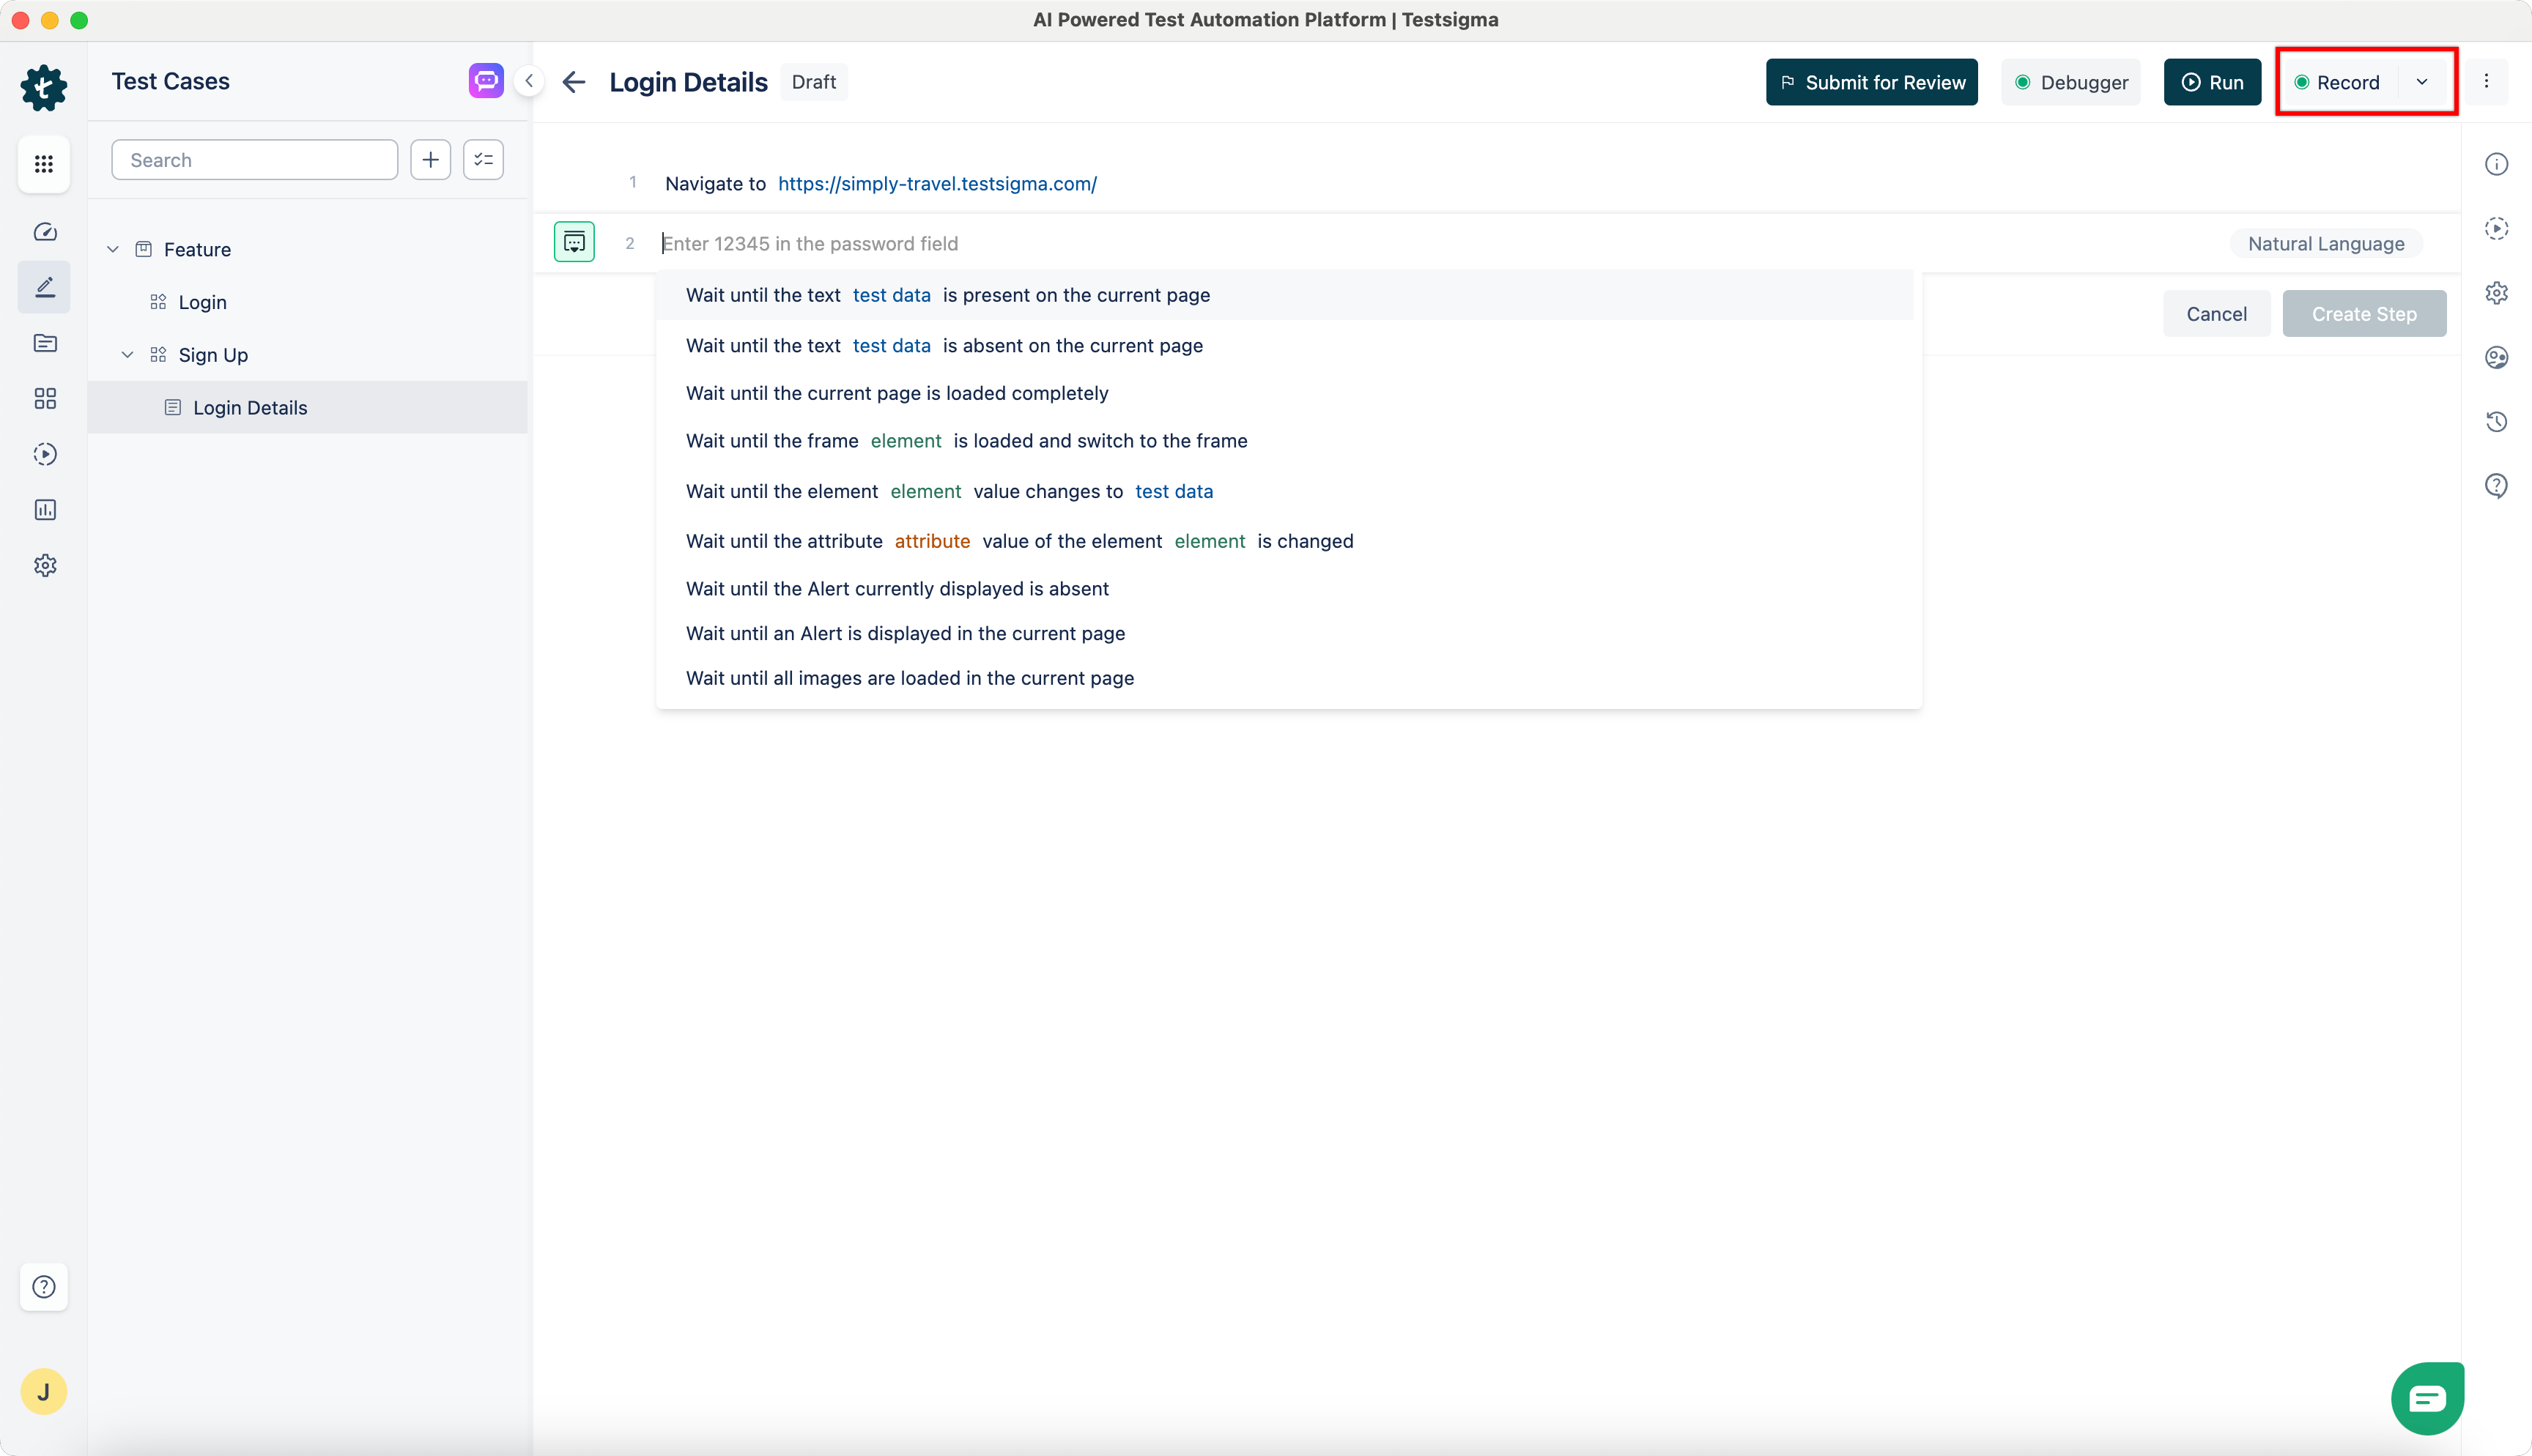
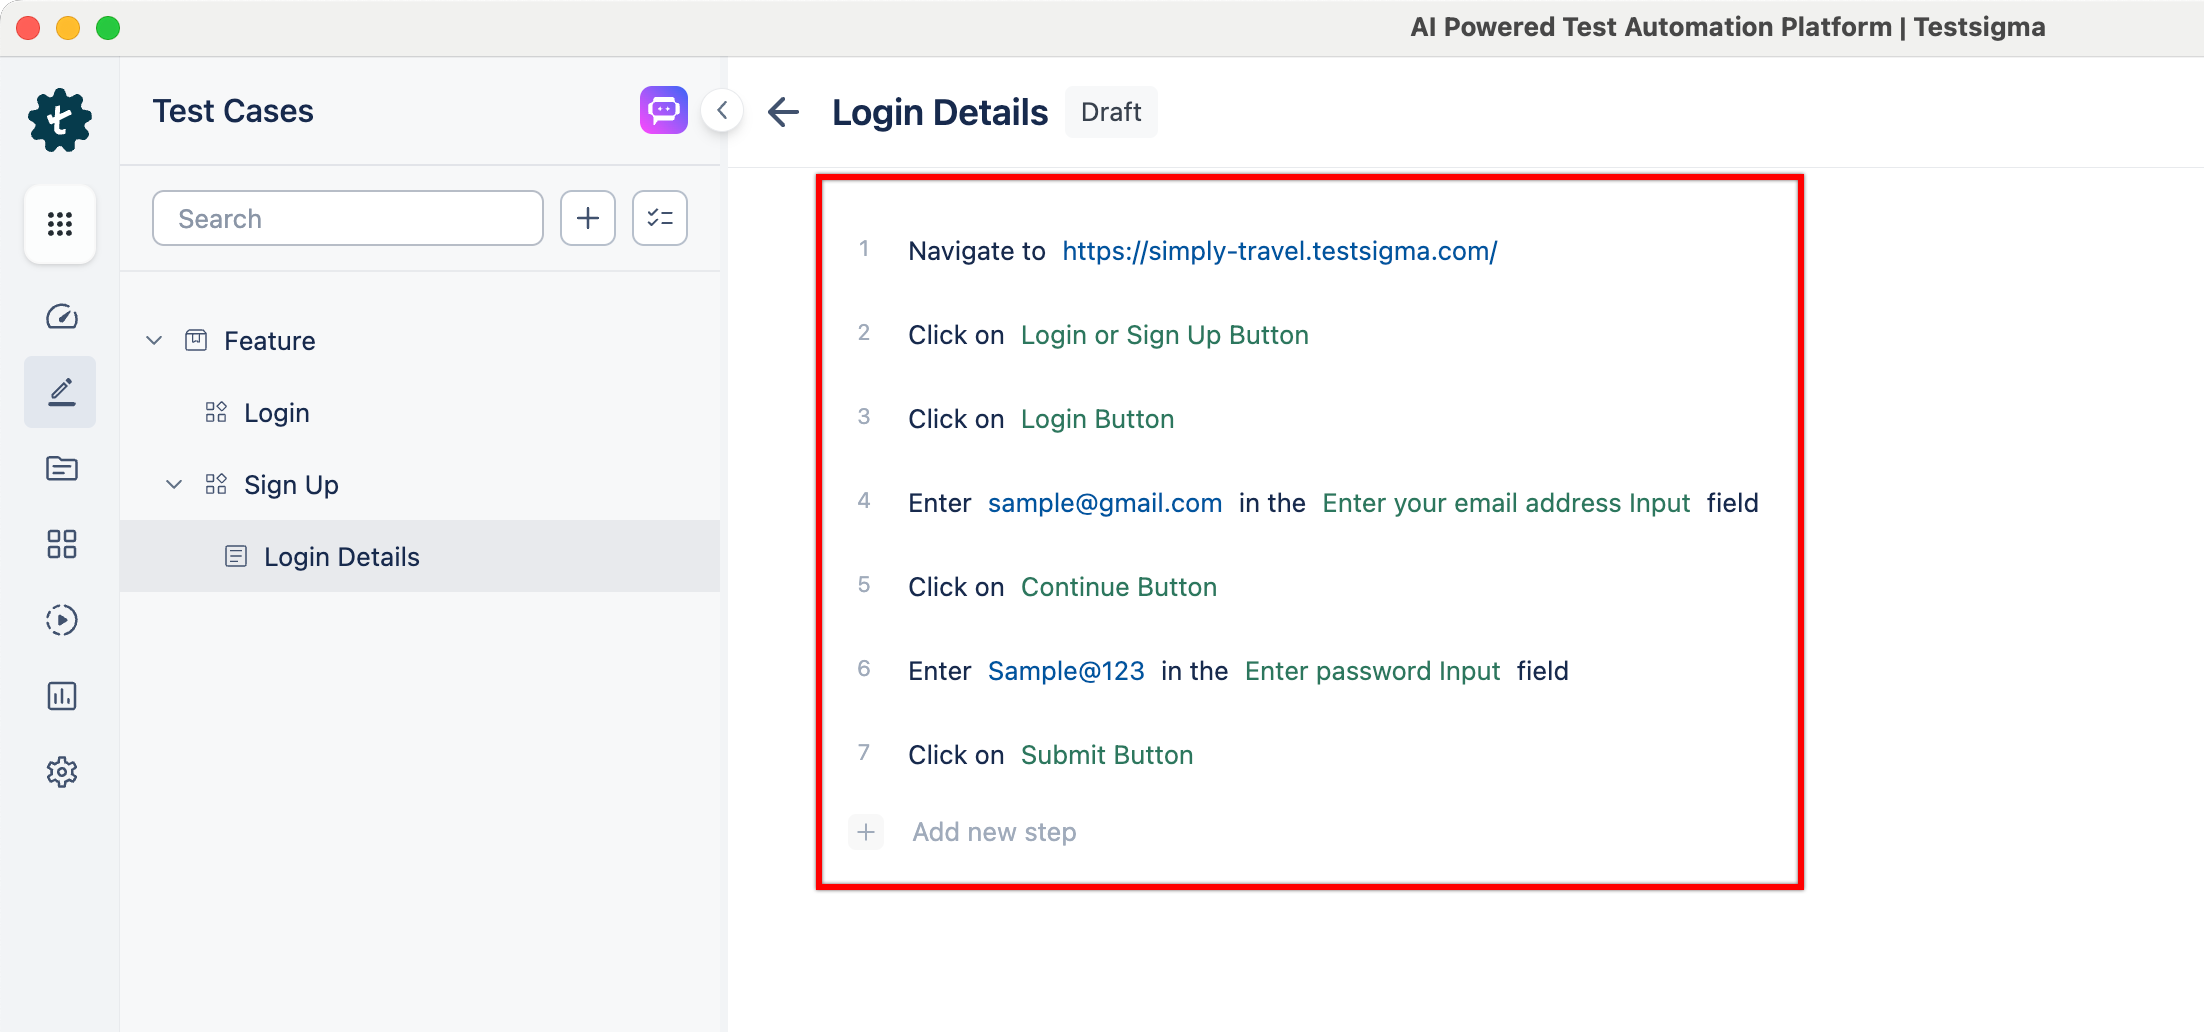
Use NLPs to create test steps as per the test case scenario.
For example, if you’re creating test steps for the login page, your test steps will be:
- Navigate to https://simply-travel.testsigma.com/
- Click on Login or Sign Up
- Click on Login
- Enter <email> in the <email address> field
- Click on Continue
- Enter <password> in the <password> field
- Click on Submit
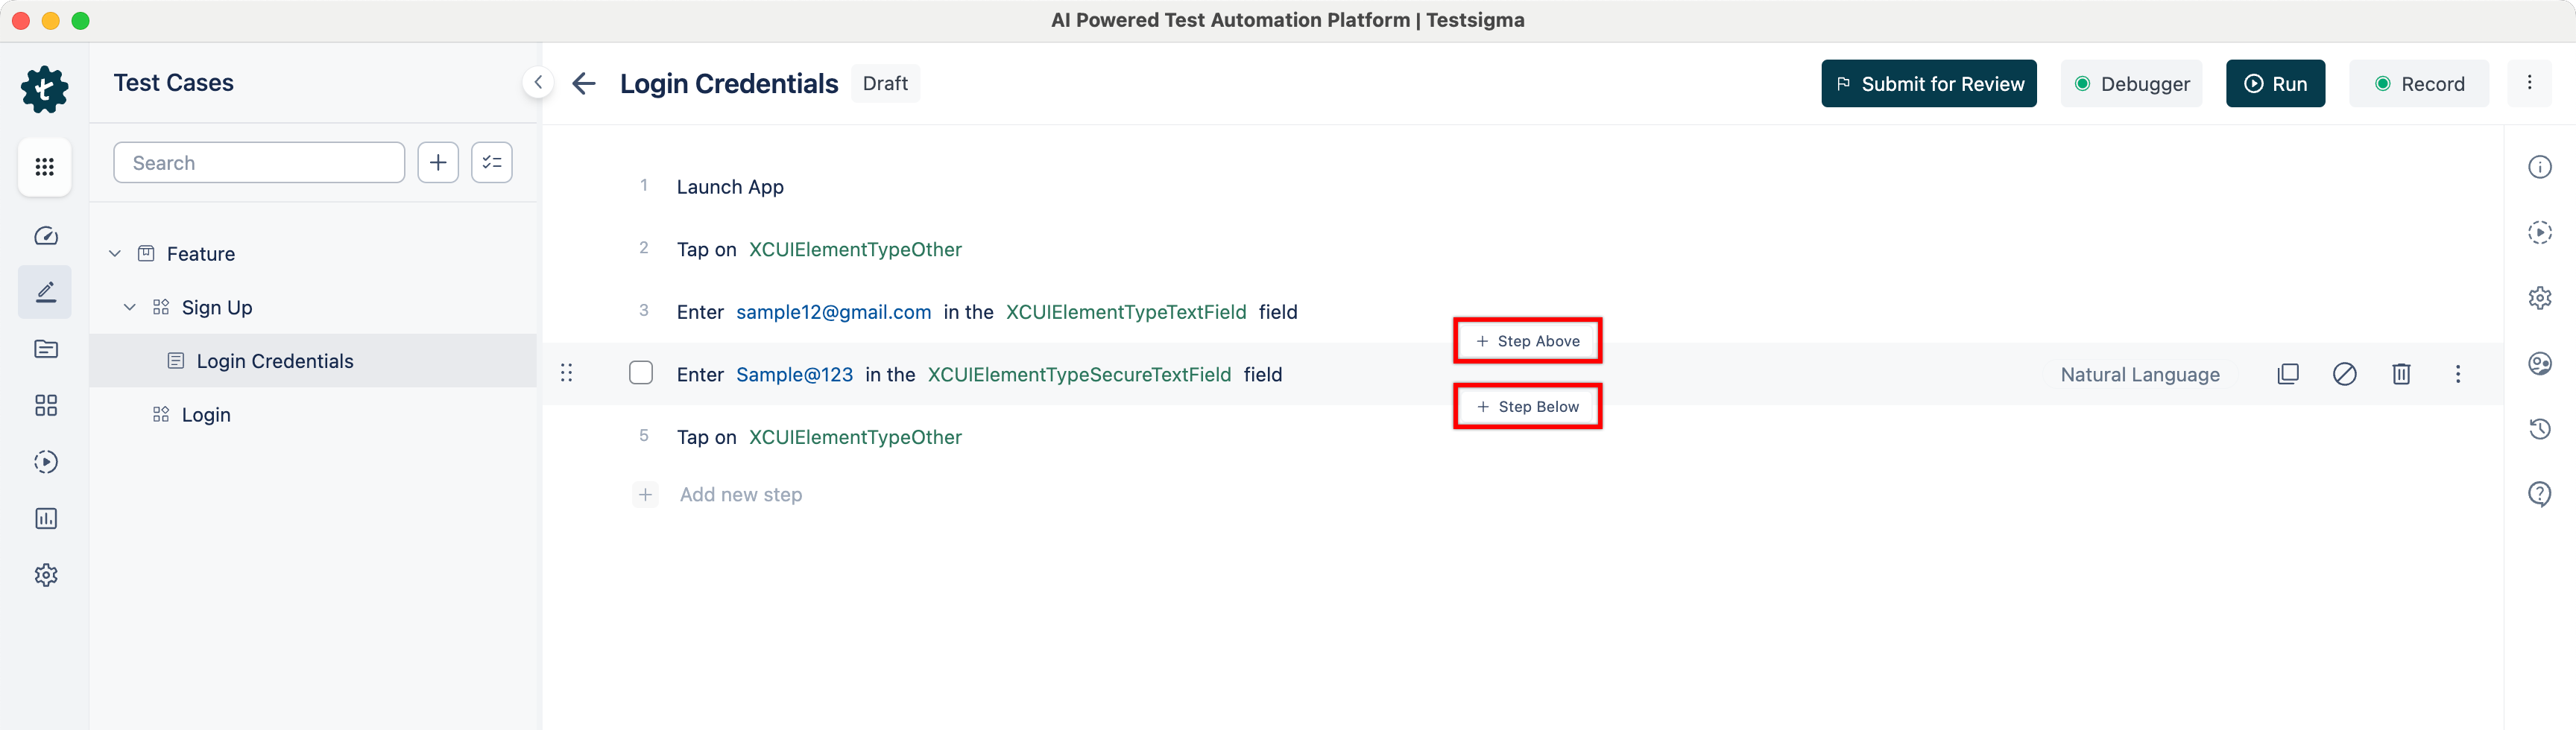
Here's a screenshot of the test steps that were reproduced in the Testsigma application:
Android and iOS
- From the left navigation bar, go to Create Tests > Test Case.

- In the Test Case Explorer section, expand the required feature and click the + icon next to the target scenario. This will open a dialog box.

-
On the dialog box, validate the target feature and scenario, enter the name, and click Create.
Alternatively, click the + icon next to the search bar and select New Test Case from the drop-down menu. Follow the same steps as above.
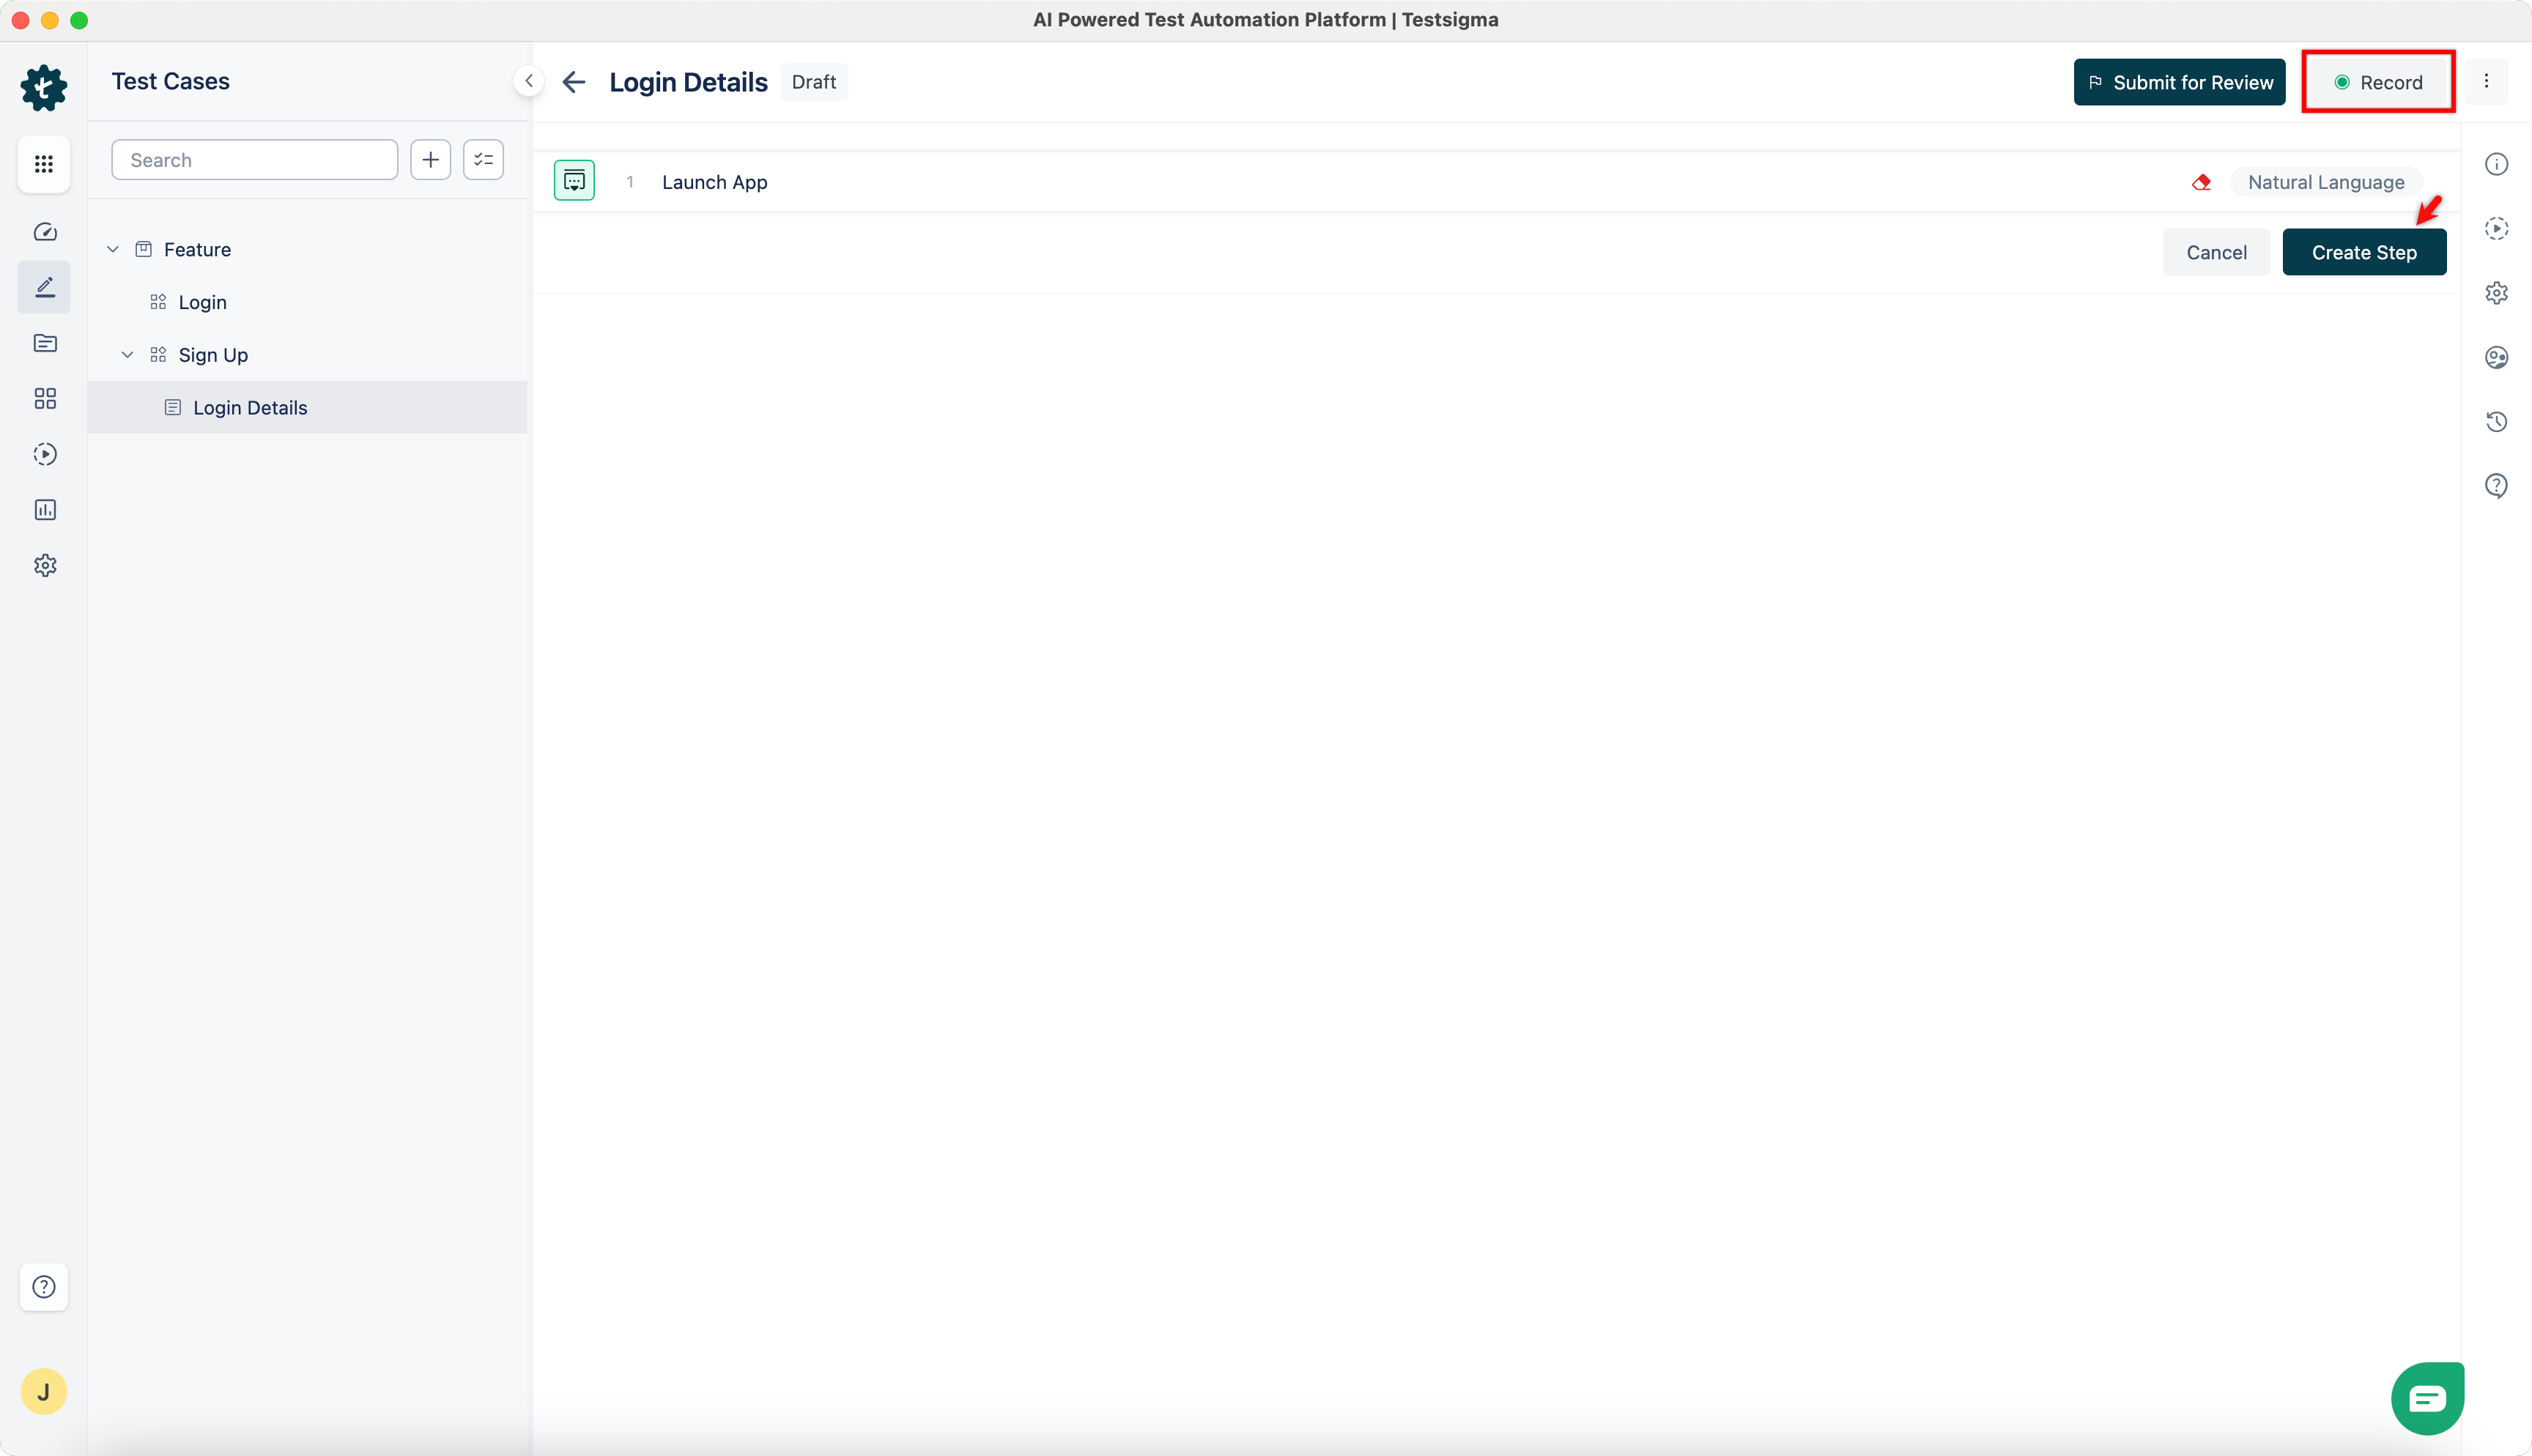
- Use NLPs to create test steps as per the test case scenario.
- By default, the first step for Android and iOS applications is Launch App.
- You can also add steps above and below a test step by clicking on Step Above & Step Below.
Creating Test Steps Using Test Recorder
Web and Mobile Web
- From the left navigation bar, go to Create Tests > Test Cases.

- In the Test Case Explorer section, expand the required feature and click the + icon next to the target scenario. This will open a dialog box.
-
On the dialog box, validate the target feature and scenario, enter the name, and click Create.
Alternatively, click the + icon next to the search bar and select New Test Case from the drop-down menu. Follow the same steps as above.
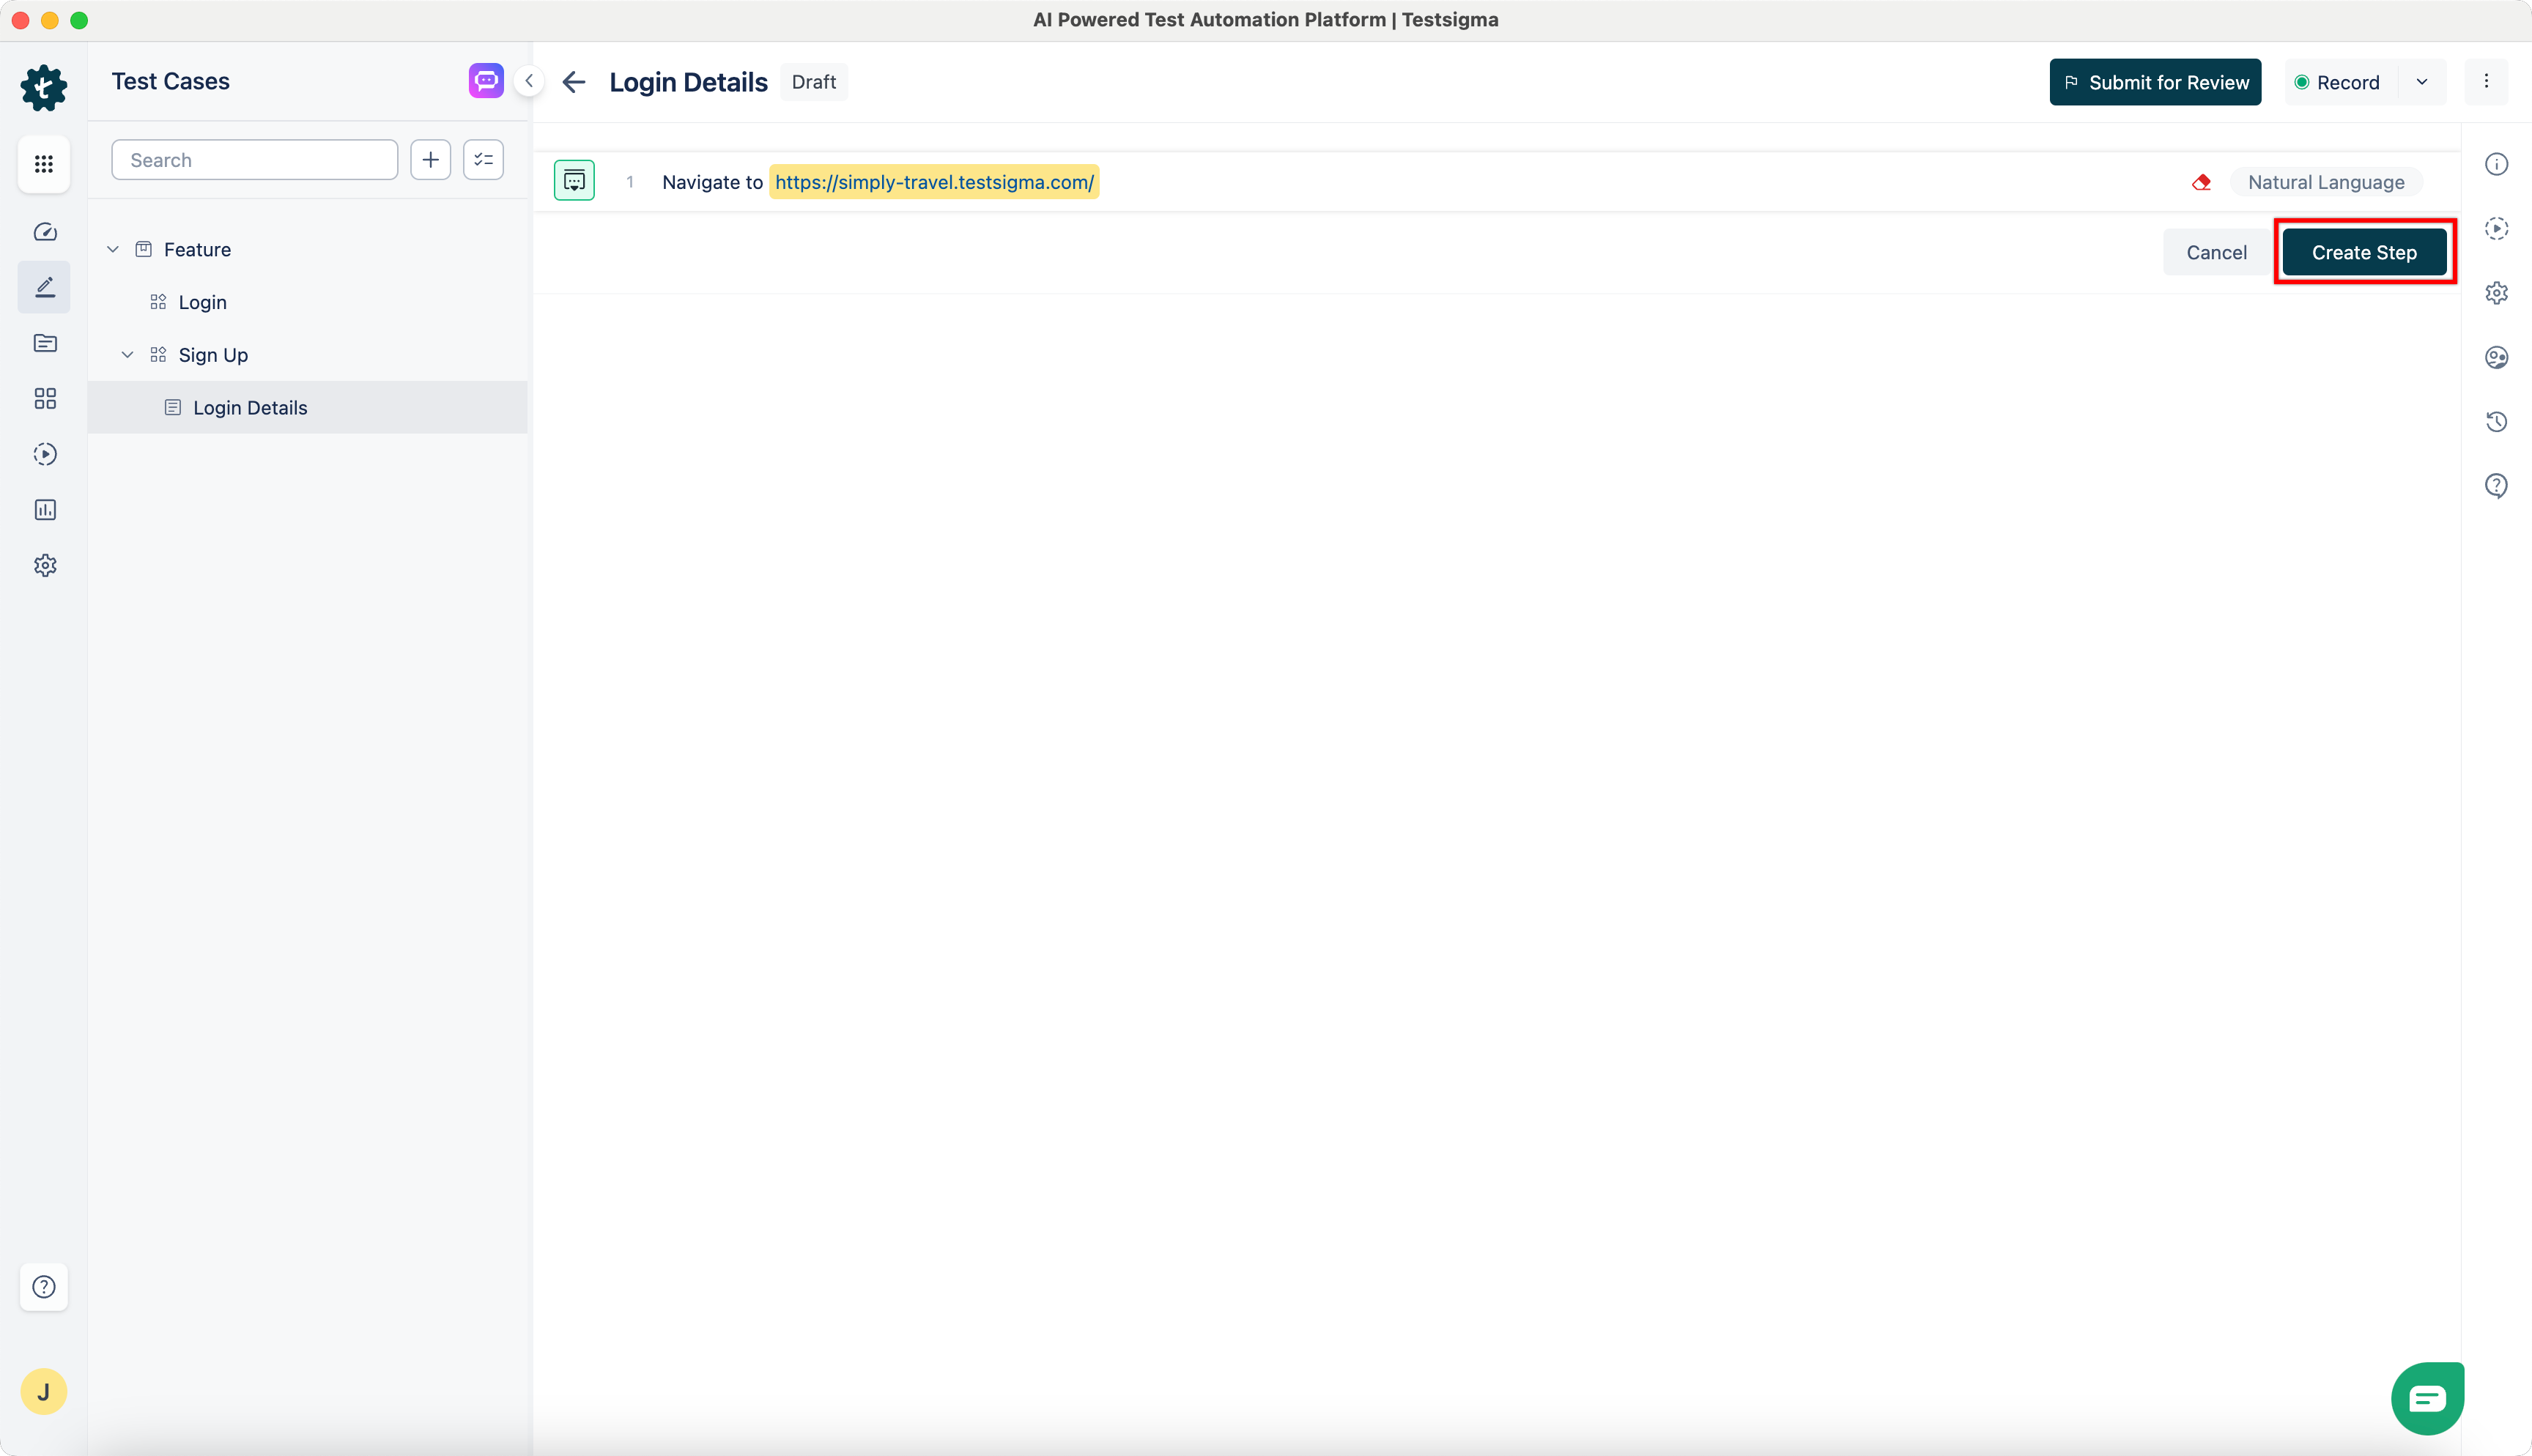
- Create a test step using the URL that you want to automate and click Create Step.
- Click Record.
- A new window will open the given URL.
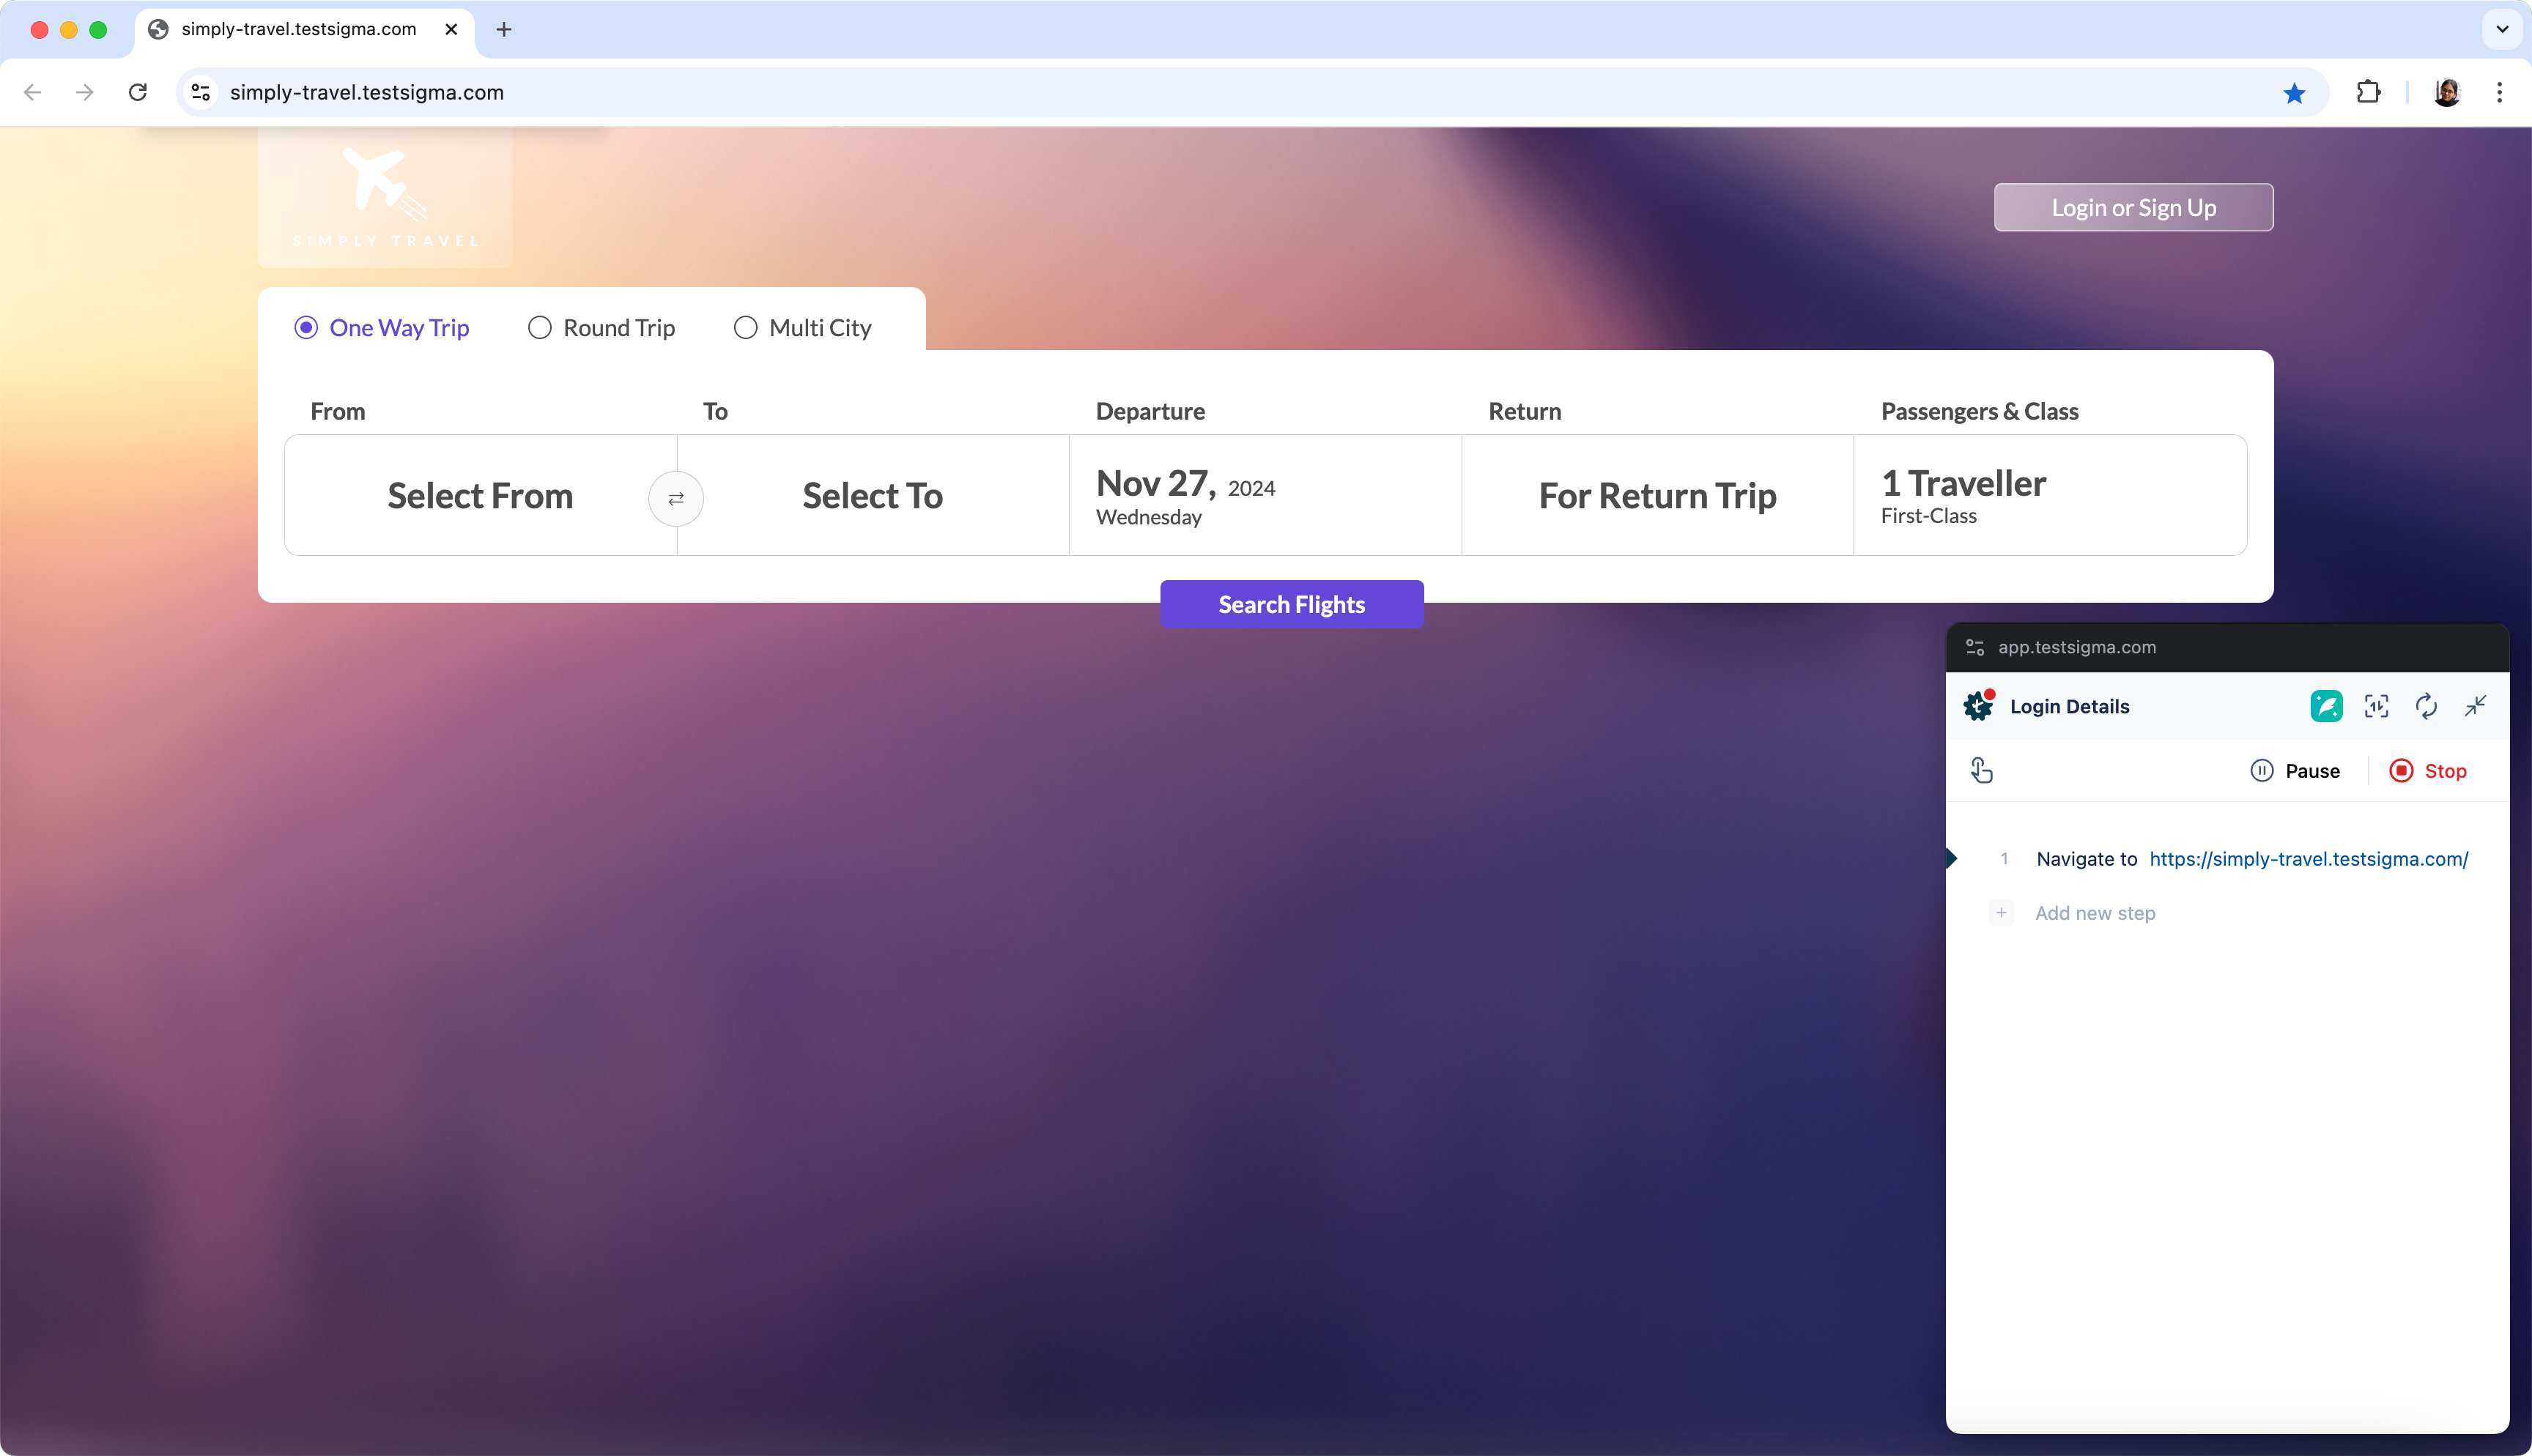
- Please wait until the web page is fully loaded so the extension can collect information from the page in the background.
- Once the first web page is fully loaded, start interacting and performing actions on the page.
- The actions will be recorded and added to the test case in the background.
- Once the required actions are complete, click on Stop to switch back to the test case details page.
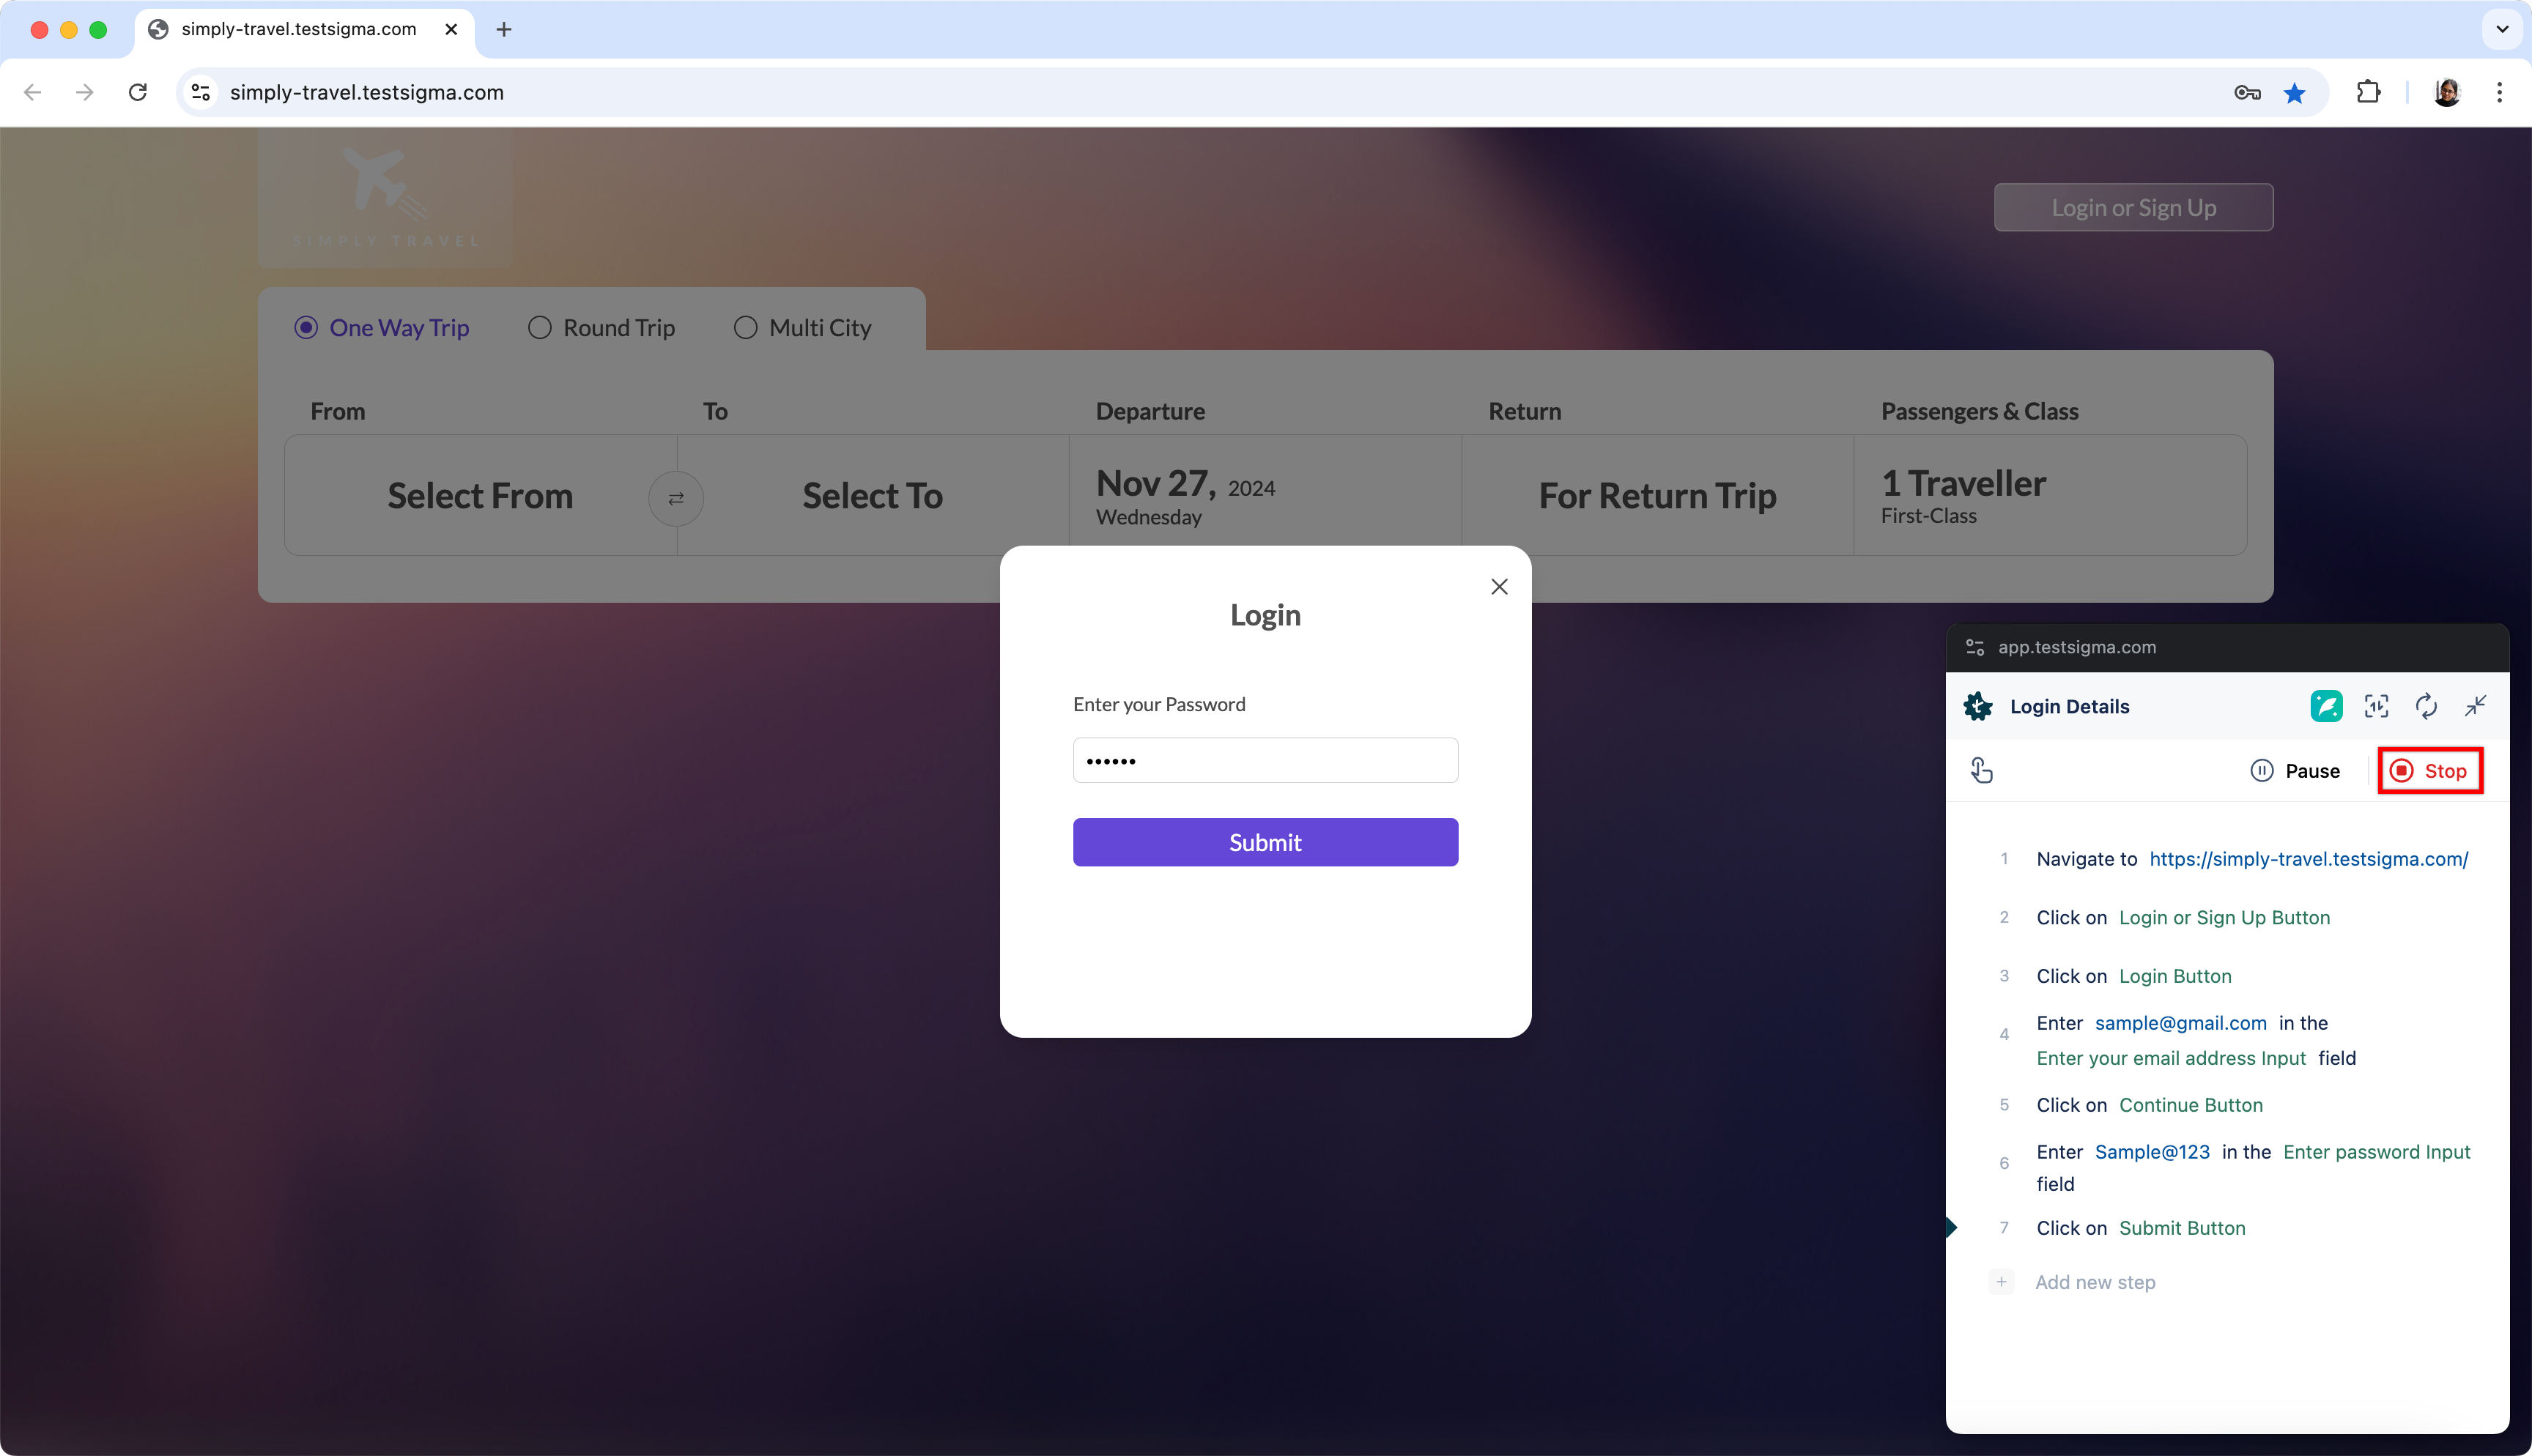
- You can see the steps recorded in the test case details page.
Android and iOS
- From the left navigation bar, go to Create Tests > Test Cases.
- In the Test Case Explorer section, expand the required feature and click the + icon next to the target scenario. This will open a dialog box.
-
On the dialog box, validate the target feature and scenario, enter the name, and click Create.
Alternatively, click the + icon next to the search bar and select New Test Case from the drop-down menu. Follow the same steps as above.
- Click Create Step and click Record.
- In the Record test steps overlay, select the required options in the Test Lab and Test Machine sections.
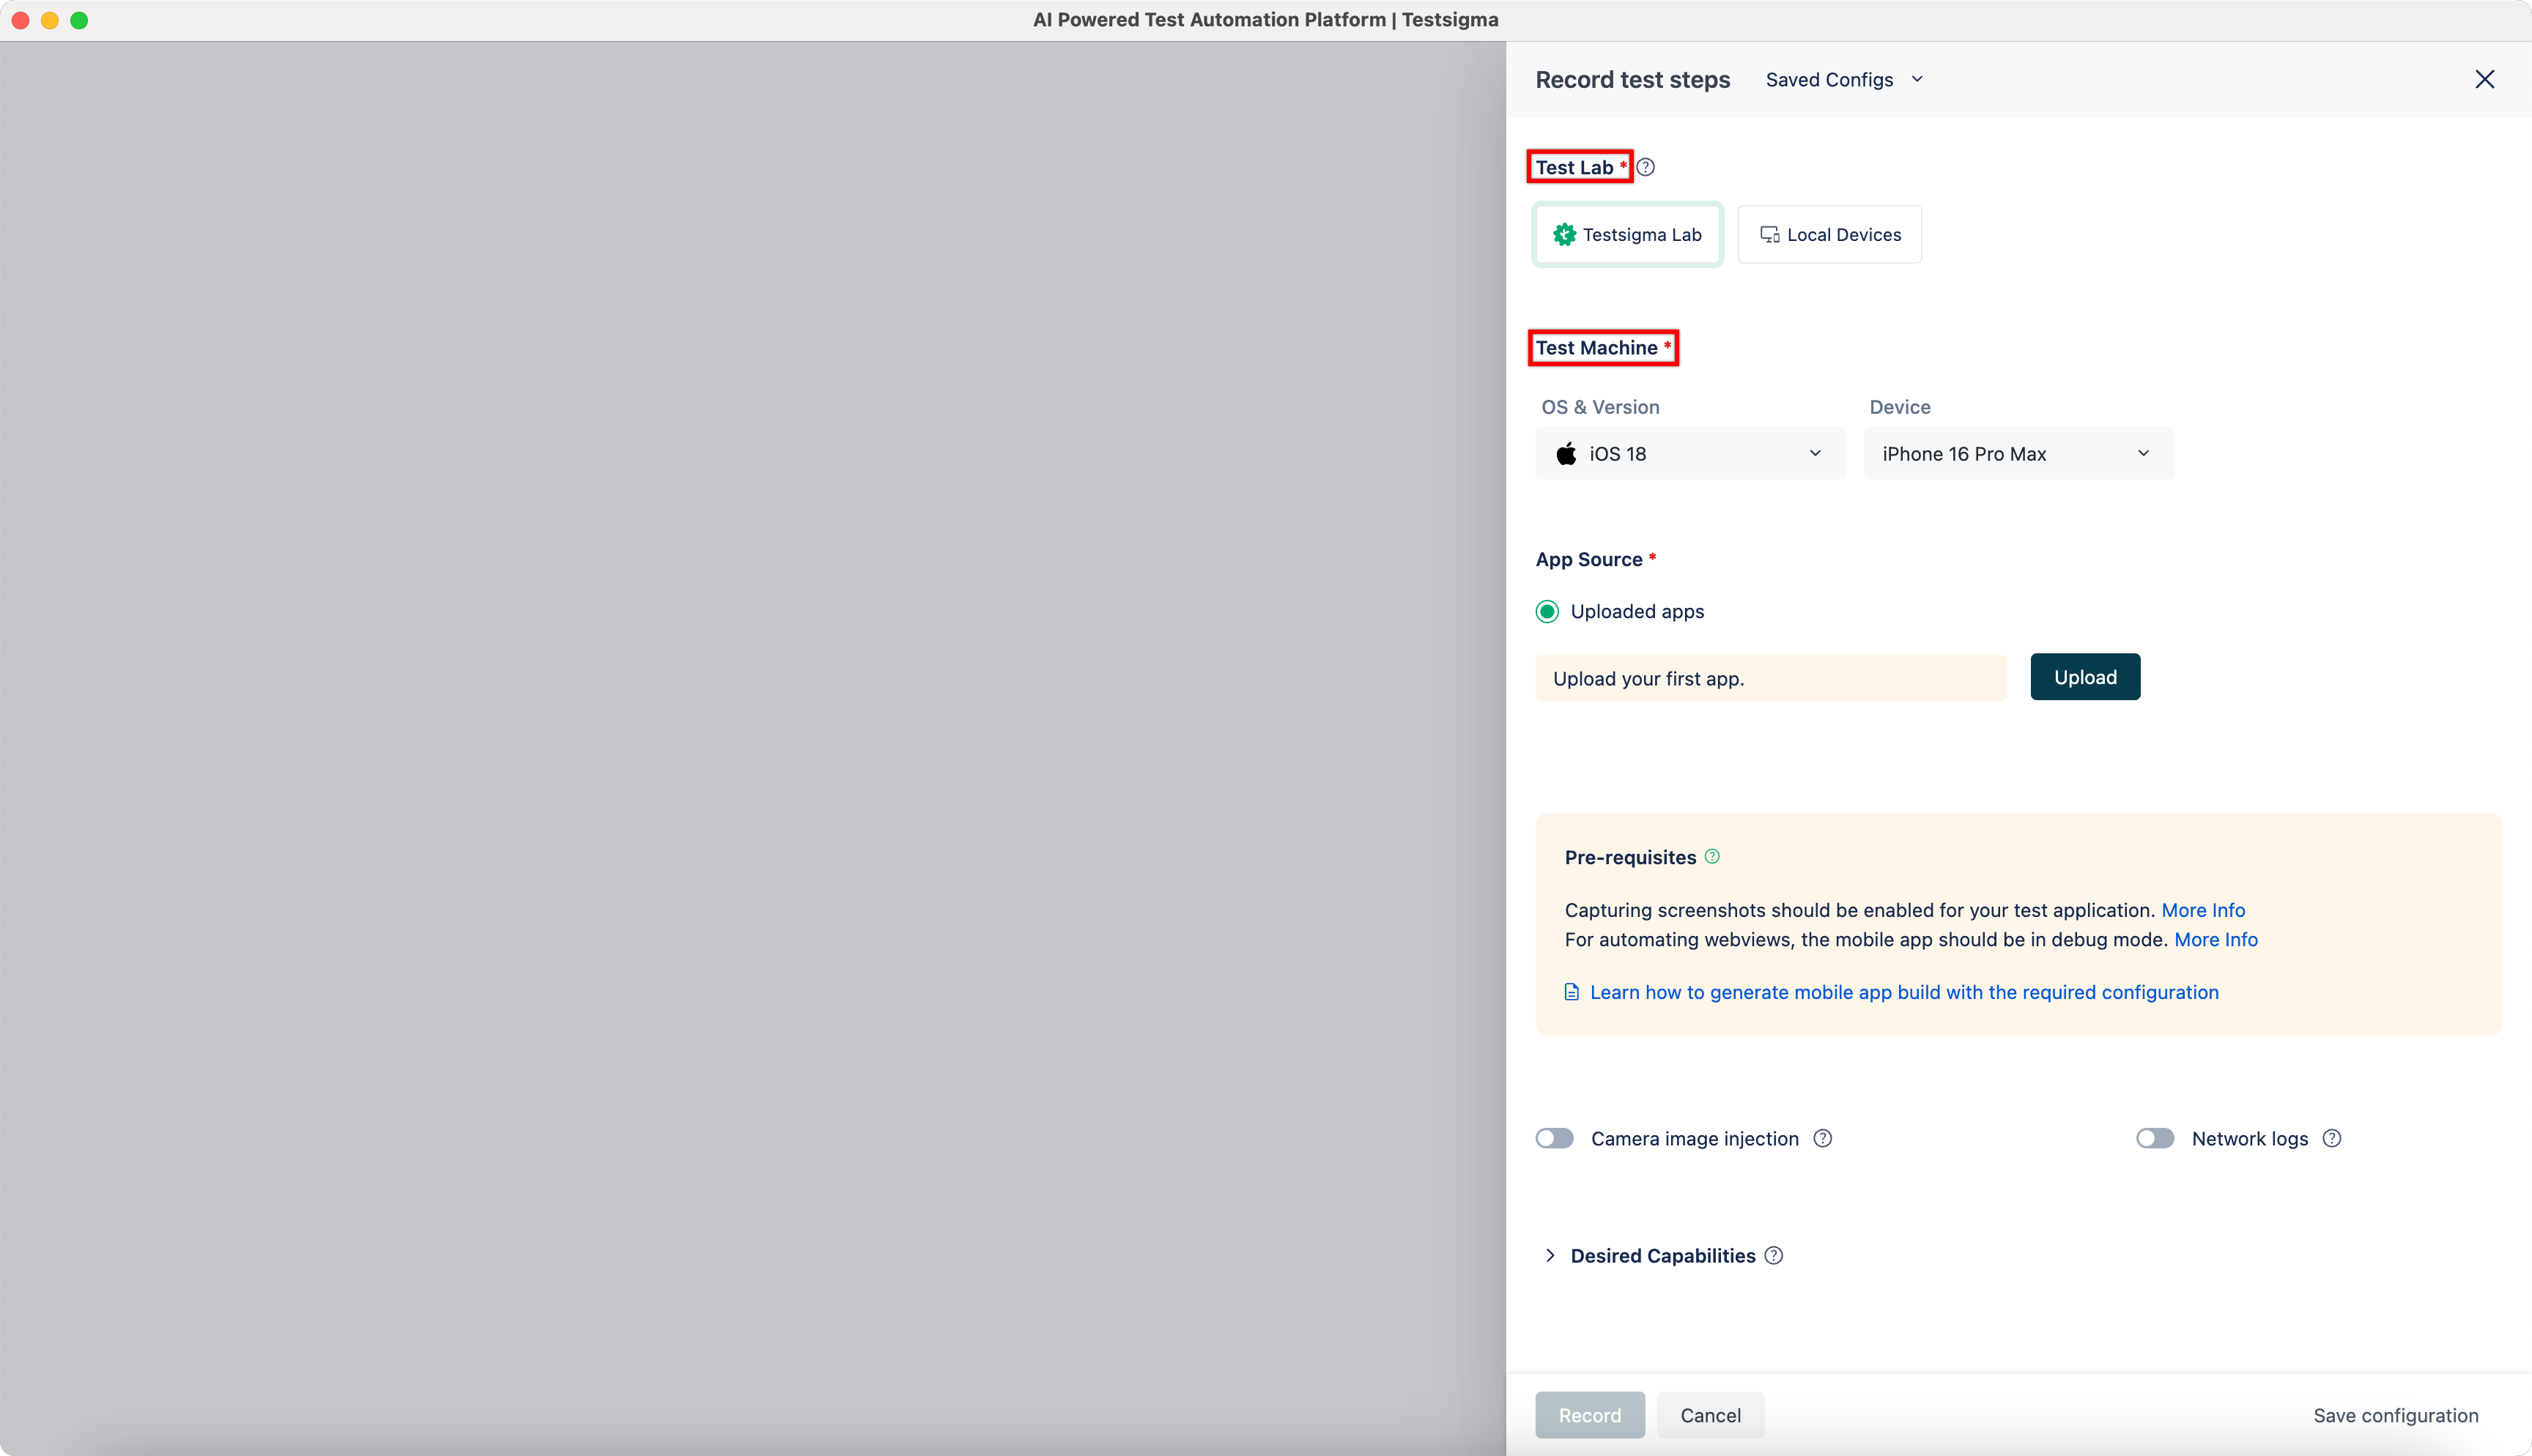
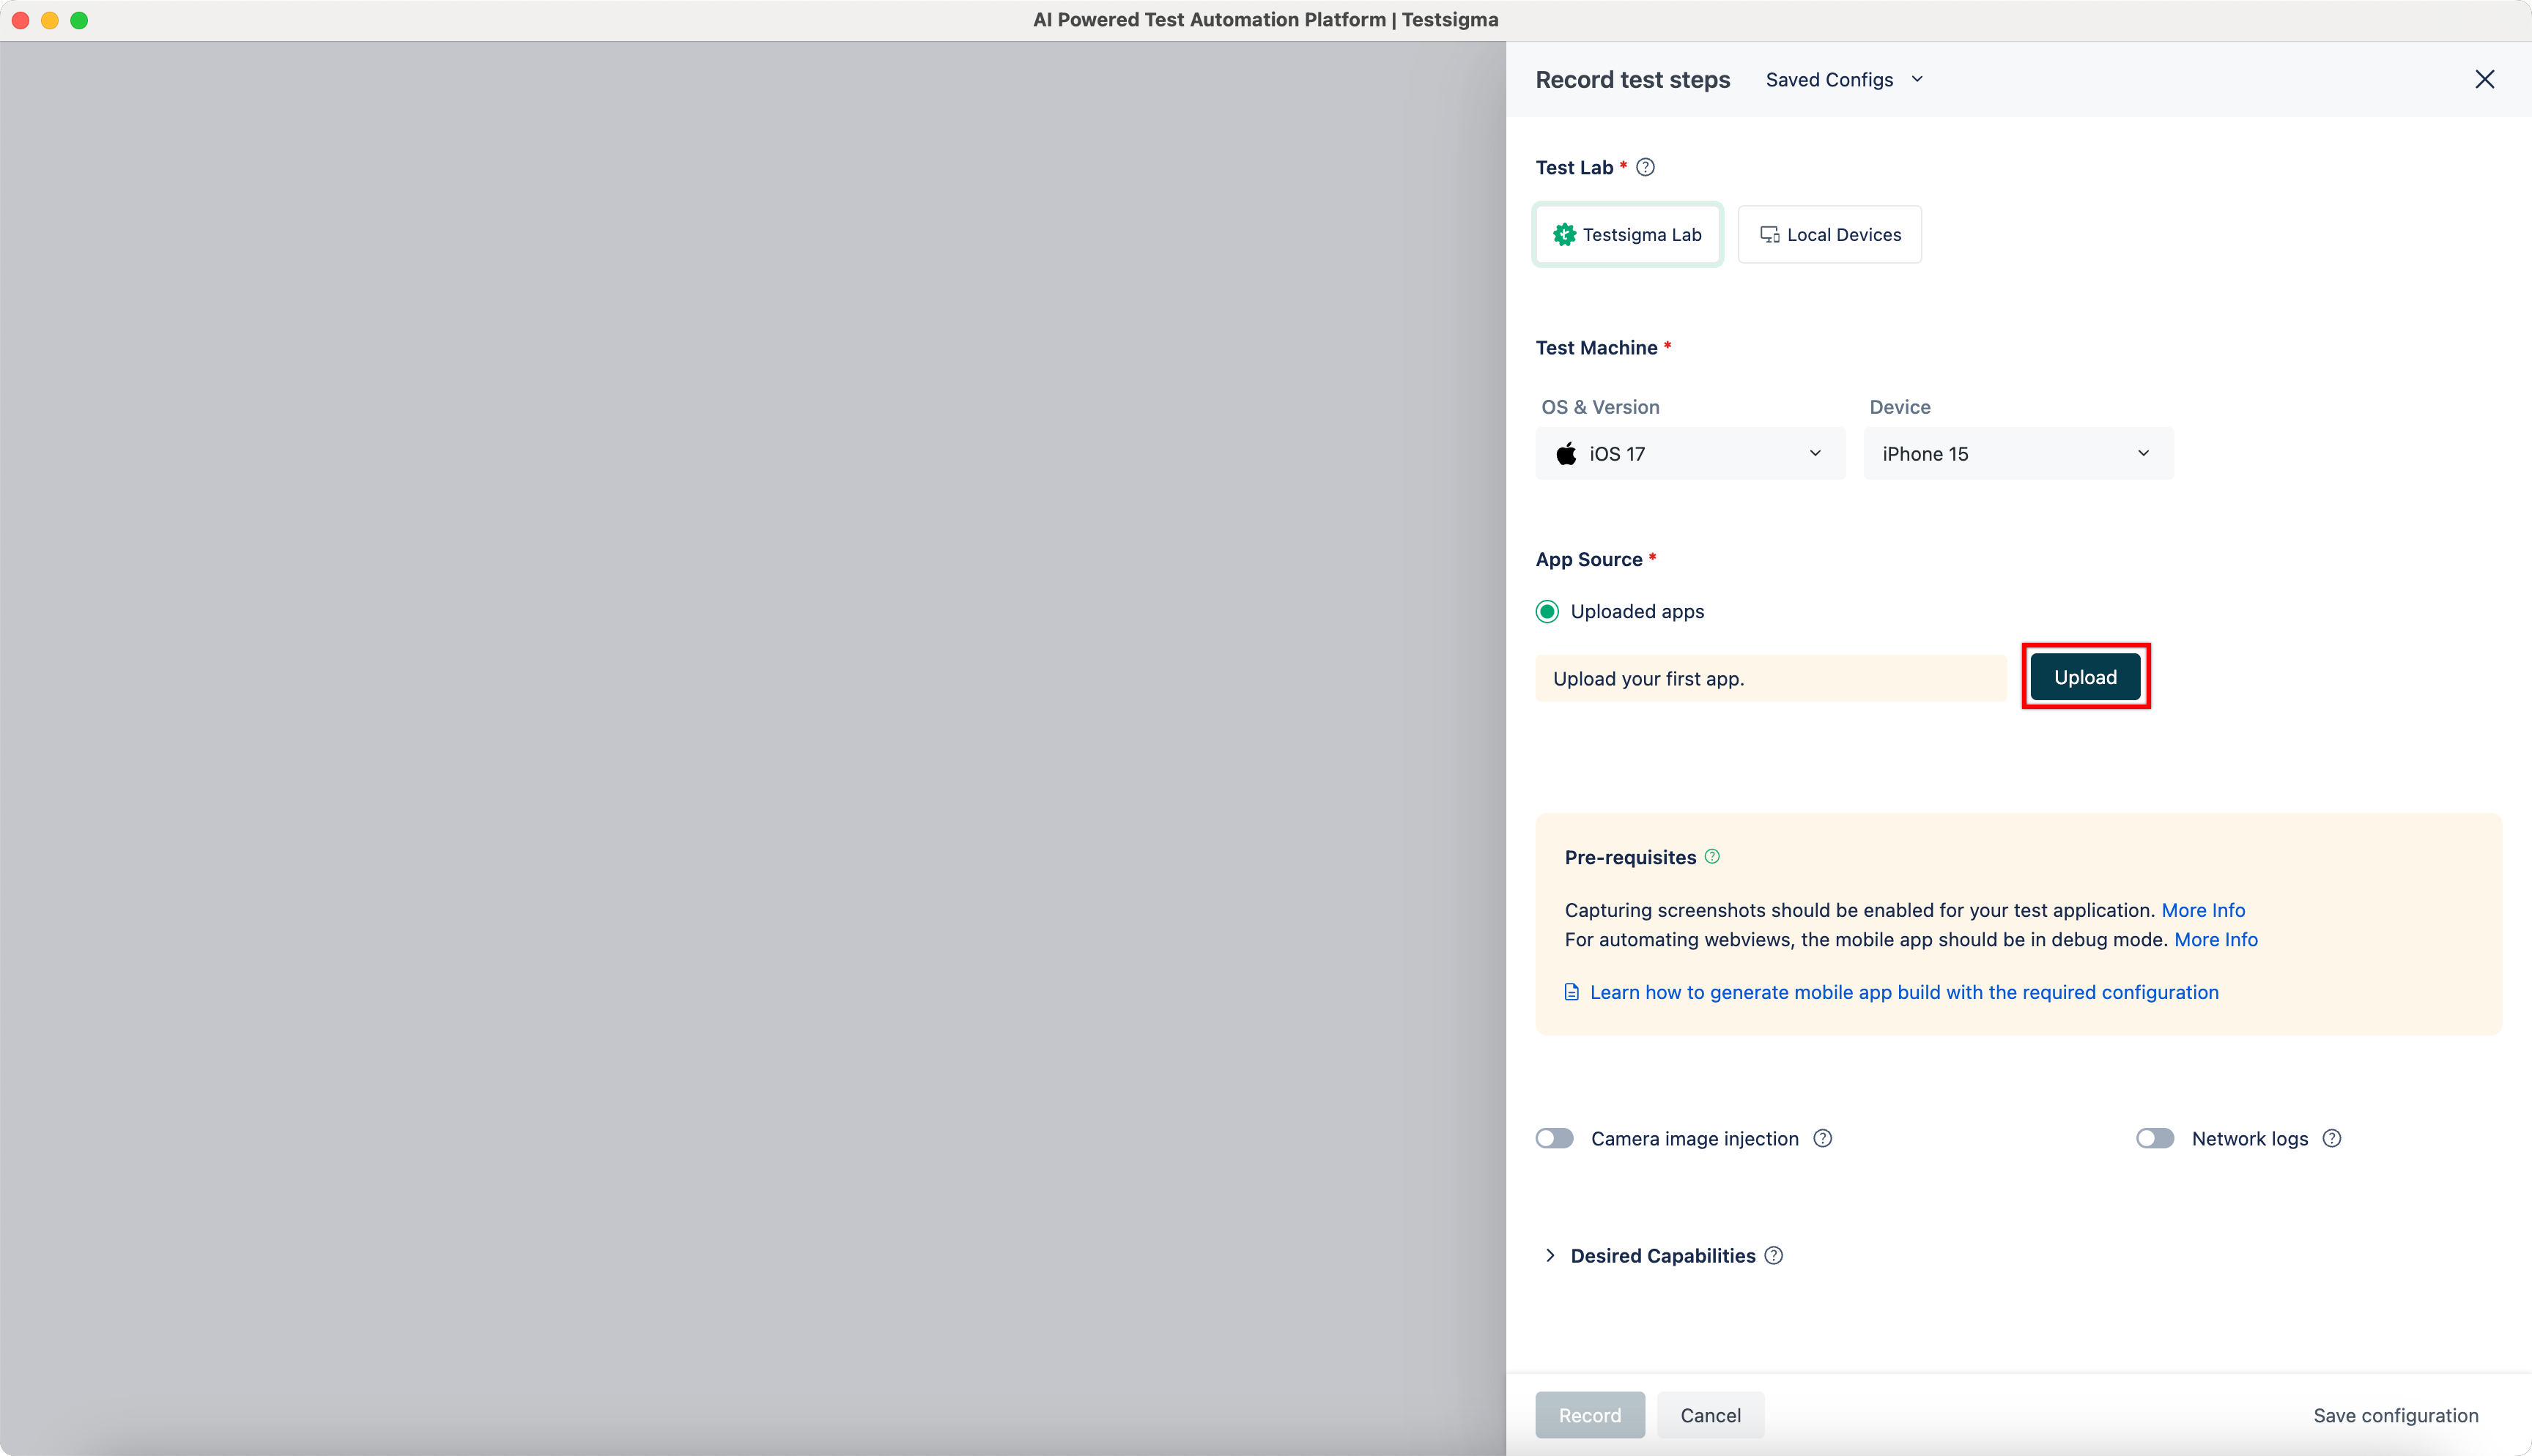
- Click Upload and upload the required file.
- Click Record.
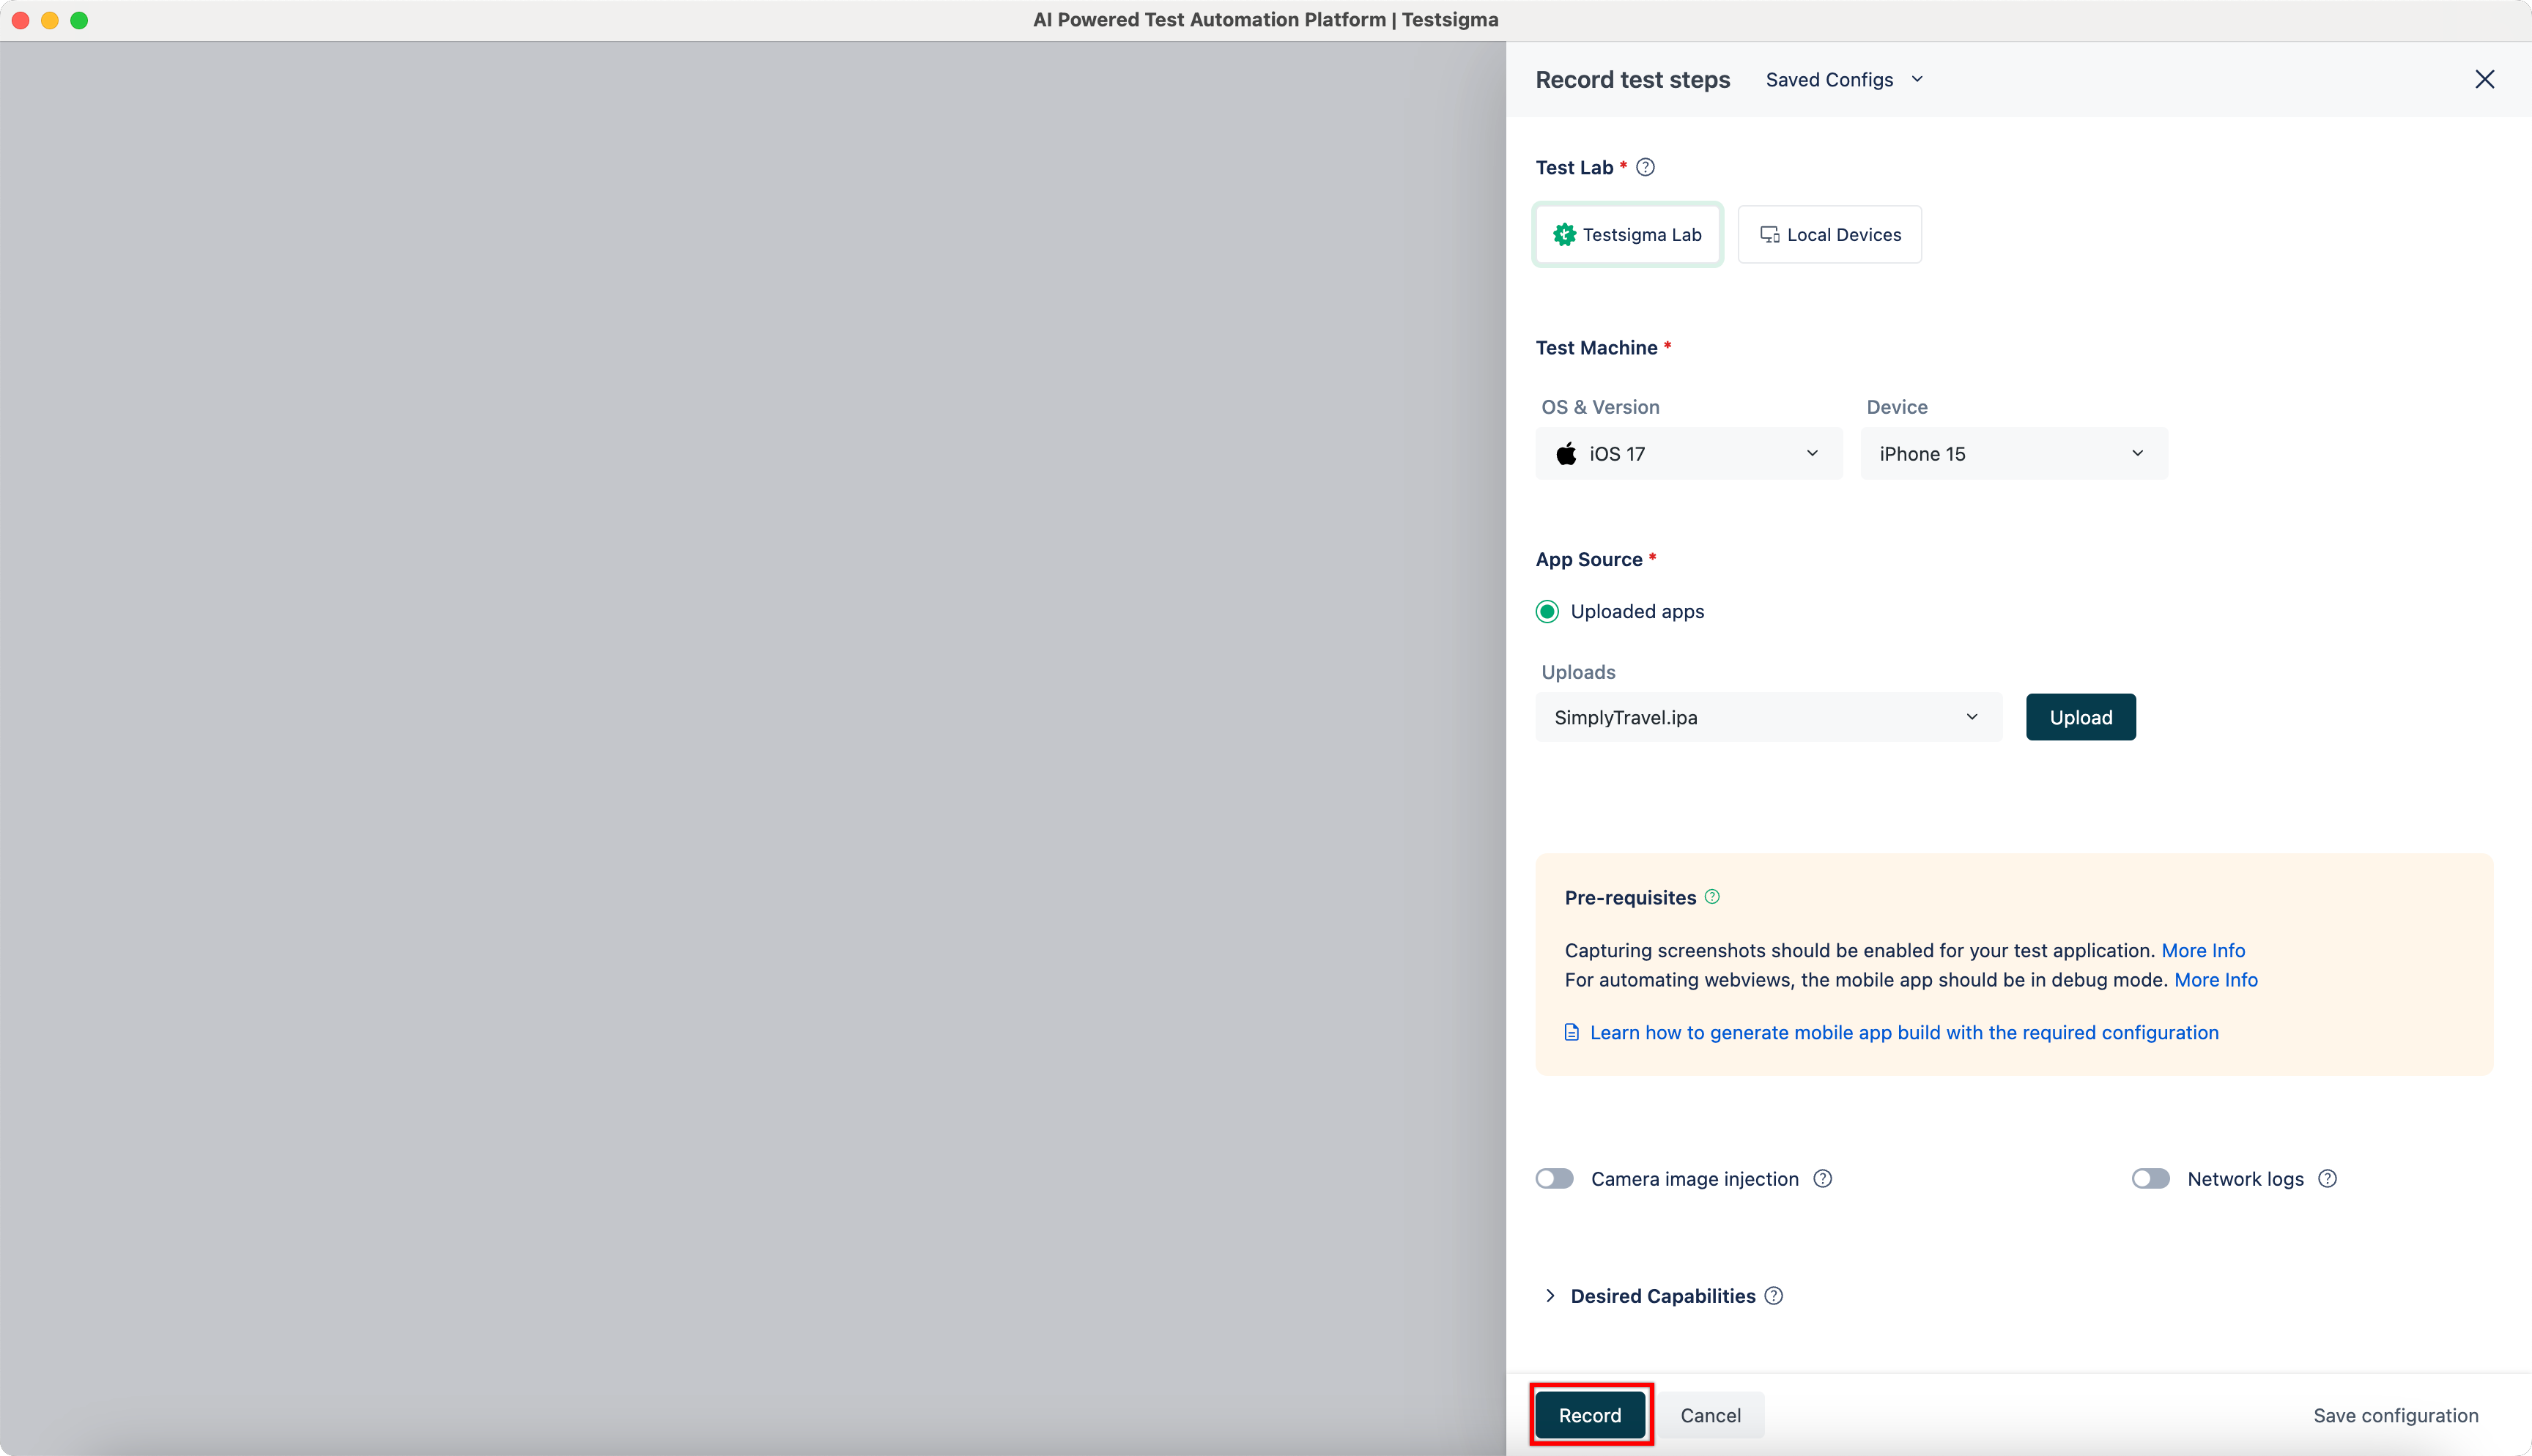
- Perform the actions on the application and once the required actions are complete, stop the recording to switch back to the test case details page.
- The test case details page will display the steps performed on the application.
- If direct recording doesn't work, revert to the old method and use the TAP button to record the element.
Want to contribute or report missing content?