- getting started
Introduction: Cloud
Frequently Asked Questions
Telemetry
Testsigma Terminology
Testsigma Sample Applications
Command Center
- collaboration
Invite Team Members
Assign Projects
Users & Role Management
Review Management [Test Cases]
Review Management [Elements]
Execution Controls
Features & Scenarios
Manage Test Cases
Test Case List Actions
Import Test Project Test Cases
Importing Postman Collections and Environments
Update Test Case Result in a Test Plan
Test Cases (Mobile Web App)
Custom Fields for Test Cases
Label Management
- Test Step Types
Type: Natural Language
Type: REST API
Type: Step Group
Type: For Loop
Type: While Loop
Type: Block
Type: If Condition
Nested Step Groups
Image Injection
Cross-application testing
- Test Data Types
Raw
Parameter
Runtime
Random
Data Generator
Phone Number
Mail Box
Environment
Concat Test Data
Create Test Data Profile
Update Test Data Profile
Updating Value in TDP
Import TDP
Bulk Deletion of a Test Data Profile
Create Test Data [Environment]
- data generators
Default Test Data Generators
Address Function Type
ChangeDataType Function Type
Company Function Type
DateFunctions Function Type
DomainFunctions Function Type
EmailFunctions Function Type
File Function Type
Friends Function Type
IdNumber Function Type
Internet Function Type
MailboxAliasFunctions Function Type
MailboxFunctions Function Type
Name Function Type
NameFunctions Function Type
Number Function Type
NumberFunctions Function Type
Phone Number Function Type
PhoneNumberFunctions Function Type
Random String Function Type
RandomText Function Type
StringFunctions Function Type
TestDataFromProfile Function Type
- Elements (Objects)
- Web Applications
Record Single Element
Record Multiple Elements
Create Elements
Supported Locator Types
Formulating Elements
Shadow DOM Elements
Verifying elements in Chrome DevTools
Handling iframe Elements?
Create Image Based Elements
Dynamic Locators using Parameter
Dynamic Locators using Runtime
Using Environment Test Data for Dynamic Locators
Locating Dynamic Elements in Date Widget
Freeze & Inspect Dynamic Elements (WebPage)
Locating Dynamic Elements in Tables
Import/Export Elements
AI Enabled Auto-Healing
Locator Precedence (Web Apps)
Verify Elements from Test Recorder
- test step recorder
Install Chrome Extension
Install Firefox Extension
Install Edge Extension
Exclude Attributes/Classes
- test plans
Add, Edit, Delete Test Machines
Add, Edit, Delete Test Suites
Schedule Test Plans
Run Test Suites In Parallel
Cross Browser Testing
Distributed Testing
Headless Testing
Test Lab Types
Disabling Test Cases in Test Plans
AfterTest Case
Post Plan Hook
AfterTest Suite
Email Configuration in Test Plan
Execute Partial Test Plans via API
- runs
Ad-hoc Run
Test Plan Executions
Dry Runs on Local Devices
Run Tests on Private Grid
Run Tests on Vendor Platforms
Run Test Plans on Local Devices
Test Locally Hosted Applications
Debug Test Case Failures
Parallel and Allowed queues
- live editor
Introduction: Testsigma Terminal
Installing Testsigma Terminal
Editing a Test Case Using Live Editor
FAQs on Testsigma Terminal
- Testsigma Agent
Pre-requisites
Setup: Windows, Mac, Linux
Setup: Android Local Devices
Setting up iOS Local Devices
Update Agent Manually
Update Drivers Manually
Delete Corrupted Agent
Delete Agents: Soft & Permanent
Triggering Tests on Local Devices
- troubleshooting
Agent - Startup and Registration Errors
Agent Logs
Upgrade Testsigma Agent Automatically
Specify Max Sessions for Agents
Testsigma Agent - FAQs
- continuous integration
Test Plan Details
REST API (Generic)
Jenkins
Azure DevOps
AWS DevOps
AWS Lambda
Circle CI
Bamboo CI
Travis CI
CodeShip CI
Shell Script(Generic)
Bitrise CI
GitHub CI/CD
Bitbucket CI/CD
GitLab CI/CD
Copado CI/CD
Gearset CI/CD
Codemagic CI/CD
- desired capabilities
Most Common Desired Capabilities
Browser Console Debug Logs
Geolocation Emulation
Bypass Unsafe Download Prompt
Geolocation for Chrome & Firefox
Custom User Profile in Chrome
Emulate Mobile Devices (Chrome)
Add Chrome Extension
Network Throttling
Network Logs
Biometric Authentication
Enable App Resigning in iOS
Enable Capturing Screenshots (Android & iOS)
Configure Android WebViews
Incognito/Private mode
Set Google Play Store Credentials
Basic Authentication [Safari]
- addons
What is an Addon?
Addons Community Marketplace
Install and Use Community Addons in Testsigma
Prerequisites for creating add-ons
Create an Addon
Update Addon
Addon Types
Create a Post Plan Hook add-on in Testsigma
Create OCR Text Extraction Addon
- configuration
API Keys
- Security(SSO)
Setting Up Google Single Sign-On(SSO) Login in Testsigma
Setting Up Okta Single Sign-On Integration with SAML Login in Testsigma
Setting up SAML-based SSO login for Testsigma in Azure
iOS Settings
Create WDA File
SMTP Configuration
Manage Access
- uploads
Upload Files
Upload Android and iOS Apps
How to generate mobile builds for Android/iOS applications?
- Testsigma REST APIs
Manage Environments
Elements
Test Plans
Upload Files
Get Project Wide Information
Upload & Update Test Data Profile
Fetch Test Results (All Levels)
Trigger Multiple Test Plans
Trigger Test Plans Remotely & Wait Until Completion
Run the Same Test Plan Multiple Times in Parallel
Schedule, Update & Delete a Test Plan Using API
Update Test Case Results Using API
Create and update values of Test Data Profile using REST API
Rerun Test Cases from Run Results using API
Salesforce Metadata Refresh Using API
- open source dev environment setup
macOS and IntelliJ Community Edition
macOS and IntelliJ Ultimate Edition
Windows and IntelliJ Ultimate Edition
Setup Dev Environment [Addons]
- NLPs
Retrieve Value in Text Element
Capture Dropdown Elements
Unable to Select Radiobutton
Unable to Click Checkbox
Clearing the Session or Cookies
UI Identifier NLP
Drag & Drop NLP
Uploading Files NLP
Use MySQL Addon in NLPs
- setup
Server Docker Deployment Errors
Secured Business Application Support
Troubleshooting Restricted Access to Testsigma
Why mobile device not displayed in Testsigma Mobile Test Recorder?
Unable to Create New Test Session
Agent Startup Failure Due to Used Ports
Tests Permanently Queued in Local Executions
Fix Testsigma Agent Registration Failures
Testsigma Agent Cleanup
Need of Apache Tomcat for Testsigma Agent
- web apps
URL not accessible
Test Queued for a Long Time
Issues with UI Identifiers
Missing Elements in Recorder
Collecting HAR File
Errors with Browser Session
Page Loading Issues
- mobile apps
Failed to Start Mobile Test Recorder
Troubleshooting “Failed to perform action Mobile Test Recorder” error
Why Test Execution State is Queued for a Long Time?
Why Mobile App Keeps Stopping After Successful Launch?
More pre-requisite settings
Why am I not able to start WDA Process on iPhone?
What are the Most Common causes for Click/Tap NLP Failure?
How to Find App Package & Activity in Android?
Cross-environment Compatible ID Locators (Android)
Why Accessibility IDs Over other Locators?
What are Common Android Issues & Proposed Solutions?
How to Find the App Bundle ID for iOS?
Developer Mode (iOS 16 & Above)
How to Handle iOS App Compatibility Issues?
How to Disable Play Protect for SMS Forwarder Installation?
How to Capture Network Logs in an Android Application?
- web apps
Why Install Chrome Extension?
Steps to Test Locally Hosted Apps
How to Turnoff Onboading Tutorial?
Non-Text Keys in Test Cases
Basic Authentication for Web
Why Bypass CAPTCHA?
Test Case Failures Due to Link Text Capture Issues
Why Is a Single Video for All Test Cases in a Test Plan Unavailable in Some Cases?
- accessibility testing
Accessibility Testing for Web Applications
Accessibility Testing for Android & iOS
- salesforce testing
Intro: Testsigma for Salesforce Testing
Creating a Connected App
Creating a Salesforce Project
Test Salesforce Connection Before Authorization
Creating Metadata Connections
Adding User Connections
Build Test Cases: Manual+Live
Salesforce Element Repositories
Intro: Testsigma Special NLPs
SOQL as Test Step
Query Builder for Salesforce Testing
Automating Listview Table NLPs
Error Handling On Metadata Refresh
Introduction: SAP Automation
Selective Element Recorder
Batch Element Recorder
Creating Test Cases for SAP Automation
List of Actions
- desktop automation
Introduction: Desktop Automation
Create Projects and Applications
Selective Element Recorder
Batch Element Recorder
Creating Test Cases for Desktop Automation
Intro: Windows Automation (Lite)
Windows (Lite) Project & Application
Element Learning with Test Recorder
Test Cases for Windows (Lite)
- GenAI Capabilities
Testsigma Copilot
Generate TDP Using Copilot
Generate Tests from User Actions
Generate Tests from Requirements (Jira)
Generate API Test Cases (Swagger)
Generate Tests from Figma Designs
Testsigma Copilot for Mobile Apps
Agentic Test Generation with GitHub
Intro: Windows Desktop Automation
Windows (Adv) Project & Application
Object Learning (Using UFT One)
Converting TSR Files to TSRx
Importing/Updating TSRx Files
Test Cases for Windows Automation
Error Handling Post TSRx File Update
- testsigma tunnel
Intro: Testsigma Tunnel
Components & Requirements
Setup and Installation: Mac
Setup and Installation: Windows
Setup and Installation: Linux
Setup and Installation: Docker
Using Testsigma Tunnel
- open source docs
Intro: Testsigma Community Edition
Testsigma Community Cloud
Testsigma Docker Setup
Reset Password
Record Single Element Using Recorder
You can also selectively capture single element of a web application using Testsigma recorder. This article discusses how to capture a single element using the Testsigma test recorder.
Prerequisites
Before you begin, ensure that the Testsigma Chrome Extension is installed and a web application is available for testing.
Steps to Capture an Element
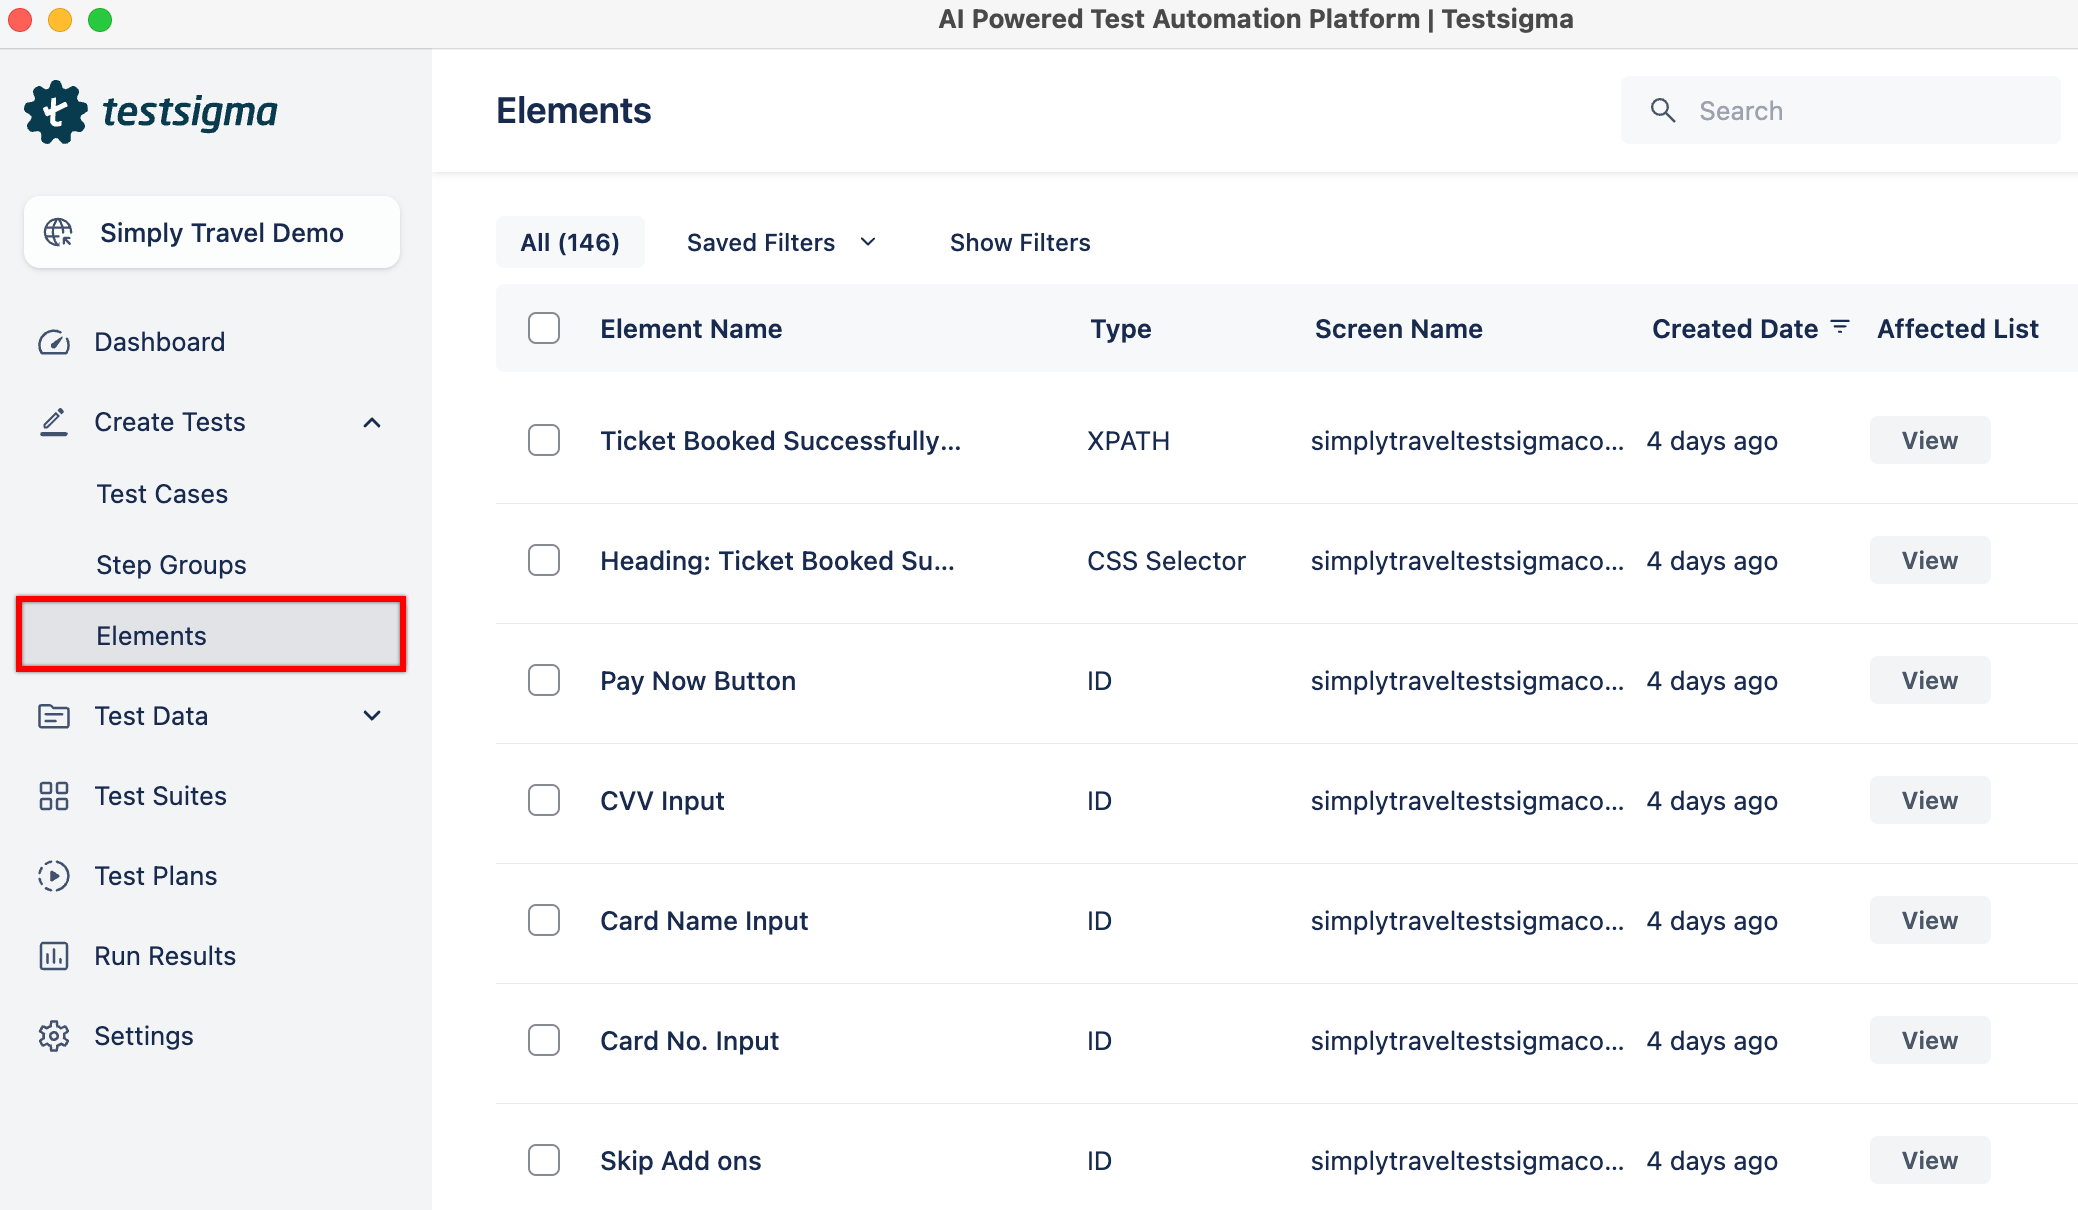
- From the left navigation bar, go to Create Tests > Elements.
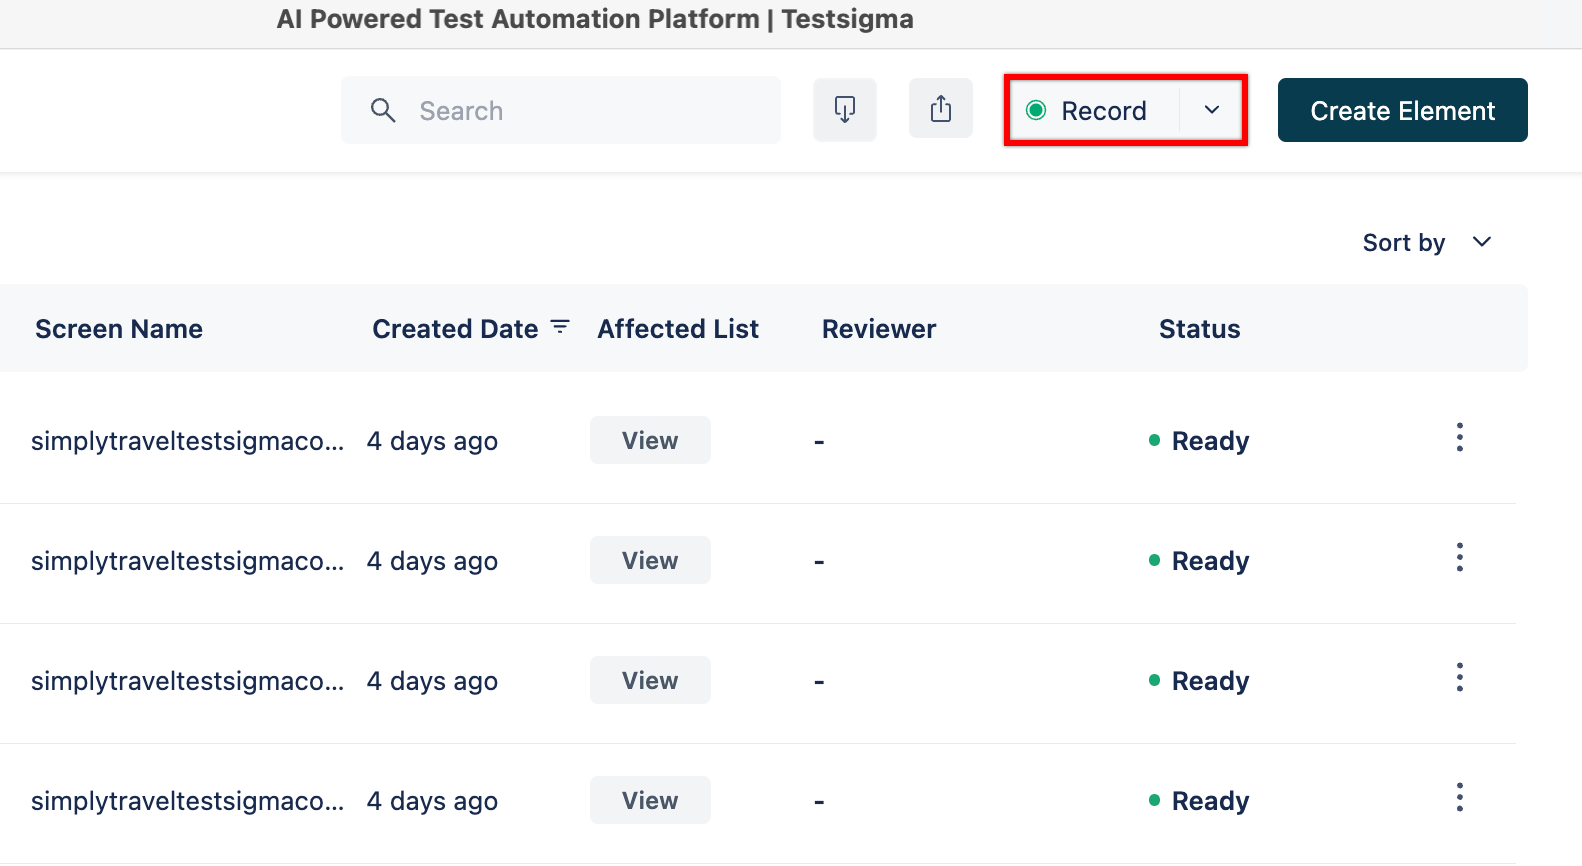
- Click on Record on the top right corner.
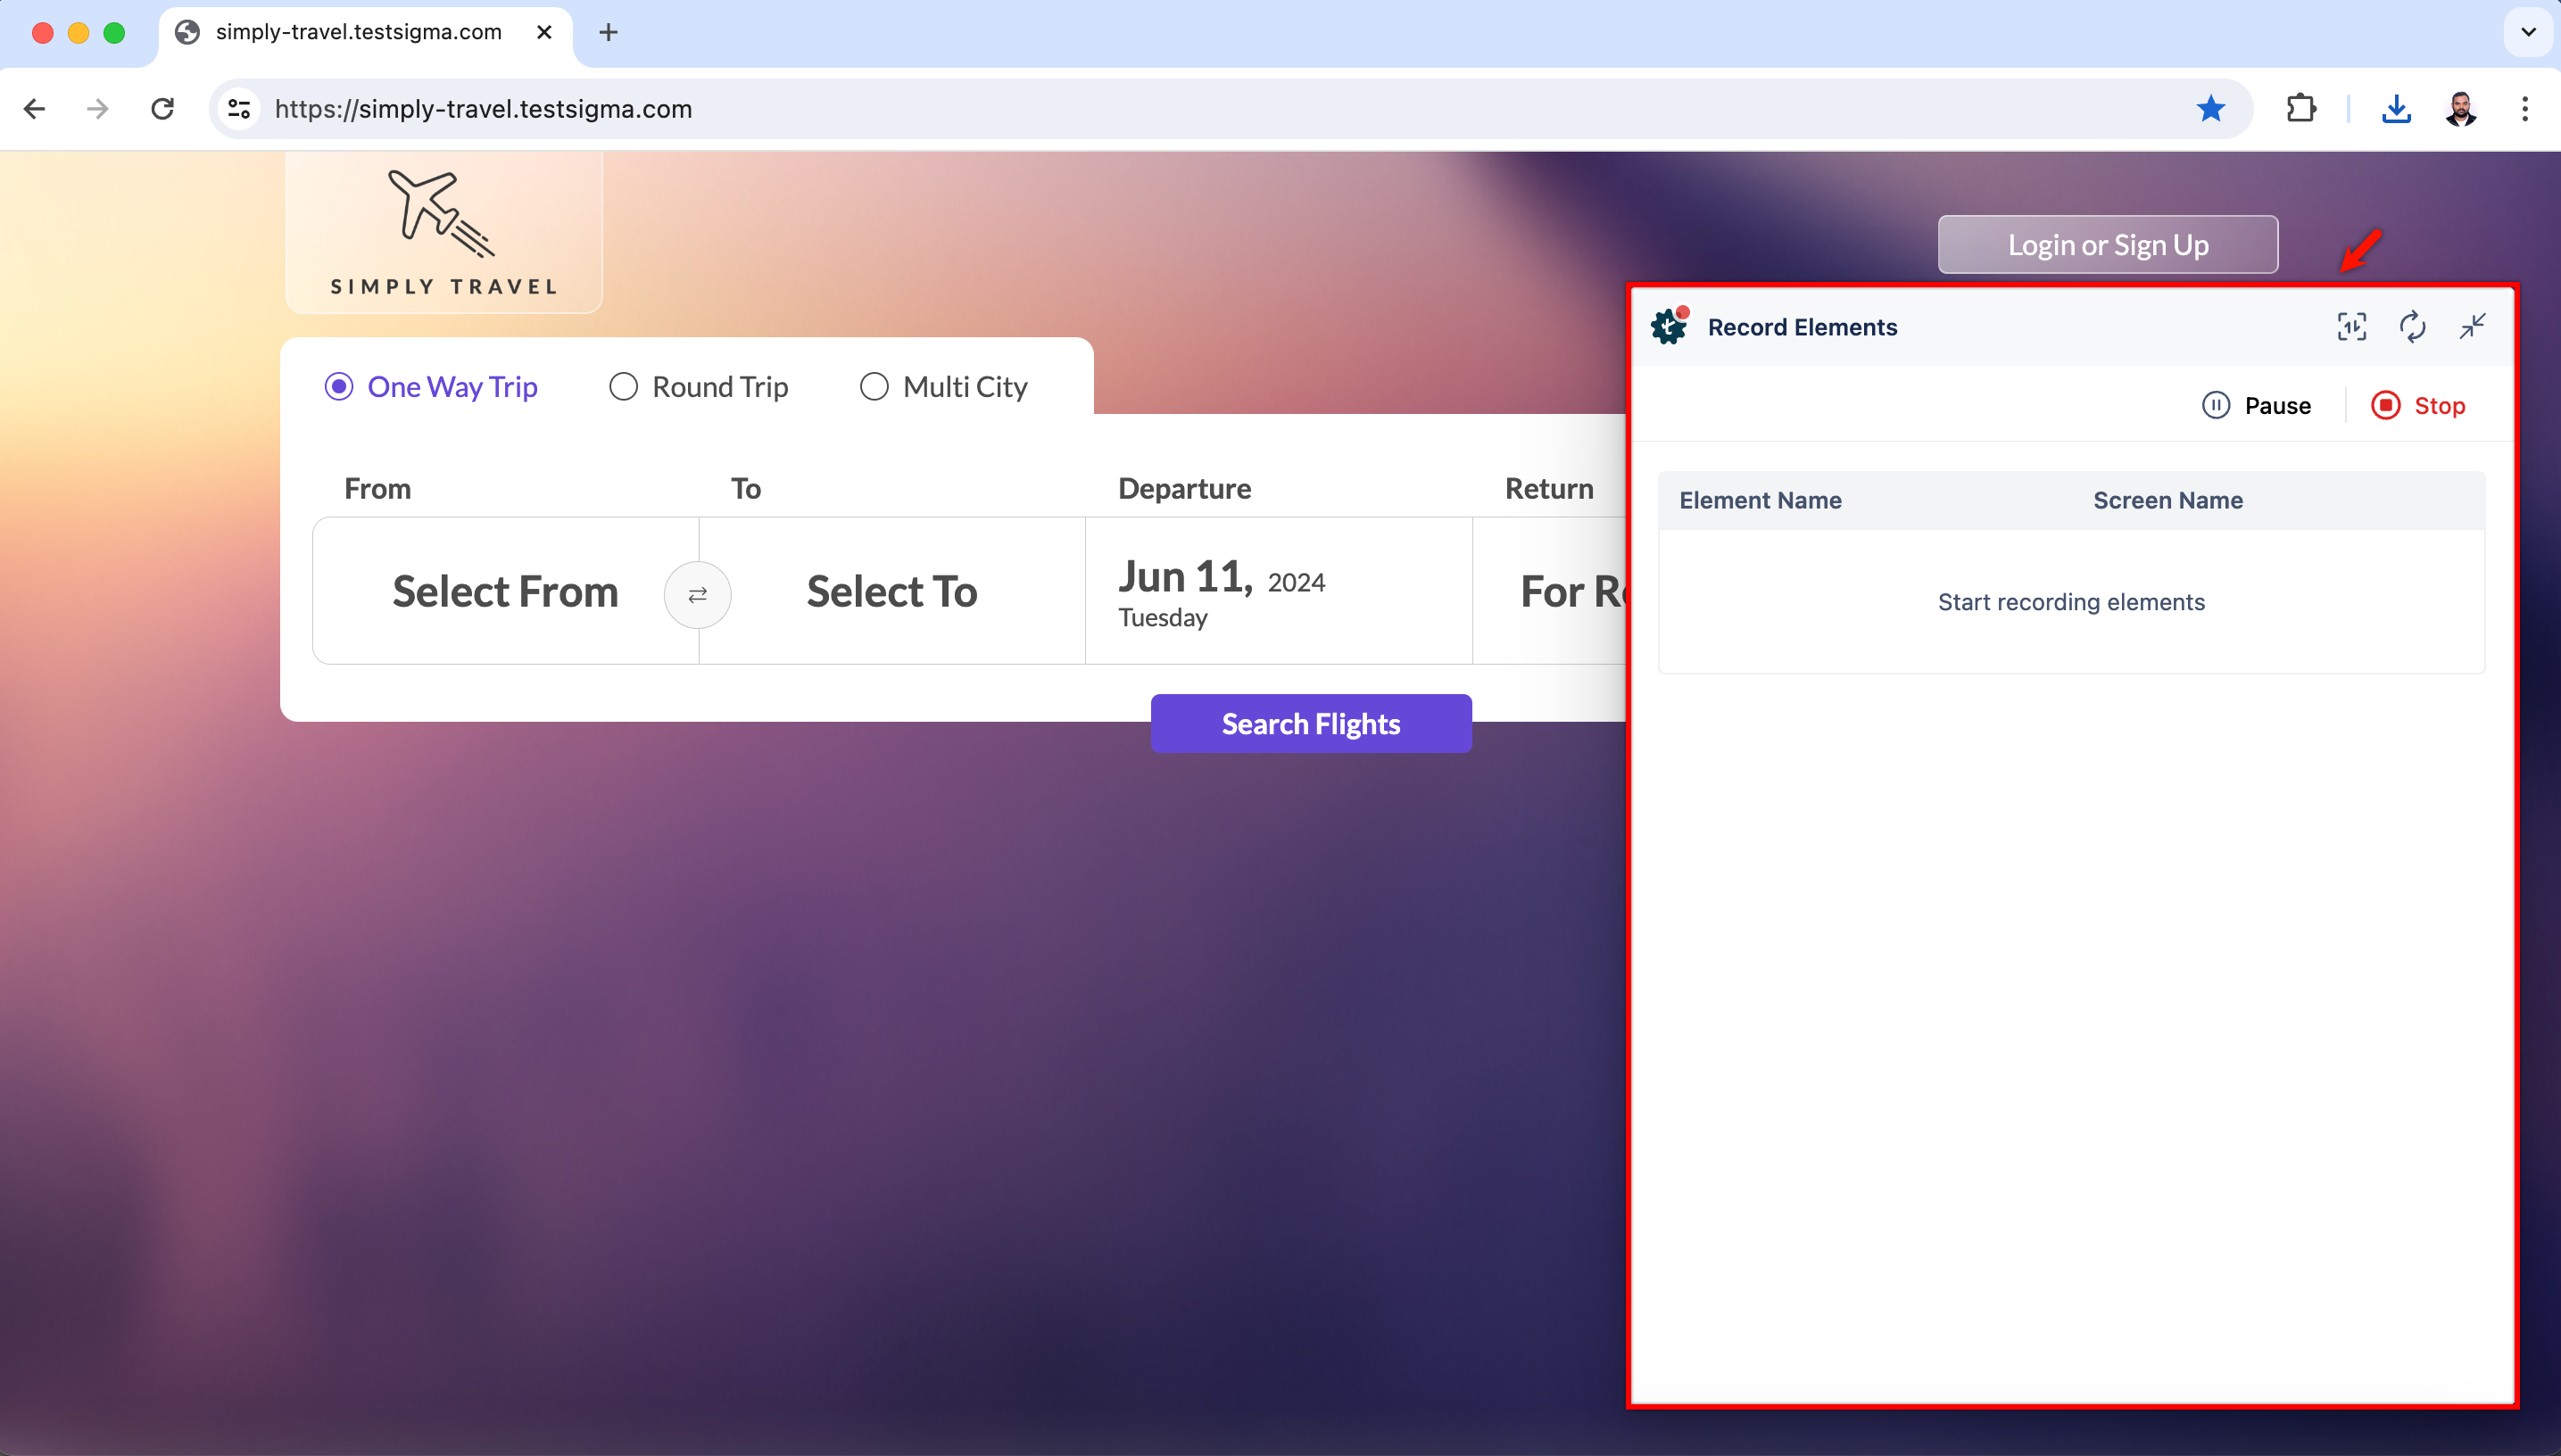
- This will open a new tab. Enter the URL from which you want to capture the elements. The Testsigma test recorder will appear and will be ready to start recording. Here, we entered the URL for Simply Travel Web.
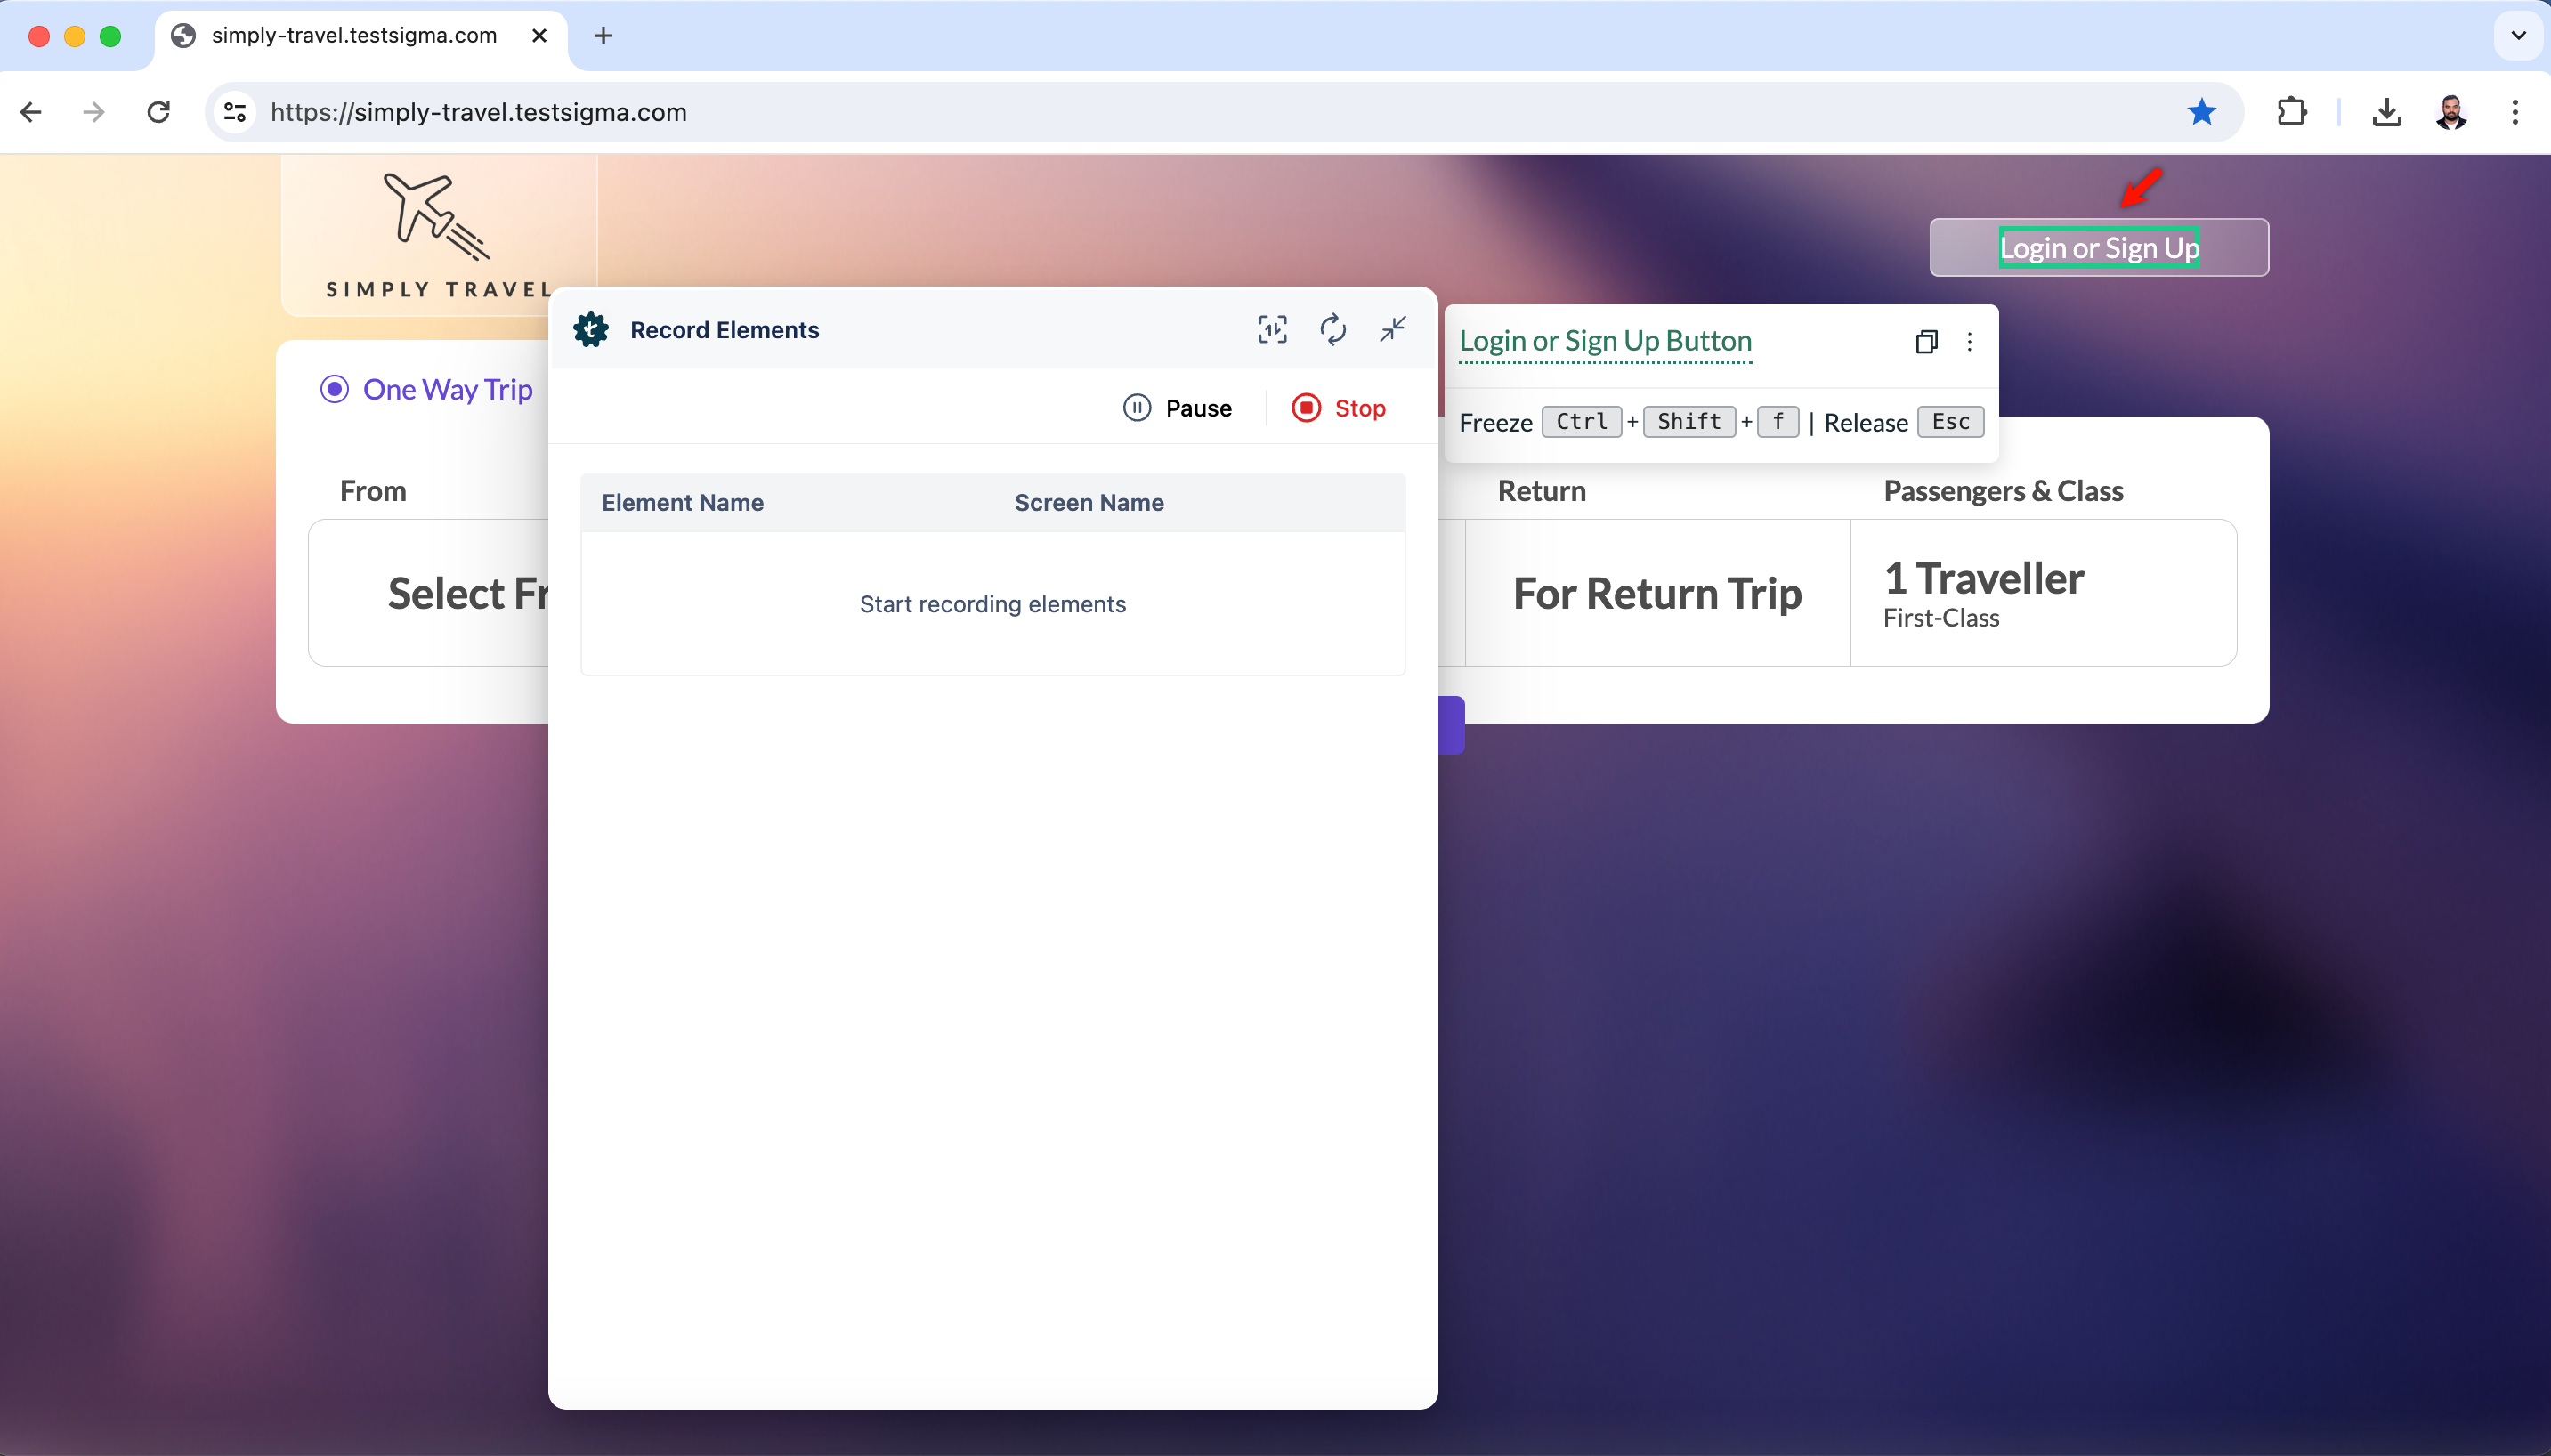
- Hover over the element you want to capture and make sure that it is highlighted in green (for example, here we are capturing the Login or Signup field):
- Click on the hovered element and wait for the element to appear in the recorder.
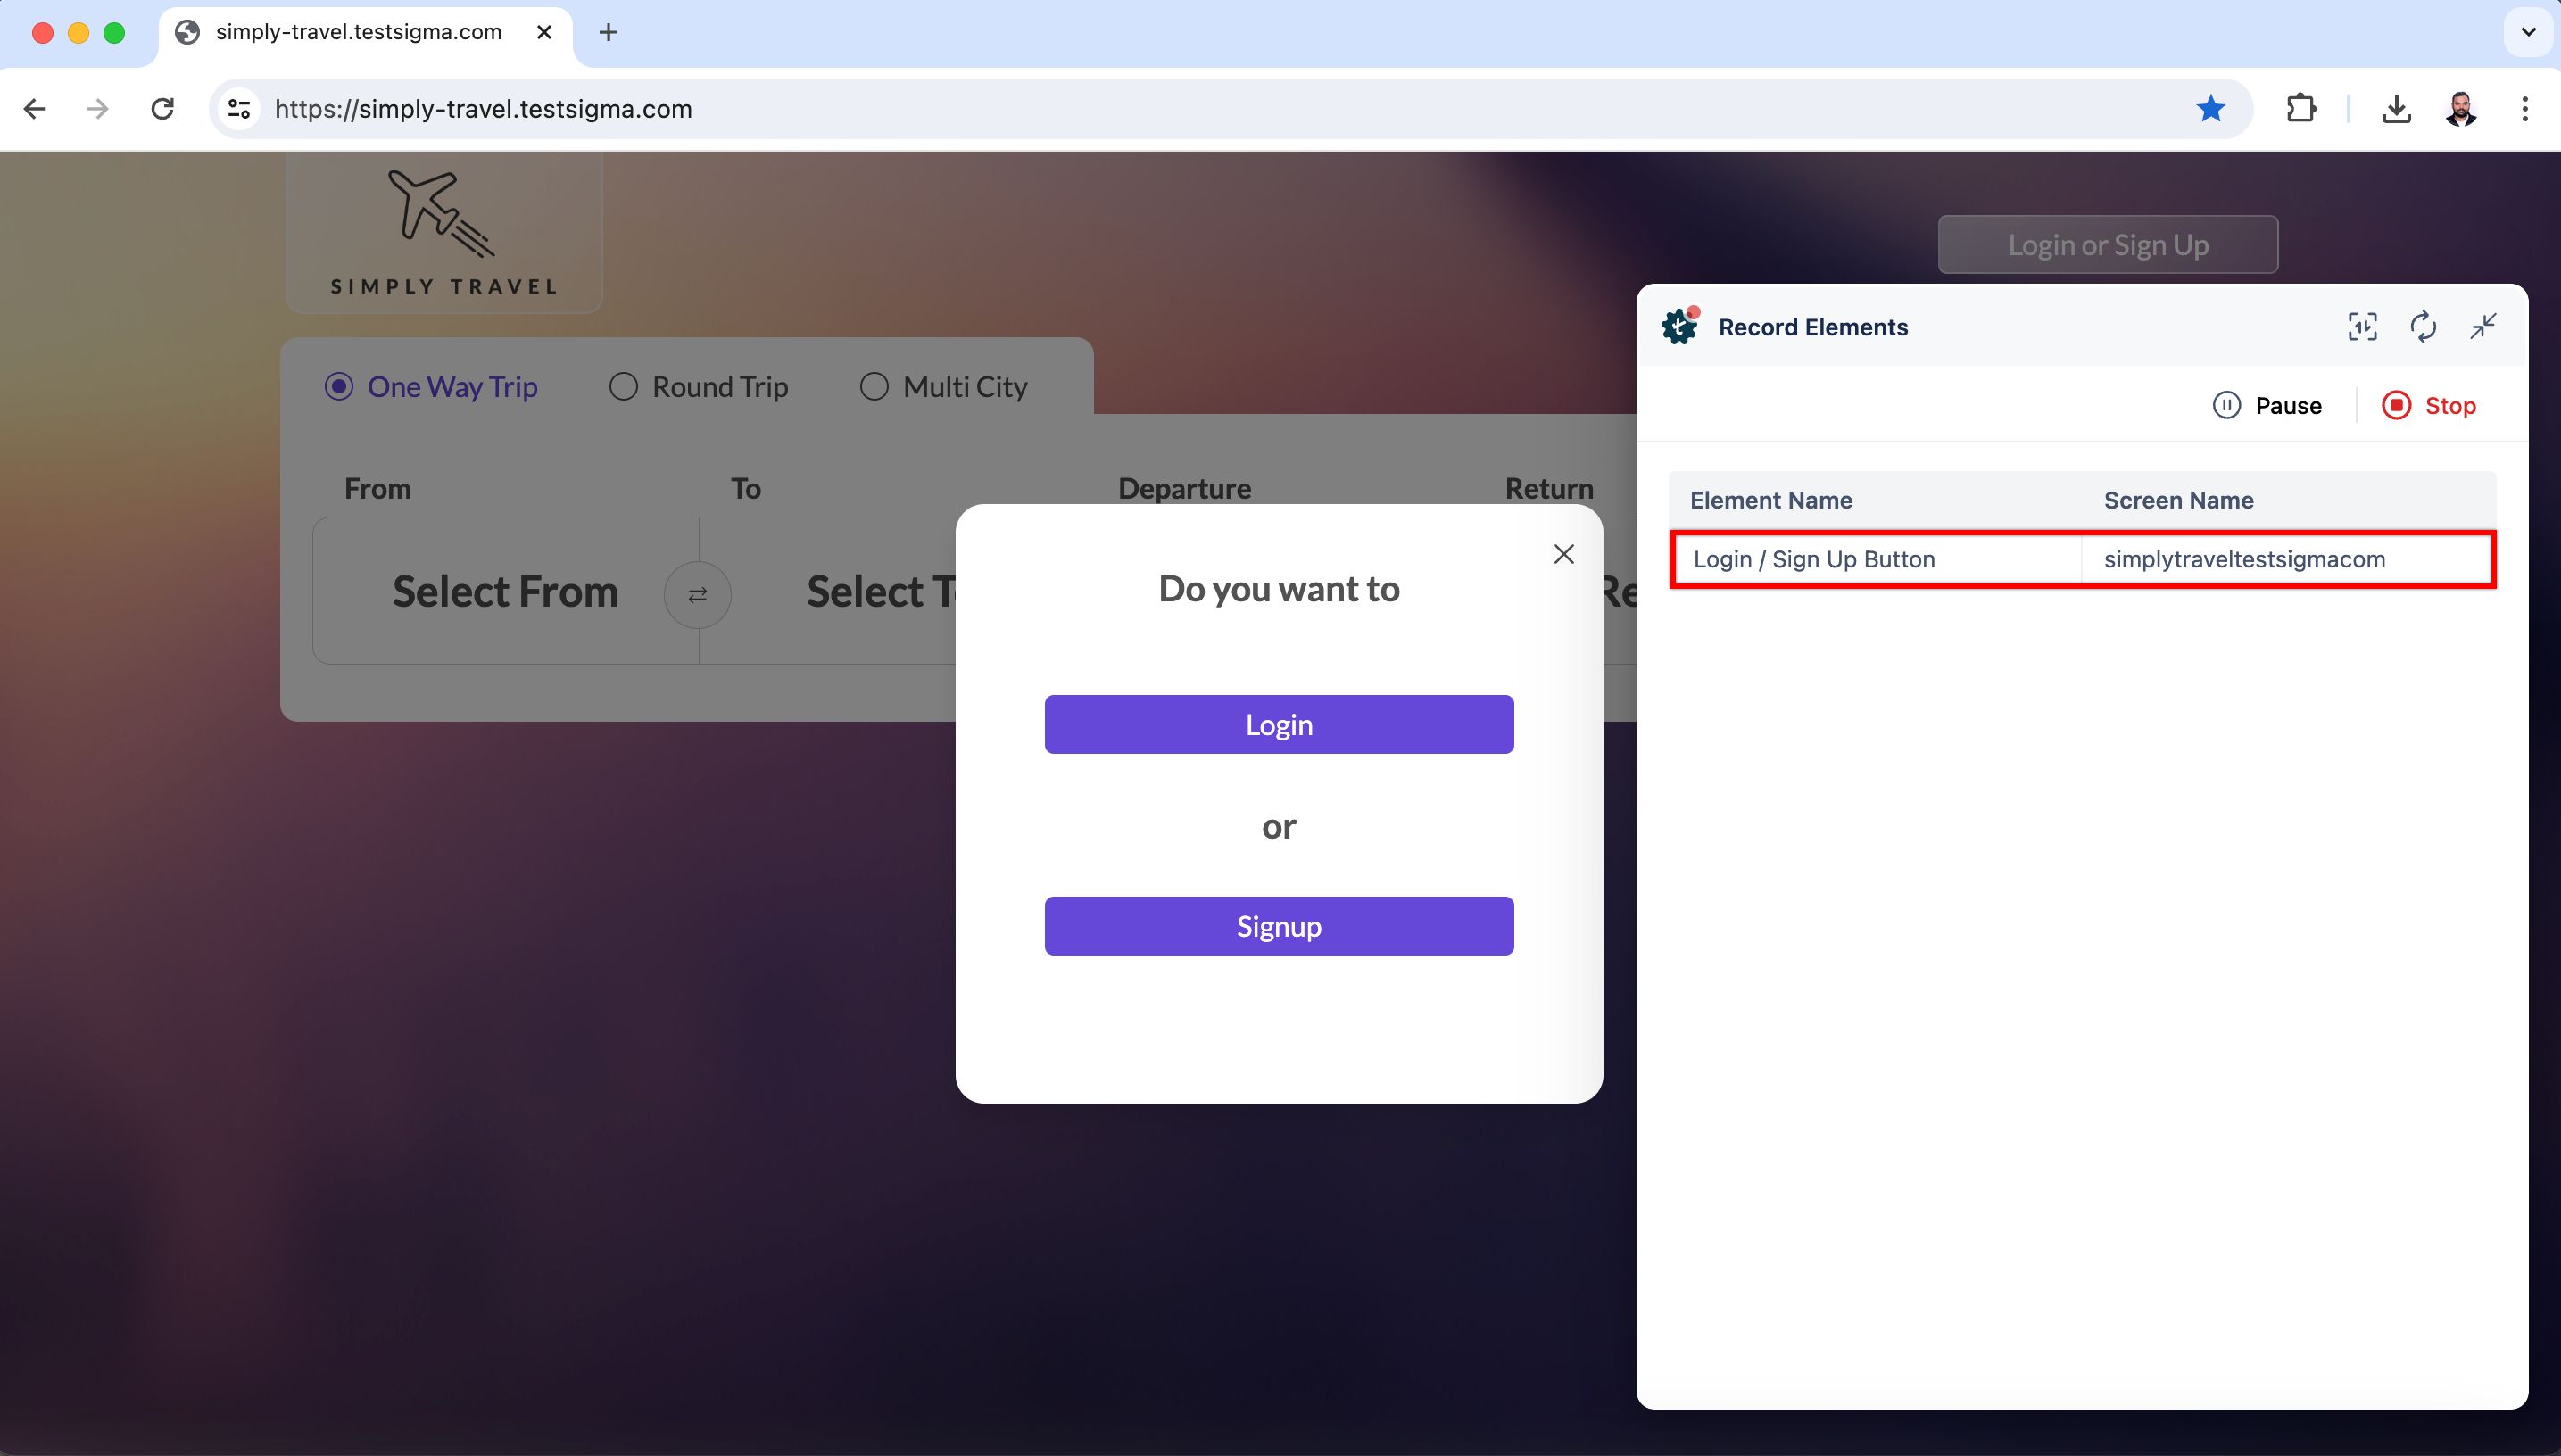
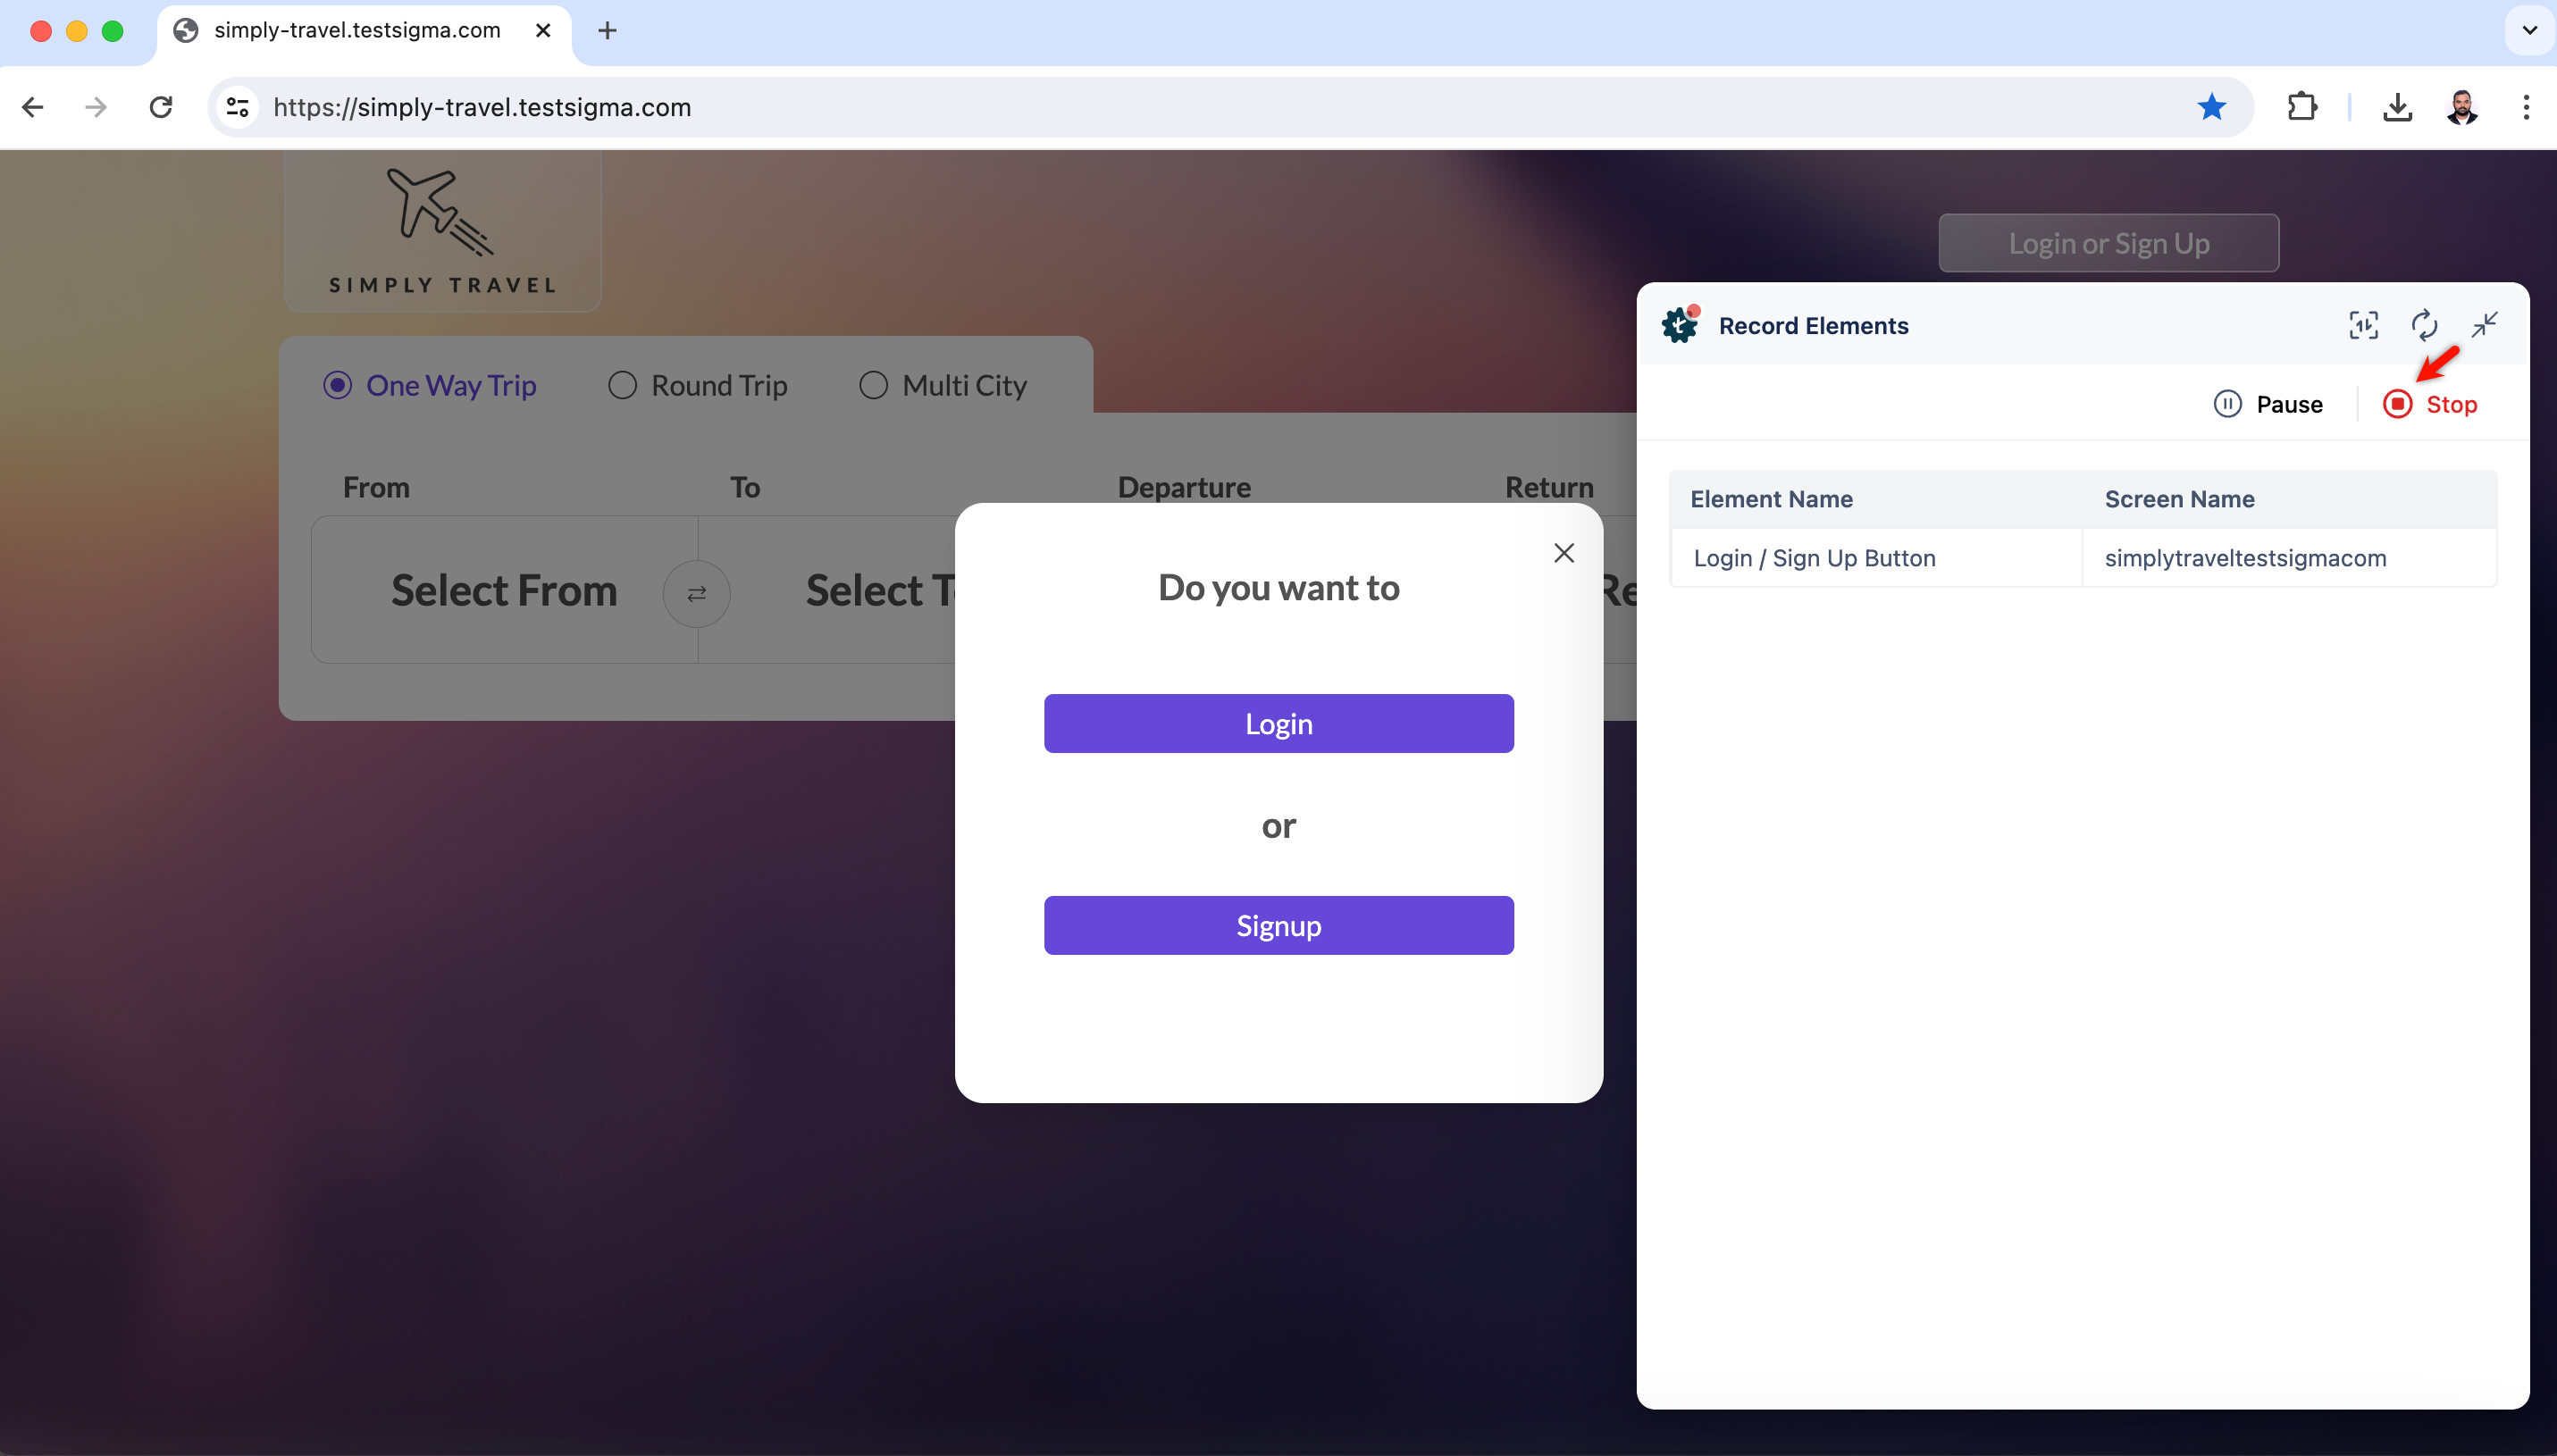
- Once you have captured the necessary element, click on Stop.
- You'll be redirected to the Elements page, where you can see all recorded elements.
While recording elements, the recorder will also capture the page image, highlighting the respective element. This provides visual context along with the element details.
Here’s a quick GIF demonstrating how to record multiple elements for a web application.

Steps to Update an Element
- From the left navigation bar, select Create Tests > Elements.
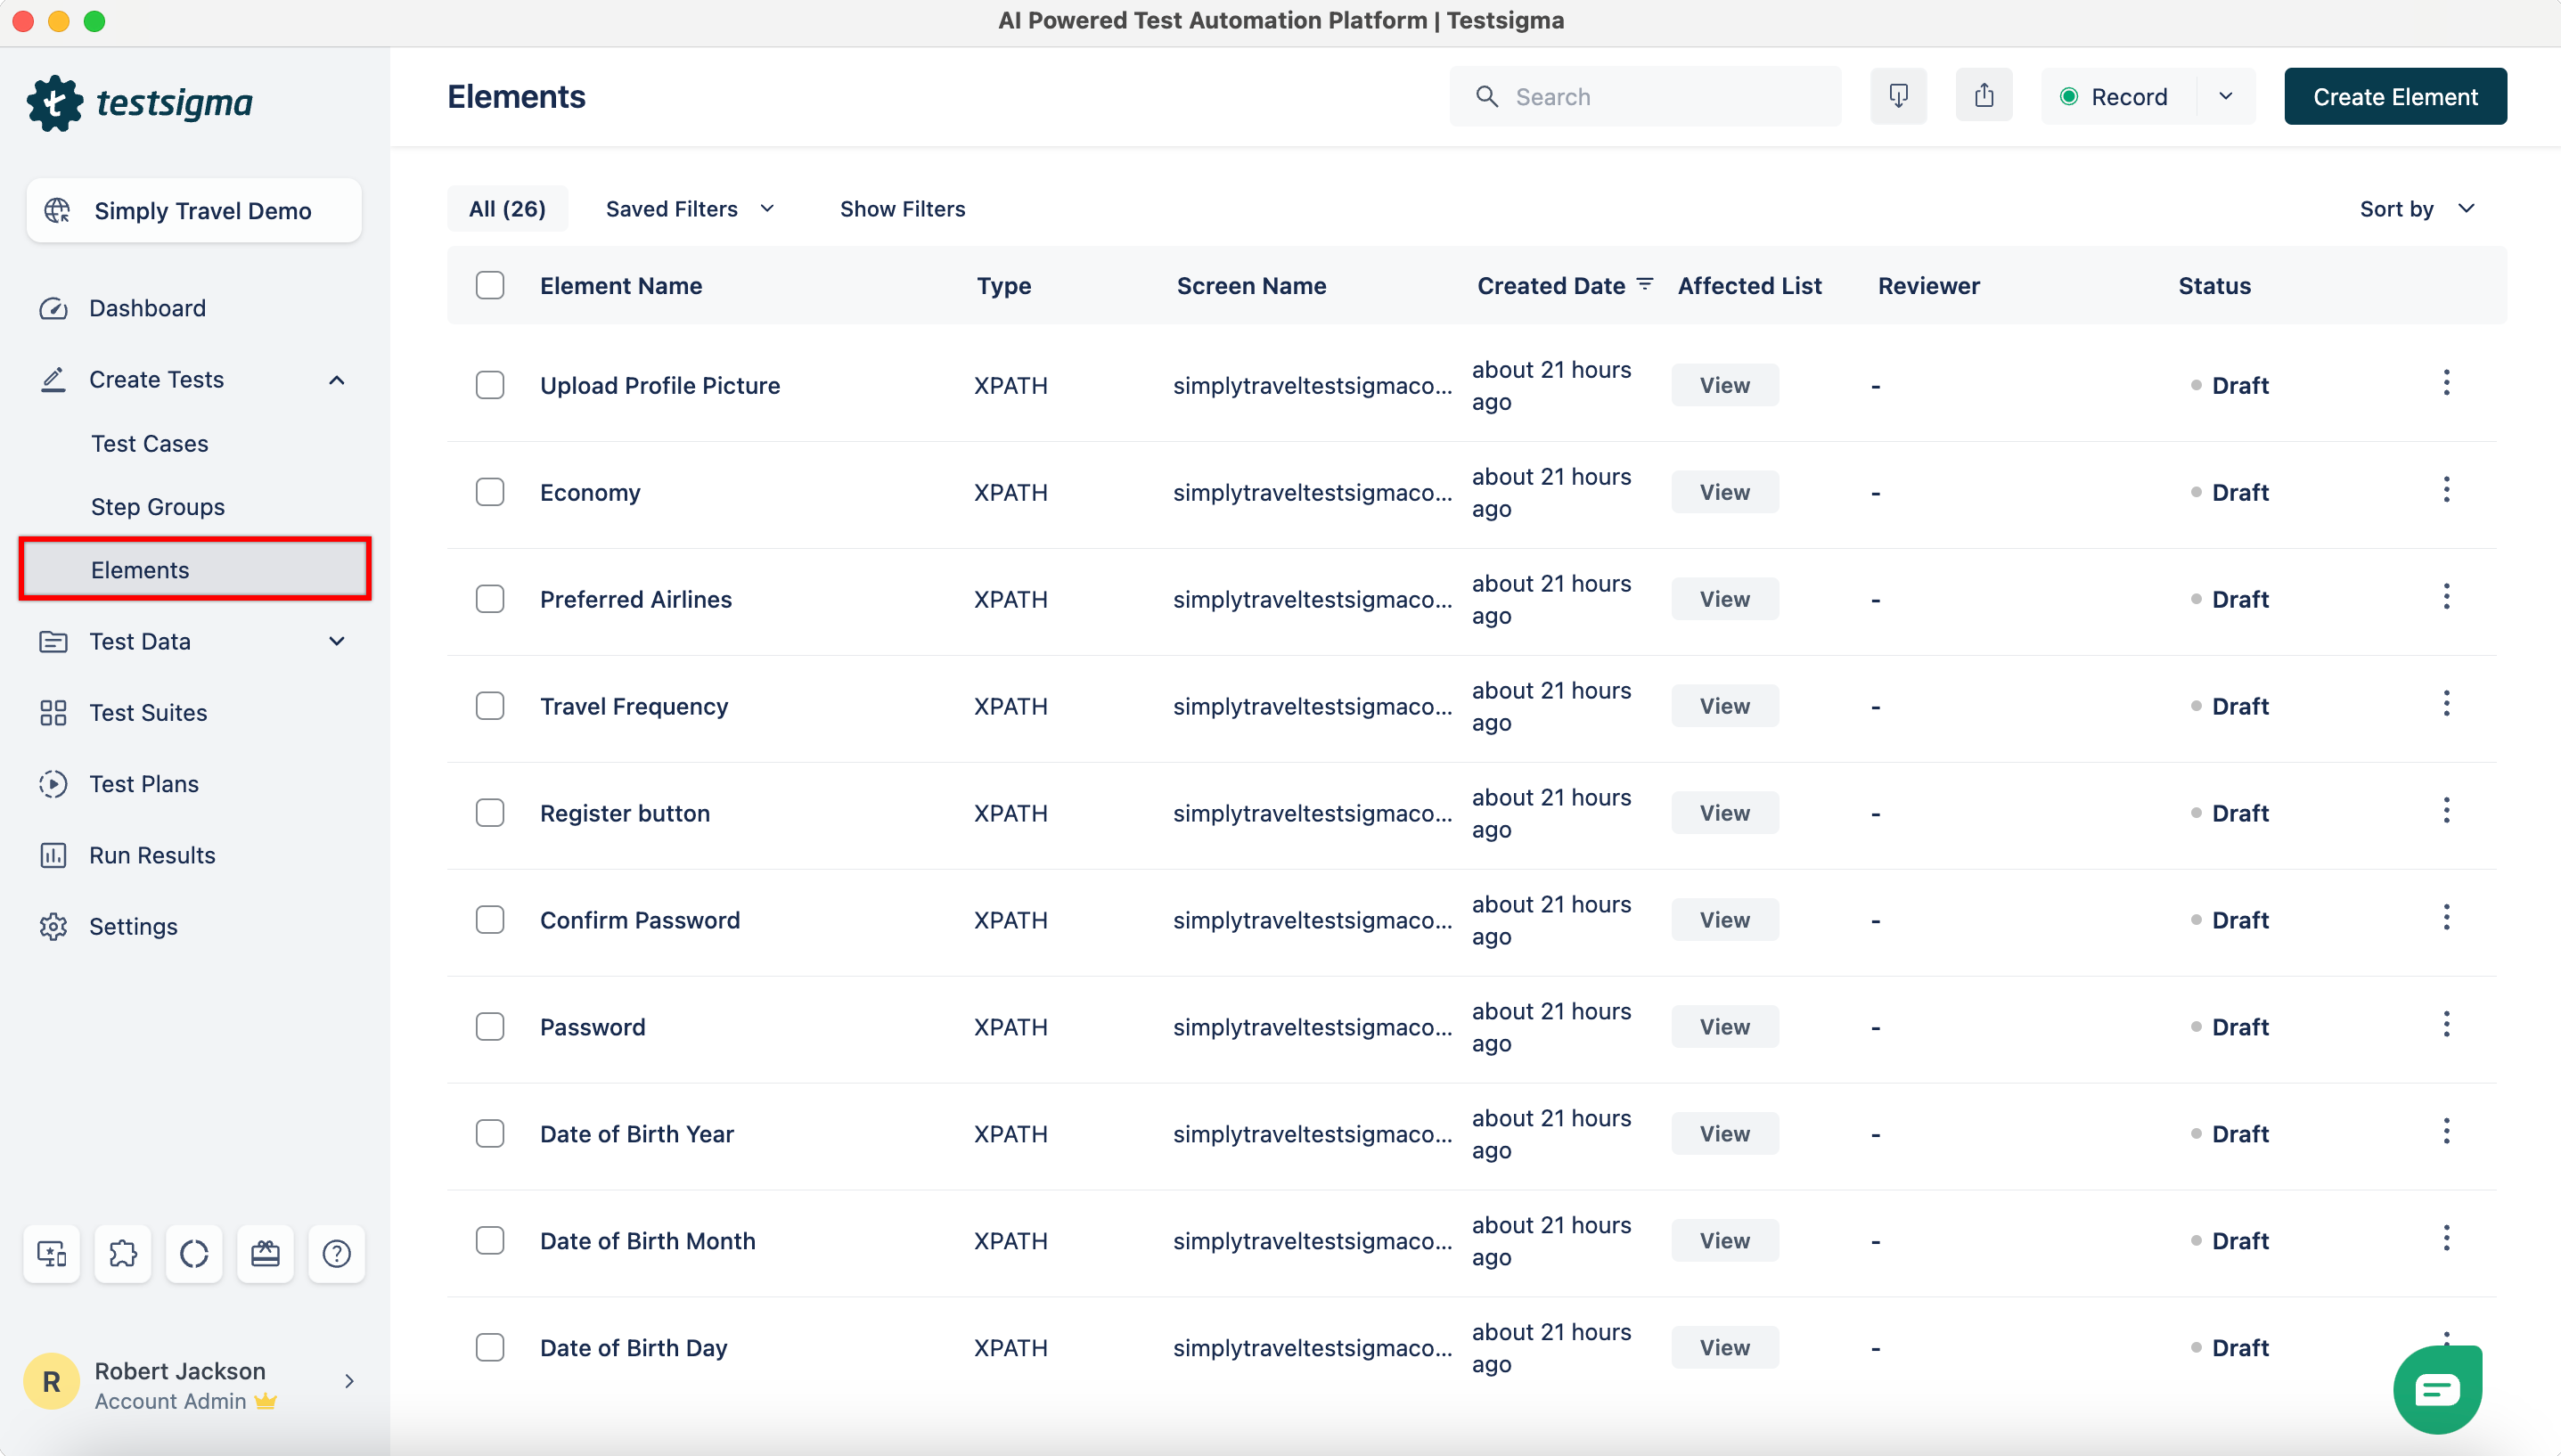
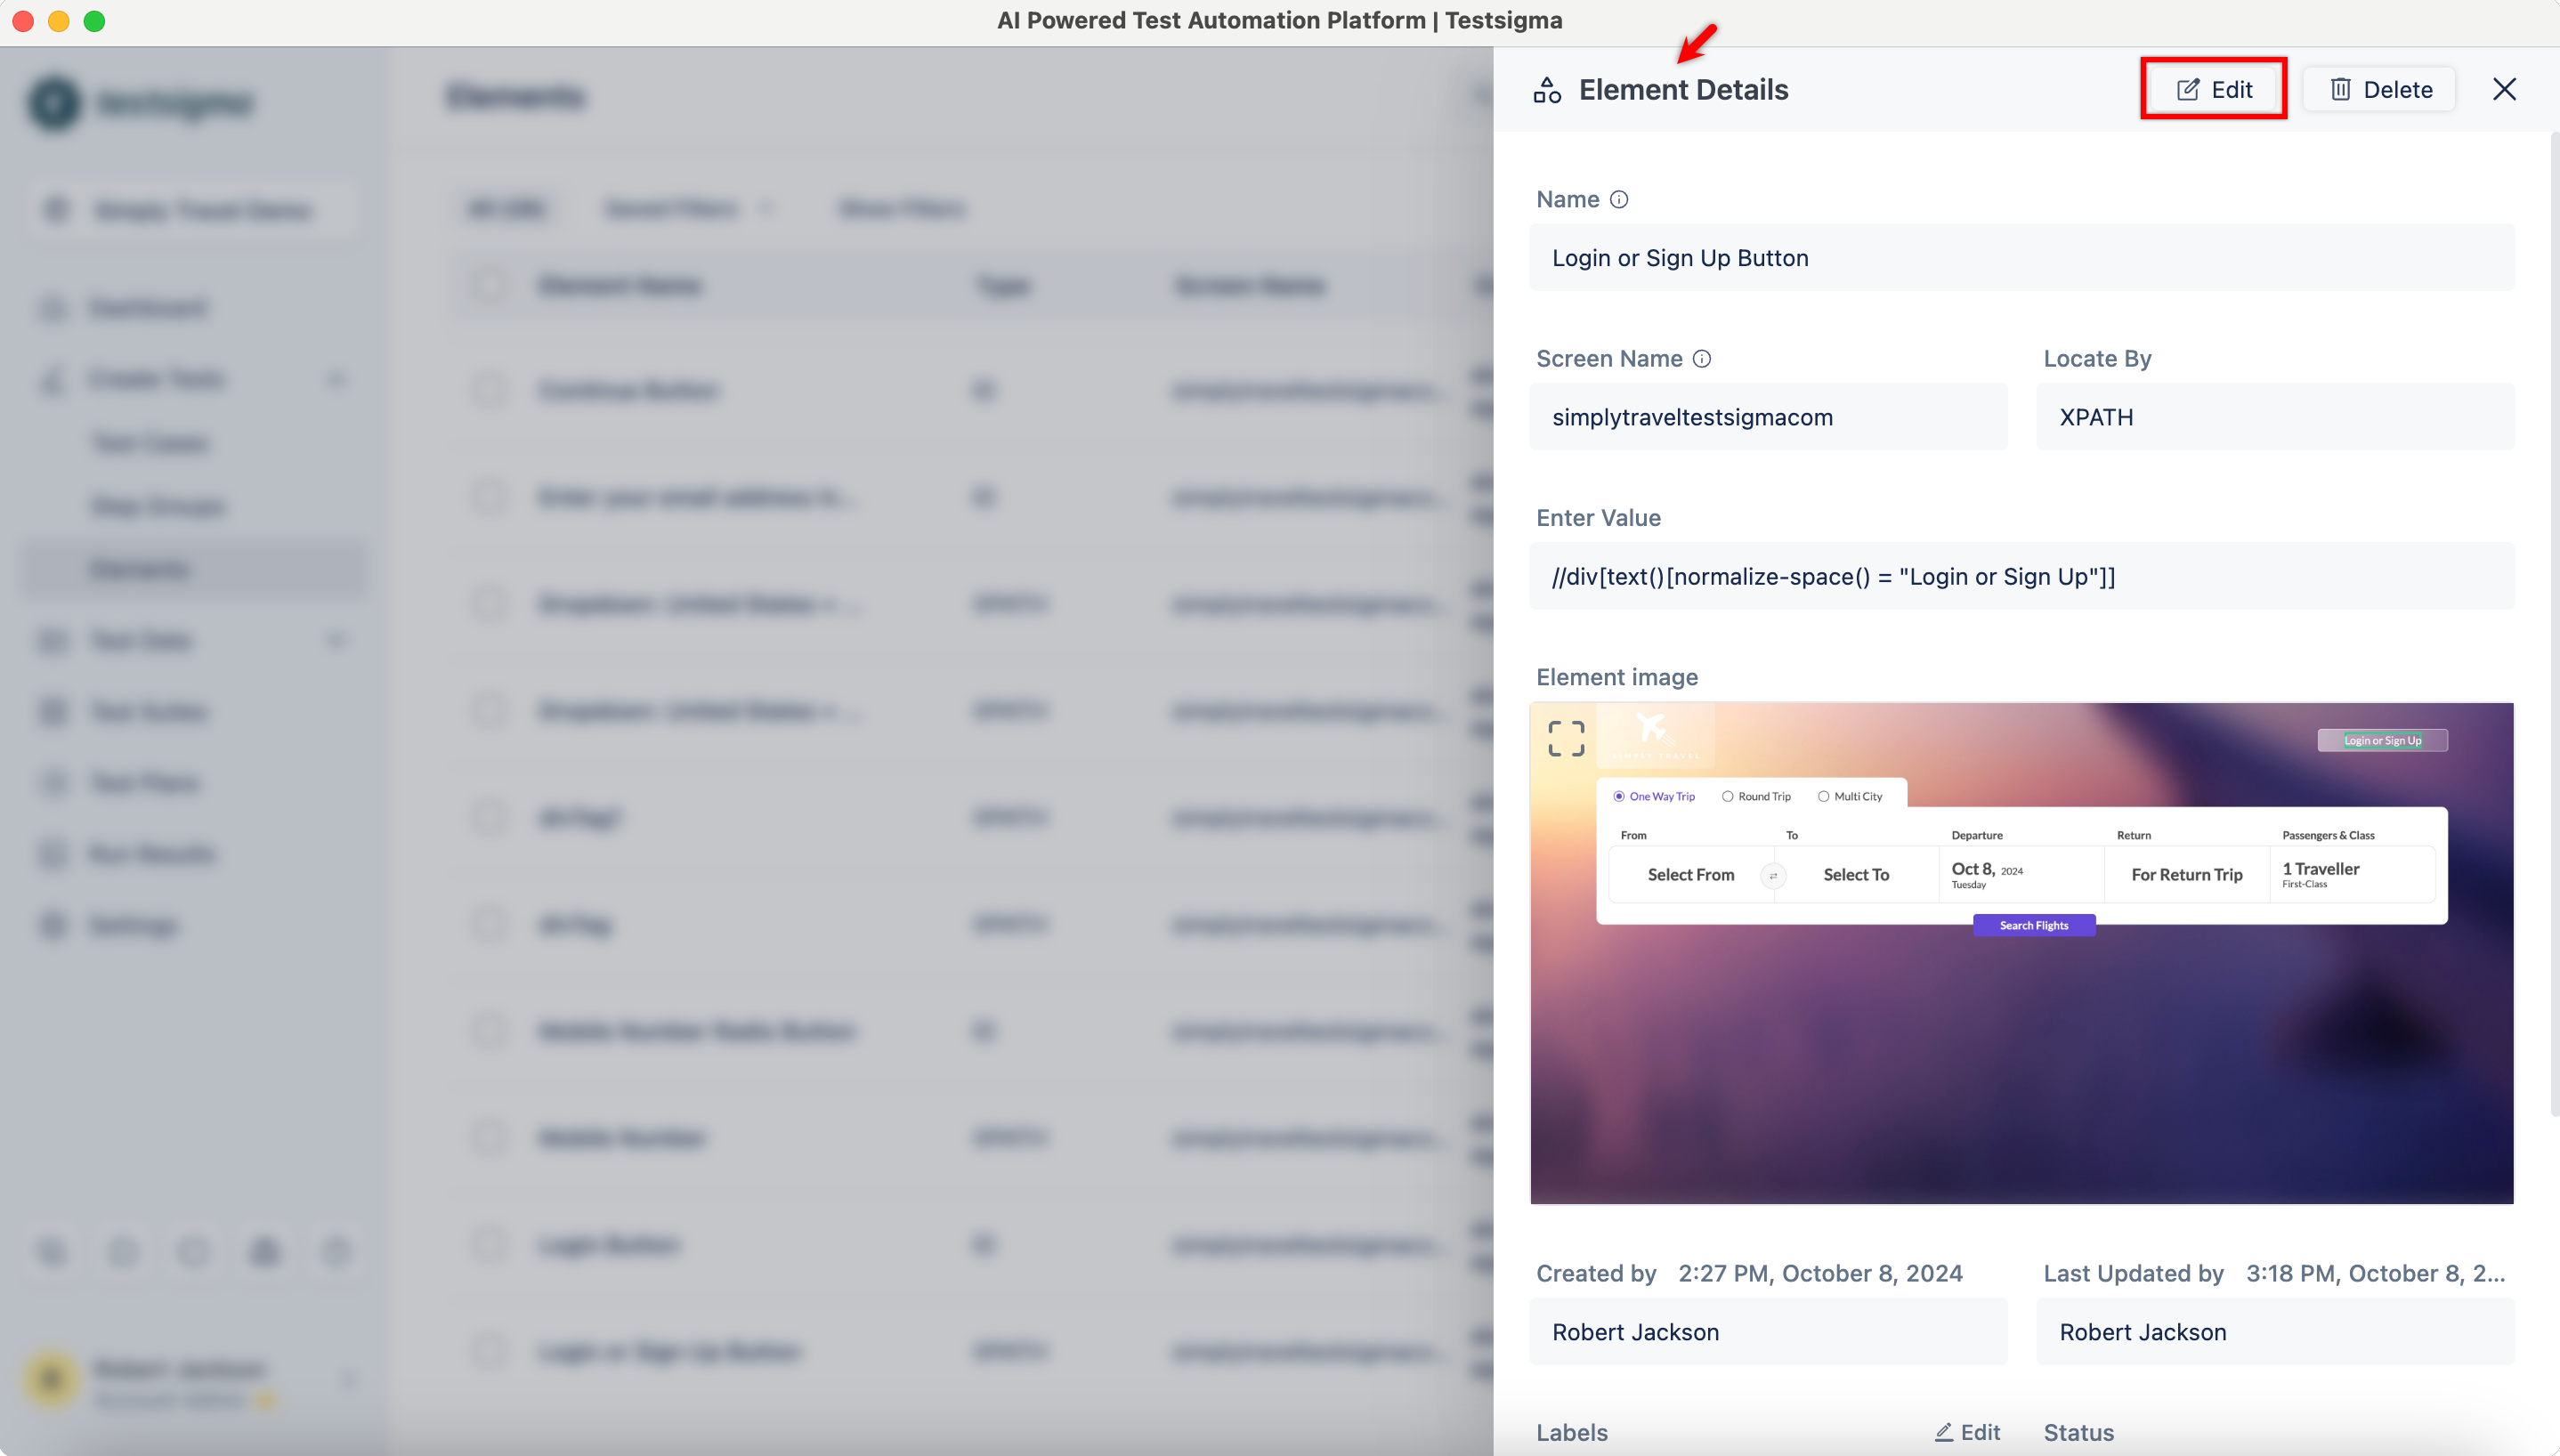
- From the Elements list page. This will open the Element Details overlay.
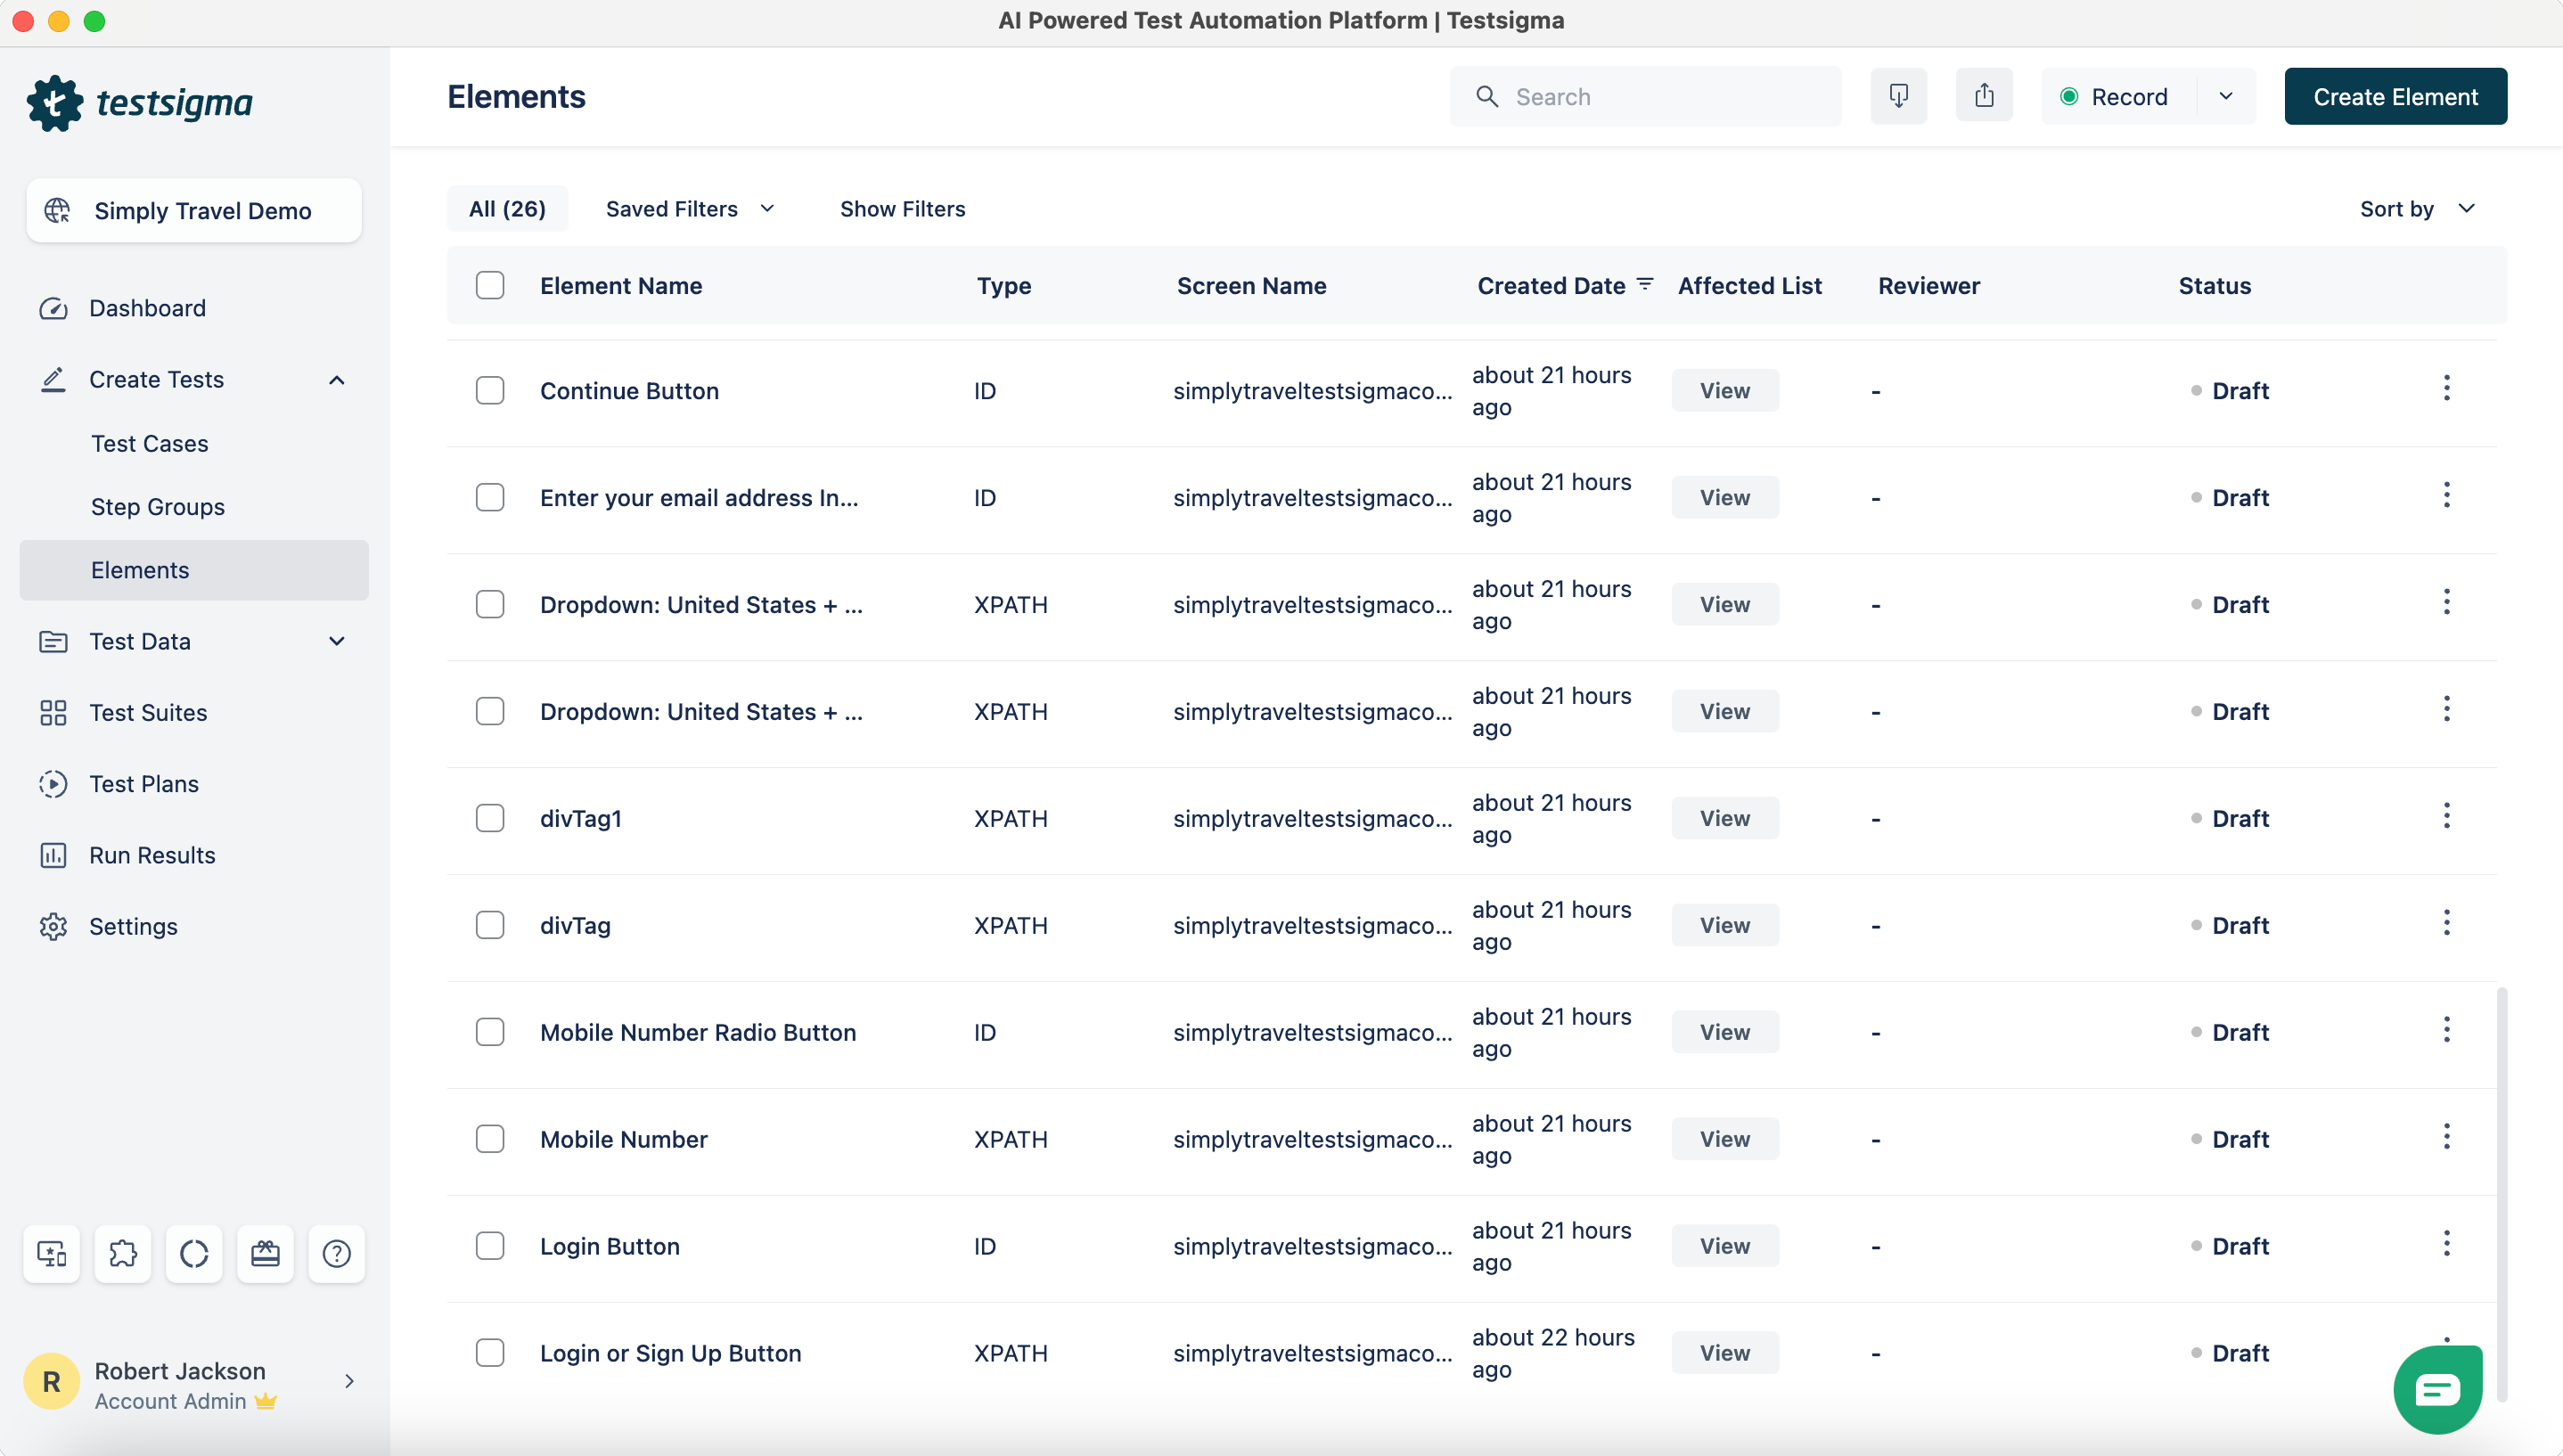
- In the Element Details overlay, click Edit. This will open the Update Element overlay.
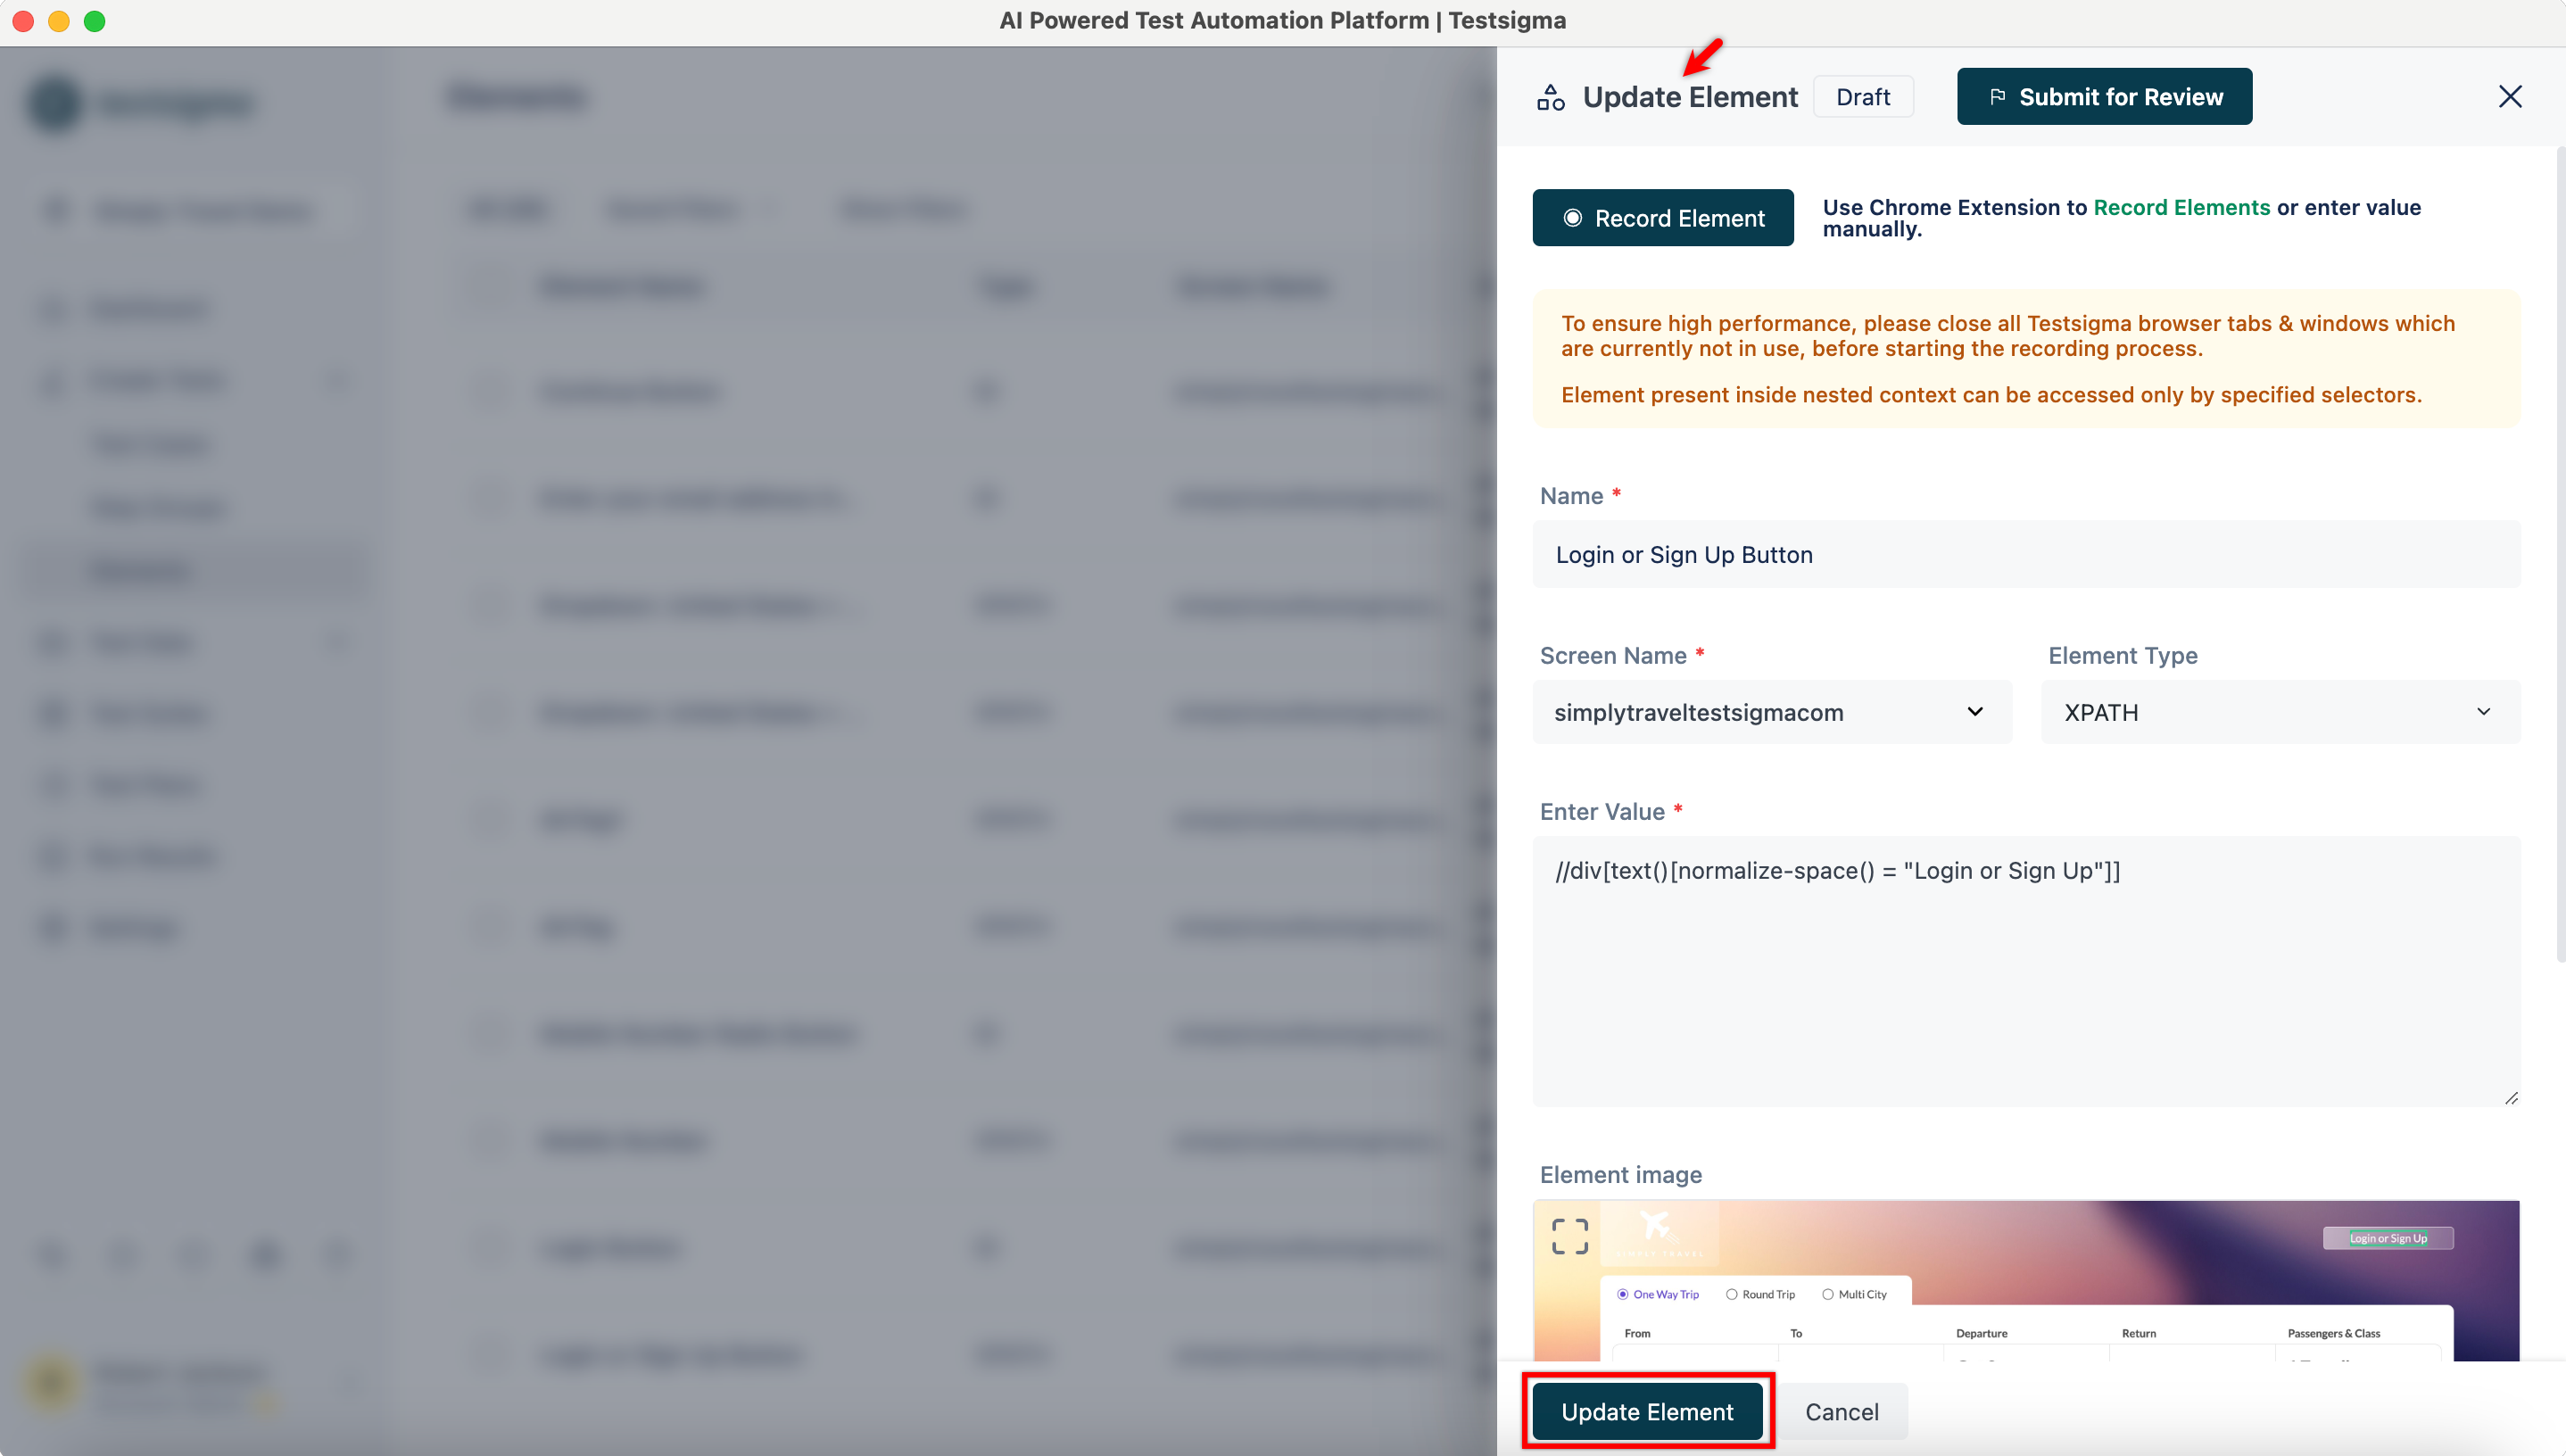
- In the Update Element overlay, manually update the details you want to change, and click Update Element.
💡 Additional Info:
You can update the following fields:
- Name
- Screen Name
- Element Type
- Value
- You can also check the highlighted element in the Element Image section in the same overlay for your reference.

You can also update the element from the run results by navigating to Ad-Hoc Runs > Test Step > Element > Edit Element.
Creating an Element While Creating Test Case
- From the left navigation bar, go to Create Tests > Test Cases, create a new test case or select an existing test case.
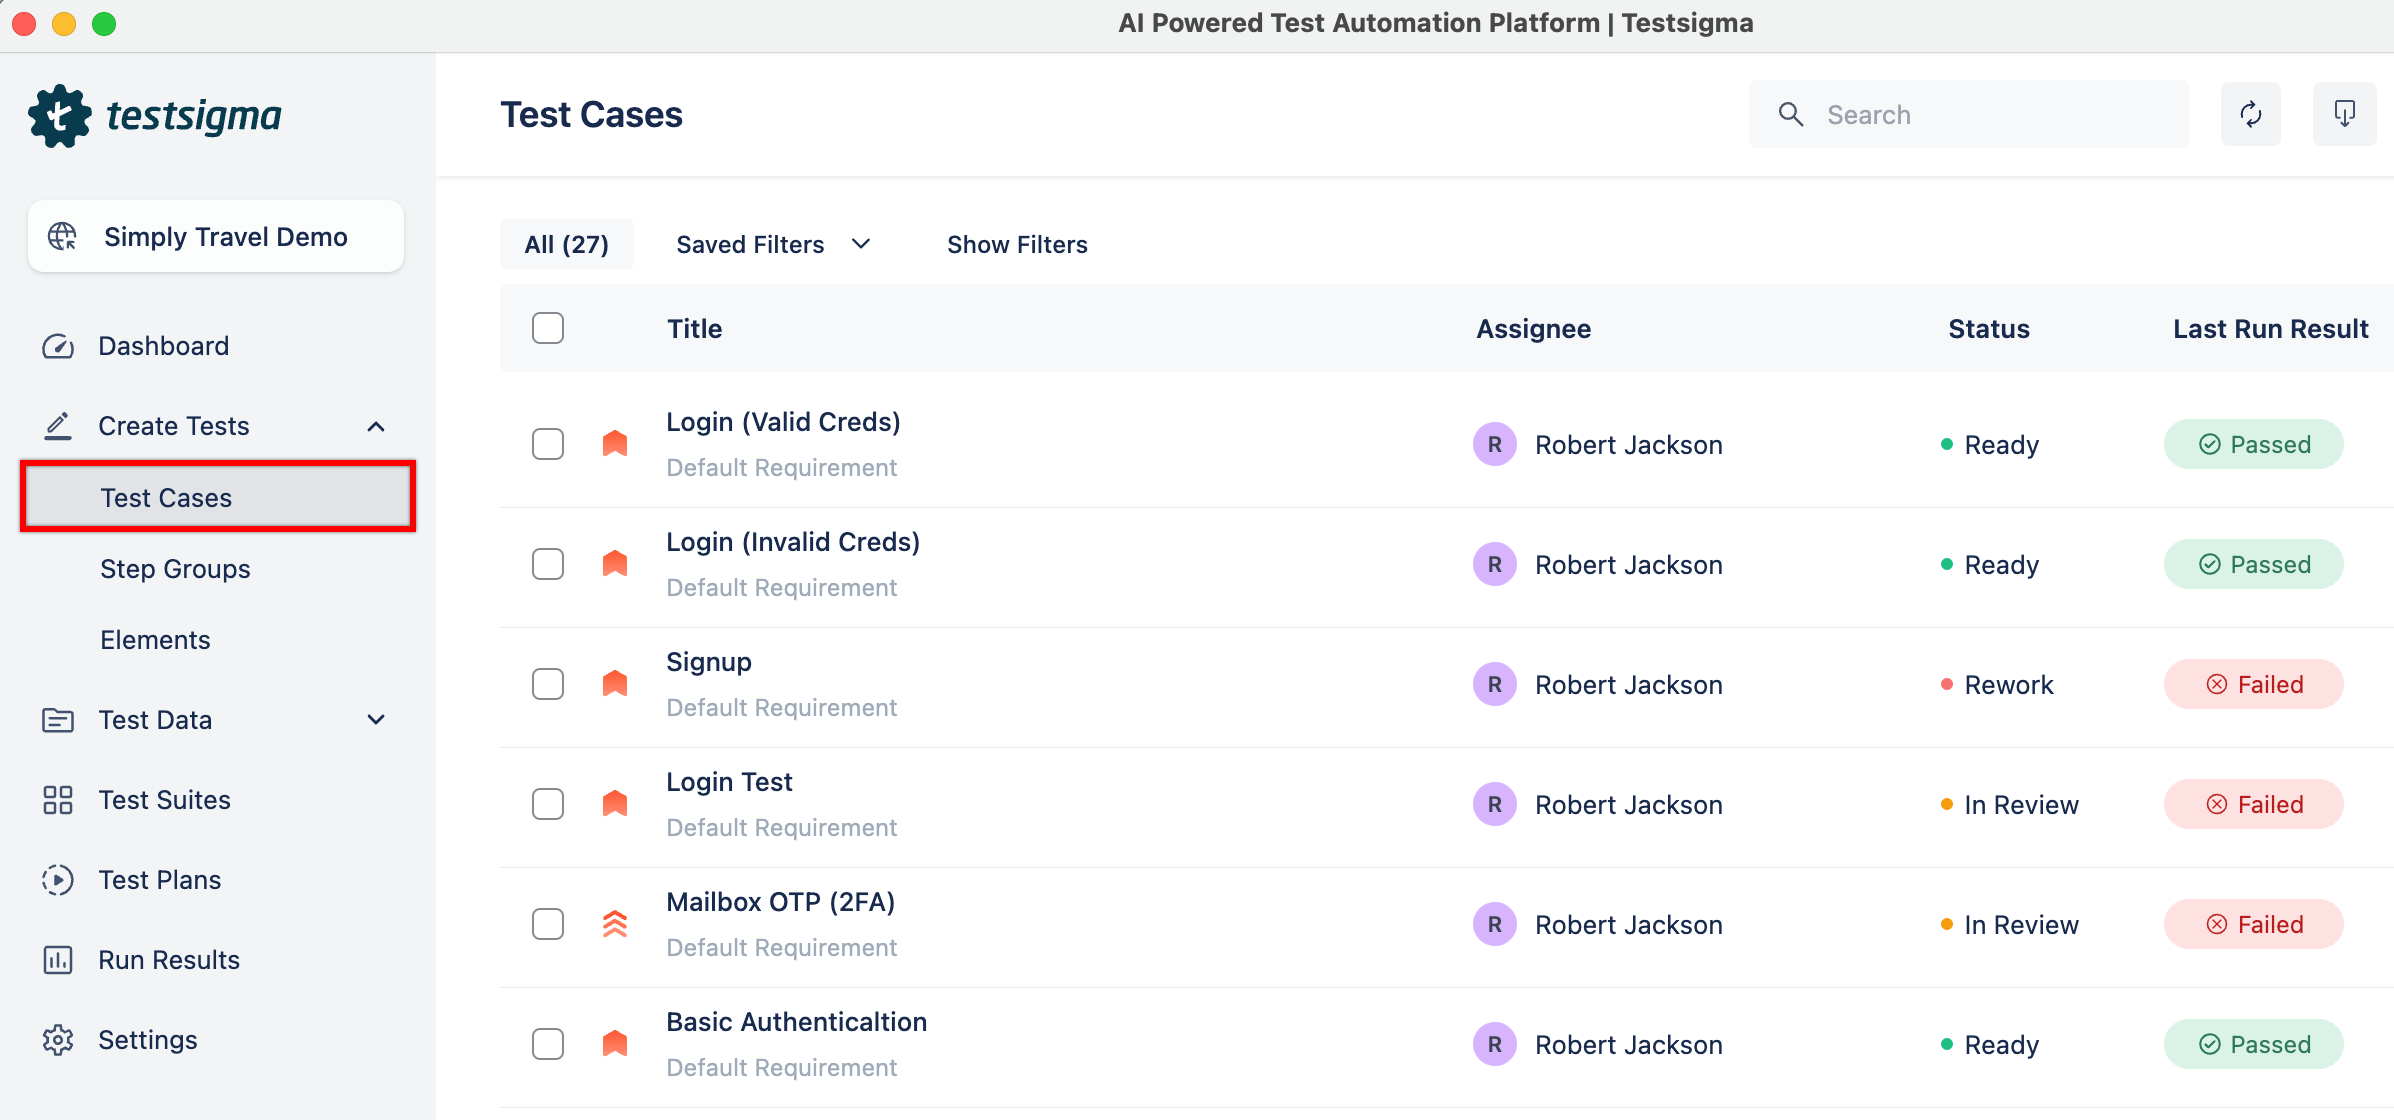
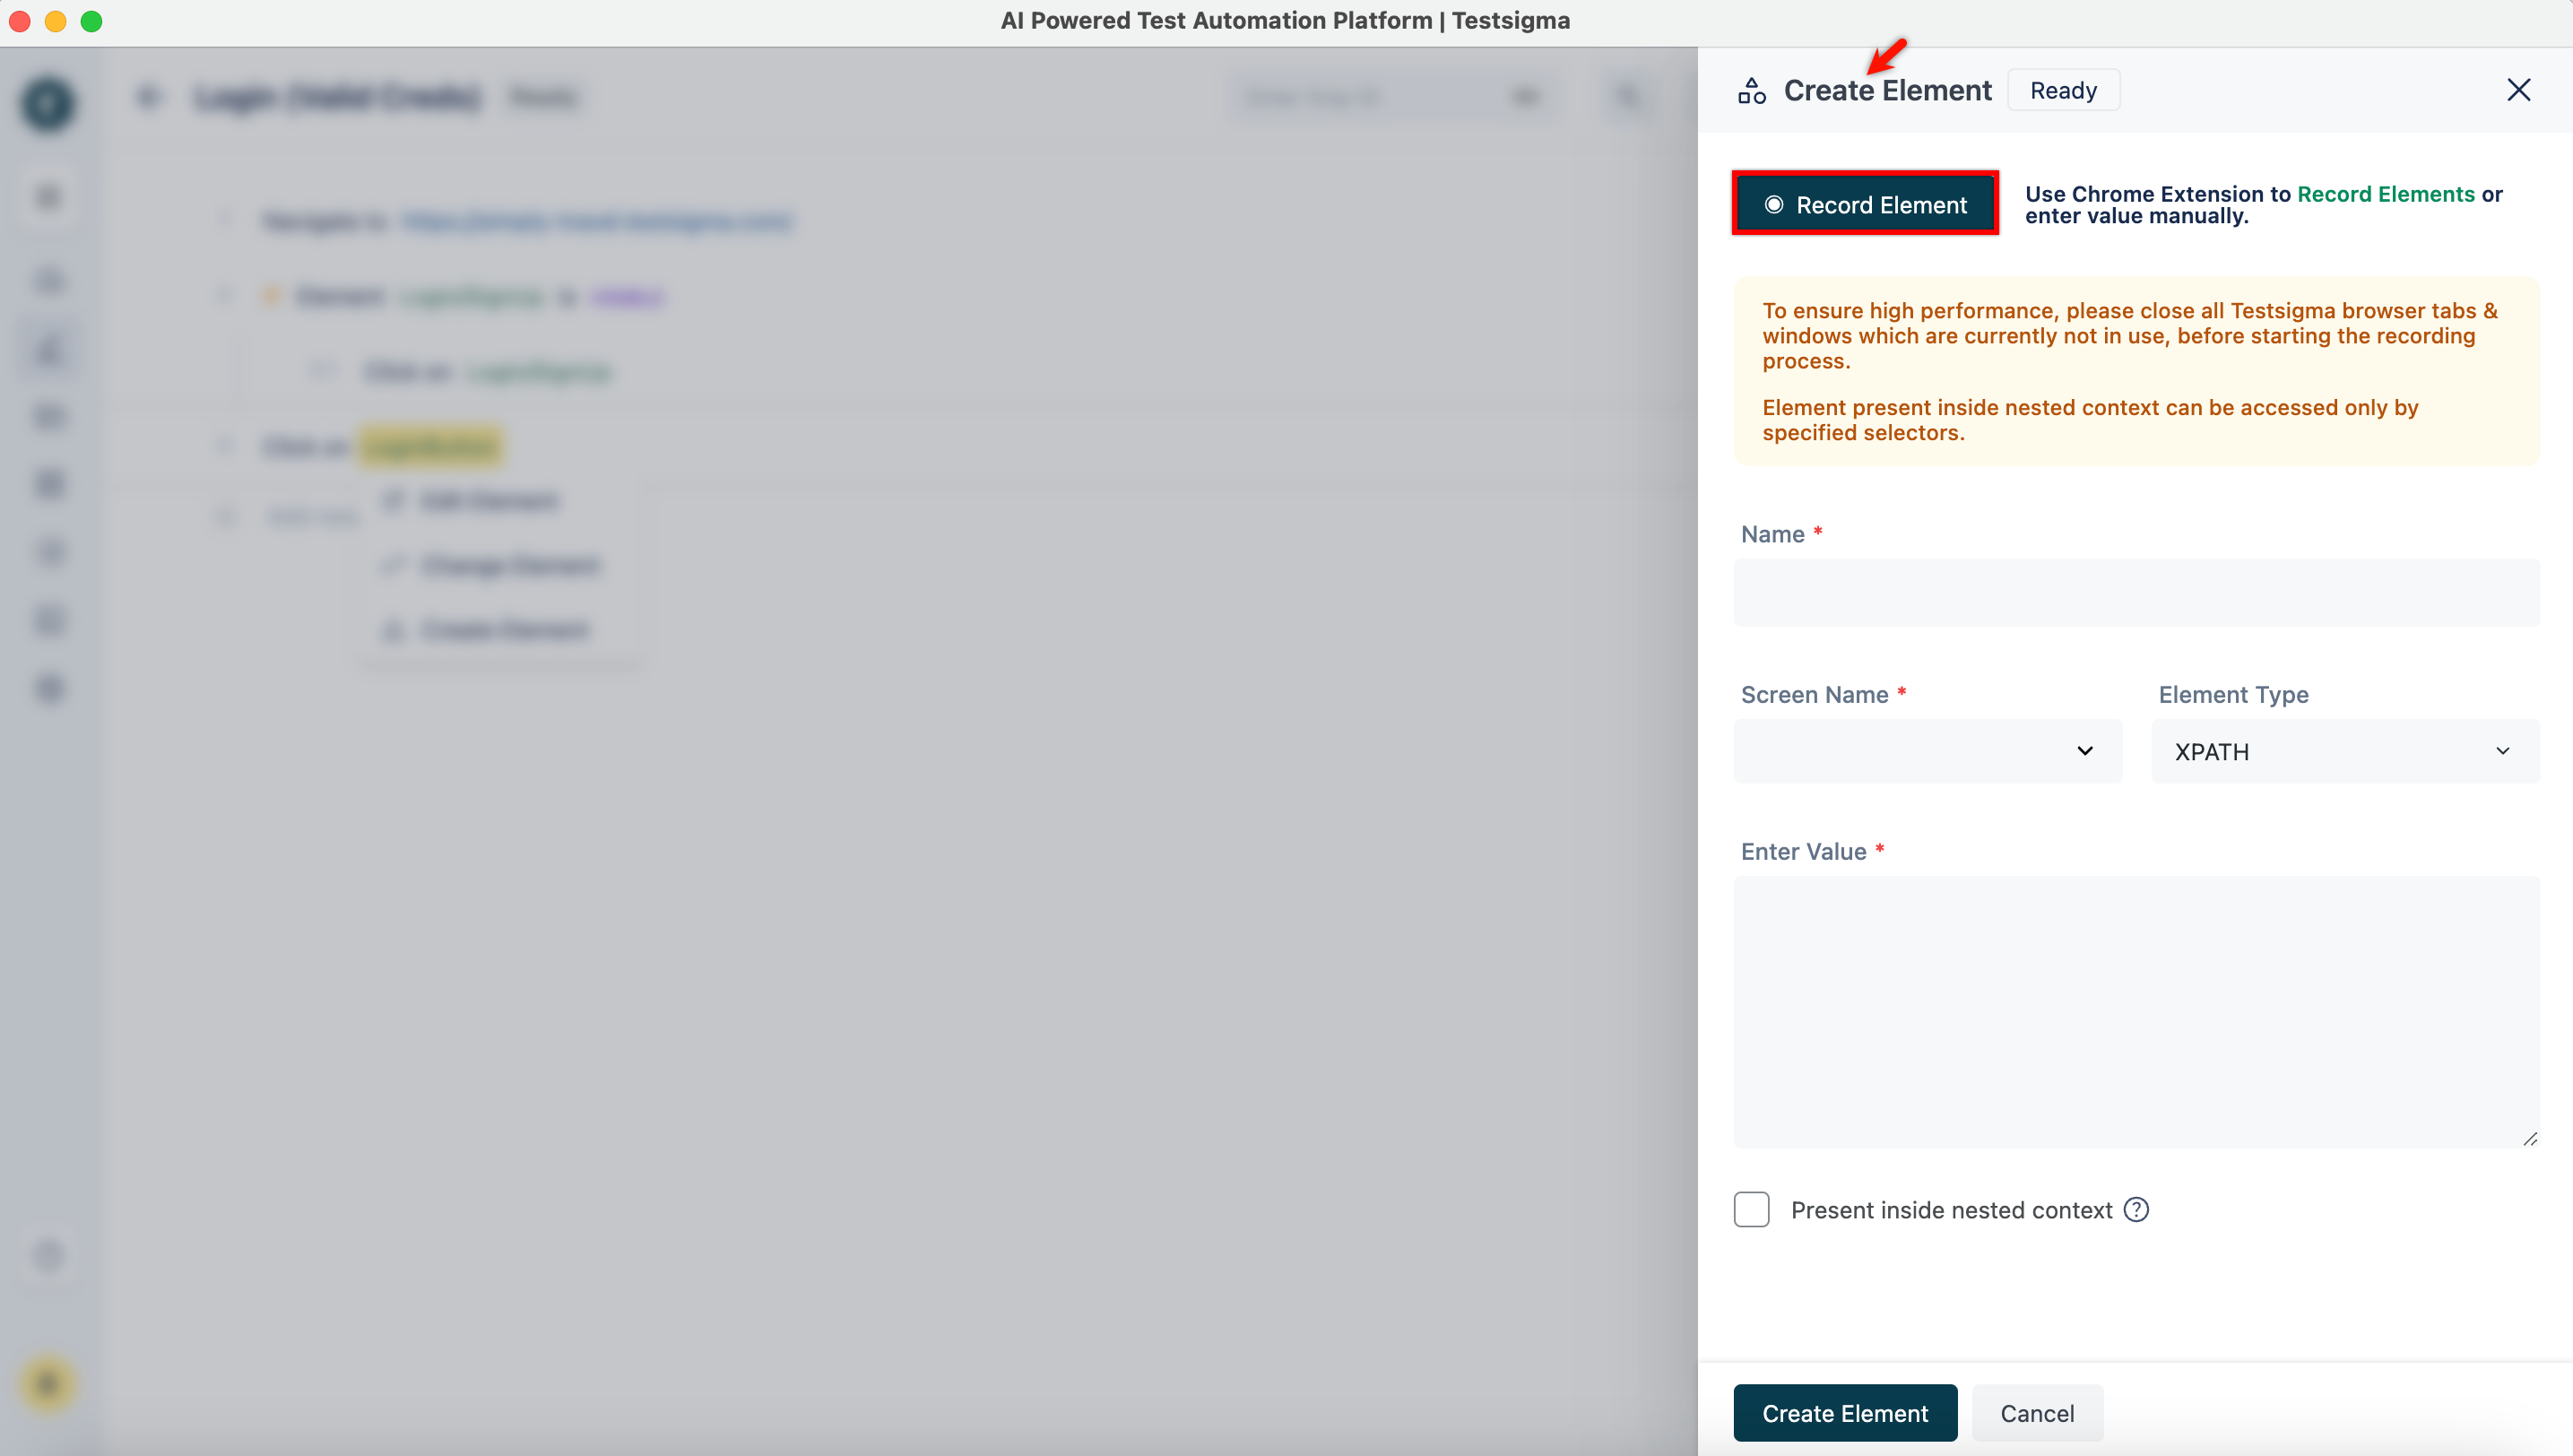
- Click on element in any test step and choose Create Element from the dropdown. This will open the Create Element overlay.
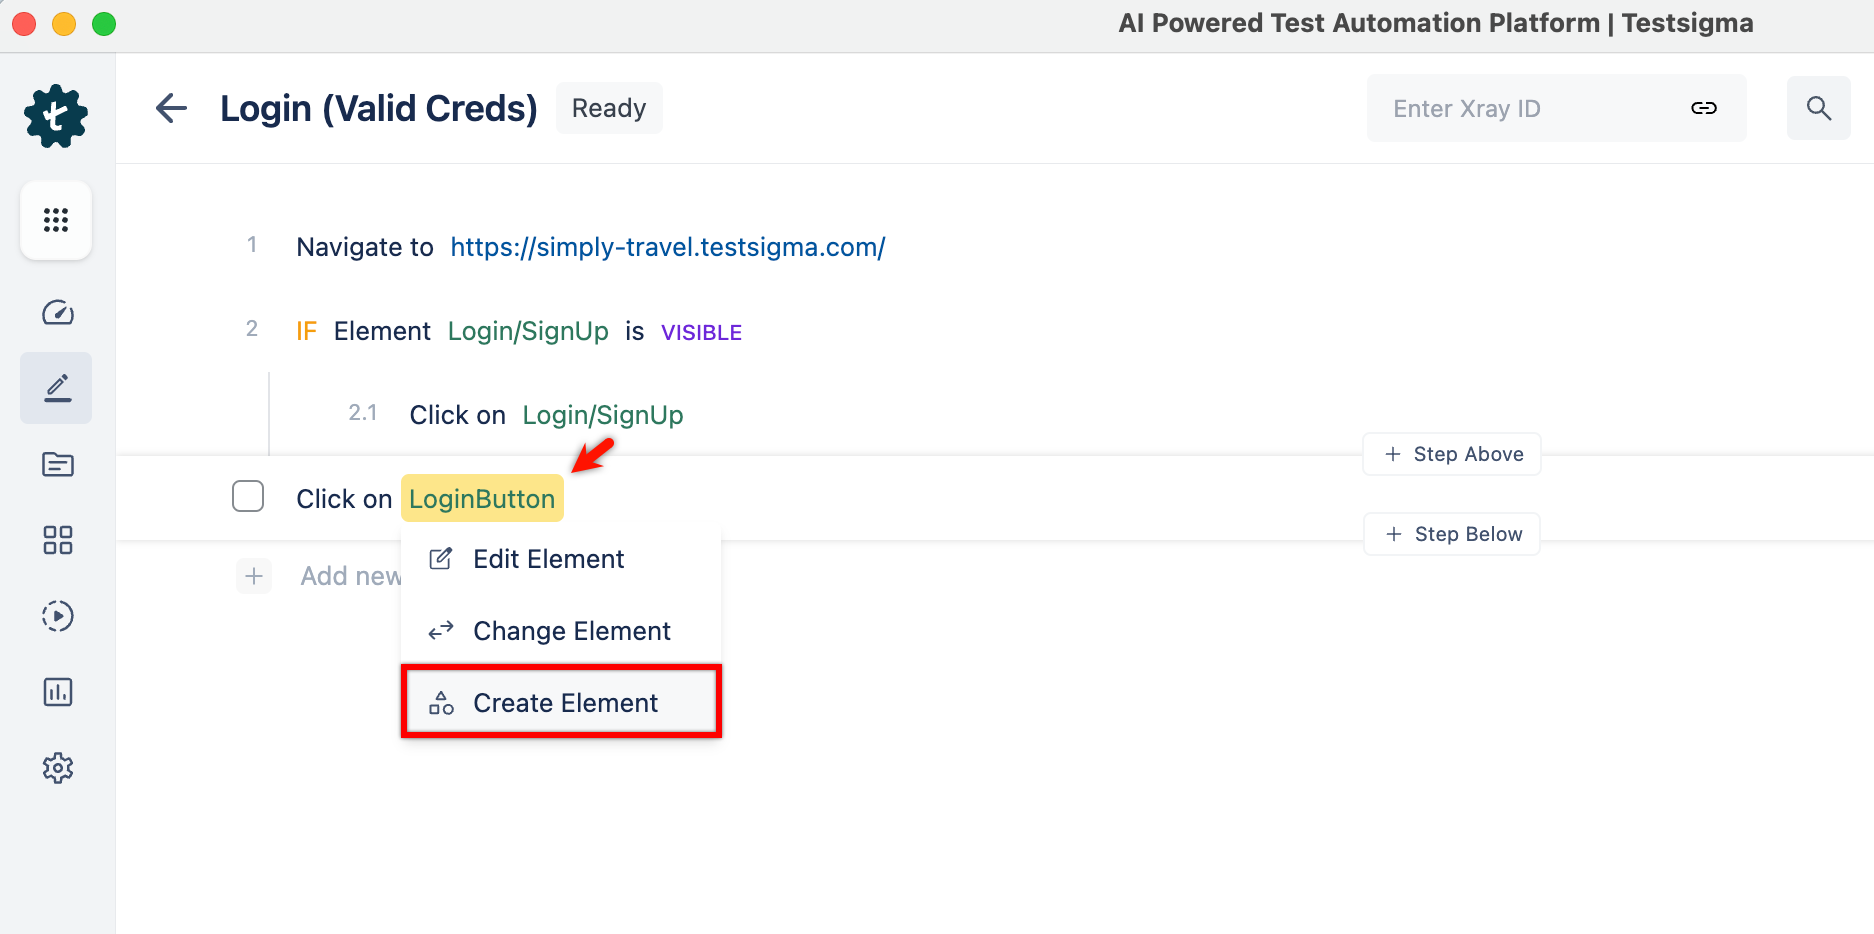
- Click on Record Element and follow the steps 3-8, mentioned in steps to create an element from the elements page to create an element.
Reusing Elements Recorded
- Create a test case in which you will be reusing your pre-recorded elements.
- Start recording test steps for the test case.
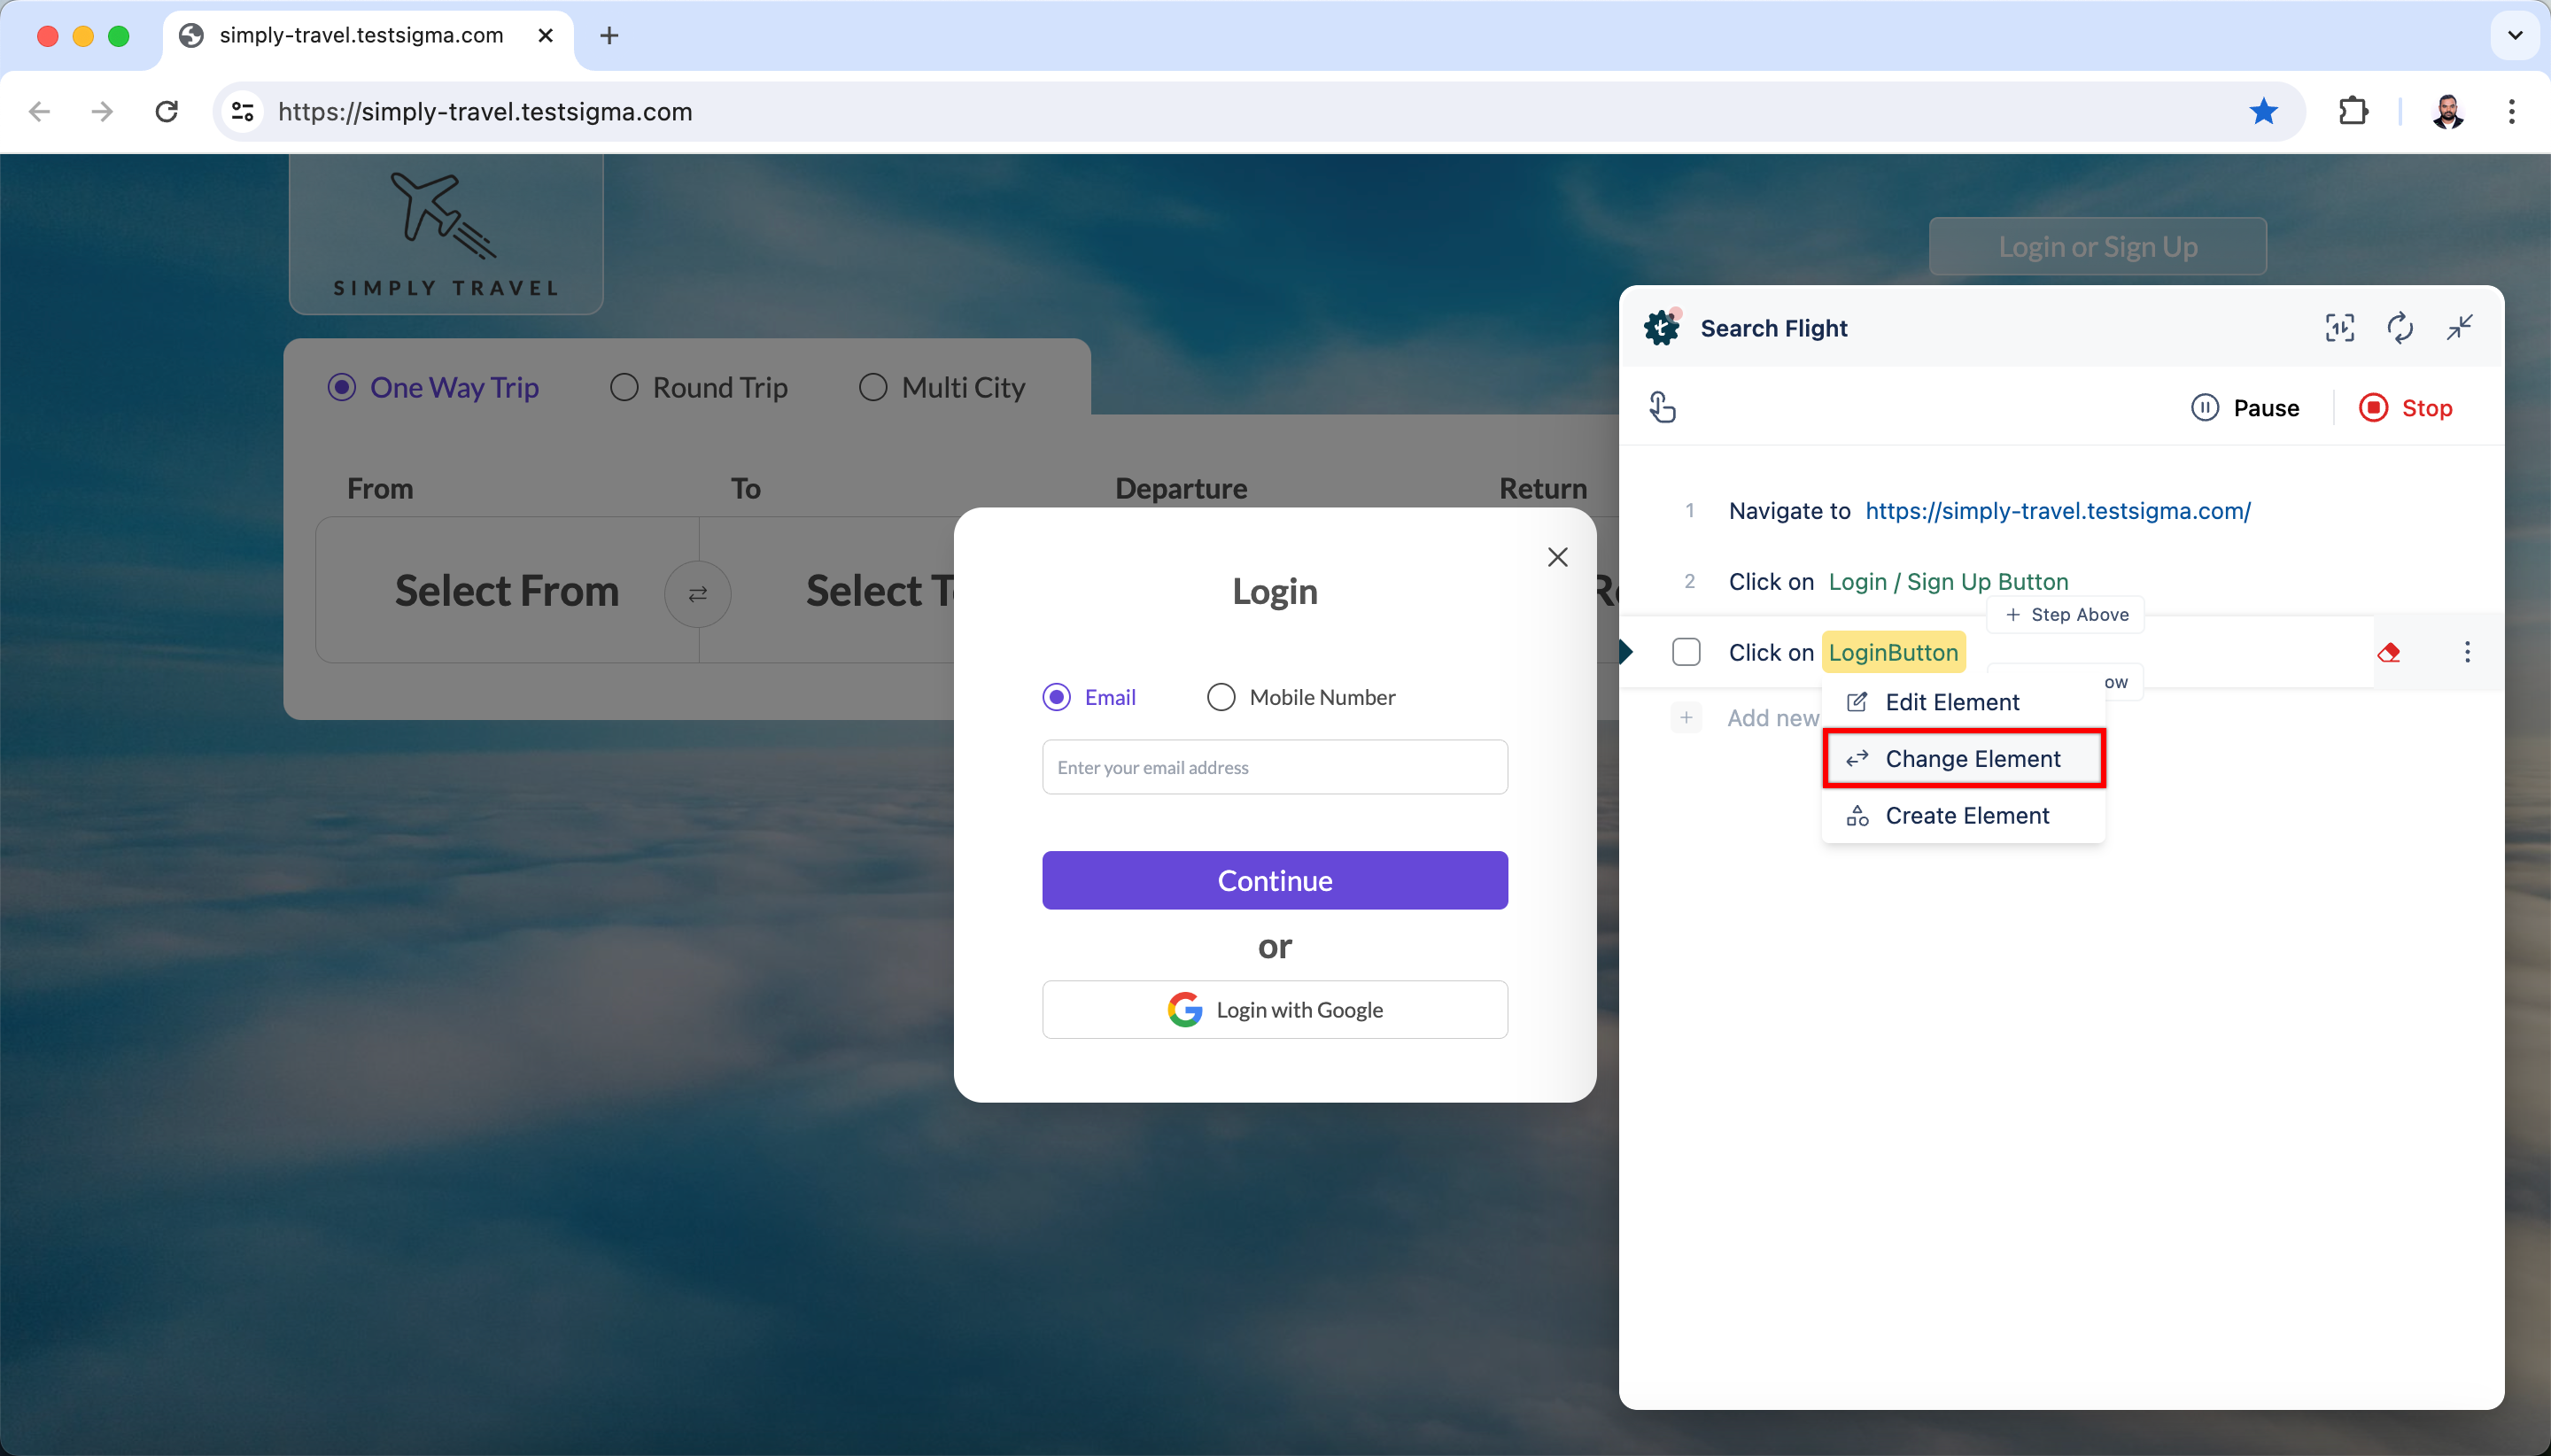
- Hover over the element on the test step where you want to reuse the saved element and click on Change Element.
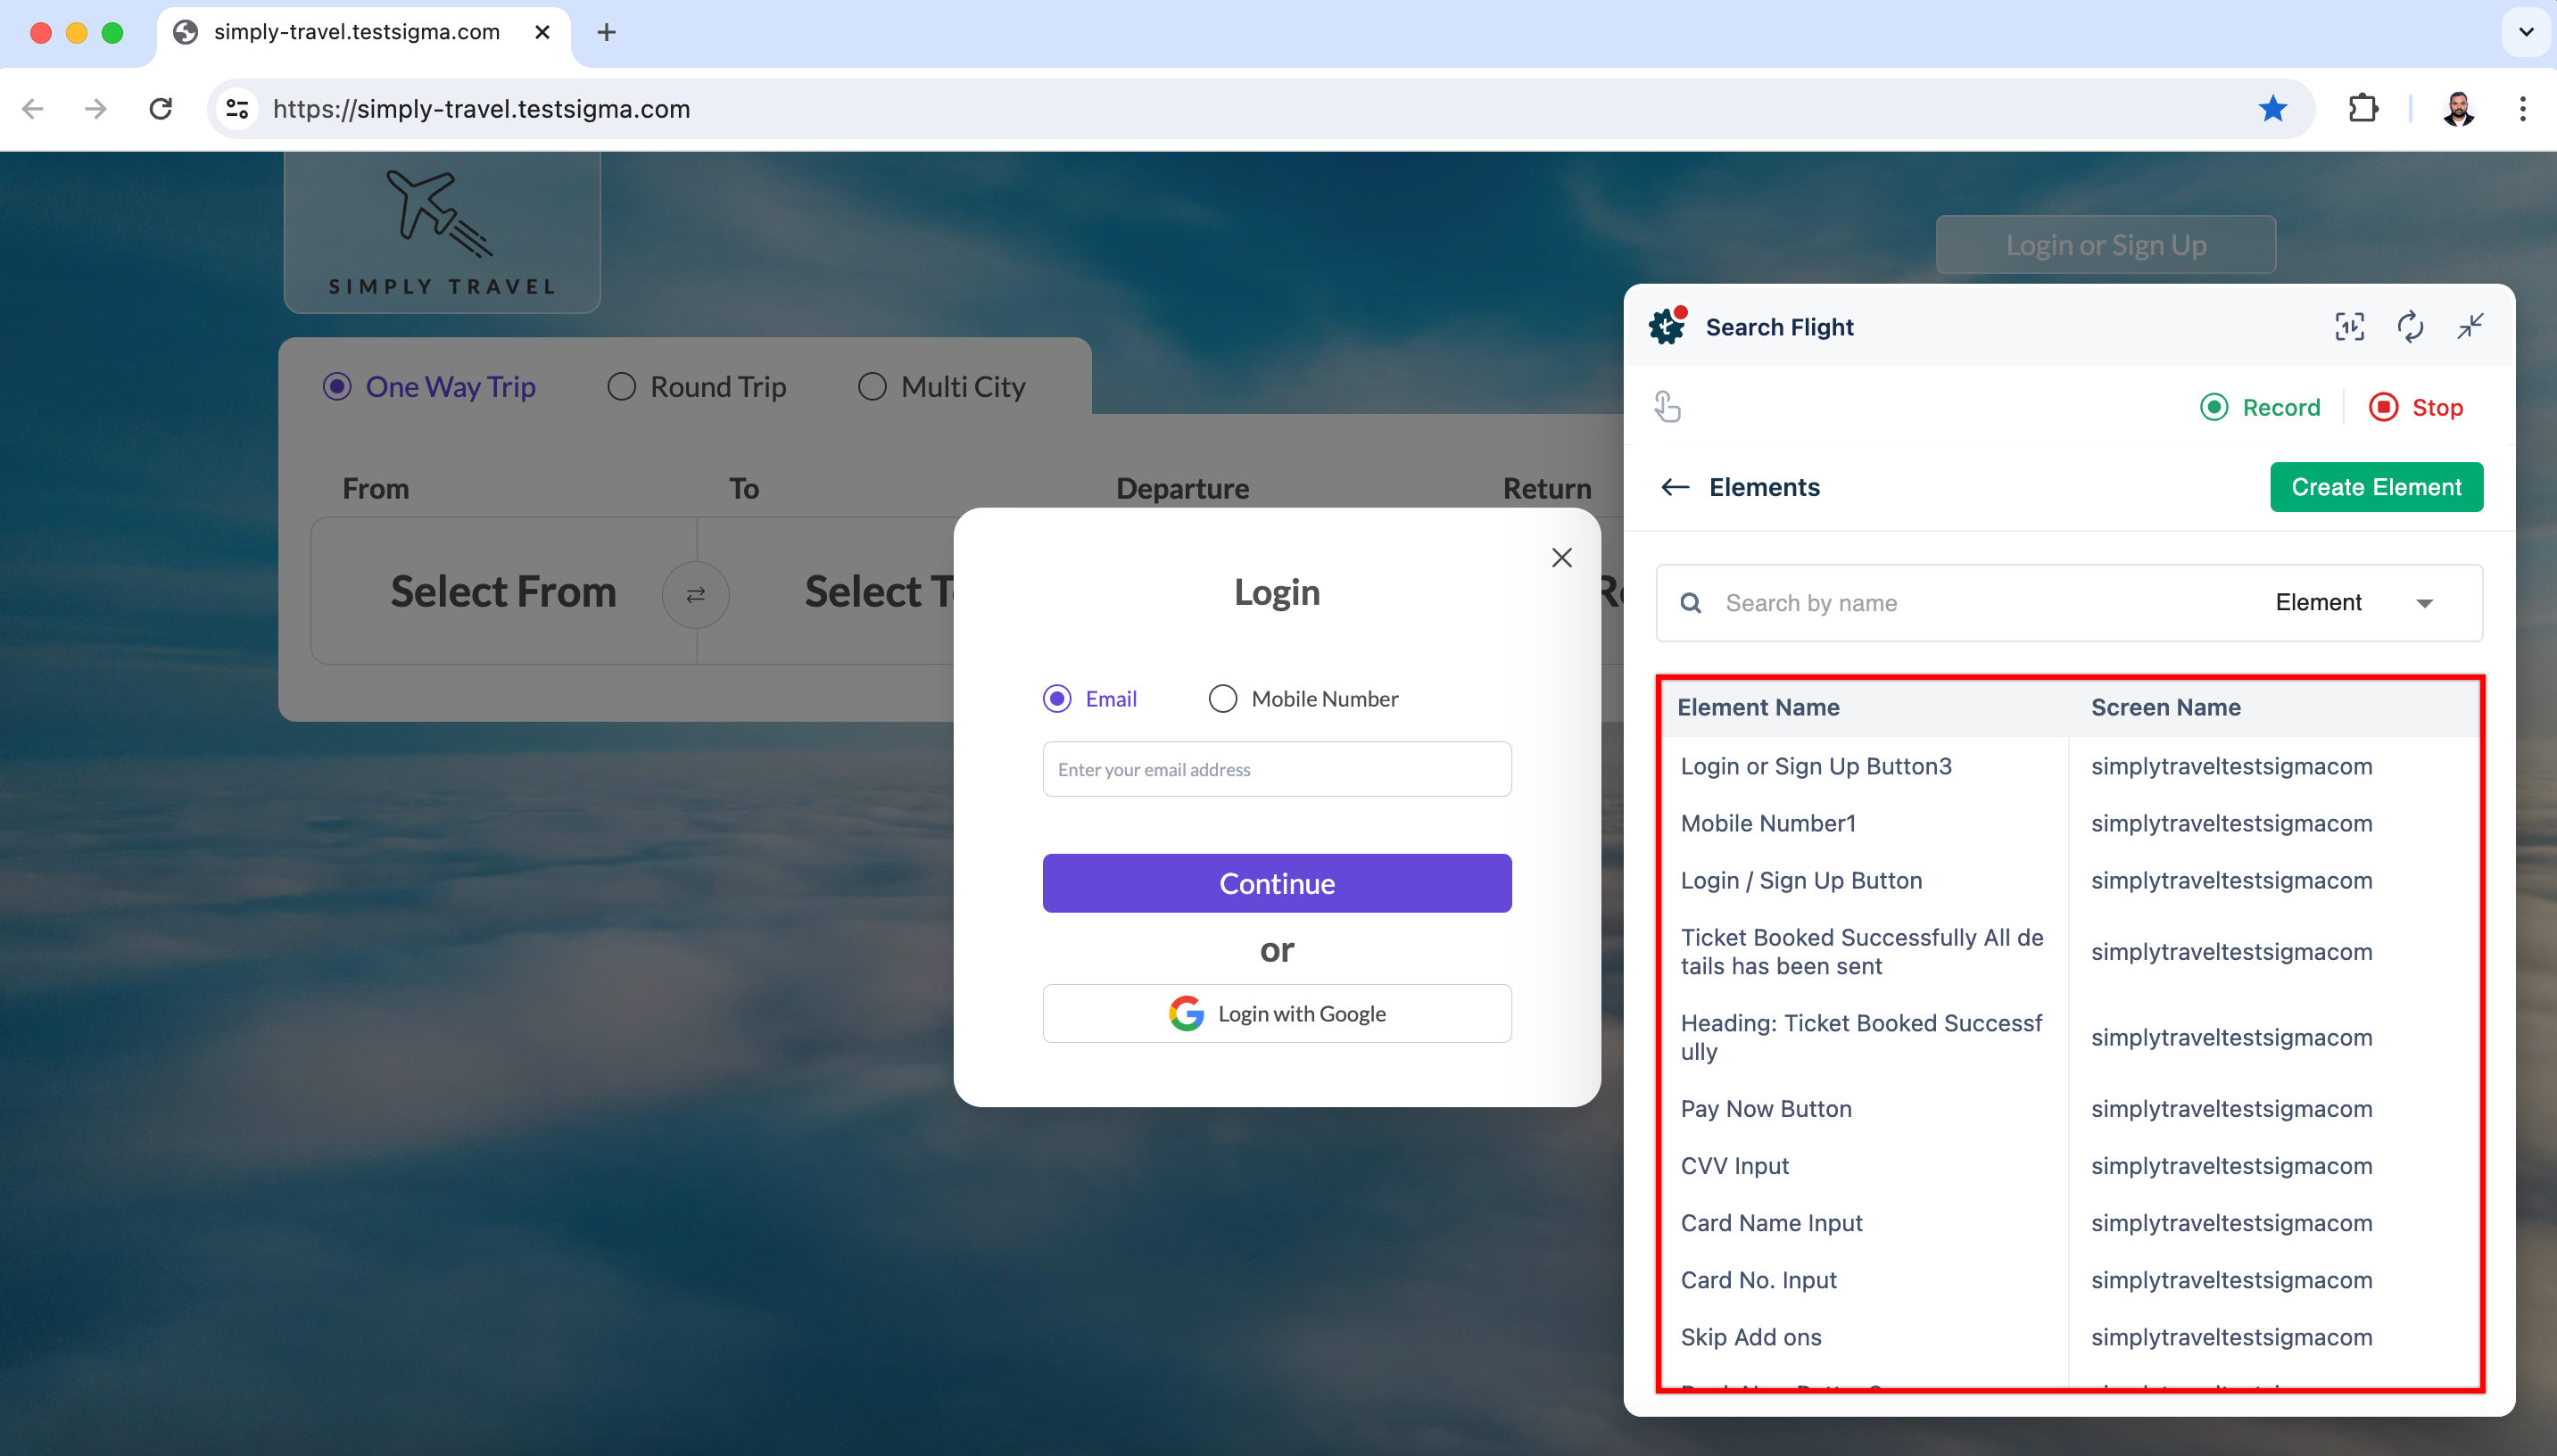
- On Elements overlay, select the element you want to reuse.
You can also reuse the element by following the same steps while creating a test case manually.
