- getting started
Introduction: Cloud
Frequently Asked Questions
Telemetry
Testsigma Terminology
Testsigma Sample Applications
Command Center
- collaboration
Invite Team Members
Assign Projects
Users & Role Management
Review Management [Test Cases]
Review Management [Elements]
Execution Controls
Features & Scenarios
Manage Test Cases
Test Case List Actions
Import Test Project Test Cases
Importing Postman Collections and Environments
Update Test Case Result in a Test Plan
Test Cases (Mobile Web App)
Custom Fields for Test Cases
Label Management
- Test Step Types
Type: Natural Language
Type: REST API
Type: Step Group
Type: For Loop
Type: While Loop
Type: Block
Type: If Condition
Nested Step Groups
Image Injection
Cross-application testing
- Test Data Types
Raw
Parameter
Runtime
Random
Data Generator
Phone Number
Mail Box
Environment
Concat Test Data
Create Test Data Profile
Update Test Data Profile
Updating Value in TDP
Import TDP
Bulk Deletion of a Test Data Profile
Create Test Data [Environment]
- data generators
Default Test Data Generators
Address Function Type
ChangeDataType Function Type
Company Function Type
DateFunctions Function Type
DomainFunctions Function Type
EmailFunctions Function Type
File Function Type
Friends Function Type
IdNumber Function Type
Internet Function Type
MailboxAliasFunctions Function Type
MailboxFunctions Function Type
Name Function Type
NameFunctions Function Type
Number Function Type
NumberFunctions Function Type
Phone Number Function Type
PhoneNumberFunctions Function Type
Random String Function Type
RandomText Function Type
StringFunctions Function Type
TestDataFromProfile Function Type
- Elements (Objects)
- Web Applications
Record Single Element
Record Multiple Elements
Create Elements
Supported Locator Types
Formulating Elements
Shadow DOM Elements
Verifying elements in Chrome DevTools
Handling iframe Elements?
Create Image Based Elements
Dynamic Locators using Parameter
Dynamic Locators using Runtime
Using Environment Test Data for Dynamic Locators
Locating Dynamic Elements in Date Widget
Freeze & Inspect Dynamic Elements (WebPage)
Locating Dynamic Elements in Tables
Import/Export Elements
AI Enabled Auto-Healing
Locator Precedence (Web Apps)
Verify Elements from Test Recorder
- test step recorder
Install Chrome Extension
Install Firefox Extension
Install Edge Extension
Exclude Attributes/Classes
- test plans
Add, Edit, Delete Test Machines
Add, Edit, Delete Test Suites
Schedule Test Plans
Run Test Suites In Parallel
Cross Browser Testing
Distributed Testing
Headless Testing
Test Lab Types
Disabling Test Cases in Test Plans
AfterTest Case
Post Plan Hook
AfterTest Suite
Email Configuration in Test Plan
Execute Partial Test Plans via API
- runs
Ad-hoc Run
Test Plan Executions
Dry Runs on Local Devices
Run Tests on Private Grid
Run Tests on Vendor Platforms
Run Test Plans on Local Devices
Test Locally Hosted Applications
Debug Test Case Failures
Parallel and Allowed queues
- live editor
Introduction: Testsigma Terminal
Installing Testsigma Terminal
Editing a Test Case Using Live Editor
FAQs on Testsigma Terminal
- Testsigma Agent
Pre-requisites
Setup: Windows, Mac, Linux
Setup: Android Local Devices
Setting up iOS Local Devices
Update Agent Manually
Update Drivers Manually
Delete Corrupted Agent
Delete Agents: Soft & Permanent
Triggering Tests on Local Devices
- troubleshooting
Agent - Startup and Registration Errors
Agent Logs
Upgrade Testsigma Agent Automatically
Specify Max Sessions for Agents
Testsigma Agent - FAQs
- continuous integration
Test Plan Details
REST API (Generic)
Jenkins
Azure DevOps
AWS DevOps
AWS Lambda
Circle CI
Bamboo CI
Travis CI
CodeShip CI
Shell Script(Generic)
Bitrise CI
GitHub CI/CD
Bitbucket CI/CD
GitLab CI/CD
Copado CI/CD
Gearset CI/CD
Codemagic CI/CD
- desired capabilities
Most Common Desired Capabilities
Browser Console Debug Logs
Geolocation Emulation
Bypass Unsafe Download Prompt
Geolocation for Chrome & Firefox
Custom User Profile in Chrome
Emulate Mobile Devices (Chrome)
Add Chrome Extension
Network Throttling
Network Logs
Biometric Authentication
Enable App Resigning in iOS
Enable Capturing Screenshots (Android & iOS)
Configure Android WebViews
Incognito/Private mode
Set Google Play Store Credentials
Basic Authentication [Safari]
- addons
What is an Addon?
Addons Community Marketplace
Install and Use Community Addons in Testsigma
Prerequisites for creating add-ons
Create an Addon
Update Addon
Addon Types
Create a Post Plan Hook add-on in Testsigma
Create OCR Text Extraction Addon
- configuration
API Keys
- Security(SSO)
Setting Up Google Single Sign-On(SSO) Login in Testsigma
Setting Up Okta Single Sign-On Integration with SAML Login in Testsigma
Setting up SAML-based SSO login for Testsigma in Azure
iOS Settings
Create WDA File
SMTP Configuration
Manage Access
- uploads
Upload Files
Upload Android and iOS Apps
How to generate mobile builds for Android/iOS applications?
- Testsigma REST APIs
Manage Environments
Elements
Test Plans
Upload Files
Get Project Wide Information
Upload & Update Test Data Profile
Fetch Test Results (All Levels)
Trigger Multiple Test Plans
Trigger Test Plans Remotely & Wait Until Completion
Run the Same Test Plan Multiple Times in Parallel
Schedule, Update & Delete a Test Plan Using API
Update Test Case Results Using API
Create and update values of Test Data Profile using REST API
Rerun Test Cases from Run Results using API
Salesforce Metadata Refresh Using API
- open source dev environment setup
macOS and IntelliJ Community Edition
macOS and IntelliJ Ultimate Edition
Windows and IntelliJ Ultimate Edition
Setup Dev Environment [Addons]
- NLPs
Retrieve Value in Text Element
Capture Dropdown Elements
Unable to Select Radiobutton
Unable to Click Checkbox
Clearing the Session or Cookies
UI Identifier NLP
Drag & Drop NLP
Uploading Files NLP
Use MySQL Addon in NLPs
- setup
Server Docker Deployment Errors
Secured Business Application Support
Troubleshooting Restricted Access to Testsigma
Why mobile device not displayed in Testsigma Mobile Test Recorder?
Unable to Create New Test Session
Agent Startup Failure Due to Used Ports
Tests Permanently Queued in Local Executions
Fix Testsigma Agent Registration Failures
Testsigma Agent Cleanup
Need of Apache Tomcat for Testsigma Agent
- web apps
URL not accessible
Test Queued for a Long Time
Issues with UI Identifiers
Missing Elements in Recorder
Collecting HAR File
Errors with Browser Session
Page Loading Issues
- mobile apps
Failed to Start Mobile Test Recorder
Troubleshooting “Failed to perform action Mobile Test Recorder” error
Why Test Execution State is Queued for a Long Time?
Why Mobile App Keeps Stopping After Successful Launch?
More pre-requisite settings
Why am I not able to start WDA Process on iPhone?
What are the Most Common causes for Click/Tap NLP Failure?
How to Find App Package & Activity in Android?
Cross-environment Compatible ID Locators (Android)
Why Accessibility IDs Over other Locators?
What are Common Android Issues & Proposed Solutions?
How to Find the App Bundle ID for iOS?
Developer Mode (iOS 16 & Above)
How to Handle iOS App Compatibility Issues?
How to Disable Play Protect for SMS Forwarder Installation?
How to Capture Network Logs in an Android Application?
- web apps
Why Install Chrome Extension?
Steps to Test Locally Hosted Apps
How to Turnoff Onboading Tutorial?
Non-Text Keys in Test Cases
Basic Authentication for Web
Why Bypass CAPTCHA?
Test Case Failures Due to Link Text Capture Issues
Why Is a Single Video for All Test Cases in a Test Plan Unavailable in Some Cases?
- accessibility testing
Accessibility Testing for Web Applications
Accessibility Testing for Android & iOS
- salesforce testing
Intro: Testsigma for Salesforce Testing
Creating a Connected App
Creating a Salesforce Project
Test Salesforce Connection Before Authorization
Creating Metadata Connections
Adding User Connections
Build Test Cases: Manual+Live
Salesforce Element Repositories
Intro: Testsigma Special NLPs
SOQL as Test Step
Query Builder for Salesforce Testing
Automating Listview Table NLPs
Error Handling On Metadata Refresh
Introduction: SAP Automation
Selective Element Recorder
Batch Element Recorder
Creating Test Cases for SAP Automation
List of Actions
- desktop automation
Introduction: Desktop Automation
Create Projects and Applications
Selective Element Recorder
Batch Element Recorder
Creating Test Cases for Desktop Automation
Intro: Windows Automation (Lite)
Windows (Lite) Project & Application
Element Learning with Test Recorder
Test Cases for Windows (Lite)
- GenAI Capabilities
Testsigma Copilot
Generate TDP Using Copilot
Generate Tests from User Actions
Generate Tests from Requirements (Jira)
Generate API Test Cases (Swagger)
Generate Tests from Figma Designs
Testsigma Copilot for Mobile Apps
Agentic Test Generation with GitHub
Intro: Windows Desktop Automation
Windows (Adv) Project & Application
Object Learning (Using UFT One)
Converting TSR Files to TSRx
Importing/Updating TSRx Files
Test Cases for Windows Automation
Error Handling Post TSRx File Update
- testsigma tunnel
Intro: Testsigma Tunnel
Components & Requirements
Setup and Installation: Mac
Setup and Installation: Windows
Setup and Installation: Linux
Setup and Installation: Docker
Using Testsigma Tunnel
- open source docs
Intro: Testsigma Community Edition
Testsigma Community Cloud
Testsigma Docker Setup
Reset Password
Setting Up Testsigma Agent Locally
With Testsigma Agent you can run tests on local machines/devices in addition to Testsigma Cloud. This article discusses how to set up the Testsigma agent on your local machine.
Download Formats Available
The Testsigma Agents are available in the following forms:
- ZIP files
- Executable files
- DMG files
- Docker image
Steps to Download Testsigma Agent as a ZIP File
- Navigate to Agents and click Download Agent.
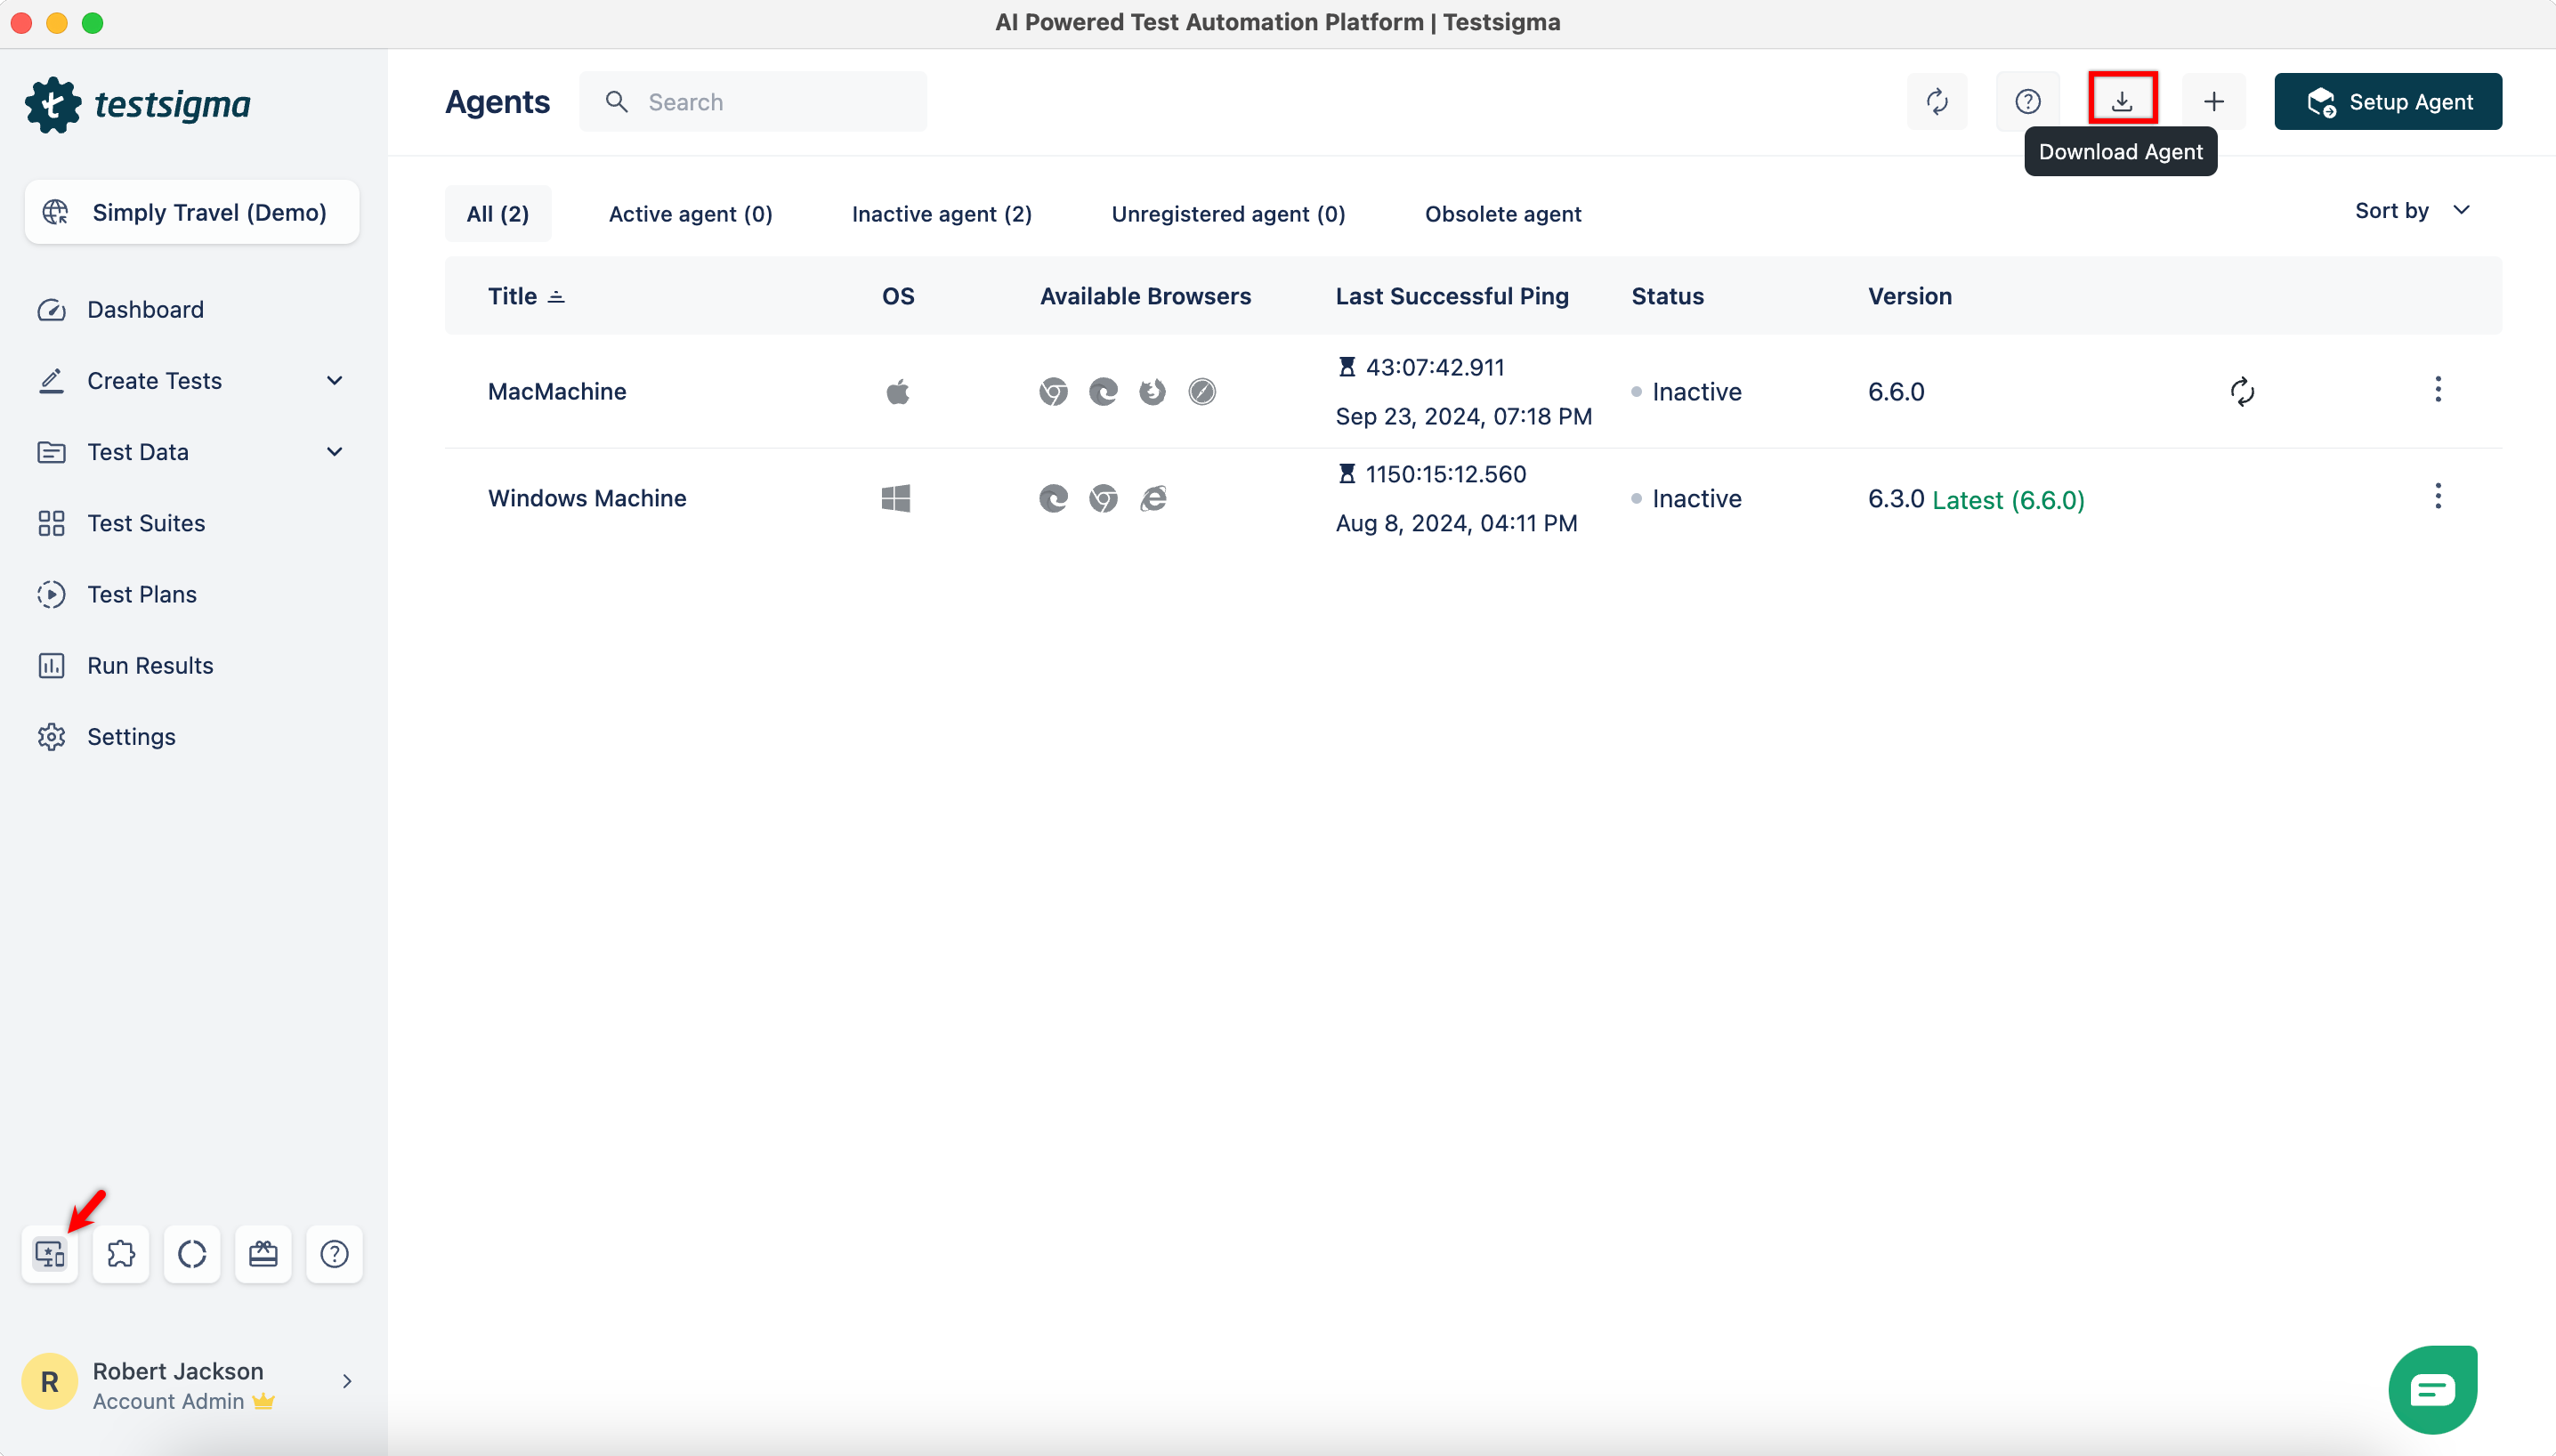
- From the dropdown that appears, download the ZIP file as per your machine.
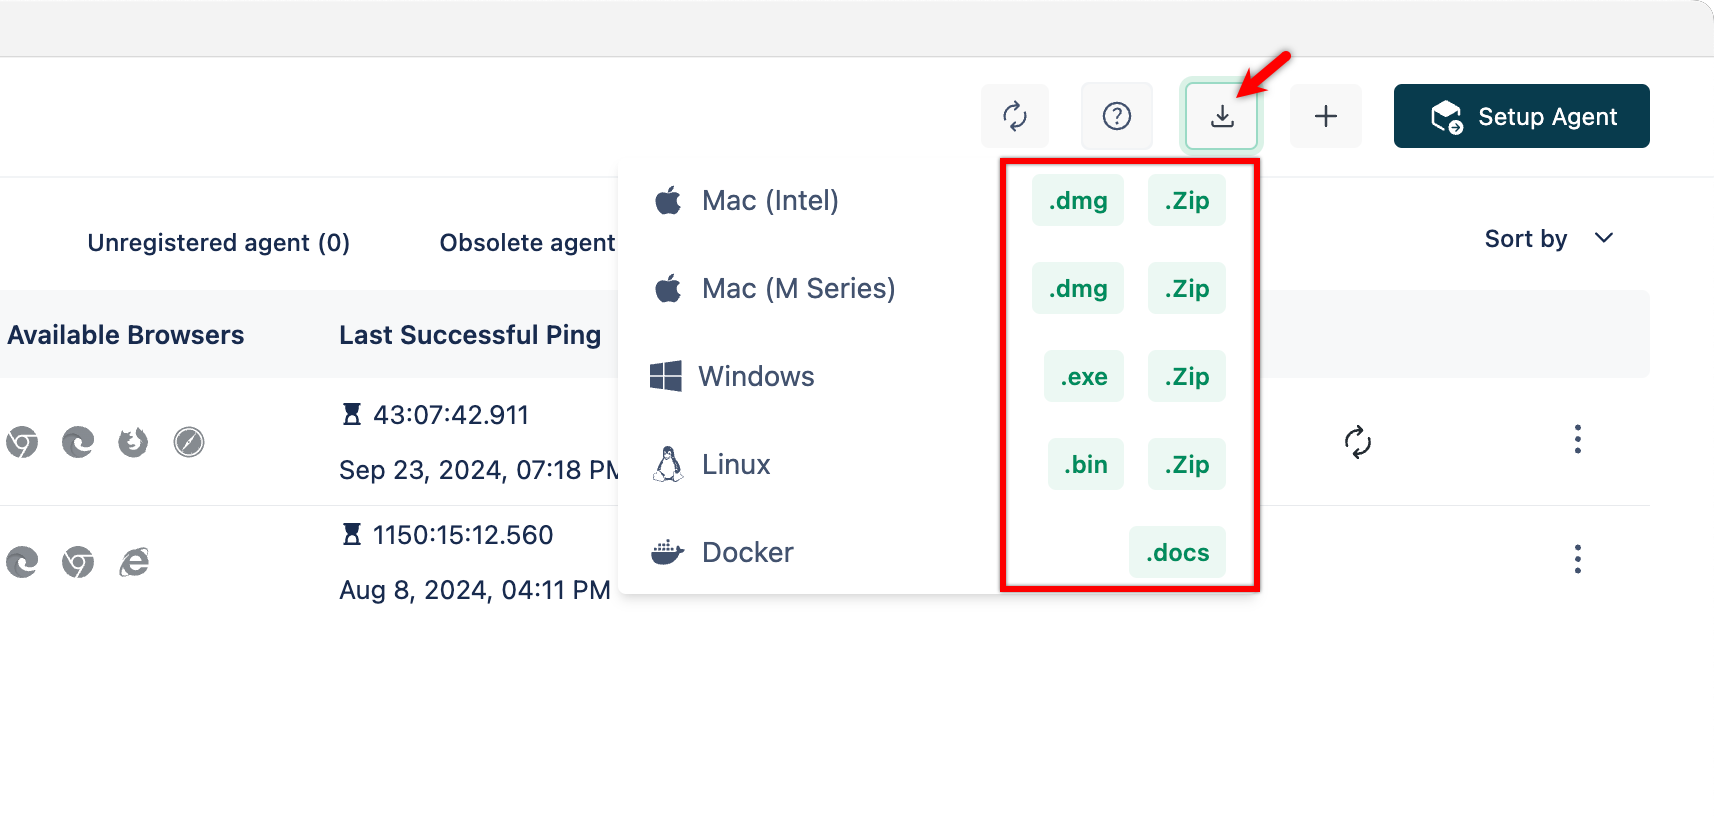
-
After downloading the agent ZIP file, extract the Testsigma Agent ZIP file to a location of your choice. Some suggested locations to place the Testsigma agent folder are mentioned in the table below:
Operating System Preferred Agent location Windows C:\Users<your_username>\ Mac /Users/<your_username>/ Linux /Users/<your_username>/ Replace the <your_username> part with your account username.
The home directory is recommended so as to avoid hassles of setting file permissions and ownership and also to avoid file corruption due to syncing with iCloud or Google Drive.
You can either start the Testsigma agent server as a process via the command line or terminal when needed. Or, you can run the Testsigma agent server as a server. For more information, refer to the below sections to see how to start the Testsigma Agent as a process or as a service.
Steps to Download Testsigma Agent as Executable File
- Navigate to Agents and click Download Agent.
-
From the dropdown that appears, select the executable file supported by your machine.
- For Windows, select exe,
- For mac, select dmg,
- For Linux, select bin to download the latest version of Testsigma Agent.
- Double click on the downloaded file.
- Choose the path where you would like to install the agent.
- Let the installer run till completion.
Once the installation is complete, you can either run the Testsigma Agent server as a process via the command line/terminal when needed.
Start the Testsigma Agent Server as a Process
For Windows
- Navigate to the Testsigma Agent installation folder and double click the start.bat or run start.bat in the command line file to start the Testsigma Agent.
- Wait for a few minutes for the Testsigma Agent to start up.
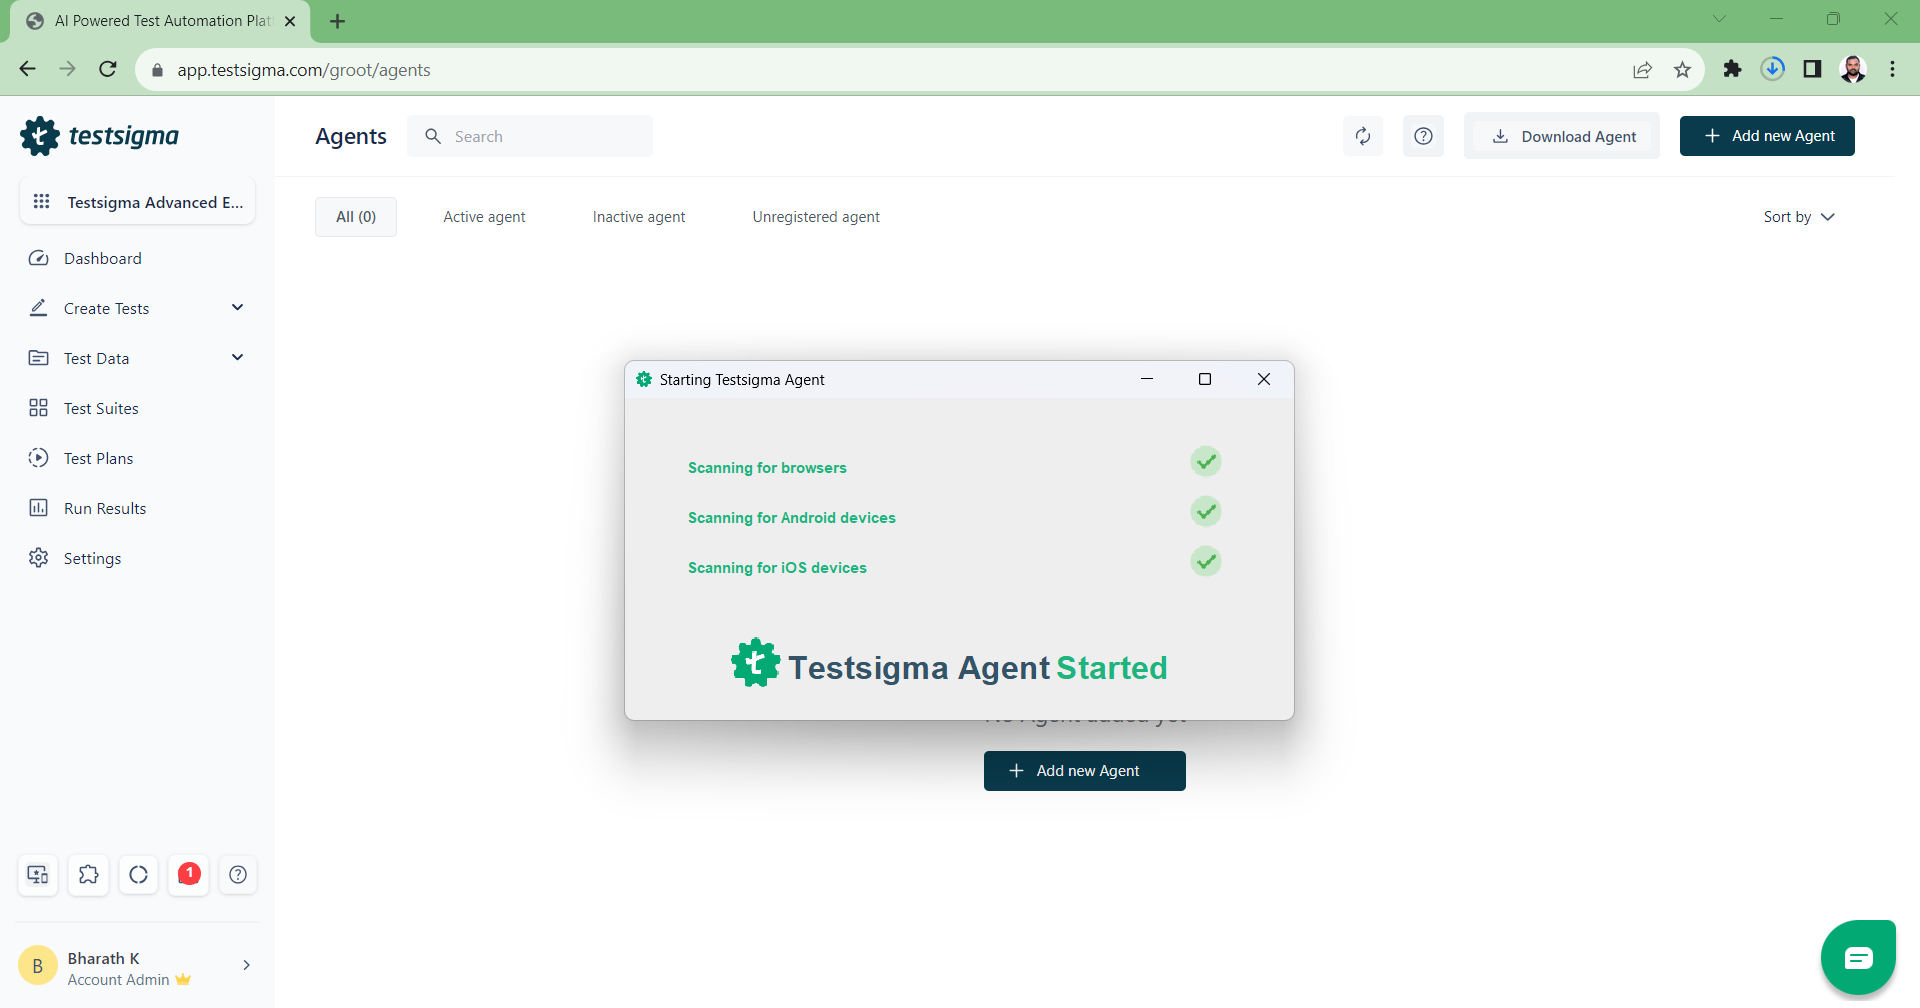
- After starting up you will be directed to the agent registration page.
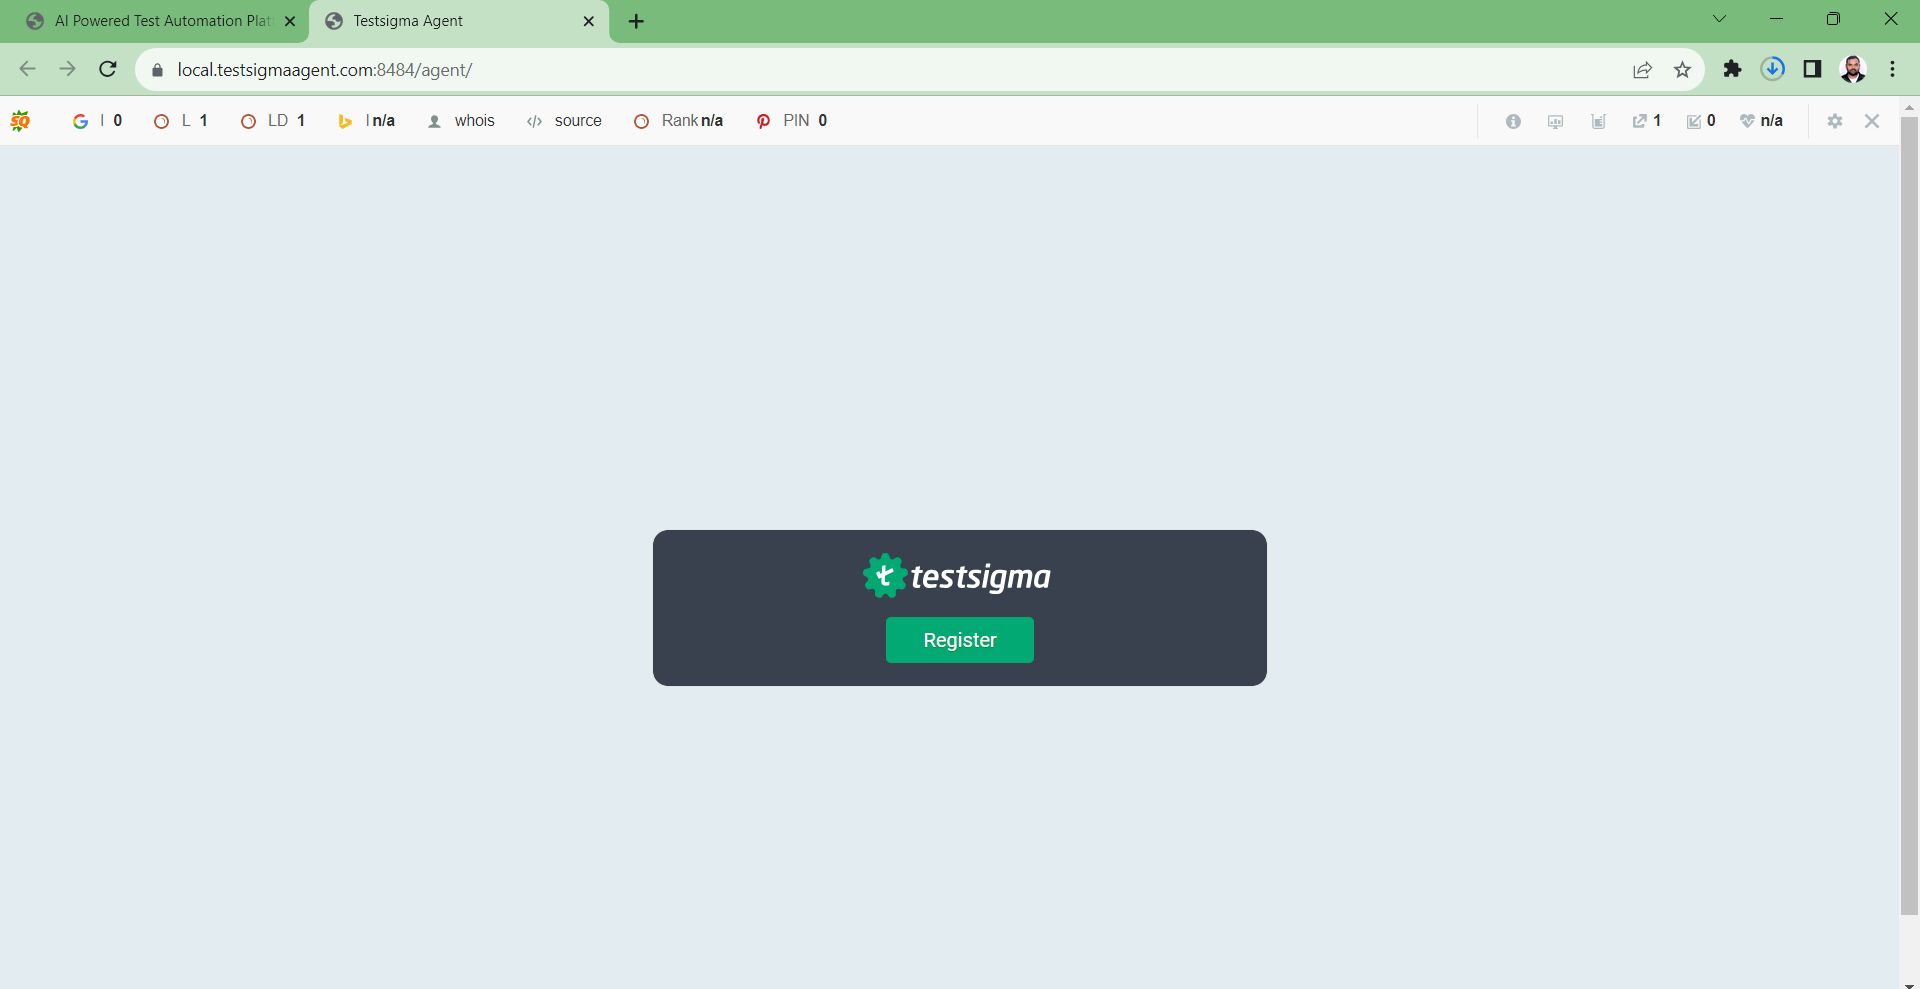
For Mac/Linux
- Navigate to the Testsigma Agent installation folder and drag start.sh to a new terminal window and click on Return.

- Wait for a few minutes for the Testsigma Agent to start up.
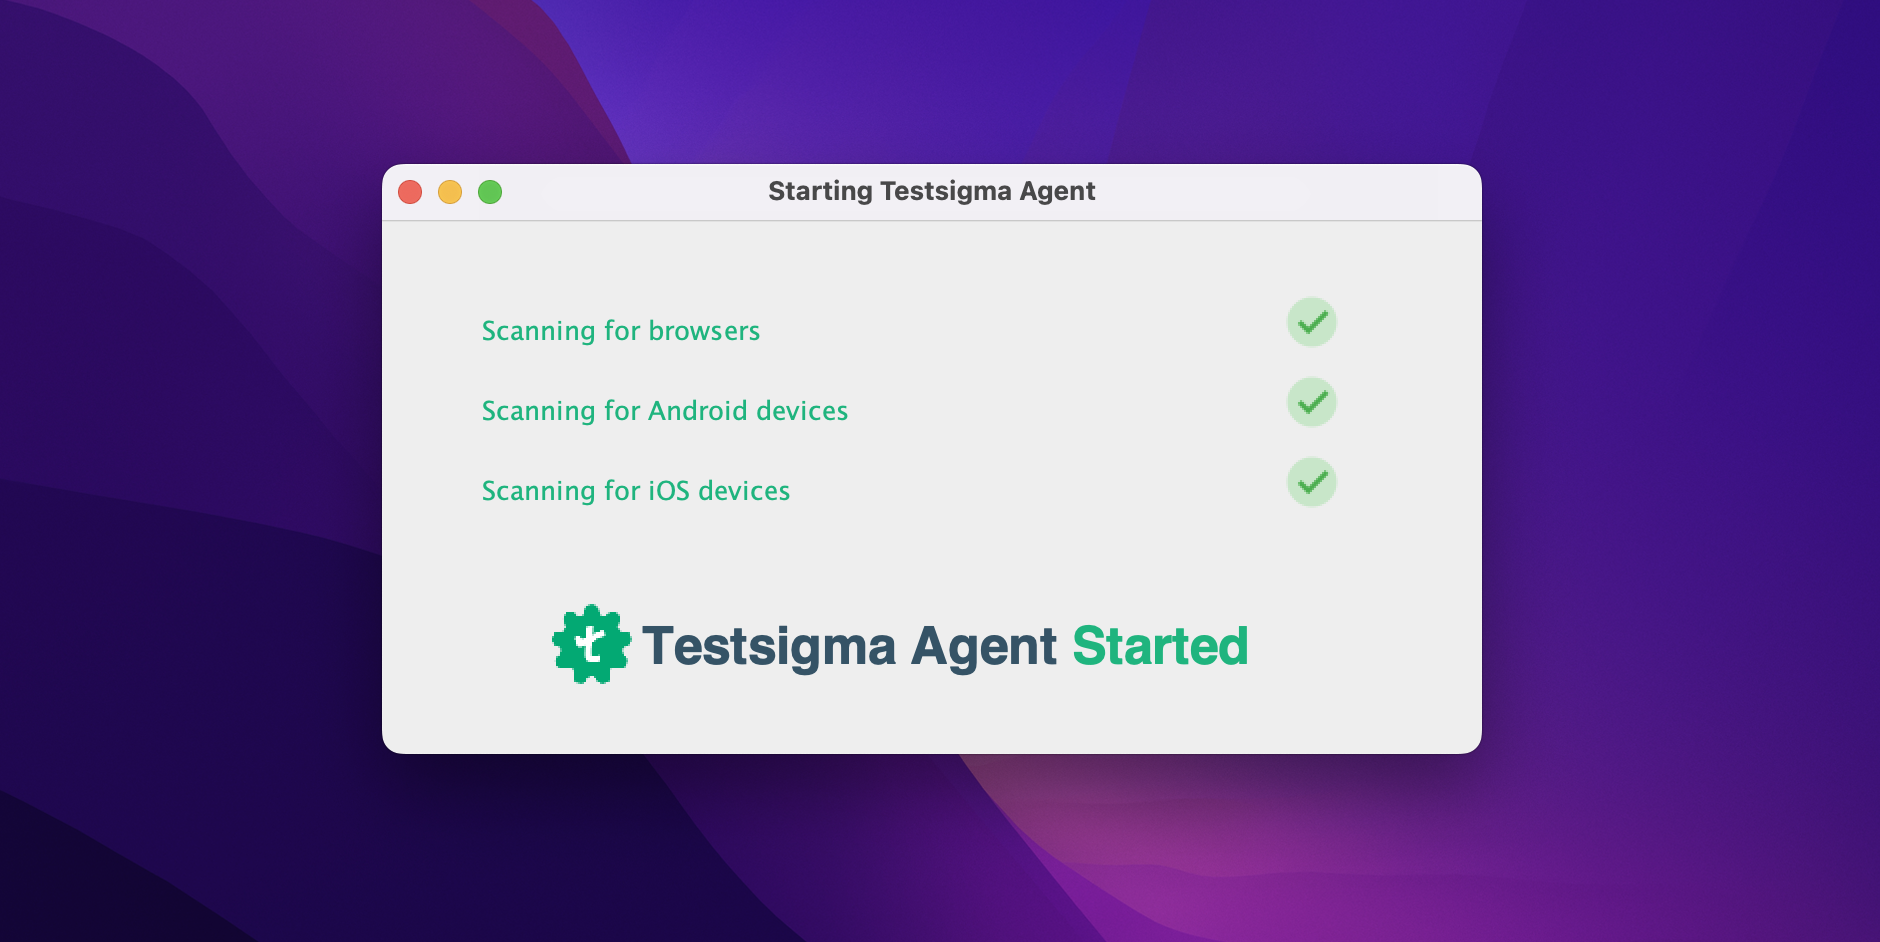
- After starting up you will be directed to the agent registration page.

For more information on how to register Testsigma Agent, see Register the Testsigma Agent.
Start the Testsigma Agent Server as a Service
- For Windows: Go to the command line. For Mac/Linux: Go to the terminal.
- Navigate to the Testsigma Agent installation folder.
- Inside the Testsigma Agent installation folder, navigate to Wrapper > Bin.
- For Mac/Linux, if you want to install the agent as a service, use the command TestsigmaAgent start.
- For Windows, if you want to install the agent as a service, use the command TestsigmaAgent install.
At present, the option to install Testsigma Agent to start automatically when system boots is only supported for windows.
- To stop the service, run the command - TestsigmaAgent stop from the same location.
Commands that work with TestsigmaAgent:
console Launch in the current console.
start Start in the background as a daemon process.
stop Stop if running as a daemon or in another console.
restart Stop if running and then start.
condrestart Restart only if already running.
status Query the current status.
install Install to start automatically when system boots.
installstart Install and start running as a daemon process.
remove Uninstall.
dump Request a Java thread dump if running.Register the Testsigma Agent
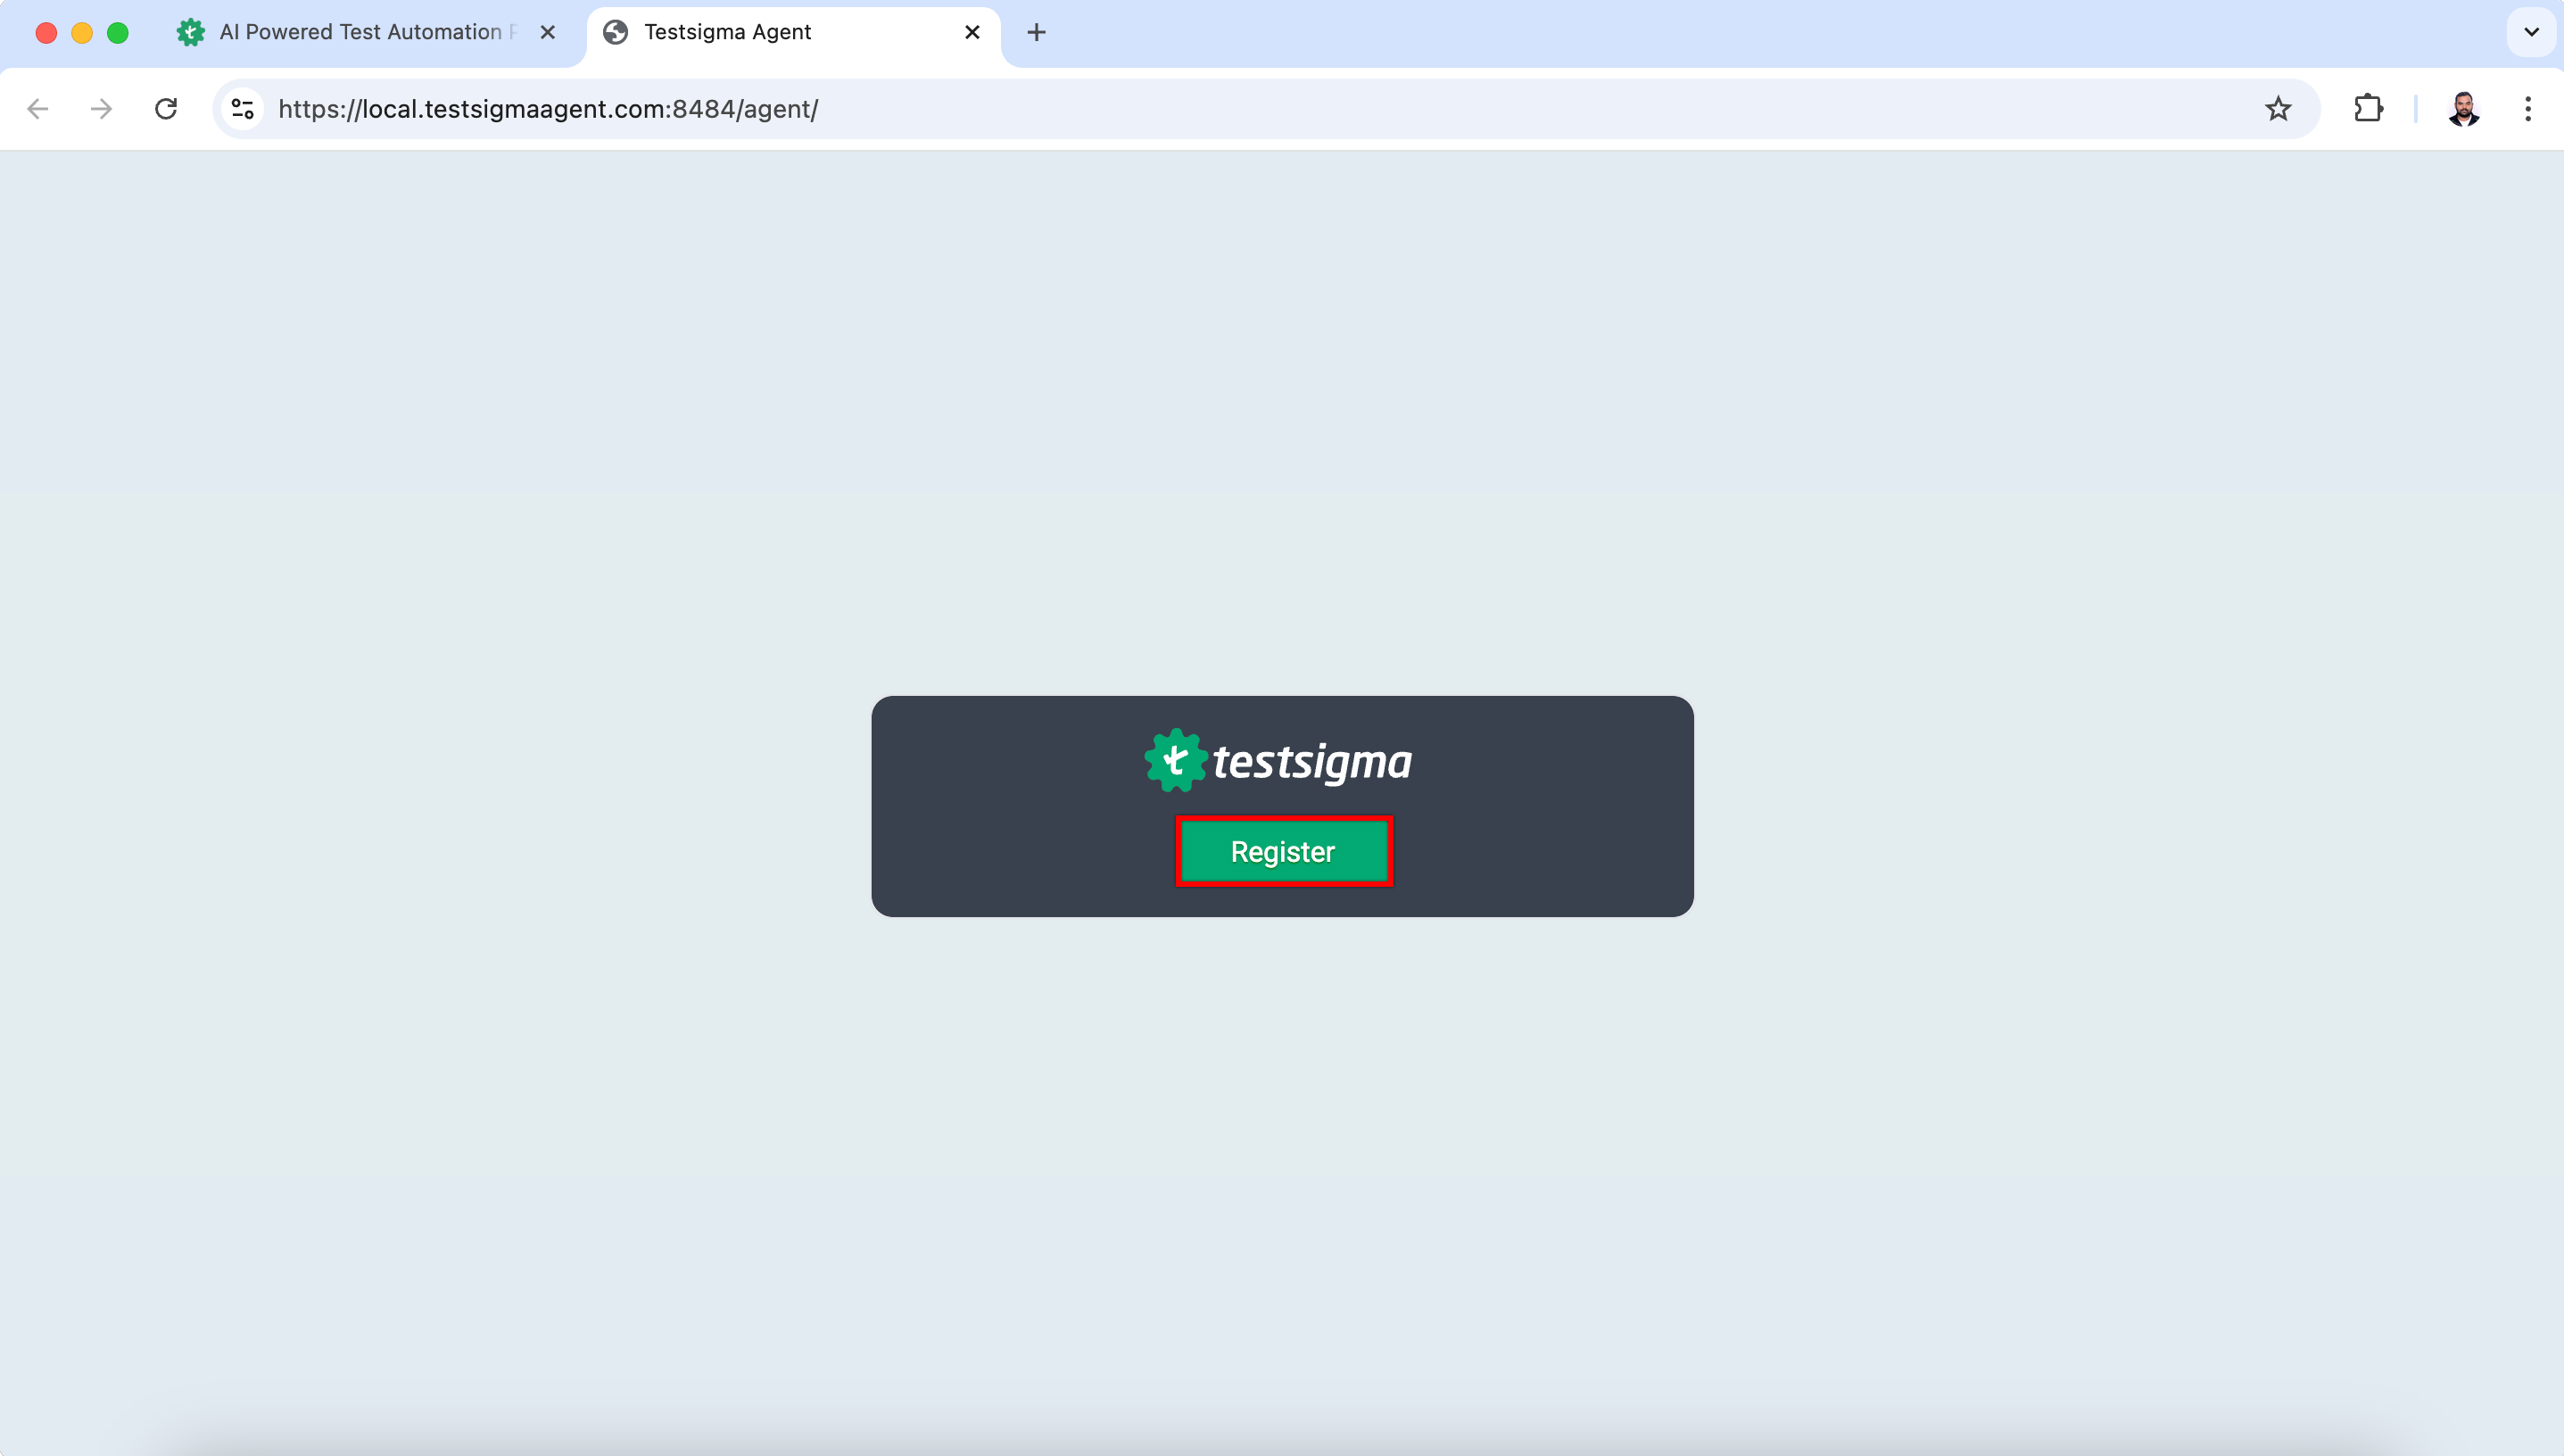
- Once your Testsigma agent is up and running, you will be directed to the Agent Registration page. Click Register to start the registration process.
-
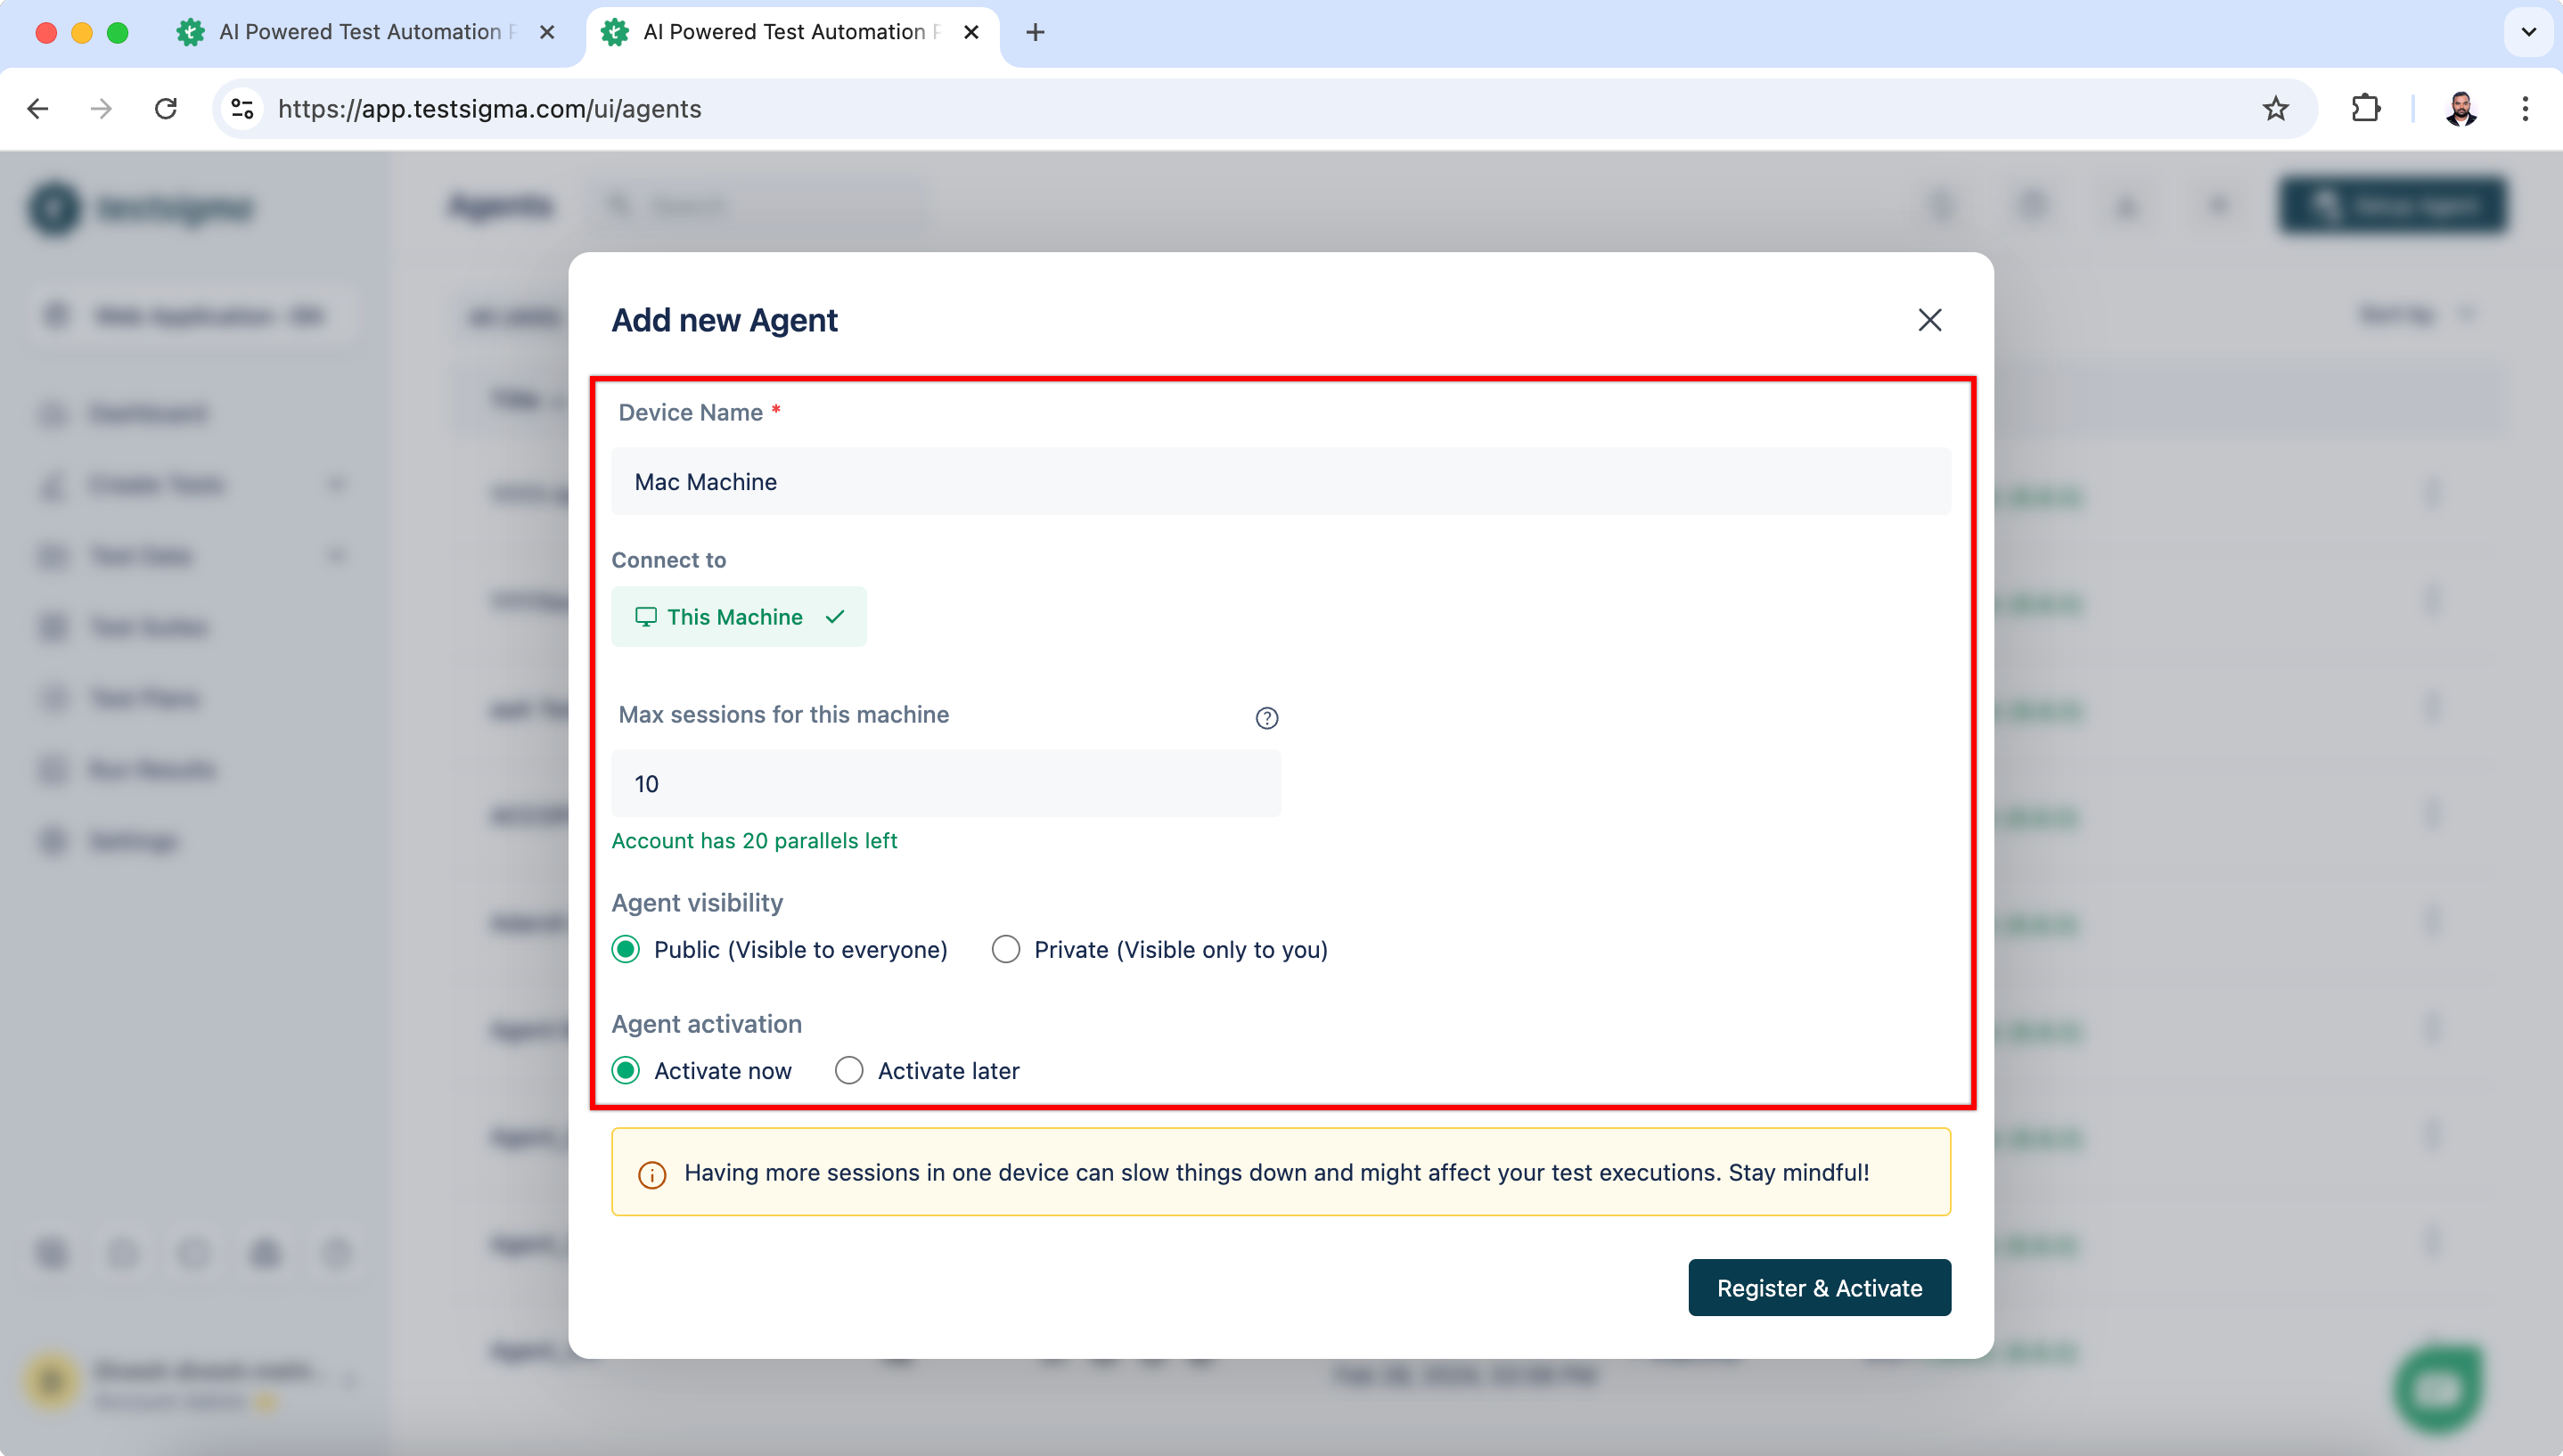
On the Add new Agent dialog,
- Enter a Name for your machine.
- Specify the maximum sessions in the textbox provided.
- To set your agent’s visibility, select either the Public or Private radio button.
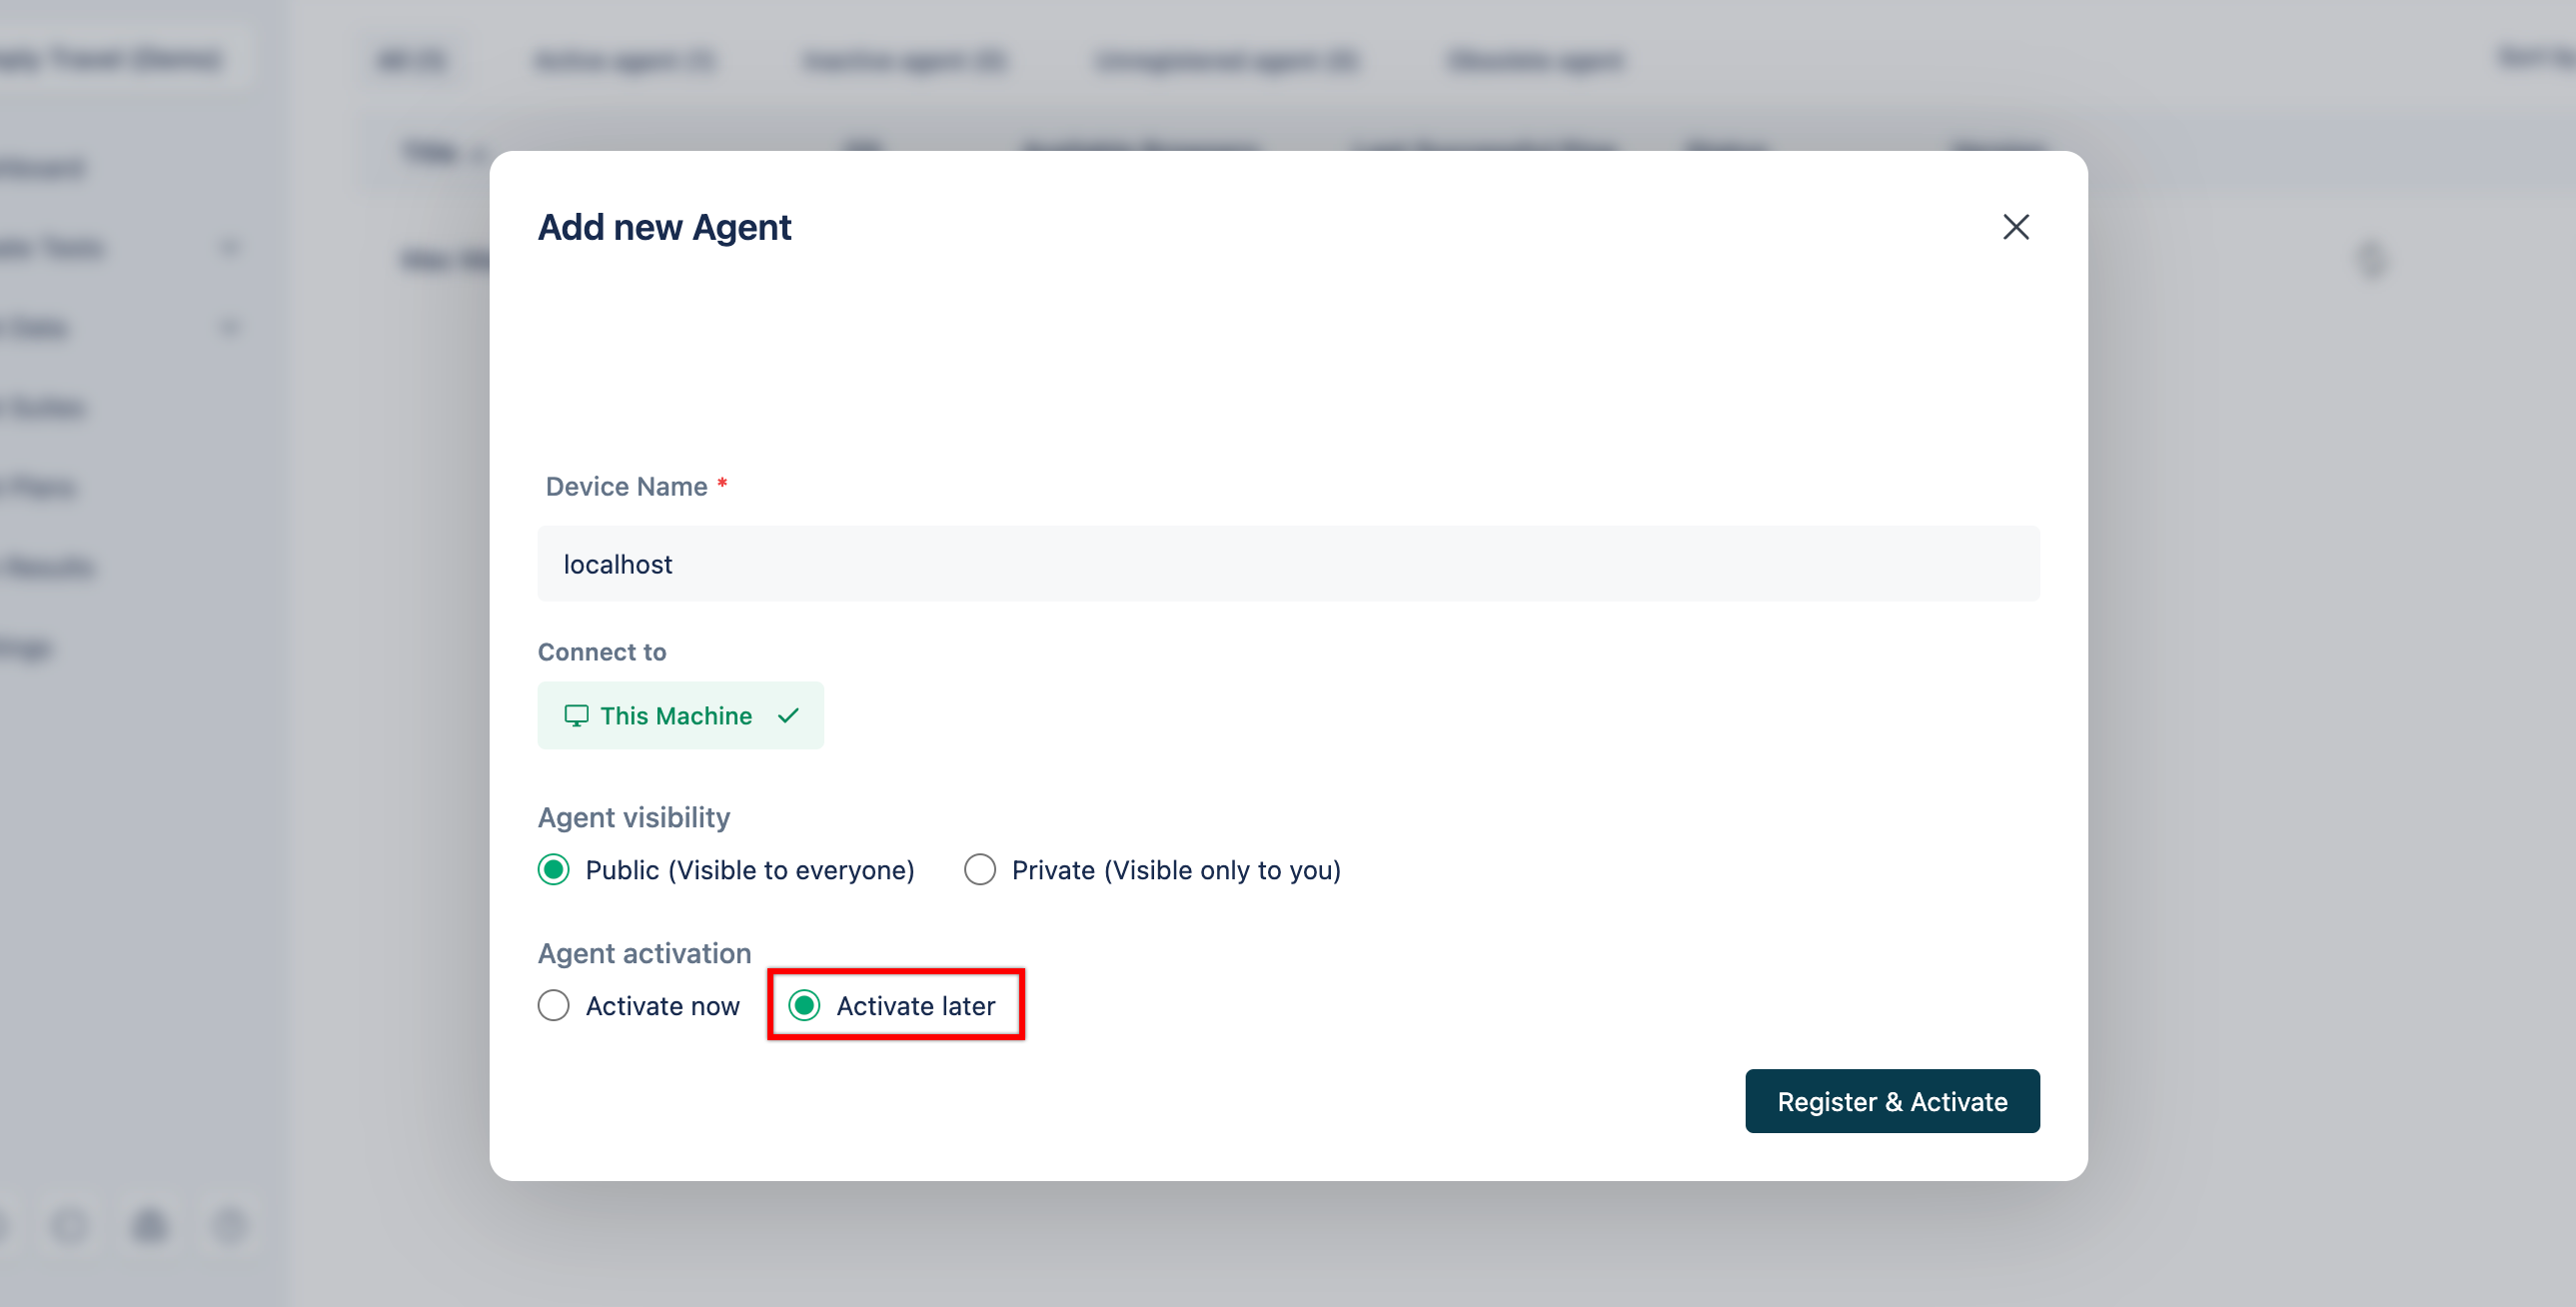
- For agent activation, choose either Activate now or Activate later.
- Click on Register & Activate
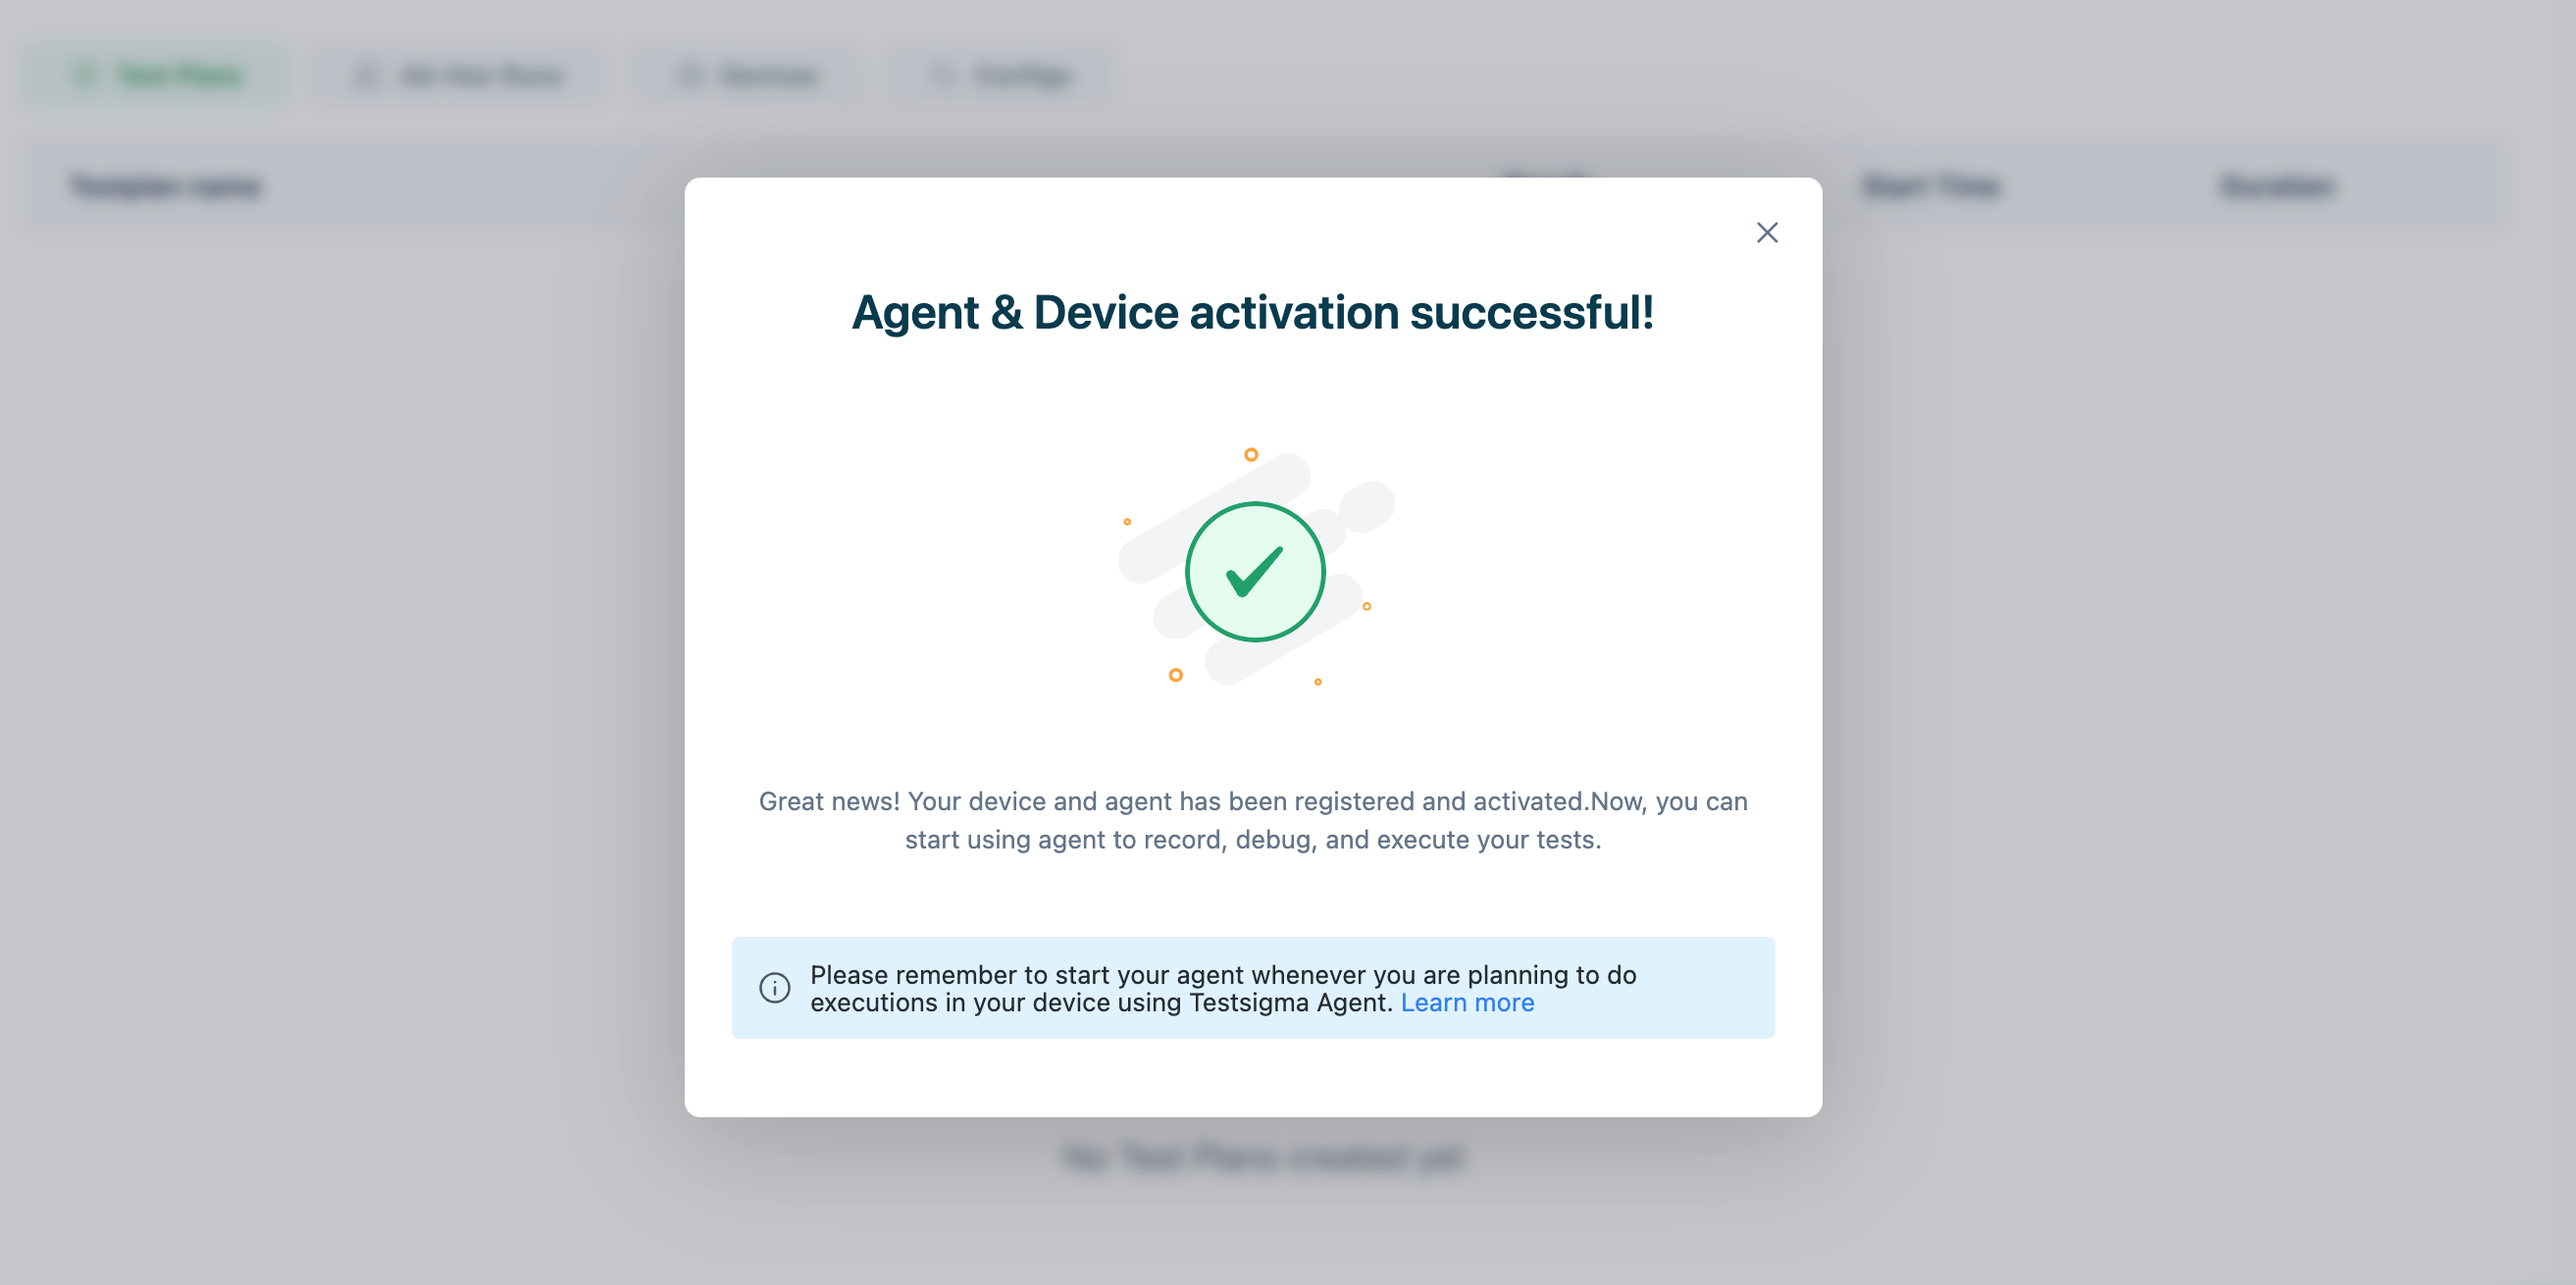
- Once the agent registration is successful, the dialog will display a success message..
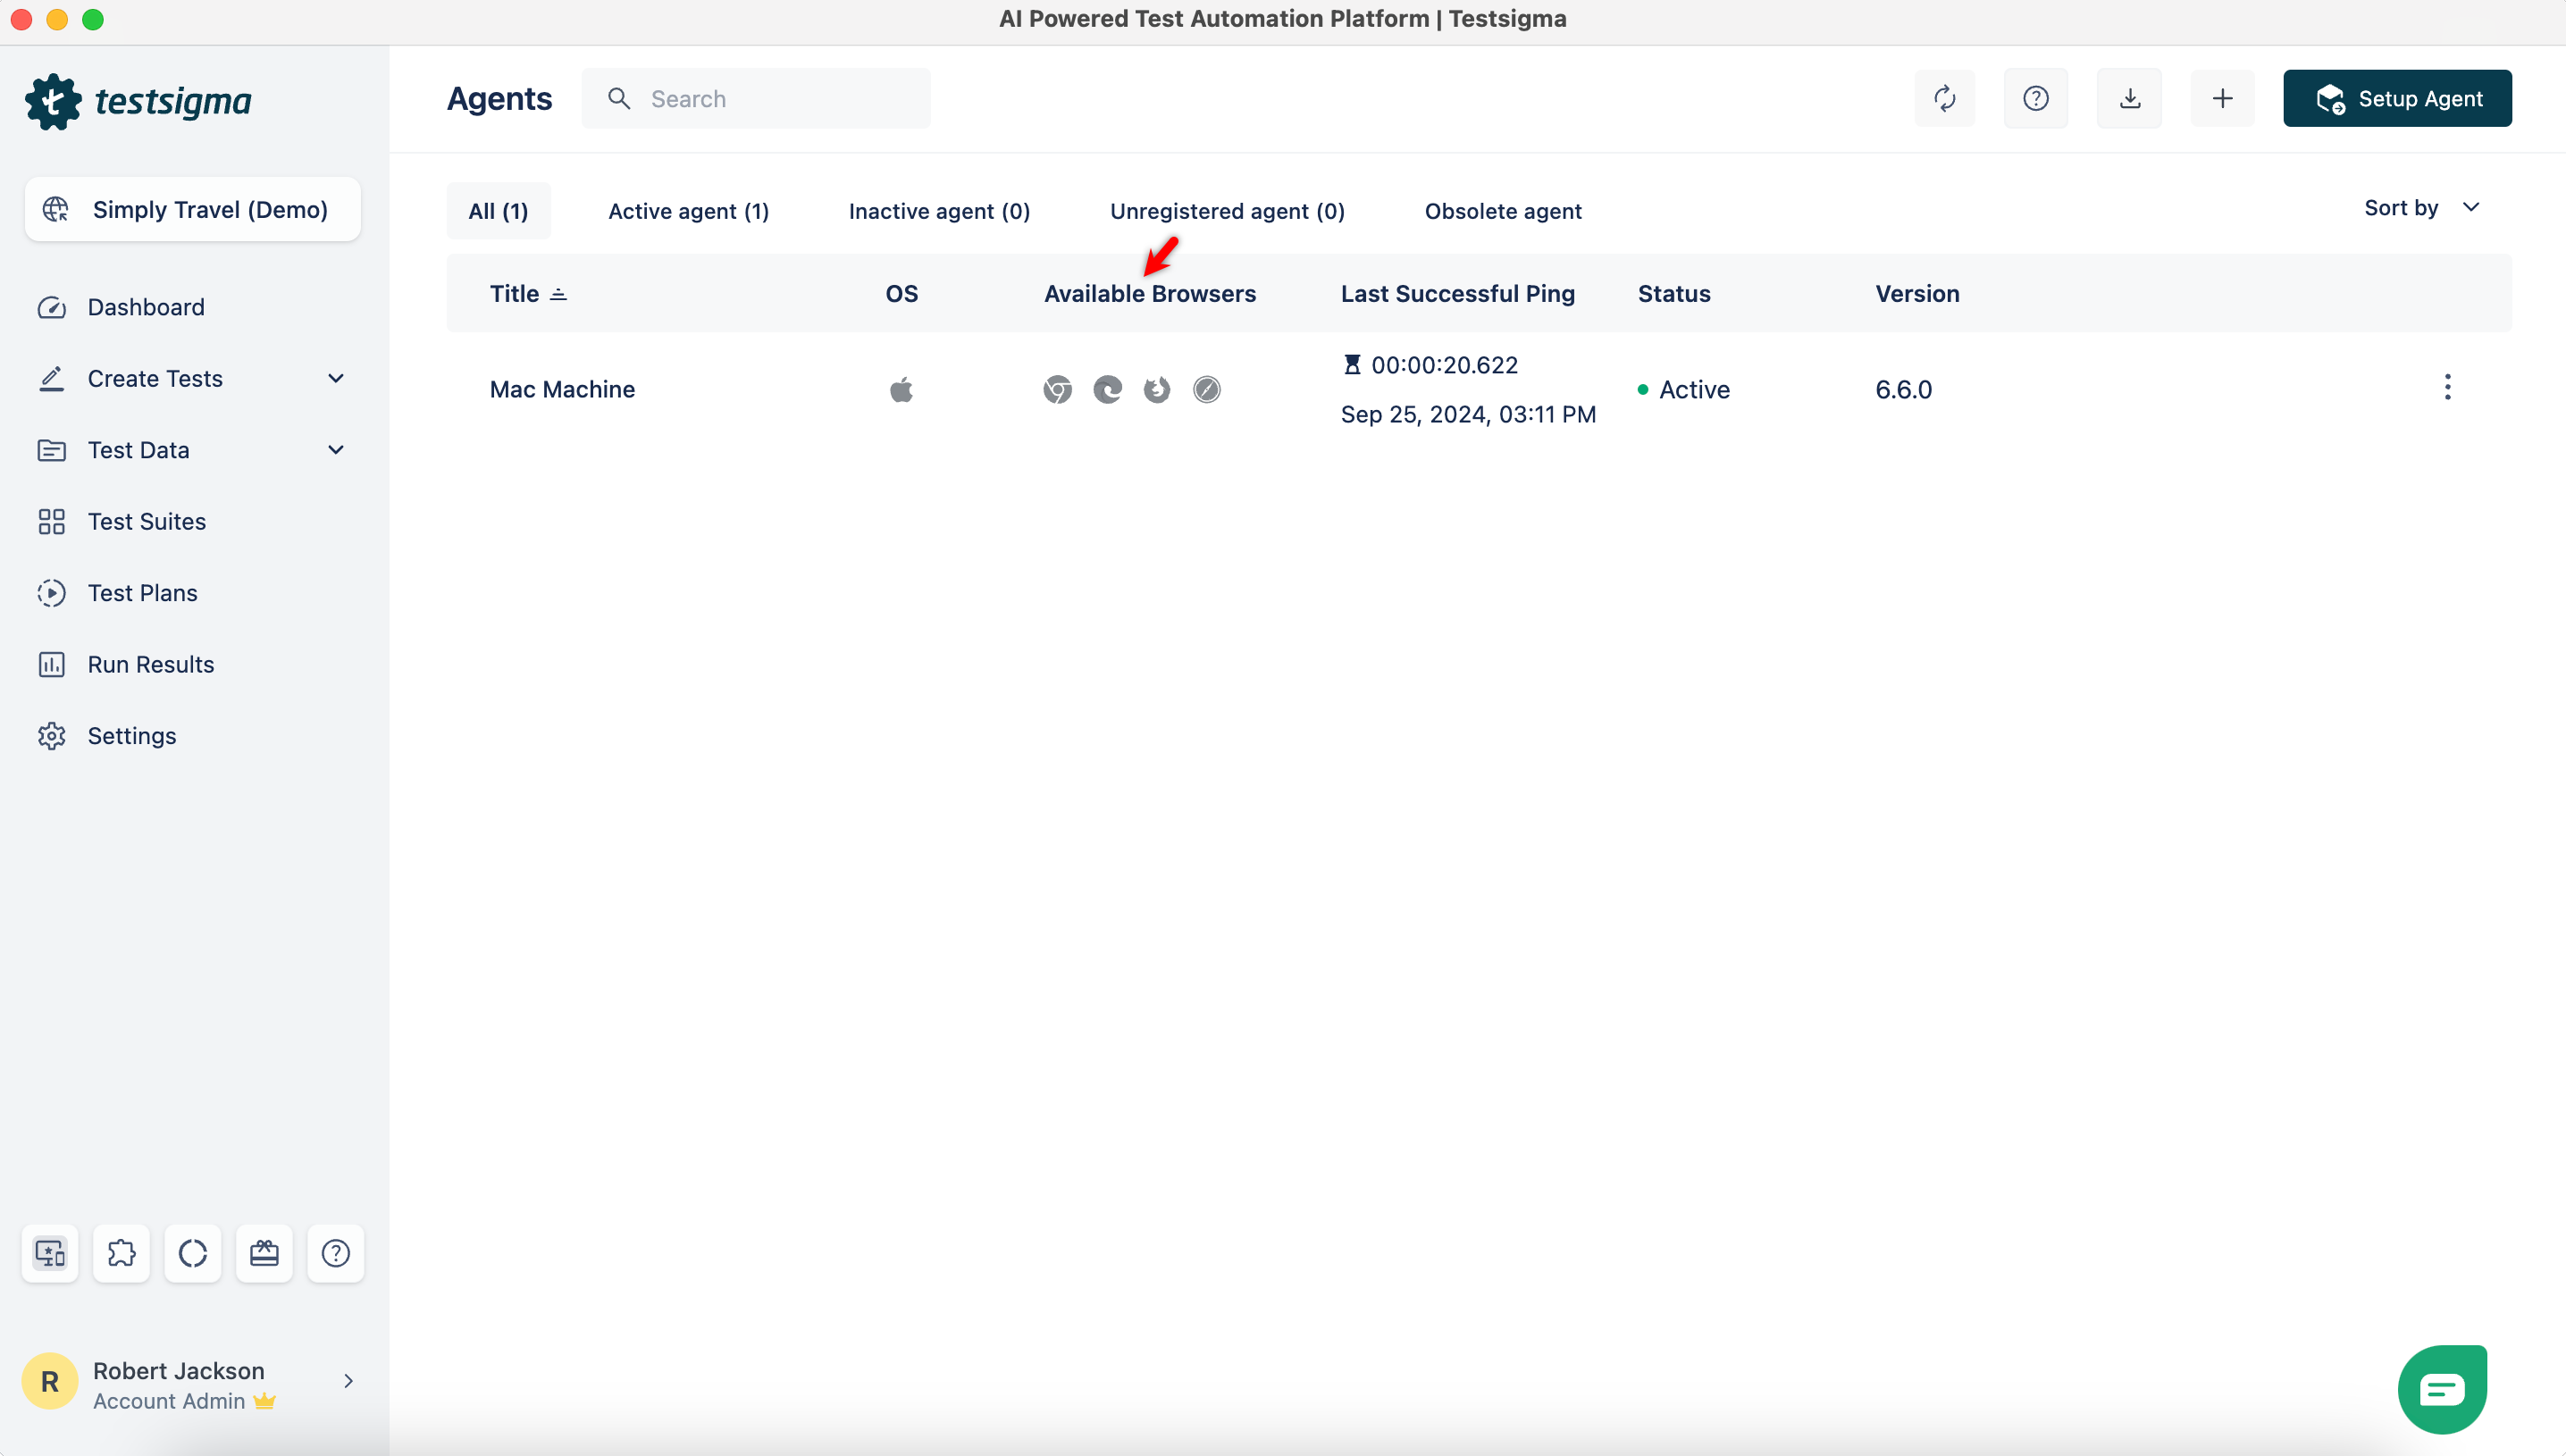
- On the Agents page, the agent you registered will be displayed along with all the available browsers on that agent machine.
- There may be instances when you want to add the Testsigma agents to your Testsigma account but want to activate them later. Make sure to select the Activate Later radio button on the Add new Agent dialog.
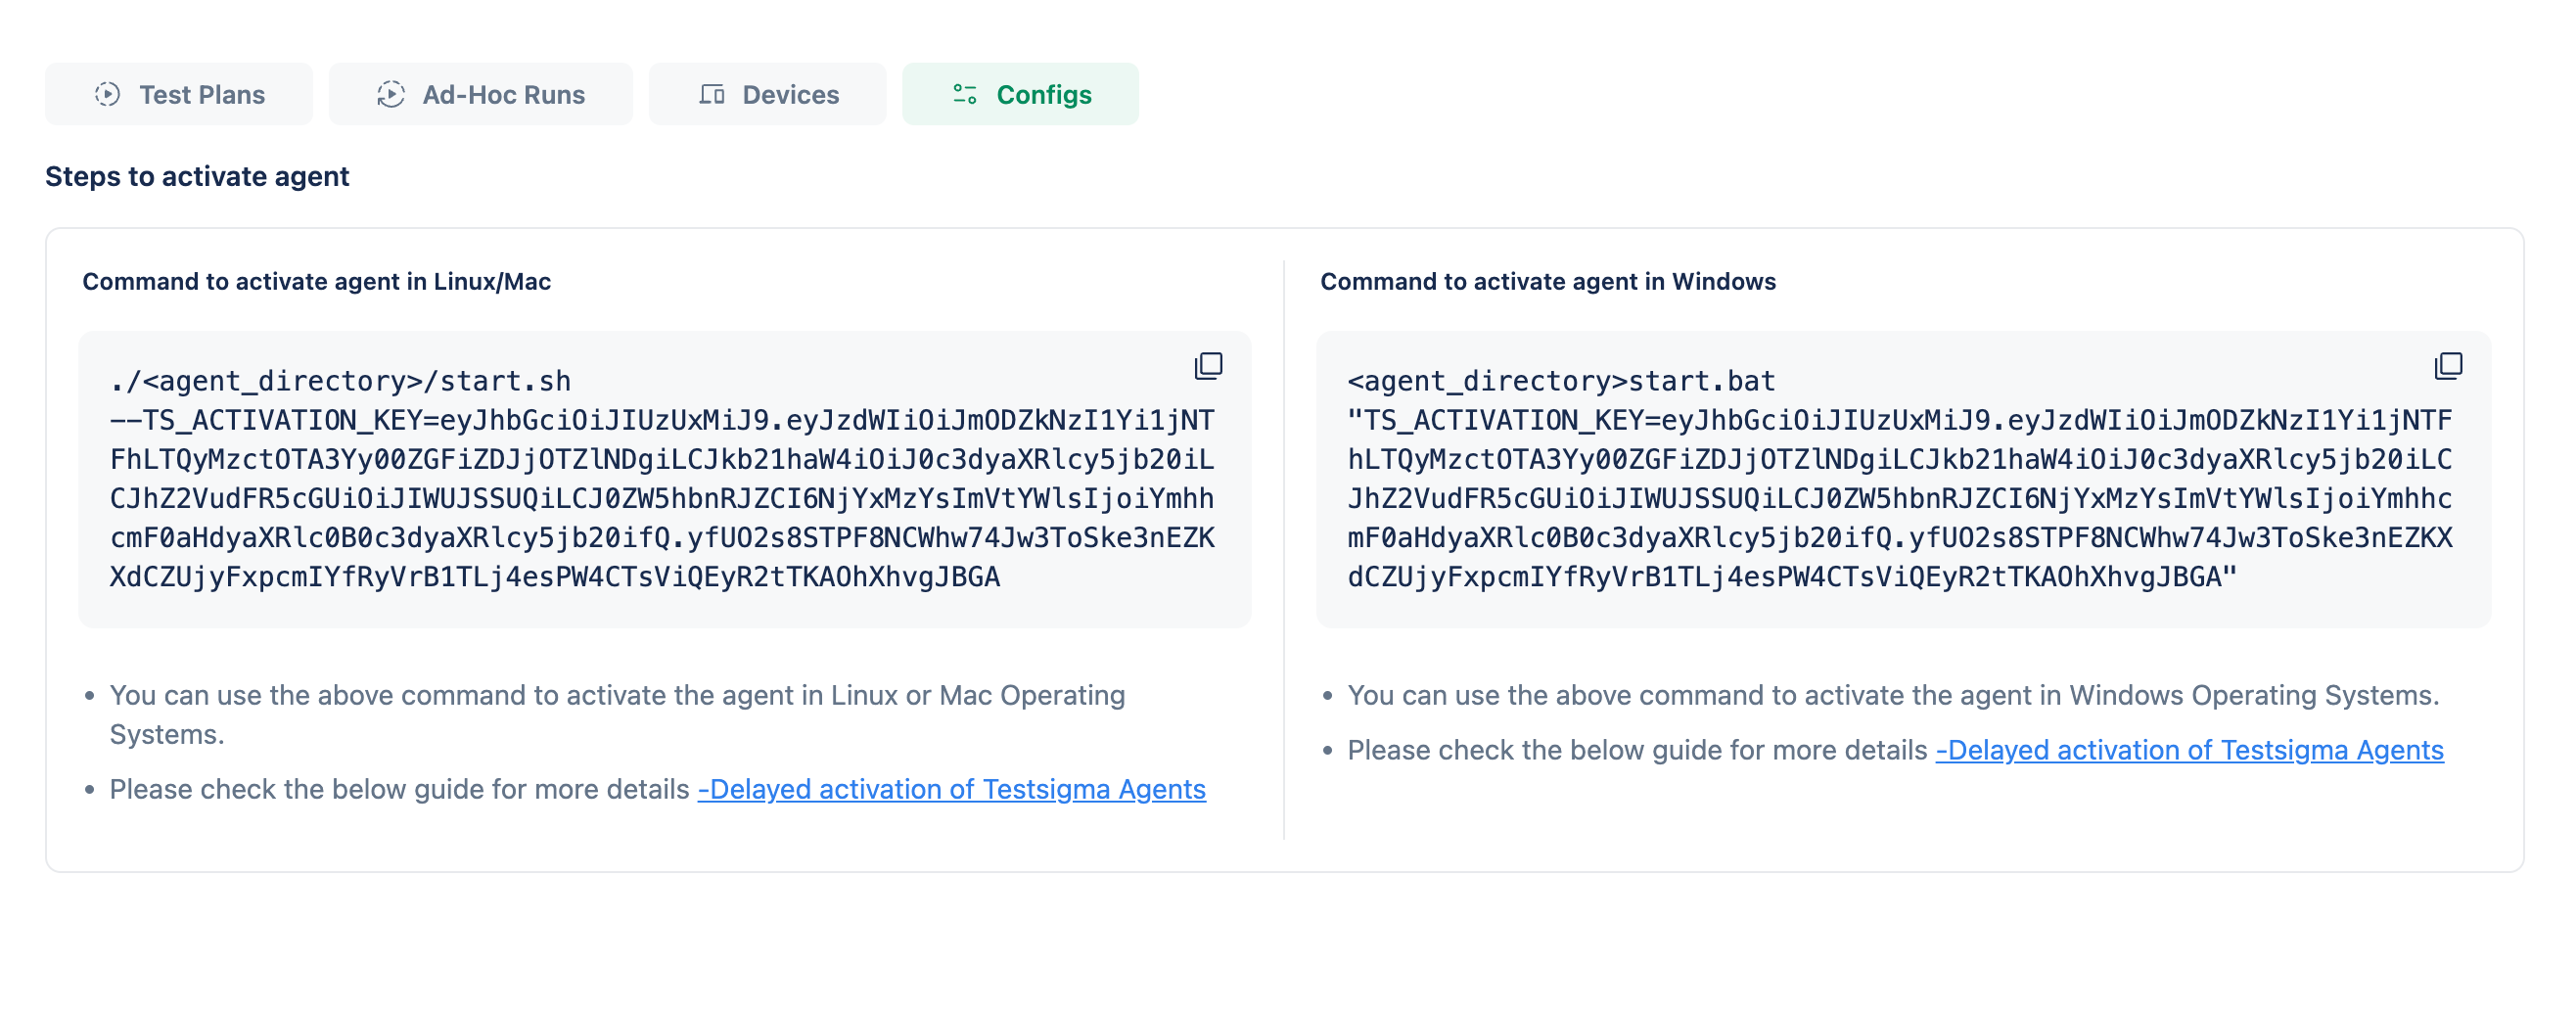
- On successfully adding the agent, you will be taken to the agent configuration page that contains the command that you can use to activate the agent later.
It might take a couple of minutes for the operating system version and the browser names to appear. Refer to the troubleshooting guide if the details does not show up after 10 minutes.
Run Testsigma Agent Using Docker
There are two ways of starting the testsigma local agent using docker:
- Create an Agent in Testsigma application, obtain the Activation Key, and use it to register the agent while the Docker container is booting.
- Create and register a New Agent entirely while booting the Docker container.
Refer to the section above to add an agent using the Activate Later option.
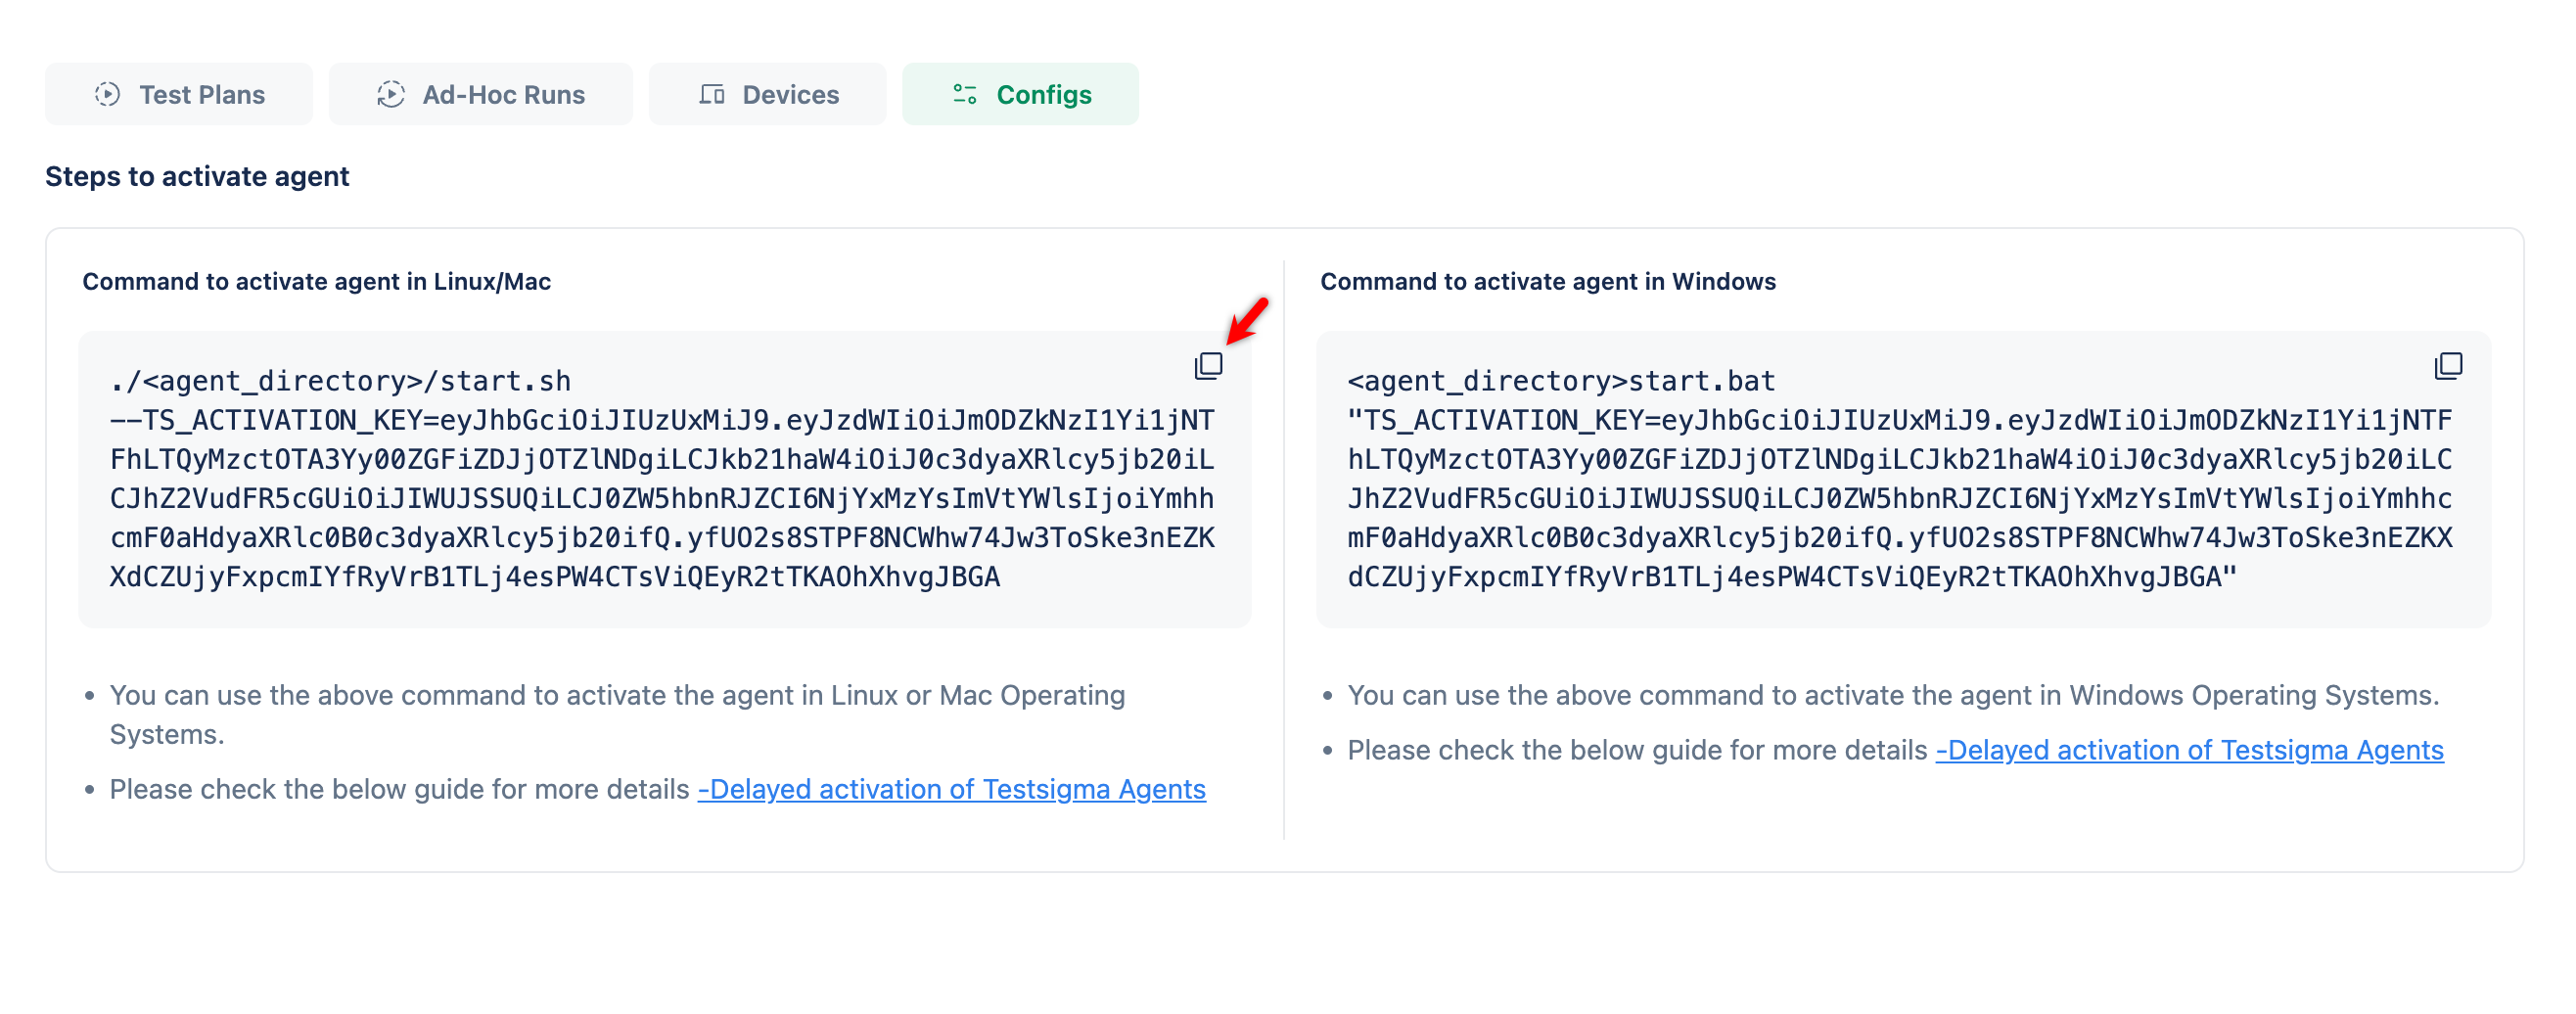
- Once the Agent is registered, navigate to Agents > select the agent > Config, and copy the Activation Key.
- Create a docker-compose.yml file with TS_ACTIVATION_KEY environment variables.
The following docker-compose snippet can be used to start a Testsigma Agent with headless Chrome, Firefox & Edge browsers:
version: "3.9"
services:
testsigma-agent:
image: testsigmainc/testsigma-agent:latest
container_name: testsigma-agent
depends_on:
- chrome
- firefox
- edge
volumes:
- ./data/agent_data:/var/ts/agent
- ./data/agent_temp:/tmp/agent_temp
- ./<foldername>:/root/.testsigma/agent/logs
environment:
TS_ACTIVATION_KEY: "REPLACE_WITH_YOUR_ACTIVATION_KEY"
CHROME: "http://chrome:4444"
FIREFOX: "http://firefox:4444"
EDGE: "http://edge:4444"
chrome:
image: selenium/standalone-chrome:latest
shm_size: 1gb
ports:
- "4444:4444"
volumes:
- ./data/agent_temp:/tmp/agent_temp
firefox:
image: selenium/standalone-firefox:latest
shm_size: 1gb
ports:
- "4445:4444"
volumes:
- ./data/agent_temp:/tmp/agent_temp
edge:
image: selenium/standalone-edge:latest
shm_size: 1gb
ports:
- "4446:4444"
volumes:
- ./data/agent_temp:/tmp/agent_temp This docker-compose snippet spins up four containers:
- Testsigma Agent
- Standalone Selenium with pre-installed Chrome
- Standalone Selenium with pre-installed Firefox
- Standalone Selenium with pre-installed Edge
Testsigma Agent will detect browser versions through the Environment Variables CHROME, FIREFOX, and EDGE. Note that these Environment Variables are all optional.
If you plan to run your test solely on the Chrome browser, there's no need to specify the FIREFOX and EDGE environment variables. Here's an example docker-compose file:
version: "3.9"
services:
testsigma-agent:
image: testsigmainc/testsigma-agent:latest
container_name: testsigma-agent
depends_on:
- chrome
volumes:
- ./data/agent_data:/var/ts/agent
- ./data/agent_temp:/tmp/agent_temp
- ./<foldername>:/root/.testsigma/agent/logs
environment:
TS_ACTIVATION_KEY: "REPLACE_WITH_YOUR_ACTIVATION_KEY"
CHROME: "http://chrome:4444"
chrome:
image: selenium/standalone-chrome:latest
shm_size: 1gb
ports:
- "4444:4444"
volumes:
- ./data/agent_temp:/tmp/agent_temp
If your system lacks sufficient resources, you can distribute browser containers across multiple systems and specify a remote debugging URL. Here's an example docker-compose file:
version: "3.9"
services:
testsigma-agent:
image: testsigmainc/testsigma-agent:latest
container_name: testsigma-agent
volumes:
- ./data/agent_data:/var/ts/agent
- ./data/agent_temp:/tmp/agent_temp
- ./<foldername>:/root/.testsigma/agent/logs
environment:
TS_ACTIVATION_KEY: "REPLACE_WITH_YOUR_ACTIVATION_KEY"
CHROME: "<REMOTE_CHROME_URL>"
FIREFOX: "<REMOTE_FIREFOX_URL>"
EDGE: "<REMOTE_EDGE_URL>"
Testsigma Agent container allows controlling minimum and maximum heap memory settings using MIN and MAX environment variables. The default values for MIN and MAX will be 1GB and 8GB, respectively. Here's an example docker-compose file:
version: "3.9"
services:
testsigma-agent:
image: testsigmainc/testsigma-agent:latest
container_name: testsigma-agent
volumes:
- ./data/agent_data:/var/ts/agent
- ./data/agent_temp:/tmp/agent_temp
- ./<foldername>:/root/.testsigma/agent/logs
environment:
TS_ACTIVATION_KEY: "REPLACE_WITH_YOUR_ACTIVATION_KEY"
MIN: "-Xms1g"
MAX: "-Xmx8g"
CHROME: "<CHROME_URL>"
FIREFOX: "<FIREFOX_URL>"
EDGE: "<EDGE_URL>"
For ARM-based Systems (Mac M1 processors):
Google does not build Chrome for Linux ARM platforms. Instead, docker-seleniarm uses the open-source Chromium browser built for ARM. Here's an example docker-compose file:
version: "3.9"
services:
testsigma-agent:
image: testsigmainc/testsigma-agent:latest
container_name: testsigma-agent
depends_on:
- chrome
- firefox
volumes:
- ./data/agent_data:/var/ts/agent
- ./data/agent_temp:/tmp/agent_temp
- ./<foldername>:/root/.testsigma/agent/logs
environment:
TS_ACTIVATION_KEY: "REPLACE_WITH_YOUR_ACTIVATION_KEY"
CHROME: "http://chrome:4444"
FIREFOX: "http://firefox:4444"
EDGE: "<REMOTE_EDGE_URL>"
chrome:
image: seleniarm/standalone-chrome:latest
shm_size: 1gb
ports:
- "4444:4444"
volumes:
- ./data/agent_temp:/tmp/agent_temp
firefox:
image: seleniarm/standalone-firefox:latest
shm_size: 1gb
ports:
- "4445:4444"
volumes:
- ./data/agent_temp:/tmp/agent_temp- Save the docker-compose.yml file in an appropriate directory.
- Open a command-line interface and navigate to the directory. Execute the command docker-compose up, which will download the necessary images and start the Testsigma Agent.
Register a New Agent While Booting the Docker Container.
To create and register the Agent Automatically in one step, you must specify the environment variables below instead of TS_ACTIVATION_KEY.
TS_AUTO_REGISTRATION_KEY - Testsigma API key
TS_AUTO_REGISTRATION_TITLE - Title of the Agent
TS_AUTO_REGISTRATION_HTTP_PORT - HTTP Port for internal communication between Agent and Testsigma
TS_AUTO_REGISTRATION_HTTPS_PORT - HTTPS Port for internal communication between Agent and Testsigma
Here's an example docker-compose file:
version: "3.9"
services:
testsigma-agent:
image: testsigmainc/testsigma-agent:latest
container_name: testsigma-agent
depends_on:
- chrome
- firefox
- edge
volumes:
- ./data/agent_data:/var/ts/agent
- ./data/agent_temp:/tmp/agent_temp
- ./<foldername>:/root/.testsigma/agent/logs
environment:
TS_AUTO_REGISTRATION_KEY: "REPLACE_WITH_API_KEY"
TS_AUTO_REGISTRATION_TITLE: "REPLACE_WITH_TITLE"
TS_AUTO_REGISTRATION_HTTP_PORT: "REPLACE_WITH_ANY_AVAILABLE_PORT_NUMBER"
TS_AUTO_REGISTRATION_HTTPS_PORT: "REPLACE_WITH_ANY_AVAILABLE_PORT_NUMBER"
CHROME: "http://chrome:4444"
FIREFOX: "http://firefox:4444"
EDGE: "http://edge:4444"
chrome:
image: selenium/standalone-chrome:latest
shm_size: 1gb
ports:
- "4444:4444"
volumes:
- ./data/agent_temp:/tmp/agent_temp
firefox:
image: selenium/standalone-firefox:latest
shm_size: 1gb
ports:
- "4445:4444"
volumes:
- ./data/agent_temp:/tmp/agent_temp
edge:
image: selenium/standalone-edge:latest
shm_size: 1gb
ports:
- "4446:4444"
volumes:
- ./data/agent_temp:/tmp/agent_tempPlease refer to the Activation Key sections for alternative methods of configuring the docker-compose file and starting the Agent using the docker-compose file.
