

Visual testing
Visual testing compares a screenshot taken during a run against a stored baseline, so a layout change shows up as a failed comparison rather than going unnoticed. It is off by default and switched on per step.
Enable visual testing on a step
Section titled “Enable visual testing on a step”Click the ellipsis icon ⋮ on the step, select Enable Visual Testing, and click Update Step. This works on the Test Case Details page and in the test step recorder.
To enable it on several steps at once, select their checkboxes, click Update Settings in the menu bar, select Enable Visual Testing in the Bulk Update Settings overlay, and click Update.
Run the test case once to create the baselines, then run it again to see comparisons.
Read a comparison
Section titled “Read a comparison”The Test Case Result page marks each visual step with a camera icon. Green means the current image matches the baseline. Red means it does not.
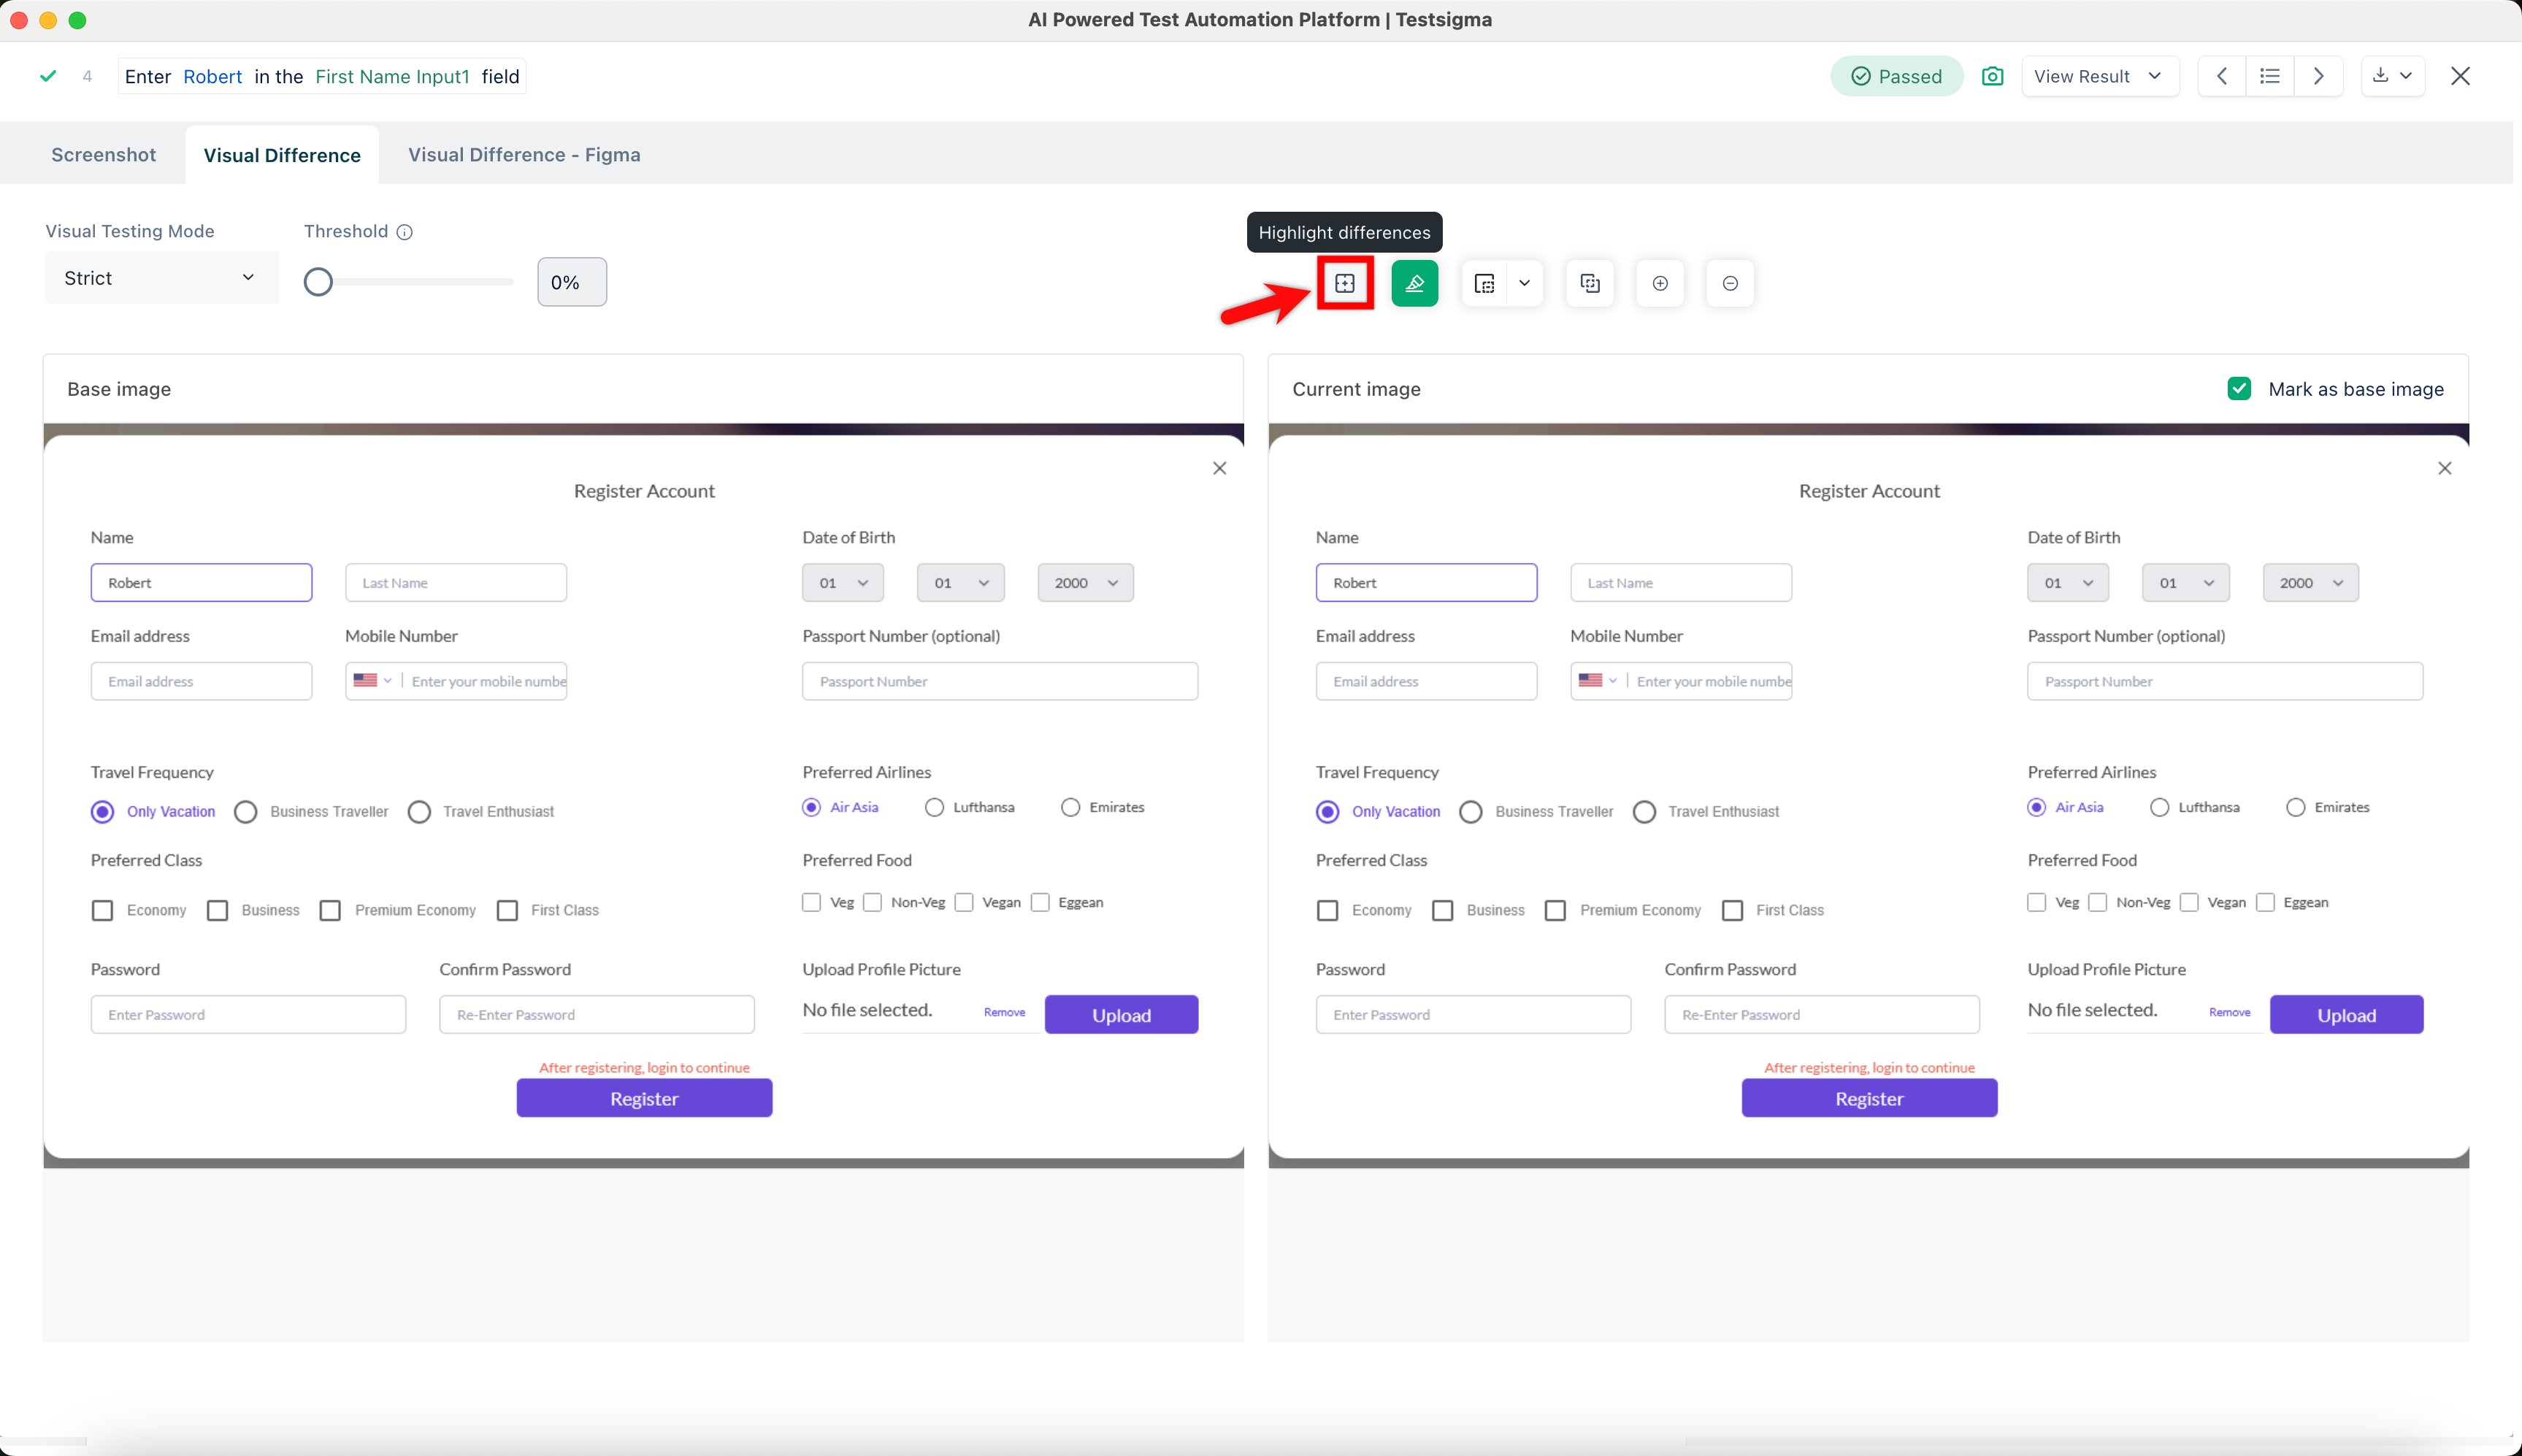
Click the icon to open Visual Difference. To reach it from a past run, click Ad-hoc Runs in the utility panel, click View Details, then click the camera icon on the step.
The overlay offers:
- Highlight Differences: marks the variations
- Hide Visual Differences: conceals them
- Select region to ignore from visual comparison: excludes areas from the comparison
- Merge base image and current image: overlays the two
- Zoom in and Zoom out
Update the baseline
Section titled “Update the baseline”A deliberate UI change makes every baseline for that screen wrong, so replace it rather than letting the comparison fail.
In the Visual Difference overlay, select Mark as base image on the current image. Later runs then compare against the new baseline.
Fail the test case on a difference
Section titled “Fail the test case on a difference”A visual difference does not fail a test case by itself. To make it fail, open Test Case Settings in the utility panel and turn on Fail Test Case if Visual Testing Fails.
Ignore parts of the screen
Section titled “Ignore parts of the screen”Dynamic content produces differences that are not defects, such as advertisements, timestamps, and user-specific data. Excluding those regions cuts the false positives, so only meaningful changes are flagged.
Open Visual Difference on the step, select Select region to ignore from visual comparison, choose the areas to exclude, and click Save ignore region.
Choose a comparison mode
Section titled “Choose a comparison mode”Two modes are available, and both compare pixel by pixel. Strict requires an exact match. Lenient takes a threshold, so a threshold of 70% passes when 70% of pixels are identical and ignores the rest.
Open Visual Difference on the step, expand Visual Testing Mode, and select Strict or Lenient. For Lenient, enter the percentage in Threshold.
A mode can be combined with the region features: Select Region narrows what is compared, and Ignore Region excludes areas from it.
Compare against a Figma design
Section titled “Compare against a Figma design”Instead of comparing a screenshot to an earlier screenshot, you can compare it to the design itself, using a Figma frame as the baseline.
-
Go to Create Tests > Test Cases and open the test case.
-
Click the ellipsis icon
⋮next to the step, select Enable Visual Testing, and click Update Step. -
Hover over the step and click the camera icon. Visual Difference - Figma opens.
-
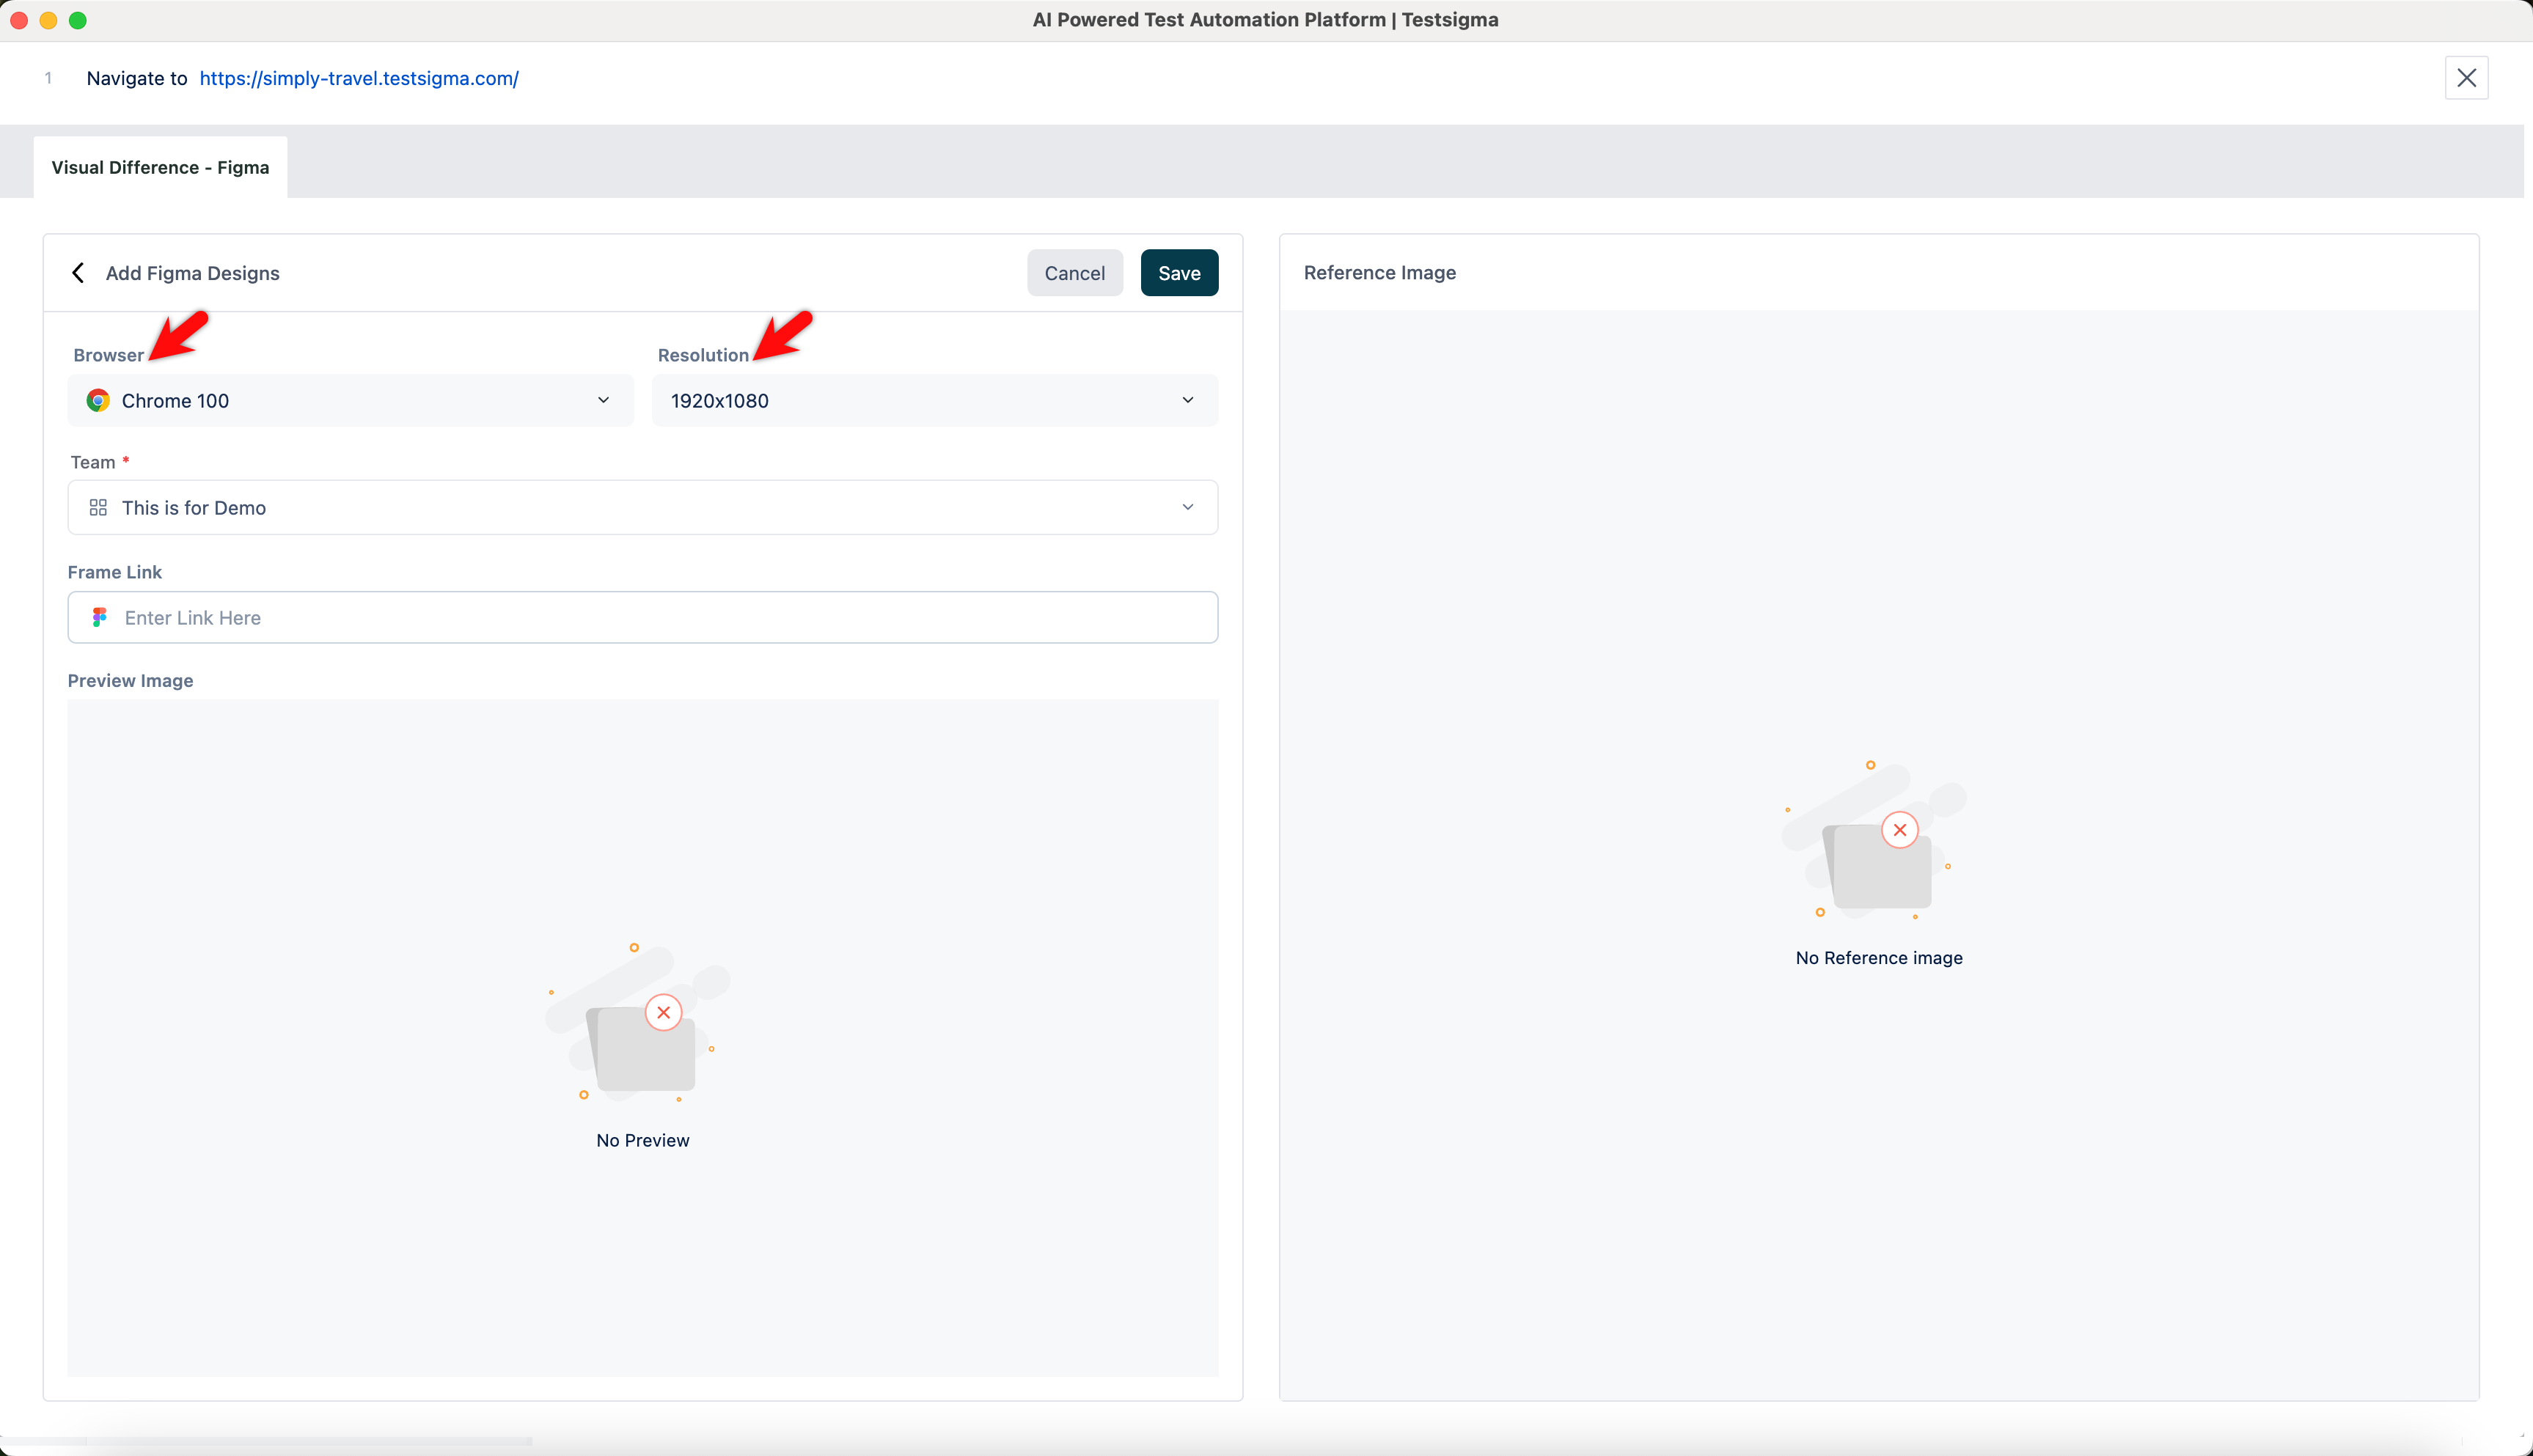
Click Add Figma Designs in the Base Line Image section.
-
Select the Browser and Resolution in Add Devices. For Android and iOS, select a mobile device with the resolution you need.
-
Enter the Figma frame link in Frame Link and click Refresh to verify it.
-
Click Save.
-
Run the test case, then click the camera icon on the step result and open the Visual Difference - Figma tab.
Was this page helpful?
Thanks for the feedback.