

Create an iOS test case
An iOS test case runs against an .ipa build on a real device or a simulator. There are 4 ways to build one, and they differ in what you start from.
| Route | Start from | Best when |
|---|---|---|
| NLPs | Nothing | You know the flow and want exact control |
| Recorder | The application on a streamed device | The flow is quicker to perform than to describe |
| Copilot | The application on a streamed device | You want Copilot to draft steps as you record |
| Atto | Requirements, designs, or prompts | You are covering a feature rather than one flow |
Before you start, you need a project and an iOS application, the .ipa itself, and a device or simulator available as a Test Machine. A local device needs setting up first, as below.
Set up a local iOS device
Section titled “Set up a local iOS device”A local device needs 3 things before it will run tests.
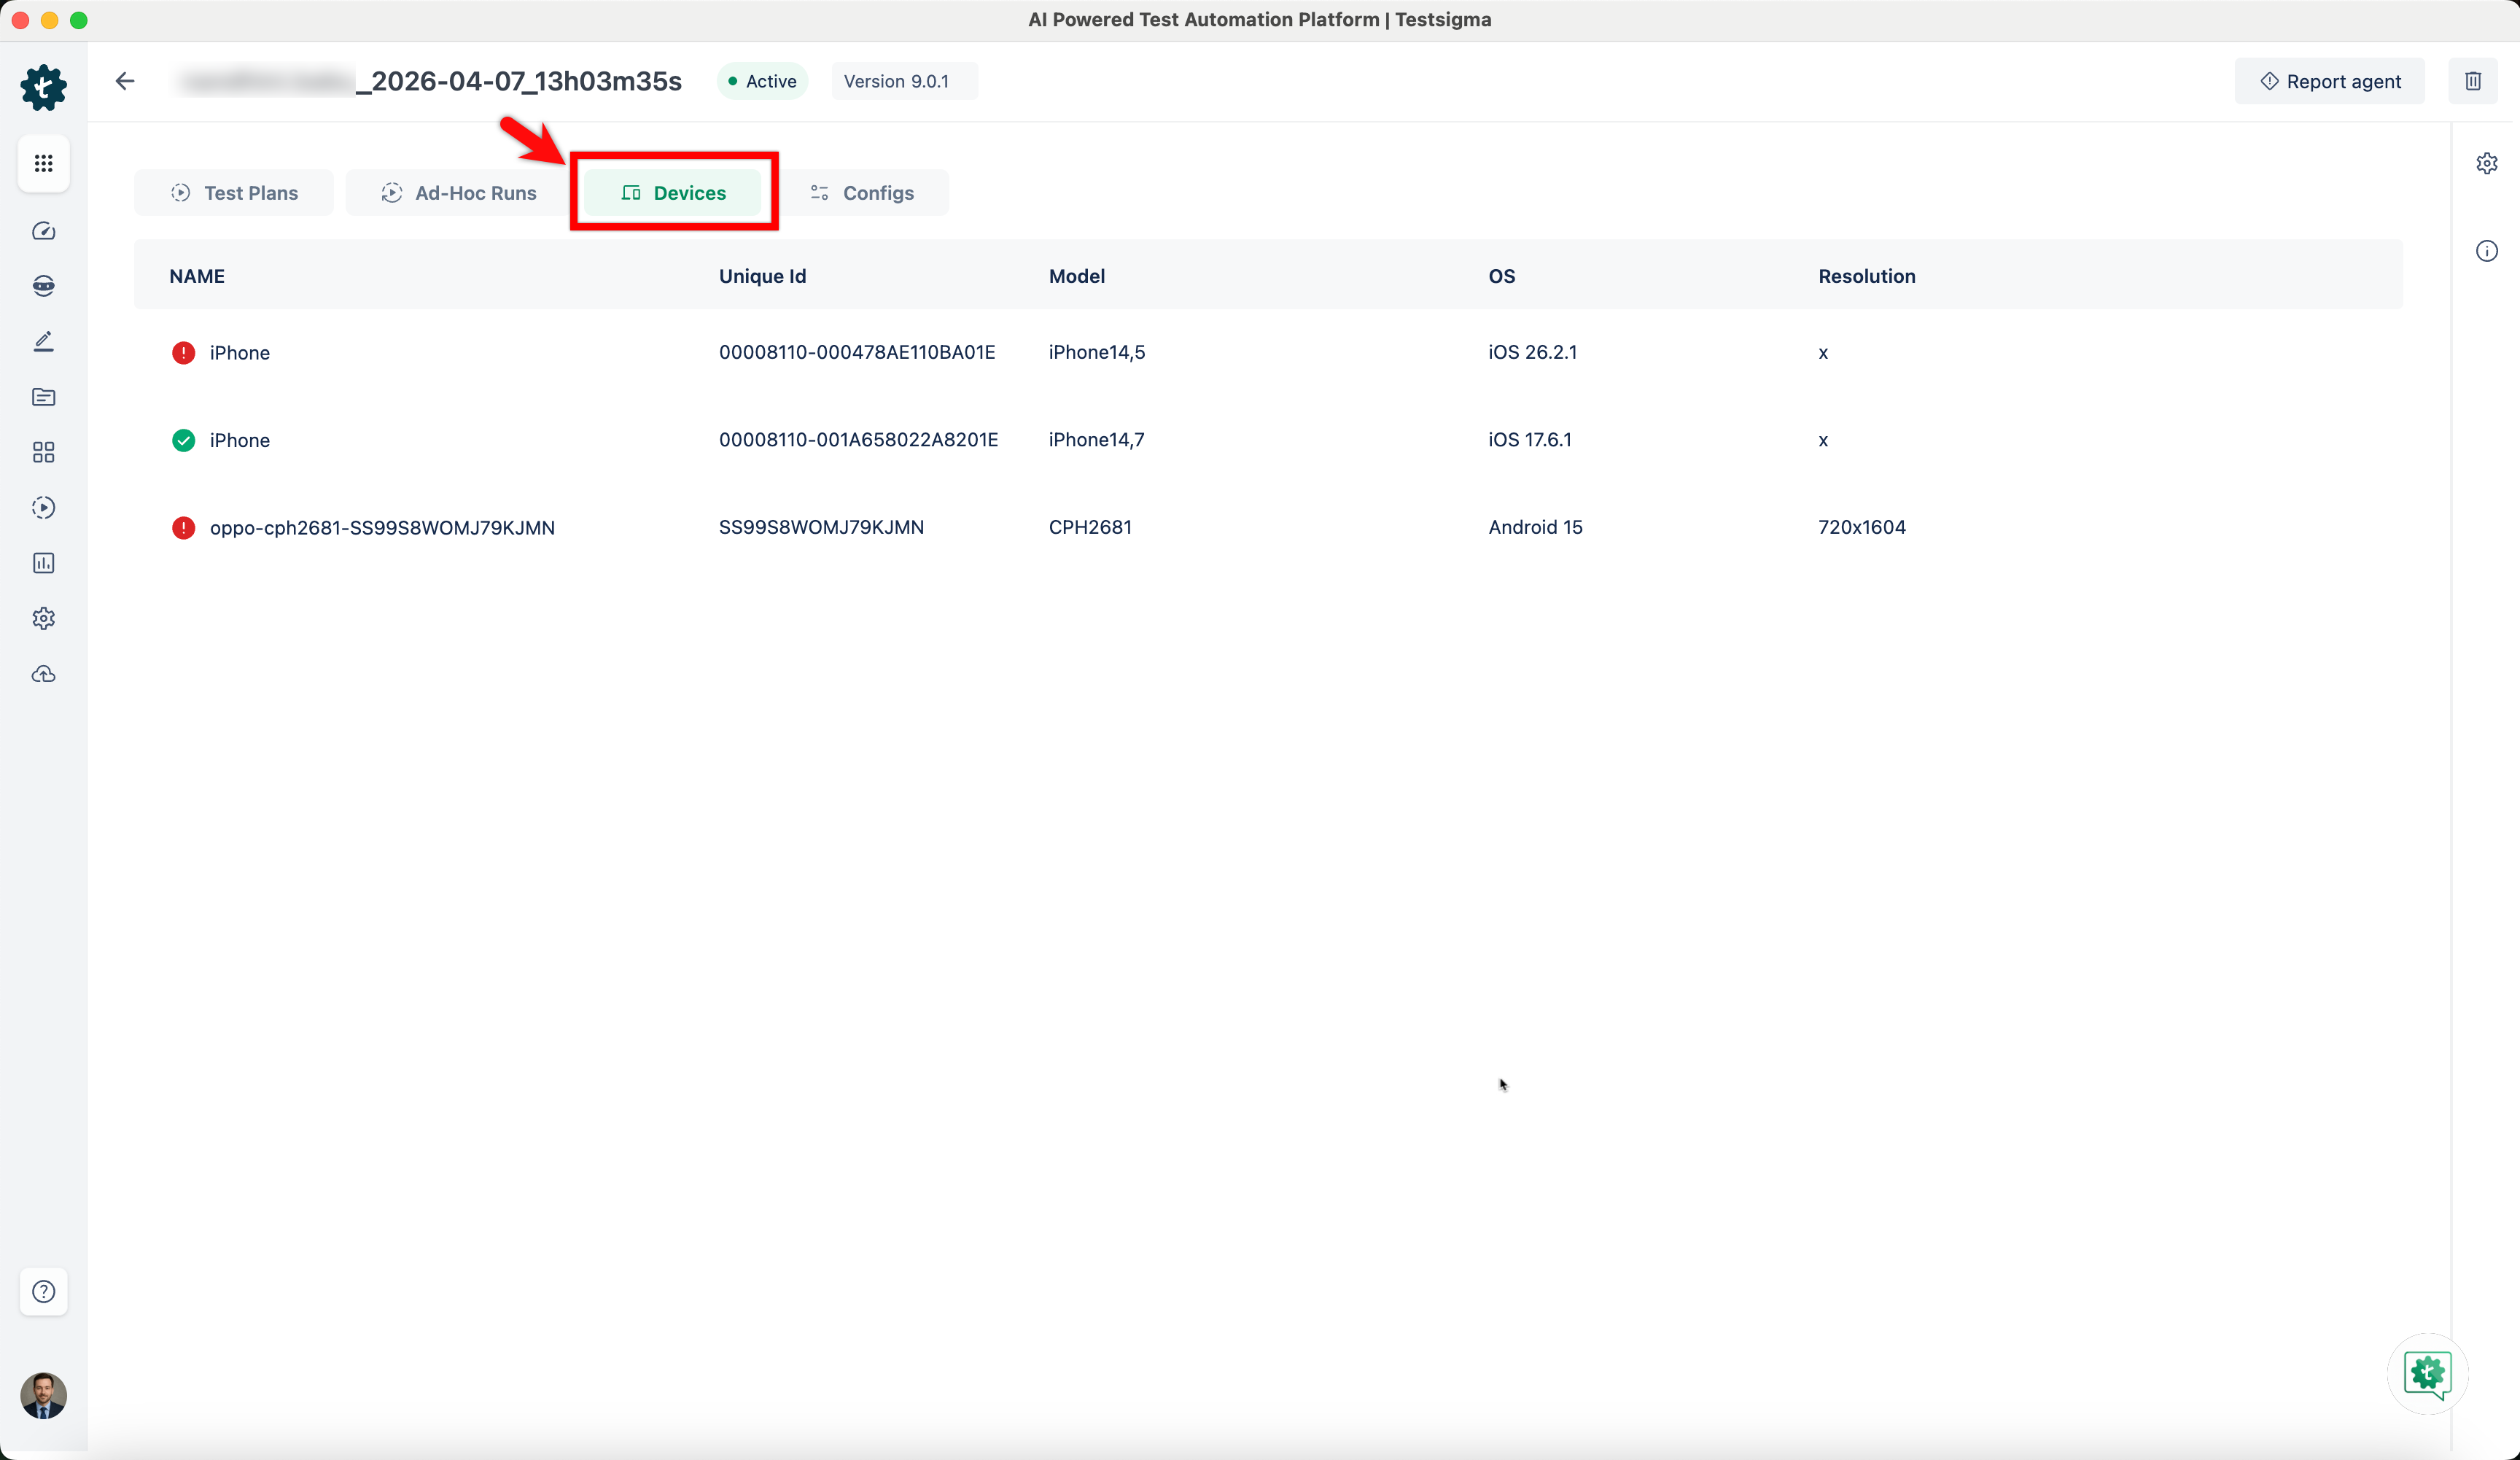
A provisioning profile configured in Testsigma, under Settings > iOS Settings. Creating one moves between Testsigma and the Apple Developer portal, generating a certificate signing request, having it signed, and building the profile from it. See Testsigma Agent.
iTunes on Windows, installed from Apple’s own .exe rather than the Microsoft Store.
Developer Mode on iOS 16 and above, which is hidden until you enable it:
-
Connect the device to a Mac with a USB cable.
-
Go to Settings > Privacy & Security on the device.
-
Turn on Developer Mode, and confirm the restart when prompted.
Create the test case
Section titled “Create the test case”-
Go to Create Tests > Test Cases.
-
Expand a folder in Test Case Explorer and click the + icon next to a subfolder.
-
Confirm the folder and subfolder, enter a name, and click Create.
The first step is created for you as Launch App, since a mobile test has to open the application before it can act on it.
Add the steps
Section titled “Add the steps”- Click Add New Step on the Test Case Details page.
- Select the NLP for the action you want, then supply its test data and elements.
- Repeat until the flow is complete.
iOS NLPs use Tap on rather than Click on, since the interaction is a tap. See Create test cases for the full action list and the step types.
- Click Record on the Test Case Details page.
- In the Record test steps overlay, select a Test Lab and a Test Machine.
- Supply the application under App Source, either by pasting an external public link or by clicking Upload and browsing to the
.ipa. Set the upload options below. - Click Record and wait for the application to load fully.
- Perform the actions you want as test steps. The recorder converts each interaction into a step.
- Click Create Step on the Test Case Details page.
- Click Copilot.
- Configure the Test Machine and App Source in the Copilot overlay, and click Launch. Copilot opens a mirrored session of your application inside Testsigma.
- Click Rec and perform the actions you want as test steps.
- Click Stop Recording.
- Click Exit Copilot, then Stop Copilot in the Stop & Exit Copilot dialog.
See Copilot for debugging and step management.
Atto generates whole test cases from requirements, Figma designs, qTest, Confluence, video, files, or a live recording, rather than steps for one flow. On mobile, Figma frames are usually the best starting point, since the design is the specification. See AI agents.
Upload options for an IPA
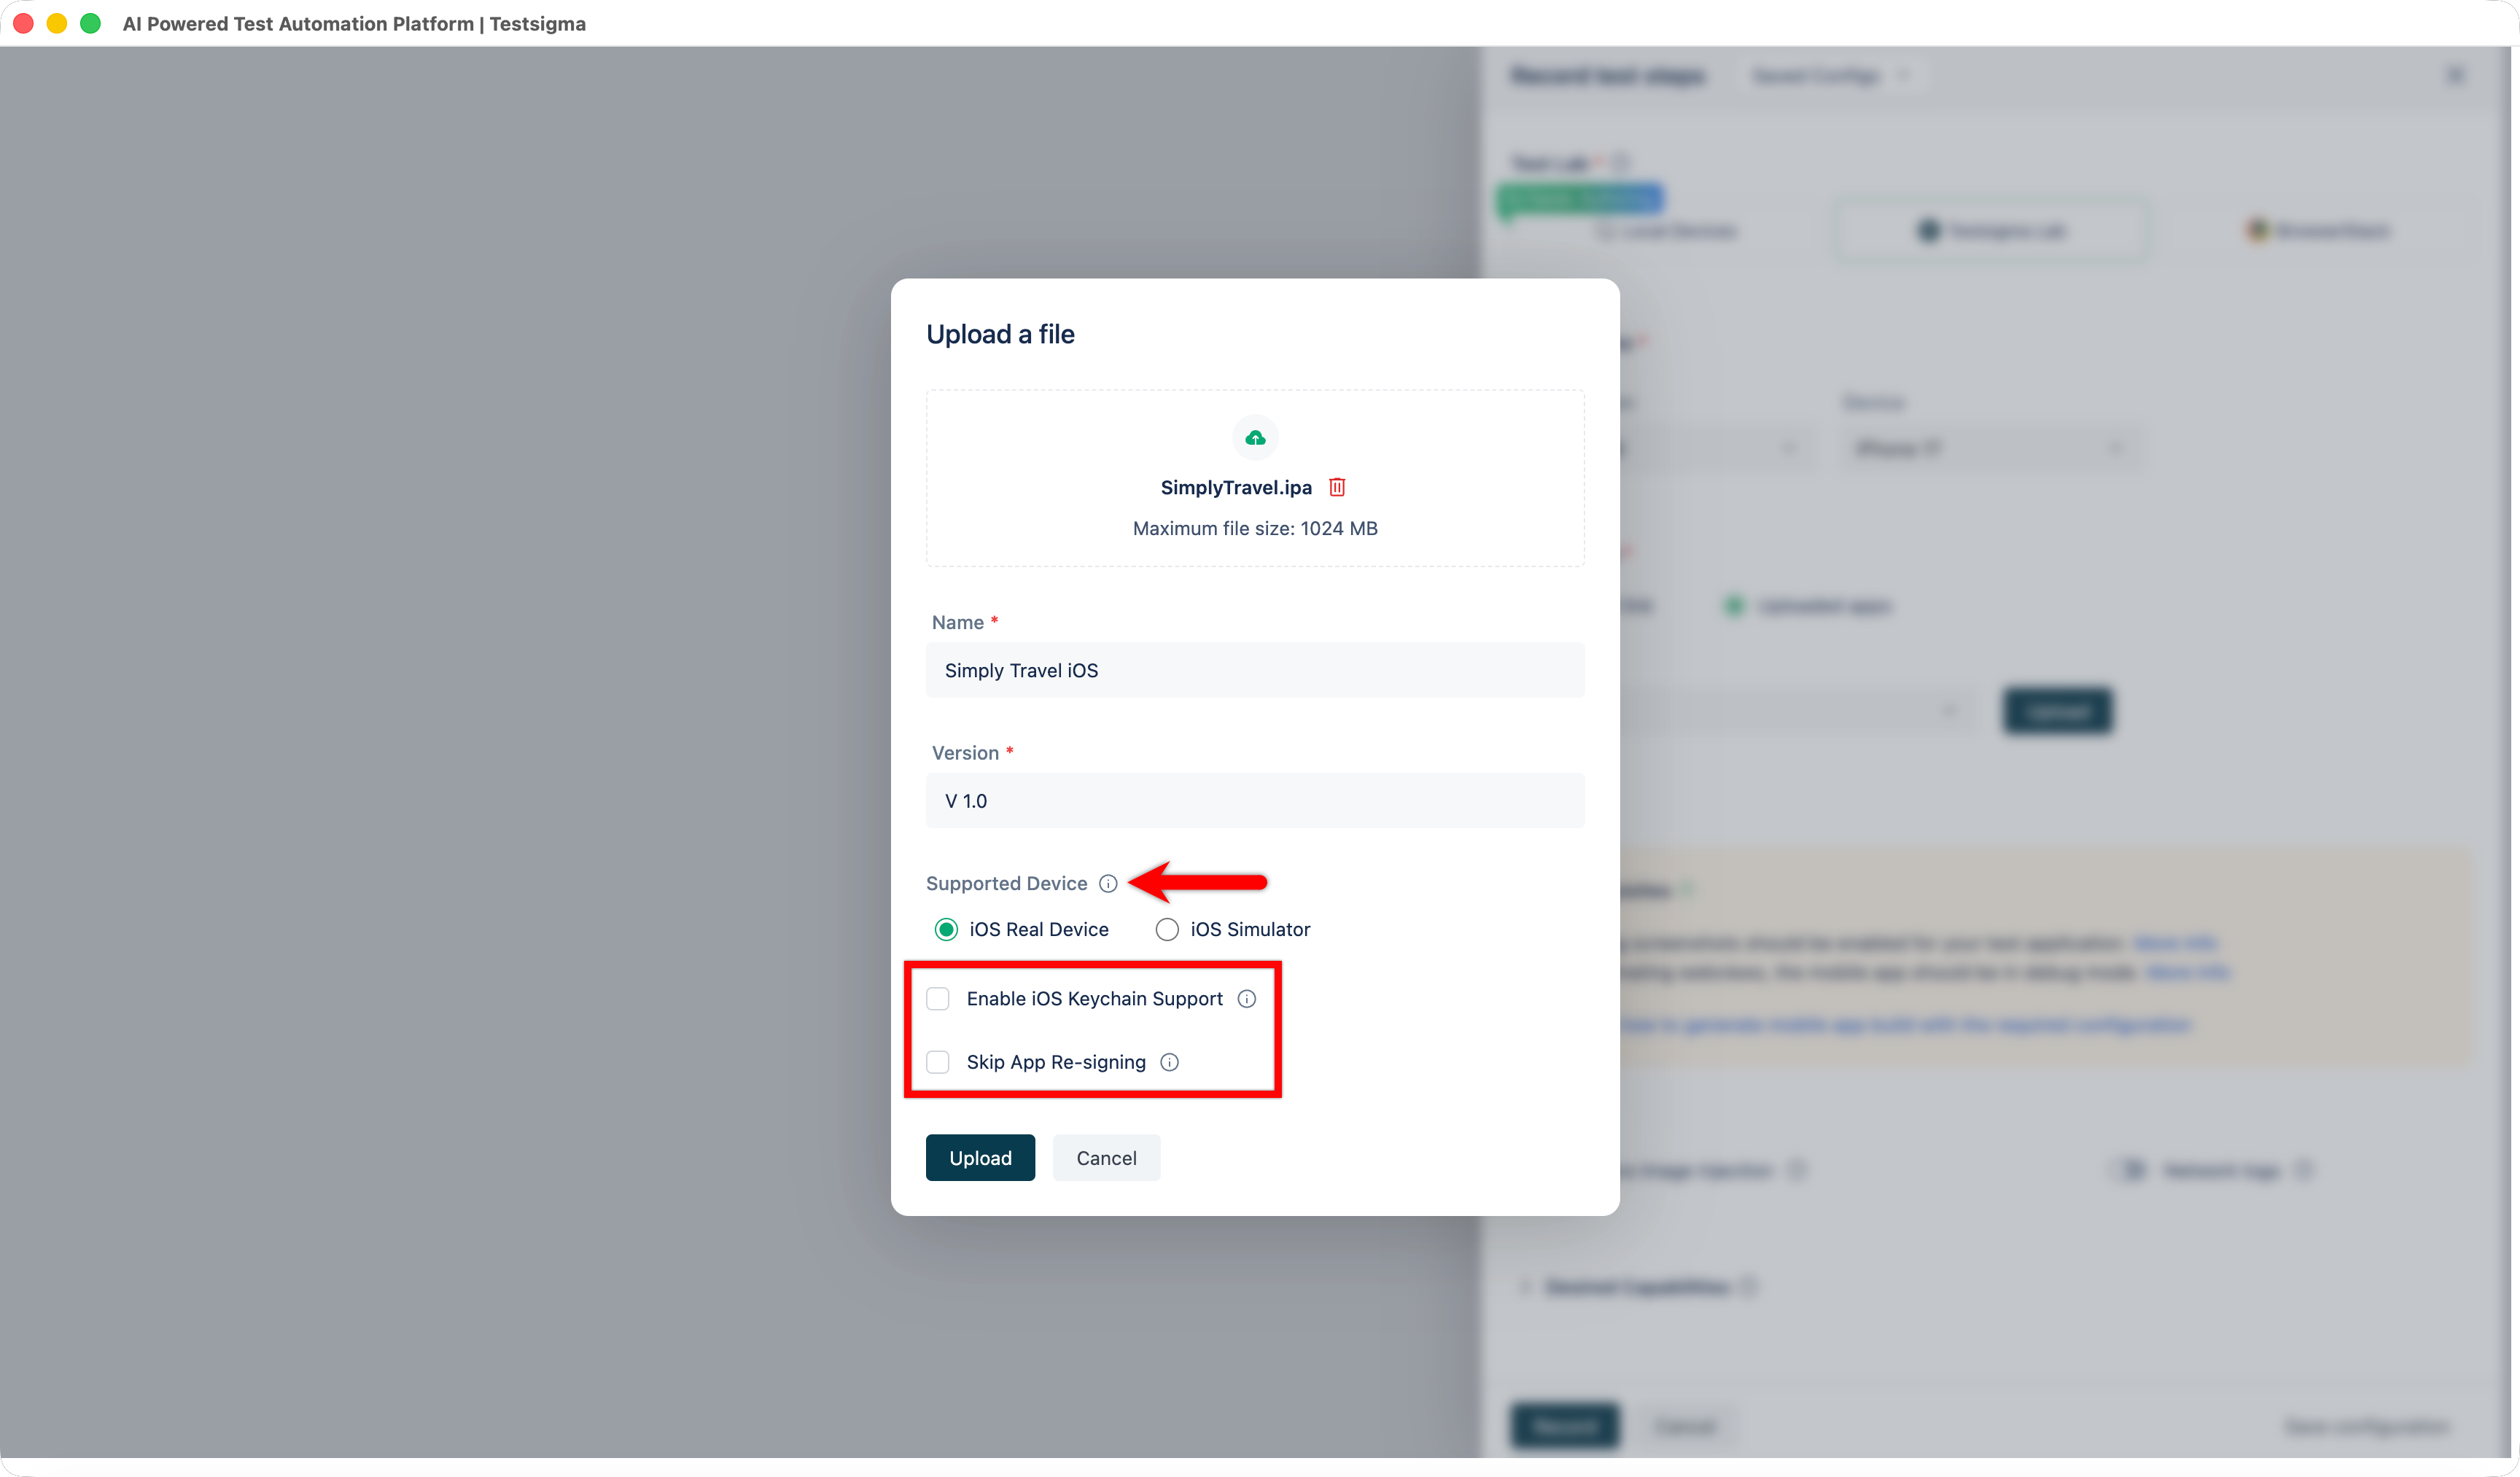
Section titled “Upload options for an IPA”An .ipa upload carries 2 options that an .apk does not.
- Enable iOS Keychain Support: clears iOS Keychain data after each test session, so credentials or tokens stored by a previous session cannot fail the next one. Use it when the application cannot reach its keychain groups after the Bundle Seed ID or Team ID changes during signing
- Skip App Re-signing: installs the application without re-signing it. Use it when the build is already signed under the Apple Developer Enterprise Program, and when you need features that depend on the original signature, such as push notifications
Recorder controls
Section titled “Recorder controls”Recording streams a device from a Test Lab, so the recorder carries controls the web recorder has no need for.
- Device controls: Install App, Mirroring mode, Inspect Mode, which shows element attributes without recording a step, Swipe By Coordinates, Tap By Coordinates, Search Element, Go back, Home, Hide Keyboard, and Rotate Screen
- Element actions: Tap, Enter Data, View Code, Clear, and Element Details
Elements
Section titled “Elements”iOS supports 5 locator types, in this order of preference:
- Accessibility ID: the first choice. The same value carries across Android and iOS, which makes a test easier to port, and it is the least likely to change when the source is restructured
- ID: the second choice. Every element is supposed to have a unique one
- XPATH: parses the source to reach the element
- Class Name: the value of the element’s Class Name attribute
- Name: the value of the element’s Name attribute
iOS element types carry an XCUIElementType prefix, and the common ones are:
| Element type | Used for | Common attributes |
|---|---|---|
XCUIElementTypeTextField | Text input such as username, email, and name | value, text, name |
XCUIElementTypeSecureTextField | Password fields, which hide the entered text | value, text, name |
XCUIElementTypeButton | Buttons | text, name |
XCUIElementTypeSwitch | Toggle switches | value, text, name |
XCUIElementTypePickerWheel | Selectors such as country or date pickers | name |
XCUIElementTypeSlider | Sliders such as brightness and volume | value |
See Elements for capturing, editing, and importing them.
Record inside a WebView
Section titled “Record inside a WebView”A blank screen with no selectable elements usually means a hybrid application rendering a WebView.
Refresh the page first. If the screen is still blank, click H in the recorder panel and select the WebView to switch context. Each switch is recorded as its own step:
Switch to Webview contextwhen you enter the WebViewSwitch to Native App Contextwhen you return to the native applicationSwitch to context with name WEBVIEW_6890.1when you pick a named view
Find the app bundle ID
Section titled “Find the app bundle ID”There is no way to look a bundle ID up directly in the App Store, so take it from one of 2 places.
From the App Store. Find the app’s iTunes link, copy the number after id in the URL, and open https://itunes.apple.com/lookup?id=<number>. Search the output for bundleId. For Apple Pages, https://itunes.apple.com/app/pages/id361309726 gives 361309726, and the lookup returns "bundleId":"com.apple.Pages".
From a local IPA. Rename the .ipa to .zip, unzip it, and read the bundle ID from the app’s Info.plist.
Install a specific app version
Section titled “Install a specific app version”A test case can install a particular build rather than the latest one, which is how you test across app versions.
-
Go to Test Data > Uploads, click the ellipsis icon
⋮against the uploaded file, and click Upload New Version. -
Click Browse File, upload the new build, and set its name and version.
-
Select Enable iOS Keychain Support or Skip App Re-signing if they apply.
-
In the test case, add the
Install the app name app-name and version app-versionNLP. -
Click app-name and select the build, then click app-version and select the version.
-
Click Create Step.
Frequently asked questions
Section titled “Frequently asked questions”Why does my app install but not launch?
Section titled “Why does my app install but not launch?”Testsigma re-signs iOS builds by default, which breaks features tied to the original signing credentials. Select Skip App Re-signing on upload, or add the resignApp capability as a String set to false under Desired Capabilities in the Ad-Hoc Run overlay.
Why does the app open and close immediately on a local device?
Section titled “Why does the app open and close immediately on a local device?”This is a WebDriverAgent problem rather than a signing one. Work through these in order:
- Restart the Testsigma Agent.
- Delete the devimage folder from the Testsigma Agent directory.
- Uninstall the WebDriverAgent (WDA) app from the device and rerun the test case. WDA is installed on the device during execution, and does not live in the agent directory.
- Check Xcode. Confirm
Xcode.appis at/Applications/Xcode.app, then set the developer directory withsudo xcode-select -s /Applications/Xcode.app/Contents/Developer.
Which entitlements survive re-signing?
Section titled “Which entitlements survive re-signing?”Re-signing with Testsigma’s wildcard provisioning profile clears most entitlements, keeping only application-identifier, team-identifier, and keychain-access-groups. Have the app read those programmatically rather than from hardcoded values, and expect anything else, such as Push Notifications and App Groups, to be unavailable unless you skip re-signing.
Why can’t the WDA process start on my iPhone?
Section titled “Why can’t the WDA process start on my iPhone?”Usually the device is running an iOS version whose support files the agent does not have. Ask Testsigma support for the current device support files, then:
- Stop the Testsigma Agent and disconnect the device.
- Delete the
<version>folder underTestsigmaAgent\ios\DeviceSupport\. - Extract the files Testsigma sent into that path.
- Start the agent and reconnect the device.
Why does Scroll to Element fail?
Section titled “Why does Scroll to Element fail?”The NLP acts only on an element already rendered in the current viewport. When the element exists in the app but has not scrolled into view, the step has no target.
Can I record on a simulator?
Section titled “Can I record on a simulator?”Yes. Start the simulator first, then the Testsigma agent, then select Local Devices and confirm the simulator appears under Test Machine. A simulator started after the agent is not detected.
Was this page helpful?
Thanks for the feedback.