

TestRail
TestRail integration maps TestRail cases onto Testsigma test cases and pushes run results back. Connect once, link cases by ID, then attach a Post Plan Hook.
Prerequisites
- A Host URL, Username, and Password from TestRail.
- Post Plan Hook enabled: contact Testsigma support.
Connect TestRail
Section titled “Connect TestRail”-
Open integrations: from the left navigation bar, go to Settings > Integrations.
-
Enable TestRail: turn on the toggle on the Testrail widget.
-
Enter credentials: in the Testrail Details dialog, enter the Host URL, Username, and Password.
-
Save: click Save & Enable.
Link test cases
Section titled “Link test cases”Before mapping, make sure the project, test runs, and test cases already exist in TestRail.
-
Copy the ID: open the test case in TestRail and copy its ID. Enter only the numeric portion, ignoring any preceding letters.
-
Open the Testsigma test case: navigate to the test case you want to link and select Manage Test Case from the Utility Panel.
-
Link it: enter the TestRail ID in the input box and click the link icon.
Repeat for each TestRail test case you want to map. Keeping the test case names identical in both tools makes the mapping easier to follow.
Export results with a Post Plan Hook
Section titled “Export results with a Post Plan Hook”-
Build the plan: create a test suite with the linked test cases and add it to a test plan.
-
Attach the hook: in the Test Plan Settings, select Standard TestRail Addon from the Post Plan Hook dropdown menu.
-
Name the project: enter the project name in the PROJECT_NAME text box. It must match the project name in TestRail exactly.
-
Run the plan: go to Test Plans and click Run Now. Testsigma creates a duplicate of the test run and displays the result once execution completes.
-
Open the TestRail result: click TestRail Result Link in the top right corner. TestRail shows the result along with the Run ID created in Testsigma.
Use the TestRail Custom with Case Match addon
Section titled “Use the TestRail Custom with Case Match addon”If you select the TestRail Custom with Case Match addon instead, fill three fields: the project name in PROJECT_NAME, a Testsigma API key (from Settings > API Keys) in API_KEY, and a JUnit template URL in TEMPLATE_URL.
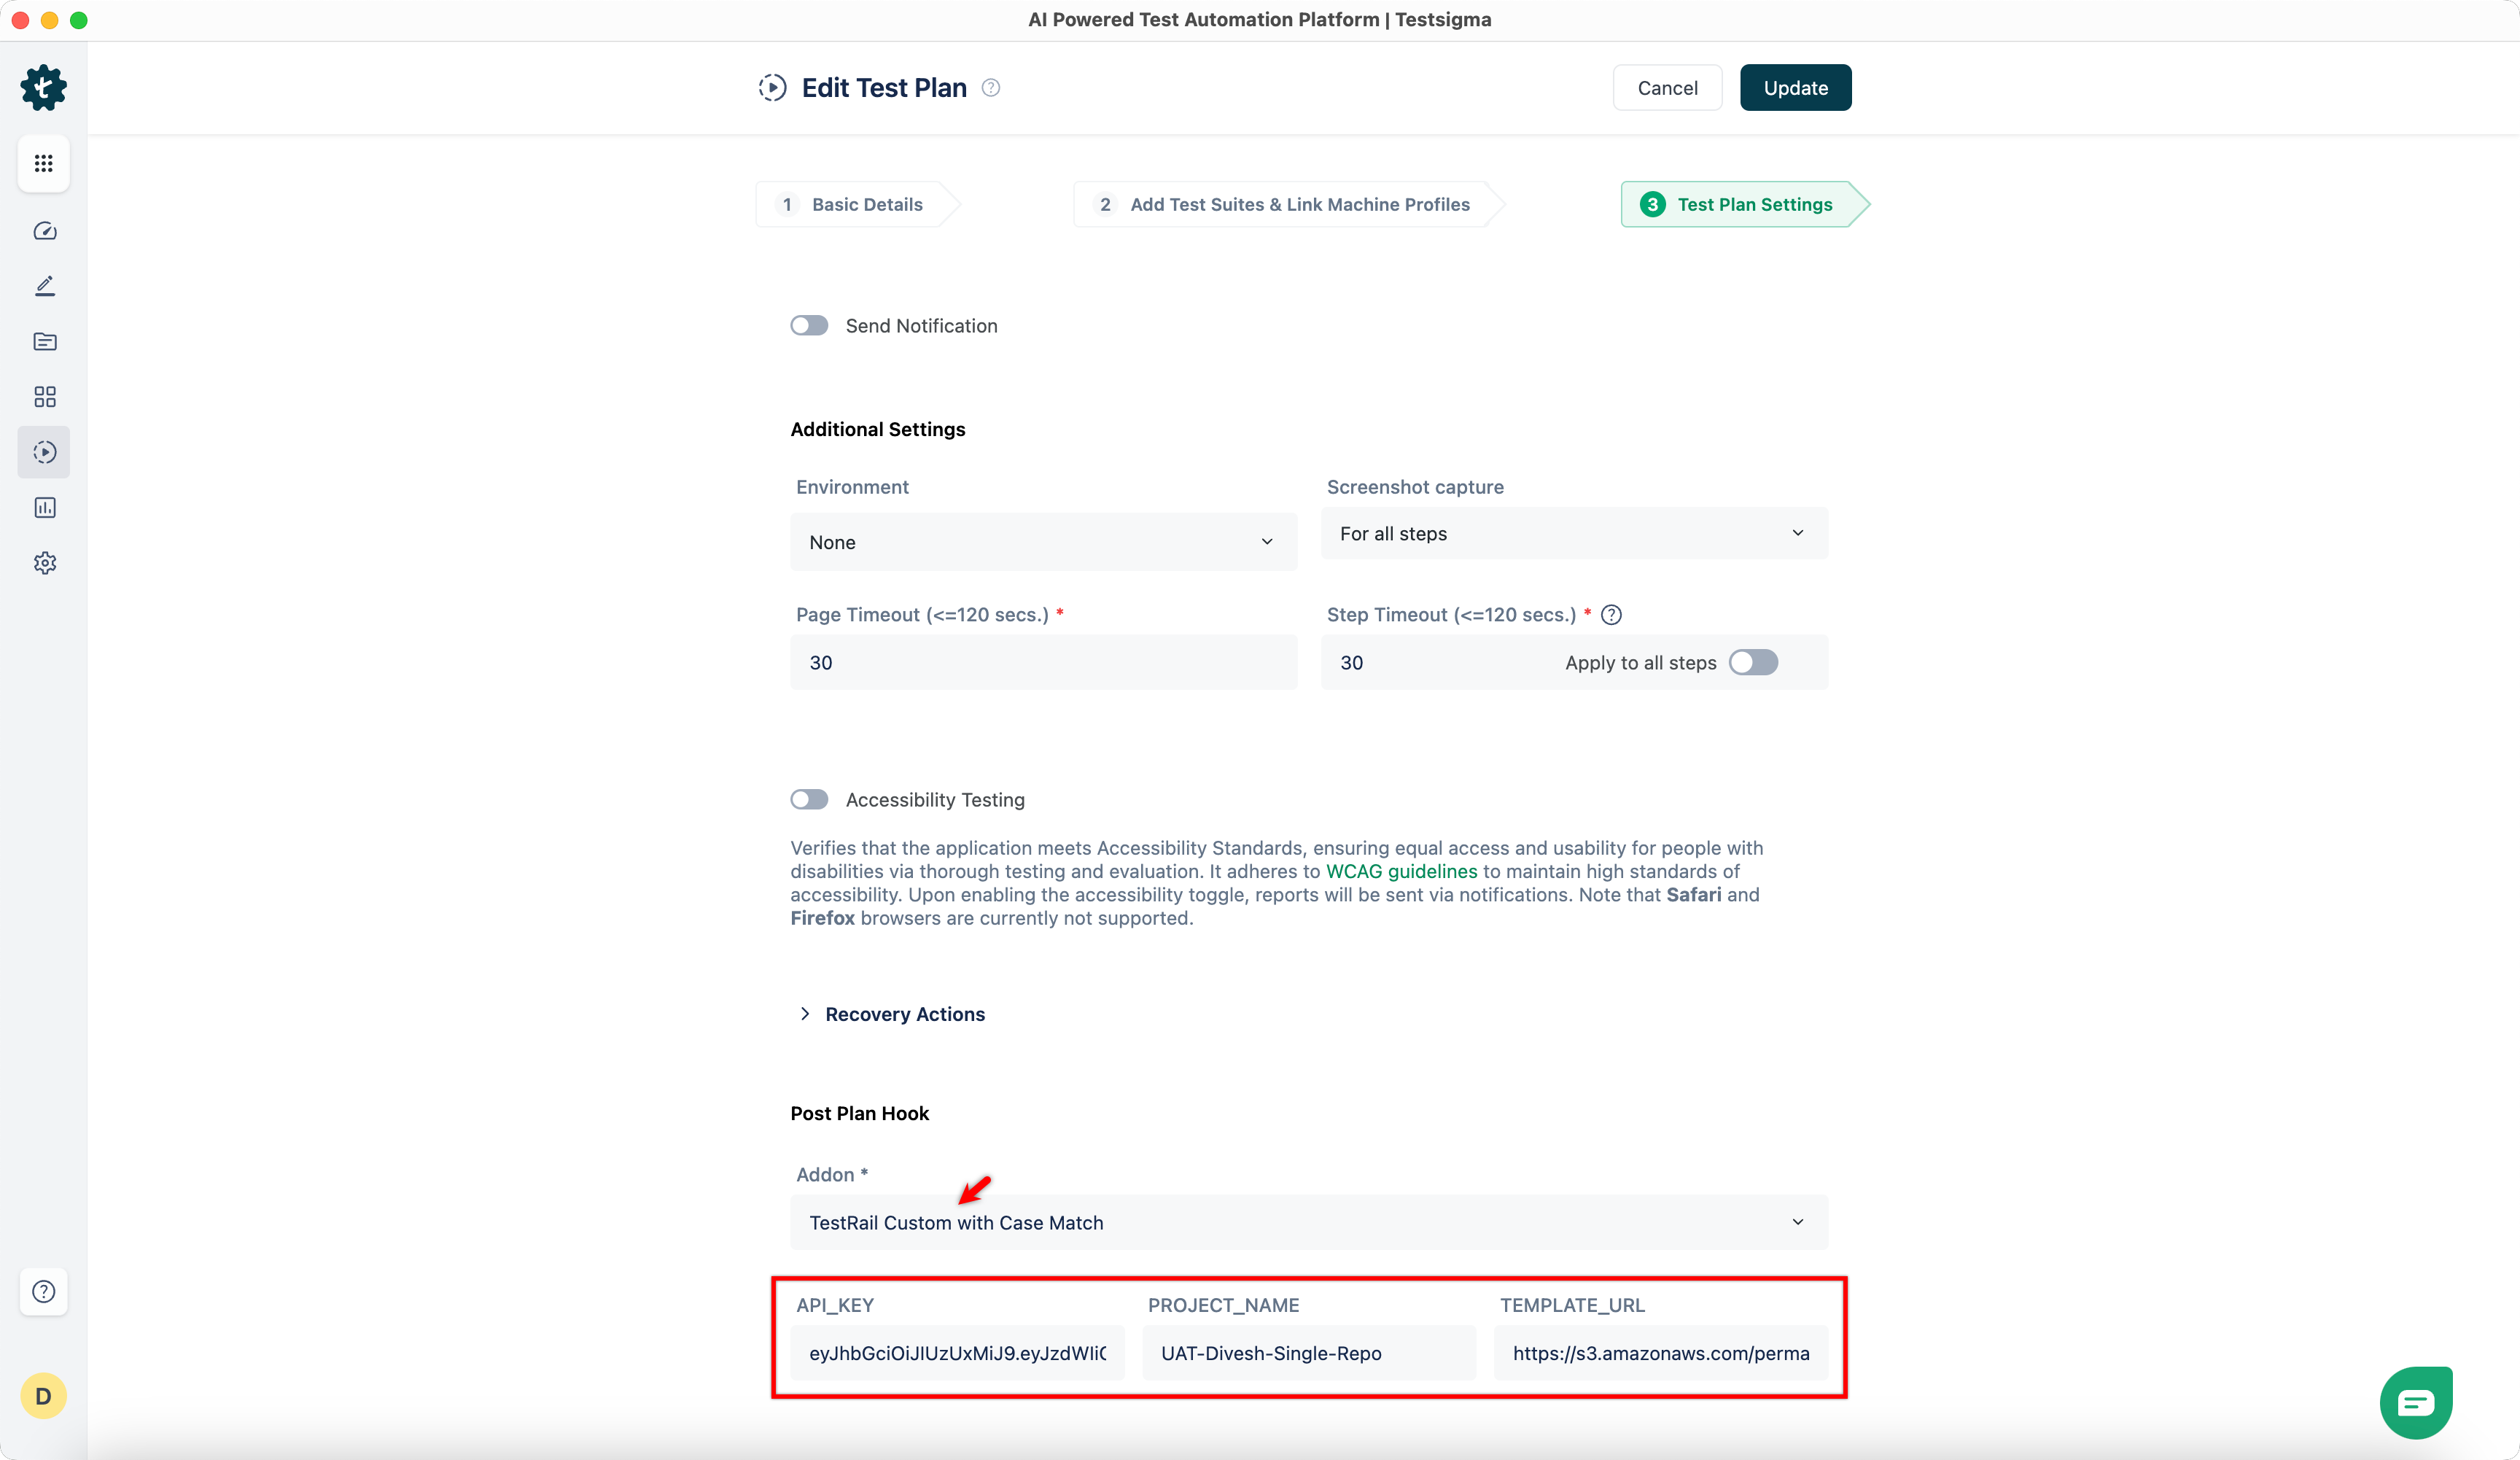
To create the template URL:
-
Download the template: download the JUnit template XML to your local system.
-
Copy the file’s URL: open your browser’s Download History, locate the downloaded XML file, then right-click it and select Copy link address (or click the Copy download link icon).
-
Update the plan: paste the URL into the TEMPLATE_URL field in the Test Plan Settings and click Create or Update.
Trigger runs through the API
Section titled “Trigger runs through the API”You can also trigger TestRail test runs using APIs. Download the Postman collection to get started.
- Authorization: a Bearer Token, copied from Settings > API Keys in Testsigma.
- Request body fields:
- TestRail Run ID: the unique identifier for the test run in TestRail.
- Hook Data: the Testsigma API Key (from Settings > API Keys), the Project Name associated with the execution, and the Template URL of the JUnit template file used to configure result data.
- Title: a title for the run.
- Execution Lab: the execution environment or lab used for running the test cases.
Was this page helpful?
Thanks for the feedback.