

Test data profiles
A test data profile is a grid of test data: each column is a parameter, and each row is a data set the test case runs against. Store a thousand credential pairs in one profile, turn on Data-Driven in the test case, and one test case covers all of them.
Prerequisites
- You have a project, and permission to manage test data.
Folders and subfolders
Section titled “Folders and subfolders”Profiles sit in a two-level tree of folders and subfolders. A folder covers a functional area of the application, a subfolder groups related profiles inside it, and the profile holds the data.
Folders and subfolders load collapsed, and Testsigma keeps their expanded state when you switch tabs.
Go to Test Data > Test Data Profiles. To create a folder, click + at the top of the left panel, select New Folder, name it, and click Add. To create a subfolder, click +, select New Subfolder, select the parent folder, click Next, name the subfolder, and click Create.
Search from the bar at the top of the left panel. Results filter as you type, across every folder and subfolder in the project.
Create a test data profile
Section titled “Create a test data profile”-
Go to Test Data > Test Data Profiles.
-
Start the profile one of two ways:
- Click + at the top of the left panel, select New Test Data Profile, choose the folder and subfolder in Select Location, and click Confirm. The subfolder you picked shows under Target Subfolder.
- Expand a folder, hover over a subfolder, and click the + beside its name. An Untitled profile opens, already attached to that subfolder.
-
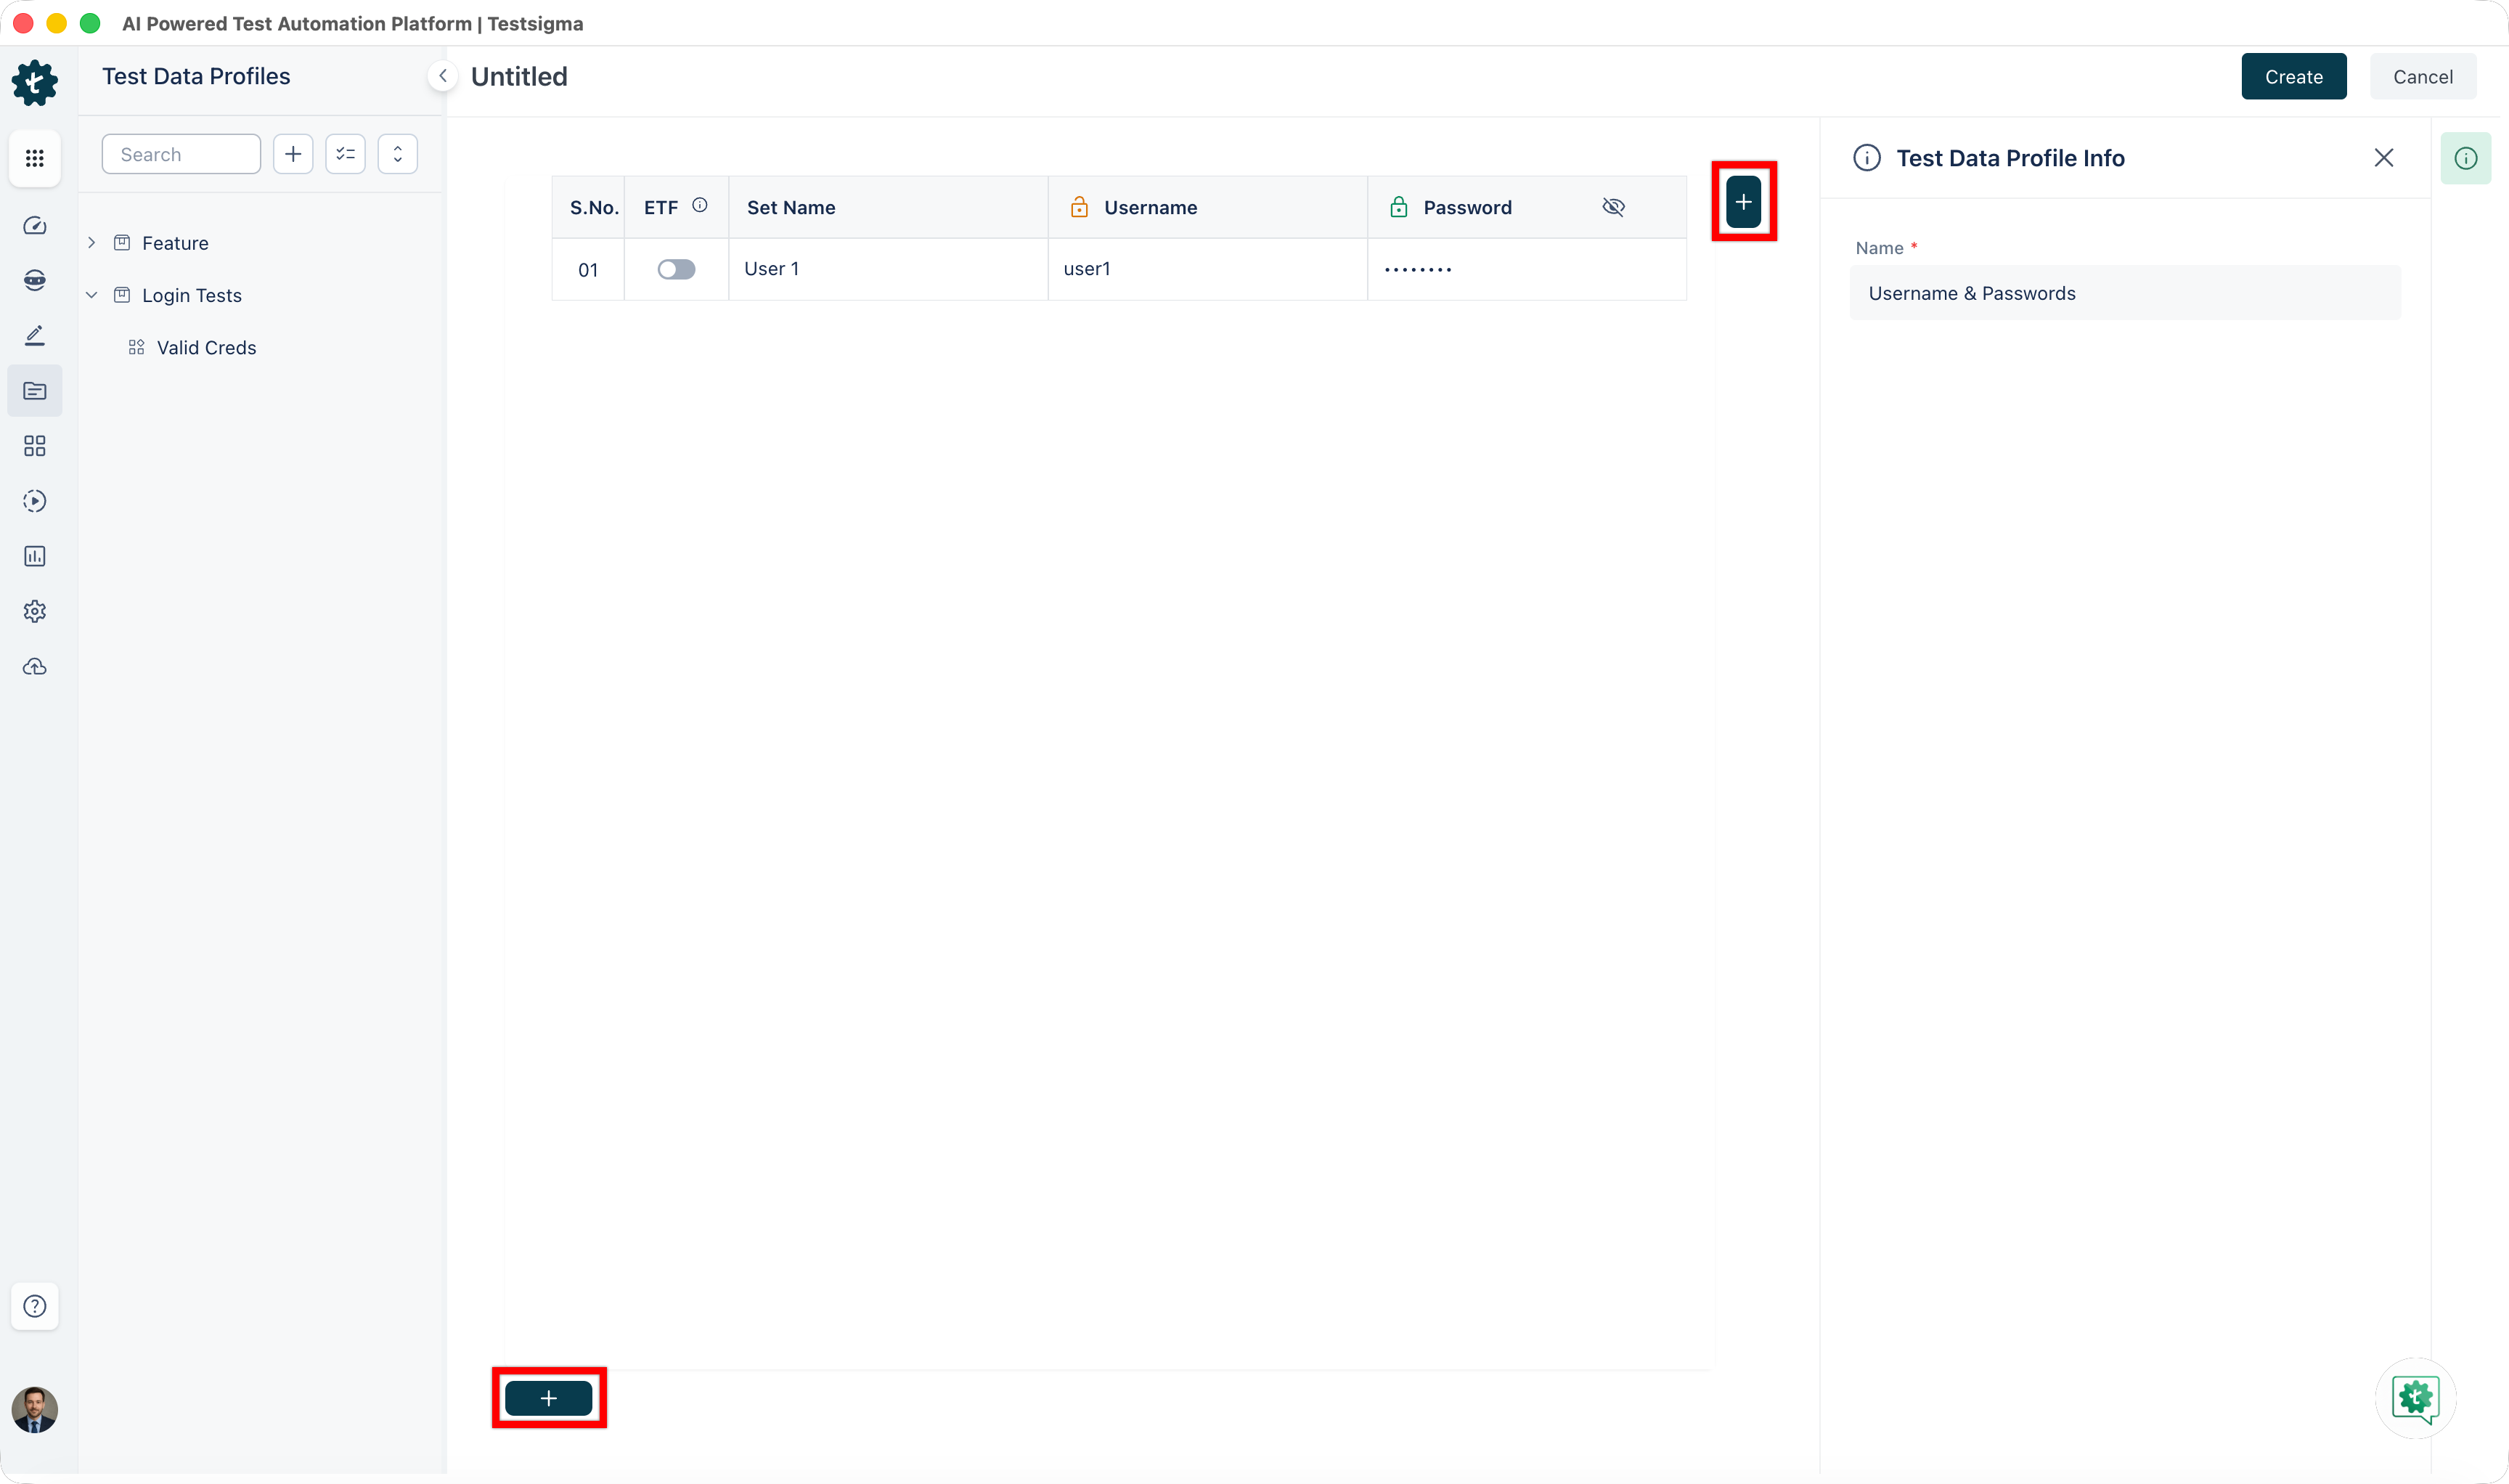
Enter a name in the Test Data Profile Info panel.
-
Click + at the top of the grid to add a parameter, and + at the bottom to add a data set. Repeat until the grid holds the columns and rows you need.
-
Enter the values.
-
Click Create.
Mask sensitive values
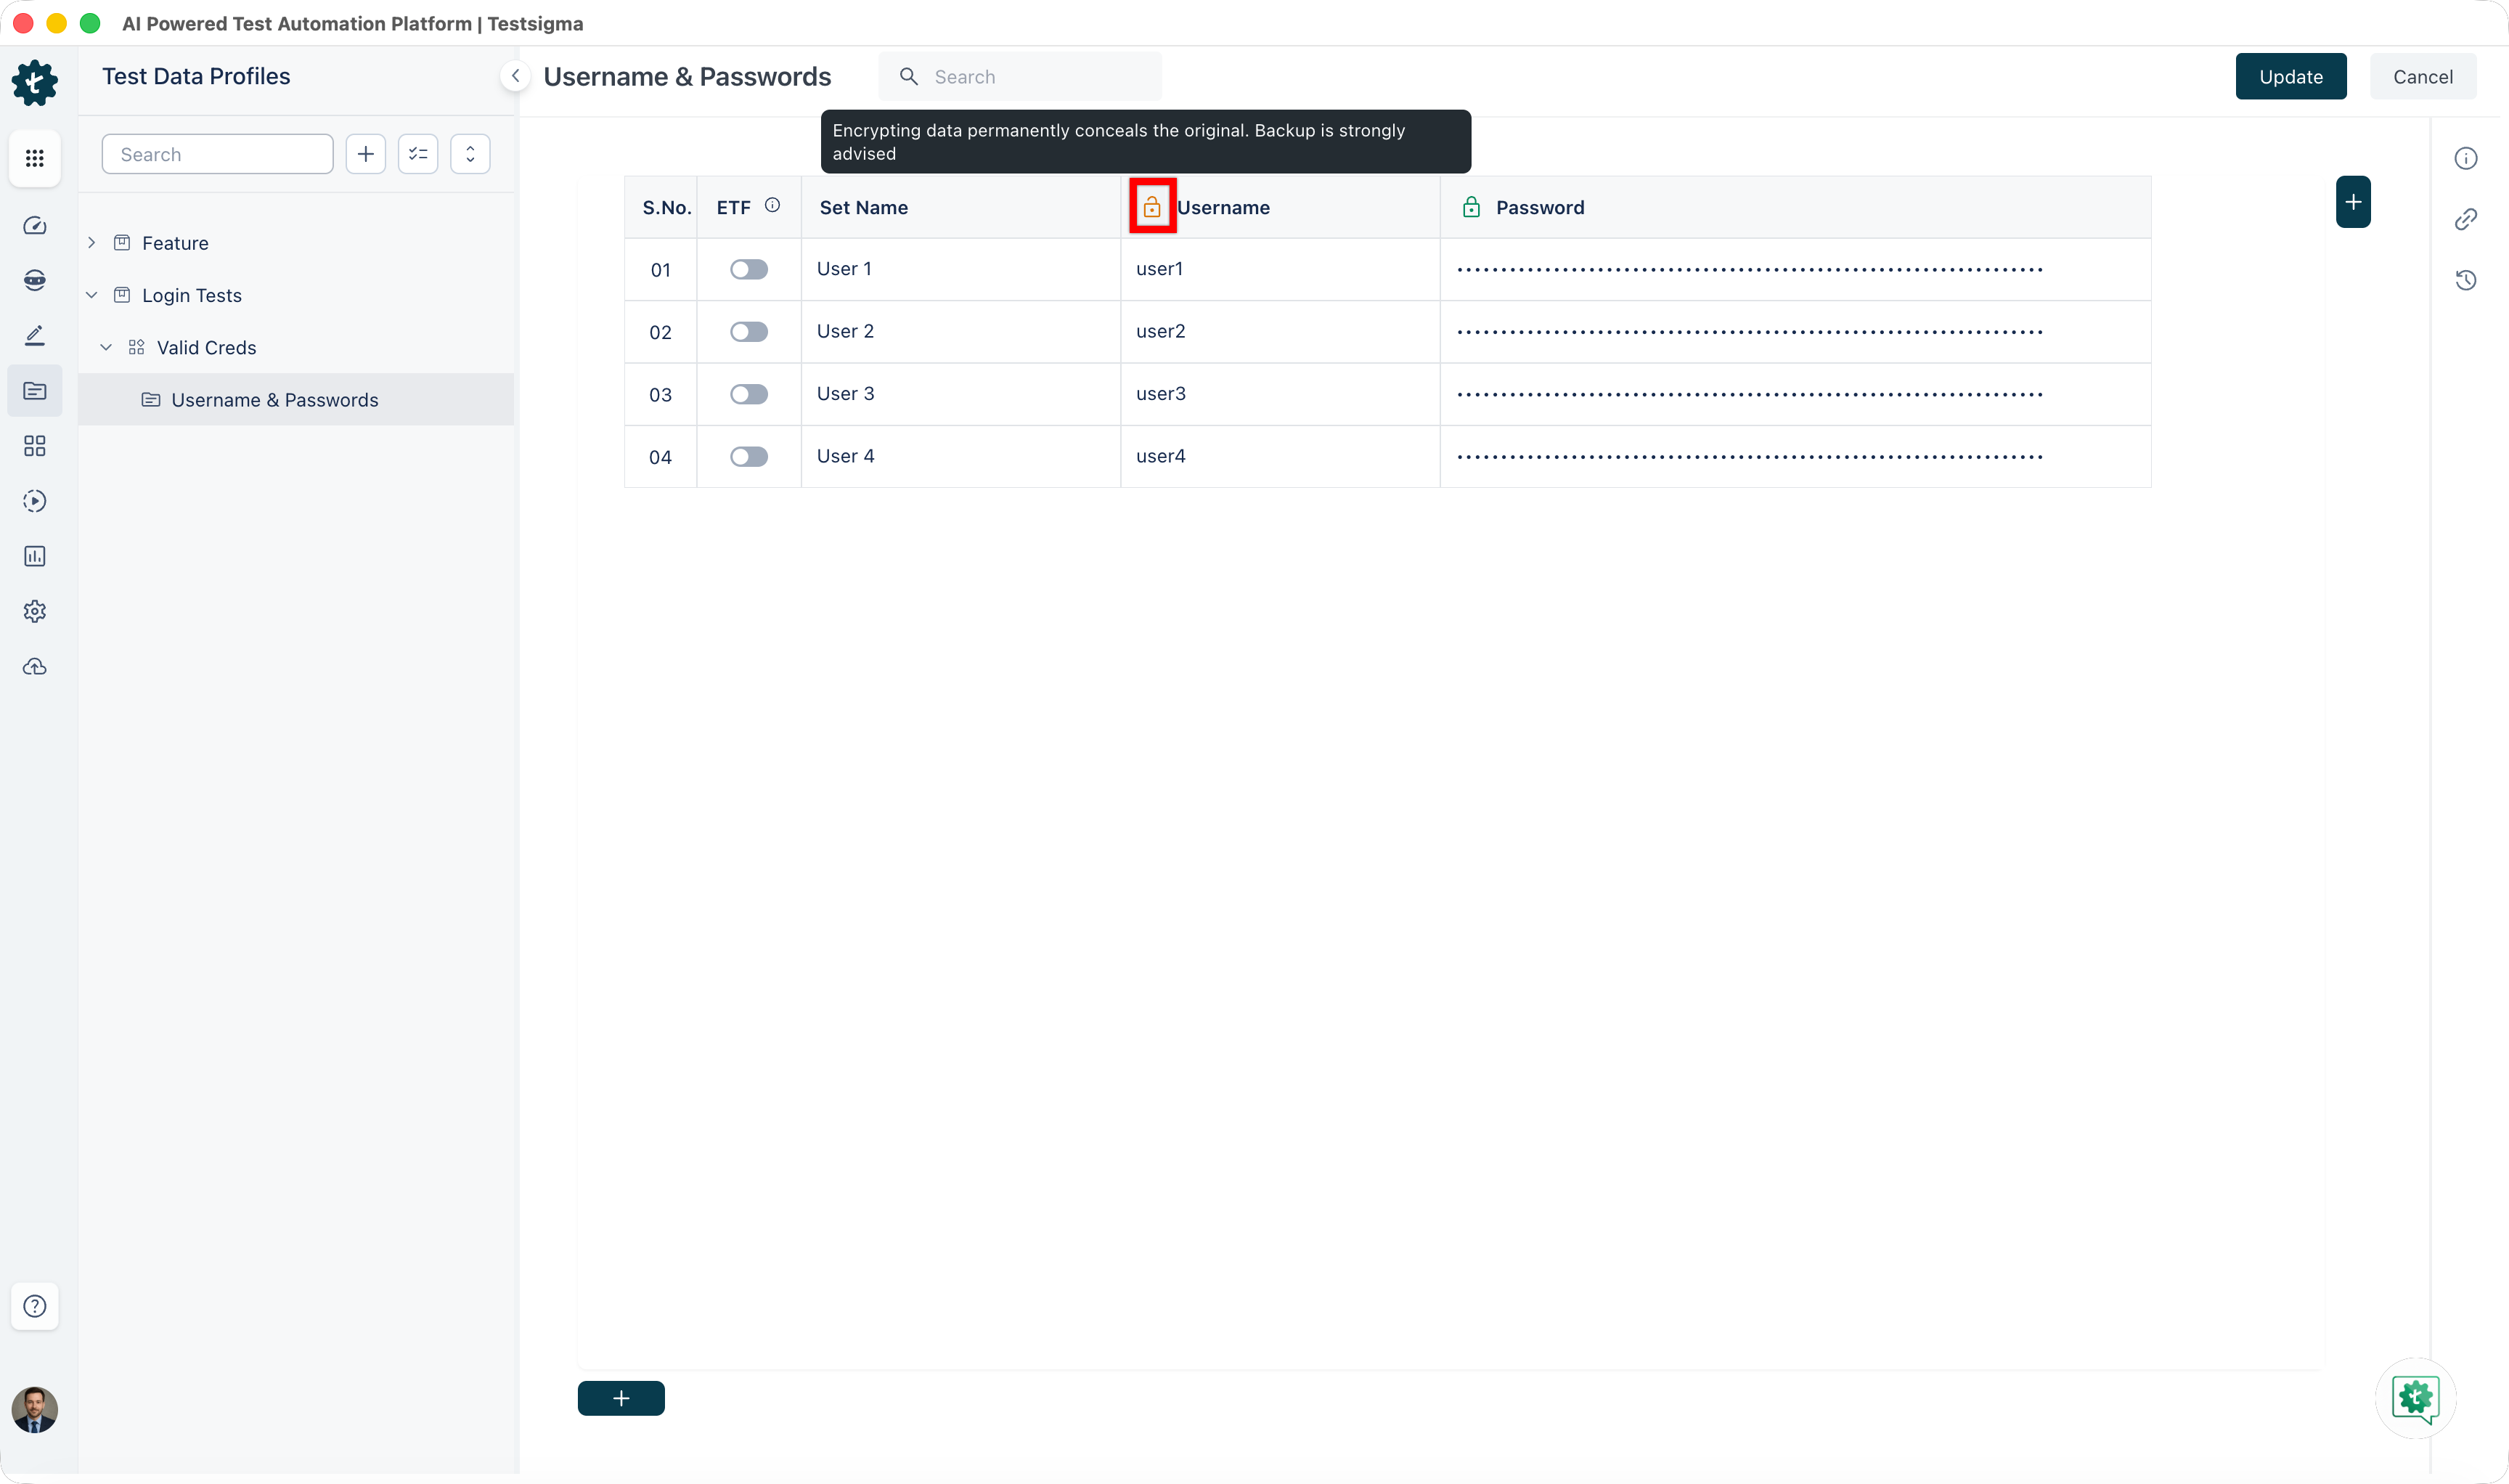
Section titled “Mask sensitive values”Mask a parameter that holds passwords or tokens, so its values show as dots to everyone.
Open the profile, enter the values in the parameter column, click the lock icon in the column header, and click Update.
Import a profile
Section titled “Import a profile”An import needs an XLSX file carrying three mandatory columns, followed by one column per parameter.
| Column | What it holds |
|---|---|
| Name | The name of the data set in that row |
| Description | A description of that row’s data |
| ExpectedToFail | YES if you expect the test case to fail on this data, NO if you expect it to pass. Shown as ETF in the profile grid |
-
Go to Test Data > Test Data Profiles and open List View.
-
Click Import.
-
Select the folder and subfolder in Select Location.
-
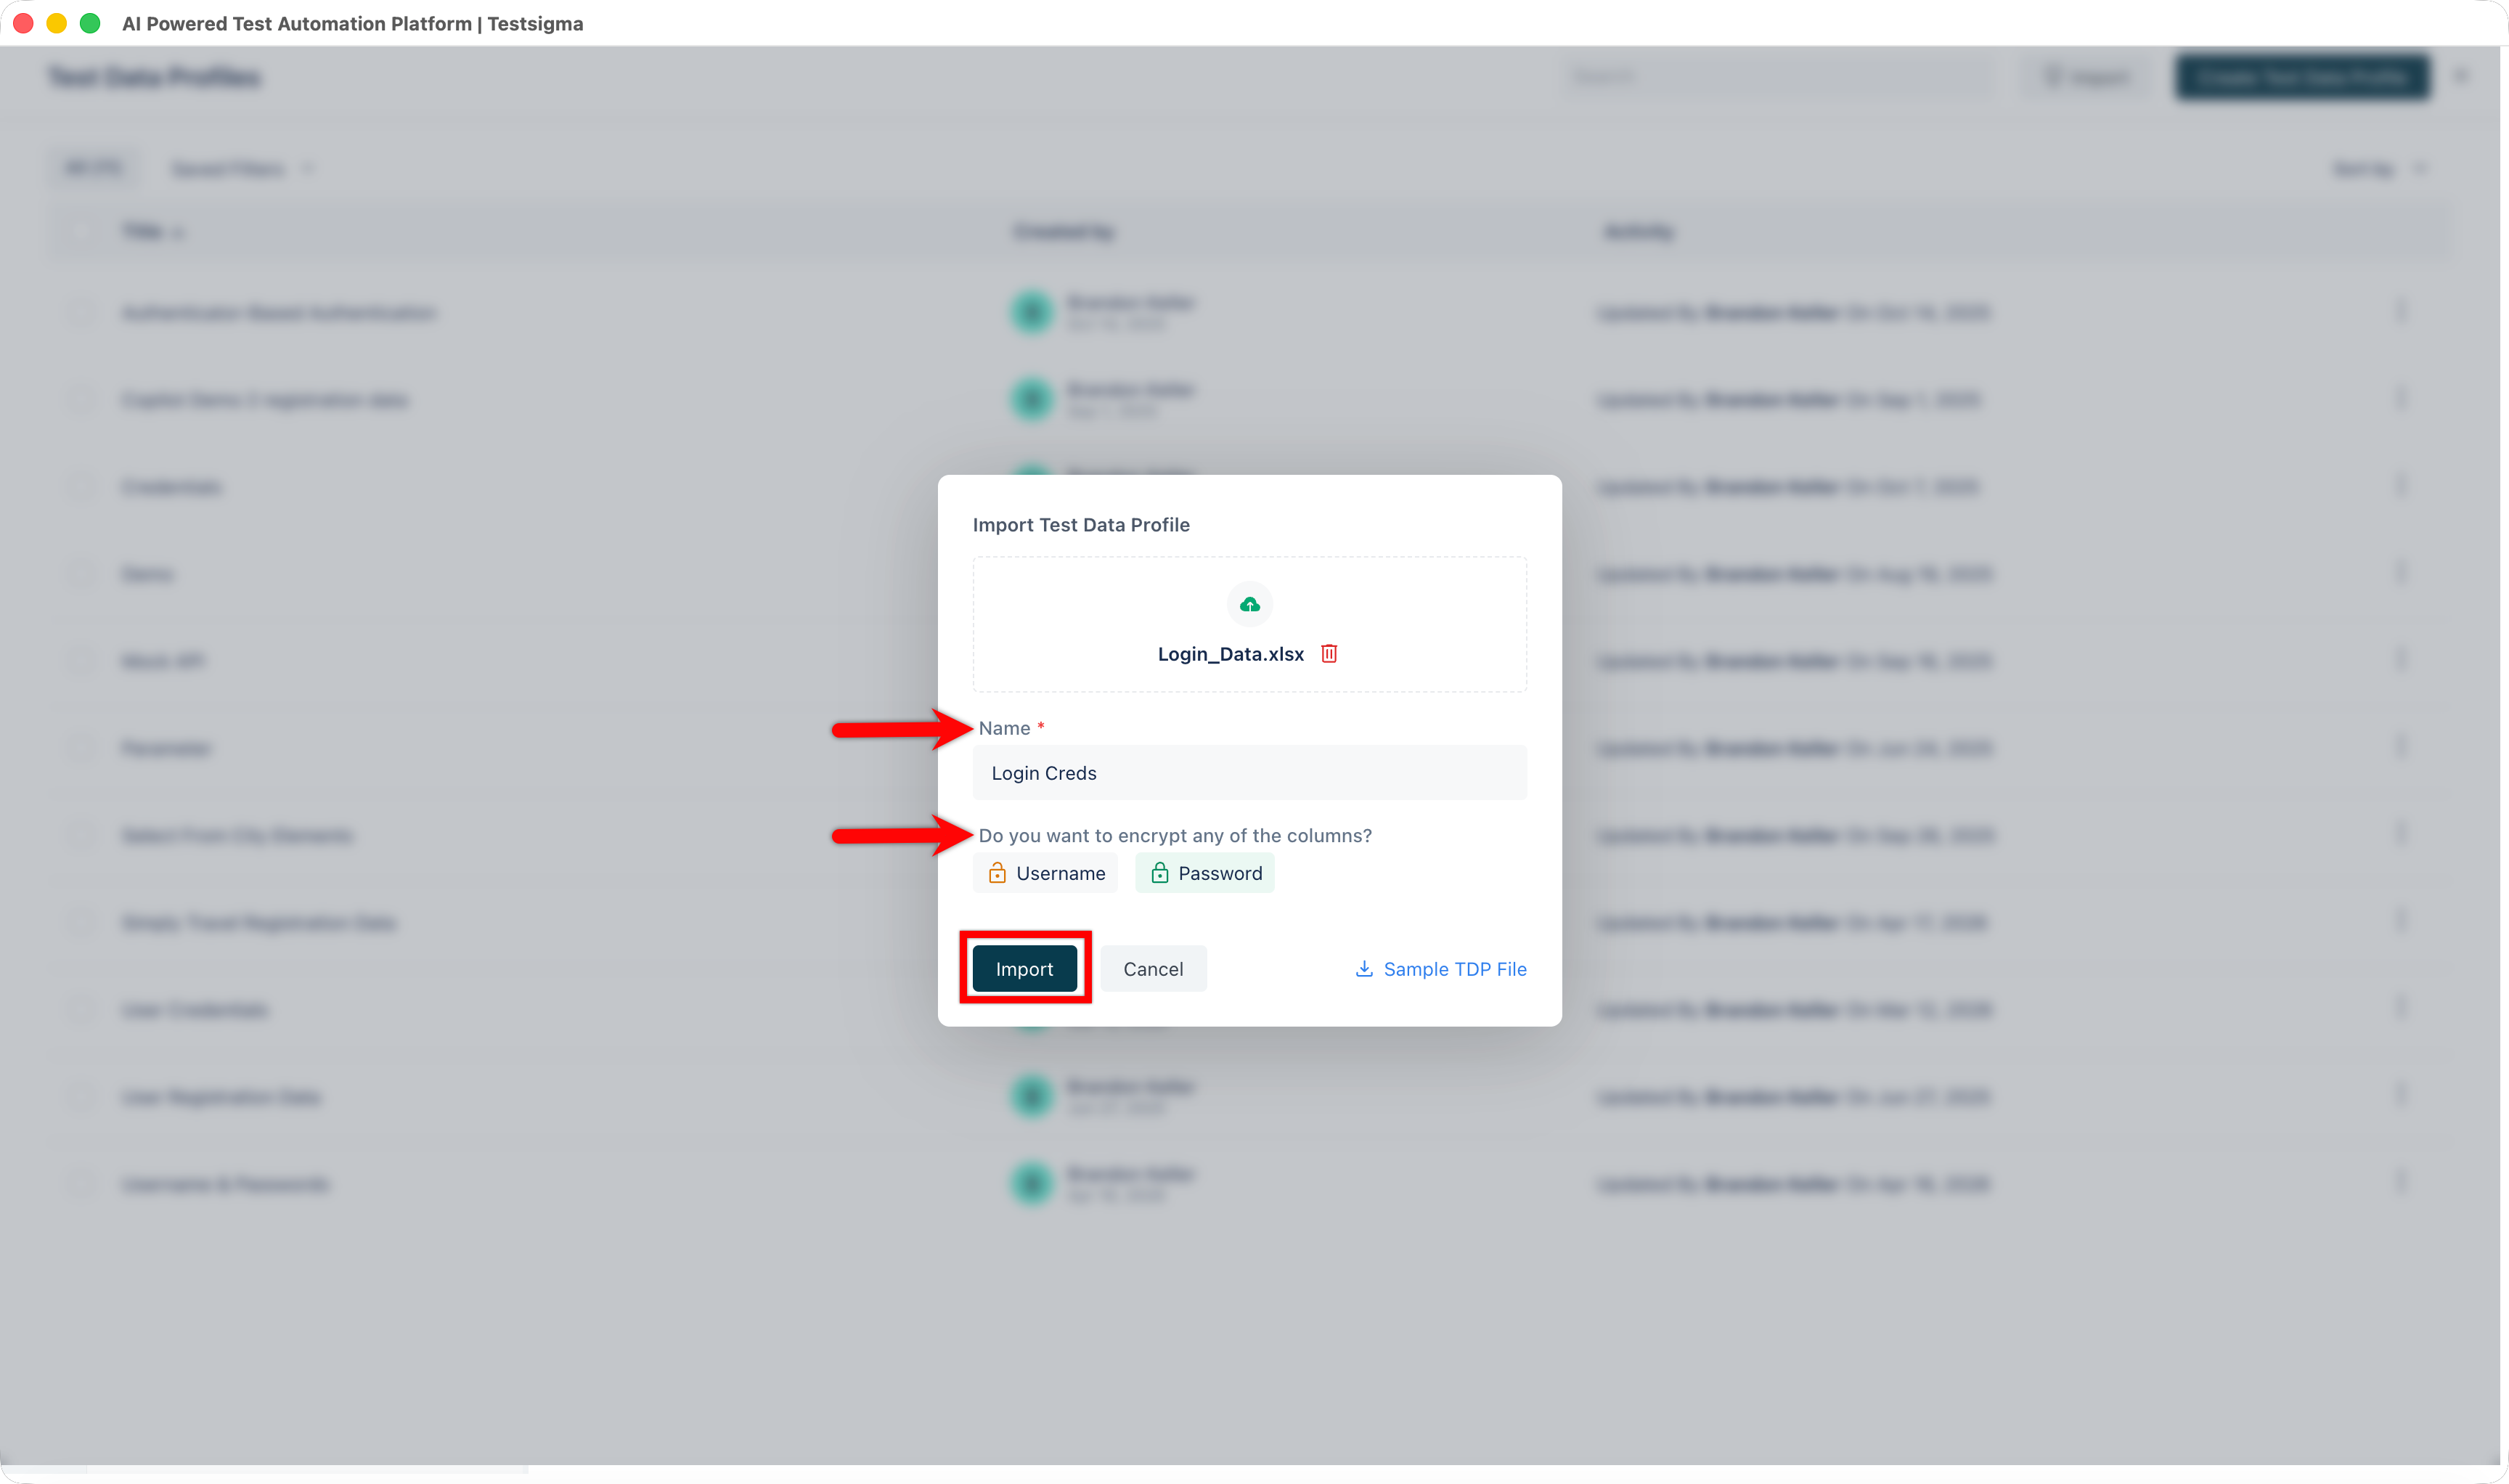
Click Browse File in Import Test Data Profile and choose the file.
-
Enter a Name for the profile.
-
Select the columns to encrypt.
-
Click Import.
Testsigma emails you when the import finishes. Refresh the page to see the profile in the tree.
Replace a profile
Section titled “Replace a profile”Find the profile from List View, click the ellipsis icon (⋮) beside it, and select Update TDP. You can also open it from the tree and click Update. Then click Browse File in Import Test Data Profile, choose the replacement, select the columns to encrypt, and click Import. Testsigma emails you when it completes.
Update a value from a test case
Section titled “Update a value from a test case”A test case can write back into a profile while it runs.
-
Open a test case and add a step using the NLP for updating a test data profile value.
-
Hover over the test data placeholder, select Plain text, and enter the new value.
-
Hover over the test data profile placeholder and select the profile.
-
Hover over the parameter placeholder and select the column to update.
-
Click Run.
The value is written to the profile when the run succeeds.
Associate a profile with a test case
Section titled “Associate a profile with a test case”-
Open the test case and click Test Case Settings in the right navigation bar.
-
Select the profile from the Test Data Profile dropdown.
-
Turn on Data-Driven to run the test case once per data set.
-
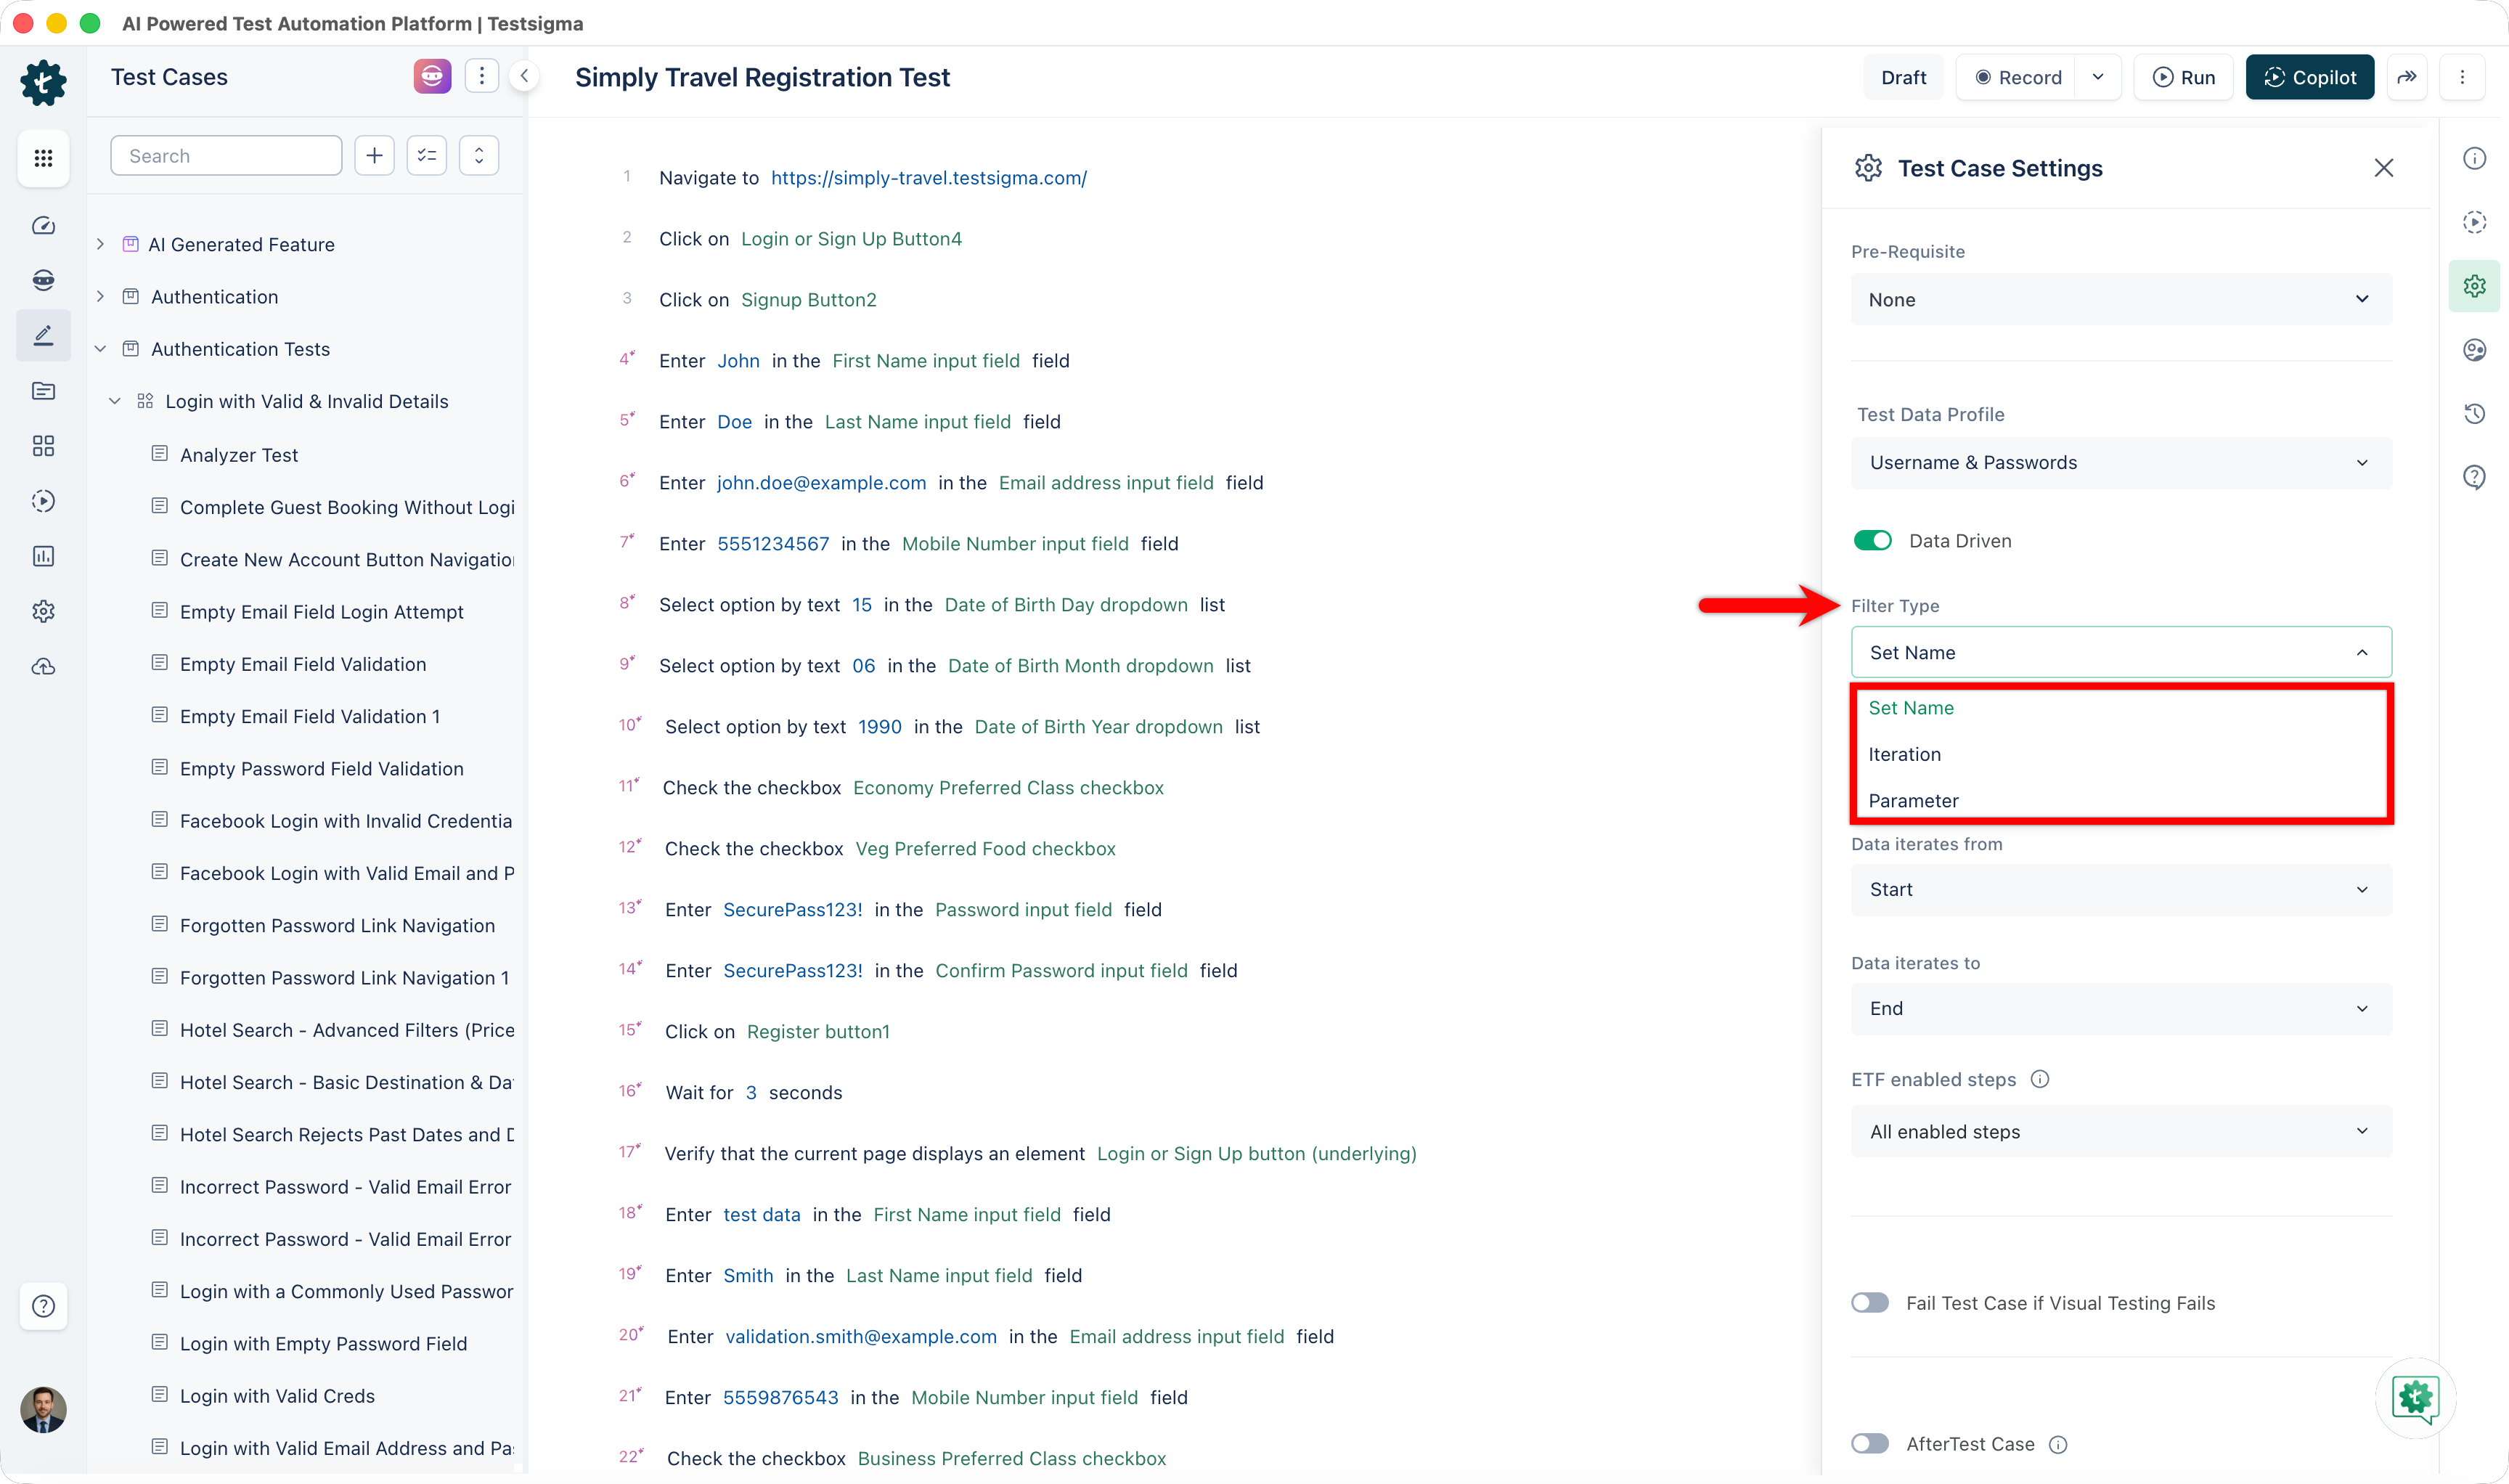
(Optional) Narrow which data sets run, using one of the filters below.
| Filter | What it does |
|---|---|
| Iteration | Filters sequential data sets, with greater than, less than, or between |
| Set Name | Filters non-sequential data sets by name, with equals, contains, starts with, or ends with |
| Parameter | Filters non-sequential data sets by the parameters used in them |
To use a parameter in a step, click Add new step and write a step carrying a test data placeholder, such as Enter test data in the element field. Click the placeholder, select @ Parameter, and pick the parameter from the right panel.
Iterate from a runtime value
Section titled “Iterate from a runtime value”A data-driven test runs every data set from start to end. To start and stop at values decided during the run, store them in a prerequisite test case and point the iteration at those variables.
-
Open the test case that runs first, and store the start and end values in the variables
RunTime_TestData_Set_StartandRunTime_TestData_Set_End. -
Open the data-driven test case and click Test Case Settings.
-
Select that test case in the Prerequisite dropdown.
-
Turn on Data-Driven.
-
Select Overwrite Test Data Set with a runtime variable in both Data Iterates From and Data Iterates To.
-
Write the steps and click Run.
Two more things work on a data set name. The store-iteration-count-test-data-set-name NLP saves it into a variable for later steps. An add-on uses data set values from the profile inside an if condition.
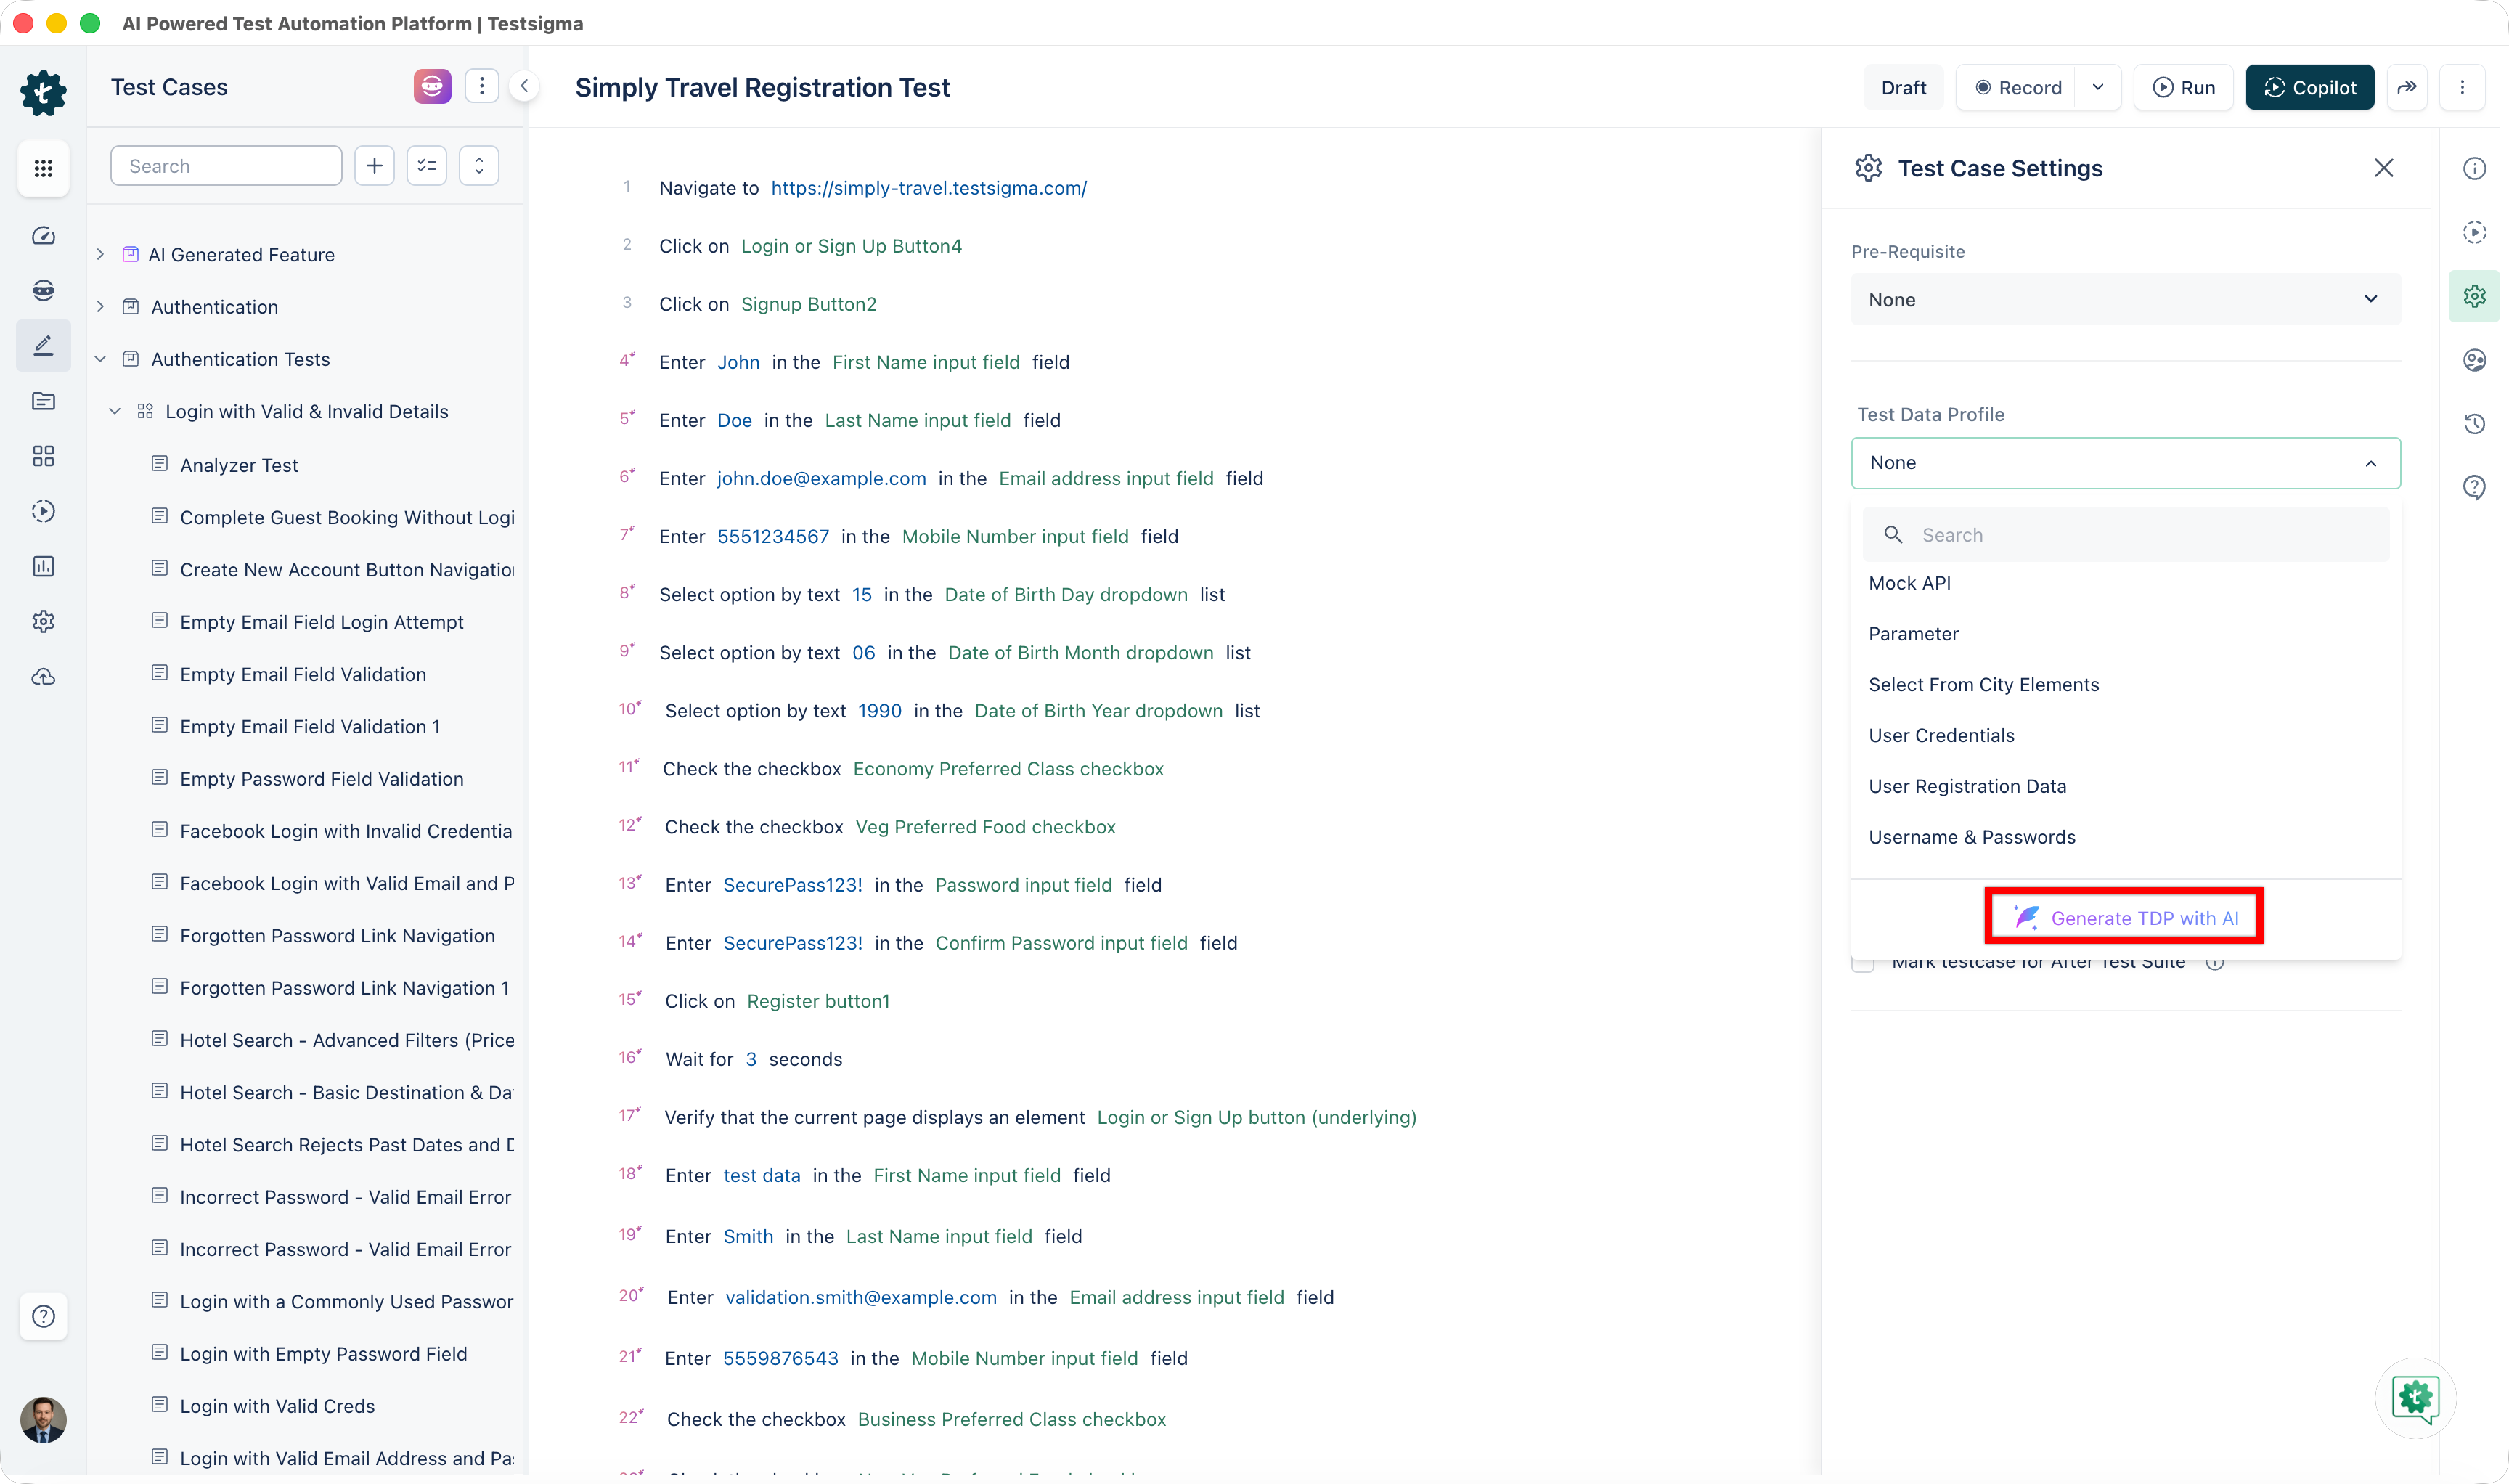
Generate a profile with AI
Section titled “Generate a profile with AI”-
Open a test case and go to Test Case Settings > Test Data Profile.
-
Click the Test Data Profile dropdown.
-
Click Generate TDP with AI.
-
Check the Field Names in Test Data Generation and click Generate.
-
Click Create and Replace when the generated data looks right.
The test data in your test steps is replaced with the generated data.
Delete profiles
Section titled “Delete profiles”-
Go to Test Data > Test Data Profiles and click the List View icon.
-
Select the profiles to delete.
-
Click Delete.
-
Enter
Deletein the Delete List of Test Data prompt and click I understand, delete this test data.
A test modifies an Excel file. How do I get the changes back into Testsigma?
Changes made during a run live on the test machine, not in your upload. Install two addons: ExcelActions_cloud to write the value into the file (its NLP takes the upload, row, column, and sheet index, and stores the modified file’s path in a runtime variable), then Upload Latest file to Testsigma Uploads to push that path back over your upload.
Was this page helpful?
Thanks for the feedback.