

Set up Salesforce testing
Testing a Salesforce application means connecting Testsigma to your Salesforce organization twice: once to read the org’s metadata, and once per user profile whose permissions a test needs to run under.
Setup runs in 3 stages. Create an app in Salesforce that authorizes the connection, create a Salesforce project in Testsigma, then create the metadata and user connections.
Create the app in Salesforce
Section titled “Create the app in Salesforce”Salesforce has replaced connected apps with External Client Apps in newer organizations. Use the route your org offers.
Before you start, you need a Salesforce organization and access to its admin email, since the identity verification code and the security token go there.
- Log in to Salesforce, enter App Manager in the quick finder on the Setup page, and click App Manager.
- Click New External Client App.
- Enter the External Client App Name, API Name, and Contact Email in Basic Information. Salesforce fills the API Name in for you.
- Set Distribution State to Local.
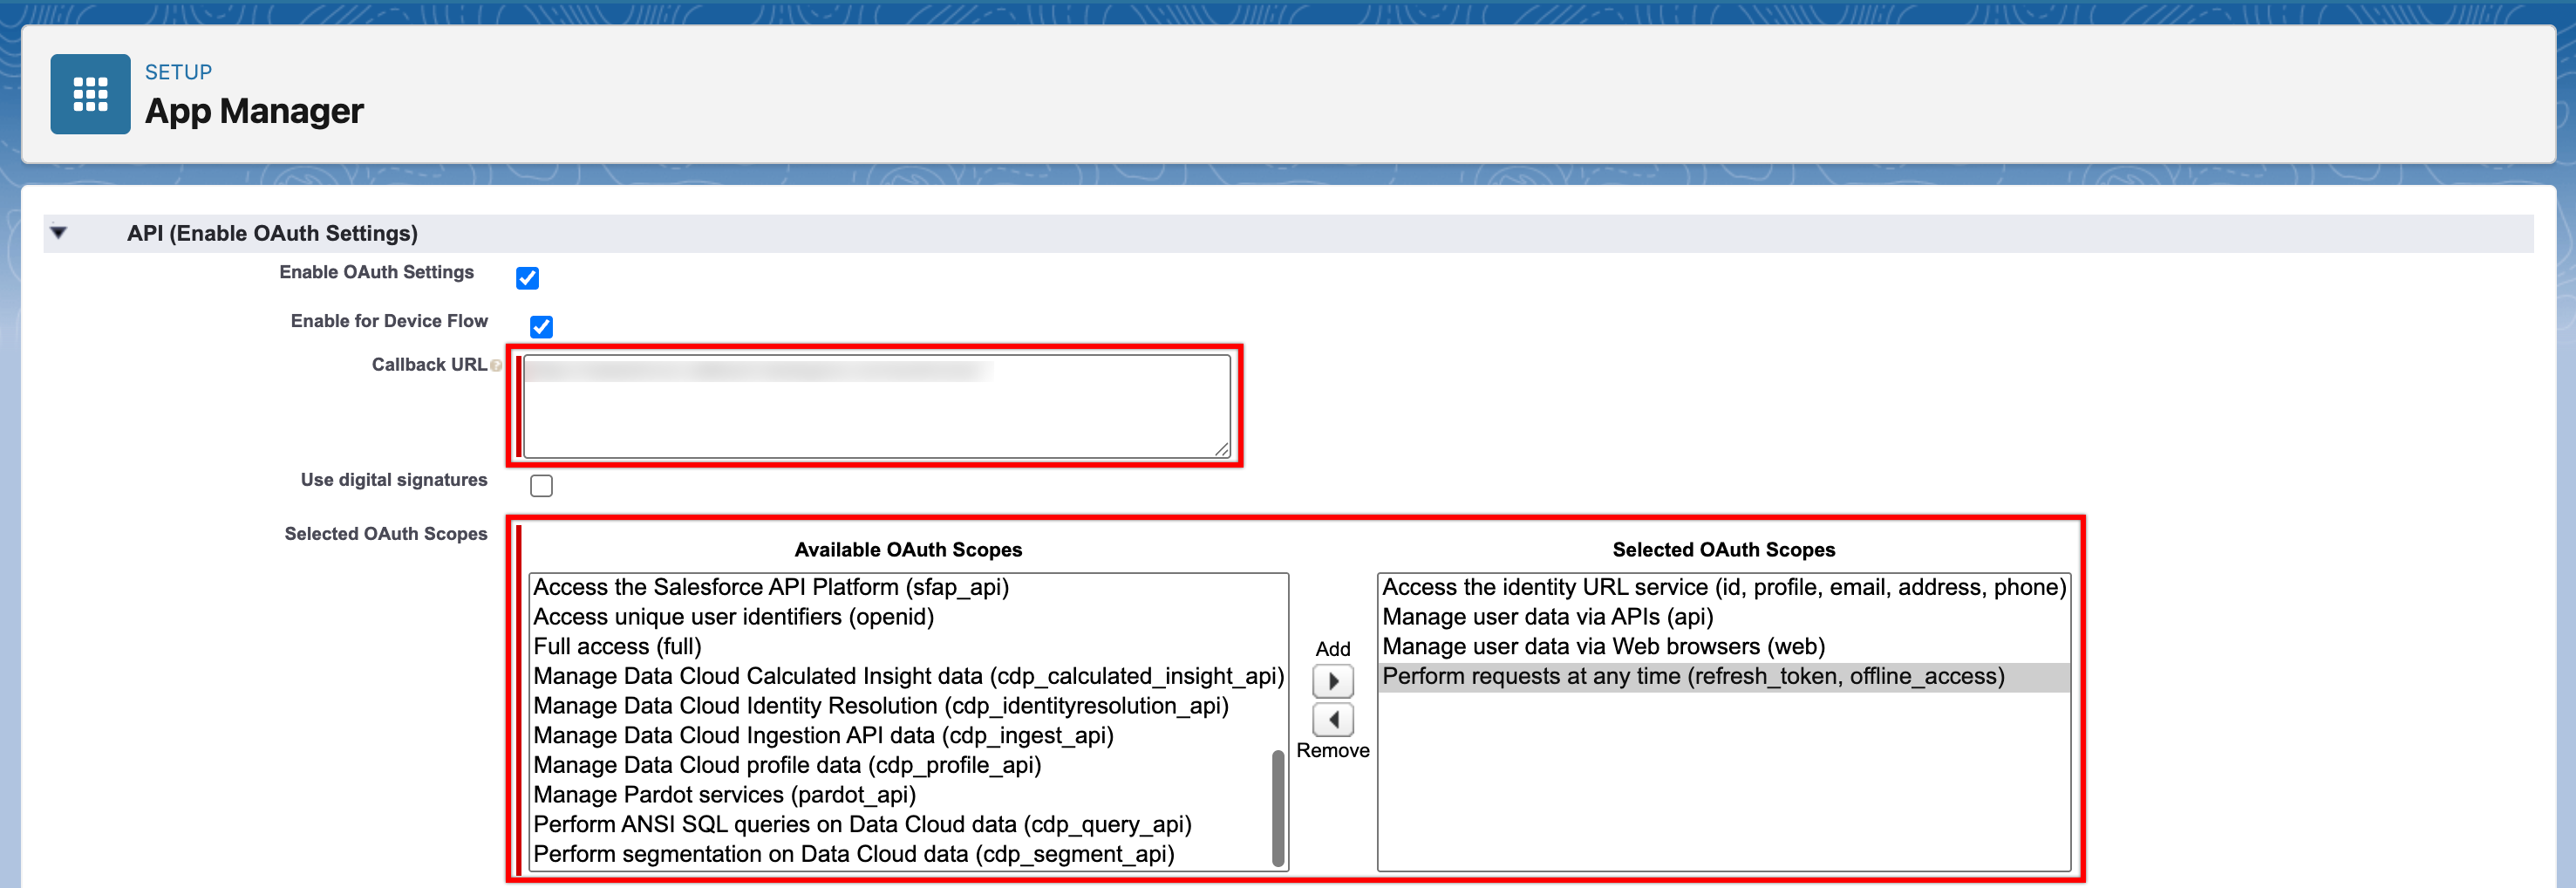
- Expand API (Enable OAuth Settings) and select Enable OAuth.
- Enter
https://salesforce-callback.testsigma.com/authorize/in Callback URL. - Move the required OAuth scopes into Selected OAuth Scopes. The scopes are mandatory for connecting and downloading metadata.
- Under Security, select Require Secret for Web Server Flow and Require Secret for Refresh Token Flow.
- Click Create.
Use this only if your organization still offers New Connected App.
- Log in to Salesforce, enter Apps in the quick finder on the Setup page, and click Settings under External Client Apps.
- Turn on Allow creation of connected apps under Connected Apps, and click Enable in the dialog. The dialog appears only the first time.
- Click New Connected App.
- Enter the Connected App Name, API Name, and Contact Email in Basic Information. Salesforce fills the API Name in for you, and the other fields are optional.
- Select Enable OAuth Settings in the API section, then set the Callback URL to
https://salesforce-callback.testsigma.com/authorize/and move the required scopes into Selected OAuth Scopes. - Click Save.
Get the consumer key and secret
Section titled “Get the consumer key and secret”Every connection below needs the app’s Consumer Key and Consumer Secret. The route differs by app type.
- External Client App: open the app, go to the Settings tab, expand OAuth Settings, and click Consumer Key and Secret
- Connected App: edit the app and click Manage Consumer Details, after confirming no checkbox in the API section is selected
Either way, Verify Your Identity opens in a new tab. Enter the OTP sent to the admin email, and Salesforce shows both values.
Create the Salesforce project
Section titled “Create the Salesforce project”-
Go to Project on the Dashboard and click New Project.
-
Enter a Project name and select Salesforce as the Application type.
-
Enter the Application name and Version, and click Create.
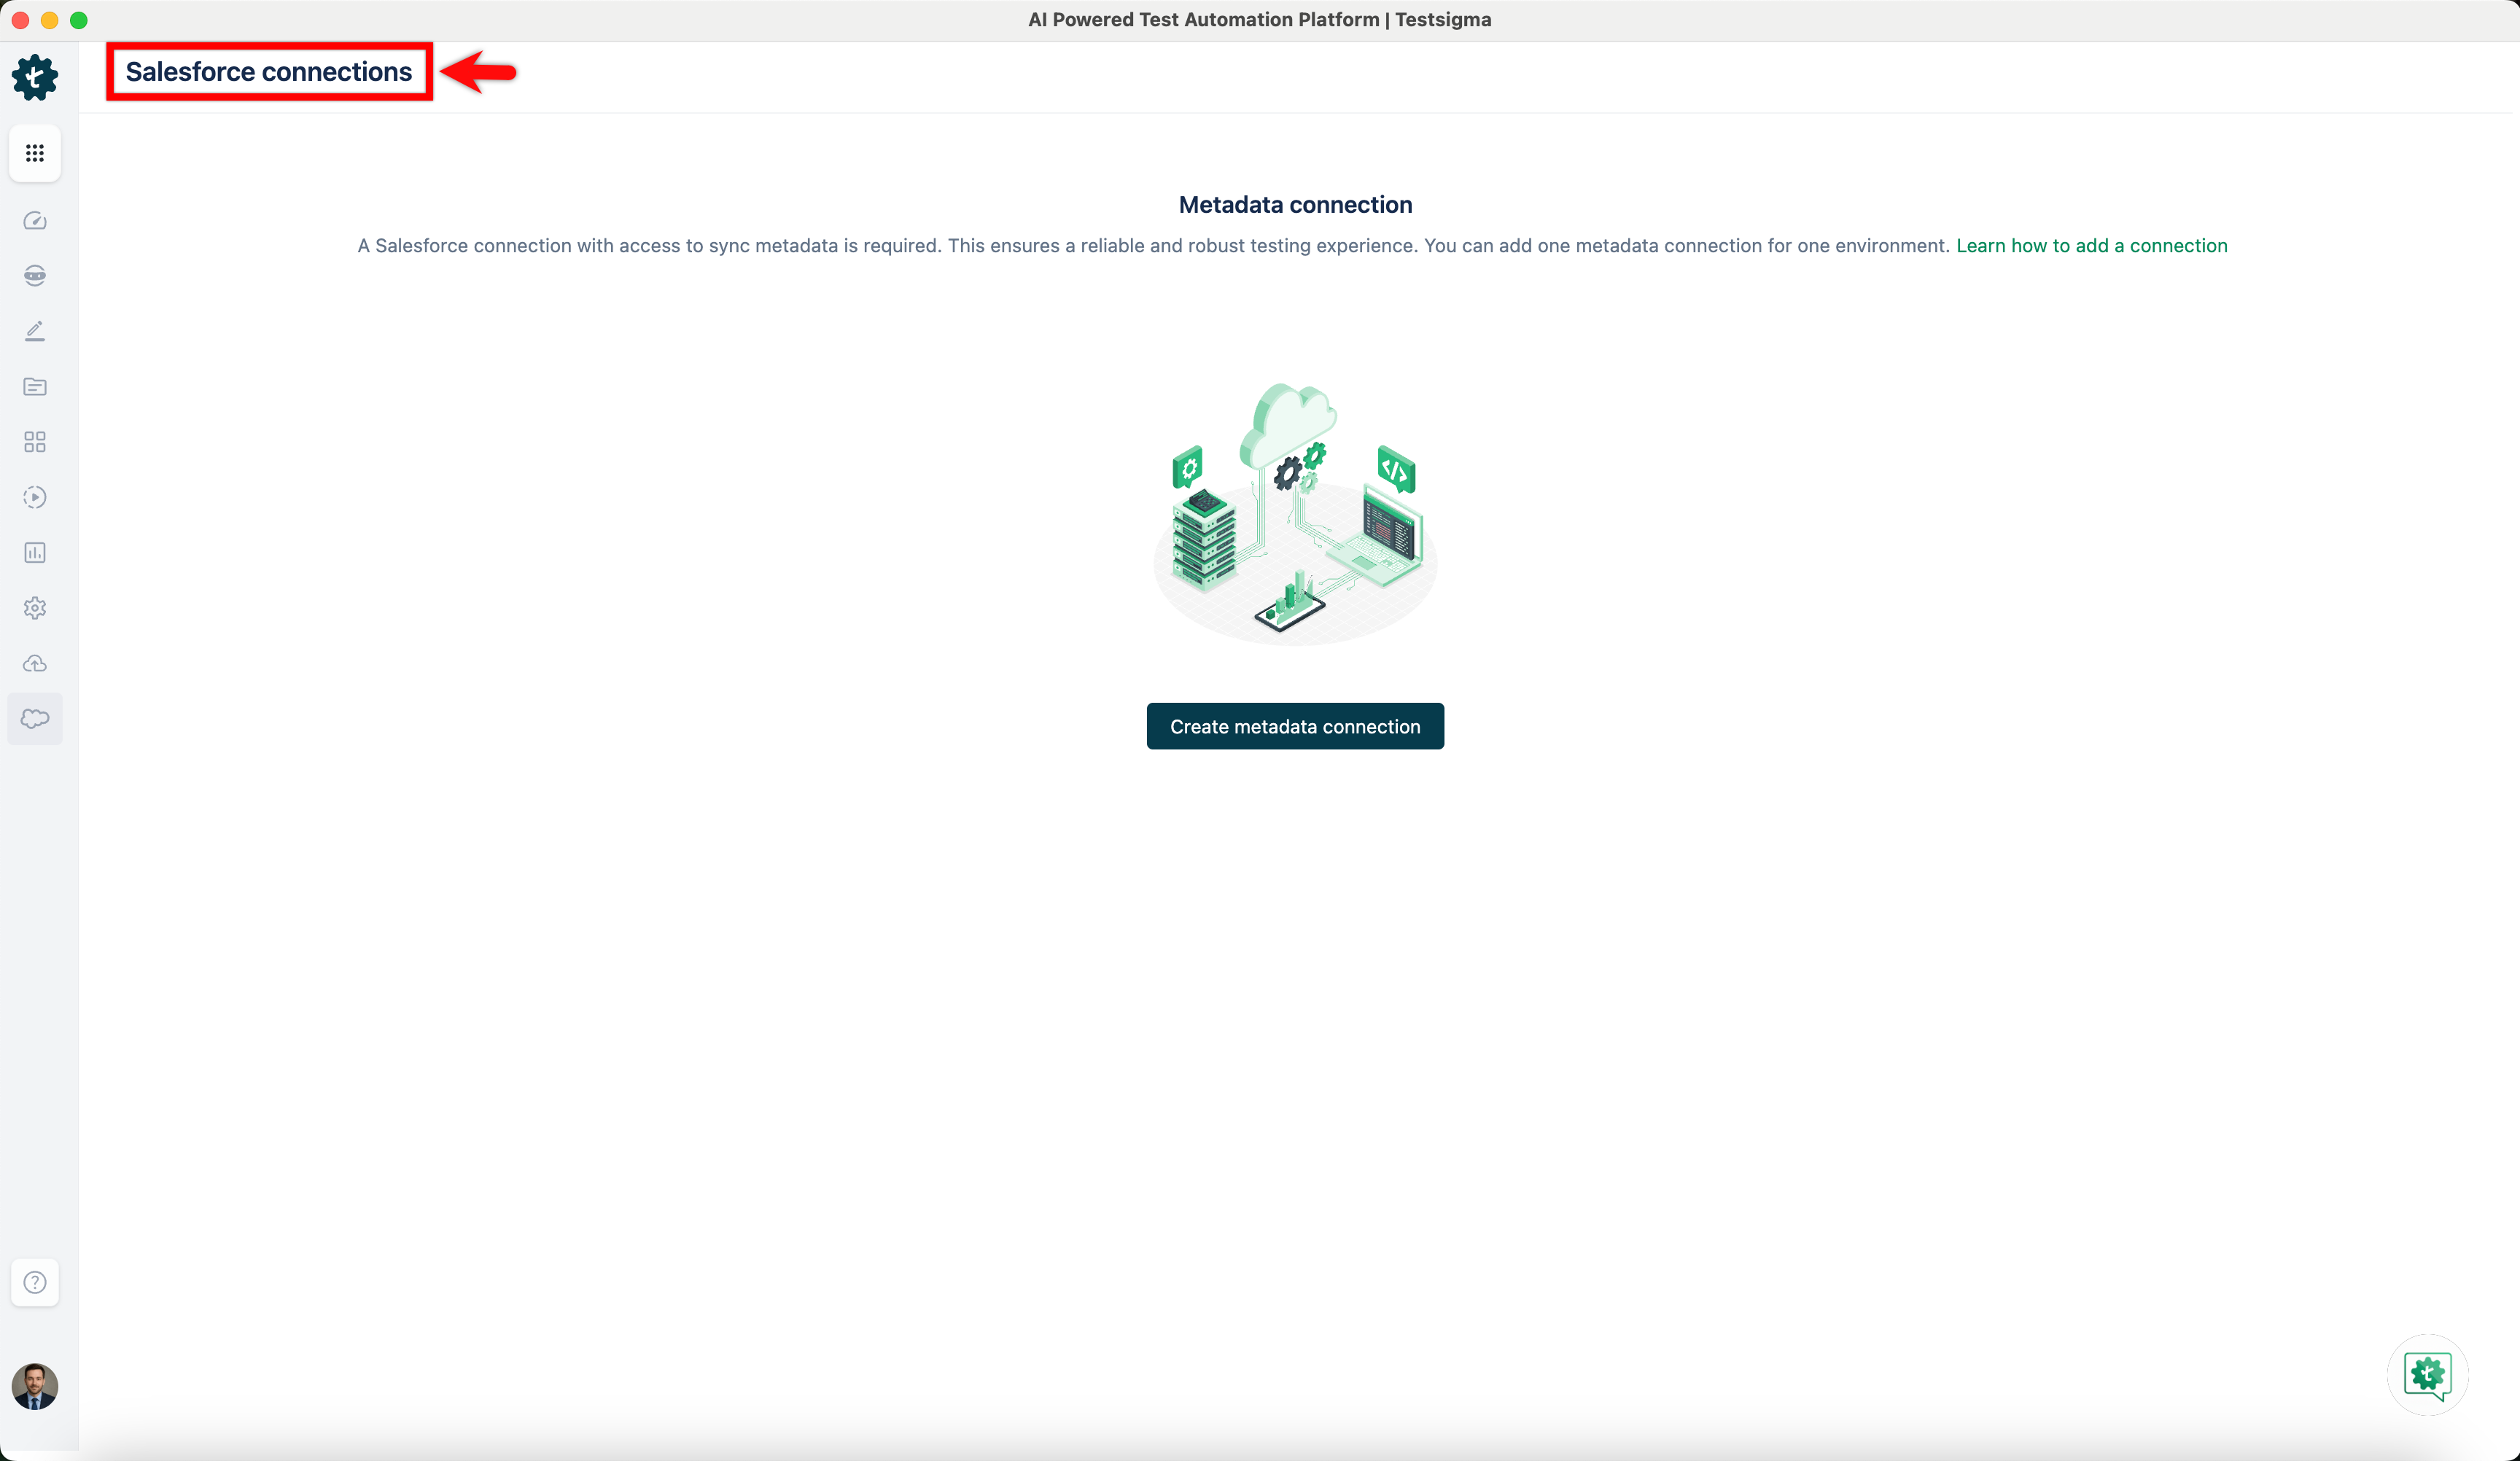
You are taken to the Salesforce connections page, where the connections below are created.
Create the metadata connection
Section titled “Create the metadata connection”The metadata connection is what lets Testsigma retrieve metadata, update configurations, create custom objects, and manage the components that define how the application behaves.
-
Click Create metadata connection on the Salesforce connections page.
-
Enter a Connection name. This is usually the user role you connect through, such as
Admin, though any name works. -
Select the environment under Connect with: Production / Developer edition for a production environment, or Sandbox for staging.
-
Select the Authentication type and fill in its fields, as below.
-
Click Authorise & Connect.
| Authentication type | Fields |
|---|---|
| OAuth 2.0 | Username, Consumer key, Consumer secret, Callback URL |
| User name & Password | Username, Password, Security token, Consumer key, Consumer secret |
The callback URL is https://salesforce-callback.testsigma.com/authorize/.
Run a test against a connection
Section titled “Run a test against a connection”Add the user connections as Environments in Testsigma first. Then on the Ad-Hoc Run overlay, select the Environment the test steps use and the Salesforce Metadata Connection to execute against. A test plan takes the same 2 values under Test Plan Settings > Additional Settings.
Add more metadata connections
Section titled “Add more metadata connections”A project can hold several metadata connections.
-
Go to Settings > SF Metadata.
-
Select the Project and Application.
-
Click Add New and fill in the Metadata Connection dialog as above.
When you create a new version, its connections can be copied rather than rebuilt. Go to Project > Project Settings > Versions, click New Version, enter a name, then open that version from Projects. On the Salesforce Connections page, click Select Existing Metadata Connection to copy from a previous version, or Create Metadata Connection to start fresh.
Edit or refresh a metadata connection
Section titled “Edit or refresh a metadata connection”To edit one, go to SF Connections, hover over the connection under Metadata connection, click the ellipsis icon ⋮, select Edit connection, make the changes, and click Authorise & Connect.
To refresh the metadata, click Refresh Metadata on the SF Connections page or on the Dashboard. A refresh downloads the org’s current structure, and any field that no longer exists surfaces as a warning on the affected test cases. See Create a Salesforce test case.
Read the activity log
Section titled “Read the activity log”The activity log on the connection details page records every metadata sync trigger with its status, and the start time of each edit or refresh.
Go to SF connections and click Activity log.
Add user connections
Section titled “Add user connections”A user connection maps to a Salesforce user profile, such as an administrator or a sales representative, so a test runs with that profile’s permissions. One connection can serve several users.
-
Go to SF connections and click Add Connection under User connection.
-
Enter a Connection name and select the user’s environment.
-
Select the Authentication type and fill in its fields, using the same table as above.
-
Click Authorise & Connect.
-
Enter the Salesforce credentials in the login window and click Log In.
-
Click Done.
The connection appears under User connection on the Salesforce connections page.
To edit one, click the ellipsis icon ⋮ against it, select Edit connection, change the details, and click Authorise & Connect. To remove one, select Delete connection and confirm.
Test a connection before authorizing
Section titled “Test a connection before authorizing”You can validate credentials without completing the authorization flow or saving the connection.
-
Go to SF Connections, or open Settings > SF Metadata.
-
Click the ellipsis icon
⋮next to the connection under Metadata connection or User connection, and click Edit Connection. -
Click Test Connection.
-
Enter your username and password on the Salesforce login page and click Log In.
Salesforce Connection Successful confirms the credentials work.
Was this page helpful?
Thanks for the feedback.