

Write automated steps
Write a test case’s automated steps yourself in the editor on its Automated steps tab. On a test case with no automated steps yet, click Write the script manually. The editor opens with an empty row, and Debug with Copilot appears in the header.
Add a step
Section titled “Add a step”-
In the empty row, type the action in your own words, such as
go,enter, orclick. A list of matching steps opens, each with a short hint and its category: Browser, Interact, Wait, or App.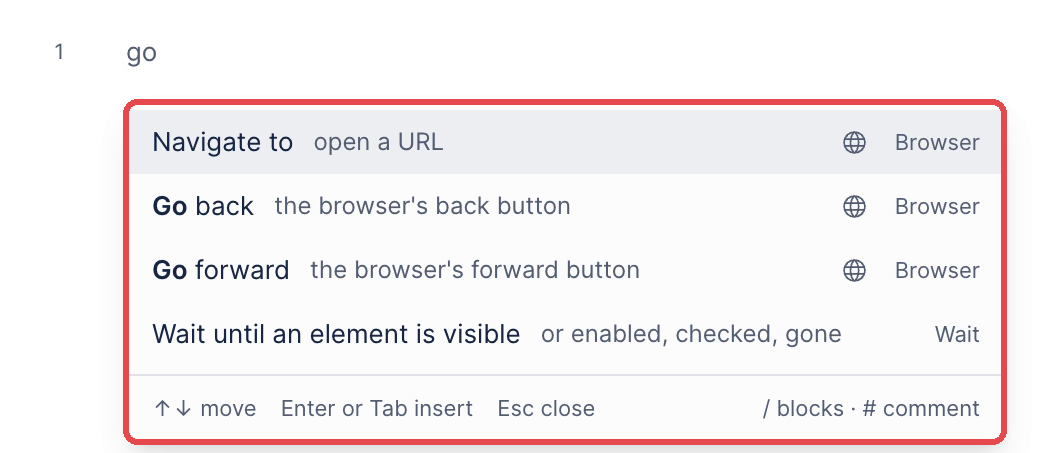
-
Highlight a step with
↑and↓, and pressEnterorTabto insert it. The step shows a chip for each value it still needs, such as URL or target, and the count above the steps shows how many are left, such as “1 to fill”. -
Click each chip and fill it in. See Fill in a value and Pick an element.
-
Press
Enterto start the next step.
Automation Type changes to Automated as soon as you add the first step, even before you fill in its values.
The web, Android, iOS, and Windows icons beside a step show the platforms it runs on. Hover an icon to see whether the step is supported there, such as “Web: supported”. Some steps run on one platform only: Navigate to, for example, is a web step.
Fill in a value
Section titled “Fill in a value”A value is the text, URL, or key a step uses. It can be text you enter or a variable that Arcus fills in when the test case runs.
-
Click the value chip, for example URL.
-
Open the tab for where the value comes from: Plain text, Runtime, Parameter, Environment, or Upload.
-
Enter the value, or select a variable.
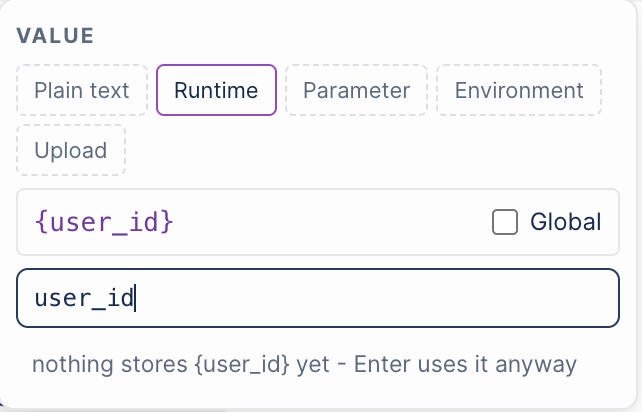
Each kind of value has its own form.
| Tab | What the step uses | Written as | Example |
|---|---|---|---|
| Plain text | Exactly the text you enter | The text itself | https://app.example.com |
| Runtime | A value an earlier step stored. See Use a stored value in a later step | {name} | {user_id} |
| Parameter | A dataset column, inside a For each loop. See Datasets | {row.column} | {row.city} |
| Environment | A variable from the environment the run reads from. See Environments | {env.name} | {env.base_url} |
| Upload | A file from the project’s uploads, for a step that uploads or sends a file. See Uploads |
Pick an element
Section titled “Pick an element”Steps that act on an element, such as Click on and Fill, need a target. Pick an element from the element library, or describe it with a locator.
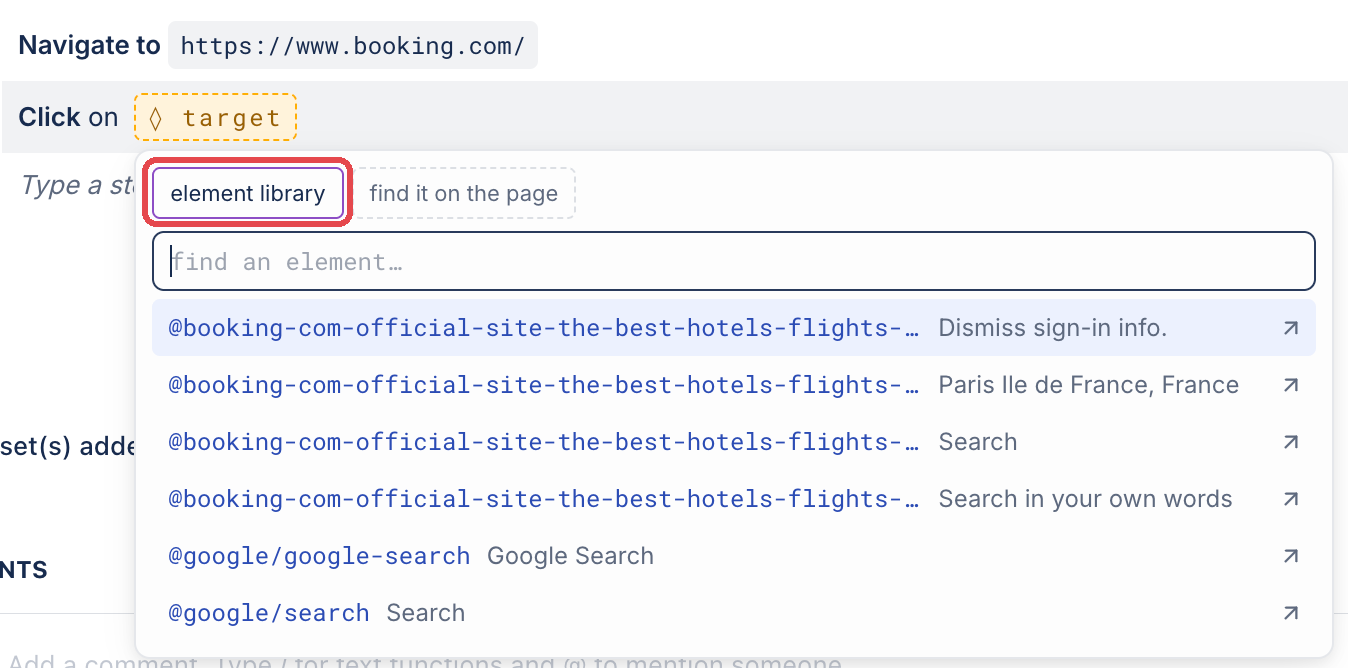
The element library lists the elements that steps in the project already use. Arcus has no separate page for managing elements. To rename an element, see Rename an element.
To pick an element from the library:
-
Click the target chip. The popover opens on element library, which lists each element’s name and the text it matches.
-
In the search field, enter part of the element’s name or text.
-
Select the element.
To locate an element on the page:
-
Click the target chip, then click find it on the page.
-
Select the locator type. Text is selected by default.
-
Select the operator.
-
Enter the value.
-
Click use this locator. The chip then shows the locator, for example text search.
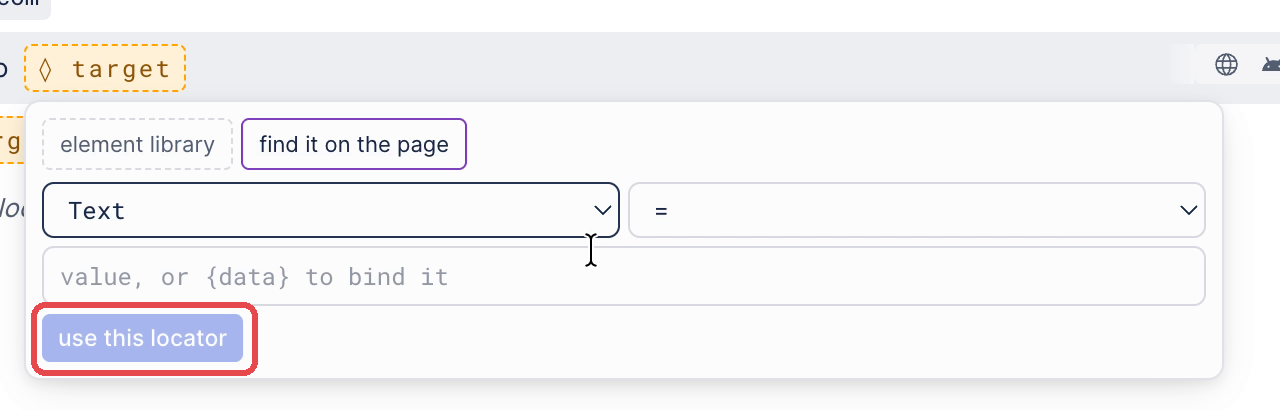
The locator types are grouped by platform:
- Web and devices: CSS, XPath, Text, Label, Name
- Web: Role, Placeholder, Title, Index, Alt text, Attribute, AI (describe it)
- Android and iOS: Accessibility ID, Class name
- Android: Android resource ID, Android UiAutomator
- iOS: iOS predicate, iOS class chain
Change a step’s settings
Section titled “Change a step’s settings”Select a step to open Step settings beside the editor, or click the step’s ellipsis icon (⋮) and click Step settings. While a step still needs a value, the panel marks it draft. A warning names what’s missing, for example “This step still needs an element.”
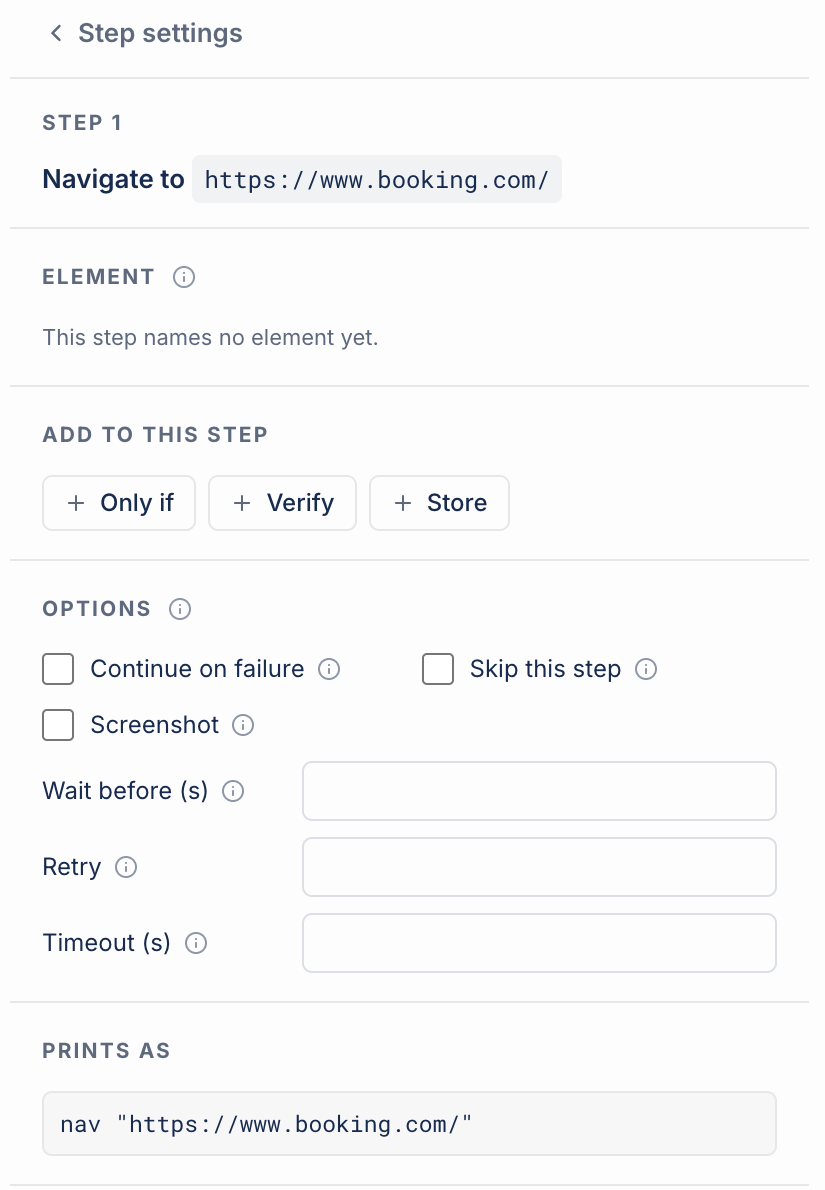
The panel has these sections:
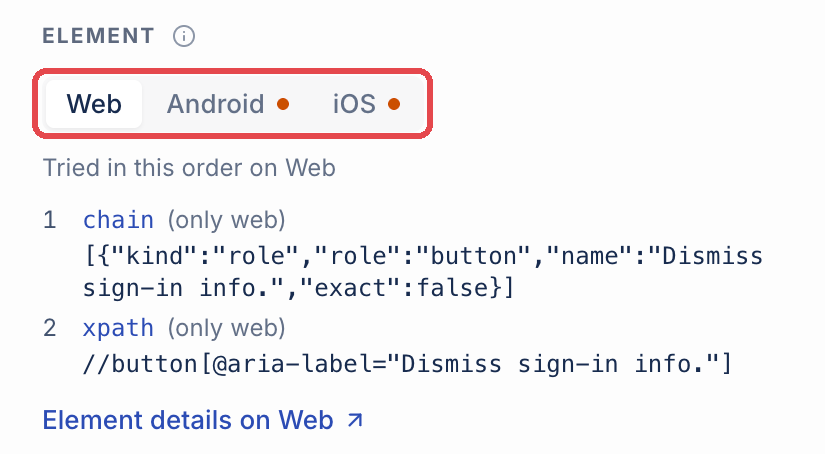
- ELEMENT: the element the step acts on. For an element from the library, the Web, Android, iOS, and Windows tabs list the locators Arcus tries on each platform, in order, with a link to the element’s details.
- ADD TO THIS STEP: the conditions, checks, and stored values you can add to the step. A Click on or Go back step offers Only if, Verify, and Store. A Verify that step offers only Store. Each one you add becomes its own section: Only if adds PRE-CONDITION, Verify adds VERIFICATION, and Store adds STORE. See Conditions, checks, and stored values on a step.
- OPTIONS: Continue on failure, Skip this step, Screenshot, Wait before (s), Retry, and Timeout (s). On a step with an element, Only if present appears here too, and the step row then shows if present.
- PRINTS AS: the step as script text, such as
nav "https://example.com/".
Reorder or delete a step
Section titled “Reorder or delete a step”Click the step’s ellipsis icon (⋮) and click an action:
- Move up:
⌥+↑ - Move down:
⌥+↓ - Duplicate:
⌘+D - Skip this step:
⌘+/, which also stops skipping a skipped step - Insert a step above and Insert a step below: no shortcut
- Delete:
⌘+Delete
To undo a change, press ⌘+Z. To redo it, press Shift+⌘+Z. Click Shortcuts above the steps to see every keyboard shortcut in the editor.
Debug the automated steps
Section titled “Debug the automated steps”Click Debug with Copilot in the test case header to run the automated steps in a live browser. The Copilot configuration panel opens first. See Copilot configuration for its settings and Debug and run with Copilot for the session.
Was this page helpful?
Thanks for the feedback.