

Uploads
An upload is a file stored in a project for test steps to use: a document a step uploads to the app under test, a binary or form-data part an API step sends, or a JSON or XML file an API step compares a response with. Each upload has a name, which is how steps refer to it, and one or more versions.
Uploads are on the Uploads tab of Test Assets. Until the first file is added, the tab reads “No uploads yet”.
Upload a file
Section titled “Upload a file”-
In the left navigation, open Test Assets and click Uploads.
-
Click Upload File. The Upload a file dialog opens.
-
Drag a file into the dialog, or click browse and choose it. Files up to 499 MB are accepted. Executable files, such as .exe, .bat, .sh, and .jar files, are refused.
-
Name is filled in with the file name. Change it to how the file should appear when you pick it in a step.
-
In Version, enter a label for this version. The version is required.
-
Click Upload. When the dialog reads “Uploaded”, click Done.
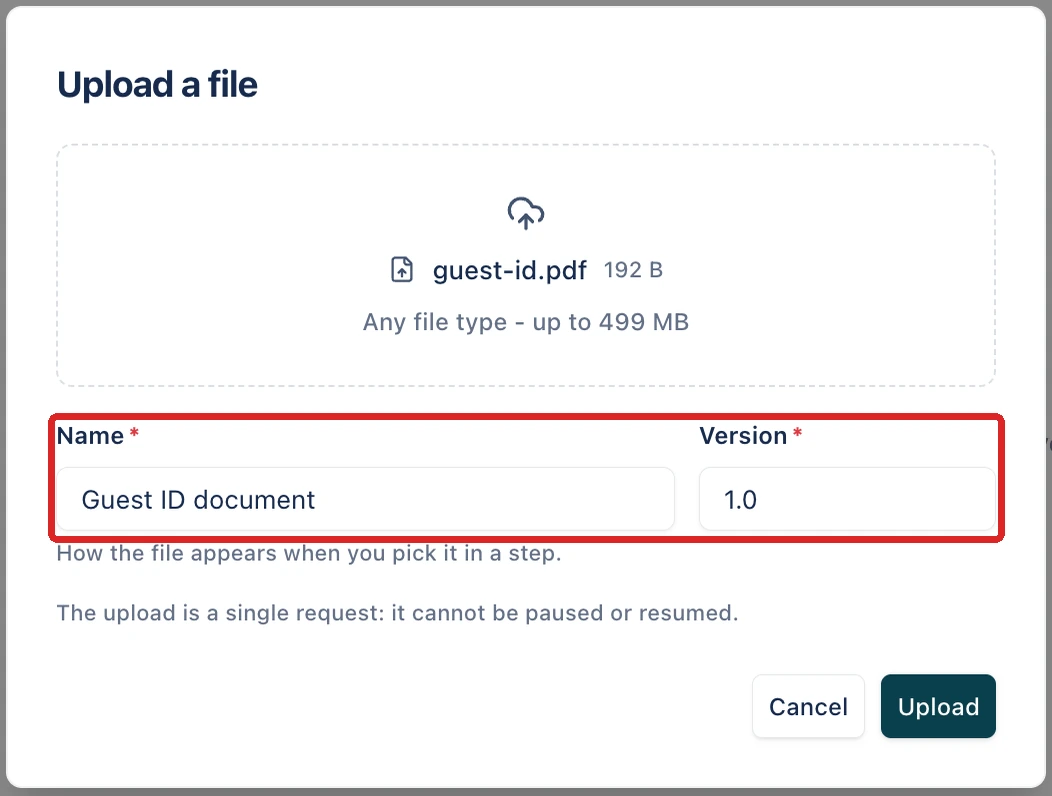
The upload is a single request, so it can’t be paused or resumed.
The Uploads tab shows how many uploads the project has. Each row shows the upload’s FILE ID, NAME, LATEST version, TYPE, SIZE, SCAN result, UPLOADER, UPDATED BY, the number of test cases it’s USED BY, and when it was UPDATED.

Arcus scans uploaded files for malware. While the scan runs, the SCAN column reads Scanning. After a clean scan, the column is empty. Not scanned means the file was stored without a scan. If the scan finds malware, the file is not kept, and the dialog reads “Rejected by the malware scan”. In the upload’s panel, a version whose scan failed shows Failed, with Retry scan.
Versions
Section titled “Versions”Click an upload’s name to open its panel. The Versions tab lists every version, newest first, with its label, who uploaded it, when, its size, and its scan result. The newest is marked Latest. To download a version, click the download icon on its row.
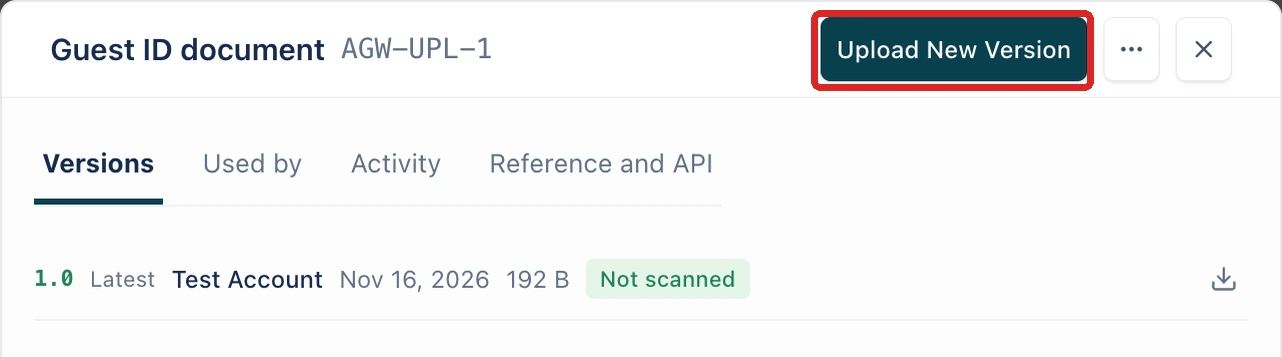
To add a version:
- In the upload’s panel, click Upload New Version. The Add as new version of dialog opens, noting that the file will be added as the upload’s next version.
- Drag in the file or click browse.
- Enter the Version label.
- Click Add version.
The panel’s other tabs are Used by and Activity. Used by lists each test case that uses the upload, with its number of steps and whether it is pinned to a version or follows Latest. Activity lists each version and how it was added: in the app, through the API, or by a test run.
Reference and API
Section titled “Reference and API”The Reference and API tab shows the upload’s File ID and its Reference, written as upload:// followed by the upload’s name, each with a copy icon. Get download link creates a link to the file.
It also has ready-made curl commands, with a copy icon, to Add a version and Get a download link through the API. Both use an API token as $ARCUS_API_TOKEN.
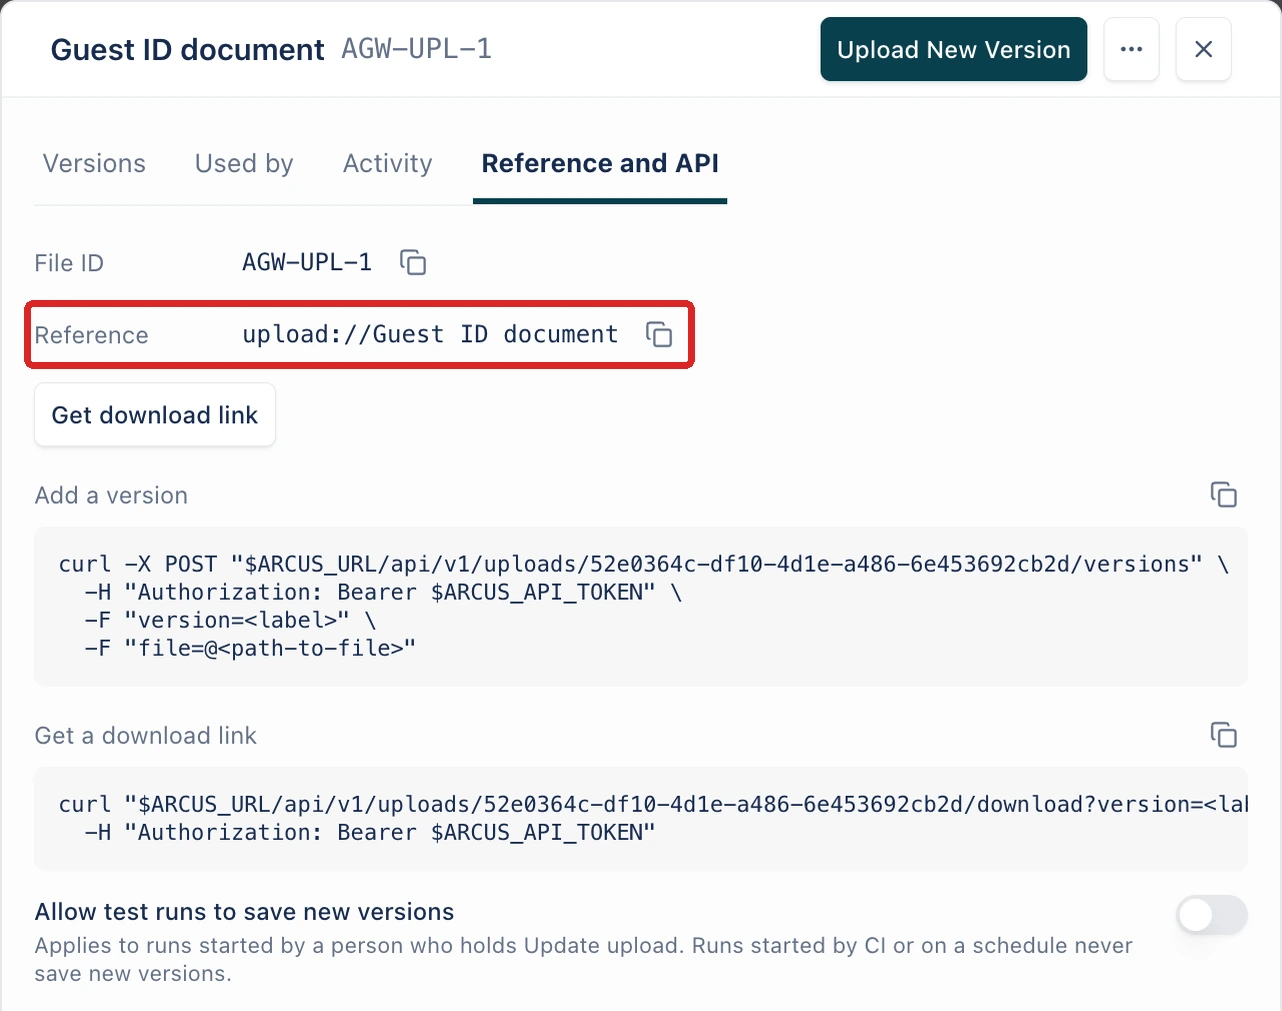
Allow test runs to save new versions lets a web test run save a file as a new version of the upload. It applies only to runs started by a person who holds the Update upload permission. Runs started by CI or on a schedule never save new versions. By default, only an Admin can change this setting.
Pick an upload in a step
Section titled “Pick an upload in a step”In the automated steps editor, click the step’s value chip and open the Upload tab. Find the upload by name and pick it. The list next to it sets the version the step uses, Latest by default. To add a file without leaving the step, click Upload a file. See Write automated steps.
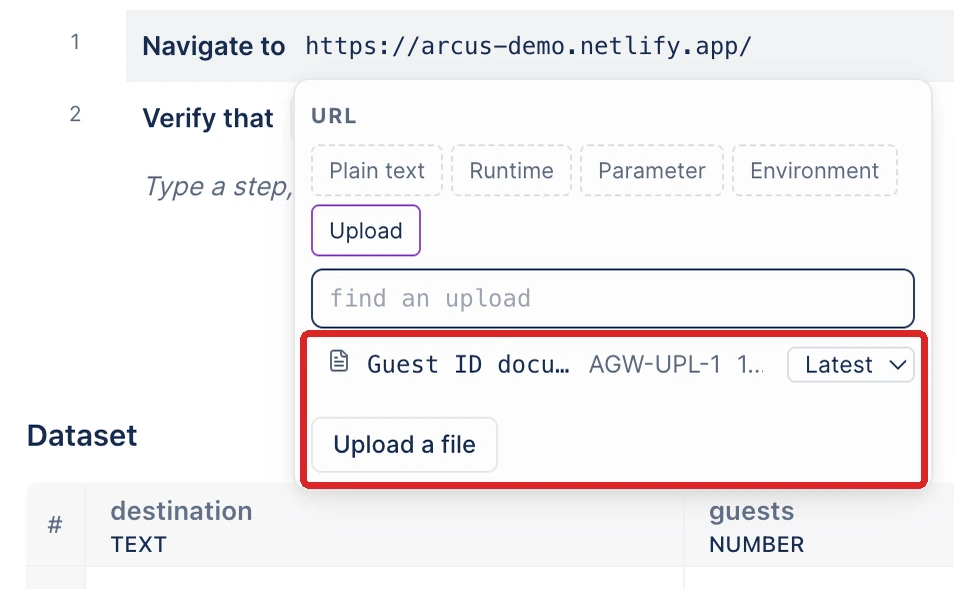
When the step runs, on the cloud or on a local agent, Arcus sends the file to the app under test with the file name it had when that version was uploaded.
In API steps, an upload can be the Binary request body, a form-data file part, or the file a response is compared with. See Send and compare files.
Download or delete an upload
Section titled “Download or delete an upload”Click the ellipsis icon (⋯) on an upload’s row, then click Delete.
In the upload’s panel, the ellipsis icon (⋯) has Download, Download link, Copy Reference, and Delete file. An upload can’t be renamed.
If a test case uses the upload, the delete dialog lists its steps and warns that they will show a broken reference and can’t run until you choose another file. Click Delete file to confirm. If steps still use a deleted upload, its name stays reserved. Uploading a file with that name offers Restore followed by the file name, which brings the deleted upload back.
Was this page helpful?
Thanks for the feedback.