

Create mobile test cases
Create a test case for an Android or iOS app, then have Copilot automate it on a real device in the cloud or on a device connected to your computer. A test case has no app type of its own. You choose Mobile, the app, and its build when you start a Copilot session, and again in the run configuration that runs the test case.
Prerequisites
Section titled “Prerequisites”- The app exists in Test Assets > Apps. See Apps.
- For Cloud: the app has an uploaded build in the Ready state. A Cloud session installs that build on the device, so an app created with Enter package details manually has nothing to install: you can select it, but Start Copilot stays unavailable. See Upload a build.
- For My local machine: the Arcus Agent is running, and a phone, emulator, or simulator is connected to it. See Connect a mobile device.
- For a real iPhone: a provisioning profile exists in Settings > iOS Settings. See iOS signing.
Create the test case
Section titled “Create the test case”- Open Test Cases in the left navigation and open the folder the test case belongs in.
- Click Create, or press
C. The dialog opens with Documentation selected as the template type and the folder you opened in the folder chip. - Enter a title and, optionally, a description.
- If the folder chip reads Select a Folder, click it, select a folder, and click Select Folder. Without a folder, Arcus shows “Folder is Required” and doesn’t create the test case.
- Click Create. The test case opens on the Details tab.
- (Optional) To have Copilot learn the steps, enter the manual steps under Steps. Arcus saves them automatically.
For the template types and the other properties in the dialog, see Manage test cases. Only test cases with the status Ready can be added to test runs and run templates.
Start a Copilot session on a device
Section titled “Start a Copilot session on a device”-
Open the Automated steps tab. If the test case has manual steps, click Learn with Copilot. Otherwise, click Author with Copilot. The Copilot configuration panel opens.
-
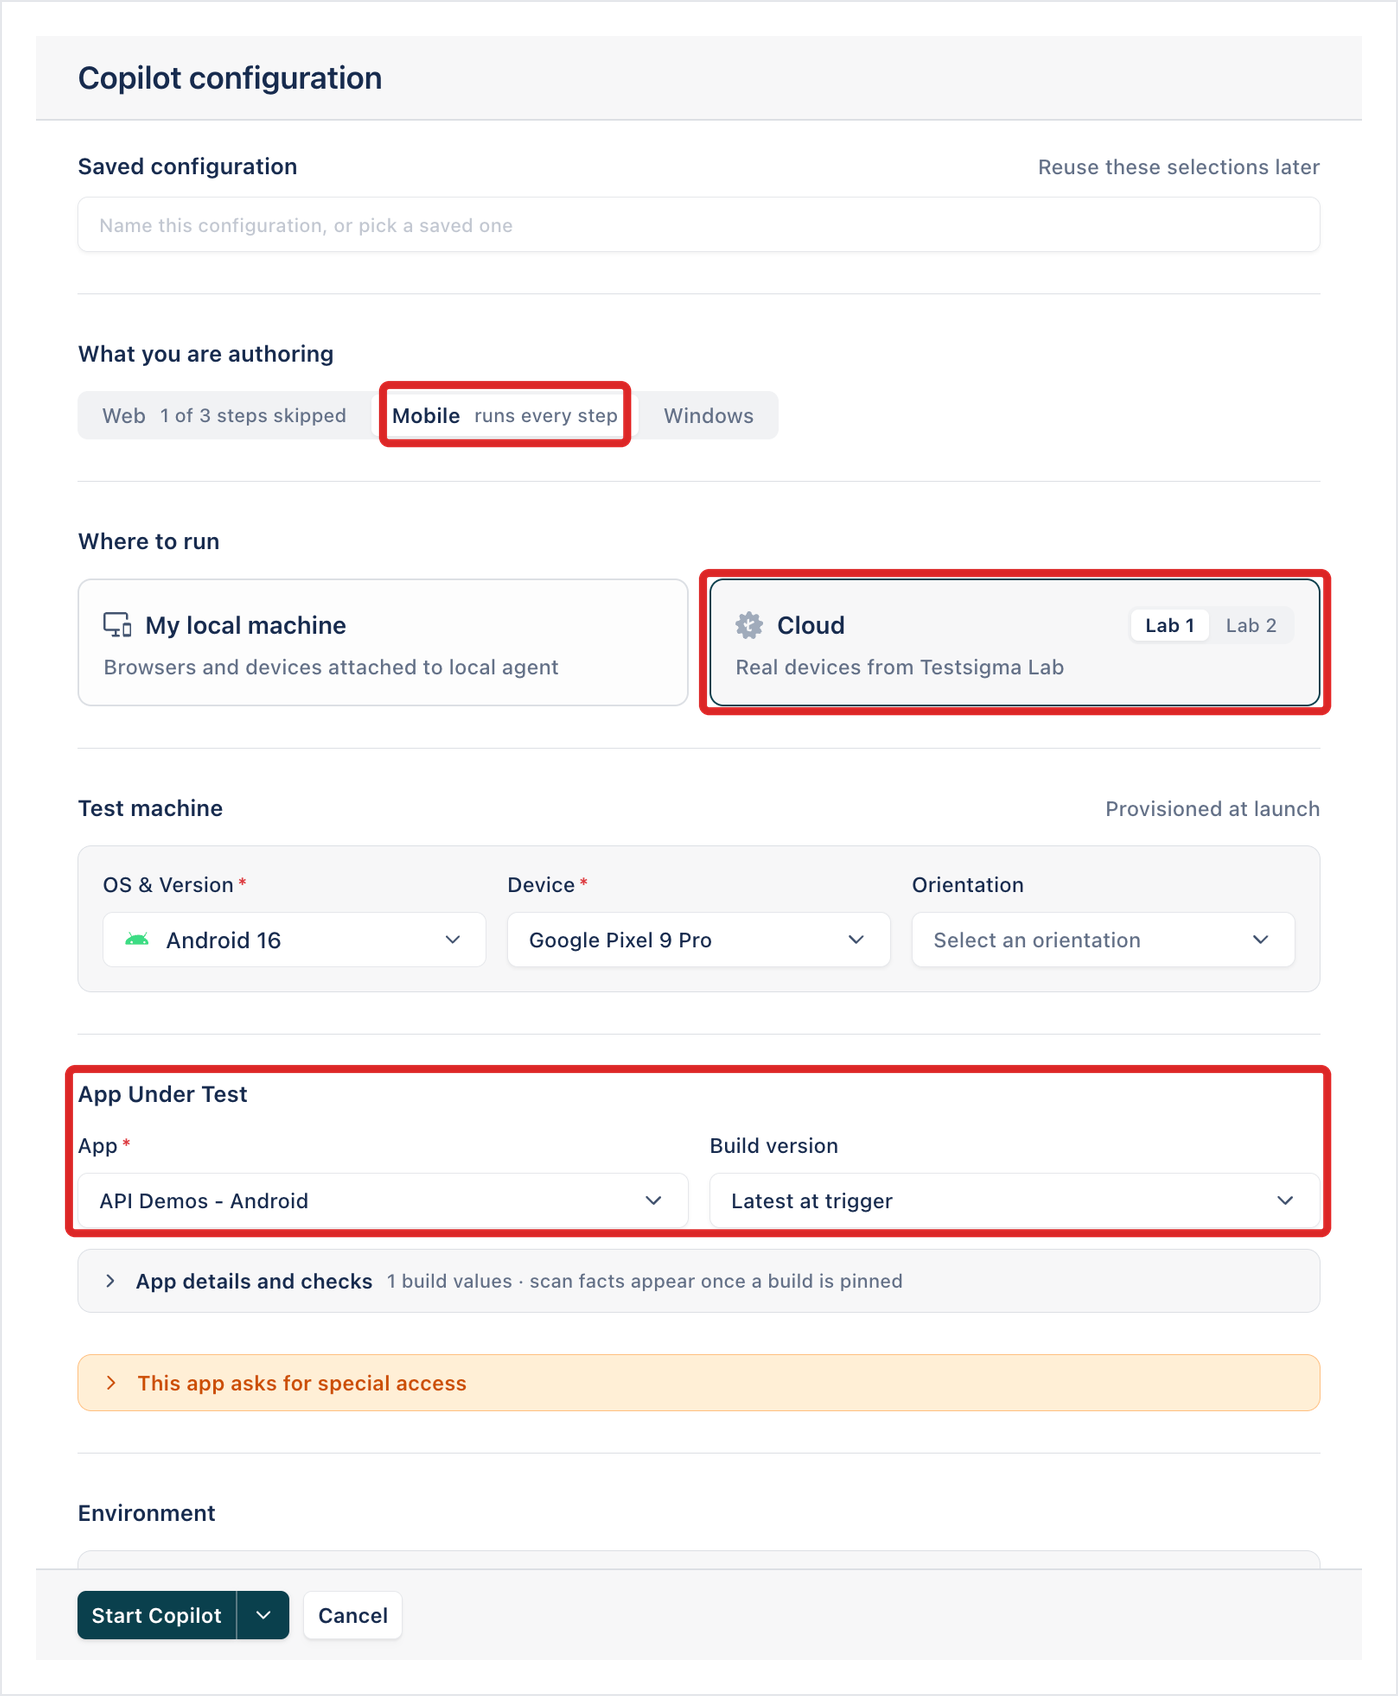
In What you are authoring, select Mobile.
-
In Where to run, select Cloud or My local machine.
-
Under Test machine, choose the device:
- Cloud: select the OS & Version and Device. The lists show the devices available to your account. Orientation is optional: Portrait or Landscape.
- My local machine: select the device in Attached device. If none is connected, the panel reads “No device is booted. Start an emulator or simulator and reopen this.” Connect or start one, then click Cancel and open the panel again.
-
Under App Under Test, select the app in App. Start Copilot stays unavailable until you do. If the project has no apps, the section reads “No apps in this project yet”. Click Open Apps to create one.
-
(Optional) In Build version, select a build. The default, Latest at trigger, installs the app’s newest build when the session starts.
-
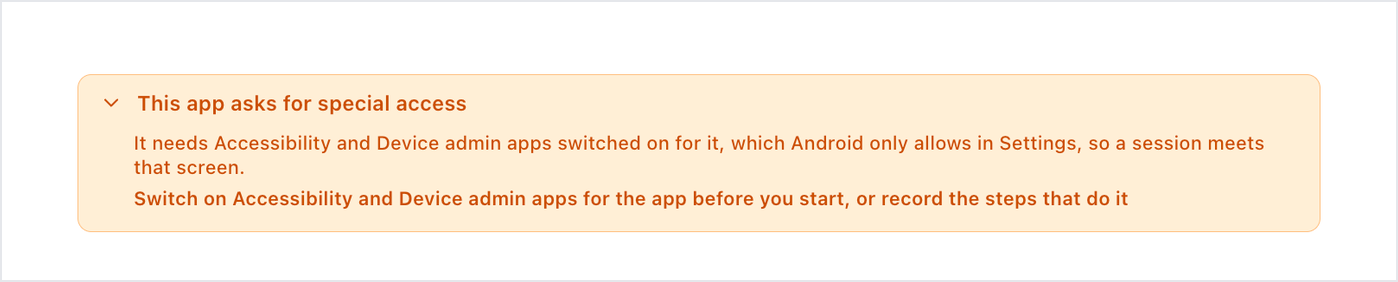
(Optional) To see what the session installs, expand App details and checks. It lists the build’s package or bundle ID and, once you pin a build, the facts Arcus read from the binary. If a row reads This app asks for special access, the app needs a permission Android grants only in Settings, such as Accessibility or Device admin. Turn it on for the app before you start, or record the steps that do it.
-
Click Start Copilot. The session opens in a new browser tab and shows “Starting the device”.
When the device is ready, Copilot runs a Launch the app step, and the app opens in the device mirror. For every setting in the panel, see Copilot configuration.
If the session shows “Couldn’t start a session on the device. Please try again.”, click Try again. The failed start still appears on the test case’s Run history as a failed Copilot run.
The session window
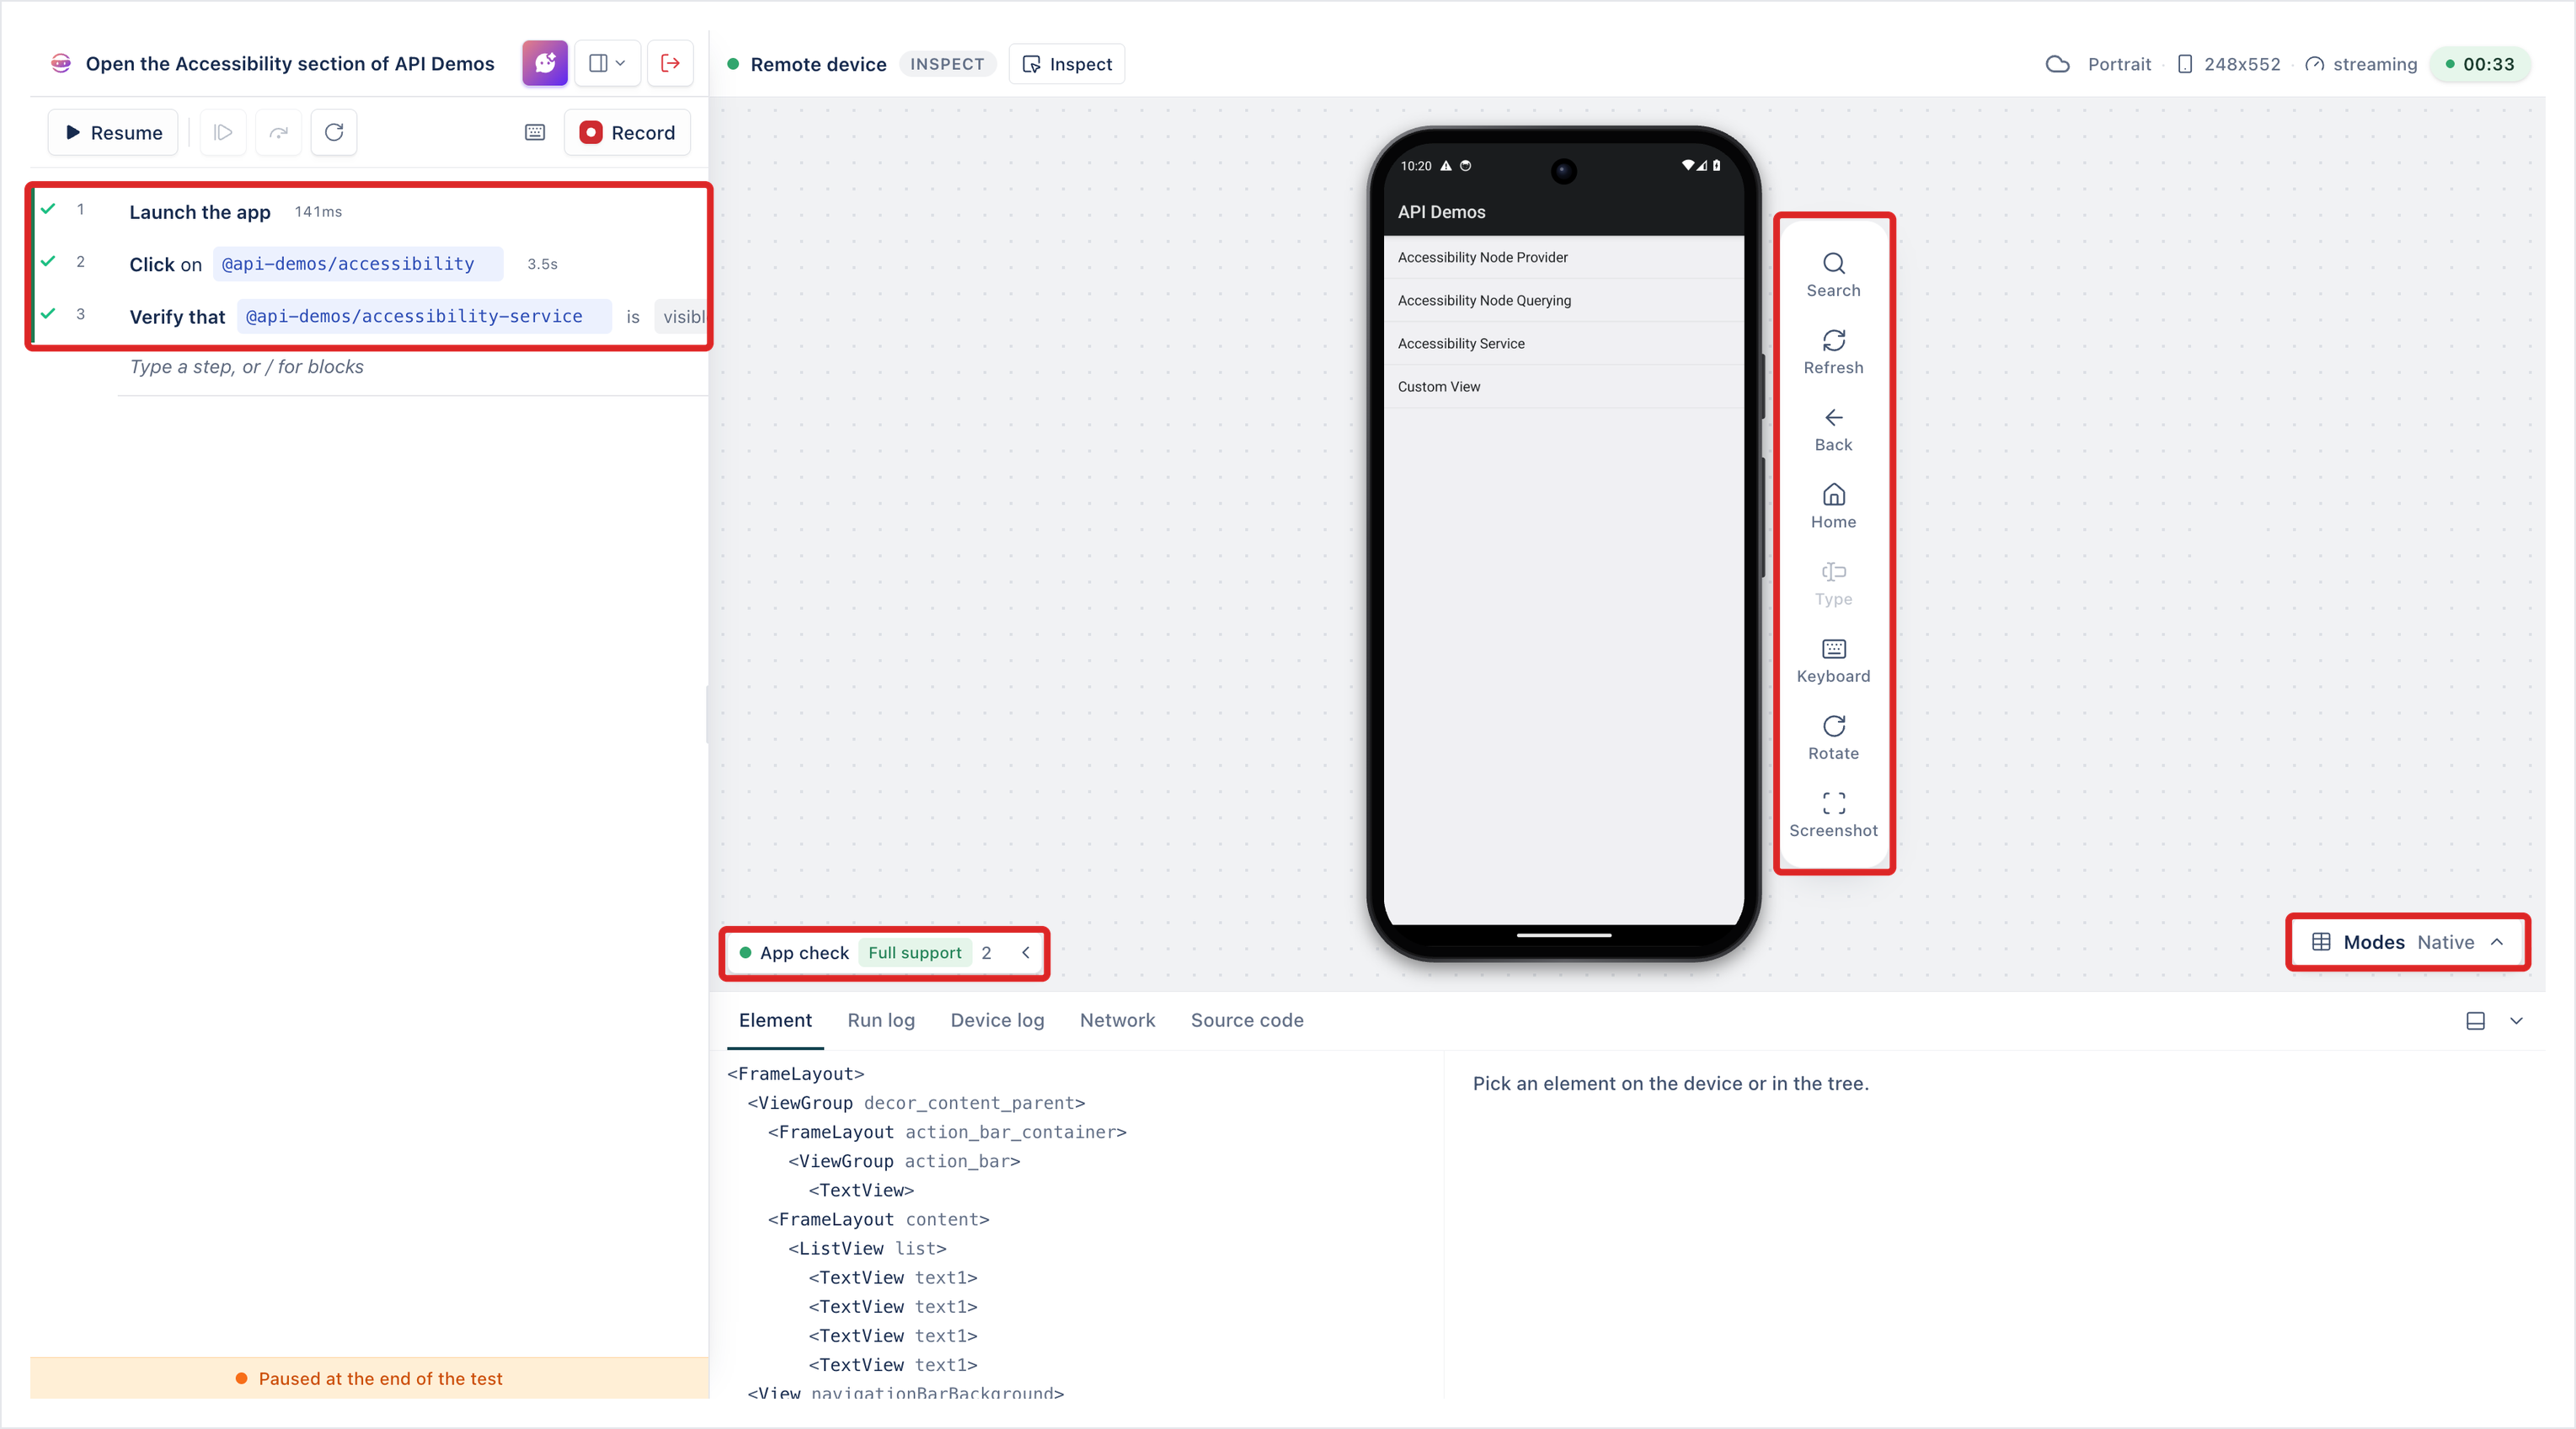
Section titled “The session window”The device mirror sits in the middle, with a toolbar beside it: Search finds elements by locator, Refresh reloads the screen, Back and Home press the device buttons, Type enters text into the focused field, Keyboard hides the device keyboard when it’s showing, Rotate turns the device, and Screenshot captures it. The header shows the orientation, the screen size, and how long the session has run. The drawer below the mirror has the Element tab, which shows the screen’s element tree and the details of the element you pick, plus Run log, Device log, Network, and Source code.
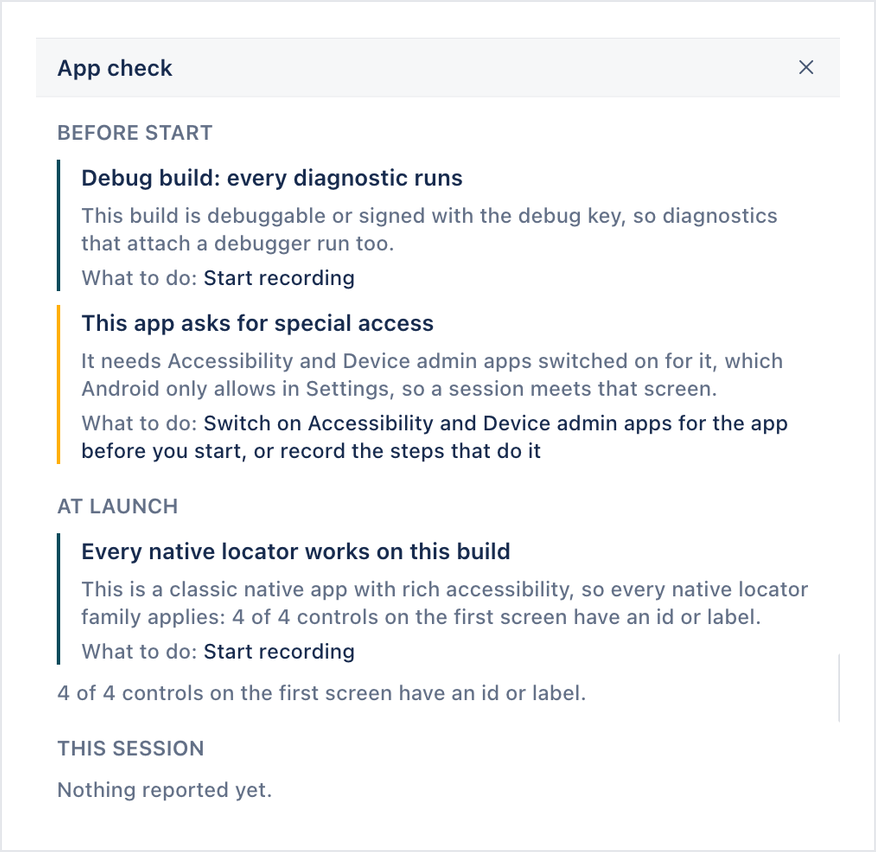
App check, below the mirror, shows what Arcus found about the build before and at launch, such as whether it’s a debug build, whether every native locator works on it, and which controls are hidden from accessibility. Click it to read each finding and what to do about it.
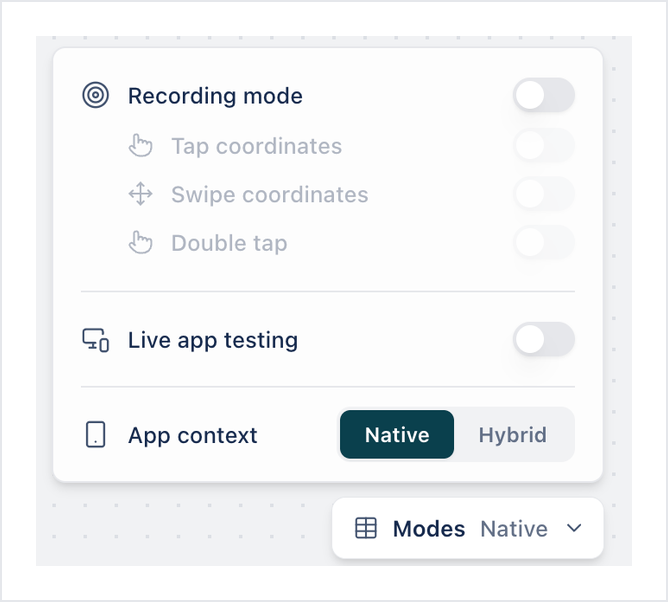
Modes, at the bottom right, holds Recording mode with its options Tap coordinates, Swipe coordinates, and Double tap, the Live app testing toggle, and App context: Native or Hybrid.
Record the steps
Section titled “Record the steps”-
Click Record. Recording mode turns on, and the banner reads “Tap and type in the device mirror here. Taps on the emulator or phone itself are not recorded.”
-
Tap the app in the device mirror. Each tap adds a Click on step marked RECORDED, and a card names the element and its locator.
-
To enter text, tap the field and type the value. The Type into box shows it. Press
Enterto add a Type step, which replaces what the field holds. -
To go back a screen, click Back in the toolbar beside the device. Copilot adds Press the device back button, which runs on Android only.
-
Click Stop recording.
To add a check, click Inspect above the device, then tap an element in the mirror. The card shows the element’s name, type, and locator, and the Element tab shows its details. Click Verify and select a check, such as is visible. Copilot adds a Verify that step for the element.
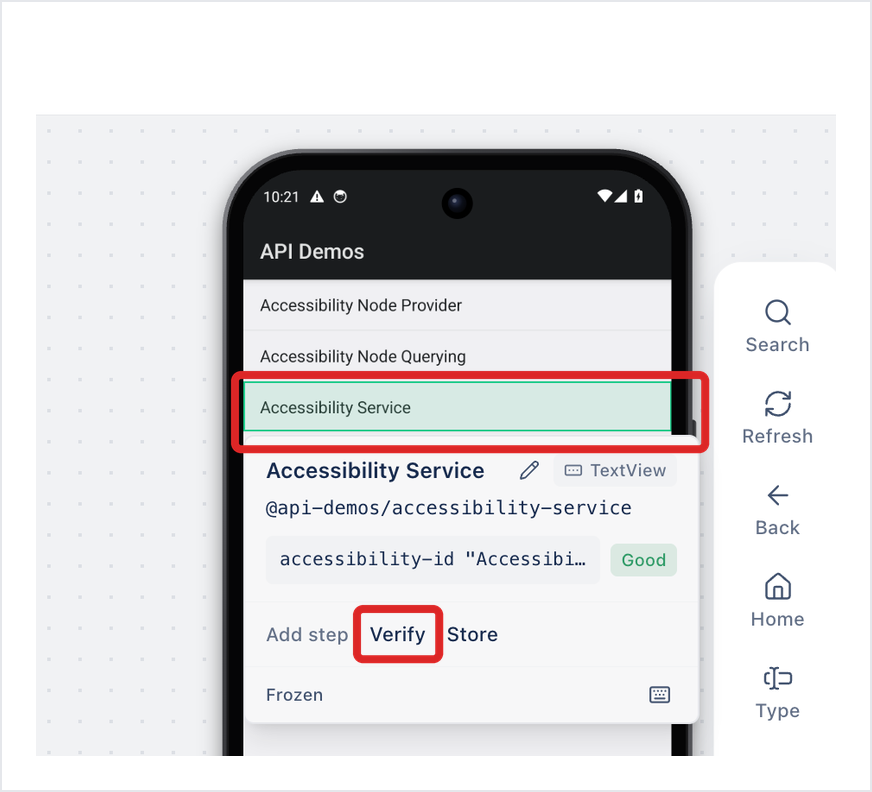
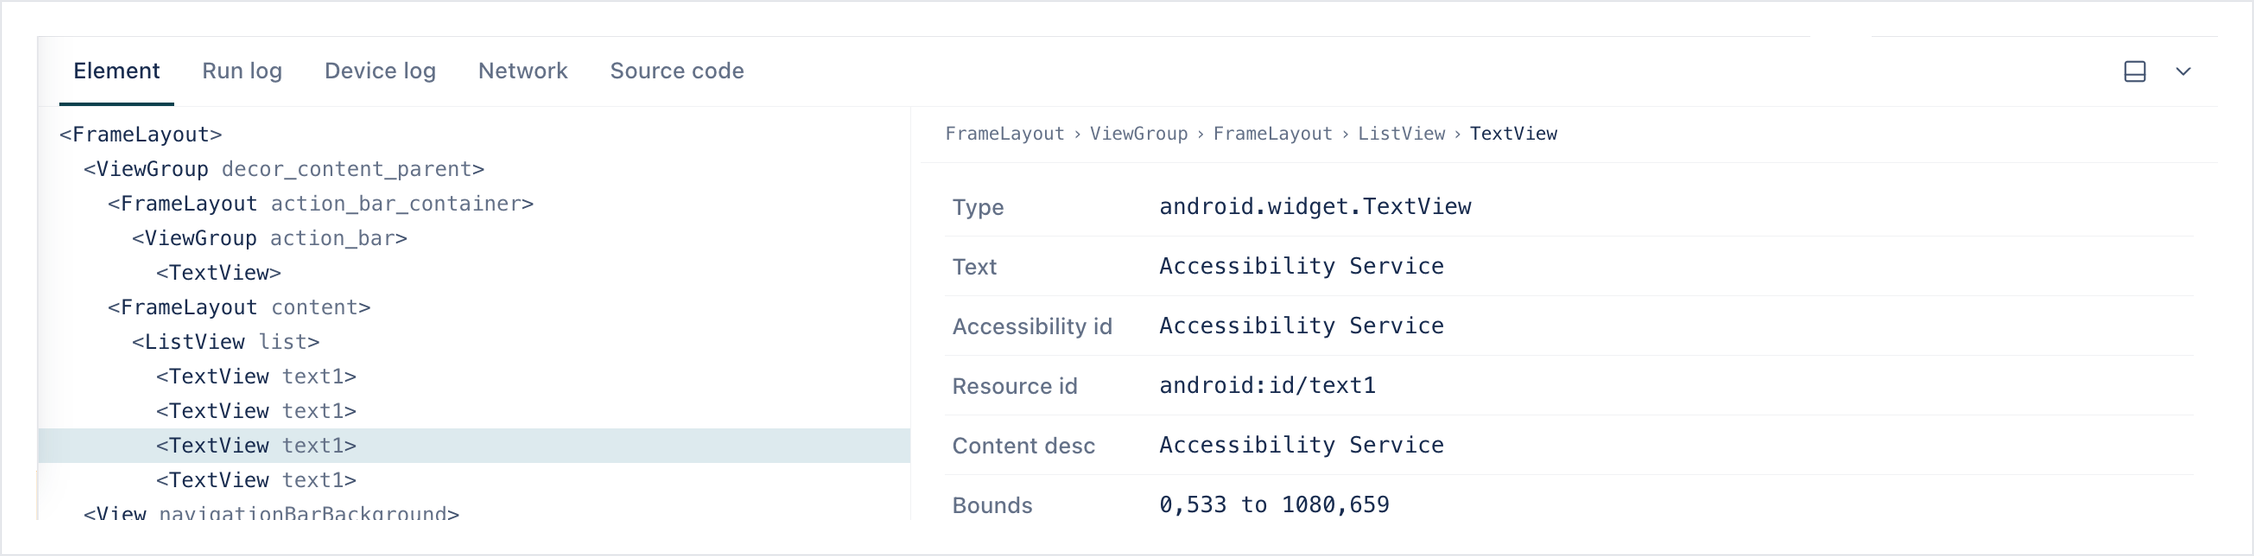
If the screen is a web page inside the app, set App context to Hybrid in Modes before you record or inspect it, so Copilot reads the page’s elements. To use the app without recording anything, turn on Live app testing.
Learn the steps
Section titled “Learn the steps”If you clicked Learn with Copilot, click Start learning instead of recording. Copilot performs the manual steps on the device and writes the automated steps. This works for Android and iOS, on a Cloud device or a device connected to your computer. See Learn with Copilot.
Check and save the steps
Section titled “Check and save the steps”-
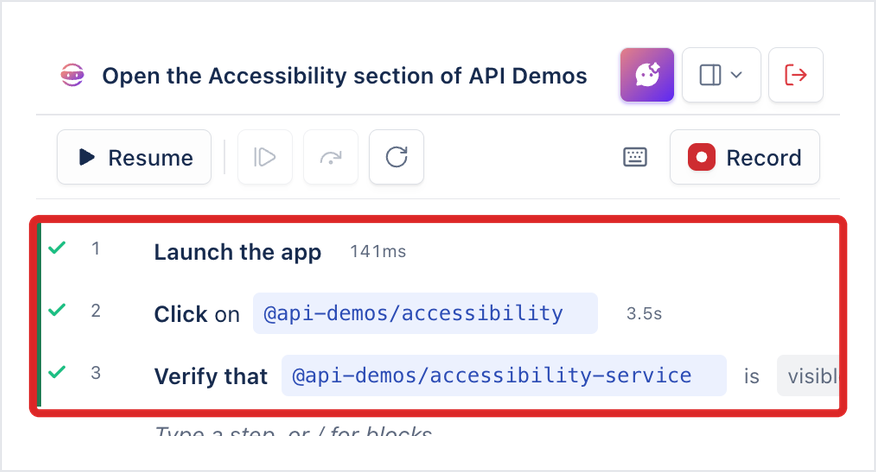
Click Restart execution. Copilot relaunches the app and runs every step. Each step that passes shows a check mark and its duration. While the steps run, the mirror reads “Running — pause to interact”.
-
Click the exit icon at the top of the Copilot panel.
-
In End session and close this tab?, click End session. On Cloud, Arcus releases the cloud machine.
Back on the test case, the Automated steps tab lists the steps, and Automation Type shows Automated. The session’s runs appear on the Run history tab, tagged with the device’s platform, such as Android. If the steps don’t show yet, refresh the page.
Run the test case
Section titled “Run the test case”Add the test case to a test run or a run template with a run configuration for Mobile. In the run configuration, select the device, then the App and its Build version under App Under Test. Latest at trigger installs the newest ready build when the run starts. A pinned build must still be ready or about to expire. See Mobile configurations.
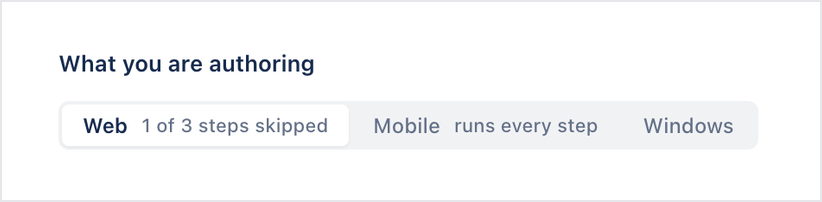
Steps written for the web only, such as Verify page with page text, are skipped on mobile. Once the test case has steps, Mobile in What you are authoring shows how many of them are skipped, such as 1 of 3 steps skipped, or runs every step.
Was this page helpful?
Thanks for the feedback.