

Set up an Arcus tunnel
An Arcus tunnel lets tests on Testsigma’s cloud labs reach an app that only your network can reach: a build on localhost, a staging site on a private network, or anything behind a firewall. You run a small client, ArcusTunnel, on a machine that can reach the app. The client opens an outbound connection to Arcus, so you don’t open any inbound port.
Tunnels are set up in Settings > Tunnels, under Execution, and chosen in a run configuration.
| You want to test | Use |
|---|---|
| An app on the internet | A cloud run configuration, with no tunnel |
| An app only your network can reach, on Testsigma’s labs | A cloud run configuration with a tunnel |
| An app on your own machine, with your own browsers and devices | A Local Agent run configuration. See Arcus Agent |
A tunnel has no effect on a Local Agent run, because that machine is already inside your network. Tunnels also don’t work with a lab you connected yourself; they run on Testsigma’s labs only.
Download the client
Section titled “Download the client”-
In the left navigation, open Settings, then click Tunnels.
-
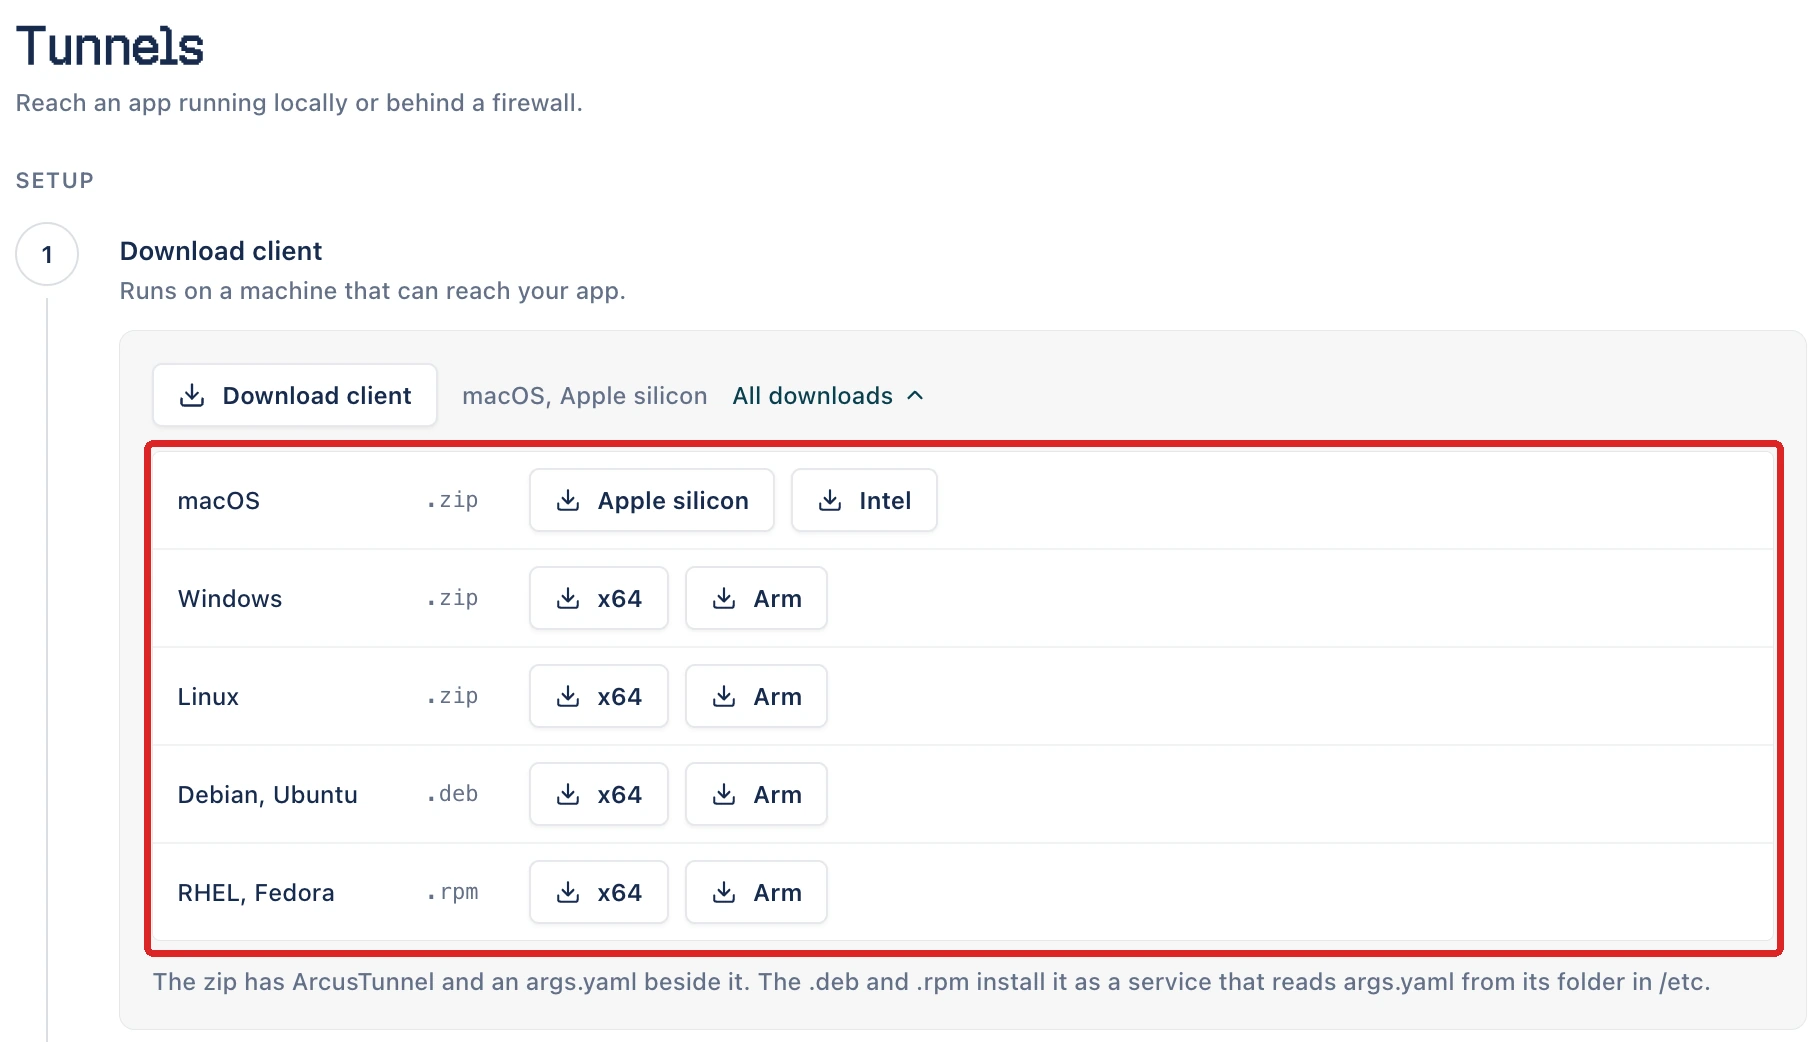
Under Download client, click Download client. Arcus offers the build for the computer you’re on. For another platform, click All downloads and pick one:
Platform File Builds macOS .zipApple silicon, Intel Windows .zipx64, Arm Linux .zipx64, Arm Debian, Ubuntu .debx64, Arm RHEL, Fedora .rpmx64, Arm -
Copy the file to a machine that can reach the app you want to test, and extract or install it there.
The .zip holds the ArcusTunnel client with an args.yaml file beside it. The .deb and .rpm packages install the client as a service that reads args.yaml from its folder in /etc.
Configure the client
Section titled “Configure the client”The client needs an API key and a tunnel name.
-
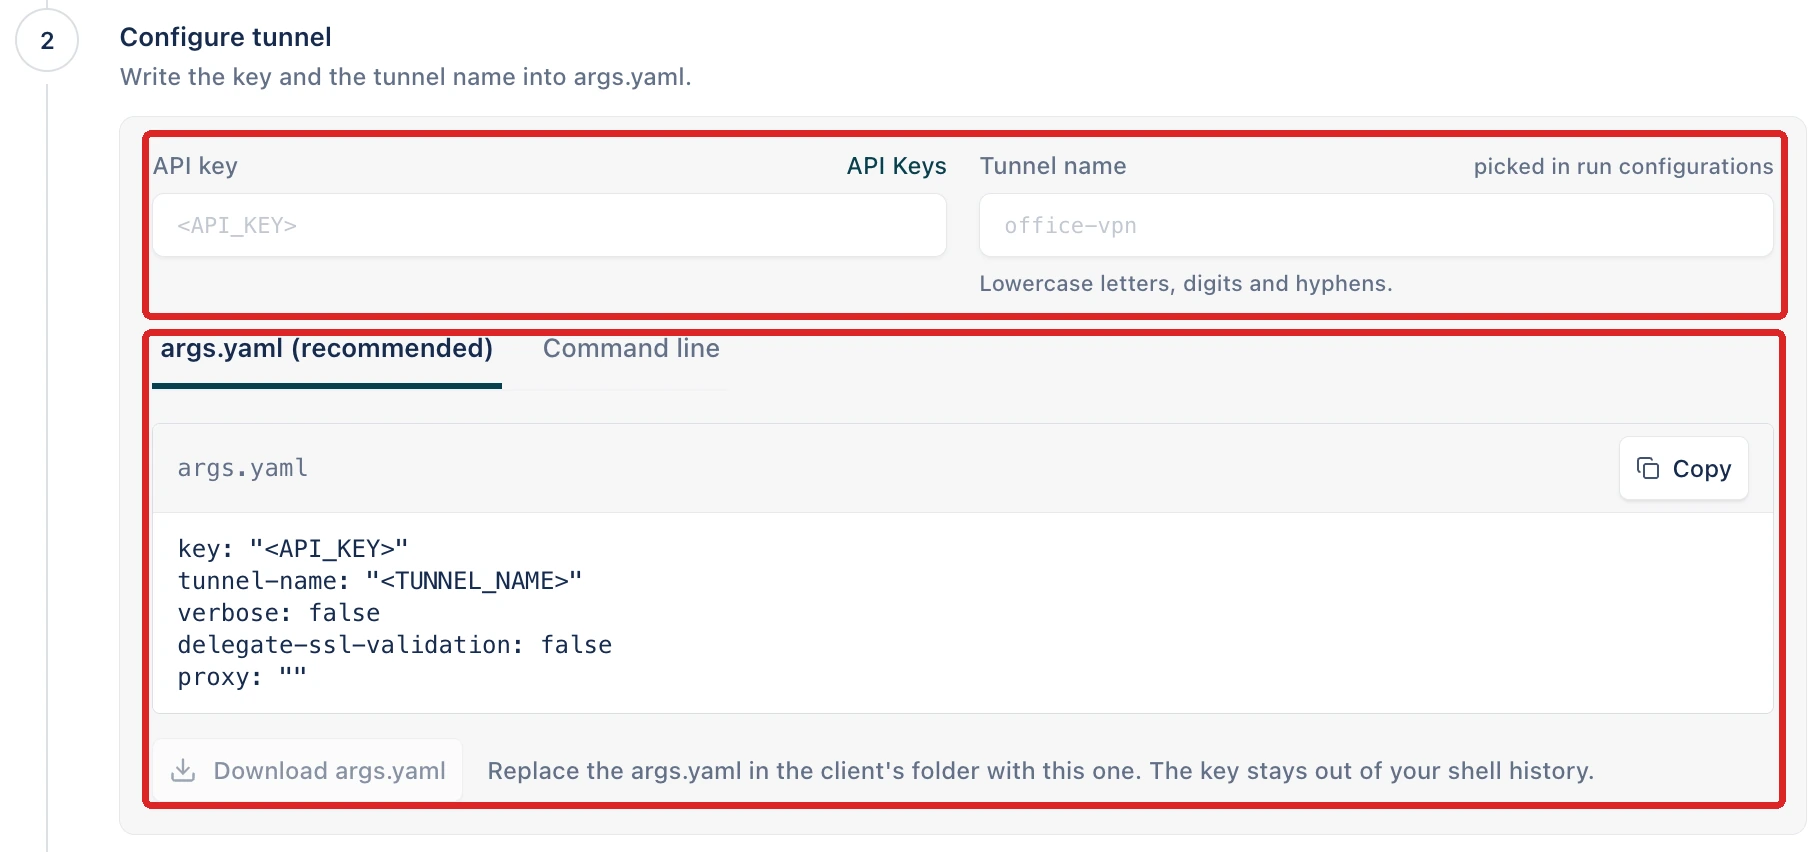
Under Configure tunnel, enter an API key. To create one, click API Keys. See API keys.
-
Enter a Tunnel name, using lowercase letters, digits, and hyphens. This is the name you pick in run configurations.
-
Choose how the client reads them:
- args.yaml (recommended): click Download args.yaml and replace the
args.yamlbeside the client with it, or click Copy and paste the contents into that file. The key stays out of your shell history. - Command line: nothing to save. The start command passes the key and the name as flags. The key ends up in your shell history.
- args.yaml (recommended): click Download args.yaml and replace the
The generated args.yaml looks like this:
key: "<API_KEY>"tunnel-name: "<TUNNEL_NAME>"verbose: falsedelegate-ssl-validation: falseproxy: ""| Setting | What it does |
|---|---|
key | The API key the client signs in with |
tunnel-name | The name the tunnel registers under. It must match the name you entered in Arcus |
verbose | Writes debug logs when true |
delegate-ssl-validation | Accepts certificates from an SSL inspection appliance on your network when true |
proxy | The proxy the client connects through, when your network requires one |
A flag on the command line wins over the same setting in args.yaml.
Start the client
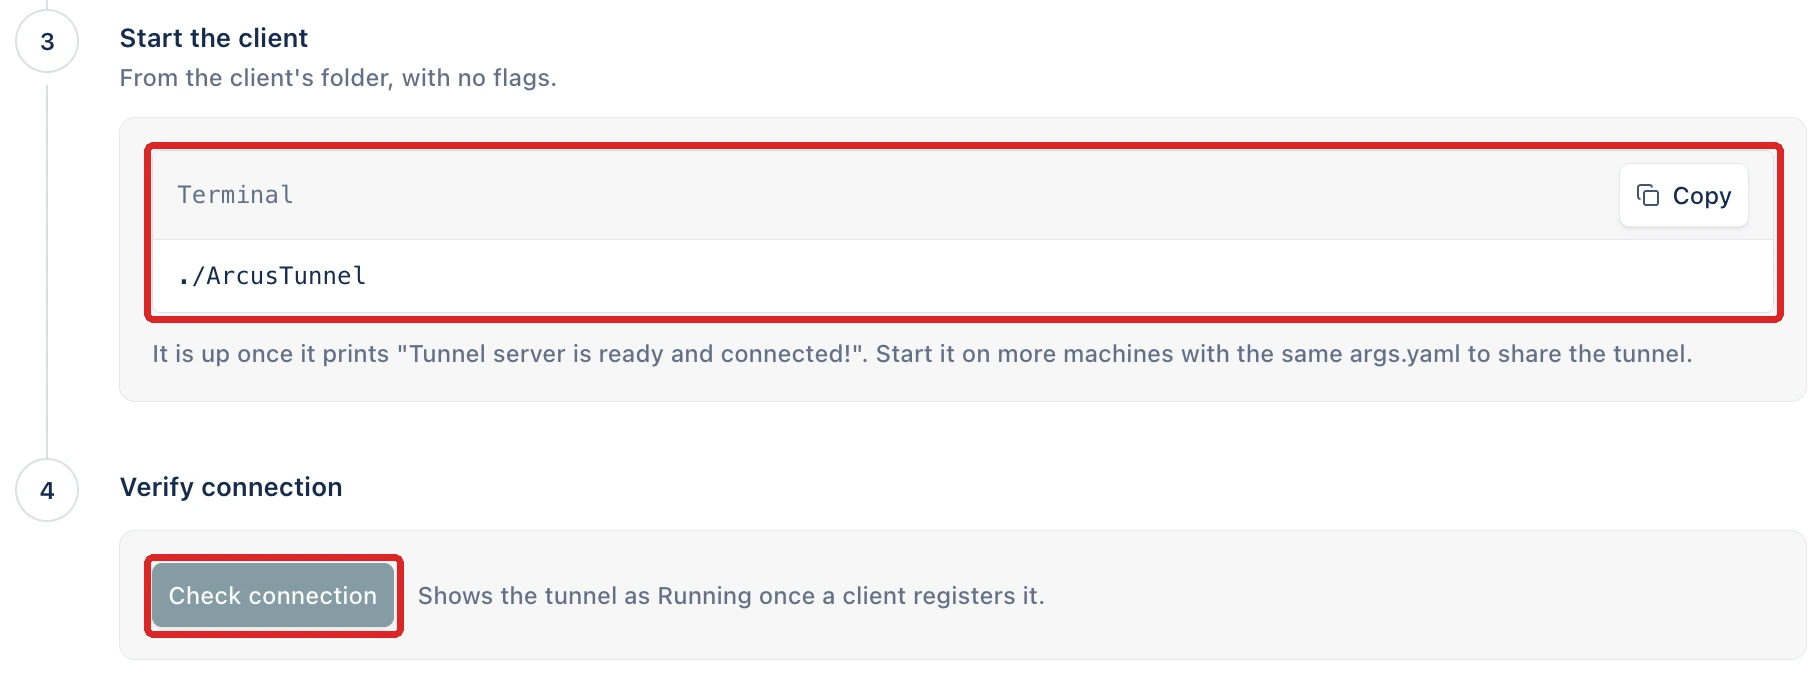
Section titled “Start the client”From the client’s folder, run the command Arcus shows under Start the client.
With args.yaml:
./ArcusTunnelWith flags:
./ArcusTunnel --key "<API_KEY>" --tunnel-name "<TUNNEL_NAME>"The tunnel is up once the client prints “Tunnel server is ready and connected!”. Keep the client running while tests use the tunnel.
To share the tunnel, start the client on more machines with the same args.yaml, or the same command. They all join one tunnel.
On Windows, the client is ArcusTunnel.exe.
Check the connection
Section titled “Check the connection”Under Verify connection, click Check connection. The tunnel shows as Running once a client has registered it.
A tunnel is created the first time a client starts with its name, and stops when its last client disconnects. The Tunnels page lists each tunnel with its Name, Status, Port, number of Clients, client Version, Last change, and Last error. Click a tunnel to open its details. A tunnel’s Status is Starting, Running, Stopping, Stopped, or Failed. The filters above the list show each status that has tunnels, with its count.
Delete a tunnel
Section titled “Delete a tunnel”-
On the Tunnels page, click the tunnel.
-
Under Delete tunnel, click Delete tunnel.
-
In the confirmation dialog, click Delete.
Deleting stops the tunnel, disconnects its clients, and frees its slot on your plan. Tests and API requests that used it then go directly over the public internet. To create it again, start a client with the same name.
You can’t delete a tunnel that a run configuration uses, or one that is still Starting. Remove it from the run configuration first.
Use a tunnel in a run configuration
Section titled “Use a tunnel in a run configuration”-
Open Test Runs, click Run Configs, then click New Run Config, or open an existing configuration.
-
Under Where to run, select Cloud.
-
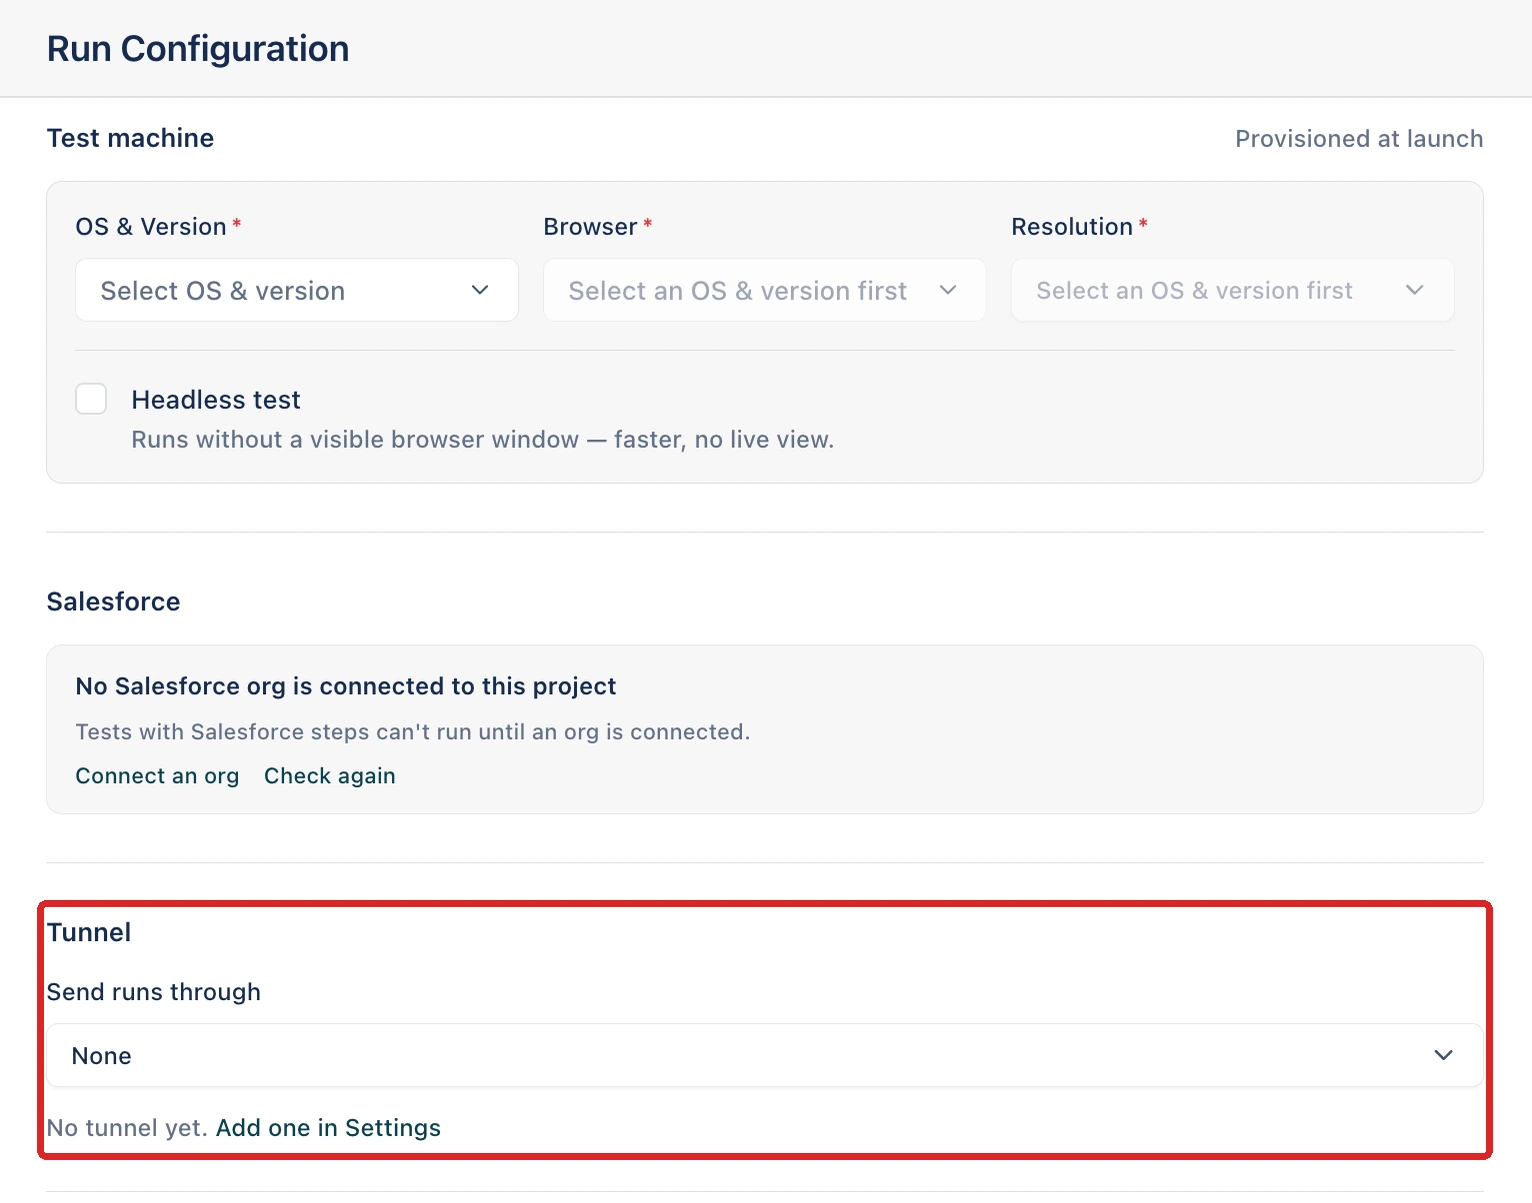
Under Tunnel, open Send runs through and select the tunnel. None sends runs straight to the internet.
-
Click Save.
Browser and mobile sessions in a run that uses this configuration go through the tunnel, and so do its API steps. An API step that names its own tunnel uses that one instead. You can also pick a tunnel for Send in an API request.
Arcus refuses to start a run if its tunnel isn’t running, so start the client before the run.
If no tunnel exists yet, the list reads “No tunnel yet.” with a link to Settings. With Local Agent selected, the section reads “A Local machine already runs inside your network, so a tunnel has no effect there.”
Header rules for web runs
Section titled “Header rules for web runs”For a web configuration with a tunnel, Header rules add headers to the browser’s requests to the hosts you match. Header values are encrypted and never shown again, and saving replaces every rule.
-
Under Header rules, click Add rule.
-
In the field that shows
api.internal, enter the host: a domain such asapi.internal,*.internalfor the domain and its subdomains, or*. -
Optionally, in the field that shows All paths, enter a path such as
/v1/orders,/v1/**, or**/health. -
In the field that shows
X-Auth-Token, enter the header name. Enter its value in the field beside it. -
Click Save.
Every rule needs a host, a header name, and a value. To delete a rule before saving, click its remove icon.
Once rules are saved, the section reads “Header rules are saved.” Click Replace to enter a new set, or Remove to delete them when you save. To undo a removal before saving, click Keep them.
Troubleshooting
Section titled “Troubleshooting”The Troubleshoot list on the Tunnels page covers the common causes:
| Problem | What to do |
|---|---|
| The tunnel isn’t running | Wait for the client to print “Tunnel server is ready and connected!” |
args.yaml isn’t used | Keep it beside ArcusTunnel. The client warns when it can’t read or parse the file |
| The name doesn’t match | Start the client with the same tunnel name you entered in Arcus |
| The key isn’t valid | Generate a new one in API Keys |
| Tunnels aren’t in your plan | See Usage and Credits |
| The tunnel limit is reached | All the tunnels your plan allows are running. Delete one, or see Usage and Credits |
A run goes to the internet instead of the tunnel
Section titled “A run goes to the internet instead of the tunnel”The run configuration’s Send runs through is set to None. Select the tunnel and save.
A run is refused when it starts
Section titled “A run is refused when it starts”The run configuration’s tunnel isn’t running. Start the client on a machine that can reach the app, wait for “Tunnel server is ready and connected!”, then start the run again.
Was this page helpful?
Thanks for the feedback.