

Quickstart
Generate a test case from one sentence, let Copilot automate it in a cloud browser, and see it pass. You don’t need an integration or anything installed. It takes about 10 minutes.
Create a project
Section titled “Create a project”-
Click your project name at the top of the sidebar, then click New Project.
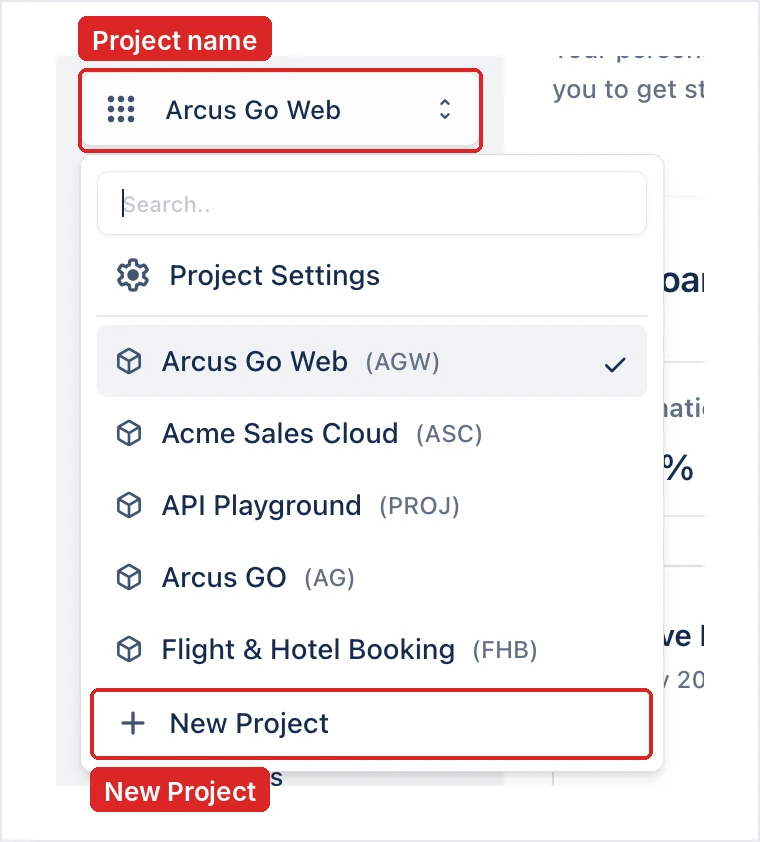
-
Enter a name and click Create Project.
Arcus fills in the project key from the name and opens the project’s Dashboard.
Describe what to test
Section titled “Describe what to test”-
On the Dashboard, under AI Powered Test Case Generation, click Start Generating. QI Home opens.
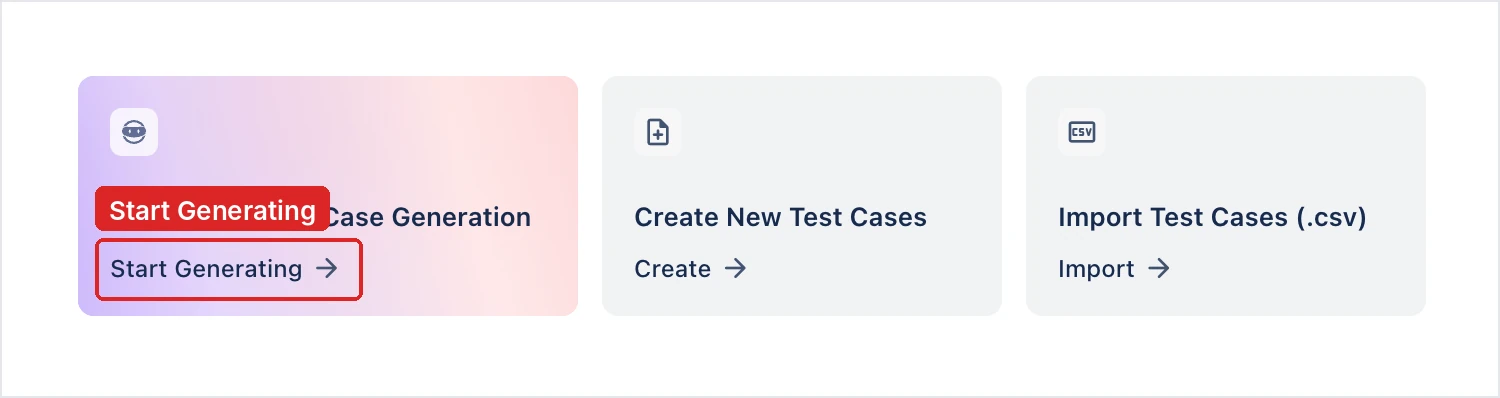
-
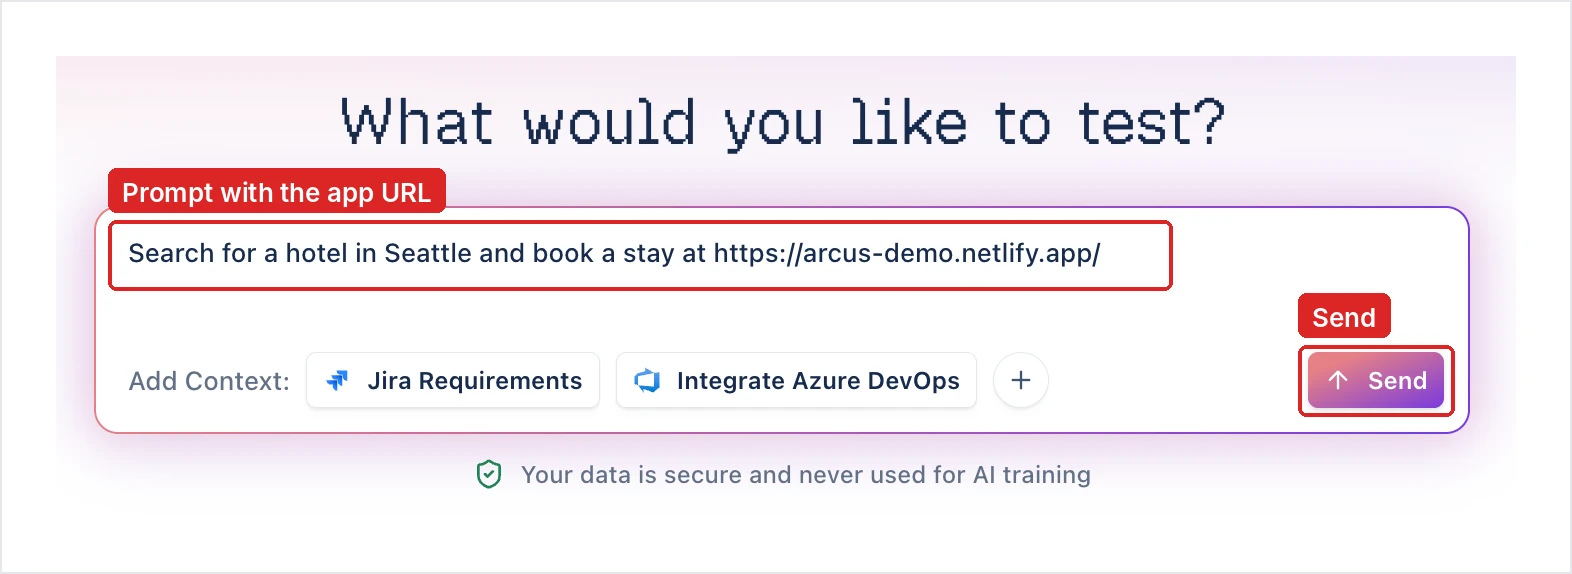
In What would you like to test?, describe a flow in your web app, and include the app’s URL.
-
Click Send.
Generate the test cases
Section titled “Generate the test cases”The Test Authoring Agent reads your prompt and asks how to start.
- Choose Continue with test case generation. It writes test cases straight away, without crawling the app first.
- When the Generation Plan appears, click Approve.
- When the agent lists the scenarios it outlined, click Yes, proceed with all.
The test cases appear in the session’s review list, marked Pending.
Automate and run a test case with Copilot
Section titled “Automate and run a test case with Copilot”-
Open one of the test cases.
-
Click Learn with Copilot.
-
Under Where to run, select Cloud.
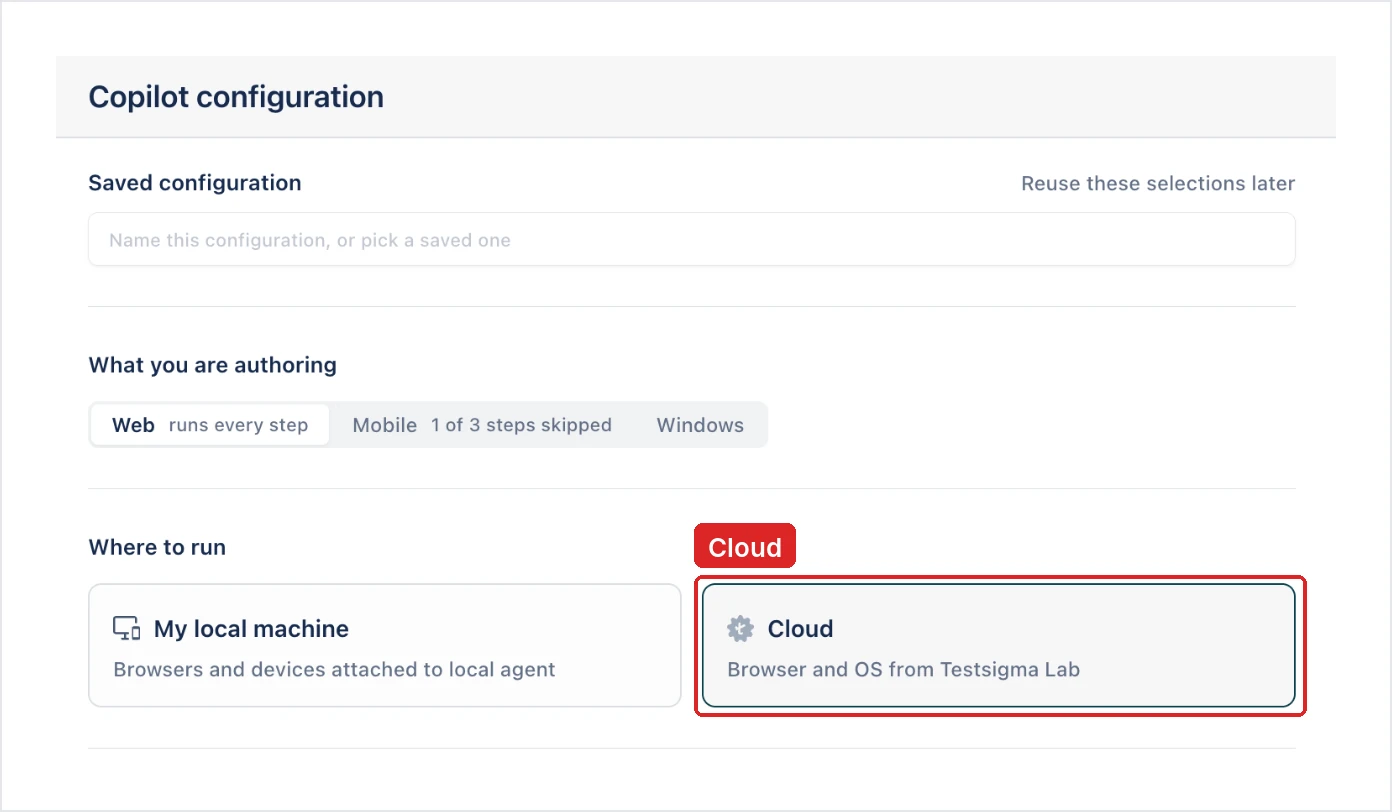
-
Click Start Copilot. The session opens in a new tab, and the cloud browser can take a minute to start. If your browser blocks the new tab, the session opens in the current one.

-
Click Start learning. Copilot drives the browser through each step and shows what it did, until it shows Learning complete.
-
Click Save and Run.
Arcus saves the test case to your library with an ID, marks it Accepted, and runs the automated steps straight away.
Check the result
Section titled “Check the result”Each step shows a tick as it passes, and the session shows Paused at the end of the test when the run finishes.
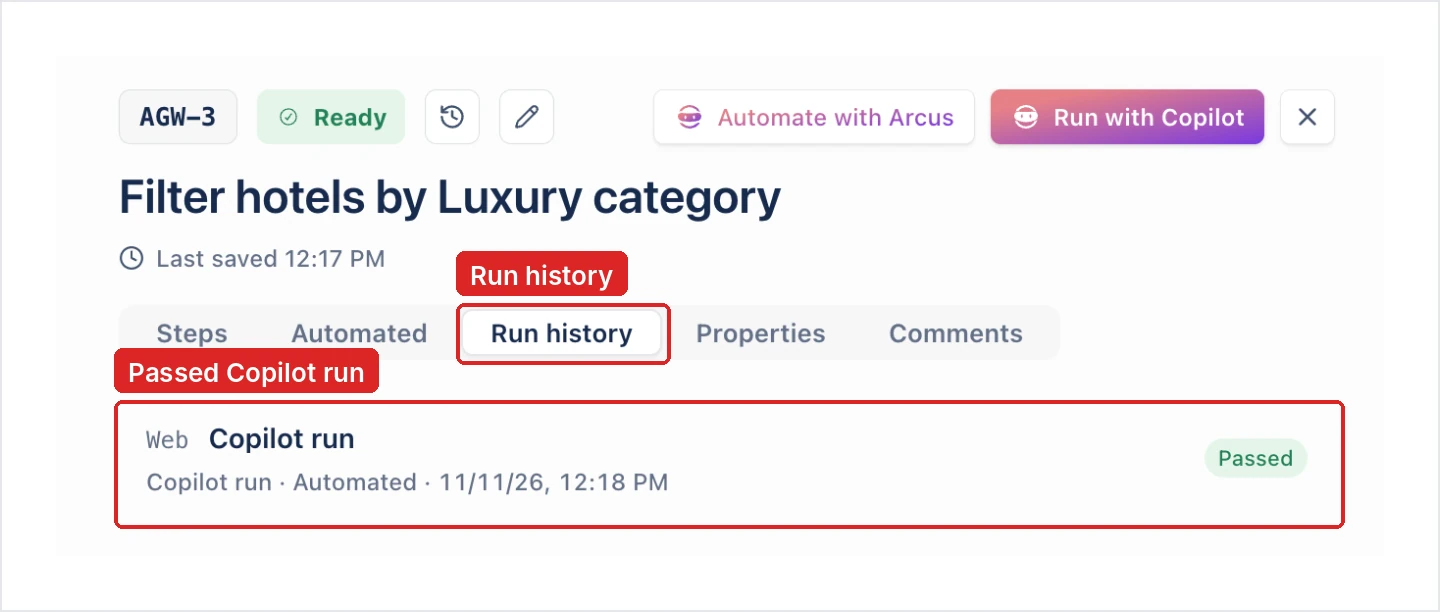
To see the run again, open the test case, select Run history, and click the run. See Run results.
Add your own context
Section titled “Add your own context”The test case you just ran came from one sentence. Arcus writes more specific test cases when it can read your real work: your stories, your designs, and what your developers change. There are 3 ways to give it that context.
-
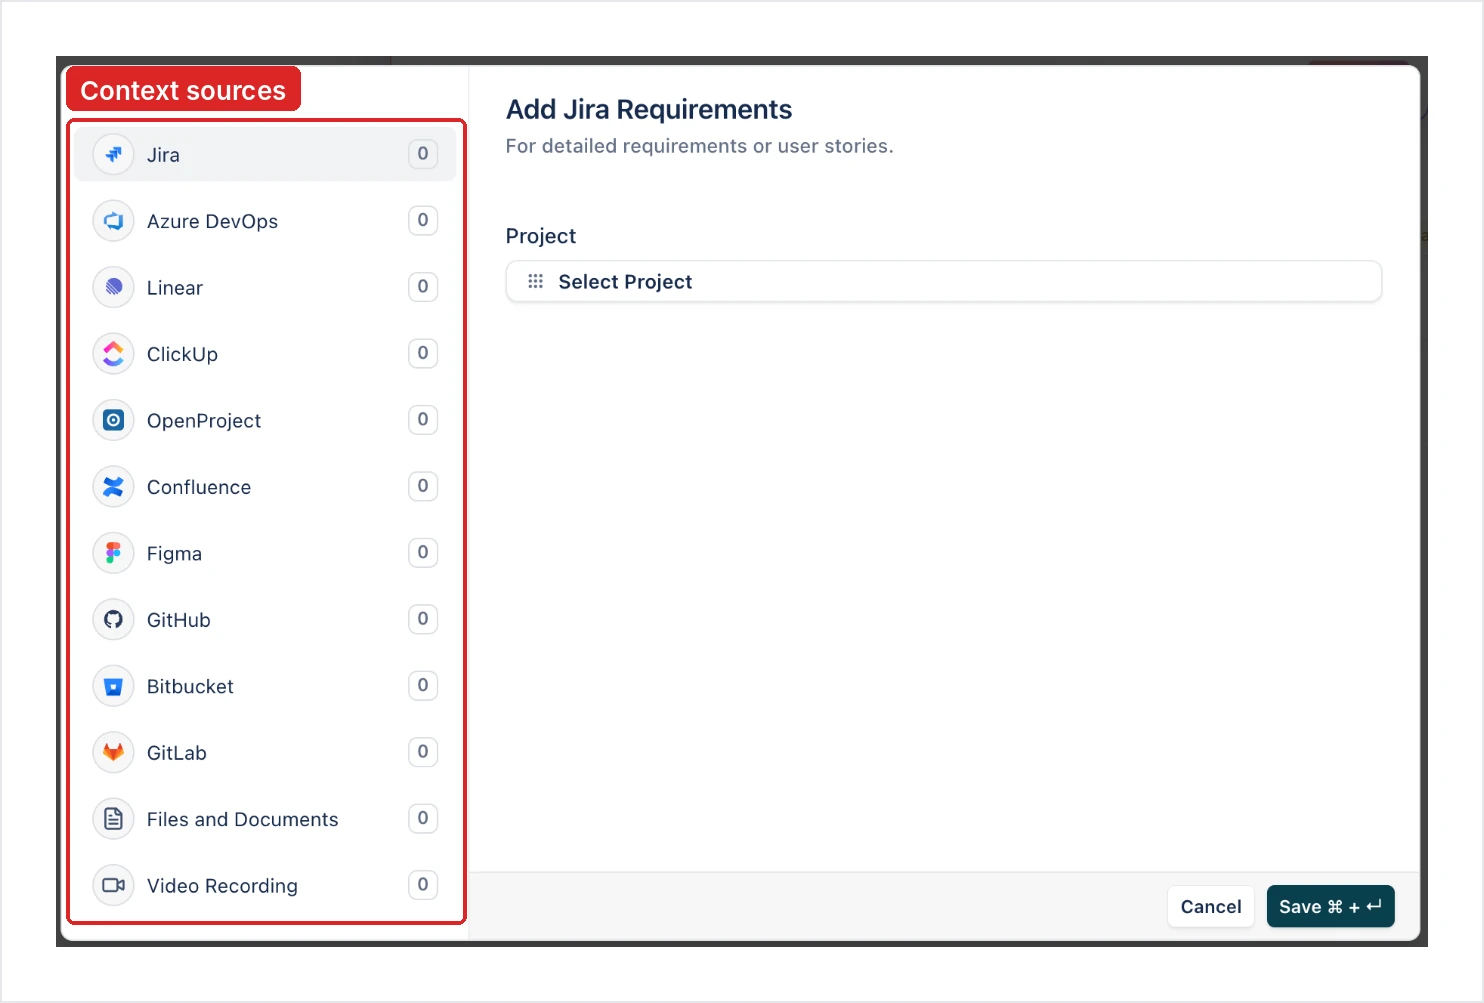
In the prompt: below the prompt box in QI Home, click Jira Requirements, or + for the other sources. You can attach Azure DevOps, Linear, ClickUp, or OpenProject work items, Confluence pages, and Figma designs. You can also attach pull requests from GitHub, GitLab, or Bitbucket, files (.jpeg, .png, .docx, .pdf, .xls), and video recordings (.mp4, .mov, .webm, .avi, .mkv). Each upload can be up to 500 MB. A source you haven’t connected shows Integrate, which opens Settings > Integrations. See Add context.
-
From your coding agent: install the Arcus plugin in Claude Code, Cursor, Codex, or GitHub Copilot. It captures each coding session, including prompts, tool calls, and file changes, and sends it to Context Management in QI Home. Setup is the same in every tool: install the plugin, sign in with
/arcus:login, and set the project with/arcus:project use. The plugin sends nothing until you sign in. To file a session under a sprint, link its ticket with/arcus:map ticket. In Cursor, the commands use a hyphen instead of a colon, as in/arcus-login. To start, click Connect code tools at the bottom of QI Home, or see Developers. -
From pull requests: connect GitHub with the Arcus GitHub App, or connect GitLab or Bitbucket. Every pull request your team raises reaches Context Management. When its title or description carries a ticket ID from your tracker, Arcus maps it to that ticket’s sprint automatically. See GitHub.
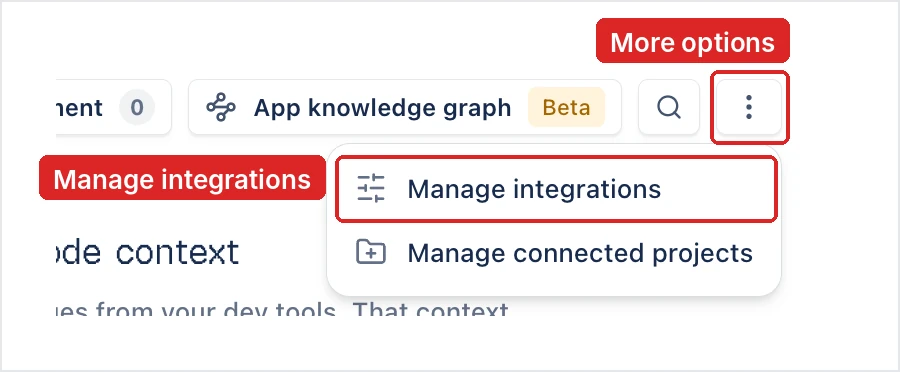
To check what’s connected, click the more options icon (⋯) on QI Home, then Manage integrations. Connected coding tools show Active under Dev Tools and AI.
What’s next
Section titled “What’s next”-
Test your own app: pick your app type (web, mobile, desktop, API, or Salesforce), and install the Arcus Agent to test on your own machine.
-
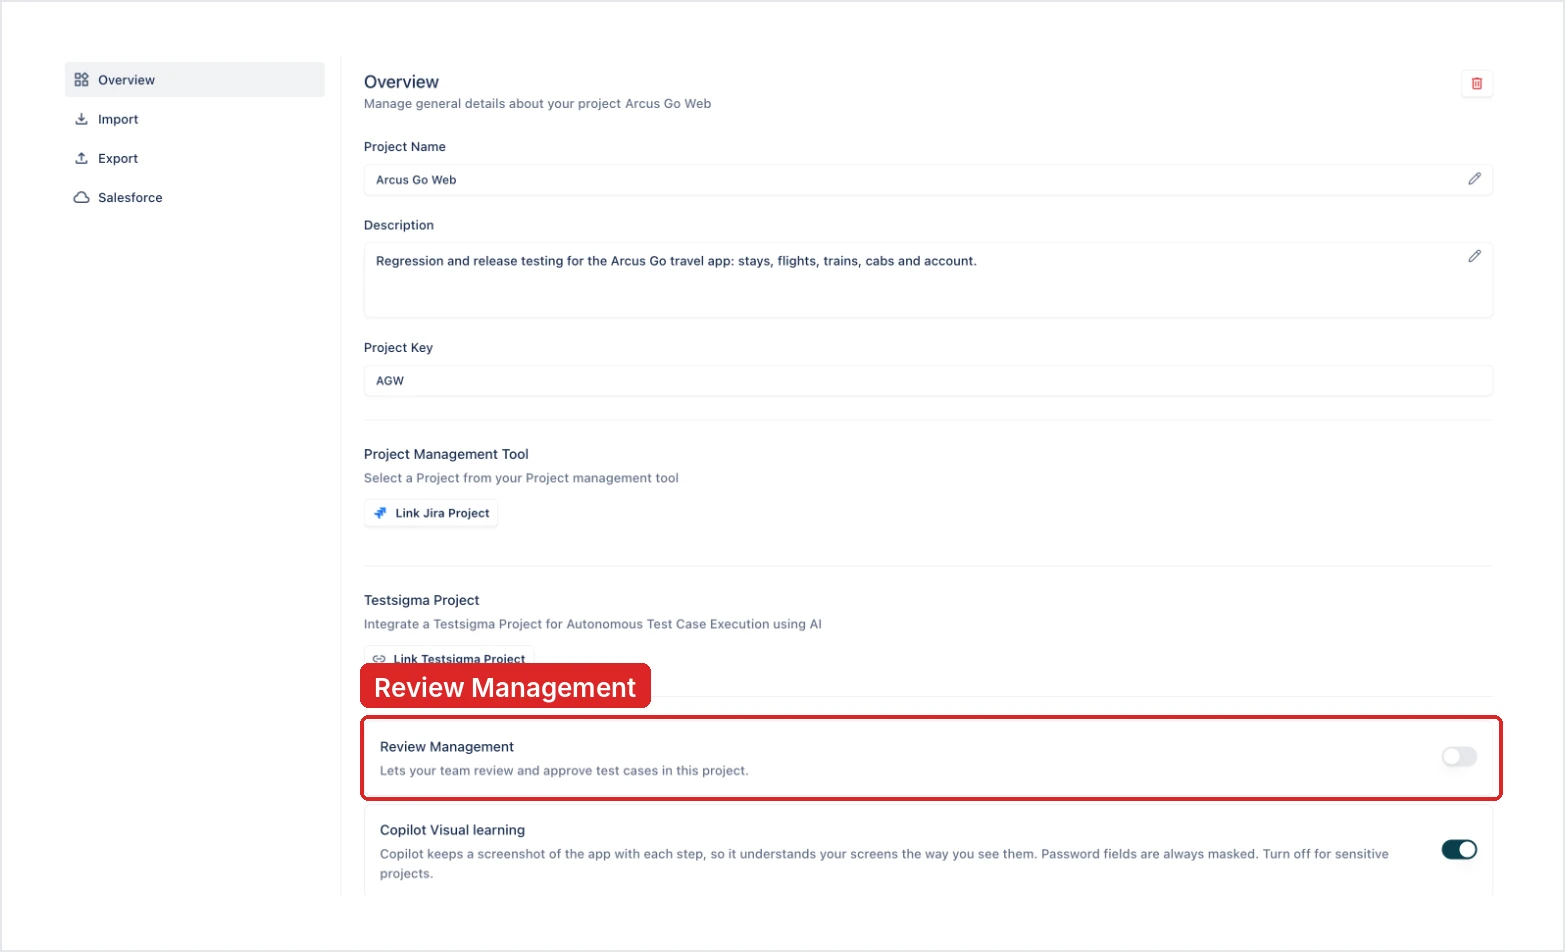
Bring your team: invite teammates, and turn on Review Management so test cases are approved before they’re used.
-
Map your app first: let the Explorer Agent crawl your app before it writes test cases. See App knowledge graph.
Troubleshooting
Section titled “Troubleshooting”The agent doesn’t reply after I send the prompt
Section titled “The agent doesn’t reply after I send the prompt”Wait 2 minutes, then go back to QI Home and send the prompt again in a new session. Check that the URL in your prompt is complete and opens in a browser.
Start learning doesn’t respond
Section titled “Start learning doesn’t respond”Click Start learning once and wait. If nothing happens after a minute, end the session with the exit icon at the top of the session, then End session. Start again from Learn with Copilot in the test case header, with Where to run set to My local machine. This needs the Arcus Agent running on your computer.
A step fails during the run
Section titled “A step fails during the run”Copilot learned from the live app, so a changed page can break a step. Click Re-run. If the same step fails, see Debug and run with Copilot.
Was this page helpful?
Thanks for the feedback.