

API tests
An API call is a step that sends an HTTP request and checks the response. You build it in a request editor inside the test case: the method, URL, parameters, body, headers, and authorization, then what to verify and what to store. A test case can hold several API calls, each passing values to the next, and can mix them with web steps.
Use API calls to test an API directly, to set up data before a UI test, or to check a backend result after one. For every field and option in the editor, see API call reference. To test a GraphQL API, see GraphQL calls.
Add an API call
Section titled “Add an API call”-
Open the test case and select Automated steps.
-
In an empty step row, type
/RESTand pressEnterto insert REST API. The request editor opens beside the steps.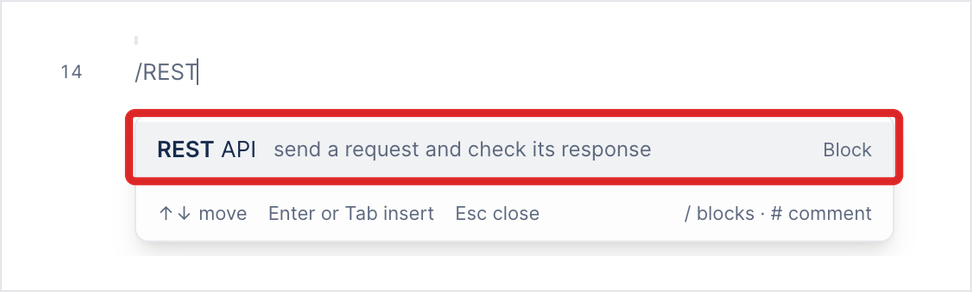
-
Click New API call at the top of the editor and enter a name for the call.
-
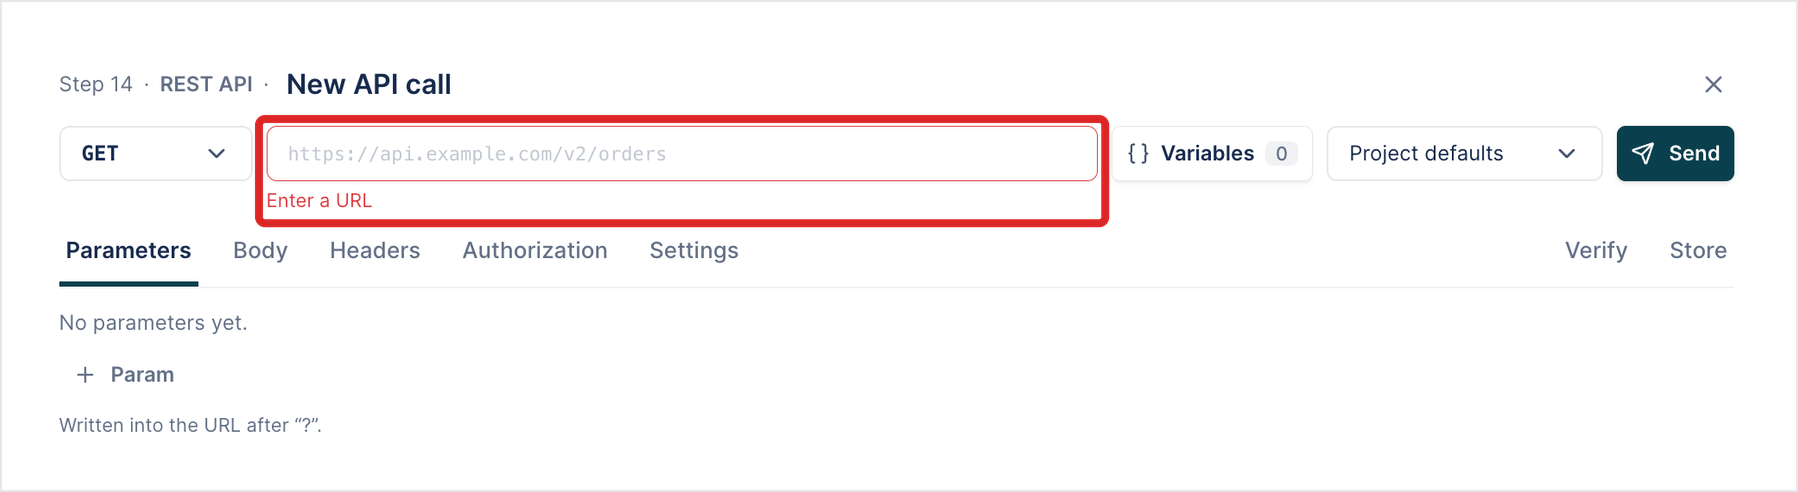
Select the method, such as GET or POST, and enter the URL. Until the URL is filled in, the field reads “Enter a URL” and Create stays unavailable.
-
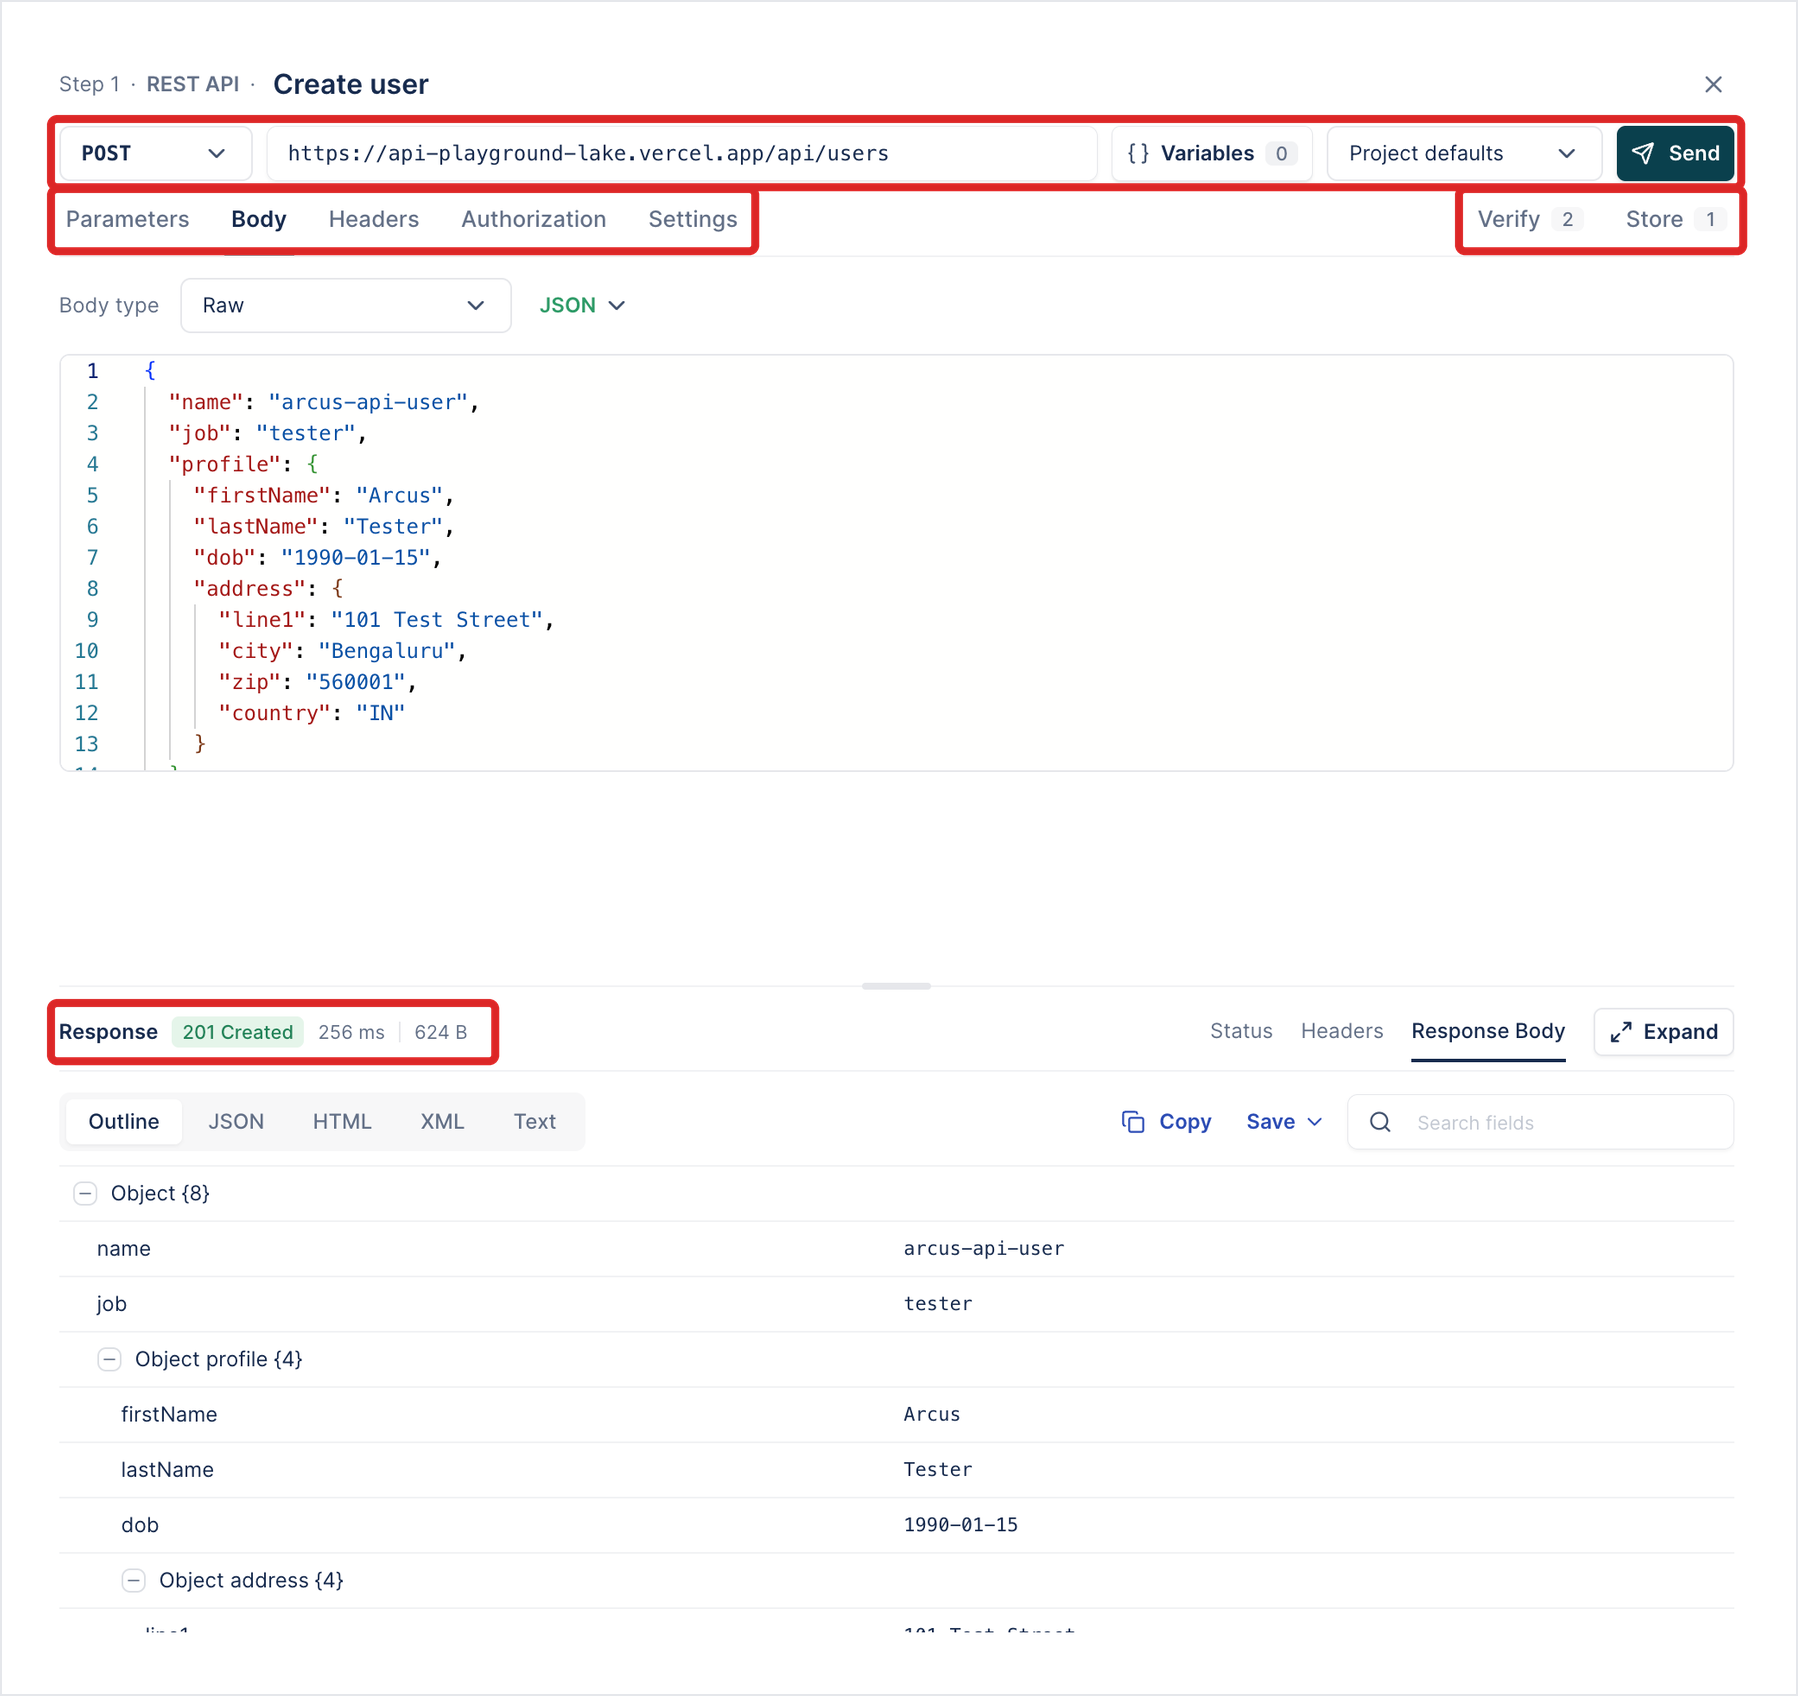
(Optional) Fill in the tabs the request needs:
- Parameters: query parameters, written into the URL after
?. - Body: form-data, x-www-form-urlencoded, Raw as JSON, XML, or Text, or Binary, a file from Uploads sent as the whole body.
- Headers: request headers.
- Authorization: Basic, Bearer, API key, OAuth 2.0, and other schemes.
- Settings: SSL verification, redirects, timeout, and other request options.
- Parameters: query parameters, written into the URL after
-
Click Send to try the request. The Response pane shows the status, the time, the size, and the body.
-
Add what to check on the Verify tab and what to keep on the Store tab. See Verify a response and Store a value.
-
Click Create.
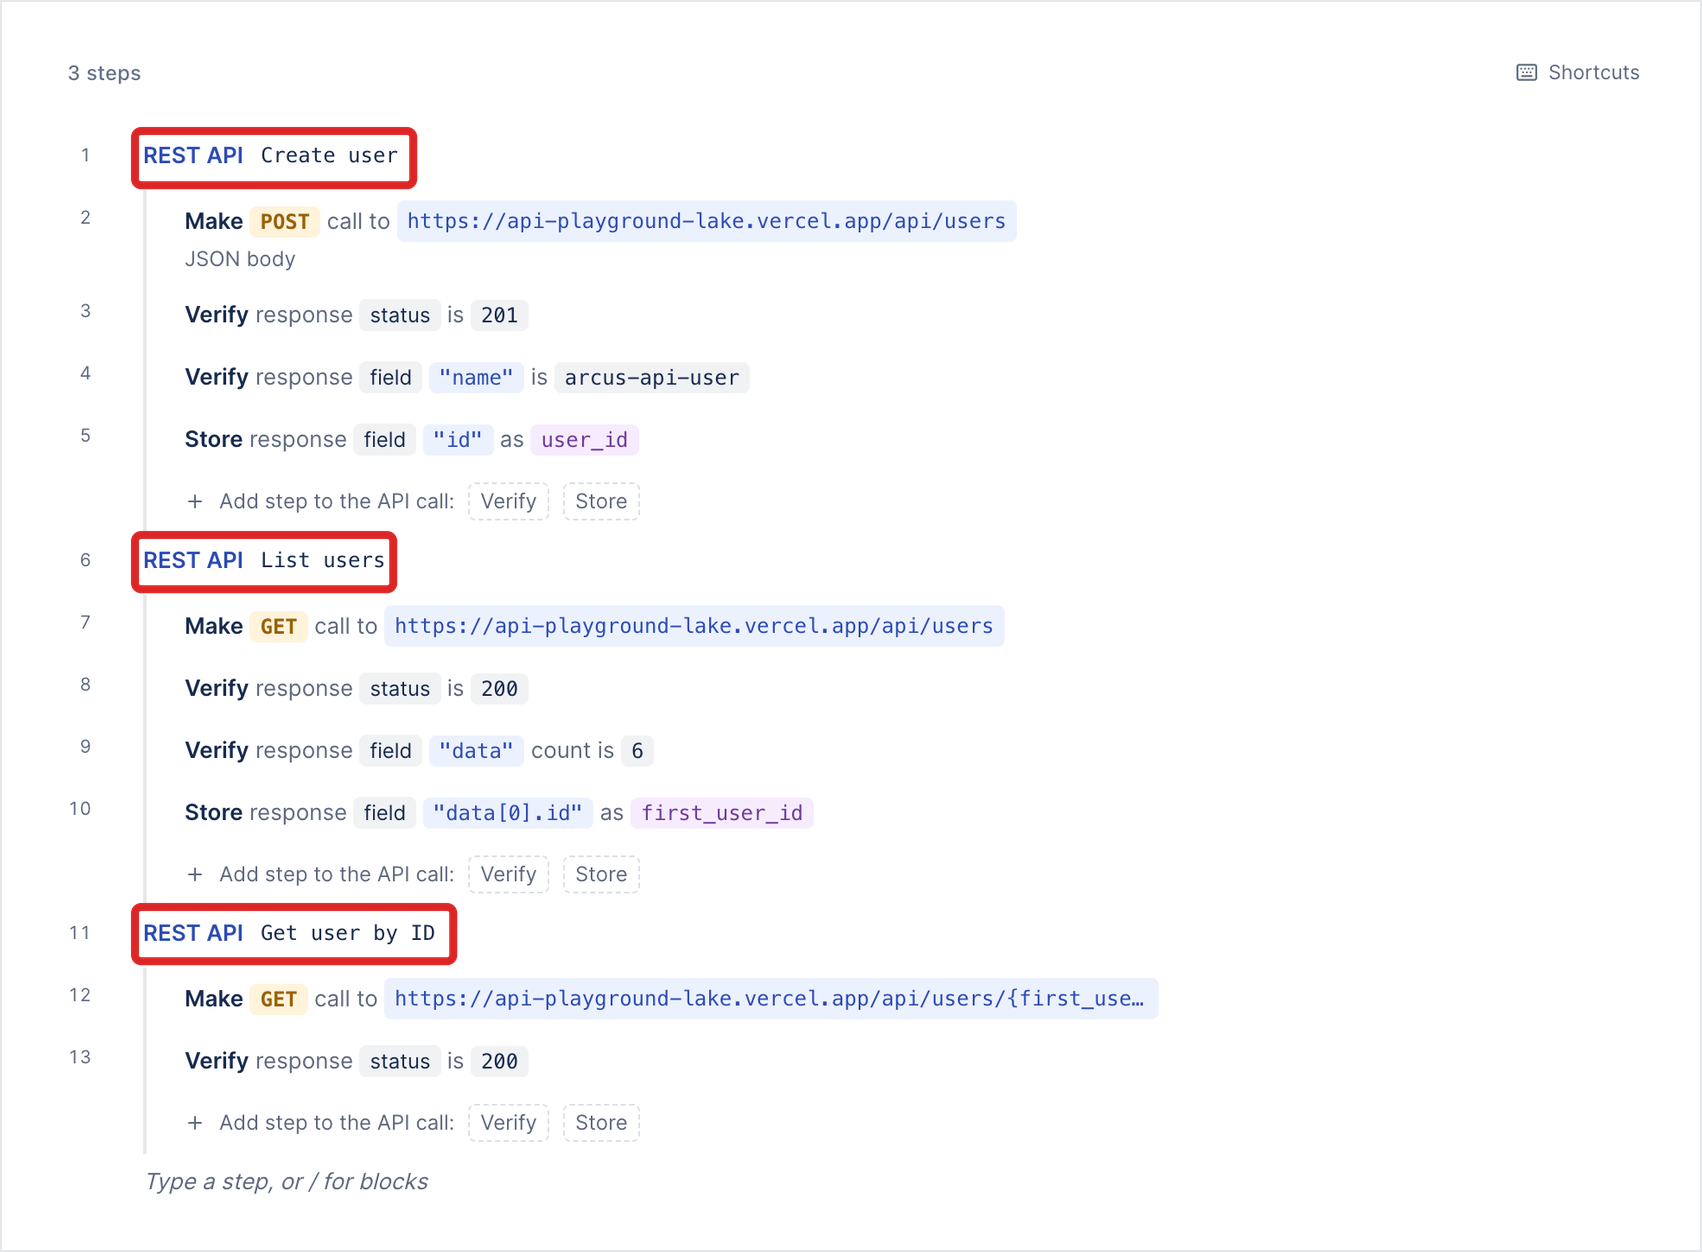
The call appears in the test as plain sentences under REST API and its name, for example “Make POST call to https://…/api/users”, “Verify response status is 201”, and “Store response field “id” as user_id”. To change it later, click the call. Changes save when you close the editor. To add a check or a stored value without opening the editor first, click Verify or Store in Add step to the API call under the call.
Verify a response
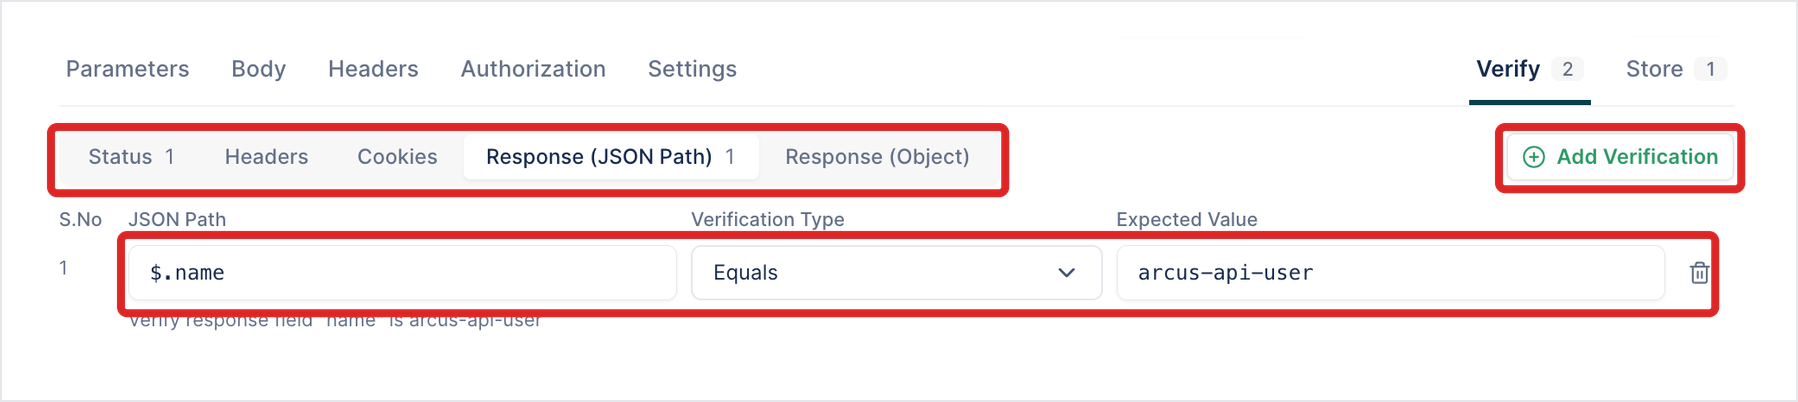
Section titled “Verify a response”On the Verify tab, click Add Verification. If you sent the request first, Arcus fills in a check from the response, such as Status code Equals 201.
Choose what to check:
- Status: the status code.
- Headers and Cookies: a response header or cookie.
- Response (JSON Path): a field in the body, by its JSON path, such as
$.nameor$.data[0].id. - Response (Object): the body as an object.
Then choose the comparison and the expected value. A JSON path check can compare values, match a regular expression, check that a field is present or absent, compare sizes with Count equals and the other count options, or check the type. For the full list, see Verification types.
Each check appears under the call, for example “Verify response field “data” count is 6”.
Send and compare files
Section titled “Send and compare files”API calls take their files from the project’s Uploads. Until the project has an upload, the file options are unavailable and read “needs Uploads”.
Send a file
Section titled “Send a file”- On the Body tab, select the body type:
- Binary: the file is sent as the whole request body. The tab reads “The picked file is sent as the whole request body.”
- form-data: the file is sent as one part of the form.
- Click Select or search files in uploads and pick the upload, or click Upload a new file to add one to Uploads first. Until a file is picked, the field reads “Pick the file to send”.
A body on a GET request shows the warning “A body on a GET request is unusual; many servers ignore or reject it.”
Form-data file parts are sent as application/octet-stream, whatever the file’s type.
Compare the response with a file
Section titled “Compare the response with a file”- On the Verify tab, click Add Verification and select Response (Object).
- In Comparison Type, select Upload File. Until a file is picked, the field reads “Pick a file to compare the response with”.
- Click Select or search JSON or XML files and pick the upload.
- In Verification Type, select how strictly to compare: Strict, Strict Order, Lenient, Non Extensible, or Schema.
File compares are checked when the test runs, not when you click Send in the editor. See Limitations.
Store a value
Section titled “Store a value”To use part of a response later in the test, store it.
-
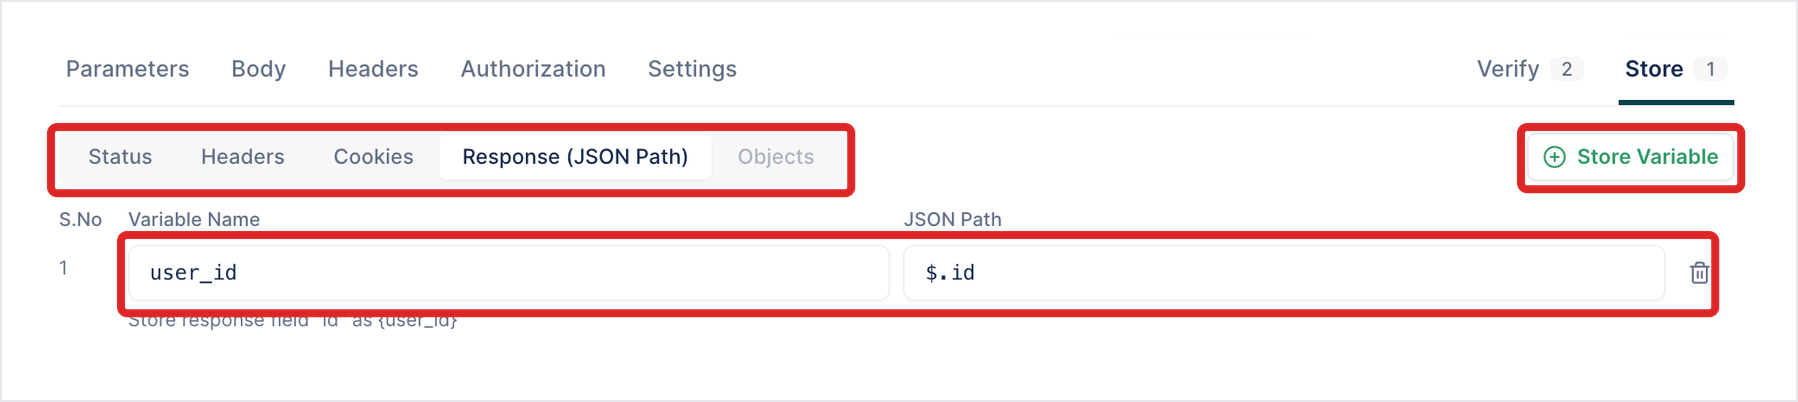
On the Store tab, select where the value comes from: Status, Headers, Cookies, or Response (JSON Path).
-
Click Store Variable.
-
Enter a Variable Name and the JSON Path of the value, such as
$.id.
The call then shows “Store response field “id” as user_id”.
Use a stored value in a later call
Section titled “Use a stored value in a later call”Type the variable name in braces anywhere in a later call: the URL, a parameter, a header, or the body. For example:
https://api.example.com/api/users/{user_id}Arcus highlights the variable. Click the call in the step list: the Step settings panel lists it under FILLED ELSEWHERE, marked “stored above”.
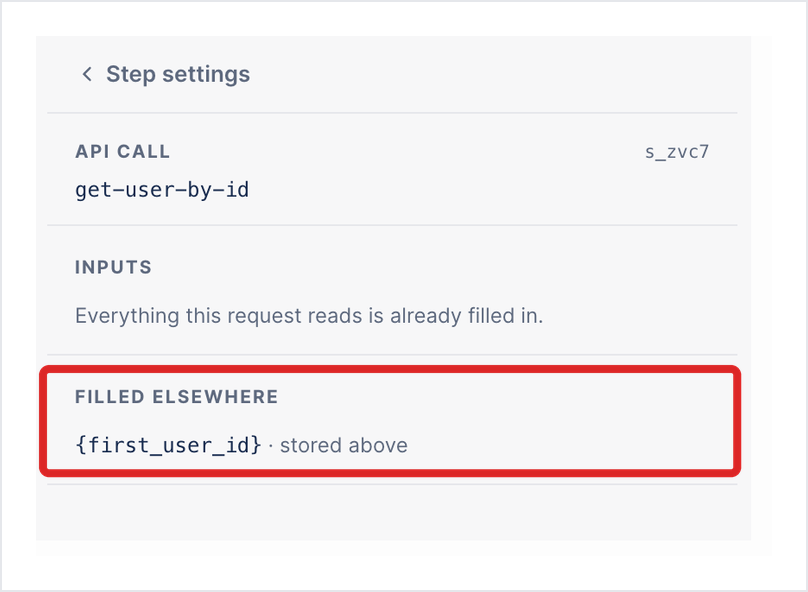
When the test runs, Arcus fills in the value from the earlier call. Send in the editor doesn’t, because nothing has run yet. To try the request, click Variables, enter a value under SENT AS, and click Use these values. Values you give there are kept for that editing session only.
Keep secrets and base URLs in an environment
Section titled “Keep secrets and base URLs in an environment”Don’t type passwords, tokens, or keys into a test. Store them as variables in Environments, and reference them as {env.variable_name}.
- Go to Test Assets > Environments > Default variables, add each secret and turn on Encrypt. Click Update.
- Create at least one environment, for example Staging. It starts with the default variables.
- In the API call, enter the reference in the field, for example
{env.api_token}in Authorization > Bearer Token > Token.
Do the same for the base URL, for example {env.base_url}/api/users, so the same test runs against each environment.
To try a call with an environment’s values in the editor, select the environment in the list beside Variables before you click Send. Project defaults uses the project’s default variables.
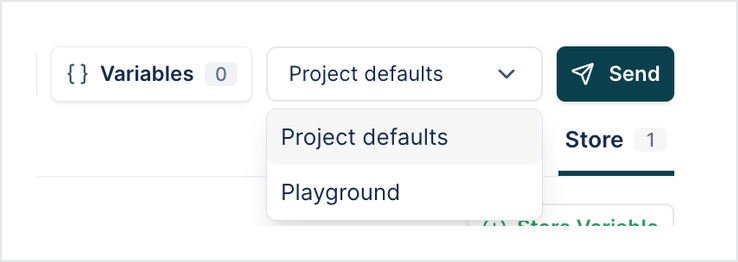
A test plan has its own environment, which every run it starts uses. A plan without one uses the project’s default variables. When you start a cycle, you can pick a different environment for that cycle.
Run an API test
Section titled “Run an API test”-
On the test case, click Debug with Copilot.
-
Under Where to run, select My local machine or Cloud.
-
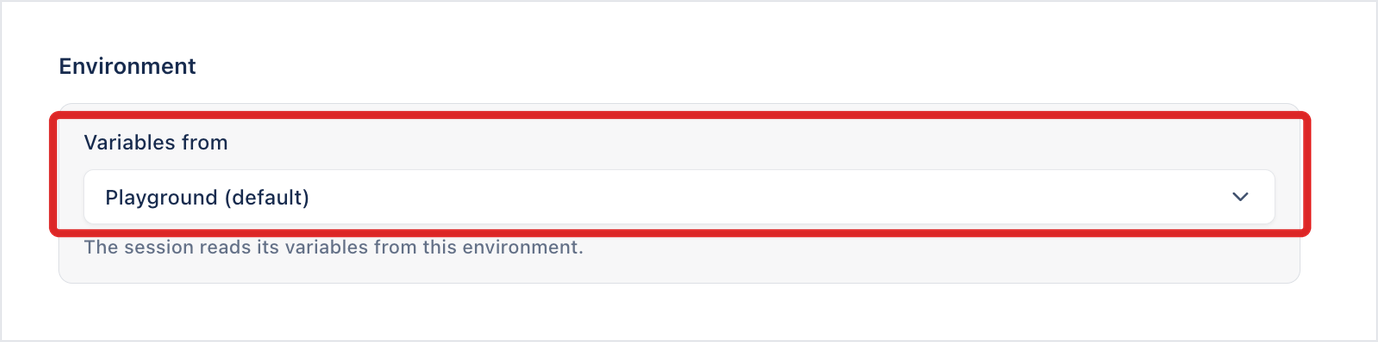
Under Variables from, select the environment.
-
Click Start Copilot.
Each call shows how long it took, and each check shows whether it passed. Click a call to see the request and the response it got.
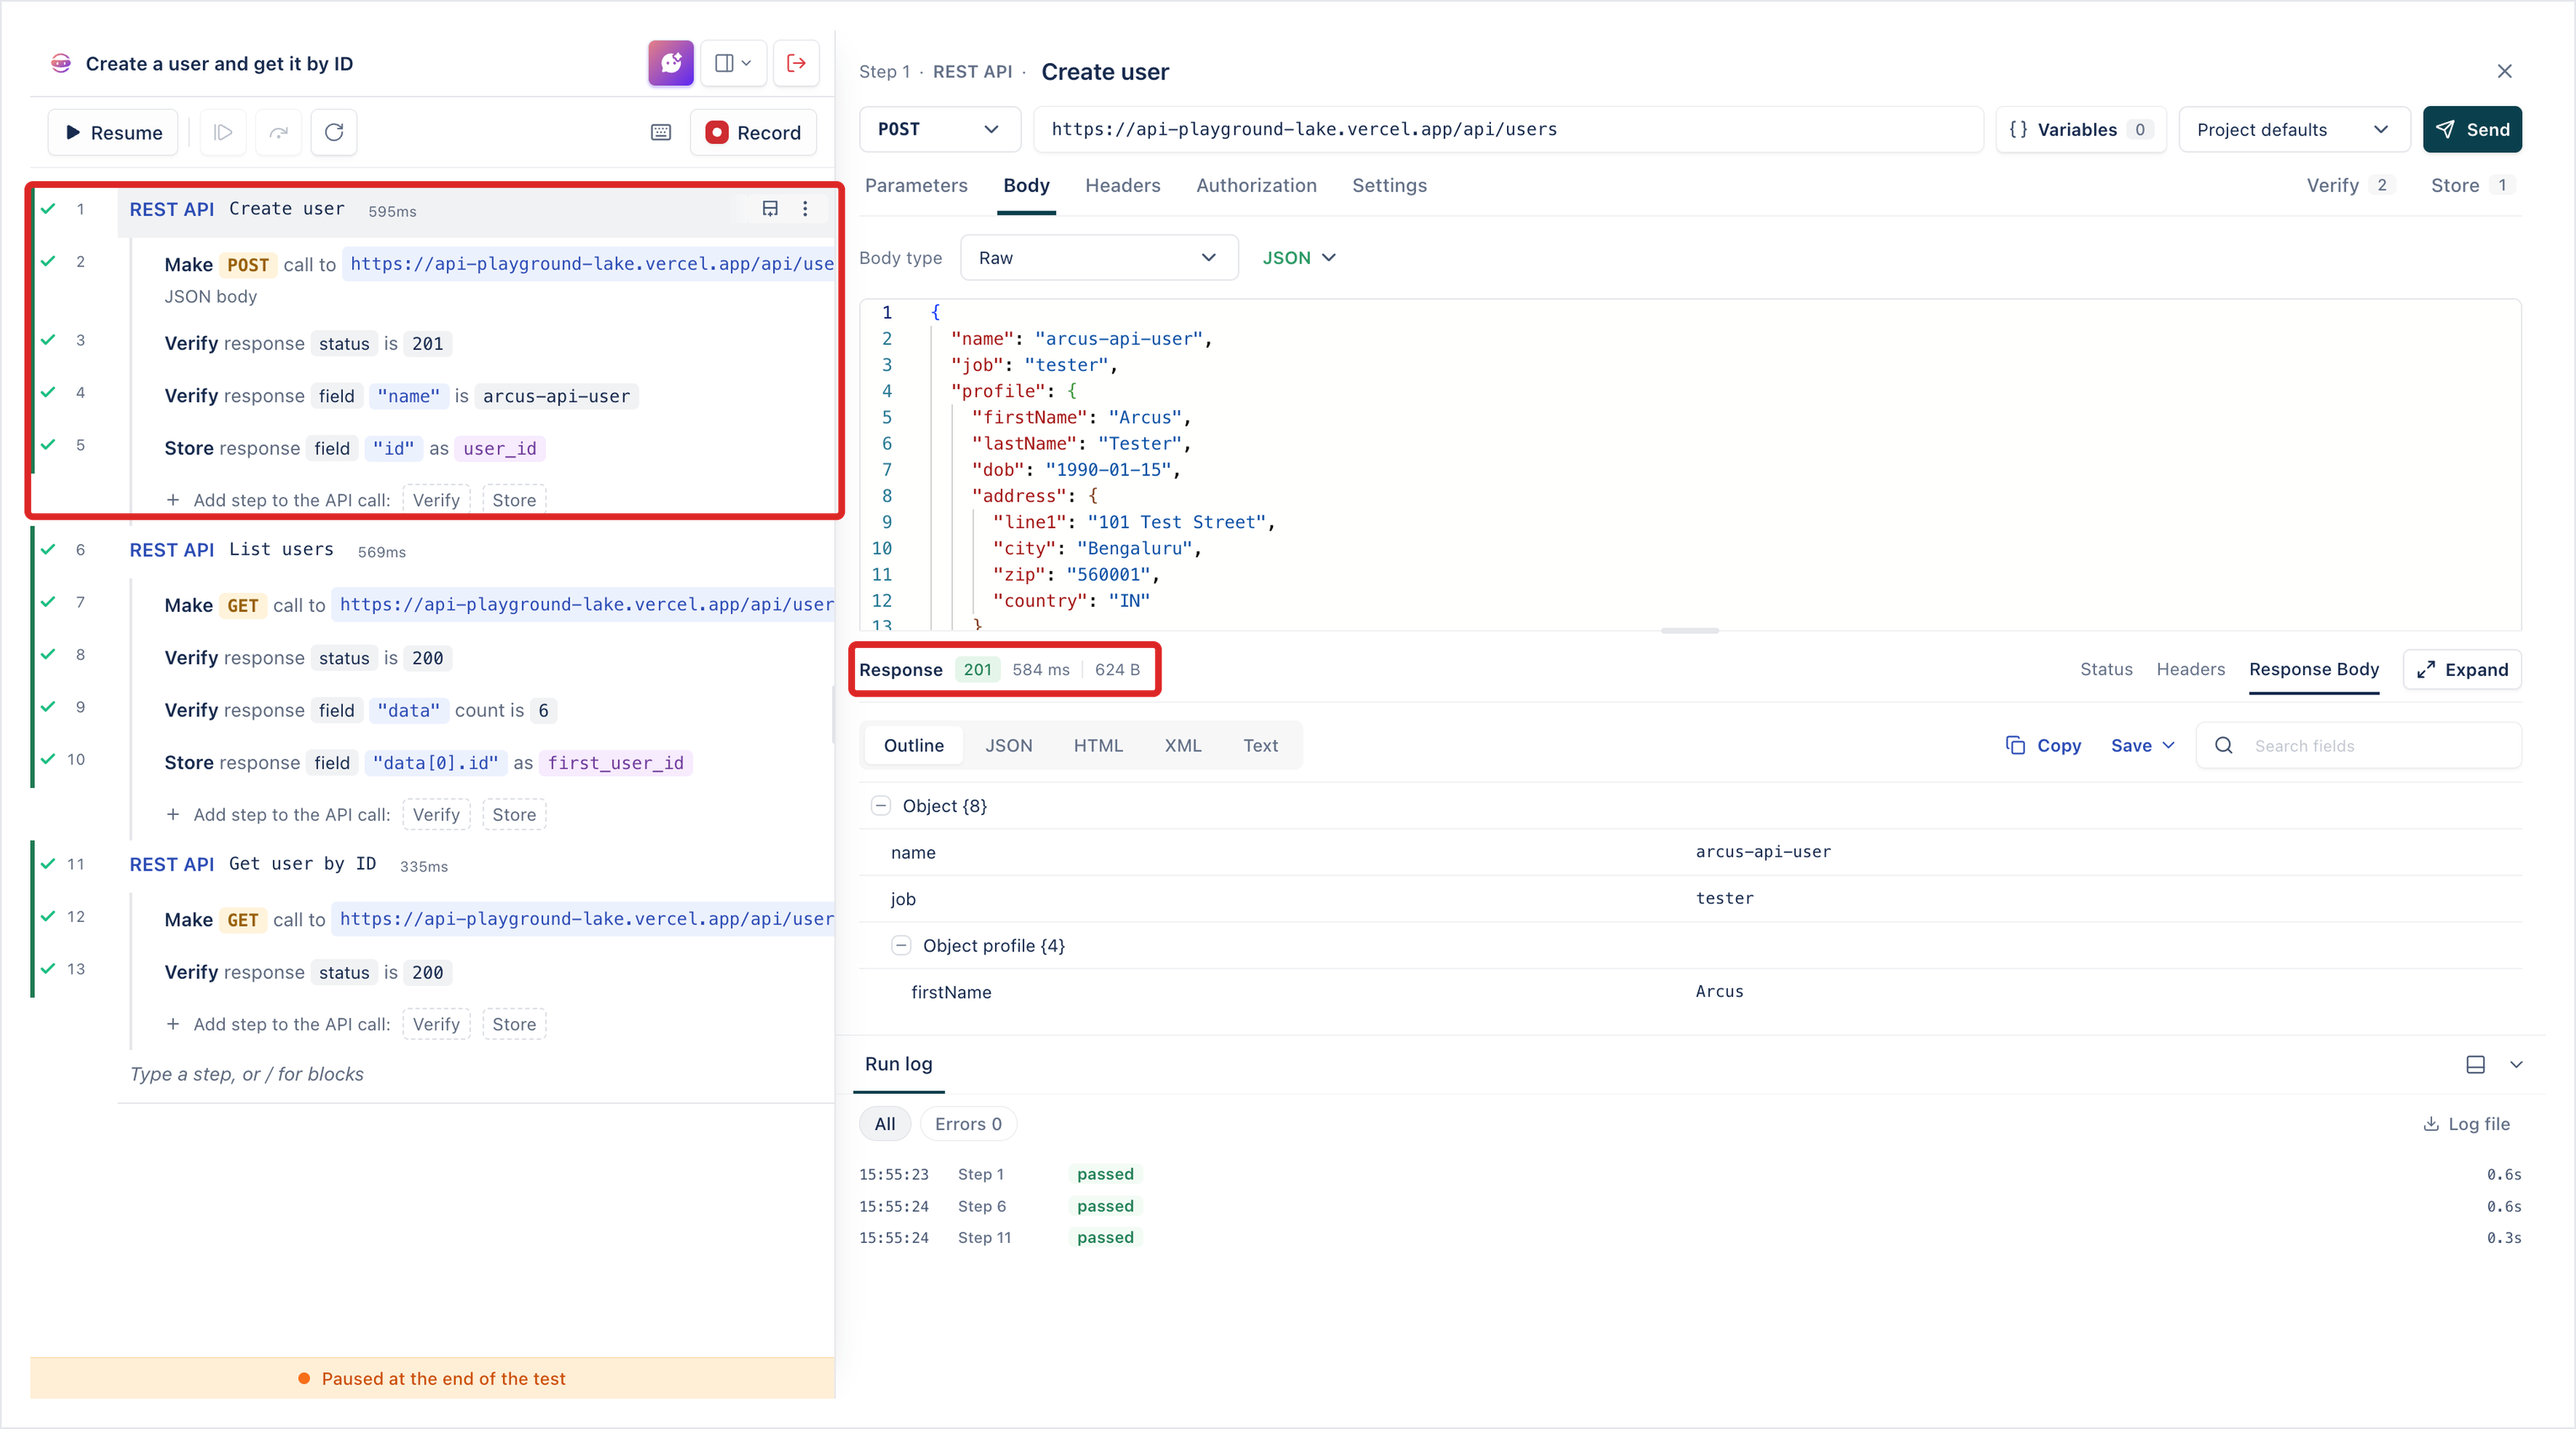
A Copilot session opens a browser even for a test with only API calls, and waits for it to start before running the calls. The browser stays on a blank page. The Run log below lists each call with its result and duration.
On your own machine, a session can need a newer Arcus Agent than the one installed. It then shows “This test needs a newer Arcus Agent” with Update Arcus Agent and Try again.
If a check fails, fix the call, then click the ellipsis icon (⋯) on it and click Run from here.
Read the results
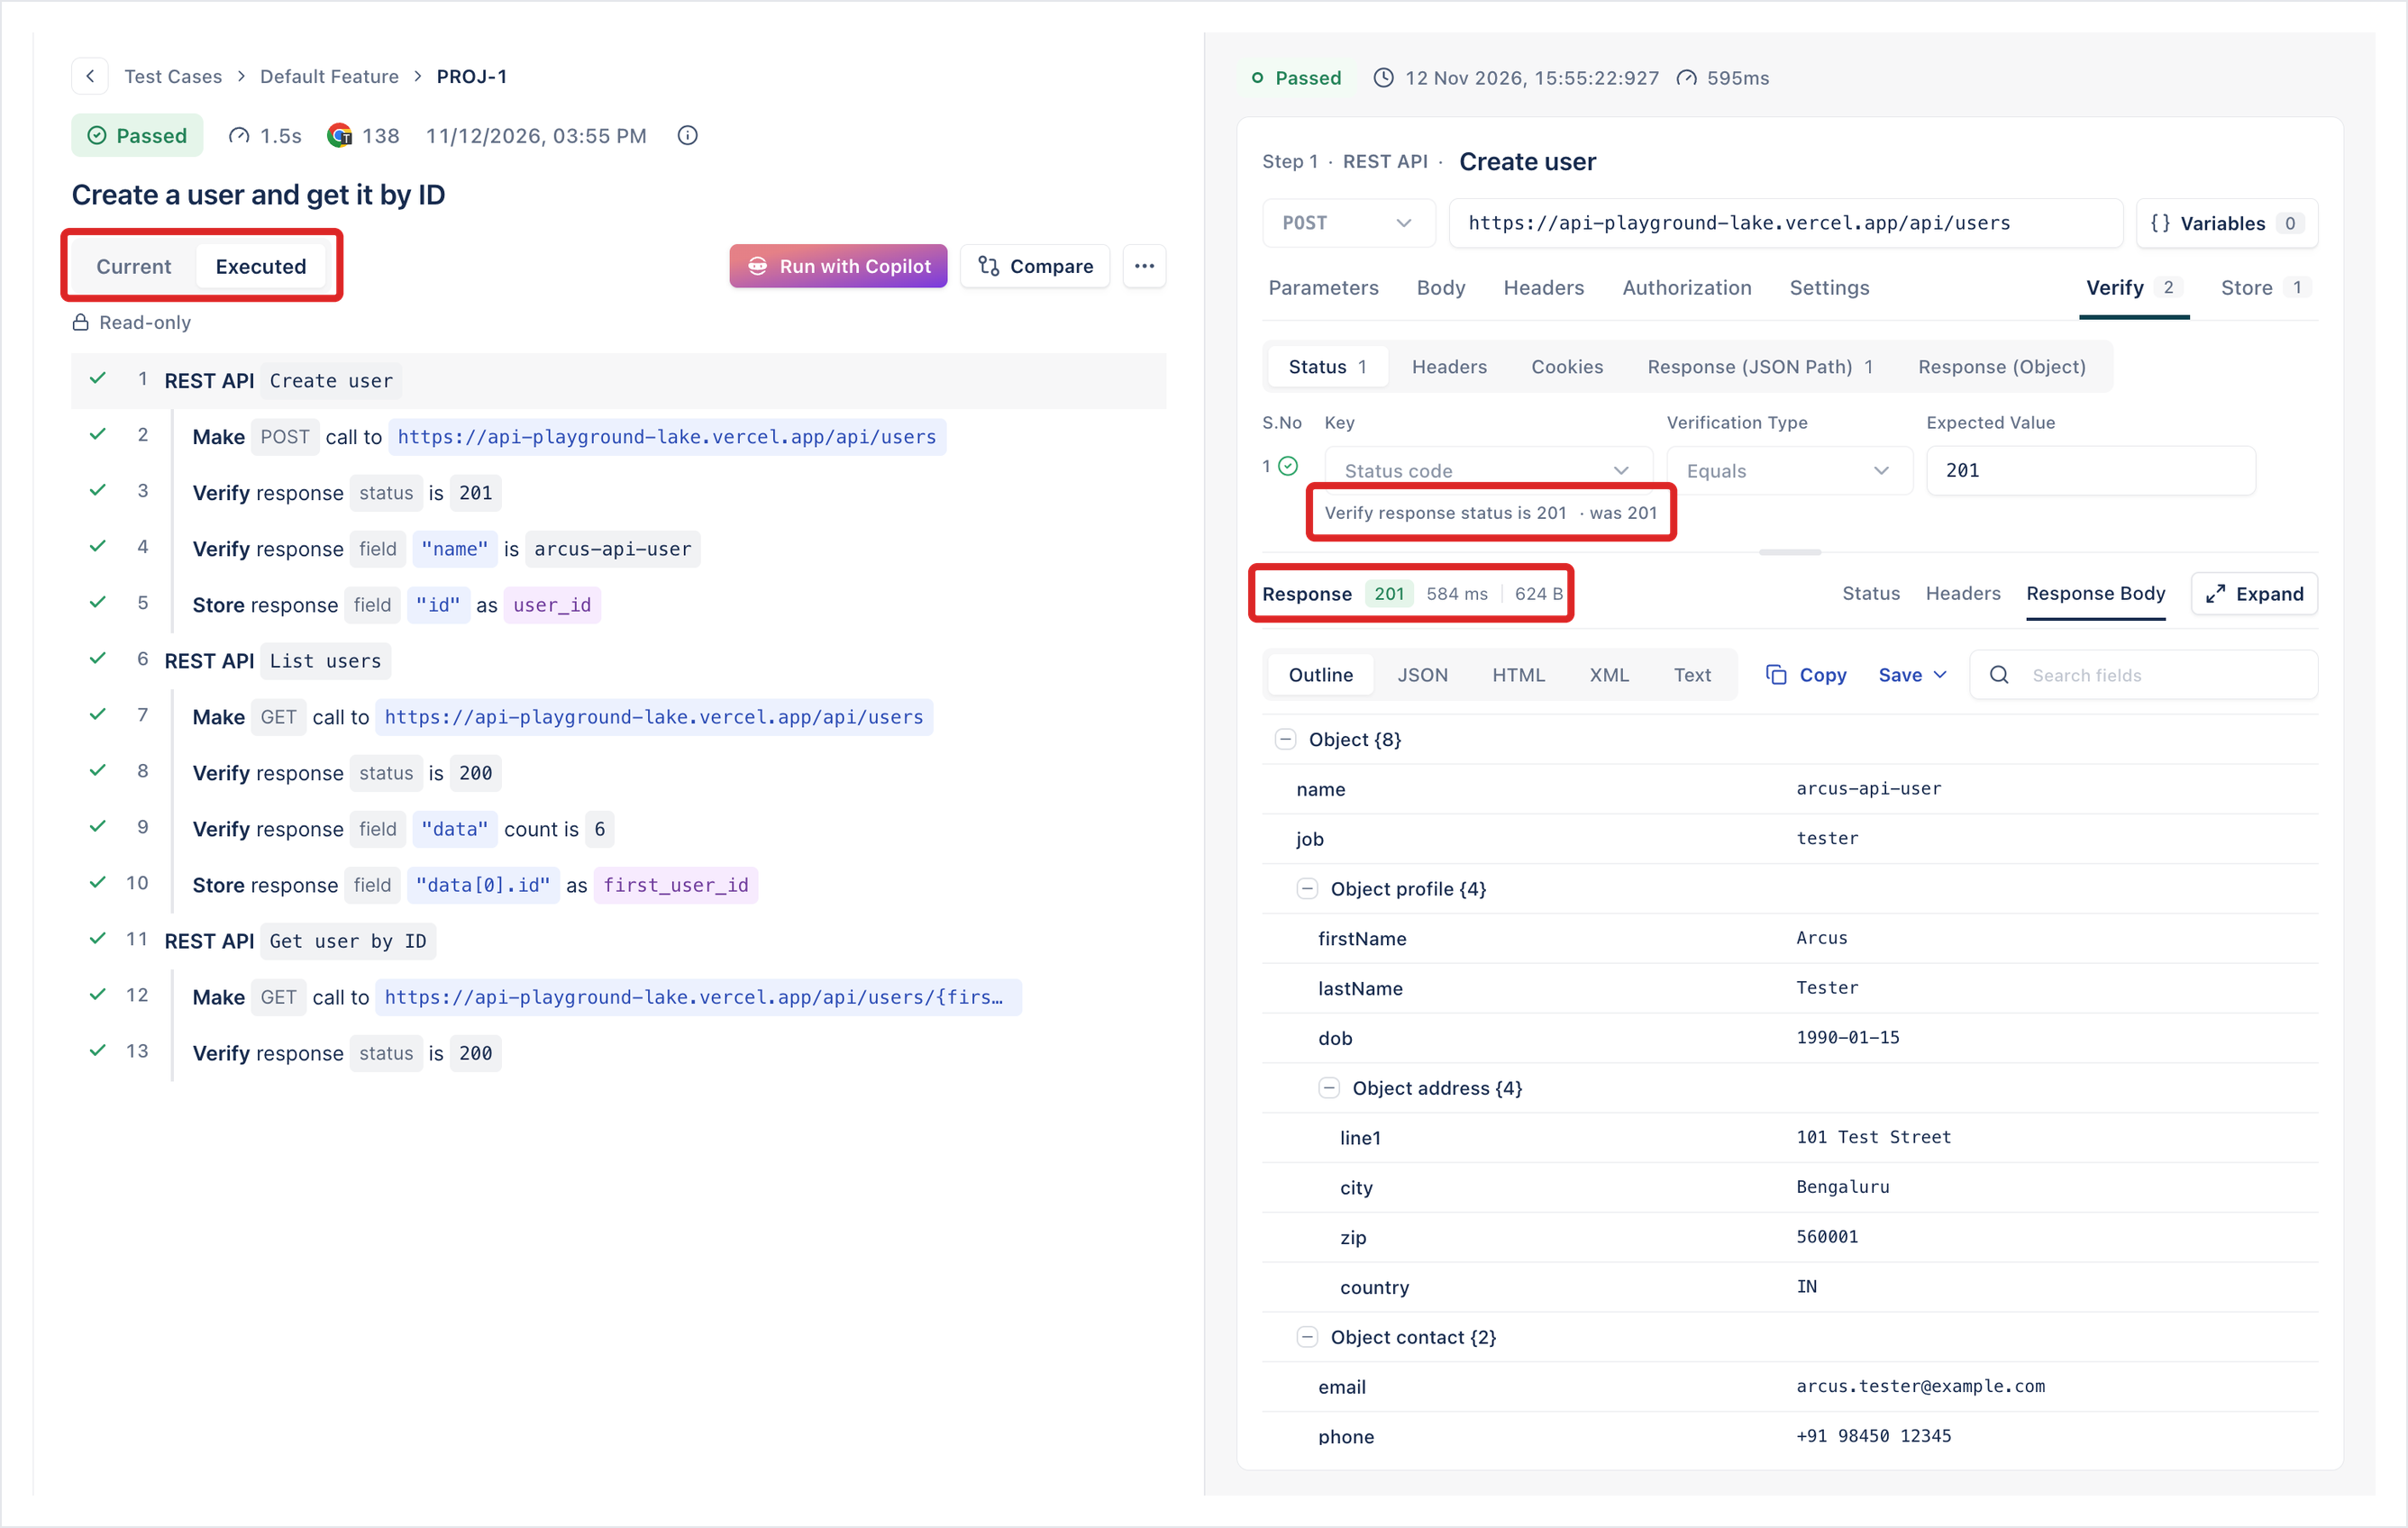
Section titled “Read the results”After a run, open the test case’s Run history and click the run. The run page shows each step with its result, read-only, as it ran (Executed). To see and edit the test case’s steps as they are now, click Current. Click an API call to see:
- The request it sent, read-only.
- Each check with the value it found, for example “Verify response status is 201 · was 201”.
- The response: status, time, size, headers, and body, viewed as Outline, JSON, HTML, XML, or Text.
Limitations
Section titled “Limitations”- You add API calls one at a time. Arcus doesn’t import OpenAPI, Swagger, or Postman collections.
- Raw bodies support JSON, XML, and Text.
- Send in the editor doesn’t evaluate file compares. They’re checked only when the test runs.
- A failed file compare doesn’t say which field differed.
- When a run fails on a call, the error can say “JSON path validation failed” even when the status check also failed. Open the call to see which checks failed.
A call works with Send but fails when the test runs
Section titled “A call works with Send but fails when the test runs”The run isn’t reading from an environment, so {env.…} references aren’t filled in. Create an environment and select it under Variables from.
A GET after a POST returns 404
Section titled “A GET after a POST returns 404”Some APIs, especially demo and mock APIs, don’t keep what you create. Check that the API stores the record. To chain calls against such an API, store a value from data it already has, such as the first item in a list.
See what a call sent
Section titled “See what a call sent”Click the call in the session or on the run page. The editor shows the request, and Variables lists every variable it used.
Was this page helpful?
Thanks for the feedback.