- create test cases
 Organizing Test Cases in Folders
- Test Cases for Web Applications
- Test Cases for Mobile Applications
- Test Cases for Mobile Web Applications
- Manage Test Cases for Web Applications
- Manage Test Cases for Android & iOS Apps
- Manage Test Cases for Mobile Web Applications
- Test Case List Actions
- Importing Postman Collections and Environments
- Custom Fields for Test Cases
- Label Management
- Update Test Case Result in a Test Plan
- Test Case: Advanced Options Guide
- Test Step Types
- Type: Natural Language
- Type: REST API
- Type: Step Group
- Type: For Loop
- Type: While Loop
- Type: Block
- Type: If Condition
- Nested Step Groups
- Image Injection
- Cross-application testing
Test Cases for Web Applications
Using Testsigma, you can easily create test cases for web applications using Atto and the AI-powered Copilot. This article walks you through all four approaches to help you get started quickly.
Prerequisites
Before you begin, ensure that:
- You have referred to the Documentation on creating projects.
- You have referred to the Documentation on creating folders.
- Testsigma Terminal is installed and the Copilot is ready.
- You have referred to the Documentation on creating Elements.
Steps to Generate Test Cases Using Atto
Please refer to the documentation on generating test cases using Atto for web applications.
Steps to Generate Test Cases Using Copilot
- From the left navigation bar, go to Create Tests > Test Cases.
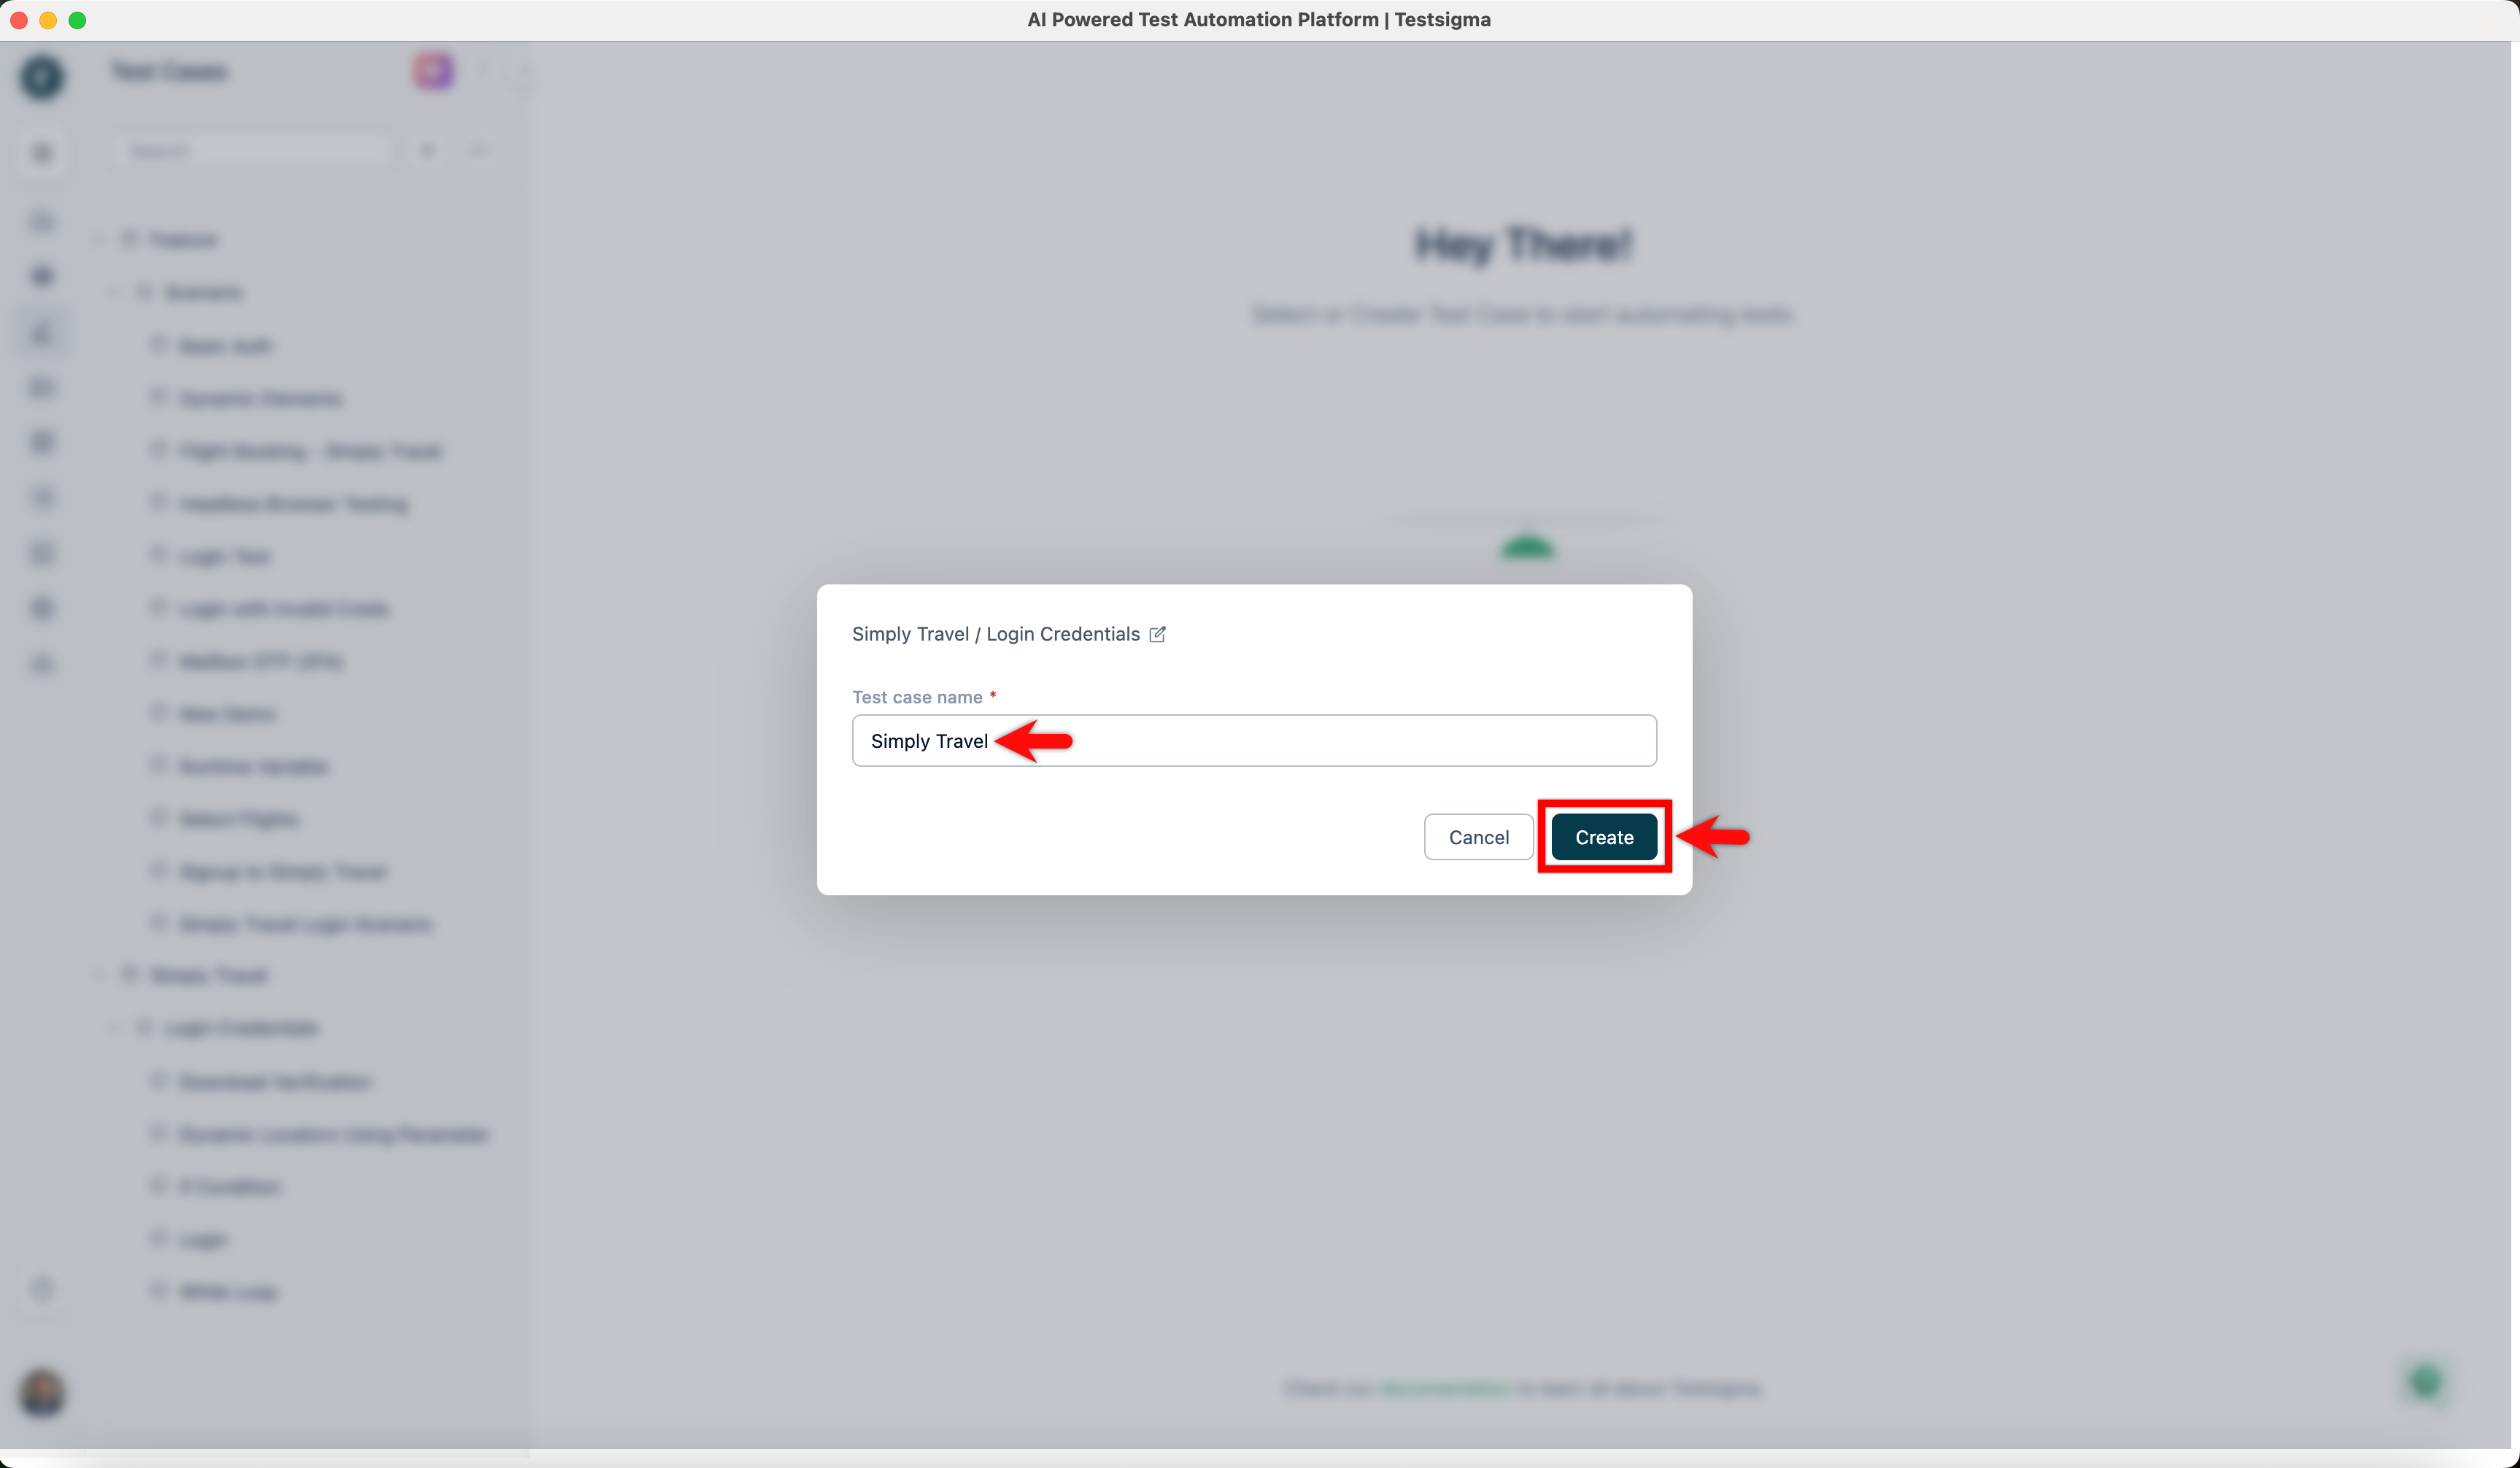
- In the Test Case Explorer section, expand a Feature and click the + icon next to the required Scenario. This opens a dialog box.
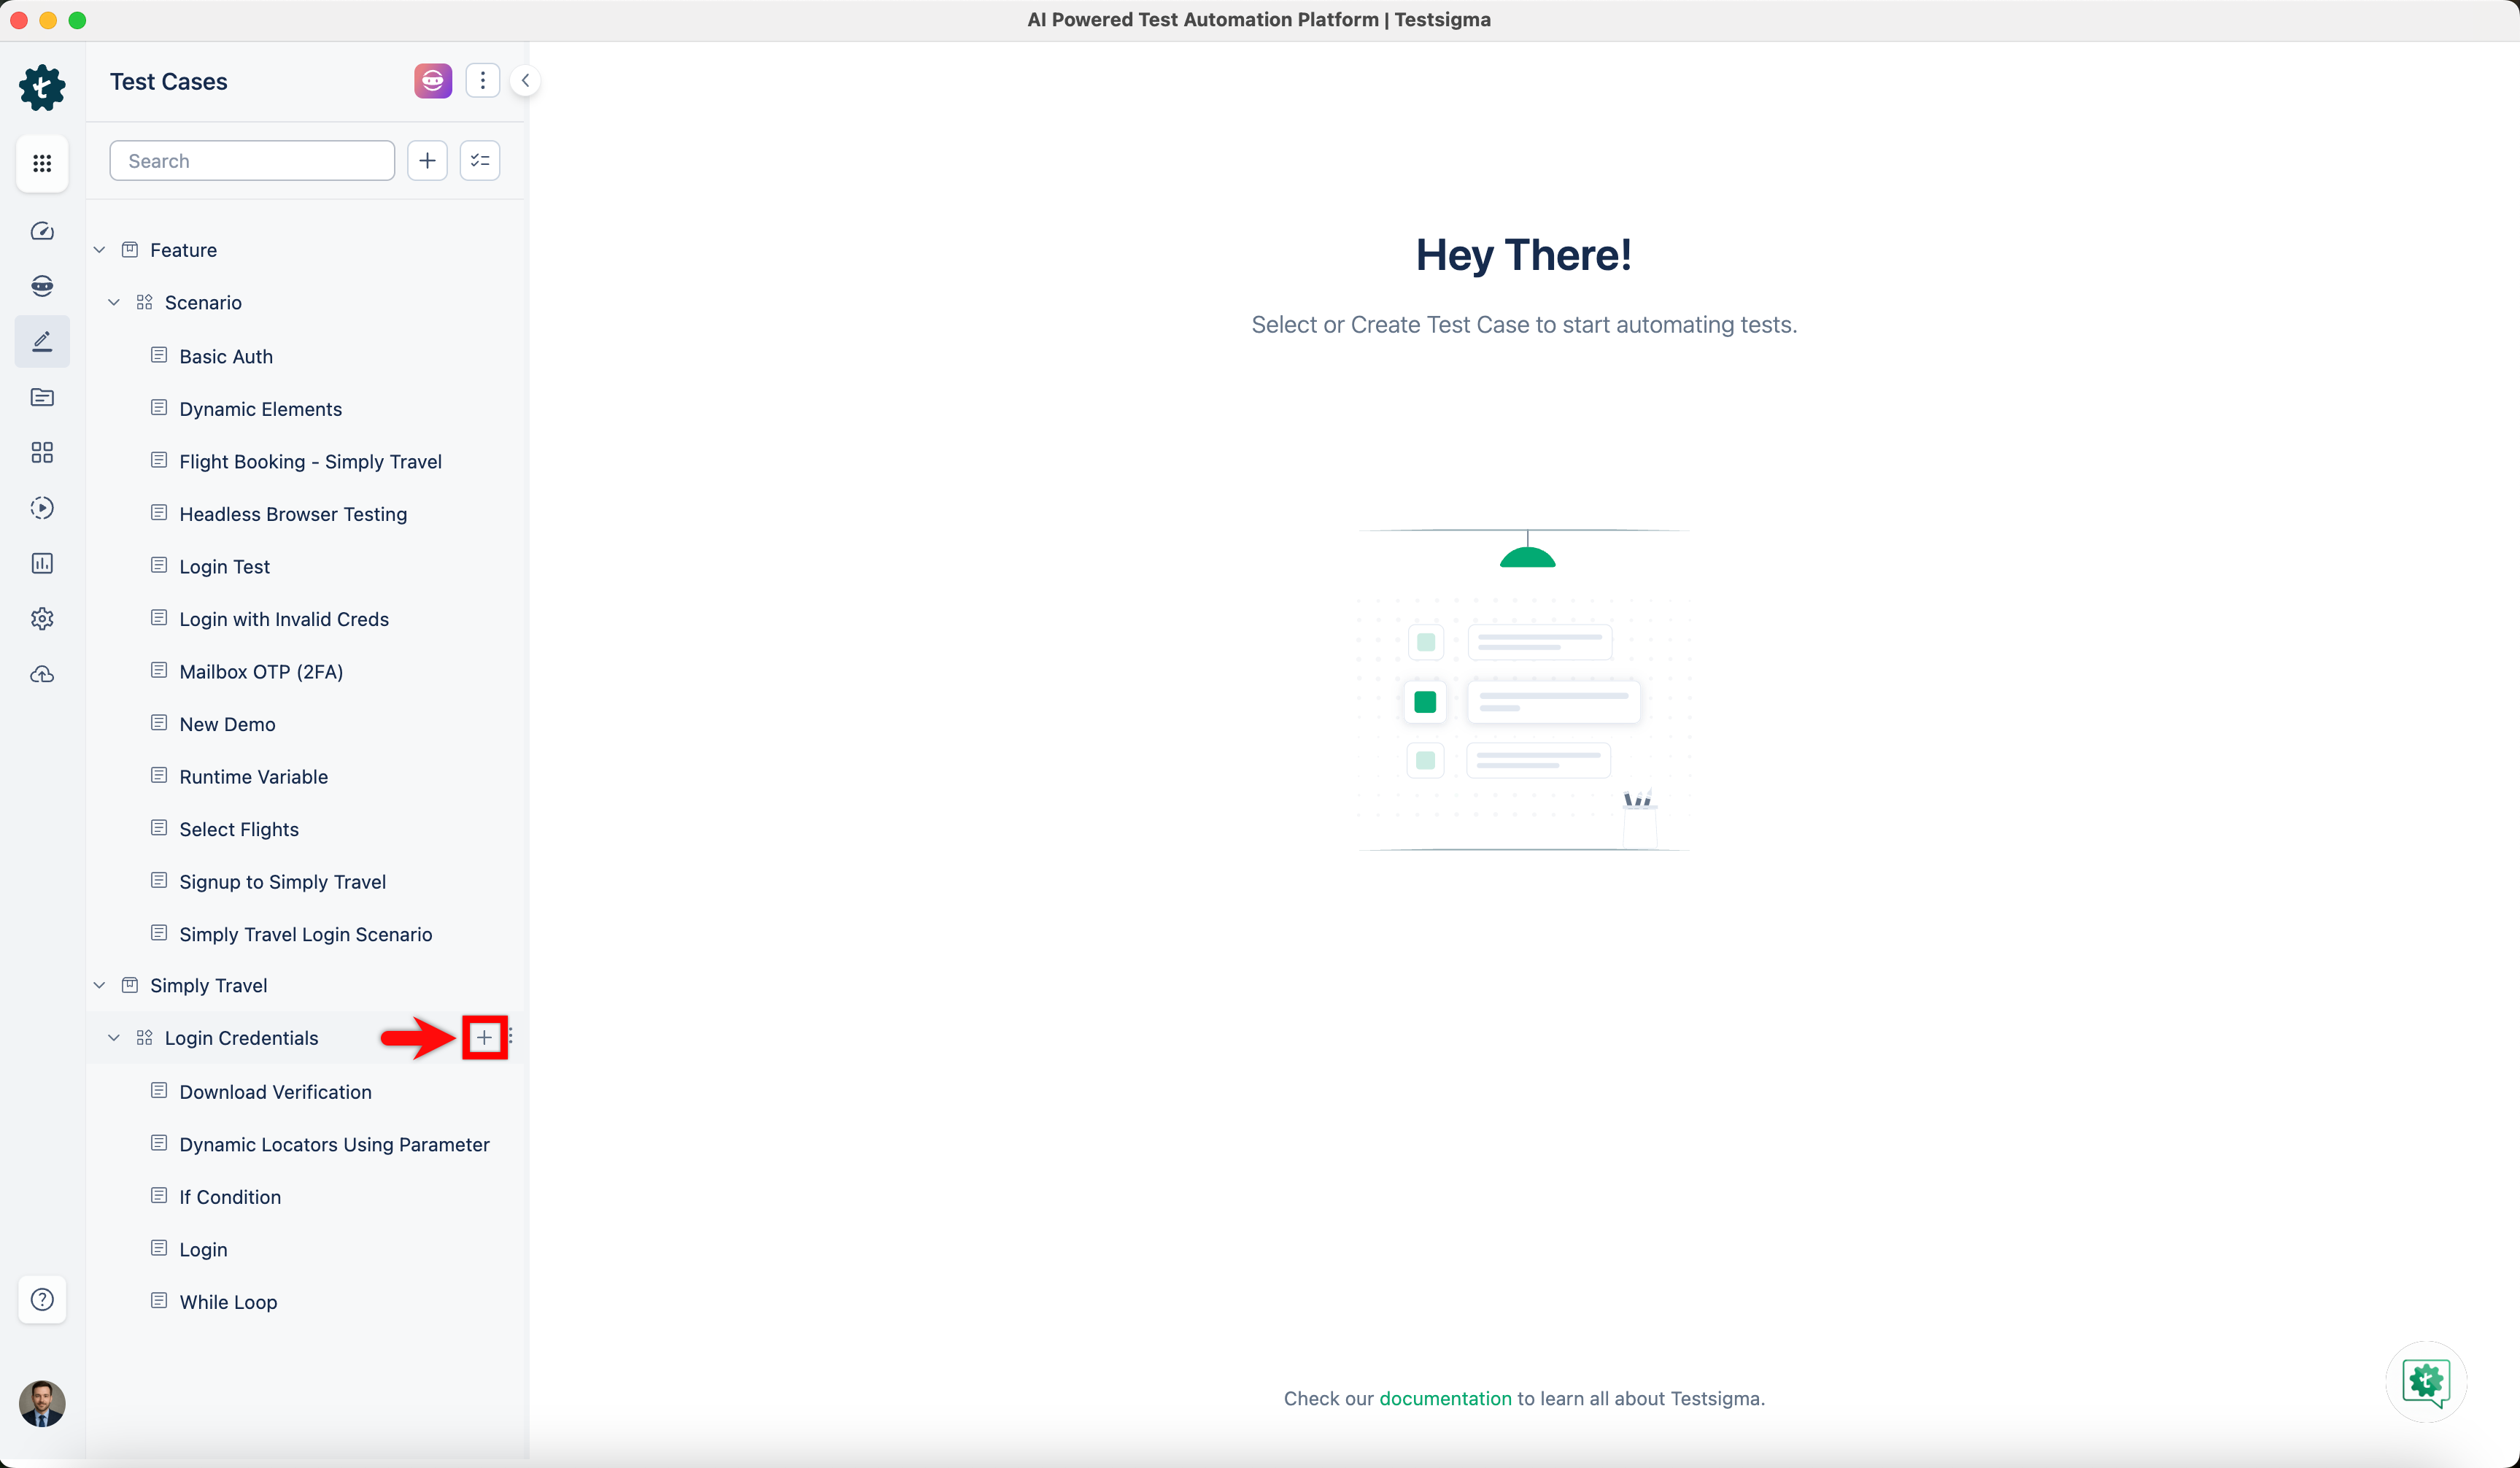
- In the dialog box, validate the target feature and scenario, enter the name in the Test Case Name input box, and click Create.
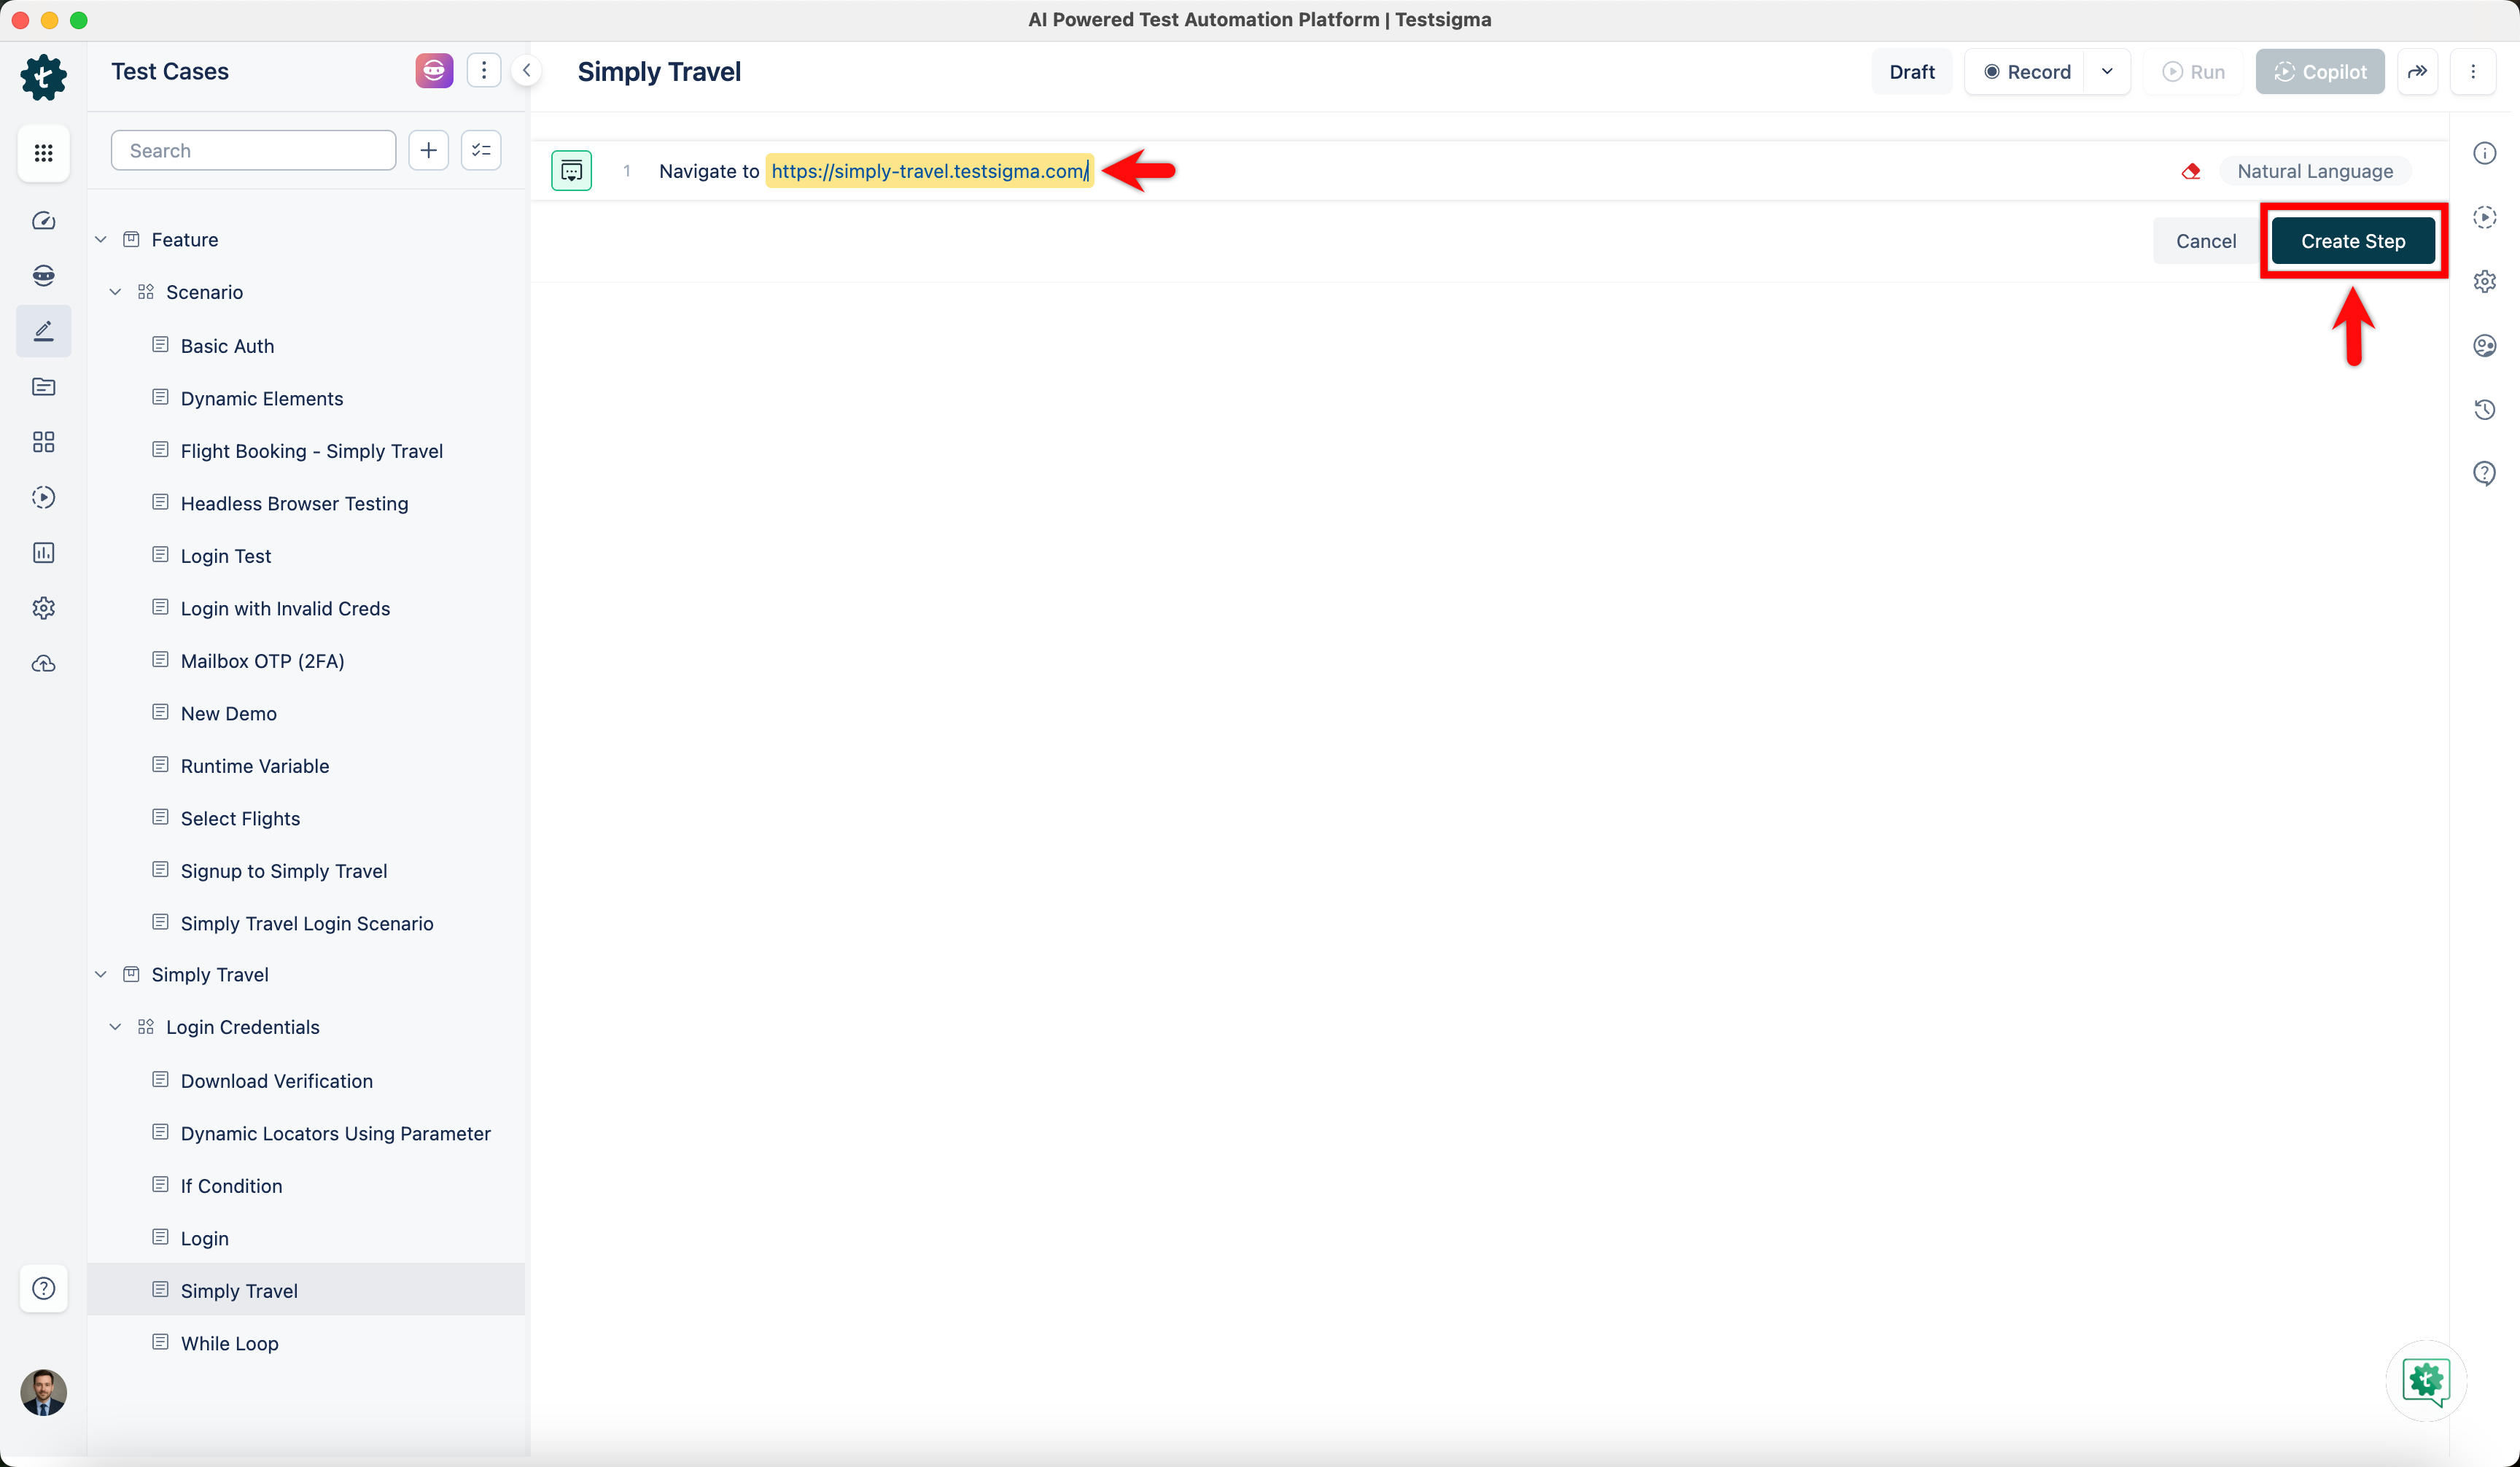
- In the Test Case Details page, enter the URL in which you want to perform the actions and capture the test steps, and click Create Step.
- Click Copilot.
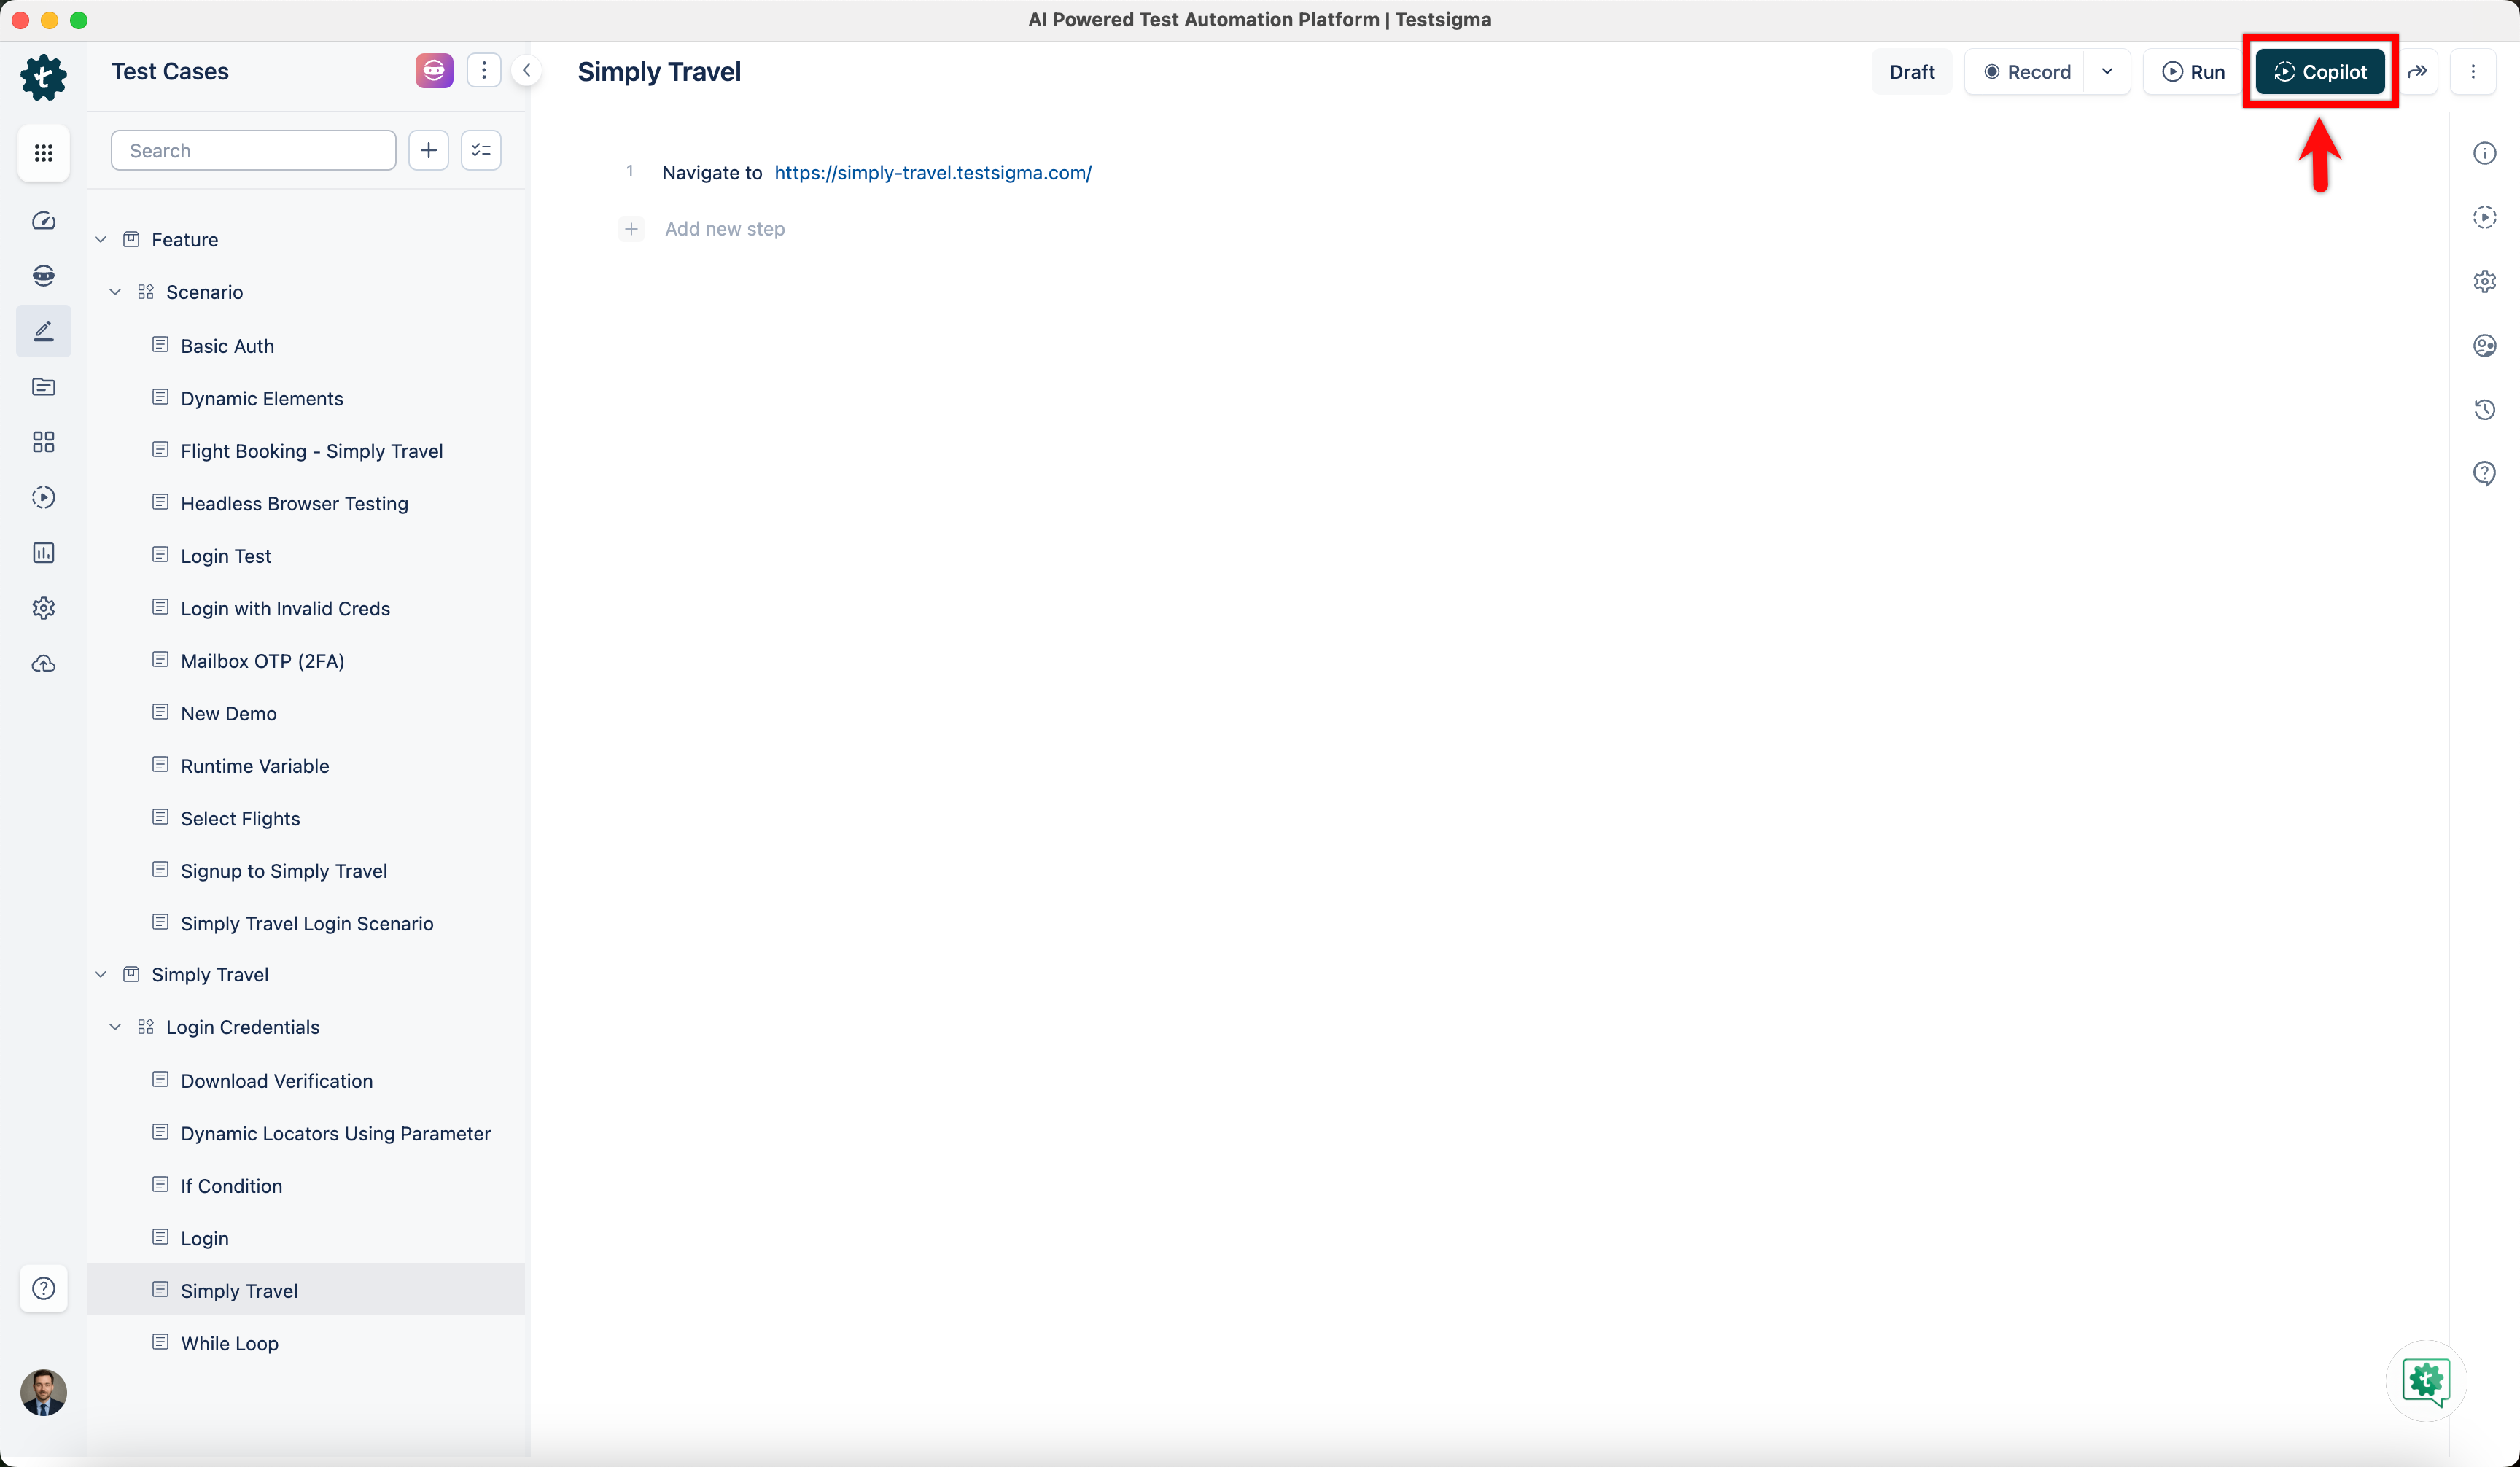
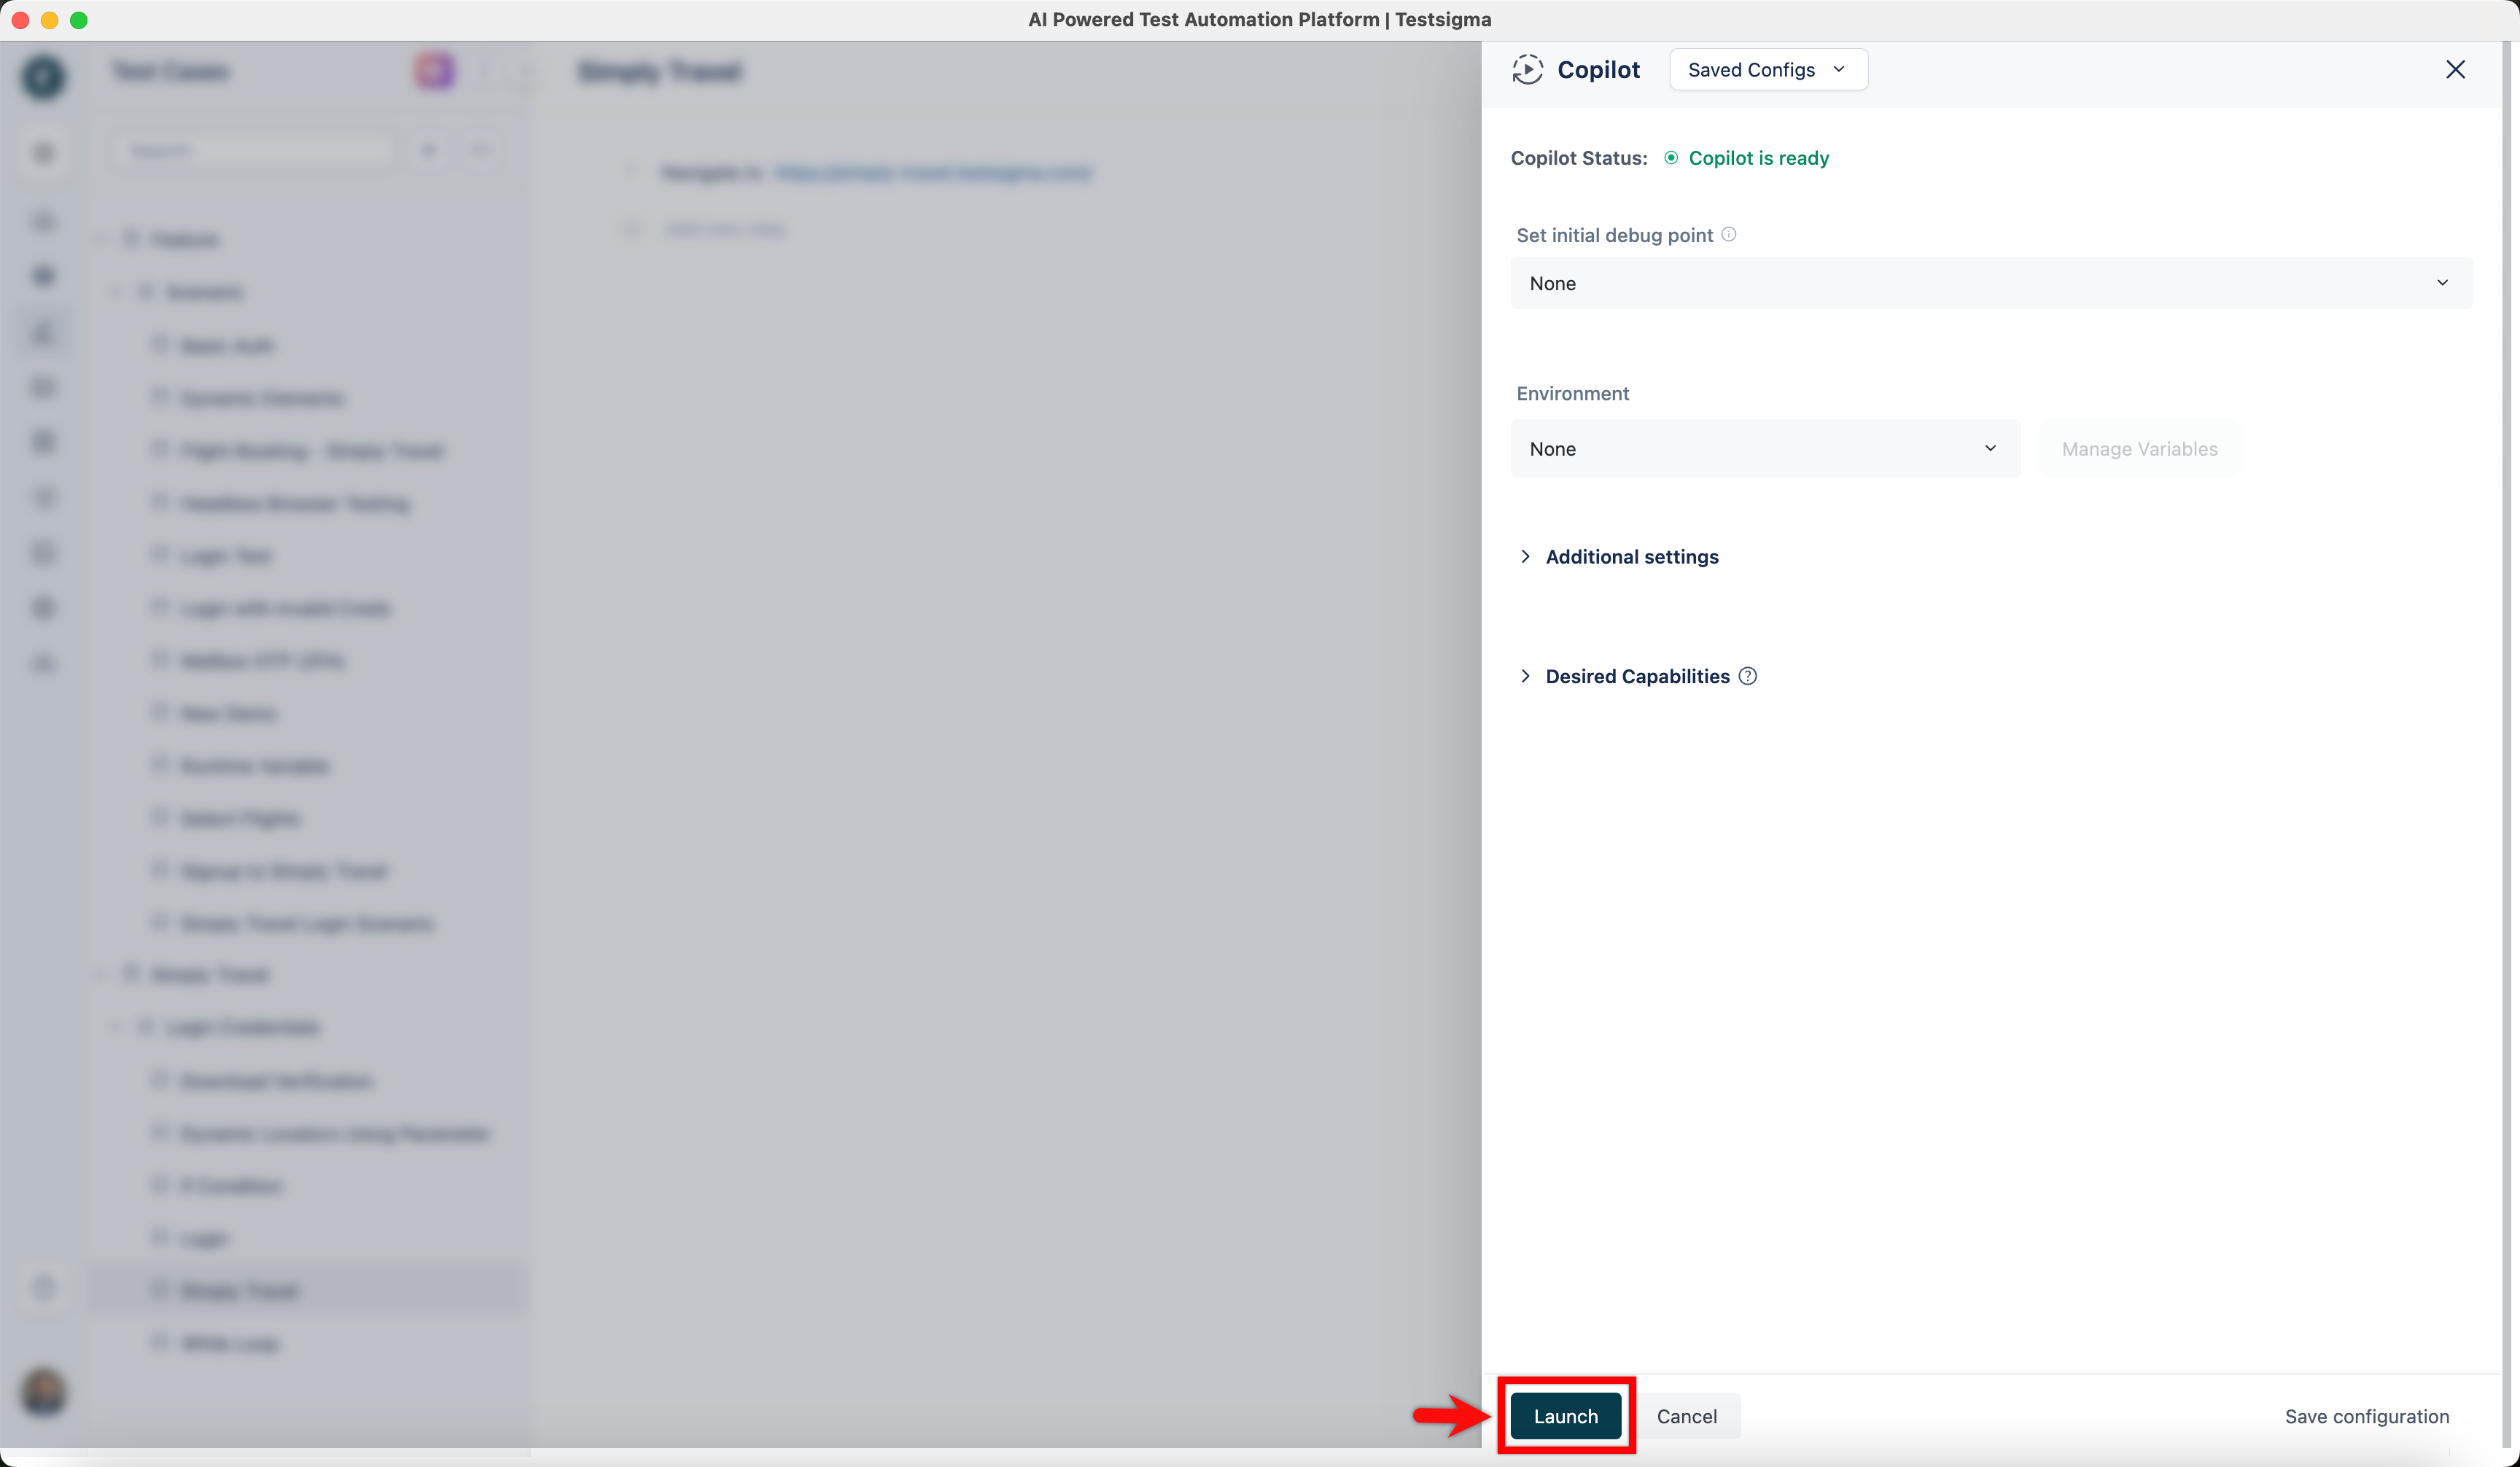
- In the Copilot overlay, click Launch.
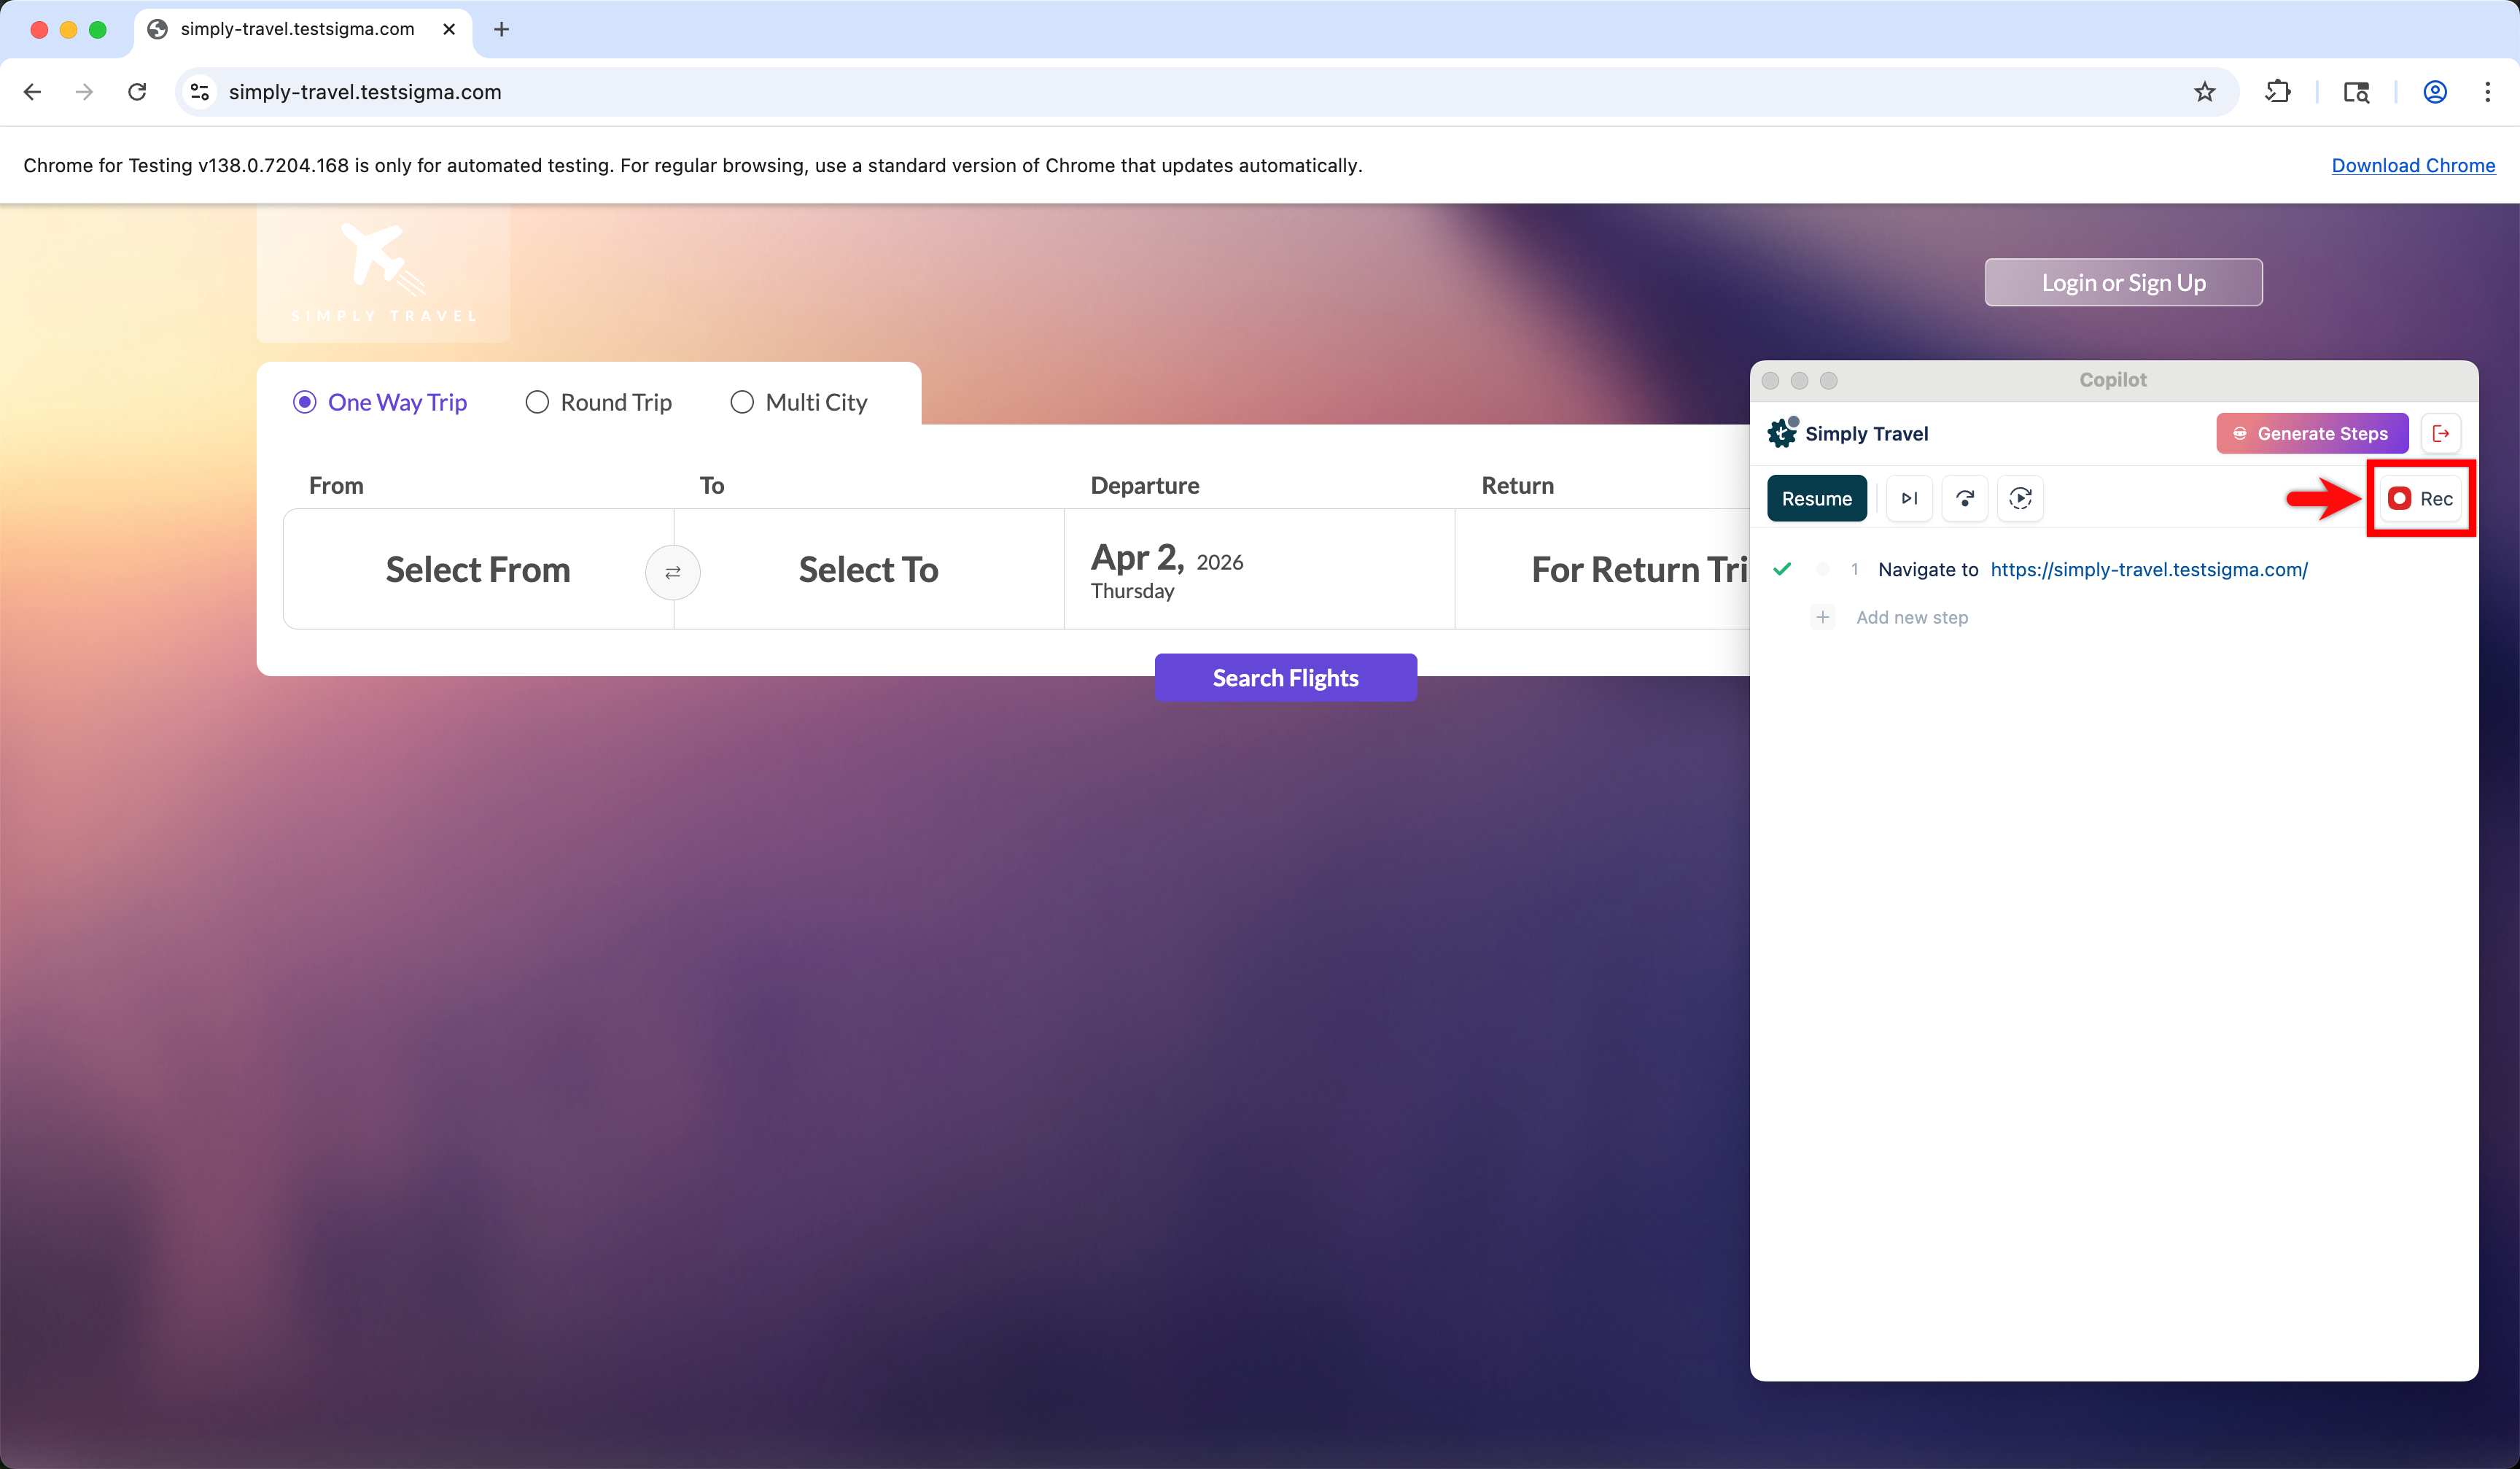
- The Copilot opens a new browser window and executes the URL.
- In the Copilot dialog, click Rec and perform the actions on the page that you want to capture as test steps.
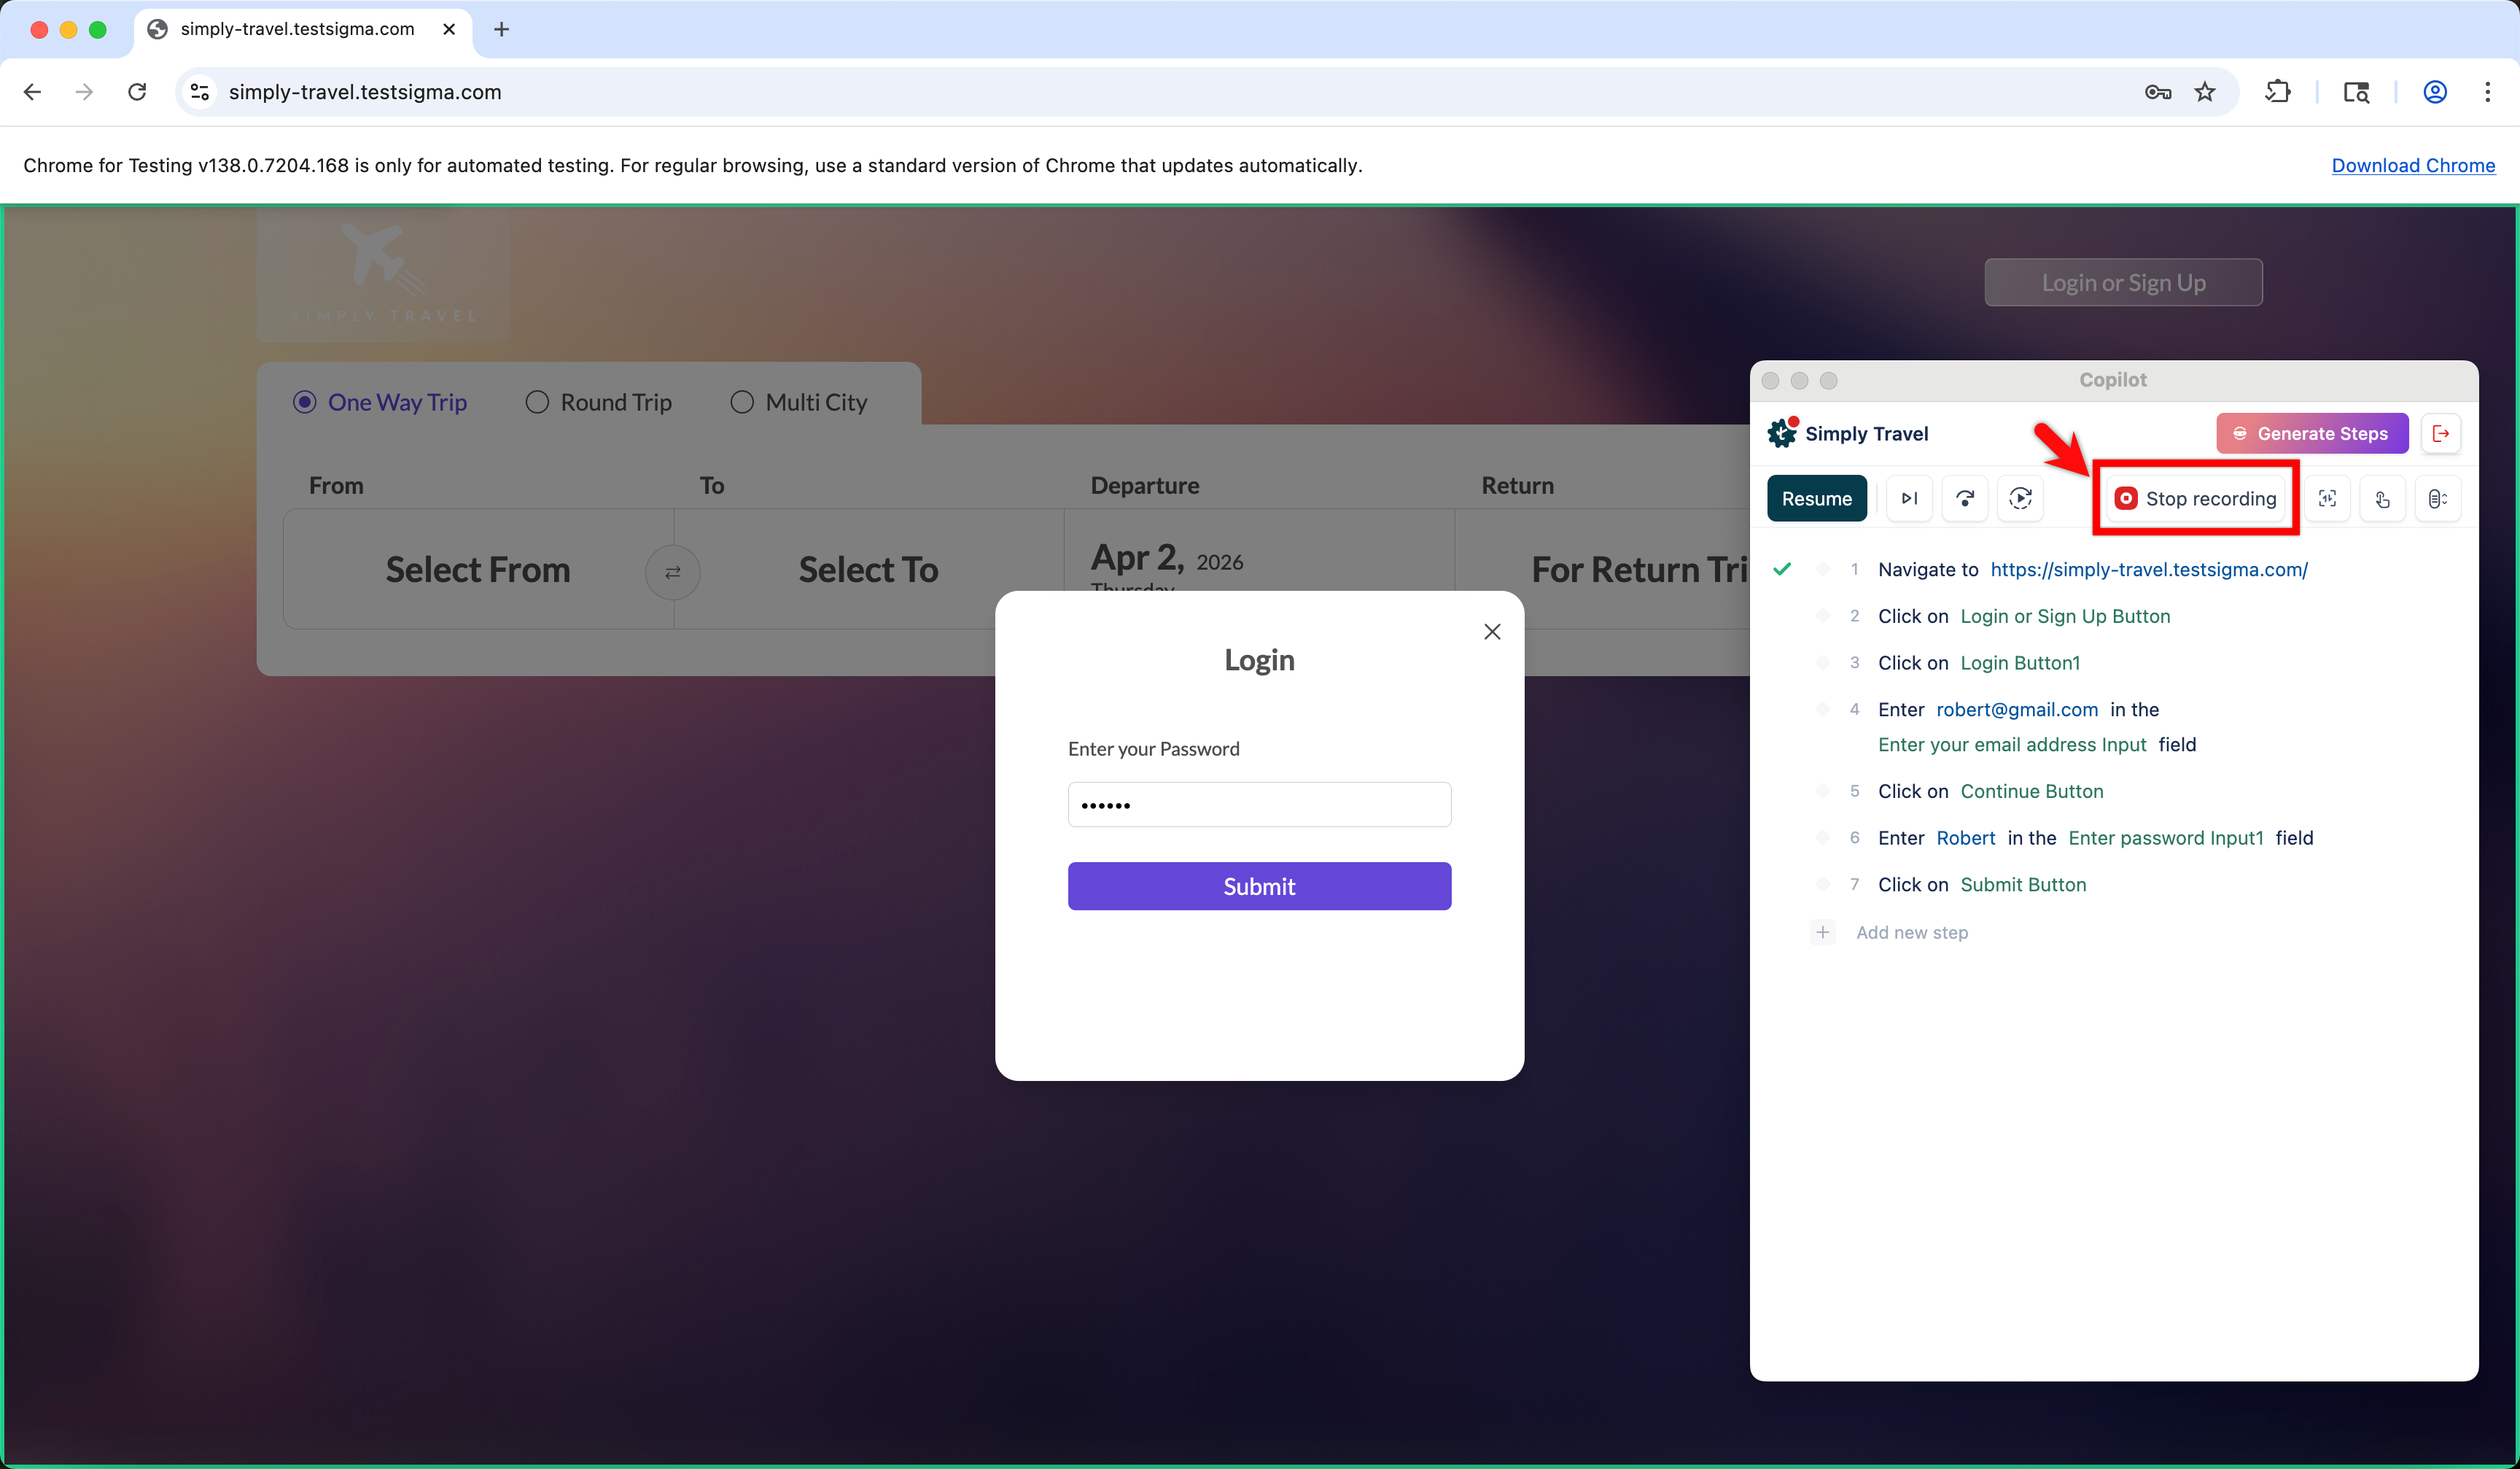
- Once you have recorded all the necessary steps, click Stop recording.
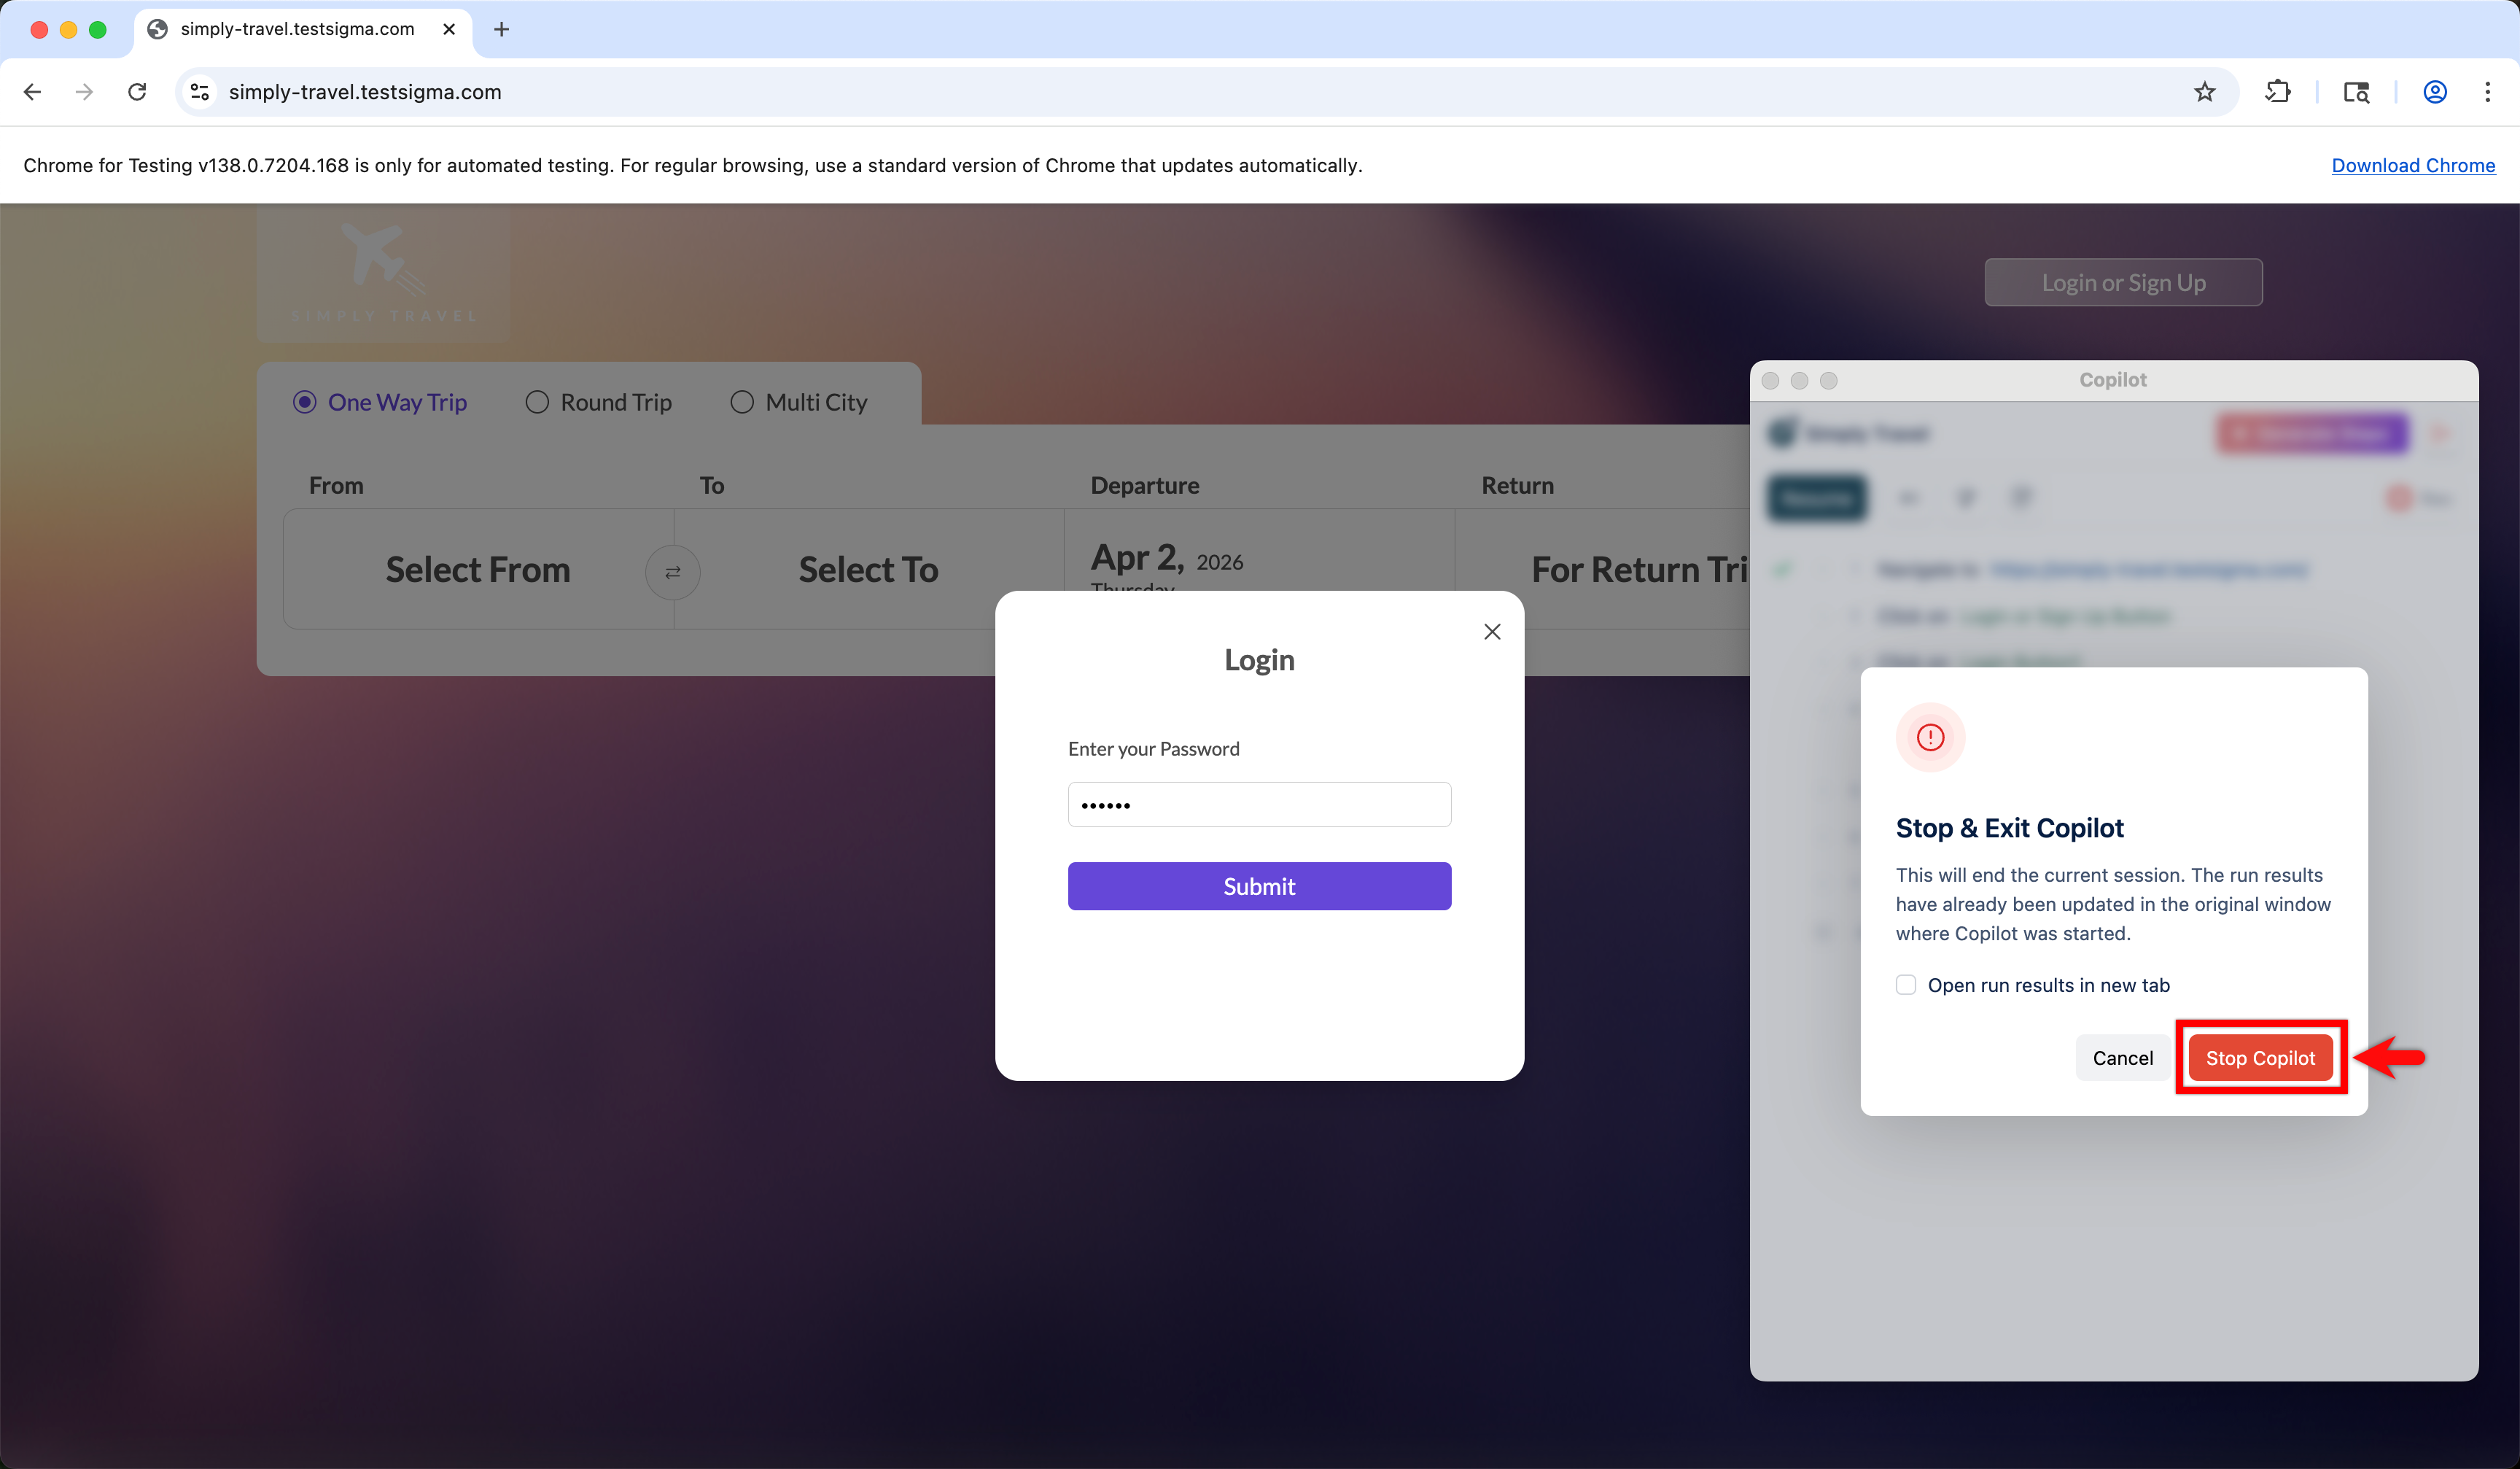
- Click Exit Copilot. A dialog box opens.
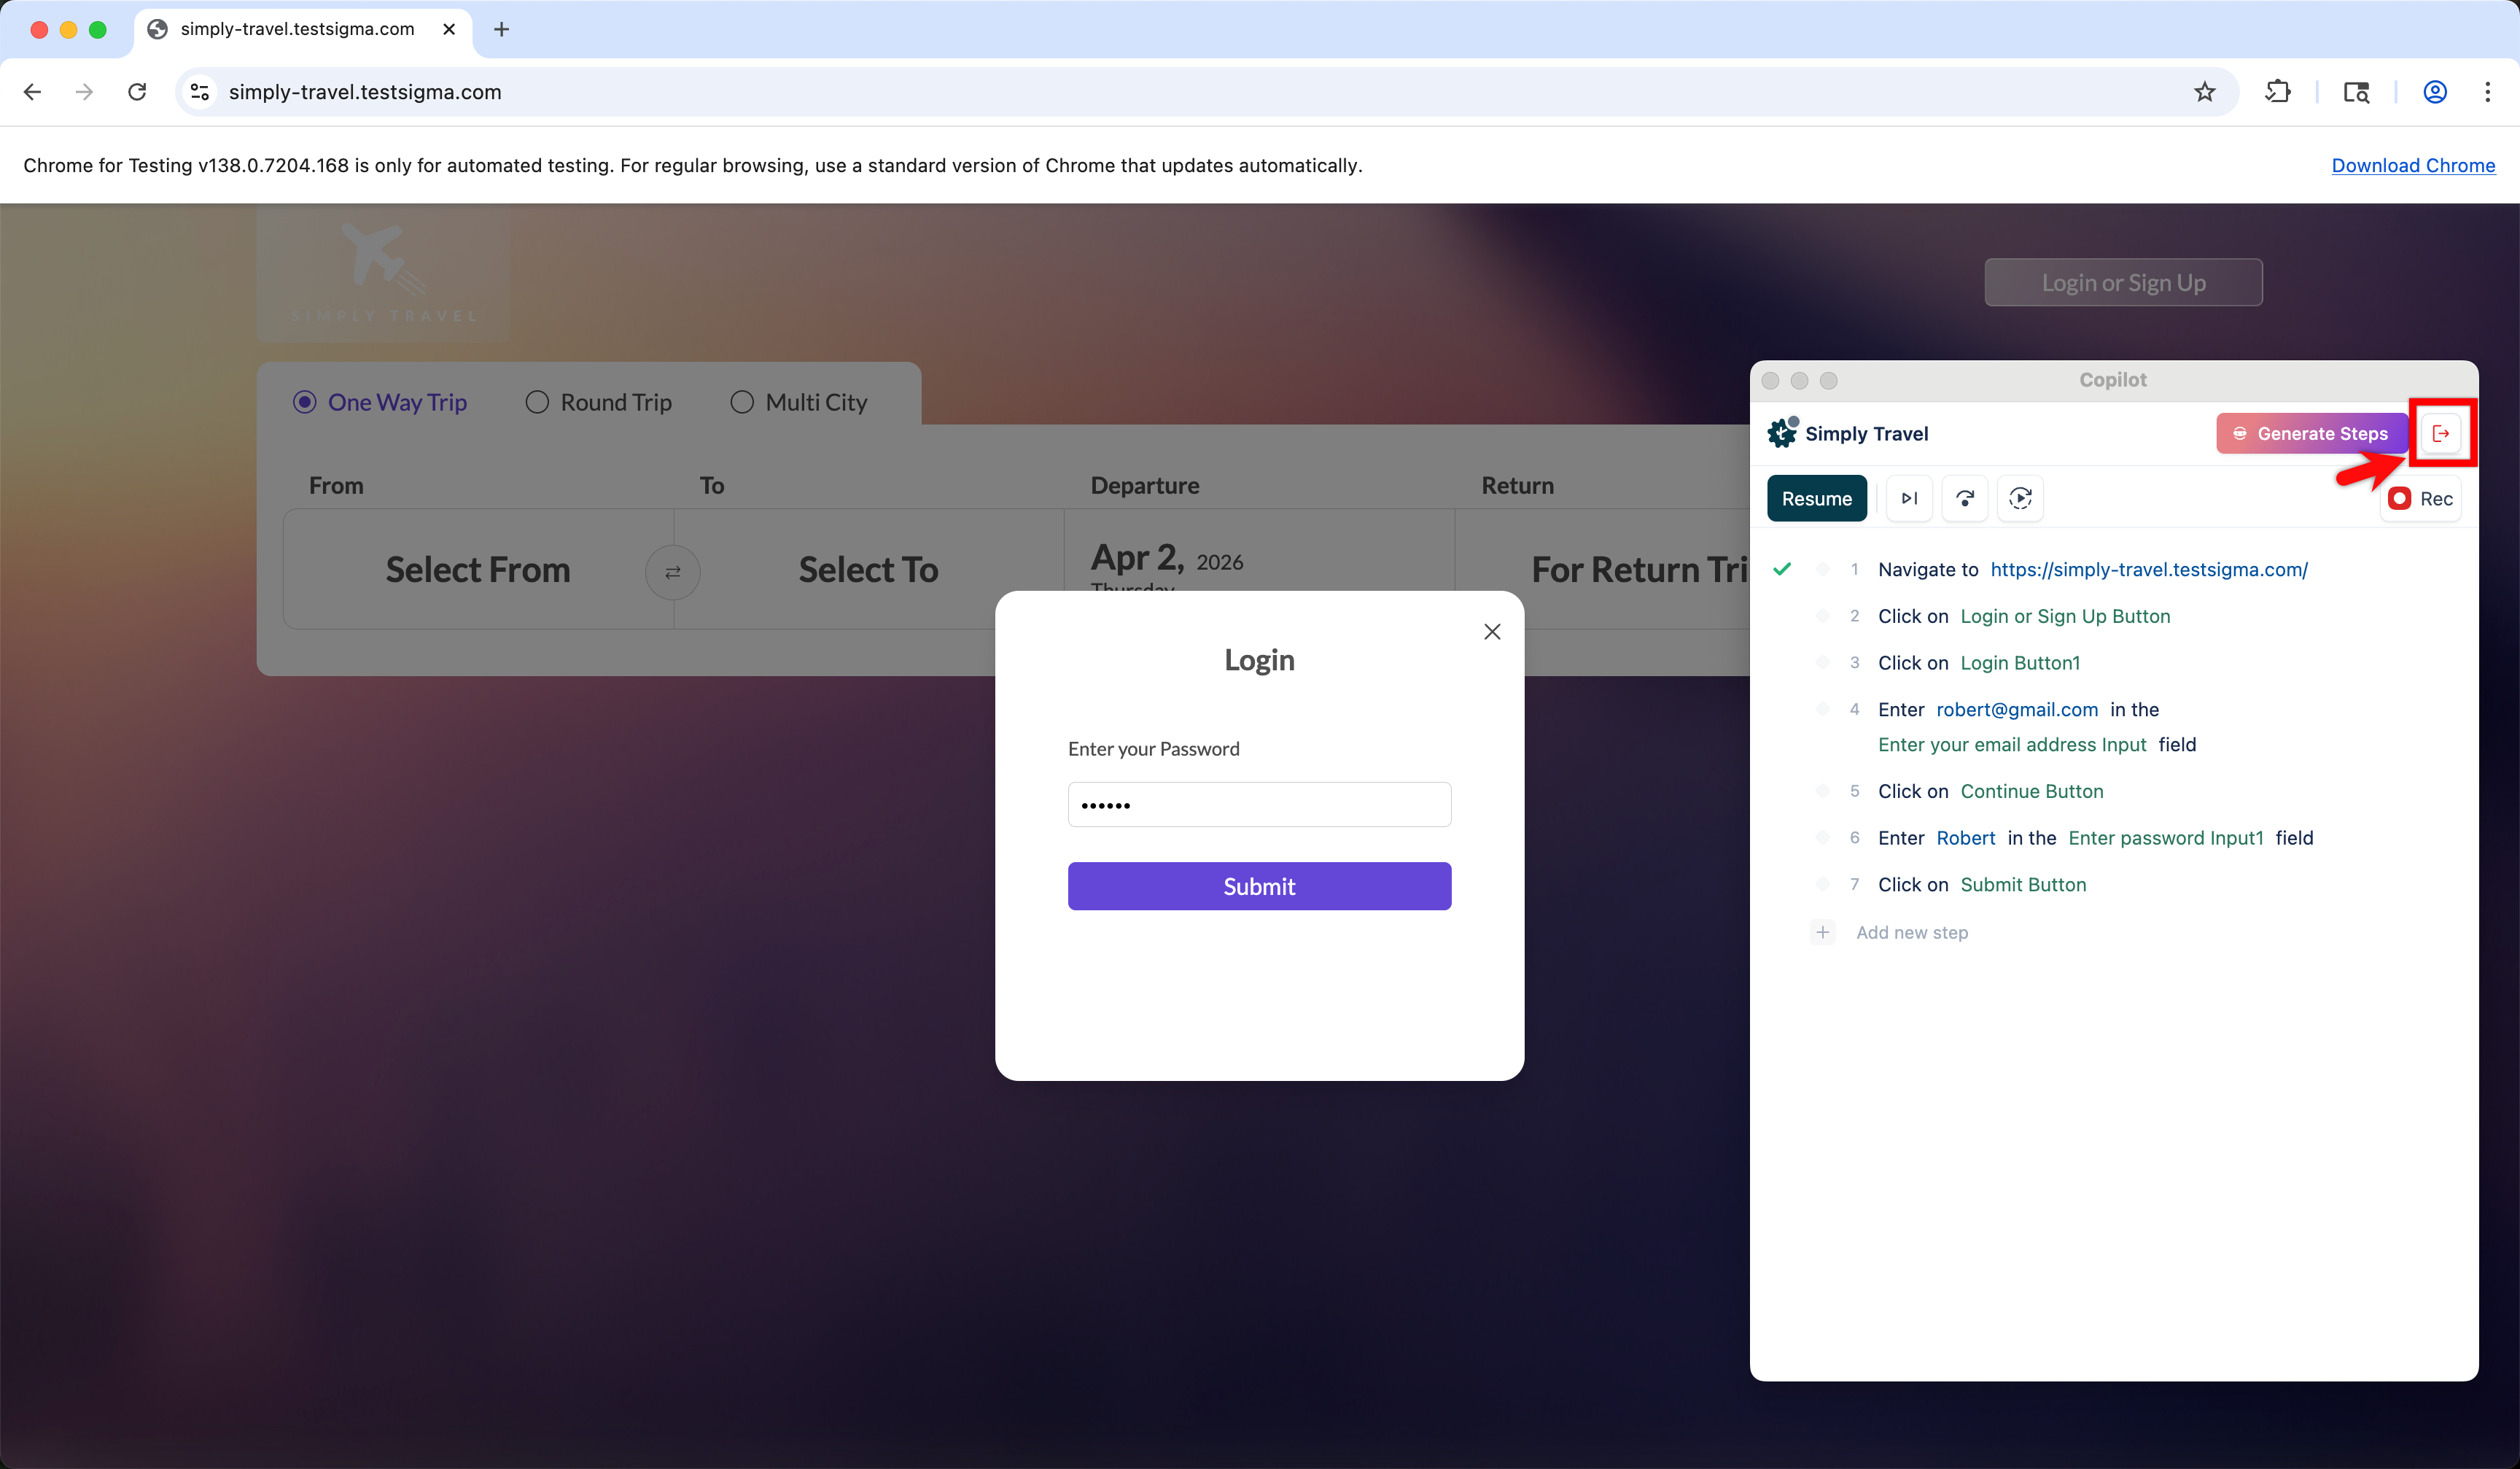
- In the Stop & Exit Copilot dialog, click Stop Copilot.
All the recorded test steps will now be available in the Test Case Details page, ready for review and execution.
NOTE:
- In the Copilot dialog, you can click Generate Steps to automatically generate test scenarios based on the current page. Select a scenario from the list and Copilot will instantly create the test steps for it.

- To learn more about the features available in the Copilot dialog, please refer to the documentation on Copilot Test Authoring for Web Application.
Steps to Create Test Cases Using Recorder
- From the left navigation bar, go to Create Tests > Test Cases.
- In the Test Case Explorer section, expand a Feature and click the + icon next to the required Scenario. This opens a dialog box.
- In the dialog box, validate the target feature and scenario, enter the name in the Test Case Name input box, and click Create.
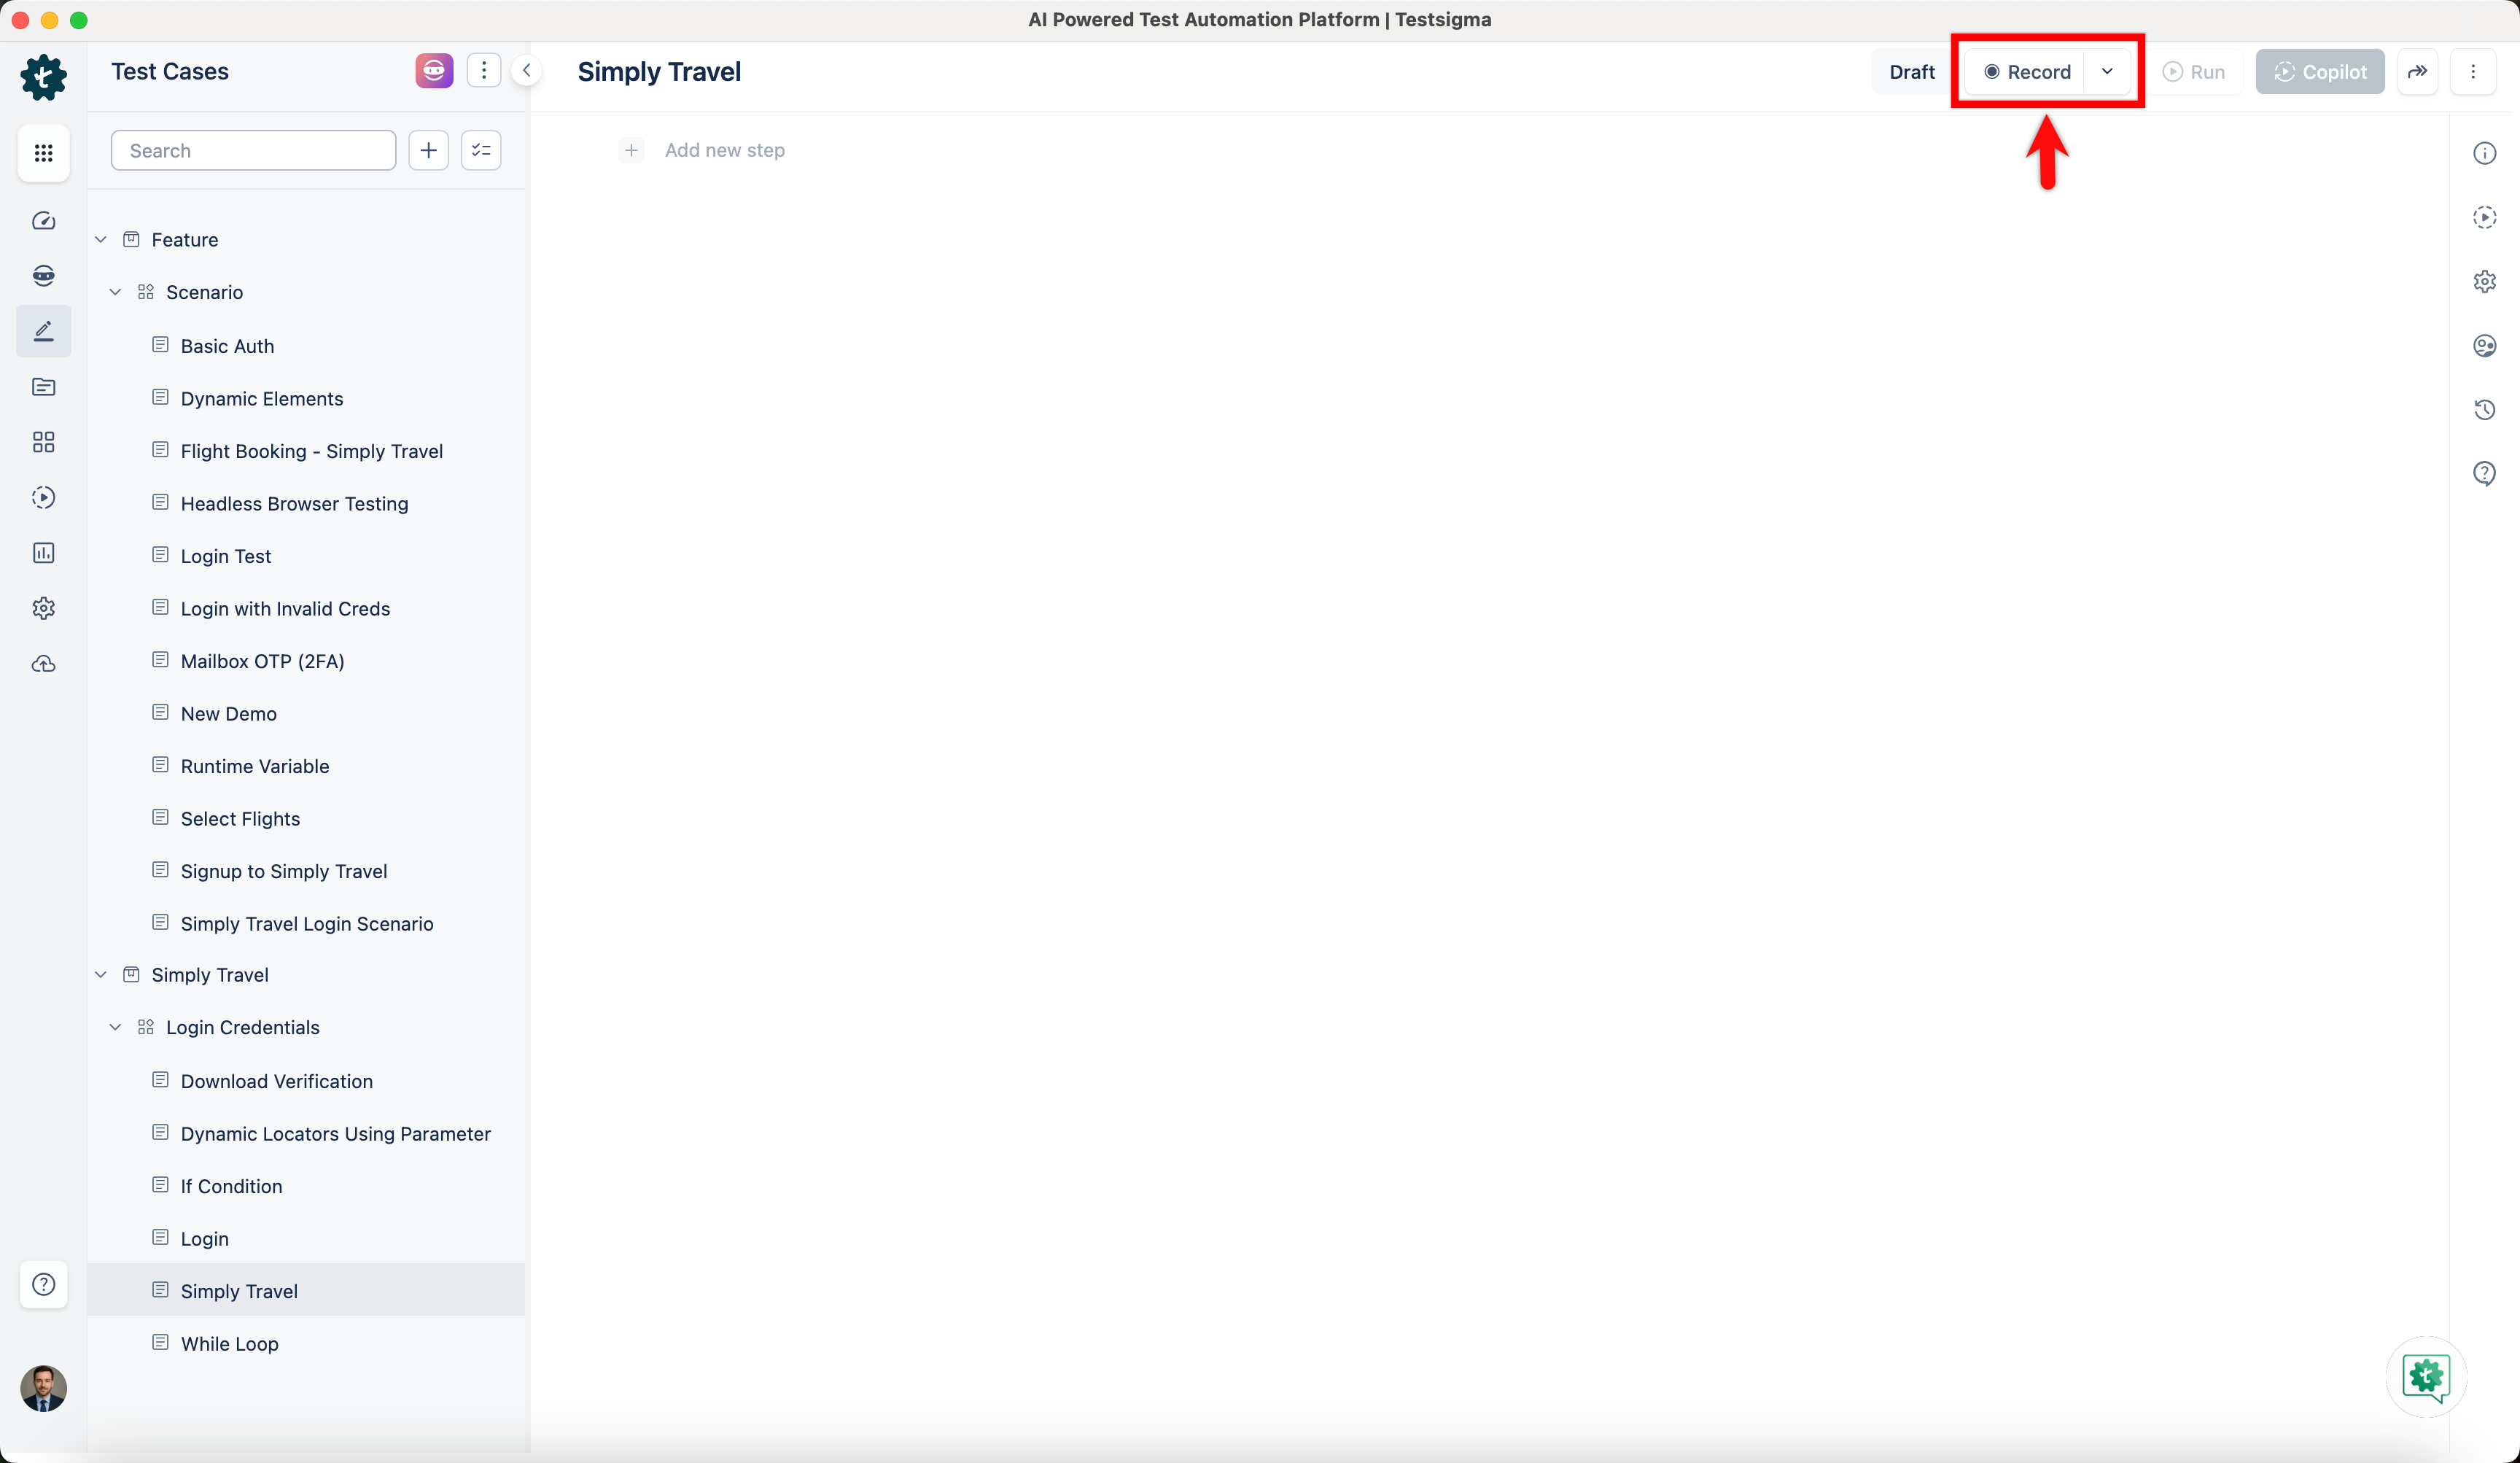
- In the Test Case Details page, click Record at the top right corner.
- This will open a new window. Enter the URL from which you want to capture the test cases. The Testsigma Recorder will appear and be ready to start recording.
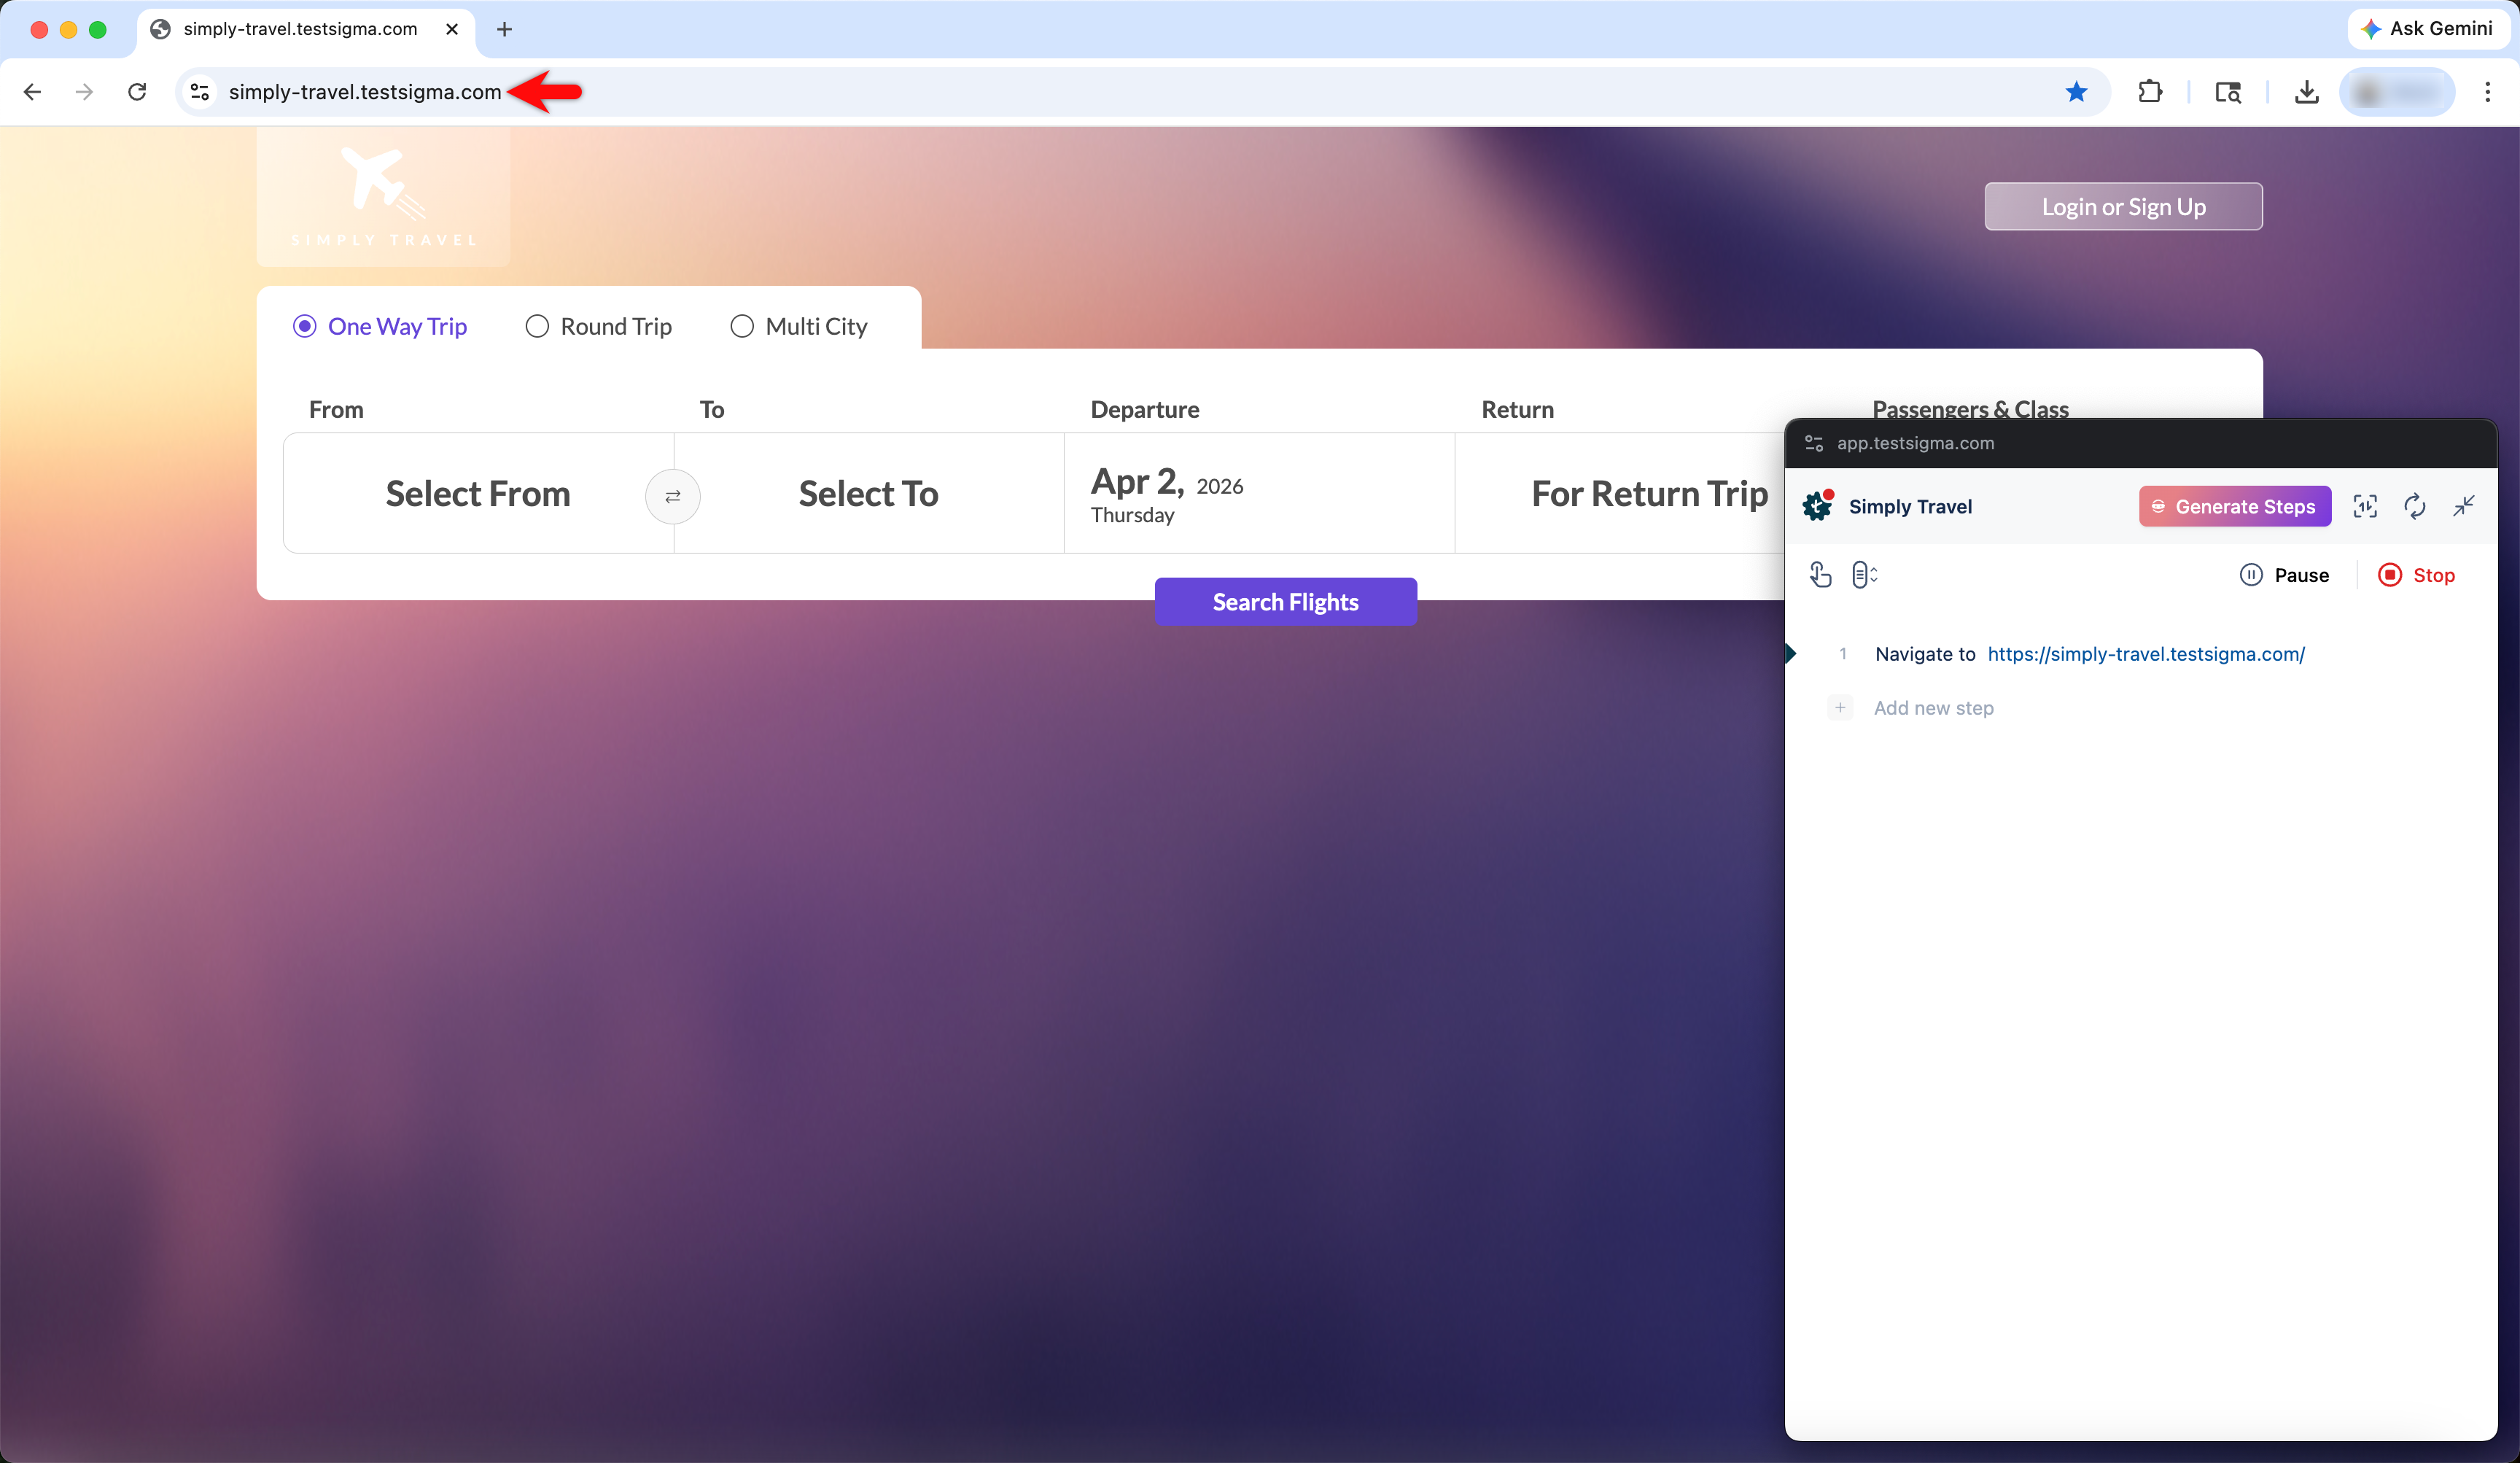
- Perform the actions on the page that you want to capture as test steps.
- Once you have recorded all the necessary steps, click Stop.

All the recorded test steps will now be available in the Test Case Details page, ready for review and execution.
Steps to Create Test Cases Using NLPs
- From the left navigation bar, go to Create Tests > Test Cases.
- In the Test Case Explorer section, expand a Feature and click the + icon next to the required Scenario. This opens a dialog box.
- In the dialog box, validate the target feature and scenario, enter the name in the Test Case Name input box, and click Create.
- In the Test Case Details page, enter the URL in which you want to perform the actions and capture the test steps, and click Create Step.
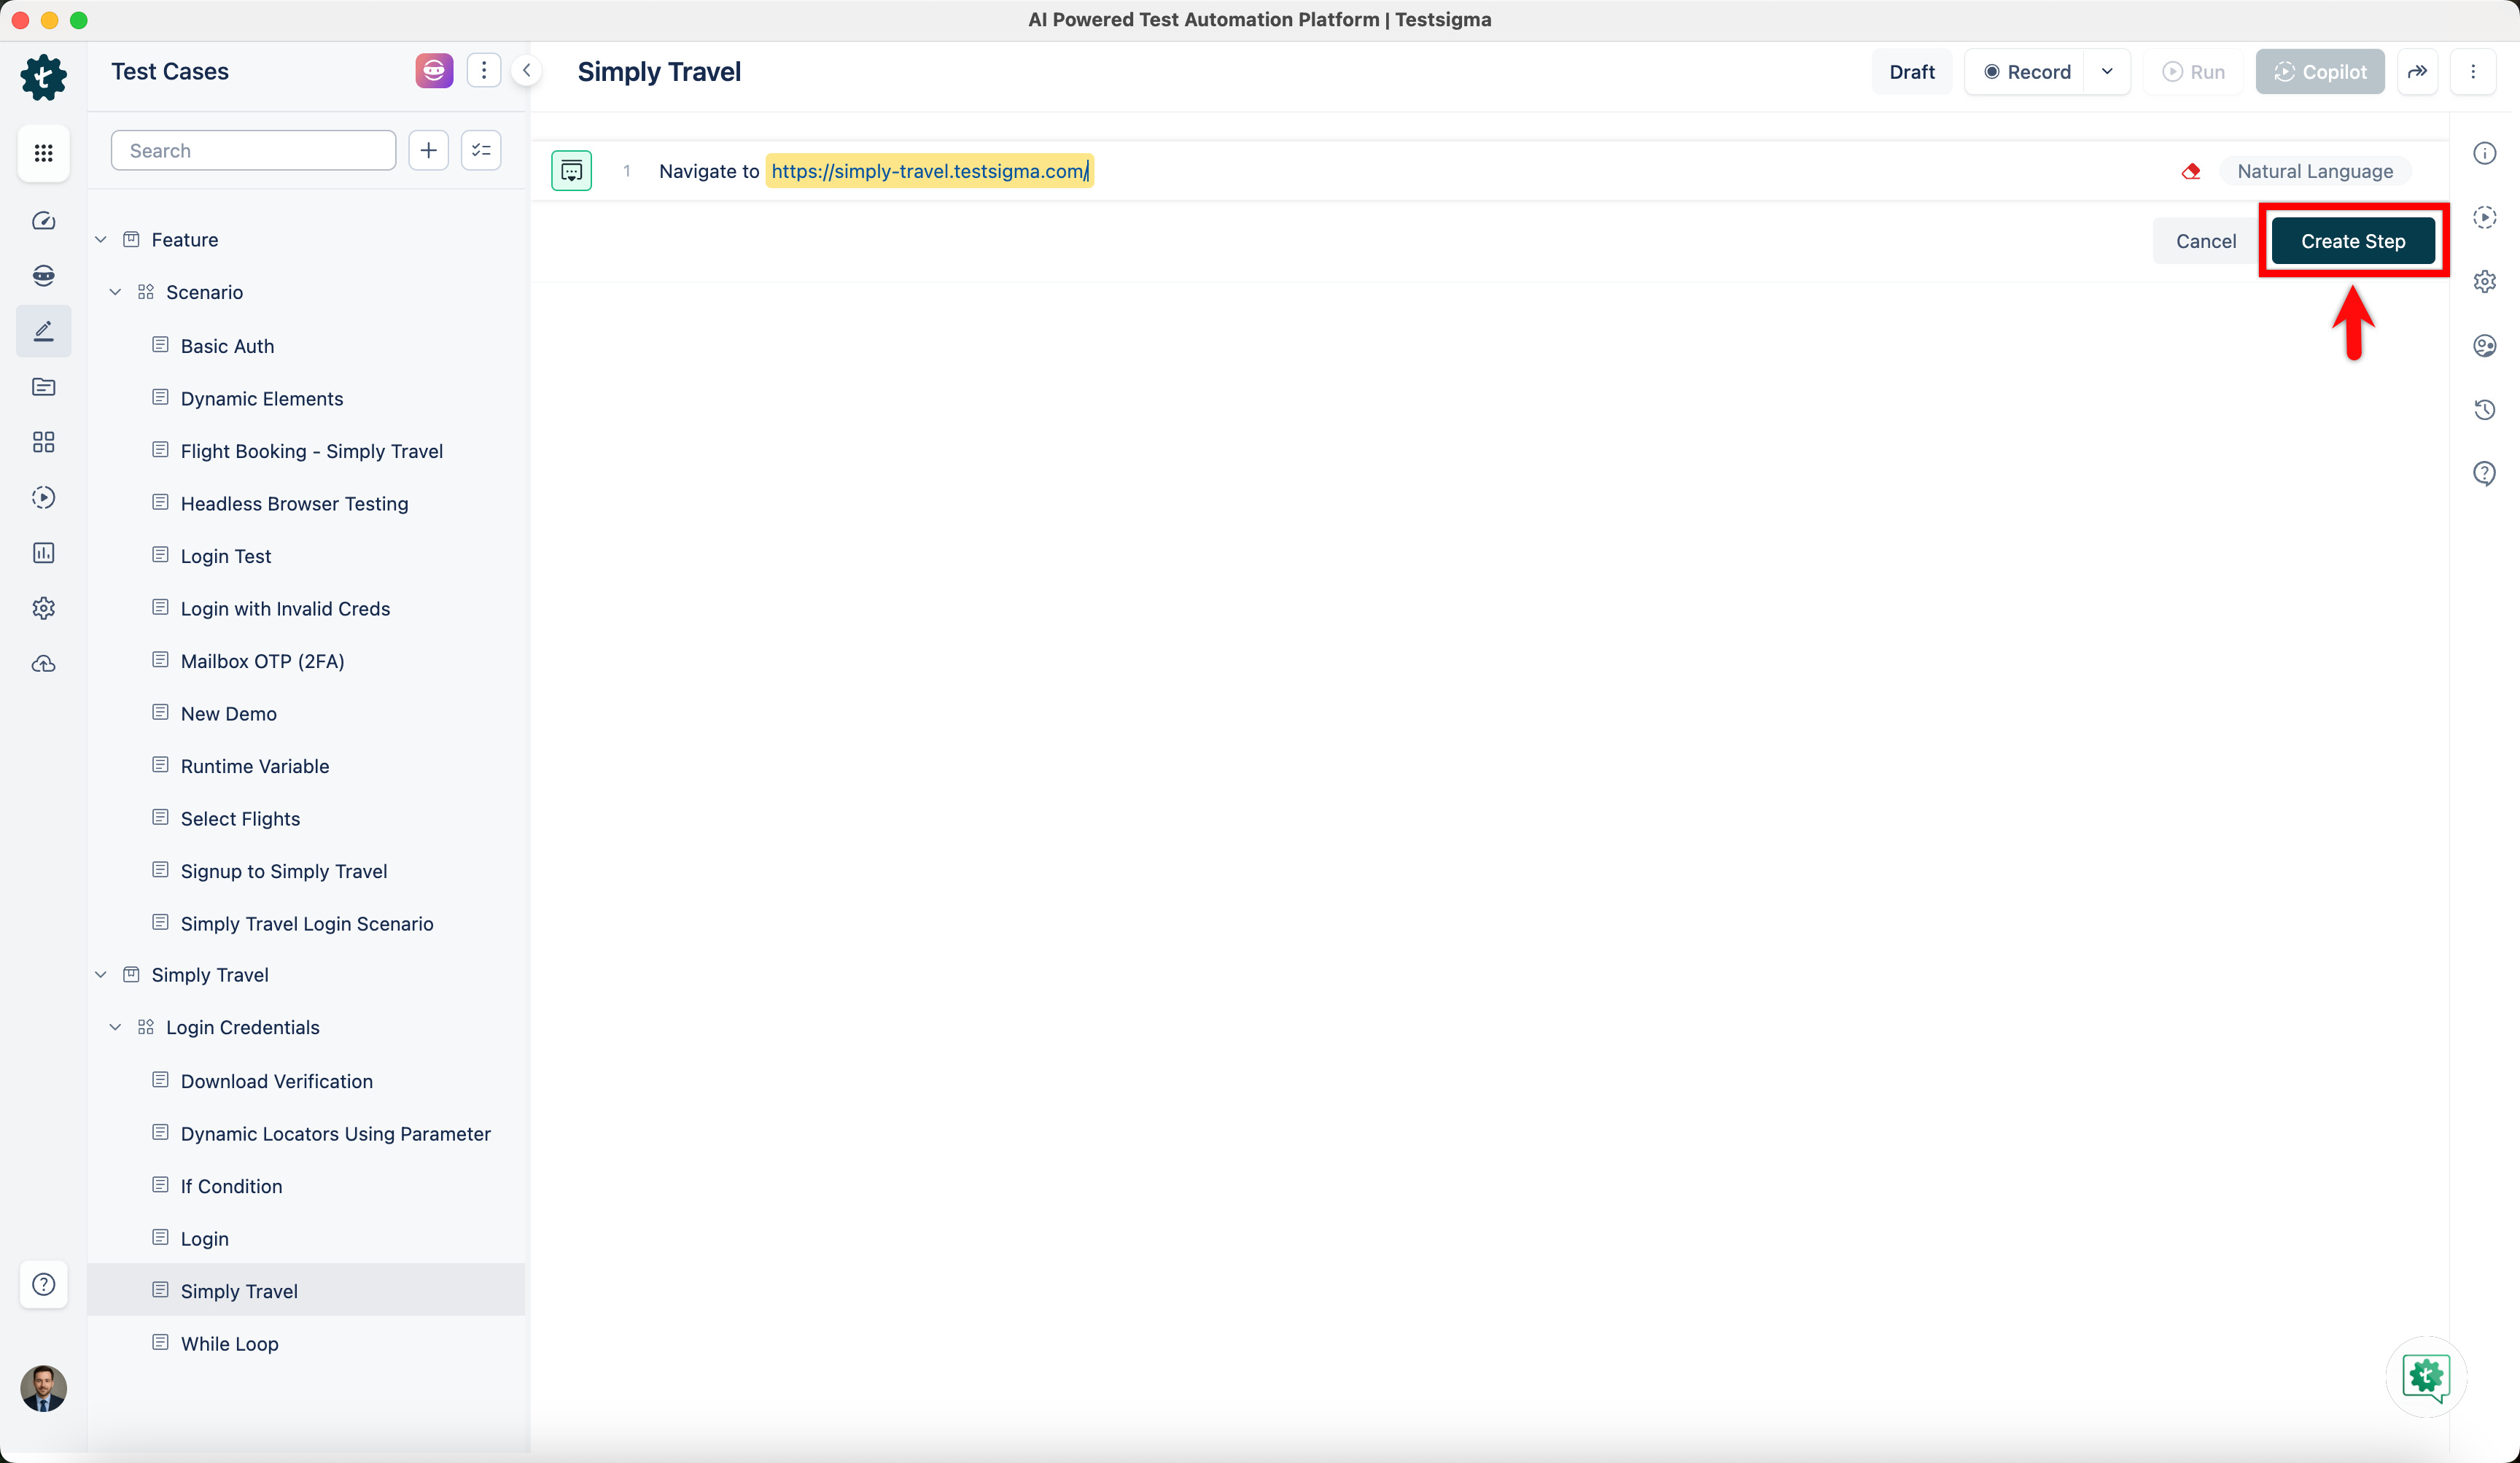
-
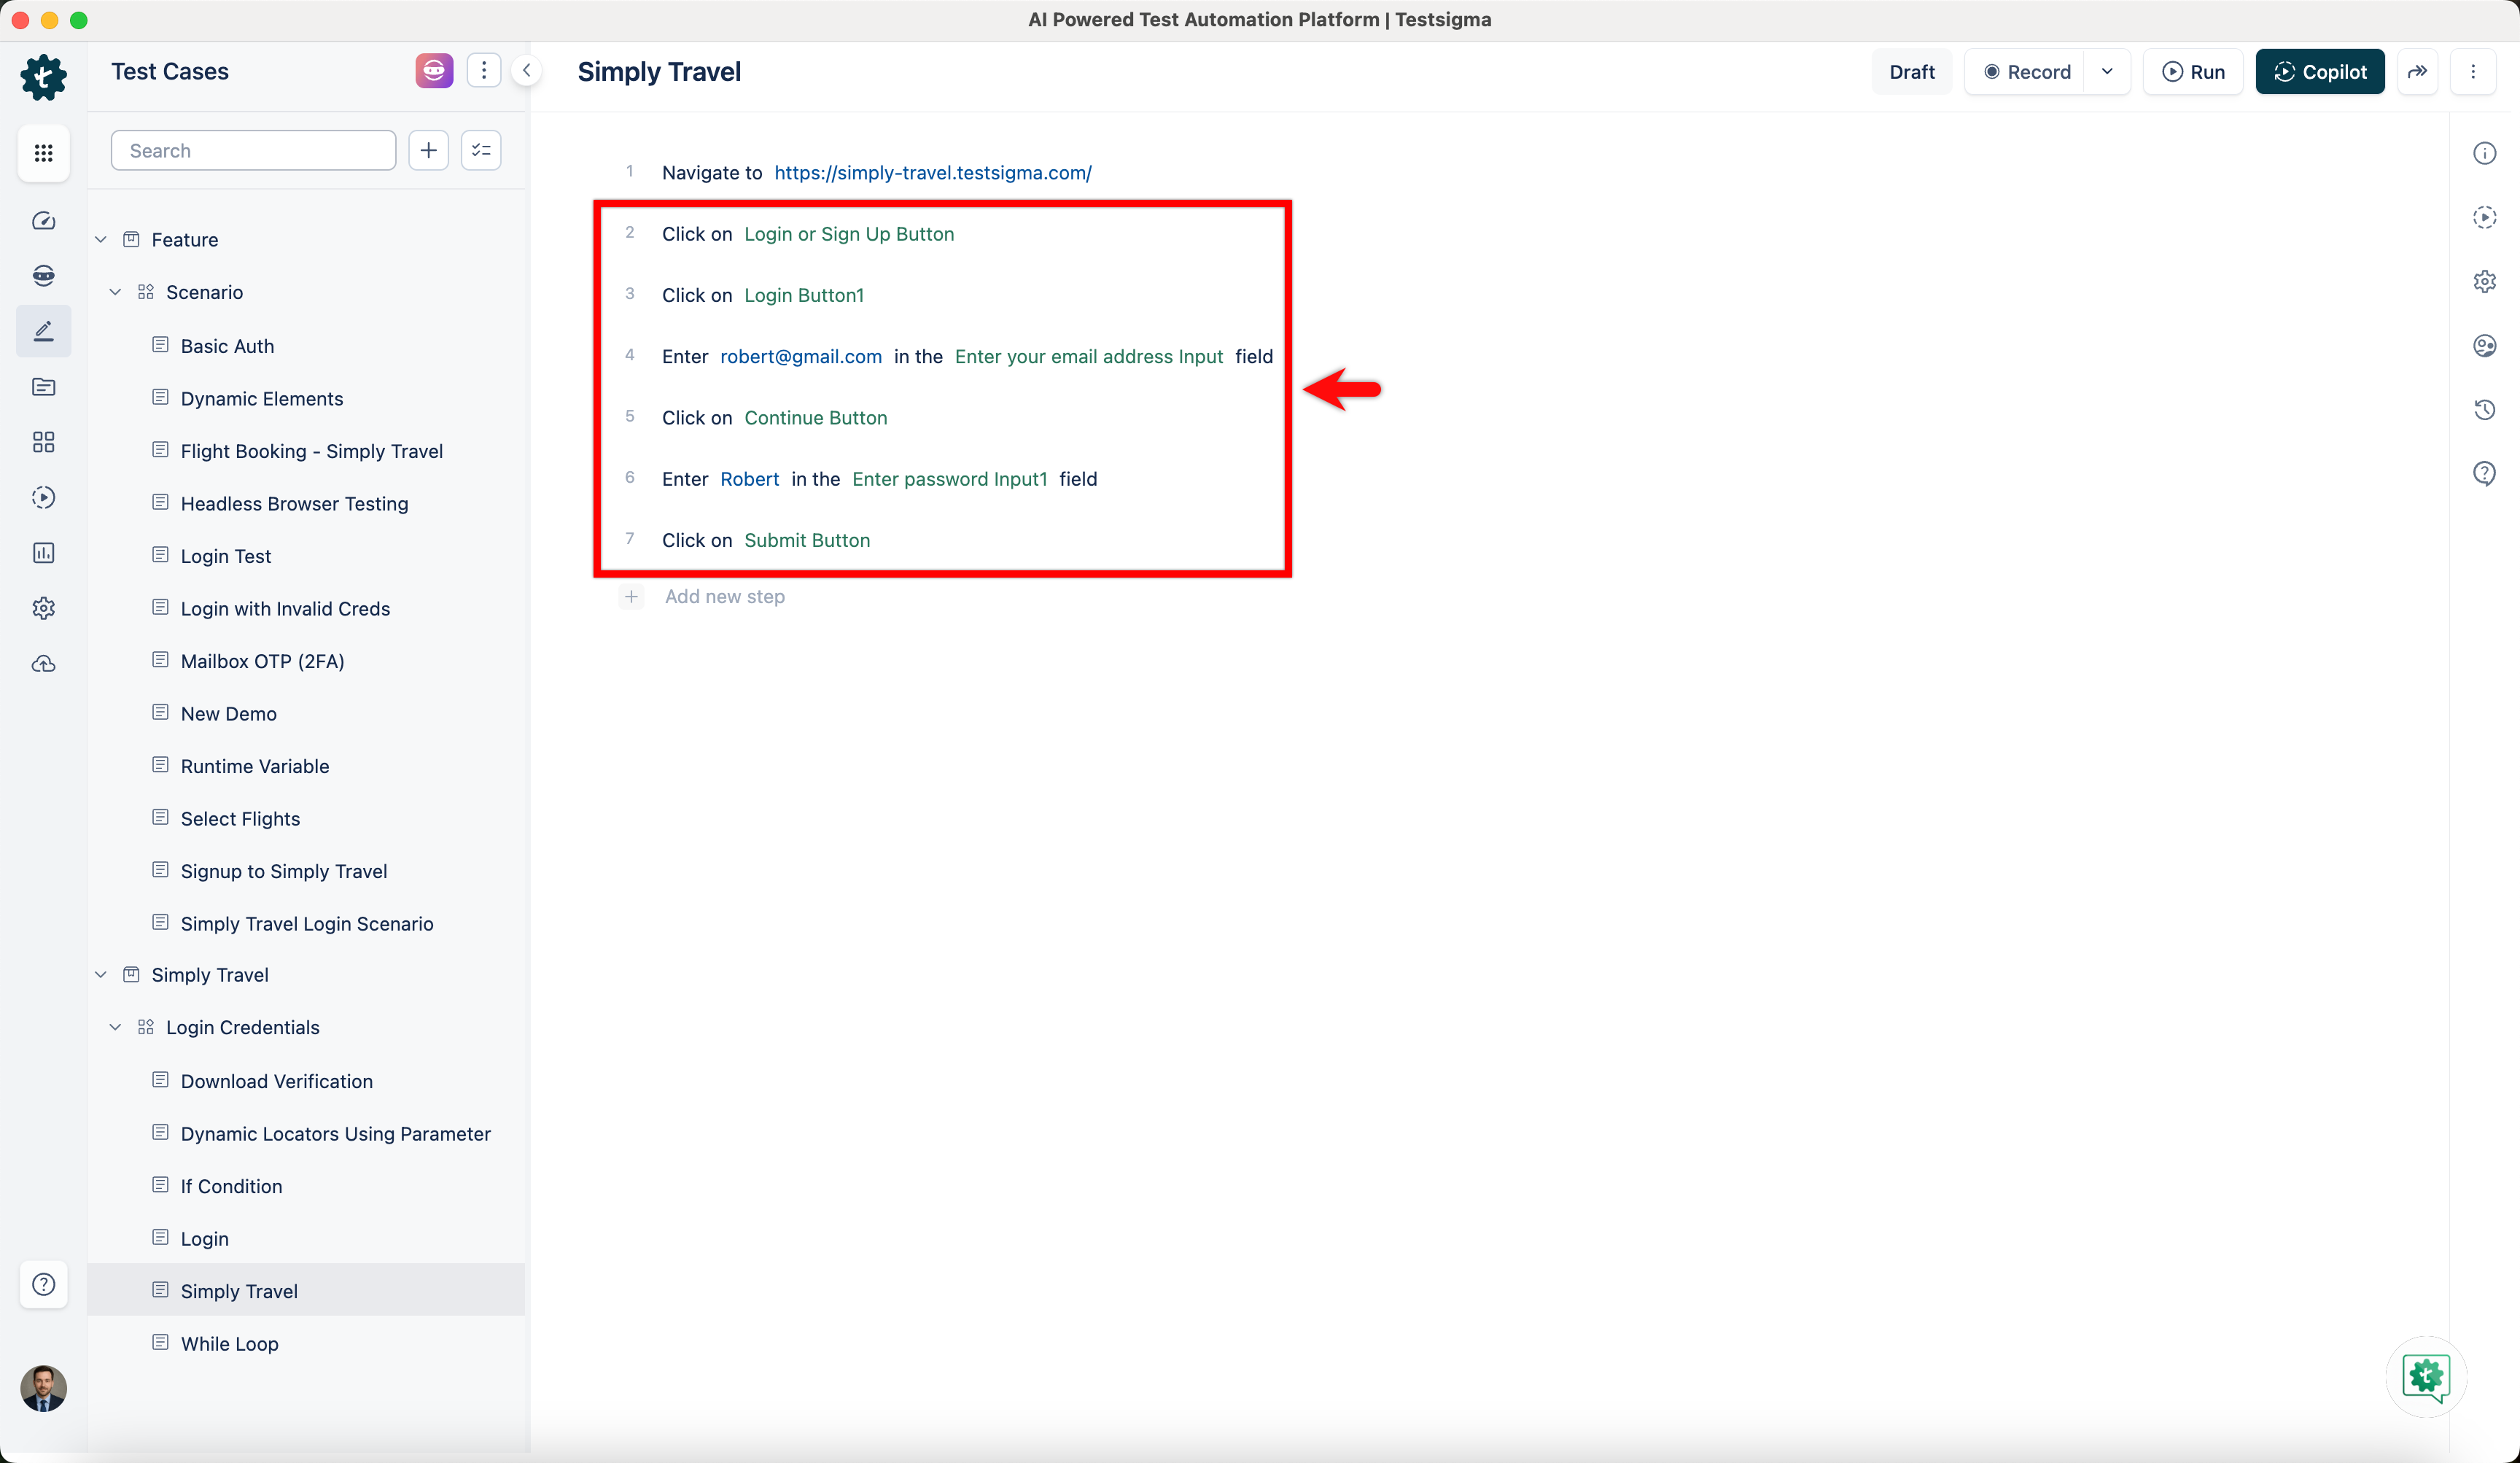
For example, here are the test steps to log in to the Simply Travel website:
- Navigate to https://simply-travel.testsigma.com/
- Click on Login / Sign Up Button
- Click on Login Button
- Enter robert@gmail.com in the Email Address Input field
- Click on Continue Button
- Enter •••••••• in the Password Input field
- Click on Submit Button
Want to contribute or report missing content?