
Generate Test Cases For Mobile Web
You can generate test cases for mobile web applications using Testsigma’s Generative AI capabilities. The system supports multiple input sources, including Jira, Figma, Xray, videos, and files such as images and PDFs. This article explains how to use Gen AI in Testsigma to generate test cases for mobile web apps.
Prerequisites
Before you begin, ensure that,
- Your Jira account is integrated with Testsigma.
- You have referred to the documentation on creating test cases.
- You have referred to the documentation on creating projects.
Steps to Generate Test Cases
- From the left navigation bar, go to Atto’s Home.
- Click Generate with AI.
- In the Generate Test Cases section, select Jira Requirements.
-
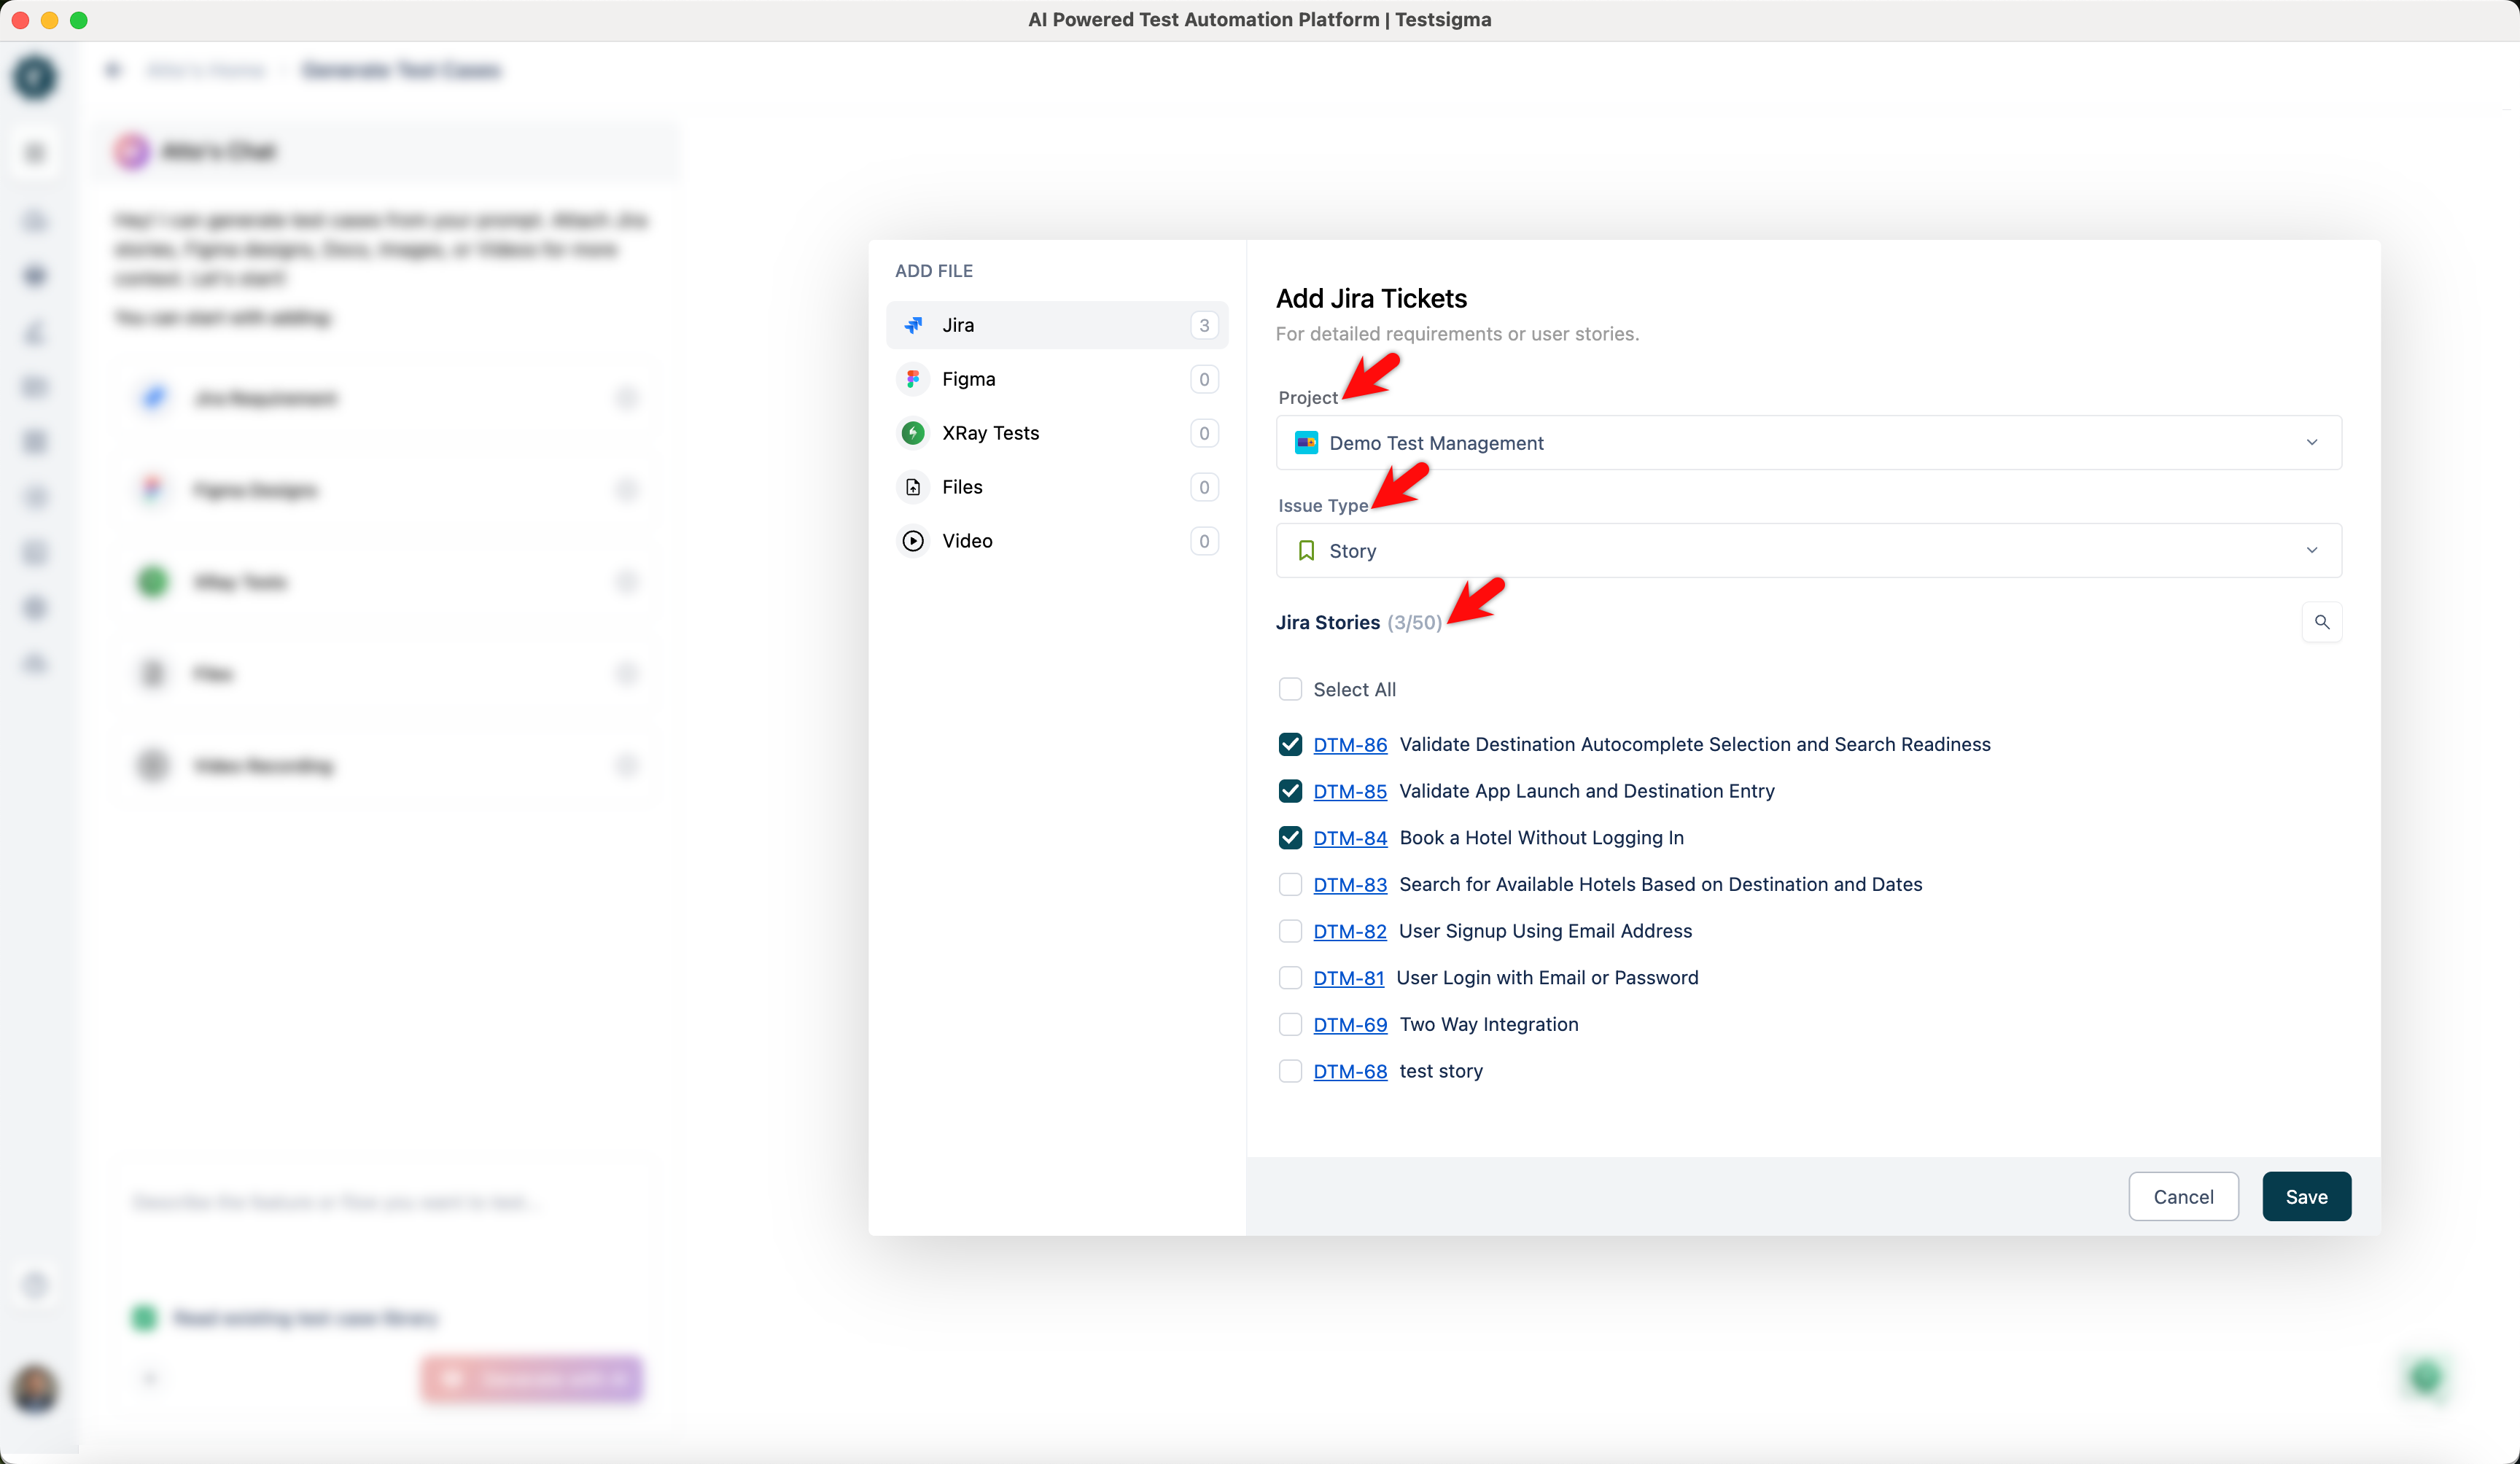
In the Add Jira Tickets dialog:
- From the Project dropdown, select the relevant Jira project.
-
Under Issue Type, select one of the following:
- If you select Epic, choose the stories for which you want to generate test cases.
- If you select Story, choose all the stories for which you want to generate test cases.
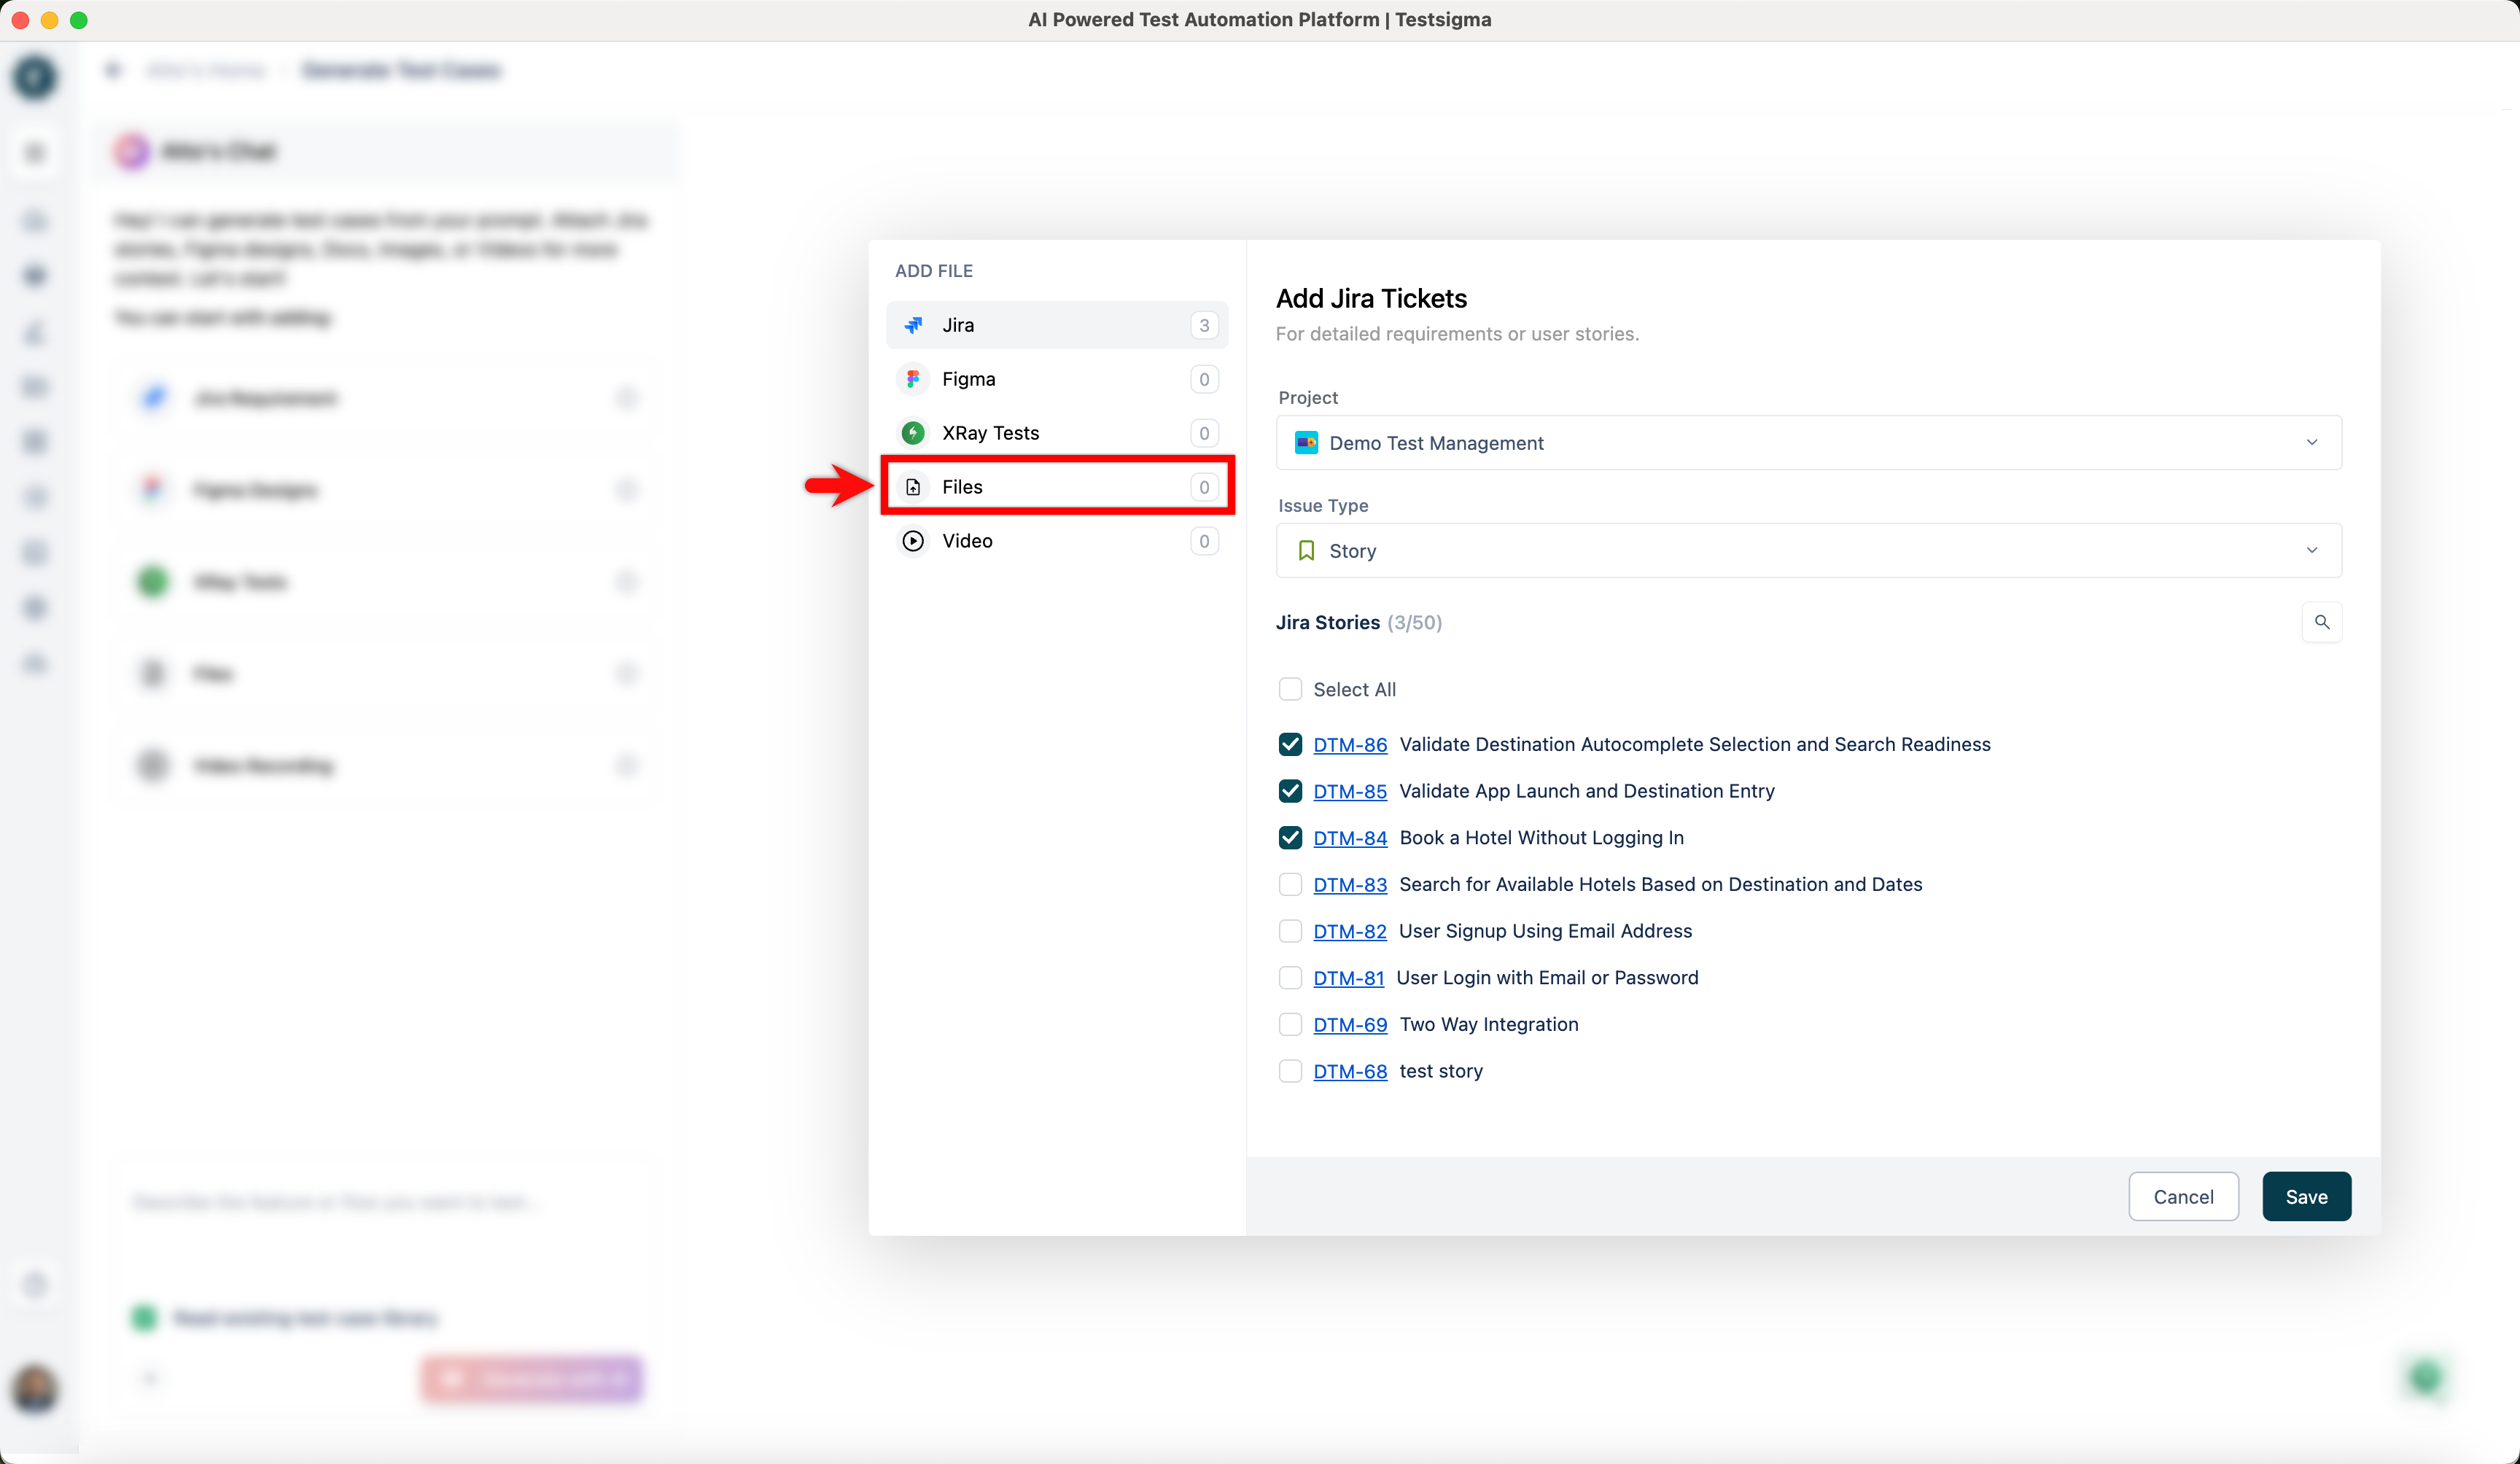
- In the Add Jira Tickets dialog, click Files from the ADD FILE menu.
-
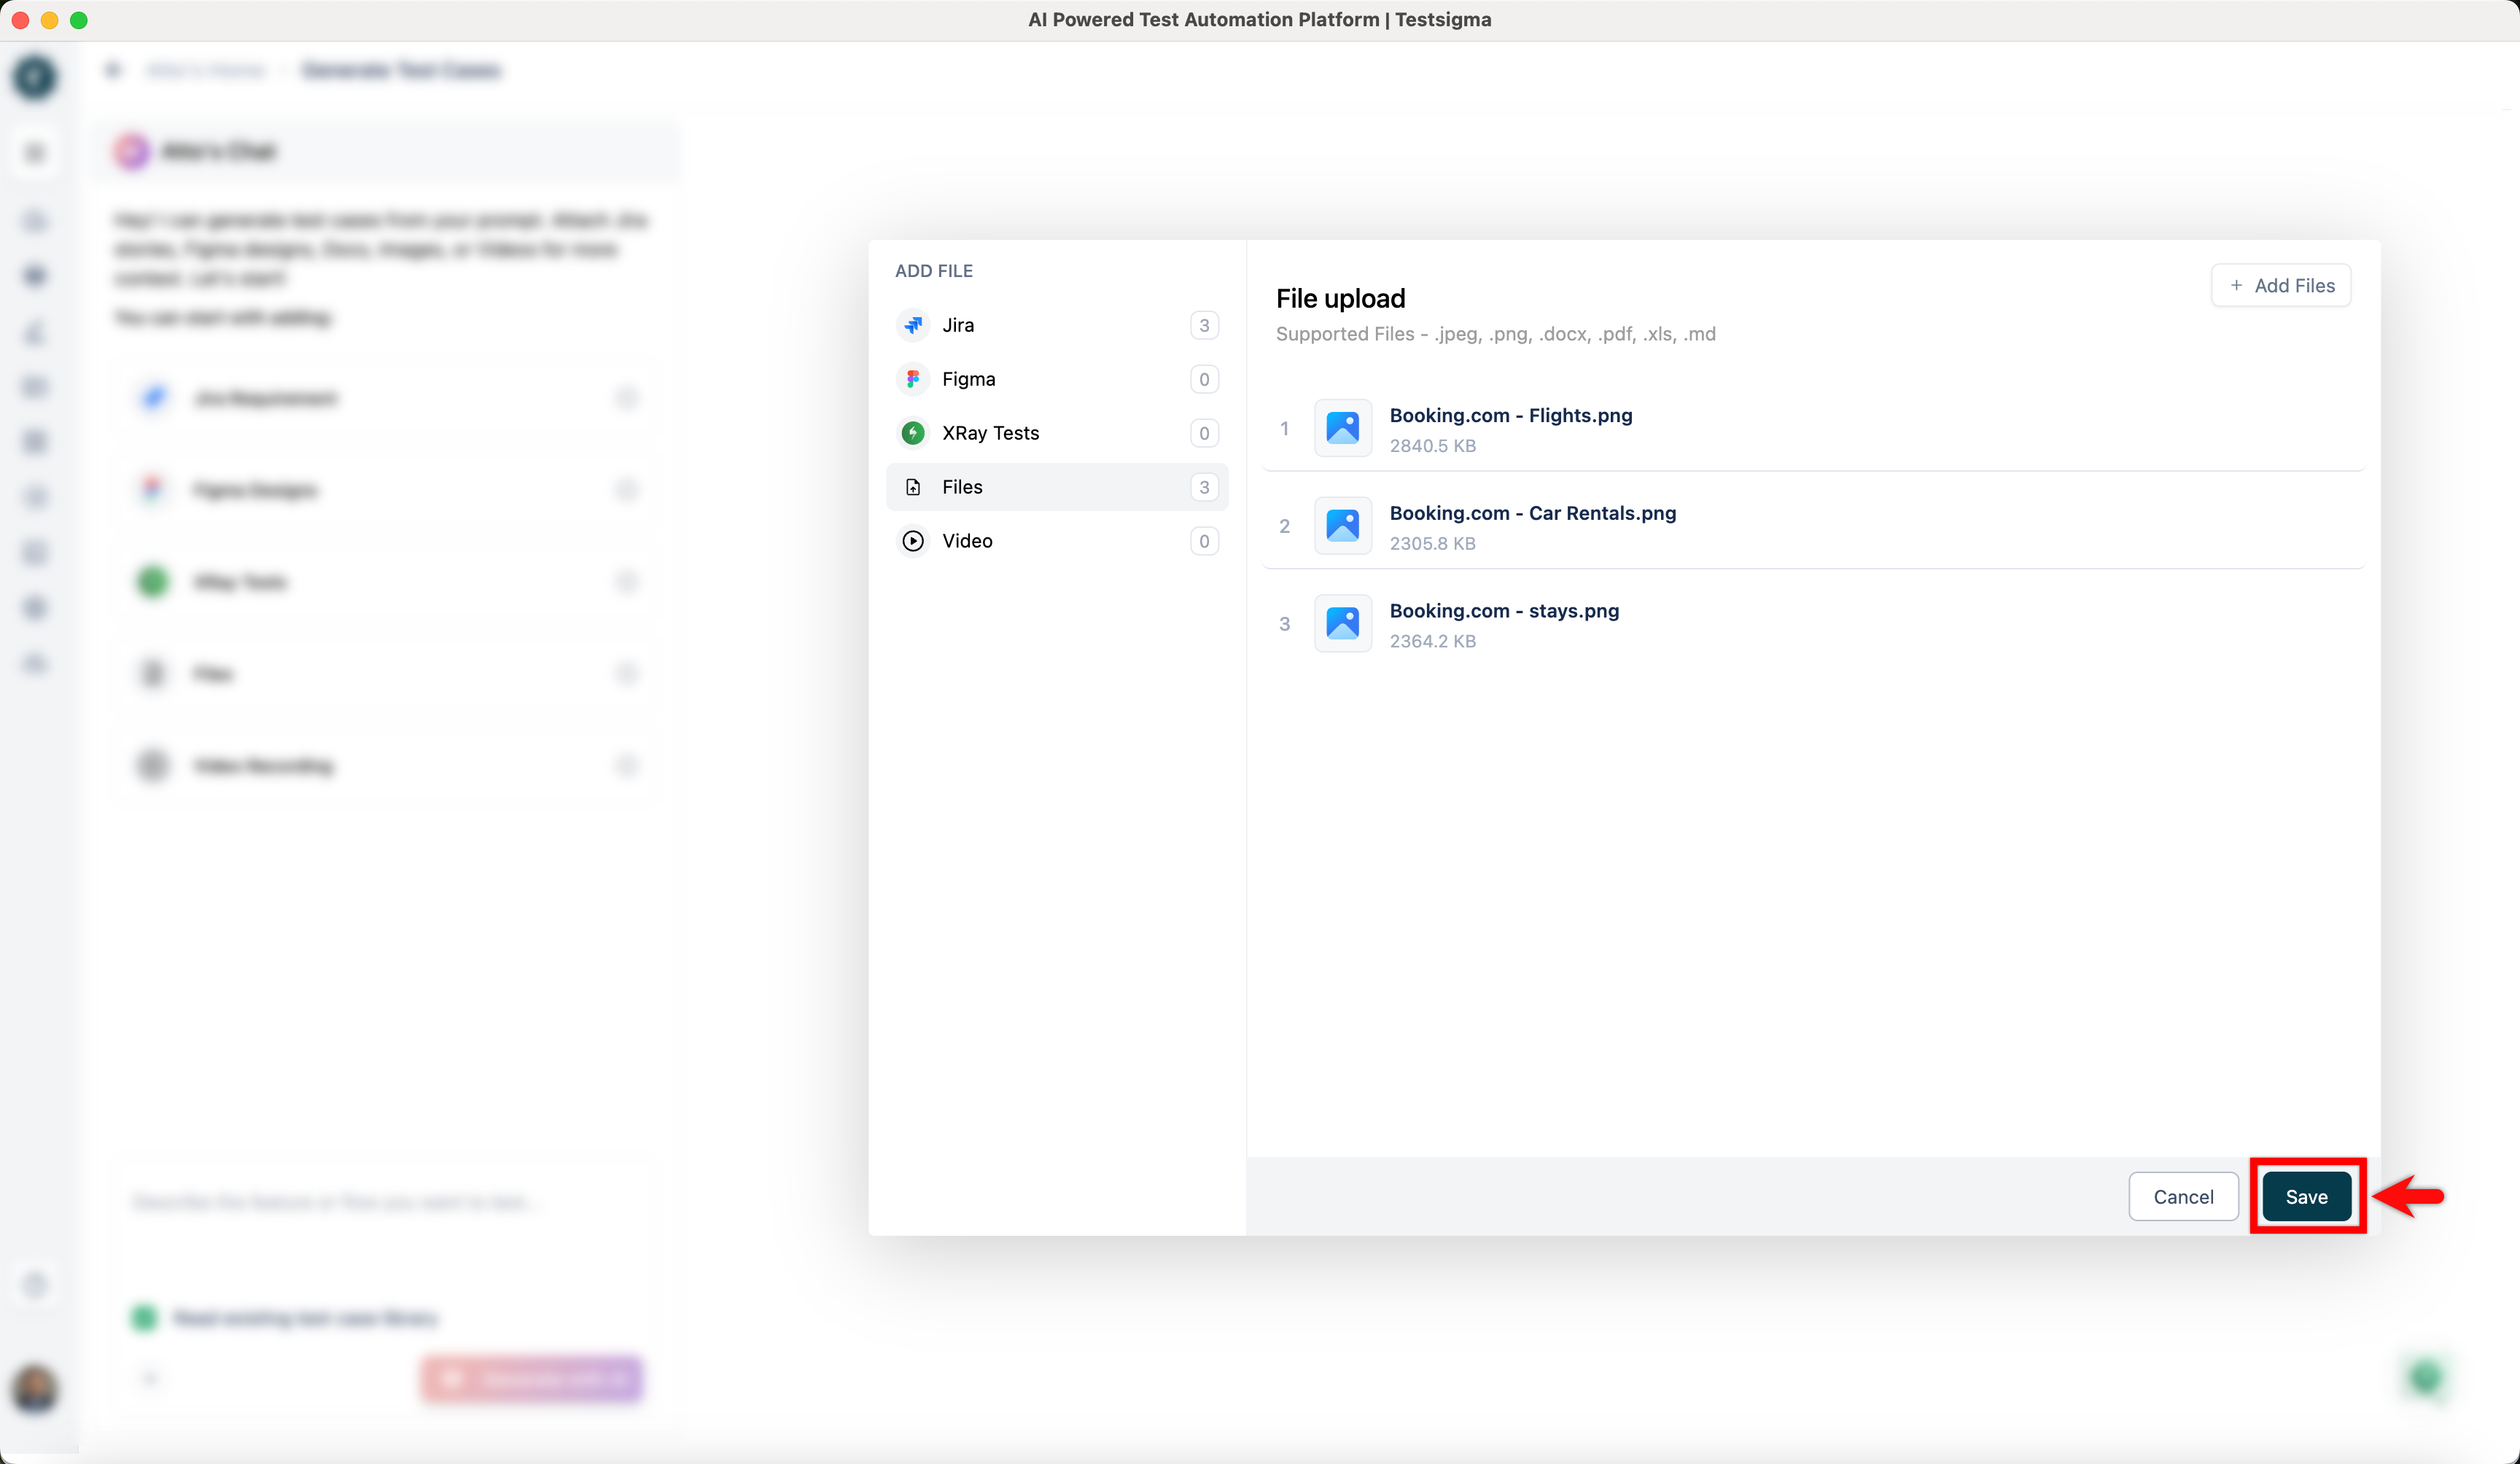
In the Files Upload dialog:
- Click Add Files.
- Click Browse, and select one or more supported files.
- Click Add Files.
- Click Save.
- In the Prompt box, enter a detailed prompt that describes the test cases you want to generate.
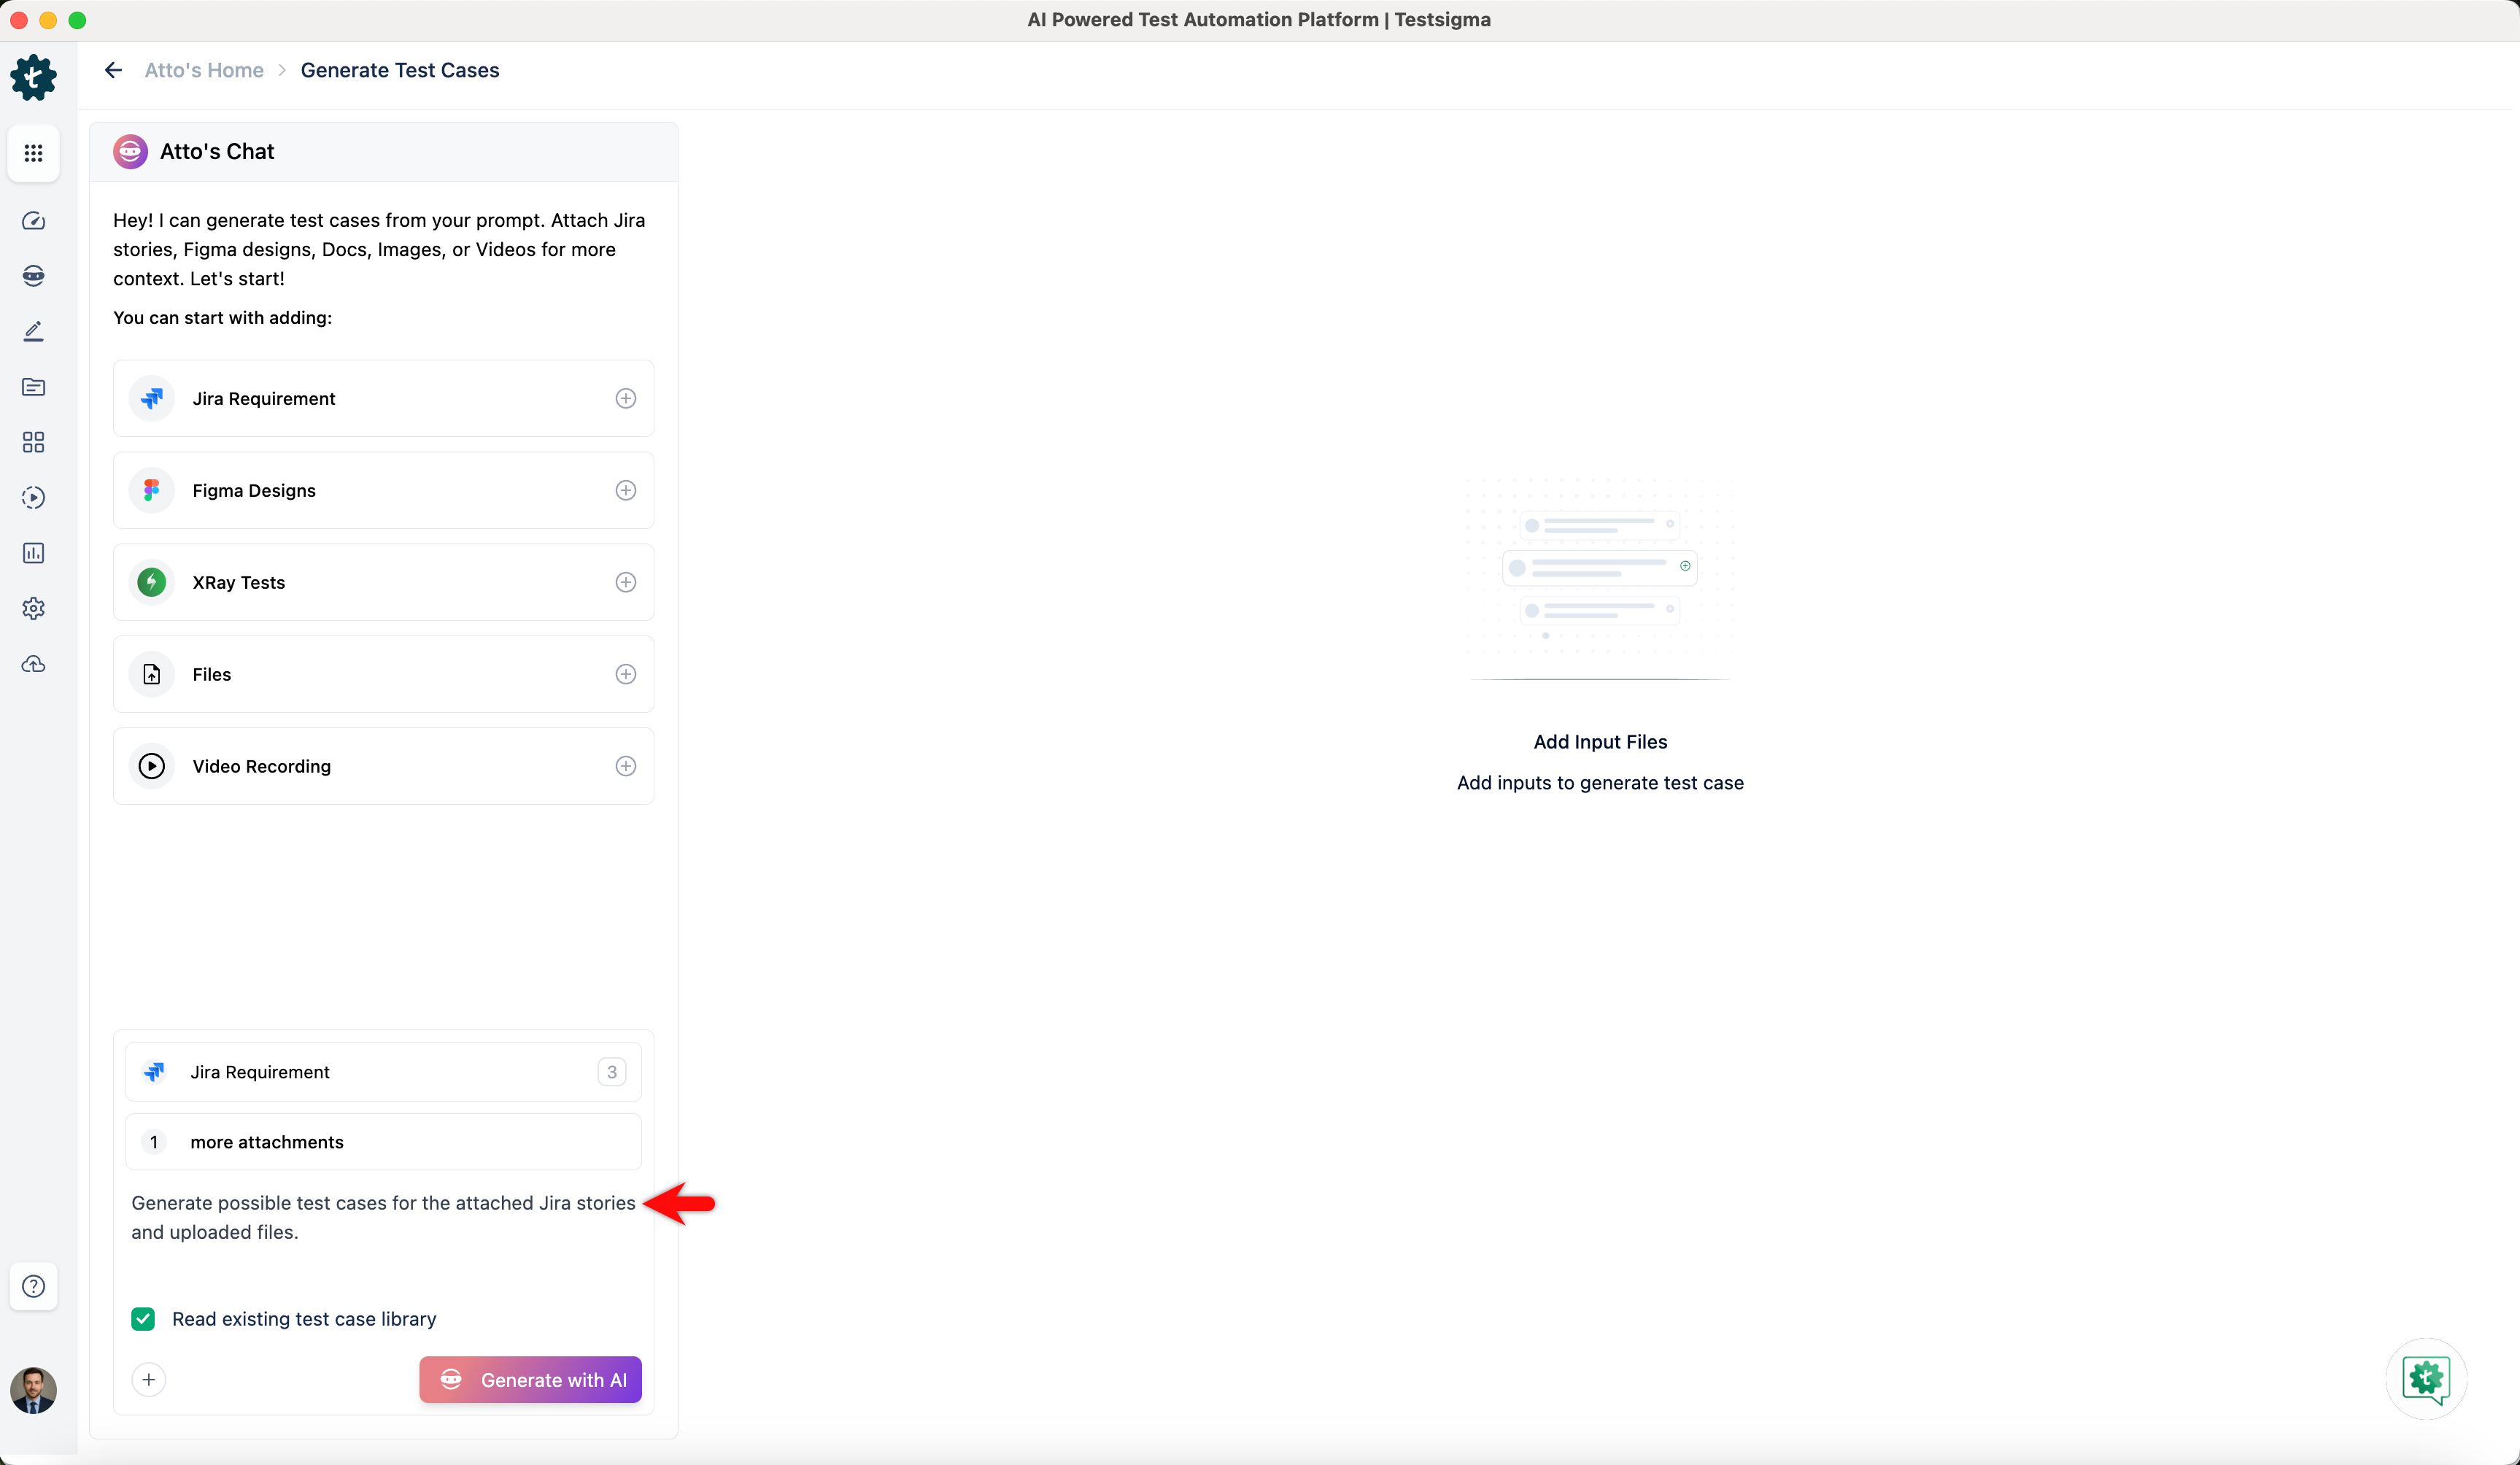
- The Read existing test case library checkbox is selected by default. Clear this checkbox if you do not want the system to consider existing test cases while generating new ones.
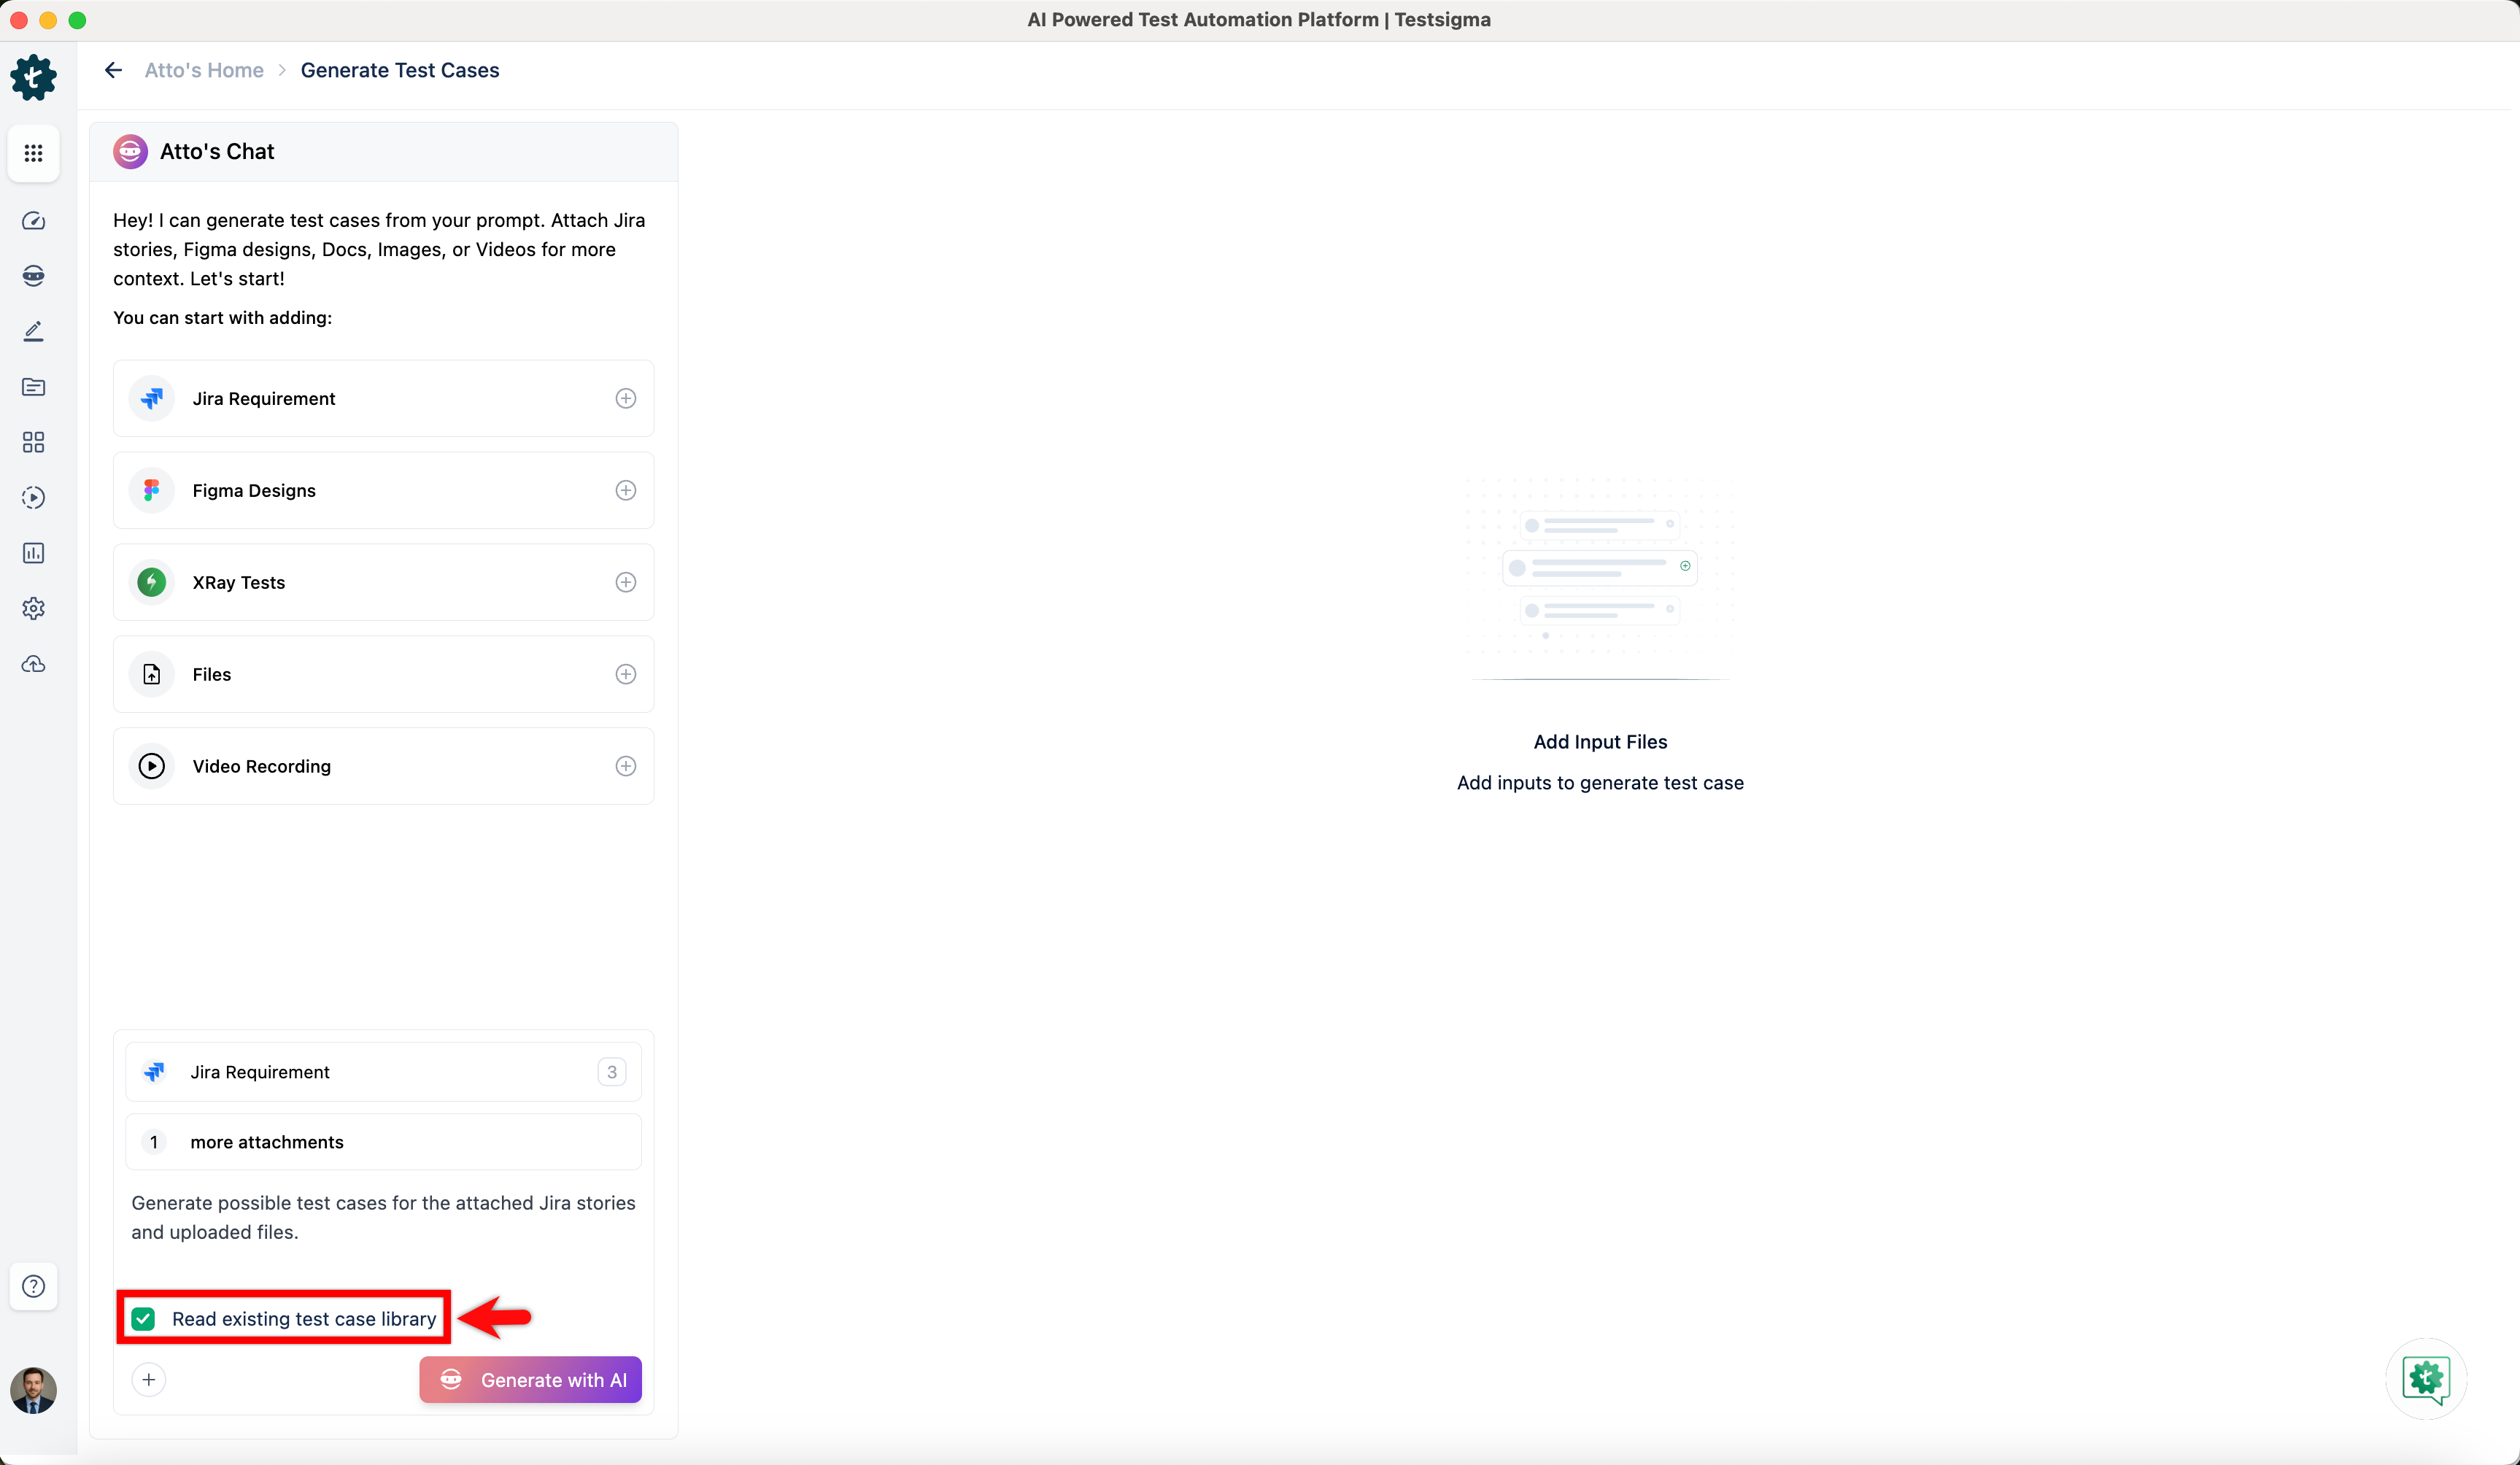
NOTE:
- Once the Read existing test case library option is enabled, it cannot be unselected during the same session. The selection remains applicable throughout the session. However, you can enable this option at any time during a session if it was not selected earlier.
- Click Generate with AI.
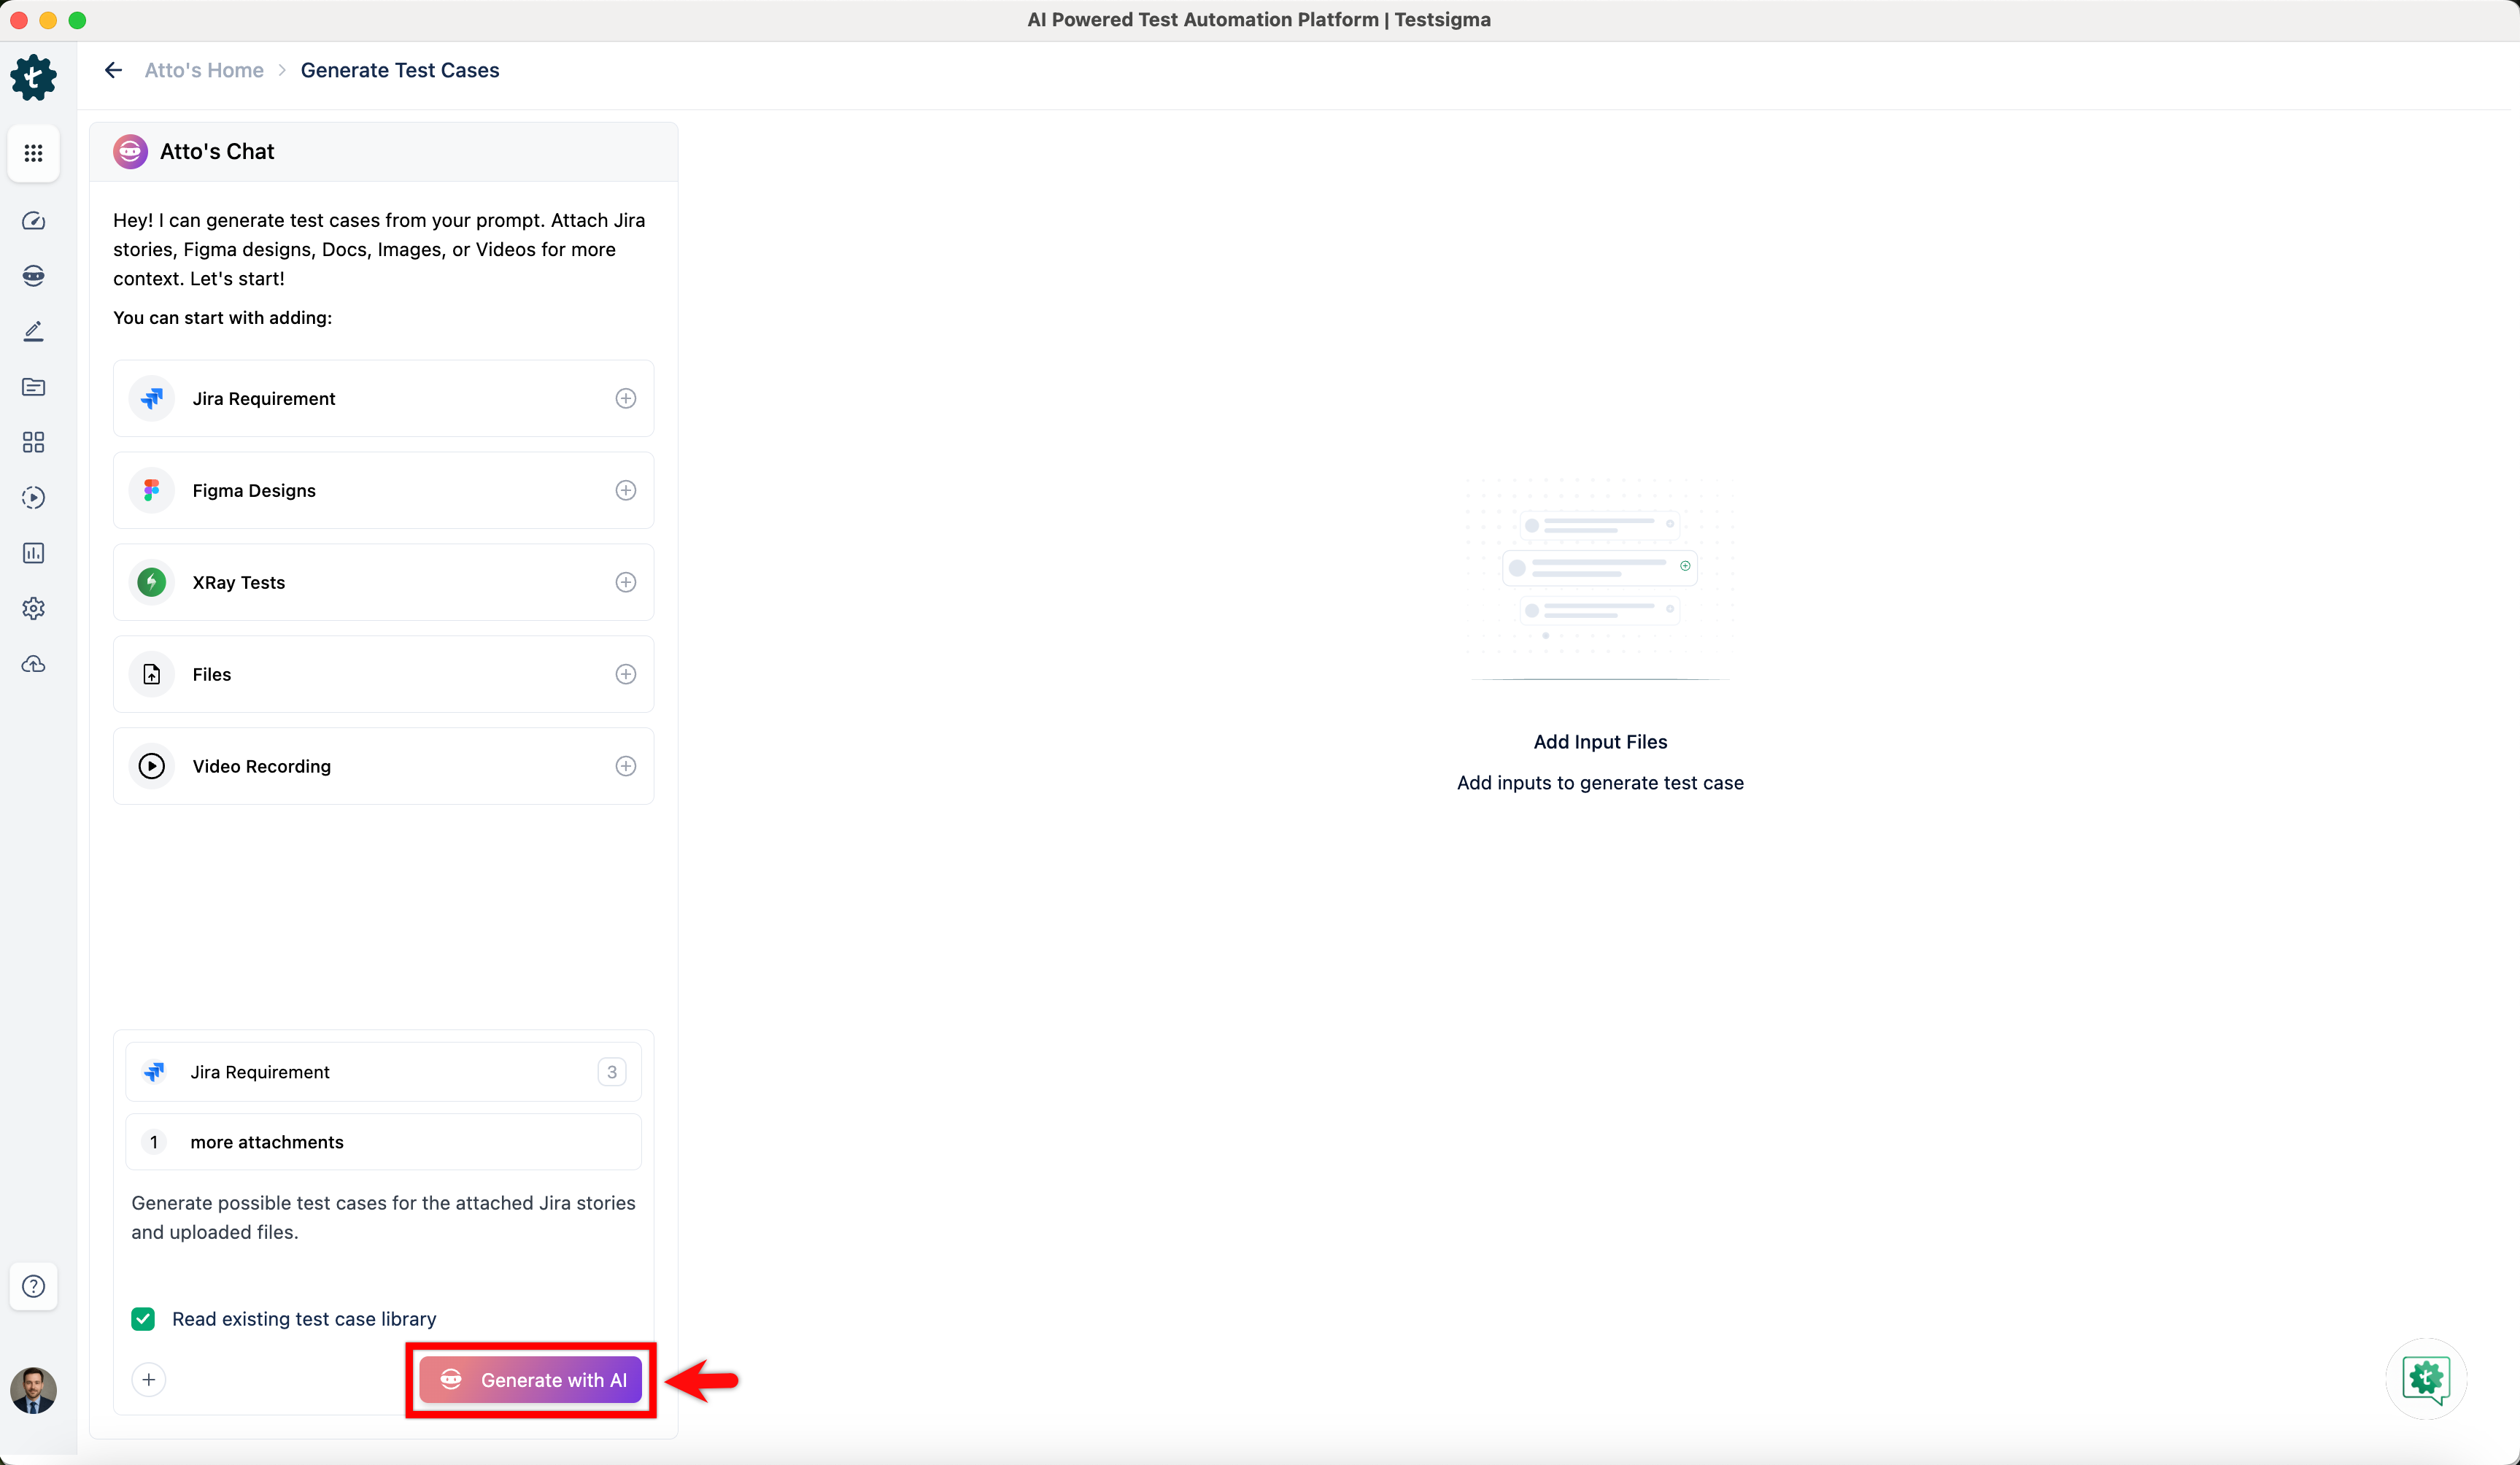
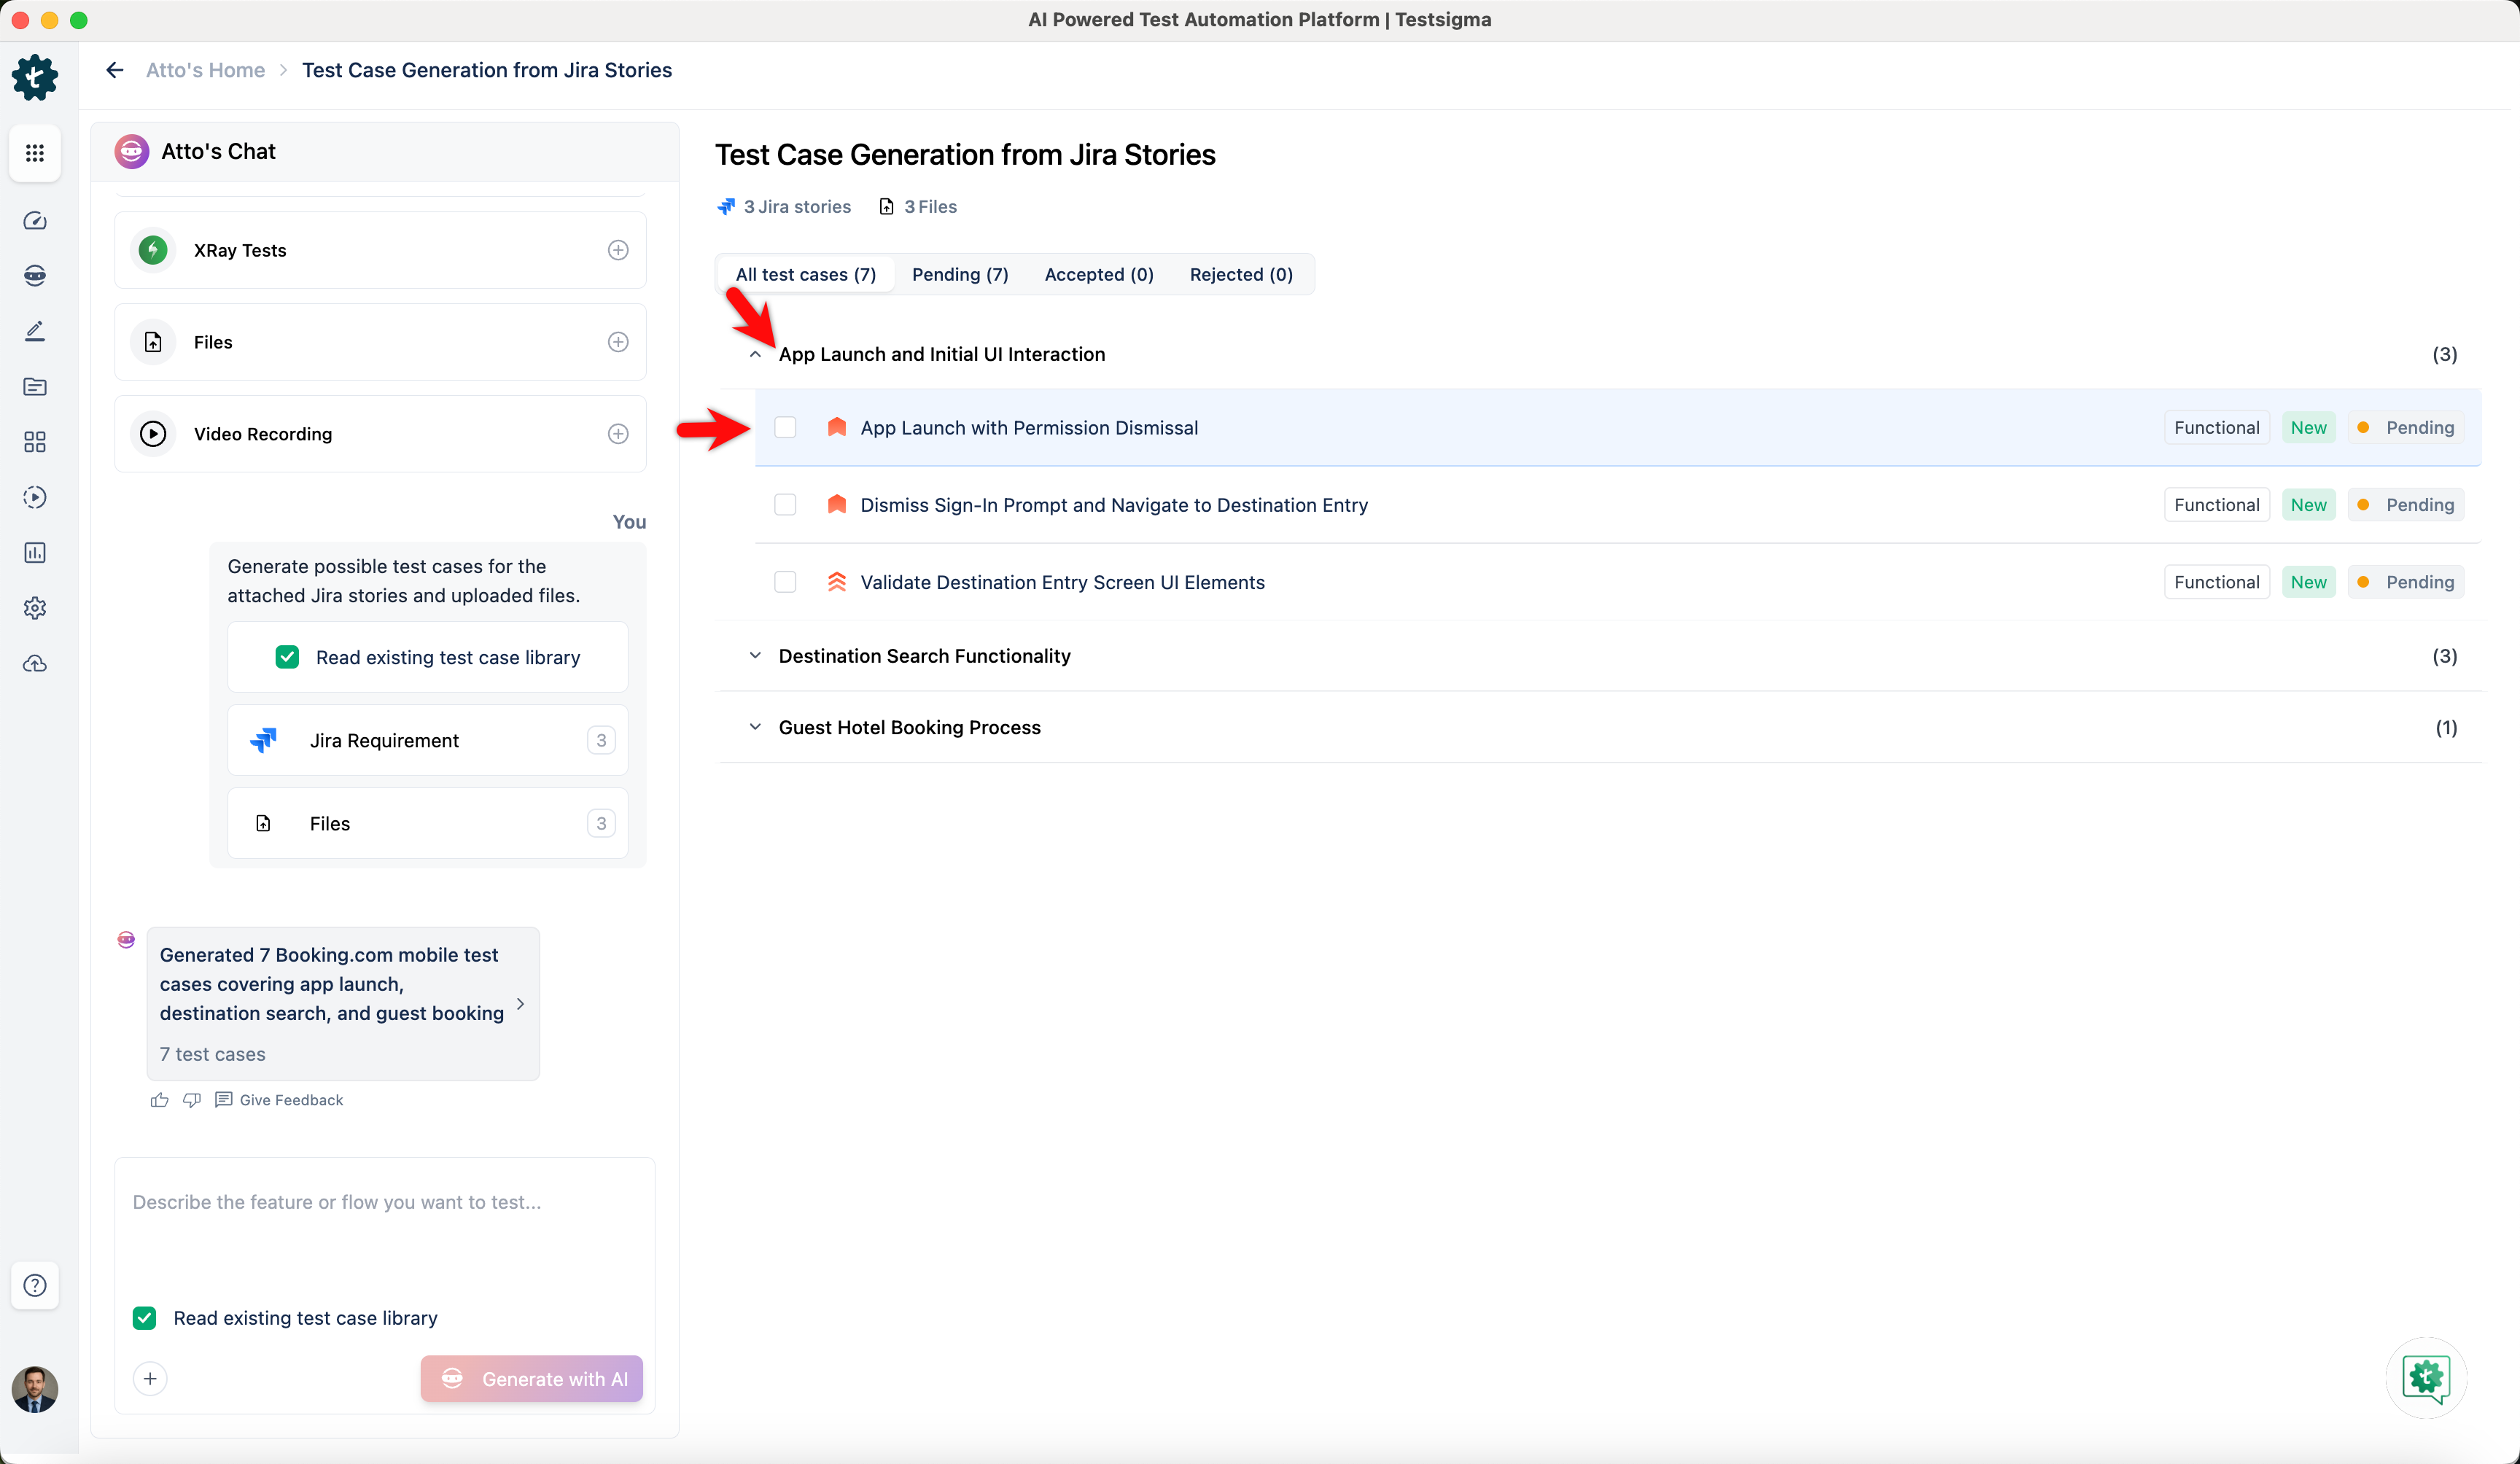
- Wait for the Generator Agent to generate multiple test cases based on the selected inputs.
Next Steps
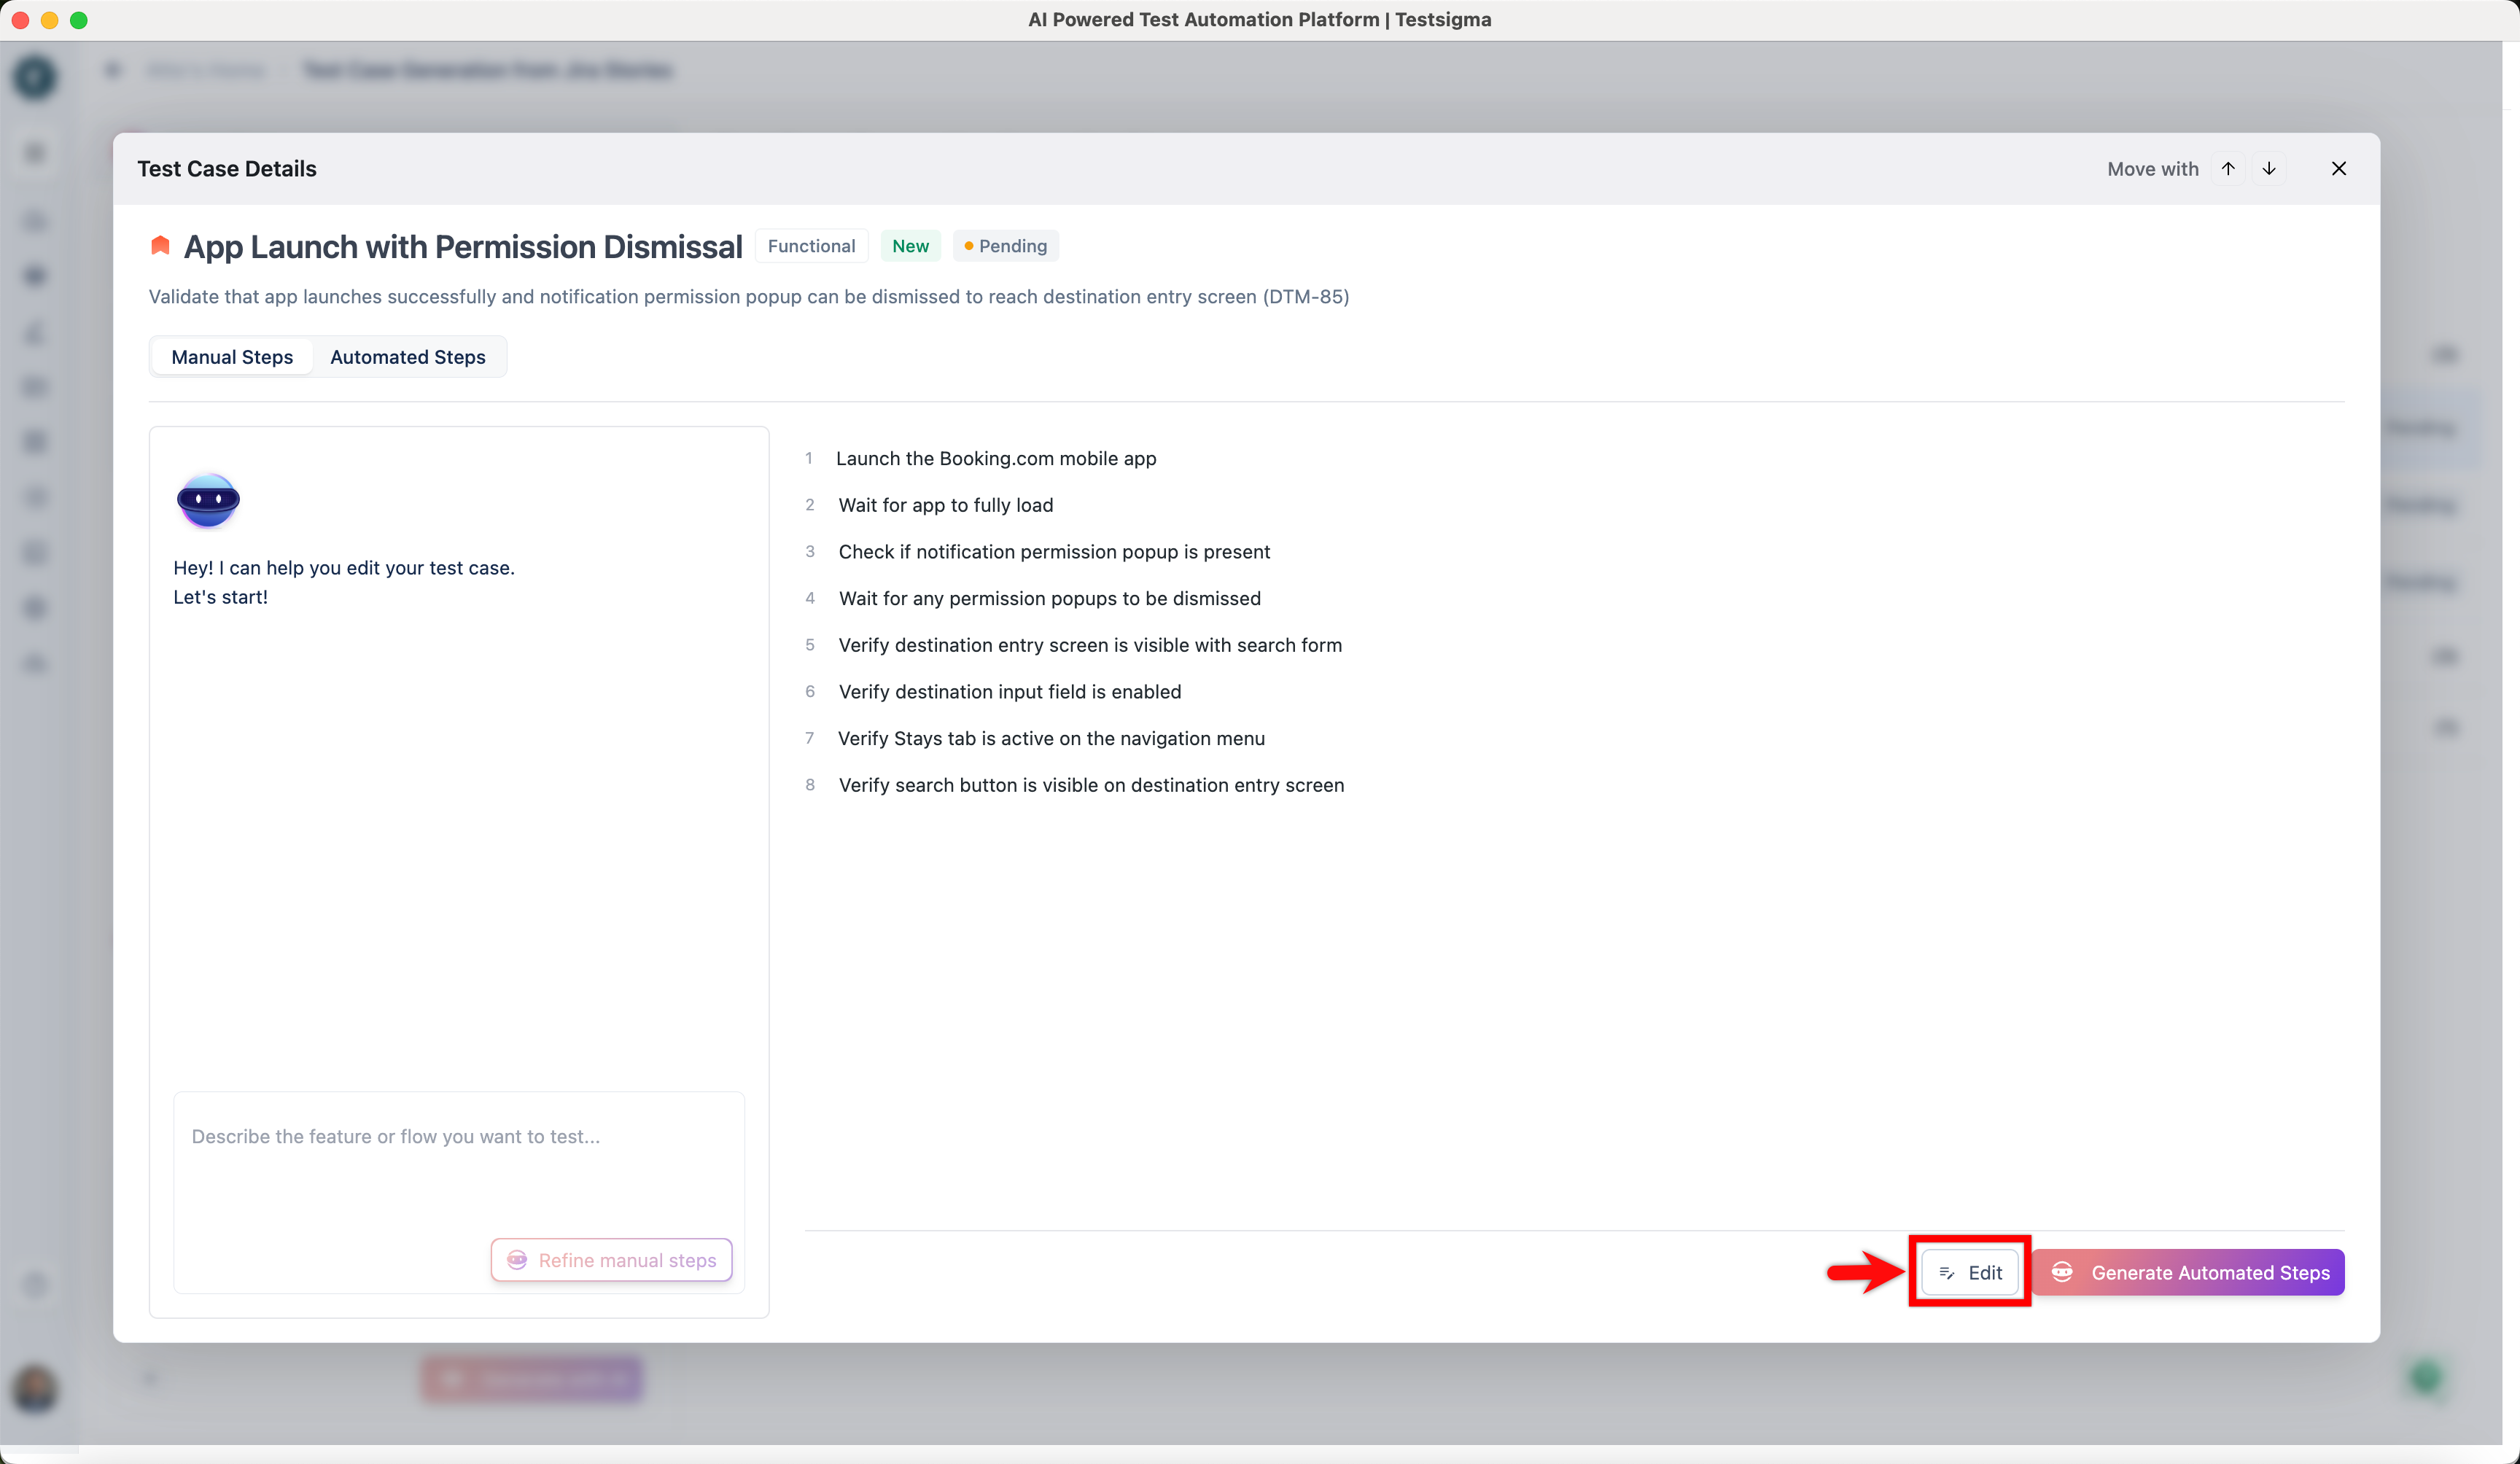
- After the test cases are generated, expand a category and select a test case.
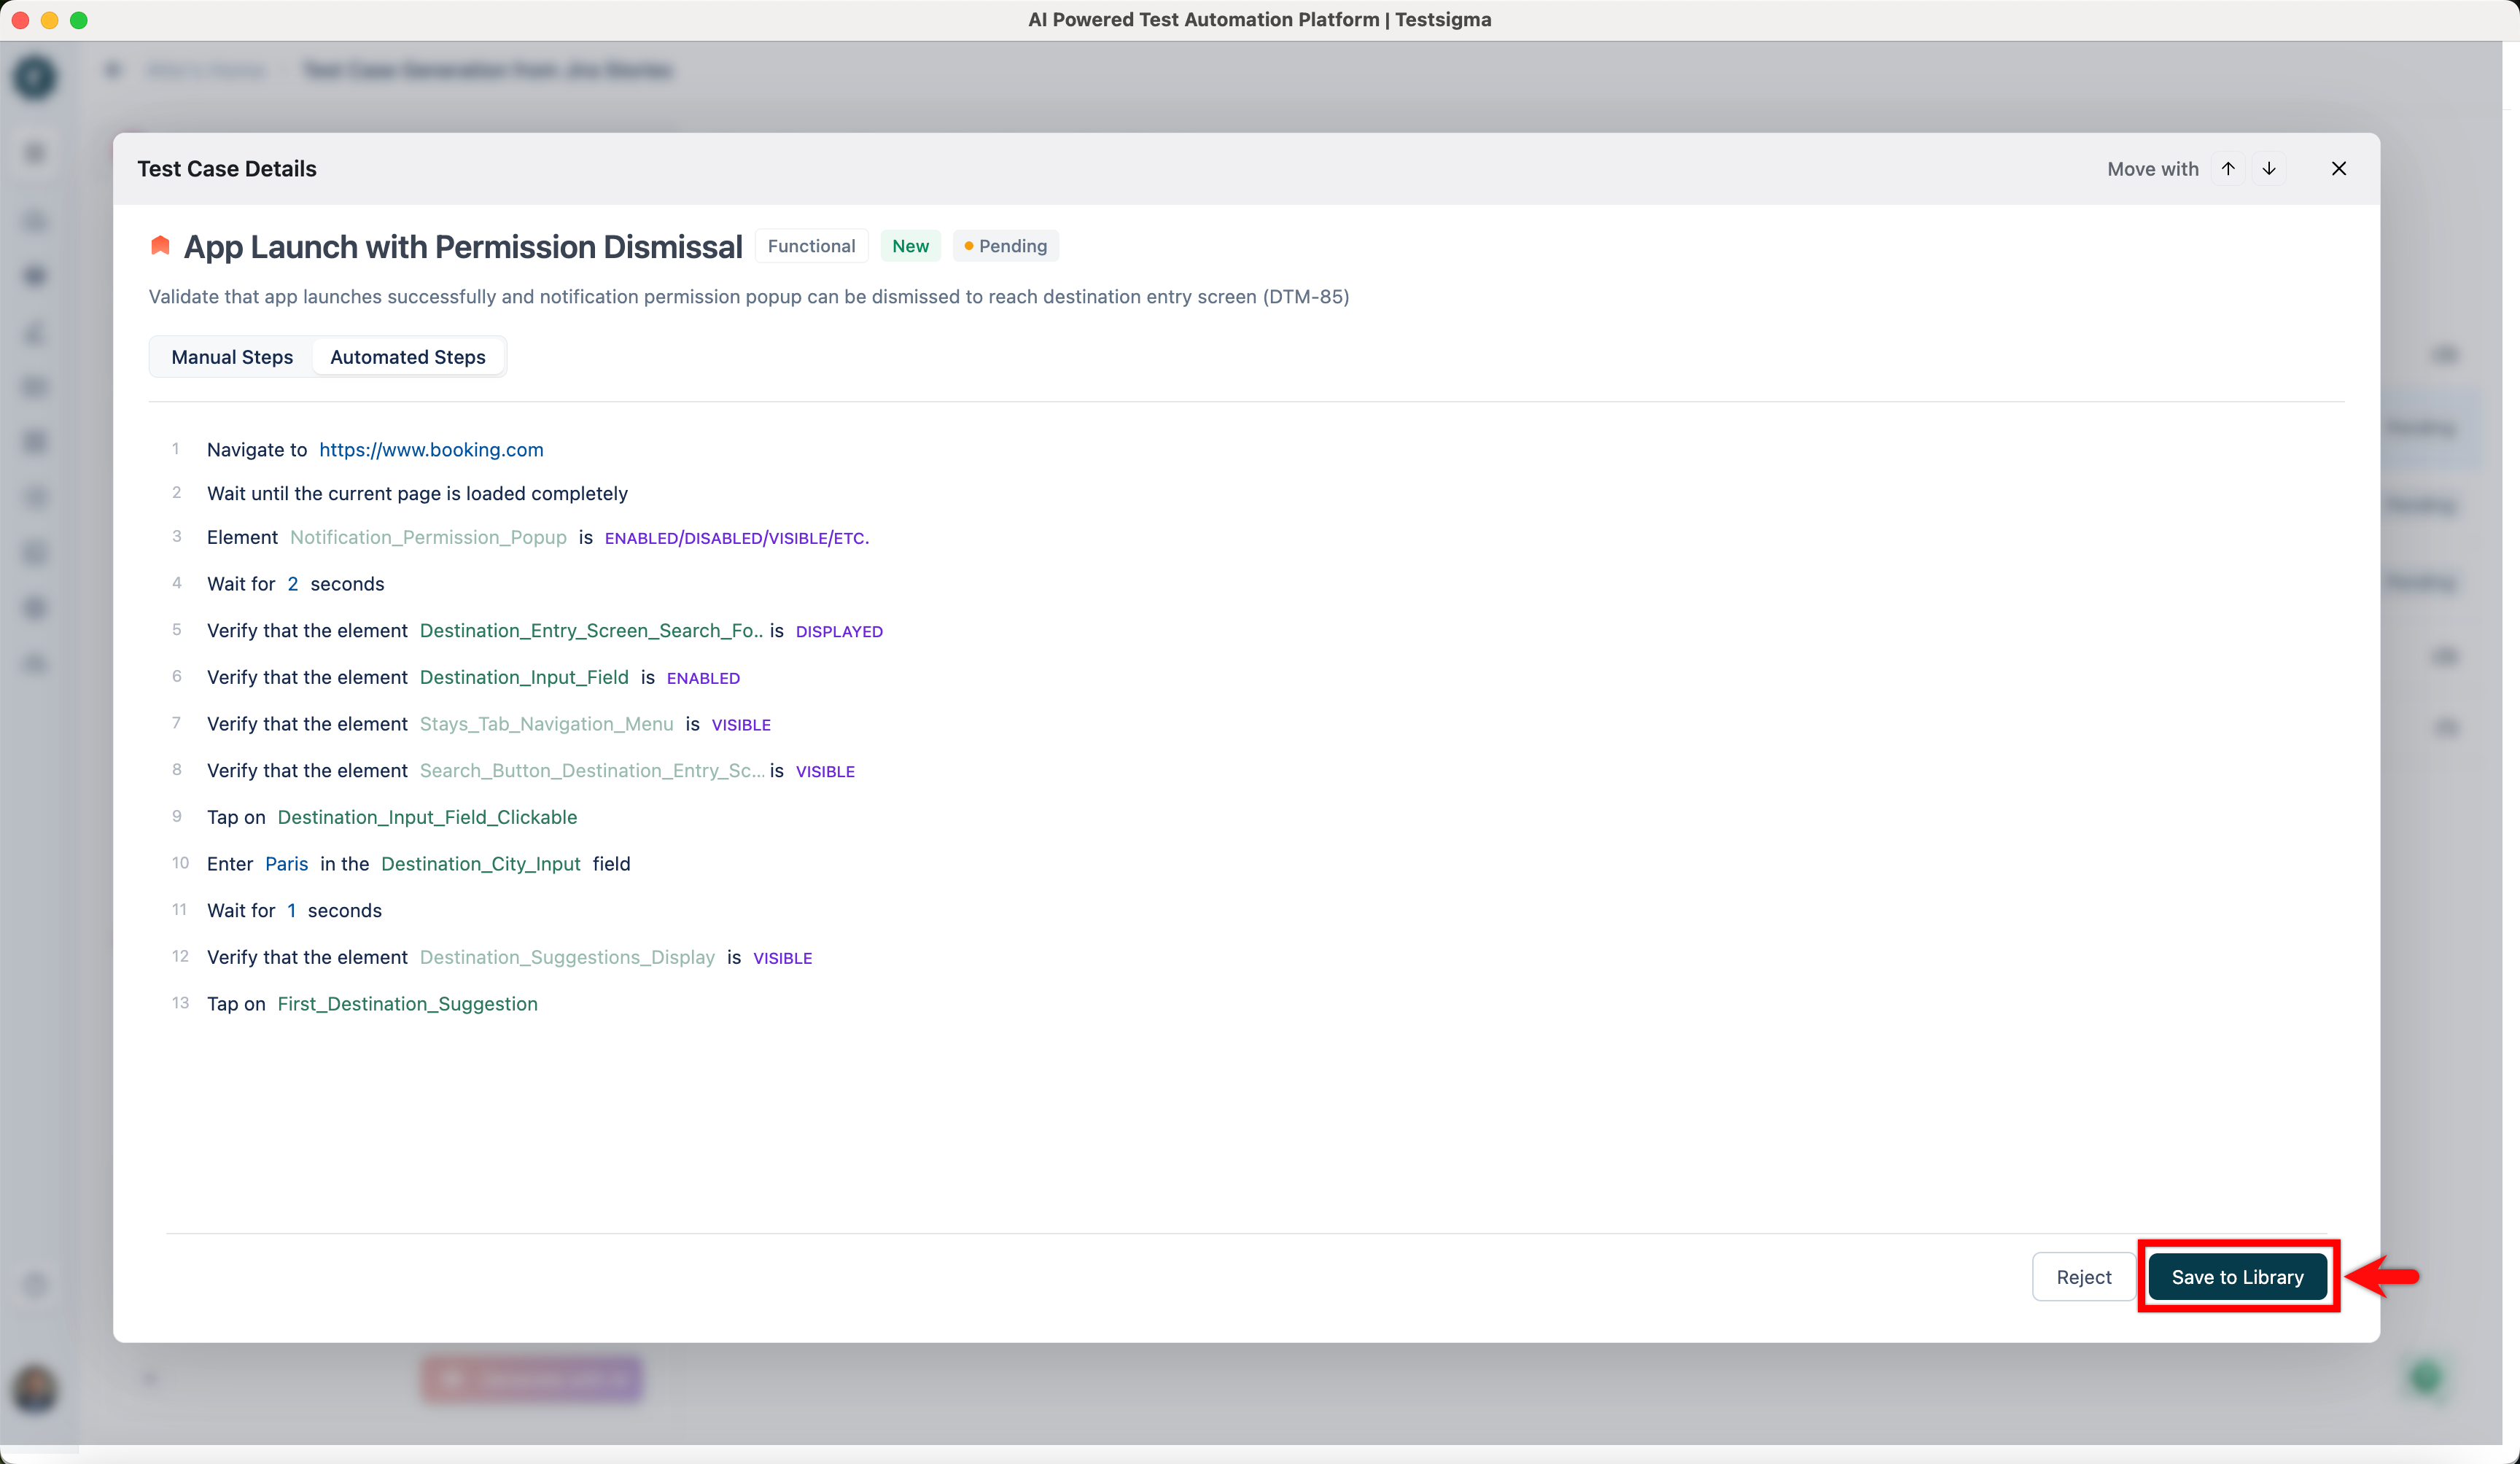
- In the Test Case Details dialog, go to the Manual Steps tab and review the generated steps.
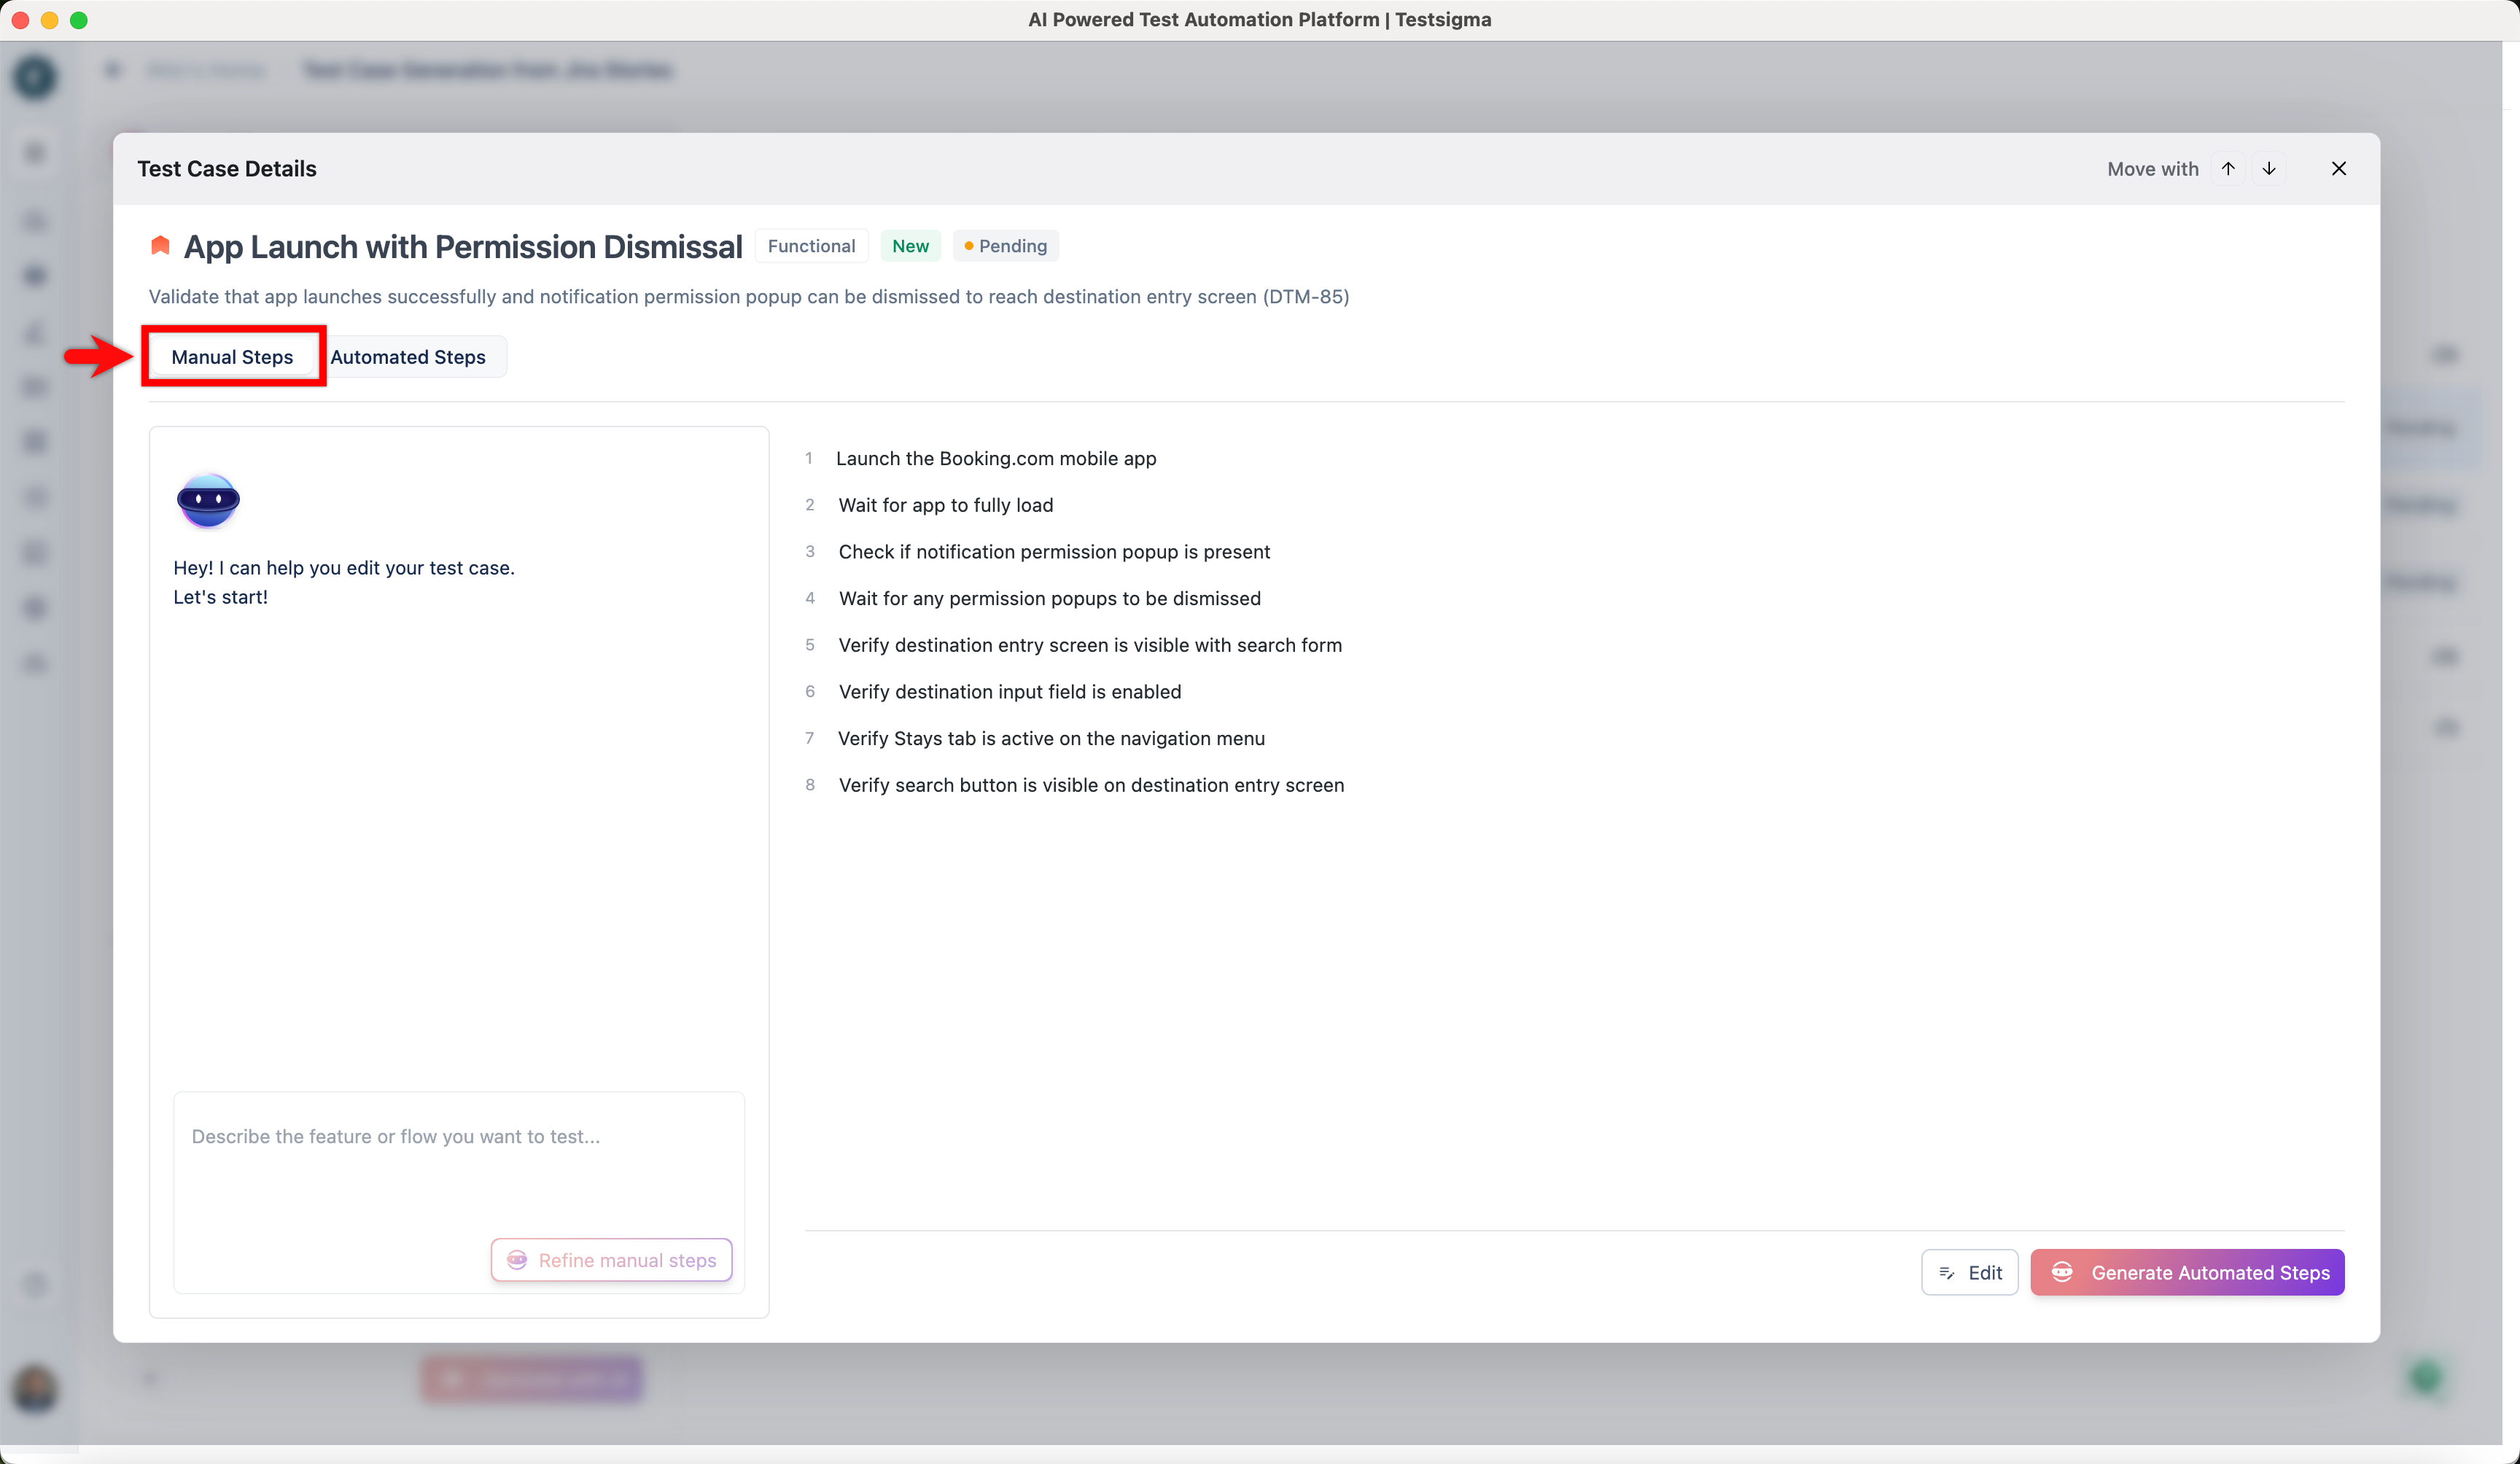
- Click Edit to add a step or block manually, or to modify existing steps.
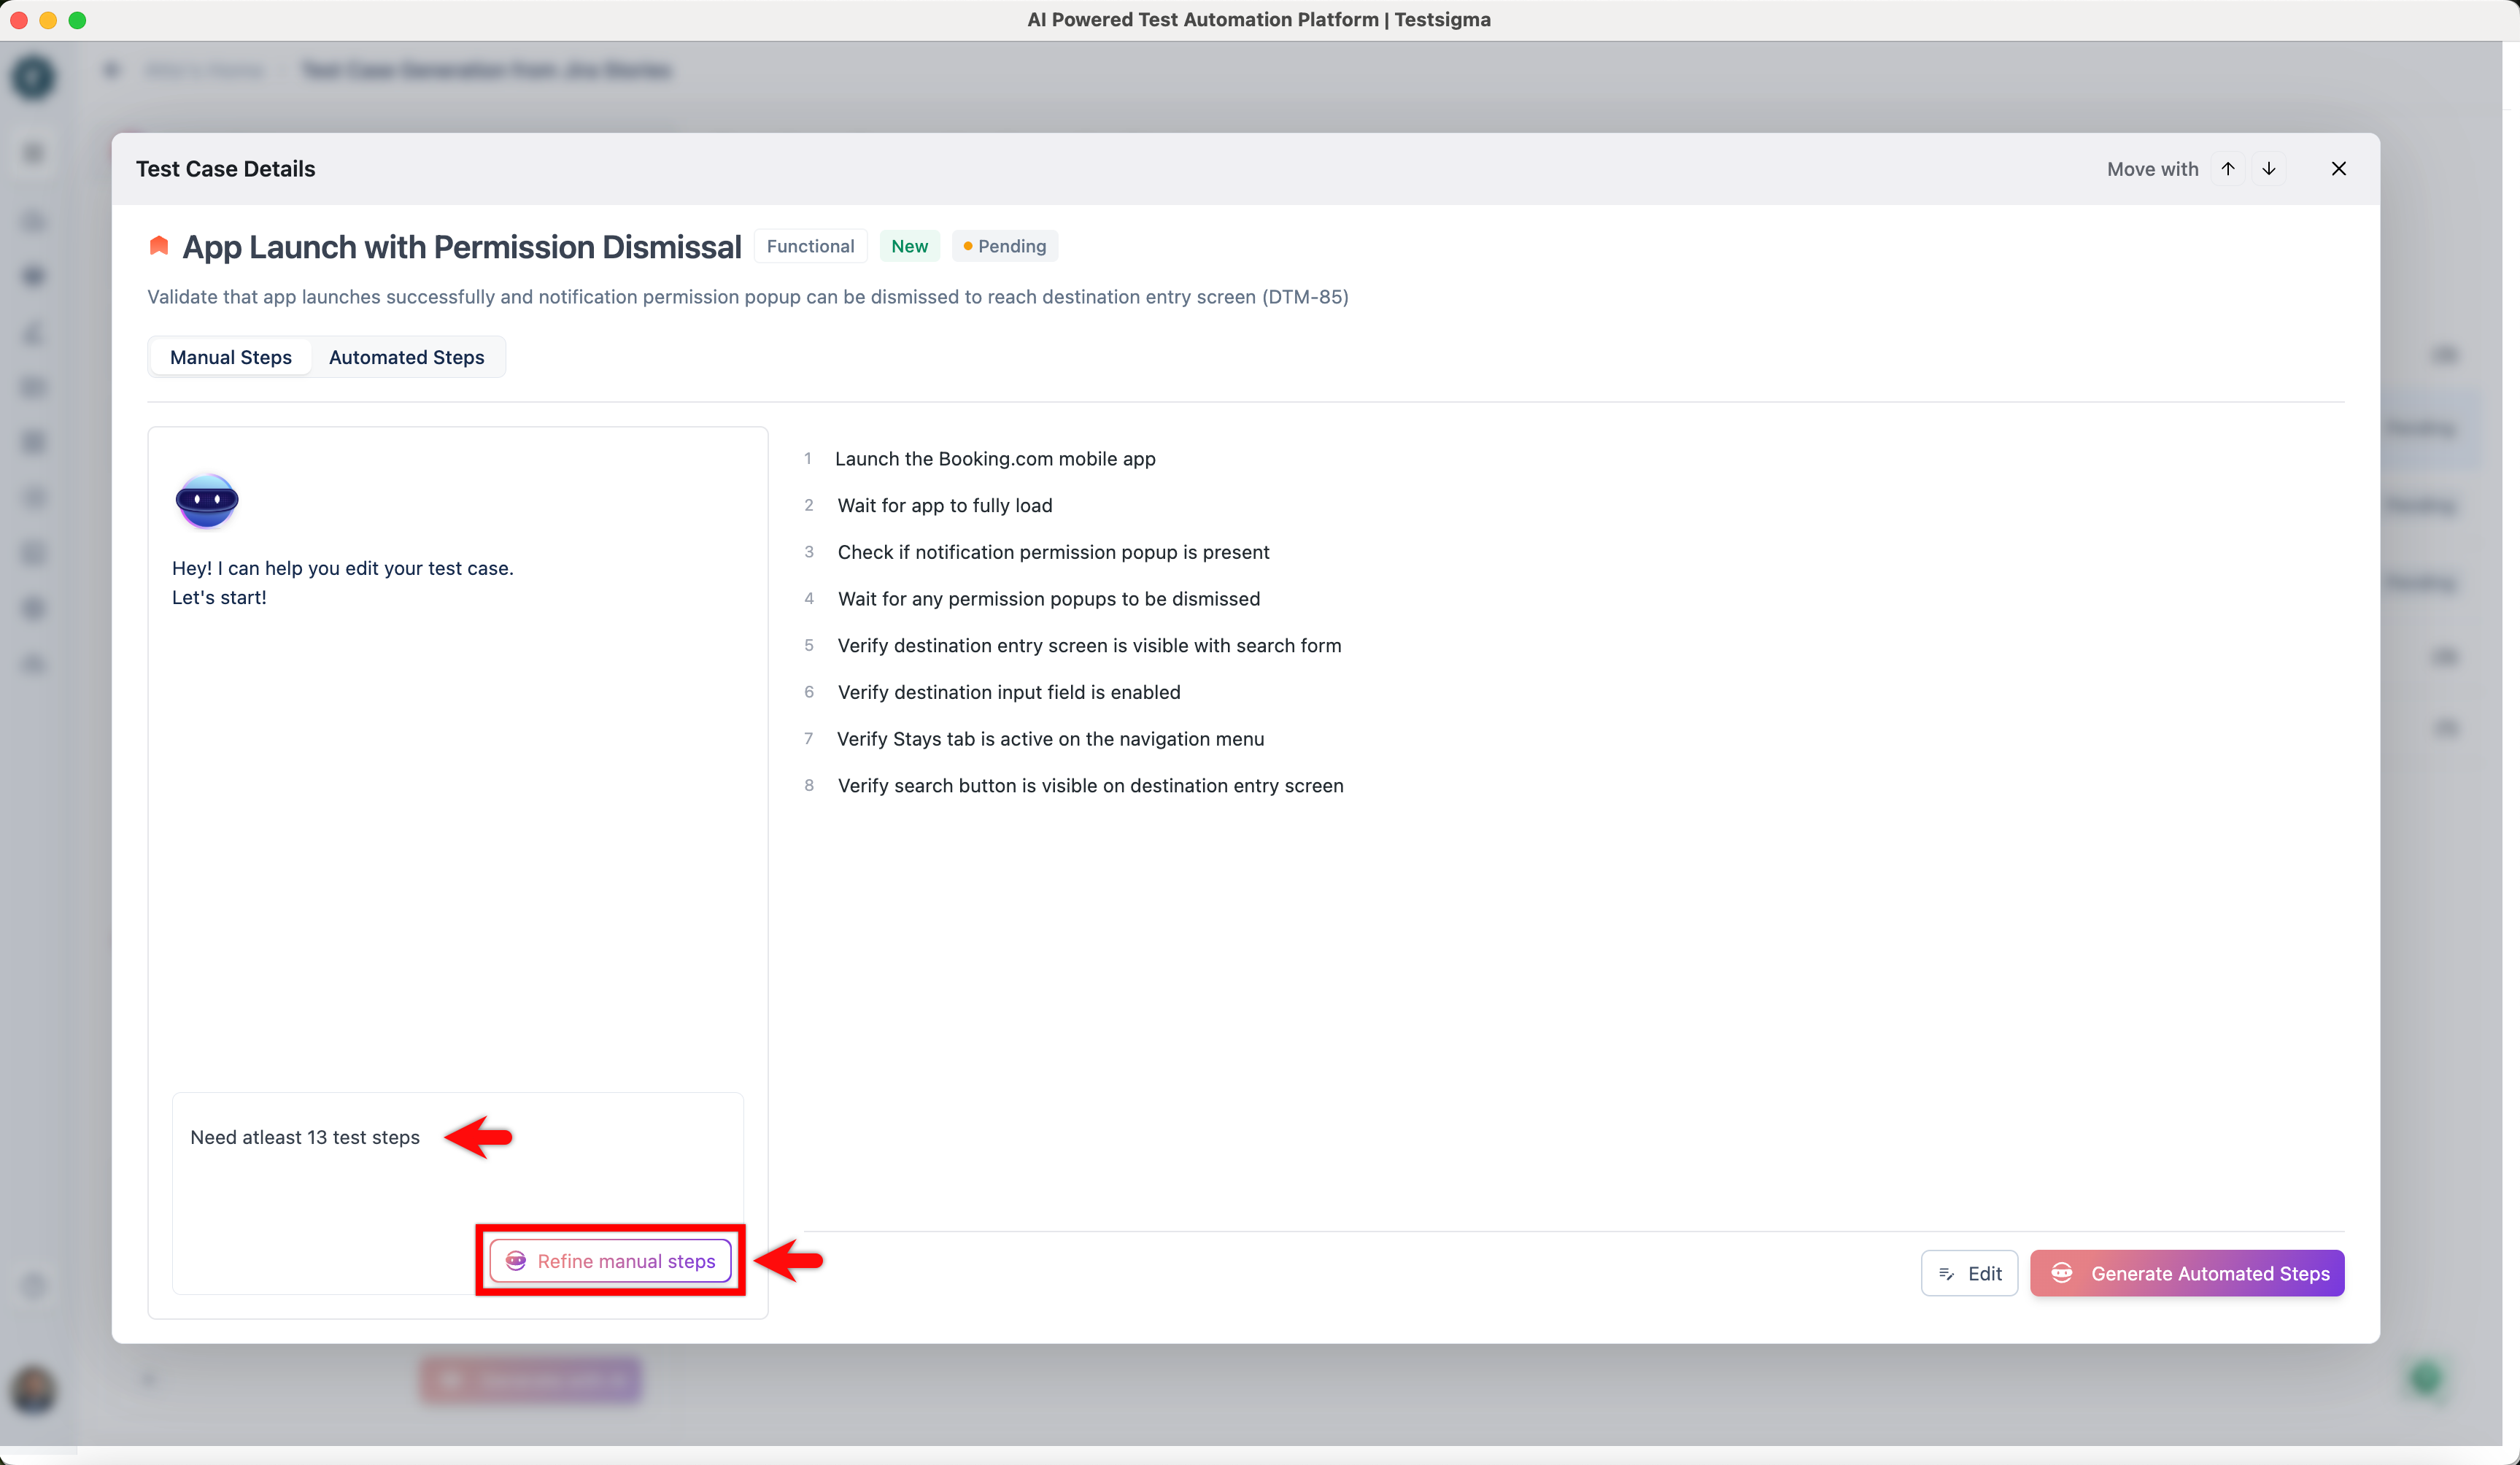
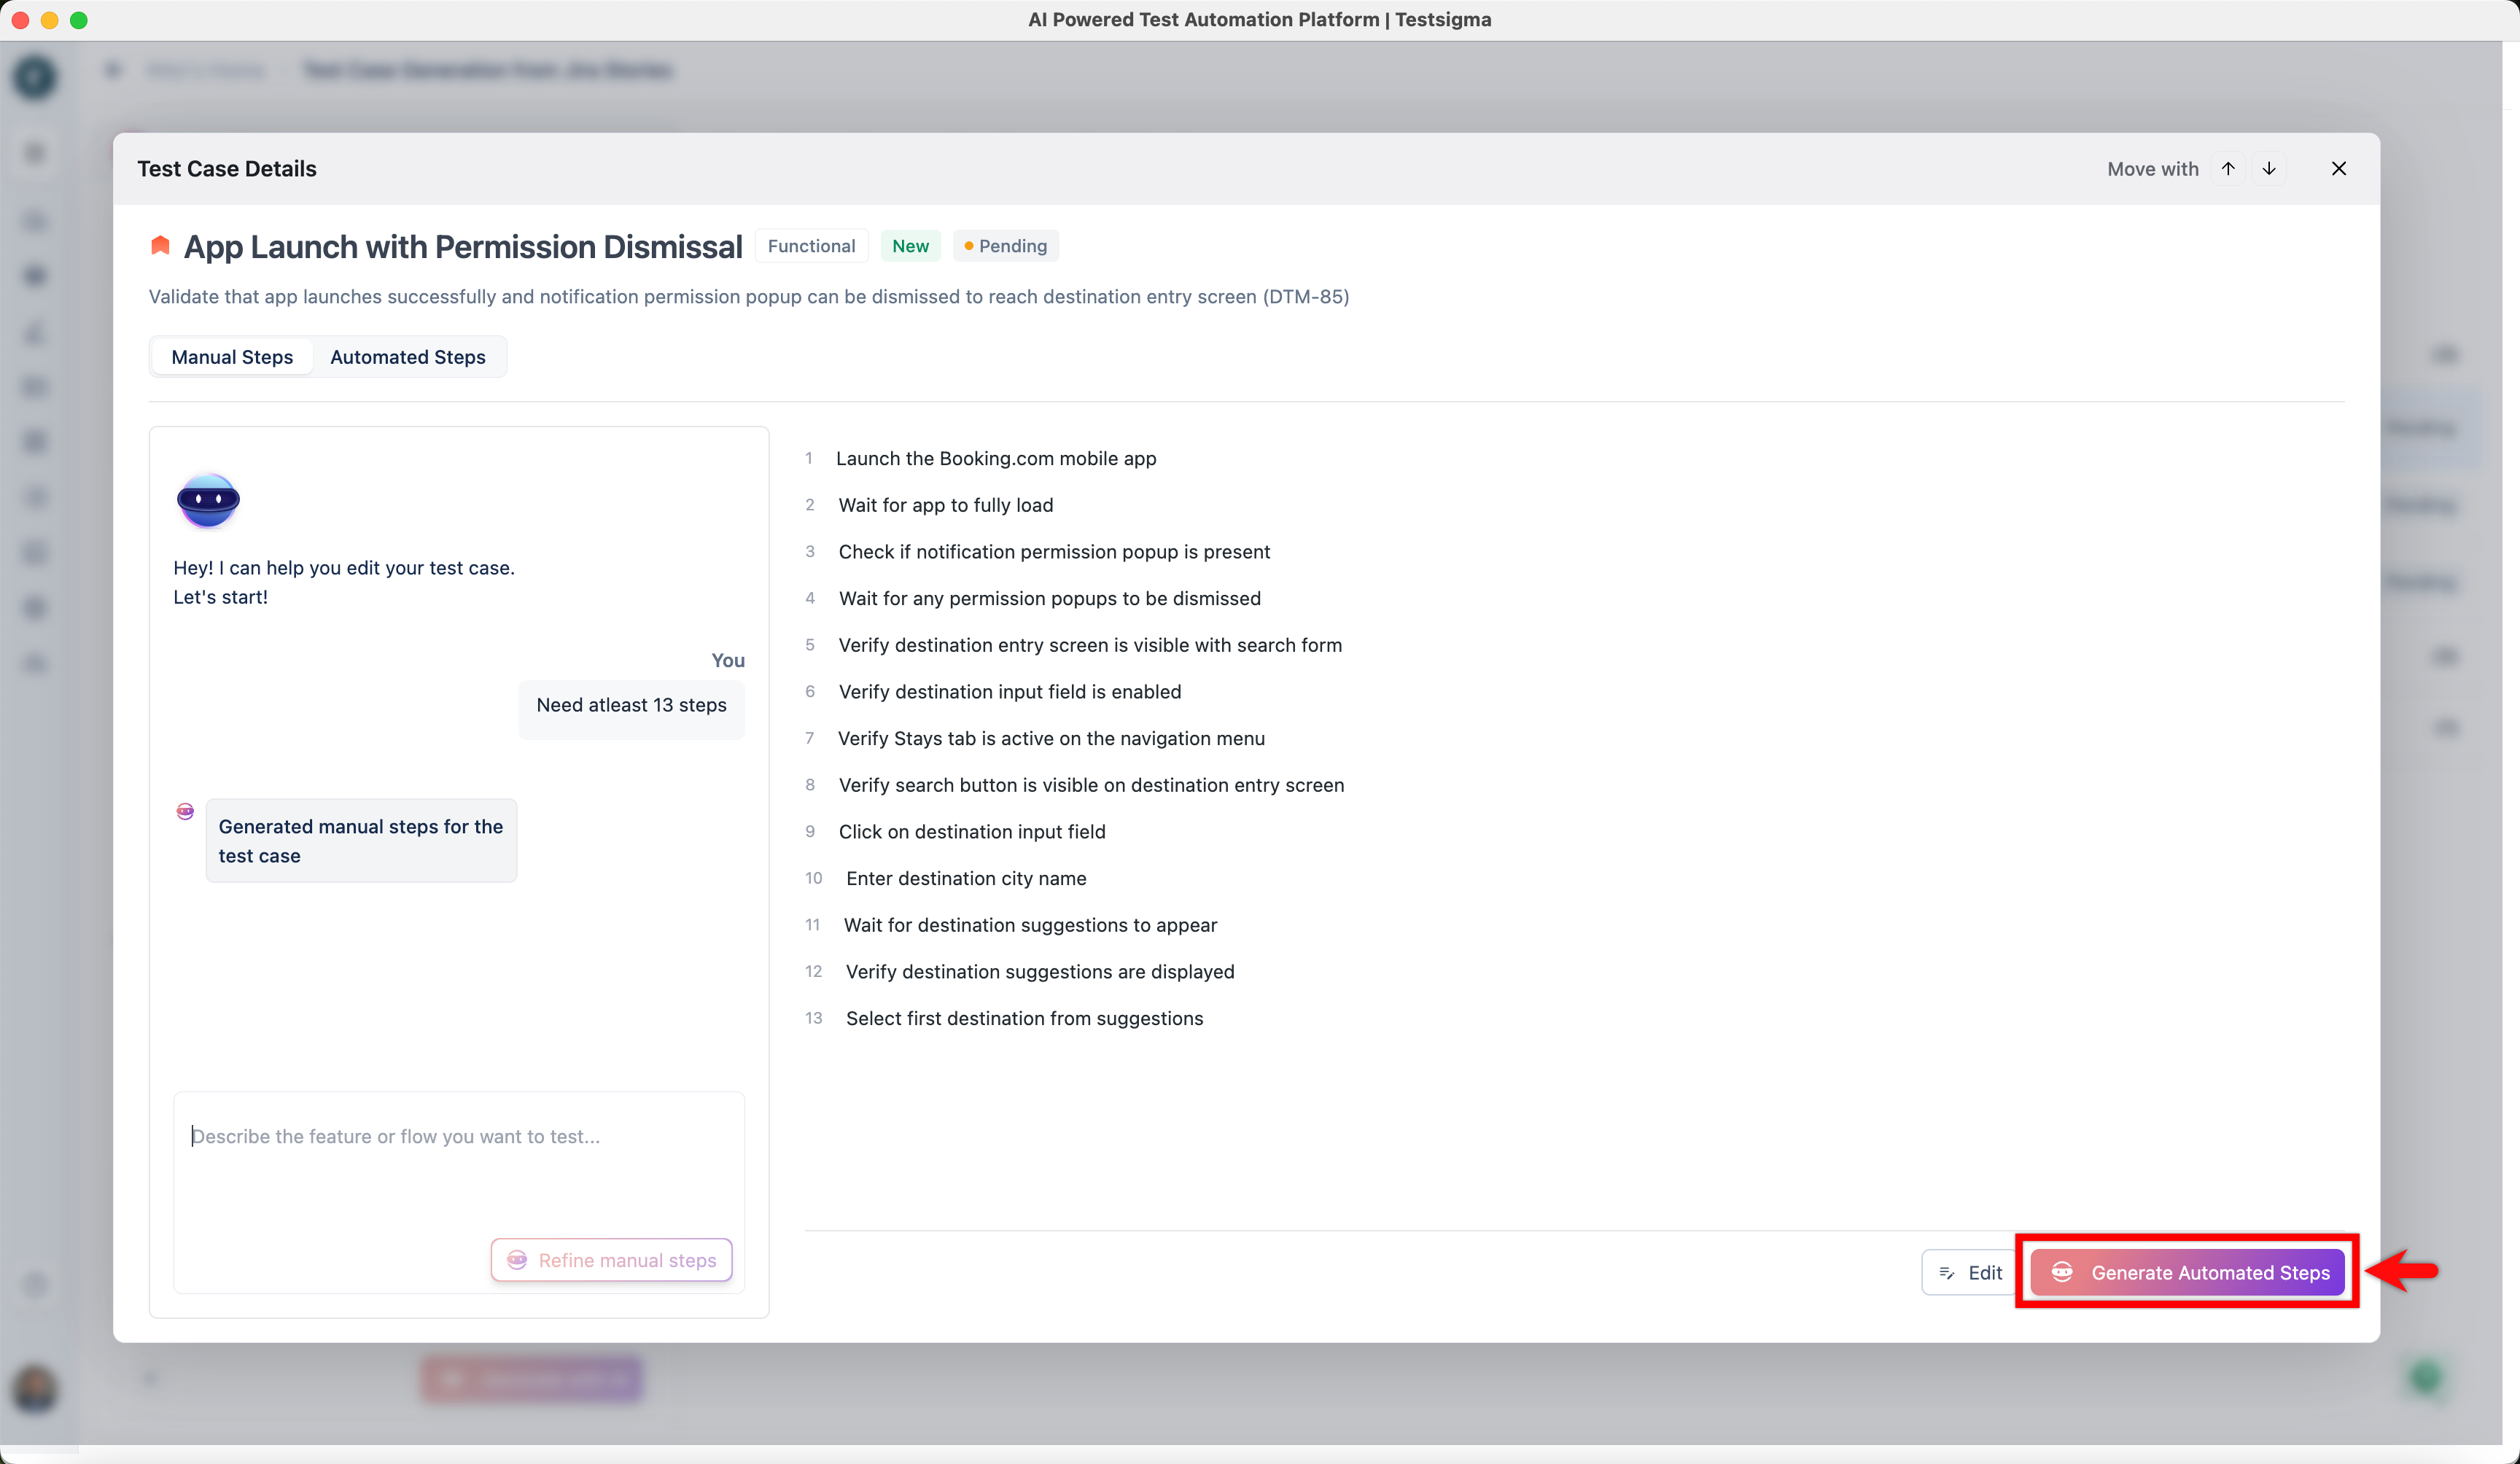
- If you want to refine the steps using Atto, enter a prompt and click Refine manual steps.
- Click Generate Automated Steps to convert the manual steps into NLP-based automated steps.
- Click Save to Library.
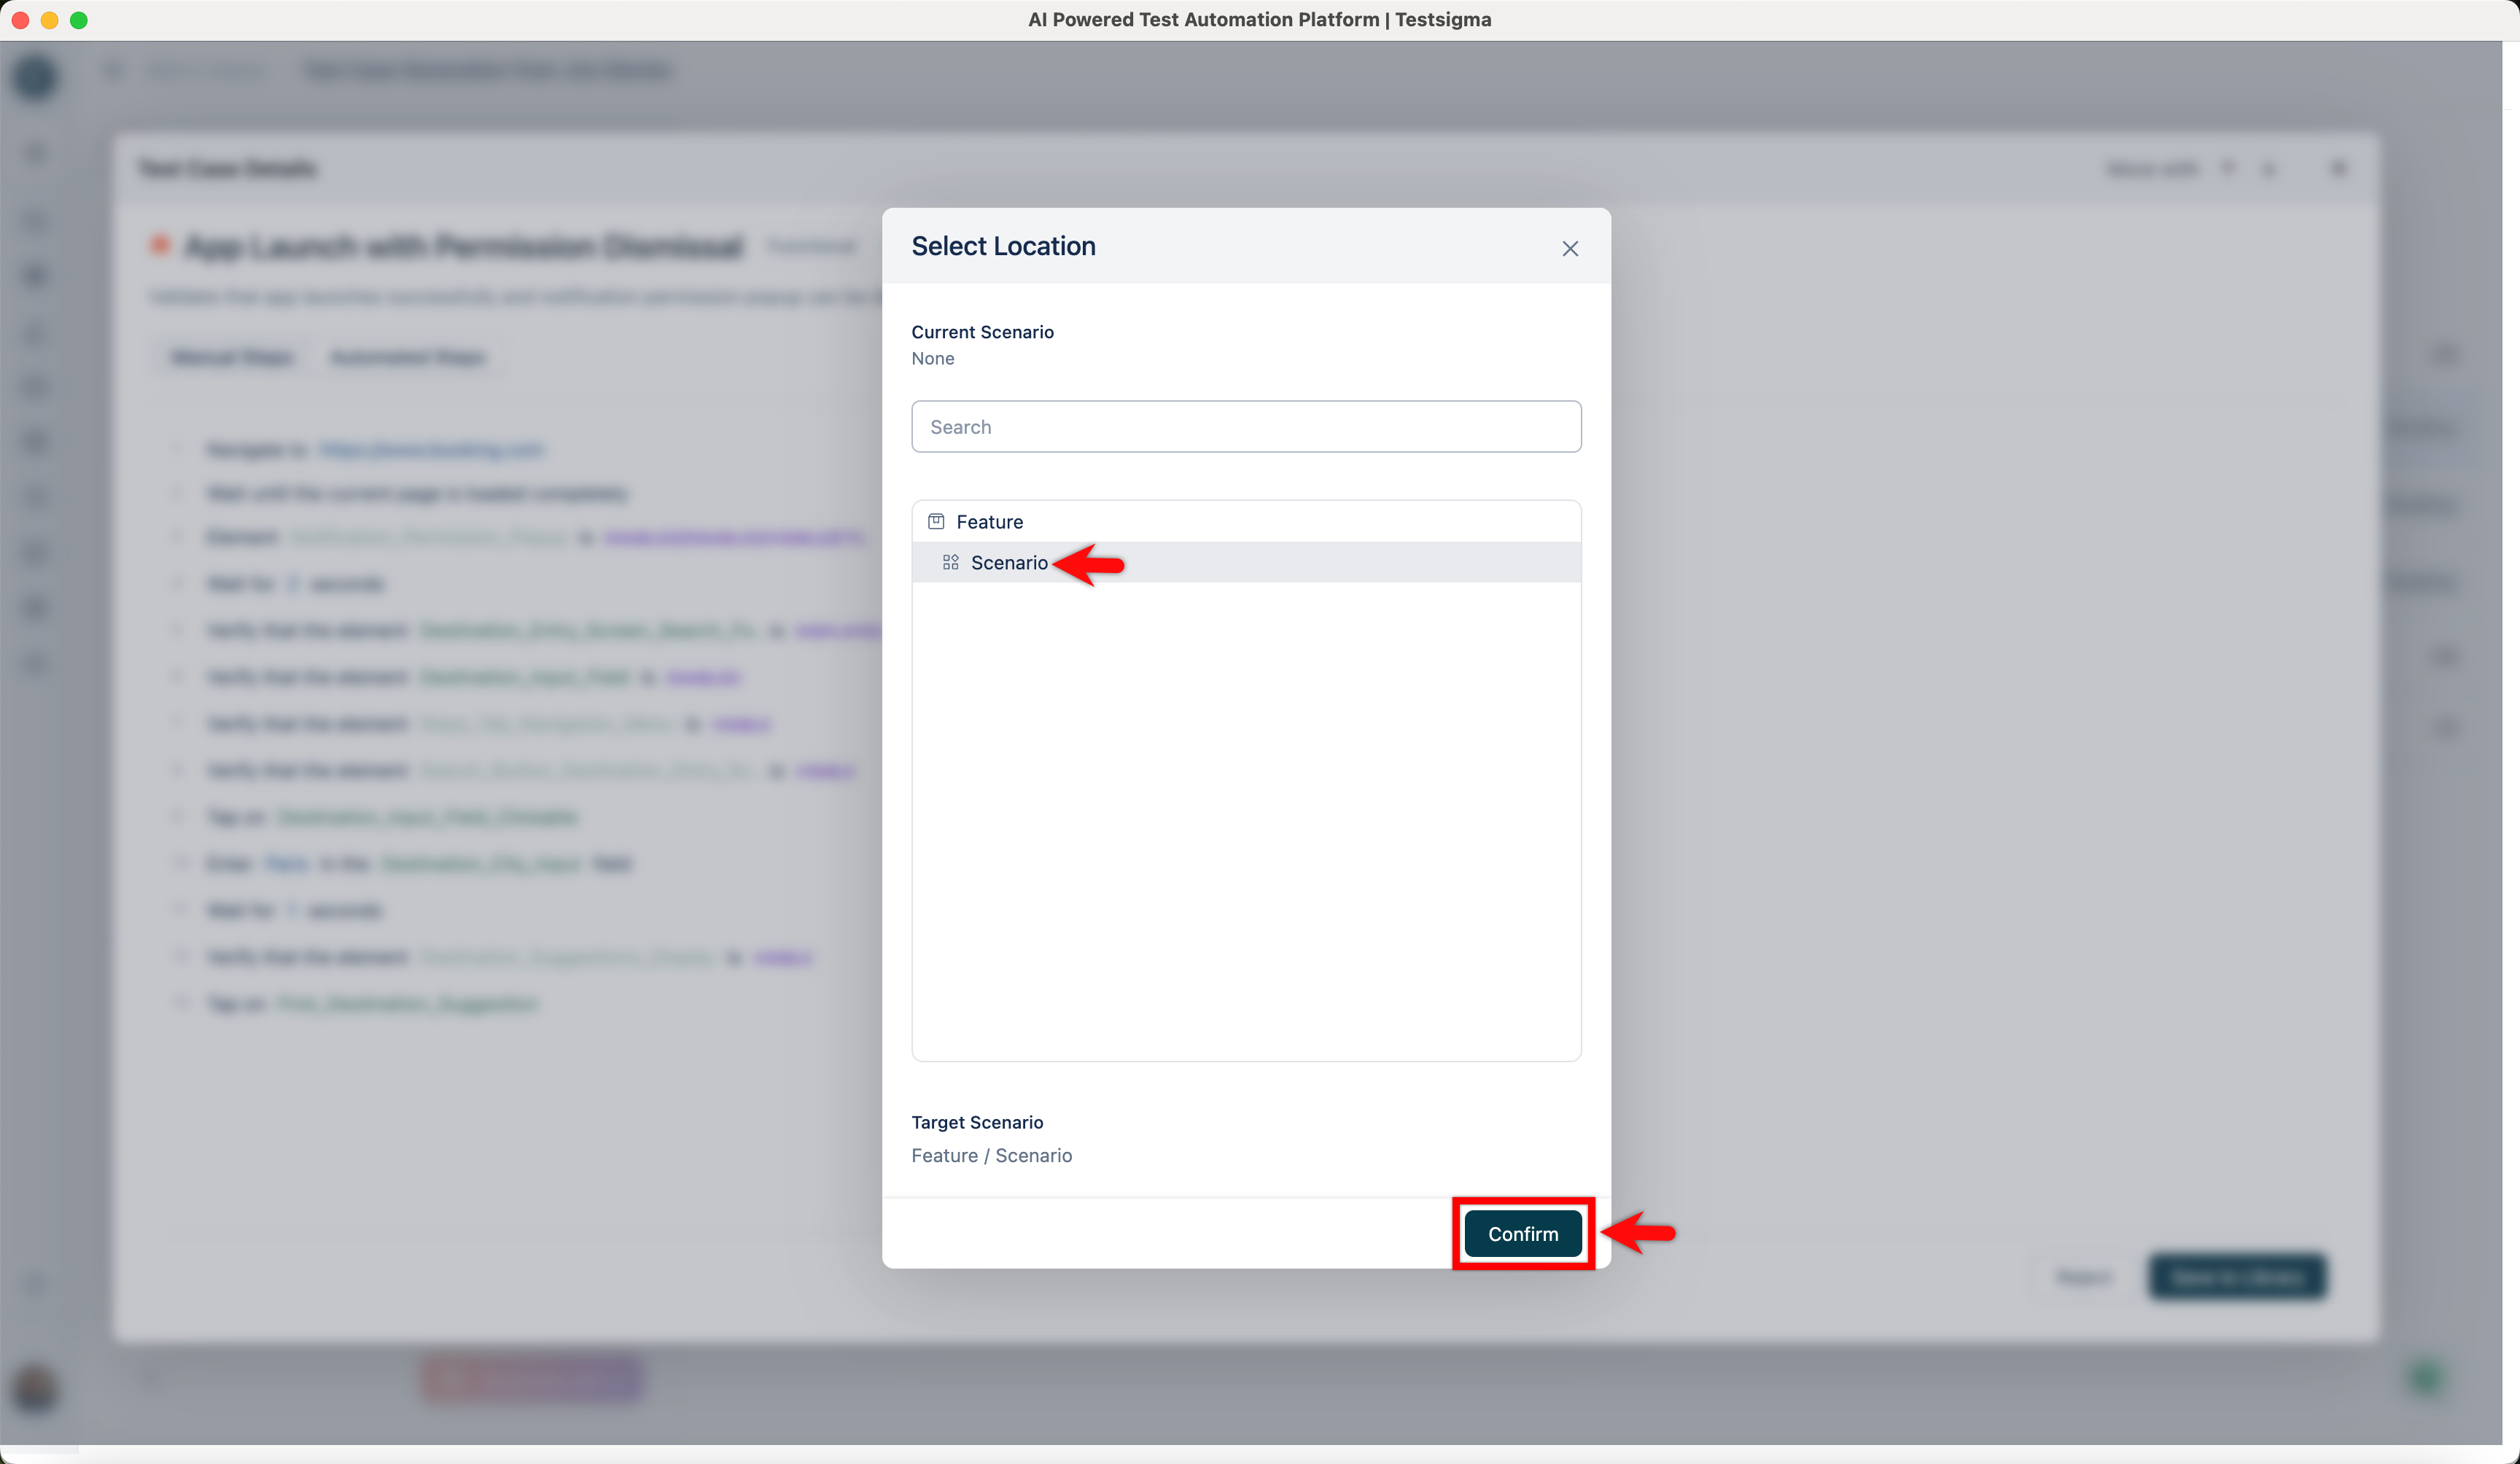
- In the Select Location dialog box, expand the required Feature, select the Scenario where you want to save the automated test case, and click Confirm.
NOTE:
- To learn about Agentic Learning, please refer to the documentation on Generator Agent.
- To understand the difference between Run with Copilot and Agentic Learning, please refer to the documentation on Run with Copilot vs Agentic Learning.
Want to contribute or report missing content?