
Generator Agent in Testsigma
The Generator Agent in Testsigma enables you to generate and automate test cases by analyzing application behavior, user workflows, and supported input sources. It converts manual test steps into executable automated steps using AI, reducing manual effort during test creation.
You can generate test cases from sources such as Jira requirements, files, and prompts, and automate them using Atto’s Live Editor. During live learning, the Generator Agent captures application elements, allows you to record additional manual steps, and provides controls to pause, reset, or stop the learning session.
After automation, you can execute the test case locally, review the generated steps, and save the test case to the test case library. This article describes how to generate, automate, and manage test cases using the Generator Agent and Atto’s Live Editor in Testsigma.
Prerequisites
Before you begin, ensure that:
- Testsigma Terminal is installed.
- Live Editor is ready for use.
Generate Test Cases Using Generator Agent
- From the left navigation bar, go to Atto’s Home.
- Click Generate with AI.
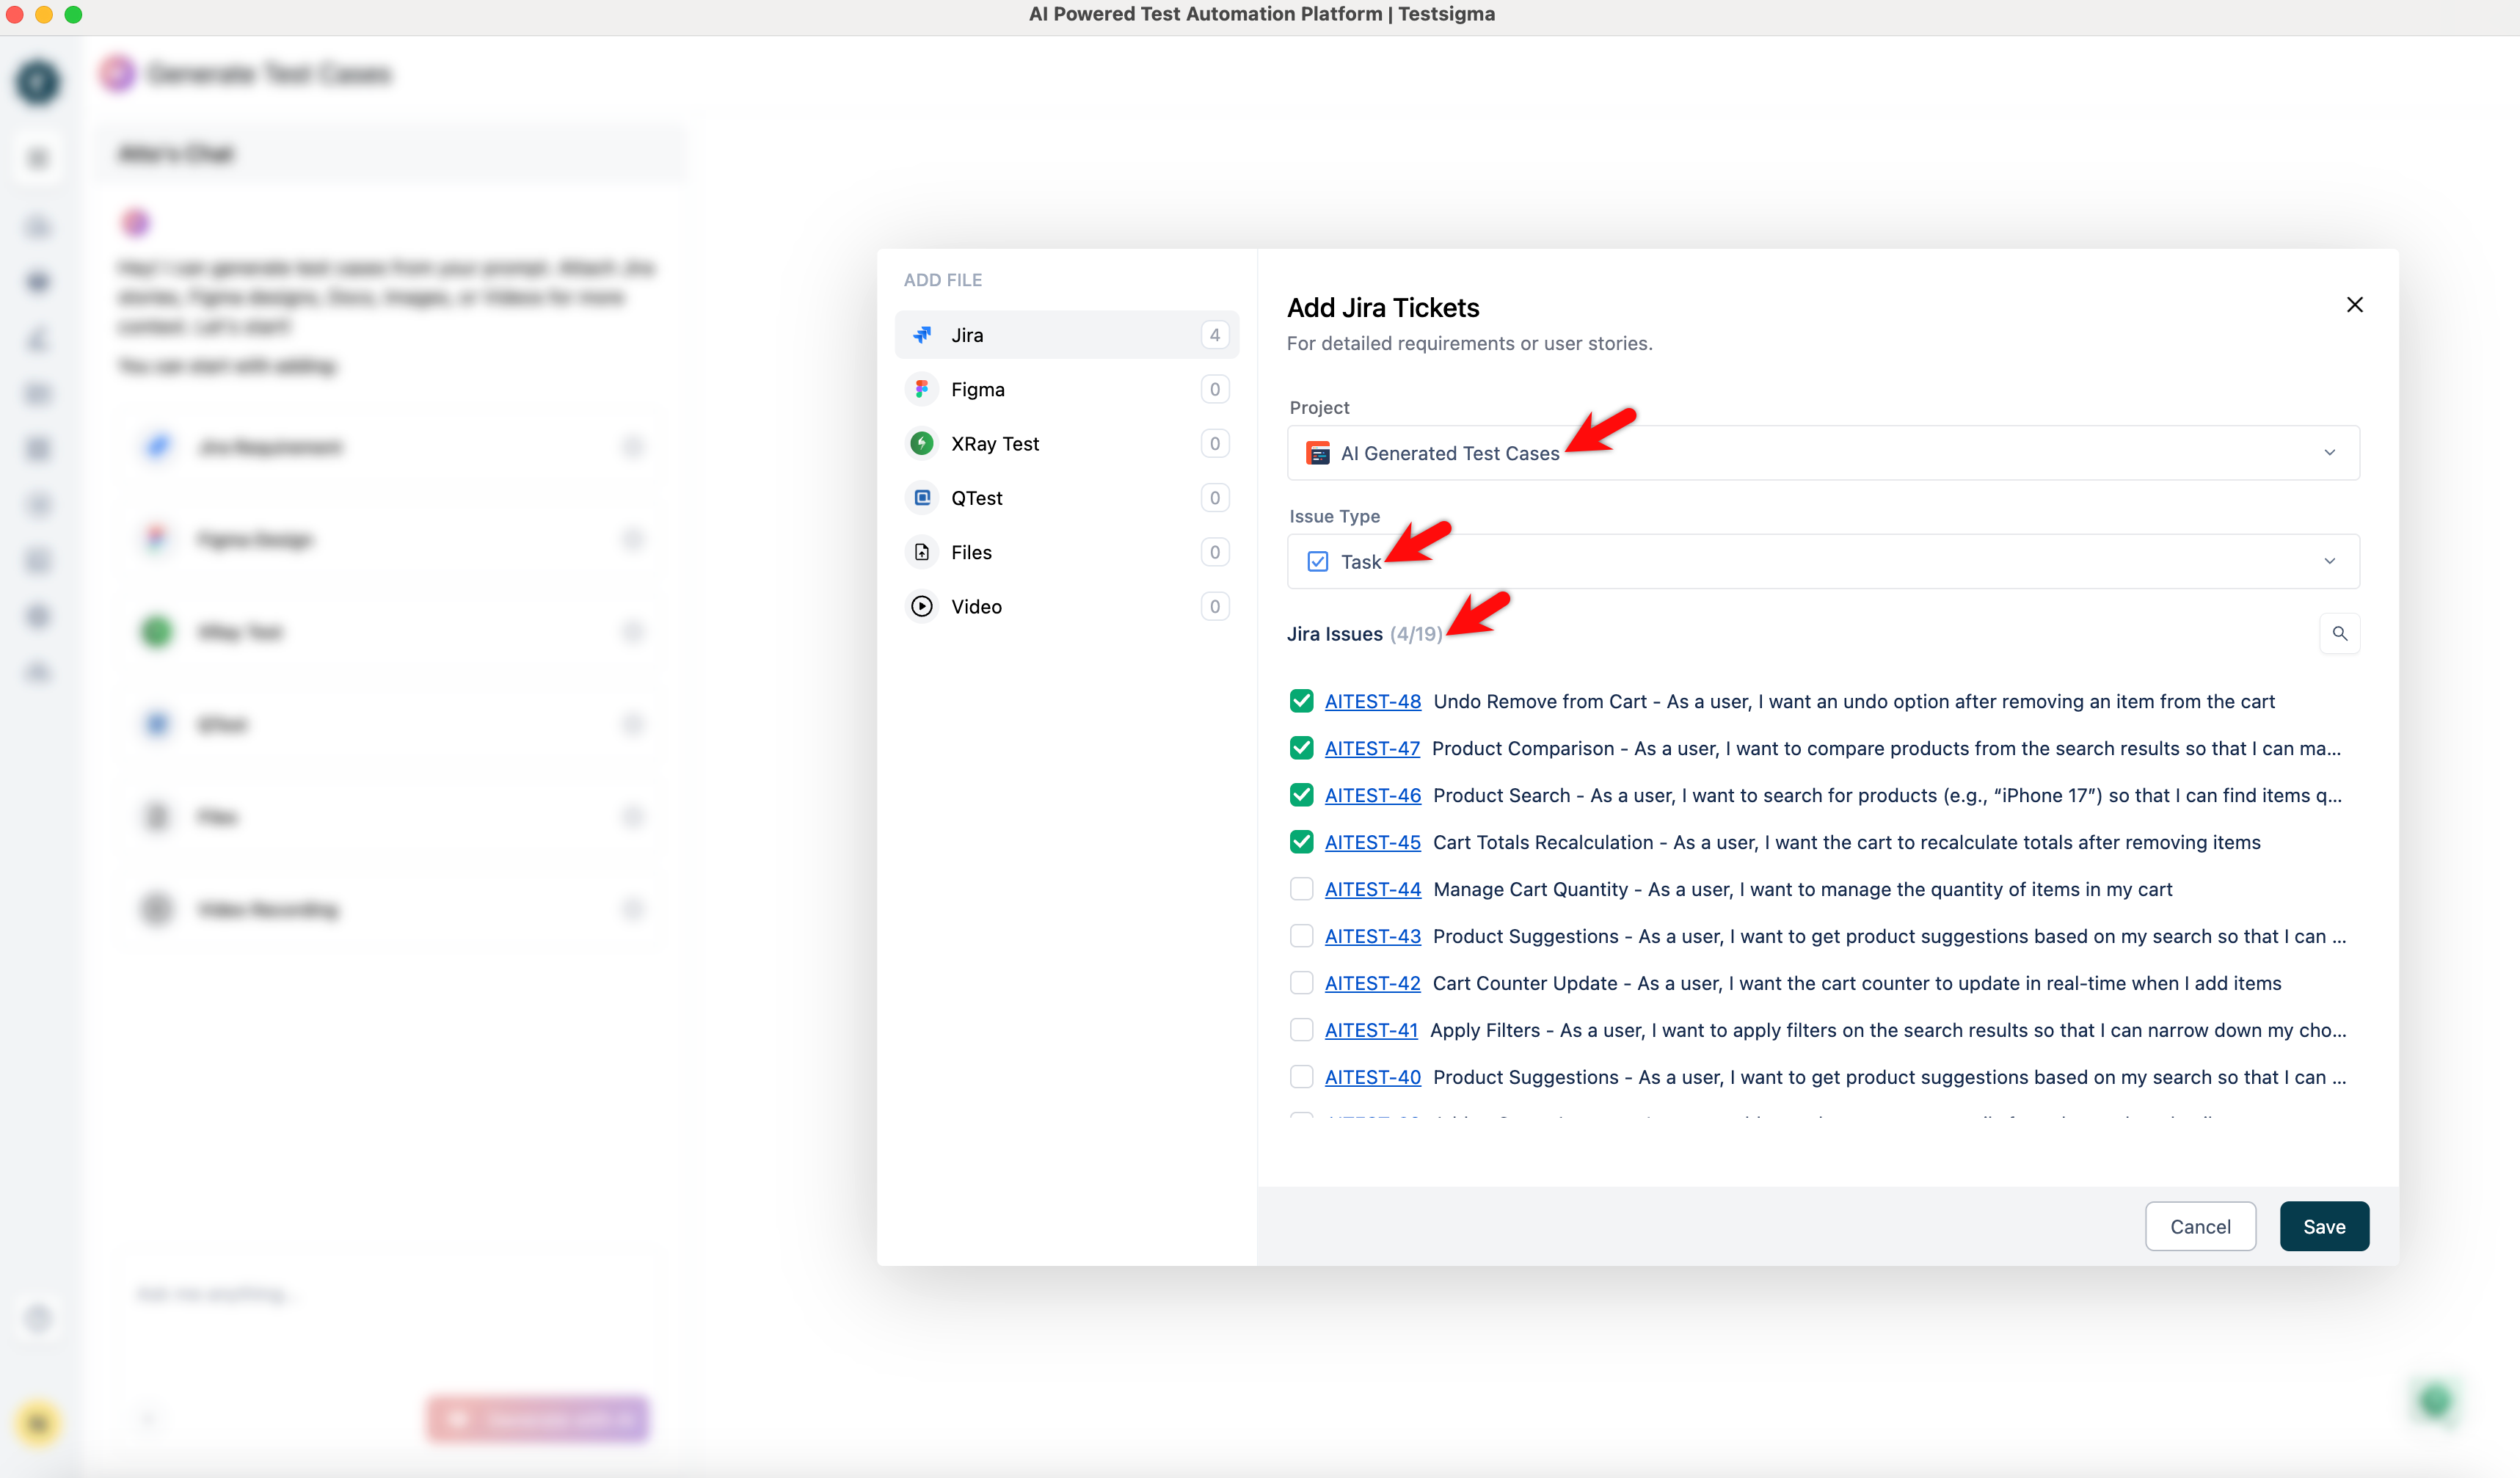
- In the Generate Test Cases section, select Jira Requirements.
-
In the Add Jira Tickets dialog:
- From the Project dropdown, select the relevant Jira project.
-
Under Issue Type, select one of the following:
- If you select Epic, choose the stories for which you want to generate test cases.
- If you select Story, choose all the stories for which you want to generate test cases.
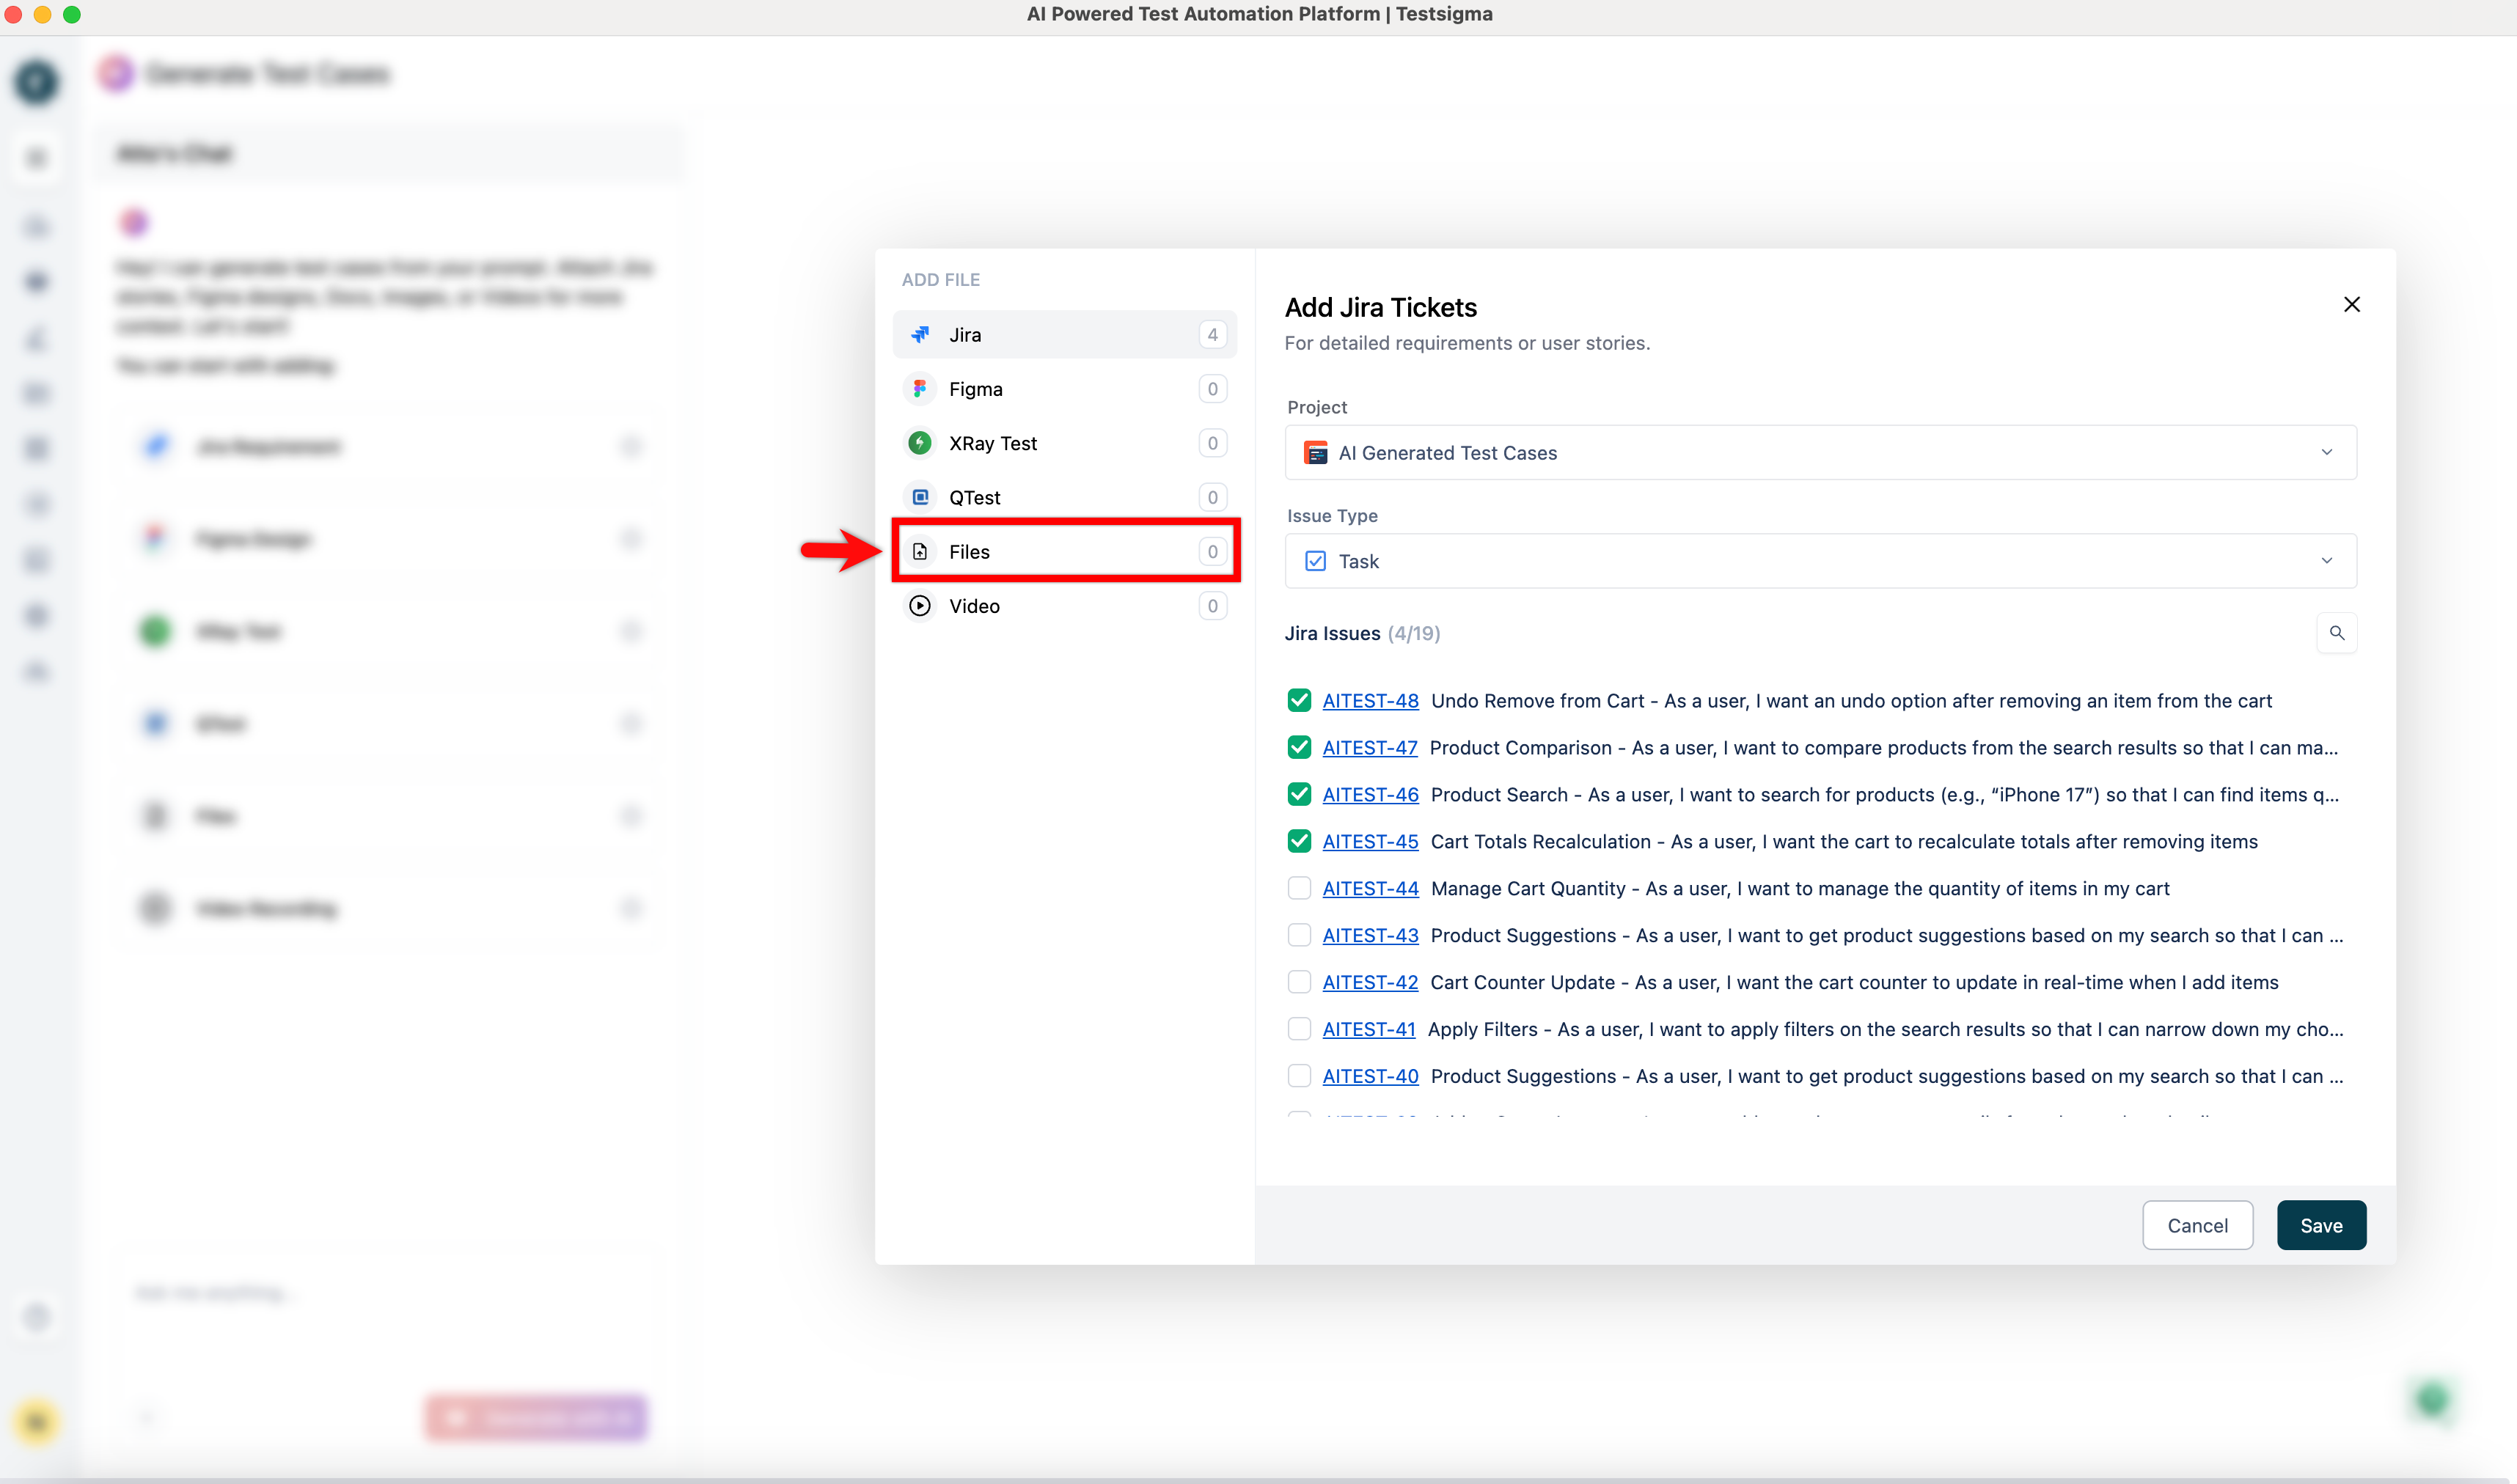
- In the Add Jira Tickets dialog, click Files from the ADD FILES menu.
-
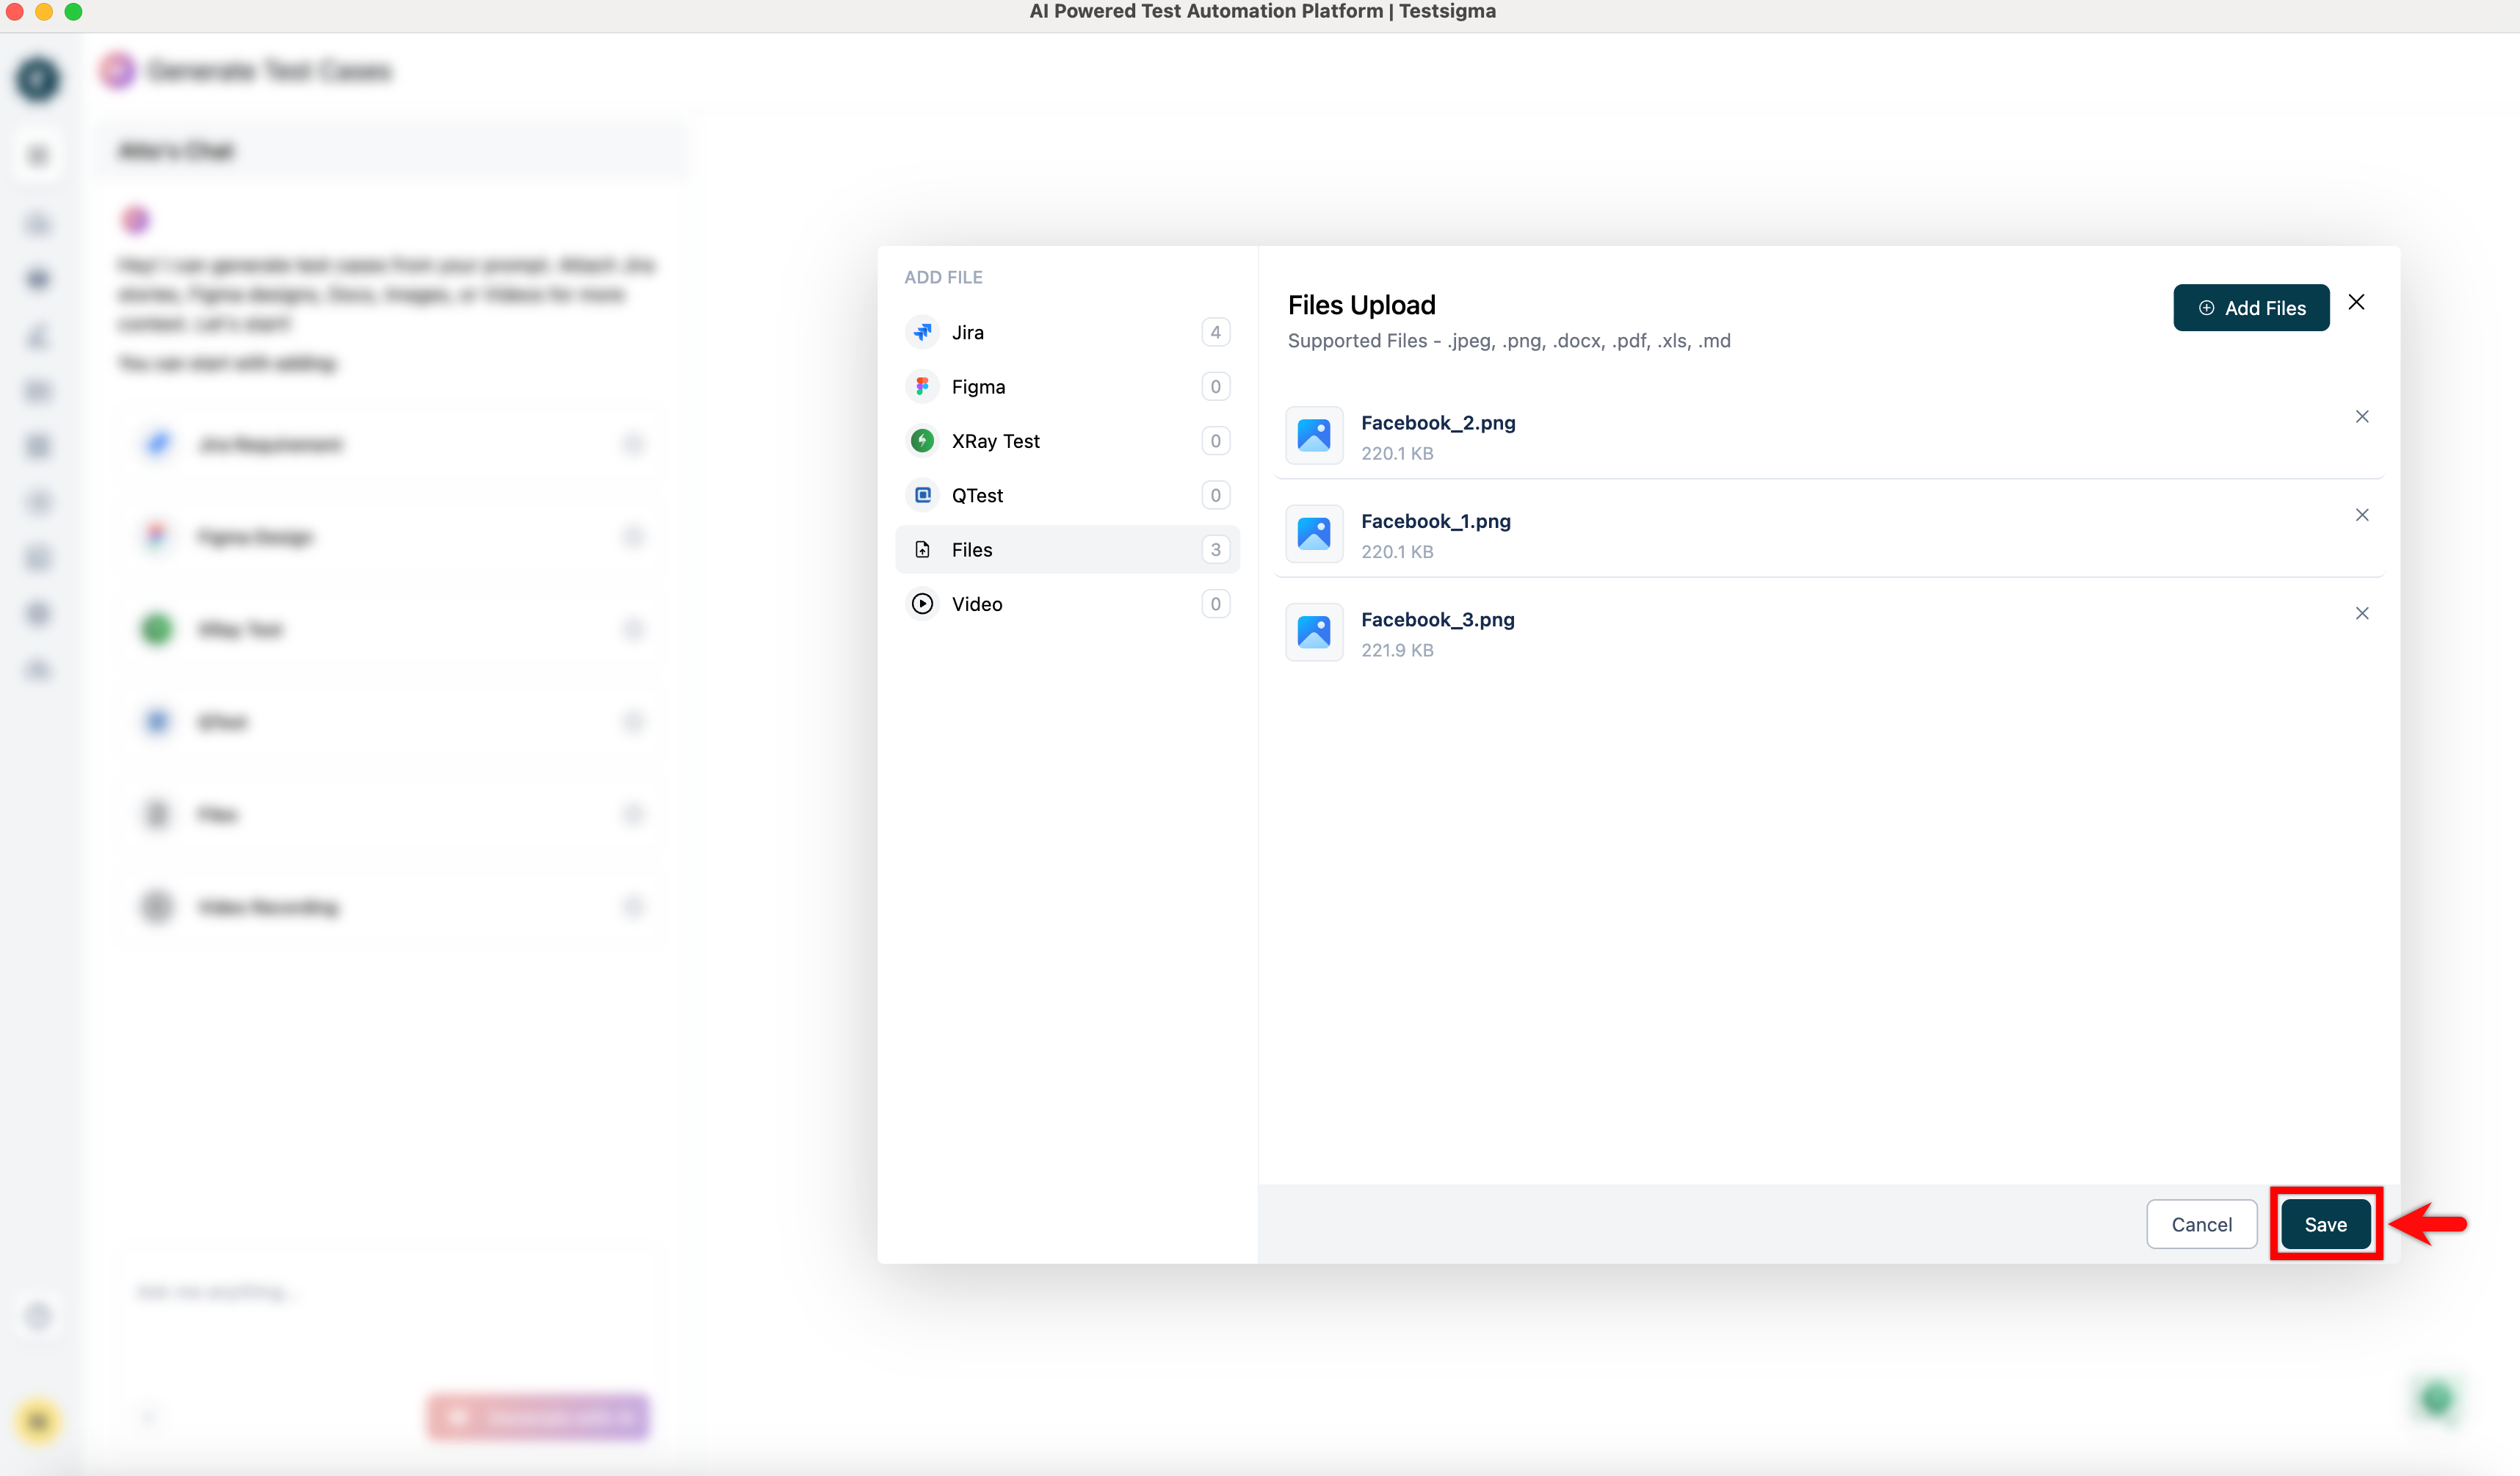
In the Files Upload dialog:
- Click Add Files.
- Click Browse, and select one or more supported files.
- Click Add Files.
- Click Save.
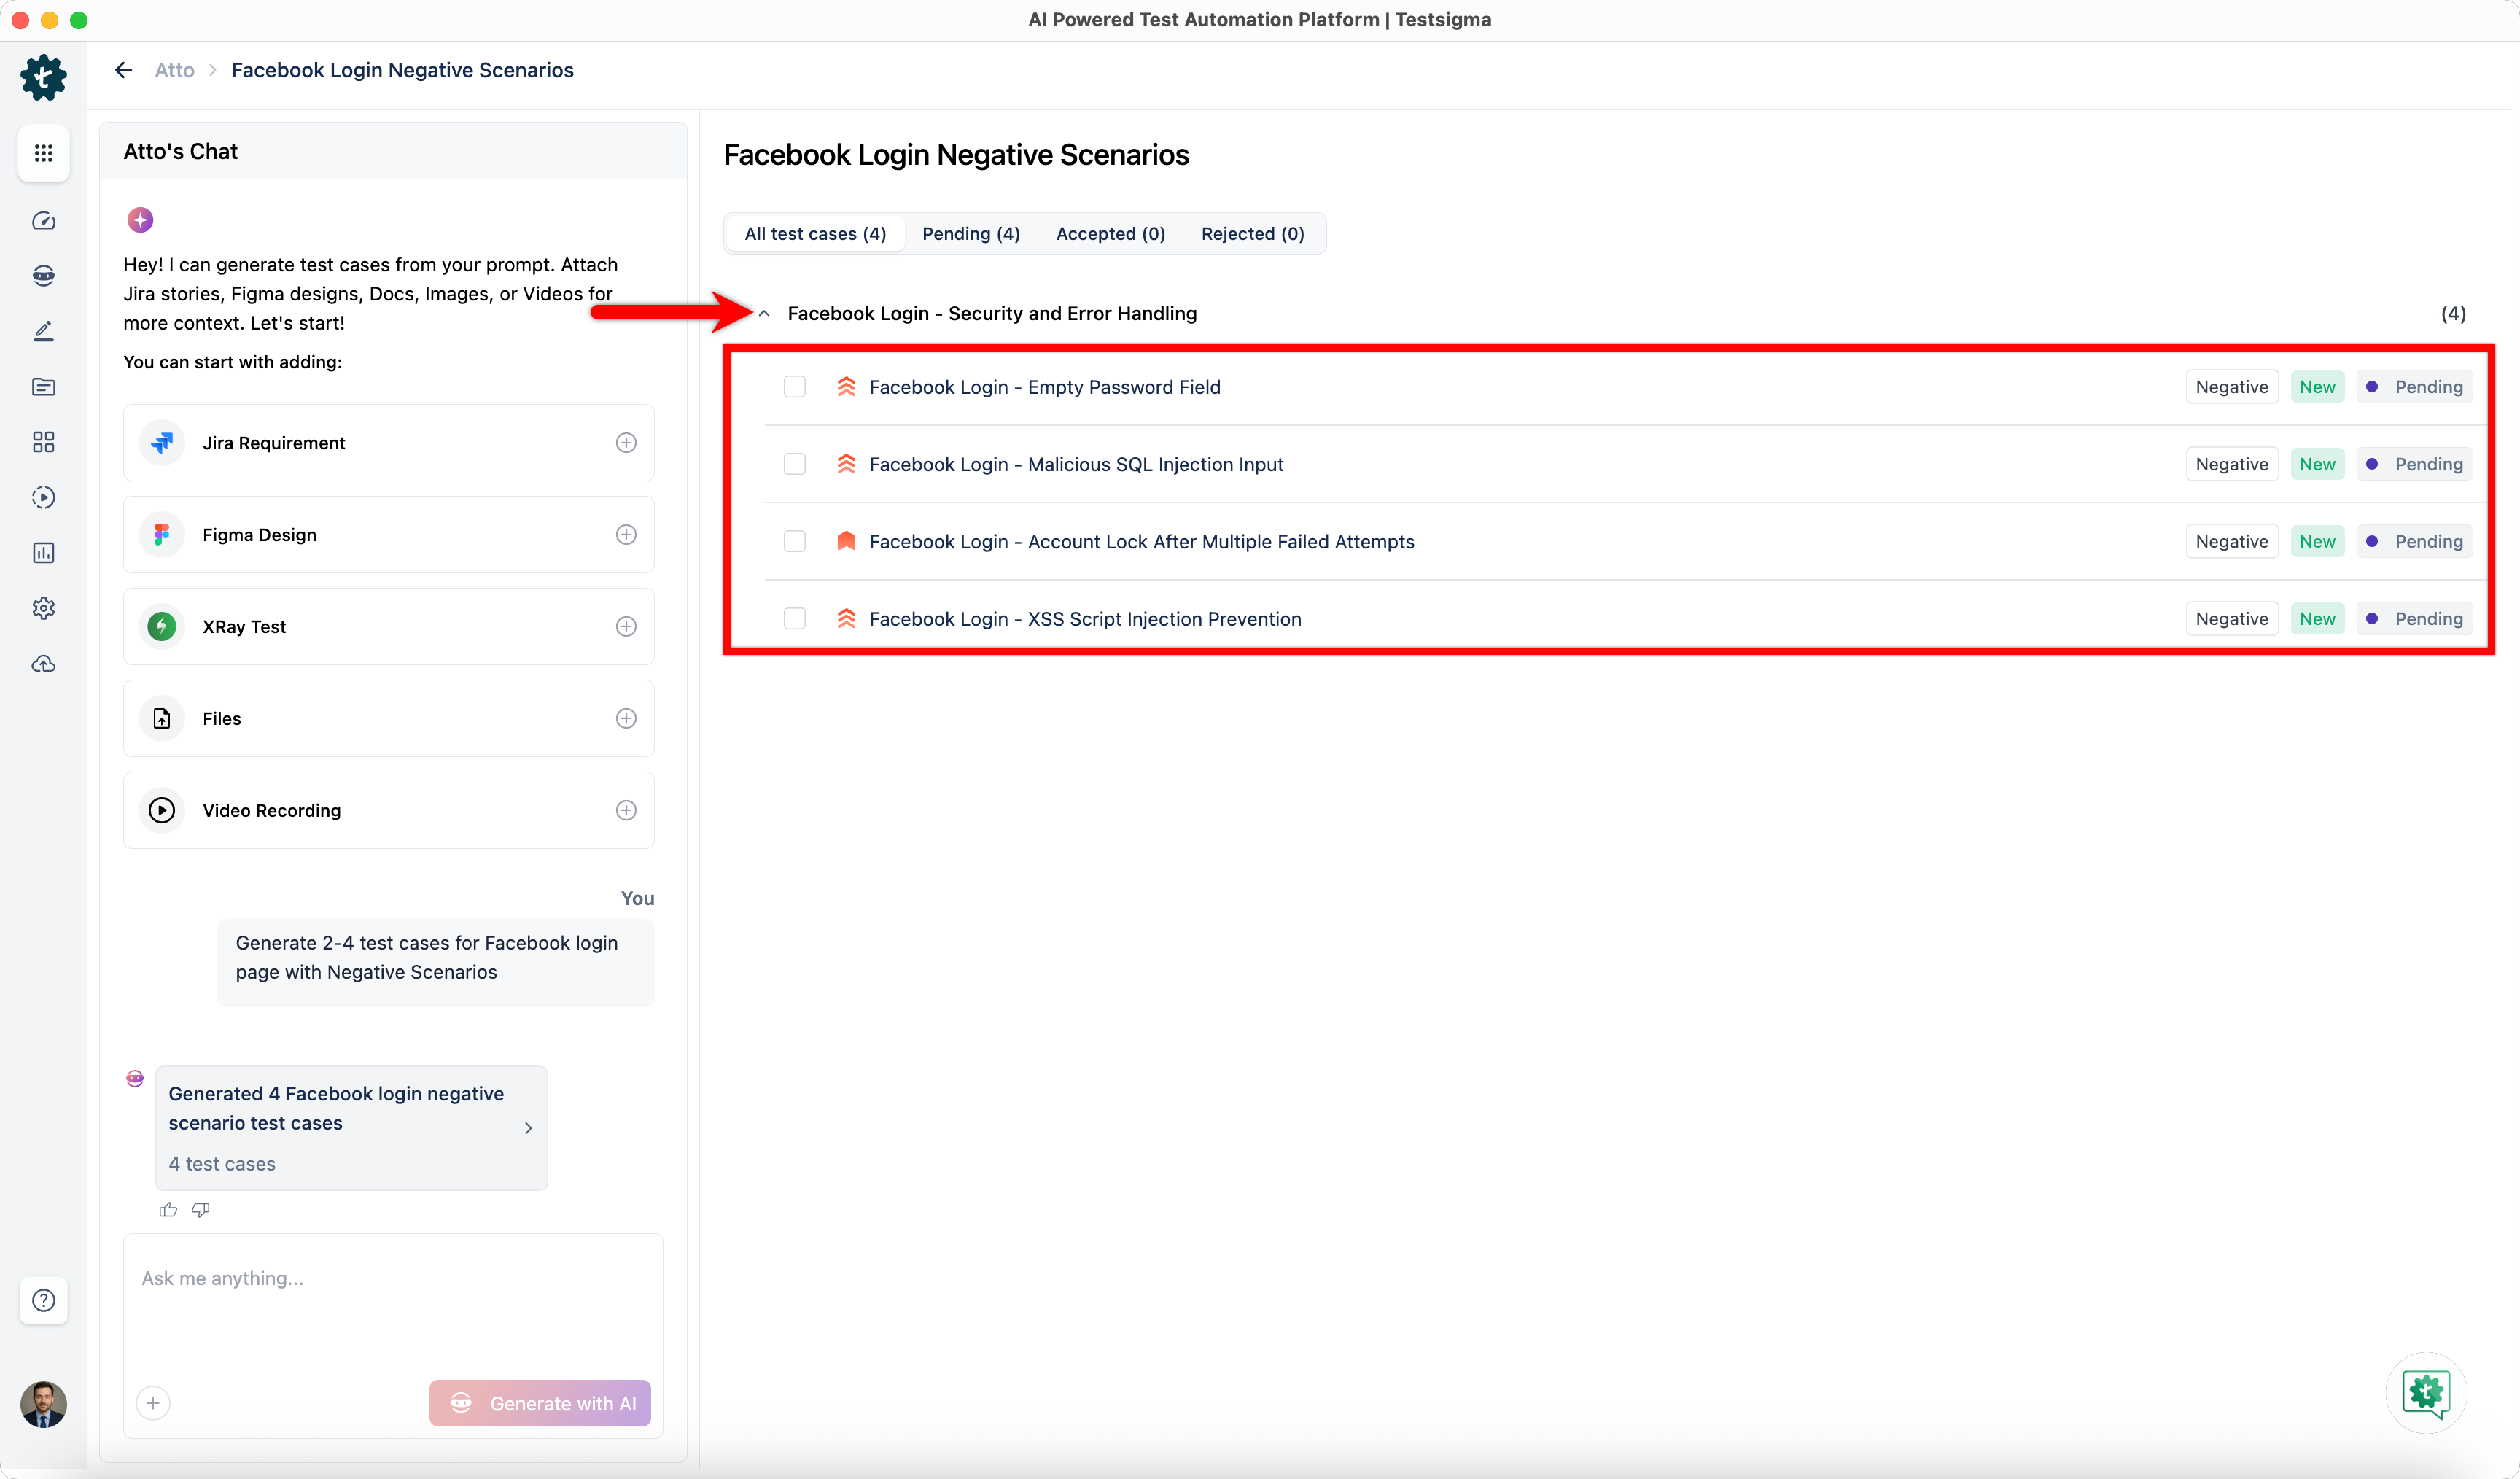
- In the Prompt field, enter a detailed description of the test cases to generate and click Generate with AI.
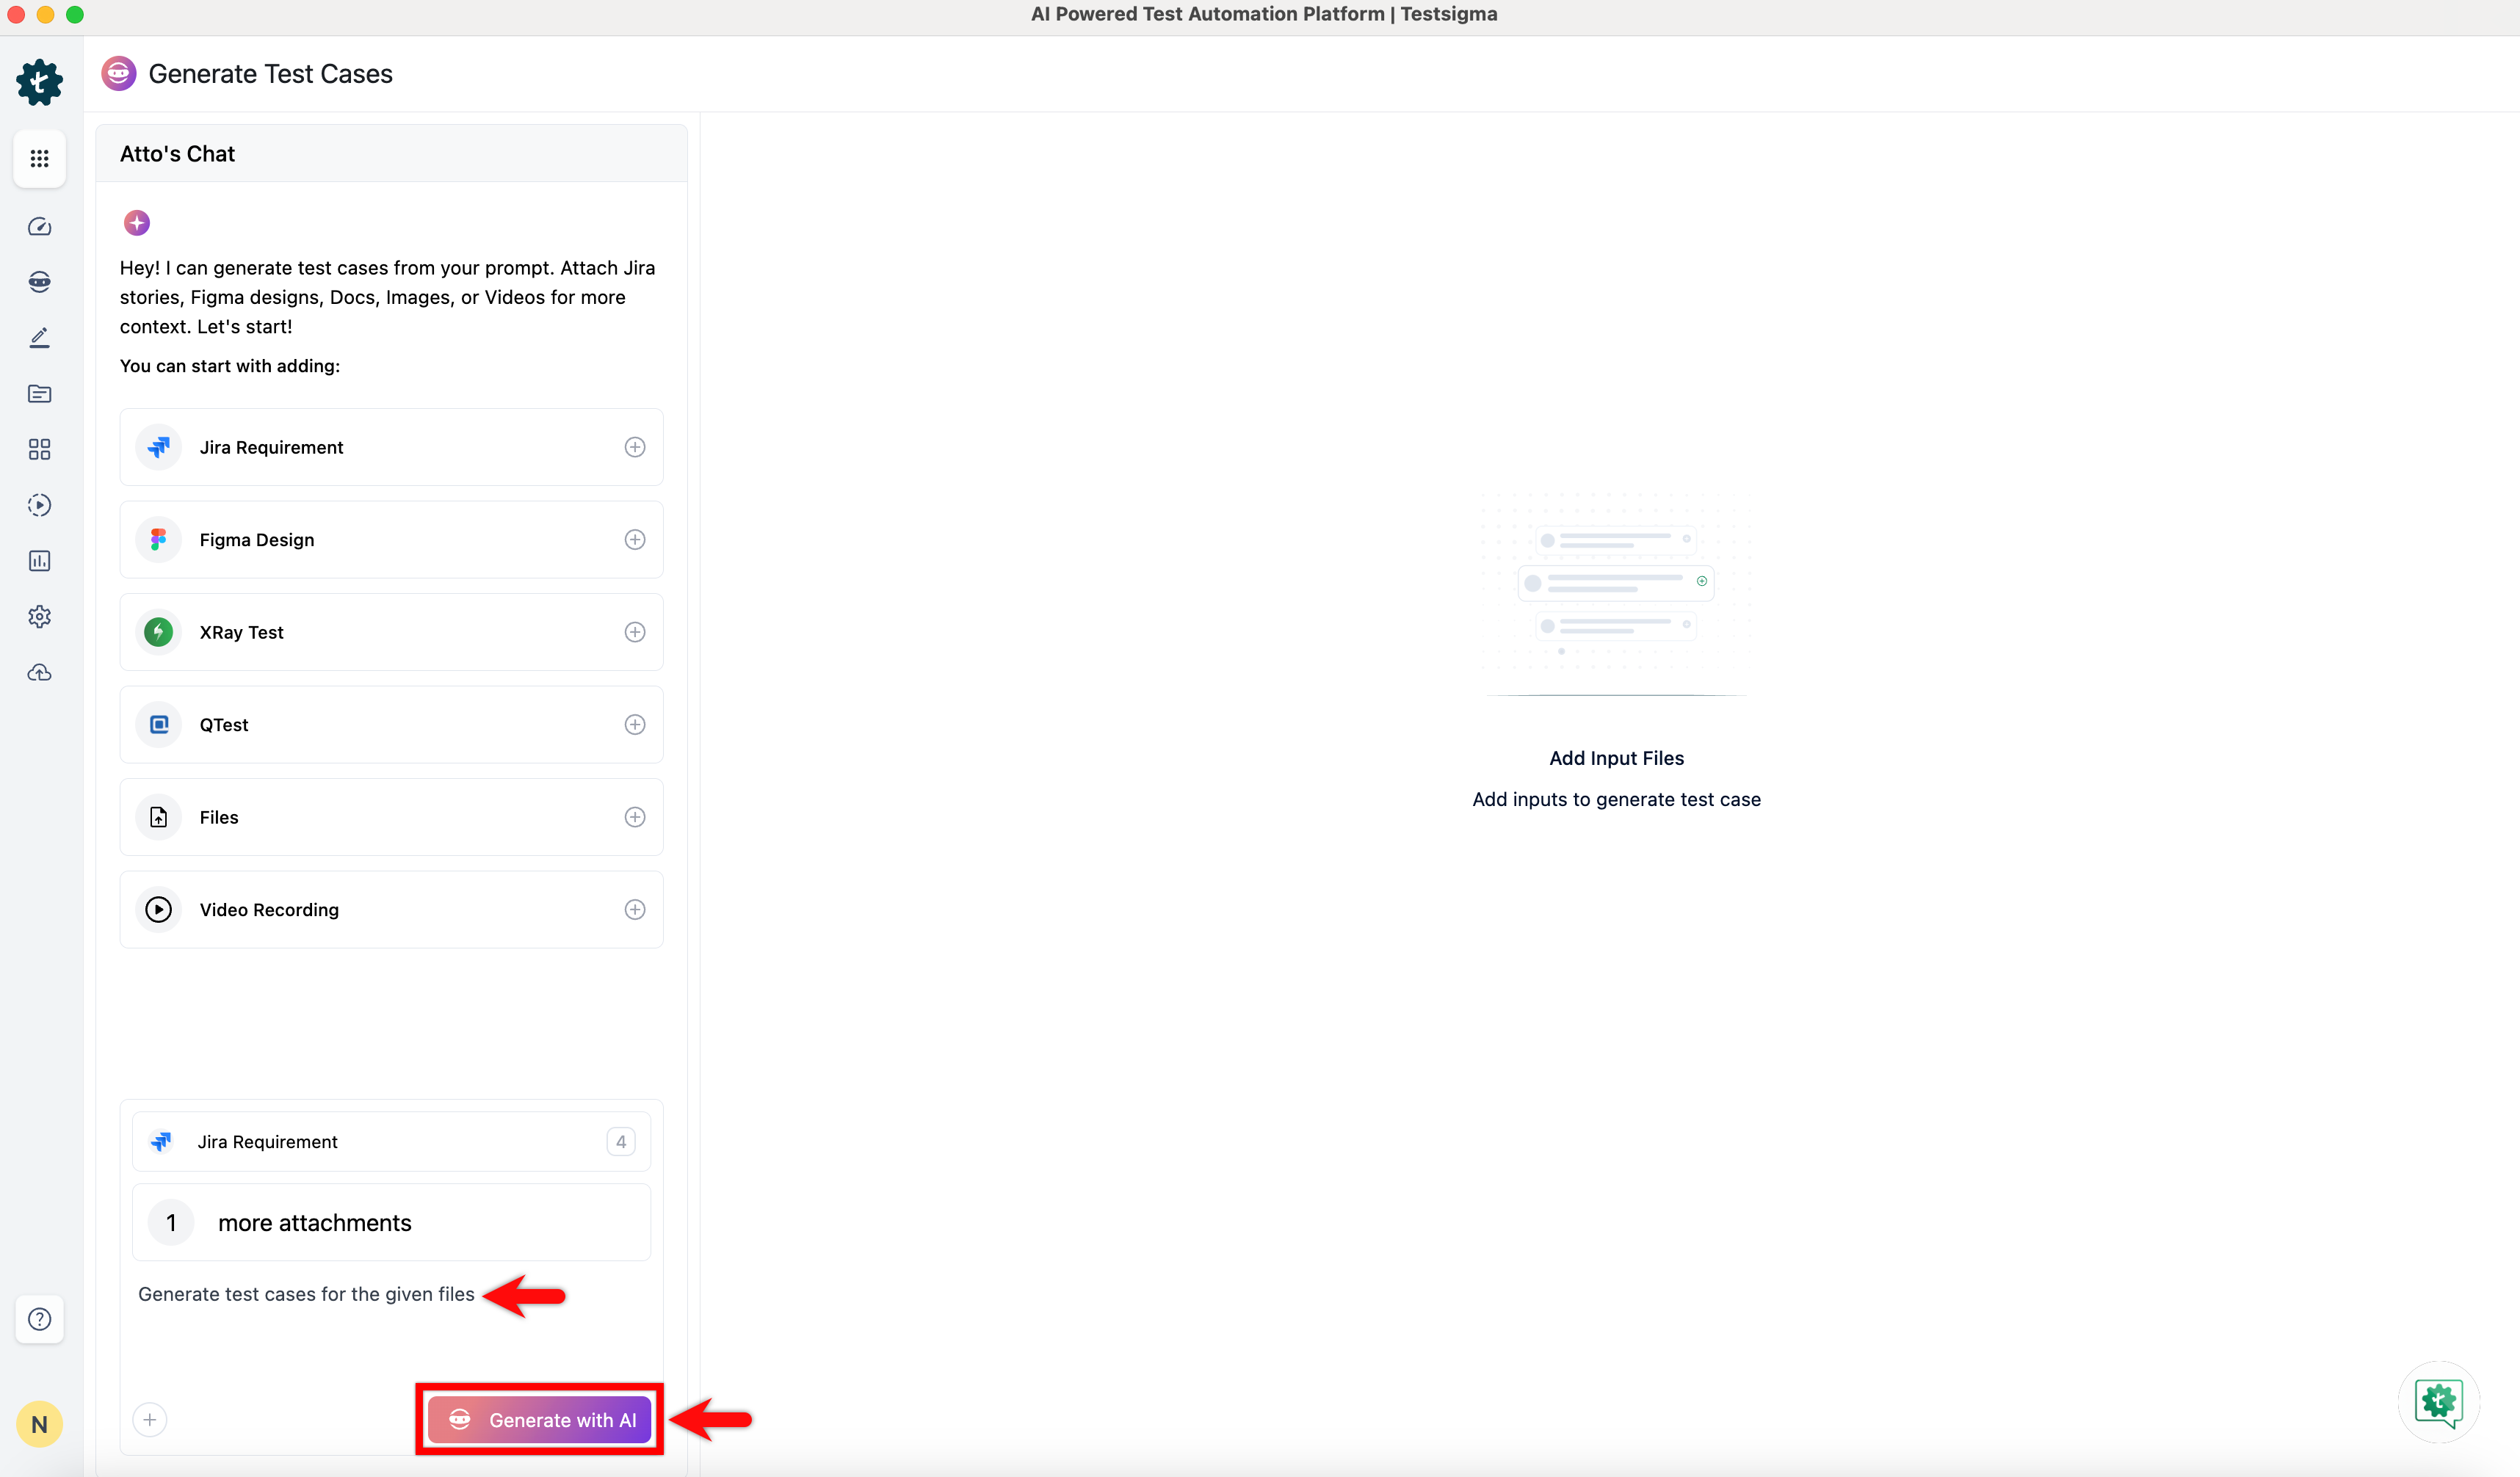
- Wait for the Generator Agent to generate test cases based on the selected inputs.
Learn the Live Application Using Live Editor
-
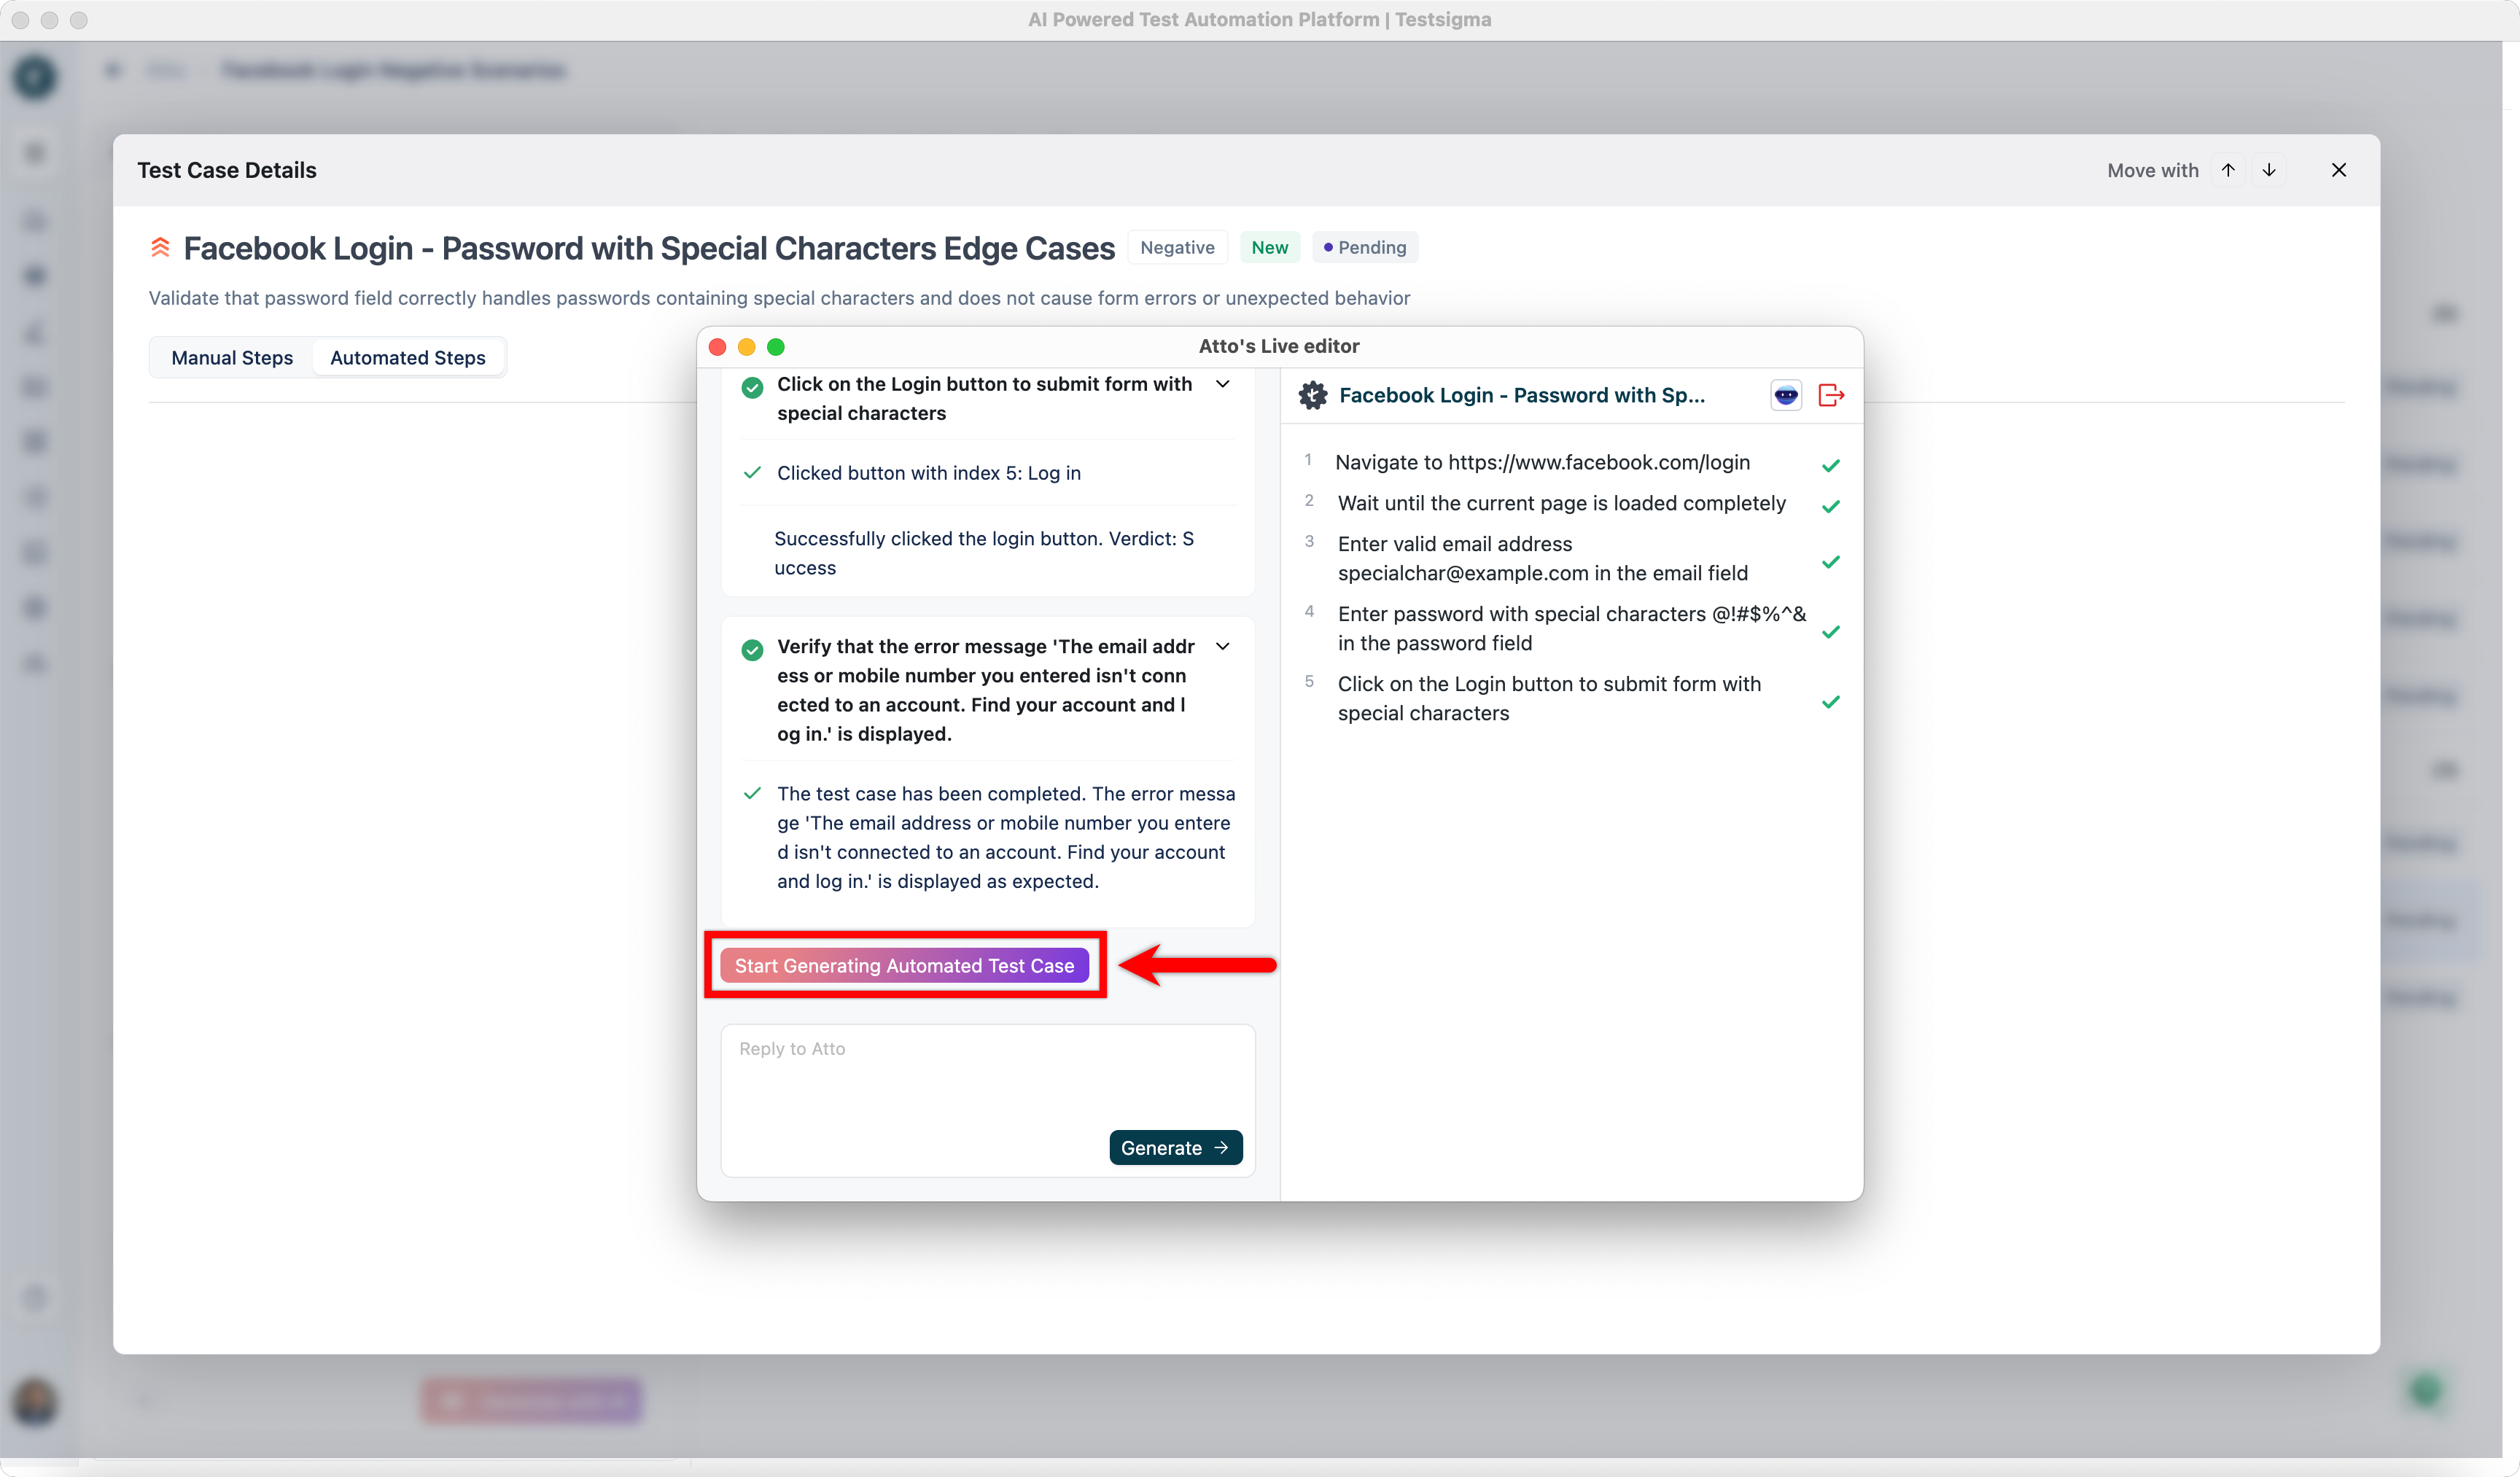
From the generated test cases list, expand a scenario and select a test case. This will open the Test Case Details dialog.
 NOTE:
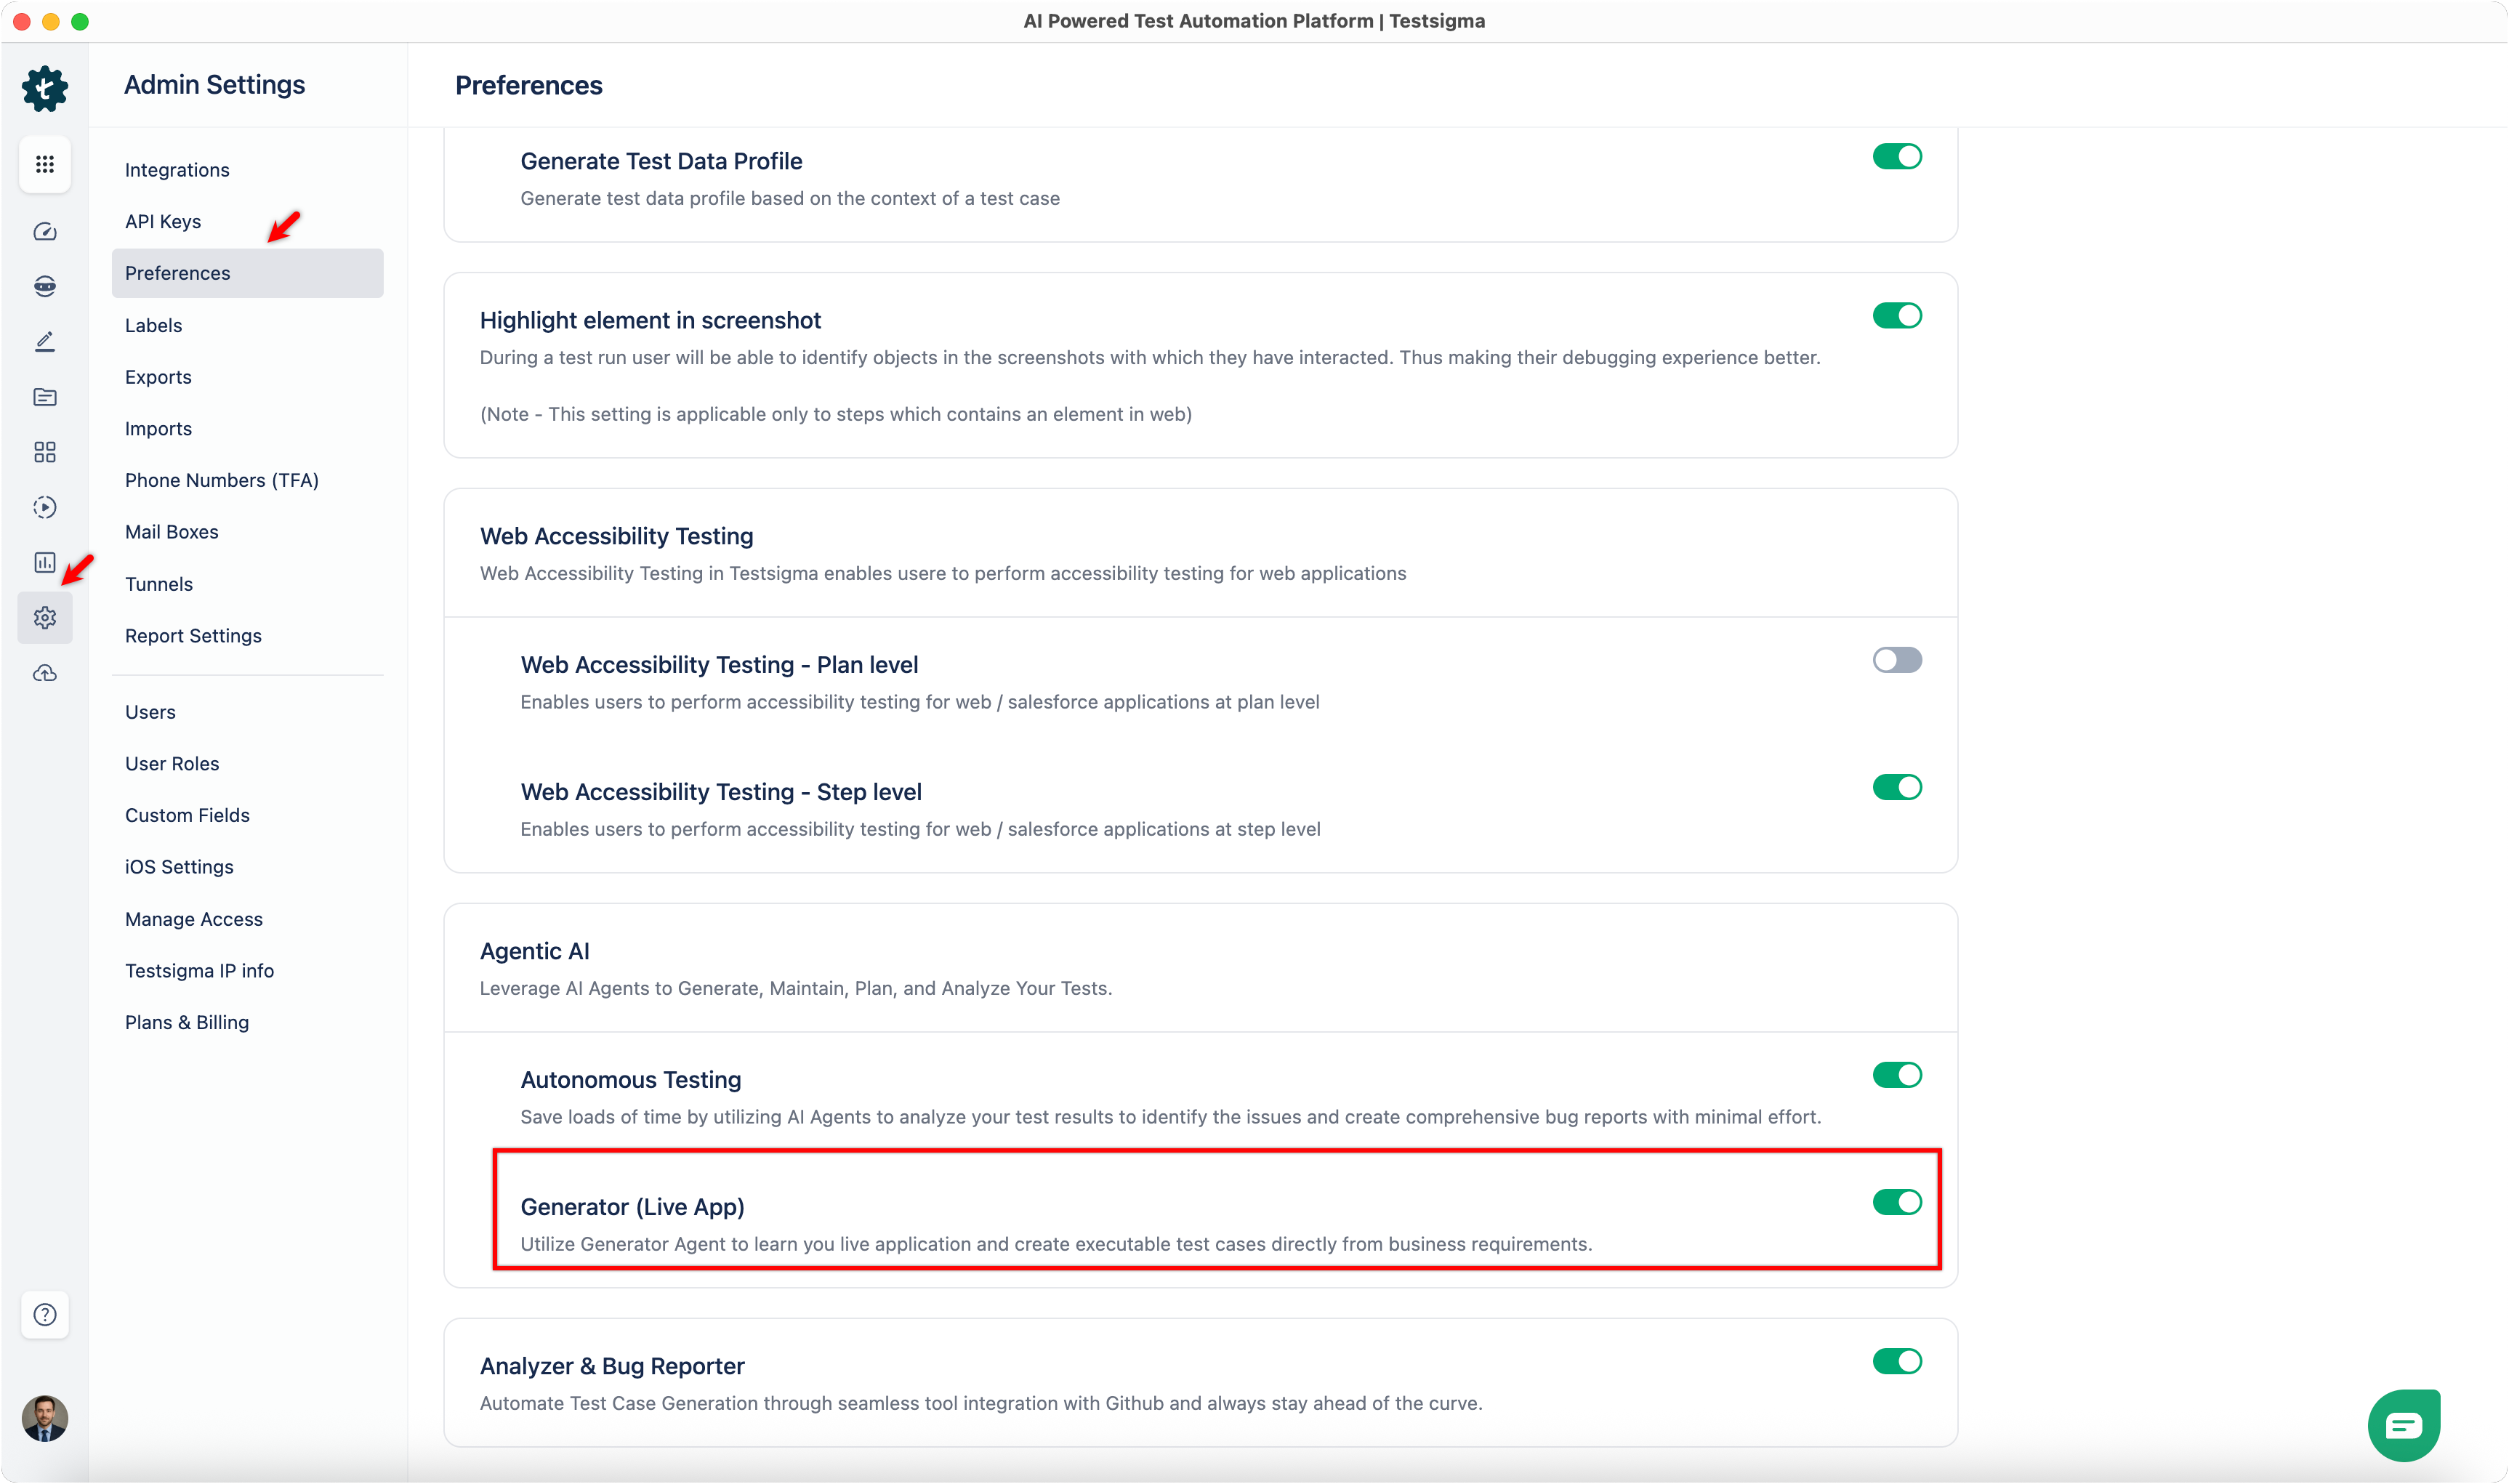
NOTE:To start automating and interact live with the app, make sure the Generator (Live App) toggle is turned on. Go to Settings > Preferences > Agentic AI > Generator, and enable the toggle.
- In the Test Case Details dialog, click the Automated Steps tab.
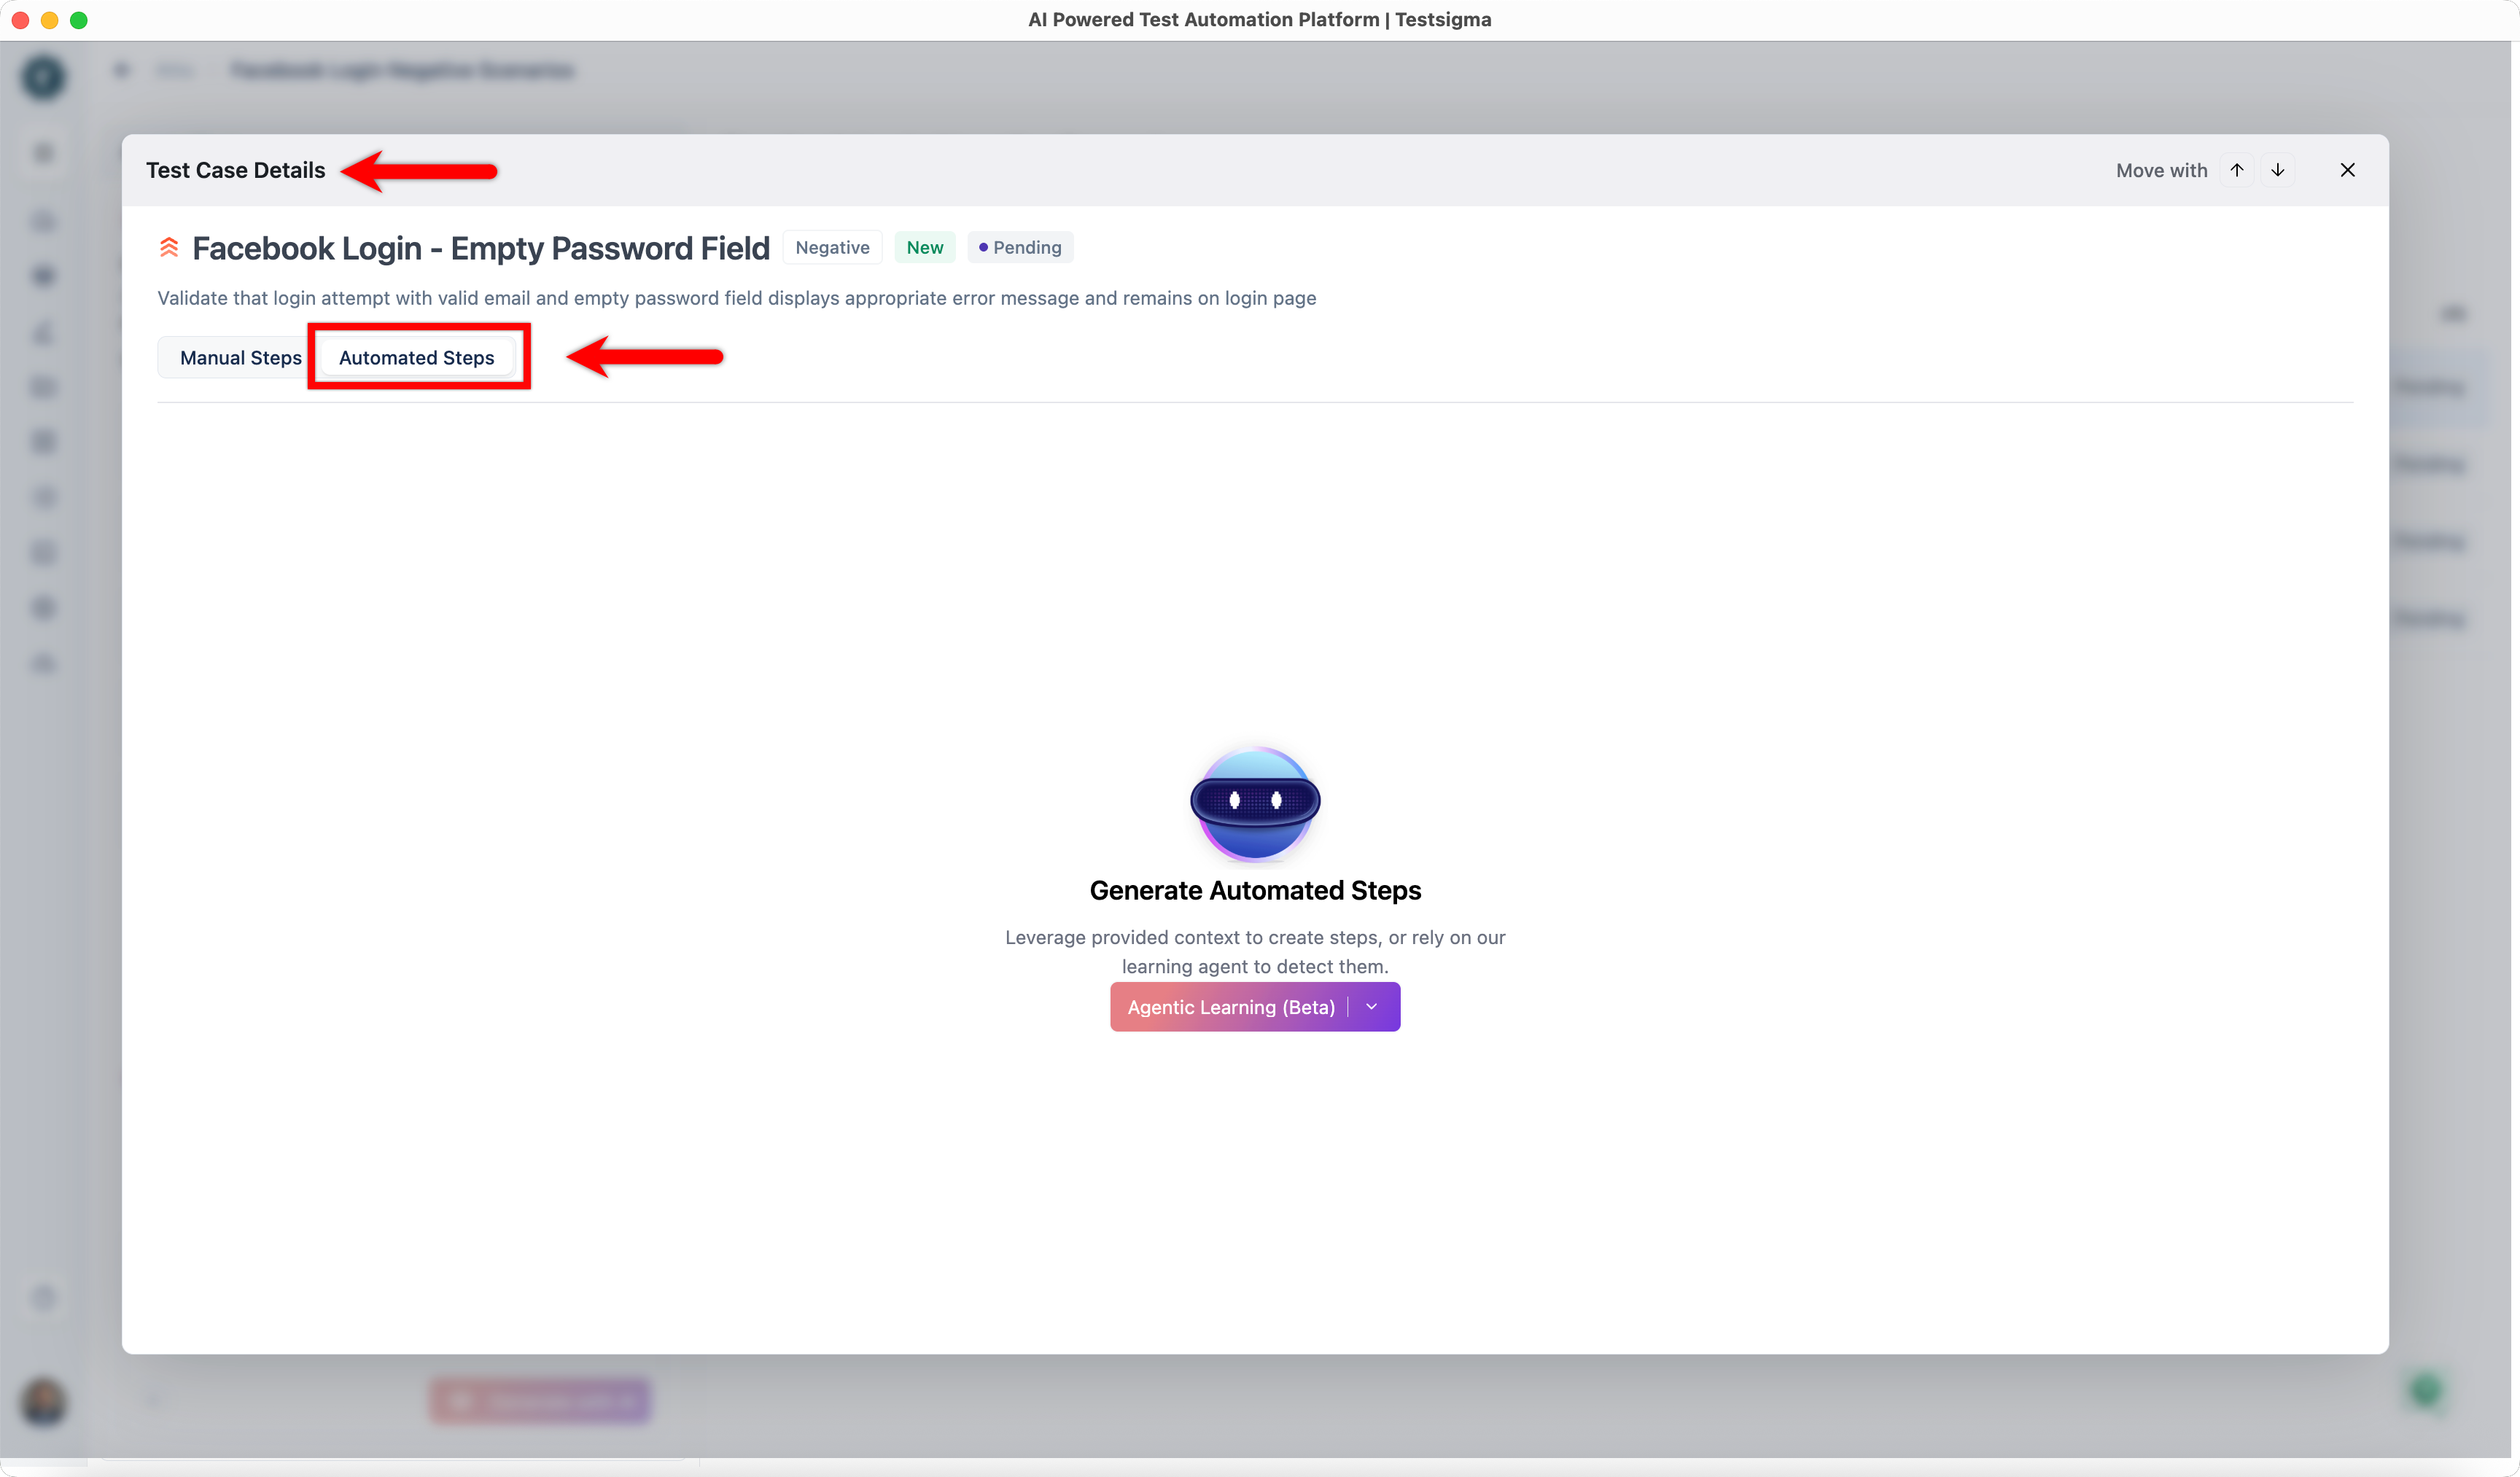
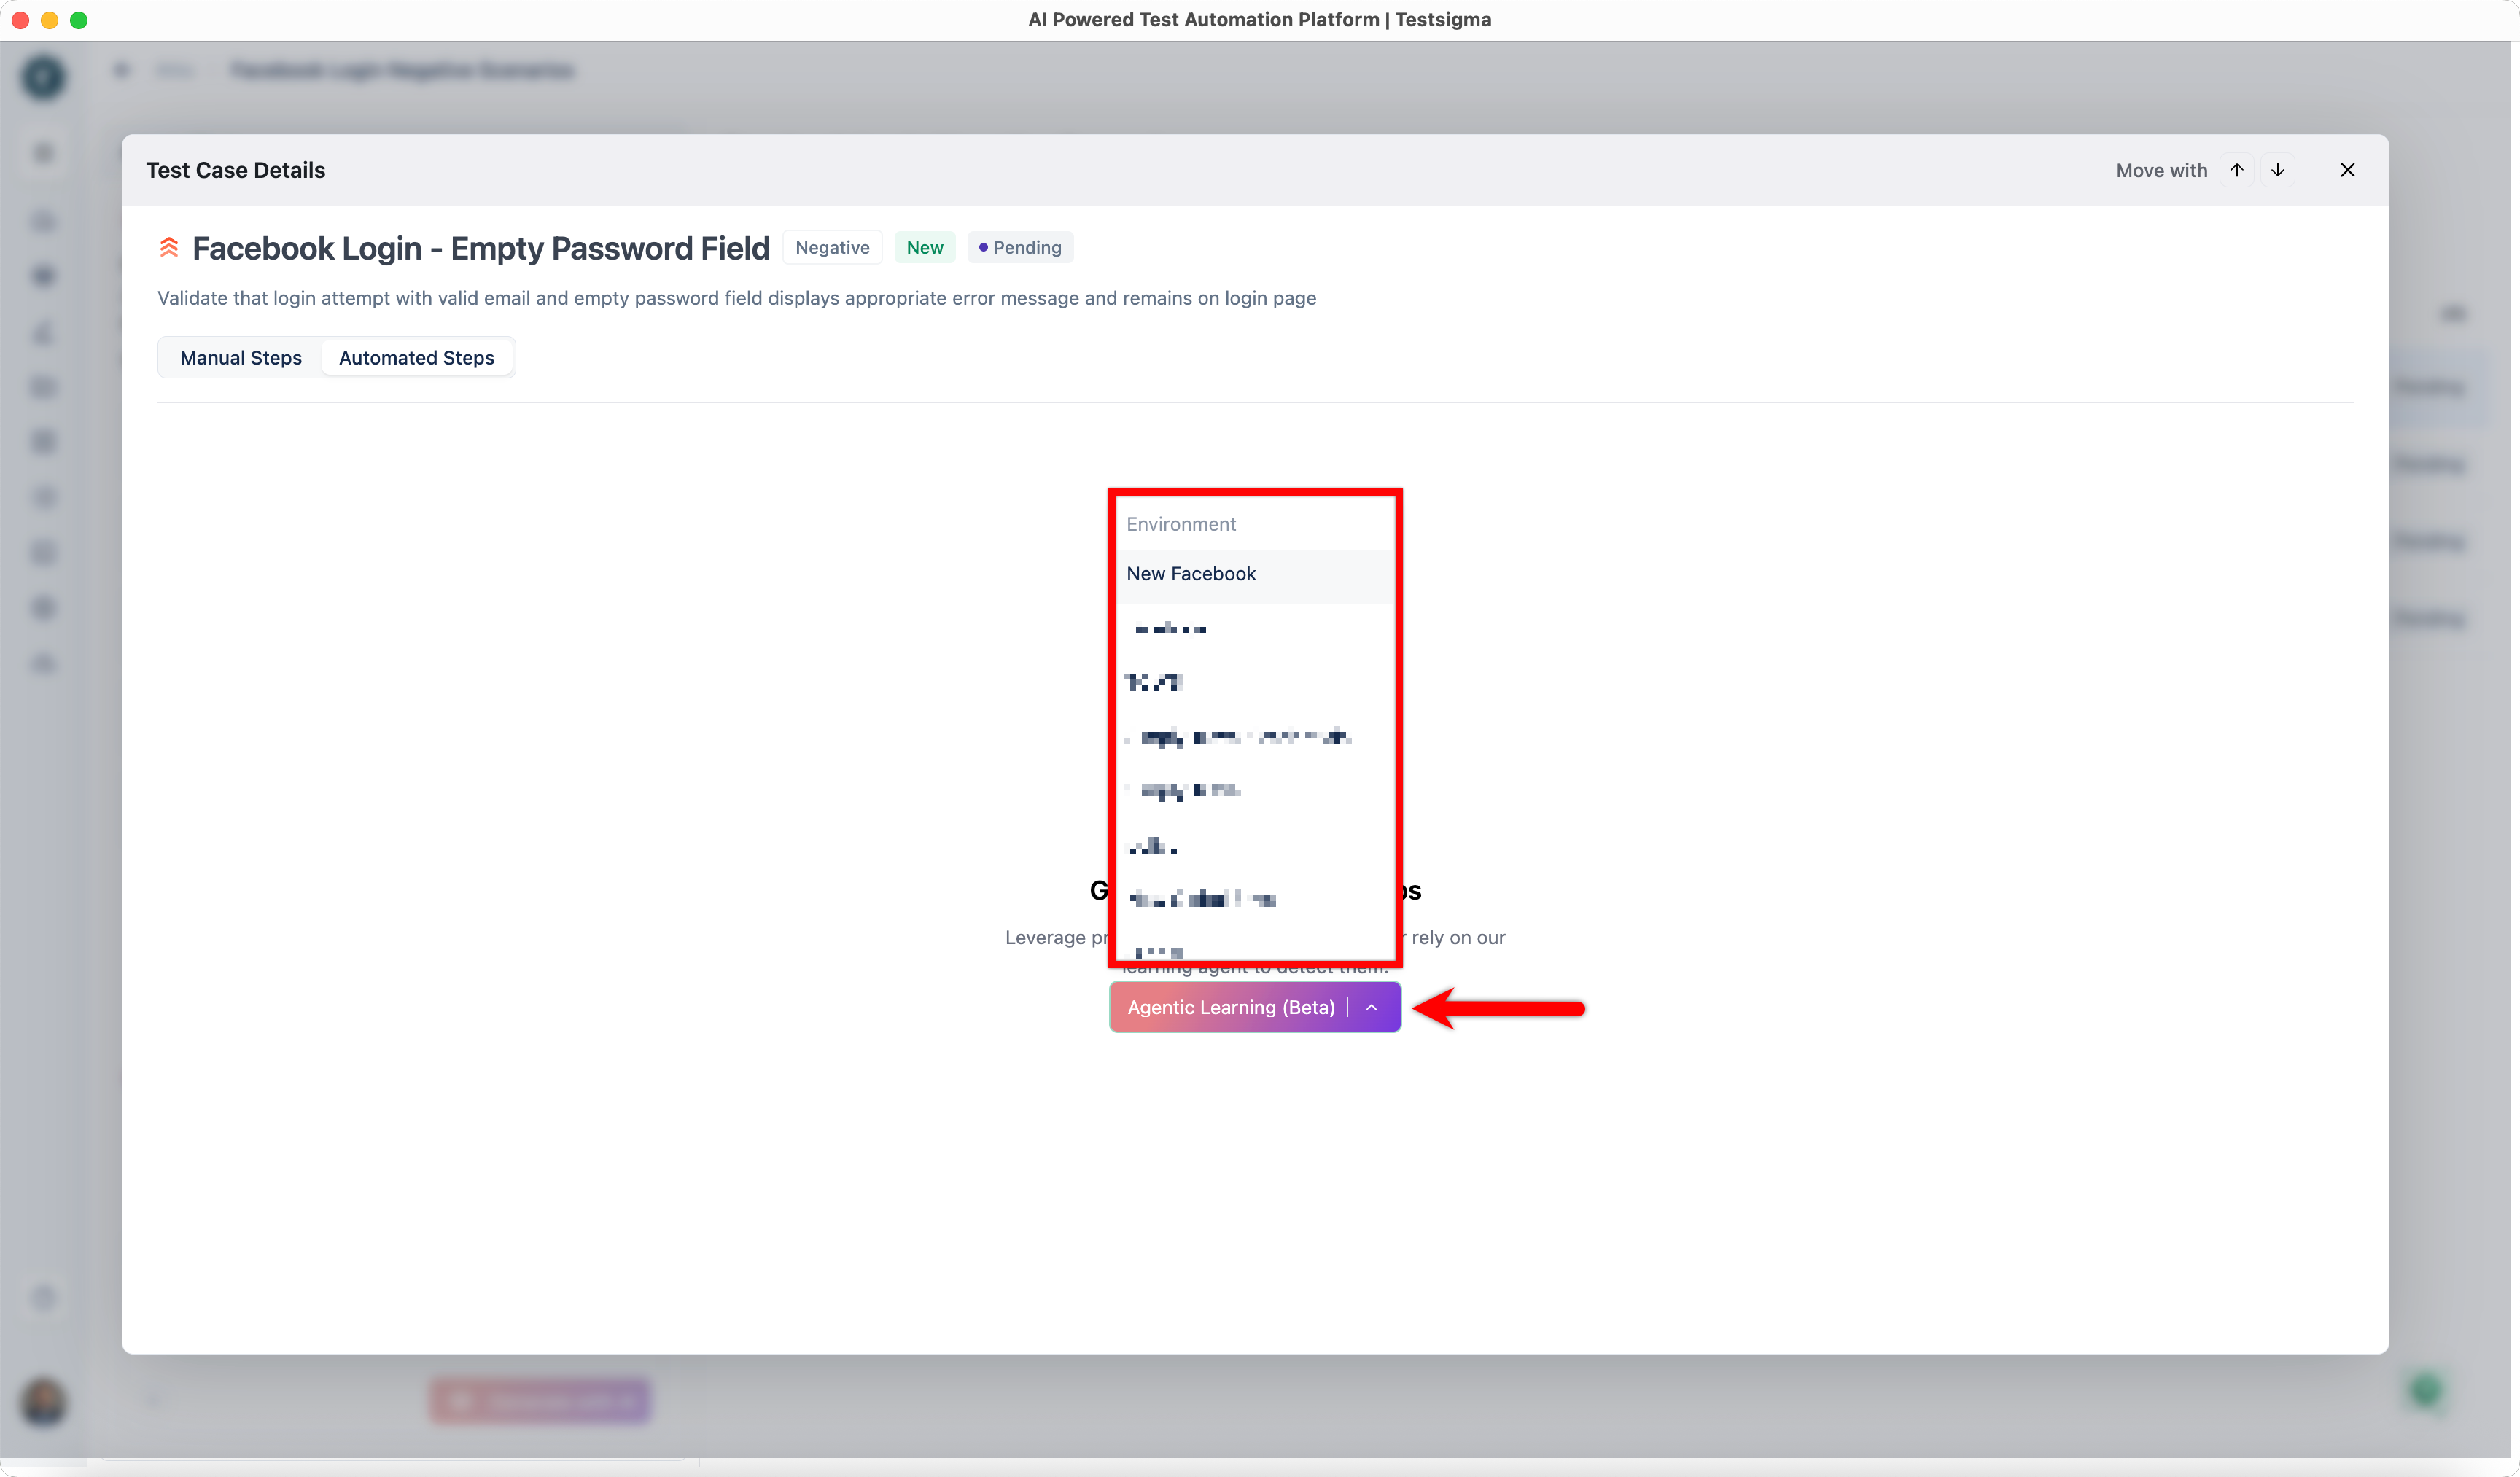
- Hover over Agentic Learning (Beta) and select an environment. This will open Atto’s Live Editor.
- Atto’s Live Editor opens with the manual steps preloaded.
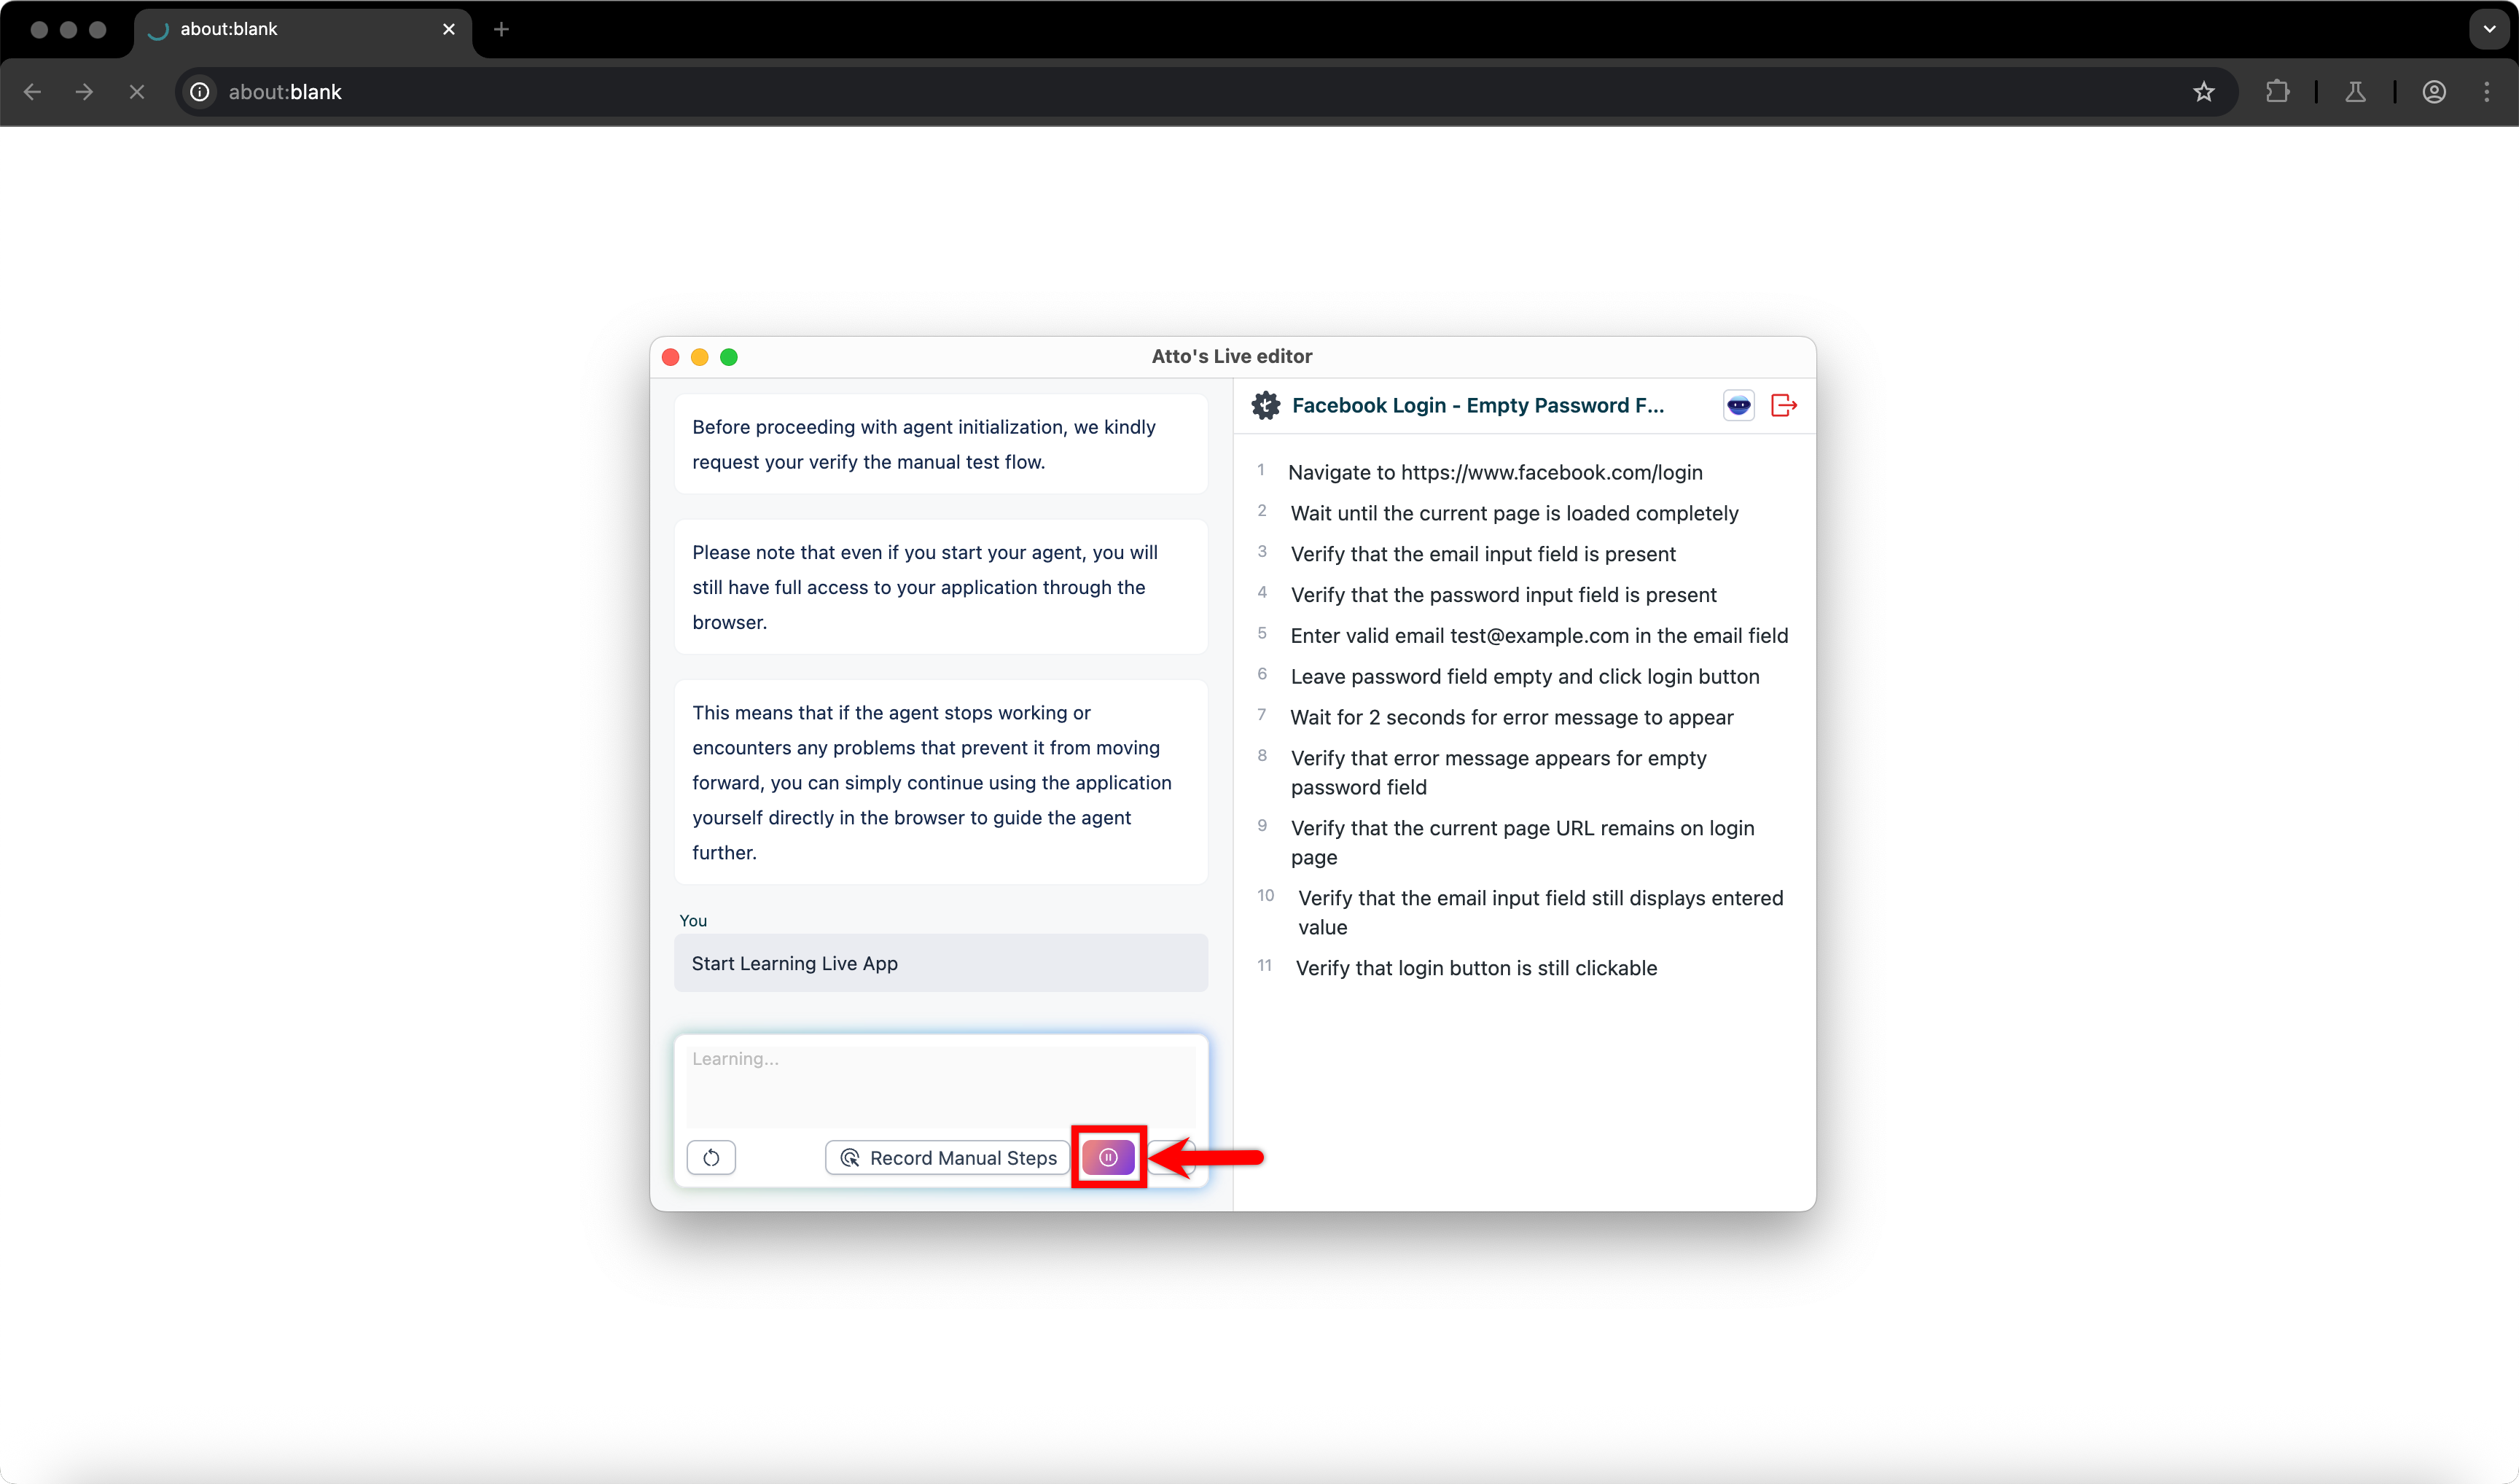
- Click Start Learning Live App in Atto’s Live Editor.

- A Chrome browser opens and the Live Editor starts learning UI elements by executing the manual steps.
- After all steps execute successfully, click Start Generating Automated Test Case to review the learned steps.
You can modify test steps by providing additional inputs if required.
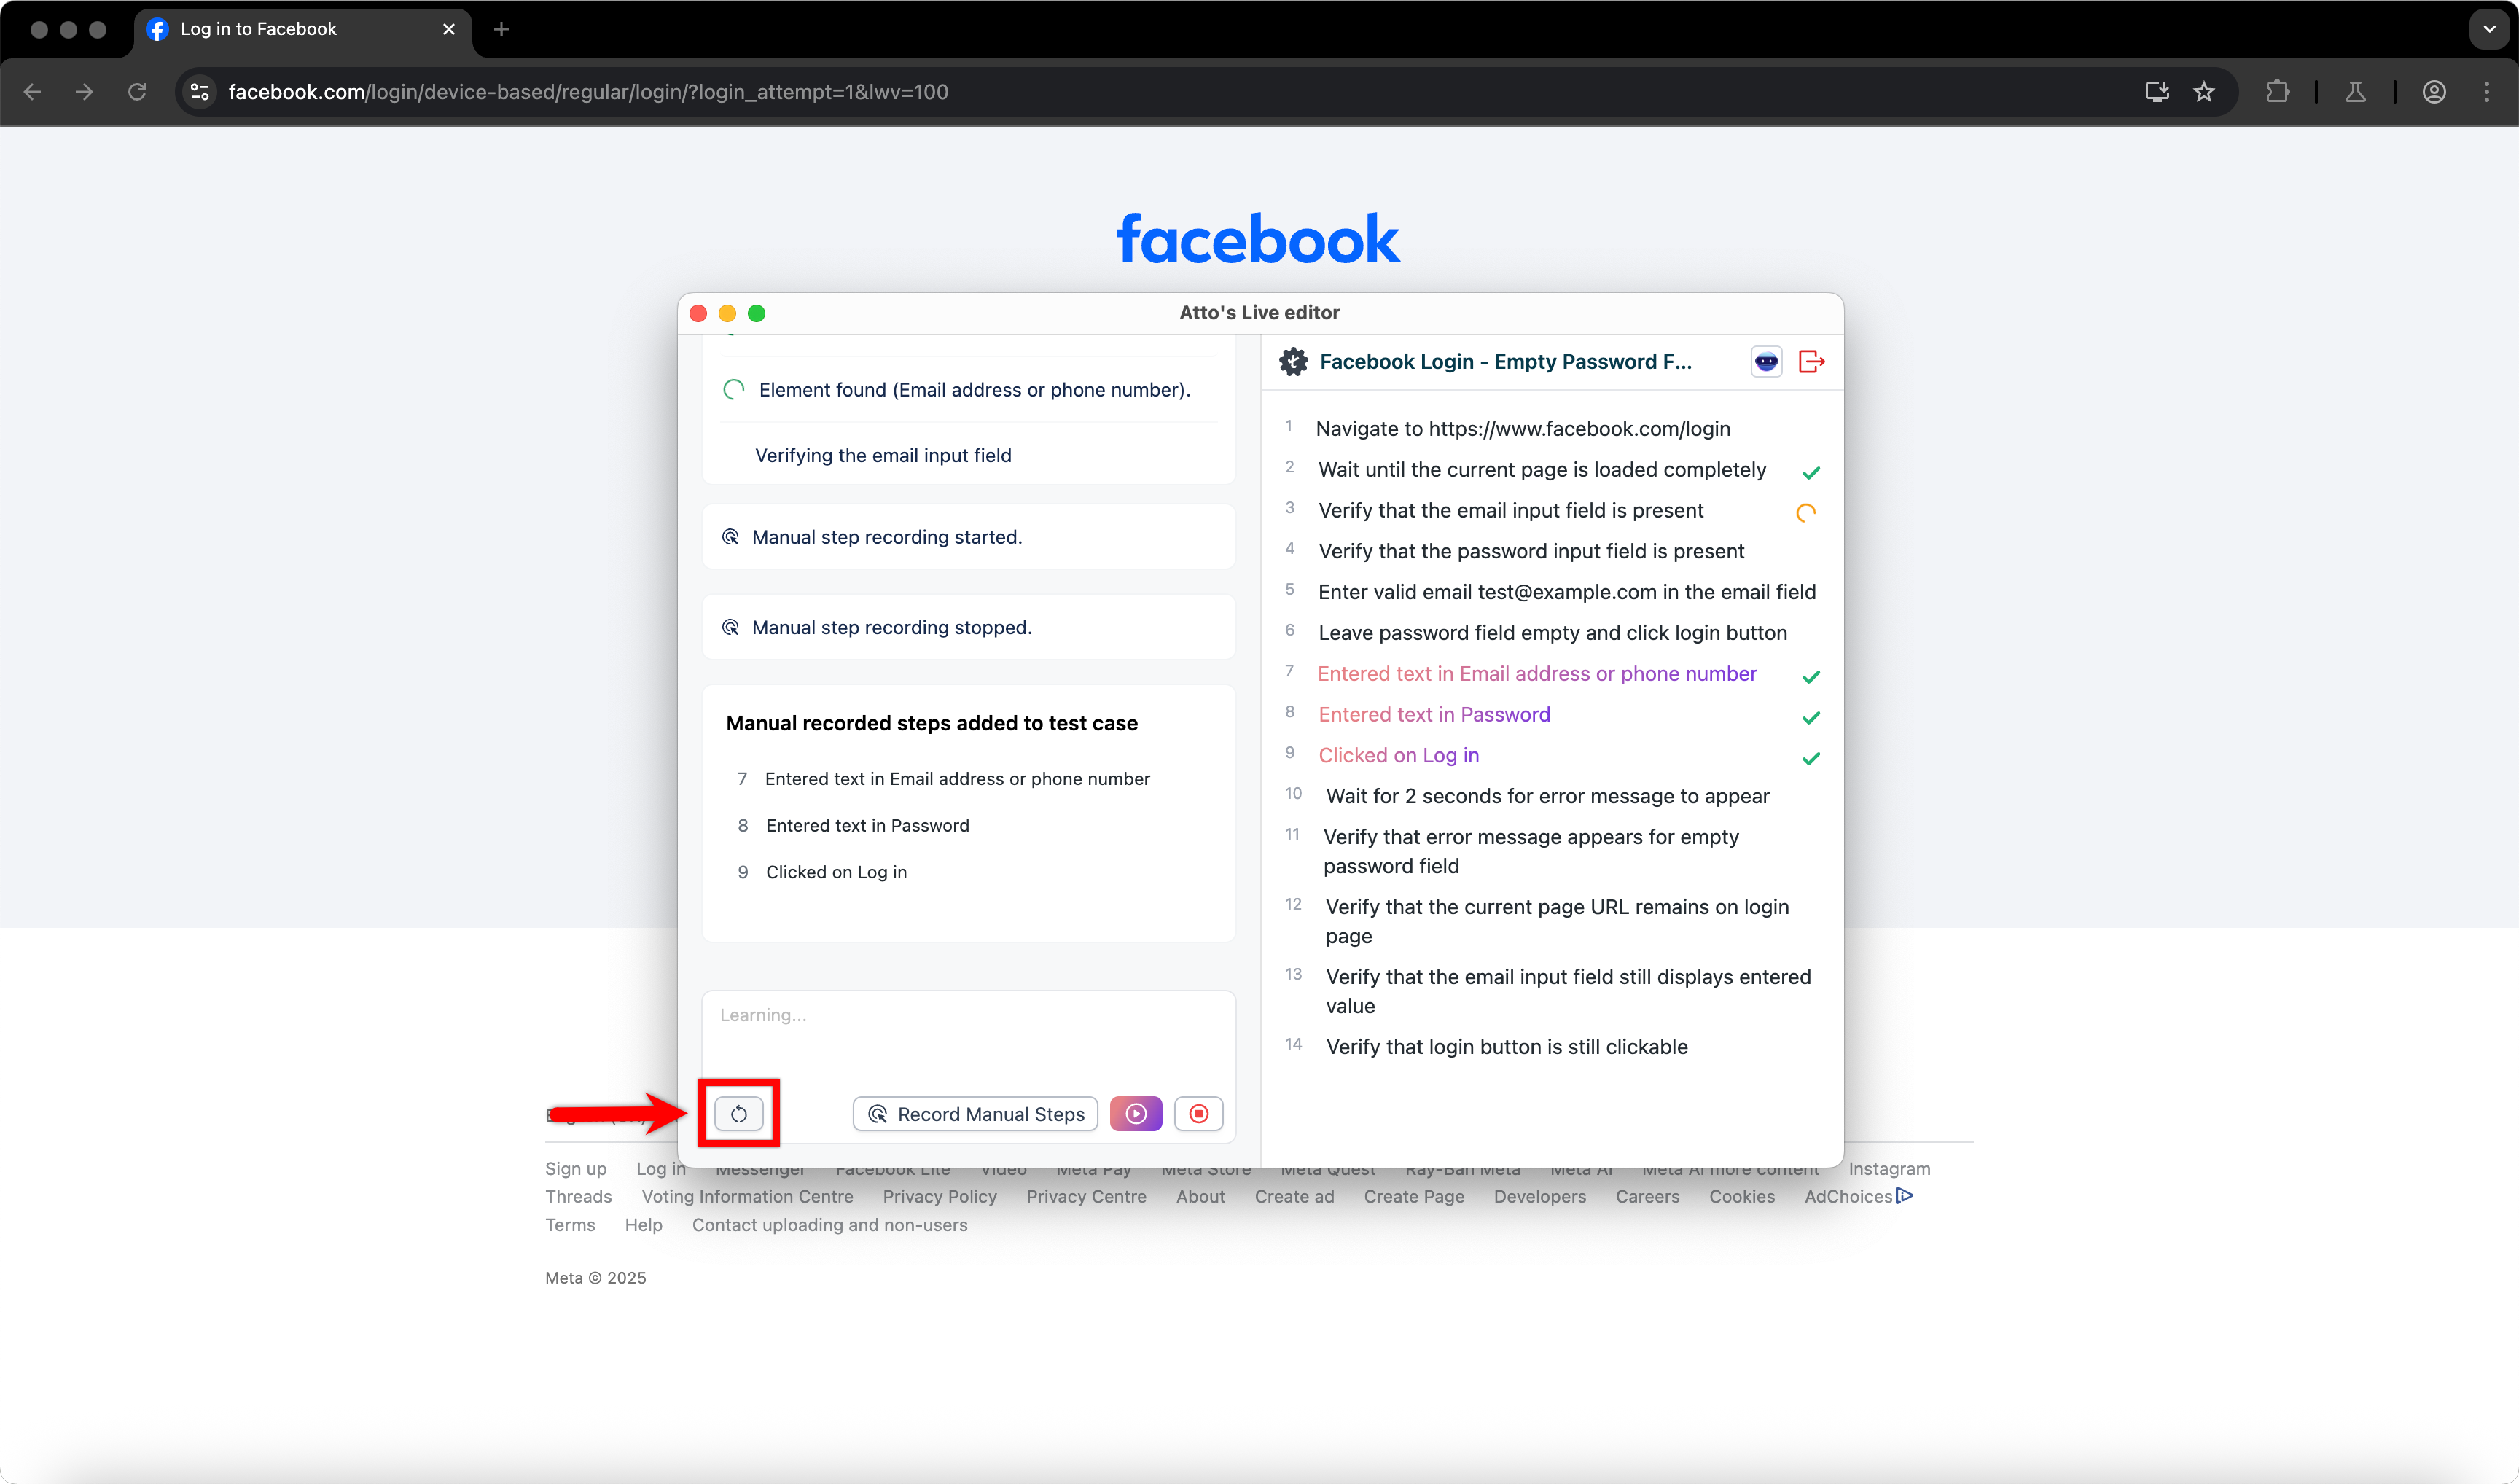
Interactive Actions During Live Learning
While Atto is learning application elements, you can control the learning session using the interactive actions available in the Atto’s Live Editor.
Reset the Learning Session
Use Reset to clear all messages and stop the current learning session.
Result:
- All in-progress actions are cleared.
- The active browser learning session is stopped.
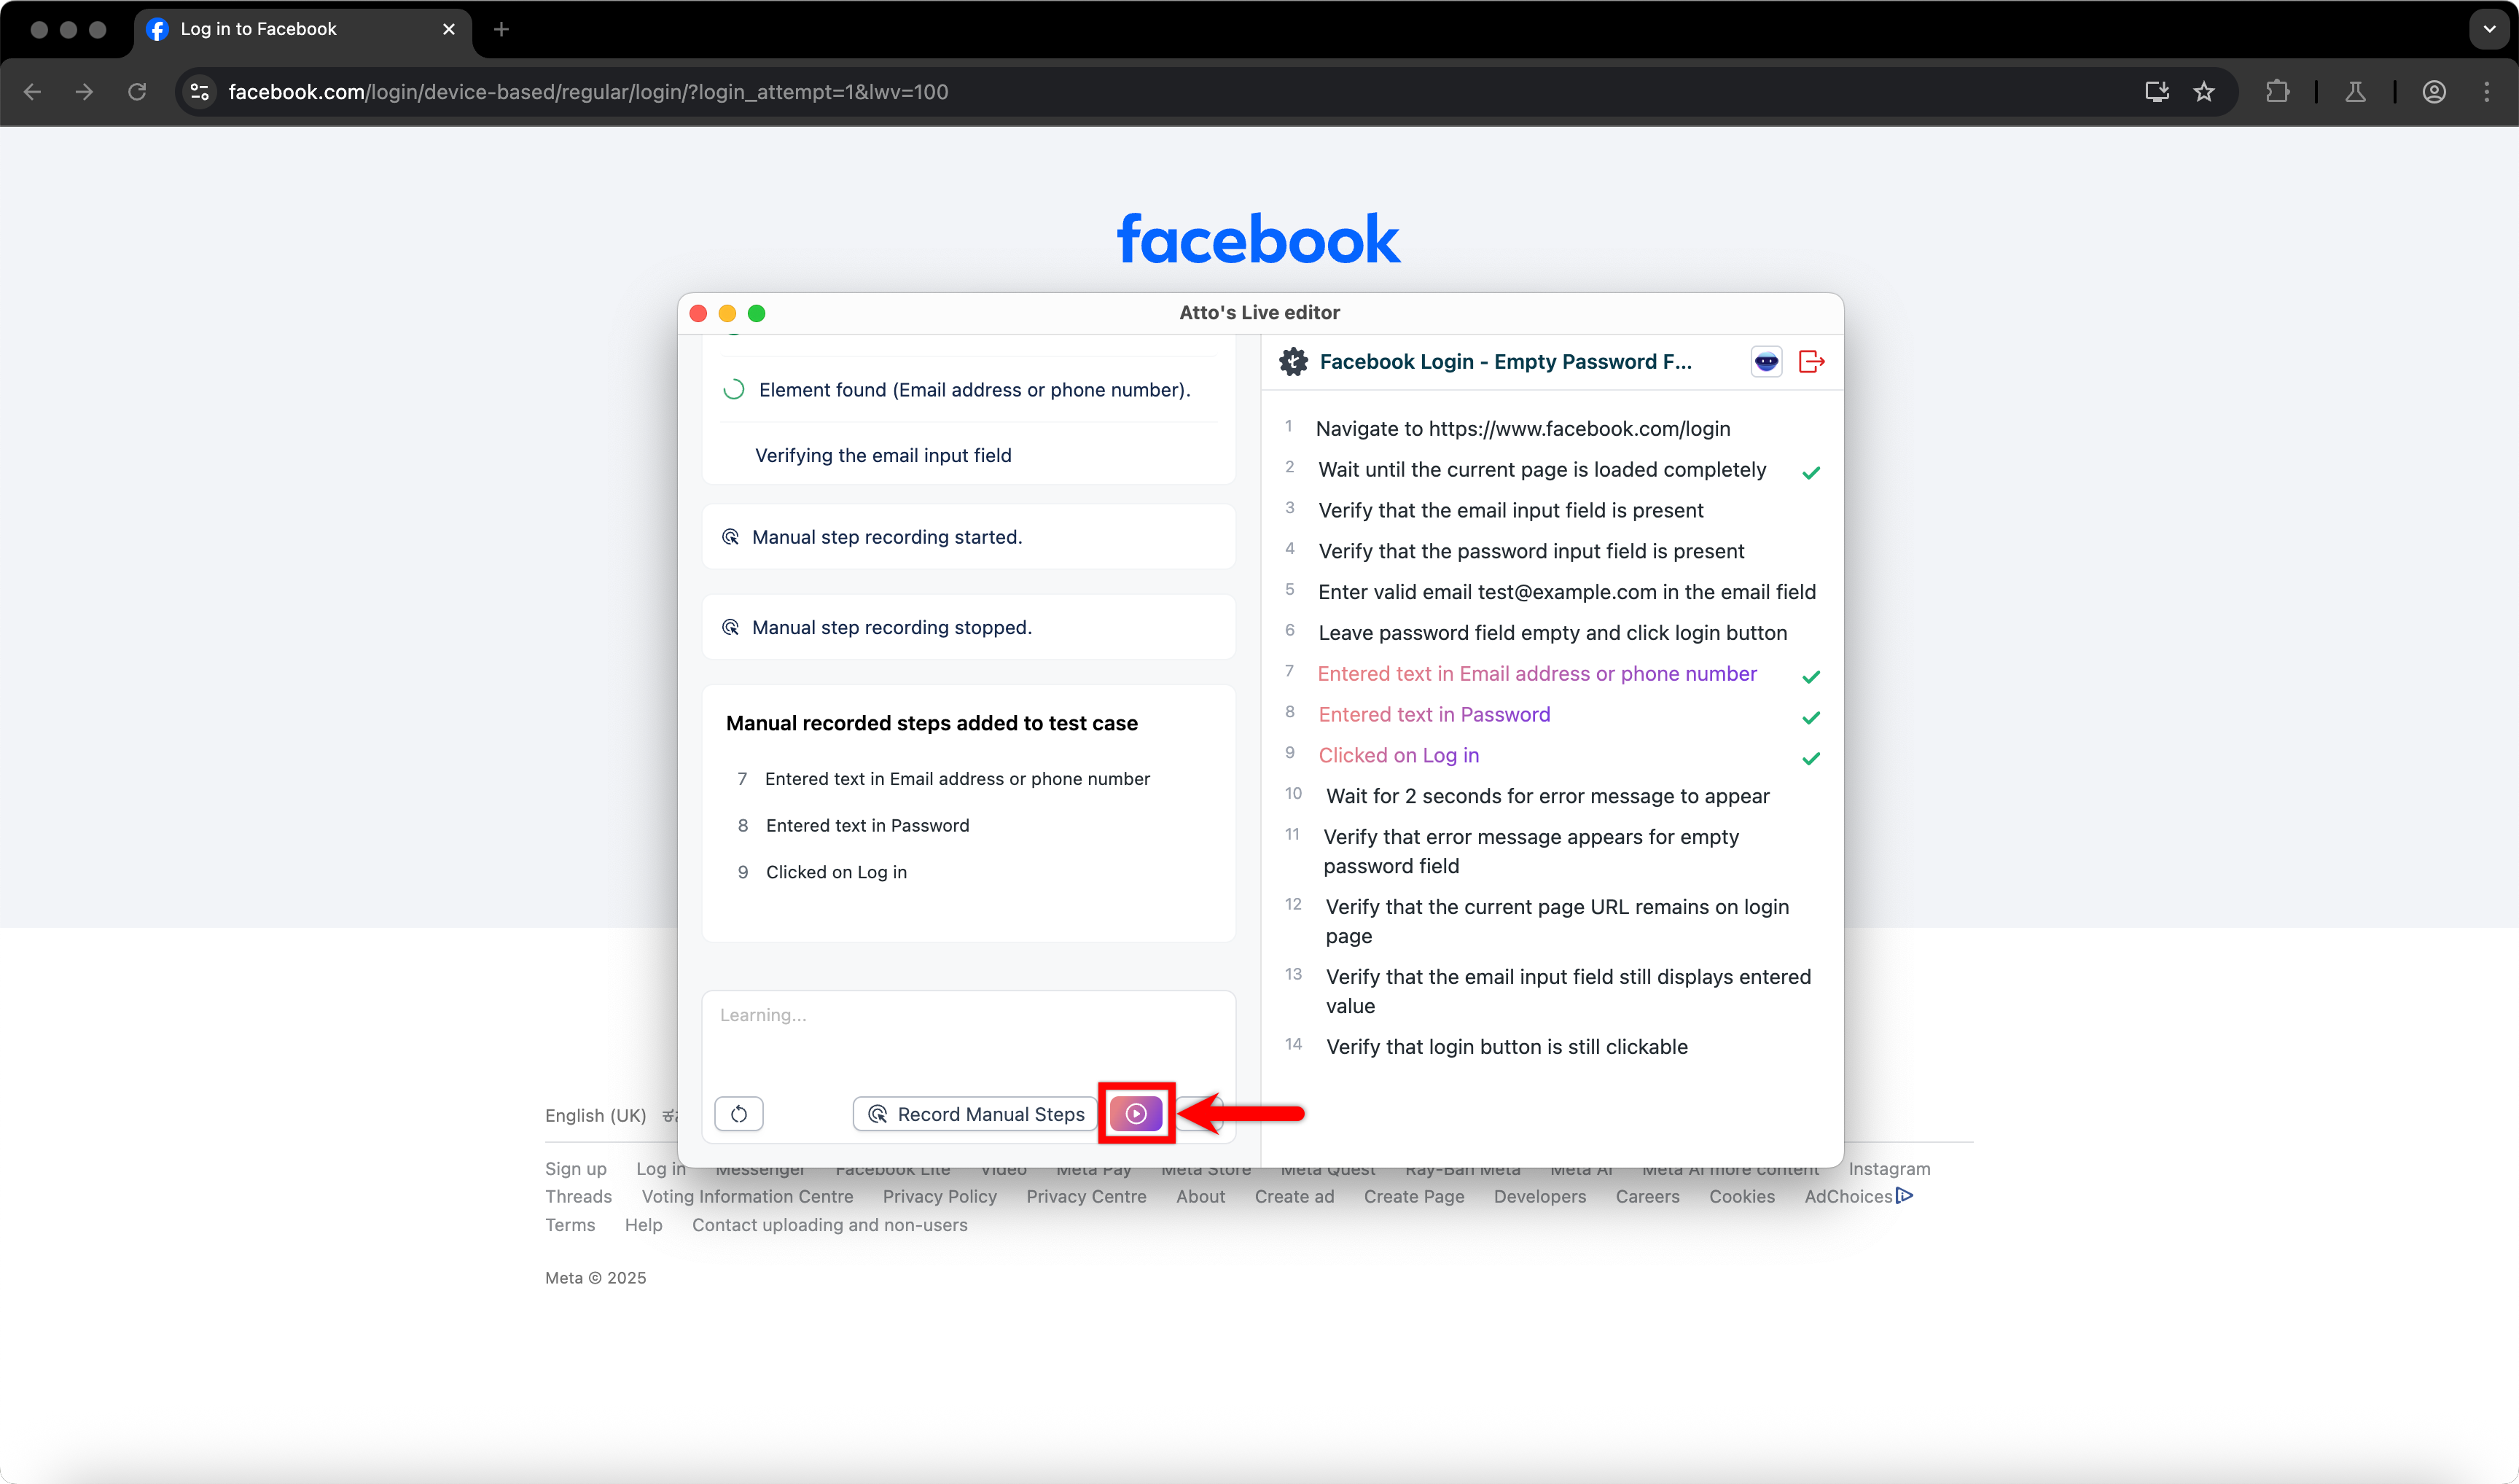
Record Manual Steps
Use Record Manual Steps to manually capture additional steps during the learning session and add them to the existing test case.
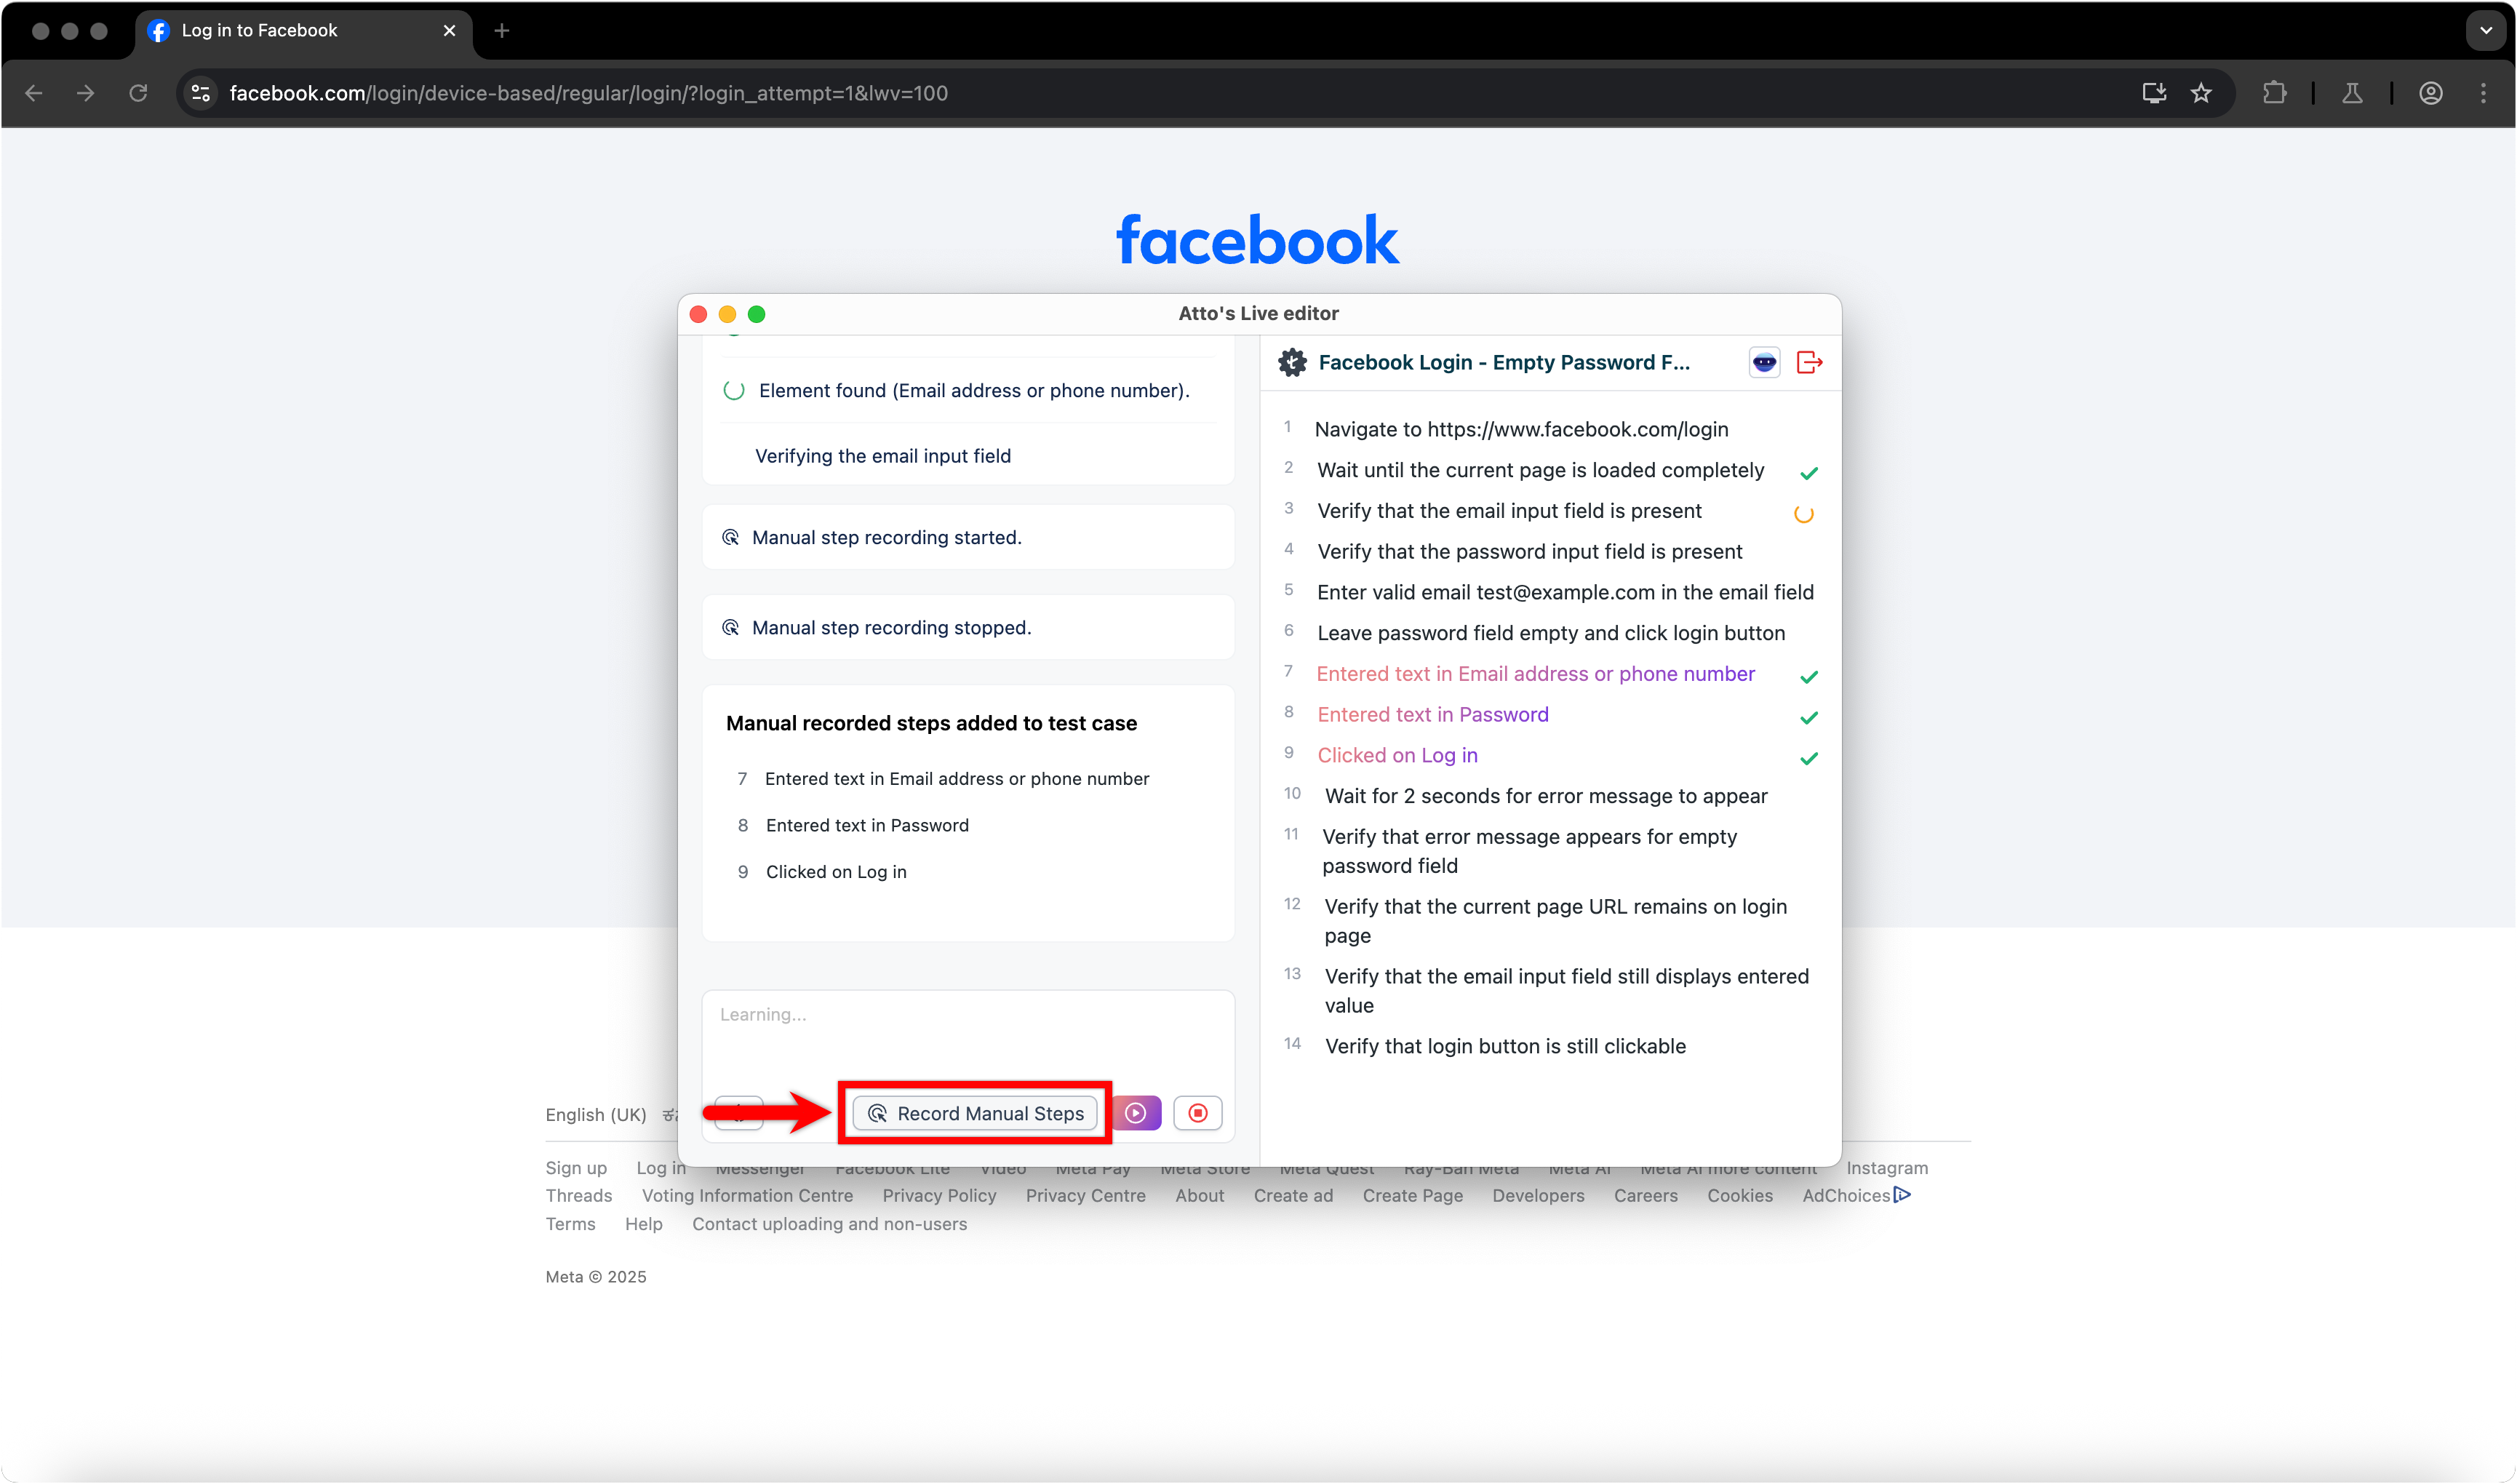
Steps:
- In the interactive panel, click Record Manual Steps.
- Perform the required actions manually.
- Click Stop Recording.
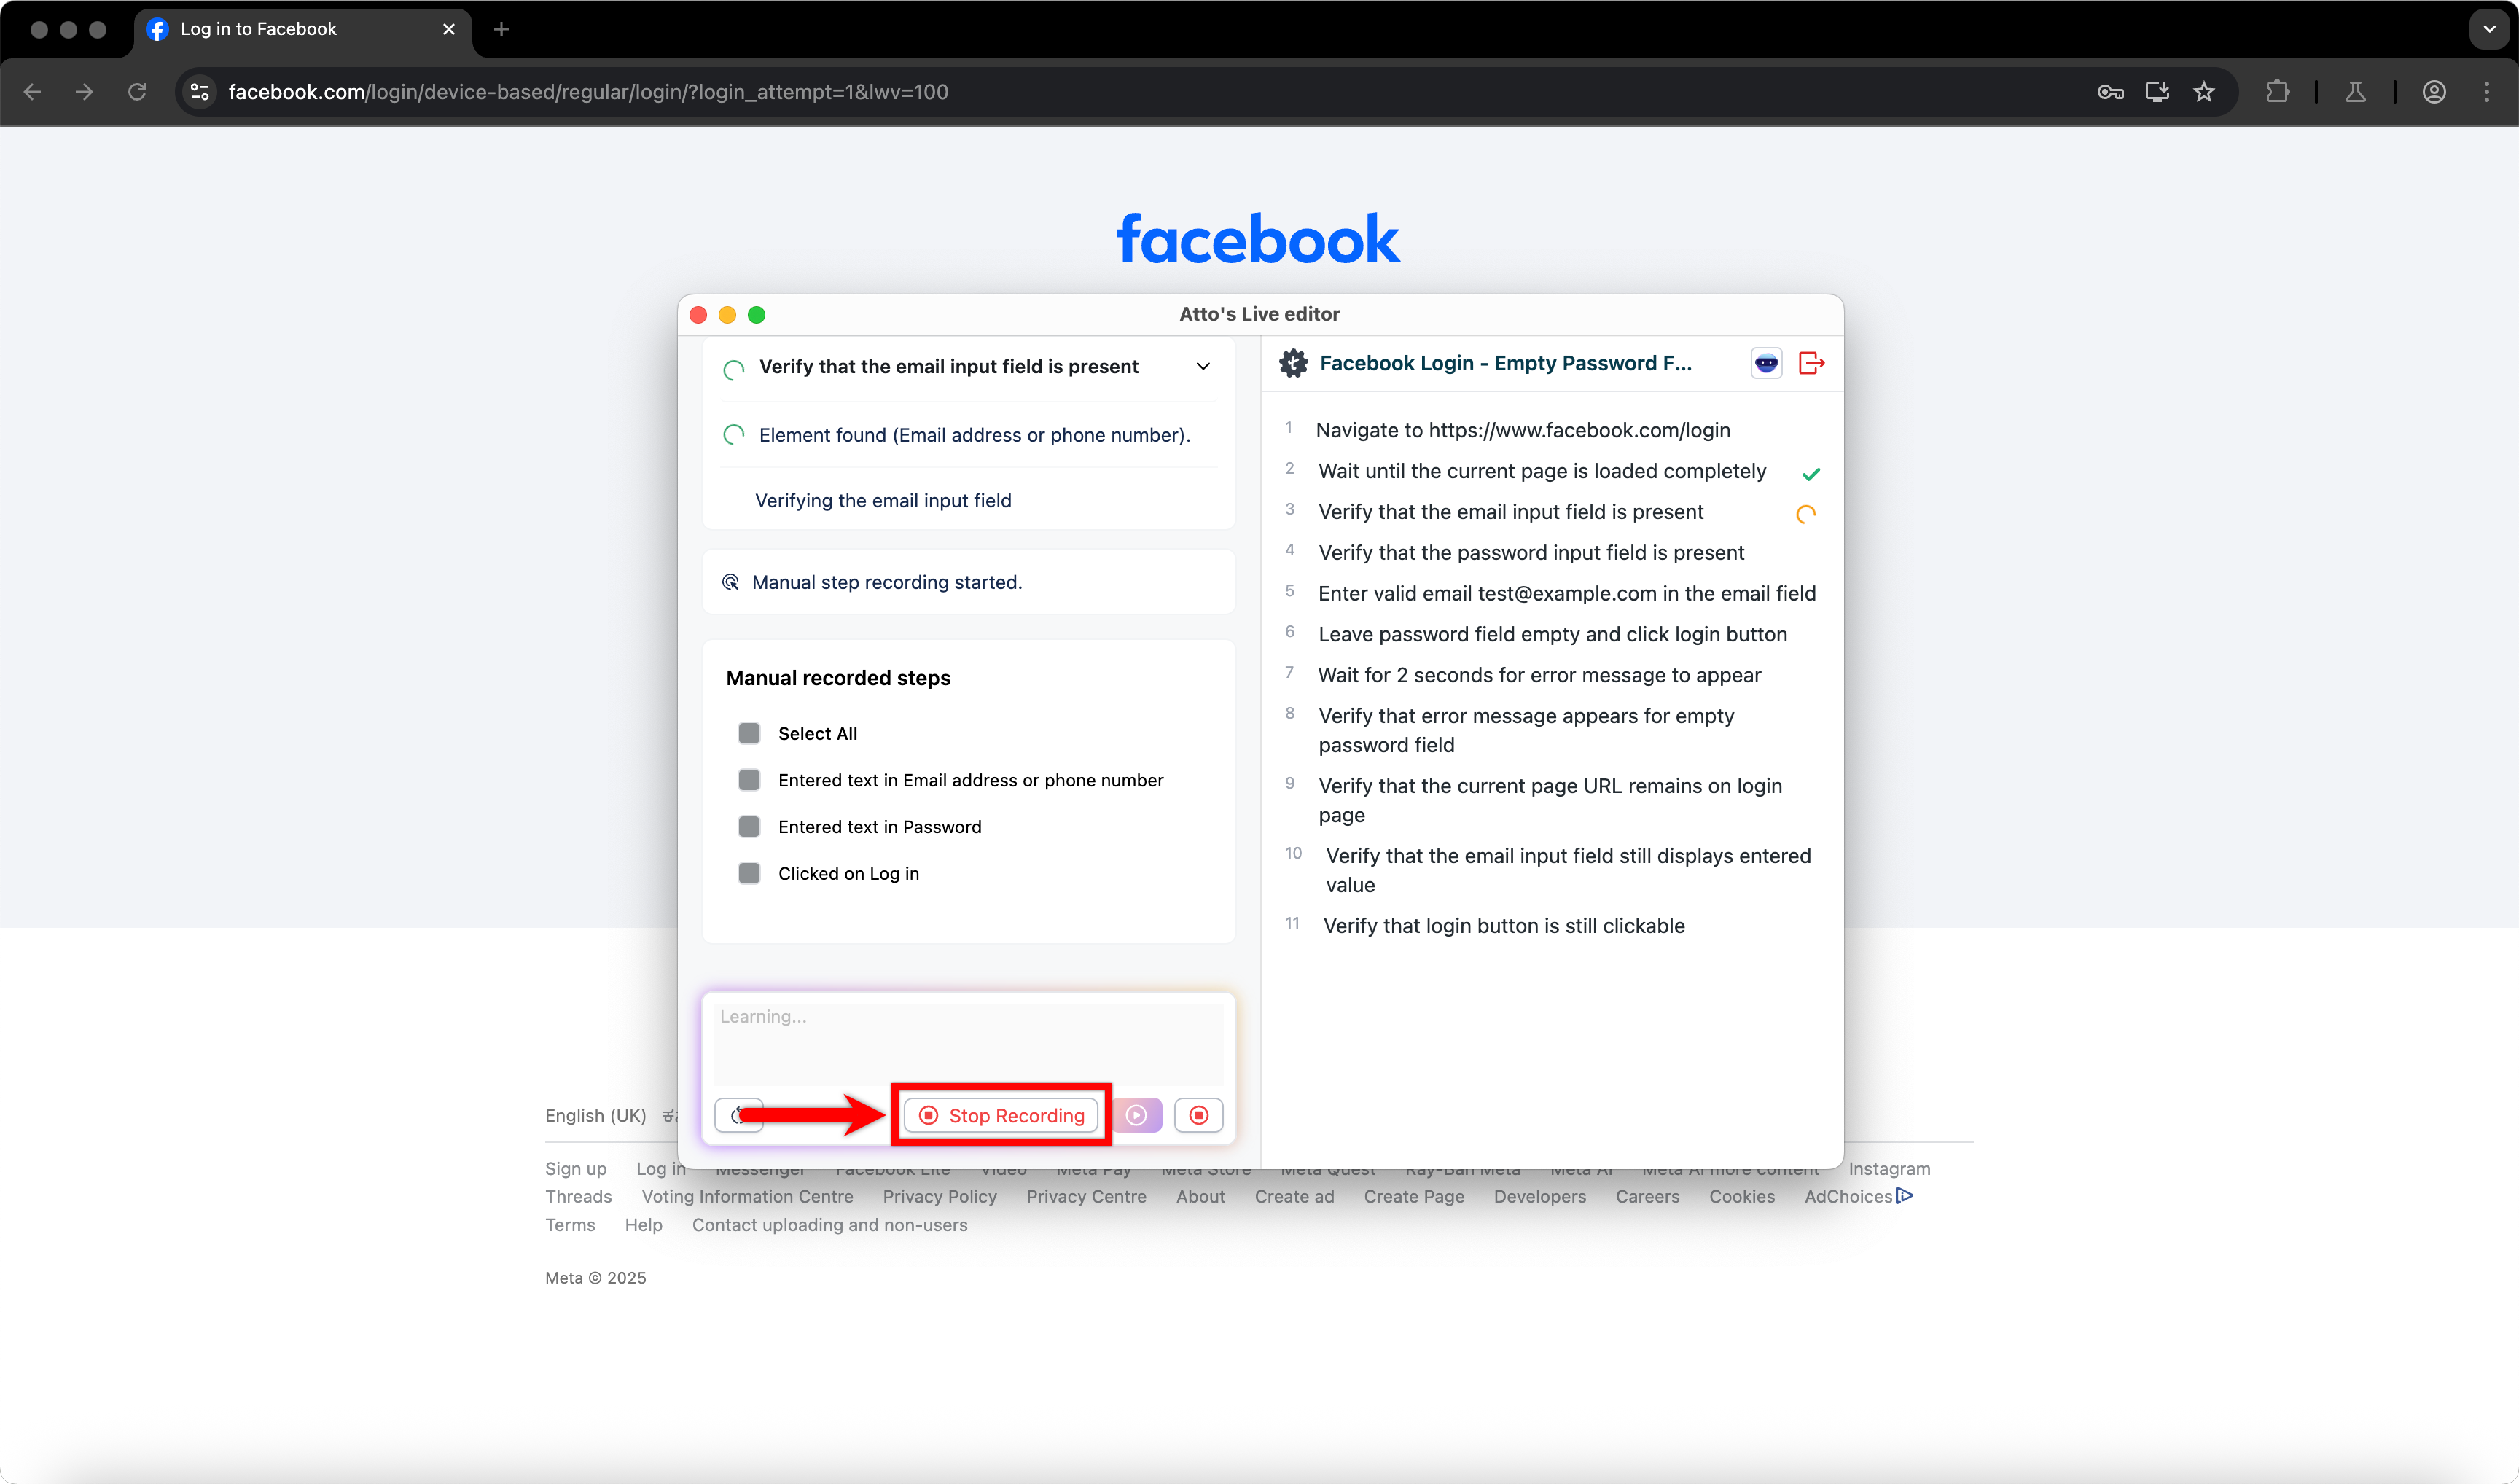
- Under Manual Recorded Steps, select the steps you want to add.
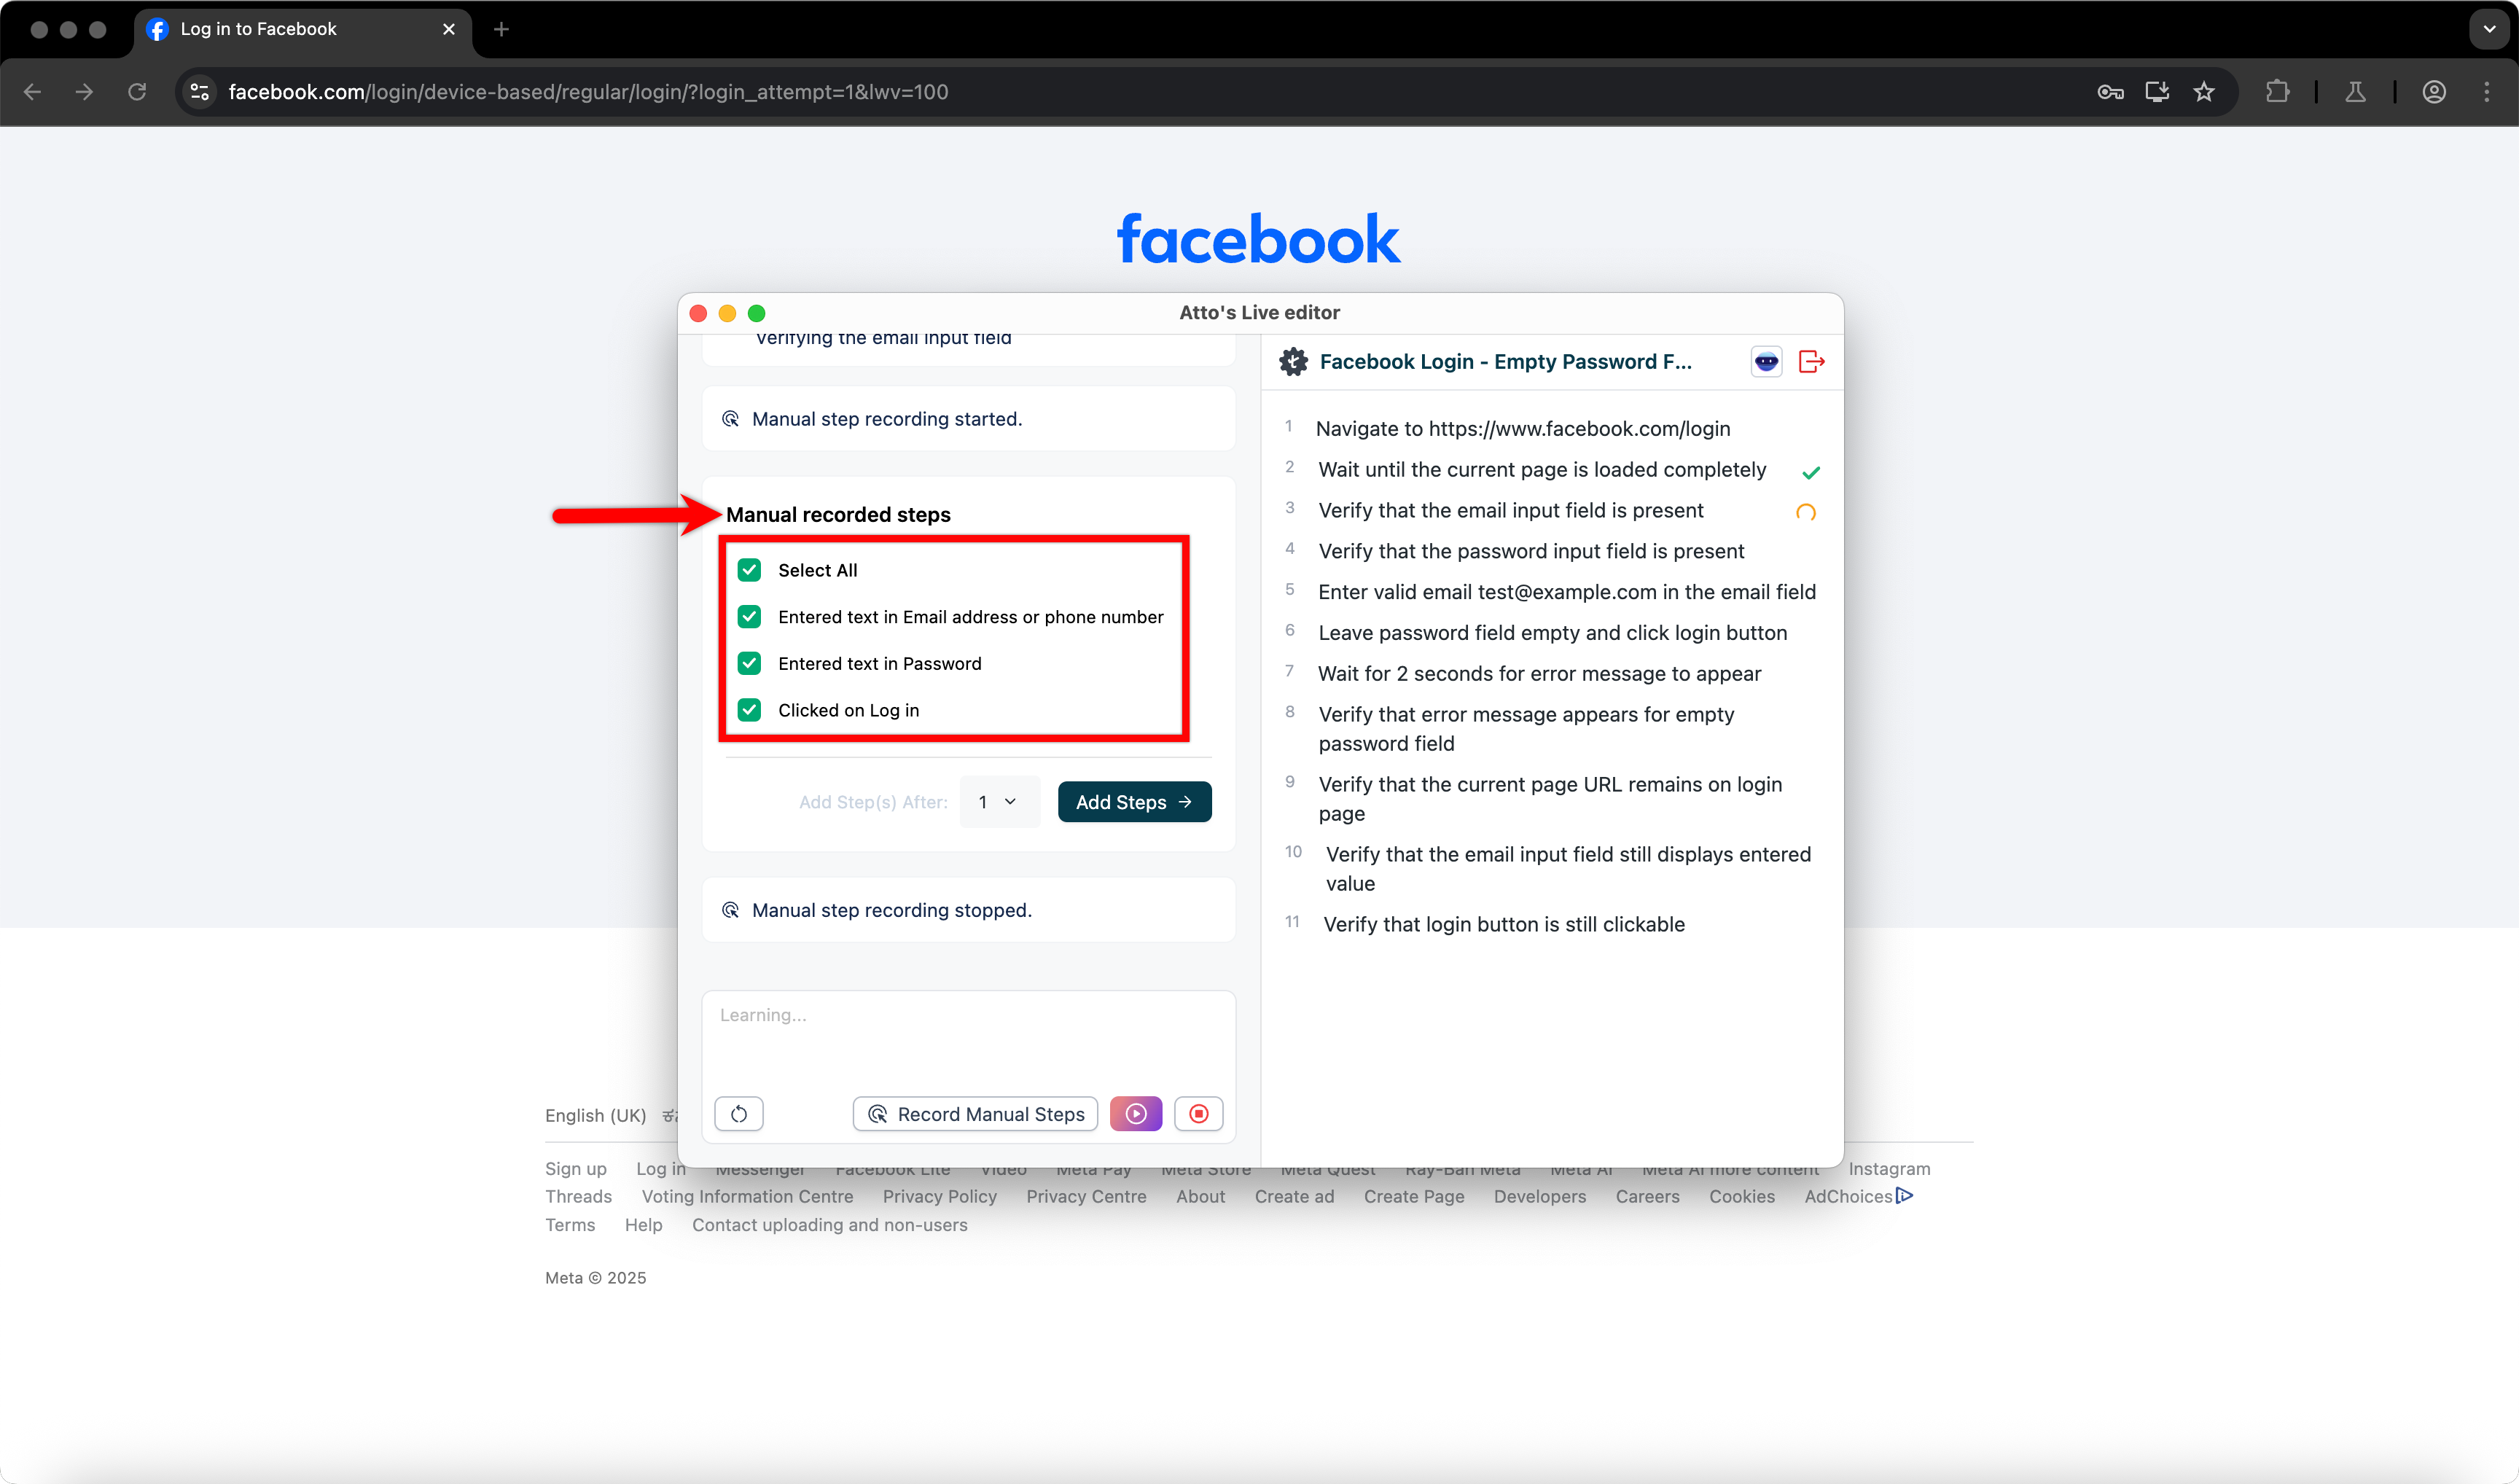
- From the Add Step(s) After dropdown, select the step number.
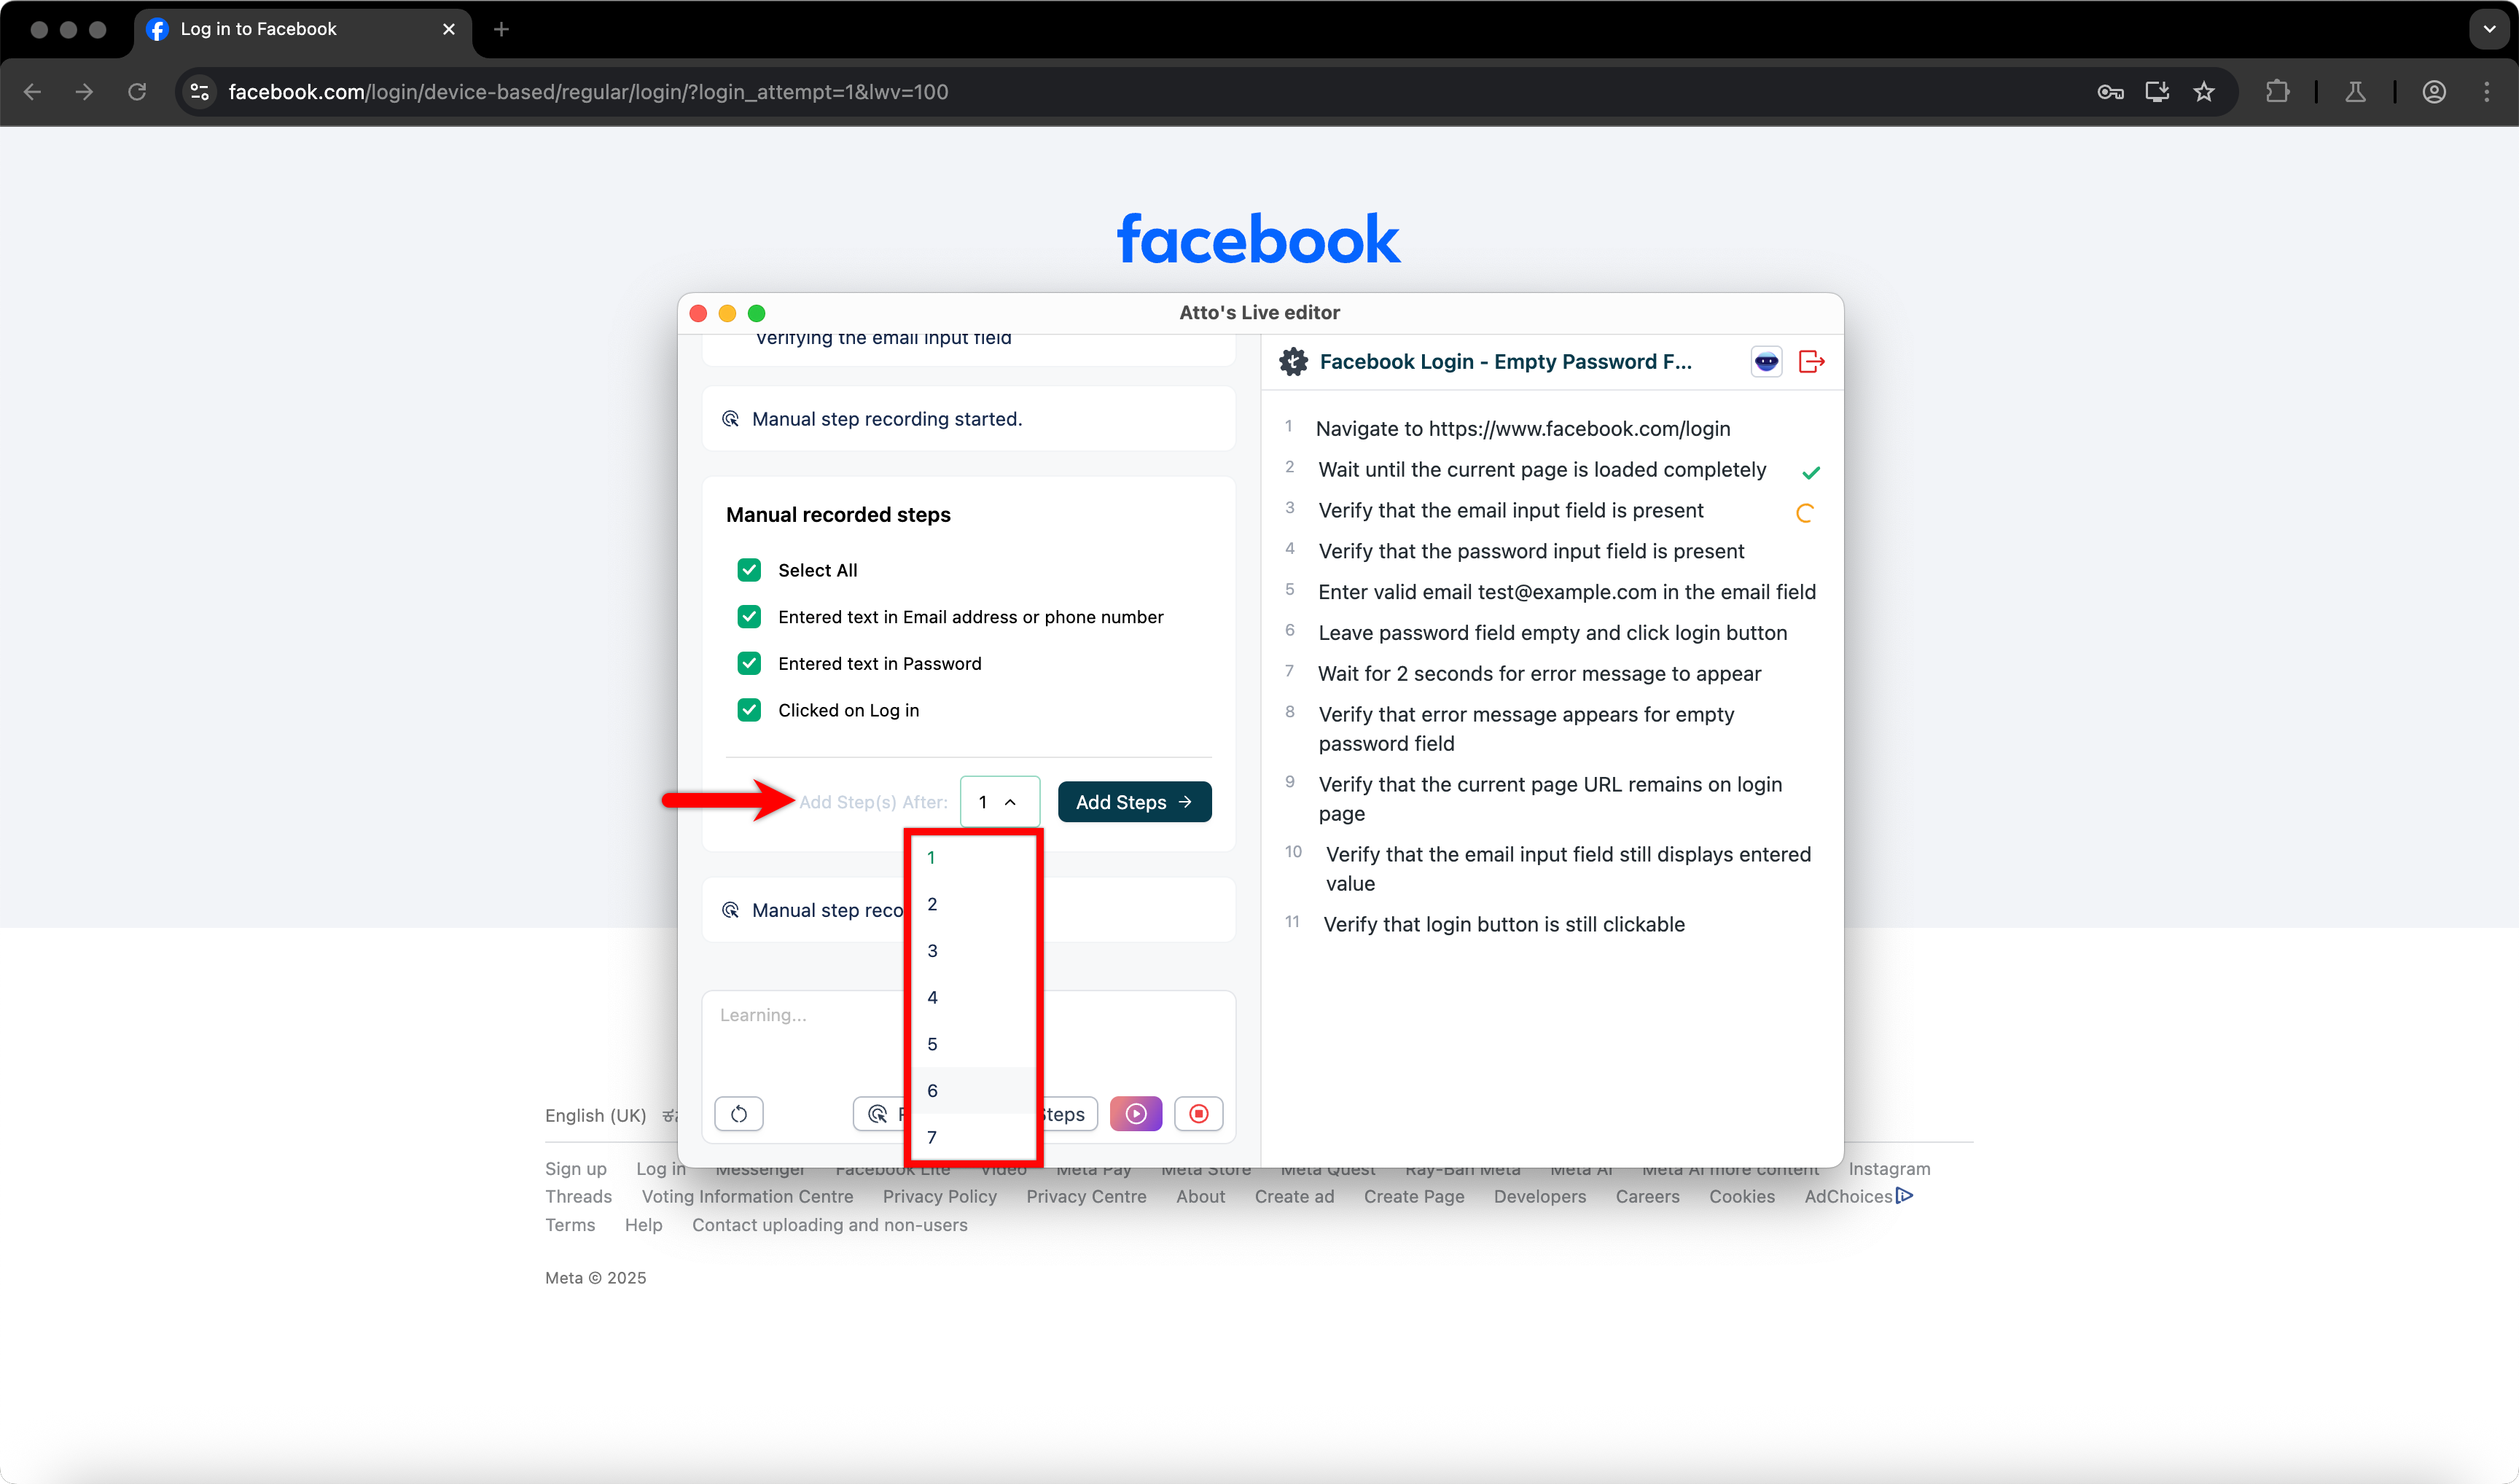
- Click Add Steps.
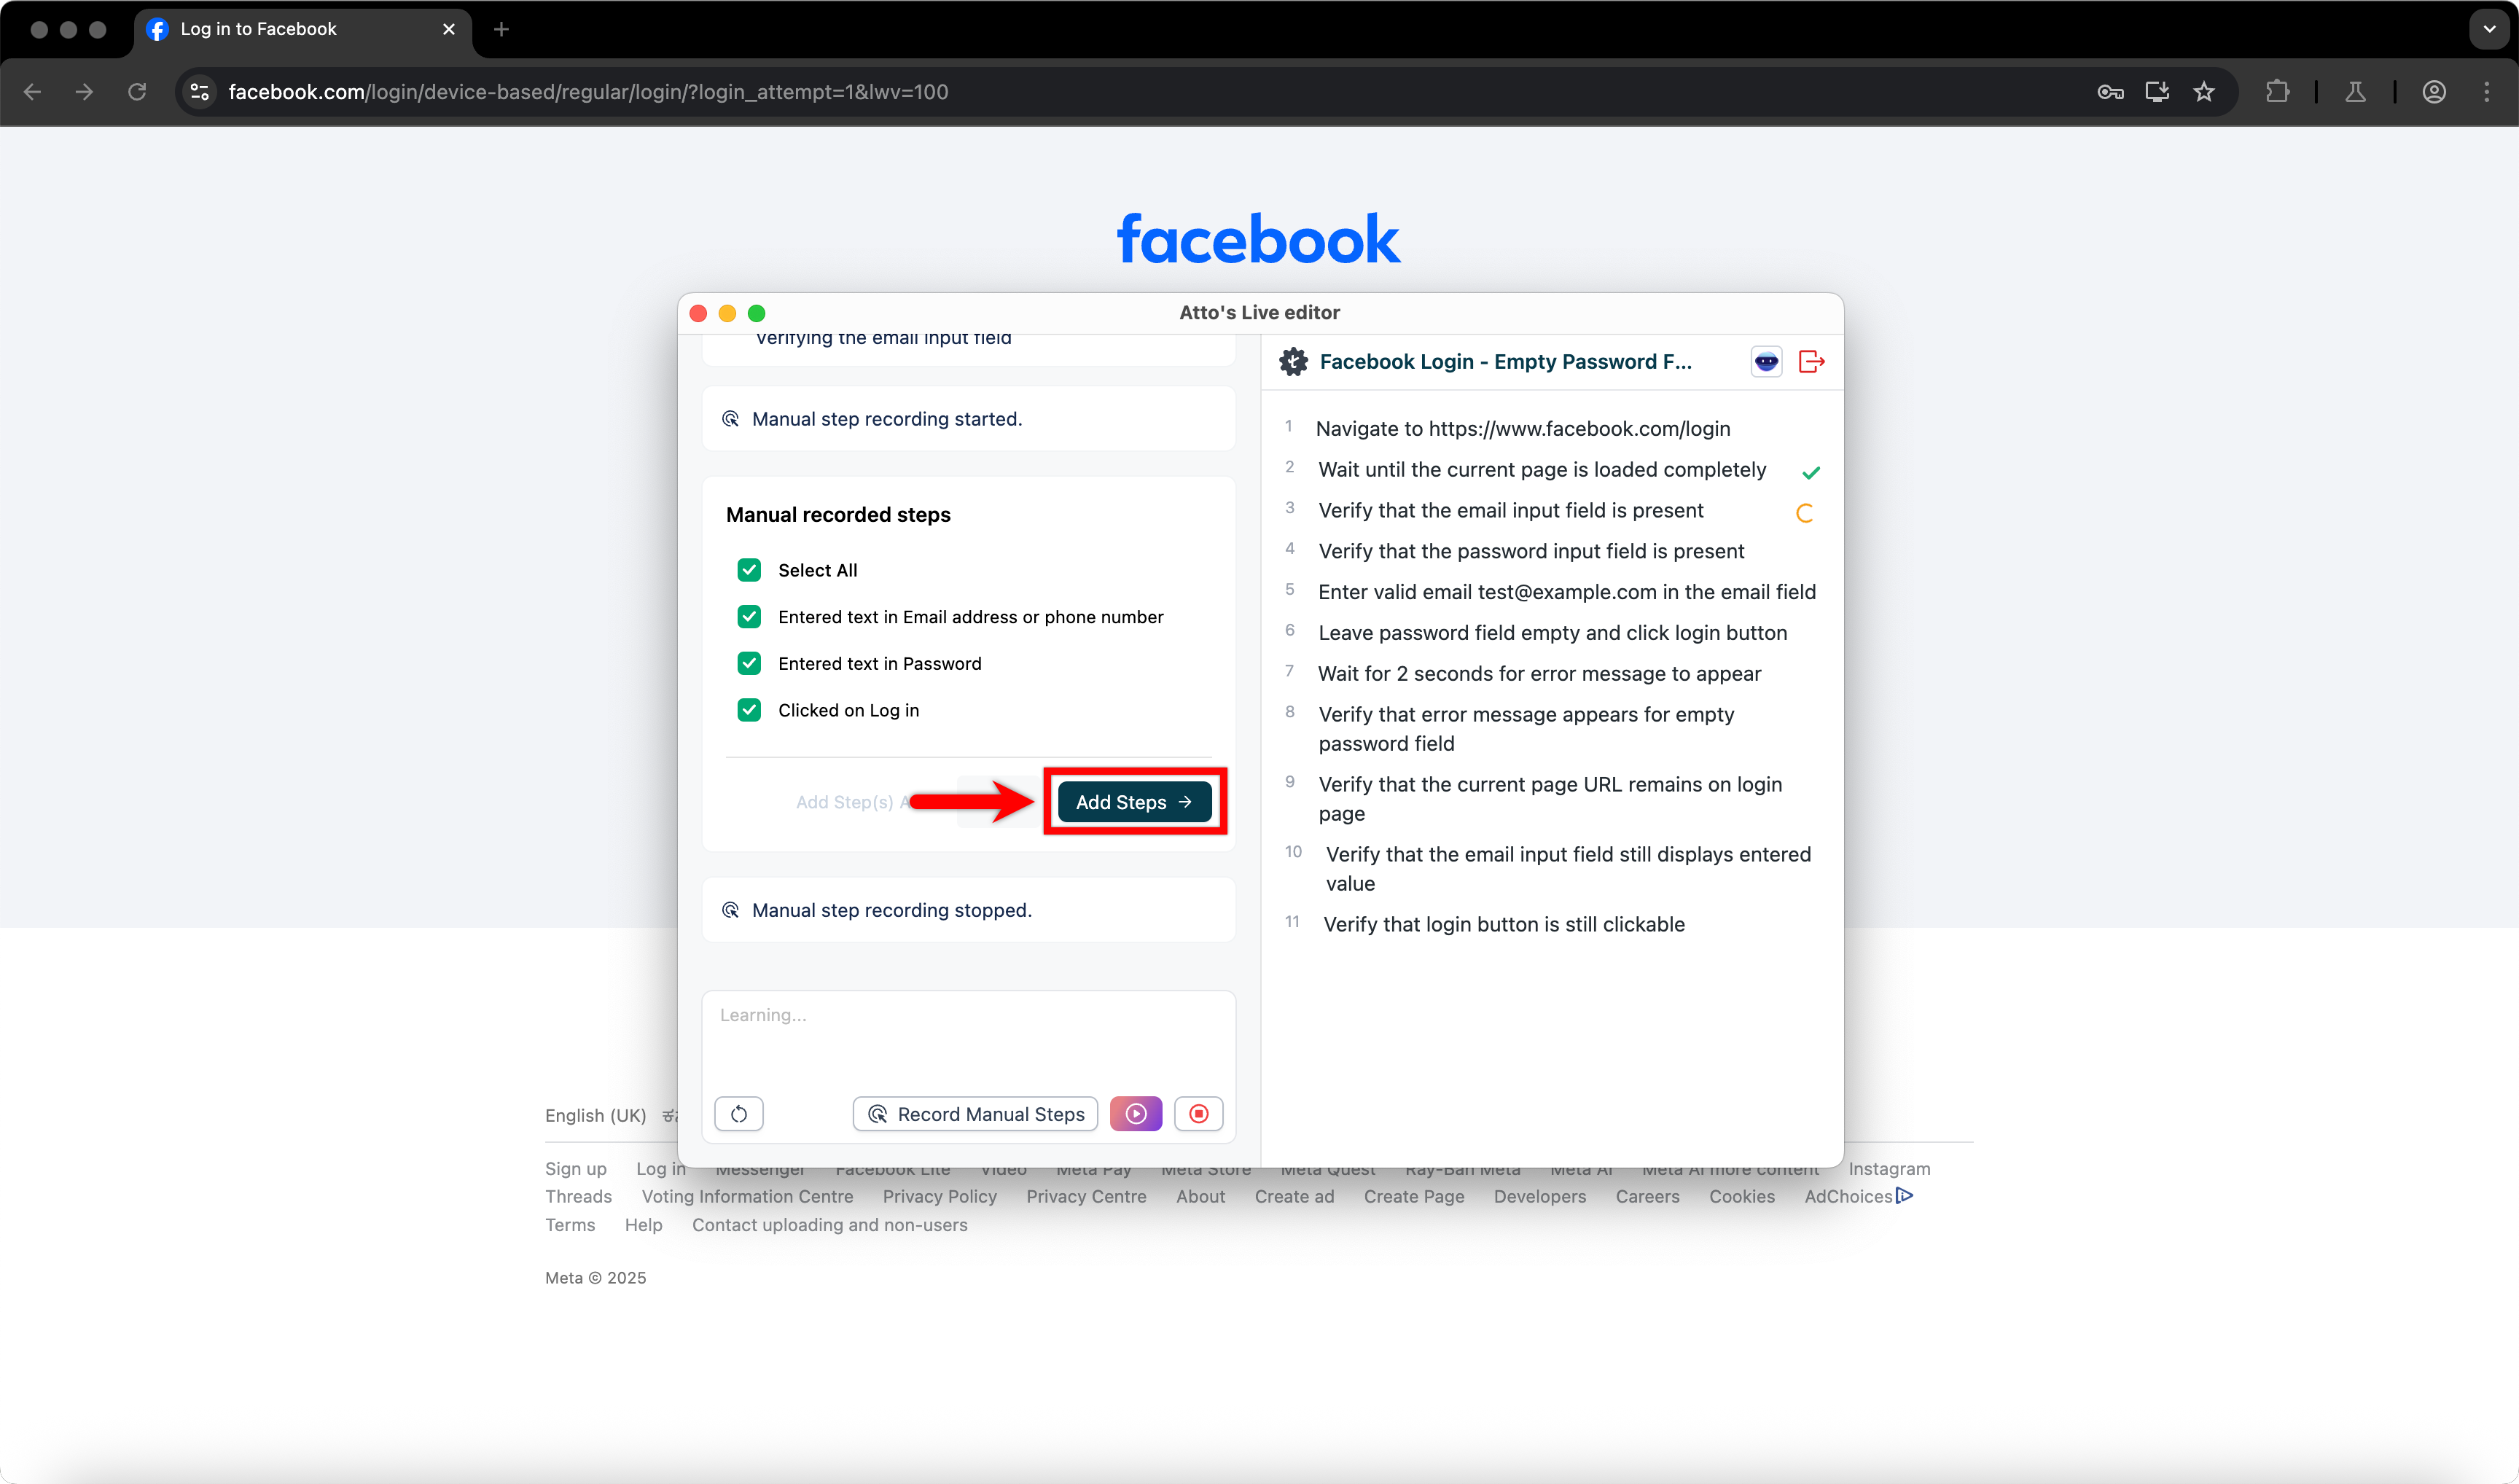
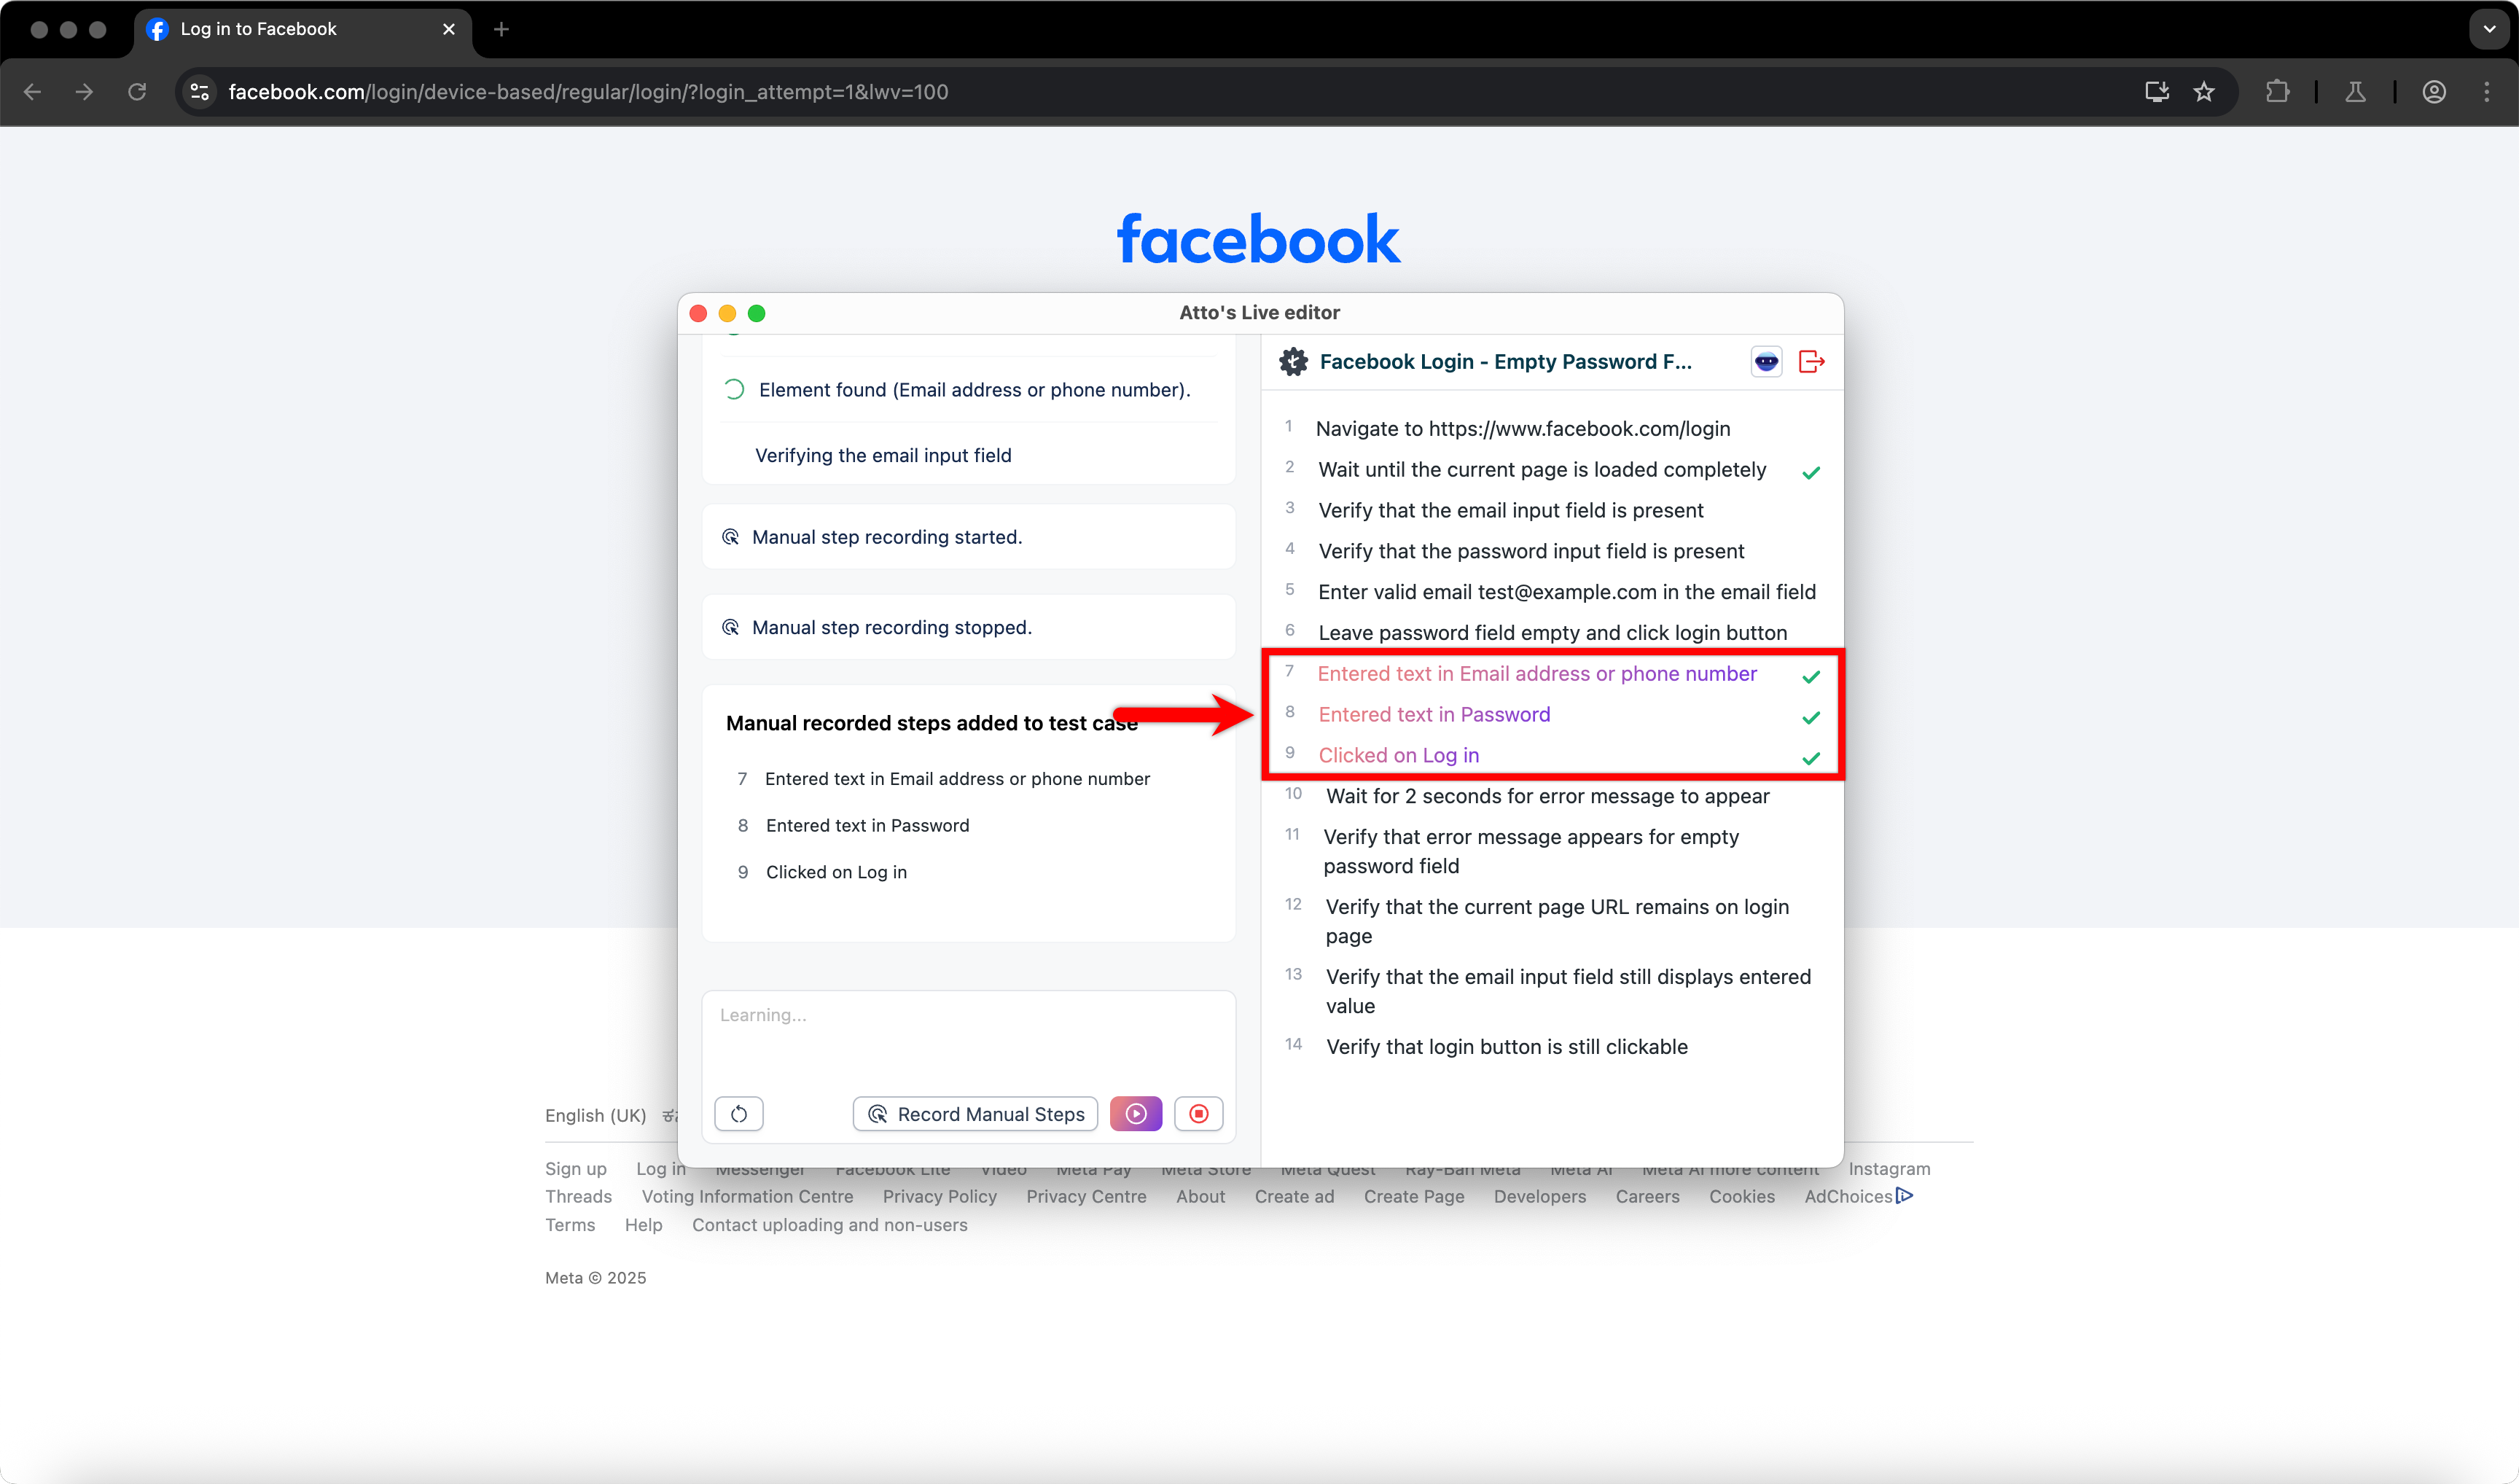
- The selected steps are added to the test case.
Pause or Resume Learning
- Click Pause to temporarily stop the learning process.
- Click Play to resume the learning session.
Stop the Learning Session
- Click Stop to end the Atto’s learning session.
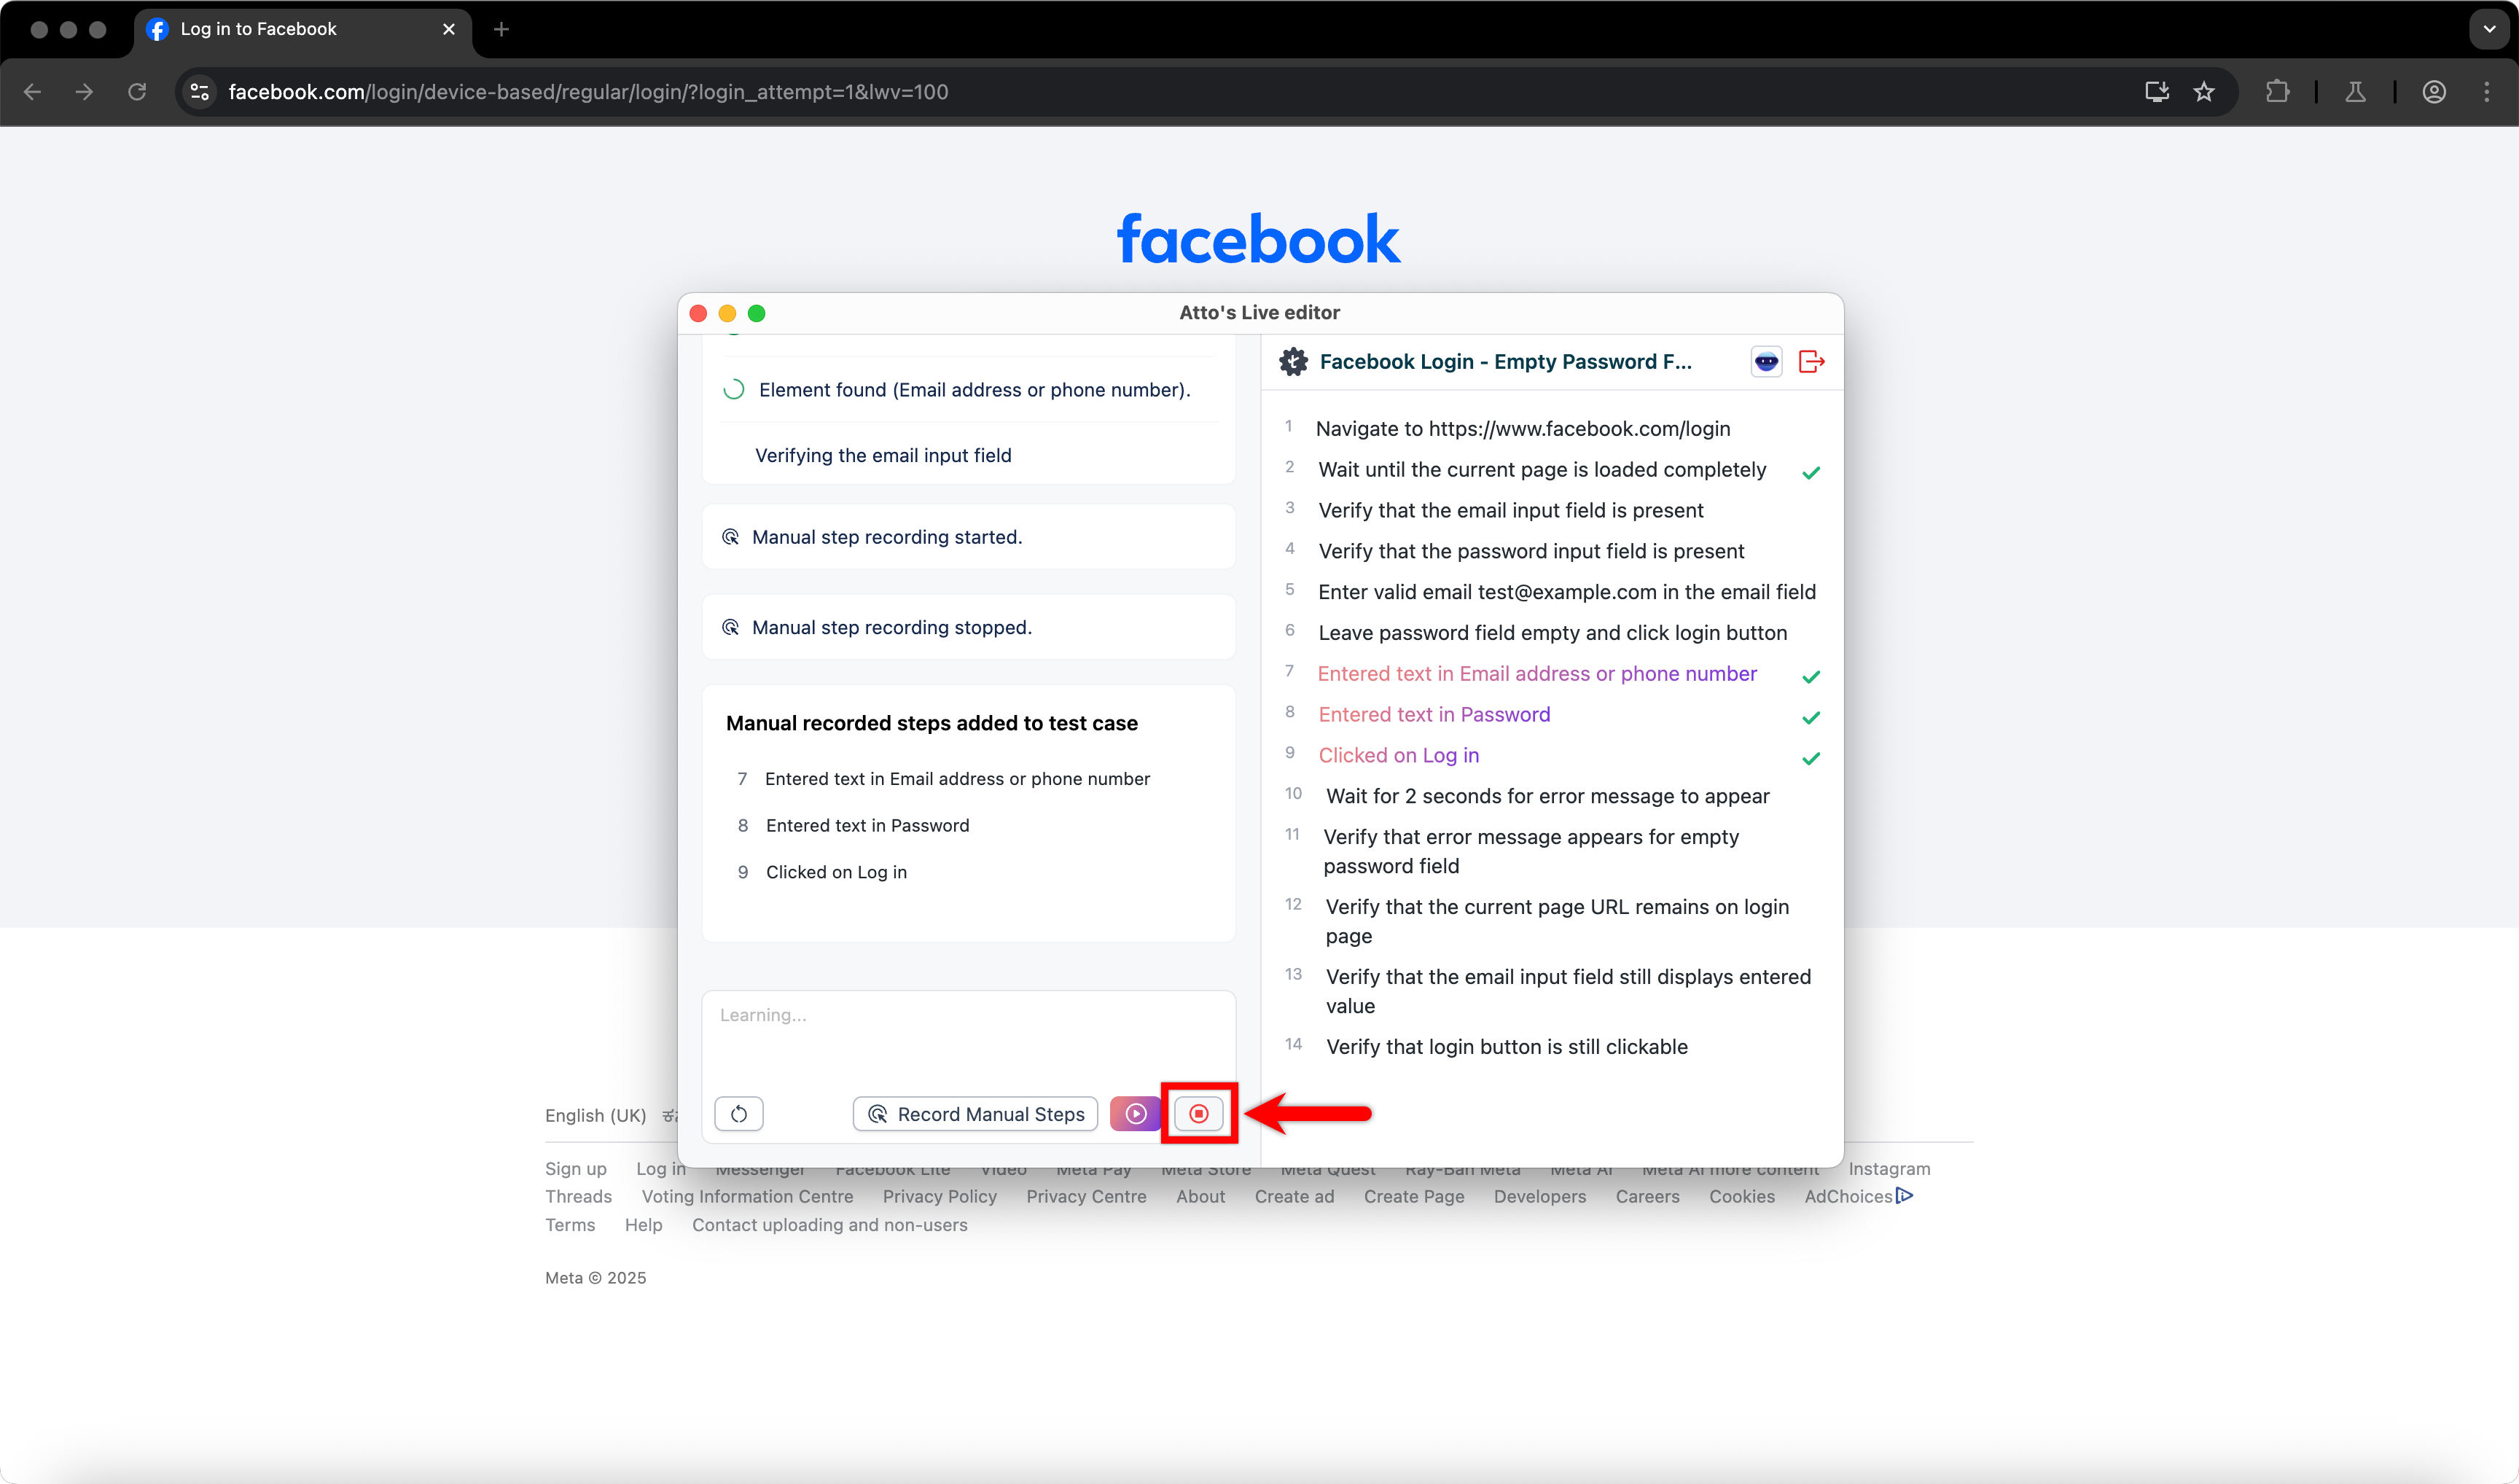
- This stops the live learning process and closes the active session.
Execute and Save the Test Case
- Click Run Now on the Atto’s Live Editor to execute the test case locally.
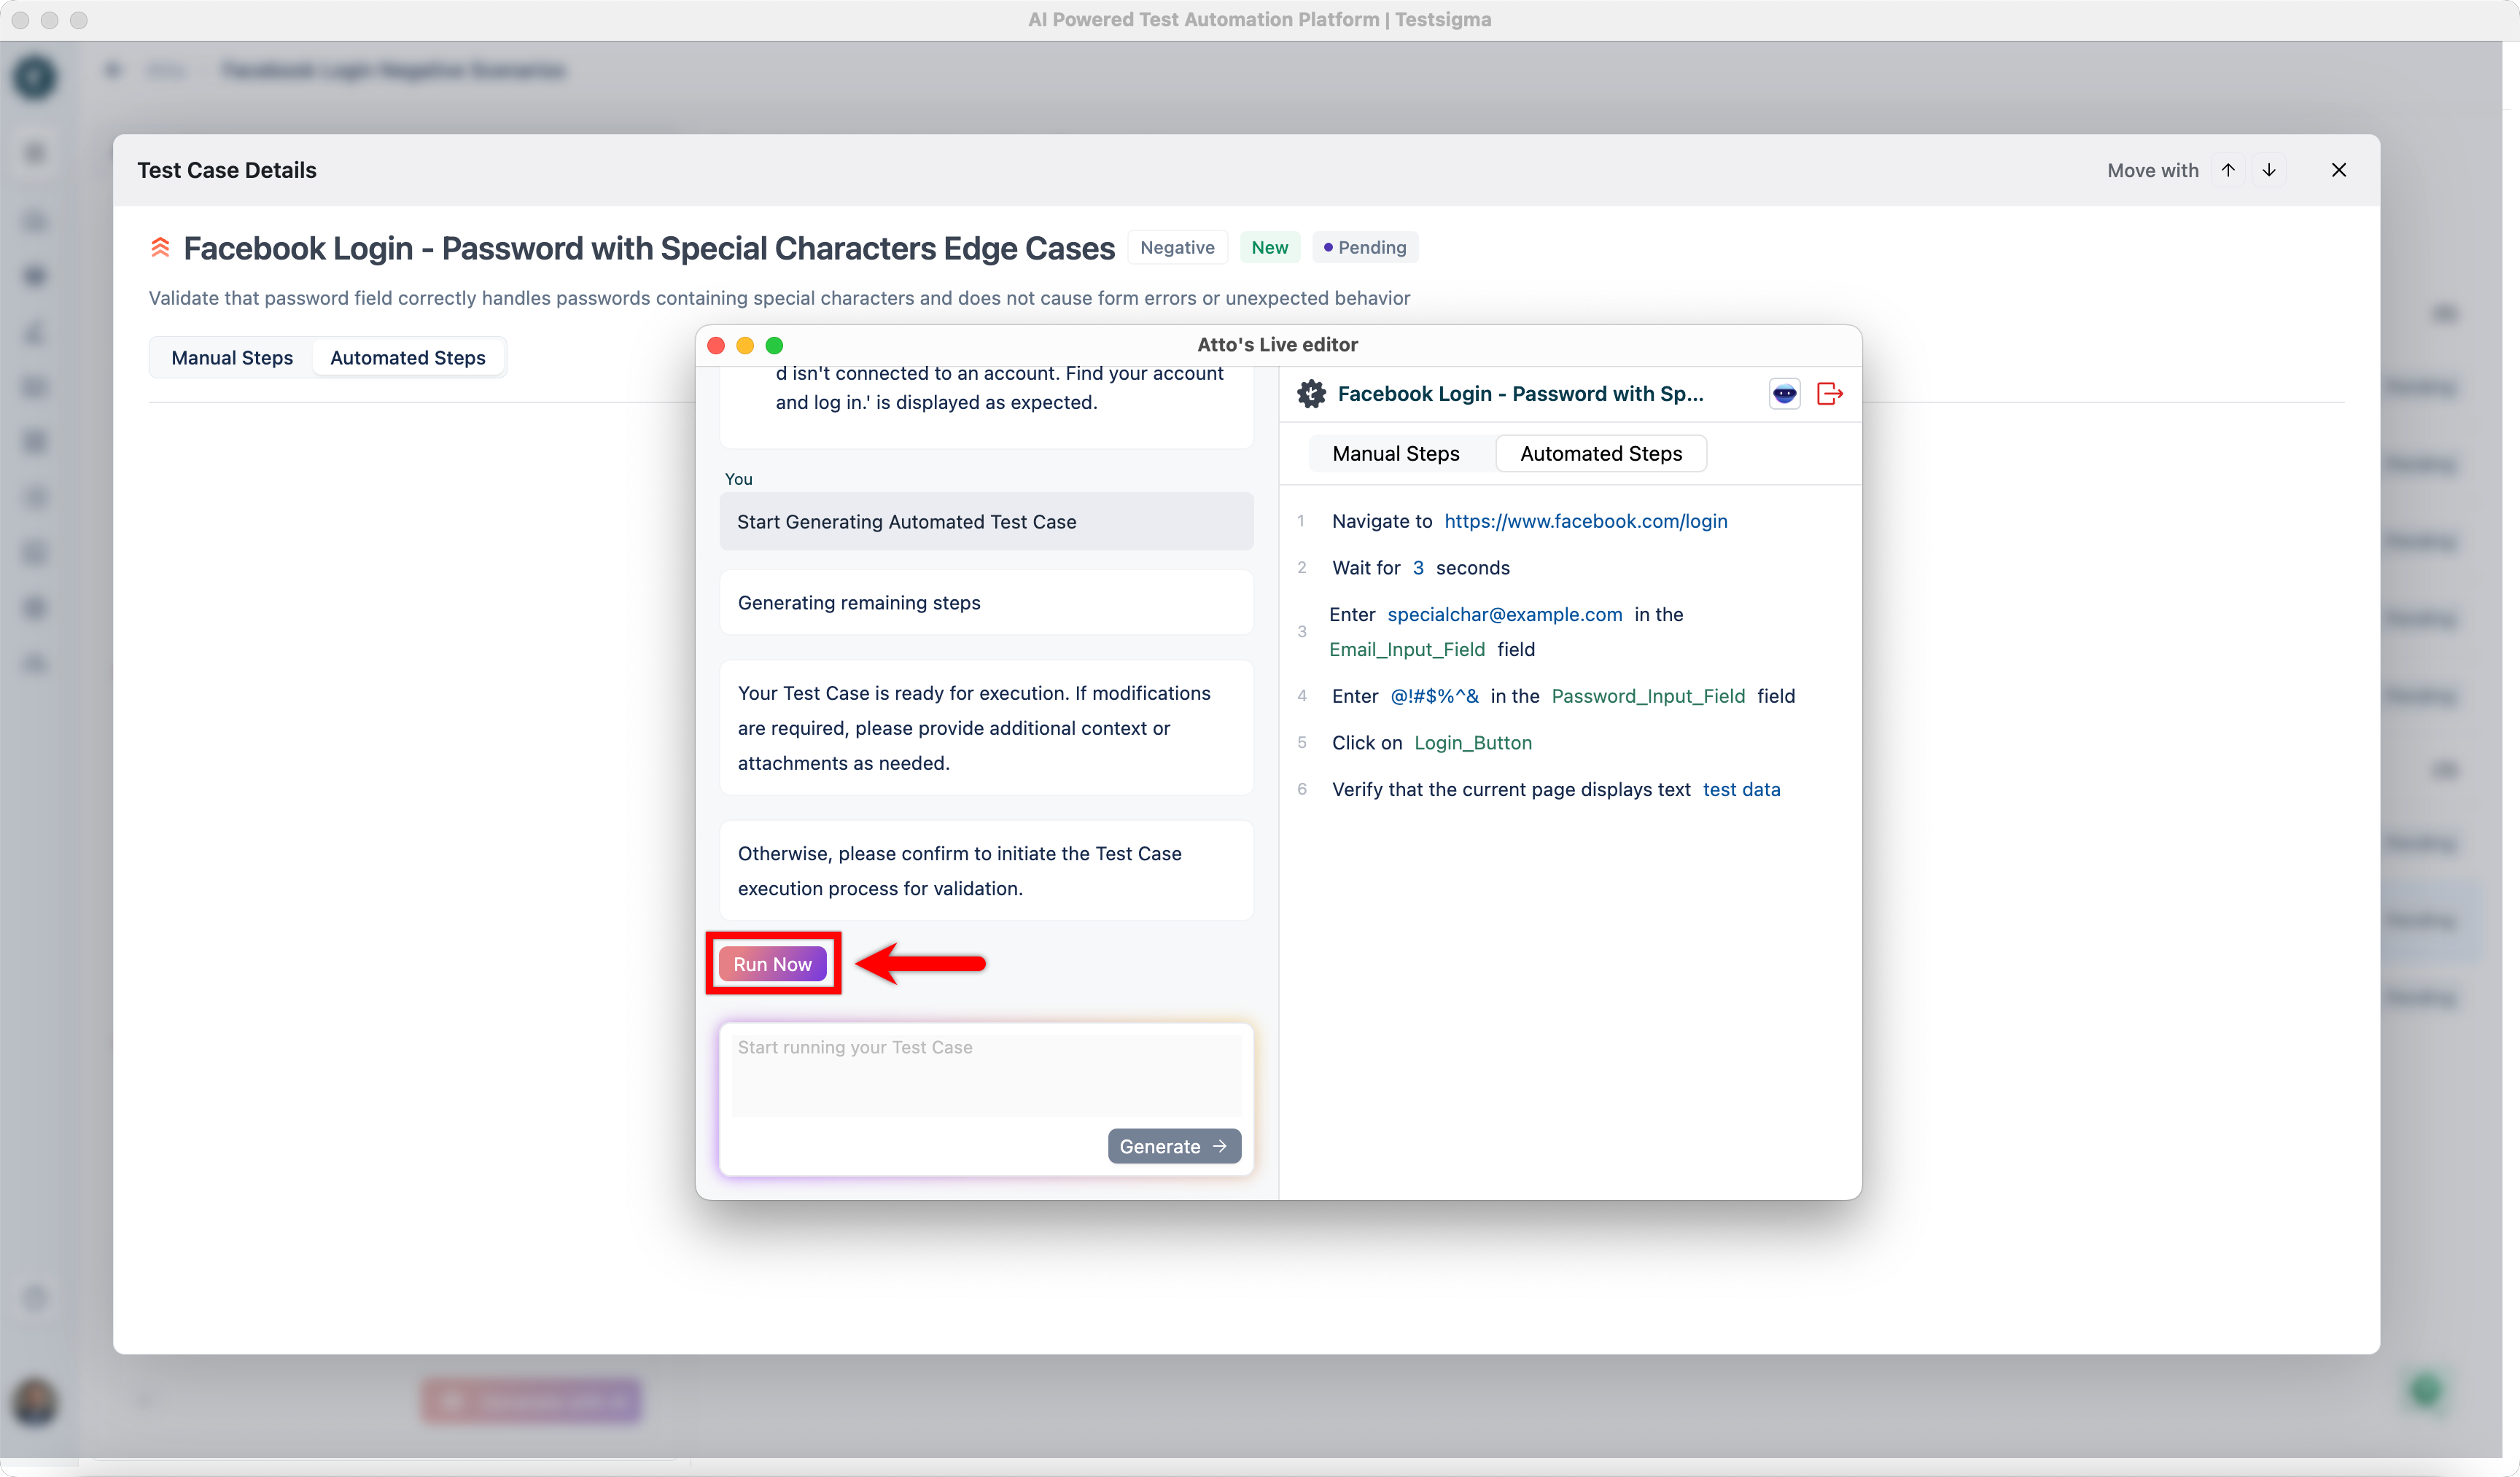
- After successful execution, click Accept to save the test case to the test case library.
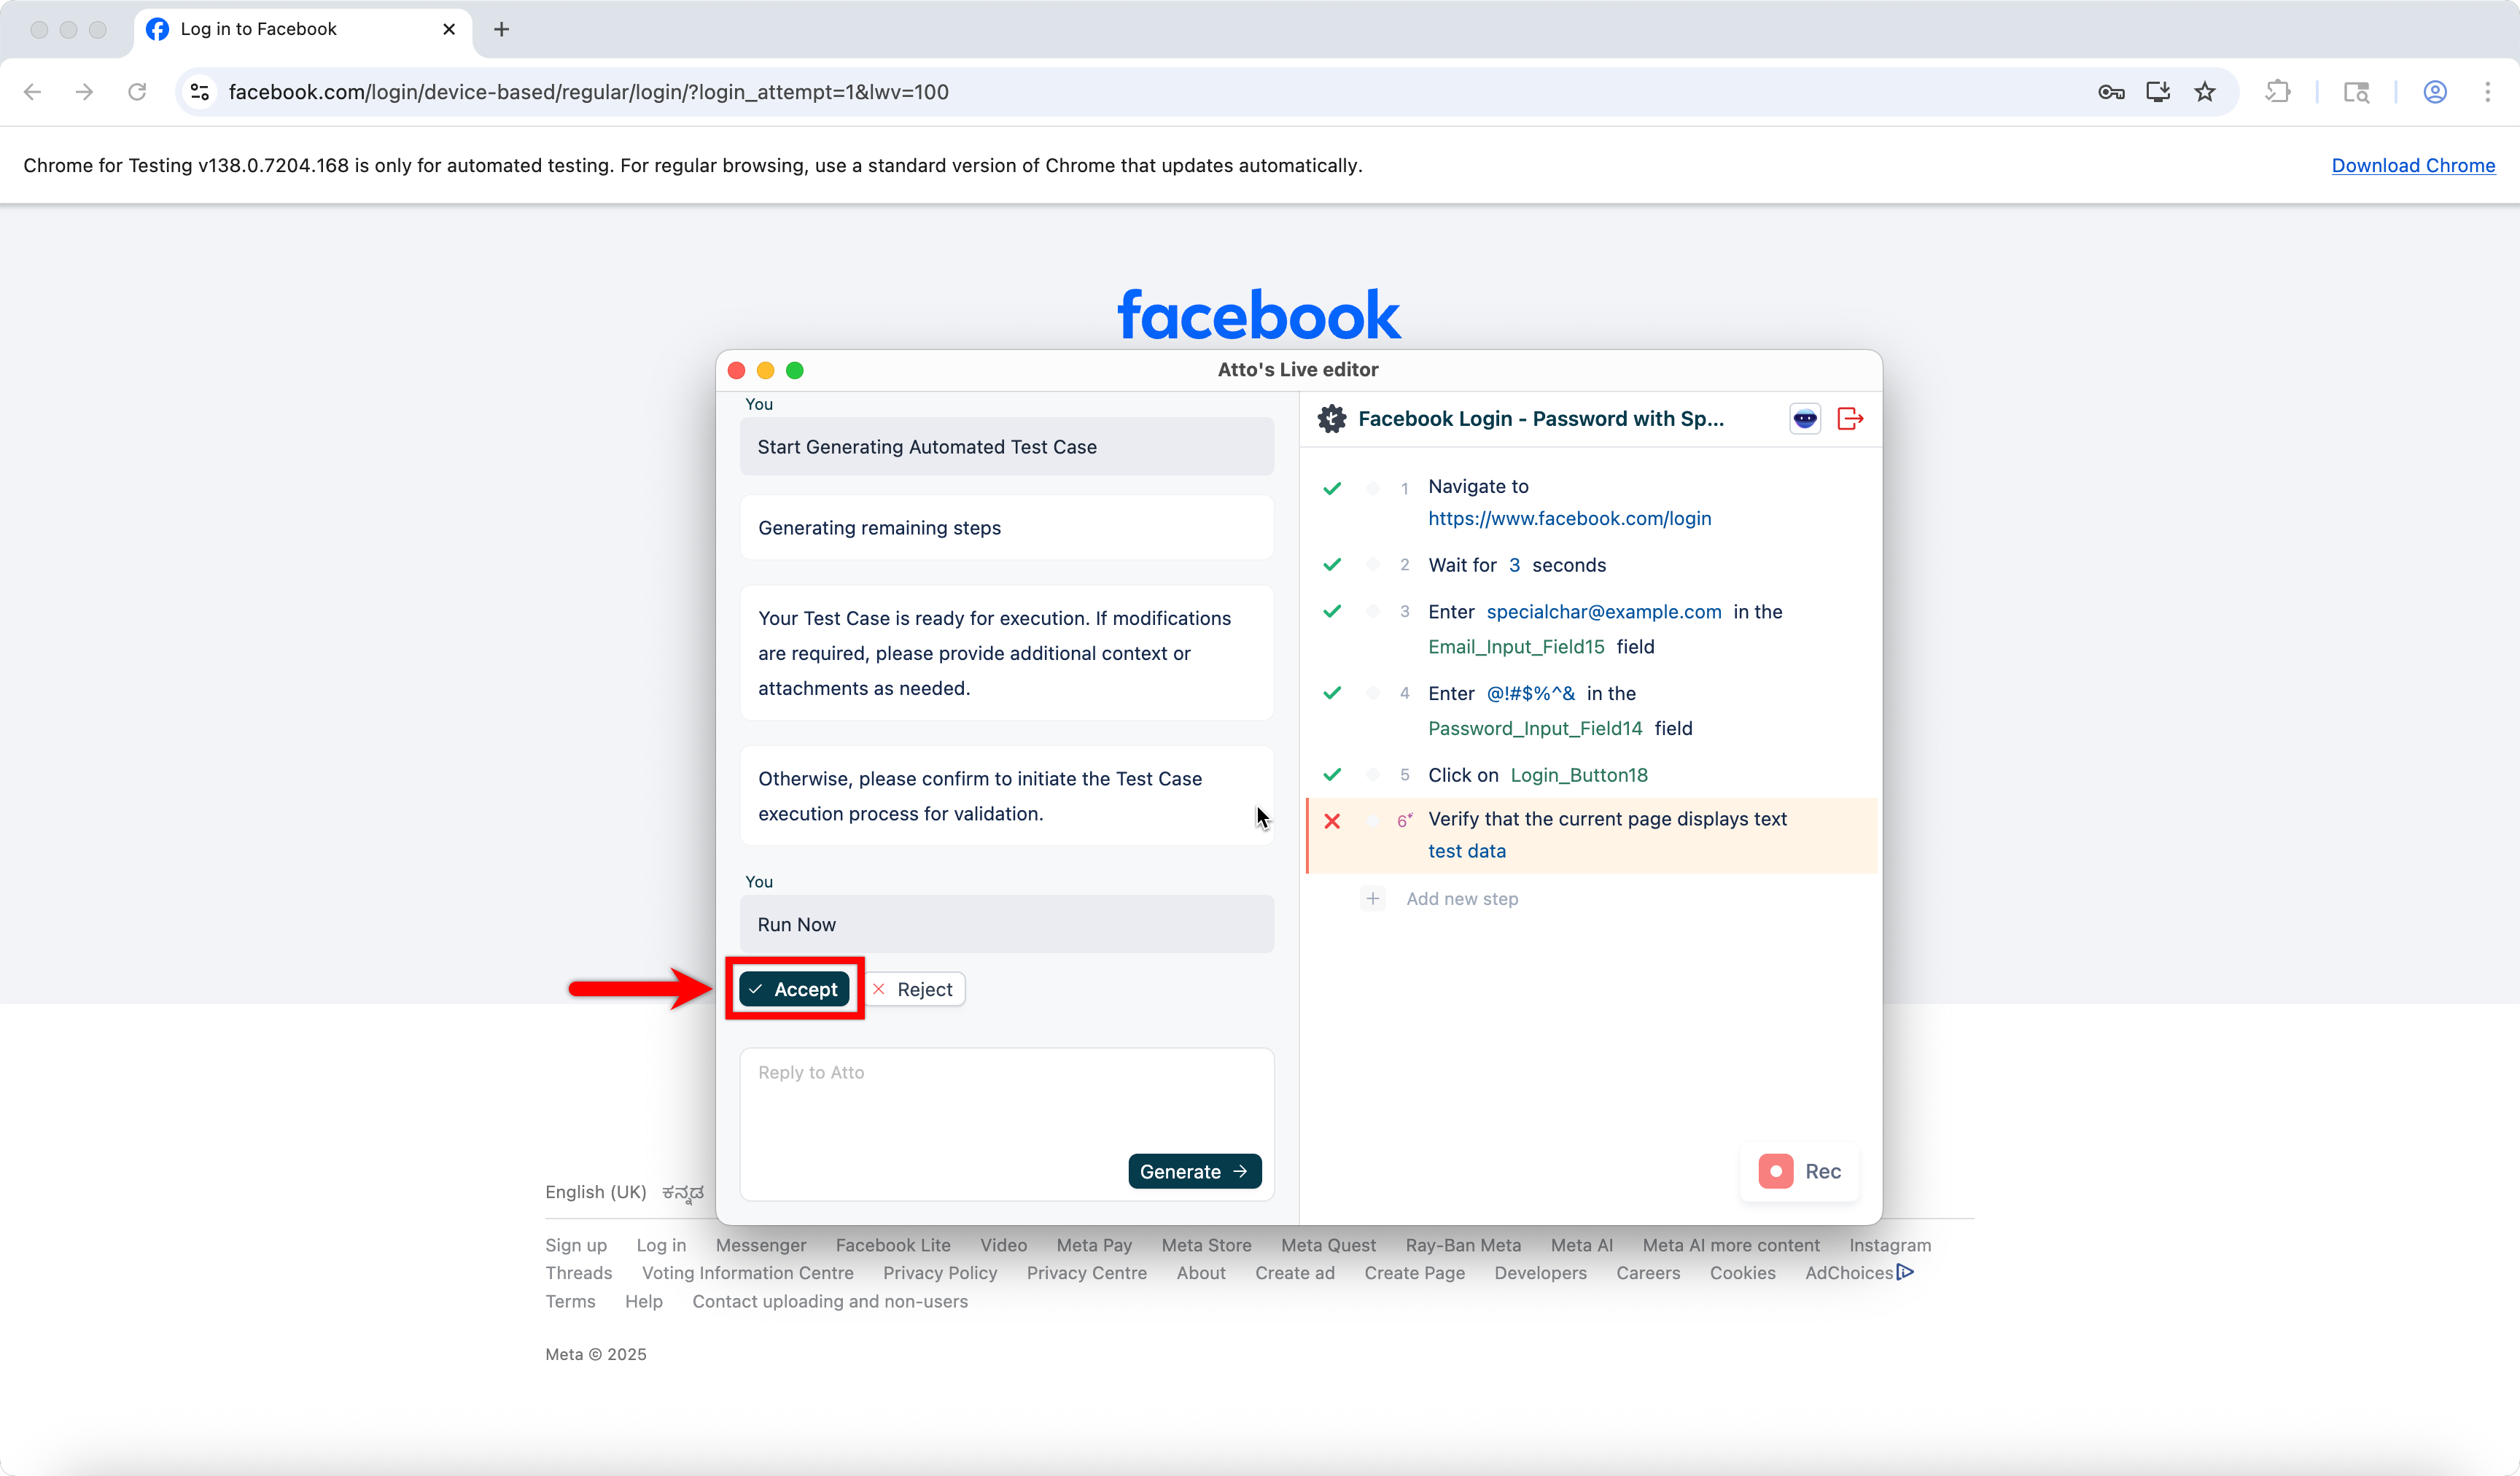
You can accept a test case even if execution fails and update it later. Reject a test case only if it is unrelated or unusable.
Want to contribute or report missing content?