


Locators AKA XPath in Selenium test automation, help to find the unique DOM elements. There are different types of locators CSS, ID, Class, XPath, etc. The XPath Locator is the most commonly used in test automation.
Table Of Contents
- 1 What is Xpath?
- 2 What is Xpath in Selenium?
- 3 Basic Xpath Syntax
- 4 How to Construct XPath Using Chrome Browser DevTools Window?
- 5 Types of Xpath
- 6 How to Write XPath in Selenium?
- 7 What is Chained XPath in Selenium?
- 8 How to Create Dynamic XPath in Selenium?
- 9 How to Write XPath for Different Types of HTML Tags and Attributes?
- 10 How to Write XPath Contains() Function in Selenium Web Driver?
- 11 XPath Matching Text Elements
- 12 How to Match Exact Text in XPath?
- 13 Partial Match of Text Content in Xpath
- 14 Using Conditions in XPath
- 15 Starts-With in Xpath
- 16 XPath Axes
- 17 How to Write Codeless Automation Scripts Using Testsigma?
- 18 Frequently Asked Questions
- 19 Suggested Readings
What is Xpath?
XML Path Language is popularly abbreviated as XPath; it locates the element uniquely in the DOM tree. In test automation, Locators and Selectors are used interchangeably.
What is Xpath in Selenium?
XPath is a syntax used to navigate and select elements in an XML document in Selenium. It is a powerful tool for web automation, allowing testers to write expressions that locate specific elements on a web page and interact with them using Selenium’s API.
Basic Xpath Syntax
//tag_name[@attribute=’value’]
// : Stands current node
tag_name : HTML tag name example input, div, span etc.
@attribute: Name of the attribute class, id, aria-label etc.
value: value of the attribute
How to Construct Xpath Using Chrome Browser Devtools Window?
Xpath can be constructed using any modern browser. As Chrome is the most used browser, the demonstration is given in Chrome. Steps remain mostly the same for other browsers as well.
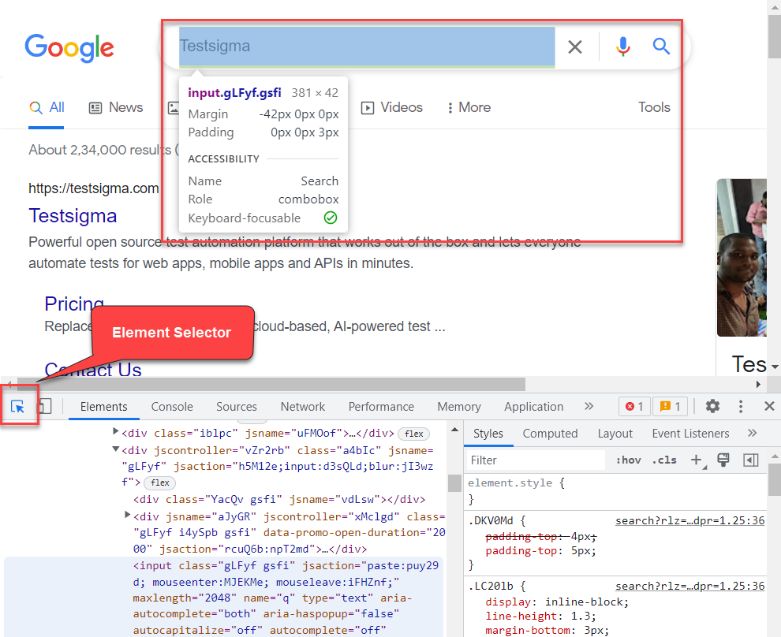
1. Open the web page.
2. Use Shortcut CTRL+SHIFT+I for Windows Or CMD+SHIFT+C for Mac.
3. The Developer window with the active Elements tab opens up.
4. Click on Element Selector, and select the Element.
5. Copy Xpath
Right Click on the DOM Tree-specific element Click on Copy then Click on Copy Xpath
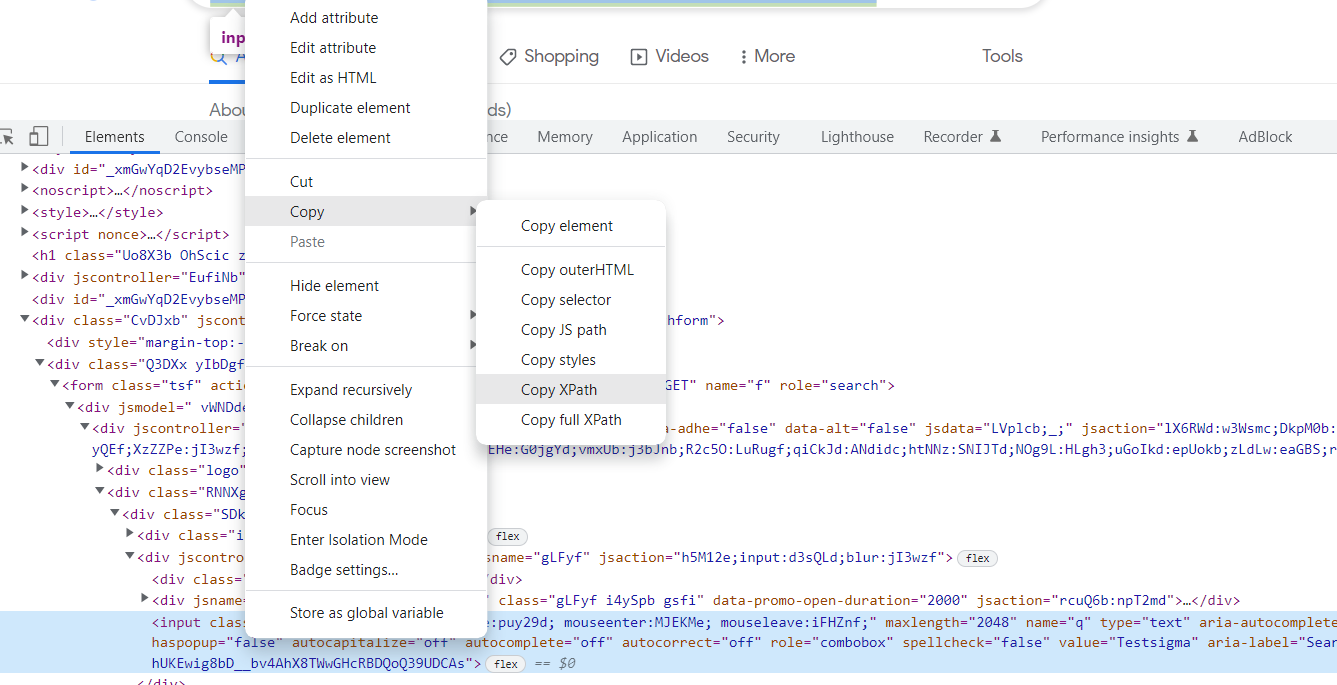
6. Verify Xpath, In the Elements Tab open search using CTRL + F (Windows) or CMD + F (Mac), and paste the copied Xpath, if the Xpath is correct, the element should highlight.

Chrome uses its way to construct the Xpath, sometimes the copied Xpath will be long, So it is not recommended to use the Copy Xpath, This way of copying Xpath is helpful for beginners until they are comfortable with constructing one on their own. In this article, you learn the best way to construct the XPath with XPath Locator strategies and keywords.
Types of Xpath
Xpath can be broadly classified into
1. Absolute Xpath
2. Relative Xpath
What is Absolute Xpath?
The absolute Xpath is often referred to as Full Xpath, which starts from the beginning of the HTML document (root). The absolute with Xpath starts with a single slash (/).
Example of Absolute Xpath
/html/body/div[4]/div[2]/form/div[1]/div[1]/div[2]/div/div[2]/inputWhy Absolute Xpath is Not Recommended for Selenium Test Automation?
Absolute XPath is not recommended for any test automation the reason is the absolute XPath starts from the root of the DOM Structure/Tree document. If there are any elements added as a child in between the path due to application improvement or feature delivery your test automation code breaks. So in test automation typically the relative Xpath locator is the best way to use it.
What is Relative Xpath?
Unlike Absolute Xpath, the relative XPath starts from the middle of the DOM Tree and it starts with double slashes (//). Since the Relative Xpath contains less top-level HTML Element node dependency it is more stable and typically used in test automation.
Example of Relative Xpath
//a[@href="/pricing"]How to Write Xpath in Selenium?
XPath is a powerful tool for locating elements in web pages. It uses a tree-based approach to navigating the HTML document, allowing you to specify the exact path to the element you want to interact with. In Selenium, XPath is one of the most common methods for finding elements.
Here are some basic XPath expressions for finding elements in Selenium:
1. Finding Elements by ID:
XQuery
- //input[@id=’username’]
This XPath expression will find the first input element with an ID of “username”.
2. Finding Elements by Name:
XQuery
- //input[@name=’password’]
This XPath expression will find the first input element with a name of “password”.
3. Finding Elements by Class Name:
XQuery
- //button[@class=’login-button’]
This XPath expression will find the first button element with a class name of “login-button”.
4. Finding Elements by Text:
XQuery
- //a[contains(text(), ‘Sign Up’)]
This XPath expression will find the first anchor element that contains the text “Sign Up”.
5. Finding Elements by Attribute:
XQuery
- //img[@alt=’Logo’]
This XPath expression will find the first image element with an alt attribute of “Logo”.
6. Finding Elements by Descendant:
XQuery
- //div[@id=box]//input
This XPath expression will find all input elements that are descendants of the div element with an ID of “box”.
7. Finding Elements by Ancestor:
XQuery
- //input[@type=’text’]/ancestor::form
This XPath expression will find the form element that is the ancestor of the first input element with a type of “text”.
These are just a few examples of how to use XPath in Selenium. There are many other ways to construct XPath expressions to find specific elements on a web page.
What is Chained Xpath in Selenium?
Chained XPath in Selenium is a technique for combining multiple XPath expressions to locate an element more precisely.
It involves using the double slash (//) to concatenate multiple XPath expressions, allowing you to narrow down the search for the desired element.
This approach is particularly useful when dealing with complex or dynamic web structures where elements are not easily accessible through a single XPath expression.
Benefits of Chained XPath
- Increased Precision: Chained XPath helps you pinpoint the exact element you need, reducing the risk of selecting the wrong element.
- Robustness: Chained XPath expressions are less susceptible to changes in the web structure, as they rely on multiple criteria to identify the element.
- Readability: Chained XPath expressions can enhance the readability of your code, making it easier to understand and maintain.
Example of Chained XPath
Consider a web page with a list of items, each containing a product name and a price. To locate the specific item named “Laptop” with a price of “$1,200,” you could use the following chained XPath expression:
XQuery
//ul[@id=’productList’]//li[contains(., ‘Laptop’)]//span[text()=’$1,200′]
In this example, the XPath expression is broken down as follows:
- //ul[@id=’productList’]: This selects the unordered list with the ID “productList.”
- //li[contains(., ‘Laptop’)]: This selects all list items within the “productList” that contain the text “Laptop.”
- //span[text()=’$1,200′]: This selects the span element within the selected list item that contains the text “$1,200.”
By combining these three XPath expressions, you effectively identify the specific list item containing the desired product and price.
How to Create Dynamic Xpath in Selenium?
XPath provides many keywords and methods which help to write XPath for any complicated scenarios, Some times you may not be able to construct Selectors using CSS selectors but you can achieve it through XPath.
As mentioned above the typical Xpath Syntax in Selenium as follows
//tagname[@attribute=’value’]
Example:
//a[@href="/pricing"]How to Write Xpath for Different Types of HTML Tags and Attributes?
XPath can be written for any type of element such as img, div, span, a, input, etc attributes such as id, class, value, href, src. In simple any HTML tag or any HTML attribute that is rendered as part of the DOM tree is eligible for Xpath.
style=”padding-top: 10px”>Below are some Basic Examples of XPath with different attributes and tag name
XPath for id attribute
//*[@id='btnK']XPath for button element class value
//button[@class='search']XPath for Image with src attribute
//img[@src='/images/logo.png']As shown above you can construct XPath for the Combination of Tagname and attribute value.
How to Write Xpath Contains() Function in Selenium Web Driver?
Contains() method in Selenium XPath is typically used when the value of an Element or attribute changes dynamically. Lets know how to use Contains() for Xpath in Selenium.
Using Contains() in Xpath for Class Attribute
Consider an example, you have HTML code like below
<button type="button" class="getting started mbg blueocean">getting started</button>In the above code, the class name is getting started mbg blueocean, and the mbg word is dynamic and it changes each time you load the page, the static text is getting started so you need to use contains for the class attribute you can use it like below.
//button[contains(@class,'getting started')]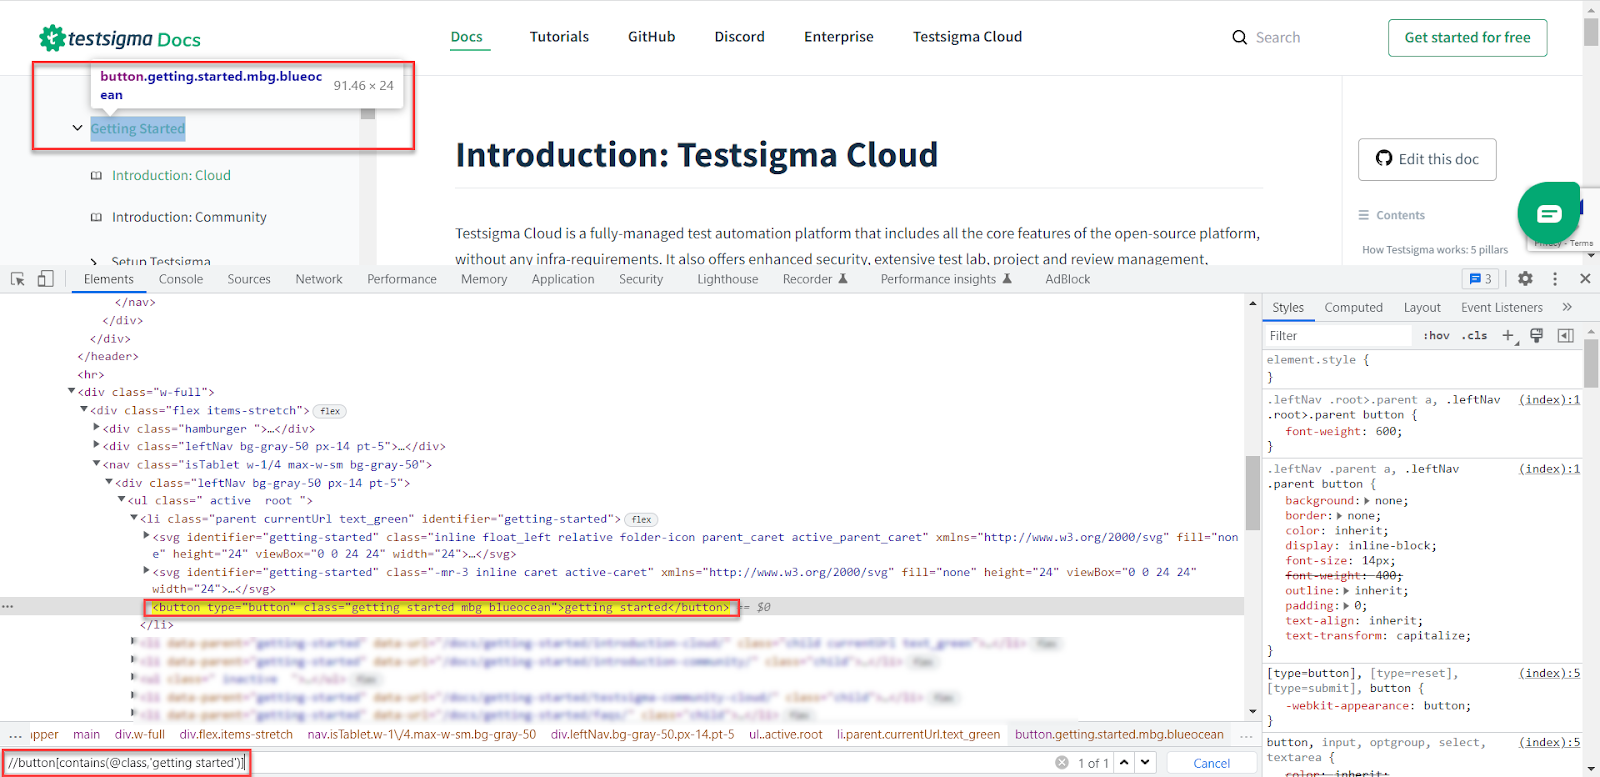
Xpath Contains Functions for Attributes.
The above example demonstrates the usage of contains for class, Just like the class you can use any attribute inside the contains.
Syntax:
//tagName[contains(@attribute_name,’partial_value’)]
Note: instead of tag name you can use star (*) which matches all the tags.
Example Usage of Contains() for Xpath in Selenium for Different Attributes
XPath contains a function for the id attribute
//*[contains(@id,'some_id')]XPath contains a function for the name attribute
//*[contains(@name,'some_name')]XPath contains function for href attribute
//a[contains(@href,'some/link.html')]XPath contains function for image src attribute
//img[contains(@src,'some/path/logo.png')]XPath contains function for name attribute
//div[contains(@name,'some_name')]XPath contains a function for the type attribute
//button[contains(@type,'sub')]Xpath Matching Text Elements
The XPath provides a text() function for manipulation of text in Xpath, using the text() function you can match the Exact text or Partial text in XPath.
How to Match Exact Text in Xpath?
Sometimes, there will not be any unique attributes for some HTML tags, only the text attached to that element is unique. In such cases, you choose to use text() in XPath.
Take an example of the Invitation page
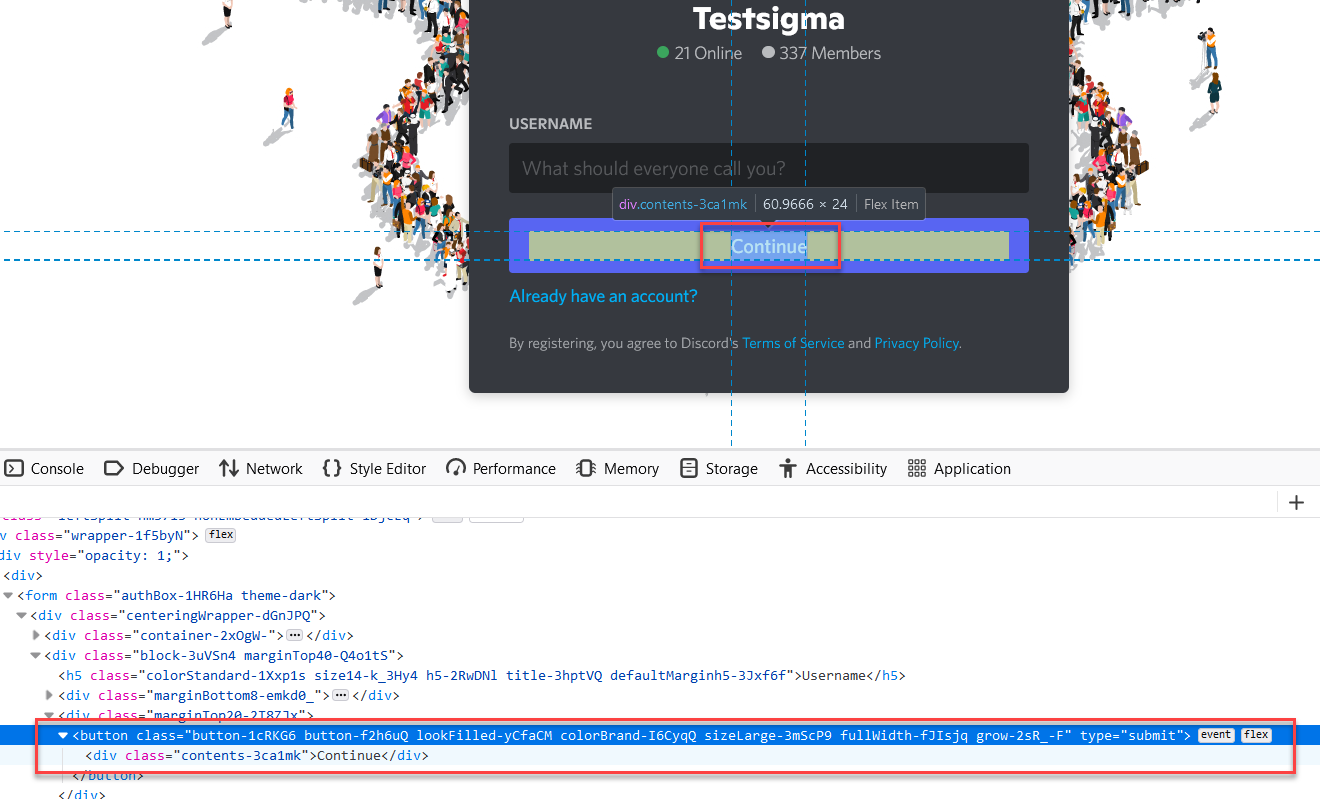
There is no unique attribute available, however, there is a text Continue which is unique.
Syntax for Matching Exact Text in Xpath Selenium
//tagName[text() =’text_value’]
For the above scenario, you can write Xpath to match the exact text below
//button/div[text()='Continue']Partial Match of Text Content in Xpath
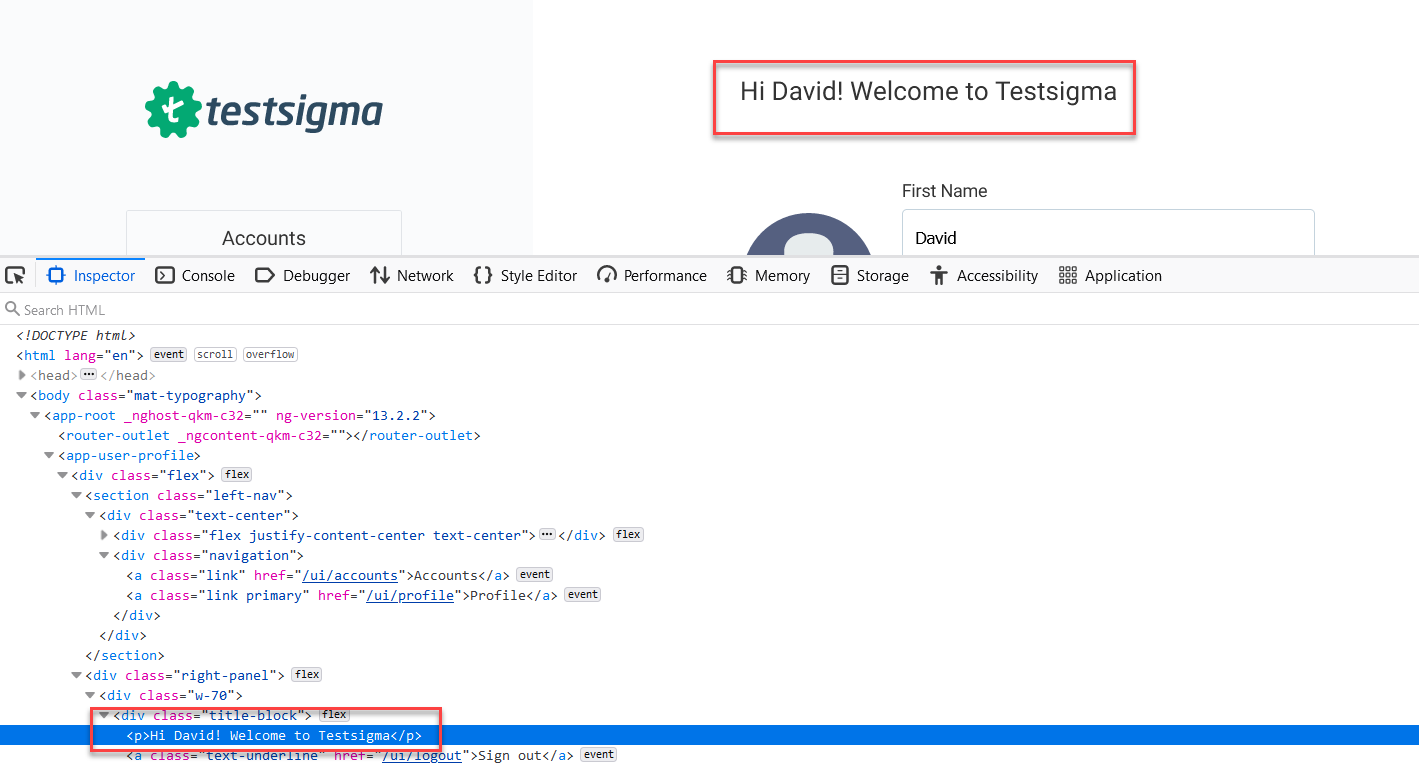
Let’s have a profile page where there is a greeting message, like ” Hi David! Welcome to Testsigma”, here only David the Firstname changes from one account to another the Welcome to Testsigma is static for all users. So when you locate the element you need to match the text only welcome to Testsigma part.
Syntax for Partial Matching Text in Xpath
//tagName[contains(text(),’partial_text’)]
Based on the above syntax for the given scenario, you can write the XPath like below
//p[contains(text(),'Welcome to testsigma')]Using Conditions in Xpath
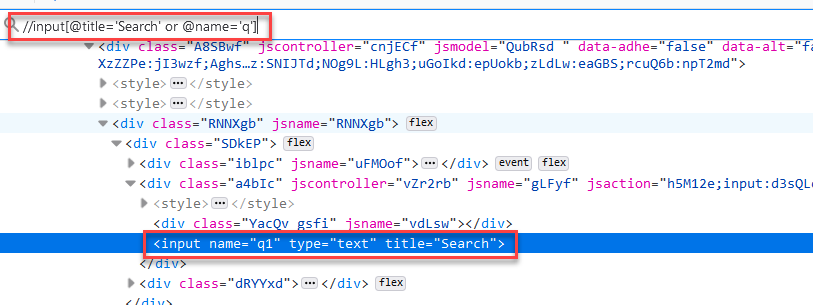
XPath allows you to use the conditions such as AND, and OR. Sometimes you might want either of the attribute value should be present for example you have HTML code
<input name="q" type="text" title="Search">OR Condition in Xpath
You might want to match either the name attribute or title attribute should match, in that case, you can use OR
//input[@title='Search' or @name='q']The above Xpath expression matches either title or name if anyone is true then it matches that DOM element.
First, it searches for an input element with attribute title=’Search’ if it finds true then returns that element, if it doesn’t find any then it goes to the next condition which is @name=’q’ if it finds any element then returns the corresponding element if there is no match for the second element then returns no element. In short, any one or both of the conditions should be true.
And Condition in Xpath
If you require to match both conditions, then you need to use AND.
Considering the example above, if you want to match both title and name, instead of or you can put and like below
//input[@title='Search' and @name='q']First, it matches the title if there is no element found (if it is false) then it returns no matching element found, if the first condition is true then evaluate the second condition if it is false then returns no matching element if it is true then it returns the corresponding element. In short, Both conditions should be true.
Consider an example where the value changes dynamically, but the first part of the id is always constant like in the below image.
Starts-With in Xpath
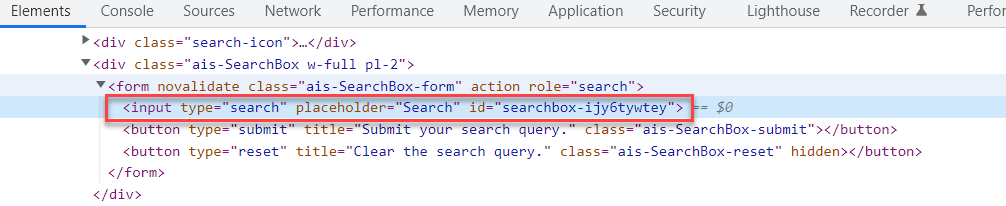
In the above use case, you can use the starts-with functionality of XPath
Xpath Starts-with Syntax:
//tagName[starts-with(@attribute,’start-value’)]
Using the syntax you can construct xpath for the above scenario
Example:
//input[starts-with(@id,'searchbox')]Note:
i. The XPath 2.0 onwards both starts-with and ends-with are supported.
ii. The Xpath ends-with can be used the same way as starts-with, the ends-with useful if the initial value changes and the end value remains constant
iii. Example of ends with //input[ends-with(@id,’end-value’)]
Xpath Axes
XPath Axes are helps to identify the elements with relationships such as a parent, child, sibling, etc. XPath Axes refer to the axis on which elements are lying relative to an element
List of Xpath Axes Methods
- ancestor
- ancestor-or-self
- attribute
- child
- descendant
- descendant-or-self
- following
- following-sibling
- namespace
- parent
- preceding
- preceding-sibling
- self
Xpath Following Axis
Selects everything in the DOM Tree after the closing tag of the current node
Syntax:
//tag_name[@attribute_name=’attribute_value’]//following:: tag_name
Example:
input[@name="btnI"]//following::inputXpath Ancestor Axis
The Ancestor Axis Matches all the ancestors (parent, grandparent, etc.) of the current node.
Syntax:
//tag_name[@attribute_name=’attribute_value’]//ancestor:: tag_name
Example:
//input[@value="Google Search"]//ancestor::divChild Axis in Xpath
The Child Axis in Xpath matches all the children of the current node
Syntax:
//tag_name[@attribute_name=’attribute_value’]//child:: tag_name
Example:
//ul[@id='list1']//child::liPreceding Axis in Xpath
Matches all nodes that appear before the current node in the HTML Document, except ancestors, attributes, and namespace
//tag_name[@attribute_name=’attribute_value’]//preceding:: tag_name
Example:
//ul[@id='list1']//preceding::divFollowing-sibling Axis in Xpath
The Following sibling selects all siblings in HTML Document after the current node
//tag_name[@attribute_name=’attribute_value’]//following-sibling::tag_name
Example:
//ul[@id='list1']//following-sibling::ulParent Axis in Xpath
Selects the parent of the current node in HTML Documents
Syntax:
//tag_name[@attribute_name=’attribute_value’]//parent::tag_name
Example:
//ul[@id='list1']//parent::divSelf Axis in Xpath
The Self Axis is rarely used in writing Xpath, this is used for selecting the current node
Syntax:
//tag_name[@attribute_name=’attribute_value’]//self::tag_name
Example:
//ul[@id='list1']//self::ulDescendant Axis in Xpath
Selects all descendants including children, grandchildren, etc. of the current node in HTML Document
//tag_name[@attribute_name=’attribute_value’]//descendant::tag_name
//ul[@id=’list1′]//descendant::div
Preceding Sibling Axis in Xpath
The preceding sibling used for selecting the all siblings before the current node
Syntax:
//tag_name[@attribute_name=’attribute_value’]//preceding-sibling::tag_name
Example:
//ul[@id='list1']//preceding-sibling::divDescendant-Or-Self Axis in Xpath
The descendant-or-self is used for selecting all descendants including children, grandchildren, etc. of the current node and the current node itself.
Syntax:
//tag_name[@attribute_name=’attribute_value’]//descendant-or-self::tag_name
Example:
//ul[@id='list1']//descendant-or-self::ulAncestor-or-self Axis in XPath
Ancestor or self is used to identify the context node and the ancestor element from the context node.
Syntax:
//tag_name[@attribute_name=’attribute_value’]//ancestor-or-self::tag_name
Example:
//div[@class='car']/ancestor-or-self::divAttribute Axis in Xpath
The attribute axis in Xpath selects all attributes of the current node
Example
//input[attribute::name = 'btnK']Note:
1. Whenever there is more than one match you can always use an index like [1] [2] [3] etc. This selects 1st 2nd and 3rd elements respectively.
2. / and //are most used in Xpath, you can use / and // at the start or in the middle
3. / matches root node, if you double slash (//) is used in the middle of any tag, it defines a descendant relationship
4. Xpath is recommended to use when there is no other way of selecting an element. For example, if the id is available then the id takes priority over the XPath
5. A single dot (.) is used to select the current node
6. A double dot (..) is used to select the parent. For example, if you want to get the parent of the body tag you can simply use //body/.
The Automation framework or test script requires coding knowledge, most of the time beginners find difficulties in understating the automation framework and working on the test script. Testsigma provides codeless automation. You do not need a single line of code. Testsigma also has a dedicated chrome recorder plugin, you can simply install it on google chrome and start automating.
How to Write Codeless Automation Scripts Using Testsigma?
1. Download and install the Testsigma Recorder plugin for Chrome
2. Login to Testsigma with Credentials ( If you don’t have an account create one)
3. Create a New Project by providing the Project Name
4. Click on Create new Testcase
5. Enter the Testcase Name and Base URL
6. Click on record Test
7. A New Browser window opens up and recording starts

8. Perform a set of actions as per your test case, once done click on finish
9. You will be landed on Testsigma Project Dashboard and all the recorded steps will be shown.
10. Click on Start to Run the Testsigma Automated Testcases
11. You will be asked for Configurations, Choose the configuration from the drop-down list
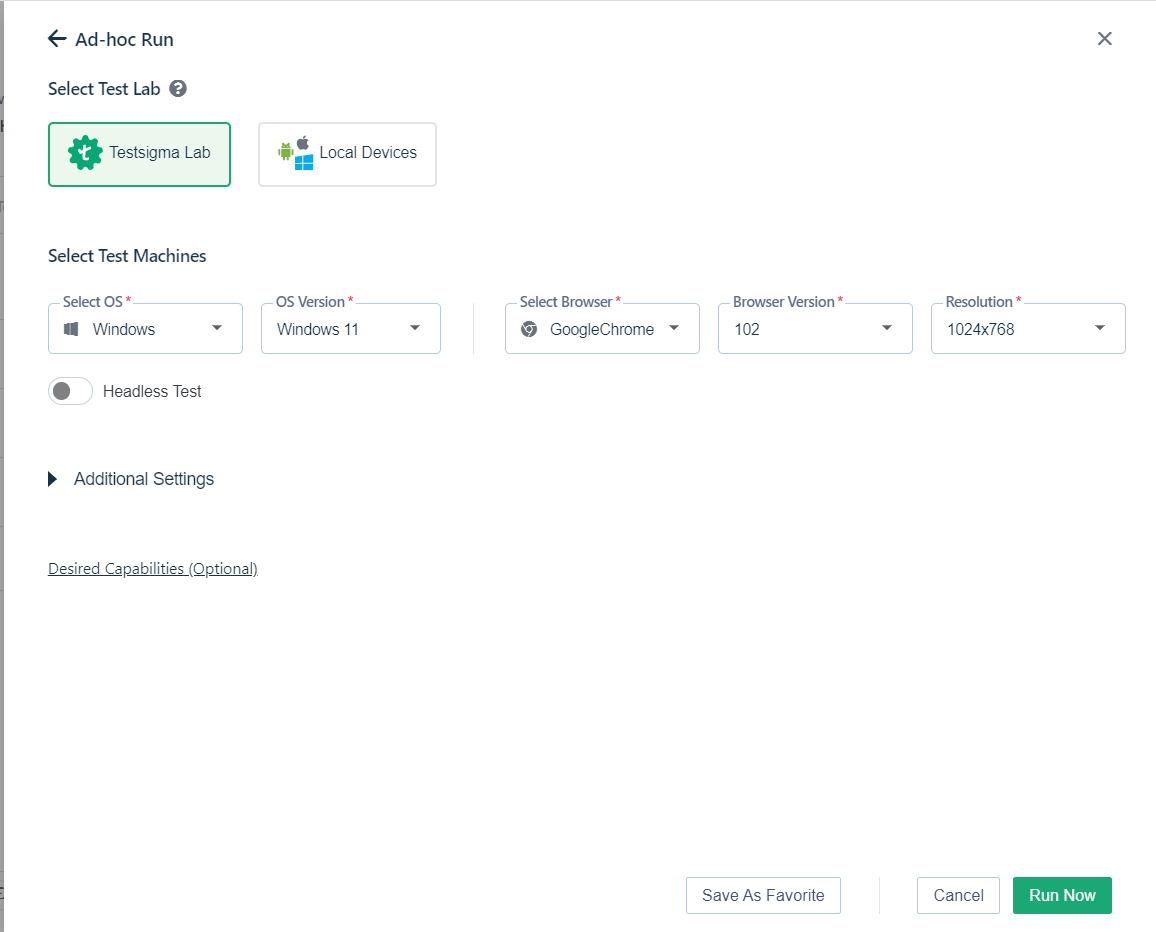
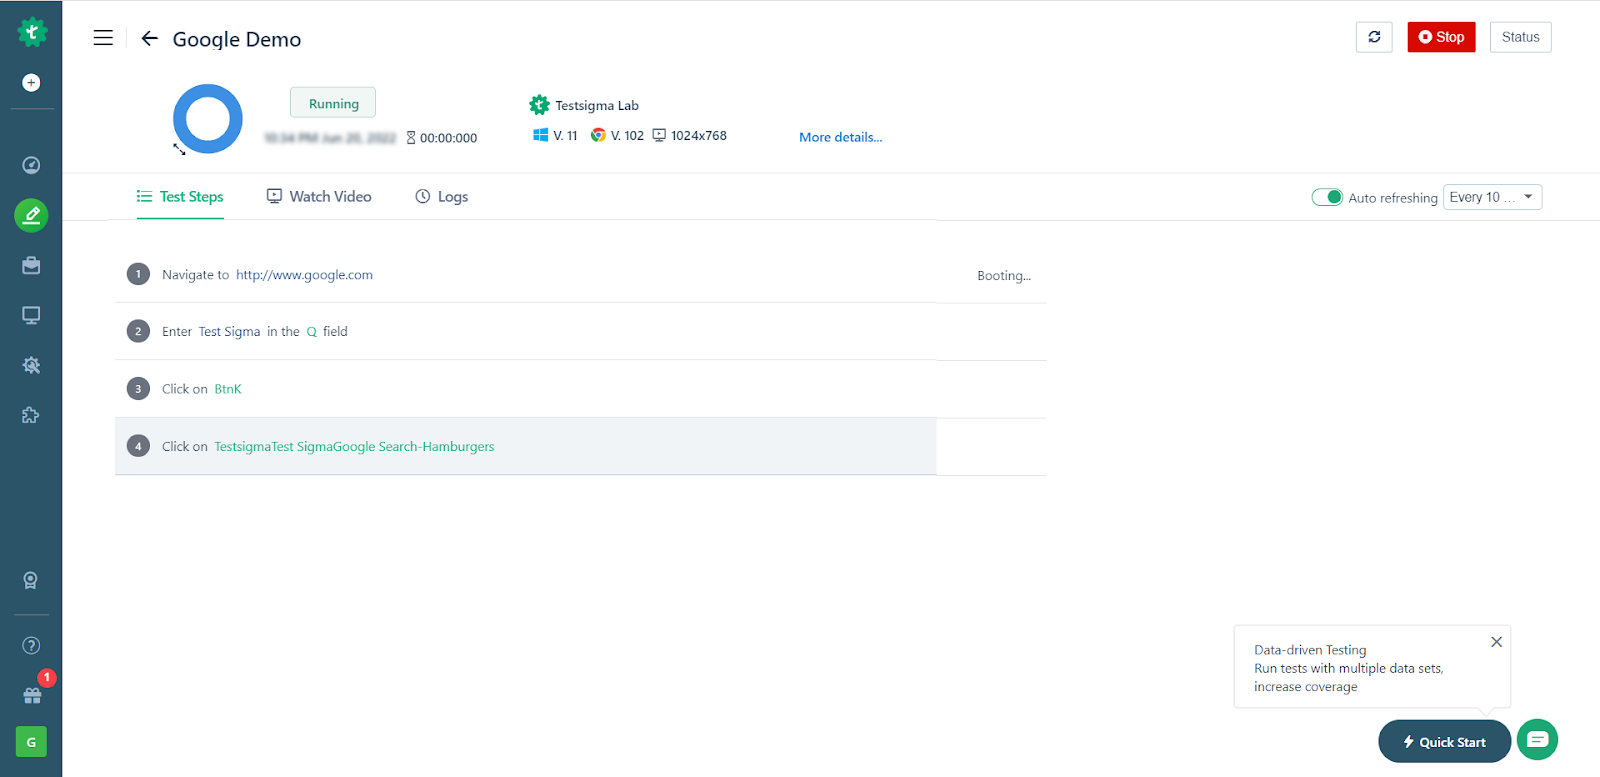
12. Click on Run now, Wait until it finishes
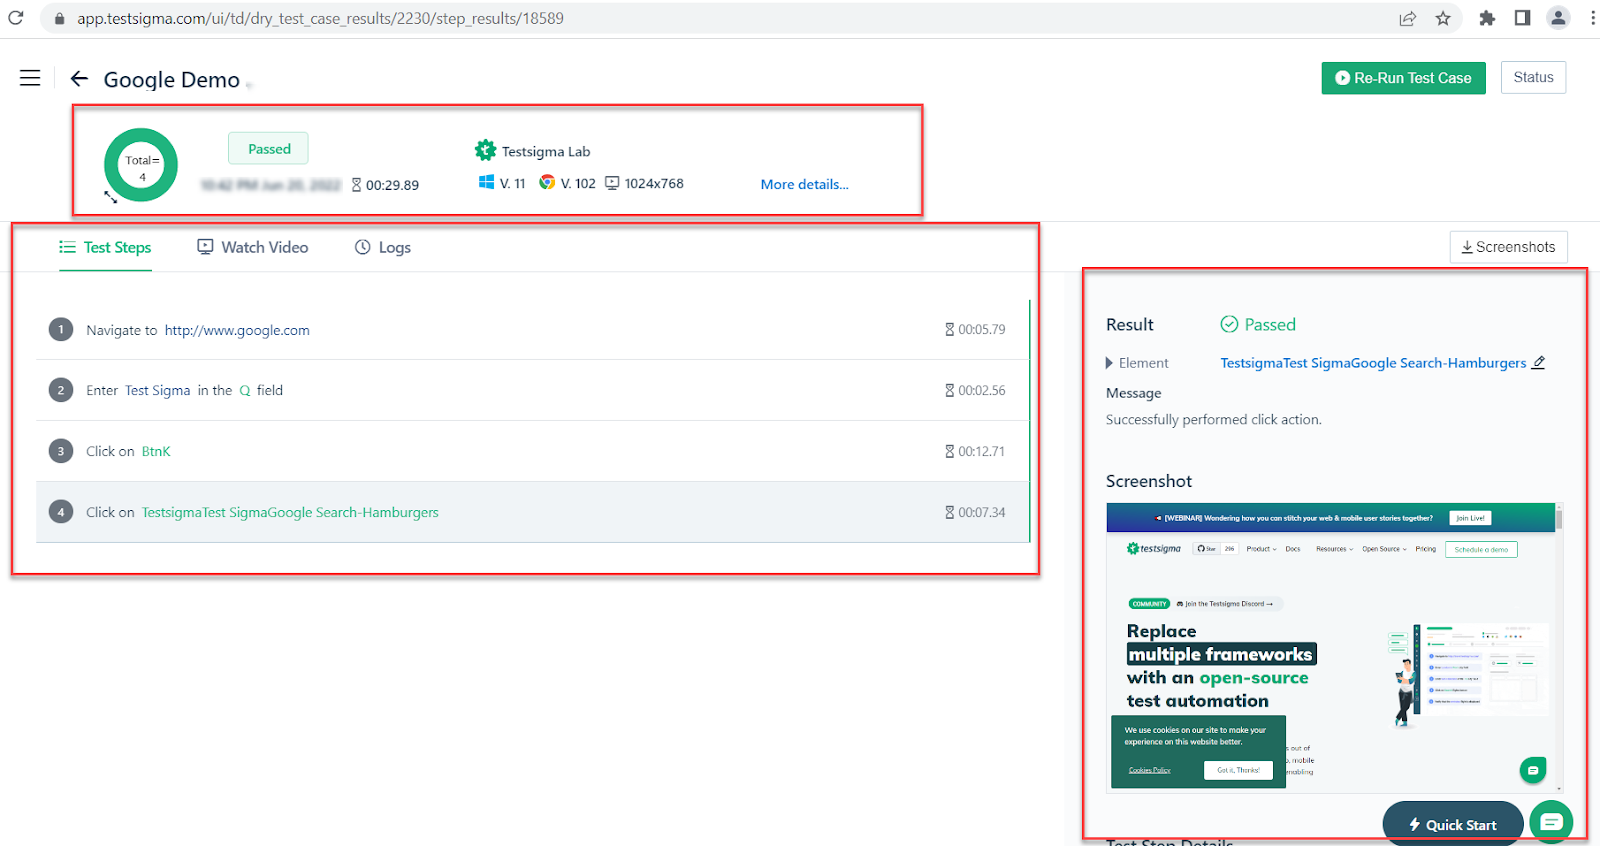
13. If the test fails, you can even edit selectors
Frequently Asked Questions
There are several ways to locate XPath in Selenium:
Developer Tools for Browsers
Firefox Firebug Add-on
Examine Element in Chrome Using Selenium IDE
As previously said, there are several ways to locate XPath in Selenium.
The precise number of ways depends on the individual’s preferences and expertise with various tools and procedures.
Text(), contains(), starts-with(), and XPath supports many other methods.
Testers can use these methods to locate items based on various criteria such as text, attribute values, etc.
With Selenium, XPath is a powerful tool for locating components on a web page.
It offers a versatile and dependable method for locating items based on various properties and criteria, making it excellent for web automation and testing.
XPath performance may vary depending on the scenario and implementation.
Yet, relative XPath expressions are faster than absolute XPath expressions since they do not rely on the entire document hierarchy.
It is advised to employ relative XPath expressions whenever possible to increase efficiency.
Suggested Readings
Quick XPath Locators Cheat Sheet
How does Selenium isDisplayed() method work?

