
Integration testing is pivotal to ensure that individually tested units work together seamlessly as a whole. This testing is not just a checkpoint but a methodology that bridges the gap between unit testing and system testing.
In this guide, we’ll explore the what, why, types, best practices, and examples, shedding light on its indispensable role in building robust software applications.
Table Of Contents
- 1 What is Integration Testing?
- 2 Why Integration Testing?
- 3 What is the Key Objective of Integration Testing:
- 4 How To Do Integration Testing?
- 5 Why Testsigma for Automated Integration Testing?
- 6 Example of Integration Testing Test Cases
- 7 Integration Testing Types
- 8 Advantages of Integration Testing
- 9 Challenges of Integration Testing
- 10 Best Practices for Integration Testing
- 11 Entry and Exit Criteria of Integration Testing
- 12 Integration Testing Comparison with Other Testing
- 13 Conclusion
What is Integration Testing?
Integration testing is the process of testing how different modules or components of your software work together. Well, you don’t want your software to crash and burn when real people use it, do you? Several integration tests exist, such as top-down, bottom-up, and bi-directional. Each sort has its forces and feeblenesses, and your selected sort will depend on your unique needs, ends, and purposes.
Of course, there are also best practices to follow regarding integration tests. So, whether you’re a software developer or just someone interested in the inner workings of technology, integration testing is something worth knowing about. And who knows, maybe you’ll be the one doing the testing!
Why Integration Testing?
Integration testing helps ensure that multiple components or modules of an application work seamlessly together. The key objective is to identify and catch any bugs arising from combining modules.
By thoroughly testing how all the different components work together, you can provide a seamless experience for your users.
Here are some key reasons ,
- Ensures that individual software modules created by different developers with different understandings and programming logic function together seamlessly.
- Identify the bugs that may arise in the interactions between software modules and the database.
- Discover potential issues that might occur in external hardware interfaces.
What isTheKey Objective of Integration Testing:
The key objective of integration testing is to ensure that all modules and components of a software system interact and operate at optimal levels to deliver desired outcomes.
At a high level, integration testing intends to meet the following objectives:
- Verify that necessary data flows between the right modules and integrated components without any loss or corruption. Example – Validating interfaces, APIs, and communications.
- Identify issues between modules, such as the passing of incorrect parameters, inconsistent data flow, and mismatched data types.
- Confirm that functions dependent on multiple modules work together to produce the right results and business value.
- Detect all performance bottlenecks (scalability edges, response times, system throughput) that show up when modules interact.
- Check the system’s response to network failures, invalid inputs, and unexpected crashes.
- Ensure proper logging, error messages, and fallback mechanisms in action.
- Assess that the system complies with data architecture and design specifications — in line with industry standards.
- Detect security risks within module interactions — unauthorized access, API, and data leaks. This includes validating authentication and authorization mechanisms.
How to Do Integration Testing?
The below section depicts the how-to-do,
- Define the scope : Determine what components must be tested in the integration test plan.
- Identify test scenarios : Identify every possible test scenario where different components interact with each other.
- Choose an automation tool : Choose the right test automation tool to automate integration testing. Opt for a tool that works for your use case and is easy for your team to use. Also, ensure that the tool will help you get high test ROI within some stipulated time. Scriptless testing tools like Testsigma help you get higher ROI along with accurate test results.
- Create test data : After identifying the test scenarios, create test data, both valid and invalid inputs (positive and negative test data) for testing.
- Create test cases : Prepare test cases for each scenario and define the input and expected outputs.
- Set up test environment : Create a test environment that closely mirrors the production environment for better test accuracy.
- Execute test cases : Run the test cases created and note the test results as (pass/fail/NA)
- Analyze the test results : Analyze the test results in detail to find the root cause of the bugs, if any, and share the feedback with the developers.
- Track issues : After sharing the feedback with the developers, follow up to check if the bugs have been fixed.
- Retest : Once the dev team fixes the bugs, rerun the test cases to ensure the application is free of bugs before moving the application to production.
- Sign off and release : After the test cases are successfully run with no issues, release the application to the users.
Approaches of Integration Testing
You can perform the integration testing using two approaches, namely,
- Manual approach
- Automated approach
Manual Testing: In the manual approach, the QA and the developers will perform all the steps manually, which can be time-consuming and error-prone in the long run.
Automated Testing: In an automated approach, testers can efficiently perform the entire integration testing process using test automation tools like Testsigma. This way, the software teams achieve high test coverage, test accuracy, and faster testing. This method saves time and effort, is less error-prone and if planned well, can cost less, too.
Should Integration Testing Be Automated?
Yes, you can automate integration testing for faster and more efficient testing. It offers several benefits over traditional approaches, like,
- It saves testing time, cost, and effort. With automated testing tools, you can run numerous test cases in one go, which would be impossible to accomplish manually.
- Human mistakes that may arise during manual testing can be avoided with automated tests.
- It helps identify errors and difficulties early in the development process, saving time and cost.
- Also, you can run specific test cases frequently. For example, when an application is updated or upgraded, it is critical to run tests frequently to ensure that new changes don’t impact actual functioning.
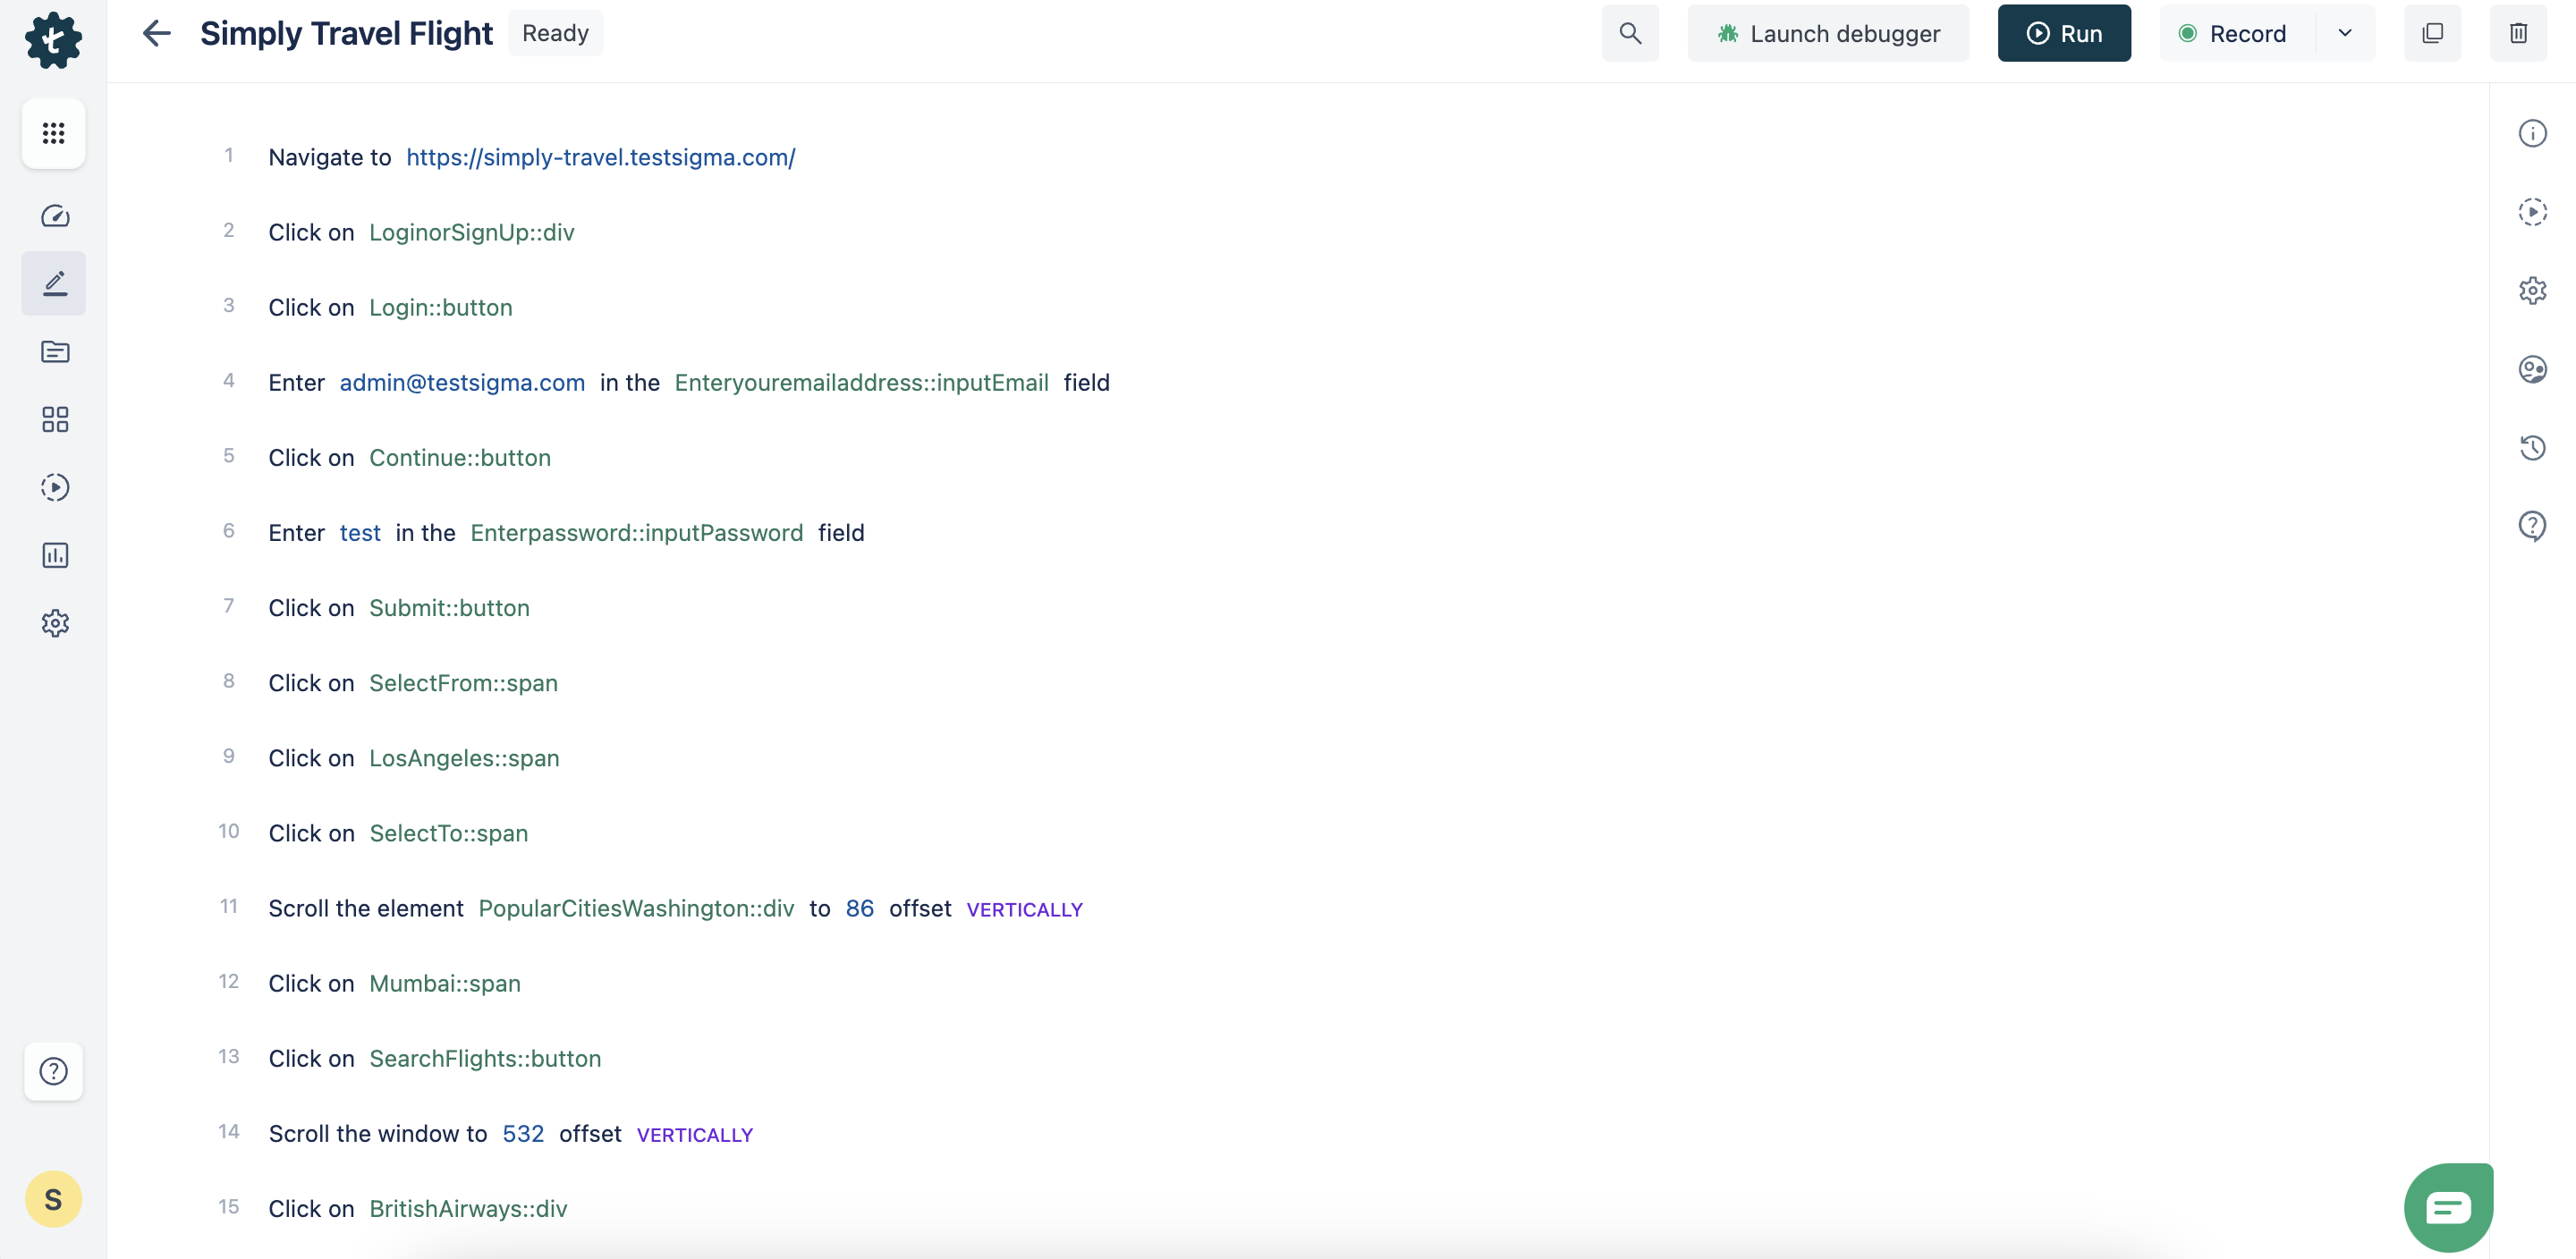
WhyTestsigmaFor Automated Integration Testing?
Testsigma is a cloud-based low-code unified test automation tool that allows you to automate integration testing for web, mobile, desktop, and API applications in one place. Using Testsigma, you can easily create and execute integration test cases in plain English using the NLPs.
Some of the key benefits of Testsigma include,
High Test Coverage
You can test your applications across 3000+ real devices/tablets and 1000+ browser/OS combinations, making your testing vast. You can also test complex and edge cases very efficiently and quickly using Testsigma’s low-code techniques like NLPs, Record, and Data-Driven Testing.
End-to-end Testing
Not just integration testing, you can perform end-to-end functional testing across web, mobile, desktop, and API apps in one platform. You don’t have to switch between multiple tools for multiple testing purposes. This helps save heaps of time, cost, effort, and resources. From integration testing to UI testing, everything can be automated with this platform.
Enterprise Application Support
With Testsigma, you can also test enterprise-grade applications like Salesforce and SAP.
5x Faster Testing
Its intuitive visual interface and powerful features make your integration testing 10x faster and help ship your products 8x faster to the market.
Example of Integration Testing Test Cases
An integration testing example test scenario may be as follows:
Some examples of integration test cases might look like :
| Test Case ID | Test Description | Input | Expected Result |
|---|---|---|---|
| TS-1 | Test integration between the payment gateway and the booking system | User books a service and makes a payment | Payment is processed correctly and the booking is confirmed |
| TS-2 | Test the integration between the messaging system and the notification system | User sends a message and receives a notification | The message is delivered correctly and the user receives the expected notification |
| TS-3 | Test the integration between the billing system and the accounting system | System generates a bill and sends it to the accounting system | The bill is correctly processed and recorded in the accounting system |
| TS-4 | Test the integration between the search engine and the recommendation engine | User performs a search and receives recommendations | The search results and recommendations are accurate and relevant to the users search query |
Integration TestingTypes
Below are some of the most common integration testing types:
Top-Down Testing:
It’s an iterative strategy that connects two or more logically linked components. This approach aims to identify any integration issues that may arise as the different components are combined. It begins with testing the largest or main component of an application. Testsigma can be utilized to test a complicated online site by starting with the main webpage and progressing through the other components in decreasing priority order.
Bottom-Up Testing:
In this testing, integrated code modules are tested before evaluating the entire system or code base. It begins with testing the smallest components of an application. Testing a payment gateway from the lowest to the highest-level components using Testsigma is an example of a bottom-up testing scenario. Read the Difference between top Down and Bottum Up Integration testing.
Big-Bang Testing:
All the components are interlinked as a single system and is tested as a complete system; testing a system with all units linked together is difficult due to the lack of attention paid to checking the interfaces between separate units. This approach helps identify issues when integrating all the different components. A big-bang testing scenario using Testsigma can involve evaluating a new e-commerce website with a shopping cart, payment gateway, user registration, and order management elements.
Sandwich Testing:
This technique involves testing the integrated components in pairs. This approach aims to identify any issues that may arise when specific features are combined. Testing a booking system by pairing the front-end and back-end components to guarantee proper communication is an example of a sandwich testing scenario using Testsigma.
Automated integration testing in software testing can help ensure software components work correctly and can be done more efficiently and successfully with a unified testing platform like Testsigma.
Advantages of Integration Testing
This testing offers several advantages regarding ensuring your system’s overall quality and functionality. Here are a few key benefits:
- Early detection of issues: This testing can help detect problems early in development, making them easier to resolve and less expensive.
- Improved quality: By discovering flaws before they become production issues, tests may help assure a higher quality system.
- Better collaboration: This testing necessitates collaboration and good team communication, improving cooperation and a more coherent output.
- More efficient testing: Automated integration tests may save time and effort by executing tests more quickly and reliably.
Introducing automation into your testing process may further enhance these benefits. Automated tests can be conducted more rapidly and consistently than manual tests, and they can assist in detecting flaws that manual testing cannot.
Challenges of Integration Testing
While this testing has numerous advantages, it may also be difficult and time-consuming.
These are a few common stumbling blocks to be aware of:
- Complexity: The test examines how various system parts work together, which may be challenging and time-consuming.
- Dependencies: Components in a system may depend on other components or external systems, making it difficult to pinpoint and test problems if you manually incorporate them while writing tests.
- Maintenance: As the testing requirements evolve, integrating testing with new components might become difficult.
- Cost: Because of manual testing, developing and performing tests can be expensive.
Best Practices for Integration Testing
Following a few best practices is essential to get the most out while testing for integration. Here are a few tips to keep in mind:
- Plan : Determine what and how you’ll test to guarantee you’re testing the proper items and avoiding delays.
- Start early : Don’t put off testing till the conclusion of the development process. Begin testing as soon as possible to uncover problems before they become more challenging and expensive.
- Use real test data : To detect flaws that may not be seen with manufactured or simplified data, test data should be realistic and indicative of the data your system would encounter in the actual world.
- Use automation : Automation can make integration tests more practical and economical. It can be conducted faster and more reliably than human tests and can help identify problems that manual testing cannot.
- Define clear objectives and expectations: Understand what needs to be tested, the scope of the integration, and the desired outcomes.
- Test environment : Create a test environment that closely mimics the production environment.
- Regularly run integration tests : especially when changes are made to components or modules, to ensure new updates do not break existing integrations.
By following these best practices and incorporating automation into your the testing process, you can help ensure that your system is of the highest quality and functionality possible.
Entry and Exit Criteria of Integration Testing
The entry and exit criteria help define when to start and stop the testing process.
Entry Criteria
- All individual units/software modules must have undergone successful unit testing.
- All high-priority issues must be fixed.
- The modules should be completed and integrated successfully into a single codebase.
- The test plan should be prepared and reviewed, including test cases and scripts.
- The test environment, including hardware, software, and network configurations, should be set up and ready for testing.
Exit Criteria
- All the integration test cases must be executed.
- The test documentation should be updated, including test results and any changes made during testing.
- Any bugs identified during this testing should be logged, tracked, and resolved.
- An exit report summarizing the results of the testing phase should be prepared and shared with relevant stakeholders.
Integration Testing Comparison with Other Testing
Regression Vs Integration Testing – Differences
Here are the most common differences below.Click the link to read more on Regression testing
| Regression Testing | Integration Testing |
| It checks the existing and stable functionalities of the application, after a new change has been introduced. | It verifies the modules and data flow between them without focusing on their individual behavior. |
| It is re-testing the existing features of the application. | It does not re-test the application. |
| Regression testing comes after functional and UAT testing or any other time when the software undergoes any changes. | Integration testing comes after unit testing. |
| It only runs and verifies previously executed tests. | This testing adds new tests to check proper data flow between modules. |
Conclusion
Knowing what integration testing is, why it is necessary, and how to approach it would improve your overall tests. One major takeaway is the use of automation in the tests, which may assist in guaranteeing that this testing is done swiftly, precisely, and thoroughly. Furthermore, a disciplined and systematic approach to the tests is required to guarantee that systems function properly and provide users with the desired value. This post should help you approach the test more confidently and effectively.
