Table Of Contents
What is Selenium in Eclipse?
Selenium in Eclipse refers to the use of the Selenium framework within the Eclipse Integrated Development Environment (IDE) to automate web browser interactions.
Key features of this integration include Selenium WebDriver, which controls web browsers programmatically, and Eclipse IDE, a widely used IDE for Java development.
Selenium is an open-source automation testing framework used to automate web browsers. It supports multiple programming languages such as Java, C#, Python, and Ruby. Selenium allows testers to write test scripts that can automate the process of testing web applications, including filling out forms, clicking buttons, and navigating between pages.
Selenium WebDriver is a component of the Selenium suite that allows users to control a web browser through a program. It provides a simple API that enables testers to interact with web browsers in a way that simulates a real user. With Selenium WebDriver, you can automate tasks such as clicking buttons, filling out forms, and navigating between pages.
In short, Selenium is a testing framework for automating web browsers, and Selenium WebDriver is a component of Selenium that allows users to control a web browser through a program.
Why Use Selenium in Eclipse?
Configuring Selenium with Eclipse comes with a great deal of benefits for testers, and here are some of them:
- Integrated Development: Eclipse provides a unified environment for writing, running, and debugging Selenium test scripts, streamlining the development process and helping maintain and manage test scripts efficiently.
- Support for Multiple Languages: While Selenium WebDriver supports multiple languages (like Java, C#, Python, etc.), using it in Eclipse typically involves Java, making it easy to integrate with other Java-based tools and libraries.
Automation Frameworks: In Eclipse, you can easily integrate Selenium with automation frameworks like TestNG or JUnit to organize tests, create test suites, and generate reports.
Advantages of Selenium
- Open-source: Selenium is an open-source tool, which means that it is free to use and can be modified to meet the specific needs of a project.
- Cross-browser compatibility: Selenium supports multiple web browsers, including Chrome, Firefox, Internet Explorer, and Safari, which makes it a versatile tool for testing web applications.
- Multi-language support: Selenium supports multiple programming languages, such as Java, C#, Python, and Ruby, which allows developers to choose the language that they are most comfortable with.
- Large community: Selenium has a large community of users and developers, which means that there is a wealth of resources, tutorials, and support available for those who are new to the tool.
- Comprehensive integration: Selenium can be integrated with other tools, such as JUnit and TestNG, to create a complete testing solution.
- Scalability:Selenium can automate small, simple tasks as well as large, complex tasks, making it a scalable tool that can grow with a project.
We have understood Selenium and its capability. Let’s see how we can configure it with Eclipse.
Prerequisites for Installation and Set up: Selenium Webdriver
This section will show how we can configure Selenium with Eclipse.
Pre-requisites:
- Download and Install Java
- Set up the Environment Variables
- Install WebDrivers
- Download and Install Eclipse
Download and Install Java
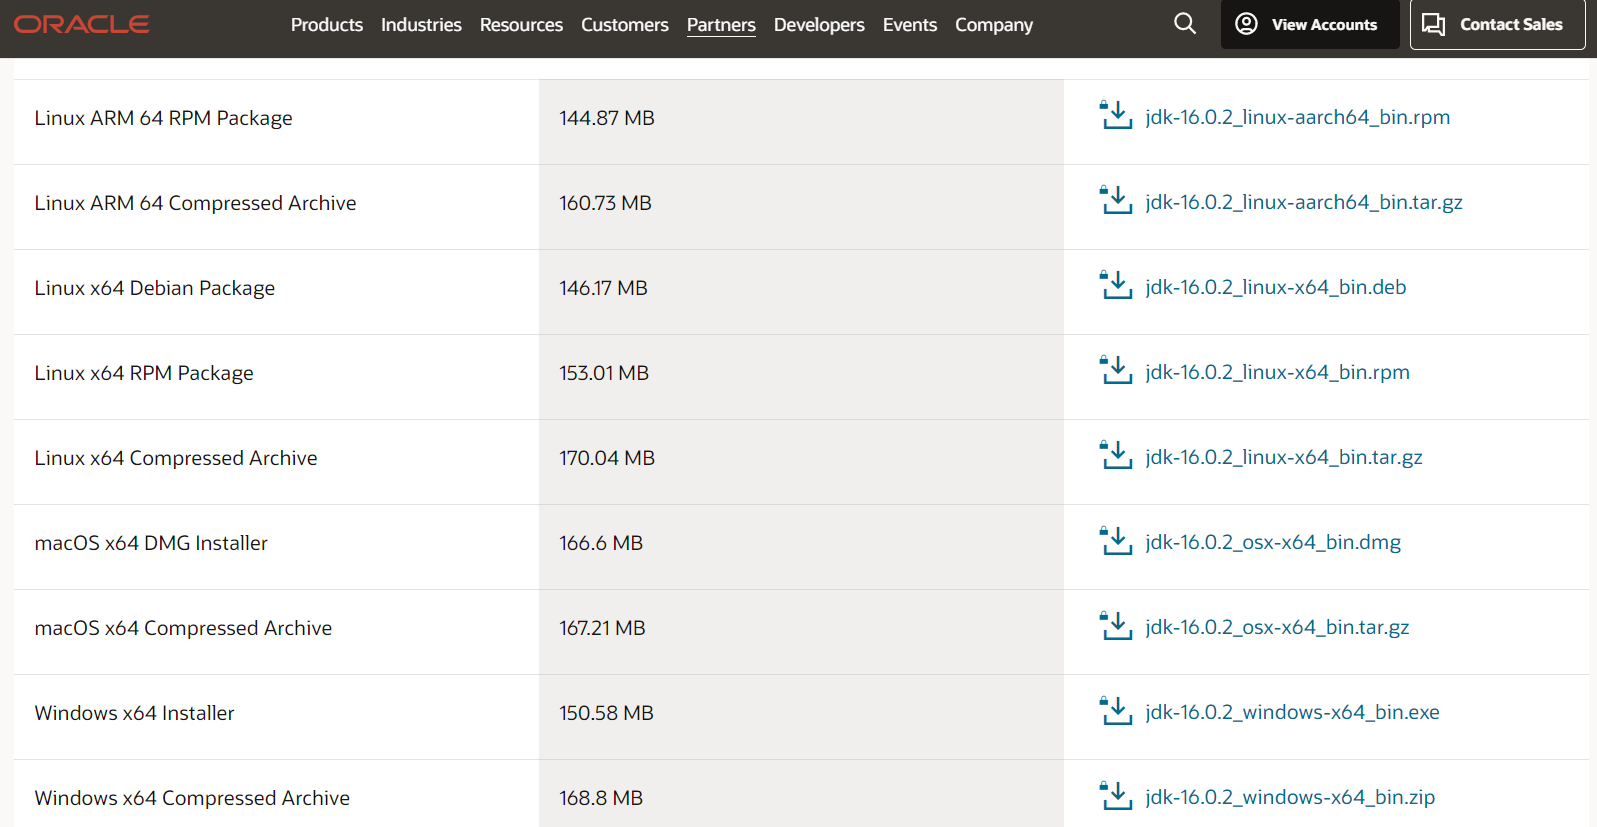
You can download and Install the Java version based on your requirement. If you want to install it on Windows, you can download Windows x64 Installer JDK from the list.
- Go to the official Java website.
- Click on the “Download” button to download the latest version of Java for your operating system.
- Once the download is complete, run the installer file to begin the installation process.
- To finish the installation, adhere to the instructions.
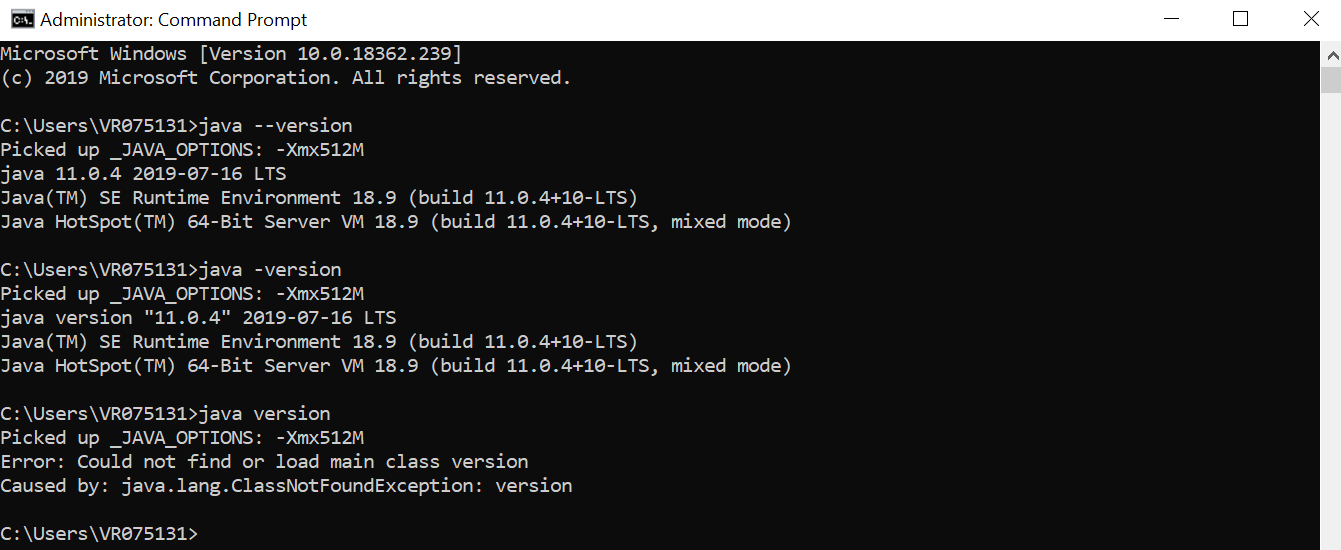
- Once the installation is complete, you can verify that Java is installed by opening a command prompt or terminal window and typing “java -version.” This should display the version of Java that is currently installed on your system.
Please note for some specific tasks or applications, you may need to install JDK instead of JRE. You can download JDK from this link here
Set up the Environment Variables
Once the installation is done, you need to set up the Java path in your system.
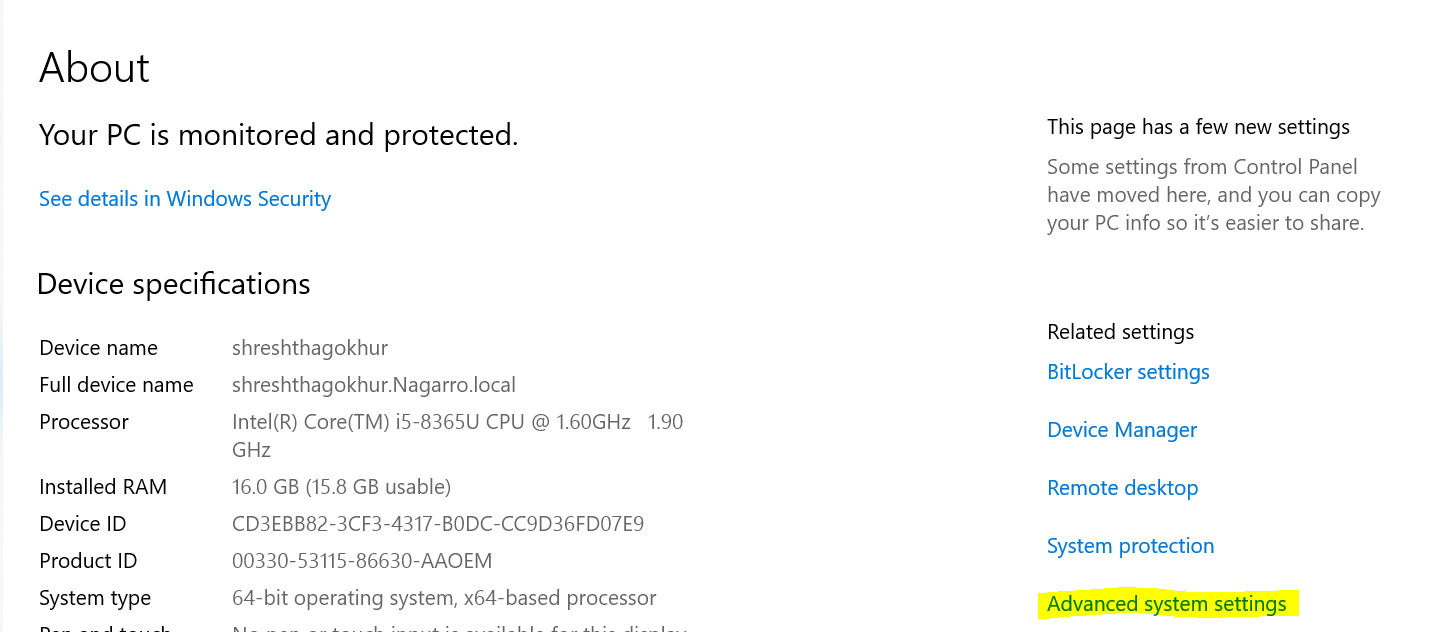
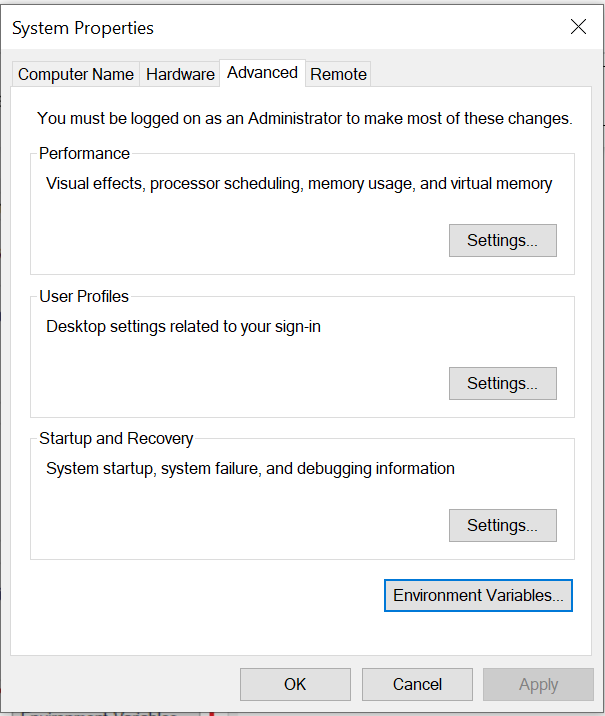
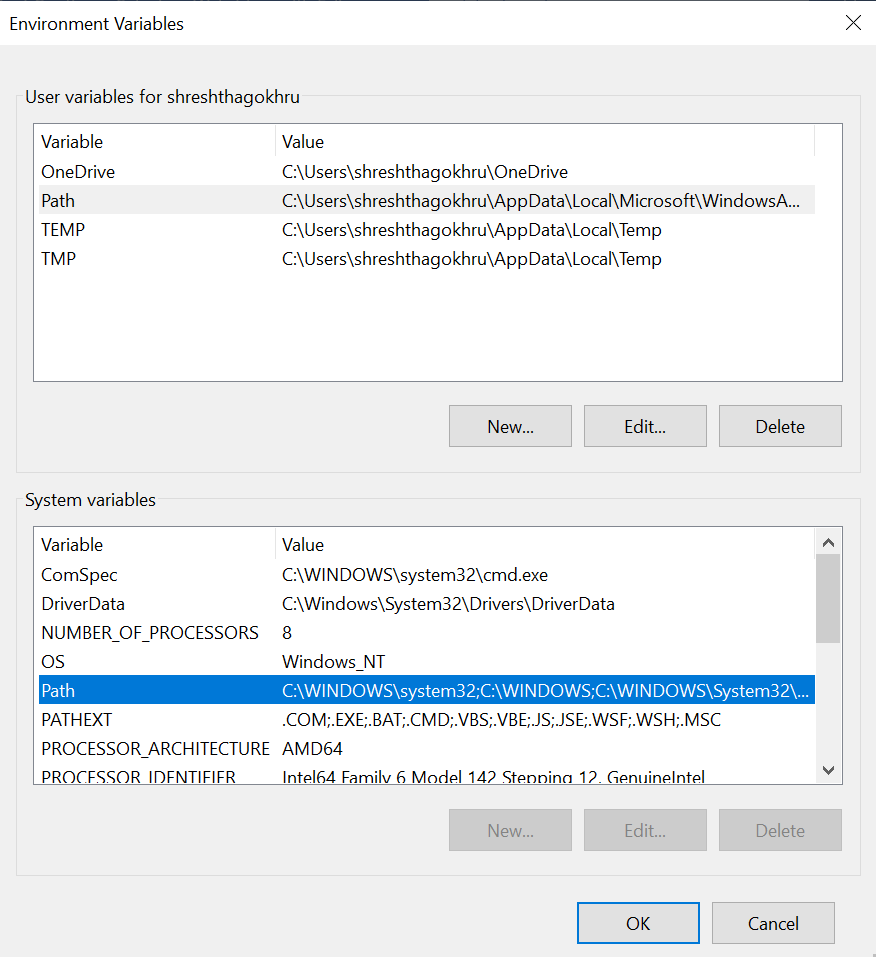
Step 4: To verify whether Java is installed in your system or not, you can open a Command prompt and run the below command:
Java -version
You will see the below result once you run that command.
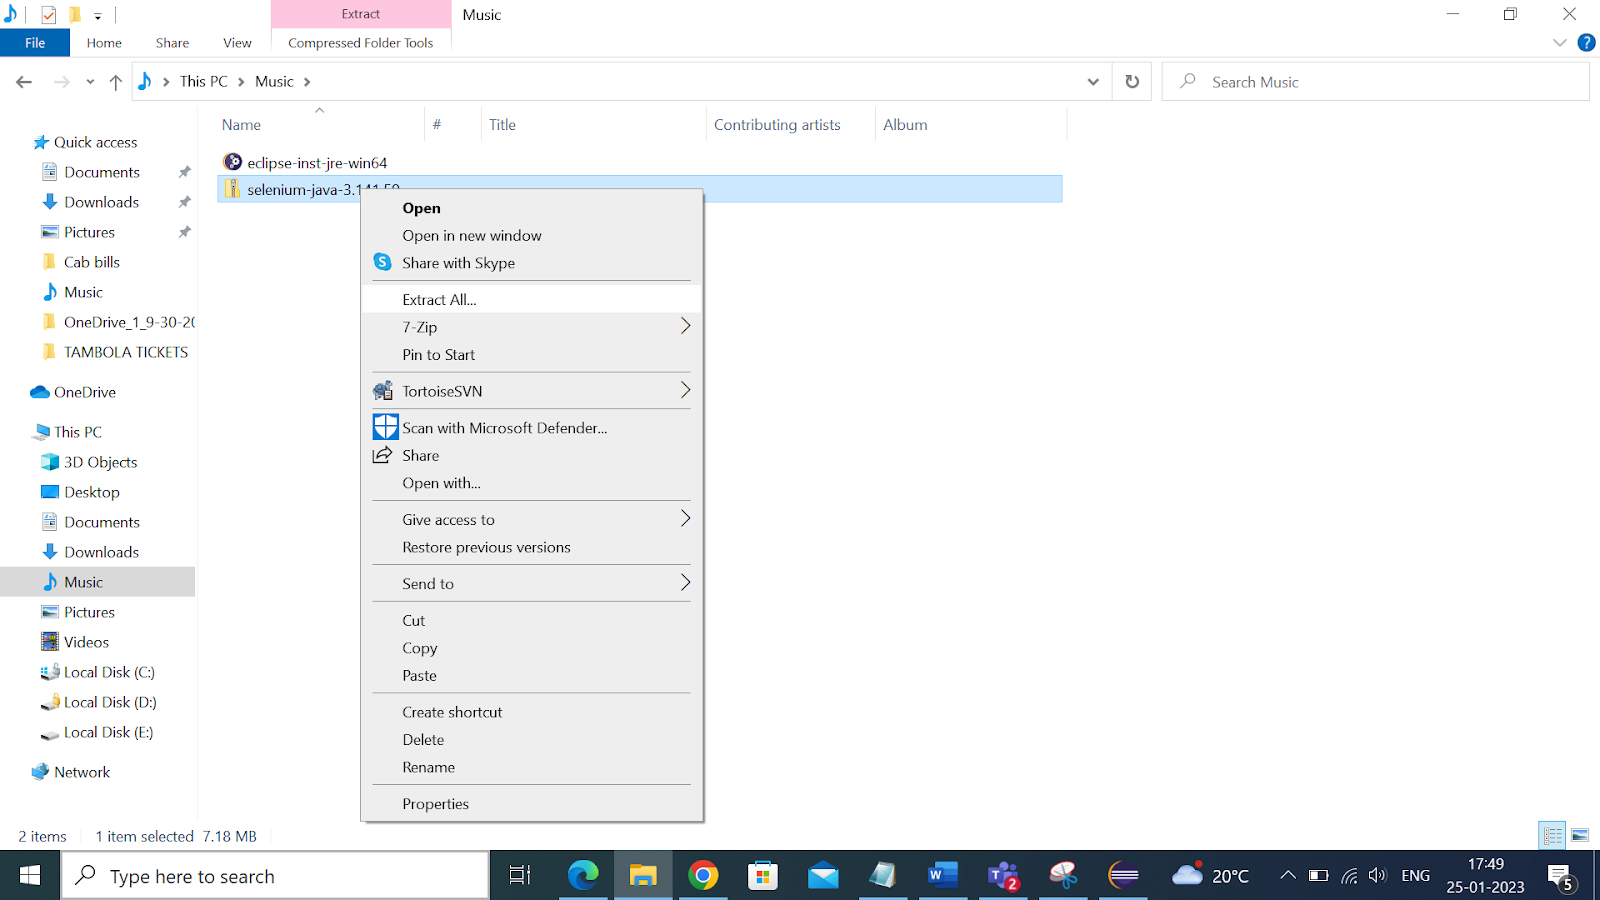
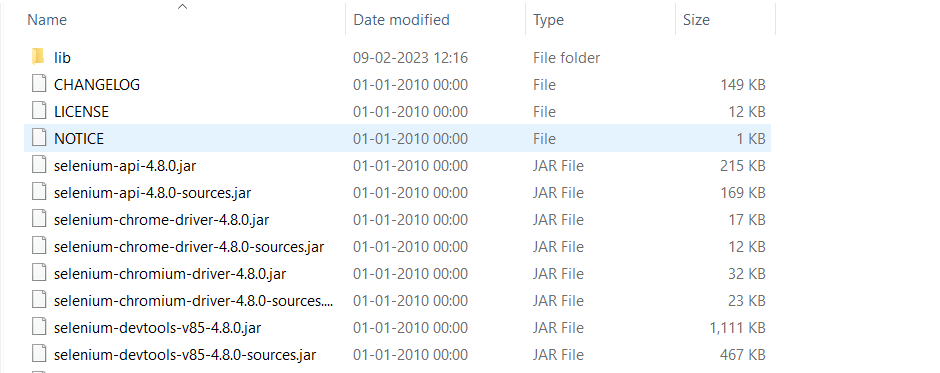
Step 5: Download and install Selenium Client and WebDriver languages Bindings from the Selenium Website.
Install Drivers for Browsers.
Installing a web driver for a specific browser is necessary to use Selenium to interact with that browser. The process for installing a webdriver will vary depending on your browser and operating system.
- Chrome: You can download the Chromedriver executable from the following link. Once you have downloaded the executable, you need to add the path of the downloaded driver to your system environment variable.
- Firefox: You can download the GeckoDriver executable from the following link. Once you have downloaded the executable, you need to add the path of the downloaded driver to your system environment variable.
- Safari: Safari does not require a separate webdriver to be installed, as it uses the browser’s built-in automation capabilities.
- Internet Explorer: You can download the InternetExplorerDriver executable from the following link. Once you have downloaded the executable, you need to add the path of the downloaded driver to your system environment variable
Download and Install Eclipse for Selenium Webdriver
Eclipse is an open-source integrated development environment (IDE) that is widely used for developing Java applications. It provides a wide range of features such as a code editor, debugging tools, and a built-in compiler, making it a popular choice among Java developers.
To download and install Eclipse:
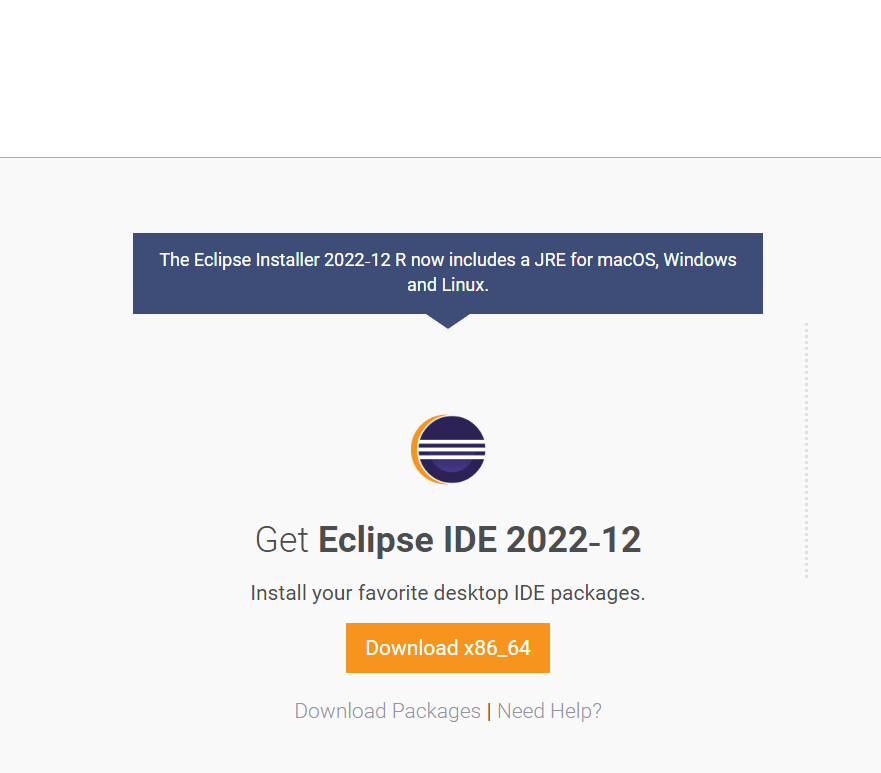
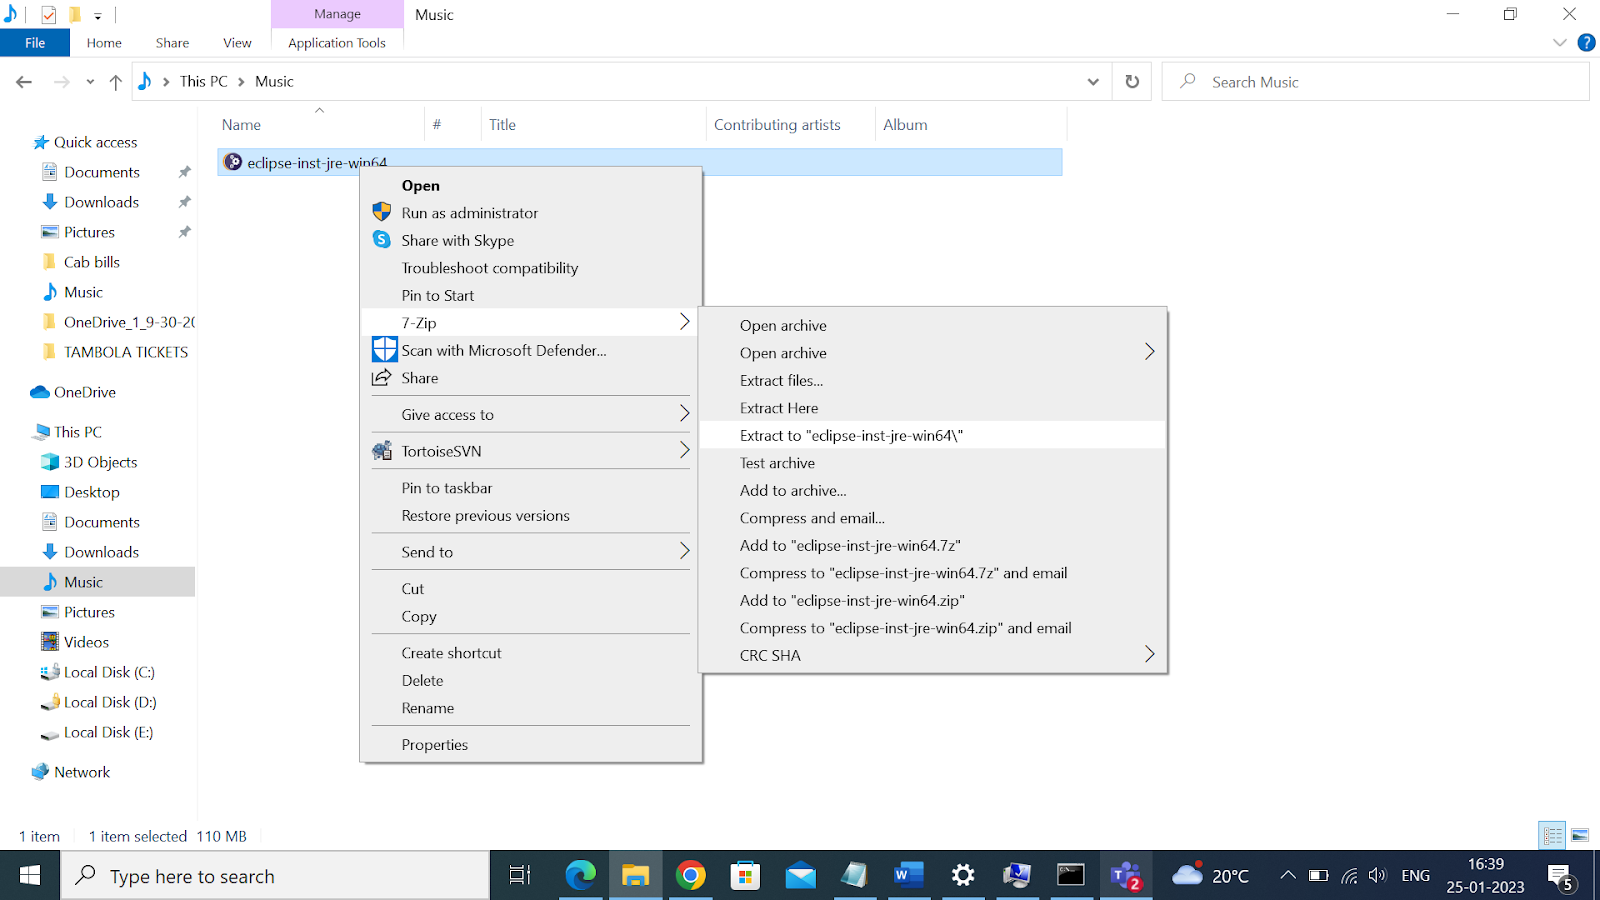
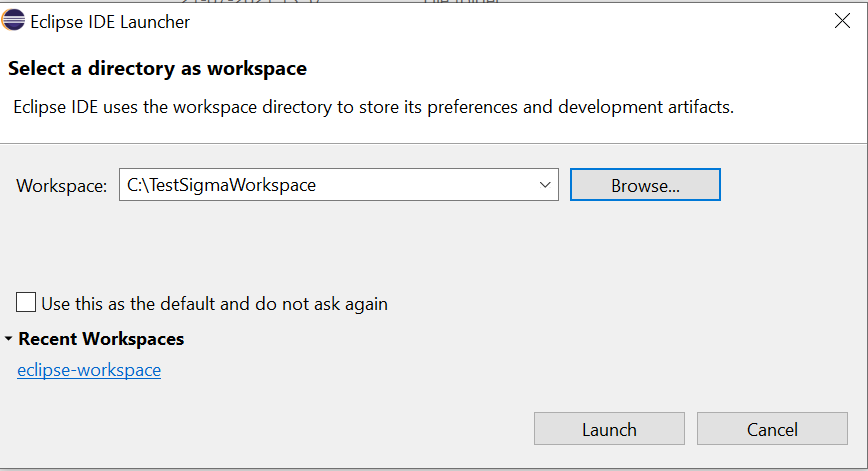
Step 4- Now user needs to create a workspace. Workspace will store all your test scripts, test results etc.
How to Get Started to Write Your Test Scripts with Selenium in Eclipse
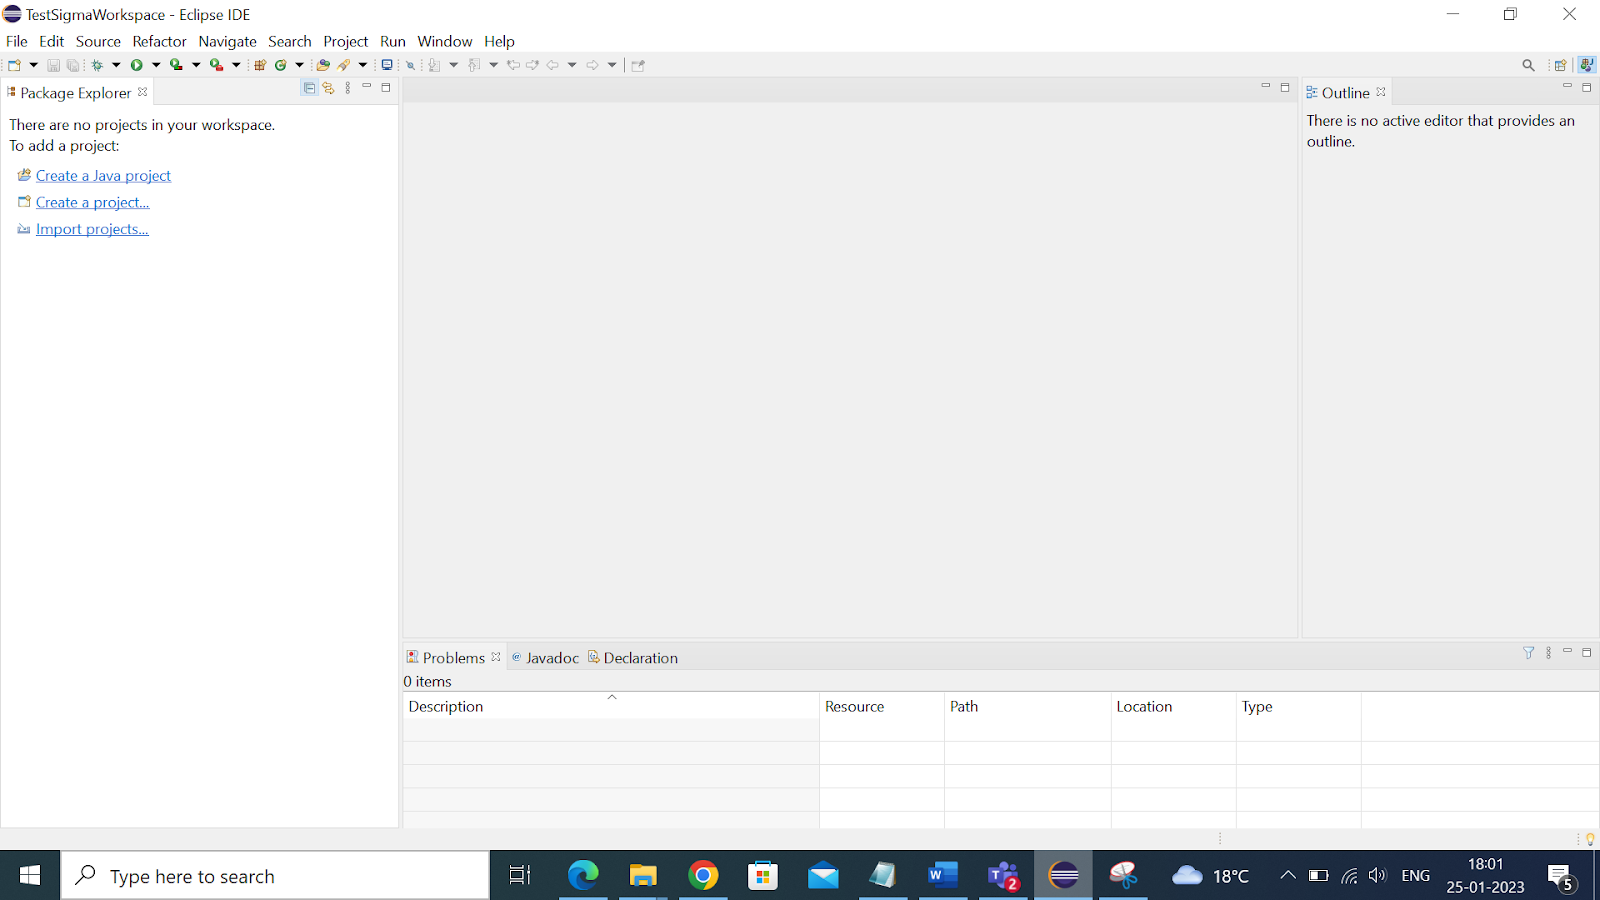
- Launch eclipse and launch workspace.
- Create a new project in Eclipse.
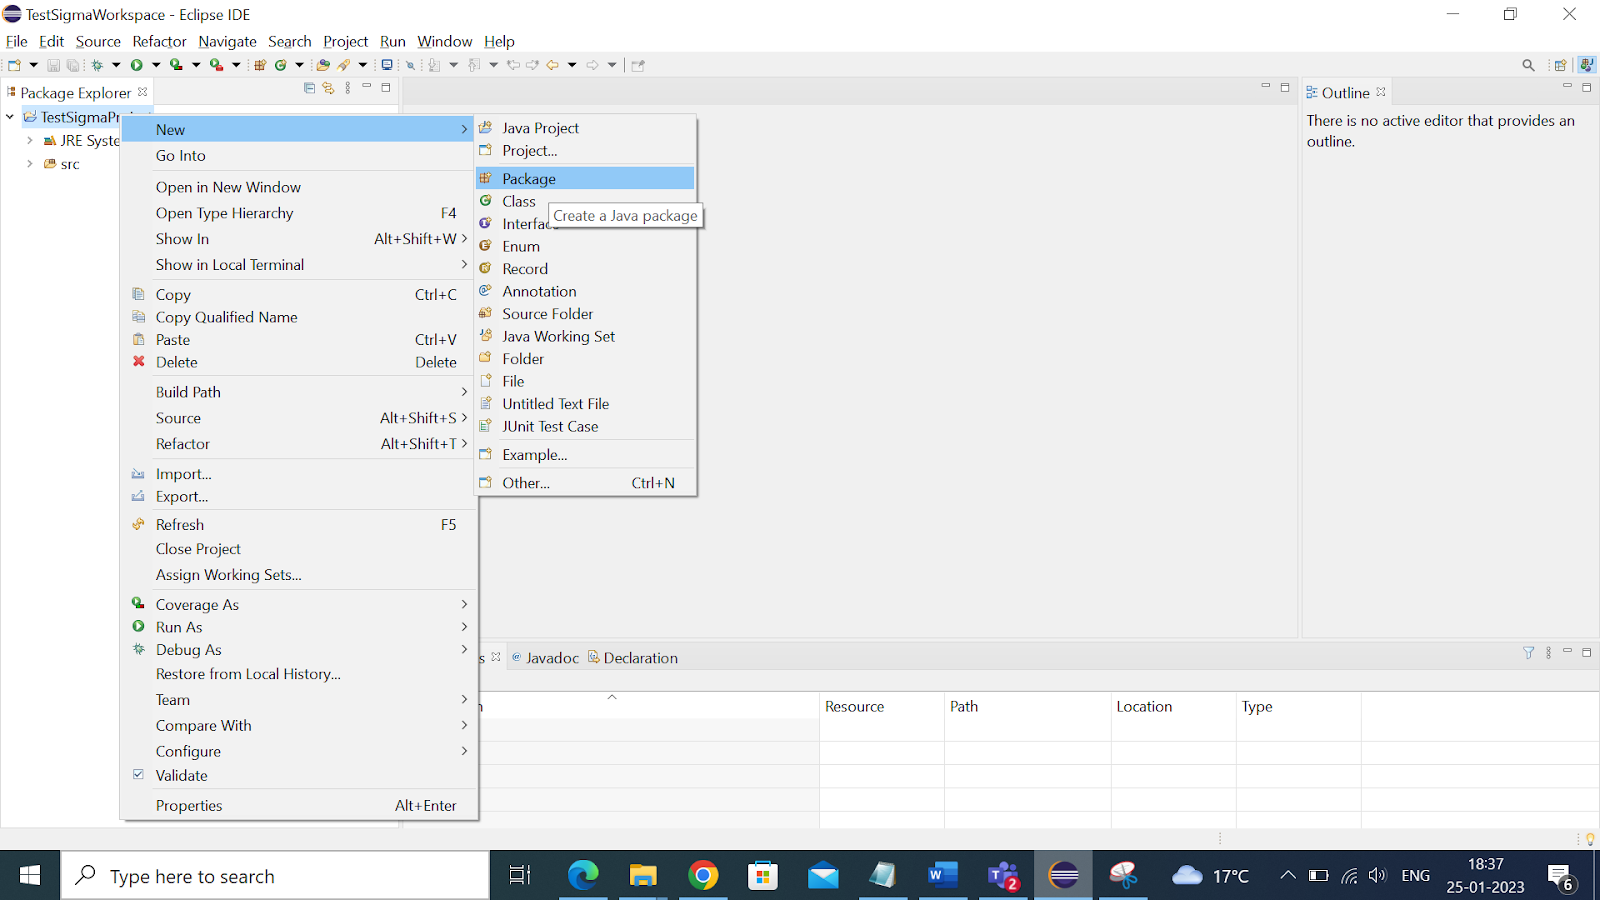
- Create a new package.
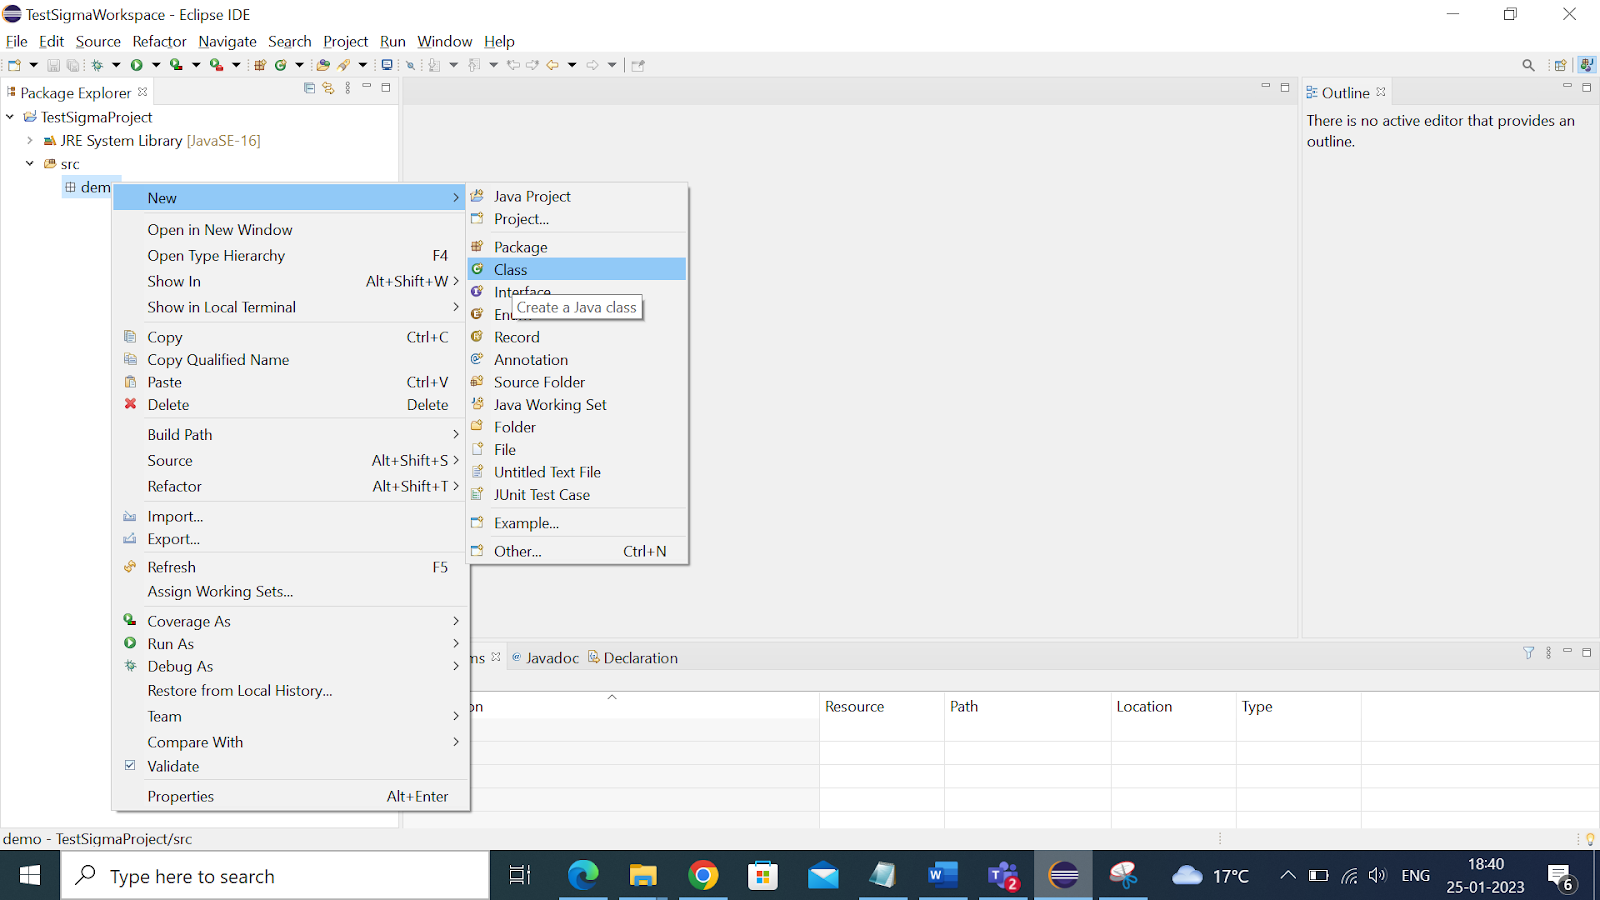
- Create a new class under the package.
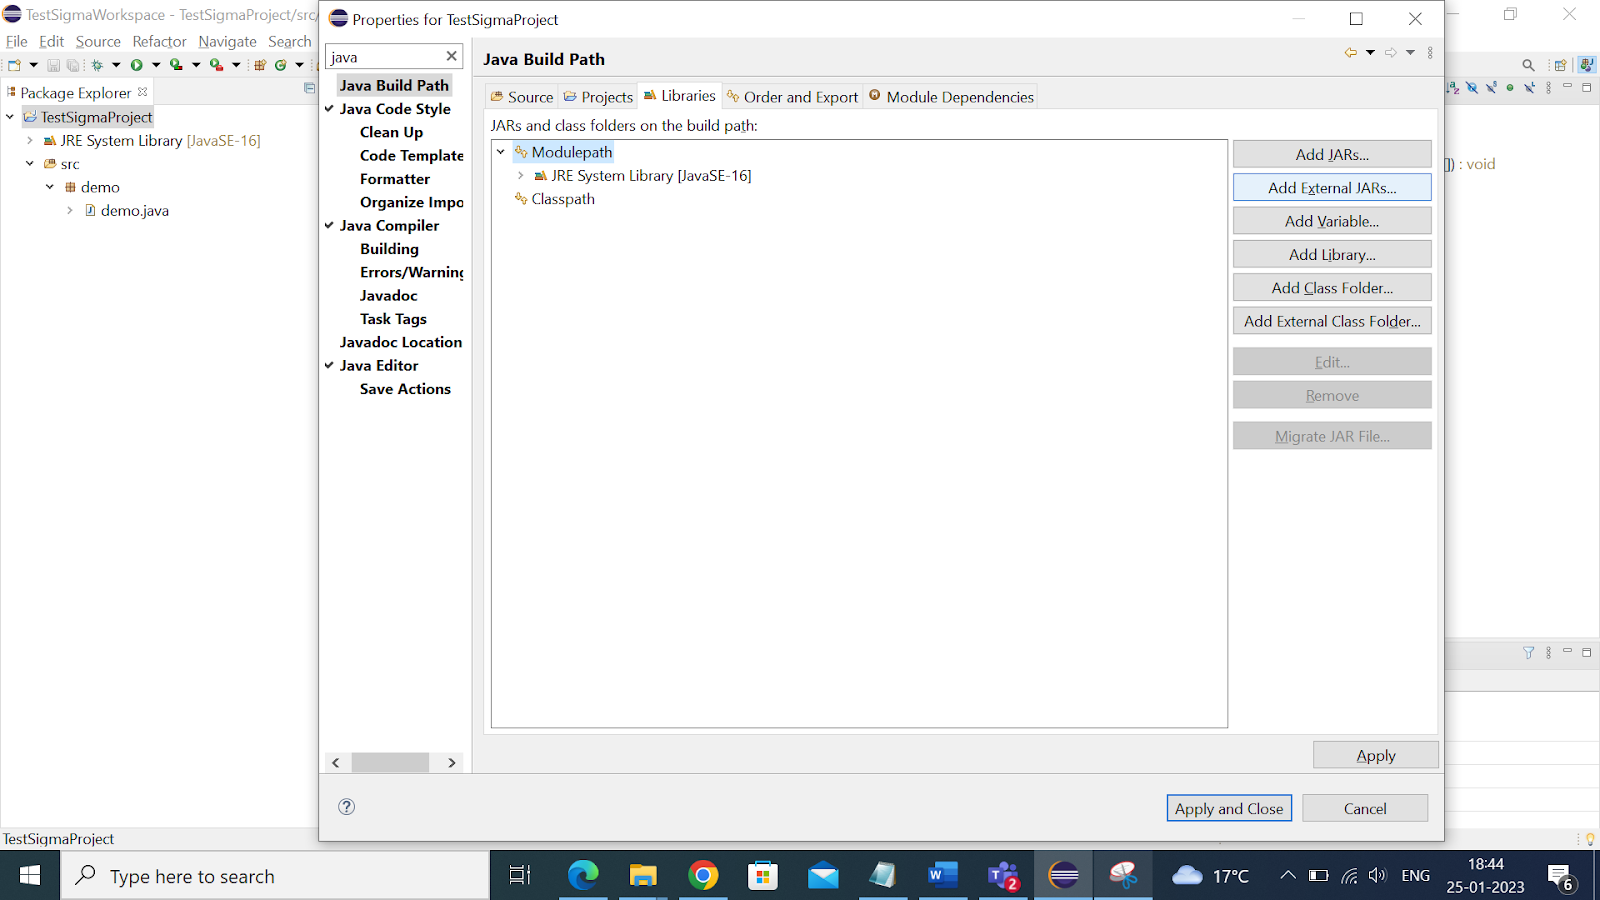
- Inserting Selenium WebDriver Jar files into the project.
Launch Eclipse and Launch the Workspace

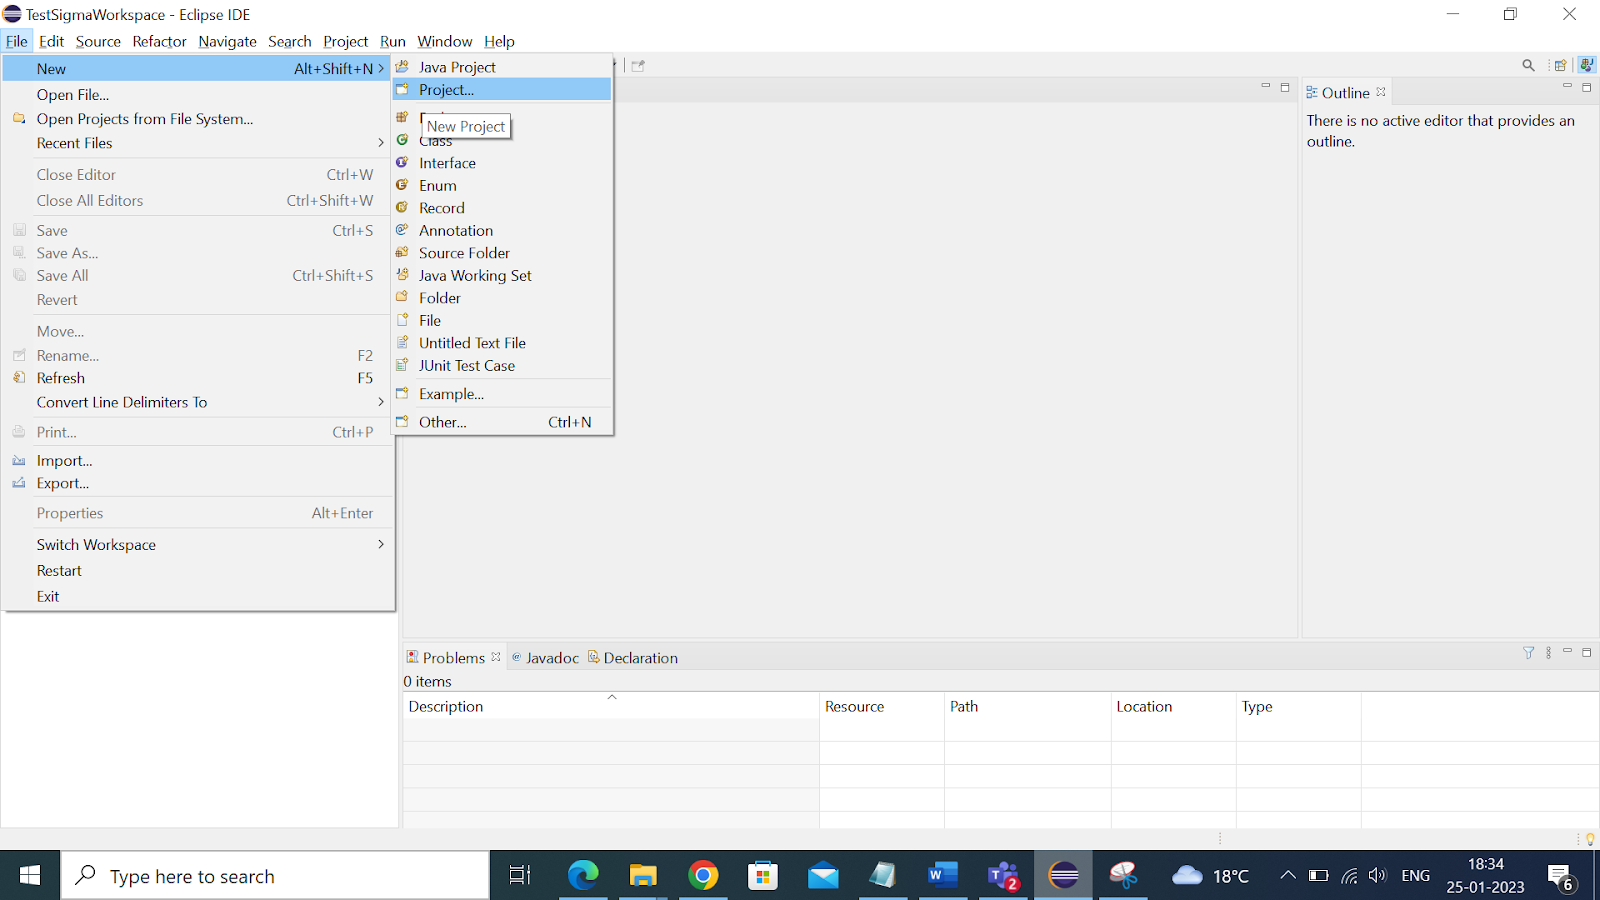
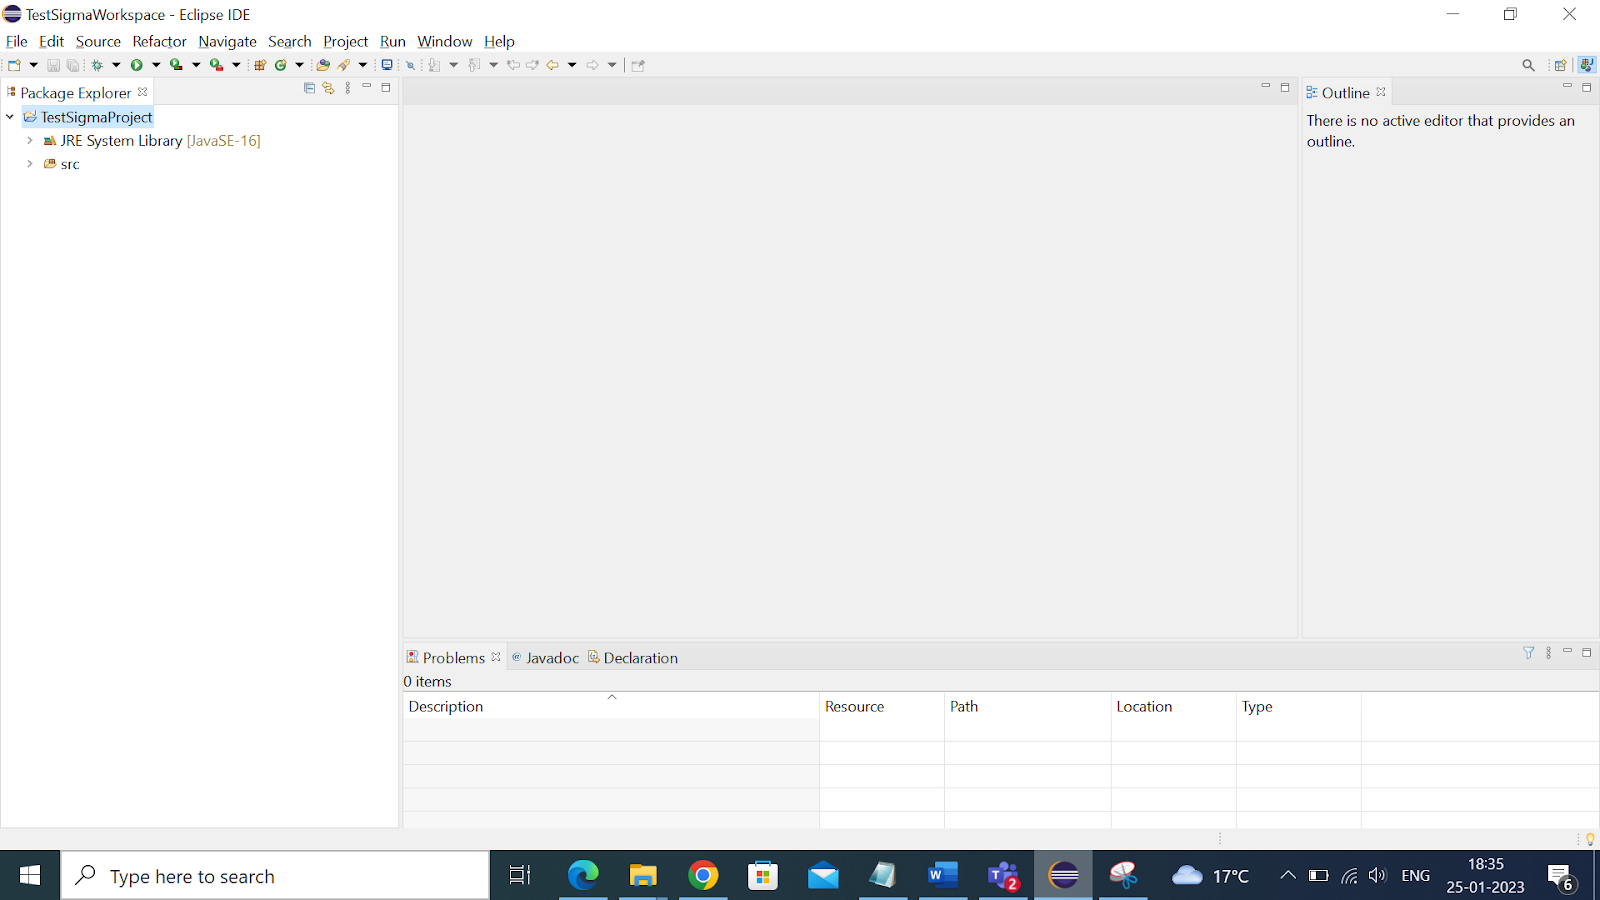
Create a New Project in Eclipse
Let’s create our first project in TestSigmaWorkspace.
Create a New Package under the Project
Create a New Class under the Package
Inserting Selenium Webdriver Jar Files Into the Project
The next step is to add Selenium JAR files. Right-click on Project and select properties. Select the Java build directory and then select Add External JARs.
Conclusion
In the above tutorial, we have taken a deep dive into the Installation and setup of Selenium with Eclipse. Selenium can be configured with other IDEs like IntelliJ. We have seen how we can configure, launch eclipse, and create new projects and classes. Selenium is used around 60% worldwide as compared to other frameworks because of being open source. I believe you are now all ready to write the first complete test scripts.
Do share your feedback on the implementation.
Happy testing…!!
Frequently Asked Questions
No, Eclipse is not required for Selenium. Selenium is a browser automation tool and can be used with any programming language and development environment. Eclipse is simply one of the many IDEs that can be used to write and run Selenium tests, but it is not necessary.
There is no one “best” IDE for Selenium automation as it depends on the user’s preference and requirements. Some popular IDEs for Selenium automation include Eclipse, IntelliJ IDEA, and Visual Studio Code. Each of these IDEs has its strengths and weaknesses and some may be better suited for certain types of projects or programming languages. It is recommended to try out a few different IDEs to find which one works best for you.
When it comes to using Eclipse for Selenium, the “best” version of Eclipse would be the one that is most compatible with the programming language and framework you are using for your Selenium tests.
Eclipse IDE for Java Developers is one of the most popular options among Selenium users as it is specifically designed for Java development and is pre-configured with the necessary plugins for Selenium development.
Eclipse IDE for JavaScript and Web Developers is another option and can be useful if you are using Selenium with JavaScript, HTML, and CSS.
Ultimately, the best version of Eclipse for Selenium will depend on your specific needs, so it’s worth exploring different options to find the one that works best for you.


