- copilot
 Introduction: Copilot
- Key Capabilities
- Launch Copilot
- Record Test Steps
- Copilot Debug Toolbar
- manage test steps
- Add Test Steps
- Edit and Update Steps
- Delete Test Steps
- Reorder Test Steps
- Bulk Actions
- FAQs on Testsigma Copilot
- troubleshooting for copilot
- Unable to Login to Testsigma Terminal?
- Unable to Download the Terminal Files?
- Unable to Extract the Terminal Files?
- Unable to Start the Terminal Due to Port Unavailability?
- Unable to Start the Agent?
- Unable to Auto-Register Your Device Using Testsigma Terminal?
- Unable to Download the Packages Required to Start the Agent?
- Unable to Update the Packages Required to Start the Agent?
- Unable to Reestablish Connection to Agent?
Unable to Start the Terminal Due to Port Unavailability?
If the Testsigma Terminal fails to start due to port unavailability, it means one or more of the required ports (8383, 8484, or 18329) are already in use by another process on your machine. This article discusses how to identify and resolve the conflict.
Step 1: Retry or Reconfigure from the Terminal Window
Before running manual commands, try the built-in recovery options in the Testsigma Terminal:
- In the Testsigma Terminal window, click Retry. This checks the port’s availability again.
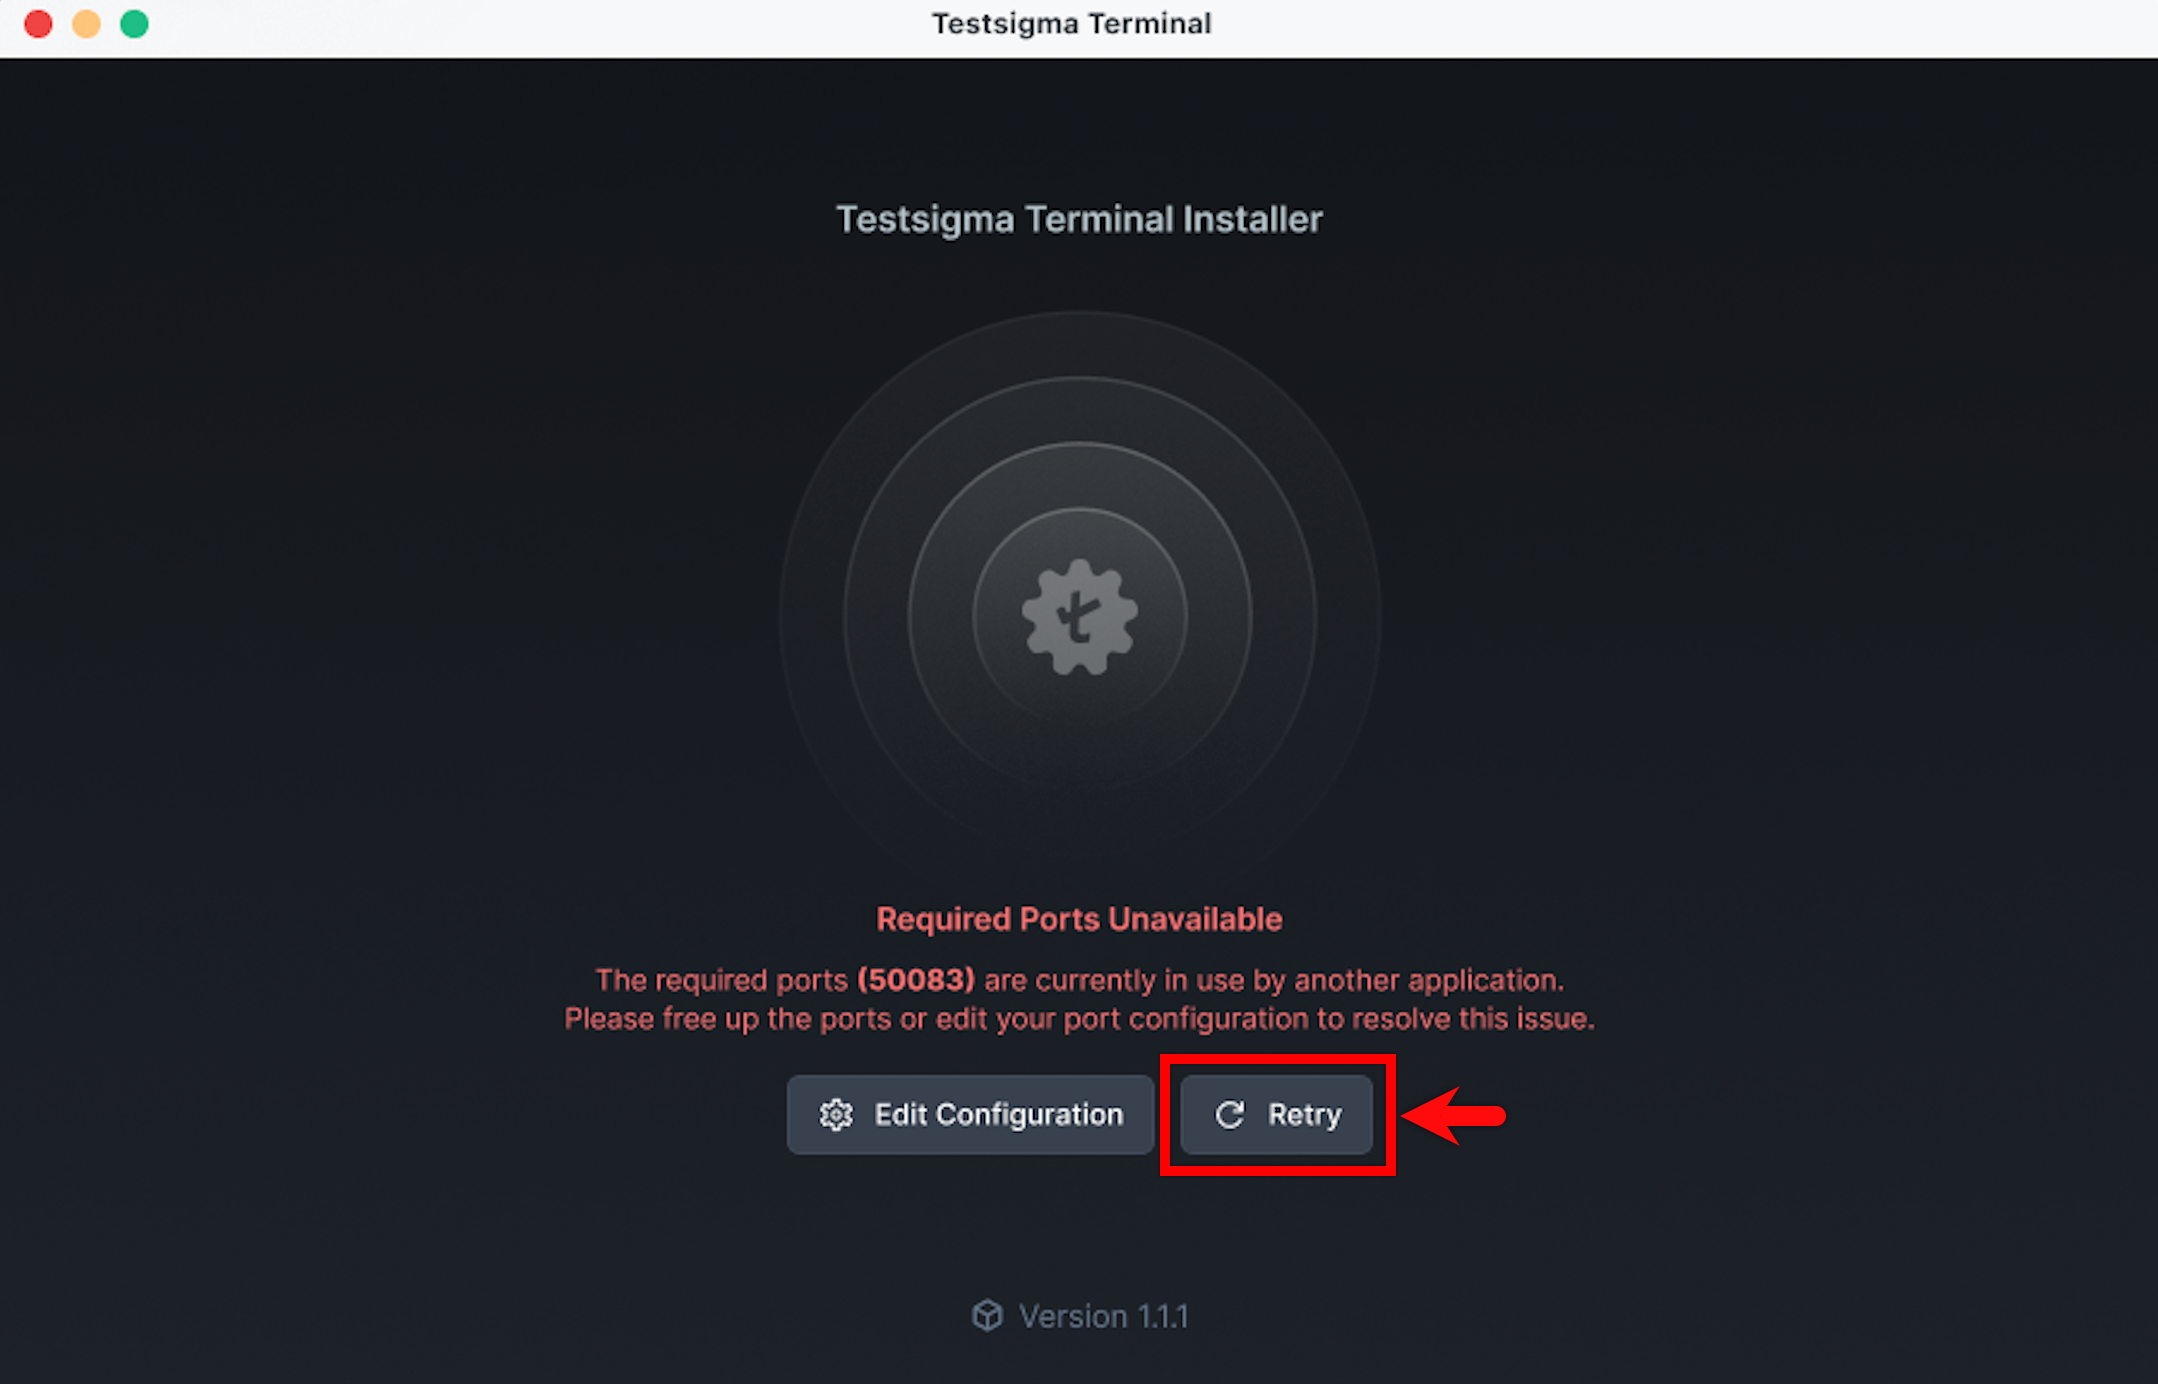
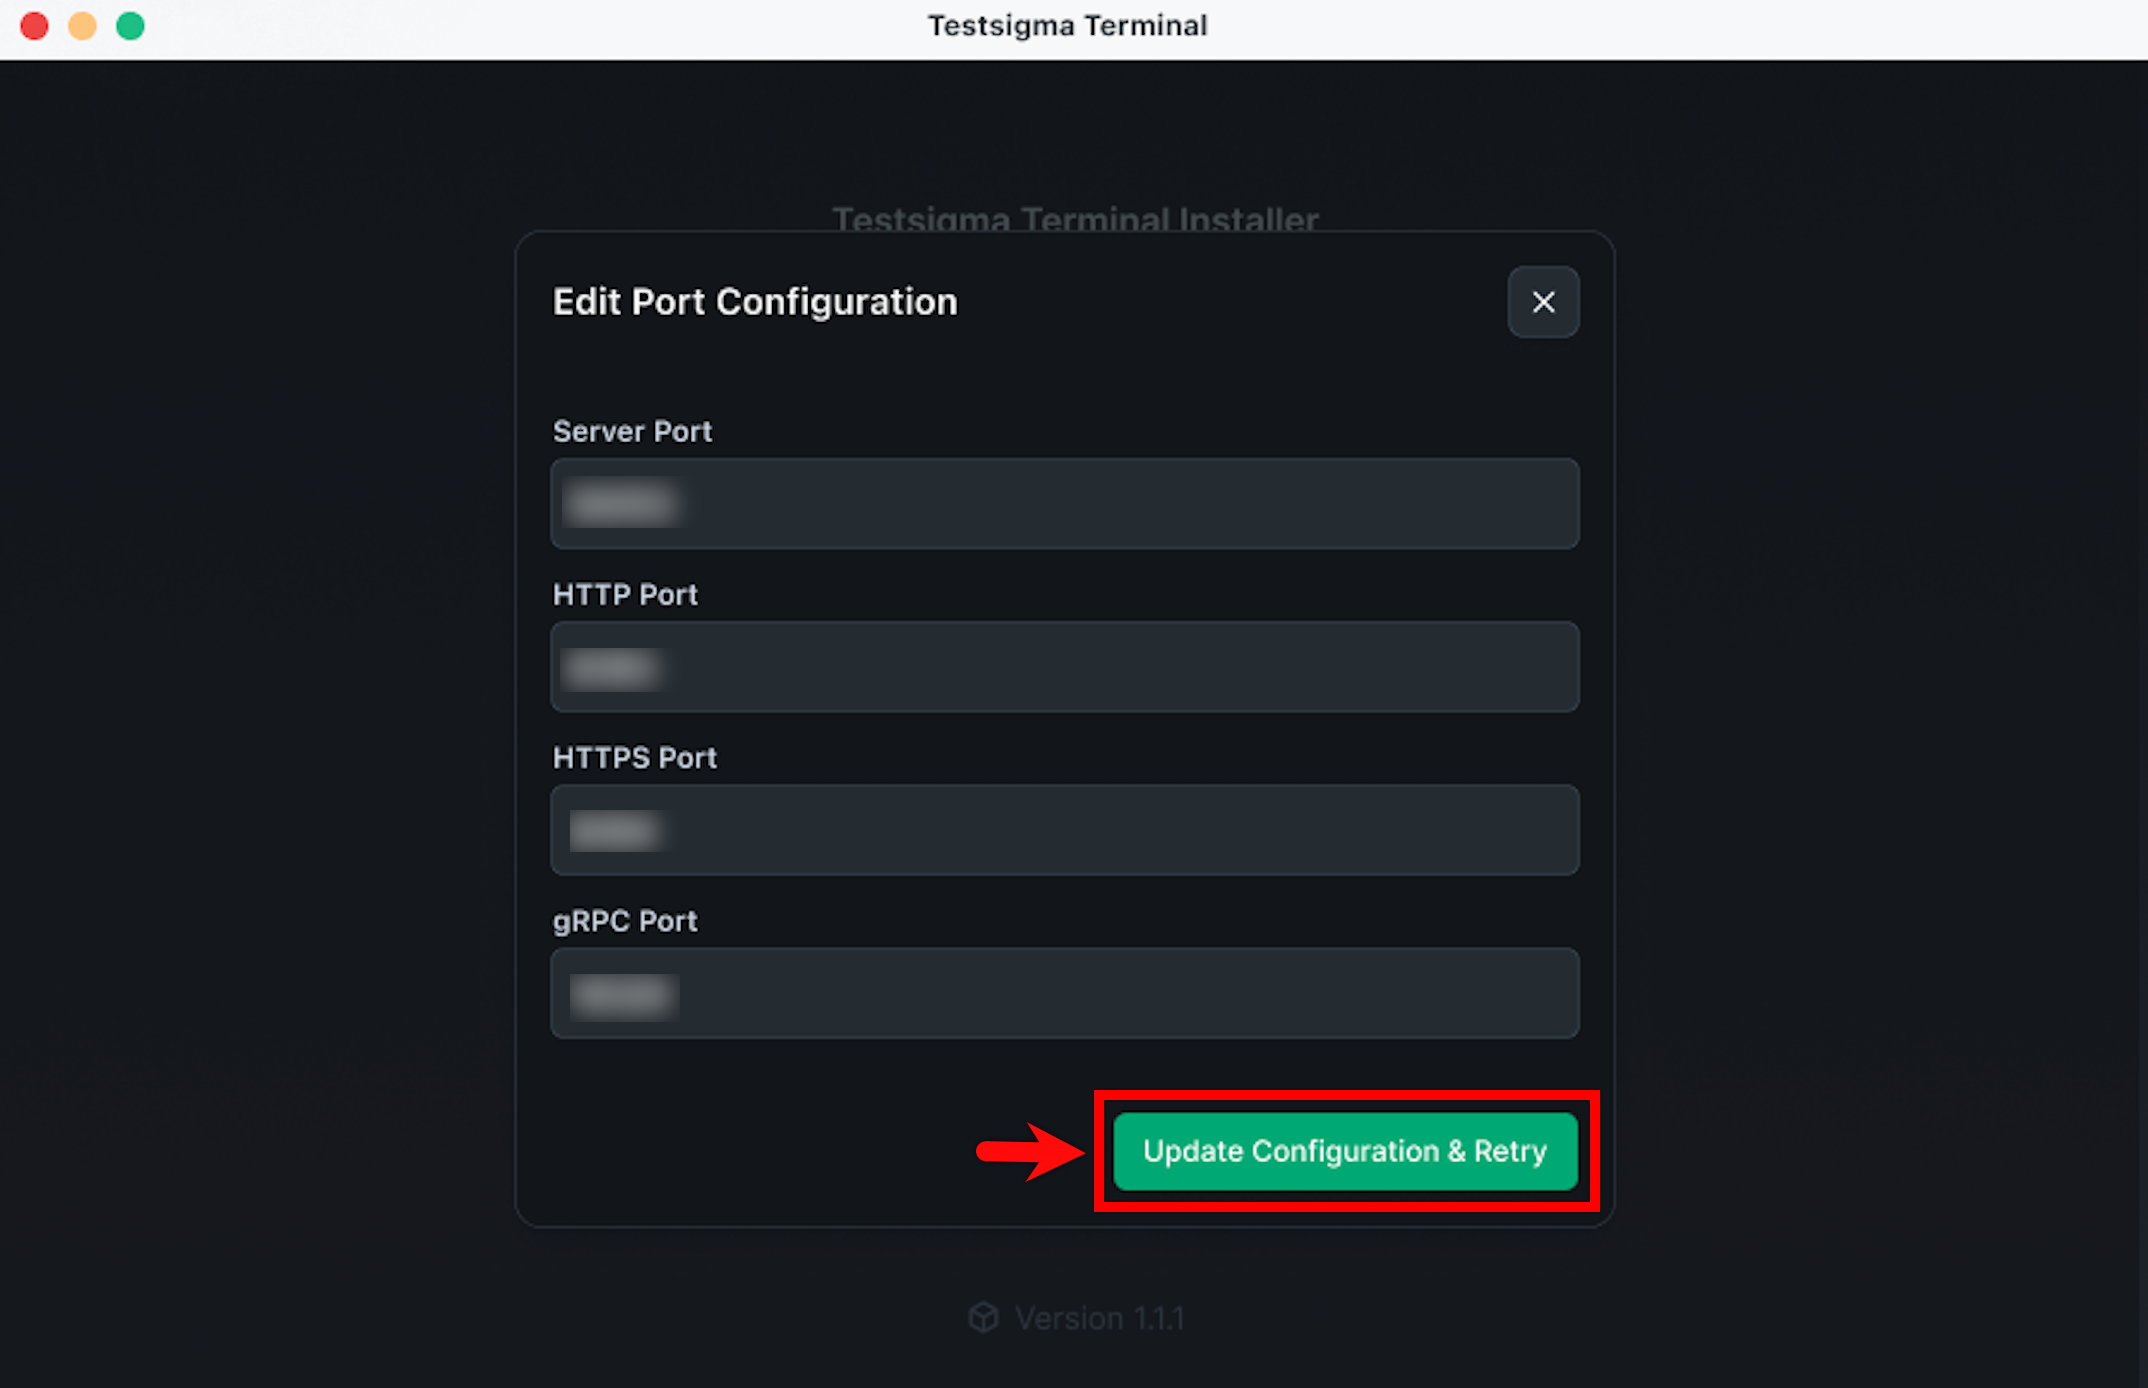
- If the issue persists, click Edit Configuration.
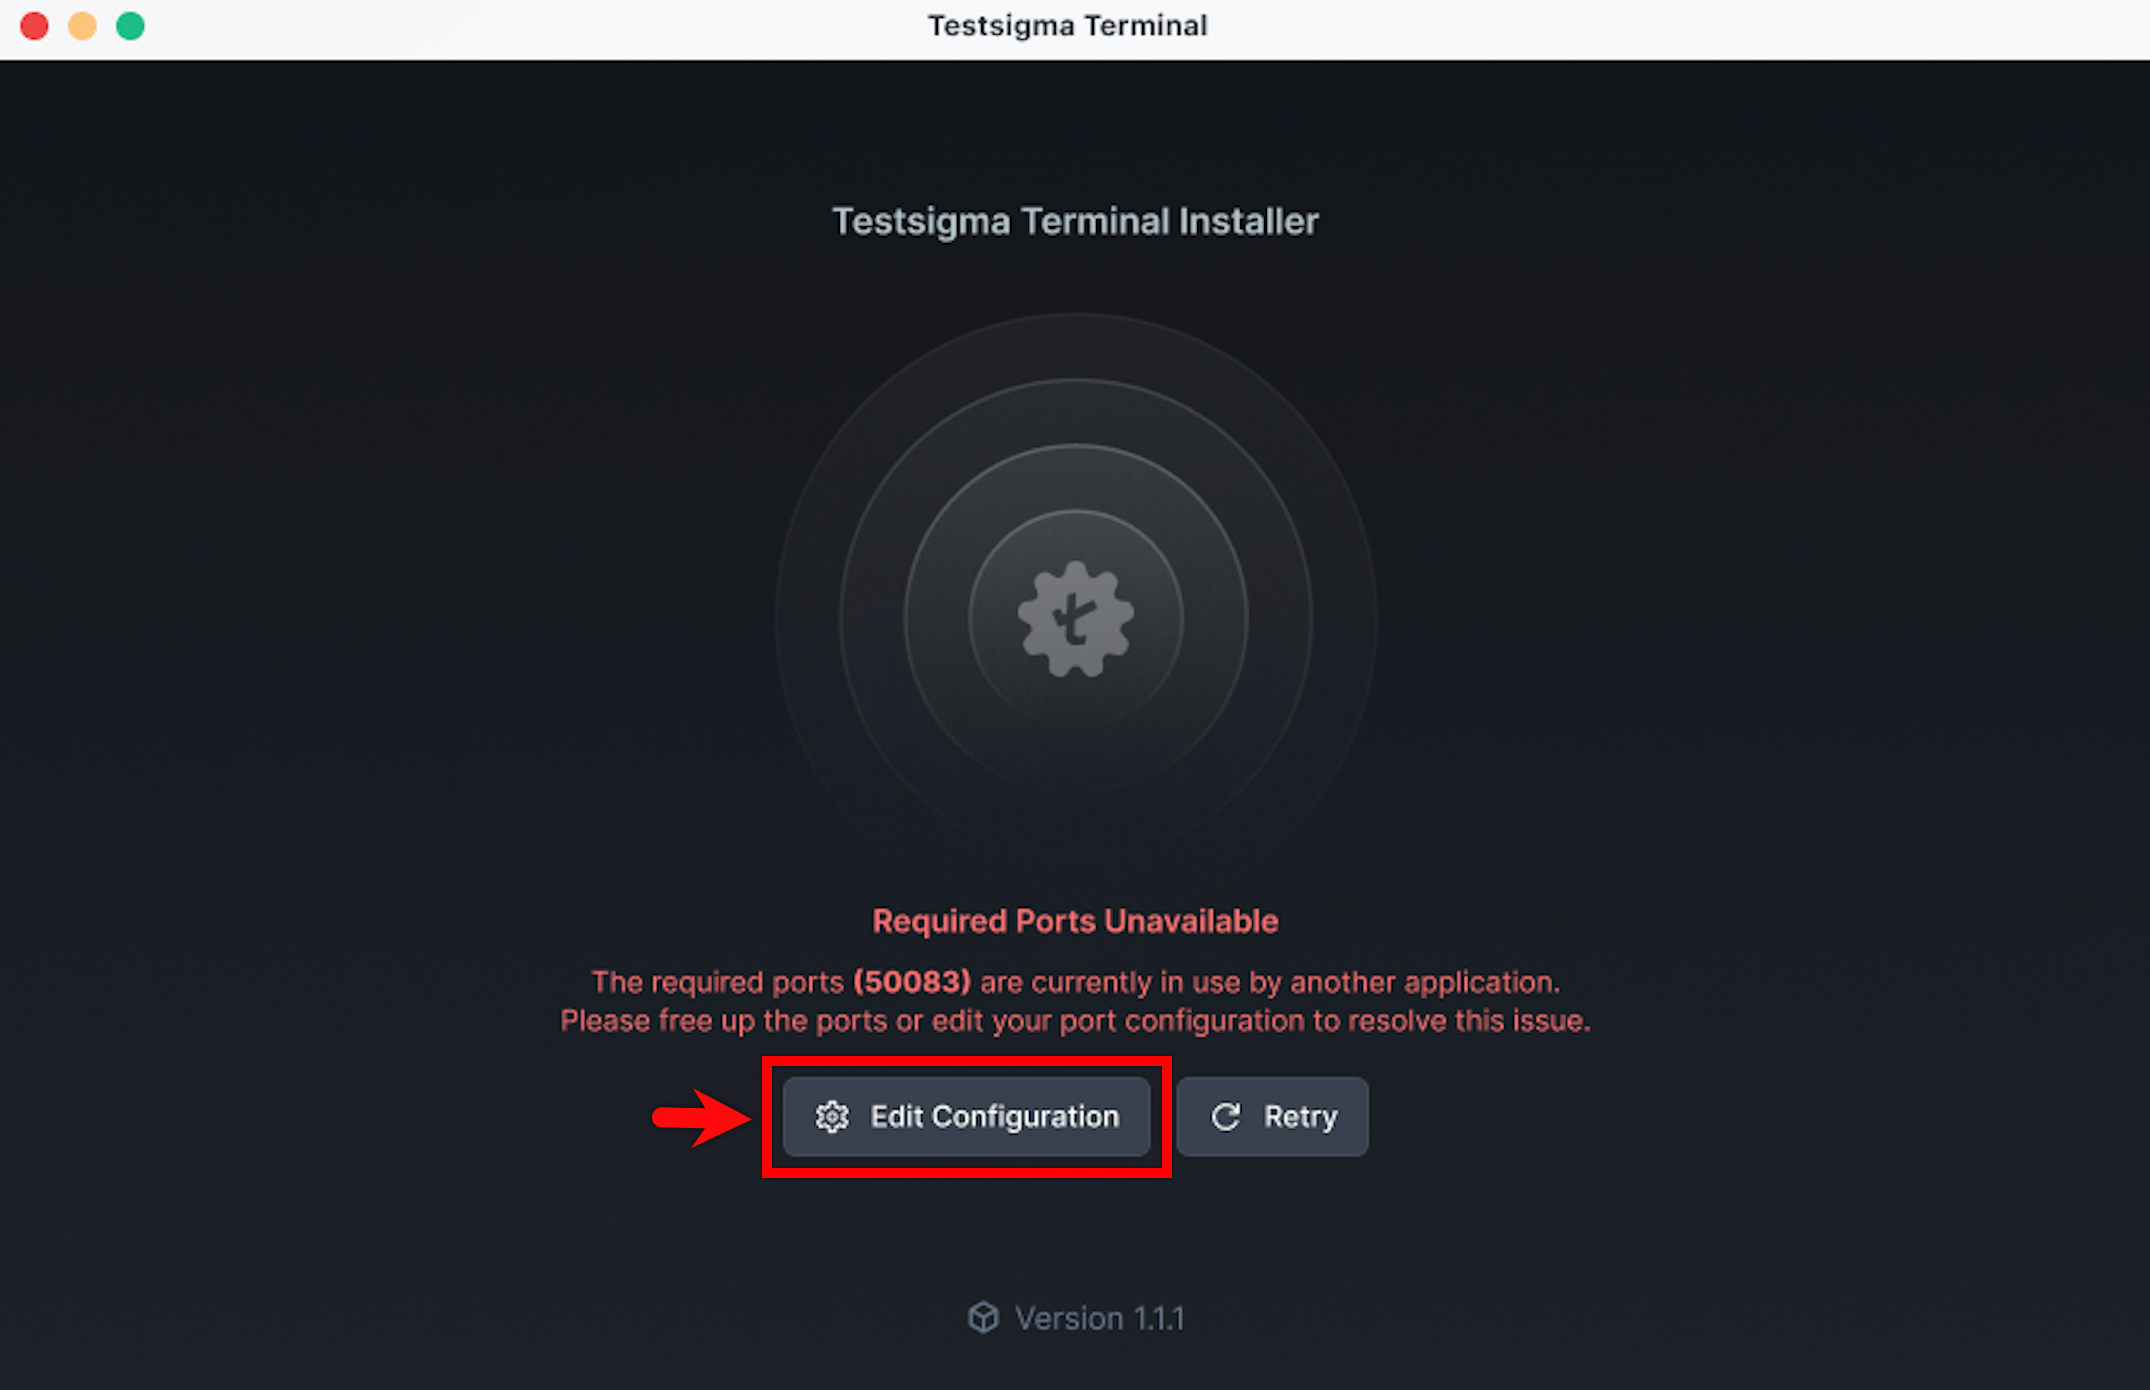
- In the Edit Configuration dialog, check the available ports on your device, update them to free ports, and click Update Configuration & Retry.
If the built-in options don’t resolve the issue, proceed to the steps below to manually identify and free the occupied port.
Step 2: Check if a Port is in Use
Run the command for your operating system to check each required port (8383, 8484, 18329). Replace the port number in the command with the one shown in the error.
Windows — Command Prompt:
netstat -ano | findstr :8383
netstat -ano | findstr :8484
netstat -ano | findstr :18329
Mac/Linux — Terminal:
lsof -i :8383
lsof -i :8484
lsof -i :18329
Interpret the output as follows:
- No output — the port is free. Proceed to Step 4.
- Output with LISTEN — a process is actively using the port. Note the PID (Process ID) from the last column and proceed to Step 3.
Step 3: Free the Occupied Port
Use the PID from Step 2 to stop the process occupying the port.
Windows — Command Prompt:
taskkill /PID <PID> /FMac/Linux — Terminal:
kill -9 <PID>Replace <PID> with the actual process ID from the output above.
If multiple ports show a LISTEN entry, repeat Steps 2 and 3 for each one before proceeding.
Step 4: Restart the Testsigma Terminal
Once you’ve freed all required ports, restart the Testsigma Terminal and verify that it launches successfully.
Want to contribute or report missing content?