- Testsigma Agent
 Pre-requisites
- Setup: Windows, Mac, Linux
- Setup: Android Local Devices
- Setting Up iOS Local Devices
- Arguments Usage Details
- Agent Upgrade Guide
- Update Agent Manually
- Update Drivers Manually
- Delete Corrupted Agent
- Delete Agents: Soft & Permanent
- Triggering Tests on Local Devices
- Testsigma Agent - FAQs
- troubleshooting
- How to Fix Agent Startup & Registration Errors?
- How to Configure Agent Logs?
- How to Upgrade Testsigma Agent Automatically?
- How to Add Max Sessions for Agents?
- How to Resolve Access Blocked Errors When Downloading the Agent?
- Why is Testsigma Agent Not Detecting My Installed Browser?
- How do I Configure Proxy Settings for the Testsigma Agent?
How to Configure Agent Logs?
Testsigma Agent is a critical utility program that must be installed on each local machine to execute Testsigma tests. Proper log management is essential for debugging and maintaining the health of these automation agents. This guide covers everything from configuring log levels to automatically or manually sending log files to the Testsigma Support Team. This document explains how to configure agent log levels, send logs automatically and manually, and debug errors.
Agent Log Level Configuration
Agent log-level configuration in Testsigma is important for debugging and keeping your automation agents healthy. By default, the INFO level is selected. This setting shows in the command line interface (CLI) and is written to the agent log files on your local device. When you report an agent issue, these logs are automatically sent to the Testsigma support team.
Change Agent Level Configuration
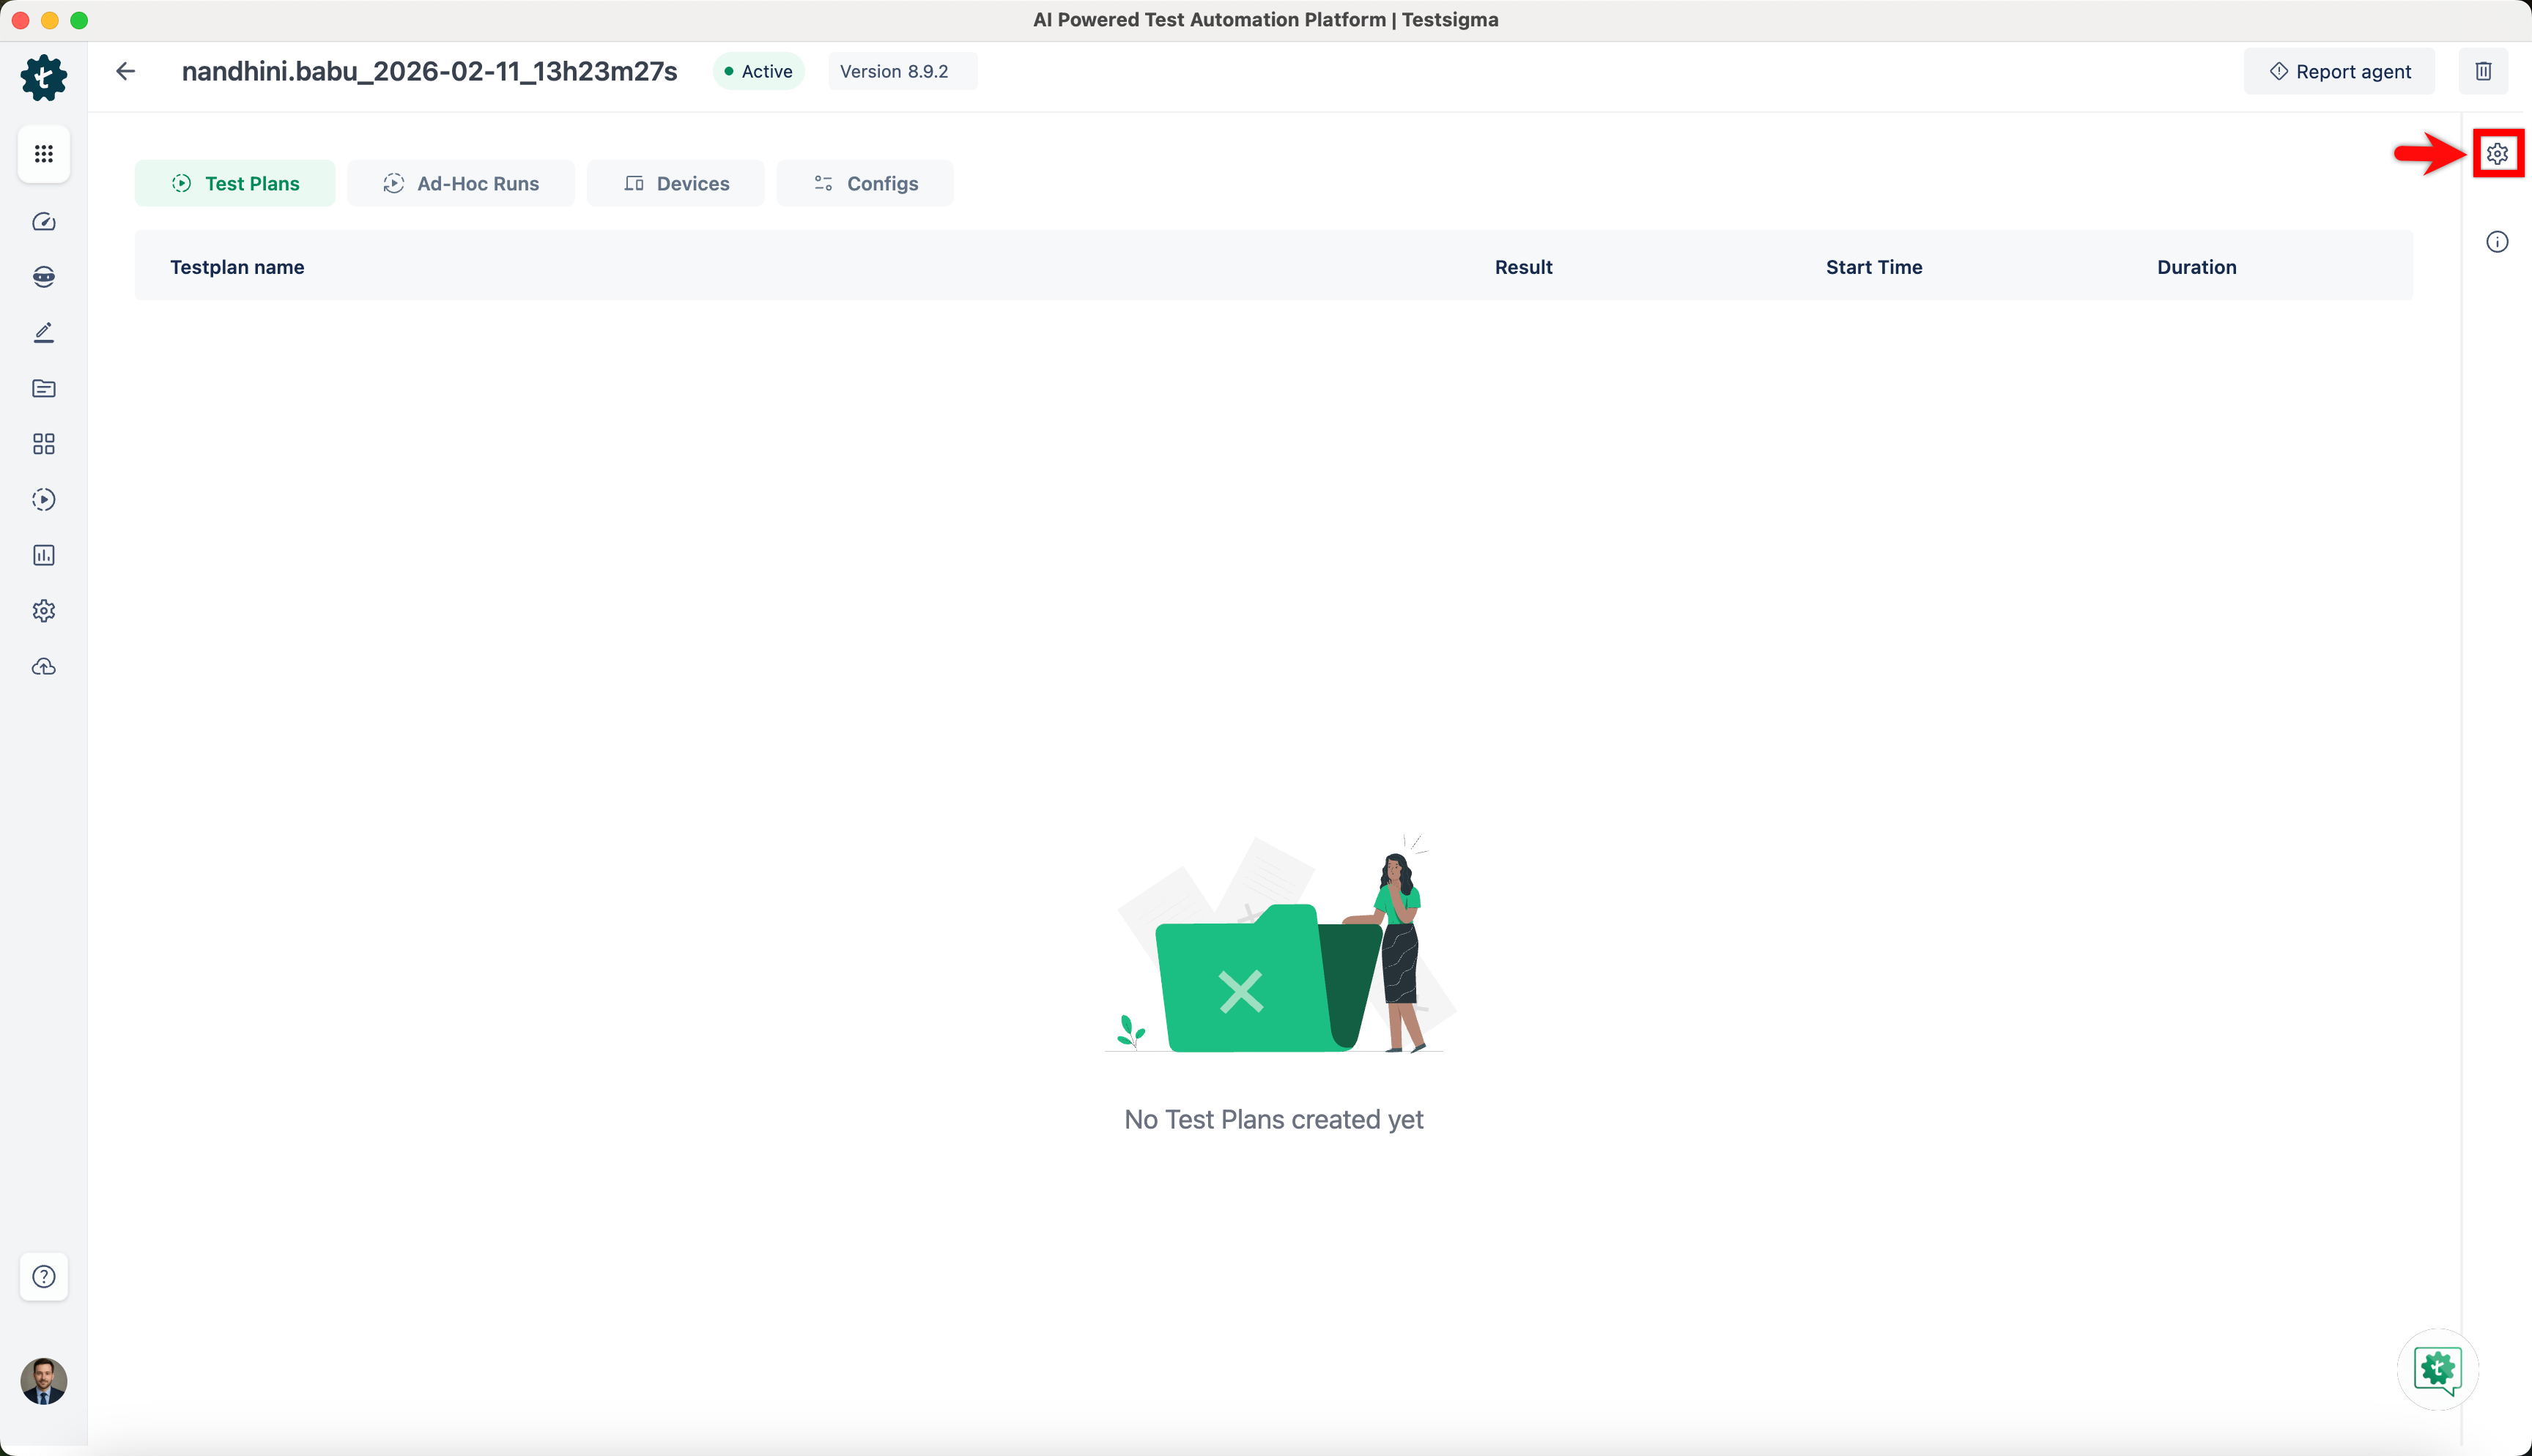
- Click on the Agents icon in the left navigation bar. Open an agent from the Agent list page.

- Click on the Agent Settings icon in the right navigation bar.
-
Choose the agent log level configuration for CLI and local files from the log level options.
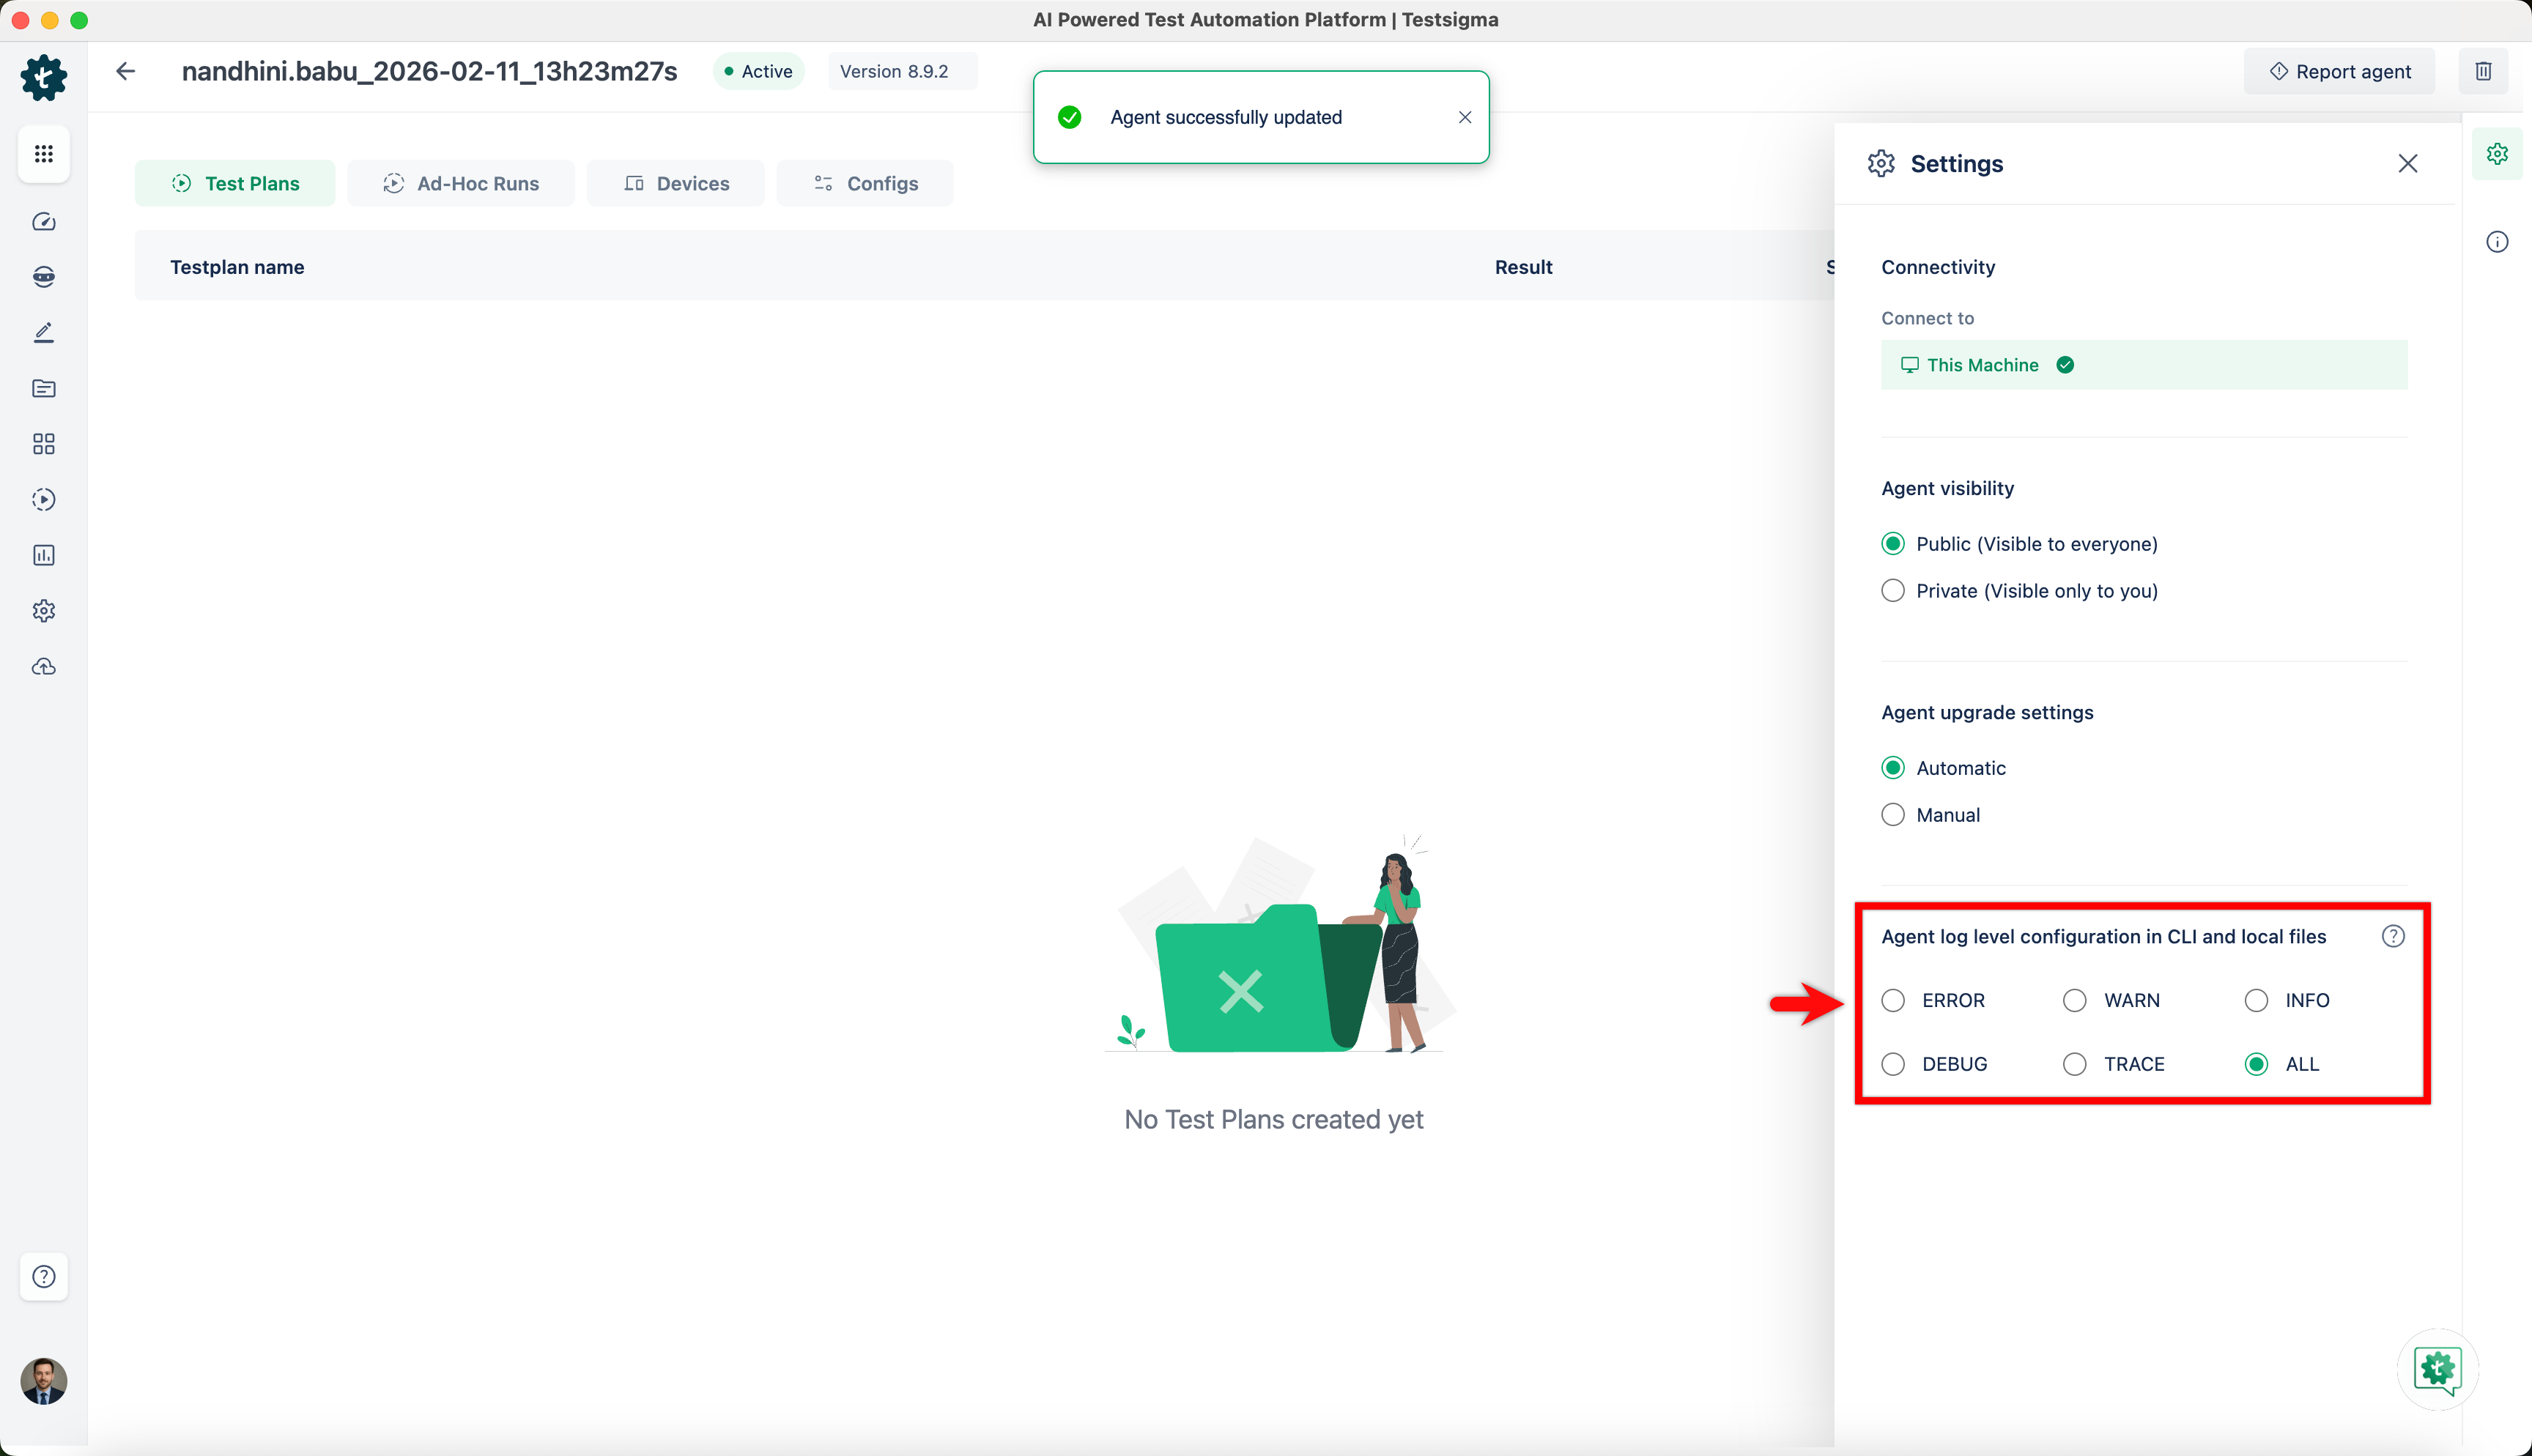
- ERROR: Logs only critical issues that cause the agent to fail. Only error messages will appear in the CLI and be saved in the local agent log files.
- WARN: Logs warnings and errors to spot potential issues early. Warning and error messages will appear in the CLI and be saved in the local agent log files.
- INFO: The default level that logs general information, warnings, and errors for regular monitoring. Info, warning, and error messages will appear in the CLI and be saved in the local agent log files.
- DEBUG: Logs detailed information for debugging. Debug info, warnings, and errors will appear in the CLI and be saved in the local agent log files.
- TRACE: Logs detailed traces of the execution flow for deep debugging. Trace messages, debug info, warnings, and errors will appear in the CLI and be saved in the local agent log files.
- ALL: Logs all messages, providing the most detailed logging. All messages (error, warning, info, debug, and trace) will appear in the CLI and be saved in the local agent log files.
- After selecting the log-level configuration, restart the agent for the changes to take effect.
Always restart the agent after changing the log-level configuration to apply the new settings.
Send the Logs Automatically
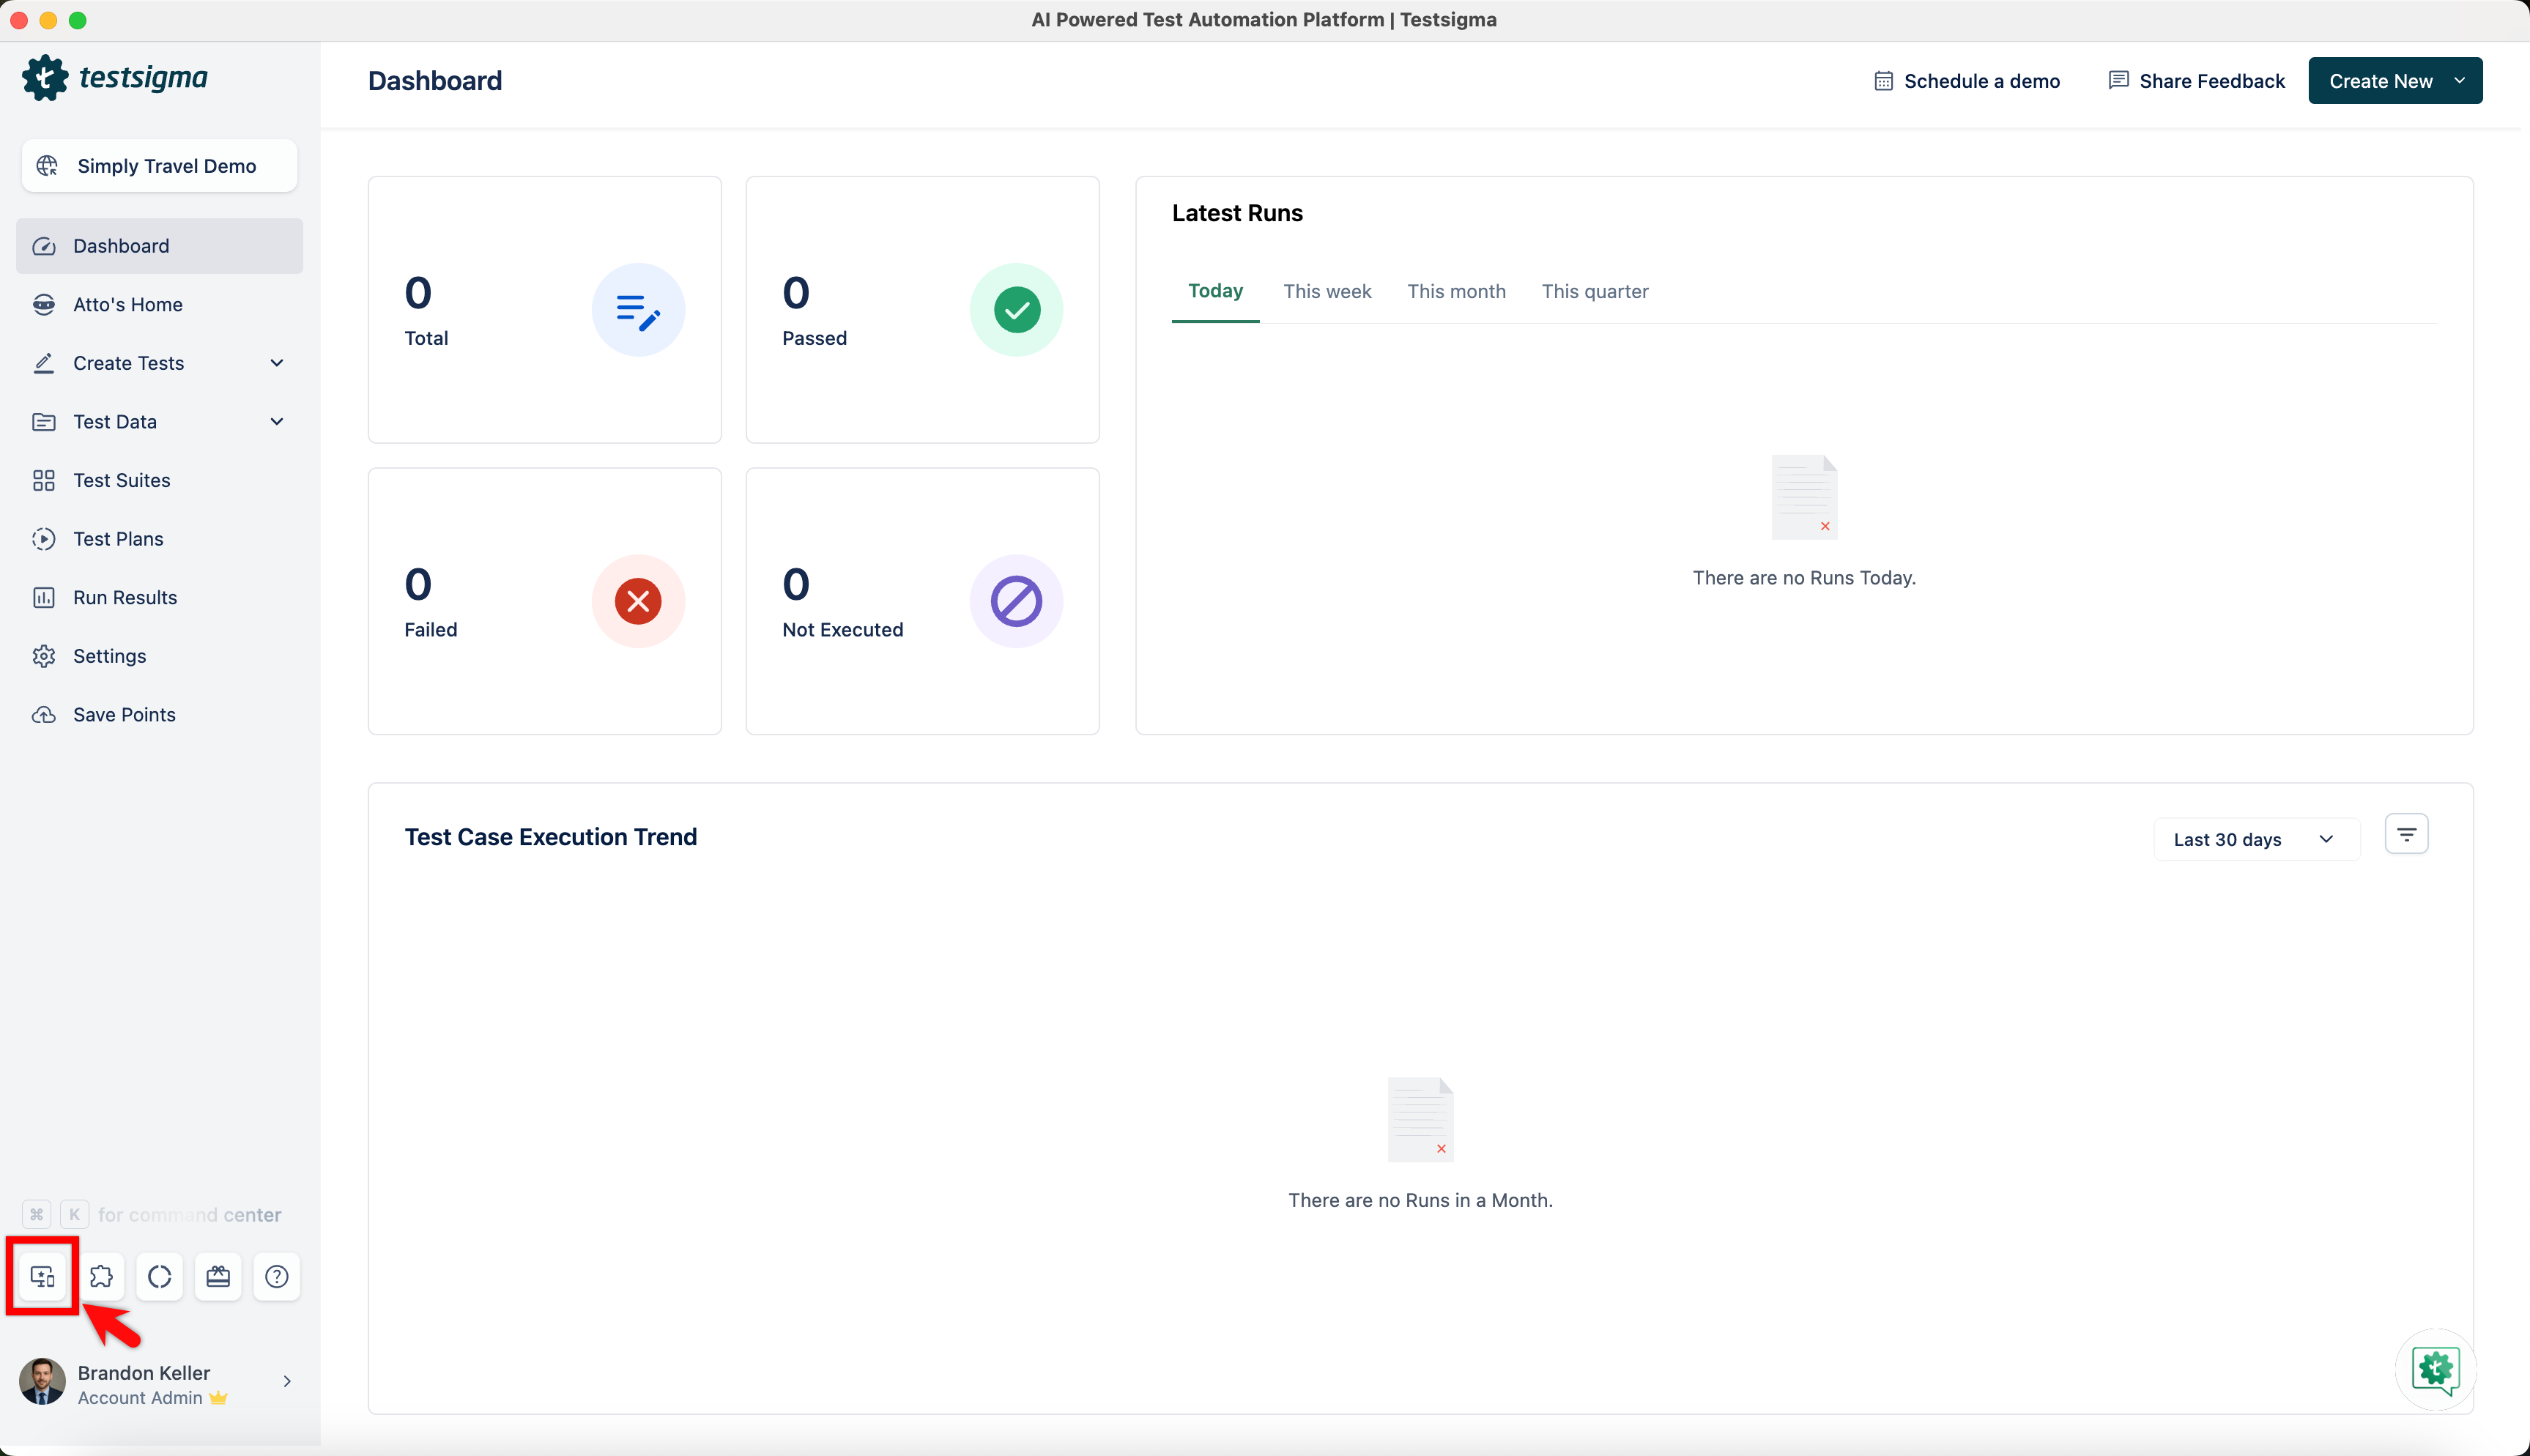
- From the dashboard, go to Agents.
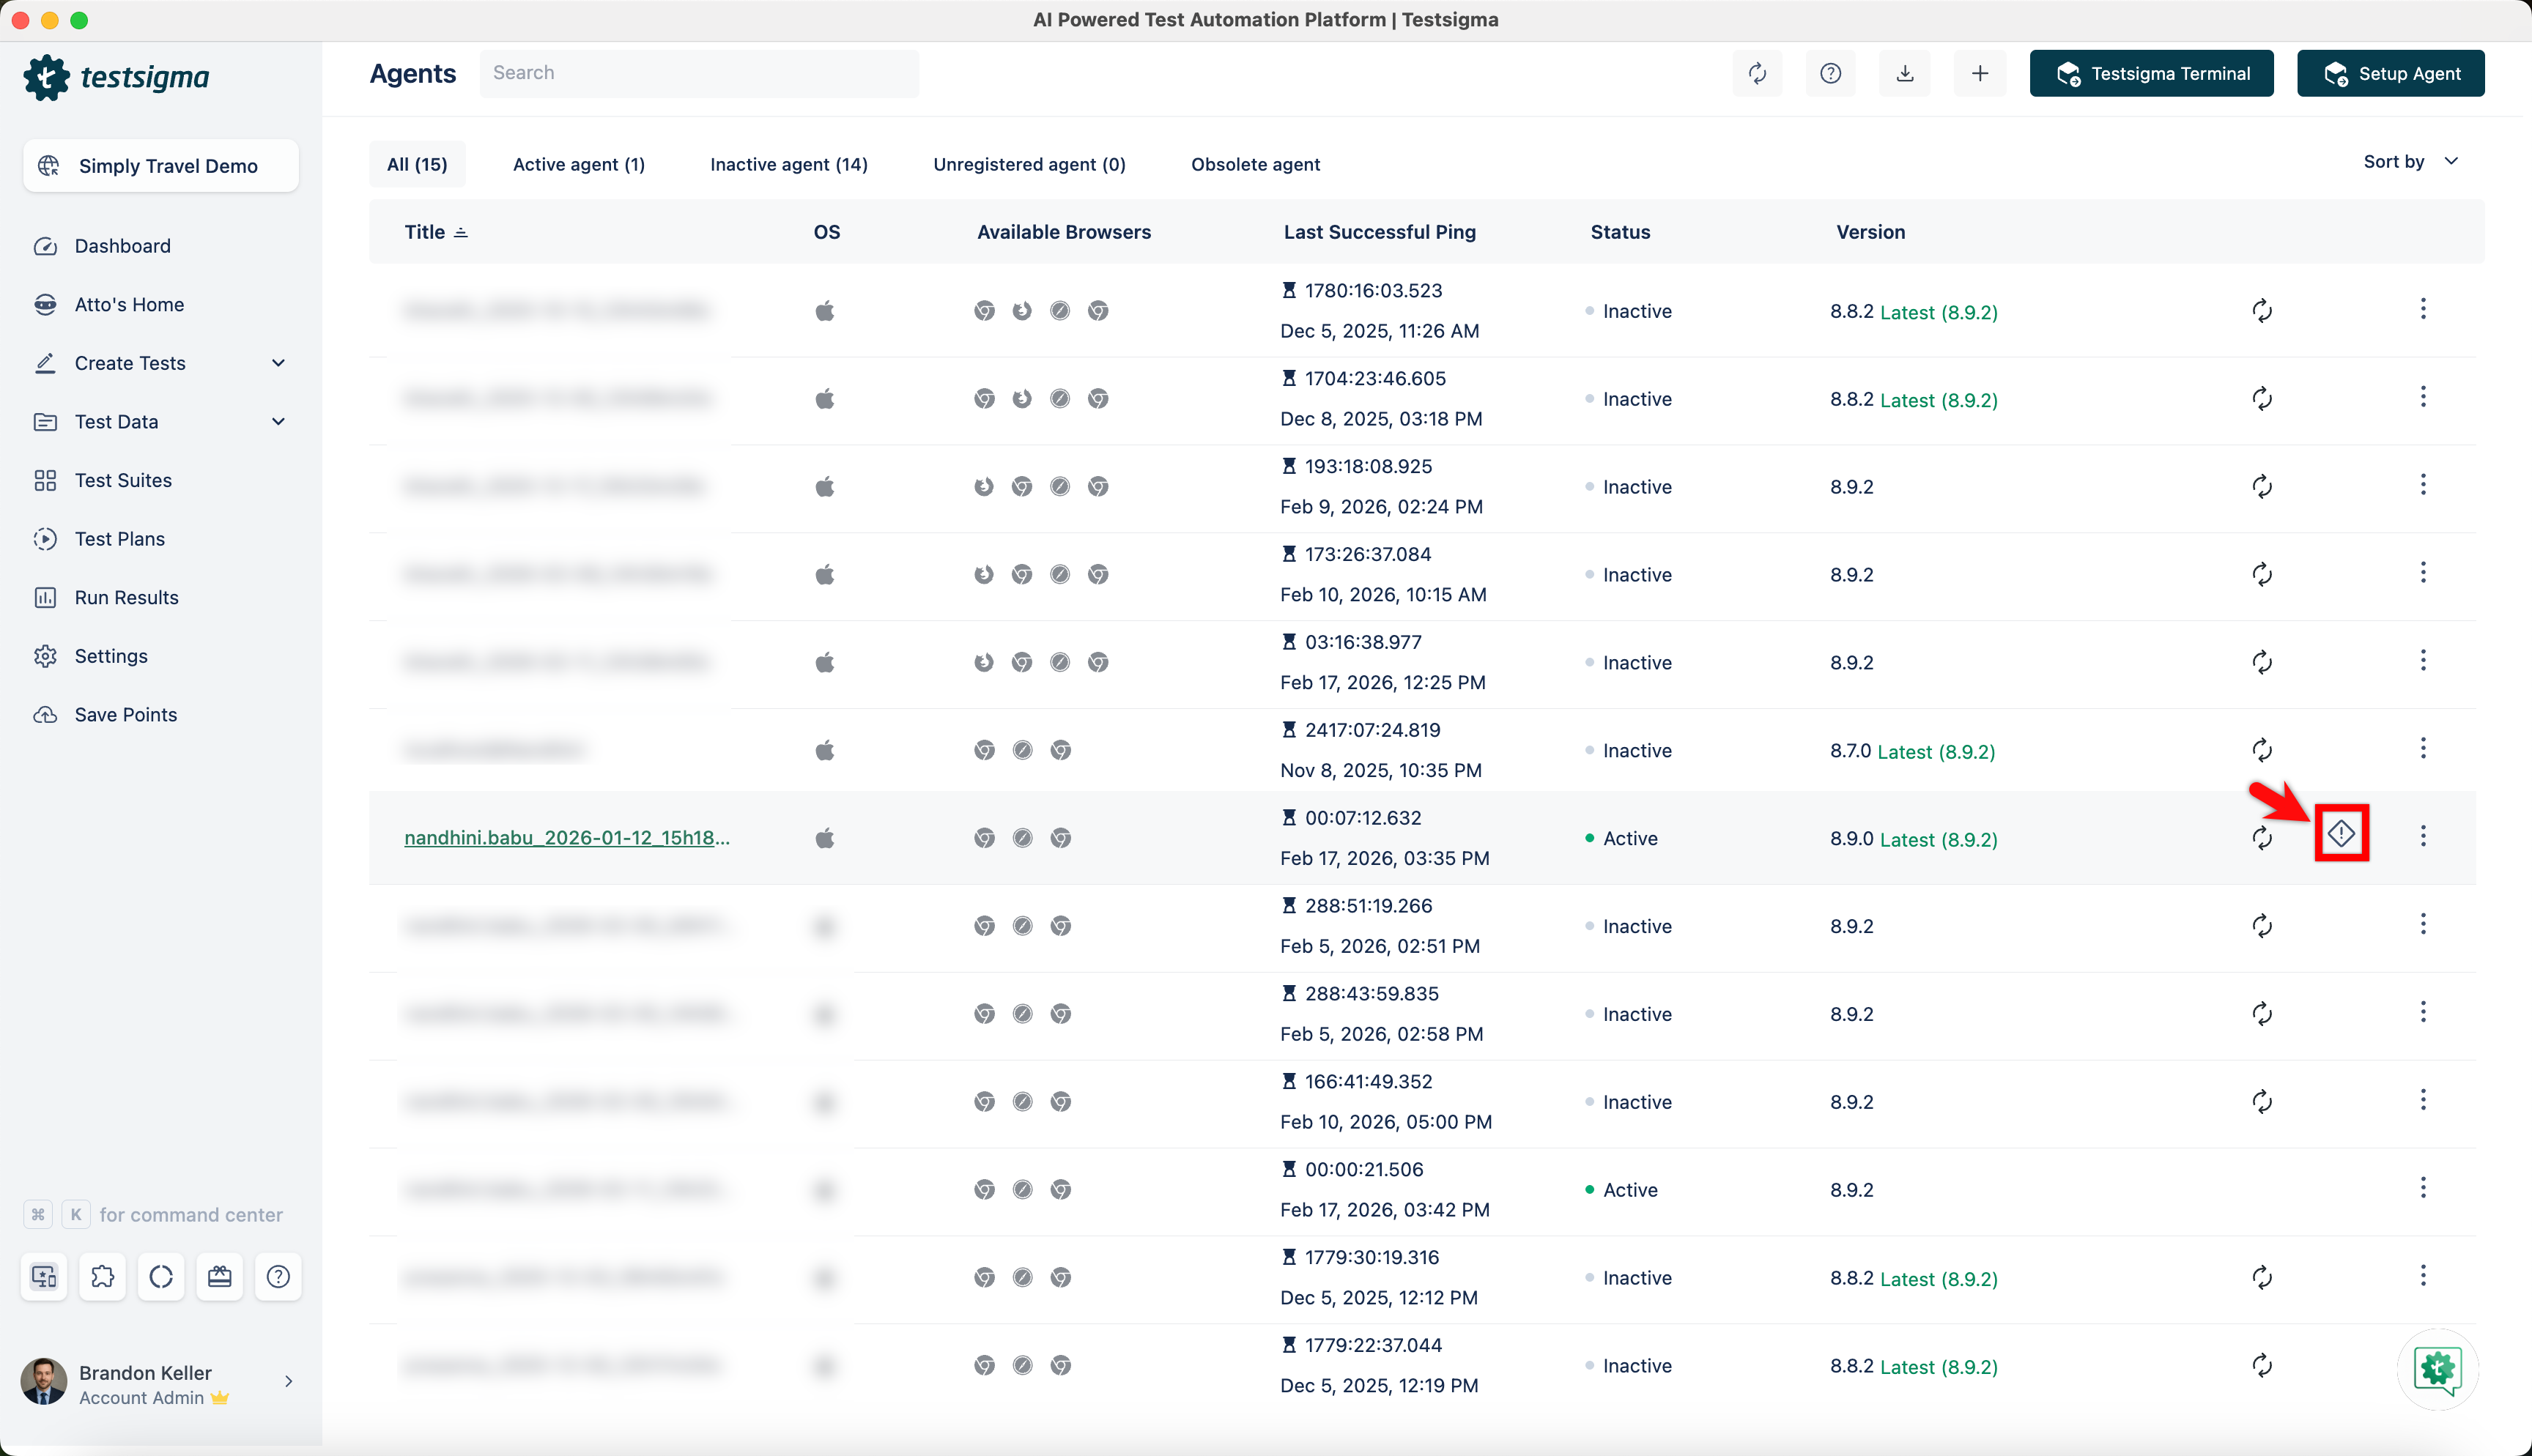
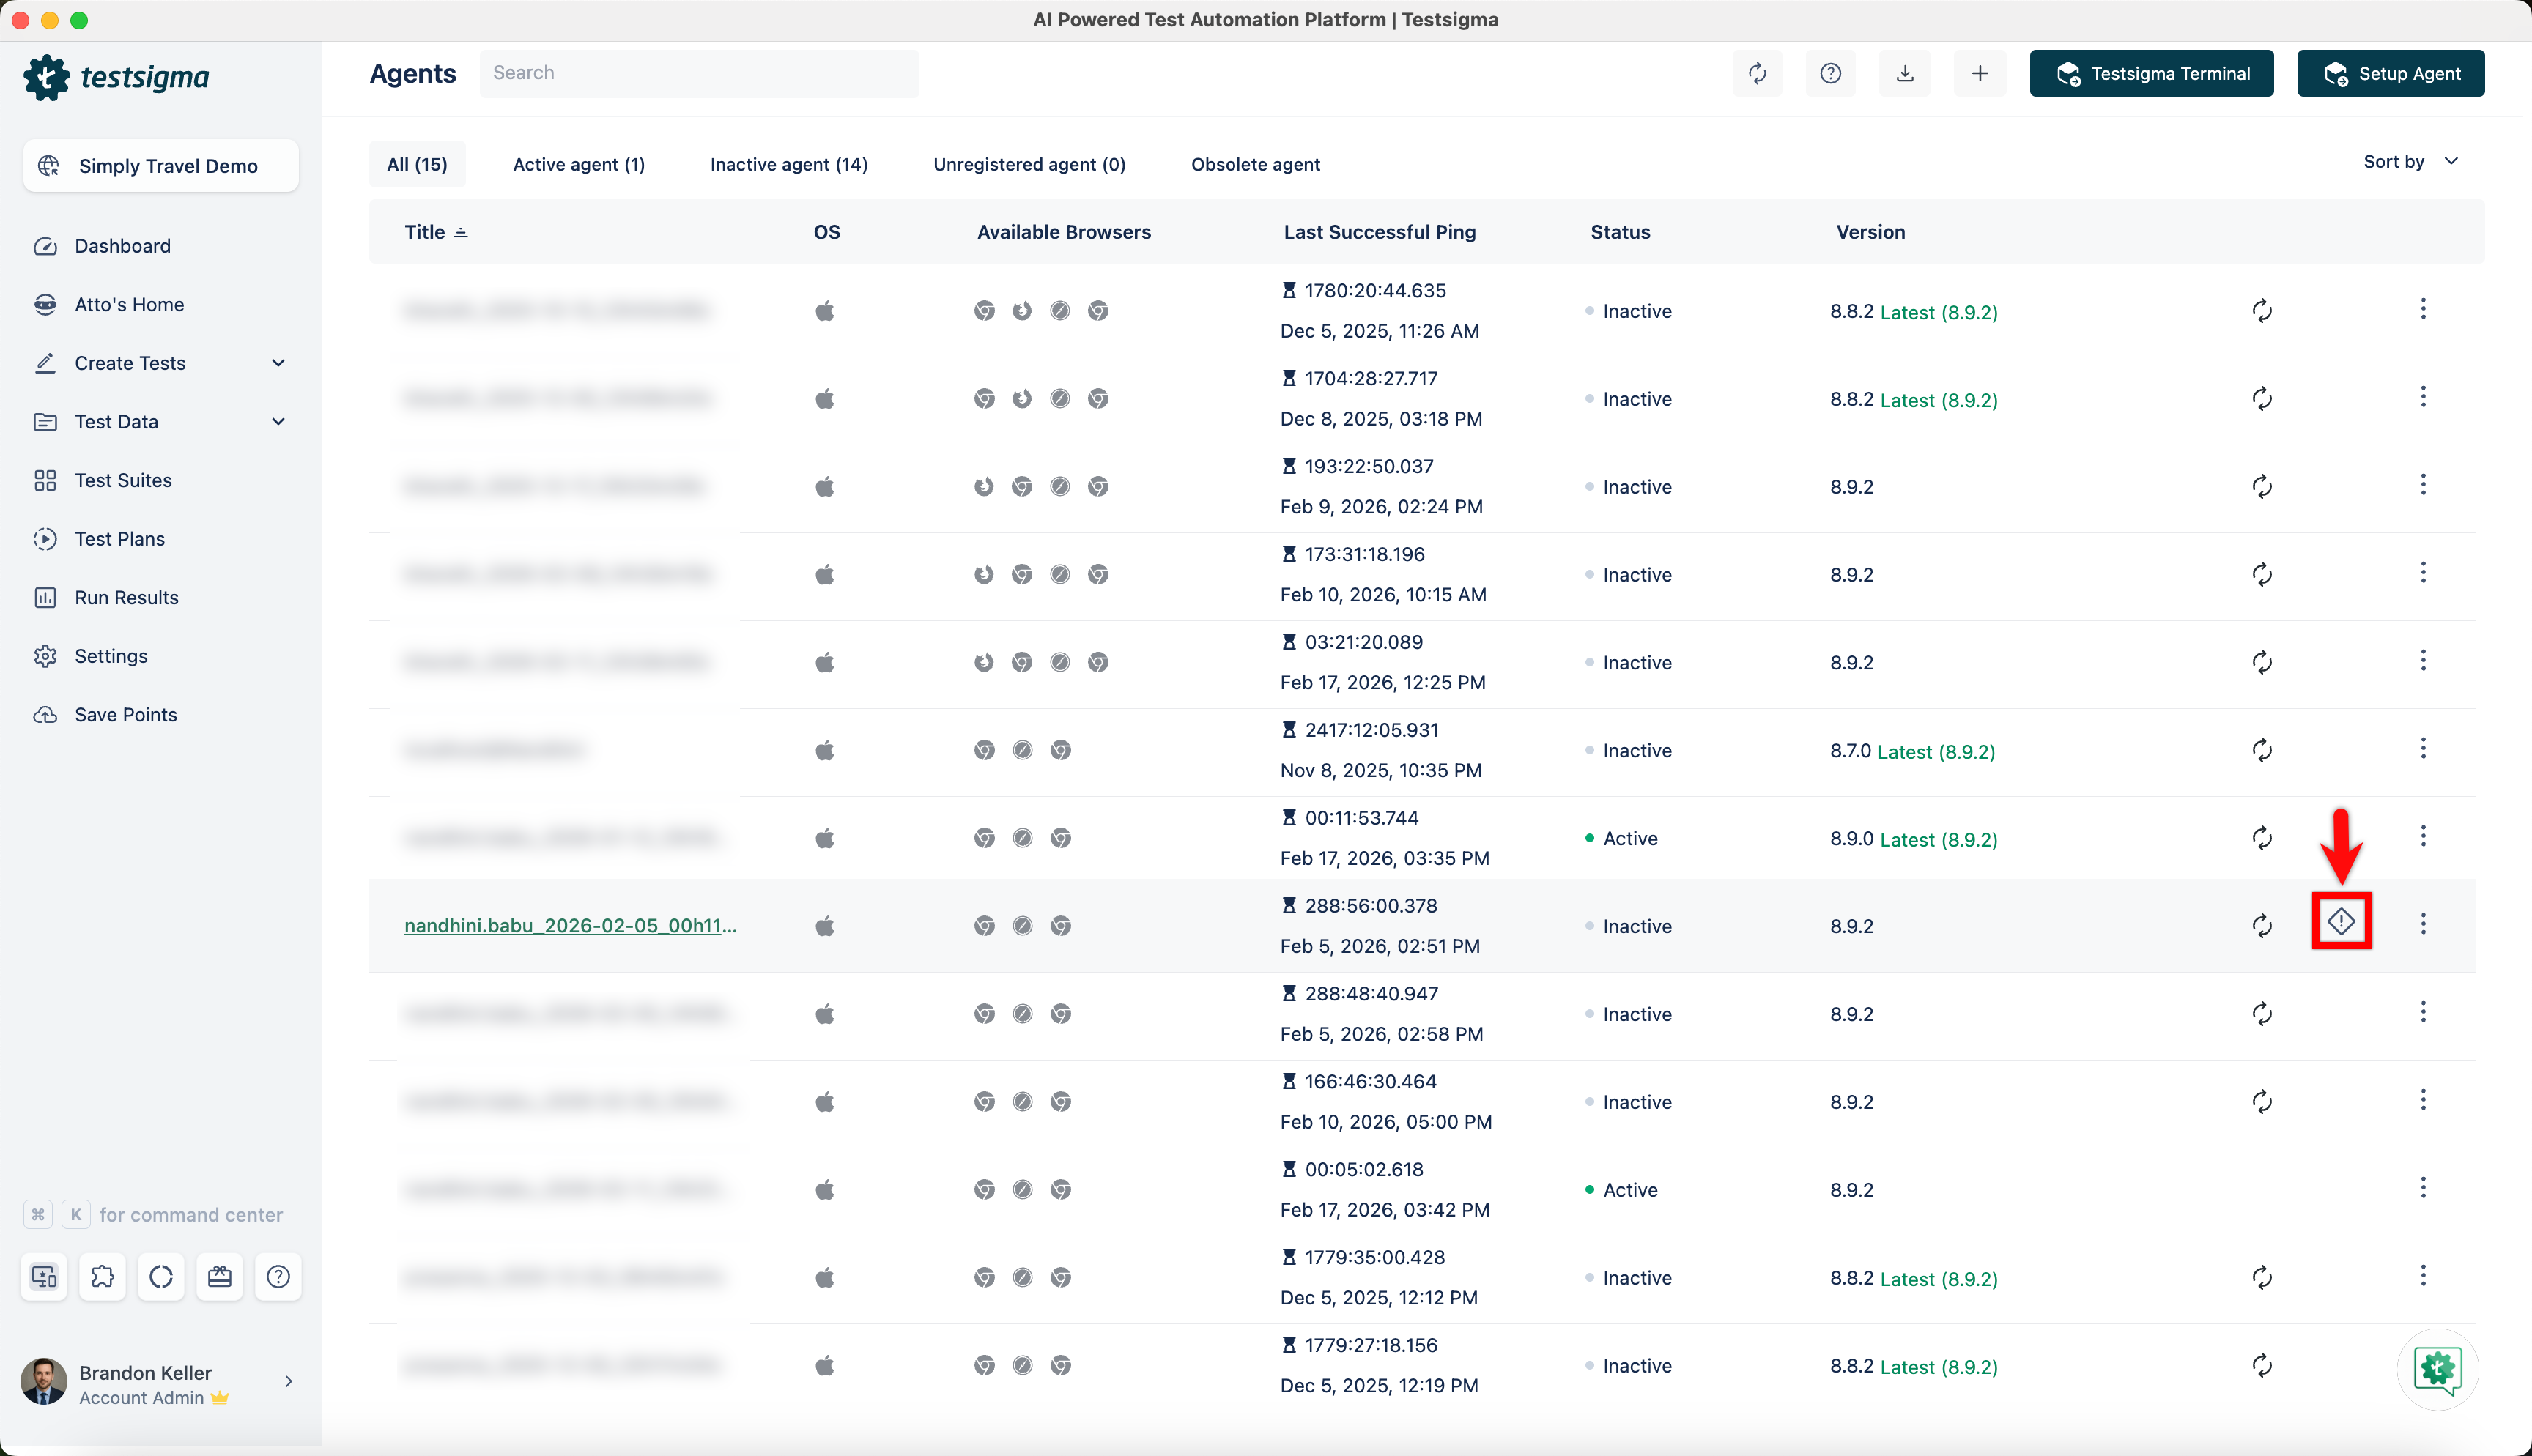
- Hover over the agent for which you want to send logs, and click Report Agent.
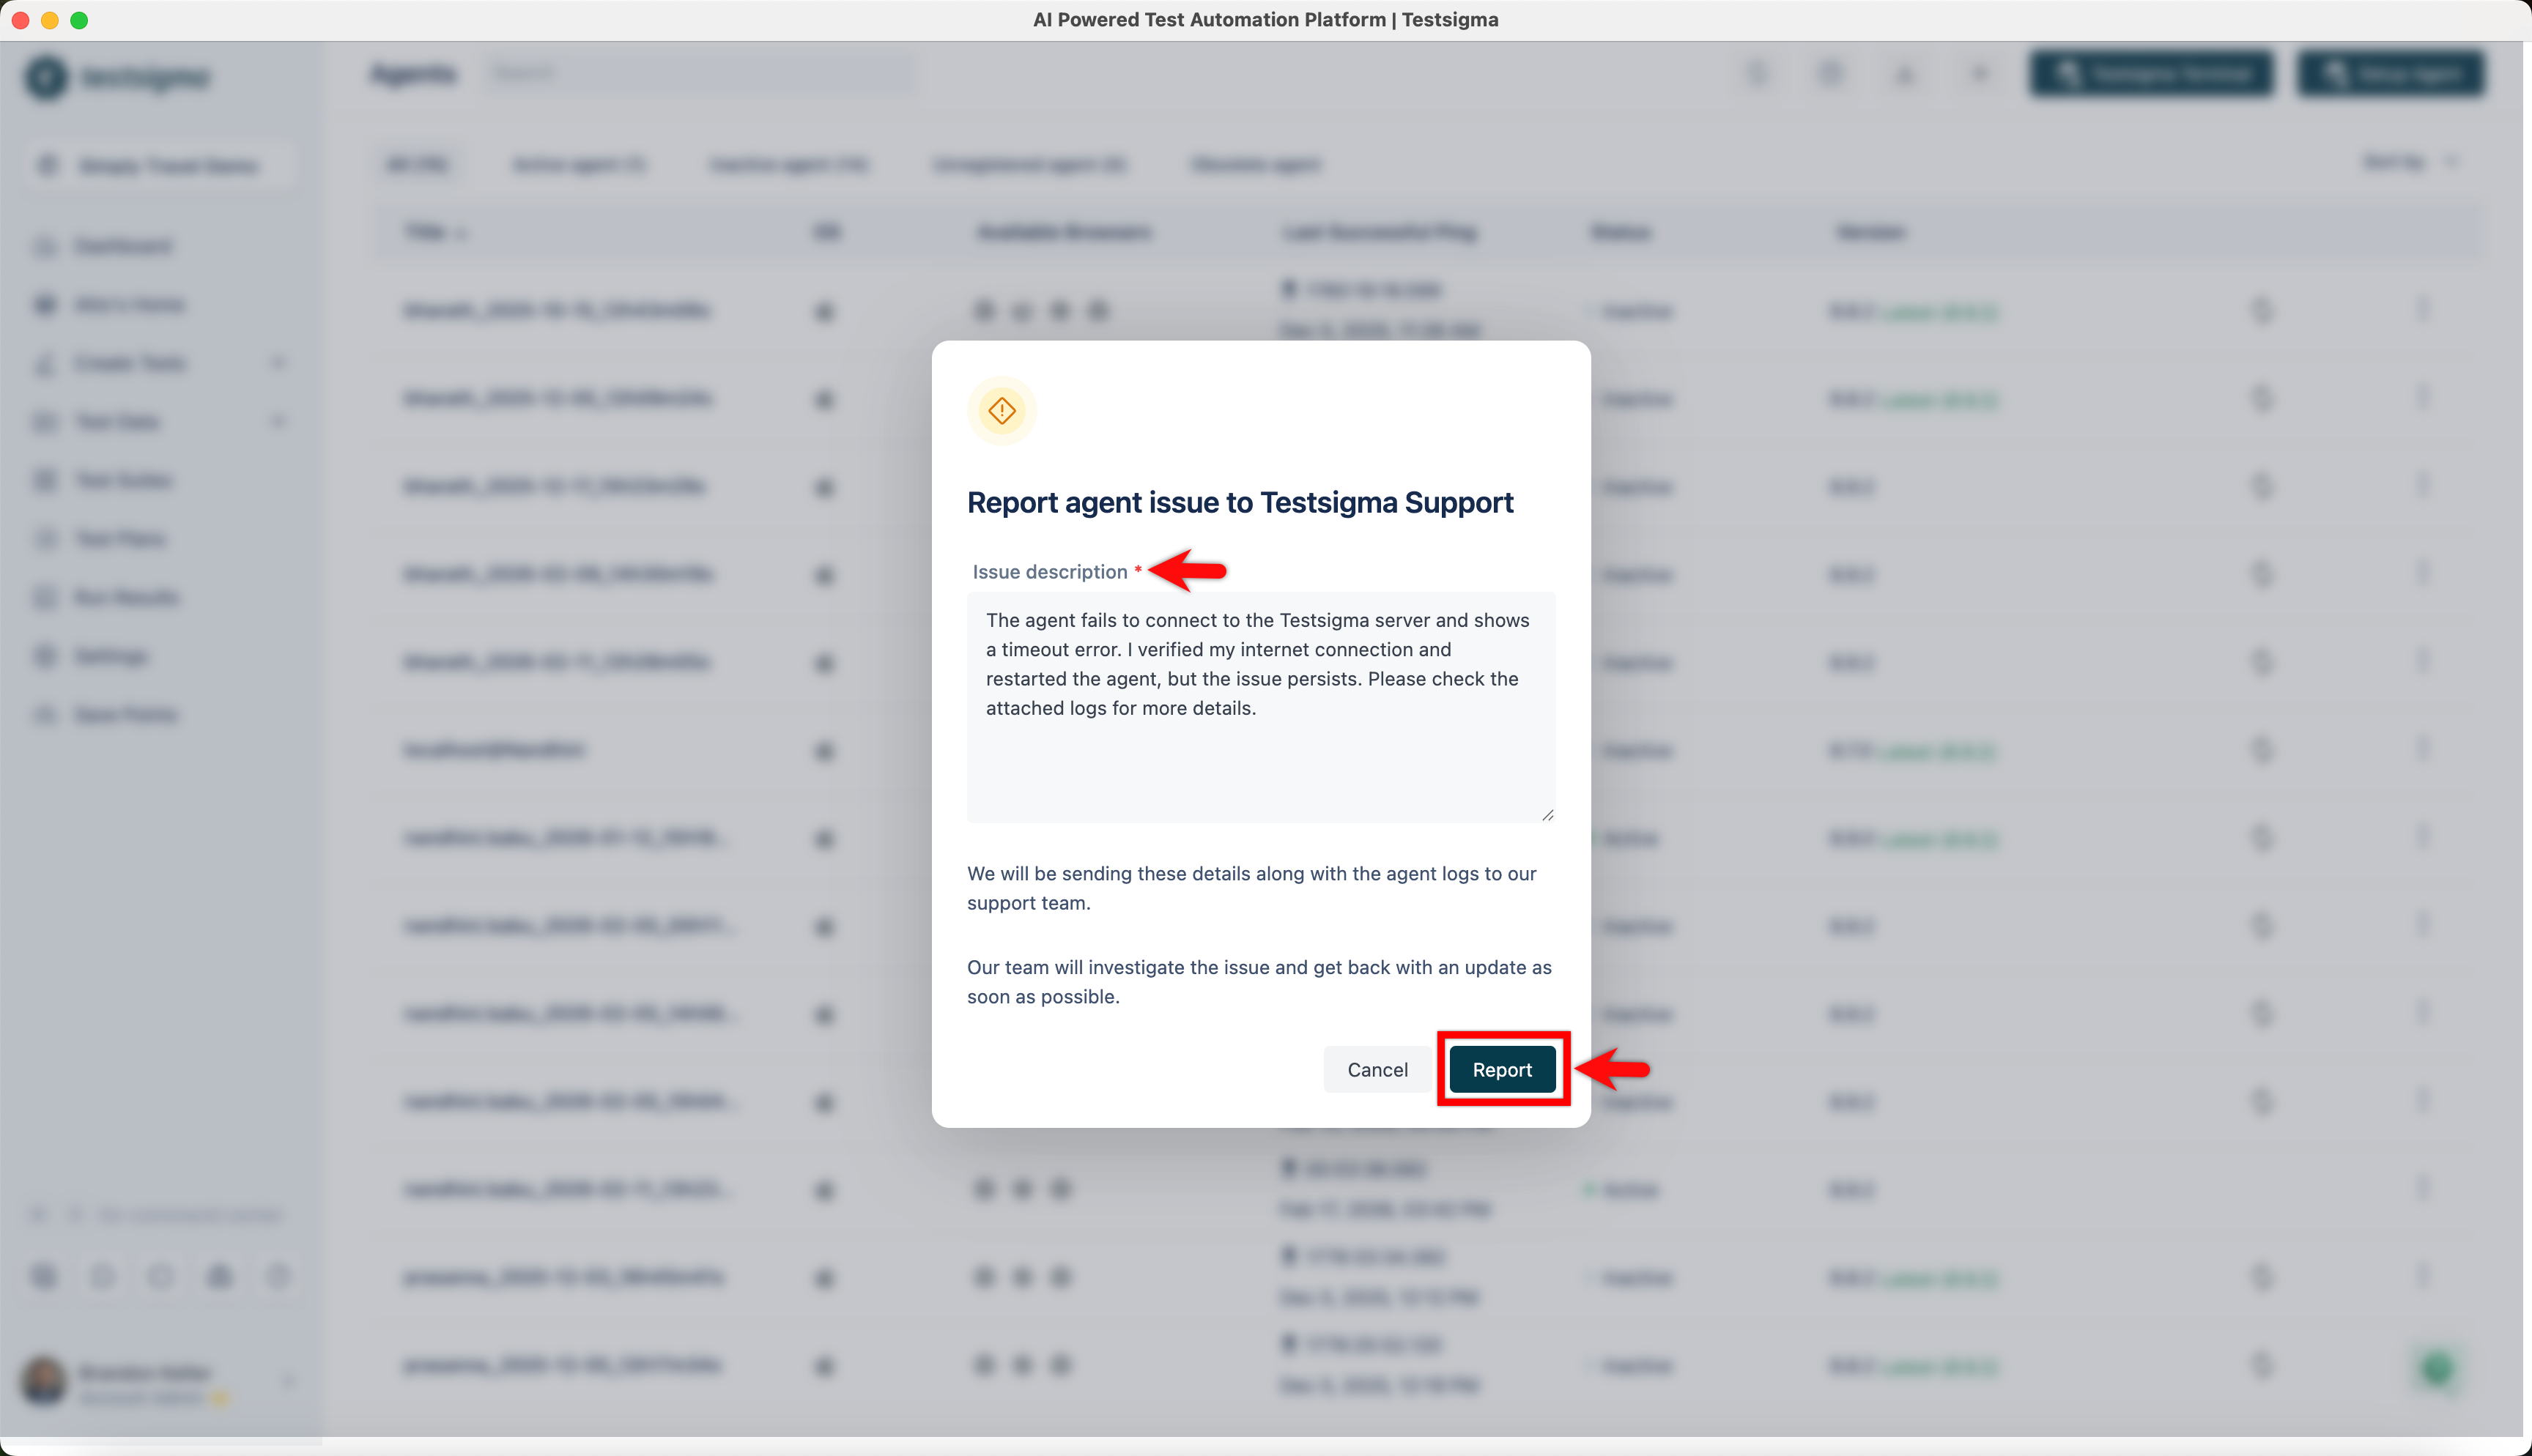
- In the warning dialog, provide a description of the problem you're facing with the agent and click Report.
- The logs will be reported to Testsigma support automatically.
Send the Logs Manually
You can find the Testsigma agent logs folder for your machine at the following locations, depending on the operating system used:
| Operating System | Location of Agent directory |
|---|---|
| Windows | %userprofile%\AppData\Roaming\Testsigma\Agent\ |
| Linux | $HOME/.testsigma/agent/ |
| Mac | $HOME/Library/Application Support/Testsigma/Agent/ |
- The %userprofile% points to the C:\Users< username > folder where < username > is replaced by your Windows login username.
- $HOME in Linux/Mac also points to the user's home folder
Inside the above directory, you will find a logs folder containing several files such as agent.log, Testengine.log, etc.
- Zip the Agent folder mentioned above.
- Hover over the agent for which you want to send logs and click Report Agent.
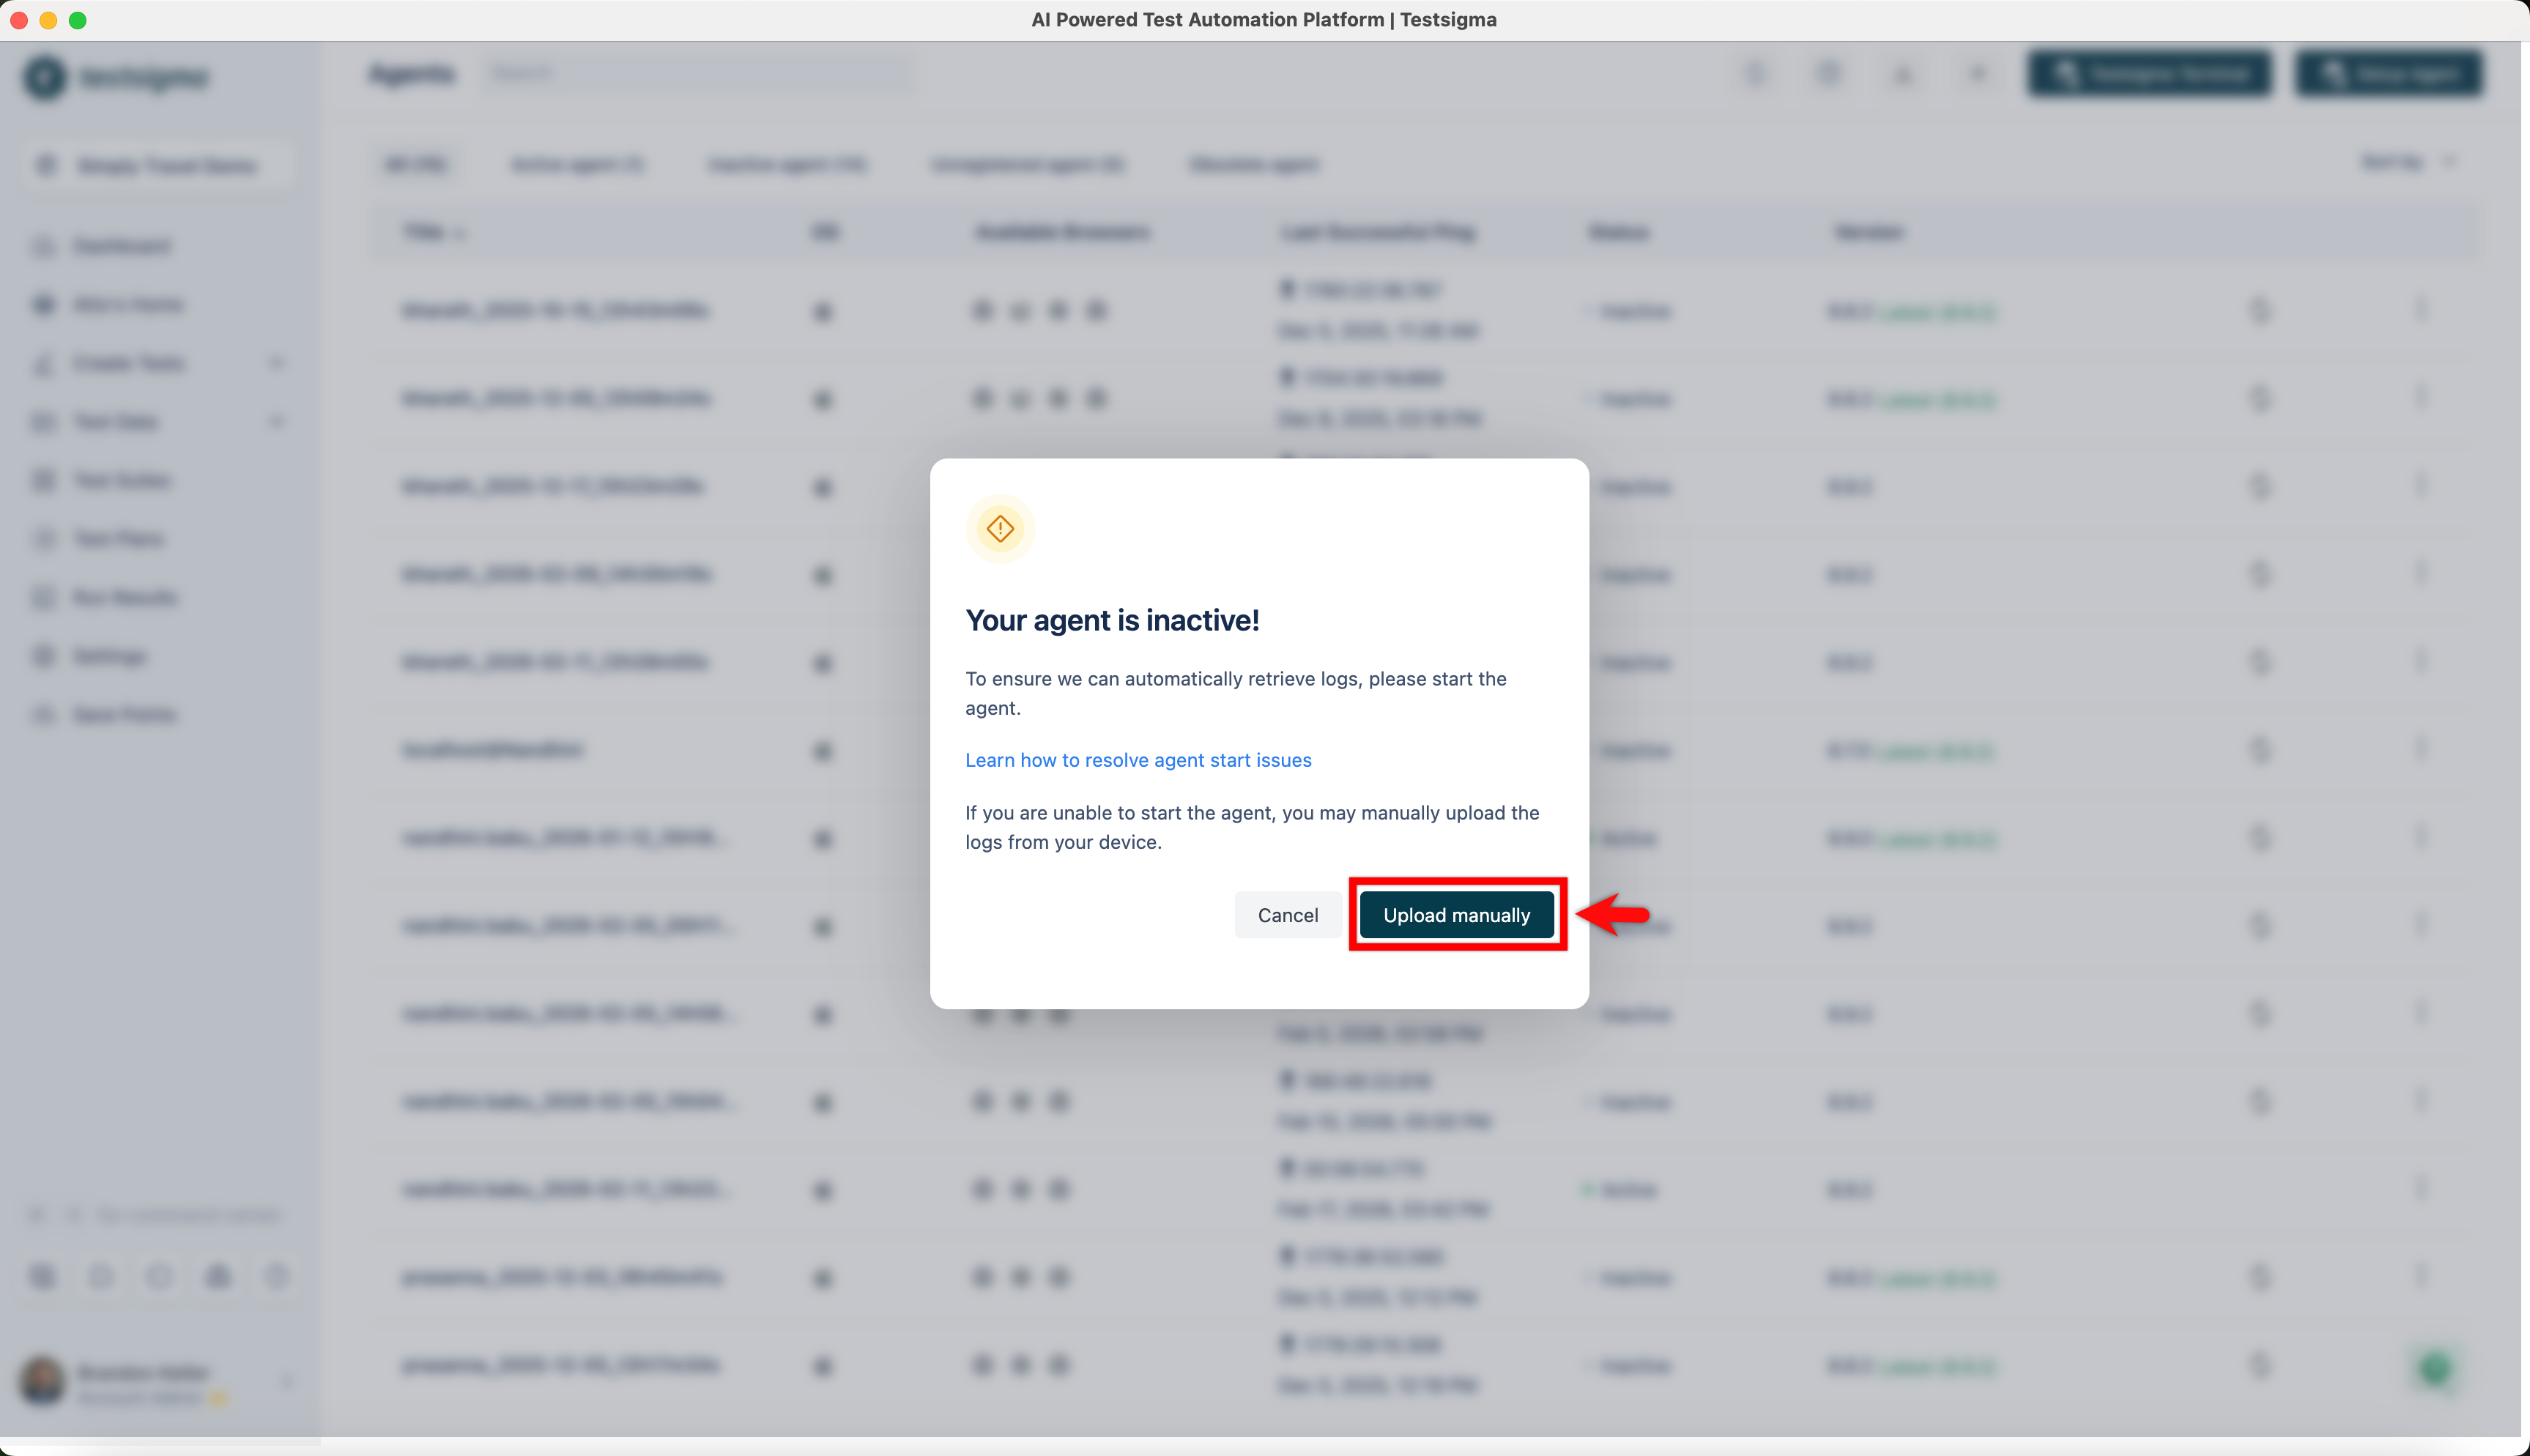
- Click Upload manually. This will open a warning dialog.
- In the warning dialog, provide a description of the problem you're facing with the agent, attach agent logs ZIP file click Report.

Debugging Agent Log Errors
For technical users, the logs serve as a valuable tool for debugging issues. If you need extra assistance, contact support@testsigma.com, providing a description of the issue along with the log files mentioned above. Including as much detail as possible will help resolve the issue quickly.
Please include the following details in your email:
- Project Name
- Application Name
- Test Case Name
- Execution Name
- Execution Type: Hybrid Web/Hybrid Mobile (if Hybrid Mobile Execution, attach Appium Logs, which can be downloaded from the Appium Server. Contact Support for more details).
Want to contribute or report missing content?