- web apps
 Why Install Chrome Extension?
- Steps to Test Locally Hosted Apps
- How to Turnoff Onboading Tutorial?
- Non-Text Keys in Test Cases
- Basic Authentication for Web
- Why Bypass CAPTCHA?
- Test Case Failures Due to Link Text Capture Issues
- Why Is a Single Video for All Test Cases in a Test Plan Unavailable in Some Cases?
- How to Handle Browser-Related Permission Issues?
- Why Can’t Selenium ChromeDriver Interact With 3DS Authentication Pages?
- What Should I Do If My Browser Blocks Local Network Access?
- Why Am I Getting an Error While Registering the Agent?
- Why Does the Try Again Error Appear While Installing the Testsigma Agent in a Proxy Environment?
- How to Enable IE Mode in Microsoft Edge?
- mobile apps
- Apple Pay Automation with Testsigma
- How do I Enhance the Execution Speed for Mobile Native Apps?
- Why am I Facing Permission Error During Local Test Execution?
- How to Resolve App Launch Issues?
- Why does the iOS App Close Right After Opening in Testsigma?
- How to Execute Android/iOS Tests in Emulators/Simulators?
- Why Does Scroll to Element Fail in Mobile Native Apps and How Do I Fix It??
- general
- Why am I Unable to Download the XLS File from the Edge Browser?
- How to Handle Browser-Related Pop-Up Issues?
- How to Handle Text-Based CAPTCHA in Testsigma?
- Why does Test Execution Fail with the Error No Route to Host?
- Why do Errors Occur When I Try to Download Files from The Exports Page?
- How to Test Flutter Apps Using Accessibility Mode?
- How to Add Multiple Runtime Variables in Data Generator Functions?
- How to Insert Test Data in RAW Body for POST API?
- What is Chrome for Testing and How Does it Work?
- How Can I Set Up Authenticator-Based Authentication in Testsigma?
- How to Update an Excel File in Testsigma Uploads?
- What Causes Longer Automation Test Execution Times in a Test Plan?
- How Do I Retrieve the OTP When it’s Embedded within HTML Tags?
- How to Configure the OracleDB Add-on in Testsigma?
How to Test Flutter Apps Using Accessibility Mode?
Testing Flutter applications with traditional automation tools can be challenging because Flutter uses canvas-based rendering. This makes it difficult to directly inspect or interact with elements like buttons and text during test recording or execution.
However, Flutter offers built-in accessibility support through a semantic tree, a separate structure used by screen readers to describe UI elements. This semantic tree enables automation tools to identify and interact with UI elements using attributes such as aria-label. This article discusses how to test flutter apps using accessibility mode.
Steps to Test Flutter Apps Using Accessibility Mode
- Right-click anywhere on the Flutter app screen.
- Select Inspect from the context menu.
- In the Elements tab, look for a hidden element that looks like this:
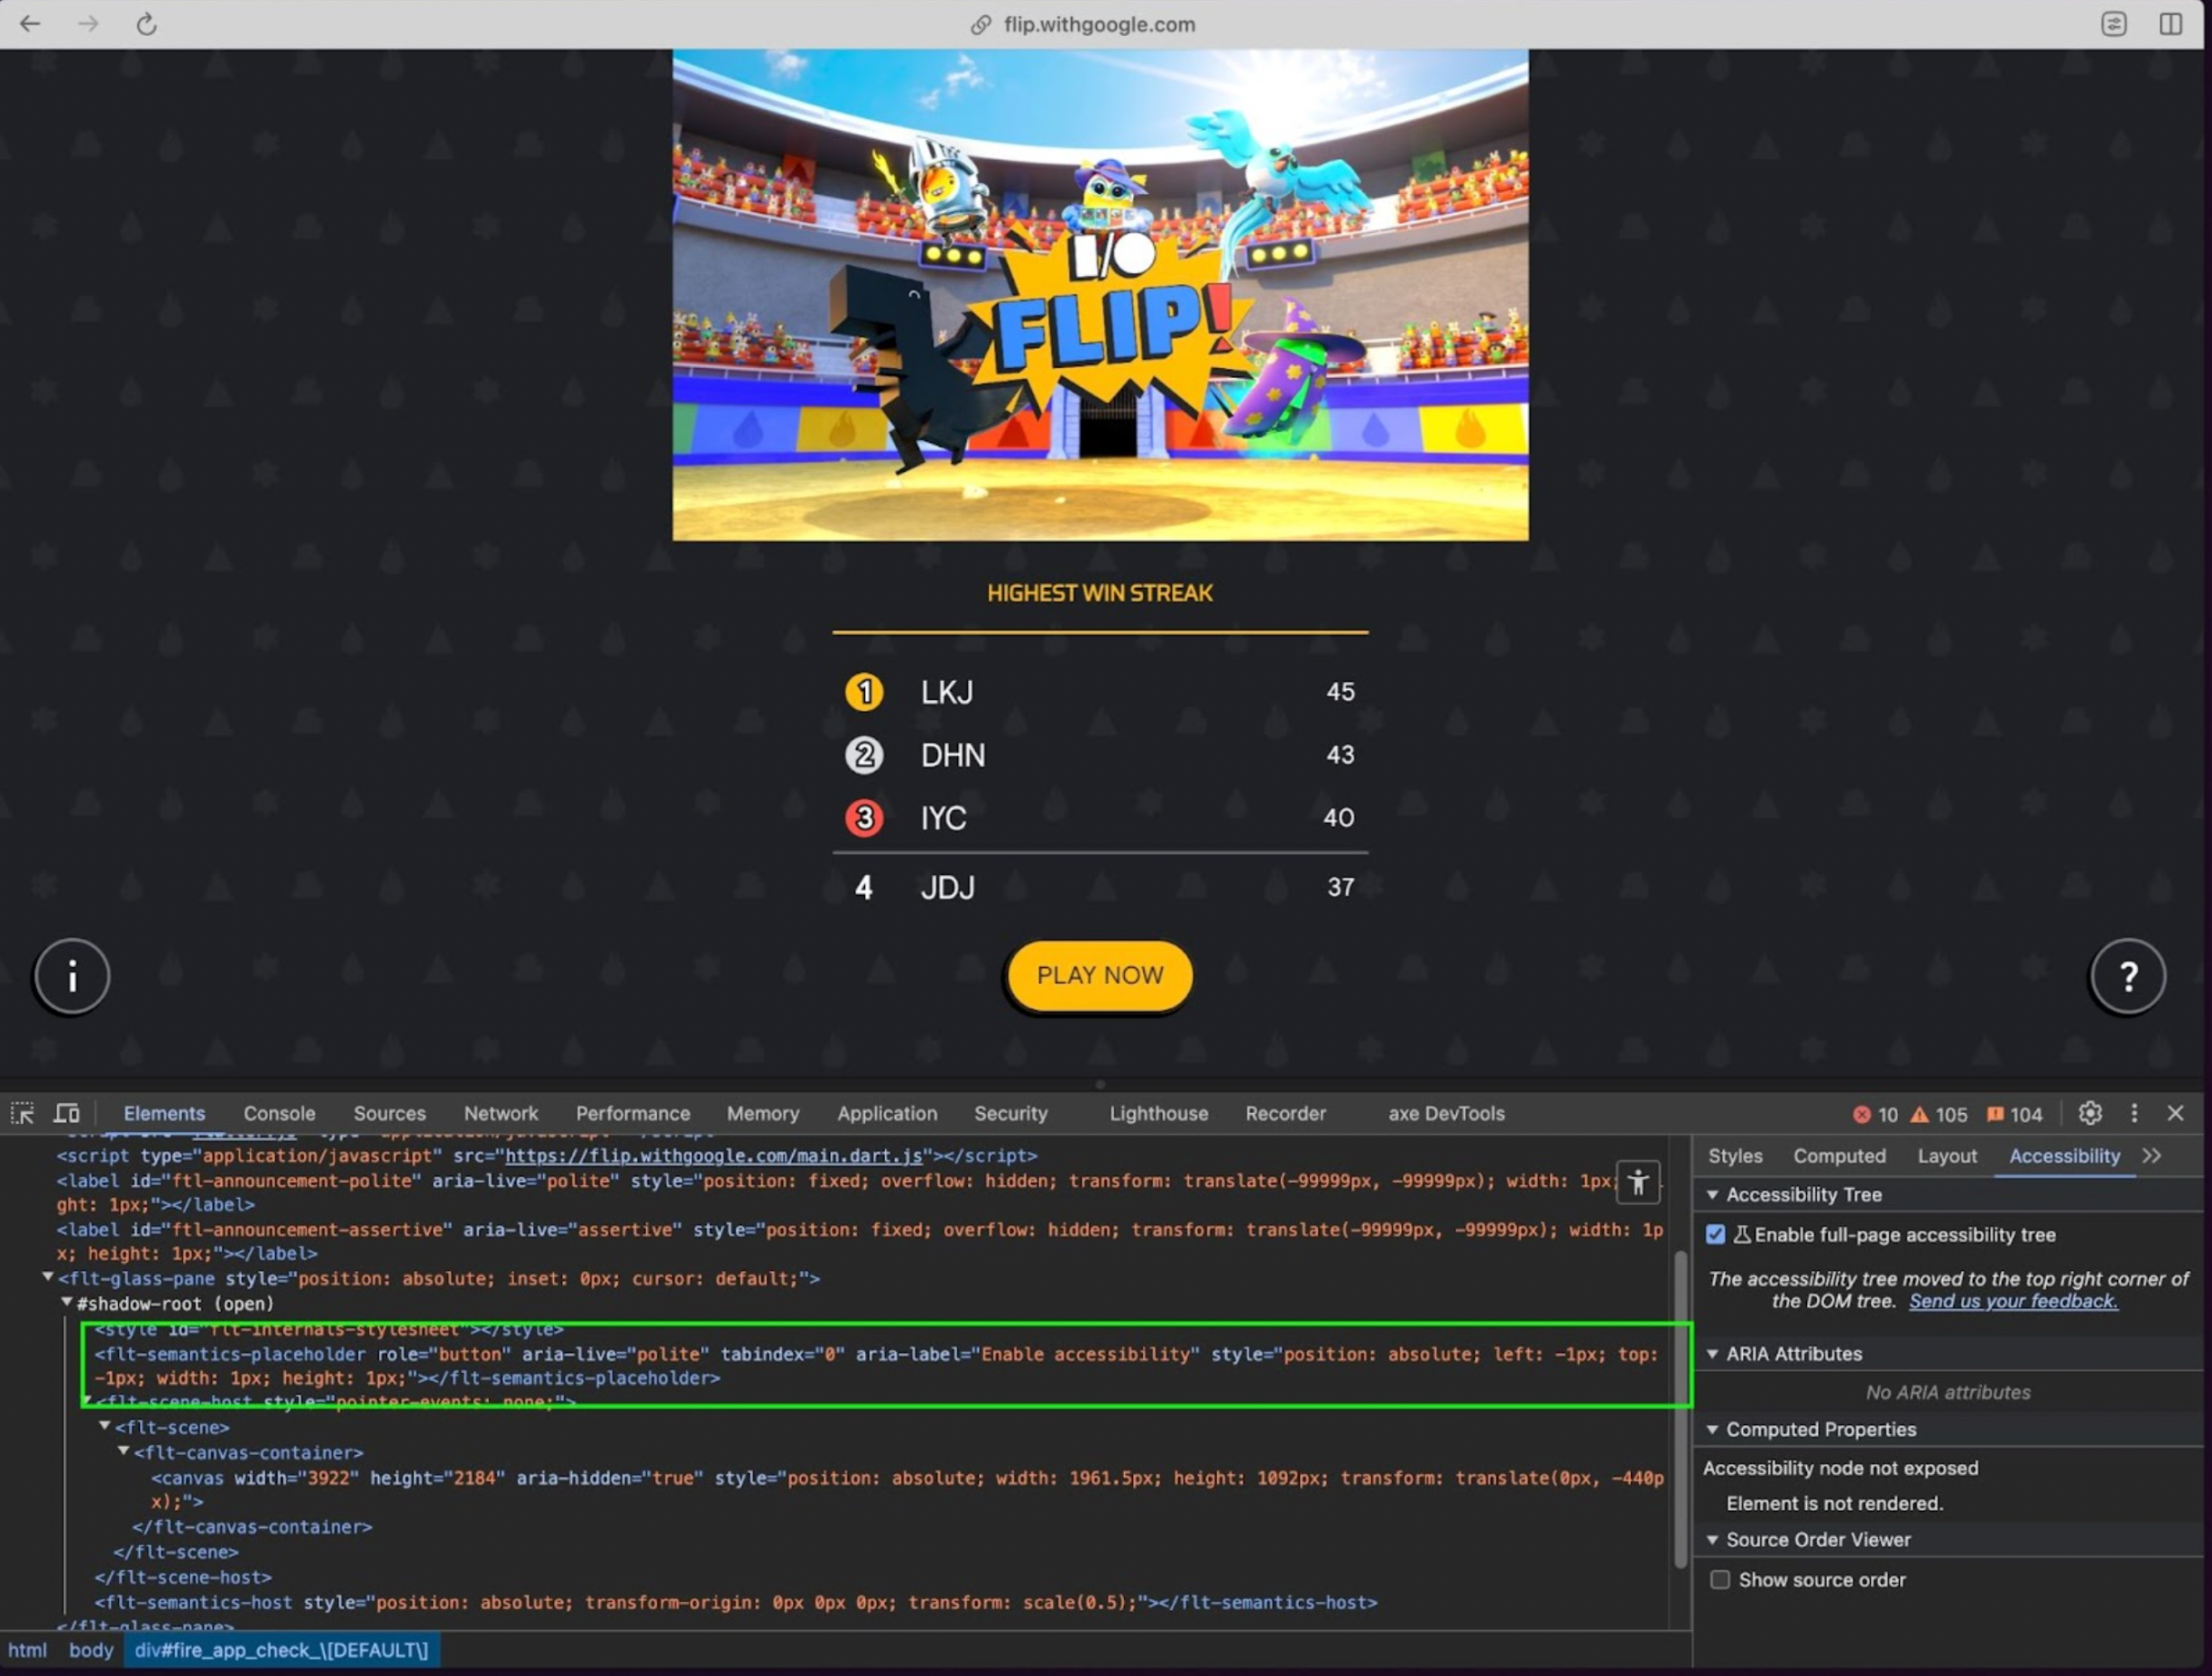
- Click on the hidden element so it becomes selected in the DOM.
- Open the Console tab in DevTools.
- Run the following command in the console to activate accessibility mode:
$0.click();- Check the Elements tab again. A whole new tree of elements will be added to the DOM. You should now see elements like:
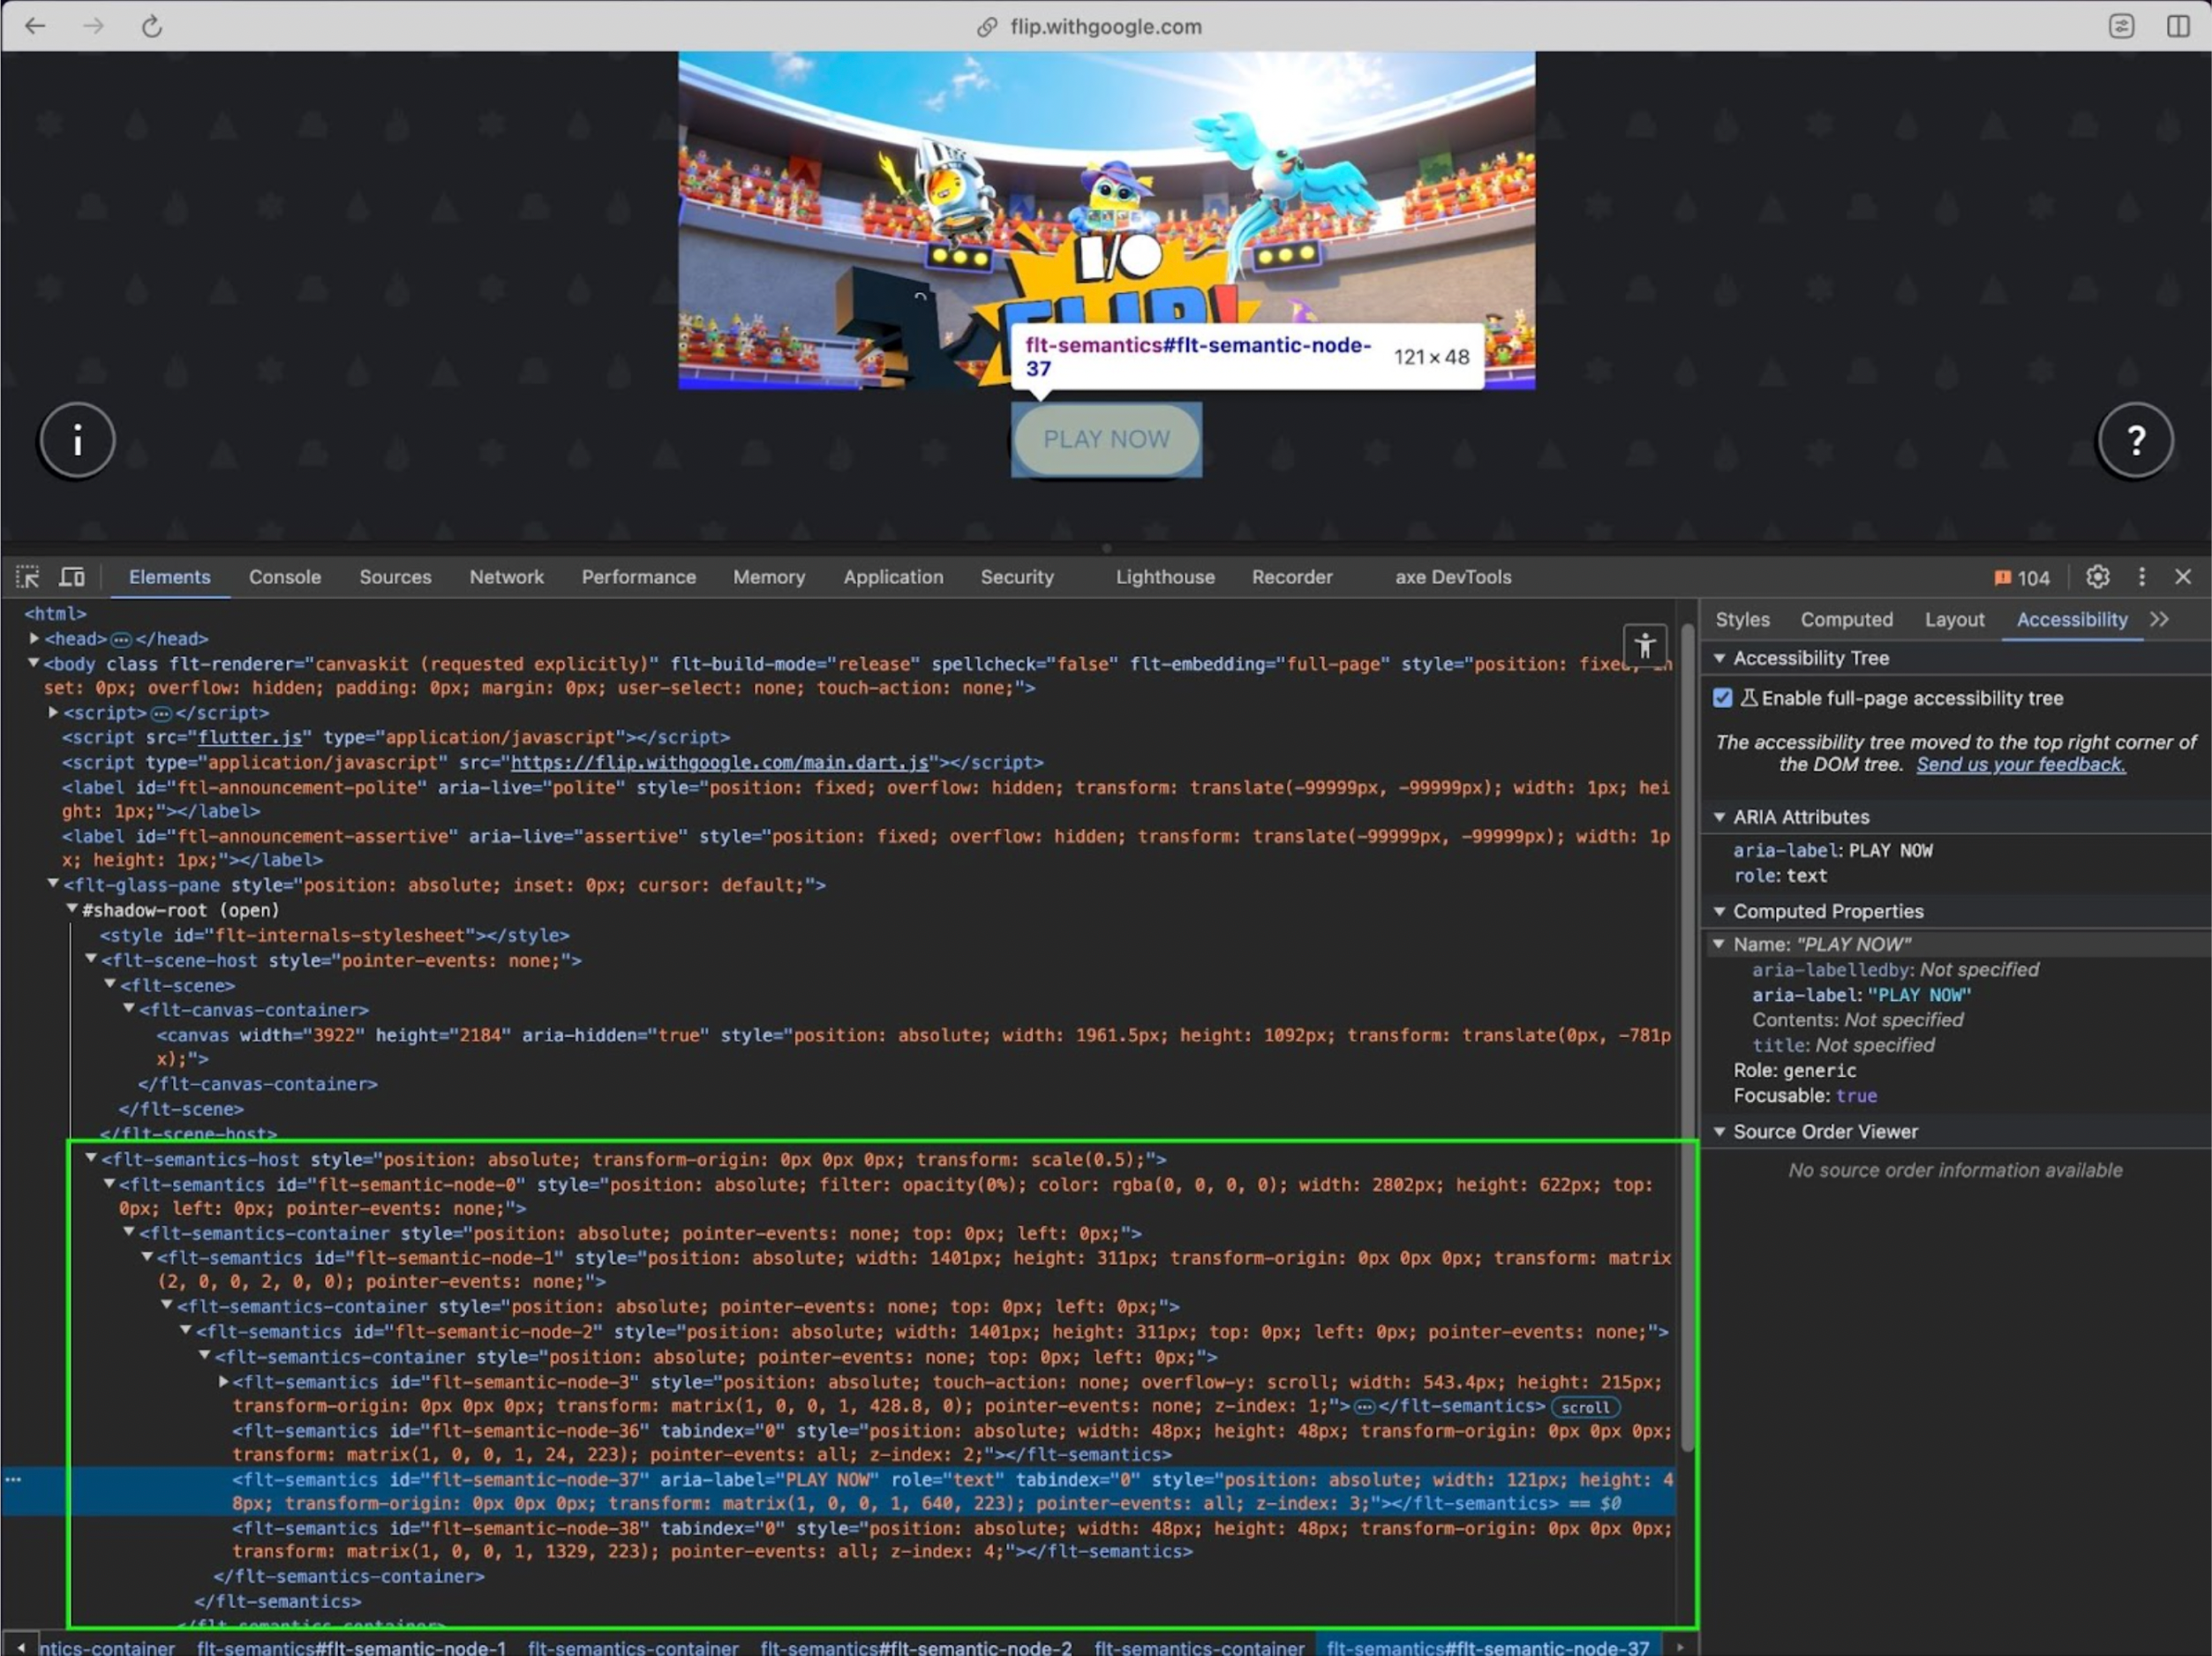
- Use these aria-label values to locate elements in your automation tests.
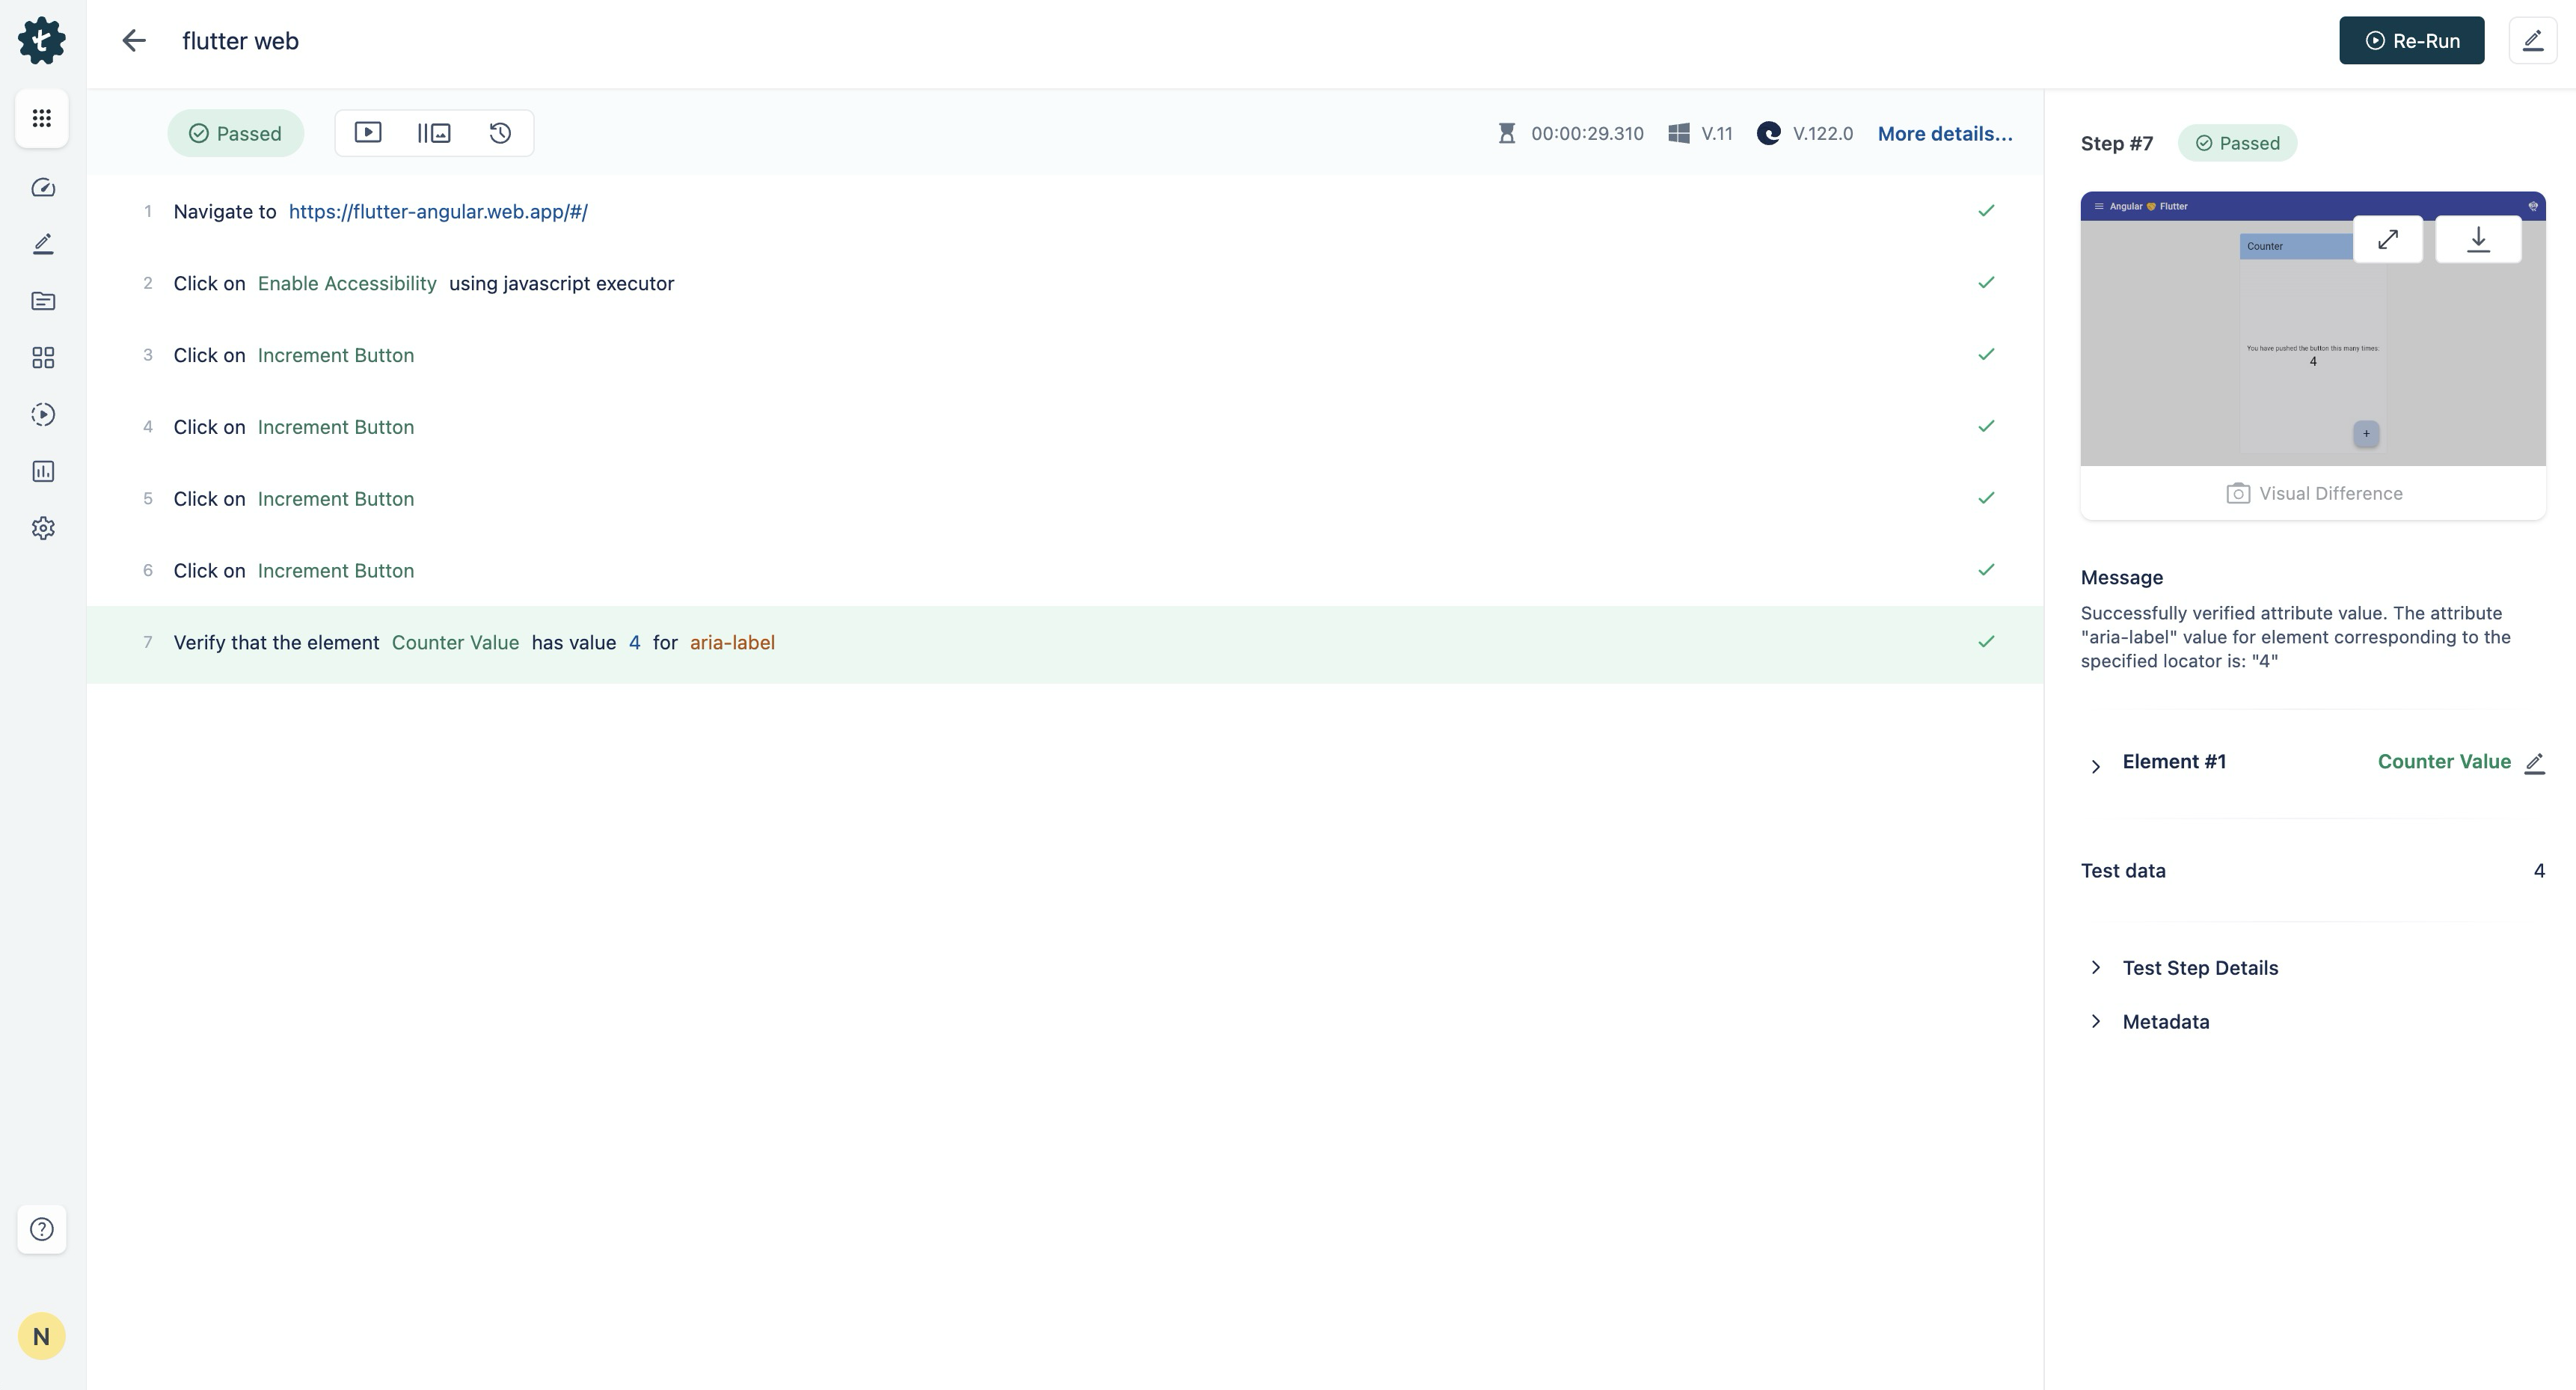
- Start recording your test using your preferred automation tool.
- Interact with the elements using their aria-label attributes.
NOTE:
-
Before executing your test, make sure:
- Accessibility mode is enabled again.
- You validate elements using aria-label or semantic attributes, not just visible screen text.
- Run your test. It should now successfully interact with the Flutter UI using accessibility-based locators.
NOTE:
- Accessibility mode is not supported on iOS devices when using the Safari browser.
Want to contribute or report missing content?